Embed Size (px)
Citation preview

Orts Porter
What is an “Orts Porter?” The dictionary says that an “ort” is any leftover scrap or fragment, and a “porter” is one who carries things, so an orts porter is really a handy little wastebasket! Keep one by your sewing machine, on your cutting table, or beside your favorite chair to receive all the little snips and trimmings you generate as you work. Here’s how to make an especially cute one that also collapses compactly, making it ideal for take-along projects.
Finished Orts Porter, open
Finished Orts Porter, closed

Materials Needed:
Cut one piece of fabric 11” by 14”. If fabric is directional, keep in mind that the panel, with the design right side up, should be wider than it is tall.
Cut two fabric circles 5 1/2” in diameter. These do not have to the same as the main fabric, but they should coordinate.
The inside hoop only of a 4” wooden embroidery hoop
Lightweight cardboard.
Batting
Thread to match and basic sewing supplies (scissors, straight pins, needle, etc.)
Construction of the Base:
1. Make two cardboard circles, drawing around the inside of the hoop. Cut the circles inside the drawn line. Finished cardboard circles should be approximately 1/8” smaller than the inside of the embroidery hoop. Be sure there’s a little “wiggle room” all around.
2. Place a cardboard circle on a double thickness of batting and draw around it. Cut out two circles of batting. They should be the same size as the cardboard circles.
3. Thread a needle with about 24” of sturdy thread. Starting and finishing on the right side of the fabric, make a running stitch close to the edge of one fabric circle. Flatten the circle out, leaving
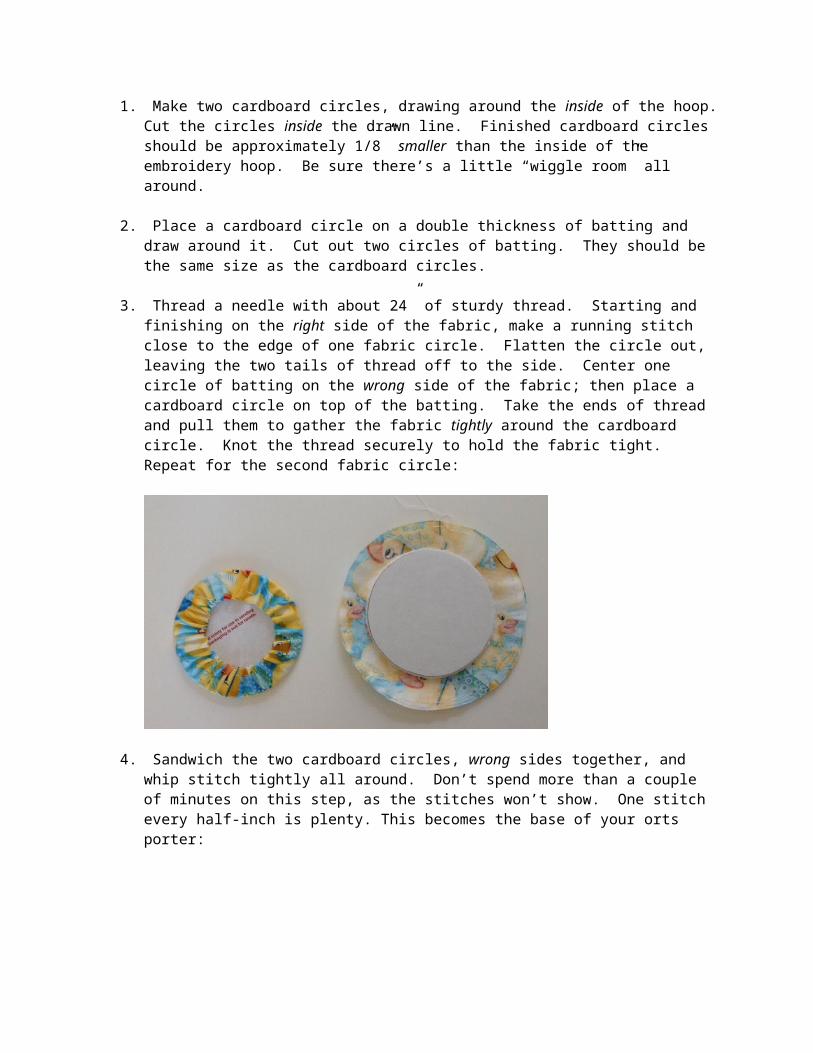
the two tails of thread off to the side. Center one circle of batting on the wrong side of the fabric; then place a cardboard circle on top of the batting. Take the ends of thread and pull them to gather the fabric tightly around the cardboard circle. Knot the thread securely to hold the fabric tight. Repeat for the second fabric circle:
4. Sandwich the two cardboard circles, wrong sides together, and whip stitch tightly all around. Don’t spend more than a couple of minutes on this step, as the stitches won’t show. One stitch every half-inch is plenty. This becomes the base of your orts porter:
Construction of the Tube:
5. Take the 11” by 14” piece of fabric and press ¼” to the wrong side on both of the 14” sides. Unfold the ¼” and sew the two 11” sides (right sides together) using a 5/8-inch seam, backstitching at beginning and end. Press the seam open. Re-fold and press the ¼” folds across the top and bottom of the seam. You now have a tube with both ends of the tube folded under one-fourth inch. (I like to press the tube into 4 equal quarters starting with the seam, the side

opposite the seam, then halfway on both sides. These pressing lines help me to line up the tube evenly in the upcoming steps.) :
6. With the fabric tube wrong side out, slip the embroidery hoop over it to the middle of the tube. Fold one end of the tube down to encase the hoop, taking care to match the seam and folded edges evenly. Pin the folded edges together at four even intervals:

Important Note: At this point, you must decide which side of the fabric you want on the exterior of your orts porter and which side will be on the interior. If your fabric is non-directional, it probably doesn’t matter unless you just like one side better than the other. If your fabric is directional, however, you must take special care to ensure that the design will be right-side-up when you’ve finished. The side of the fabric that you want on the exterior must now be on the inside of the hoop. The side that will be hidden on the interior must now be on the outside of the hoop. Keep in mind that the hoop forms the top, or opening, of your orts porter.
7. Work the hoop into the fold at the opposite end from the pinned edges. Take extra care to assure that the hoop is fully nested into the fold all the way around. (This is easier if you put your hand, but not your thumb, inside the tube. With your thumbnail on the outside and forefinger inside, push up against the hoop. Smooth the rim out with your other hand.) Pin fabric together tight below the hoop at even intervals. With matching thread, make running stitches just under the hoop all the way around it. Individual stabbing stitches to the inside, then outside will allow you to make smaller stitches closer to the hoop. Backstitch to secure the end of this stitching:

Assembling the parts:
8. Double-check to make sure that your exterior fabric is inside the tube. Moving the inner layer of fabric out of the way, slip the base into the opening of the tube. Pin the folded edge of the tube to the rim of the base at even intervals, distributing fullness evenly all around the circle. (Remember that the side of the cardboard circle facing out now will end up on the interior.) With matching thread, make small whip stitches to secure the folded edge of the tube to fabric of the base:

9. Push the base through the hoop, turning the orts porter right side out. Gently pull the fabric around the opening of the hoop so that the stitch line is just inside the rim:

10. Pin evenly and then sew the remaining folded edge of the tube to the bottom rim of the base. There will probably be some of the previous seam allowance peeking out, but just poke it to the inside with the tip of your needle or your stiletto and make a neat seam:
Ta-daaaaah!! It’s done!! Twist, (don’t just push) the base until it tucks tightly into the hoop for storage. Push down on the top with your thumbs to open. If the base seems a little too large to fit inside the hoop, don’t worry, as it will soften with use. You might want to trim your next cardboard circles a tiny bit smaller.
Now, why not make another one?!


![img.mlbstatic.com · Cleveland 1954 Indians batting - Pitching for Kansas City 1985 Royals : LHP nanny Jackson Batting: SHB page-Phil]ey Batting: RHB Wally-Westlake Batting: RHB George](https://img.dokumen.tips/doc/110x75/5f7e059d1e17b7025b240fae/img-cleveland-1954-indians-batting-pitching-for-kansas-city-1985-royals-lhp.jpg)