Embed Size (px)
Citation preview

P/N : MFL67378001(1.0) MW
RU
MO
RR
eflex
Printed in Mexico
RUMOR Reflex

Copyright ©2012 LG Electronics, Inc. All rights reserved.LG and the LG logo are registered trademarks of LG Group and its related entities. All other trademarks are the property of their respective owners.

UUsseerr GGuuiiddee

Introduction . . . . . . . . . . . . . . . . . . . . . . . . . . . . .i
Your Phone’s Menu . . . . . . . . . . . . . . . . . . . . . .ii
Get Started . . . . . . . . . . . . . . . . . . . . . . . . . . . . .1
Set Up Service . . . . . . . . . . . . . . . . . . . . . . . . . . . .2Get Started . . . . . . . . . . . . . . . . . . . . . . . . . . . . . . . . . .2
Set Up Your Voicemail . . . . . . . . . . . . . . . . . . . . . . . .3
Get Help . . . . . . . . . . . . . . . . . . . . . . . . . . . . . . . . . . . .4
Your Phone . . . . . . . . . . . . . . . . . . . . . . . . . . . . .5
Your Phone: The Basics . . . . . . . . . . . . . . . . . . . .6Front View of Your Phone . . . . . . . . . . . . . . . . . . . . . .7
Viewing the Display Screen . . . . . . . . . . . . . . . . . .11
Features of Your Phone . . . . . . . . . . . . . . . . . . . . . .15
Turn Your Phone On and Off . . . . . . . . . . . . . . . . .16
Using Your Phone’s Battery and Charger . . . . . . .17
Navigating Through Phone Menus . . . . . . . . . . . .20
Display Your Phone Number . . . . . . . . . . . . . . . . . .21
Make and Answer Calls . . . . . . . . . . . . . . . . . . . . . .22
Entering Text . . . . . . . . . . . . . . . . . . . . . . . . . . . . . . . .30
Controlling Your Phone’s Settings . . . . . . . . . .34Sound Settings . . . . . . . . . . . . . . . . . . . . . . . . . . . . .35
Display Settings . . . . . . . . . . . . . . . . . . . . . . . . . . . . .38
Location Settings . . . . . . . . . . . . . . . . . . . . . . . . . . . .40
Messaging Settings . . . . . . . . . . . . . . . . . . . . . . . . .40
CMAS Settings . . . . . . . . . . . . . . . . . . . . . . . . . . . . .42
Airplane Mode . . . . . . . . . . . . . . . . . . . . . . . . . . . . . .42
TTY Use . . . . . . . . . . . . . . . . . . . . . . . . . . . . . . . . . . .43
Phone Setup Options . . . . . . . . . . . . . . . . . . . . . . . .44
Setting Your Phone’s Security . . . . . . . . . . . . .46Using Your Phone’s Lock Feature . . . . . . . . . . . . . .46
Reset/Delete . . . . . . . . . . . . . . . . . . . . . . . . . . . . . . . .47
Reset Default Settings . . . . . . . . . . . . . . . . . . . . . . .48
Managing History . . . . . . . . . . . . . . . . . . . . . . . .49View Recent History . . . . . . . . . . . . . . . . . . . . . . . .49
Recent History Options . . . . . . . . . . . . . . . . . . . . . .49
Make a Call From Recent History . . . . . . . . . . . . .50
Viewing History Thread . . . . . . . . . . . . . . . . . . . . . .50
Table of Contents
Save a Number From Recent History . . . . . . . . . .51
Prepend a Number From Recent History . . . . . . .52
Erase Recent History . . . . . . . . . . . . . . . . . . . . . . . .52
Using Contacts . . . . . . . . . . . . . . . . . . . . . . . . . . .53Add a Number to a Contacts Entry . . . . . . . . . . . .54
Find Contacts Entries . . . . . . . . . . . . . . . . . . . . . . . .54
Contacts Entry Options . . . . . . . . . . . . . . . . . . . . . .55
Add a Number to a Contacts Entry . . . . . . . . . . . .56
Edit a Contacts Entry’s Numbers . . . . . . . . . . . . . .57
Assign Speed Dial Numbers . . . . . . . . . . . . . . . . .57
Edit a Contacts Entry . . . . . . . . . . . . . . . . . . . . . . . .58
Select a Ringtone Type for an Entry . . . . . . . . . . .58
Dial Services . . . . . . . . . . . . . . . . . . . . . . . . . . . . . . .59
Using the Phone’s Tools . . . . . . . . . . . . . . . . . . .60Calendar . . . . . . . . . . . . . . . . . . . . . . . . . . . . . . . . . . .60
Clock . . . . . . . . . . . . . . . . . . . . . . . . . . . . . . . . . . . . . .63
Notepad . . . . . . . . . . . . . . . . . . . . . . . . . . . . . . . . . . .64
EZ Tip Calculator . . . . . . . . . . . . . . . . . . . . . . . . . . .65
Calculator . . . . . . . . . . . . . . . . . . . . . . . . . . . . . . . . . .65
World Clock . . . . . . . . . . . . . . . . . . . . . . . . . . . . . . . .66
Using Your Phone’s Voice Services . . . . . . . .67Voice Memos . . . . . . . . . . . . . . . . . . . . . . . . . . . . . . .67
Service Features . . . . . . . . . . . . . . . . . . . . . . .69
Service Features: The Basics . . . . . . . . . . . . . .70Voicemail . . . . . . . . . . . . . . . . . . . . . . . . . . . . . . . . . .70
Text and Multimedia Messaging . . . . . . . . . . . . . .74
Using Caller ID . . . . . . . . . . . . . . . . . . . . . . . . . . . . . .76
Responding to Call Waiting . . . . . . . . . . . . . . . . . .77
Make a Three-Way Call . . . . . . . . . . . . . . . . . . . . . .77
Using Call Forwarding . . . . . . . . . . . . . . . . . . . . . . .78
Data Services . . . . . . . . . . . . . . . . . . . . . . . . . . . .79Data Service Applications . . . . . . . . . . . . . . . . . . . .79
Getting Started With Data Services . . . . . . . . . . . .80
Games, Ringers, and More . . . . . . . . . . . . . . . . . . .82
Browsing the Web . . . . . . . . . . . . . . . . . . . . . . . . . . .84
Data Services FAQs . . . . . . . . . . . . . . . . . . . . . . . . .85
Safety and Warranty Information . . . . . . . .87
Important Safety Information . . . . . . . . . . . . . .88General Precautions . . . . . . . . . . . . . . . . . . . . . . . . .88
Maintaining Safe Use of and Access to Your Phone . . . . . . . . . . . . . . . . . . . . . . .90
Using Your Phone With a Hearing Aid Device . . .92
Caring for the Battery . . . . . . . . . . . . . . . . . . . . . . . .93
Radiofrequency (RF) Energy . . . . . . . . . . . . . . . . . .94
Owner’s Record . . . . . . . . . . . . . . . . . . . . . . . . . . . . .95
Manufacturer’s Warranty . . . . . . . . . . . . . . . . . .96

i
Introduction
This User Guide introduces you to your wirelessservice and all the features of your new phone.It’s divided into four sections:
l Section 1: Getting Started
l Section 2: Your Phone
l Section 3: Service Features
l Section 4: Safety and Warranty Information
Throughout this guide, you’ll find tips thathighlight special shortcuts and timely remindersto help you make the most of your new phoneand service. The Table of Contents and Indexwill also help you quickly locate specificinformation.
You’ll get the most out of your phone if you readeach section. However, if you’d like to get rightto a specific feature, simply locate that sectionin the Table of Contents and go directly to thatpage. Follow the instructions in that section,and you’ll be ready to use your phone in notime.
ii
1. Web2. Messaging
1. Voicemail
2 Send Message
3. Messages
4. Email
5. Settings
1. Callback Number
2. Preset Messages
3. Signature
4. SMS Re-Assembly
5. CMAS Settings
1. CMAS-Presidential Alert
2. CMAS-Extreme Alert
3. CMAS-Severe Alert
4. CMAS-Amber Alert
5. CMAS-Test Alert
3. My Stuff1. Application Manager
2. Games
3. Ringtones
4. Applications
5. Wallpapers
6. Chat Flirt Fun
7. Options
1. Get New
2. My Stuff Manager
3. Memory Status
4. Get Stuff5. Re-Boost
1. Re-Boost Locator
2. Call Balance
3. Call Re-Boost
4. My Account
6. Entertainment
1. Music
1. Playlist
2. Artists
3. All Songs
4. Albums
5. Genres
2. Games
Your Phone’s Menu
The following list outlines your phone’s menu structure.

iii
7. Photos & Videos1. Camera
2. Camcorder
3. My Photos & Videos
1. In Phone
2. Memory Card
4. Other Settings
1. Auto-Save to
2. Status Bar
3. Location
4. Slideshow Interval
8. Social Networking1. Facebook
2. Twitter
3. Hookt
9. Settings1. Display
1. Screen Savers
1. Main Screen
2. Lock Screen
2. Banner
3. Lockscreen Clock
4. Brightness
5. Backlight
1. Backlight Dim
2. Backlight Off
6. Picture ID
1. Contacts
2. Unsaved Numbers
3. Private/Unknown
7. Font Size
1. Messages
2. Browser
3. Notepad
4. Applications8. Power Save Mode9. Whisper Notification10. Quick Composer
2. Volume1. Incoming Ringtone2. Playback Volume3. Power Up/Down4. Key Beeps
1. Tone Length2. Tone Volume3. Tone Type

iv
3. Ringtones1. Incoming Calls
1. Contacts2. Unsaved Numbers3. Private/Unknown
2. Call Alerts1. Beep Each Minute2. Out of Service3. Connect4. Signal Fade/Call Drop
3. Voicemail
4. Messages
5. Alarm/Calendar
6. Power Up/Down
4. Vibration
1. Incoming Calls
1. Contacts
2. Unsaved Numbers
3. Private/Unknown
2. Voicemail
3. Messages
4. Alarm/Calendar
5. Text Entry
1. Word Complete
2. Next Word Complete
3. Word Scan
6. Activate This Device
7. Phone Info
1. Phone#/User ID
2. Icon Glossary3. Memory Info4. Battery Status5. Version6. Advanced7. My Account
1. Account Details2. Hear Minutes3. Hear Balance
8. Lock Phone1. Lock Now2. Change Lock Code
9. Parental Controls1. On/Off2. Change Parental Control
Code3. Restriction
1. Voice Call2. Messaging3. Web4. Camera / Camcorder5. Force Location On
10. Call Setup
1. Auto-Answer
2. Abbreviated Dialing
3. Contacts Match
11. TTY
12. Airplane Mode

v
13. Data
1. On/Off
2. Update Profile
14. Headset Mode
15. Language (Idioma)
16. Location
17. Reset/Delete
1. Reset Settings
2. Reset Phone
3. Delete Stuff
1. Messages
2. Call Logs
3. Browser Cookies andCache
4. Downloaded Content
5. Contacts
6. My Photos & Videos
7. Voice Memo
8. Shortcuts
4. Change Lock Code
10. Tools1. Clock
1. Alarm
2. World Clock
3. Stopwatch
2 Calendar
3. Bluetooth
1. Bluetooth
2. Visibility
3. Add New
4. Trusted Devices
5. My Bluetooth Info
6. Help
4. Update Phone
1. Update Firmware
2. Update PRL
5. Mass Storage
1. Connect to PC
2. File Manager
3. Format Memory Card
4. Memory Info
6. Voice Service
1. Voice Command
1. Call[Name][Type]/[Number]
2. Send Msg to[Name][Type]/[Number]
3. Find [Name][Type]
4. Go to [Menu]
5. Check [Item]
6. Voice CommandTraining
7. Exit Voice Command
2. Voice Reader
1. Voice Guide
2. Phone Status

vi
3. Voice Memo
4. Settings & Info
1. Set Speaker
2. Help
7. Calculator
1. Calculator
2. Ez Tip Calculator
3. Unit Converter
8. Notepad
9. Document Viewer

Section 1
Get Started

2 Section 1A: Setting Up Service
Set Up Service
In This Section
l Get Started
l Setting Up Your Voicemail
l Get Help
Setting up service on your new phone is quickand easy.This section walks you through the necessarysteps to unlock your phone, set up yourvoicemail, establish passwords, and contactyour service provider for assistance with yourwireless service.
Get Started
Unlocking Your Phone
If your phone is locked, the main display will say“-Locked-” after it is powered on.
Follow these easy steps to unlock your phone:
1. Press and hold to turn the phone on.
2. Drag to the left or right to unlock thephone.
3. Touch Unlock and enter your four-digit lockcode (For security purposes, the code is notvisible as you type).
Tip: Current code is <Last 4 digits of your phone number>. WARNING : If you change the code and forget it, phone mustbe reset and you will lose all data.

Section 1A: Setting Up Service 3
Set Up Your Voicemail
All unanswered calls to your phone areautomatically transferred to your voicemail, even ifyour phone is in use or turned off. Therefore, youwill want to set up your voicemail and personalgreeting as soon as your phone is activated.
To set up your voicemail:
1. From standby mode, press and touchand hold .
- or -
Slide open the QWERTY keyboard and press
the .
2. Follow the system prompts to:
n Create your passcode.
n Record your name announcement.
n Record your greeting.
n Choose whether or not to activate One-Touch Message Access (a feature that letsyou access messages simply by pressingand holding , bypassing the need foryou to enter your passcode).
Voicemail PasscodeYou are required to create your voicemail password (or passcode) when you set up your voicemail. For more information orto change your voicemail password, please contact your serviceprovider.
Setting U
p Service

4 Section 1A: Setting Up Service
Get Help
Directory Assistance
You have access to a variety of services andinformation through Directory Assistance,including residential, business, and governmentlistings, assistance with local or long-distancecalls, movie listings, and hotel, restaurant,shopping, and major local event information. Theremay be a per-call charge and you may be chargedfor airtime.
To call your wireless Directory Assistance:
© Press and touch
from the dial pad.

Section 2
Your Phone

6 Section 2A: Your Phone: The Basics
Your Phone: The Basics
In This Section
l Front View of Your Phone
l Viewing the Display Screen
l Features of Your Phone
l Turning Your Phone On and Off
l Using Your Phone’s Battery and Charger
l Navigating Through Phone Menus
l Displaying Your Phone Number
l Making and Answering Calls
l Entering Text
Your phone is packed with features thatsimplify your life and expand your ability tostay connected to the people and informationthat are important to you. This section willguide you through the basic functions andcalling features of your phone.

Section 2A: Your Phone: The Basics 7
Front View of Your PhonePhone
Basics
4. Battery StrengthIndicator
7. Talk Key8. Back Key
9. Microphone
2. Status Light
6. Home Key
10. QWERTY Keyboard5. Touch Screen
3. Status Bar Icons
1. Earpiece

8 Section 2A: Your Phone: The Basics
13. Emoticon/Symbols Key
11. Function Key 14. Space Key
16. Enter Key
17. Delete/Back Key
21. Camera Lens
23. Speaker19. Charger/
Accessory Port
20. Camera Button
18. VolumeButtons
12. Shift Key 15. Navigation Keys
22. Camera Self-portraitMirror

Section 2A: Your Phone: The Basics 9
Key Functions1. Earpiece lets you hear the caller and
automated prompts.
2. Status Light indicates incoming calls, new
messages, or other events by blinking. It is red
while charging and turns green when charging
is completed.
3. Status Bar Icons provide information about
your phone’s status such as signal strength,
roaming, ringer setting, messaging, and
battery charge.
4. Battery Strength Indicator represents the
amount of remaining battery charge currently
available in your phone. When all bars are
displayed in the battery icon, the phone‘s
battery is fully charged. When no bars are
displayed, the phone‘s battery is nearly
completely discharged.
5. Touch Screen displays all the information
needed to operate your phone, such as the
call status, the Contacts list, the date and time,
and the signal and battery strength.
6. Home Key lets you go back to the Home menu
from any menu display. To go back to standby
mode, press this key again.
7. Talk Key brings the dial pad on the screen.
Hold down to activate Voice Command while in
standby mode.
8. Back Key returns you to the previous menu
when in a sub-menu. This key also allows you
to return to the previous screen when using
the Browser.
9. Microphone allows other callers to hear you
clearly when you are speaking to them.
PhoneB
asics

10 Section 2A: Your Phone: The Basics
10. QWERTY Keyboard lets you enter numbers,
letters, and characters. Press the number keys
for speed dialing.
11. Function Key allows you enter the alternate
character (such as @ for the B key) on the
QWERTY keyboard.
12. Shift Key lets you to capitalize letters.
13. Emoticon/Symbols Key lets you enter
emoticons and symbols when entering text.
14. Space Key lets you enter a space.
15. Navigation Keys let you move the cursor up,
down, right or left to navigate menus or when
using the Browser.
16. Enter Key lets you move the cursor to the
beginning of the next line.
17. Delete/Back Key deletes characters in text
entry mode. When in a menu, pressing this key
returns you to the previous menu. This key also
allows you to return to the previous screen
when using the Browser.
18. Volume Buttons allows you to adjust the ringer
volume or adjust the voice volume during a
call.
19. Charger/Accessory Port allows you to connect
the phone charger or an optional USB cable.
CAUTION!: Inserting an accessory into the incorrect port maydamage the phone.
20. Camera Button lets you activate the camera
and camcorder to take pictures and videos.
21. Camera Lens is used for picture taking and
video recording. Keep clean for optimal
performance.
Section 2A: Your Phone: The Basics 11
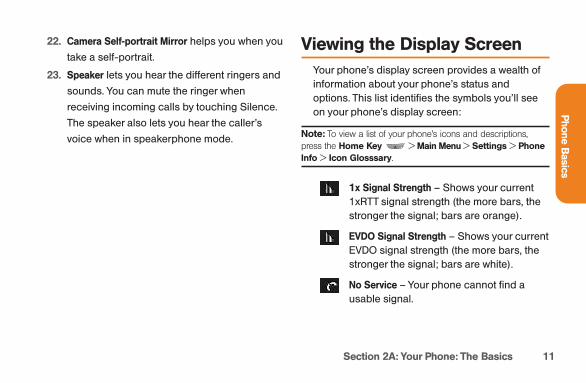
22. Camera Self-portrait Mirror helps you when you
take a self-portrait.
23. Speaker lets you hear the different ringers and
sounds. You can mute the ringer when
receiving incoming calls by touching Silence.
The speaker also lets you hear the caller’s
voice when in speakerphone mode.
Viewing the Display ScreenYour phone’s display screen provides a wealth ofinformation about your phone’s status andoptions. This list identifies the symbols you’ll seeon your phone’s display screen:
Note: To view a list of your phone’s icons and descriptions,press the Home Key > Main Menu > Settings > PhoneInfo > Icon Glosssary.
1x Signal Strength – Shows your current1xRTT signal strength (the more bars, thestronger the signal; bars are orange).
EVDO Signal Strength – Shows your currentEVDO signal strength (the more bars, thestronger the signal; bars are white).
No Service – Your phone cannot find ausable signal.
PhoneB
asics

12 Section 2A: Your Phone: The Basics
EVDO Data Service – Mobile broadbanddata service (EVDO) is available. Whenactive, the icon is animated.
1x Service Activated – Indicates that 1xRTTdata service is available. When active, theicon is animated.
1x Service Deactivated – Indicates that1xRTT data service is deactivated.
1x Service Unavailable – Data service iscurrently unavailable.
Airplane Mode – Indicates that the phoneis in Airplane Mode.
Full Battery – Shows your current batterycharge level. (Icon shown is fully charged.)
Low Battery – Shows that the batterycharge level is low.
Ringtone Only – Indicates that the ringeronly is set for the call alert.
Vibrate Only – Indicates that the ringervolume is set to vibrate only.
1 Beep – Indicates that one beep is set forthe call alert.
1 Beep & Vibrate – Indicates that one beepand vibration is set for the call alert.
Vibrate All – Indicates that the ringervolume is set to vibrate all.
Ringtone Off – The ringer is set to off.
Silence All – All sounds are turned off.
Ringtone & Vibrate – Indicates that theringer and vibrate mode is set.
Bubble Icon – Indicates you have missedalerts such as voicemail, missed calls, newmessages, scheduled events, or acompleted wireless backup.
Urgent Message – Indicates you have newurgent messages.

Section 2A: Your Phone: The Basics 13
Sent Message – Indicates the message issent.
Received Message – Indicates the messageis received.
Recipient – Indicates the recipient field.
File Attachment – Indicates the fileattachment field.
File Attached – Indicates a file is attached.
Audio file attached – Indicates an audio file isattached.
Voice file attached – Indicates a voice file isattached.
Calendar file attached – Indicates acalendar file is attached.
Contact file attached – Indicates a contactfile is attached.
Location On – Your phone‘s locationfeature is on and available for location-based services such as GPS Navigation.
Location Off – Your phone‘s location feature isoff. Your location is available only for 911.
TTY – Indicates your phone is operating inTTY mode.
Speaker – Indicates that the speaker isactivated.
Bluetooth Enabled (Hidden) – Indicates thatthe Bluetooth function is enabled buthidden from other devices.
Bluetooth Enabled (Visible) – Indicates thatthe Bluetooth function is enabled and isvisible to other devices.
Bluetooth Connected – Indicates that theBluetooth function is connected.
PhoneB
asics

14 Section 2A: Your Phone: The Basics
Bluetooth Connected (Mono/Stereo Headset)– Indicates that the Bluetooth function isconnected to a mono or stereo headset.
Bluetooth Connected (Stereo Speaker) –Indicates that the Bluetooth function isconnected to a stereo speaker.
Alarm Clock – Indicates that an alarm isactivated.
Missed Calls – Indicates missed calls.
Incoming Calls – Indicates incoming calls.
Outgoing Calls – Indicates outgoing calls.
Camera/Picture – Indicates camera mode.
Camcorder/Video – Indicates camcordermode.
1 Background Application – Indicates thatone application is active.
2 Background Applications – Indicates that2 applications are active.
3 Background Applications – Indicates that3 applications are active.
4 Background Applications – Indicates that4 applications are active.
5 Background Applications – Indicates that5 applications are active.
Camera Resolution 2MP – Indicates that thecamera resolution is set to 2MP.
Camcorder Resolution WQVGA – Indicatesthat the camcorder resolution is set toWQVGA.
Camera Resolution High – Indicates that thecamera resolution is set to High.
Camera/Camcorder Resolution Med –Indicates that the camera/camcorderresolution is set to Medium.

Section 2A: Your Phone: The Basics 15
Camera/Camcorder Resolution Low –Indicates that the camera/camcorderresolution is set to Low.
Ê Camera/Camcorder Resolution Low –Indicates that the camera/camcorderresolution is set to Low.
Ê Zoom – Allows you to zoom in and outwhen taking pictures or recording video.
Ê Self Timer – Allows you to set a timer delayfor taking pictures or recording video. Thisis ideal when you want to be a part of thepicture or recording.
Ê Capture – Allows you to take a picture.
Ê Color Tone – Allows you to change thecolor tone for your pictures and videos.
Ê Night Mode Setting – The camera has beenset to Night Mode.
Features of Your Phone
Congratulations on the purchase of your phone.The RUMOR Reflex by LG is an easy-to-use,lightweight and reliable phone that offers manysignificant features and service options. Thefollowing list previews some of those features ofthe phone:
v Data service provides access to the wirelessInternet in digital mode.
v Voicemail and Text Messaging provide quickand convenient messaging capabilities.
v Games, ringtones, wallpapers, and otherapplications can be downloaded to make yourphone as unique as you are. Additionalcharges may apply.
PhoneB
asics

16 Section 2A: Your Phone: The Basics
v Your Contacts List allows you to store up to600 entries, with up to seven phone numbersper entry.
v The Calendar offers several personalinformation management features to help youmanage your busy lifestyle.
v The Location feature works in connection withavailable location-based services.
v Predictive Text Input lets you quickly typemessages with one keypress per letter.
v Speed Numbers let you dial phone numberswith one or two key presses.
Turn Your Phone On and Off
Turning Your Phone On
To turn your phone on:
© Press and hold .
Once your phone is on, it may display “Looking forService”, which indicates that your phone issearching for a signal. When your phone finds asignal, it automatically enters standby mode – thephone’s idle state. At this point, you are ready tobegin making and receiving calls.
If your phone is unable to find a signal after 15minutes of searching, a Power Save feature isautomatically activated. When a signal is found,your phone automatically returns to standby mode.
In Power Save mode, your phone searches for asignal periodically without your intervention. Youcan also initiate a search for service by pressingany key (when your phone is turned on).

Section 2A: Your Phone: The Basics 17
Turning Your Phone Off
To turn your phone off:
© Press and hold for two seconds untilyou see the powering-down animation onthe screen.
Your screen remains blank while your phone is off(unless the battery is charging).
Using Your Phone’s Batteryand ChargerWARNING: Use only Boost-approved or LG-approvedbatteries and chargers with your phone. The failure to use aBoost-approved or LG-approved battery and charger mayincrease the risk that your phone will overheat, catch fire, orexplode, resulting in serious bodily injury, death, or propertydamage.
Battery CapacityThe battery provides up to 5.3 hours of continuousdigital talk time (per Sprint lab).
When the battery reaches 5% of its capacity, thebattery icon blinks. When there are approximatelytwo minutes of talk time left, the phone sounds anaudible alert and then turns off.
Note: Long backlight settings, searching for service, vibratemode, Browser use, and other variables may reduce thebattery’s talk and standby times.
PhoneB
asics

18 Section 2A: Your Phone: The Basics
Tip: Be sure to watch your phone’s battery level indicator andcharge the battery before it runs out of power.
Installing the Battery
To install the battery:
© Remove the battery from its packaging.
© Use the fingertip cutout at the bottom of the
back cover to lift the back cover off.
© Insert the battery into the opening in the
back of the phone. Make sure the
connectors align with the phone terminals.
© Position the battery cover over the battery
compartment and press it downward until
you hear a click.
Removing the Battery
WARNING: Do not handle a damaged or leaking Li-Ionbattery as you can be burned.
To remove the battery:
© Make sure the power is off so that you don‘tlose any stored numbers or messages.
© Use the fingertip cutout at the bottom of theback cover to lift the back cover off.
© Lift the battery using the fingertip cutoutlocated at the bottom of the batterycompartment and remove it from the phone.
Section 2A: Your Phone: The Basics 19
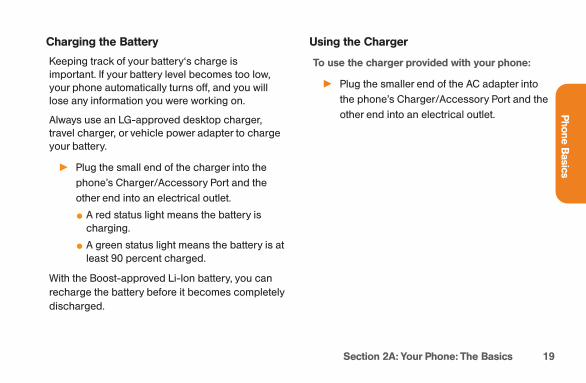
Charging the Battery
Keeping track of your battery‘s charge isimportant. If your battery level becomes too low,your phone automatically turns off, and you willlose any information you were working on.
Always use an LG-approved desktop charger,travel charger, or vehicle power adapter to chargeyour battery.
© Plug the small end of the charger into the
phone’s Charger/Accessory Port and the
other end into an electrical outlet.
v A red status light means the battery ischarging.
v A green status light means the battery is atleast 90 percent charged.
With the Boost-approved Li-Ion battery, you canrecharge the battery before it becomes completelydischarged.
Using the Charger
To use the charger provided with your phone:
© Plug the smaller end of the AC adapter into
the phone’s Charger/Accessory Port and the
other end into an electrical outlet. PhoneB
asics

20 Section 2A: Your Phone: The Basics
Navigating Through PhoneMenus
The Navigation Key on your phone allows you toscroll through menus quickly and easily. The scrollbar at the right of the screen keeps track of yourposition in the menu at all times.
To navigate through a screen, simply press theNavigation Key up or down.
For a summary of your phone’s menu, please see“Your Phone’s Menu” on page ii.
Touch > Main Menu to access allavailable menus.
On the Touch Screen
To scroll through lists, touch the screen and slideyour finger up the screen. The list will move up somore items are visible. To display the top of the listagain, slide the screen down.
To select an item, touch it on the menu. For example, to view your text messages:
1. Touch and then Main Menu toaccess the main menu.
2. Touch Messaging.
3. Touch Messages. All of your messages (ifany) will be displayed.
Navigate through Menus Using the QWERTYKeyboard
The Navigation Keys on the QWERTY keyboard letyou quickly scroll through on-screen items. Tonavigate through a menu, press the up and downNavigation Keys. As you navigate through themenu, options are highlighted. Select any optionby highlighting it and pressing .
For example, to view your text messages:
1. Slide open the QWERTY keypad and pressthe Home Key and then Main Menu .

Section 2A: Your Phone: The Basics 21
2. Select Messaging by pressing the downarrow key until you see that menu option andpressing .
3. Use the Navigation Keys to highlightMessages and press .
Back Up Within a Menu
To go to the previous menu:
© Press .
– or –
© Press on the QWERTY Keyboard.
To return to the Home screen:
© Press twice.
– or –
© Touch the header icon at the top left corner
of the screen.
Display Your Phone Number
Just in case you forget your phone number, yourphone can remind you.
To display your phone number:
© Touch > Main Menu > Settings >
Phone Info > Phone#/User ID. Your phone
number and other information about your
phone and account will be displayed.
PhoneB
asics

22 Section 2A: Your Phone: The Basics
Make and Answer Calls
Make Phone CallsPlacing a call from your phone is as easy asmaking a call from any landline phone. Just enterthe number and press .
To make a call using your keypad:
1. Press and enter a phone number usingthe dial pad or the QWERTY keyboard. If youmake a mistake while dialing, touch toerase the numbers.
2. Touch or press .
3. To end the call, drag the toggle key to .
Tip: To redial other recent numbers, press , touch , touchthe desired number, and then Call. When making calls off theNationwide Network, always dial using 11 digits (1 + area code+ phone number).
You can also place calls from your phone byspeed dialing numbers from your Contacts, using
your History listings, and ASR (Automatic SpeechRecognition).
Dialing OptionsWhen you enter numbers you will see a variety ofdialing options displayed on the phone‘s screen.
The following options are available when dialinga number:
v Save: Saves the entered number to yourContacts.
v Contact Details: Displays Contacts details fornumbers that are already saved in the phone.
v Send Msg: Allows you to quickly send amessage to the number.
v Pause: Enter digits and touch this to enter apause within a number string.
Tip: To use speed dial to dial a phone number, touch and holdthe speed dial number. If the speed dial number is two digits,enter the first digit, and then touch and hold the second digit.

Section 2A: Your Phone: The Basics 23
Answer an Incoming CallTo answer an incoming call:
1. Make sure your phone is on. If your phone isoff, incoming calls go to voicemail.
2. Touch Answer.
- or -
Touch and drag the toggle key to Answer.
Your phone notifies you of incoming calls in thefollowing ways:
v The phone rings or vibrates.
v The indicator light flashes.
v The backlight illuminates.
v The screen displays an incoming callmessage.
If the incoming call is from a number stored in yourContacts, the entry‘s name is displayed. You mayalso see the caller‘s phone number, if available.
Receive Call Options
You also see the following options if your phone ison standby. To select an option, touch thecorresponding touch key.
v Silence to mute the ringer.
v Send to Voicemail to send the call tovoicemail.
v Ignore with Text to send a text message. Youcan send the preset message or write a newone.
v Answer to answer the call.
Note: When your phone is off, incoming calls go directly tovoicemail.
Ending a Call
To disconnect from a call when you are finished:
© Touch .
PhoneB
asics

24 Section 2A: Your Phone: The Basics
Missed Call NotificationWhen you do not answer an incoming call, yourscreen displays the Missed Call log in a bubble onthe standby screen.
To display a Missed Call entry from thenotification screen:
© Touch the entry. To dial the phone number,
touch Call. To send a message, touch SendMsg.
Call Emergency NumbersYou can place emergency calls to 911, even ifyour account is restricted.
Note: When you place an emergency call, your phoneautomatically enters Emergency mode.
Press and dial .
During an emergency call, you will see a variety ofoptions displayed on the screen.
To initiate an option, touch the following:
v My Phone# to display your phone numberduring an emergency call.
v Speaker to activate speakerphone mode. If youare in speakerphone mode, the option isdisplayed as Speaker Off to deactivate.
v Dial Pad to display the dial pad.
v More to access the following options:

Section 2A: Your Phone: The Basics 25
n Phone Info to check the phone number,version, etc.
n Cancel to close the pop-up menu.
To exit Emergency mode:
1. Touch End Call to end a 911 call.
2. Touch Exit to exit from the Emergency mode.
Note: When you are in Emergency mode, you can exit onlyfrom the options menu.
Enhanced 911 (E911) Information
This phone features an embedded GlobalPositioning System (GPS) chip necessary forutilizing E911 emergency location services whereavailable.
When you place an emergency 911 call, the GPSfeature of your phone seeks information tocalculate your approximate location. Dependingon several variables, including availability andaccess to satellite signals, it may take up to 30
seconds or more to determine and report yourapproximate location.
IMPORTANT: Always report your location to the 911operator when placing an emergency call. Some designatedemergency call takers, known as Public Safety Answering Points(PSAPs) may not be equipped to receive GPS locationinformation from your phone.
In-Call OptionsSeveral in-call features are available as optionsduring a call. To select an option, touch thecorresponding touchkey. The following optionsmay be available:
v Mute to mute the microphone. Touch Unmuteto unmute the microphone.
v Speaker to activate speakerphone mode. Ifyou are in speakerphone mode, the option isdisplayed as Speaker Off to deactivate.
v Dial Pad to display the dial pad.
v End Call to end the call.
PhoneB
asics

26 Section 2A: Your Phone: The Basics
v More to access the following options:n Save to save a phone number in your
Contacts.n Contact Details to display the contact
details (if the contact is saved in theContacts).
n Main Menu to display the phone‘s mainmenu.
n 3-Way Call to initiate a 3-way call.
n Contacts to display your Contacts list.
n Voice Memo to record the currentconversation.
n Phone Info to check the phone number,version, etc.
n Cancel to close the pop-up menu.
Warning! Because of higher volume levels, do not place thephone near your ear during speakerphone use.
Save a Phone NumberYou can store 600 Contacts entries with up toseven phone numbers per Contact in your phone.Each entry‘s name can contain 64 characters.Your phone automatically sorts the Contactsentries alphabetically.
To save a number from standby mode:
1. Press to display the dial pad.
2. Enter a phone number.
3. Touch Save.
4. Touch New Entry for a new contact orExisting Entry to add a number to anexisting contact.
5. Touch a label for the number (Mobile, Home,Work, Pager, Fax, or Other).
6. Touch the Enter Name field and enter thenew contact name using the touch keypador QWERTY keyboard.
Section 2A: Your Phone: The Basics 27
– or –
Search an existing contact name and touch
it to save the new number.
7. Touch Done to save the new entry.
Find a Phone NumberYou can find a phone number by searchingContacts for entries by name.
1. Press and touch . The Contacts listis displayed.
2. Touch and enter the first letter or lettersof an entry. (The more letters you enter, themore specific the search.) To display anentry, touch it.
3. To dial a number, touch Call or press .
Dial and Save Phone Numbers WithPauses
You can dial or save phone numbers with pausesfor use with automated systems, such as voicemailor credit card billing numbers.
Note: You can have multiple pauses in a phone number.
To dial or saved phone numbers with pauses:
1. Press and enter the phone number.
2. Touch Pause.
3. Enter additional numbers.
4. Touch Talk to dial the number.
– or –
Touch Save to save the number in your
Contacts.
Note: When dialing a number with a pause, touch Send Tones.
PhoneB
asics

28 Section 2A: Your Phone: The Basics
Abbreviated DialingAbbreviated Dialing is similar to speed dialing. Youcan use either of the following abbreviated dialingfeatures.
v Contacts Match – Retrieve any number savedin your Contacts by entering any consecutivethree digits of the number. Touch Talk to dialthe retrieved number.
v Prepend – Prepend the first five or six digits(for example, the area code and prefix) to anyfour or five digits you enter. Touch Talk to dialthe resulting number.
To place a call using Contacts Match:
1. Press and enter three to six digits of aContacts entry‘s phone number. Thenumbers in your Contacts list that containmatches will display.
2. Touch to display the details.
3. Touch the contact you want to call and thentouch Talk.
To place a call using Prepend Dialing:
1. Press and enter the last four or fivedigits of the phone number. The AbbreviatedDialing number will display.
2. Touch to display the details.
3. Touch the number and touch Talk.
Dial From the Contacts ListYou can dial a phone number directly from yourContacts list.
1. Press and touch .
2. Touch the entry you want to call and touchCall.
3. If multiple numbers are saved in the Contactentry, touch the number you wish todial.

Section 2A: Your Phone: The Basics 29
Using Speed DialingYou can store up to 98 numbers in your phone‘sspeed dial memory. Dial speed dial entries usingone key touch for locations 2–9 or two key touchesfor locations 10–99.
To use One-Touch Dialing for speed diallocations 2–9:
v Touch and hold the appropriate key forapproximately two seconds. The displayconfirms that you have dialed the numberwhen it shows “Connecting...”.
To use Two-Touch Dialing for speed diallocations 10-99:
1. Touch the first digit.
2. Touch and hold the second digit forapproximately two seconds. The displayconfirms that you have dialed the numberwhen it shows “Connecting...”.
Plus (+) Code DialingWhen placing international calls, Plus CodeDialing automatically enters the internationalaccess code for your location (for example, 011for international calls made from the U.S.).
1. Touch and hold until you see a “+” onthe display screen.
2. Dial the country code and phone number,and then touch Talk. The phoneautomatically prepends the access code forinternational dialing, followed by the countrycode and phone number.
PhoneB
asics
30 Section 2A: Your Phone: The Basics
Entering TextYour phone provides convenient ways to enterletters, numbers, and symbols whenever you areprompted to enter text (for example, when addinga Contacts entry or when using email and textmessaging).
Select a Text Input ModeYou can use the touch keypad or the QWERTYkeyboard. While you are using the touch keypad,you can switch to and from the QWERTYkeyboard.
To change the character input mode:
1. From a screen where you can enter text,touch to change the text input mode.
2. Select one of the following options:
n Predictive to enter text using a predictivetext entry system that reduces the numberof keystrokes required to enter a word.
n Abc to use multi-touch entry – touch once for “a,” twice for “b”, three times for“c.”
n 123 to enter numbers by touching thenumbers on the keypad.
n Symbols to enter symbols.
n Emoticon to enter “emoticons.”
n Smiley to enter smileys.
Tip: When entering text, touch or press to changeletter capitalization (Abc > ABC > abc).
Predictive Text InputPredictive Text Input lets you enter text using a fewkeystrokes per word.
Predictive Text Input uses an intuitive worddatabase to analyze the letters you enter andcreate a suitable word. The word may change asyou type.
Section 2A: Your Phone: The Basics 31
To enter a word using T9 Text Input:
1. Select the Predictive text input mode.
2. Enter a couple of letters of a word. When youenter a letter of a word, a small window willappear and shows the words starting with theletters. If you make a mistake, touch orpress to erase a single character. Touchand hold or press and hold toerase an entire word.
3. Touch and scroll to the desired word.Then touch the desired word.
4. If a word you want to enter is not displayed inthe list, select Add Word? to add a word tothe Predictive Text Input database.
5. Enter the word and touch Done. The word willappear as an option the next time you scrollthrough options during Predictive Text Input.
For more information about Predictive Text Input,visit the T9 Web site at www.T9.com.
ABC Mode (Touch Keypad Only)In Abc mode, also known as multi-touch entry, youtouch keys one, two, three, or four times to enterthe letters you see on the keypad. For example,touch once for “a,” twice for “b”, or threetimes for “c”; or touch once for “p,” twice for“q,” three times for “r,” or four times for “s.”
1. Select the Abc mode.
2. Touch the corresponding keys repeatedlyuntil the correct letter appears. (For example,to enter the word “Bill,” touch twice,
three times, three times, andthree times again.)If you make a mistake, touch to erase asingle character. Touch and hold toerase an entire word.
By default, the first letter of an entry is capitalizedand the following letters are lowercased. You canchange the letter case using .
PhoneB
asics
32 Section 2A: Your Phone: The Basics
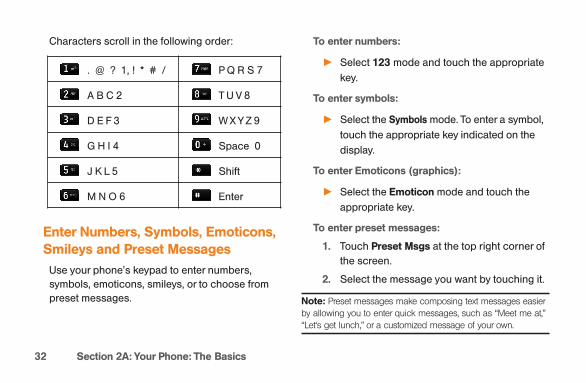
Characters scroll in the following order:
Enter Numbers, Symbols, Emoticons,Smileys and Preset Messages
Use your phone's keypad to enter numbers,symbols, emoticons, smileys, or to choose frompreset messages.
To enter numbers:
© Select 123 mode and touch the appropriate
key.
To enter symbols:
© Select the Symbols mode. To enter a symbol,
touch the appropriate key indicated on the
display.
To enter Emoticons (graphics):
© Select the Emoticon mode and touch the
appropriate key.
To enter preset messages:
1. Touch Preset Msgs at the top right corner ofthe screen.
2. Select the message you want by touching it.
Note: Preset messages make composing text messages easierby allowing you to enter quick messages, such as “Meet me at,”“Let‘s get lunch,” or a customized message of your own.
. @ ? 1, ! * # / P Q R S 7
A B C 2 T U V 8
D E F 3 W X Y Z 9
G H I 4 Space 0
J K L 5 Shift
M N O 6 Enter

Section 2A: Your Phone: The Basics 33
HandwritingWhen entering text, besides “typing” the text withthe touch keypad, you also have the option towrite with your fingertip. The touch screenconverts your movements into characters.
1. Touch on the keypad. The handwritingentry screen appears.
2. Write within the handwriting entry screen. Tochange letter case or shift between letters,numbers, and symbols, touch the icons justabove the handwriting entry screen. Whenyou are finished, touch Done.
Enter Text With the QWERTY KeyboardYour phone has a built-in QWERTY keyboard,specifically designed for easy and comfortabletext entry. The QWERTY keyboard uses the samelayout and works just like the keyboard on yourcomputer. The easiest way to enter text is by usingyour thumbs to type on the QWERTY keyboard.
1. From a screen where you can enter text,touch and select whether to turn thepredictive text entry system on or off.
2. Use your thumbs to enter text.
v To change capitalization, press .
v To enter an alternate character on a key,press the Function Key and thenpress the alternate character‘s key. To lockthe Function Key, press twice.
v To enter “emoticons,” press andtouch a symbol or press the arrow keys tohighlight an emoticon and press .
v To enter symbols, press and pressand touch the desired one or press
the arrow keys to highlight a symbol andpress .
v To enter preset messages, touch PresetMsgs at the top right corner of the screen.Select the message you want by touching it.
PhoneB
asics

34 Section 2B: Controlling Your Phone’s Settings
Controlling Your Phone’sSettings
In This Section
l Sound Settings
l Display Settings
l Text Entry Settings
l Location Settings
l Messaging Settings
l Airplane Mode
l TTY Use With Service
l Phone Setup Options
l Security Settings
Using the menu options available on yourphone, you can customize your phone tosound, look, and operate just the way youwant it to. This section describes how you canchange your phone’s settings to best suit yourneeds. Take a few moments to review theseoptions and to adjust or add settings that areright for you.

Section 2B: Controlling Your Phone’s Settings 35
Sound Settings
RingersRinger settings help you identify incoming callsand messages. You can assign ringer types toindividual Contacts entries, types of calls, andtypes of messages.
Incoming Calls
Your phone provides a variety of ringer optionsthat allow you to customize your ring and volumesettings. These options allow you to identifyincoming calls by the ring.
To select a ringtone for incoming calls:
1. Touch > Main Menu > (slide the screenup) > Settings > Ringtones > IncomingCalls.
2. Touch Contacts, Unsaved Numbers, orPrivate/ Unknown. For Contacts, touch thefollowing:
v Contacts with Default Ringer: You can seta ringer type for calls from contacts withdefault ringer.
v One Contact: You can set a specific ringertype for calls from one specific contact.
3. Select a category and then scroll throughthe available ringers. Touch to hear asample ringer.
4. Touch a ringer to assign it.
Get New Ringers
1. Touch > Main Menu > (slide the screenup) > Settings > Ringtones > IncomingCalls, Voicemail, Messages, orAlarm/Calendar.
2. Select a call or message type to display a listof ringer type categories.
3. Select Downloaded Ringers > Get New. TheBrowser starts and displays the Ringersmenu.
YourPhone’s Settings

36 Section 2B: Controlling Your Phone’s Settings
4. Scroll through available ringers. When youfind one you want, touch it.
5. To make a purchase, touch Buy and thenDownload.
6. When the download is finished, select anoption to continue:
v Listen to listen to the ringer.
v Set As to finish assigning the ringer.
v Shop to browse for other items todownload.
Messages
1. Touch > Main Menu > (slide the screenup) > Settings > Ringtones > Messages.
2. Select a category and then scroll throughthe available ringers. Touch to hear asample ringer.
3. Touch a ringer to assign it.
Assign Ringers to Contacts
1. Touch > Main Menu > (slide the screenup) > Settings > Ringtones > IncomingCalls > Contacts > One Contact.
2. Touch a contact entry.
3. Select a category and then scroll throughthe available ringers. Touch to hear asample ringer.
4. Touch a ringer to assign it.
Voicemail
To select a ringtone for messaging:
1. Touch > Main Menu > (slide the screenup) > Settings > Ringtones > Voicemail.
2. Select a category and then scroll throughthe available ringers. Touch to hear asample ringer.
3. Touch a ringer to assign it.

Section 2B: Controlling Your Phone’s Settings 37
Key Tone SettingsYour phone offers a number of options for selectingthe audible tones accompanying a keypress.
To select a tone volume:
1. Touch > Main Menu > (slide the screenup) > Settings > Volume > Key Beeps.
2. Select an option.
v Tone Length to select a key tone length.(During a call, longer tone lengths may bebetter for tone recognition when dialingvoicemail or other automated systems.)
v Tone Volume to select a keypress volumelevel.
v Tone Type to select the sound of akeypress.
Adjusting the Phone’s Volume SettingsAdjust your phone‘s volume settings to suit yourneeds and your environment.
To adjust your phone’s volume settings:
1. Touch > Main Menu > (slide the screenup) > Settings > Volume.
2. Select Incoming Ringtone, PlaybackVolume, or Key Beeps.
3. Touch a level bar to set the volume, or selectSilence All, Vibrate All, Ringer Off, or 1Beep.
4. Toggle the VIBRATE setting. (Note: Thistoggle key is not available when Silence Allor Vibrate All is selected.)
5. Touch Done.
Tip: You can adjust the ringer volume in any screen (or theearpiece volume during a call) by using the Volume Buttons onthe left side of your phone.
YourPhone’s Settings

38 Section 2B: Controlling Your Phone’s Settings
Call AlertsSet your phone to alert you with an audible tonewhen you change service areas, once a minuteduring a voice call, or when a call has beenconnected or dropped.
To enable or disable alert sounds:
1. Touch > Main Menu > (slide the screenup) > Settings > Ringtones > Call Alerts.
2. Toggle the Beep Each Minute, Out ofService, Connect, or Signal Fade/ Call Dropbuttons between ON and OFF.
Silence AllThe Silence All option allows you to mute allsounds without turning your phone off.
To activate Silence All:
© Press the Volume Button down until you see“Silence All” on the screen and touch Done.
To deactivate Silence All:
© Press the Volume Button up repeatedly toselect a volume level and touch Done.
Display Settings
BacklightSelect how long the display screen and keypadremain backlit after you press any key.
To change the display backlight setting:
1. Touch > Main Menu > (slide the screenup) > Settings > Display > Backlight.
2. Select Backlight Dim or Backlight Off.
3. Touch a time setting.
Note: Long backlight settings reduce the battery‘s talk andstandby times.

Section 2B: Controlling Your Phone’s Settings 39
Screen SaversChoose what you see on the display screen when instandby mode.
To change the display image :
1. Touch > Main Menu > (slide the screenup) > Settings > Display > Screen Savers >Main Screen or Lock Screen.
2. Select No Image, Preloaded, My Photos,Assigned Media, Downloaded Images, orTake New Picture.
3. Touch an image to view it. While viewing animage, you can flick the screen left or right toscroll through and view other availableimages.
4. Touch Assign to assign an image.
Changing the Phone’s Menu StyleYour phone allows you to choose how the menuappears on your display screen.
To select the display’s menu style:
1. Touch > Edit > Grid View or List View.
2. Touch Done to save the setting.
Language (Idioma)You can choose to display your phone‘s on-screen menus in English or in Spanish.
To assign a language for the phone’s display:
1. Touch > Main Menu > Settings >Language (Idioma).
2. Touch English or Español.
YourPhone’s Settings

40 Section 2B: Controlling Your Phone’s Settings
Location SettingsYour phone is equipped with a Location feature foruse in connection with location-based services.
The Location feature allows the network to detectyour position. Turning Location off will hide yourlocation from everyone except 911.
Note: Turning Location on will allow the network to detect yourposition using GPS technology, making some applications andservices easier to use. Turning Location off will disable the GPSlocation function for all purposes except 911, but will not hideyour general location based on the cell site serving your call. Noapplication or service may use your location without your requestor permission. GPS-enhanced 911 is not available in all areas.
To enable your phone’s Location feature:
1. Touch > Main Menu > Settings >Location. You will see the Locationdisclaimer.
2. Read the disclaimer and touch Continue .
3. Touch On or Off to change the existingLocation setting.
When you turn the Location feature on, the phone
displays the icon. When you turn Location
off, the phone displays the icon.
Messaging SettingsMessaging Settings allow you to decide how youwould like to be notified of new messages, tocreate a signature with each sent message, and tocreate your own preset messages.
Setting Message Notification
When you receive a text message, your phone cannotify you by displaying an icon on your displayscreen. You can also choose to be notified with awhisper alert message on your display screen.
1. Touch > Main Menu > Settings >Display.
Section 2B: Controlling Your Phone’s Settings 41
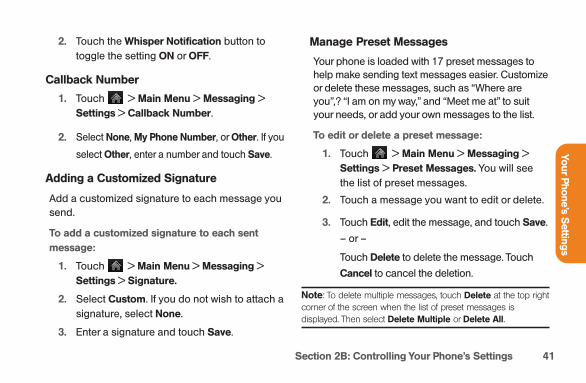
2. Touch the Whisper Notification button totoggle the setting ON or OFF.
Callback Number
1. Touch > Main Menu > Messaging >Settings > Callback Number.
2. Select None, My Phone Number, or Other. If you
select Other, enter a number and touch Save.
Adding a Customized Signature
Add a customized signature to each message yousend.
To add a customized signature to each sentmessage:
1. Touch > Main Menu > Messaging >Settings > Signature.
2. Select Custom. If you do not wish to attach asignature, select None.
3. Enter a signature and touch Save.
Manage Preset Messages
Your phone is loaded with 17 preset messages tohelp make sending text messages easier. Customizeor delete these messages, such as “Where areyou”,? “I am on my way,” and “Meet me at” to suityour needs, or add your own messages to the list.
To edit or delete a preset message:
1. Touch > Main Menu > Messaging >Settings > Preset Messages. You will seethe list of preset messages.
2. Touch a message you want to edit or delete.
3. Touch Edit, edit the message, and touch Save.
– or –
Touch Delete to delete the message. Touch
Cancel to cancel the deletion.
Note: To delete multiple messages, touch Delete at the top rightcorner of the screen when the list of preset messages isdisplayed. Then select Delete Multiple or Delete All.
YourPhone’s Settings

42 Section 2B: Controlling Your Phone’s Settings
To add a new preset message:
1. Touch > Main Menu > Messaging >Settings > Preset Messages. You will seethe list of preset messages.
2. To add a new message, touch Add New.
3. Enter your message and touch Save. Yournew message will be added to the beginningof the list.
CMAS Settings
Wireless Emergency Alerts (WEA), also known asCMAS, is a part of a national alerting system calledIPAWS (Integrated Public Alert and WarningSystem) that enables emergency managementofficials to rapidly disseminate the warnings andsafety information via text alerts to wirelessphones based on the phones’ geographiclocation. The Federal Emergency ManagementAgency, or FEMA, is responsible for receiving the
alerting information and forwarding the alerts toparticipating wireless carriers such as BoostMobile. Such alerts may come from the Presidentof the United States; the National Weather Service,and state or county public safety officials. Thissystem is integrated into the same nationalalerting services that serve television and radiotoday. For more information regarding WEA/CMASplease visit the FEMA website at“http://www.fema.gov/emergency/ipaws/projects.shtm”.
Airplane Mode
Airplane Mode allows you to use many of yourphone‘s features, such as Games, Notepad, andVoice Memos, when you are in an airplane or inany other area where making or receiving calls ordata is prohibited. When you set your phone toAirplane Mode, it cannot send or receive any callsor access online information.

Section 2B: Controlling Your Phone’s Settings 43
1. Touch > Main Menu > (slide the screenup) > Settings > Airplane Mode.
2. Read the disclaimer and touch Continue.
2. Select On, Off, or On Power Up.
While in Airplane Mode, your phone’s standbyscreen will display “Phone Off” in the Status Bar.
TTY UseA TTY (also known as a TDD or Text Telephone) is atelecommunications device that allows peoplewho are deaf, hard of hearing, or who havespeech or language disabilities, to communicateby telephone.
Your phone is compatible with select TTY devices.Please check with the manufacturer of your TTYdevice to ensure that it is compatible with digitalcell phones. Your phone and TTY device willconnect via a special cable that plugs into yourphone‘s headset jack. If this cable was not
provided with your TTY device, contact your TTYdevice manufacturer to purchase the connectorcable.
When establishing your service, please callCustomer Service via the stateTelecommunications Relay Service (TRS) by firstdialing 7-1-1 Talk. Then provide the state TRS withthis number: 866-727-4889.
To turn TTY Mode on or off:
1. Touch > Main Menu > Settings > TTY.You will see an informational message.
2. Touch Continue.
3. Touch On to turn TTY mode on.
– or –
Touch Cancel to leave TTY mode turned off.
Note: In TTY Mode, your phone will display the TTY access iconwhen the TTY device is plugged into the phone.When enabled, TTY mode may impair the audio quality of non-TTY devices connected to the headset jack.
YourPhone’s Settings
WARNING!: It is recommended that TTY users makeemergency calls by other means, including TelecommunicationsRelay Services (TRS), analog cellular, and landlinecommunications. Wireless TTY calls to 911 may be corruptedwhen received by public safety answering points (PSAPs),rendering some communications unintelligible. The problemencountered appears related to software used by PSAPs. Thismatter has been brought to the attention of the FCC, and thewireless industry and the PSAP community are currently workingto resolve this.
Phone Setup Options
Your Home MenuYour phone offers you the option of customizingthe home screen with the most frequently usedmenus for direct access.
1. Touch to open the Home menu.
2. Touch Add. Various menu options will bedisplayed.
3. Touch to the right of a menu option toadd that menu option to your Home menu. Tonavigate to a specific submenu, touch amenu option repeatedly until you see thesubmenu you want and touch .
4. When you finish selecting menus to add,touch Done.
Auto-Answer ModeSet your phone to automatically pick up incomingcalls when connected to an optional hands-freecar kit.
To set Auto-Answer mode:
1. Touch > Main Menu > (slide the screenup) > Settings > Call Setup > Auto-Answer.
2. Touch an option.
v Off to disable Auto-Answer.
v Headset to answer calls automatically whenthe phone is connected to an optional
44 Section 2B: Controlling Your Phone’s Settings

Section 2B: Controlling Your Phone’s Settings 45
headset. Remember, your phone will answercalls in Auto-Answer mode even if you are notpresent.
Setting Abbreviated DialingAbbreviated Dialing is similar to speed dialing
To set your abbreviated dialing options:
1. Touch > Main Menu > (slide the screenup) > Settings > Call Setup.
2. Touch the Abbreviated Dialing button totoggle the setting to ON.
3. Enter the first five- or six-digit prefix in thePrefix field and then touch OK.
v To deactivate this feature, select OFF duringstep 2 above.
Tip: To make an Abbreviated Dial call, see “AbbreviatedDialing”on page 27.
Note: Abbreviated Dialing does not apply to 911 or 411.
Contacts MatchThis allows you to turn the contacts matchingfeature on or off.
To set your contacts match options:
1. Press > Main Menu > (slide the screenup) > Settings > Call Setup.
2. Touch the Contacts Match button to togglethe setting ON or OFF.
Text EntryThis allows you to customize text entry.
1. Press > Main Menu > Settings > TextEntry.
2. Touch the Word Complete, Next WordComplete, and Word Scan buttons to togglethe settings between ON and OFF.
YourPhone’s Settings

46 Section 2B: Controlling Your Phone’s Settings
Setting Your Phone’sSecurity
In This Section
l Using Your Phone’s Lock Feature
l Erasing Phone Content
l Resetting Default Settings
By using the security settings on your phone,you receive peace of mind without sacrificingflexibility. This section will familiarize you withyour phone’s security settings. With severaloptions available, you can customize yourphone to meet your personal needs.
Using Your Phone’s Lock Feature
Lock Your PhoneWhen your phone is locked, you can only receiveincoming calls or make calls to 911, CustomerService, or special numbers.
1. Touch > Main Menu > (slide the screenup) > Settings > Lock Phone and enter yourlock code. Please note that you will be askedif you want to change or keep the defaultlock code the first time you access thismenu.
2. Touch Lock Now.
Unlock Your PhoneTo unlock your phone:
1. From standby mode, touch Unlock.
2. Enter your lock code.

Section 2B: Controlling Your Phone’s Settings 47
Current code is <Last 4 digits of MDN>.
WARNING: If you change the code and forget it, phone mustbe replaced losing all data.
Change the Lock CodeTo change your Lock Code:
1. Touch > Main Menu > Settings > LockPhone and enter your lock code.
2. Touch Change Lock Code and then enterand re-enter your new lock code.
Tip: To access the Change Lock Code menu, you can alsotouch > Main Menu > (slide the screen up) > Settings >Reset/Delete and enter your lock code. Then select ChangeLock Code.
Call in Lock ModeYou can place calls to 911 and to your specialnumbers when in lock mode. (For information onspecial numbers, see “Parental Controls”.)
To place an outgoing call in lock mode:
© To call an emergency number, special
number, or Customer Service, touch Dialer,
enter the phone number, and touch Talk.
Reset/DeleteYou can quickly erase all the content you havecreated or stored in your phone.
1. Touch > Main Menu > (slide the screenup) > Settings > Reset/Delete and enteryour lock code.
2. Select Delete Stuff.
3. Touch an option.
n Messages to delete all messages.
n Call Logs to delete all call logs.
n Browser Cookies and Cache to delete theBrowser‘s cookies and cache.
n Downloaded Content to delete all thecontents you have downloaded.
YourPhone’s Settings

48 Section 2C: Setting Your Phone’s Security
n Contacts to delete all the contents of yourContacts list.
n My Photos & Videos to delete all picturesand videos in My Photos & Videos.
n Voice Memo to delete all voice memos.
n Shortcuts to delete the menus you addedon the Home menu.
4. Touch Delete to confirm the deletion
Reset Default Settings
Resetting the phone to default settings restores allthe factory defaults, including the ringer types anddisplay settings. The Contacts, Call History,Calendar, and Messaging are not affected.
To reset default settings:
1. Touch > Main Menu > Settings >Reset/ Delete and enter your lock code.
2. Select Reset Settings. You will see adisclaimer.
3. Read the disclaimer and if you are certainthat you would like to restore all the factorysettings, touch Reset.

Section 2E: Managing Call History 49
Managing History
In This Section
l Viewing History
l History Options
l Making a Call From History
l Viewing History Thread
l Saving a Phone Number From History
l Prepend a Phone Number From History
l Erasing History
Call History keeps track of incoming calls,calls made from your phone, and missed calls.This section guides you through accessing andmaking the most of your Call History.
View Recent HistoryTo view a Call History entry:
1. From standby mode, press and touch.
2. Touch an entry.
Note: Call History only records calls that occur while the phone isturned on. If a call is received while your phone is turned off, itwill not appear in the phone's Incoming or Missed call logs.
Recent History OptionsYour Recent History menu options include calling,sending a message, viewing the history of a caller,saving a number to contacts, and viewing contactdetails.
Touch a History entry to access the followingoptions:
v Call to dial the entry.
Call H
istory

50 Section 2E: Managing Call History
v Send Msg to send a message.
v History to view all the history of the caller orreceiver.
v Save Contact to save the number if it is notalready in your Contacts.
v Contact Details to view the contact information(if the number has already been saved toContacts).
Touch Delete at the top right corner of the screento delete multiple or all History entries.
Make a Call From RecentHistory
The Recent History list lets you quickly place callsto recent incoming, outgoing, or missed numbers.
To place a call from Call History:
1. From standby mode, press and touch.
2. Scroll through the History entries and touch
to dial the entry.
Note: You cannot make calls from Call History to entriesidentified as No ID or Restricted.
Viewing History ThreadHistory is a list of the last 60 phone numbers (orContacts entries) for calls you placed, accepted,or missed. History makes redialing a number fastand easy. It is continually updated as your phoneautomatically adds new numbers to the beginningof the list and removes the oldest entries from thebottom of the list.
Each entry contains the phone number (if it isavailable) and Contacts entry name (if the numberis in your Contacts). Duplicate calls (same numberand type of call) may only appear once on the list.

Section 2E: Managing Call History 51
1. From standby mode, press and touch.
2. Touch an entry.
Note: History records only calls that occur while the phone isturned on. If a call is received while your phone is turned off, itwill not be included in history. If you return a call from thevoicemail menu, it will not be included in your phone‘s history.
Save a Number From RecentHistory
Your phone can store up to 600 Contacts entries.Contacts entries can store up to a total of sevenphone numbers, and each entry‘s name cancontain 64 characters.
To save a phone number from History:
1. Touch a History entry and touch SaveContact.
2. Select New Entry to create a new Contactsentry for the number or Existing Entry tosave the number to an existing entry.
3. Touch the phone label to select it (Mobile,Home, Work, Pager, Fax, or Other).
4. Touch the Enter Name field and enter thenew contact name using the touch keypador QWERTY keyboard, and then touch Done.
– or –
Search an existing contact name and touchit to save the new number.
5. Touch Done to save the new entry.
Note: You cannot save phone numbers already in yourContacts or from calls identified as No ID or Restricted.
Call H
istory
52 Section 2E: Managing Call History
Prepend a Number FromRecent History
If you need to make a call from Recent History andyou are outside your local area code, you can addthe appropriate prefix by prepending the number.
To prepend a phone number from History:
1. From standby mode, press and touch.
2. Touch a History entry and then touchHistory.
3. Touch an entry and touch Prepend.
4. Enter the prefix and press to call thenumber.
Erase Recent History
To erase individual History entries, see “RecentHistory Options”.
To erase History:
1. From standby mode, press and touch.
2. Touch Delete at the top right corner of thescreen and select Delete Multiple or DeleteAll.
3. After selecting entries to erase, touch Delete.
– or –
If you are certain you want to erase all theHistory entries, touch Delete.

Section 2F: Using Contacts 53
Using Contacts
In This Section
l Adding a New Contact Entry
l Saving a Phone Number
l Contacts Entry Options
l Editing a Contacts Entry
l Adding a Number to a Contacts Entry
l Editing a Contacts Entry‘s Numbers
l Assigning Speed Dial Numbers
l Selecting a Ringer Type for an Entry
l Assigning a Picture to an Entry
l Creating a Group
l Finding Contacts Entries
l Secret Contacts Entries
l Dialing Services
l Hello UI
Now that you know the basics that make iteasier to stay in touch with people andinformation, you’re ready to explore yourphone’s more advanced features. This sectionexplains how to use your phone’s Contacts List,and helps you make the most of your contactsand time when you are trying to connect with theimportant people in your life.
Contacts
54 Section 2F: Using Contacts
Add a Number to a ContactsEntry
Your phone can store up to 600 Contacts entries.Contacts entries can store up to a total of 7 phonenumbers, and each entry‘s name can contain 64characters.
To add a new entry:
1. From standby mode, touch > Contacts.
2. Touch Add New > New Contact.
3. Touch the Enter Name field and enter thenew contact name using the touch keypador QWERTY keyboard, and then touch Done.
4. Touch the Add Number field, enter a phonenumber, and then touch Done.
5. Touch a phone label to select it (Mobile,Home, Work, Pager, Fax, or Other).
6. Scroll down to additional fields and enter oredit information as desired.
7. Touch Done.
After saving the number, your phone display theContacts list.
Find Contacts Entries
There are several ways to find your Contactentries.Follow the steps outlined in the sections below tofind entries from the Contacts menu.
Finding Entries
To find entries
1. From standby mode, touch > Contacts.
2. Scroll through all the entries.
– or –

Section 2F: Using Contacts 55
To quickly move up or down in the listalphabetically, touch and hold the thumb tabon the right side and drag to an initial letter.
– or –
Touch and enter the first letter or lettersof aname (such as “dav” for “Dave”). Themore letters you enter, the more your searchnarrows.
3. To display an entry, touch it.
4. To dial the entry‘s default phone number,touch Call.
– or –
To close the entry display, touch the entryagain.
Contacts Entry OptionsOnce you've stored a Contact entry, you can adddetails such as phone numbers, add emailaddresses, URL, default ringers, postal address,or even the contact's birthday.
To display a Contacts entry:
1. From standby mode, touch > Contacts.
2. Touch an entry and then touch .
Contacts entry options:
© Display an entry and touch Edit at the top
right corner of the screen.
n Add Number to add a phone to the entry.
n Add Email to add an email address to theentry.
n Add URL to add a website’s URL to theentry.
Contacts

56 Section 2F: Using Contacts
n Default Ringer to assign apreprogrammed or downloaded ringer.
n Default Vibrate Type to assign a vibrationtype for incoming calls from the contact.
n Enter Address to add an address.
n Enter Birthday to add a birthday.
n Enter Memo to add a note, or otherinformation.
n Enter Job Title to add a job title.
n Enter Company to add a company.
n No Secret/Secret to change to Secret tohide an entry‘s phone number(s).
Add a Number to a ContactsEntry
You can add up to seven phone numbers to aContact entry.
To add a phone number to an entry:
1. Display a Contacts entry.
2. Touch Edit at the top right corner of thescreen and then touch Add Number.
3. Enter the new phone number and touchDone.
Note: To add a pause, touch Pause and enter additionalnumbers.
4. Touch a label for the number.
5. Touch Done to save the new number.

Section 2F: Using Contacts 57
Edit a Contacts Entry’sNumbers
Edit a contact entry’s phone numbers using theedit option.
To edit an entry’s phone number:
1. Display a Contacts entry and touch Edit atthe top right corner of the screen.
2. Touch a number.
3. Touch to clear one digit at a time ortouch and hold to erase the entirenumber.
4. Re-enter or edit the number and touch Done.
5. Touch Done to save the number.
Assign Speed Dial NumbersYour phone can store up to 98 phone numbers inspeed dial locations.
To assign a speed dial number to a new phonenumber:
1. Add a phone number to a new or to anexisting Contacts entry.
2. On the Contacts list, touch More > Settings> Speed Numbers.
3. Touch an available speed dial location.
Note: To move to far below quickly, touch the scroll thumb taband drag to the desired location.
4. Select a phone number in the Contacts. Aconfirmation is displayed.
To assign a speed dial number to an existingphone number:
1. From standby mode, touch > Contacts.
Contacts

58 Section 2F: Using Contacts
2. Touch More > Settings > Speed Numbers.
3. Touch an available speed dial location.
4. Select a phone number in the Contacts. Aconfirmation is displayed.
Note: To scroll down quickly, touch the scroll thumb tab anddrag to the desired location
Edit a Contacts EntryEditing a Contact’s entry is quick and easy.
To make changes to an entry:
1. Display a Contacts entry and touch Edit atthe top right corner of the screen.
2. Highlight the information you wish to edit(Name, Ringer, etc.).
3. Add or edit the information and touch Done(if applicable).
Select a Ringtone Type for anEntry
Assign a ringtone type to a Contacts entry so youcan identify the caller by the ringtone type.
To select a ringtone type for an entry:
1. Display a Contacts entry and touch Edit atthe top right corner of the screen.
2. Slide the screen up and touch the currentring type to display the Ringtone Type menu.
3. Select a ringtone menu, such as DefaultRingtone, Downloaded Ringtones, OtherRingtones, No Ringtone, My Videos, VoiceMemo, My Audio or Assigned Media.
4. Scroll through available ringtone. To hear asample ringtone, touch .
5. Touch a ringtone to select it.
6. Touch Done to save the new ringtone type.

Section 2F: Using Contacts 59
Dial ServicesYour Contacts list is preprogrammed with contactnumbers for various services.
To dial a service from your Contacts:
1. From standby mode, touch > Contacts.
2. Touch More > Settings > Services andselect from the following available services:Call Balance, Call Care, Call Re-Boost,Directory Assistance, Voicemail, BoostCare, Directory Assistance, CommunityInformation, or Non-Emergency Svcs.
To dial a service from standby mode using yourdial pad:
1. Press to display the dial pad.
2. Dial the appropriate service number:
n Call Balance –
n Call Care –
n Call Re-Boost –
n Dir Assistance (411) – ,
, or
n Voicemail –
n Boost Care –
n Community Information –
n Non-Emergency Svcs –
3. Press to dial the number.
Contacts

60 Section 2G: Using the Phone’s Calendar and Tools
Using the Phone’s Tools
In This Section
l Using Your Phone’s Calendar
l Using Your Phone’s Alarm Clock
l Using Your Phone’s Notepad
l Using Your Phone’s Tools
Your phone is equipped with several personalinformation management features that help youmanage your schedule. This section shows youhow to use these features to turn your phone intoa time management planner that helps you keepup with your contacts, schedules, andcommitments.
Calendar
Add an event to the calendarYour Calendar helps organize your time andreminds you of important events.
To add an event:
1. Touch > Main Menu > (slide the screenup) > Tools > Calendar.
2. Touch the day to which you would like to addan event and touch Add New. The currentday is the default.
3. Touch Time to select a time for the event.Slide the hour, minute, and am/pm wheel upor down. Touch End and then set the endtime and touch Done.
n For an all-day event, touch All Day.
4. Touch Content to enter a notes about the event.
n Enter a note or memo and touch Save.

Section 2G: Using the Phone’s Calendar and Tools 61
5. Touch Related person to select contactsrelated to the event.
n After selecting related persons in theContacts list touch Done.
6. Touch Alarm to set an alarm time.
n Select None, On time, 5 minutes, 10 minutes, 1 hour, 1 day, or 2 days .
7. Touch Alarm Bell to select a ringer type.
n Select a ringer menu and touch a ringer.
8. Touch Volume to select a ringer volume.
9. Touch Location to enter a location.
n Enter the event location and touch Save.
10. Touch Set Repeat to select a repeatingstatus.
n Select None, Daily, Mon - Fri, Select Days,Weekly, Monthly, or Yearly.
11. Touch Save to save the event.
Event AlertsWhen your phone is turned on and you have anevent alarm scheduled, your phone alerts you anddisplays the event summary. There are several waysyour phone can alert you to scheduled events:
v By playing the assigned ringer type.
v By illuminating the backlight.
v By flashing the LED.
Event Alert MenuWhen your phone is turned on and you have anevent alarm scheduled, your phone can alert youand display the event summary.
When the alert goes off, unlock the screen (ifnecessary) and touch one of the following options:
v Snooze to silence the alarm and schedules itto replay again in 10 minutes.
v View to display the event detail screen.
v Dissmiss to dismiss the alarm.
Tools

62 Section 2G: Using the Phone’s Calendar and Tools
View EventsTo view your scheduled events:
1. Touch > Main Menu > (slide the screenup) > Tools > Calendar.
2. Touch the day for which you would like toview events.
Tip: In the calendar view, days with events scheduled areunderlined.
3. Touch List or # Events. Your phone listsevents in chronological order.
4. Touch an event to list its details.
Going to the Current Day’s CalendarMenu
To go to the Calendar menu for today’s date:
© On the Calendar, touch the Month/Year section
at the top and then touch Go to Today.
Erasing a day’s EventsTo erase a day’s scheduled events:
1. Touch > Main Menu > (slide the screenup) > Tools > Calendar.
2. Touch the day for which you would like to
erase events and then touch List or #Events.
Tip: In calendar view, days with events scheduled are underlined.
3. Touch Delete at the top right corner of thescreen and select Delete Today.
4. Select Delete or Cancel.
Note: If the day for which you are erasing events contains arepeating event, you will receive the following prompt: “There aresome recurring events. Do you want to delete?” Select Yes toerase a all occurrences or No to cancel the deletion of therepeating event.

Section 2G: Using the Phone’s Calendar and Tools 63
Erase Past Events
To delete events scheduled before a specifictime and date:
1. Touch > Main Menu > (slide the screenup) > Tools > Calendar > Delete > DeleteOld.
2. Select the option to erase events older thanOne day, One week, One month, or Oneyear. You will see a message informing youhow many events were erased.
Erase All Events
To delete all scheduled events:
1. Touch > Main Menu > (slide the screenup) > Tools > Calendar > Delete > DeleteAll. You will see an alert notifying you that allevents will be erased.
2. Select Delete to erase all events or Cancel toreturn to the calendar view.
ClockYour phone comes with a built-in alarm clock thathas multiple alarm capabilities.
To use the alarm clock:
1. Touch > Main Menu > (slide the screenup) > Tools > Clock > Alarm.
2. Touch Add New.
3. Touch and slide the alarm switch to ON.
4. Touch the time to set a time for the alarm.
n Tough the digital clock (above the dial) toadjust the clock.
– or –
n Touch and drag the hour and minutehands and then touch am/pm to select atime.
5. Touch Repeat to select a repetition type.
n Touch Daily, Once, Weekly, Mon - Fri, orSat & Sun.
Tools

64 Section 2G: Using the Phone’s Calendar and Tools
6. Touch Sound/Vibration to select AlwaysSound & Vibrate, Always Sound, or AlwaysVibrate.
7. Touch Alarm Bell to select a ringer type.
n Select a ringer menu and touch a ringer.
8. Touch Volume to select Volume levels.
n Touch the bar at the volume level youwant.
9. Touch Vibration Type to select vibrationtype.
n Touch the desired vibration type.
10. Touch Snooze to select repetition type.
n Select Snooze 5mins, Snooze 10mins,Snooze 15mins, Snooze 20mins, orSnooze Off.
11. Touch Save to set the alarm.
NotepadYour phone comes with a notepad that you canuse to compose and store reminders and notes tohelp keep you organized.
To compose a note:
1. Touch > Main Menu > (slide the screenup) > Tools > (slide the screen up) >Notepad > Add New.
2. Enter your note using the touch keypad orQWERTY keyboard and touch Save.
To read a saved note:
1. Touch > Main Menu > (slide the screenup) > Tools > (slide the screen up) >Notepad.
2. Touch a note.
Section 2G: Using the Phone’s Calendar and Tools 65
To delete saved notes:
1. Touch > Main Menu> (slide the screenup) > Tools > (slide the screen up) >Notepad.
2. Touch a note.3. Touch Delete.
EZ Tip CalculatorThe EZ Tip Calculator tool makes it easy tocalculate a tip based on the total bill.
To quickly and easily calculate tip amounts:
1. Touch > Main Menu > (slide the screenup) > Tools > (slide the screen up) >Calculator > Ez Tip Calculator.
2. Touch the Total Bill field and enter theamount of the total bill.
3. Touch the Tip (%) field and enter a tippercentage. EZ Tip Calculator instantly
calculates the correct tip.
4. If you’re splitting the check, touch the Splitfield, and enter the number of people in yourparty. EZ Tip Calculator calculates anddisplays the ‘per person’ amount.
CalculatorYour phone comes with a built-in calculator.
To use the calculator:
1. Touch > Main Menu > (slide the screenup) > Tools > (slide the screen up) >Calculator > Calculator.
2. Enter numbers using your keypad.
n Touch to enter decimal points.
n Touch to change the value frompositive to negative .
n Touch to clear all numbers.
3. Touch for the total.
Tools

66 Section 2G: Using the Phone’s Calendar and Tools
World ClockYou can view the time in over 50 differentlocations.
To view the time in over 50 different locations:
1. Touch > Main Menu > (slide the screenup) > Tools > Clock > World Clock.
2. Touch New City to display the map.
Tip: You can search a city from the cities list. Touch , touchthe search field and enter the city name.
3. Touch or to scroll through continentsand touch to select the continent. Citiesin the continent will be displayed.
4. Touch or to scroll through cities andtouch .
– or –
Touch and drag the map to find a city andtouch .
Section 2H: Using Your Phone’s Voice Services 67
Using Your Phone’s VoiceServices
In This Section
l Managing Voice Memos
This section includes easy-to-followinstructions on using managing voice memos.
Voice MemosUse your phone‘s Voice Memo feature to recordbrief memos to remind you of important events,phone numbers, or grocery list items, or to recorda conversation during a phone call.
Record Voice MemosTo record a voice memo:
1. Touch > Main Menu > (slide the screen
up) > Tools > Voice Service > Voice Memo> Record.
2. Begin recording after the prompt.
To end the recording of your memo:
© Touch Stop.
To record a conversation during a phone call:
© During a call, touch More > Voice Memo. Aminute counter is displayed on the left top ofthe screen to indicate the amount of timerecorded.
To end the recording of your conversation:
© Touch the counter and the recording will stop.
Note: Your phone can store 30 voice memos with up to a totalof 10 minutes for all memos.
VoiceS
ervices

68 Section 2H: Using Your Phone’s Voice Services
Voice Memo OptionsTo play the voice memos you have recorded:
1. Touch > Main Menu > (slide the screenup) > Tools > Voice Service > Voice Memo.
2. Touch the voice memo you wish to hear.
To choose voice memo options:
1. Touch > Main Menu > (slide the screenup) > Tools > Voice Service > Voice Memo.
2. Find a voice memo and touch to choosefrom the voice memo options:
n Send Message to send a message withthe voice memo attached.
n Set As to assign as a ringer to Contactswith Default Ringer, One Contact,Unsaved Numbers, Private/Unknown,Voicemail, Messages, or Alarm/Calendar.
n View Details to view the selected voicememo information.
n Edit Title to edit the selected voice memotitle.
n Memory Info to view the memory statusfor voice memo. The total memory for voicememo is 10 minutes.
n Cancel to close the options menu.
Erase Voice MemosTo delete voice memos:
1. Touch > Main Menu > (slide the screenup) > Tools > Voice Service > Voice Memo.
2. Touch Delete at the top right corner of thescreen and select Delete Multiple or DeleteAll.
n Delete Multiple to delete more than oneselected memo at a time.
n Delete All to delete all voice memos.

Section 3
Service Features
70 Section 3A: Service Features: The Basics
Service Features: TheBasics
In This Section
l Using Voicemail
l Using Text Messaging
l Using Caller ID
l Responding to Call Waiting
l Making a Three-Way Call
l Using Call Forwarding
This section outlines basic calling featuresavailable.
Voicemail
Setting Up Your VoicemailYour phone automatically transfers all unansweredcalls to your voicemail, even if your phone is in useor turned off. You should set up your Voicemail andpersonal greeting as soon as your phone isactivated. Always use a password to protectagainst unauthorized access.
To set up your voicemail:
1. Press to open the dial pad.
2. Touch and hold to dial your voicemail.
3. Follow the system prompts to:
n Create your passcode.
n Record your name announcement.
n Record your greeting.
Section 3A: Service Features: The Basics 71
Note: It is recommended that you create a passcode whensetting up your voicemail to protect against unauthorized access.Without a passcode, anyone who has access to your phone isable to access your voicemail messages.
Voicemail NotificationThere are several ways your phone alerts you to anew voicemail message:
v By displaying a message on the screen.
v By sounding the assigned ringer type.
v By the LED blinking red.
v By displaying a Voicemail bubble on thescreen.
New Voicemail Message AlertsWhen you receive a new voice message, yourphone alerts you and prompts you to call yourvoicemail.
To call your voicemail:
© Press , then touch and hold .
To display your Missed Log:
© Touch the bubble icon (such as ) on the
Status Bar and then the notification.
Retrieve Your Voicemail MessagesYou can retrieve and review your messagesdirectly from your wireless phone or from any othertouch-tone phone. To dial from your wirelessphone, either speed dial your voicemail or use themenu keys.
Service
Features

72 Section 3A: Service Features: The Basics
Using One-Touch Message Access
© Press , then touch and hold . Your
phone will dial your voicemail box.
Using the Menu Keys on Your Phone toAccess Your Messages
1. Touch > Main Menu > Messaging.
2. Touch on Voicemail to listen to yourmessages.
Note: You are charged for airtime minutes when you areaccessing your voicemail from your wireless phone.
Using AnotherTouch-Tone Phone to AccessMessages
1. Dial your wireless phone number.
2. When your voicemail answers, theStar/Asterisk Key.
3. Enter your passcode.
Tip: When you call into voicemail, you first hear the headerinformation (date, time, and sender information) for the message.To skip directly to the message, press 4 during the header.
Voicemail Button Guide
Here‘s a quick guide to your keypad functionswhile listening to voicemail messages.
Date/Time Send Reply Advance
Replay Rewind Forward
Erase Save
Cancel Help Skip

Section 3A: Service Features: The Basics 73
Voicemail OptionsYour phone offers several options for organizingand accessing your voicemail.
Using Expert Mode
Using the Expert Mode setting for your personalvoicemail box helps you navigate through thevoicemail system more quickly by shortening thevoice prompts you hear at each level.
To turn Expert Mode on or off:
1. Press and hold to access yourvoicemail. If your voicemail box contains anynew or saved messages, press toaccess the main voicemail menu.
2. Enter your passcode.
3. Press to change your Personal Options.
4. Press for Expert Mode.
5. Press to turn Expert Mode on or off.
Voicemail Menu KeyFollowing the prompts on the voicemail system, youcan use your keypad to navigate through thevoicemail menu. The following list outlines yourphone’s voicemail menu structure.
Listen
Date & Time Information
Reply
Replay
Rewind
Erase
Save
Options
Service
Features

74 Section 3A: Service Features: The Basics
Personal Options
Settings
Skip Passcode
Auto-Play
Message Date & Time Playback
Change Passcode
Numeric Pages
Return to Personal Options Menu
Greetings
Change Main Greeting
Change Recorded Name
Return to Personal Options Menu
Expert Mode On/Off
Disconnect
Text and Multimedia MessagingWith your phone’s messaging features, you cansend and receive instant text messages (SMS), ormultimedia messages (MMS) that can includevideo and audio, between your wireless phoneand another messaging-ready phone. When youreceive a new message, it will automaticallydisplay a notification on your phone‘s screen.
In addition, text messaging includes a variety ofpreset messages, such as “Call me” and “I have towork late” that make composing messages fastand easy. Use your phone to customize your ownpreset messages (up to 100 characters).
Compose Text/Picture Messages1. Slide the keyboard out and touch Message.
– or –
Touch > Send Message.
2. Select an entry method:

Section 3A: Service Features: The Basics 75
n New Addr to use the keypad to enter awireless phone number or email addressof the recipient directly.
n Go to Contacts to select a recipient fromyour Contacts. Qualifying Contacts entriesmust contain a wireless phone number oran email address.
3. Touch Done when you have finished
entering recipients. You may include up to
40 recipients per message.
4. Enter a message or use the preset
messages, symbols, smileys, or emoticons
n To type a message, use your keyboard ortouch keypad to enter your message.
n To use a preset message, touch PresetMsgs in the upper right corner and thentouch a message to enter.
n To enter a symbol, an emoticon, or asmiley:
• On the touch keypad: Touch Abc andselect Symbols, Emoticons, or Smileys.Touch a desired symbol, emoticon, orsmiley and Done.
– or –
• On the QWERTY keyboard: Press ,and touch a desired symbol or emoticon.
5. To attach attachments, touch AddAttachment.
6. Review your message and touch Send. You
may select additional messaging options by
touching More to add a subject, set the
message priority urgent, set the callback
number, or save it as draft.
Note: If an attachment is added to a text message, it will beautomatically convert to a Picture Message and you will becharged accordingly.
Service
Features

76 Section 3A: Service Features: The Basics
Access Text/Picture MessagesAccessing text or picture messages on your phoneis as simple as touching the notification bubble onyour screen.
To read an SMS/MMS message:
© When you receive a text/picture message,you will see a notification bubble on yourphone’s screen. Touch the bubble to see theentire message.
To reply to a text/picture message:
1. While the message is open, touch Reply.
2. Follow steps 4-6 under “ComposeText/Picture Messages” to complete andsend your reply.
Manage Preset Messages
To add or edit preset messages:
1. Touch > Main Menu > Messaging >Settings > Preset Messages.
2. Touch Add New to add a new preset message.
– or –
Touch a preset message and then Edit.
3. Enter your new message or changes andtouch Save.
Using Caller ID
Caller ID allows people to identify a caller beforeanswering the phone by displaying the number ofthe incoming call. If you do not want your numberdisplayed when you make a call, follow these steps.
To block your phone number from beingdisplayed for a specific outgoing call:
1. Press and then touch .
2. Enter a phone number.
3. Touch Talk.
To permanently block your number, call yourservice provider.
Section 3A: Service Features: The Basics 77
Responding to Call WaitingWhen you’re on a call, Call Waiting alerts you toincoming calls by sounding two beeps. Yourphone’s screen informs you that another call iscoming in and displays the caller’s phone number(if it is available and you are in digital mode).
To respond to an incoming call while you’re on acall:
© Touch Answer. This puts the first caller on
hold and answers the second call.
To switch back to the first caller:
© Touch the call entry on the screen or press
.
Tip: For those calls where you don‘t want to be interrupted, youcan temporarily disable Call Waiting by entering before placingyour call. Call Waiting is automatically reactivated once you endthe call.
Make a Three-Way CallWith 3-Way Calling, you can talk to two people atthe same time. When using this feature, the normalairtime rates will be charged for each of the twocalls.
To make a Three-Way Call:
1. Enter a number and press .
2. Once you have established the connection,touch More > 3-Way Call.
3. From the options that appear at the top ofyour screen select a contact from Contacts,Recent History, or Enter Phone Number andtouch Talk.
4. When you’re connected to the second party,touch Join to begin your 3-way call.
Service
Features

78 Section 3A: Service Features: The Basics
If one of the people you called hangs up duringyour call, you and the remaining caller stayconnected. If you initiated the call and are the firstto hang up, all callers are disconnected.
Using Call Forwarding
Call Forwarding lets you forward all your incomingcalls to another phone number – even when yourphone is turned off. You can continue to make callsfrom your phone when you have activated CallForwarding.
To activate Call Forwarding:
1. Press and touch .
2. Enter the area code and phone number towhich you want your calls forwarded.
3. Touch Talk. You will see a message and heara tone to confirm the activation of CallForwarding.
To deactivate Call Forwarding:
1. Press and touch .
2. Touch Talk. You will see a message and heara tone to confirm the deactivation.
Data S
ervices
Data Services
In This Section
l Data Service Applications
l Getting Started With Data Services
l Downloading Content
l Exploring the Web
l Data Services FAQs
Data service offers easy and amazing featuresyou will really use. These services – includingmessaging, games, downloadable ringtonesand wallpapers, and portable Web access – letyou have fun, stay in touch, and stay informedno matter where you go on the availablenetwork.
This section introduces these advanced servicesand walks you through the necessary steps tostart taking advantage of data service.
Data Service Applications
Here is a brief list of the application typesavailable through your phone. For moreinformation, please contact your service provider.
Games – Download exciting games with full-colorgraphics and sound.
Ringtones – Personalize your phone bydownloading and assigning different ringtones tonumbers in your Contacts.
Wallpapers – Download unique images to use aswallpapers – or make it easy to tell who’s calling byassigning specific images to numbers in yourContacts.
Web – Access the Internet and up-to-date newsand information from your phone.
Section 3B: Data Services 79
80 Section 3B: Data Services
Getting Started With DataServices
This section will help you learn the basics of usingyour data service, including managing your username, launching a data connection, andnavigating the Web with your phone.
Your User NameWhen you buy a phone and sign up for service,you’re automatically assigned a user name, whichis typically based on your wireless phone number.
When you use data services, your user name issubmitted to identify you to the available network.The user name is also useful as a way topersonalize services and as an online virtualidentity.
Your user name will be automatically programmedinto your phone. You don’t have to enter it.
Finding Your User Name
If you aren’t sure what your user name is, you caneasily find it on your phone.
find your user name:
© Touch > Main Menu > (slide the screen
up) > Settings > Phone Info > Phone#/UserID.
Launch a Web BrowserTo launch the Web Browser:
© Touch > Main Menu > Web. Your data
connection starts and you see the Web home
page.
While connecting, you may see an animation anda “Connecting” message.

Section 3B: Data Services 81
Connection Status and IndicatorsYour phone displays the current status of yourdata connection through indicators at the top ofthe screen. The following symbols are used:
Your phone is connected to the high-speedMobile Broadband Network (EVDO). Whenthe triangles are animated, data is beingtransferred (for example, when you areopening a Web page). When the trianglesare white, you are connected to the networkbut data is not currently being transferred(for example, when you are viewing a Webpage that is completely open). In either state,you can receive incoming calls.
Your phone is on and is connected to the1xRTT data network. When the arrows areanimated, data is being transferred (forexample, when you are opening a Webpage) and you cannot receive calls. Whenthe arrows are white, you are connected to
the network but data is not currently beingtransferred (for example, when you areviewing a Web page that is completely open)and you can receive calls.
If you do not see an indicator, your phone does nothave a current data connection. To launch aconnection, see “Launching a Web Connection”.
Browsing the WebBrowsing through menus and websites during adata session is easy once you’ve learned a fewbasics. Here are some tips for getting around:
Scrolling
As with other parts of your phone‘s menu, you‘llhave to scroll up and down to see everything onsome websites.
To scroll line by line through websites:
© Touch and slide the screen up or down.
– or –
Data S
ervices

82 Section 3B: Data Services
Touch and drag the scroll bar on the right of
the screen.
Selecting
To select onscreen items:
© Touch a link and it will take you to that web
page. If you are using the QWERTY keyboard,
use the Navigation Keys to highlight a link and
press .
Links, which are displayed as underlined text,allow you to jump to Web pages, select specialfunctions, or even place phone calls.
To select links:
© Touch the linked text on your phone.
Going Back
To go back one page:
© Press on your phone.
Note: You can also use for deleting text (like aBackspace Key) when you are entering text.
Going Home
To return to the home page:
© Press and hold .
Games, Ringers, and More
You have access to a dynamic variety ofdownloadable content, such as games, ringers,screen savers, and other applications. (Additionalcharges may apply.) Follow the basic steps belowto access and download these items.
Access the Download Menus
To access the download menus:
1. Touch > Main Menu > My Stuff.
Section 3B: Data Services 83
2. Select a download category (Games,Ringtones, Applications, Wallpapers orChat Flirt Fun), and then select Get New.The Browser will start and take you to thecorresponding download menu.
Select an Item to Download
You can search for available items to download ina number of ways
© Featured displays a selection of featured
items.
© Categories allows you to narrow your search
to a general category. (There may be several
pages of available content in a list. Select
Next 9 to view additional items.)
© Search allows you to use your keypad to
enter search criteria to locate an item. You
may enter an entire word or title or perform a
partial-word search.
Download an Item
Once you’ve chosen and highlighted an item,touch it to select it. You will see a summary pagefor the item including its title, cost, and expirationdate.
To download a selected item:
1. From the information page, select Buy. Theitem will download automatically. When yousee the New Download screen, you havesuccessfully downloaded the item to yourphone.
2. Select an option to continue:
n Select Listen/Use/Run/View to listen to aringer, start a game or application, or viewa screen saver. Your data session will end,and you will be redirected to theappropriate phone menu screen.
n Select Set As to assign a ringer or screensaver to a phone function.
n Select Settings to configure downloadedgames or applications.
Data S
ervices

84 Section 3B: Data Services
n Select Shop to browse for other items todownload.
n Press to quit the Browser and returnto standby mode.
Browsing the Web
With Web access on your phone, you can browsefull-color graphic versions of your favorite Websites, making it easier than ever to stay informedwhile on the go. Follow sports scores, breakingnews and weather, and shop on your phoneanywhere on the available network.
In addition to the features already covered in thissection, the home page offers access to thesecolorful, graphically rich Web categories, whichmay include News, Weather, Entertainment,Sports, Money, Travel, Shopping, and Tools, aswell as other useful options such as Search. Manysites are available under more than one menu –choose the one that’s most convenient for you.
Browser MenuAlthough the home page offers a broad andconvenient array of sites and services for you tobrowse, not all sites are supported, and certainfunctions, are not available. While navigating, theBrowser menu offers additional options to expandyour use of the Web on your phone.
Open the Browser Menu
You may open the Browser menu anytime you'reusing the Browser, from any page you are viewing.
To open the Browser menu:
Options available under the Browser menuinclude:
v Back to go back to the most recent Webpage.
v Forward to move to a previously viewedpage (after having used Back option).
v Pages to open a new page or view otheropened pages.
v Zoom to zoom in and zoom out.
Section 3B: Data Services 85
v Options to choose font size, privacysettings, etc.
Go to a Specific Website
To go to a particular Web site by entering a URL(Web site address):
1. Touch the URL field.
2. Use your keyboard to enter a websiteaddress and press or touch Done.
Note: Not all Web sites are viewable on your phone.
Restart the Web Browser
If the Web Browser seems to be malfunctioning or stopsresponding, you can usually fix the problem by simplyrestarting the Browser.
To reset the Browser:
1. Touch the Browser menu.
2. Select Options > Browser settings >Advanced > Reset browser.
3. Touch the items you want to reset, thentouch Reset selected items if you still wishto continue.
Data Services FAQs
How will I know when my phone is ready for dataservice?Your user name will be displayed when you access
> Main Menu > Settings > Phone info >Phone#/ User ID.
How do I sign in for the first time?You are automatically signed in to access dataservices when you use the Browser.
Data S
ervices

86 Section 3B: Data Services
How do I know when my phone is connected todata services?Your phone automatically connects when you usedata service or an incoming message arrives. Youwill also see the or indicator icon.
Can I make calls and use data services at thesame time?You cannot use voice and data servicessimultaneously. If you receive a call while dataservice is active, your phone forwards the call tovoicemail. You can place an outgoing call anytime,but it will interrupt any in-progress data session.
When is my data connection active?Your connection is active when data is beingtransferred. Outgoing calls are allowed; incomingcalls go directly to voicemail. When active, the or indicator icon is animated on thedisplay screen.
When is my data connection dormant?If your phone receives no data for 10 seconds, the
connection goes dormant. When the connection isdormant, you can make and receive voice calls. Ifyour phone receives no data for an extendedperiod, the connection will terminate.
Can I sign out of data services?You can sign out without turning off your phone;however, you will not be able to browse the Web oruse other data services. While signed out, you canstill place or receive phone calls, check voicemail,and use other voice services. You may sign inagain at any time. To sign out, touch > MainMenu > (slide the screen up) > Settings > Data >On/Off in your phone’s menu. Read the disclaimerand touch Disable.

Section 4
Safety and WarrantyInformation
88 Section 4A: Important Safety Information
Important SafetyInformation
In This Section
l General Precautions
l Maintaining Safe Use of and Access to Your Phone
l Using Your Phone With a Hearing Aid Device
l Caring for the Battery
l Radiofrequency (RF) Energy
l Owner’s Record
l Phone Guide Proprietary Notice
This phone guide contains importantoperational and safety information that willhelp you safely use your phone. Failure to readand follow the information provided in thisphone guide may result in serious bodily injury,death, or property damage.
General PrecautionsThere are several simple guidelines to operating yourphone properly and maintaining safe, satisfactory service.
v Hold the phone with the antenna raised, fully extended,and over your shoulder.
v Try not to hold, bend, or twist the phone’s antenna.
v Don’t use the phone if the antenna is damaged.
v Speak directly into the mouthpiece.
v Avoid exposing your phone and accessories to rain orliquid spills. If your phone does get wet, immediatelyturn the power off and remove the battery.
v Although your phone is quite sturdy, it is a complexpiece of equipment and can be broken. Avoiddropping, hitting, bending, or sitting on it.
v Any changes or modifications to your phone notexpressly approved in this document could void yourwarranty for this equipment and void your authority tooperate this equipment.
v Do not disassemble or open crush, bend or deform,puncture or shred.
v Do not modify or remanufacture, attempt to insert

Section 4A: Important Safety Information 89
foreign objects into the battery, immerse or expose towater or other liquids, expose to fire, explosion or otherhazard.
v Only use the battery for the system for which it isspecified.
v Only use the battery with a charging system that hasbeen qualified with the system per this standard. Useof an unqualified battery or charger may present a riskof fire, explosion, leakage, or other hazard.
v Do not short circuit a battery or allow metallicconductive objects to contact battery terminals.
v Replace the battery only with another battery that hasbeen qualified with the system per this standard, IEEE-Std-1725-200x. Use of an unqualified battery maypresent a risk of fire, explosion, leakage or otherhazard.
v Promptly dispose of used batteries in accordance withlocal regulations.
v Battery usage by children should be supervised.
v Avoid dropping the phone or battery. If the phone orbattery is dropped, especially on a hard surface, andthe user suspects damage, take it to a service centerfor inspection.
v Improper battery use may result in a fire, explosion orother hazard.
v For those host devices that utilize a USB port as acharging source, the host device's user manual shallinclude a statement that the phone shall only beconnected to products that bear the USB-IF logo orhave completed the USB-IF compliance program.
Note: For the best care of your phone, only authorized personnelshould service your phone and accessories. Failure to do so may bedangerous and void your warranty.
HAC statementThis phone has been tested and rated for use with hearingaids for some of the wireless technologies that it uses.However, there may be some newer wireless technologiesused in this phone that have not been tested yet for usewith hearing aids.
It is important to try the different features of this phonethoroughly and in different locations, using your hearing aidor cochlear implant, to determine if you hear any interferingnoise.
Consult your service provider or the manufacturer of thisphone for information on hearing aid compatibility. If you
Important S
afety Information

90 Section 4A: Important Safety Information
have questions about return or exchange policies, consultyour service provider or phone retailer.
Part 15.19 statementThis device and its accessories comply with part15 of FCCrules. Operation is subject to the following two conditions:
(1) This device & its accessories may not cause harmfulinterference.
(2) This device & its accessories must accept anyinterference received, including interference that maycause undesired operation.
Part 15.21 statementChange or Modifications that are not expressly approved bythe manufacturer could void the user's authority to operatethe equipment.
Part 15.105 statementThis equipment has been tested and found to comply withthe limits for a class B digital device, pursuant to Part 15 ofthe FCC Rules. These limits are designed to providereasonable protection against harmful interference in aresidential installation. This equipment generates uses andcan radiate radio frequency energy and, if not installed andused in accordance with the instructions, may causeharmful interference to radio communications. However,there is no guarantee that interference will not occur in a
particular installation. if this equipment does cause harmfulinterference or television reception, which can bedetermined by turning the equipment off and on, the useris encouraged to try to correct the interference by one ormore of the following measures:
v Reorient or relocate the receiving antenna.
v Increase the separation between the equipment andreceiver.
v Connect the equipment into an outlet on a circuitdifferent from that to which the receiver is connected.
v Consult the dealer or an experienced radio/TVtechnician for help.
Maintaining Safe Use of andAccess to Your Phone
Do Not Rely on Your Phone for Emergency CallsMobile phones operate using radio signals, which cannotguarantee connection in all conditions. Therefore, youshould never rely solely upon any mobile phone foressential communication (e.g., medical emergencies).Emergency calls may not be possible on all cellularnetworks or when certain network services and/or mobile

Section 4A: Important Safety Information 91
phone features are in use. Check with your local serviceprovider for details.
Using Your Phone While DrivingTalking on your phone while driving (or operating thephone without a hands-free device) is prohibited in somejurisdictions. Laws vary as to specific restrictions.Remember that safety always comes first.
Following Safety GuidelinesTo operate your phone safely and efficiently, always followany special regulations in a given area. Turn your phone offin areas where use is forbidden or when it may causeinterference or danger.
Using Your Phone Near Other Electronic DevicesMost modern electronic equipment is shielded fromradiofrequency (RF) signals. However, RF signals fromwireless phones may affect inadequately shieldedelectronic equipment.
RF signals may affect improperly installed or inadequatelyshielded electronic operating systems and/or entertainmentsystems in motor vehicles. Check with the manufacturer ortheir representative to determine if these systems areadequately shielded from external RF signals. Also checkwith the manufacturer regarding any equipment that hasbeen added to your vehicle.
Consult the manufacturer about any personal medicaldevices, such as pacemakers and hearing aids, todetermine if they are adequately shielded from external RFsignals.
Note: Always turn off the phone in health-care facilities and requestpermission before using the phone near medical equipment.
Turning Off Your Phone Before FlyingTurn off your phone before boarding any aircraft. To preventpossible interference with aircraft systems, the U.S. FederalAviation Administration (FAA) regulations require you tohave permission from a crew member to use your phonewhile the plane is on the ground. To prevent any risk ofinterference, FCC regulations prohibit using your phonewhile the plane is in the air.
Turning Off Your Phone in Dangerous AreasTo avoid interfering with blasting operations, turn yourphone off when in a blasting area or in other areas withsigns indicating two-way radios should be turned off.Construction crews often use remote-control RF devices toset off explosives.
Turn your phone off when you’re in any area that has apotentially explosive atmosphere. Although it’s rare, yourphone and accessories could generate sparks. Sparks can
Important S
afety Information
92 Section 4A: Important Safety Information
cause an explosion or fire, resulting in bodily injury or evendeath. These areas are often, but not always, clearlymarked. They include:
v Fueling areas such as gas stations.
v Below deck on boats.
v Fuel or chemical transfer or storage facilities.
v Areas where the air contains chemicals or particles suchas grain, dust, or metal powders.
v Any other area where you would normally be advised toturn off your vehicle’s engine.
Note: Never transport or store flammable gas, flammable liquid, orexplosives in the compartment of your vehicle that contains yourphone or accessories.
Restricting Children’s Access to Your PhoneYour phone is not a toy. Do not allow children to play with itas they could hurt themselves and others, damage thephone or make calls that use your airtime balance.
Using Your Phone With aHearing Aid Device
A number of phones offered by your service provider havebeen tested for hearing aid device compatibility. Whensome wireless phones are used with certain hearingdevices (including hearing aids and cochlear implants),users may detect a noise which can interfere with theeffectiveness of the hearing device. Some hearing devices are more immune than others tothis interference noise, and phones also vary in the amountof interference noise they may generate. ANSI standardC63.19 was developed to provide a standardized means ofmeasuring both wireless phone and hearing devices todetermine usability rating categories for both. Ratings have been developed for mobile phones to assisthearing device users find phones thatmay be compatiblewith their hearing device. Not all phones have been ratedfor compatibility with hearing devices. Phones that havebeen rated have a label located on the box. YourRUMOR Reflex has an M4 and a T4 rating. These ratings are not guarantees. Results will varydepending on the user’s hearing device and individual typeand degree of hearing loss. If a hearing device is

Section 4A: Important Safety Information 93
particularly vulnerable to interference noise; even a phonewith a higher rating may still cause unacceptable noiselevels in the hearing device. Trying out the phone with yourhearing device is the best way to evaluate it for yourpersonal needs. M-Ratings: Phones rated M3 or M4 meet FCC requirementsfor hearing aid compatibility and are likely to generate lessinterference to hearing devices than unrated phones. (M4is the better/higher of the two ratings.) T-Ratings: Phonesrated T3 or T4 meet FCC requirements and are likely to bemore usable with a hearing device’s telecoil (“T Switch”or“Telephone Switch”) than unrated phones. (T4 is thebetter/higher of the two ratings. Note that not all hearingdevices have telecoils in them.)
Caring for the Battery
Protecting Your BatteryThe guidelines listed below help you get the most out ofyour battery’s performance.
v Recently there have been some public reports ofwireless phone batteries overheating, catching fire orexploding. It appears that many, if not all, of thesereports involve counterfeit or inexpensive, aftermarket-brand batteries with unknown or questionable
manufacturing standards. LG is not aware of similarproblems with LG phones resulting from the proper useof batteries and accessories approved by LG. Use onlyapproved batteries and accessories found through LG.Buying the right batteries and accessories is the bestway to ensure they’re genuine and safe.
v In order to avoid damage, charge the battery only intemperatures that range from 32° F to 113° F (0° C to45° C).
v Don’t use the battery charger in direct sunlight or in highhumidity areas, such as the bathroom.
v Never dispose of the battery by incineration.
v Keep the metal contacts on top of the battery clean.
v Don’t attempt to disassemble or short-circuit the battery.
v The battery may need recharging if it has not beenused for a long period of time.
v It’s best to replace the battery when it no longerprovides acceptable performance. It can be rechargedhundreds of times before it needs replacing.
v Don’t store the battery in high temperature areas forlong periods of time. It’s best to follow these storagerules:
Important S
afety Information
94 Section 4A: Important Safety Information
Less than one month:-4° F to 140° F (-20° C to 60° C)
More than one month:-4° F to 113° F (-20° C to 45° C)
Disposal of Lithium Ion (Li-Ion) Batteries
Do not handle a damaged or leaking Li-Ion battery as youcan be burned.
For safe disposal options of your Li-Ion batteries, contactyour nearest authorized service center.
Special Note: Be sure to dispose of your batteryproperly. In some areas, the disposal of batteries inhousehold or business trash may be prohibited.
Radiofrequency (RF) Energy
Understanding How Your Phone OperatesYour phone is basically a radio transmitter and receiver.When it’s turned on, it receives and transmitsradiofrequency (RF) signals. When you use your phone, thesystem handling your call controls the power level. Thispower can range from 0.006 watts to 0.2 watts in digitalmode.
Knowing Radiofrequency SafetyThe design of your phone complies with updated NCRPstandards described below.
In 1991-92, the Institute of Electrical and ElectronicsEngineers (IEEE) and the American National StandardsInstitute (ANSI) joined in updating ANSI’s 1982 standard forsafety levels with respect to human exposure to RF signals.More than 120 scientists, engineers and physicians fromuniversities, government health agencies and industriesdeveloped this updated standard after reviewing theavailable body of research. In 1993, the FederalCommunications Commission (FCC) adopted this updatedstandard in a regulation. In August 1996, the FCC adoptedhybrid standard consisting of the existing ANSI/IEEEstandard and the guidelines published by the NationalCouncil of Radiation Protection and Measurements (NCRP).
Body-Worn OperationTo maintain compliance with FCC RF exposure guidelines,if you wear a handset on your body, use the supplied orapproved carrying case, holster or other body-wornaccessory. If you do not use a body-worn accessory,ensure the antenna is at least 7/16 inch (2.0 centimeters)from your body when transmitting. Use of non- approvedaccessories may violate FCC RF exposure guidelines.
For more information about RF exposure, visit the FCC Website at www.fcc.gov.
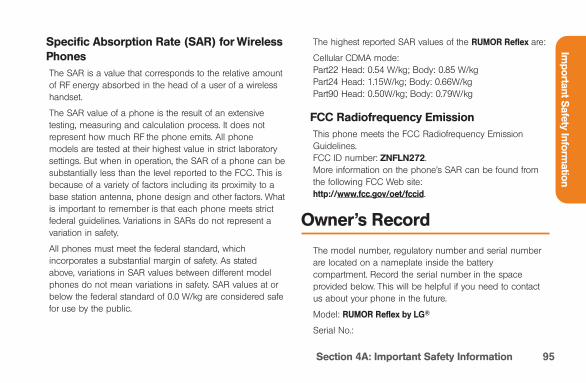
Section 4A: Important Safety Information 95
Specific Absorption Rate (SAR) for WirelessPhonesThe SAR is a value that corresponds to the relative amountof RF energy absorbed in the head of a user of a wirelesshandset.
The SAR value of a phone is the result of an extensivetesting, measuring and calculation process. It does notrepresent how much RF the phone emits. All phonemodels are tested at their highest value in strict laboratorysettings. But when in operation, the SAR of a phone can besubstantially less than the level reported to the FCC. This isbecause of a variety of factors including its proximity to abase station antenna, phone design and other factors. Whatis important to remember is that each phone meets strictfederal guidelines. Variations in SARs do not represent avariation in safety.
All phones must meet the federal standard, whichincorporates a substantial margin of safety. As statedabove, variations in SAR values between different modelphones do not mean variations in safety. SAR values at orbelow the federal standard of 0.0 W/kg are considered safefor use by the public.
The highest reported SAR values of the RUMOR Reflex are:
Cellular CDMA mode:Part22 Head: 0.54 W/kg; Body: 0.85 W/kgPart24 Head: 1.15W/kg; Body: 0.66W/kgPart90 Head: 0.50W/kg; Body: 0.79W/kg
FCC Radiofrequency EmissionThis phone meets the FCC Radiofrequency EmissionGuidelines. FCC ID number: ZNFLN272. More information on the phone’s SAR can be found fromthe following FCC Web site: http://www.fcc.gov/oet/fccid.
Owner’s Record
The model number, regulatory number and serial numberare located on a nameplate inside the batterycompartment. Record the serial number in the spaceprovided below. This will be helpful if you need to contactus about your phone in the future.
Model: RUMOR Reflex by LG®
Serial No.:
Important S
afety Information
96 Section 4B: Manufacturer’s Warranty
Manufacturer’s Warranty
In This Section
l Manufacturer’s Warranty
Your phone has been designed to provide youwith reliable, worry-free service. If for anyreason you have a problem with yourequipment, please refer to the manufacturer’swarranty in this section.
Manufacturer’s Warranty
1. WHAT THIS WARRANTY COVERS:LG offers you a limited warranty that the enclosedsubscriber unit, and its enclosed accessories, will be freefrom defects in material and workmanship, according to thefollowing terms and conditions:
(1) The limited warranty for the unit and enclosedaccessories shall be a period of one (1) year from thedate of original purchase. The remaining warranty periodfor the unit being repaired or replaced shall bedetermined by presentation of the original sales receiptfor the purchase of the unit.
(2) The limited warranty extends only to the originalpurchaser of the product and is not assignable ortransferable to any subsequent purchaser / end user.
(3) The limited warranty is good only to the originalpurchaser of the product during the warranty period aslong as it is in the U.S., including Alaska, Hawaii, U.S.Territories, and all Canadian Provinces.
(4) The external housing and cosmetic parts shall be free ofmajor defects at the time of shipment and, therefore,shall not be covered under these limited warranty terms.

Section 4B: Manufacturer’s Warranty 97
(5) Upon request from LG, the consumer must provideinformation satisfactory to LG to prove the date ofpurchase or exchange.
(6) The customer shall bear the cost of shipping theproduct to the Customer Service Department of LG. LGshall bear the cost of shipping the product back to theconsumer after the completion of service under thislimited warranty.
2. WHAT THIS WARRANTY DOES NOTCOVER:(1) Defects or damage resulting from use of the product in
ways other than its intended manner.
(2) Defect or damage from abnormal use, abnormalconditions, improper storage, exposure to moisture ordampness, unauthorized modifications, unauthorizedconnections, unauthorized repair, misuse, neglect,abuse, accident, alteration, improper installation, or otheracts which are not the fault of LG, including damagecaused by shipping, blown fuses, or spills of food orliquid.
(3) Breakage or damage to antennas unless caused directlyby defects in material or workmanship.
(4) Alleged defects or malfunctions of the product if theCustomer Service Department at LG was not notified bythe consumer during the applicable limited warrantyperiod.
(5) Products which have had the serial number removed ormade illegible.
(6) This limited warranty is in lieu of all other warranties,expressed or implied, either in fact or by operations oflaw, statutory or otherwise, including, but not limited to,any implied warranty of marketability, merchantability, orfitness for a particular use.
(7) Damage resulting from use of non-LG approvedaccessories.
(8) All plastic surfaces and all other externally exposedparts that are scratched or damaged due to normalcustomer use.
(9) Products operated outside published maximum ratings.
(10) Products used or obtained in a rental program.
(11) Consumables (such as fuses).
3. WHAT LG WILL DO:LG will, at its sole option, either repair, replace or refund thepurchase price of any unit that does not conform to this
Warranty

98 Section 4B: Manufacturer’s Warranty
limited warranty. LG may choose at its option to usefunctionally equivalent re-conditioned, refurbished or newunits or parts or any units. In addition, LG will not re-installor back-up any data, applications or software that you haveadded to your phone. It is therefore recommended that youback-up any such data or information prior to sending theunit to LG to avoid the permanent loss of such information.
4. STATE LAW RIGHTS:No other express warranty is applicable to this product. THEDURATION OF ANY IMPLIED WARRANTIES, INCLUDINGTHE IMPLIED WARRANTY OF MARKETABILITY ORMERCHANTABILITY, IS LIMITED TO THE DURATION OF THEEXPRESS WARRANTY HEREIN. LG SHALL NOT BE LIABLEFOR THE LOSS OF THE USE OF THE PRODUCT,INCONVENIENCE, LOSS OR ANY OTHER DAMAGES,DIRECT OR CONSEQUENTIAL, ARISING OUT OF THE USEOF, OR INABILITY TO USE, THIS PRODUCT OR FOR ANYBREACH OF ANY EXPRESS OR IMPLIED WARRANTY,INCLUDING THE IMPLIED WARRANTY OF MARKETABILITYOR MERCHANTABILITY APPLICABLE TO THIS PRODUCT.
Some states do not allow the exclusion of limitation ofincidental or consequential damages or limitations on howlong an implied warranty lasts; so these limitations orexclusions may not apply to you. This warranty gives you
specific legal rights and you may also have other rights,which vary from state to state.
5. HOW TO GET WARRANTY SERVICE:To obtain warranty service, please call the followingtelephone number from anywhere in the continental UnitedStates:
LG Electronics Service
201 James Record Road
Huntsville, AL 35824
Tel. 1-800-793-8896 Email: http://us.lgservice.com
Please call or write for the location of the LGE authorizedservice center nearest you and the procedures for obtainingwarranty claims.

Index 99
AABC Mode 31Access Text/Picture Messages76Add a Number to a ContactsEntry 54, 56Add an event to the calendar60Adjusting the Phone’s VolumeSettings 37Airplane/Music Mode 42Alarm Clock 63-64Answer an Incoming Call 23Assign Speed Dial Numbers 57Auto-Answer Mode 44
BBacklight 38Battery Capacity 17Browser Menu 84Browsing the Web 81, 84
CCalculator 65Call Alerts 38Call in Lock Mode 47Caller ID 76Calling Emergency Numbers 24Caring for the Battery 93Change the Lock Code 47Changing the Phone’s MenuStyle 39Charging the Battery 19CMAS Settings 42Compose Text/Picture Messages74Connection Status andIndicators 81Contacts Entry Options 55Contacts Match 45Controlling Your Phone’s Settings34
DData Service Applications 79Data Services FAQs 85Dial From the Contacts List 28Dial Services 59Dialing and Saving PhoneNumbers With Pauses 27Dialing Options 22Display Settings 38Displaying Your Phone Number21
EEdit a Contacts Entry 58Edit a Contacts Entry’s Numbers57Emoticons 32Enter Numbers, Symbols,Emoticons, Smileys and PresetMessages 32Enter Text With the QWERTYKeyboard 33
Index

100 Index
Entering Text 30-33Preset Messages 32Symbols 32
Erase Recent History 52Erase Voice Memos 68Erasing a Day’s Events 62Erasing All Events 63Erasing Past Events 63Event Alert Menu 61Event Alerts 61EZ Tip Calculator 65
FFeatures of Your Phone 15Find Contacts Entries 54Finding a Phone Number 27Front View of Your Phone 7
GGames, Ringers, and More 82General Precautions 88Getting Help 4Getting Started 2
Getting Started With DataServices 80Going to the Current Day’sCalendar Menu 62
HHandwriting 33
IImportant Safety Information 88In-Call Options 25Installing the Battery 18
KKey Functions 9Key Tone Settings 37
LLanguage 39Launch a Web Browser 80Location Settings 40Lock Your Phone 46
MMaintaining Safe Use of andAccess to Your Phone 90Make a Call From Recent History50Make a Three-Way Call 77Making and Answering Calls 22Making Calls 22Manufacturer’s Warranty 96Messaging Settings 40Missed Call Notification 24
NNavigating Through PhoneMenus 20New Voicemail Message Alerts71Notepad 64
OOwner’s Record 95

Index 101
PPhone Setup Options 44Phone’s Lock Feature 46Phone’s Security 46Plus (+) Code Dialing 29Predictive Text Input 30Prepend a Number From RecentHistory 52Preset Messages 76
RRadiofrequency (RF) Energy 94Recent History 49Recent History Options 49Record Voice Memos 67Removing the Battery 18Reset Default Settings 48Reset/Delete 47Responding to Call Waiting 77Retrieving Your VoicemailMessages 71Ringers 35
SSave a Number From RecentHistory 51Saving a Phone Number 26Screen Savers 39Select a Ringtone Type for anEntry 58Selecting a Text Input Mode 30Service Features: The Basics 70Setting Abbreviated Dialing 45Setting Up Service 2Setting Up Your Voicemail 3Setting UpYour Voicemail 70Silence All 38Sound Settings 35
TTable of Contents bText and Multimedia Messaging74Text Entry 45The Basics 6
Tools 60TTY 43Turning Your Phone Off 17Turning Your Phone On 16Turning Your Phone On and Off16
UUnlock Your Phone 46Using Abbreviated Dialing 28Using Call Forwarding 78Using Speed Dialing 29Using the Charger 19Using Voicemail 70Using Your Phone With aHearing Aid Device 92Using Your Phone’s Battery andCharger 17Using Your Phone’s Calendar 60
VViewing Events 62Viewing History Thread 50
Index

102 Index
Viewing the Display Screen 11Voice Memo Options 68Voice Memos 67Voicemail Menu Key 73Voicemail Notification 71Voicemail Options 73
WWorld Clock 66
YYour Home Screen 44Your Phone’s Menu iiYour User Name 80

MEMO

MEMO

GGuuííaa ddeell uussuuaarriioo

Introducción . . . . . . . . . . . . . . . . . . . . . . . . . . . . .i
El menú de su teléfono . . . . . . . . . . . . . . . . . .ii
Para empezar . . . . . . . . . . . . . . . . . . . . . . . . . . .1
Configuración del servicio . . . . . . . . . . . . . . . . .2Cómo empezar . . . . . . . . . . . . . . . . . . . . . . . . . . . . . .2
Configuración de su correo de voz . . . . . . . . . . . . .3
Para obtener ayuda . . . . . . . . . . . . . . . . . . . . . . . . . . .4
Su teléfono . . . . . . . . . . . . . . . . . . . . . . . . . . . . .5
Su teléfono: Aspectos básicos . . . . . . . . . . . . .6Vista frontal de su teléfono . . . . . . . . . . . . . . . . . . . .7
Ver la pantalla de visualización . . . . . . . . . . . . . . .11
Características de su teléfono . . . . . . . . . . . . . . . .16
Apagar y encender el teléfono . . . . . . . . . . . . . . . .17
Uso de la batería y cargador de su teléfono . . . .18
Navegación por los menús del teléfono . . . . . . . .20
Para mostrar su número de teléfono . . . . . . . . . . .22
Hacer y recibir llamadas . . . . . . . . . . . . . . . . . . . . .22
Introducción de texto . . . . . . . . . . . . . . . . . . . . . . . .31
Controlar la configuración del teléfono . . . . .36Configuración de sonido . . . . . . . . . . . . . . . . . . . . .36
Configuración de pantalla . . . . . . . . . . . . . . . . . . . .41
Configuración de la ubicación . . . . . . . . . . . . . . . .42
Configuración de mensajes . . . . . . . . . . . . . . . . . .43
Configuración de CMAS . . . . . . . . . . . . . . . . . . . . .45
Modo de Avión . . . . . . . . . . . . . . . . . . . . . . . . . . . . .46
Uso de TTY con el servicio . . . . . . . . . . . . . . . . . . .46
Opciones de configuración del teléfono . . . . . . .47
Configuración de la seguridad de su teléfono . . . . . . . . . . . . . . . . . . . . . . . . . . .50
Uso de la función de bloqueo del teléfono . . . . .50
Borrar el contenido del teléfono . . . . . . . . . . . . . . .52
Restablecer a la configuración predeterminada .52
Administración del Historial . . . . . . . . . . . . . . .54Ver el Historial . . . . . . . . . . . . . . . . . . . . . . . . . . . . . .54
Opciones del Historial . . . . . . . . . . . . . . . . . . . . . . .55
Hacer una llamada desde el Historial . . . . . . . . .55
Tabla de contenidos

Ver la secuencia del Historial . . . . . . . . . . . . . . . . .56
Guardar un número de teléfono del Historial . . .56
Agregar el prefijo a un número de teléfono del Historial . . . . . . . . . . . . . . . . . . . . . . . . .57
Borrar el Historial . . . . . . . . . . . . . . . . . . . . . . . . . . . .58
Uso de los contactos . . . . . . . . . . . . . . . . . . . . .59Agregar una nueva entrada de contactos . . . . . .60
Búsqueda de contactos . . . . . . . . . . . . . . . . . . . . .60
Opciones de entradas de contactos . . . . . . . . . . .61
Agregar un número a una entrada de contactos . . . . . . . . . . . . . . . . . . . . . . . .62
Editar los números de una entrada de contactos . . . . . . . . . . . . . . . . . . . . . . . .63
Asignación de números de marcado rápido . . . .63
Edición de una entrada de contacto . . . . . . . . . . .64
Selección de un timbre para una entrada . . . . . .65
Servicios de Marcación . . . . . . . . . . . . . . . . . . . . . .65
Uso de las herramientas del teléfono . . . . . .67Calendario . . . . . . . . . . . . . . . . . . . . . . . . . . . . . . . . .67
Despertador . . . . . . . . . . . . . . . . . . . . . . . . . . . . . . . .70
Bloc de Notas . . . . . . . . . . . . . . . . . . . . . . . . . . . . . .71
Calculadora de Propina . . . . . . . . . . . . . . . . . . . . . .72
Calculadora . . . . . . . . . . . . . . . . . . . . . . . . . . . . . . . .73
Reloj Mundial . . . . . . . . . . . . . . . . . . . . . . . . . . . . . . .73
Uso de los servicios de voz de su teléfono .74Administración de los memo de voz . . . . . . . . . .74
Características del servicio . . . . . . . . . . . . .77
Características del servicio: Aspectos básicos . . . . . . . . . . . . . . . . . . . . . . . .78
Uso del correo de voz . . . . . . . . . . . . . . . . . . . . . . .78
Uso de la mensajería de texto y multimedia . . . .82
Uso de ID de Llamador . . . . . . . . . . . . . . . . . . . . . .85
Responder a una llamada en espera . . . . . . . . . .85
Hacer una llamada tripartita . . . . . . . . . . . . . . . . . .86
Uso de desvío de llamadas . . . . . . . . . . . . . . . . . .86
Servicio de datos . . . . . . . . . . . . . . . . . . . . . . . . .88Aplicaciones de servicios de datos . . . . . . . . . . . .89
Para empezar con los servicios de datos . . . . . .89
Descargar juegos, timbres y más . . . . . . . . . . . . .92
Navegar la Web . . . . . . . . . . . . . . . . . . . . . . . . . . . . .94
Preguntas frecuentes acerca el servicio de datos . . . . . . . . . . . . . . . . . . . . . . . . .96
Información de seguridad y garantía . . . .99
Información de seguridad . . . . . . . . . . . . . . .100Precauciones generales . . . . . . . . . . . . . . . . . . . .100
Mantener el uso seguro y el acceso a su teléfono . . . . . . . . . . . . . . . . . . . . .103
Uso del teléfono con un audífono . . . . . . . . . . . .105
Cuidado de la batería . . . . . . . . . . . . . . . . . . . . . .106
Energía de Radiofrequencia (RF) . . . . . . . . . . . .107
Registro del propietario . . . . . . . . . . . . . . . . . . . . .108
Garantía del fabricante . . . . . . . . . . . . . . . . . .109
i
Introducción
Esta Guía del usuario lo introduce al servicio ytodas las funciones de su nuevo teléfono. Estádividida en cuatro secciones:
l Sección 1: Para empezar
l Sección 2: Su teléfono
l Sección 3: Características del servicio
l Sección 4: Información de seguridad y garantía
A lo largo de esta guía encontrará sugerenciasque incluyen atajos especiales y recordatoriospara ayudarle a obtener el mejor resultado de sunuevo teléfono y su nuevo servicio. LosContenidos y el Índice también le ayudarán aubicar rápidamente información concreta.
Sacará el máximo provecho de su teléfono silee cada sección. Sin embargo, si quiere irdirectamente a una función concreta, sólo tieneque encontrar esa sección en la Tabla deContenidos e ir directamente a esa página. Sigalas instrucciones de esa sección y estará listopara usar su teléfono de inmediato.

ii
1. Web2. Mensajería
1. Correo de Voz
2 Enviar Mensaje
3. Mensajes
4. Email
5. Configuración
1. Número de Devolución
2. Mensajes Preestablecidos
3. Firma
4. Mensaje Reensamblaje
5. Configuració de CMAS
1. CMAS-Presidential Alert
2. CMAS-Extreme Alert
3. CMAS-Severe Alert
4. CMAS-Amber Alert
5. CMAS-Test Alert
3. Mis Cosas1. Administrador de Aplicación
2. Juegos
3. Tonos de llamada
4. Aplicaciones
5. Fondos de pantalla
6. Chat Flirt Fun
7. Opciones
1. Obtener Nuevo
2. Mi Admin. de Cosas
3. Estado de la Memoria
4. Compras5. Re-Boost
1. Localizador Re-Boost
2. Balance de Llamadas
3. Re-Boost de Llamadas
4. Mi Cuenta
6. Entretenimiento1. Música
1. Lista de Reproducción
2. Artistas
3. Reproducir Todas
4. Álbums
5. Géneros
2. Juegos
El menú de su teléfono
La siguiente lista resume la estructura del menú del teléfono.

iii
7. Fotos & Vídeos1. Cámera
2. Videocámara
3. Mis Fotos & Vídeos
1. En Télefono
2. Tarjeta de Memoria
4. Configuración
1. Auto-Guardar
2. Barra de Estado
3. Ubicación
4. Intervalo de pres. de diap.
8. Red Social1. Facebook
2. Twitter
3. Hookt
9. Configuración1. Pantalla
1. Salvapantallas
1. Pantalla Principal
2. Bloquear Pantalla
2. Aviso
3. Reloj del Lockscreen
4. Brillo
5. Luz de Fondo
1. Retroiluminación oscura
2. Retroiluminacióndesactivada
6. ID de Foto
1. Contactos
2. Número no guardados
3. Privados/Desconocidos
7. Tamano de Fuente
1. Mensajes
2. Navegador
3. Bloc de Notas
4. Aplicaciónes8. Economizador de Energía9. Notificación de Susurro10. Quick Composer
2. Volumen1. Timbre entrante2. Volumen reproducción3. Potencia Encender/ Apagar4. Bips de tecla
1. Longitud de Tono2. Volumen de Tono3. Tipo de Tono

iv
3. Timbres1. Llamadas Entrantes
1. Contactos2. Números no guardados3. Privados/Desconocidos
2. Alertas de llamadas1. Bip de Minuto2. Sin Servicio3. Conectar4. Desconetar Señal/
Llamada
3. Correo de Voz
4. Mensajería
5. Alarma/Calendario
6. Potencia Encendar/Apagar
4. Vibración
1. Llamadas Entrantes
1. Contactos
2. Números no guardados
3. Privados/Desconocidos
2. Correo de Voz
3. Mensajería
4. Alarma/Calendario
5. Entrada de Texto
1. Finaliz. de Palabras
2. Predic. de Palabras
3. Examinación de Palabras
6. Activar este dispositvo
7. Info de Teléfono
1. # de teléfono/ID de usuario
2. Glosario de Iconos3. Info de Memoria4. Estado de batería5. Versión6. Avanzado7. Mi Cuenta
1. Detalles de Cuenta2. Oír Minutos3. Oír Balance
8. BloquearTeléfono1. Bloquear Ahora2. Cambiar Código de
Bloqueo9. Controles Parentales
1. Encender/Apagar2. Cambiar Código de Control
Parental3. Restricción
1. Llamada de Voz2. Mensajería3. Web4. Cámara/Videocámara5. Forzar ubicación activada
10. Config. de Llamada
1. Auto-Contestación
2. Marcación Abreviada
3. Encontrar Contactos
11. TTY
12. Modo de Avión

v
13. Datos
1. Encender/Apagar
2. Actualizar Perfil
14. Modo de Auricular
15. Idioma (Language)
16. Ubicación
17. Restablecer/Borrar
1. Restablecer Configuracións
2. Restablecer Teléfono
3. Borrar Cosas
1. Mensajes
2. Registros de llamadas
3. Cookies y cache delexplorador
4. Contenido Descargado
5. Contactos
6. Mis Fotos & Vídeos
7. Memo de Voz
8. Accesos Directos
4. Cambiar Código de Bloqueo
10. Herramientas1. Reloj
1. Alarma
2. Reloj Mundial
3. Cronómetro
2 Calendario
3. Bluetooth
1. Bluetooth
2. Visibilidad
3. Agregar nuevo
4. Aparatos de Confianza
5. Mi Información de Bluetooth
6. Ayuda
4. Actualizar teléfono
1. Actualizar firmware
2. Actualizar PRL
5. Almacenanmiento Masivo
1. Conecta al PC
2. Archivo Administrador
3. Formatear Tarjeta Memoria
4. Info De Memoria
6. Servicio de Voz
1. Comando de voz
1. Llamar [Nombre][Tipo]/[Número]
2. Enviar mensaje para[Nombre][Tipo]/ [Número]
3. Buscar [Nombre][Tipo]
4. Ir a [Menú]
5. Verificar [Elemento]
6. EntrenamientoCommando de Voz
7. Salir Commando de Voz
2. Lector de Voz
1. Guía de Voz
2. Estado de Teléfono

vi
3. Memo de Voz
4. Configuración & Info
1. Establecer altavoz
2. Ayuda
7. Calcuadora
1. Calcuadora
2. Calcuadora de Propina
3. Conversor de Unidad
8. Bloc de Notas
9. Visor de documentos

Sección 1
Para empezar
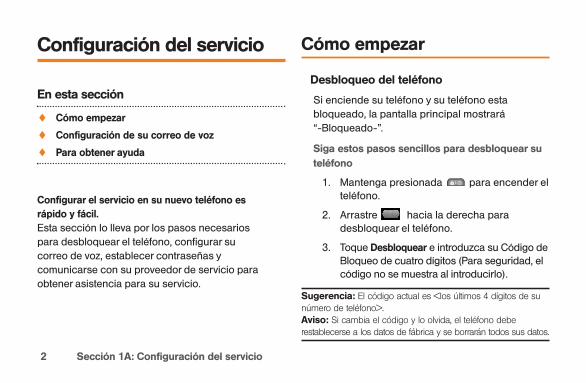
2 Sección 1A: Configuración del servicio
Configuración del servicio
En esta sección
l Cómo empezar
l Configuración de su correo de voz
l Para obtener ayuda
Configurar el servicio en su nuevo teléfono esrápido y fácil.Esta sección lo lleva por los pasos necesariospara desbloquear el teléfono, configurar sucorreo de voz, establecer contraseñas ycomunicarse con su proveedor de servicio paraobtener asistencia para su servicio.
Cómo empezar
Desbloqueo del teléfono
Si enciende su teléfono y su teléfono establoqueado, la pantalla principal mostrará “-Bloqueado-”.
Siga estos pasos sencillos para desbloquear suteléfono
1. Mantenga presionada para encender elteléfono.
2. Arrastre hacia la derecha paradesbloquear el teléfono.
3. Toque Desbloquear e introduzca su Código deBloqueo de cuatro dígitos (Para seguridad, elcódigo no se muestra al introducirlo).
Sugerencia: El código actual es <los últimos 4 dígitos de sunúmero de teléfono>. Aviso: Si cambia el código y lo olvida, el teléfono deberestablecerse a los datos de fábrica y se borrarán todos sus datos.

Sección 1A: Configuración del servicio 3
Configuración de su correo devoz
Todas las llamadas a su teléfono no respondidasse transfieren automáticamente a su correo de voz,incluso si está usando el teléfono o lo tieneapagado. Por tanto, le recomendamos configurar sucorreo de voz y su saludo personal tan prontocomo se active su teléfono.
Para configurar su correo de voz:
1. Desde el modo de espera, presione ytoque ymantenga presionado .
- o -
Deslice para abrir el teclado QWERTY y
presione el .
2. Siga las indicaciones del sistema para:
n Crear su código de pase
n Grabar su saludo
n Grabe su anuncio de nombre
n Elija si desea o no activar el Acceso amensajes con una tecla (una funciónque le permite acceder a los mensajessimplemente manteniendo presionada
y omitiendo la necesidad de queintroduzca su código de pase).
Código de paso del correo de vozCreará la contraseña (o código de paso) de su correo devoz cuando configure su correo de voz. Para obtener másinformación o para cambiar su contraseña del correo de voz,comuníquese con su proveedor de servicio.
Configuración del servicio

4 Sección 1A: Configuración del servicio
Para obtener ayuda
Asistencia de Directorio
Tiene acceso a una variedad de servicios einformación mediante Asistencia de Directorio,incluidas listas residenciales, de negocios ygubernamentales; asistencia con llamadaslocales o de larga distancia; e información sobrehoteles, restaurantes, compras y los principaleseventos locales. Hay un cargo por llamada, y se lefacturará el tiempo de aire.
Para llamar a la Asistencia de Directorio:
© Presione y toque
en el teclado de marcación.

Sección 2
Su teléfono
6 Sección 2A: Su teléfono: Aspectos básicos
Su teléfono: Aspectosbásicos
En esta sección
l Vista frontal de su teléfono
l Ver la pantalla de visualización
l Características de su teléfono
l Apagar y encender el teléfono
l Uso de la batería y cargador de su teléfono
l Navegación por los menús del teléfono
l Para mostrar su número de teléfono
l Hacer y recibir llamadas
l Introducción de texto
Su teléfono contiene multitud de funciones quesimplifican su vida y amplían su capacidad demantenerse conectado con la gente einformación que le resultan importantes. Estasección lo guiará por las funciones básicas ylas funciones de llamada de su teléfono.

Sección 2A: Su teléfono: Aspectos básicos 7
Vista frontal de su teléfono
Aspectos básicos del teléfono
4. Indicador de potencia dela batería
7. Tecla Llamar8. Tecla Atrás
9. Micrófono
2. Luz de estado
6. Tecla Inicio
10.Teclado QWERTY5. Pantalla táctil
3. Iconos de la Barra de estado
1. Auricular

8 Sección 2A: Su teléfono: Aspectos básicos
21. Lente de la cámara
22. Espejo decámara
23. Altavoz
19. Puerto paraCargador/Accesorios
20. Botón deCámara
18. Botones de Volumen
13. Tecla deEmoticonos/Símbolos
11. Tecla Función 14. Tecla de Espacio
16. Tecla Intro
17. Tecla Borrar/Atrás
12. Tecla Mayúsculas/Minúsculas
15. Teclas deNavegación

Sección 2A: Su teléfono: Aspectos básicos 9
Key Functions1. Auricular le permite escuchar a quien le llama
e indicaciones automatizadas.
2. Luz de estado destella para indicar llamadasentrantes,mensajes nuevos u otros eventos.La luz se vuelve roja cuando se carga elteléfono y verde cuando la carga estácompleta.
3. Iconos de la Barra de estado proporcionaninformación acerca del estado del teléfono ylas opciones, tales como intensidad de laseñal, roaming, configuración del timbre,mensajes y carga de la batería.
4. Indicador de potencia de la batería representala cantidad de carga de la batería que quedadisponible en el teléfono. Cuando se muestrantodas las barras en el icono de la batería,significa que está totalmente cargada. Cuandono se muestran barras, la batería del teléfonoestá casi completamente descargada.
5. Pantalla táctil muestra toda la informaciónnecesaria para hacer funcionar el teléfonocomo el estado de la llamada, la lista decontactos, la fecha y la hora, la potencia de laseñal y de la batería.
6. Tecla Inicio permite volver a la pantallaprincipal en cualquier visualización de menú.Para volver al modo de espera, presione estatecla de nuevo.
7. Tecla Llamar trae el teclado de marcación a lapantalla. Manténgala presionada para activarel comando de voz mientras esté en modo deespera.
8. Tecla Atrás regresa al menú anterior cuandoestá en un submenú. Esta tecla tambiénpermite volver a la pantalla anterior duranteuna sesión de datos.
9. Micrófono Permite que lo escuchen quieneslo llaman.
Aspectos básicos del teléfono
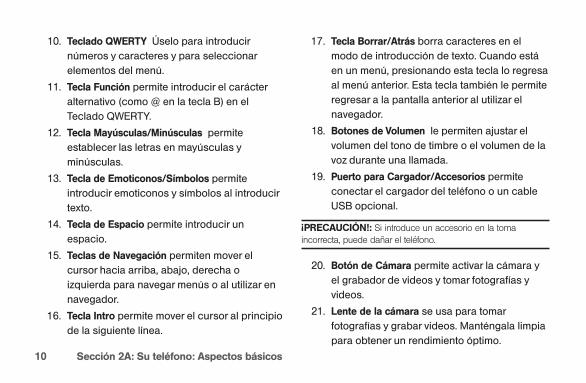
10 Sección 2A: Su teléfono: Aspectos básicos
10. Teclado QWERTY Úselo para introducirnúmeros y caracteres y para seleccionarelementos del menú.
11. Tecla Función permite introducir el carácteralternativo (como @ en la tecla B) en elTeclado QWERTY.
12. Tecla Mayúsculas/Minúsculas permiteestablecer las letras en mayúsculas yminúsculas.
13. Tecla de Emoticonos/Símbolos permiteintroducir emoticonos y símbolos al introducirtexto.
14. Tecla de Espacio permite introducir unespacio.
15. Teclas de Navegación permiten mover elcursor hacia arriba, abajo, derecha oizquierda para navegar menús o al utilizar ennavegador.
16. Tecla Intro permite mover el cursor al principiode la siguiente línea.
17. Tecla Borrar/Atrás borra caracteres en elmodo de introducción de texto. Cuando estáen un menú, presionando esta tecla lo regresaal menú anterior. Esta tecla también le permiteregresar a la pantalla anterior al utilizar elnavegador.
18. Botones de Volumen le permiten ajustar elvolumen del tono de timbre o el volumen de lavoz durante una llamada.
19. Puerto para Cargador/Accesorios permiteconectar el cargador del teléfono o un cableUSB opcional.
¡PRECAUCIÓN!: Si introduce un accesorio en la tomaincorrecta, puede dañar el teléfono.
20. Botón de Cámara permite activar la cámara yel grabador de videos y tomar fotografías yvideos.
21. Lente de la cámara se usa para tomarfotografías y grabar videos. Manténgala limpiapara obtener un rendimiento óptimo.

Sección 2A: Su teléfono: Aspectos básicos 11
22. Espejo de cámara le ayuda cuando toma fotosde si mismo.
23. Altavoz permite escuchar los distintos timbresy sonidos. Al tocar Silencio puede silenciar eltimbre cuando recibe llamadas entrantes. Elparlante también permite escuchar la voz dequien llama cuando está en modo de altavoz.
Ver la pantalla de visualización
La pantalla del teléfono proporciona gran cantidadde información acerca del estado de su teléfono ysus opciones. Esta lista identifica los símbolos queverá en la pantalla de visualización de su teléfono:
Nota: Para ver una lista de los iconos y descripciones de suteléfono, toque la Tecla Inicio > Menú Principal >Configuración > Info de Teléfono > Glosario de Iconos.
1x Fuerza de Señal: Muestra la intensidadactualde la señal 1xRTT. (Cuantas másbarras, más potente la señal; las barrasson amarillas.)
EVDO Fuerza de Señal: Muestra laintensidad actual de la señal EVDO.(Cuantas más barras, más potente es laseñal; las barras son blancas.)
Sin servicio: El teléfono no puedeencontrar una señal disponible.
Aspectos básicos del teléfono

12 Sección 2A: Su teléfono: Aspectos básicos
Servicio de EVDO Datos: Está disponible elservicio de datos con banda ancha móvil(EVDO). Si la opción está activa, el iconoestá animado.
Servicio de 1x Activado: Significa que elservicio de datos 1xRTT está disponible.Si la opción está activa, el icono estáanimado.
Servicio de 1x Desactivado: Significa queel servicio de datos 1xRTT estádesactivado.
Servicio de 1x Indisponible: Significa queel servicio de datos 1xRTT no estádisponible en este momento.
Modo de Avión:Significa que el teléfonoestá en Modo de Avión.
Batería Llena: Muestra el nivel de cargaactual de labatería. (El ícono que semuestra corresponde a cargacompleta).
Batería Baja: Muestra el nivel de cargaactual de la batería. (El ícono que semuestra corresponde a carga completa.)
Timbre Sólo: Significa que solo el timbreestá establecido para alerta de llamadas.
Sólo Vibración: Significa que el volumendel timbre está establecido sólo para quevibre.
1 Bip: Significa que está establecido sóloun pitido para alerta de llamadas.
1 Bip & Vibración: Significa que estáestablecido un pitido y vibración paraalerta de llamadas.
Vibrar todo: Significa que el volumen deltimbre está establecido para que vibre entodos los casos.
Timbre Apagado: El timbre está apagado.
Silencio: Todos los sonidos están apagados.

Sección 2A: Su teléfono: Aspectos básicos 13
Timbre y Vibrar: Significa que estáestablecido el modo de timbre y vibrar.
Icono burbuja: Significa que ha perdidoalertas, tales como buzón de voz, llamadasperdidas, mensajes nuevos, eventosprogramados o una copia de seguridadcompleta.
Mensaje Urgente: Significa que tienenuevos mensajes urgentes.
Mensaje Enviado: Significa que se envió elmensaje.
Mensaje Recibido: Significa que se recibióel mensaje.
Recipiente: Indica el campo deldestinatario.
Accesorio del archivo: Indica el campopara adjuntar archivos.
Archivo adjunto: Indica que se adjunta unarchivo.
Archivo de audio adjunto: Indica que seadjunta un archivo de audio.
Archivo de voz adjunto: Indica que seadjunta un archivo de voz.
Archivo de calendario adjunto: Indica quese adjunta un archivo de calendario.
Archivo de contacto adjunto: Indica que seadjunta un archivo de contactos.
Ubicación Encendido: La función deubicación del teléfono está activada ydisponible para los servicios basados enla ubicación como la navegación por GPS.
Ubicación Apagado: La función deubicación del teléfono está desactivada.La ubicación está disponible únicamentepara el 911.
Aspectos básicos del teléfono

14 Sección 2A: Su teléfono: Aspectos básicos
TTY: Indica que el teléfono estáfuncionando en modoTTY.
Altavoz: Indica que el altavoz estáactivado.
Bluetooth Activado (Escondido): Indica quela función Bluetooth está activada pero suteléfono está escondido de otrosdispositivos.
Bluetooth Activado (Visible): Indica que lafunción Bluetooth está activada y suteléfono está visible para otrosdispositivos.
Bluetooth Conectado: Indica que la funciónBluetooth está conectada.
Bluetooth Conectado (Auricular mono/estéreo): Indica que la función Bluetoothestá conectada a un auricular mono oestéreo.
Bluetooth Conectado (Altavoz estéreo):Indica que la función Bluetooth estáconectada a un auricular estéreo.
Despertador: Indica que la alarma estáactivada.
Llamadas Perdidas: Indica llamadasperdidas.
Llamadas Entrantes: Indica llamadasentrantes.
Llamadas Salientes: Indica llamadassalientes.
Cámara/Imagen: Indica el modo decámara.
Videocámara/Vídeo: Indica el modo devideocámara.
1 Aplicación en segundo plano: Indica quehay una aplicación activa.
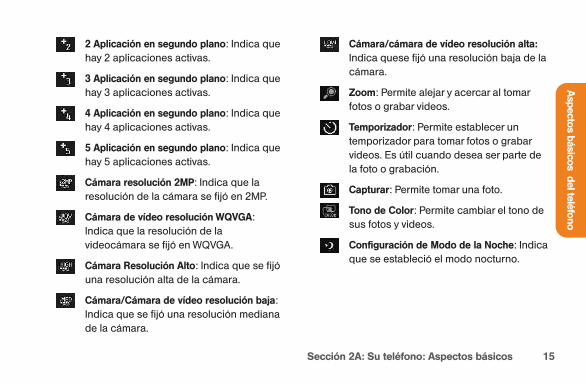
Sección 2A: Su teléfono: Aspectos básicos 15
2 Aplicación en segundo plano: Indica quehay 2 aplicaciones activas.
3 Aplicación en segundo plano: Indica quehay 3 aplicaciones activas.
4 Aplicación en segundo plano: Indica quehay 4 aplicaciones activas.
5 Aplicación en segundo plano: Indica quehay 5 aplicaciones activas.
Cámara resolución 2MP: Indica que laresolución de la cámara se fijó en 2MP.
Cámara de vídeo resolución WQVGA:Indica que la resolución de lavideocámara se fijó en WQVGA.
Cámara Resolución Alto: Indica que se fijóuna resolución alta de la cámara.
Cámara/Cámara de vídeo resolución baja:Indica que se fijó una resolución medianade la cámara.
Cámara/cámara de vídeo resolución alta:Indica quese fijó una resolución baja de lacámara.
Zoom: Permite alejar y acercar al tomarfotos o grabar videos.
Temporizador: Permite establecer untemporizador para tomar fotos o grabarvideos. Es útil cuando desea ser parte dela foto o grabación.
Capturar: Permite tomar una foto.
Tono de Color: Permite cambiar el tono desus fotos y videos.
Configuración de Modo de la Noche: Indicaque se estableció el modo nocturno.
Aspectos básicos del teléfono

16 Sección 2A: Su teléfono: Aspectos básicos
Características de su teléfono
Felicidades por la compra de su teléfono. ElRUMOR Reflex de LG es fácil de usar, confiable ytambién ofrece muchas funciones y opciones deservicio muy importantes. La lista siguiente haceun resumen de algunas de las funcionesdisponibles:
v Servicio de datos proporciona acceso aInternet en modo digital.
v Correo de Voz y mensajería de texto ofrecenrápidas y convenientes capacidades demensajería.
v Se pueden descargar juegos, timbres, fondosde pantalla y otras aplicaciones para hacer asu teléfono tan único como usted. Puedenaplicarse cargos adicionales.
v Su lista de contactos le permite almacenarhasta 600 entradas, con hasta siete númerosde teléfono por cada entrada.
v El Calendario integrado ofrece variasfunciones de administración de informaciónpersonal para ayudarle a administrar su activoestilo de vida.
v La función de ubicación trabaja con laconexión disponible con servicios basados enubicación.
v La entrada de texto T9 le permite escribirrápidamente mensajes con una presión detecla por letra.
v Números Rápidos le permite marcar númerosde teléfono con una o dos presiones de tecla.
Sección 2A: Su teléfono: Aspectos básicos 17
Apagar y encender el teléfono
Encender el teléfono
Para encender el teléfono:
© Mantenga presionada por
aproximadamente dos segundos.
Una vez que su teléfono esté encendido, puedemostrar “Buscando el Servicio”, lo que indica quesu teléfono está buscando una señal. Cuando laencuentra, entra automáticamente en modo deespera – el estado de inactividad del teléfono. Eneste punto, está listo para empezar a hacer yrecibir llamadas.
Si su teléfono no puede encontrar una señaldespués de 15 minutos de búsqueda, se activaautomáticamente una función de ahorro deenergía. Cuando se encuentra una señal, suteléfono vuelve automáticamente al modo deespera.
En modo de Ahorro de energía, su teléfono buscaperiódicamente una señal sin necesidad deintervención de usted. También puede iniciar unabúsqueda del servicio presionando cualquiertecla (con el teléfono encendido).
Apagar el teléfono
Para apagar el teléfono:
© Mantenga presionada por dossegundos hasta que vea la animación deapagado en la pantalla.
La pantalla permanecerá en negro mientras estéapagado el teléfono (a menos que se estécargando la batería).
Aspectos básicos del teléfono

18 Sección 2A: Su teléfono: Aspectos básicos
Uso de la batería y cargadorde su teléfono
¡ADVERTENCIA!: Use únicamente baterías y cargadoresaprobados por el fabricante. El no usar una batería y cargadoraprobados por el fabricante aumenta el riesgo de que suteléfono se sobrecaliente, se incendie o estalle, dando comoresultado graves lesiones físicas, la muerte o daños materiales.
Capacidad de la bateríaLa batería proporciona hasta 5.3 horas deconversación digital continua, de acuerdo con ellaboratorio de Sprint.Cuando la batería alcanza 5% de su capacidad, elicono de batería parpadea. Cuando quedanaproximadamente dos minutos de tiempo deconversación restantes, el teléfono hace sonar unaalerta sonora y se apaga.
Nota: Las configuraciones de luz de fondo prolongadas, labúsqueda de servicio, el modo de vibración y el uso del navegadorafectarán los tiempos de conversación y espera de la batería.
Sugerencia: Cuide de revisar el indicador de nivel de bateríade su teléfono o cargue la batería antes de que se agote.
Instalación de la batería
Para instalar la batería:
© Retire la batería del paquete.
© Use la abertura de dedos en la parte inferior
de la tapa posterior para levantar la tapa y
retirarla.
© Inserte la batería en la abertura en la parte
posterior del teléfono y asegúrese de que
los conectores estén alineados con los del
teléfono.
© Coloque la tapa sobre el compartimiento de
la batería y deslícela hacia abajo hasta
escuchar un clic.
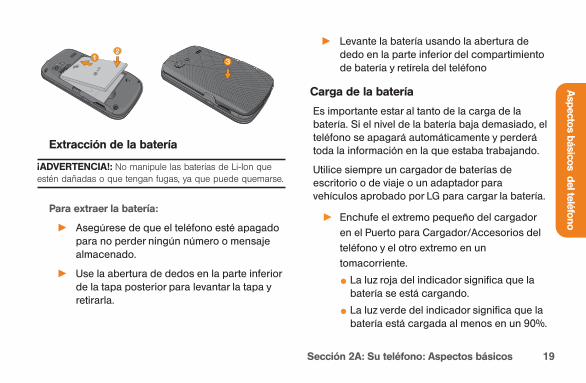
Sección 2A: Su teléfono: Aspectos básicos 19
Extracción de la batería
¡ADVERTENCIA!: No manipule las baterías de Li-Ion queestén dañadas o que tengan fugas, ya que puede quemarse.
Para extraer la batería:
© Asegúrese de que el teléfono esté apagadopara no perder ningún número o mensajealmacenado.
© Use la abertura de dedos en la parte inferiorde la tapa posterior para levantar la tapa yretirarla.
© Levante la batería usando la abertura dededo en la parte inferior del compartimientode batería y retírela del teléfono
Carga de la batería
Es importante estar al tanto de la carga de labatería. Si el nivel de la batería baja demasiado, elteléfono se apagará automáticamente y perderátoda la información en la que estaba trabajando.
Utilice siempre un cargador de baterías deescritorio o de viaje o un adaptador paravehículos aprobado por LG para cargar la batería.
© Enchufe el extremo pequeño del cargador
en el Puerto para Cargador/Accesorios del
teléfono y el otro extremo en un
tomacorriente.
v La luz roja del indicador significa que labatería se está cargando.
v La luz verde del indicador significa que labatería está cargada al menos en un 90%.
Aspectos básicos del teléfono

20 Sección 2A: Su teléfono: Aspectos básicos
Con las baterías de iones de litio aprobadas porBoost, se puede recargar la batería antes de quese agote porcompleto.
Uso del cargador
Para usar el cargador incluido con su teléfono:
© Enchufe el extremo chico del adaptador en
el Puerto para Cargador/Accesorios del
teléfono y el otro extremo en una toma de
corriente.
Navegación por los menús delteléfono
La Tecla de Navegación de su teléfono le permitedesplazarse por los menús de manera rápida ysencilla. La barra de desplazamiento en el ladoderecho de la pantalla muestra su posición en losmenús que este navegando.
Para navegar por un menú, sólo tiene quepresionar la Tecla de Navegación hacia arriba ohacia abajo.
Para ver un resumen del menú de su teléfono,consulte “El menú de su teléfono” en la página ii.
Toque > Menú Principal para acceder atodos los menús disponibles.
En la pantalla táctil
Para desplazarse por las listas, toque la pantalla ydeslice el dedo hacia arriba por la pantalla.

Sección 2A: Su teléfono: Aspectos básicos 21
La lista se mueve hacia arriba para mostrar otroselementos. Para volver a mostrar la parte superiorde la lista, deslice la pantalla hacia abajo. Paraseleccionar un elemento, tóquelo en el menú.
Por ejemplo, para ver los mensajes de texto:
1. Toque y luego Menú Principal paraacceder al menú principal.
2. Toque Mensajería.
3. Toque Mensajes. Todos sus mensajes (siexisten) se mostrarán.
Navegar por menús con el teclado QWERTY
Las Teclas de Navegación le permitendesplazarse por los elementos en la pantalla. Paranavegar por un menú, presione las Teclas deNavegación hacia arriba o hacia abajo. Al navegarpor el menú, se resaltan las opciones del menú.Para seleccionar una opción, resáltela y presione
.
Por ejemplo, para ver los mensajes de texto:
1. Abra el teclado QWERTY, presione la TeclaInicio y luego Menú Principal .
2. Use las Teclas de Navegación para resaltarMensajería y presione .
3. Use las Teclas de Navegación para resaltarMensajería y presione .
Regresar dentro de un menú
Para ir al menú anterior:
© Presione .
– o –
© Presione en el teclado QWERTY.
Para volver a la pantalla principal:
© Presione dos veces.
– o –
© Toque el icono del encabezado en la
esquina superior izquierda de la pantalla.
Aspectos básicos del teléfono

22 Sección 2A: Su teléfono: Aspectos básicos
Para mostrar su número deteléfono
Sólo en caso de que olvide su número deteléfono, su teléfono se lo puede recordar.
Para mostrar su número de teléfono:
© Toque > Menú Principal >Configuración > Info de Teléfono > # deteléfono/ID de usuario. Se mostrarán sunúmero de teléfono y otros datos sobre suteléfono y su cuenta.
Hacer y recibir llamadas
Hacer y llamadasHacer una llamada desde su teléfono es tan fácilcomo desde cualquier teléfono de línea fija. Sólotiene que introducir el número y presionar .
Para hacer una llamada con el teclado:
1. Presione e introduzca un número deteléfono con el teclado de marcación o conel teclado QWERTY. Si se equivoca almarcar, toque para borrar los número.
2. Toque o presione .
3. Para finalizar la llamada, arrastre la tecla deconmutación hasta .

Sección 2A: Su teléfono: Aspectos básicos 23
Sugerencia: Para volver a marcar otros números recientes,
presione , toque , toque el número deseado y Llamar.
Si realiza llamadas fuera de la red nacional, siempre marque 11
dígitos (1 + código de área + número de teléfono).
También puede hacer llamadas desde su teléfonopor medio de Contactos, de su Historial dellamadas y por medio de ASR(Automatic SpeechRecognition, reconocimiento automático de voz).
Opciones de MarcaciónCuando ingrese números, verá una variedad deopciones de marcación en la pantalla del teléfono.
Las siguientes opciones están disponiblescuando marca a un número:
v Guardar: Guarda el número introducido a susContactos.
v Detalles Contacto: Muestra los detalles delcontacto de los números que estánguardados en el teléfono.
v Enviar Msj: Permite enviar un mensajerápidamente al número.
v Pausa: Ingrese dígitos y toque esta opciónpara introducir una pausa dentro de la cadenade números.
Sugerencia: Para usar el marcado rápido para marcar unnúmero de teléfono, mantenga presionado el número demarcado rápido. Si el número de marcado rápido tiene dosdígitos, introduzca el primero y luego mantenga presionado elsegundo.
Contestar llamadasPara contestar a una llamada entrante:
1. Asegúrese de que el teléfono estéencendido. Si el teléfono está apagado, lasllamadas entrantes van al correo de voz.
2. Toque Respuesta.
- o -
Aspectos básicos del teléfono

24 Sección 2A: Su teléfono: Aspectos básicos
Toque la tecla de conmutación y arrástrela a
Respuesta.
Su teléfono le puede avisar de las llamadasentrantes de las siguientes maneras:
v El teléfono suena o vibra.
v La luz del indicador destella.
v Se ilumina la luz de fondo.
v La pantalla muestra un mensaje de llamadaentrante.
Si la llamada entrante es de un númeroalmacenado en sus contactos, se muestra elnombre del contacto. También puede mostrarse elnúmero de teléfono de quien llama, si estádisponible.
Si el teléfono está en espera, también puede verlas siguientes opciones. Para seleccionar unaopción, presione la tecla correspondiente.
v Silencio para silenciar el timbre.
v Enviar a correo de voz para enviar la llamada alcorreo de voz.
v Ignorar con texto para enviar un mensaje detexto. Puede enviar un mensaje preestablecidoo escribir uno nuevo.
v Respuesta para responder a la llamada.
Nota: Si el teléfono está apagado, las llamadas entrantes vandirectamente al correo de voz.
Finalizar una llamada
Para desconectar una llamada cuando hayaterminado:
© Toque .
Sección 2A: Su teléfono: Aspectos básicos 25
Notificación de llamada perdidaCuando no responde a una llamada entrante, lapantalla mostrará el registro de llamadas perdidasen una burbuja en la pantalla de espera.
Para mostrar la llamada perdida desde lapantalla de notificación:
© Toque la entrada. Para marcar el número de
teléfono, toque Llamar. Para enviar un
mensaje, toque Enviar Msj.
Llamar a números de emergenciaPuede hacer llamadas al 911 (marque
), incluso si su teléfono estábloqueado o la cuenta está restringida.
Nota: Al hacer una llamada de emergencia, su teléfono entraautomáticamente en modo de Emergencia
Durante una llamada de emergencia, verá unavariedad de opciones en la pantalla.
Para iniciar una opción, toque lo siguiente:
v Mi número de teléfono para mostrar su númerode teléfono durante una llamada deemergencia.
v Altavoz para activar el modo de altavoz.
v Tec marc para mostrar el teclado de marcación.
v Más para acceder a las siguientes opciones:
v Info de tel para verificar el número de teléfono,versión, etc.
v Cancelar para cerrar el menú emergente.
Para salir del modo de Emergencia:
1. Presione Finalizar Llmd para finalizar unallamada al 911.
2. Toque Salir para salir del modo deemergencia.
Nota: Cuando esté en modo de Emergencia, sólo puede salirdesde el menú de opciones.
Aspectos básicos del teléfono
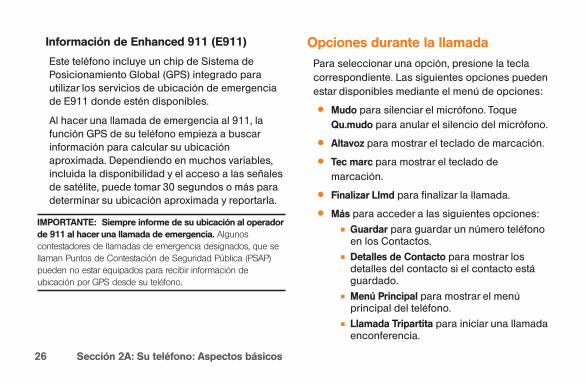
26 Sección 2A: Su teléfono: Aspectos básicos
Información de Enhanced 911 (E911)
Este teléfono incluye un chip de Sistema dePosicionamiento Global (GPS) integrado parautilizar los servicios de ubicación de emergenciade E911 donde estén disponibles.
Al hacer una llamada de emergencia al 911, lafunción GPS de su teléfono empieza a buscarinformación para calcular su ubicaciónaproximada. Dependiendo en muchos variables,incluida la disponibilidad y el acceso a las señalesde satélite, puede tomar 30 segundos o más paradeterminar su ubicación aproximada y reportarla.
IMPORTANTE: Siempre informe de su ubicación al operadorde 911 al hacer una llamada de emergencia. Algunoscontestadores de llamadas de emergencia designados, que sellaman Puntos de Contestación de Seguridad Pública (PSAP)pueden no estar equipados para recibir información deubicación por GPS desde su teléfono.
Opciones durante la llamadaPara seleccionar una opción, presione la teclacorrespondiente. Las siguientes opciones puedenestar disponibles mediante el menú de opciones:
v Mudo para silenciar el micrófono. ToqueQu.mudo para anular el silencio del micrófono.
v Altavoz para mostrar el teclado de marcación.
v Tec marc para mostrar el teclado demarcación.
v Finalizar Llmd para finalizar la llamada.
v Más para acceder a las siguientes opciones:n Guardar para guardar un número teléfono
en los Contactos.n Detalles de Contacto para mostrar los
detalles del contacto si el contacto estáguardado.
n Menú Principal para mostrar el menúprincipal del teléfono.
n Llamada Tripartita para iniciar una llamadaenconferencia.

Sección 2A: Su teléfono: Aspectos básicos 27
n Contactos para mostrar la lista decontactos.
n Memo de Voz para grabar la conversaciónactual.
n Info de tel para comprobar el número deteléfono, la versión, etc.
n Cancelar para cerrar el menú emergente.
¡Advertencia! Debido a los elevados niveles de volumen, nocoloque el teléfono cerca de su oído al utilizar el altavoz.
Guardar un número de teléfonoPuede guardar hasta siete entradas de númerosde teléfono por contacto y hasta 600 contactos enel teléfono. El nombre de cada entrada puedecontener 64 caracteres. El teléfono organizaautomáticamente los contactos en ordenalfabético.
Para guardar un número desde la pantallaprincipal:
1. Presione para mostrar el teclado demarcación.
2. Introduzca un número de teléfono.
3. Toque Guardar.
4. Toque Nueva Entrada para un nuevocontacto o Entrada Existente para agregarleun número a un contacto existente.
5. Toque una etiqueta de teléfono (Móvil, Casa,Trabajo, Biper, Fax u Otro).
6. Toque el campo Introducir nombre eintroduzca el nombre del nuevo contactocon el teclado táctil o el teclado QWERTY.
– o –
Busque un nombre de contacto existente ytóquelo para guardar el nuevo número.
7. Toque Hecho para guardar la nueva entrada.
Aspectos básicos del teléfono

28 Sección 2A: Su teléfono: Aspectos básicos
Encontrar un número de teléfonoPuede buscar entradas entre los contactos pornombre.
1. Presione y toque . Aparecerá lalista de contactos.
2. Toque e ingrese la(s) primera(s) letra(s)de una entrada. (Cuantas más letrasintroduzca, más concreta será la búsqueda).Para mostrar una entrada, tóquela.
3. Para marcar un número, toque Hablar opresione .
Marcación de números de teléfonocon pausas
Puede marcar o guardar números de teléfono conpausas para usarlos con sistemas automatizados,como el correo de voz o los números defacturación de tarjeta de crédito.
Nota: Puede tener múltiples pausas en un número de teléfono.
Para marcar o guardar números de teléfono conpausas:
1. Presione e ingrese el número deteléfono.
2. Toque Pausa.
3. Introduzca los números adicionales.
4. Toque Hablar para marcar el número.
– o –
Toque Guardar para guardar el número ensus contactos.
Nota: Al marcar un número con una pausa fija, toque EnviarTonos.
Uso de Marcación abreviadaMarcación abreviada es similar a la función demarcación rápida. Puede utilizar cualquiera de lassiguientes características de marcación abreviada.

Sección 2A: Su teléfono: Aspectos básicos 29
v Encontrar Contactos: Permite ver un númeroguardado en los contactos al introducir sólotres dígitos consecutivos del número. ToqueHablar para marcar el número encontrado.
v Agregar prefijo: Agrega los primeros cinco oseis dígitos(por ejemplo, el código de área y elprefijo) a cualquier combinación de cuatro ocinco dígitos que ingrese. Toque Hablar paramarcar el número resultante.
Para realizar una llamada utilizando EncontrarContactos:
1. Presione e introduzca entre tres y seisdígitos del número de teléfono de la entradade contacto. Aparecerán los números de lalista de contactos que coincidan.
2. Toque para mostrar los detalles.
3. Toque el contacto que quiere llamar y luegotoque Hablar.
Para hacer una llamada usando la funciónAgregar prefijo:
1. Presione e introduzca los últimoscuatro o cinco dígitos de un número deteléfono. Se mostrará el número deMarcación abreviado.
2. Toque para mostrar los detalles.
3. Toque el número y toque Hablar.
Marcar desde los contactos1. Presione y toque .
2. Toque la entrada que quiere llamar y toqueHablar.
3. Si hay varios números guardados en laentrada del contacto, toque el númeroque desea marcar.
Uso del marcado rápidoPuede almacenar hasta 98 números en lamemoria de marcado rápido del teléfono. Puede
Aspectos básicos del teléfono

30 Sección 2A: Su teléfono: Aspectos básicos
marcar las entradas de marcado rápido con sólotocar una tecla para las ubicaciones 2 a 9 o altocar dos teclas para las ubicaciones 10 a 99.
Para usar el marcado de una tecla para lasubicaciones de Marcado rápido 2 a 9:
v Toque y mantenga presionada la teclacorrespondiente durante aproximadamentedos segundos. La pantalla confirma que hamarcado el número cuando muestra“Conectando...”.
Para usar el marcado de dos teclas para lasubicaciones de Marcado rápido 10 a 99:
1. Presione o toque el primer dígito.
2. Toque o toque y mantenga presionada latecla del segundo dígito duranteaproximadamente dos segundos. Lapantalla confirma que ha marcado elnúmero cuando muestra “Conectando...”.
Marcado de código plusCuando realice llamadas internacionales, elmarcado de código plus ingresa automáticamenteel código de acceso internacional de suubicación (por ejemplo, 011 para llamadasinternacionales realizadas desde los EE.UU.).
1. Presione y mantenga presionado hasta que vea un “+” en la pantalla.
2. Marque el código de país y el número deteléfono, y luego toque Hablar. El teléfonoautomáticamente añade el código deacceso para llamadas internacionales,seguido del código de país y del número deteléfono.

Sección 2A: Su teléfono: Aspectos básicos 31
Introducción de texto
Seleccionar un modo de introducciónde texto
El teléfono proporciona maneras convenientes deintroducir letras, números y símbolos siempre quese le pida que introduzca texto (por ejemplo, alagregar una entrada a Contactos o al usar elcorreo electrónico y los mensajes de texto). Puedeutilizar el teclado táctil o el teclado QWERTY.Mientras está utilizando el teclado táctil puedecambiar al teclado QWERTY y viceversa.
Para cambiar el modo de introducción decaracteres:
1. Desde una pantalla en la que puedaintroducir texto, toque para cambiar elmodo de entrada de texto.
2. Seleccione una de las opciones siguientes:
n Predictivo para introducir un texto
usando un sistema predictivo deentrada de texto que reduce la cantidadde toques de teclas necesarias paraintroducir una palabra.
n Abc para usar entradas con múltiplestoques - toque una vez para la “a”,dos veces para la “b”, tres veces para la“c”.
n 123 para introducir números al tocar losnúmeros del teclado.
n Símbolos para introducir símbolos.
n Emoticon para introducir emoticonos.
n Smileys para introducir íconos gestuales .
Sugerencia: Al introducir texto, toque la tecla o presionepara cambiar de mayúscula/ minúscula
y viceversa de las letras (Abc > ABC > abc).
Aspectos básicos del teléfono

32 Sección 2A: Su teléfono: Aspectos básicos
Entrada de texto predictivoLa entrada de texto predictivo permite introducirtexto utilizando unos pocos toques de teclas porpalabra.
La entrada de texto predictivo utiliza una baseintuitiva de palabras que analiza las letras queintroduce para crear una palabra adecuada. Lapalabra puede cambiar a medida que escribe.
Para introducir una palabra con entrada de texto T9:
1. Seleccione el modo de entrada de textoPredictivo.
2. Introduzca algunas letras de una palabra. Alintroducir una letra de una palabra, se abriráuna pequeña ventana que mostrará laspalabras que comienzan con esa letra. Sicomete un error, toque o presione para borrar un solo carácter. Toque ymantenga presionada o mantengapresionada para borrar una palabracompleta.
3. Toque y desplácese a la palabradeseada. Luego toque la palabra deseada.
4. Si la palabra que desea introducir no semuestra en la lista, toque Agreg Palabra?para agregar la palabra a la base de datosde la introducción de texto predictivo.
5. Introduzca la palabra y toque Hecho. Lapróxima vez que se desplace entre lasopciones, la palabra aparecerá como una delas opciones en la entrada de texto predictivo.
Para obtener más información acerca de laentrada de texto predictivo, visite el sitio Web deT9 en www.T9.com.
Modo ABC (solo en el teclado táctil)En el modo ABC, también conocido como entradacon múltiples toques, se debe tocar las teclas una,dos o tres veces para introducir las letras que veen el teclado. Por ejemplo, toque una vezpara la “a”, dos veces para la “b”, tres veces para
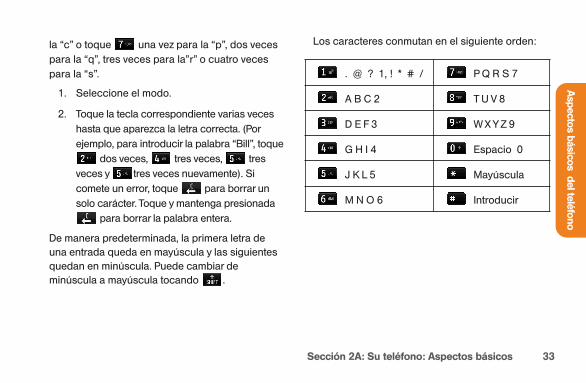
Sección 2A: Su teléfono: Aspectos básicos 33
la “c” o toque una vez para la “p”, dos vecespara la “q”, tres veces para la”r” o cuatro vecespara la “s”.
1. Seleccione el modo.
2. Toque la tecla correspondiente varias veceshasta que aparezca la letra correcta. (Porejemplo, para introducir la palabra “Bill”, toque
dos veces, tres veces, tresveces y tres veces nuevamente). Sicomete un error, toque para borrar unsolo carácter. Toque y mantenga presionada
para borrar la palabra entera.
De manera predeterminada, la primera letra deuna entrada queda en mayúscula y las siguientesquedan en minúscula. Puede cambiar deminúscula a mayúscula tocando .
Los caracteres conmutan en el siguiente orden:
Aspectos básicos del teléfono
. @ ? 1, ! * # / P Q R S 7
A B C 2 T U V 8
D E F 3 W X Y Z 9
G H I 4 Espacio 0
J K L 5 Mayúscula
M N O 6 Introducir

34 Sección 2A: Su teléfono: Aspectos básicos
Introducción de números, símbolos,emoticonos y mensajes pregrabados
Para introducir números:
© Seleccione el modo 123 y toque la tecla
correspondiente.
Para introducir símbolos:
© Seleccione el modo Símbolos. Para
introducir un símbolo, toque la tecla
correspondiente indicada en la pantalla.
Para introducir emoticonos (gráficos):
© Seleccione el modo Emoticon y toque la
tecla correspondiente.
Para introducir mensajes preestablecidos:
1. Toque Msj Prees en la parte superiorderecha de la pantalla.
2. Toque el mensaje que desee paraseleccionarlo.
Nota: Los mensajes preestablecidos facilitan la redacción demensajes de texto porque permiten introducir mensajes rápidos,tales como “Nos encontramos?”, “Voy en camino” o un mensajesuyo personalizado.
Escritura a manoCuando se introduce texto, además de “escribir”el texto con el teclado táctil, también tiene laopción de escribir con la punta del dedo. Lapantalla táctil convierte sus movimientos encaracteres.
1. En la pantalla de introducción de texto,toque . Aparecerá la pantalla deintroducción de texto a mano.
2. Escriba dentro de la pantalla deintroducción de texto a mano. Para cambiarde minúscula a mayúscula o cambiar deletras a números o símbolos, toque losiconos justo encima de la pantalla deintroducción de texto a mano. Al finalizar,toque Hecho.

Sección 2A: Su teléfono: Aspectos básicos 35
Introducir texto con el tecladoQWERTY
El teléfono cuenta con un teclado QWERTYintegrado, diseñado específicamente paraintroducir texto de manera fácil y cómoda. Elteclado QWERTY tiene la misma disposición yfunciona de la misma manera que el teclado deuna computadora. La manera más sencilla deintroducir texto es usar los pulgares para escribircon el teclado QWERTY.
1. Desde una pantalla en la que se puedaintroducir texto, toque y seleccione siquiere activar el sistema predictivo paraintroducir texto.
2. Use los pulgares para introducir texto.
v Para cambiar el uso de mayúsculas,presione .
v Para introducir un carácter alternativo deuna tecla, presione la Tecla Funcióny luego la tecla del carácter alternativo.Para bloquear la Tecla Función, presione
dos veces.
v Para introducir emoticonos, presioney toque el símbolo o presione las
teclas de flechas para resaltar unemoticono y presione .
v Para introducir símbolos, presione ypresione , toque el símbolo deseadoque desee o presione las Teclas deNavegación para resaltar un símbolo ypresione .
v Para introducir mensajes preestablecidos,toque Msj Prees. en la esquina superiorderecha de la pantalla. Toque el mensajeque desee para seleccionarlo.
Aspectos básicos del teléfono

36 Sección 2B: Controlar la configuración del teléfono
Controlar la configuracióndel teléfono
En esta sección
l Configuración de sonido
l Configuración de pantalla
l Configuración de introducción de texto
l Configuración de la ubicación
l Configuración de mensajes
l Modo de Avión
l Uso de TTY con el servicio
l Opciones de configuración del teléfono
l Configuración de seguridad de su teléfono
Usando las opciones de menú disponibles en suteléfono, puede personalizar el teléfono para quesuene, se vea y funcione exactamente de laforma en que usted lo desea. Esta seccióndescribe cómo puede cambiar la configuraciónde su teléfono para ajustarse mejor a susnecesidades. Tómese unos momentos pararevisar esas opciones y para ajustar o agregarlas configuraciones adecuadas para usted.
Configuración de sonido
TimbresLos timbres le ayudan a identificar las llamadasentrantes y los mensajes. Puede asignarle timbresa entradas individuales de contactos, tipos dellamadas y tipos de mensajes.
Llamadas entrantes
Su teléfono le proporciona varias opciones detimbre que le permiten personalizar sus ajustes de

Sección 2B: Controlar la configuración del teléfono 37
timbre y volumen. Estas opciones le permitenidentificar las llamadas entrantes por su timbre.
Para seleccionar un timbre para llamadasentrantes:
1. Toque > Menù Principal > Configuración> Timbres > Llmadas Entrantes.
2. Toque Contactos, Números no guardados oPrivado/Desconocidos. Para Contactos,toque lo siguiente:
v Contactos con timbre predet.: Permiteestablecer un tipo de timbre para lasllamadas provenientes de contactos conun timbre predeterminado.
v Un Contacto: Permite establecer un timbreespecífico para las llamadas de uncontacto en particular.
3. Seleccione una categoría y luego,desplácese por los timbres disponibles.Toque para escuchar un timbre demuestra.
4. Toque un timbre para asignarlo.
Obtener timbres nuevos
1. Toque > Menú Principal > (deslice lapantalla hacia arriba) > Configuración >Timbres > Llamadas Entrantes, Correo deVoz, Mensajería o Alarma/Calendario.
2. Seleccione un tipo de llamada o de mensajepara ver una lista de categorías para tiposde timbre.
3. Seleccione Timbre Descargado > ObtenerNuevo. El navegador se ejecuta y muestra elmenú de timbres.
4. Desplácese por los timbres disponibles.Cuando encuentre uno que desee usar,tóquelo.
5. Para realizar una compra, toque Purchase(Comprar) y luego Download (Descargar).
6. Cuando la descarga termine, seleccioneuna de las opciones para continuar:
Configuración del teléfono

38 Sección 2B: Controlar la configuración del teléfono
v Escuchar para escuchar el timbre.
v Asignar como para terminar de asignar eltimbre.
v Get New (Comprar Nuevo) para explorarotros elementos que se puedendescargar.
Seleccionar tipos de timbre para mensajes
1. Toque > Menú Principal > (deslice lapantalla hacia arriba) > Configuración >Timbres > Mensajes.
2. Seleccione una categoría y luegodesplácese por los timbres disponibles.Toque para escuchar un timbre demuestra.
3. Toque un timbre para asignarlo.
Asignar timbres a contactos1. Toque > Menú Principal > (deslice la
pantalla hacia arriba) > Configuración >Timbres > Llamadas Entrantes > Contactos >Un Contacto.
2. Toque una entrada de contacto.
3. Seleccione una categoría y luegodesplácese por los timbres disponibles.Toque para escuchar un timbre de muestra.
4. Toque un timbre para asignarlo.
Seleccionar tipos de timbre para correo devoz
Para seleccionar tono de tono de timbre paralosmensajes:
1. Toque > Menú Principal > (deslice lapantalla hacia arriba) > Configuración >Timbres > Correo de Voz.
2. Seleccione una categoría y luegodesplácese por los timbres disponibles.
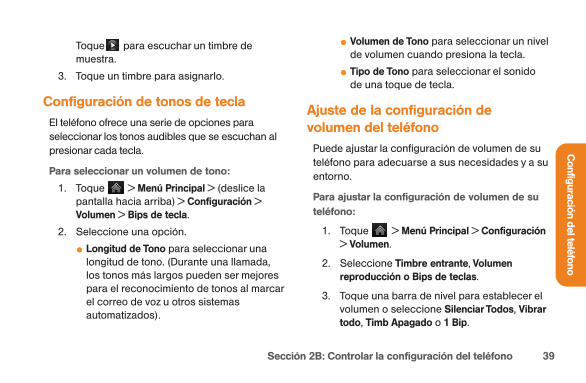
Sección 2B: Controlar la configuración del teléfono 39
Toque para escuchar un timbre demuestra.
3. Toque un timbre para asignarlo.
Configuración de tonos de teclaEl teléfono ofrece una serie de opciones paraseleccionar los tonos audibles que se escuchan alpresionar cada tecla.
Para seleccionar un volumen de tono:
1. Toque > Menú Principal > (deslice lapantalla hacia arriba) > Configuración >Volumen > Bips de tecla.
2. Seleccione una opción.
v Longitud de Tono para seleccionar unalongitud de tono. (Durante una llamada,los tonos más largos pueden ser mejorespara el reconocimiento de tonos al marcarel correo de voz u otros sistemasautomatizados).
v Volumen de Tono para seleccionar un nivelde volumen cuando presiona la tecla.
v Tipo de Tono para seleccionar el sonidode una toque de tecla.
Ajuste de la configuración devolumen del teléfono
Puede ajustar la configuración de volumen de suteléfono para adecuarse a sus necesidades y a suentorno.
Para ajustar la configuración de volumen de suteléfono:
1. Toque > Menú Principal > Configuración> Volumen.
2. Seleccione Timbre entrante, Volumenreproducción o Bips de teclas.
3. Toque una barra de nivel para establecer elvolumen o seleccione Silenciar Todos, Vibrartodo, Timb Apagado o 1 Bip.
Configuración del teléfono

40 Sección 2B: Controlar la configuración del teléfono
4. Alterne la configuración de VIBRE. (Nota:Esta tecla de conmutación no estádisponible cuando está seleccionadoSilenciar Todos o Vibrar todo).
5. Toque Hecho.
Sugerencia: Puede ajustar el volumen del timbre en modode espera (o el volumen del audífono durante una llamada)con los Botones de Volumen que está del lado izquierdo de suteléfono.
Notificación de alertasSu teléfono puede alertarle con un tono audiblecuando cambie de área de servicio, una vez cadaminuto durante una llamada de voz, cuando se haconectado una llamada o cuando se estédesvaneciendo la señal de su teléfono.
Para habilitar o deshabilitar los sonidos dealerta:
1. Toque > Menú Principal > Configuración> Timbres > Alertas de llamada.
2. Toque los botones Bip de Minuto, SinServicio, Conectar o DesconectarSeñal/Llamada para alternar entre ON(Encendido) y OFF (Apagado).
Silenciar TodosLa opción Silenciar Todos del teléfono le permiteeliminar todos los sonidos sin apagar el teléfono.
Para activar Silenciar Todos:
© Presione el Botón de Volumen hacia abajorepetidamente hasta que mire “SilenciarTodos” en la pantalla y toque Hecho.
Para desactivar Silenciar Todos:
© Presione el Botón de Volumen hacia arribavarias veces y seleccione el nivel devolumen que desea y toque Hecho.

Sección 2B: Controlar la configuración del teléfono 41
Configuración de pantalla
Cambio del tiempo de luz de fondoSeleccione la duración en la que la pantalla devisualización y el teclado permanecen escondidosdespués de presionar cualquier tecla.
Para cambiar la configuración de luz de fondo:
1. Toque > Menú Principal > Configuración> Pantalla > Luz de Fondo.
2. Seleccione Retroiluminación oscura oRetroiluminación desactivada.
3. Toque una configuración de hora.
Nota: Los valores de luz de fondo prolongados afectan lostiempos de conversación y de espera de la batería.
Cambiar el fondo de la pantallaChoose what you see on the display screen when instandby mode.
Para cambiar las imágenes de la pantalla:
1. Toque > Menú Principal > Configuración> Pantalla > Salvapantallas > PantallaPrincipal o Bloquear pantalla.
2. Seleccione entre No hay imagen,Precargados, Mis Fotos, Medios Asignados,Imagen Descargado o Capturar ImagenNueva.
3. Toque una imagen para verla. Mientras ve laimagen, puede dar un toquecito en lapantalla hacia la izquierda o la derecha paradesplazarse y ver otras imágenes.
4. Toque Asignar para asignar una imagen.
Configuración del teléfono
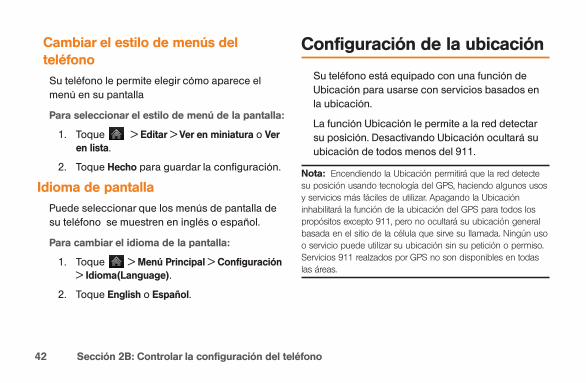
42 Sección 2B: Controlar la configuración del teléfono
Cambiar el estilo de menús delteléfono
Su teléfono le permite elegir cómo aparece elmenú en su pantalla
Para seleccionar el estilo de menú de la pantalla:
1. Toque > Editar > Ver en miniatura o Veren lista.
2. Toque Hecho para guardar la configuración.
Idioma de pantallaPuede seleccionar que los menús de pantalla desu teléfono se muestren en inglés o español.
Para cambiar el idioma de la pantalla:
1. Toque > Menú Principal > Configuración> Idioma(Language).
2. Toque English o Español.
Configuración de la ubicación
Su teléfono está equipado con una función deUbicación para usarse con servicios basados enla ubicación.
La función Ubicación le permite a la red detectarsu posición. Desactivando Ubicación ocultará suubicación de todos menos del 911.
Nota: Encendiendo la Ubicación permitirá que la red detectesu posición usando tecnología del GPS, haciendo algunos usosy servicios más fáciles de utilizar. Apagando la Ubicacióninhabilitará la función de la ubicación del GPS para todos lospropósitos excepto 911, pero no ocultará su ubicación generalbasada en el sitio de la célula que sirve su llamada. Ningún usoo servicio puede utilizar su ubicación sin su petición o permiso.Servicios 911 realzados por GPS no son disponibles en todaslas áreas.

Sección 2B: Controlar la configuración del teléfono 43
Para habilitar la función Ubicación de suteléfono:
1. Toque > Menú Principal > Configuración> Ubicación. Aparecerá la exención deresponsabilidad de localización.
2. Lea el descargo de responsabilidad y toque
Continuar.
3. Toque Encender o Apagar para cambiar laconfiguración de ubicación existente.
Cuando está activada la función Ubicación, la
pantalla de espera de su teléfono mostrará el
icono Cuando se desactiva Ubicación,
aparecerá el icono .
Configuración de mensajes
La configuración de mensajería le permite decidirde qué manera desea ser notificado cuando recibanuevos mensajes, crear una firma en cadamensaje enviado y crear sus propios mensajespreestablecidos.
Establecer la notificación de mensajes
Cuando recibe un mensaje, el teléfono se lo notificaal mostrar un icono en la pantalla de visualización.También puede elegir que le notifiquen mediante unmensaje de notificación en la pantalla devisualización.
1. Toque > Menú Principal > Configuración> Pantalla.
2. Toque el botón Notificación de Susurro paraalternar entre ON (Encendido) y OFF(Apagado).
Configuración del teléfono

44 Sección 2B: Controlar la configuración del teléfono
Número de devolución de llamada
1. Toque > Menú Principal > Mensajería >Configuración > Número de Devolución.
2. Seleccione Ningún, Mi núm teléfono u Otro.
Si selecciona Otro, introduzca un número y
toque Guardar.
Agregar una firma personalizada
Agregue una firma personalizada a cada mensajeenviado.
Agregue una firma personalizada a cada mensajeenviado:
1. Toque > Menú Principal > Mensajería >Configuración > Firma.
2. Seleccione Personalizado. Si no deseaadjuntar una firma, seleccione Ninguna.
3. Introduzca una firma y toque Guardar.
Administrar los mensajes preestablecidos
El teléfono viene con 17 mensajes preestablecidospara ayudarlo a enviar mensajes de texto másfácilmente. Personalice o borre este tipo demensajes, por ejemplo, “Donde estas?,””Voy encamino” y “Veamonos” para adaptarlos a susnecesidades, o agregue sus propios mensajes a lalista.
Para editar o borrar un mensaje preestablecido:
1. Toque > Menú Principal > Mensajería >Configuración > Mensajes Preestablecidos.Verá la lista de mensajes preestablecidos.
2. Toque un mensaje que desee editar o borrar.
3. Toque Editar, edite el mensaje y toque
Guardar.
– o –
Toque Borrar para borrar el mensaje. ToqueCancelar para cancelar la eliminación.

Sección 2B: Controlar la configuración del teléfono 45
Nota: Para borrar varios mensajes, toque Borrar en la partesuperior derecha de la pantalla cuando aparezca la lista demensajes preestablecidos. A continuación, seleccione BorrarMúltiple o BorrarTodos.
Para agregar un nuevo mensaje preestablecido::
1. Toque > Menú Principal > Mensajería >Configuración > Mensajes Preestablecidos.Verá la lista de mensajes preestablecidos.
2. Para agregar un nuevo mensaje, toqueAgregar Nuevo.
3. Introduzca el mensaje y toque Guardar. Elnuevo mensaje se agregará al comienzo dela lista.
Configuración de CMAS
Alertas Inalámbricas de Emergencia (WirelessEmergency Alerts, WEA), también conocidascomo CMAS, es una parte de un sistema nacionalde alertas llamado IPAWS (Integrated Public Alert
and Warning System; Sistema integrado dealertas y avisos públicos) que permite a oficialesde administración de emergencia difundir lasadvertencias e información de seguridadrápidamente a través de alertas de texto ateléfonos inalámbricos basados en su ubicacióngeográfica. La Agencia Federal para el Manejo deEmergencias (Federal Emergency ManagementAgency) o FEMA, se encarga de recibir lainformación de alerta y de la transmisión de lasalertas a los proveedores de serviciosinalámbricos participantes, como Boost Mobile.Estas alertas pueden proceder del Presidente deEE.UU., Servicio Meteorológico Nacional y losfuncionarios estatales o del condado deseguridad pública. Este sistema se integra en losmismos servicios de alertas nacionales queatienden a la televisión y la radio de hoy. Para másinformación sobre WEA/CMAS, por favor visite elsitio web de FEMA en“http://www.fema.gov/emergency/ipaws/projects.shtm”.
Configuración del teléfono

46 Sección 2B: Controlar la configuración del teléfono
Modo de Avión
El Modo de Avión le permite usar muchas de lasfunciones de su teléfono, como Juegos, Bloc deNotas, Memo de Voz, etc., cuando esté en unavión o en cualquier otra zona donde estéprohibido enviar o recibir llamadas o datos.Cuando el teléfono está en Modo de Avión, nopuede enviar ni recibir llamadas, ni acceder ainformación en línea.
1. Toque > Menú Principal > (deslice lapantalla hacia arriba) > Configuración >Modo de Avión.
2. Lea la exención de responsabilidad y toque
Continuar.
2. Seleccione Encender, Apagar o Alencenderse.
Al estar en Modo de Avión, la pantalla de esperade su teléfono mostrará “Phone Off” (Teléfonoapagado)en la Barra de estado.
Uso de TTY con el servicio
Un TTY (también conocido como TDD o Teléfonode texto) es un dispositivo de telecomunicacionesque permite comunicarse por teléfono a personassordas o con problemas de audición, del habla odel lenguaje.
Su teléfono es compatible con dispositivosselectos de TTY. Compruebe con el fabricante desu dispositivo TTY para asegurarse de que admitela transmisión inalámbrica digital. Su teléfono y sudispositivo TTY se conectarán mediante un cableespecial que se conecta a la toma para auriculardel teléfono. Si este cable no venía incluido consu dispositivo TTY, comuníquese con el fabricantede su dispositivo TTY para comprar el cableconector.
Al establecer el servicio, llame al servicio alclientemediante el servicio de revelo detelecomunicaciones(TRS, TelecommunicationsRelay Service) del estado marcando primero 7-1-1

Sección 2B: Controlar la configuración del teléfono 47
Hablar. A continuación, proporcione el TRS deestado con este número: 866-727-4889.
Para activar o desactivar el modo TTY:
1. Toque > Menú Principal > Configuración> TTY. Verá un mensaje informativo.
2. Toque Continuar.
3. Toque Encender para activar el modo TTY.
– o –
Toque Apagar para apagar el modo TTY.
Nota: En el modo TTY, el teléfono mostrará el icono de accesoa TTY cuando se enchufe el dispositivo TTY al teléfono. Si elmodo TTY está habilitado, es posible que disminuya la calidadde audio de los demás dispositivos conectados a la toma delauricular.
¡ADVERTENCIA!: El departamento de llamadas deemergencia 911 recomienda que los usuarios de TTY hagan lasllamadas de emergencia por otro medio, incluidos los serviciosde relevo de telecomunicaciones, los celulares analógicos y lascomunicaciones por líneas fijas. Las llamadas inalámbricas de
TTY al 911 pueden verse alteradas si las reciben los puntos derespuesta de seguridad pública (PSAP, Public Safety AnsweringPoints). Eso haría que algunas comunicaciones seanininteligibles. El problema parece relacionarse con el softwareque usan los PSAP. Este asunto se presentó ante la FCC y laindustria de las comunicaciones inalámbricas y la comunidadde los PSAP están trabajando actualmente para resolver estainconveniencia.
Opciones de configuracióndel teléfono
Pantalla PrincipalEl teléfono ofrece la opción de personalizar lapantalla principal con los menús utilizados conmayor frecuencia como accesos directos.
1. Toque para abrir la el menú Inicio.
2. Toque Agregar. Se muestran varios menúsprincipales.
Configuración del teléfono

48 Sección 2B: Controlar la configuración del teléfono
3. Toque a la derecha del una opción demenú para agregar esa opción de menú almenú Inicio. Para desplazarse a unsubmenú específico, toque la opción demenú repetidamente hasta que vea elsubmenú que desea y toque .
4. Cuando termine de seleccionar los menús aagregar, toque Hecho.
Modo Auto-ContestaciónPuede configurar su teléfono para que contesteautomáticamente a las llamadas entrantes al estarconectado a un auricular opcional de manos libres.
Para configurar el modo de Auto-Contestación:
1. Toque > Menú Principal > Configuración> Config. de Llamada > Auto-Contestación.
2. Toque una opción.
n Apagar para deshabilitar Auto-Contestación.
n Auriculares para contestar llamadasautomáticamente cuando el teléfonoestá conectado a un aparato manoslibres. Recuerde, su teléfono contestarállamadas al estar en modo Auto-Contestación incluso si usted no estápresente.
Marcación AbreviadaPara configurar sus opciones de marcaciónabreviada:
1. Toque > Menú Principal > (deslice lapantalla hacia arriba) > Configuración >(deslice la pantalla hacia arriba) > Config. deLlamada.
2. Deslice el botón Marcación Abreviada a laposición ON (Encendido).
3. Introduzca el primer prefijo de cinco o seisdígitos en el campo Prefijo y luego toque OK.

Sección 2B: Controlar la configuración del teléfono 49
v Para desactivar esta función, seleccione OFF(Apagado) en el paso 2 mencionadoanteriormente.
Sugerencia: Para hacer una llamada con marcaciónabreviada, consulte la sección “Uso de Marcación abreviada” enla página 28.
Nota: No se aplica marcación abreviada a los servicios 911 o 411.
Encontrar ContactosEsto le permite activar o desactivar la función decoincidencia de contactos.
Para configurar sus opciones de coincidencia decontactos:
1. Toque > Menú Principal > Configuración> Más > Config. de Llamada.
2. Toque el botón Encontrar Contactos paraalternar entre ON (Encendido) y OFF(Apagado).
Entrada de TextoEsto le permite personalizar la entrada de texto.
1. Toque > Menú Principal > Configuración> Entrada de Texto.
2. Toque el botón Finaliz. de Palabras, Predic.de Palabras o Examinación de Palabras paraalternar entre ON (Encendido) y OFF(Apagado).
Configuración del teléfono

50 Sección 2C: Configuración de la seguridad de su teléfono
Configuración de laseguridad de su teléfonoEn esta sección
l Uso de la función de bloqueo del teléfono
l Borrar el contenido del teléfono
l Restablecer a la configuración predeterminada
Al usar la configuración de seguridad de su
teléfono, obtiene tranquilidad mental sin
sacrificar la flexibilidad. Esta sección lo
familiarizará con los ajustes de seguridad de su
teléfono. Con varias opciones a su alcance,
puede personalizar su teléfono para cubrir sus
necesidades personales.
Uso de la función de bloqueodel teléfono
Bloqueo del teléfono
Cuando el teléfono está bloqueado, sólo puederecibir llamadas entrantes o hacer llamadas al 911o a números especiales.
1. Toque > Menú Principal > Configuración> Bloquear Teléfono e introduzca el códigode bloqueo. Por favor, tenga en cuenta quela primera vez que acceda a este menú lepreguntarán si desea cambiar o mantener elcódigo de bloqueo predeterminado.
2. Toque Bloquear Ahora.

Sección 2C: Configuración de la seguridad de su teléfono 51
Desbloqueo del teléfonoPara desbloquear el teléfono:
1. Desde la pantalla principal, toqueDesbloquear.
2. Introduzca su código de bloqueo.
El código actual es <los últimos 4 dígitos desu número de teléfono >.
Aviso: Si cambia el código y lo olvida, el teléfono deberestablecerse a los datos de fábrica y se borrarán todos susdatos.
Cambiar el código de bloqueoPara cambiar su código de bloqueo:
1. Toque > Menú Principal > Configuración> Bloquear Teléfono e ingrese su código debloqueo.
2. Toque Cambiar Código de Bloqueo eintroduzca y vuelva a introducir su nuevocódigo de bloqueo.
Sugerencia: Para acceder al menú Cambiar Código deBloqueo, también puede tocar > Menú Principal > (deslicela pantalla hacia arriba) > Configuración > Restablecer/Borrary luego introducir el código de bloqueo. A continuación,seleccione Cambiar Código de Bloqueo.
Llamadas en modo de bloqueoEn modo de bloqueo, puede hacer llamadas al911 y a sus números especiales (Para obtenerinformación sobre los números especiales,consulte “Controles Parentales”).
Para hacer una llamada saliente en modo debloqueo:
© Para llamar a un número de emergencia, a
un número especial o al servicio al cliente,
toque Marcador, introduzca el número de
teléfono y toque Hablar.
Seguridad del teléfono
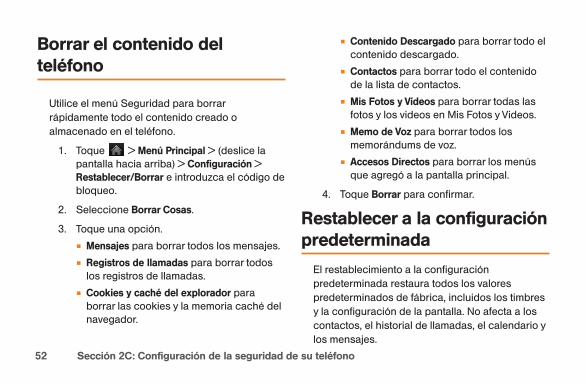
52 Sección 2C: Configuración de la seguridad de su teléfono
Borrar el contenido delteléfono
Utilice el menú Seguridad para borrarrápidamente todo el contenido creado oalmacenado en el teléfono.
1. Toque > Menú Principal > (deslice lapantalla hacia arriba) > Configuración >Restablecer/Borrar e introduzca el código debloqueo.
2. Seleccione Borrar Cosas.
3. Toque una opción.
n Mensajes para borrar todos los mensajes.
n Registros de llamadas para borrar todoslos registros de llamadas.
n Cookies y caché del explorador paraborrar las cookies y la memoria caché delnavegador.
n Contenido Descargado para borrar todo elcontenido descargado.
n Contactos para borrar todo el contenidode la lista de contactos.
n Mis Fotos y Vídeos para borrar todas lasfotos y los videos en Mis Fotos y Videos.
n Memo de Voz para borrar todos losmemorándums de voz.
n Accesos Directos para borrar los menúsque agregó a la pantalla principal.
4. Toque Borrar para confirmar.
Restablecer a la configuraciónpredeterminada
El restablecimiento a la configuraciónpredeterminada restaura todos los valorespredeterminados de fábrica, incluidos los timbresy la configuración de la pantalla. No afecta a loscontactos, el historial de llamadas, el calendario ylos mensajes.

Para restablecer la configuraciónpredeterminada:
1. Toque > Menú Principal > Configuración> Restablecer/Borrar e introduzca el códigode bloqueo.
2. Seleccione Restablecer Configuracións. Verála exención de responsabilidad.
3. Lea la exención de responsabilidad y si estáseguro de que desea restaurar todos losvalores de fábrica, toque Restablecer.
Seguridad del teléfono
Sección 2C: Configuración de la seguridad de su teléfono 53

54 Sección 2E: Administración del Historial
Administración del Historial
En esta sección
l Ver el Historial
l Opciones del Historial
l Hacer una llamada desde el Historial
l Ver la secuencia del Historial
l Guardar un número de teléfono del Historial
l Agregar el prefijo a un número de teléfono delHistorial
l Borrar el Historial
El Historial de llamadas mantiene un registro de
las llamadas entrantes, las llamadas realizadas
desde su teléfono y las llamadas perdidas. Esta
sección lo lleva por los pasos necesarios para
acceder a su Historial de llamadas y sacarle el
mayor provecho posible.
Ver el Historial
Para ver una entrada del Historial de llamadas:
1. Desde el modo de espera, presione ytoque .
2. Toque una entrada.
Nota: El Historial de llamadas sólo registra llamadas queocurran mientras el teléfono está encendido. Si se recibe unallamada mientras el teléfono está apagado, no aparecerá enlos registros de llamadas entrantes o perdidas.

Sección 2E: Administración del Historial 55
Opciones del Historial
Toque una entrada del historial para acceder a lassiguientes opciones:
v Llamada para marcar la entrada.
v Enviar Msj para enviar un mensaje.
v Historial para ver el historial del emisor o delreceptor.
v Guardar contacto para guardar el número sitodavía no está en sus contactos.
v Detalles Contacto para ver la información delcontacto (si el número ya fue guardado en loscontactos).
Toque Borrar en la parte superior derecha de lapantalla para eliminar varias o todas las entradas.
Hacer una llamada desde elHistorial
La lista de Historial de llamdas le permite marcarllamadas rápidamente a números entrantes,salientes o perdidos recientes.
Para hacer una llamada desde el Historial dellamadas:
1. Desde el modo de espera presione ytoque .
2. Desplácese a través de las entradas del
historial y toque para marcar la entrada.
No puede hacer llamadas desde el Historial de llamadas aentradas identificadas como Sin ID o Restringido.
Historial de
llamadas

56 Sección 2E: Administración del Historial
Ver la secuencia del Historial
El historial es una lista de los últimos 60 númerosde teléfono (o entradas de contactos) de lasllamadas realizadas, recibidas o perdidas. Elhistorial hace que volver a marcar un número searápido y fácil. Se actualiza continuamente amedida que se agregan de manera automáticanuevos números al principio de la lista y seeliminan las entradas más antiguas desde la parteinferior de la lista
Cada entrada contiene el número de teléfono (siestá disponible) y el nombre de la entrada decontactos (si el número está en los contactos). Esprobable que las llamadas duplicadas (mismonúmero y tipo de llamada) aparezcan sólo una vezen la lista.
1. Desde el modo de espera, presione ytoque .
2. Toque una entrada.
Nota: El historial sólo registra las llamadas que ocurrenmientras el teléfono está encendido. Si se recibe una llamadamientras el teléfono está apagado, no se incluirá en el historial.Si devuelve una llamada desde el menú de correo de voz, nose incluirá en el historial del teléfono.
Guardar un número deteléfono del Historial
Su teléfono puede almacenar hasta 600 entradasde Contactos. Las entradas de contactos puedenalmacenar un total de 7 números de teléfono y elnombre de cada entrada puede contener 64caracteres.
Para guardar un número de teléfono del Historialde llamadas:
1. Toque una entrada del historial y toque
Guardar Contacto.
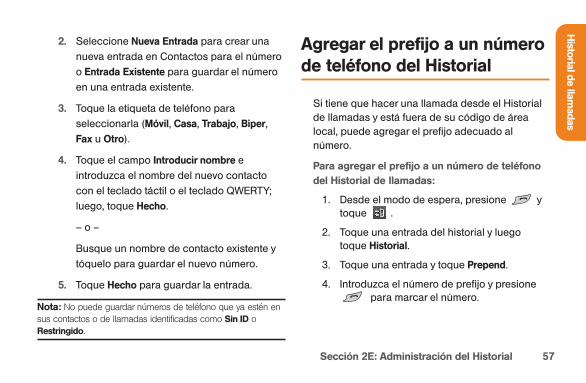
Sección 2E: Administración del Historial 57
2. Seleccione Nueva Entrada para crear una
nueva entrada en Contactos para el número
o Entrada Existente para guardar el número
en una entrada existente.
3. Toque la etiqueta de teléfono para
seleccionarla (Móvil, Casa, Trabajo, Biper,
Fax u Otro).
4. Toque el campo Introducir nombre e
introduzca el nombre del nuevo contacto
con el teclado táctil o el teclado QWERTY;
luego, toque Hecho.
– o –
Busque un nombre de contacto existente y
tóquelo para guardar el nuevo número.
5. Toque Hecho para guardar la entrada.
Nota: No puede guardar números de teléfono que ya estén ensus contactos o de llamadas identificadas como Sin ID oRestringido.
Agregar el prefijo a un númerode teléfono del Historial
Si tiene que hacer una llamada desde el Historialde llamadas y está fuera de su código de árealocal, puede agregar el prefijo adecuado alnúmero.
Para agregar el prefijo a un número de teléfonodel Historial de llamadas:
1. Desde el modo de espera, presione ytoque .
2. Toque una entrada del historial y luegotoque Historial.
3. Toque una entrada y toque Prepend.
4. Introduzca el número de prefijo y presionepara marcar el número.
Historial de
llamadas

58 Sección 2E: Administración del Historial
Borrar el Historial
Para borrar entradas individuales del Historial dellamadas, consulte “Opciones del Historial”.
Para borrar todo el Historial de llamadas:
1. Desde el modo de espera, presione ytoque .
2. Toque Borrar en la esquina superior derechade la pantalla y seleccione Borrar Múltiple oBorrar Todos.
3. Después de seleccionar las entradas quedesea borrar, toque Borrar.
– o –
Si está seguro de que quiere borrar todaslas entradas del historial, toque Borrar.
Sección 2F: Usar contactos 59
Uso de los contactos
En esta sección
l Agregar una nueva entrada de contacto
l Guardar un número de teléfono
l Opciones de entradas de contactos
l Editar una entrada de contactos
l Agregar un número a una entrada de contactos
l Editar los números de una entrada de contactos
l Asignar números de marcado rápido
l Seleccionar un tipo de timbre para una entrada
l Asignar una imagen a una entrada
l Crear un grupo
l Encontrar entradas de contactos
l Entradas de contactos secretos
l Servicios de marcado
l Hello UI
Ahora que conoce los aspectos básicos que lefacilitan el mantenerse en contacto conpersonas e información, está listo para explorarlas funciones mucho más avanzadas de suteléfono. Esta sección le explica cómo usar loscontactos en su teléfono y le ayuda aaprovechar al máximo sus contactos y sutiempo cuando intenta conectarse con laspersonas que son importantes en su vida.
Contactos

60 Sección 2F: Usar contactos
Agregar una nueva entrada decontactos
El teléfono puede almacenar hasta 600 entradasde contactos. Las entradas de contactos puedenalmacenar un total de siete números de teléfono yel nombre de cada entrada puede contener 64caracteres.
Para agregar una nueva entrada:
1. Desde el modo de espera, toque >Contactos.
2. Toque Agregar Nuevo > Nuevo Contacto.
3. Toque Introducir nombre e introduzca elnombre del nuevo contacto con el tecladotáctil o el teclado QWERTY; luego, toqueHecho.
4. Toque Agregar Número, introduzca unnúmero de teléfono y luego toque Hecho.
5. Toque una etiqueta de teléfono para
seleccionarla (Móvil, Casa, Trabajo, Biper,Fax u Otro).
6. Desplácese hacia abajo hasta los camposadicionales e introduzca o edite informaciónsegún sus preferencias.
8. Toque Hecho.
Después de guardar el número, el teléfonomostrará la Lista de contactos.
Búsqueda de contactos
Hay varias maneras de encontrar las entradas decontacto. Siga los pasos descritos en lassiguientes secciones para encontrar entradas enel menú Contactos.
Encontrar Entradas
Para encontrar entradas:
1. Desde el modo de espera, toque >Contactos.
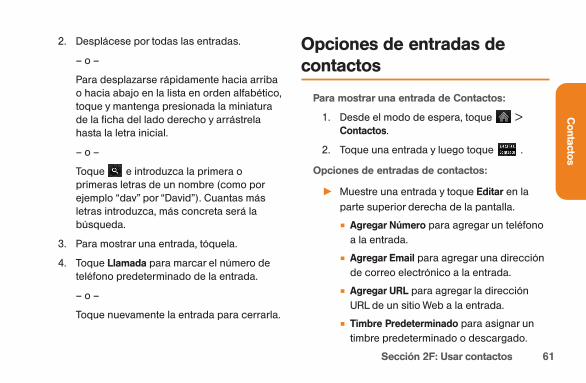
Sección 2F: Usar contactos 61
2. Desplácese por todas las entradas.
– o –
Para desplazarse rápidamente hacia arribao hacia abajo en la lista en orden alfabético,toque y mantenga presionada la miniaturade la ficha del lado derecho y arrástrelahasta la letra inicial.
– o –
Toque e introduzca la primera oprimeras letras de un nombre (como porejemplo “dav” por “David”). Cuantas másletras introduzca, más concreta será labúsqueda.
3. Para mostrar una entrada, tóquela.
4. Toque Llamada para marcar el número deteléfono predeterminado de la entrada.
– o –
Toque nuevamente la entrada para cerrarla.
Opciones de entradas decontactos
Para mostrar una entrada de Contactos:
1. Desde el modo de espera, toque >Contactos.
2. Toque una entrada y luego toque .
Opciones de entradas de contactos:
© Muestre una entrada y toque Editar en la
parte superior derecha de la pantalla.
n Agregar Número para agregar un teléfonoa la entrada.
n Agregar Email para agregar una direcciónde correo electrónico a la entrada.
n Agregar URL para agregar la direcciónURL de un sitio Web a la entrada.
n Timbre Predeterminado para asignar untimbre predeterminado o descargado.
Contactos

62 Sección 2F: Usar contactos
n Predeterminado Tipo de Vibre para asignarun tipo de vibración para las llamadasentrantes del contacto.
n Introducir Dirección para agregar unadirección.
n Introducir Cumpleaños para agregar uncumpleaños.
n Introducir nota para agregar una nota, undomicilio u otra información.
n Introducir Título de empleo para agregarun cargo.
n Introducir Compañía para agregar unaempresa.
n No Secreto/Secreto para cambiar aSecreto y ocultar uno o más números deteléfono de una entrada.
Agregar un número a unaentrada de contactos
Puede agregar hasta siete números de teléfono auna entrada de Contacto.
Para agregar un número de teléfono a unaentrada:
1. Muestre una entrada de contacto.
2. Toque Editar en la parte superior derecha dela pantalla y luego toque Añadir Número.
3. Introduzca el nuevo número de teléfono ytoque Hecho.
Nota: Para agregar una pausa, toque Pausa e introduzca losnúmeros adicionales.
4. Toque una etiqueta para el número.
5. Toque Hecho para guardar el nuevo número.

Sección 2F: Usar contactos 63
Editar los números de unaentrada de contactos
Para editar el número de teléfono de unaentrada.
1. Muestre una entrada de contacto y toqueEditar en la parte superior de la pantalla.
2. Toque un número.
3. Toque para eliminar los dígitos de auno o mantenga presionada paraborrar el número completo.
4. Vuelva a introducir el número o edítelo ytoque Hecho.
5. Toque Hecho para guardar el número.
Asignación de números demarcado rápido
El teléfono puede almacenar hasta 98 números deteléfono en ubicaciones de marcado rápido.
Para asignarle un número de marcado rápido aun nuevo número de teléfono:
1. Agregue un número de teléfono a unaentrada de contacto nueva o existente.
2. En la lista de contactos, toque Más >Configuración > Números Rápidos.
3. Toque una posición disponible paramarcación rápida.
Nota: Para moverse con rapidez hacia abajo, toque la ficha dedesplazamiento en miniatura y arrástrela a la ubicación queprefiera.
4. Seleccionar un número de teléfono enContactos. Aparece una confirmación.
Contactos

64 Sección 2F: Usar contactos
Para asignarle un número de marcado rápido aun número de teléfono ya existente:
1. Desde el modo de espera, toque >Contactos.
2. Toque Más > Configuración > NúmerosRápidos.
3. Toque una posición disponible paramarcación rápida.
4. Seleccionar un número de teléfono enContactos. Aparece una confirmación.
Nota: Para moverse hacia muy abajo, toque la ficha dedesplazamiento en miniatura y arrástrela a la ubicación queprefiera.
Edición de una entrada decontacto
Para realizar cambios en una entrada:
1. Muestre una entrada de contacto y toqueEditar en la parte superior derecha de lapantalla.
2. Resalte la información que desea editar(Nombre, Timbre, etc.).
3. Agregue o edite la información y toqueHecho (si corresponde).
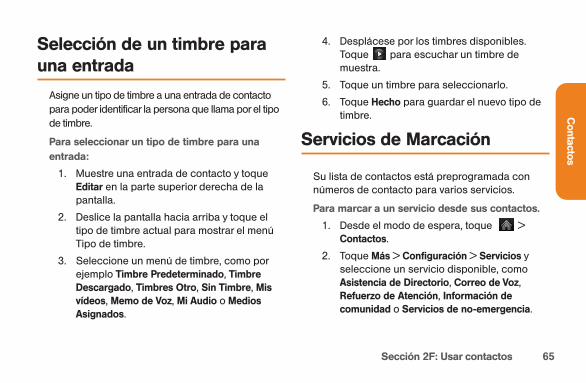
Sección 2F: Usar contactos 65
Selección de un timbre parauna entrada
Asigne un tipo de timbre a una entrada de contactopara poder identificar la persona que llama por el tipode timbre.
Para seleccionar un tipo de timbre para unaentrada:
1. Muestre una entrada de contacto y toqueEditar en la parte superior derecha de lapantalla.
2. Deslice la pantalla hacia arriba y toque eltipo de timbre actual para mostrar el menúTipo de timbre.
3. Seleccione un menú de timbre, como porejemplo Timbre Predeterminado, TimbreDescargado, Timbres Otro, Sin Timbre, Misvídeos, Memo de Voz, Mi Audio o MediosAsignados.
4. Desplácese por los timbres disponibles.Toque para escuchar un timbre demuestra.
5. Toque un timbre para seleccionarlo.
6. Toque Hecho para guardar el nuevo tipo detimbre.
Servicios de Marcación
Su lista de contactos está preprogramada connúmeros de contacto para varios servicios.
Para marcar a un servicio desde sus contactos.
1. Desde el modo de espera, toque >Contactos.
2. Toque Más > Configuración > Servicios yseleccione un servicio disponible, comoAsistencia de Directorio, Correo de Voz,Refuerzo de Atención, Información decomunidad o Servicios de no-emergencia.
Contactos

66 Sección 2F: Usar contactos
Para marcar un servicio desde el modo deespera con el teclado de marcación:
1. Presione para mostrar el teclado demarcación.
2. Marque el número del serviciocorrespondiente:
n Escuchar Saldo –
n Atención al Cliente –
n Recargar tu Cuenta –
n Asistencia de Directorio – ,
, or
n Correo de Voz –
n Refuerzo de Atención –
n Información de comunidad –
n Servicios de no-emergencia –
3. Presione para marcar el número.

Uso de las herramientas delteléfono
En esta sección
l Uso del Calendario del teléfonol Despertadorl Bloc de Notasl Uso de las Herramientas del teléfono
Su teléfono está equipado con varias
funciones de administración de la información
personal que le ayudan a administrar su estilo
de vida ocupada. Esta sección le muestra cómo
usar estas funciones para convertir su teléfono
en un planificador de administración del tiempo
para ayudarle a mantenerse al día en sus
contactos, agenda y compromisos. Lleva la
productividad a un nivel completamente nuevo.
Calendario
Agregar un evento al CalendarioAgregar un evento al calendario ayuda a organizarel tiempo y le recuerda eventos importantes.
Para agregar un evento:
1. Toque > Menú Principal > (deslice lapantalla hacia arriba) > Herramientas >Calendario.
2. Toque al día en el cual le gustaría agregarun evento y toque Agregar nuevo. El díaactual es el predeterminado.
3. Toque Tiempo para seleccionar una horapara el evento. Deslice la rueda de horas,minutos y am/pm hacia arriba o hacia abajo.Toque Fin. y después configure la hora definalización y toque Hecho.
n Para un evento de todo el día, toque DíaEntero.
Herram
ientas
Sección 2F: Uso de las herramientas del teléfono 67

68 Sección 2G: Uso de las herramientas del teléfono
4. Toque Contenido para introducir una notaacerca del evento.
n Escriba una nota o memorándum y toqueGuardar.
5. Toque Persona relacionada para seleccionarcontactos relacionados con el evento.
n Después de seleccionar personasrelacionadas en la lista de contactos,toque Hecho.
6. Toque Alarma para configurar la hora de unaalarma.
n Seleccione Ningún, A la hora, 5 minutos,10 minutos, 1 hora, 1 día o 2 días.
7. Toque Alarma para seleccionar un tipo detimbre.
n Seleccione un menú de timbre y toque untimbre.
8. Toque Volumen para seleccionar un volumende timbre.
9. Toque Localización para introducir unaubicación.
n Introduzca la ubicación del evento y toqueGuardar.
10. Toque Fije Repetir para seleccionar unestado repetitivo.
n Seleccione Ningún, Diario, Lun - Vie,Seleccione días, Semanalmente,Mensualmente o Anualmente.
11. Toque Guardar para guardar el evento.
Alertas de eventosCuando el teléfono está encendido y tieneprogramada la alarma para un evento, le alertará ymostrará un resumen del evento. El teléfono puedealertarlo sobre eventos programados de diferentesmaneras:
v Al sonar el tipo de timbre asignado.
v Al encender la luz de fondo.
v Al destellar el LED.

Menú de alertas de eventosCuando el teléfono está encendido y tieneprogramada la alarma para un evento, puedealertarle y mostrar un resumen del evento.
Cuando la alerta se apaga, desbloquee la pantalla (sinecesario) y toque una de las siguientes opciones:
v Dormi para silenciar la alarma y programarlapara que vuelva a sonar en 10 minutos.
v Ver para mostrar la pantalla de detalles del evento.v Ignorar para ignorar la alarma.
Ver los eventosPara ver los eventos programados:
1. Toque > Menú Principal > (deslice lapantalla hacia arriba) > Herramientas >Calendario.
2. Toque el día con los eventos que desea ver.
Sugerencia: En la vista de calendario, los días que tienen eventosprogramados aparecen con una línea subrayando la fecha.
3. Toque Lista o # de eventos. El teléfono listalos eventos en orden cronológico.
4. Toque un evento para listar sus detalles.
Ir al menú de Calendario de hoyPara ir al menú de Calendario de la fecha de hoy:
© En el calendario, toque el campo “mes, año” y
luego toque Ir a la fecha.
Borrar los eventos de un díaPara borrar los eventos programados para undía
1. Toque > Menú Principal > Herramientas> Calendario.
2. Toque el día con los eventos que desea borrar
y luego toque Lista o # de eventos.
Sugerencia: En la vista de calendario, los días que tienen eventosprogramados aparecen con una línea subrayando la fecha.
Herram
ientas
Sección 2G: Uso de las herramientas del teléfono 69
70 Sección 2G: Uso de las herramientas del teléfono
3. Toque Borrar en la parte superior derecha dela pantalla y seleccione Borrar hoy.
4. Seleccione Borrar o Cancelar.
Nota: Si el día al que le está borrando eventos contiene un eventorepetitivo, recibirá la siguiente indicación: “Este es un eventorecurrente. ¿Desea borrarlo?” Seleccione Sí para borrar todos loscasos o No para cancelar el borrado del evento repetitivo.
Borrar eventos pasados
Para borrar los eventos programados antes deuna hora y fecha determinados:
1. Toque > Menú Principal > (deslice lapantalla hacia arriba) > Herramientas >Calendario > Borrar > Borrar antiguos.
2. Seleccione la opción para borrar loseventos que tienen más de Un día, Unasemana, Un mes o Un año. Verá un mensajeque le informará cuántos eventos seborraron.
Borrar todos los eventos
Para borrar todos los eventos programados
1. Toque > Menú Principal > (deslice lapantalla hacia arriba) > Herramientas >Calendario > Borrar > Borrar todo. Verá unaalerta que le informará que todos loseventos se borrarán.
2. Seleccione Borrar para borrar todos loseventos o Cancelar para volver a la vista decalendario.
Despertador
Su teléfono viene con un despertador que tienemúltiples capacidades de alarma.
Para usar el despertador:
1. Toque > Menú Principal > (deslice lapantalla hacia arriba) > Herramientas > Reloj> Alarma.
2. Toque Agregar nuevo.

Sección 2G: Uso de las herramientas del teléfono 71
3. Toque y arrastre el botón de tiempo a ON(Encendido).
4. Toque la hora para establecer la hora de laalarma.n Toque el reloj digital (arriba de la
marcación) para ajustar el reloj.
- o -n Toque y arrastre las agujas de la hora y
los minutos; después toque am/pm paraseleccionar una hora.
5. Toque Repetir para seleccionar un tipo derepetición.n Toque Diario, Una vez, Semanalmente,
Lun-Vie o Sáb & Dom.
6. Toque Sonidos/Vibración para seleccionarSonidos y Vibrar, Siempre Sonidos o SiempreVibrar.
7. Toque Bell de Alarma para seleccionar untipo de timbre.n Seleccione un menú de timbre y toque un
timbre.
8. Toque Volumen para seleccionar un nivel devolumen.
n Toque la barra al nivel de volumen quedesea y después toque Hecho.
9. Toque Tipo de Vibración para seleccionar eltipo de vibración.
n Toque el tipo de vibración deseado.
10. Toque Dormi para seleccionar el tipo derepetición.
n Seleccione Posponer 5 minutos, Posponer10 minutos, Posponer 15 minutos,Posponer 20 minutos o Posponerdesactivado.
11. Toque Guardar para establecer la alarma.
Bloc de NotasEl teléfono viene con un Bloc de Notas quepuede usar para redactar y almacenarrecordatorios y notas para ayudarlo amantenerse organizado.
Herram
ientas

72 Sección 2G: Uso de las herramientas del teléfono
Para redactar una nota:
1. Toque > Menú Principal > (deslice lapantalla hacia arriba) > Herramientas >(deslice la pantalla hacia arriba) > Bloc deNotas > Agregar nuevo.
2. Introduzca la nota con el teclado táctil o elteclado QWERTY y toque Guardar.
Para leer una nota guardada:
1. Toque > Menú Principal > (deslice lapantalla hacia arriba) > Herramientas >(deslice la pantalla hacia arriba) > Bloc deNotas.
2. Toque una nota.
Para borrar notas guardadas:
1. Toque > Menú Principal > (deslice laPantalla hacia arriba) > Herramientas >(deslice la pantalla hacia arriba) > Bloc deNotas.
2. Toque una nota.3. Toque Guardar (aparecerá una confirmación).4. Toque Borrar.
Calculadora de Propina
Para calcular las cantidades de propinas rápidoy fácilmente:
1. Toque > Menú Principal > (deslice lapantalla hacia arriba) > Herramientas >(deslice la pantalla hacia arriba) >Calculadora > Calculadora de Propina.
2. Toque el campo Cuenta Total e introduzca elmonto total de la cuenta.
3. Toque el campo Propina (%) e introduzca elporcentaje de propina. La Calculadora dePropina calcula la propina correctainstantáneamente.
4. Si está dividiendo la cuenta, toque el campoDividir e introduzca la cantidad de personasque hay en el grupo. La Calculadora dePropina calcula y muestra el monto “porpersona”.

Sección 2G: Uso de las herramientas del teléfono 73
Calculadora
Su teléfono viene con una calculadora.
Para usar la calculadora:
1. Toque > Menú Principal > (deslice lapantalla hacia arriba) > Herramientas >(deslice la pantalla hacia arriba) >Calculadora > Calculadora.
2. Introduzca números con el teclado
n Toque para introducir puntos decimales.
n Toque para cambiar el valor depositivo a negativo.
n Toque para borrar todos los números.
3. Toque para obtener el total.
Reloj Mundial
Permite ver la hora en más de 50 ubicaciones.
Para ver la hora en más de 50 lugares distintos:
1. Toque >Menú Principal > (deslice lapantalla hacia arriba) > Herramientas > Reloj> Reloj Mundial.
2. Toque Ciudad Nueva para mostrar el mapa.
Sugerencia: Puede buscar una ciudad desde la lista deciudades. Toque , toque el campo de búsqueda eintroduzca el nombre de la ciudad.
3. Toque o para desplazarse a través delos continentes, y toque paraseleccionar el continente. Apareceránciudades en el continente.
4. Toque o para desplazarse a través delas ciudades, y toque .
– o –
Toque y arrastre el mapa para encontrar unaciudad y toque .
Herram
ientas

74 Sección 2H: Uso de los servicios de voz de su teléfono
Uso de los servicios de voz desu teléfono
En esta sección
l Administración de los memos de voz
Esta sección incluye instrucciones fáciles de
seguir para usar el marcado activado por voz y
para administrar los memos de voz.
Administración de los memo devoz
Puede usar los servicios de voz del teléfono paragrabar breves memorándums con el objeto derecordarle eventos importantes, números deteléfono o artículos de la lista de compras.
Grabación de memos de vozPara grabar un memo de voz:
1. Toque > Menú Principal > (deslice la
pantalla hacia arriba) > Herramientas >
Servicio de Voz > Memo de Voz > Grabar.
2. Comience la grabación después del aviso.
Para terminar la grabación del memo:
© Toque Detener.

Para grabar una conversación durante unallamada de teléfono:
© Durante una llamada, toque Más > Memo deVoz. Aparecerá un contador de minutos en laparte superior izquierda de la pantalla paraindicar el tiempo de grabación.
Para terminar la grabación de su conversación:
© Toque el contador para finalizar la grabación.
Nota: El teléfono puede almacenar 30 memorándums de vozcon un total de hasta 10 minutos para todos losmemorándums.
Opciones de memo de vozPara reproducir los memos de voz que hagrabado:
1. Toque > Menú Principal > (deslice lapantalla hacia arriba) > Herramientas >Servicio de Voz > Memo de Voz.
2. Toque el memorándum de voz que deseaescuchar.
Para elegir las opciones de memorándum de voz.
1. Toque > Menú Principal > (deslice lapantalla hacia arriba) > Herramientas >Servicio de Voz > Memo de Voz.
2. Encuentre un memorándum de voz y toquepara elegir entre las opciones de memo
de voz:
n Enviar Mensaje para enviar un mensajecon un memorándum de voz adjunto.
Servicios de
voz
Sección 2H: Uso de los servicios de voz de su teléfono 75

76 Sección 2H: Uso de los servicios de voz de su teléfono
n Asignar Como para asignarlo como untimbre para Contactos sin TimbrePredeterminado, Un Contacto, Números NoGuardados, Privados/Desconocidos,Correo de Voz, Mensajes oAlarma/Calendario.
n Ver Detalles para ver la información delmemorándum de voz seleccionado.
n Editar Títulos para editar el título delmemorándum de voz seleccionado.
n Info. de Memoria para ver el estado de lamemoria para los memorándums de voz.La memoria total para los memorándumsde voz es de 10 minutos.
n Cancelar para cerrar el menú de opciones.
Borrar memos de vozPara borrar todos los memos de voz:
1. Toque > Menú Principal > (deslice lapantalla hacia arriba) > Herramientas >Servicio de Voz > Memo de Voz.
2. Toque Borrar en la parte superior derechade la pantalla y seleccione Borrar Multiple oBorrar todos.
n Borrar Multiple para borrar más de unmemorándum seleccionado por vez.
n Borrar todos para borrar todos losmemorándums de voz.

Sección 3
Características del servicio

78 Sección 3A: Características del servicio: Aspectos básicos
Características del servicio:Aspectos básicos
En esta sección
l Uso del correo de voz
l Uso de la mensajería de texto
l Uso de ID de Llamador
l Responder a una llamada en espera
l Hacer una llamada tripartita
l Uso de desvío de llamadas
Ahora que ha dominado los aspectos
fundamentales de su teléfono, es hora de
explorar las funciones de llamada que optimizan
su servicio. Esta sección delinea las funciones
básicas del servicio.
Uso del correo de voz
Configuración de su correo de vozTodas las llamadas no contestadas en su teléfonose transfieren automáticamente a su correo de voz,incluso si está usando el teléfono o lo tieneapagado. Por lo tanto, le recomendamos configurarsu Correo de voz y su saludo personal tan prontocomo se active su teléfono.
Para configurar su correo de voz:
1. Presione para abrir el teclado demarcación.
2. Toque y mantenga presionado .
3. Siga las indicaciones del sistema para:
n Crear un código de paso.
n Grabar un anuncio de nombre.
n Grabar un saludo.

Sección 3A: Características del servicio: Aspectos básicos 79
Nota: Se le recomienda que cree un código de paso cuandoconfigure su correo de voz para protegerlo contra accesos noautorizados. Sin un código de paso, cualquiera que tengaacceso a su teléfono podrá acceder a sus mensajes de correode voz.
Notificación de correo de vozHay varias formas en que su teléfono le alerta deun nuevo mensaje:
v Mostrando un mensaje en la pantalla.
v Haciendo sonar el timbre asignado.
v Haciendo destellar el LED en rojo.
v Mostrando un globo de correo de voz en lapantalla.
Alertas de mensajes nuevos decorreo de voz
Al recibir un nuevo mensaje de voz, su teléfono leavisa y le indica que llame a su correo de voz.
Para llamar a su correo de voz:
© Presione y luego toque y mantenga
presionado .
Para mostrar el registro de llamadas perdidas:
© Toque el ícono del globo (como este ) en
la Barra de estado.
Recuperación de sus mensajes decorreo de voz
Puede revisar sus mensajes directamente desdesu teléfono o desde cualquier otro teléfono detonos. Para marcar desde su teléfono, puedemarcar su correo de voz con marcado rápido ousar las teclas de menú.
Uso del acceso a mensajes de una tecla
© Presione y luego toque y mantenga
presionado . El teléfono marcará su
correo de correo de voz.
Características del servicio

80 Sección 3A: Características del servicio: Aspectos básicos
Usar las teclas de menú del teléfono paraacceder a los mensajes
1. Toque > Menú Principal > Mensajería >Correo de Voz.
2. Toque en el Correo de Voz paraescuchar los mensajes.
Nota: Se le cobrarán minutos de tiempo de aire cuandoacceda al correo de voz desde su teléfono inalámbrico.
Uso de un teléfono distinto de su teléfono paraacceder a los mensajes
1. Marque su número de teléfono.
2. Cuando responda su correo de voz,presione la Tecla Estrella/Asterisco.
3. Introduzca su código de paso.
Sugerencia: Al llamar a correo de voz, escuchará primero lainformación de encabezado (fecha, hora e información delremitente) del mensaje. Para pasar directamente al mensaje,presione 4 durante el encabezado.
Guía de los botones del correo de voz
Esta es una guía rápida para las funciones delteclado mientras escucha los mensajes de correode voz.
Fecha y hora Enviar respuesta Avance
Reproducir Rebobinar Adelantede nuevo
Borrar Guardar
Cancelar Ayuda Omitir

Sección 3A: Características del servicio: Aspectos básicos 81
Opciones de correo de vozSu teléfono ofrece varias opciones para organizarsu correo de voz y accederlo.
Uso del modo Experto
El uso de la configuración de modo Experto parasu buzón de correo de voz personal le ayuda anavegar más rápidamente por el sistema decorreo de voz, reduciendo el número deindicaciones de voz que escucha en cada nivel.
Para activar o desactivar el modo Experto:
1. Mantenga presionada para acceder asu correo de voz. Si su buzón de correo devoz contiene cualquier mensaje nuevo oguardado, presione para acceder a sumenú principal de correo de voz.
2. Ingrese su contraseña.
3. Presione para cambiar las opcionespersonales siguiendo las indicaciones delsistema.
4. Presione de nuevo para ir al modoExperto.
5. Presione para activar o desactivar elmodo Experto.
Teclas del menú de correo de vozSiguiendo las indicaciones del sistema de correode voz, puede usar el teclado para navegar por elmenú de correo de voz. La lista siguiente delineala estructura de menús de correo de voz de suteléfono.
Escuchar
Información de fecha y hora
Responder
Reproducir de nuevo
Rebobinar
Borrar
Guardar
Opciones
Características del servicio

82 Sección 3A: Características del servicio: Aspectos básicos
Opciones personales
Ajustes
Omitir código de paso
Reproducción automática
Encendido/apagado de la fecha
y hora del mensajes
Cambiar código de paso
Páginas numéricas.
Regresar al menú de Opciones
personales
Saludos
Cambiar saludo principal
Cambiar el nombre grabado
Regresar al menú de Opciones
personales
Encendido/apagado del modo experto
Desconectar
Uso de la mensajería de textoy multimedia
Con las funciones de mensajería del teléfono,puede enviar y recibir mensajes de textoinstantáneos (SMS) o mensajes multimedia (MMS)que pueden incluir video y audio, entre el teléfonoinalámbrico y otro teléfono habilitado paramensajería. Al recibir un nuevo mensaje,aparecerá automáticamente una notificación en lapantalla del teléfono. Además, la mensajería detexto incluye una variedad de mensajespreestablecidos, como “Llámame” y “Llego tarde”que agilizan y facilitan la redacción de mensajes.Use el teléfono para personalizar sus propiosmensajes preestablecidos (hasta 100 caracteres).
Composición de mensajes detexto/multimedia
1. Deslice el teclado hacia afuera y toqueMensaje.

Sección 3A: Características del servicio: Aspectos básicos 83
– o –
Toque > Enviar Mensaje.
2. Seleccione un método de entrada:
n Nuev dirc para usar el teclado e introducirun número de teléfono inalámbrico o unadirección de correo electrónico deldestinatario directamente.
n Ir a contactos para seleccionar undestinatario de sus contactos. Lasentradas de contactos válidas debencontener un número de teléfonoinalámbrico o una dirección de correoelectrónico.
3. Toque Hecho cuando finalice de introducir
los destinatarios. Puede incluir hasta 40
destinatarios por mensaje.
4. Escriba un mensaje o use los mensajes,
símbolos o emoticonos preestablecidos.
n Para escribir un mensaje, use o toque elteclado para introducirlo.
n Para usar un mensaje preestablecido,toque Msj Prees. en la esquina superiorderecha y luego toque un mensaje paraintroducirlo.
n Para introducir un símbolo o unemoticono:• En el teclado táctil: Toque ABC y
seleccione Símbolos, Emoticon oSmileys. Toque el símbolo o emoticonoque desee y luego Hecho.
– o –
• En el teclado QWERTY: Presione ytoque el símbolo o emoticono que desee.
5. Para agregar un archivo adjunto, toque
Agregar Adjunto.
6. Revise el mensaje y toque Enviar. Puede
seleccionar más opciones de mensajes al
Características del servicio

84 Sección 3A: Características del servicio: Aspectos básicos
tocar Más para agregar un asunto,
establecer mensajes con prioridad urgente,
establecer números de devolución de
llamada o guardar el mensaje como
borrador.
Nota: Si agrega un archivo adjunto o un asunto al mensaje detexto, se convertirá automáticamente en Mensaje de fotos y se lecobrarán los cargos correspondientes.
Acceder a mensajes detexto/multimedia
Para leer un mensaje SMS/MMS:
© Cuando recibe un mensaje de texto/fotos,verá un globo de notificación en la pantalladel teléfono. Toque el globo para ver todo elmensaje.
Para responder un mensaje de texto/fotos:
1. Mientras el mensaje está abierto, toqueResponder.
2. Siga los paso 4 a 6 que se describen en“Composición de mensajes de texto/multimedia” para completar y enviar surespuesta.
Uso de Mensajes PreestablecidosLos mensajes preestablecidos facilitan laredacción de los mensajes de texto/multimedia.
Para agregar o editar mensajes preestablecidos:
1. Toque > Menú Principal > Mensajería >Configuración > Mensajes Preestablecidos.
2. Toque Agregar Nuevo para agregar un nuevomensaje preestablecido.
– o –
Toque un mensaje preestablecido y luegoEditar.
3. Introduzca el mensaje o los cambios y toqueGuardar.

Sección 3A: Características del servicio: Aspectos básicos 85
Uso de ID de Llamador
ID de llamador le permite a la gente identificar quiénllama antes de contestar el teléfono mostrando elnúmero de la llamada entrante. Si no desea que semuestre su número cuando hace una llamada, sólotiene que seguir estos pasos sencillos.
Para bloquear la presentación de su número deteléfono en una llamada saliente específica:
1. Presione y toque .
2. Introduzca un número de teléfono.
3. Toque Hablar
Para bloquear permanentemente su número,llame a su proveedor de servicio.
Responder a una llamada enespera
En el transcurso de una llamada, Llamada enespera le avisa de llamadas entrantes haciendosonar dos pitidos. La pantalla de su teléfono leinforma de que está entrando otra llamada ymuestra el número de teléfono de quien llama (siestá disponible y usted está en modo digital).
Para responder a una llamada entrante cuandoesté en una llamada:
© Toque Respuesta. Esto pone en espera a laprimera persona y responde la segundallamada.
Características del servicio

86 Sección 3A: Características del servicio: Aspectos básicos
Para volver a la primera llamada:
© Toque la entrada de llamada en la pantalla opresione .
Sugerencia: Para las llamadas en las que no desea serinterrumpido, puede inhabilitar temporalmente la funciónLlamada en espera al introducir antes de hacer la llamada. Lallamada en espera se reactiva automáticamente una vez quetermine la llamada.
Hacer una llamada tripartita
Con las llamadas tripartitas, puede hablar con dospersonas al mismo tiempo. Al usar esta función,se cargará la tarifa de tiempo de aire normal porcada una de las dos llamadas.
Para hacer una llamada tripartita:
1. Introduzca el número y presione .
2. Una vez establecida la conexión, toque Más> Llamada Tripartita.
3. De las opciones que aparecen en la partesuperior de la pantalla, seleccione uncontacto de Contactos, Historial reciente oIntroducir número de teléfono y toque Hablar.
4. Cuando esté conectado con la segundapersona, toque Juntar para iniciar la llamadaen conferencia. Si una de las personas a lasque llamó termina la comunicación durantela llamada, usted y la persona que quedósiguen conectados. Si usted inició lallamada y es el primero en terminar lacomunicación, las otras dos personas sedesconectarán.
Uso de desvío de llamadas
El desvío de llamadas le permite desviar todas lasllamadas entrantes a otro número de teléfono,incluso cuando su teléfono esté apagado. Puedeseguir haciendo llamadas desde su teléfonocuando se activa el desvío de llamadas.

Características del servicio
Para activar el desvío de llamadas:
1. Presione y toque .
2. Introduzca el código de área y el número deteléfono al cual deben desviarse lasllamadas.
3. Toque Hablar. Verá un mensaje y escucharáun tono para confirmar la activación deldesvío de llamadas.
Para desactivar el desvío de llamadas:
1. Oprima y toque .
2. Toque Hablar. Verá un mensaje y escucharáun tono para confirmar la desactivación.
Sección 3A: Características del servicio: Aspectos básicos 87

88 Sección 3B: Servicio de datos
Servicio de datos
En esta sección
l Aplicaciones de servicios de datos
l Para empezar con los servicios de datos
l Descargar contenido
l Exploración de la Internet
l Preguntas frecuentes acerca el servicio de datos
El servicio de datos le trae claridad que puedever y escuchar con avanzados servicios demultimedia. Estas funciones, incluida lamensajería, los juegos, los timbresdescargables y los protectores de pantalla, asícomo el acceso portátil a la Internet, son fácilesde aprender y de usar. Claramente, es unaforma totalmente nueva de ver lo inalámbrico.
Esta sección presenta estos serviciosavanzados y lo lleva por los pasos necesariospara empezar a aprovechar los servicios. Paraobtener detalles e instrucciones completos,póngase en contacto con su proveedor deservicio.

Sección 3B: Servicio de datos 89
Aplicaciones de servicios dedatos
Ésta es una breve lista de las aplicacionesdisponibles mediante su teléfono. Para másinformación, por favor llame a su proveedor deservicio.
Juegos – Descargue emocionantes juegoscon gráficos a todo color y sonido.
Timbres – Personalice su teléfonodescargando distintos timbres yasignándoselos a sus Contactos.
Fondos de pantalla – Descargue imágenesúnicas para usarlas como protectores depantalla o haga más sencillo saber quién llamaasignando imágenes específicas a los númerosde sus Contactos.
Internet – Acceso a sitios Internet populares,con gráficos y todo, desde su teléfono.
Para empezar con losservicios de datos
Esta sección le ayudará a conocer los aspectosbásicos del uso de sus servicios, entre ellos laadministración de su nombre de usuario, el iniciode una conexión de datos y navegar la Internetcon su teléfono.
Su nombre de usuarioAl comprar un teléfono e inscribirse en el servicio,automáticamente se le asigna un nombre deusuario, que habitualmente se basa en su nombrey un número.
Al usar los servicios, su nombre de usuario se envíapara identificarlo en la Red. El nombre de usuariotambién es útil como forma de personalizar losservicios Internet y como identidad virtual en línea.Su nombre de usuario se programaráautomáticamente en su teléfono. No necesitaintroducirlo.
Servicio de
datos
90 Sección 3B: Servicio de datos
Para encontrar su nombre de usuario
Si no está seguro de cuál es su nombre deusuario, puede encontrarlo fácilmente en línea oen su teléfono.
Para encontrar su nombre de usuario:
© Toque > Menú Principal > (deslice la
pantalla hacia arriba) > Configuración > Infode. Teléfono > # de teléfono/ID de usuario.
Inicio del navegadorPara iniciar el navegador:
© Toque > Menú Principal > Web. La
conexión de datos comienza y verá la página
principal de Web.
Mientras se realiza la conexión, es posible quevea una animación y el mensaje “Conectando”.
Estado de conexión e indicadores La pantalla de su teléfono le permite conocer elestado actual de su conexión de datos medianteindicadores que aparecen en la parte superior dela pantalla. Se usan los símbolos siguientes:
Su teléfono está conectado a una red debanda ancha móvil de alta velocidad(EVDO). Cuando los triángulos estánanimados, los datos se están transfiriendo(por ejemplo, cuando abre una página Web).Cuando los triángulos son blancos, estáconectado a la red, pero no se estántransfiriendo datos actualmente (porejemplo, al ver una página Web que estácompletamente abierta). En cualquierestado puede recibir llamadas entrantes.

El teléfono está encendido y conectado a lared de datos 1xRTT. Cuando las flechasestán animadas, se están transfiriendodatos (por ejemplo, al abrir una página Web)y no puede recibir llamadas. Cuando lasflechas son blancas, está conectado a lared, pero no se están transfiriendo datosactualmente (por ejemplo, al ver una páginaWeb que está completamente abierta) ypuede recibir llamadas.
Si no ve un indicador, el teléfono no tiene unaconexión de datos actual. Para iniciar unaconexión, consulte “Iniciar una conexión Web”.
Navegación de la WebNavegar por los menús y sitios Web durante unasesión de datos es sencillo una vez que hayaaprendido algunos aspectos básicos. Éstas sonalgunas sugerencias para desplazarse confacilidad:
Desplazamiento
Como ocurre con otras partes del menú delteléfono, tendrá que desplazarse hacia arriba yhacia abajo para ver todo el contenido en algunossitios Web.
Para desplazarse línea por línea por los sitiosWeb:
© Toque la pantalla y deslícela hacia arriba o
hacia abajo.
– o –
Toque la barra de desplazamiento y
arrástrela a la derecha de la pantalla.
Servicio de
datos
Sección 3B: Servicio de datos 91

92 Sección 3B: Servicio de datos
Selección
Para seleccionar elementos en pantalla:
© Toque un enlace y lo llevará a esa página
Web. Si está usando el teclado QWERTY, use
las teclas de flechas para resaltar un enlace y
presione .
Los enlaces, que se muestran como textosubrayado, le permiten saltar a páginas Webdistintas, seleccionar funciones especiales oincluso hacer llamadas de teléfono.
Para seleccionar enlaces:
© Toque el enlace.
Regresar
Para regresar una página:
© Presione de su teléfono.
Nota: También puede usar la tecla para eliminar texto(como una tecla de retroceso) al introducir texto.
Ir al inicio
Para volver a la página de inicio:
© Mantenga presionada .
Descargar juegos, timbres ymás
Tiene acceso a una variedad dinámica decontenido para descargar, como juegos, timbres,salvapantallas y otras aplicaciones. Es posibleque se apliquen cargos adicionales. Siga lospasos básicos que se describen a continuaciónpara acceder y descargar estos elementos.
Acceso a los menús de descarga
Para acceder a los menús de descarga:
1. Toque > Menú Principal > Mis Cosas.
2. Seleccione una categoría de descarga(Juegos, Tonos de llamada, Aplicaciones,Fondos de pantalla o Chat Flirt Fun) y luego

Sección 3B: Servicio de datos 93
Servicio de
datos
seleccione Obtener Nuevo. Se iniciará elnavegador y lo dirigirá al menú de descargacorrespondiente.
Seleccionar un elemento para descargar
Puede buscar elementos disponibles paradescargar de varias maneras
© Features (Destacados) muestra una
selección de elementos destacados.
© Categories (Categorías) permite restringir la
búsqueda a un categoría general. (Es
posible que existan varias páginas de
contenidos disponibles en una lista.
Seleccione Next 9 (Siguiente 9) para ver los
elementos adicionales).
© Search (Buscar) permite usar el teclado e
introducir criterios de búsqueda para
encontrar un elemento. Puede introducir una
palabra entera o un título entero o realizar
una búsqueda parcial de la palabra.
Descarga de un elemento
Una vez que haya elegido y resaltado unelemento, tóquelo para seleccionarlo. Verá unapágina de resumen del elemento que incluye eltítulo, costo y fecha de validez.
Para descargar un artículo seleccionado:
1. Desde la página de información, seleccionePurchase (Comprar). El elemento sedescargará automáticamente. Cuando veala pantalla Nueva descarga, habrádescargado correctamente el elemento enel teléfono.
2. Seleccione una opción para continuar:

94 Sección 3B: Servicio de datos
n Seleccione Escuchar/Usar/Ver paraescuchar un timbre, iniciar un juego oaplicación o ver un salvapantalla. Lasesión de datos finalizará y será redirigidoa la pantalla de menú apropiada delteléfono.
n Seleccione Asignar Como para asignarleun timbre o un salvapantalla a una funcióndel teléfono.
n Seleccione Configuración para configurarlas aplicaciones o los juegosdescargados.
n Seleccione Comprar para explorar otroselementos que puede descargar.
n Presione para cerrar el navegador yvolver al modo de espera.
Navegar la Web
Con acceso a la Internet en su teléfono puede verversiones gráficas a todo color de sus sitiosInternet favoritos, haciendo más sencillo quenunca mantenerse informado cuando está enmovimiento. Siga los marcadores deportivos, lasúltimas noticias y el clima, u haga compras en suteléfono cualquier lugar de la red suya.
Además de las funciones ya cubiertas en estasección, la página de inicio ofrece acceso a estascoloridas categorías Internet ricas en gráficos,como Noticias, Clima, Entretenimiento, Deportes,Finanzas, Viajes, Compras y Herramientas denegocios, así como útiles opciones deadministración como Búsqueda. Muchos sitiosestán disponibles bajo más de un menú, elija elque le resulte más conveniente.

Sección 3B: Servicio de datos 95
Uso del menú del navegadorAunque la página de inicio ofrece una amplio yconveniente rango de sitios y servicios para quenavegue por ellos, no están representados todoslos sitios, y algunas funciones, como irdirectamente a sitios Internet específicos no estándisponibles. Para éstas y otras funciones, tendráque usar el menú del navegador. El menú delnavegador ofrece funcionalidad adicional paraampliar su uso de la Internet en su teléfono.
Abrir el menú del navegador
El menú del navegador puede abrirse encualquier momento en que tenga una sesiónactiva, desde cualquier página que esté viendo.
Para abrir menú del navegador:
Las opciones disponibles bajo el menú delnavegador incluyen:
v Atrás para retroceder a la página Webmás reciente.
v Adelante para ir a una página visitadacon anterioridad (después de haberusado la opción atrás).
v Páginas abre una nueva página y permitever las páginas abiertas.
v Zoom permite acercar y alejar.v Opciones para elegir el tamaño de fuente,
la configuración de privacidad, etc.
Ir a un sitio Web determinado
Para ir directamente a un sitio Web introduciendosu URL (dirección de sitio Web):
1. Toque el campo URL.
2. Use el teclado para introducir la direccióndel sitio Web y presione o toqueHecho.
Nota: No será posible ver todos los sitios Web en su teléfono.
Servicio de
datos

96 Sección 3B: Servicio de datos
Reinicio del Navegador
Si el navegador parece estar funcionando mal odeja de responder, generalmente se puederesolver el problema sencillamente reiniciando elnavegador.
Para reiniciar el Navegador:
1. Toque el menú del navegador.
2. Seleccione Opciones > Configuración delnavegador > Avanzados > Reinicializarnavegador.
3. Toque los elementos que desea reinicializary luego toque Borra los elementos si todavíadesea continuar.
Preguntas frecuentes acercael servicio de datos
¿Cómo sé cuando mi teléfono está listo para losservicios ?Su nombre de usuario se mostrará cuando accedaa > Menú Principal > Configuración > Info deTeléfono > # de teléfono/ID de usuario.
¿Cómo inicio sesión la primera vez?
Se hace inicio de sesión automáticamente paraacceder a los servicios cuando enciende elteléfono.
¿Cómo sé cuando mi teléfono está conectado alos servicios de datos?El teléfono se conecta automáticamente cuandousa los servicios de datos o cuando recibe unmensaje entrante. También verá o el iconoindicador .

Sección 3B: Servicio de datos 97
¿Puedo hacer llamadas y usar los servicios dedatos al mismo tiempo?
No se pueden usar simultáneamente la voz y losservicios de datos. Si recibe una llamada cuandoesté activo el servicio de datos, la llamada sedesviará a correo de voz. Puede hacer unallamada saliente en cualquier momento, perointerrumpirá cualquier sesión de que tenga encurso.
¿Cuándo está activa mi conexión de datos?
Su conexión está activa cuando se estántransfiriendo datos. Se permiten las llamadassalientes, las llamadas entrantes van directamenteal correo de voz. Cuando está activo, el indicador
or destella en la pantalla del teléfono.
¿Cuándo está latente mi conexión de datos?
Si no se reciben datos durante 10 segundos, laconexión pasa a latente. Cuando la conexión estálatente, se permiten las llamadas de voz (Laconexión puede activarse nuevamente conrapidez). Si no se reciben datos durante unperíodo de tiempo prolongado, la conexión sedará por terminada.
Servicio de
datos
98 Sección 3B: Servicio de datos
¿Puedo apagar servicios de los datos?Puede cerrar sesión sin apagar el teléfono; sinembargo, no podrá navegar por la Web ni usarotros servicios de datos. Aún sin haber iniciadosesión, podrá seguir haciendo y recibiendollamadas, comprobar el correo de voz y usar otrosservicios de voz. Puede iniciar sesión nuevamenteen cualquier momento. Para cerrar la sesión, toque
> Menú Principal > (deslice la pantalla haciaarriba) > Configuración > Datos >Encender/Apagar en el menú del teléfono. Lea laexención de responsabilidad y toque Desactivar.

Sección 4
Información deseguridad y garantía

100 Sección 4A: Información de seguridad
Información de seguridad
En esta sección
l Precauciones generales
l Mantener el uso seguro y el acceso a su teléfono
l Uso del teléfono con un audífono
l Cuidado de la batería
l Energía de Radiofrequencia (RF)
l Registro del propietario
l Aviso exclusivo de la guía del teléfono
Parte de aprovechar al máximo su teléfono esaprender cómo funciona y cómo cuidarlo. Estasección delinea las directrices de desempeño yseguridad que le ayudan a entender lascaracterísticas básicas del funcionamiento desu teléfono.
Precauciones generales
Hay varios lineamientos sencillos para operarcorrectamente su teléfono y mantener un servicio seguro ysatisfactorio.
v Sostenga el teléfono con la antena levantada,totalmente extendida y por encima de su hombro.
v Intente no tocar, doblar o retorcer la antena delteléfono.
v No use el teléfono si la antena está dañada.
v Hable directamente al micrófono.
v Evite exponer su teléfono y accesorios a la lluvia o aderrames líquidos. Si su teléfono se moja de todasformas, apáguelo de inmediato y quite la batería.
v Aunque su teléfono es bastante resistente, es unapieza compleja de equipo y puede romperse. Evitedejarlo caer, golpearlo, doblarlo o sentarse sobre él.
v Cualquier cambio o modificación a su teléfono que nohaya sido aprobado explícitamente en este documentopodría anular su garantía de este equipo y suautorización para operarlo.

Sección 4A: Información de seguridad 101
v No desarme ni abra, aplaste, doble, deforme, perforeni haga tiras.
v No modifique ni remanufacture, ni intente introducirobjetos extraños en el interior de la batería, ni lasumerja ni exponga a agua u otros líquidos, ni laexponga al fuego, explosiones u otros riesgos.
v Sólo use la batería para el sistema para el cual estáindicada.
v Sólo use la batería con un sistema de carga que hayasido certificado con IEEE-Std-1725-200x según esteestándar. El uso de una batería o cargador nocertificados puede presentar riesgo de incendo,explosión, derrames o de otro tipo.
v No cortocircuite las baterías ni permita que objetosconductorse metálicos opriman los terminales de lasbaterías.
v Sólo reemplace la batería con otra que haya sidocertificada con el sistema según este estándar, IEEE-Std-1725-200x. El uso de una batería no certificadapuede presentar riesgo de incendo, explosión,derrames o de otro tipo.
v Deshágase rápidamente de las baterías usadas deacuerdo con las regulaciones locales.
v El uso de las baterías por parte de niños debehacerse bajo supervisión.
v Evite dejar caer el teléfono o la batería. Si el teléfono ola batería caen, especialmente en una superficie dura,y el usuario sospecha que hay daños, llévela a uncentro de servicio para que la inspeccionen.
v Debe implementarse, al meno, uno de los métodos deautenticación. (por ej. H/W, S/W, Mecánico, Holograma,etc.)
v El uso incorrecto de las baterías puede dar comoresultado un incendio, explosión u otros riesgos.
Nota: Para el mejor cuidado de su teléfono, sólo el personalautorizado debe darle servicio al teléfono y a sus accesorios. El nohacer esto puede ser peligroso y anular su garantía.
HACEste teléfono ha sido probado y clasificado para su usocon audífonos para algunas de las tecnologíasinalámbricas que utiliza. Sin embargo, puede haberalgunas tecnologías inalámbricas nuevas utilizadas en esteteléfono que no se han probado aún para su uso conaudífonos. Es importante tratar las diferentes característicasde este teléfono a fondo y en diferentes lugares, utilizando
Información de
seguridad importante

102 Sección 4A: Información de seguridad
el audífono o implante coclear, para determiner si escuchacualquier ruido de interferencia. Consulte con su proveedorde servicios o fabricante de este teléfono para obtenerinformación sobre la compatibilidad de audífonos. Si tienepreguntas sobre las políticas de devolución o cambio,consulte a su proveedor de servicios o distribuidor deteléfonos.
Declaración del articulo 15.19Este dispositivo y sus accesorios cumplen con las normasde la FCC de part15. El funcionamiento esta sujeto a lasdos condiciones siguientes:
(1) Este dispositivo y sus accesorios no puede causarinterferencias perjudiciales.
(2) Este dispositivo y sus accesorios deben aceptarcualquier interferencia recibida, incluyendo interferenciasque puedan causar un funcionamiento no deseado.
Declaración del articulo 15.21Cambio o modificaciones que no esten expresamenteaprobados por la fabricante pueden anular la autorizacion delusuario para operar el equipo.
Declaracion del articulo 15.105Este equipo ha sido evaluado y se ha comprobado quecumple con los limites para un dispositivo digital clase B,conforme el Articulo 15 de las reglas de la FCC. Estoslimites han sido disenados para brindar una proteccionrazonable contra la interferencia danina en una instalacionresidencial. Este equipo genera, utiliza y puede irradiarenergia de radiofrecuencia y, si no se instalay utiliza deacuerdo con las instrucciones, podria causar interferenciadanina para las comunicaciones radiales. Sin embargo, noexiste garantia de que la interferencia no se produzca enuna instalacion en particular. Si este equipo ocasionainterferencias daninas en la recepcion de television (lo cualpuede determinarse encendiendo y apagando el equipo)se recomienda al usuario que intente corregir lainterferencia tomando una o mas de las siguientesmedidas:
v Aumentar la distancia entre el equipo y el receptor.
v Conectar el equipo en una toma de un circuito diferentede aquel al que esta conectado el receptor.
v Consultar con el distribuidor o un técnico de radio/TVexperimentado para obtener ayuda.

Sección 4A: Información de seguridad 103
Información de
seguridad importante
Mantener el uso seguro y elacceso a su teléfono
No dependa de su teléfono para las llamadas deemergenciaLos celulares funcionan utilizando señales de radio. Ello nopuede garantizar la conexión en todas las circunstancias.Por lo tanto, nunca dependa exclusivamente de un celularpara su comunicación esencial (por ej. emergenciasmédicas). Puede que no sea posible realizar llamadas deemergencia en todas las redes de celulares o cuandodeterminados servicios de red y/o funciones de celularestén en uso. Comuníquese con su proveedor local paraobtener información detallada.
Uso de su teléfono mientras manejaHablar por el teléfono mientras maneja (u operar el teléfonosin un dispositivo de manos libres) está prohibido enalgunas jurisdicciones. Las restricciones específicas de lasleyes varían. Recuerde que la seguridad siempre va enprimer lugar.
Seguimiento de los lineamientos de seguridadPara operar su teléfono con seguridad y eficiencia, sigasiempre las disposiciones especiales de un área determinada.
Apague el teléfono en áreas donde esté prohibido su uso ocuando pueda ocasionar interferencias o peligro.
Uso del teléfono cerca de otros dispositivoselectrónicosLa mayoría del equipo electrónico moderno está blindadacontra las señales de radiofrecuencia (RF). No obstante,las señales de RF de los teléfonos inalámbricos puedeafectar a equipo electrónico que tenga un blindajeinadecuado.
En los vehículos automotores, las señales de RF puedenafectar a los sistemas operativos o sistemas deentretenimiento mal instalados o mal blindados. Consulteal fabricante o a uno de sus representantes paradeterminar si estos sistemas están adecuadamenteblindados contra señales de RF externas. Igualmente,compruebe con el fabricante lo referente a cualquierequipo que se haya agregado para su vehículo.
Consulte al fabricante de cualquier dispositivo médicopersonal, como son los marcapasos y audífonos, paradeterminar si están adecuadamente blindados de señalesde RF externas.
Nota: Apague siempre el teléfono cuando esté en instalaciones deatención a la salud y solicite permiso antes de usar el teléfono cercade equipos médicos.

104 Sección 4A: Información de seguridad
Apagar su teléfono antes de volarApague el teléfono antes de abordar cualquier aeronave.Para evitar una posible interferencia con los sistemas delas aeronaves, las regulaciones de la Administraciónfederal de aviación de los EE.UU. (FAA) le exigen quetenga permiso de un miembro de la tripulación para usarsu teléfono cuando la aeronave está en tierra. Para evitarcualquier riesgo de interferencia, las regulaciones de laFCC prohíben el uso del teléfono cuando la aeronave estáen el aire.
Apagar su teléfono en zonas peligrosasPara evitar interferir con operaciones de cargas explosivas,apague el teléfono cuando esté en una zona deexplosiones o en cualquier otra área con letreros queindiquen que los radios de dos vías deben apagarse. Lascuadrillas de construcción usan con frecuencia dispositivosde RF de control remoto para hacer estallar explosivos.
Apague el teléfono siempre que está en una zona quetenga una atmósfera potencialmente explosiva. Aunque espoco frecuente, el teléfono y los accesorios podríangenerar chispas. Las chispas pueden ocasionar unaexplosión o un incendio, causando lesiones corporales oincluso la muerte. Estas áreas están marcadas confrecuencia, pero no siempre. Incluyen:
v Las áreas de abastecimiento de combustible, talescomo las gasolineras.
v Bajo cubierta en embarcaciones.
v Instalaciones de transferencia o almacenamiento decombustibles o sustancias químicas.
v Áreas en las que el aire contenga sustancias químicaso partículas tales como granos, polvo o polvosmetálicos.
v Cualquier otra zona en la normalmente se le indicaríaque apagara el motor de su vehículo.
Nota: Nunca transporte o almacene gases o líquidos inflamables niexplosivos en el compartimiento de su vehículo que contenga suteléfono o sus accesorios.
Restricción del acceso de los niños a su teléfonoSu teléfono no es un juguete. No permita que los niñosjueguen con él, ya que podrían lesionarse a sí mismos y aotros, dañar el teléfono o hacer llamadas que incrementensu recibo.
Sección 4A: Información de seguridad 105
Uso del teléfono con unaudífono
Varios de los teléfonos de han sido probados paraaudífono Compatibilidad. Cuando algunos teléfonosinalámbricos son utilizados con ciertos dispositivos deaudición (incluyendo audifonos y los implantes cocleares),los usuarios pueden detectar un ruido que puede interferircon la eficacia de la audiencia dispositivo. Algunos audifonos son más inmunes que otras a estainjerencia ruido, y los teléfonos también varían en lacantidad de ruido de interferencia que pueden generar.ANSI C63.19 estándar fue desarrollado para proporcionaruna medida normalizada tanto de teléfonos móviles ydispositivos de audición para determinar la utilidad declasificación para ambas categorías. Se han desarrollado para teléfonos móviles para ayudar aaudiencia dispositivo Los usuarios a encontrar teléfonosthatmay ser compatible con su dispositivo. No Todos losteléfonos se han clasificado para la compatibilidad condispositivos de audicion. Teléfonos que se han evaluadocon una etiqueta en la caja. Su Rumor Reflex de LGtiene un M4 y un T4 de estrellas.
Estas puntuaciones no son garantías. Los resultados varíandependiendo del dispositivo del usuario y el tipo depersona y el grado de pérdida auditiva. Si un dispositivode audición es particularmente vulnerable a la interferenciade ruido, incluso un teléfono con una calificación mayortodavía puede causar niveles de ruido inaceptables en eldispositivo de audición. Probar el teléfono con sudispositivo es la mejor manera para evaluar la misma parasus necesidades personales. Valoración-M: Teléfonos valorados M3 o M4 cumplen conlos requisitos de la FCC para Compatibilidad de audífono yes probable que genere interferencia menos que de losdispositivos móviles sin valoración (M4 es la mejor / mayorde las dos puntuaciones.). Valoración-T: Teléfonosvalorados T3 o T4 cumplen con los requisitos de la FCC yes probable que sean más fácil de usar, con un audífonodel dispositivo telefónica ( “T Switch” o “Teléfono Switch”)de los teléfonos sin calificación. (T4 es la mejor / mayor delas dos puntuaciones. Tenga en cuenta que no todos losdispositivos de audiencia han telecoils en ellos.)
Información de
seguridad importante

106 Sección 4A: Información de seguridad
Cuidado de la batería
Protección de su bateríaLos lineamientos abajo indicados le ayudan a obtener elmáximo provecho del rendimiento de su batería.v Use únicamente baterías y cargadores de escritorio
aprobados. Estos cargadores están diseñados paraelevar al máximo la vida de la batería. El uso de otrasbaterías o cargadores anula la garantía y puede causardaños.
Comprar las baterías y los accesorios adecuados es lamejor manera de garantizar que sean genuinos yseguros.
v Para evitar los daños, cambie la batería sólo entemperaturas que estén entre 0º C y 45º C (32º F a113º F).
v No use el cargador de batería bajo la luz directa del solo en áreas de elevada humedad, como sería el baño.
v Nunca se deshaga de la batería mediante incineración.v Mantenga limpios los contactos metálicos de la parte
superior de la batería.v No intente desarmar la batería ni provocarle un corto
circuito.
v La batería puede tener que cargarse si no se le hausado durante un período de tiempo prolongado.
v Es mejor reemplazar la batería cuando ya no tenga undesempeño aceptable. Puede recargarse cientos deveces antes de que sea necesario reemplazarla.
v No almacene la batería en áreas de alta temperaturadurante períodos prolongados de tiempo. Es mejorseguir estas reglas de almacenamiento:
Menos de un mes:-4 F a 140º F (-20º C a 60º C)
Más de un mes:-4 F a 113º F (-20º C a 45º C)
Para desechar sus baterías de iones de litio (Li-Ion)Para desechar sus baterías de LiIon, comuníquese con suabastecedor de servicio.
Para desechar con seguridad sus baterías de Li-Ion,comuníquese con su centro de servicios autorizado máscercano.
Nota especial: Asegúrese de deshacerse correctamentede la batería. En algunos lugares puede estar prohibidodeshacerse de baterías en la basura de las casas onegocios.

Sección 4A: Información de seguridad 107
Energía de Radiofrequencia (RF)
Entender cómo funciona su teléfonoSu teléfono es esencialmente un transmisor y receptor deradio. Cuando se enciende, recibe y transmite señales deradiofrecuencia (RF). Al usar el teléfono, el sistema quemaneja su llamada controla el nivel de potencia. Estaenergía puede ir de 0.006 watts a 0.2 watts en modo digital.
Conocer la seguridad de las frecuencias de radioEl diseño de su teléfono cumple con los estándaresactualizados de la NCRP que se describen a continuación.
En 1991-92, el Instituto de Ingenieros Eléctricos yElectrónicos (IEEE) y el Instituto Nacional Americano deEstándares (ANSI) se unieron para actualizar el estándarANSI de 1982 para los niveles de seguridad respecto de laexposición humana a las señales de RF. Más de 120científicos, ingenieros y físicos de universidades,dependencias de gobierno ocupadas de la salud eindustrias, desarrollaron este estándar actualizado despuésde revisar el cuerpo de investigaciones disponibles. En1993, la La Comisión Federal de Comunicaciones (FCC)adoptó este estándar en una regulación. En agosto de 1996,la FCC adoptó un estándar híbrido que consta del estándarANSI/IEEE existente y las directrices publicadas por el
Consejo Nacional de Protección Radiológica y Metrología(NCRP).
Operación llevándolo en el cuerpoPara mantener el cumplimiento con los lineamientos deexposición a las RF de la FCC, si usa un teléfono en elcuerpo, utilice el estuche de transporte, la funda u otroaccesorio de uso en el cuerpo proporcionados oaprobados. Si no emplea un accesorio en el cuerpo,asegúrese de que la antena esté al menos a 2.0centímetros (7/16 de pulgada) de su cuerpo cuando estétransmitiendo. El uso de accesorios no aprobados puedeviolar las directrices de exposición a la RF de la FCC.
Para obtener más información sobre la exposición a la RF,visite el sitio Web de la FCC en www.fcc.gov.
Tasas de absorción específicas (SpecificAbsorption Rates, SAR) de los teléfonosinalámbricosSAR es un valor que corresponde a la cantidad relativa deenergía de RF absorbida en la cabeza del usuario de unterminal inalámbrico.
El valor SAR de un teléfono es resultado de un amplioproceso de pruebas, mediciones y cálculos. No representacuánta RF emite el teléfono. Todos los modelos de
Información de
seguridad importante
108 Sección 4A: Información de seguridad
teléfonos se prueban a su valor más alto en condicionesestrictas de laboratorio. Pero al estar en funcionamiento, elSAR de un teléfono puede ser sustancialmente menor alnivel del que se informó a la FCC. Esto se debe a variosfactores, que incluyen su proximidad a una antena deestación de base, el diseño del teléfono y otros factores. Loimportante es recordar que cada teléfono cumple conestrictas directrices federales. Las variaciones en los SARno representan una variación en la seguridad.
Todos los teléfonos deben cumplir el estándar federal, queincorpora un margen de seguridad sustancial. Como seindicó arriba, las variaciones en los valores SAR dedistintos modelos de teléfono no representan variacionesen la seguridad. Los valores SAR que estén en el estándarfederal de 1.6 W/Kg. o por debajo, se consideran segurospara ser usados por el público.
Los valores SAR más elevados de los que informa para elRUMOR Reflex son:
Modo Celular CDMA:Part22 Cabeza: 0.54 W/kg; Cuerpo: 0.85 W/kgPart24 Cabeza: 1.15W/kg; Cuerpo: 0.66W/kgPart90 Cabeza: 0.50W/kg; Cuerpo: 0.79W/kg
Emisión de radiofrecuencias de la FCCEste teléfono cumple con los lineamientos de Emisión deradiofrecuencias de la FCC. Número de Id. de la FCC: ZNFLN272.Se puede encontrar más información sobre el SAR delteléfono en el siguiente sitio Web de la FCC:http://www.fcc.gov/oet/fccid.
Registro del propietario
El número de modelo, el número regulatorio y el númerode serie se ubican en una placa dentro delcompartimiento de la batería. Anote el número de serie enel espacio que tiene abajo. Esto será útil si tiene quecomunicarse con nosotros más adelante para hablar de suteléfono.
Modelo: RUMOR Reflex por LG
Núm. de serie.:

Sección 4B: Garantía 109
Garantía del fabricante
En esta sección
l Garantía del fabricante
Su teléfono se ha diseñado para proporcionarle
un servicio confiable y libre de preocupaciones.
Si por cualquier motivo tiene un problema con
su equipo, consulte la garantía del fabricante
en esta sección.
Garantía del fabricante1. LO QUE CUBRE ESTA GARANTÍA:
LG le ofrece una garantía limitada de que la unidad desuscriptor adjunta y sus accesorios incluidos estarán libresde defectos de materiales y mano de obra según lostérminos y condiciones siguientes:
(1) La garantía limitada del producto se prolonga duranteDOCE (12) MESES contado a partir de la fecha deadquisición del producto. El periodo de garantíarestante QUINCE (15) MESES de la unidad que se estareparando o sustituyendo se determinará mediante lapresentación del recibo de ventas original por lacompra de la unidad.
(2) La garantía limitada se extiende sólo al compradororiginal del producto y no es asignable ni transferible aningún otro comprador o usuario final subsecuentes.
(3) Esta garantía sólo es buena para el comprador originaldel producto durante el periodo de garantía siempreque sea en los EE.UU., incluidos Alaska, Hawaii, losterritorios de los EE.UU. y todas las provinciascanadienses.
Garantía

110 Sección 4B: Garantía
(4) La carcasa externa y las partes cosmética estarán libresde defectos al momento de la distribución, y por tantono estarán cubiertas por los términos de esta garantíalimitada.
(5) A solicitud de LG, el consumidor deberá aportarinformación aceptable para probar la fecha de compra.
(6) El cliente se hara cargo del costo de envío del productoal Departamento de servicio al cliente de LG. LG sehará cargo del costo de envío del producto de vuelta alconsumidor después de realizar el servicio según estagarantía limitada.
2. LO QUE NO CUBRE ESTA GARANTÍA:
(1) Defectos o daños al producto por el uso de una formadistinta a la normal acostumbrada.
(2) Defectos o daños al producto por un uso anormal,condiciones anormales, almacenamiento inadecuado,exposición a la humedad o agua, modificaciones noautorizadas, conexiones no autorizadas, reparación noautorizada, mal uso, negligencia, abuso, accidentes,alteraciones, instalación incorrecta o cualquier otro actoque no sea responsabilidad de LG, incluido el dañocausado por la transportación, fusibles fundidos yderrames de alimentos o líquidos.
(3) Rotura o daños a las antenas a menos que hayan sidoocasionadas directamente por defectos en losmateriales o mano de obra.
(4) El consumidor debe notificar al Departamento deservicio al cliente de LG el supuesto defecto odesperfecto del producto durante el periodo de garantíalimitada aplicable para hacer efectiva la garantía.
(5) Productos a los que se haya eliminado el numero deserie, o en los que este sea ilegible.
(6) Esta garantía limitada se otorga en lugar de cualquierotra garantía, explícita o implícita, de hecho o por lodispuesto en las leyes, establecido por ellas oimplicado, incluso, aunque de manera enunciativa y nolimitativa, cualquier garantía implícita de comerciabilidado adecuación para un uso en particular.
(7) Daños resultantes del uso de accesorios no aprobadospor LG.
(8) Todas las superficies de plástico y todas las demaspiezas externas expuestas que se rayen o danendebido al uso normal por parte del cliente.
(9) Productos que hayan sido puestos en funcionamientopor encima de las limitaciones máximas indicadas.

Sección 4B: Garantía 111
(10) Productos utilizados u obtenidos en un programa dearrendamiento.
(11) Consumibles (como seria el caso de los fusibles). Garantía

112 Índice
AAcceder a mensajes detexto/multimedia 84Ajuste de la configuración devolumen del teléfono 39Alertas de mensajes nuevos decorreo de voz 79Apagar el teléfono 17Apagar y encender el teléfono17Aplicaciones de servicios dedatos 89Aspectos básicos 6
BBloqueo del teléfono 50Borrar el contenido del teléfono52
CCalculadora 73Calendario 67
Cambiar el código de bloqueo51Cambiar el estilo de menús delteléfono 42Cambiar el fondo de la pantalla41Cambio del tiempo de luz defondo 41Capacidad de la batería 18Características de su teléfono16Características del servicio 78Carga de la batería 19Cómo empezar 2Composición de mensajes detexto/multimedia 82Configuración de CMAS 45Configuración de la seguridadde su teléfono 50Configuración de la ubicación42Configuración de mensajes 43
Configuración de pantalla 41Configuración de sonido 36Configuración de su correo devoz 3, 78Configuración de tonos de tecla39Configuración del servicio 2contactos 59Contestar llamadas 23Controlar la configuración delteléfono 36Cuidado de la batería 106
DDesbloqueo del teléfono 51Descargar juegos, timbres y más92
Eemoticonos 34Encender el teléfono 17Encontrar Contactos 49

Índice 113
Índice
Encontrar un número deteléfono 28Energía de Radiofrequencia (RF)107Entrada de Texto 49Entrada de texto predictivo 32Escritura a mano 34Estado de conexión eindicadores 90Extracción de la batería 19
GGarantía del fabricante 109Guardar un número de teléfono27
HHacer una llamada tripartita 86Hacer y llamadas 22Hacer y recibir llamadas 22
IIdioma de pantalla 42
Inicio del navegador 90Instalación de la batería 18Introducción iIntroducción de números,símbolos, emoticonos ymensajes pregrabados 34Introducción de texto 31Introducir texto con el tecladoQWERTY 35
KKey Functions 9
LLlamadas en modo de bloqueo51Llamar a números deemergencia 25
MMantener el uso seguro y elacceso a su teléfono 103Marcación Abreviada 48
Marcado de código plus 30Marcado de números deteléfono con pausas 28Marcar desde los contactos 29mensajes 34Modo ABC 32Modo Auto-Contestación 48Modo de Avión 46
NNavegación de la Web 91Navegación por los menús delteléfono 20Navegar la Web 94Notificación de alertas 40Notificación de correo de voz79Notificación de llamada perdida25
OOpciones de configuración delteléfono 47
114 Índice
Opciones de correo de voz 81Opciones de Marcación 23Opciones durante la llamada26
PPantalla Principal 47Para empezar con los serviciosde datos 89Para mostrar su número deteléfono 22Para obtener ayuda 4Precauciones generales 100Preguntas frecuentes acerca elservicio de datos 96
RRecuperación de sus mensajesde correo de voz 79Registro del propietario 108Reloj Mundial 73Responder a una llamada enespera 85
Restablecer a la configuraciónpredeterminada 52
SSeleccionar un modo deintroducción de texto 31Servicio de datos 88Silenciar todos 40símbolos 34Su nombre de usuario 89
TTabla de contenidos bTeclas del menú de correo devoz 81Timbres 36TTY 46
UUso de desvío de llamadas 86Uso de ID de Llamador 85Uso de la batería y cargador desu teléfono 18
Uso de la función de bloqueodel teléfono 50Uso de la mensajería de texto ymultimedia 82Uso de marcación abreviada28Uso de MensajesPreestablecidos 84Uso del cargador 20Uso del correo de voz 78Uso del marcado rápido 29Uso del menú del navegador95Uso del teléfono con unaudífono 105
VVer la pantalla de visualización11Vista frontal de su teléfono 7

MEMO

MEMO

MEMO