Embed Size (px)
Citation preview
�
© 2006 GMT Games, LLC
CAESAR: Conquest of Gaul
RULE- BOOK
GMT Games, LLC • P.O. Box �308, Hanford, CA 93232-�308www.GMTGames.com
�. Introduction ........................................................... 22. Components and Terms ........................................ 23. The Sequence of Play ........................................... 54. Leaders .................................................................. 55. Leader Activation/Orders ...................................... 9
T A B L E O F C O N T E N T SRevised July, 2012
6. Movement ............................................................. �37. Facing and ZOC’s ................................................. �78. Combat .................................................................. �89. Special Combat Units ........................................... 23�0. The Effects of Combat .......................................... 24

2
© 2006 GMT Games, LLC
CAESAR: Conquest of Gaul
1.0 IntroductionCaesar: Conquest of Gaul (C:CoG) allows the GBoH series to simulate virtually all of the major battles (but not sieges; sorry) that the Romans had during Caesar’s subjugation of Gaul.
C:CoG uses most of the same basic rules as Vol. IV in the series, The Great Battles of Julius Caesar. However, the C:CoG rules are shorter, mostly because it was a rather simpler time with smaller armies. The main change is the elimination of Section Commanders (for those of you who have played JC), plus the addition of tribal rules that first showed up in the Dictator and Jugurtha modules. In addition, we also have a “bonus” set of Naval Rules, used by two of the scenarios -the first time these mechanics have appeared.
A General Note for Players not familiar with the GBoH system: C:CoG uses a tactical system which rewards most those who know what their men can do and how to exploit the capabilities of even the worst of them. To calmly blunder into battle with a “let’s see what happens here” theory is to end up assigned as tactical advisor to the Helvetii.
And remember: Watch Your Flanks.
2.0 Components and Terms2.1 The MapsEach battle has its own map sheet, with the exception of the naval scenario. A hexgrid covers each map to regulate movement and combat, and the effects of the different types of terrain on the map are covered in the rules and charts.
2.2 The Playing PiecesThere are three types of playing pieces, or counters: combat units, representing the various types of fighting troops; leaders, the individuals who command the troops; and information markers used to note certain types of information necessary for play.
2.21 Each combat unit is a specific type-and (possibly) class (as illustrated below)-depending on its weaponry, body armor/pro-tection and level of experience. In C:CoG most of the units are the legionary “cohorts” and the tribal infantry (usually “Barbar-ian” or Light.) All combat units are rated numerically for their Size, Troop Quality (TQ), and Movement capability. Units that are capable of firing missiles also have a Missile Indicator, in-dicating the type of missile used (A = arrow, J = javelin and X = battle axe). The Missile Table gives the Ranges over which these missiles may fire.
PLAY NOTE: For ships, see the Naval Scenario booklet.
Each combat unit has two sides. When a unit is flipped to its reverse side, that side indicates that it is Depleted [10.2]. Unlike most other games in the series, the reverse side of a combat unit no longer indicates that the unit has Moved.
2.22 Each unit is of a certain Type, such as CO (cohorts), BI (Barbarian Infantry), LN (lance-armed cavalry), etc. Some types are further subdivided into Class: e.g., all CO (cohorts) are either VET (Veterans) or REC (Recruits). These descriptions are used
to determine the effectiveness of one type/class when fighting another.
2.23 The Legions. This period of history finds the legion com-posed of �0 cohorts of identically-armed men. The old pre-Mar-ian velites had been replaced by even lighter-armed auxiliaries, usually in the form of hired skirmisher elements, such as Cretan archers and Balearic slingers.
We have provided all of the historical legions Caesar used in Gaul. Some of the legions have two incarnations, VET and REC, allowing us to use them at the differing levels of their experience. The scenario rules tell when to use which. Players can tell the general, overall ability/level of a given legion by looking at the “class”/experience level of its cohorts.
Caveat: the value of individual cohorts, based on experience levels, cannot be gleaned from the somewhat non-linear Clash of Swords Chart alone. That table is always read together with the Shock Superiority Chart.
2.24 Examples of Combat Units
2.25 Leaders have a variety of ratings, used to rate their Initiative and Command capabilities [4.1].
DESIGN NOTE: The Tribunes from JC have been replaced by Legates. They serve the same purpose. Historically, Caesar paid little attention to the Tribunes Rome assigned to him; far too many were political hacks with no military experience. He chose to use his hand-picked legates.
2.26 Informational Markers, such as “Shock-Check TQ,” “#’s” (representing Cohesion Points lost), “Routed,” “Wind Direction,” etc., are used to record certain game functions, as discussed below.
2.3 Charts, Tables, and the DieThe use of each chart and table is explained in the rules. The all purpose Master GBoH Shock Superiority and Clash of Swords Charts, which cover all the units in all the pre-gunpowder games to date, is enclosed.
The game uses a �0-sided die; the ‘0’ is treated as a ‘0’ (not a ‘�0’), and is less than ‘�’.
2.4 TerminologyKnowledge of the following game terms will be useful for play.
Activated Leader: the leader who is giving Orders or Com-mands to his troops at any given instant. Only one leader may be active at any one time.
Missile TypeUnit TypeMovement Allowance
Legion & CohortClassSize
Troop Quality (TQ)
Front Back

3
© 2006 GMT Games, LLC
CAESAR: Conquest of Gaul
Class: Subcategory within the Cohort, used to differentiate between levels of training and experience. Cohorts are either Veterans or Recruits.
Cohesion: A unit’s ability to remain in an organized fighting formation. In the game this is measured by Cohesion hits.
Depletion: The loss of manpower that slightly reduces a unit’s overall effectiveness.
Finished Leader: A leader who has previously been activated that turn; is now “Finished,” and (normally) may not be activated again. Leaders may be Finished for other reasons, such as being Wounded, failure to Trump, etc.
Inactive Leader: A leader who has yet to be activated and is still eligible to be activated.
Leader: Leaders were the proconsuls, legates, and chiefs who commanded the troops.
Legion: An administrative and battlefield term for the combining of ten cohorts into the (very loose) equivalent of a brigade, com-manded by a Legate. The word derives from the Latin for “levy.” By the �st Century B.C., legions had become more professional and cohesive. Each legion was nominally commanded by a group of Tribunes, although Caesar ignored the tribunes and used his Legates to disseminate his orders.
Line: All units that are eligible to move under a single “Line Command.” The term “line” does not apply to Cohorts or Legions. It usually consists of non-Roman foot, cavalry, or auxiliaries.
MA: Acronym for a unit’s basic Movement Allowance.
Missile Volley: Friendly units throwing javelins, shooting arrows or slinging stones at enemy units.
Momentum: The mechanic by which a leader can undertake more than one Orders Phase in a turn.
Order or Line/Legion Command: Two of the methods leaders have of getting their troops to move. Orders apply to individual units; LCs to individual Legions or Lines of units. A “Line” Command is the same as a “Legion” command, except that the latter applies only to cohorts; the former is used for cavalry, non-cohort, and barbarian units.
Orders Phase: The period during a turn when a Leader gives Individual Orders, or Legion, Line Commands to his troops to move and fight.
Passed Legate: A Legate whose turn has been skipped so that the Proconsul may activate that Legate (and his legion) in his Orders phase.
Shock Combat: Hand-to-hand, (and, often literally, eyeball-to-eyeball), hack and thrust, slash and crash, melee.
Size: Representing the number of men in that unit. The Size of auxiliaries/skirmishers (‘�’) does not represent numbers (which are usually low, anyway), but rather the fact that that unit is
deployed dispersed (with little formation) so that numbers have no effect on that unit’s strength.
Superiority: The relative capabilities and “killing” effectiveness of the opposing weapons/armor system, augmented by that unit’s training and experience (for cohorts). Superiority, when achieved, will substantially increase an opponent’s losses in cohesion.
TQ: Acronym for the all-important Troop Quality rating. It will be consulted constantly throughout play — at almost any time a unit does something that will endanger its cohesion. The Cohesion hit and TQ Check Chart summarizes when a player uses the TQ Rating.
Trump: The mechanic by which an enemy leader can stop a friendly leader from undergoing an Orders Phase and transfer that phase to that enemy leader. It can also be used by a friendly leader to go before another, but lower-rated, friendly leader.
Type: General, categorical description of combat unit, usually used to determine combat effectiveness and results. Examples: CO (Cohorts), BI (Barbarian Infantry), etc.
Zone of Control (ZOC): The hexes—usually directly to the front of a unit—into which that unit exerts, by its presence, enough “influence” so as to inhibit freedom of movement.
Knowledge of the following types of combat units/terms will be useful for play.
Aquila: The Eagle standards of each Legion. The eagle had been introduced by Gaius Marius as the universal icon for each legion. The metaphysical center of the legion, much like regimental flags in the �8th-�9th centuries, it is used for Rally for the Romans (Plural is Aquilae).
Archer: Light troops, with virtually no armor/protec-tion, that fired about 30+ arrows an effective distance of 150+ yards with a maximum range of 250 yards (less when mounted and moving). The arrows of the day could rarely pierce metal armor but were fairly effective against unarmored sections of the body. Cheap to arm; expen-sive to train. Used as skirmishers (auxiliares). From available evidence, it appears that the Gallic tribes had few archers.
Auxiliaries: All non-cohort Roman troops were grouped under the term “auxiliaries” (in Latin, auxiliares). These included all the skirmishers, most of which were hired from other countries.
Barbarian Cavalry: Cavalry with some (but not a lot of) body armor, light shields and, perhaps, a lance and/or swords. Armed in a manner similar to the Lancers, here they are treated as a separate class due to their bigger horses, unit aggression and over-the-top “feroc-ity,” which, while not pushing them into a “Heavy” category, still enabled them to be superior to most other cavalry of the era.
DESIGN NOTE: It is often rather difficult to determine whether barbarian horse was truly “light” or “barbarian,” as we have designated some. For example, there is much evidence that the
4
© 2006 GMT Games, LLC
CAESAR: Conquest of Gaul
famed German cavalry was truly “light,” and that its feared capabilities arose from its combined arms approach with Light Infantry.
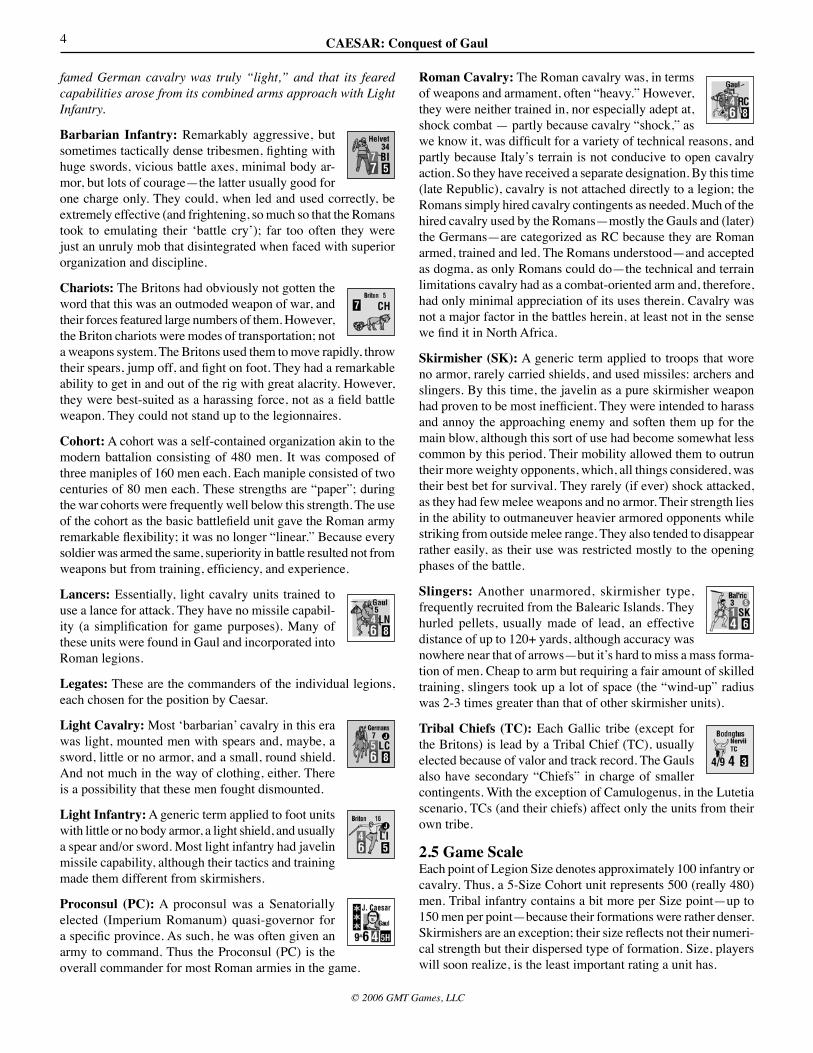
Barbarian Infantry: Remarkably aggressive, but sometimes tactically dense tribesmen, fighting with huge swords, vicious battle axes, minimal body ar-mor, but lots of courage—the latter usually good for one charge only. They could, when led and used correctly, be extremely effective (and frightening, so much so that the Romans took to emulating their ‘battle cry’); far too often they were just an unruly mob that disintegrated when faced with superior organization and discipline.
Chariots: The Britons had obviously not gotten the word that this was an outmoded weapon of war, and their forces featured large numbers of them. However, the Briton chariots were modes of transportation; not a weapons system. The Britons used them to move rapidly, throw their spears, jump off, and fight on foot. They had a remarkable ability to get in and out of the rig with great alacrity. However, they were best-suited as a harassing force, not as a field battle weapon. They could not stand up to the legionnaires.
Cohort: A cohort was a self-contained organization akin to the modern battalion consisting of 480 men. It was composed of three maniples of �60 men each. Each maniple consisted of two centuries of 80 men each. These strengths are “paper”; during the war cohorts were frequently well below this strength. The use of the cohort as the basic battlefield unit gave the Roman army remarkable flexibility; it was no longer “linear.” Because every soldier was armed the same, superiority in battle resulted not from weapons but from training, efficiency, and experience.
Lancers: Essentially, light cavalry units trained to use a lance for attack. They have no missile capabil-ity (a simplification for game purposes). Many of these units were found in Gaul and incorporated into Roman legions.
Legates: These are the commanders of the individual legions, each chosen for the position by Caesar.
Light Cavalry: Most ‘barbarian’ cavalry in this era was light, mounted men with spears and, maybe, a sword, little or no armor, and a small, round shield. And not much in the way of clothing, either. There is a possibility that these men fought dismounted.
Light Infantry: A generic term applied to foot units with little or no body armor, a light shield, and usually a spear and/or sword. Most light infantry had javelin missile capability, although their tactics and training made them different from skirmishers.
Proconsul (PC): A proconsul was a Senatorially elected (Imperium Romanum) quasi-governor for a specific province. As such, he was often given an army to command. Thus the Proconsul (PC) is the overall commander for most Roman armies in the game.
Roman Cavalry: The Roman cavalry was, in terms of weapons and armament, often “heavy.” However, they were neither trained in, nor especially adept at, shock combat — partly because cavalry “shock,” as we know it, was difficult for a variety of technical reasons, and partly because Italy’s terrain is not conducive to open cavalry action. So they have received a separate designation. By this time (late Republic), cavalry is not attached directly to a legion; the Romans simply hired cavalry contingents as needed. Much of the hired cavalry used by the Romans—mostly the Gauls and (later) the Germans—are categorized as RC because they are Roman armed, trained and led. The Romans understood—and accepted as dogma, as only Romans could do—the technical and terrain limitations cavalry had as a combat-oriented arm and, therefore, had only minimal appreciation of its uses therein. Cavalry was not a major factor in the battles herein, at least not in the sense we find it in North Africa.
Skirmisher (SK): A generic term applied to troops that wore no armor, rarely carried shields, and used missiles: archers and slingers. By this time, the javelin as a pure skirmisher weapon had proven to be most inefficient. They were intended to harass and annoy the approaching enemy and soften them up for the main blow, although this sort of use had become somewhat less common by this period. Their mobility allowed them to outrun their more weighty opponents, which, all things considered, was their best bet for survival. They rarely (if ever) shock attacked, as they had few melee weapons and no armor. Their strength lies in the ability to outmaneuver heavier armored opponents while striking from outside melee range. They also tended to disappear rather easily, as their use was restricted mostly to the opening phases of the battle.
Slingers: Another unarmored, skirmisher type, frequently recruited from the Balearic Islands. They hurled pellets, usually made of lead, an effective distance of up to 120+ yards, although accuracy was nowhere near that of arrows—but it’s hard to miss a mass forma-tion of men. Cheap to arm but requiring a fair amount of skilled training, slingers took up a lot of space (the “wind-up” radius was 2-3 times greater than that of other skirmisher units).
Tribal Chiefs (TC): Each Gallic tribe (except for the Britons) is lead by a Tribal Chief (TC), usually elected because of valor and track record. The Gauls also have secondary “Chiefs” in charge of smaller contingents. With the exception of Camulogenus, in the Lutetia scenario, TCs (and their chiefs) affect only the units from their own tribe.
2.5 Game ScaleEach point of Legion Size denotes approximately �00 infantry or cavalry. Thus, a 5-Size Cohort unit represents 500 (really 480) men. Tribal infantry contains a bit more per Size point—up to �50 men per point—because their formations were rather denser. Skirmishers are an exception; their size reflects not their numeri-cal strength but their dispersed type of formation. Size, players will soon realize, is the least important rating a unit has.

5
© 2006 GMT Games, LLC
CAESAR: Conquest of Gaul
Each hex is approximately 75+ paces (yards) from side to side. Each game turn covers about 20 minutes of real time, although gamers should not take that too literally.
HISTORICAL NOTE: Despite the “they fought from dawn to dusk” rhetoric that one finds in so many of the “period” sources, few set-piece battles rarely lasted more than a few hours. Swing-ing a sword on a hot day, wearing armor and carrying a shield, is not a “long-distance” sport.
2.6 Game Length A battle is fought until one side routs, which may happen soon or may take some time. Experience with our convention/tournament GBoH games has shown us that an average battle can take from two to six hours to resolve, and that time frame has less to do with the actual battle than the players’ methodology. Our feeling is that battles with barbarians tended to be short-lived affairs.
2.7 QuestionsSend a self addressed stamped envelope to:
GMT GamesATTN: Caesar: Conquest of Gaul Q’sPO Box �308Hanford CA 93232www.GMTgames.com
You can also reach us at www.Consimworld.com in the various gaming sections.
3.0 The Sequence of PlayPlayers activate each of their leaders in the order determined by their Initiative Rating [5.1]. When a leader is activated he gives orders which allow units within his Range to move and conduct combat. After all leaders are Finished, each player checks for Army Withdrawal after which that game turn is concluded.
The Sequence of PlayA. The Auxiliares Phase. Players may use their Proconsul or Tribal Chief(s) to activate their skirmisher units [5.6].
B. Leader Activation Phase�. The player with the lowest Initiative-rated leader who has not yet been activated, activates that leader.
2. That player may attempt to by-pass that Leader’s turn by Trumping his own leader [5.41].
C. Orders Phase1. Movement and Missile Fire Segment. a. For each Individual Order issued by an activated leader,
the player may perform any one function listed in 5.22 with one combat unit, Aquila, or leader. Or,
b. For each Line Command issued, an entire Line of cavalry and/or non-cohort infantry may Move and/or Fire Missiles. Or,
c. For each Legion Command issued, all in-command cohorts of affected and eligible Legions may Move and/or Fire
Missiles. * Units capable of Orderly Withdrawal [6.5], Line Extension
[6.6] and/or Reaction Fire [8.2] may do so throughout this segment.
2. Shock Combat Segment. After a leader has finished issuing orders or Line/Legion Commands, eligible units [8.3] engage in Shock combat, using the following sequence:
a. Shock Requirement Designation; all non-moving, eligible units that choose to Shock are given “Shock-No Check” markers [7.25-6]
b. The Charge (Pre-Shock TQ Check) c. Resolution of Possible Leader Casualties d. The Clash of Swords (determine Superiority and Shock
column) e. Resolve the Melee f. Check for possible Collapse (Rout) and Cavalry Pursuit
D. Momentum Phase or Return to “B.”The player for the leader who was activated in the immediately preceding Orders Phase may attempt a Momentum dieroll to give that leader another Orders Phase (Phase “C”), or play returns to Phase “B” for any leaders that remain un-activated.
E. Rout and Reload Phase�. Remove “Rallied” and “Legion Activated” markers2. Perform Camp Rally [10.45]3. Rout Movement: Routed units must undergo Rout Move-
ment4. Reload. Eligible missile units may get more missiles [8.15]5. Return “eliminated” leaders [4.63]6. Army Withdrawal Check: Each Player checks to see if his
army has reached its Withdrawal level 7. Flip “Finished” leaders and Aquila back to their front sides.
Remove all “Fired” markers
At the conclusion of the R&R Phase, that game turn is concluded and another turn begins.
There is no set number of turns. The battle continues until one side wins.
4.0 LeadersCombat units may not move or missile fire without getting ei-ther an Order or a Line/Legion Command from a leader. Those combat units that had received such orders during a turn, or that are within range of the activated leader and under the command of that leader, may conduct Shock Combat. Each leader counter has two sides: “Active” and “Finished.” A leader who has not yet been, or is now, activated uses his Active side. A leader that has concluded its activation is flipped to his Finished side.

6
© 2006 GMT Games, LLC
CAESAR: Conquest of Gaul
4.1 Roman Leader CountersEach Roman leader possesses several ratings; most of which appear only on the leader’s active side:
Strategy (Activated Side only): Used to determine if Legates can issue Legion/Line Commands without the presence (i.e., outside the range) of the Proconsul [4.24].
Command Range (Activated Side only): Denotes the leader’s overall presence on the battlefield—as well as the presence of his aides—and the effectiveness of his abilities: the range in hexes over which that leader may exert his Initiative. The range is measured using an unobstructed path of hexes equal to or less than the range, traced between leader and unit. Count the unit’s hex, but not the leader’s. A path is obstructed by hexes occupied by enemy units, an unoccupied hex in an enemy Zone of Control (ZOC), or terrain a leader could not cross or enter. Friendly units negate enemy ZOCs for purposes of tracing order paths. All other paths are considered unobstructed.
Initiative (Activated Side only): Denotes his basic ability to control forces and make rapid decisions — the higher the rating the better the leader. Initiative is used to:• determine the order of leader activation;• determine the likelihood of that leader being able to use Mo-
mentum. • define the number of individual unit ‘orders’ that leader may
issue per Orders Phase.
Elite Commander Status: Only Julius Caesar has this status, and even that is somewhat limited [5.5].
Line/Legion Command (LC) Rating (Activated Side only): The number indicates, if eligible [4.3], the number of Legion/Line commands the leader may issue instead of issuing a series of individual orders to a given number of units. For Legates, this value is ‘�’ and its use is limited to his assigned Legion or cavalry group.
Charisma: Denotes his ability to spur his troops on to greater efforts. The rating is used to adjust the dieroll on the Shock Combat Results Table in his favor for combat units with which he is stacked and Rally combat units.
Heroic Charisma: (Both Sides): Same as Charisma, except it applies to all units stacked with and adjacent to the leader. Moreover, if the leader is in an enemy ZOC the Heroic Range extends to any unit within two hexes. Caesar and Ariovistus are the only leaders with this rating.
Movement Allowance (MA): The MA of a leader is not printed on the counter. Rather, the number of Movement Points a Leader may expend in a single Orders Phase is nine (9) for all leaders.
Personal Combat: There is no rating for Personal Combat (as there has been in previous, pre-Roman volumes in the series) [8.34].
4.2 Roman Command SystemIMPORTANT PLAY NOTE: The Command system in C:CoG is simpler than that used for Caesar (TCW), mostly because Caesar did not use Section Commanders at this time. Caesar commanded the army, and he gave orders directly to his legates (the “tribunes” of Caesar). The few times that there is a “Sec-tion Commander,” it is Titus Labienus, and he’s usually with a separate section of the army. Thus, we have excised many of the rules that appear in Caesar (TCW). However, those rules remain intact for that game; the section before you applies solely to this game.
Each legion is controlled by a Legate. The Legates may each activate their own legions (only). Or they may “Pass” when it is their turn, so that they may be activated by the Proconsul in a much larger grouping.
The Proconsul (PC) also commands the independent (they are not attached to a specific legion) auxiliaries.
4.21 The Roman army is usually led by a Proconsul.• Each legion and each group of cavalry is commanded by its
own Legate. Legates may command either a Legion or cavalry group
• Non-cohort infantry units—auxiliares (here, skirmishers)—have no specific leader. These may receive Orders or Line Commands from the Proconsul only if within his range. In addition, Skirmishers can be moved in the Auxiliares Phase. Legates may not command SK or LI type troops.
4.22 Legates A Legate may command only the legion/cavalry group to which he is assigned at the start of the game. He may not affect any other type of unit (but see the Labienus exception [4.25]).
The Roman Player has �3 Legates. He assigns a Legate to each Legion and each group of cavalry. The choice of who to assign is up to the player, unless there is a specific assignment (usually Labienus).
When activated, in any non-Momentum generated Orders Phase [5.1] a Legate may do one of the following:
1. Issue Individual Orders (invariably only three, as all Legates have an Initiative rating of ‘3’) to single units in his Legion [4.31]. Flip that Legate’s Aquila to its “Legate Activated” side [4.41]
2. Issue a Legion Command to all cohorts in his legion that are within his range. To do this, the Legate must either• [No dieroll necessary] start the phase within his Proconsul’s
Command Range. He may not move to get into Range, or• [Dieroll necessary] If he starts outside his PC’s range, he may
issue an LC only by die rolling equal to or less than his Strategy rating

7
© 2006 GMT Games, LLC
CAESAR: Conquest of Gaul
If a Legate issues a Legion Command under this section, the PC may not issue any type of Order to that legion that turn [4.24]. Flip that Legate’s Aquila to its “Legate Activated” side [4.41].
Exception: For the first turn of a game, a Legate—regardless of his proximity to the Proconsul—may always issue a No-DR LC in his non-Momentum phase.
A Legate who fails his Legion Command die roll may issue Individual Orders.
3. Issue a Line Command to all cavalry units in his assigned cavalry group, no die roll necessary
4. Pass. A Legate that has Passed is still eligible to be used for Legion Commands when so activated by his PC [5.16]. What they cannot do:
• Legates may issue Legion/Line Commands in a Momentum-generated Orders Phase only by dieroll, even if within the PC’s Command Range
• Legates may not Pass in a Momentum-generated Phase • Legates may not be used for Trumping
4.23 Proconsuls
Proconsuls (PC) are the leaders of the Roman Army; here, Caesar. When Activated—and not Restricted [4.24]—in any Phase, even a Momentum-generated Phase, the PC can: �. Leave enemy ZOCs by issuing an Individual Order to him-
self2. Issue Individual Orders to other, friendly leaders (one per
leader per Orders Phase) to move them. If the leader to be moved starts in an enemy ZOC it costs the PC two (2) Orders to move that leader. Note that a PC in an enemy ZOC may not issue an Order to move another leader; he must first leave that ZOC. PC’s are the only leaders that can give Orders to a leader so that the latter may leave an enemy ZOC.
3. Issue Individual Orders to units of any type within range, for any purpose the game allows
4. Issue a Line Command (see 4.35)5. Issue a Legion Command to a number of legions equal to his
Legion Command Capability. A Legion Command is used to activate the Legate of the legion. Therefore, the Legate must be within the Proconsul’s Command Range, and the legion must not have been activated by its Legate earlier in the turn. (And 4.22 [2] applies here, too.)
6. Activate skirmishers in the Auxiliares Phase [5.6]
4.24 If a Legate is used to activate his legion (either by Orders or LC), the Proconsul may not activate that legion when it is his
turn. This will be obvious by having placed the Legate on his “Finished” side.
4.25 Labienus. Throughout the Gallic War, Caesar’s right-hand man / second-in-command was his legate, Titus Quintus Labi-enus. As such, Labienus has capabilities slightly different from the other legates. Regardless to which legion he is assigned, Labienus may “command” any two legions [4.23[5]]. However, he must command the same legions for the entire turn; he may not, say, give an LC to the X and XII, then, gaining Momentum, give a Legion Command to the VII. If issuing two Legion Com-mands in one phase, the cohorts of one may be within his range, for the other, its Legate must be within range (and subject to 4.22[2]). Or he may issue the two Legion Commands through their Legates.
4.3 Roman Leader CapabilitiesWhen activated, and within 4.2, a leader may issue either Individ-ual Orders or Line/Legion Commands. He may not do both.
4.31 A leader may give Individual Orders or Legion/Line Com-mands to any friendly combat units within his Command Range [4.1] within the LC restrictions of 4.33. Command Ranges are calculated at the instant the Order is given. Legates may give Orders only to cohorts in their legions, or to the cavalry group with which they start.
4.32 An Individual Order allows one friendly unit to conduct movement and/or missile volley, be rallied, etc. [5.22]. Without an order a unit may not move voluntarily. In a given Orders Phase, a leader may issue a number of orders equal to his Initia-tive Rating. Once a leader can give no more Orders and cannot be activated again, flip him to his Finished side.
4.33 A leader, instead of issuing Individual Orders, may issue a Legion or Line Command (LC), if he is eligible to do so [4.34 in combination with [4.22]: • Legion Commands are issued to the cohorts of a legion, through
its legate• Line Commands are used for all non-cohort type units
[4.35]
Units issued a Line/Legion Command may Move and/or Fire [5.22].
4.34 Types of Commands: Legion Command: A Legion Command may be issued to all the cohorts in a single legion that are within their Legate’s Command Range, [4.23[5]]. They do not have to be adjacent, in a line, or any other such restriction, as long as they are within that Legate’s range. If a PC issues an LC to more than one legion at the same time, the player has a choice:• The Wave Method: Each legion moves and fights separately,
as if they were being commanded in separate Phases. Each legion completes its actions before the other gets to go.
• The All-for-One Method: All legions move “as one.” Each legion (and the units therein) regardless of its place on the map, finishes each segment and sub-segment of the Orders Phase before any one can continue on to the next segment/sub-seg-

8
© 2006 GMT Games, LLC
CAESAR: Conquest of Gaul
ment.
NOTE: Before any movement takes place, the player must an-nounce which of the two methods he is using. He must then stick with that method for all legions activated in that Orders Phase.
Line Command: A Line Command may be issued to any/all units that comprise any one Line [4.35] by any leader capable of issuing Line Commands to those units. They do not have to be adjacent, in a line, or any other such restriction as long as they are within the Leader’s Command Range.
NOTE: Leaders who wish to issue LCs may not move to place units in range; such range is determined from the start of the Phase. They may move when their units do, though.
4.35 Line Composition: The phrase (and use of) “lines” refers only to non-cohort units. A “Line” consists of either Cavalry or Auxiliares. There is no limit to the number of units in a Line that may be so ordered, and all the eligible units in a Line do not have to take part. However, only units in that one Line-type may be moved; other type units are simply ignored. The only other requirement is that, to be in a Line, the units must be within Command Range of the leader issuing the LC. Units in a Line do not have to stay within range when they move [See 5.6 on activation of Auxiliares].
4.36 A leader may issue a Legion or Line Command to any or all of the units in his command (legion or line) that are within his Command Range and Line of Sight (LOS) at the start of that Orders Phase [8.16, and interpret it liberally in the case of disagreements, and see also 4.2 for further capabilities and restrictions].
4.37 The Proconsul, when activated, may issue Individual Or-ders, a Line Command, or single or multiple Legion Commands, depending on his rating for the latter and range. He may issue commands to legions whose legates are not “Finished,” if the Legate for that legion is within his (PC) range. The Legate, in turn, may activate his cohorts [4.34].
4.38 In order for a leader to move, that leader must issue an In-dividual Order to himself, receive an Individual Order from the Proconsul, or he may move at the same time as a Line/Legion to which he issued a Line/Legion Command [6.14]. A leader, other than the Proconsul, who is in an enemy ZOC may not issue Orders or LCs (either to combat units or to himself, and thus may not move out of that enemy ZOC) unless and until he is moved out of that ZOC by an Order/LC from the Proconsul [5.26].
4.39 Limitations to Command:• Proconsul legion activation restrictions [4.24 and 4.37].• A leader who is “Finished” [5.15] may not issue Orders or LCs.
However, he may move, but only if ordered by a Proconsul to do so.
4.4 Aquilae4.41 Aquilae (the eagle standards of the legions) are not combat units. They have been printed on two sides; the “back side,”
the one that says “Legate Activated,” is used to indicate when a Legate has issued Individual Orders or a Legion Command and thus is not eligible to be activated later on in the turn by the PC [4.22].
4.42 Aquilae are informational markers; they stack freely. However, when stacking they must be stacked with either a cohort from that legion or that legion’s Legate. They may not be stacked with any other friendly unit.
4.43 Aquilae can move by themselves; the only rating they have on the counter is their MA (they never suffer hits). Aquilae may also be “carried” by any of the units in 4.42. There is no penalty or additional movement cost to do so.
4.44 If a unit or a leader that is carrying an Aquila Routs—or, for leaders, moves with a routed unit or uses Orderly Withdrawal [6.5] — there is a chance that the Aquila will not be carried along. Roll a die before moving the routed units in that hex. The Aquila is left behind if:• the dieroll is higher than the combat unit’s printed TQ• there is only a leader in the hex, and the dieroll is higher than
the leader’s Initiative Rating.
4.45 If an Aquila is Captured—which occurs simply by having an enemy unit enter a hex containing an unaccompanied Aquila—the player losing the Aquila is assessed 25 Rout Points. This is doubly disastrous, as Aquilae were not considered when determining the Rout Point totals listed for withdrawal in each scenario. The captured Aquila may be re-captured at which point the Roman earns back �5 Rout Points (not the 25 he lost).
PLAY NOTE: If the Aquila is lost, use the Legion Activated mark-ers in place of the Aquila to indicate that status.
4.46 If a unit or leader routs off the map, or is otherwise elimi-nated, while carrying an Aquila, the player is assessed �0 Rout Points.
4.47 Aquilae are the main Rally and Retreat point for routed cohorts (only) [see 10.44].
4.5 Tribal Command SystemEffective tribal leadership depended upon personal example. Tribal chieftains were expected to be up front, showing their men the way. To do otherwise was to quickly lose one’s politi-cal standing.
DESIGN NOTE: Because of the dearth of information on the names of tribal chiefs, we have decided to “make up” a few names, rather than just say “chief,” etc. This was done much in the spirit of the famous French/Gallic cartoon character, “As-terix.” Our wit and inspiration varied from battle to battle.

9
© 2006 GMT Games, LLC
CAESAR: Conquest of Gaul
4.51 Tribal leaders use a different rating system from the Ro-man leaders.
As you can see, instead of having one Range rating, Boduagnatus, like other Tribal leaders, has two. Also, there is only an Initia-tive Rating; there are no Line Command or Strategy Ratings. Charisma remains the same.
4.52 There are two types of Tribal leaders: Tribal Chiefs (TC), the overall commander for that tribe, and Chiefs, their subordi-nates. There is no restriction as to which Chiefs may command what units, with three exceptions:• They may be either foot or cavalry; no mixing. (There is an
exception for the German cavalry; see the battle rules.)• Units activated by one Chief, may not be activated by another
in that turn. This does not apply to the “in range Shock” rule [7.25[C]].
• Tribal Chiefs command only the units from their Tribe. They may not activate, nor may they affect, units from other tribes.
4.53 Command Ranges: Tribal Leaders have two Command Ranges:• The first number, the shorter one, is the Orders Range—the
range over which they may issue Individual Orders and effect Shock [7.25 [C]]
• The second number is the Line Activation Range—the range a combat unit has to be within in order to be considered part of that leader’s Line
In order to issue a Line command, a Chief must be within two hexes of at least one unit in that line.
4.54 Line Command Capability. The following are in effect when determining what a tribal “line” is:
1. Tribal lines [4.35] may be either infantry (BI and or LI) or cavalry. Not both. However, see the rules for Ariovistus’ Ger-man Cavalry.
2. Chiefs may issue Line Commands under the following cir-cumstances:• If within their Tribal Chief’s Order Range, or on the first turn
of the game, they may automatically use a Line Command in the initial, non-Momentum Phase. No DR is needed to do this.
• In any initial, non-Momentum Phase, if they are not within the TC’s Orders Range, they may automatically use a LC. However, if doing so, they may not attempt Momentum.
Exception: This No-Mo restriction does not apply to the First Turn of the game (only).
• In any other situation—either initial, non-Momentum Phase or a Momentum Phase—they must roll to issue a LC. If the DR is the same as or lower than their Initiative Rating, they may issue a LC. If higher, they may issue only Orders. A die rolled LC always retains the ability to attempt Momentum. A Chief that fails this LC DR may issue Individual Orders.
3. When issuing a Line Command, any units (either infantry or cavalry) that are within that leader’s Line Command Range, are considered part of that Line. • The Leader must be within two hexes of at least one unit in
that line.• Each unit in the line must be adjacent to at least one other unit
from that line (this includes cavalry!).
4.6 Leaders and CombatThis section covers general rules relating to leaders and enemy combat units. For specific rules for leader casualties from Missile Fire and during Shock, see 8.�9 and 8.34.
4.61 Leaders may enter enemy ZOCs only if stacked with a friendly combat unit, or that ZOC already contains a friendly combat unit. Like combat units, leaders, too, must cease move-ment upon entering an enemy ZOC. A leader may leave an enemy ZOC by himself, but only if he receives orders from the PC or TC [4.38].
4.62 The instant any enemy combat unit moves adjacent to a friendly leader by any means, or if an enemy combat unit is adjacent to a friendly leader after Shock combat, that friendly leader, even if Finished, Passed or Restricted, can immediately undertake an Orderly Withdrawal [6.5] of up to three hexes. The leader may withdraw whether he is alone in a hex or stacked with a friendly combat unit. If the leader is not stacked with a combat unit and does not withdraw—or cannot, because he is surrounded by enemy units, enemy ZOC, and/or impassable ter-rain—that leader is eliminated (captured/killed). A leader stacked with a combat unit that uses Orderly Withdrawal may instead withdraw with that unit.
4.63 All leaders, other than a Proconsul or Tribal Chief, may be Replaced when killed. Remove the killed leader from the game. At the end of the turn, return him by stacking him with any unit that he is eligible to command.
4.64 If a Proconsul or Tribal Chief is eliminated he is not re-placed; no other leader takes over.
5.0 Leader ActivationLeaders issue Orders or Legion/Line Commands in the Orders Phase. Leaders may not issue any orders/commands until they are activated. Players may use the Momentum rule to give an activated leader up to two additional Orders Phases. They may also use the Trump Option to activate a Leader sooner than usual. Momentum and Trump ability may be limited by 4.2.
IMPORTANT NOTE: For the sake of brevity, the word “order” will also mean a Legion or Line Command, unless the rule spe-cifically uses the term “Individual Order” to distinguish it from

�0
© 2006 GMT Games, LLC
CAESAR: Conquest of Gaul
a Legion/Line Command.
5.1 How to Activate Leaders5.11 All leaders start the turn Inactive, and each has the opportu-nity to become Activated and issue orders. After they complete issuing orders, they are then Finished. In a rare occurrence [5.33[2]] Finished leaders may be Re-Activated.
5.12 Following the Auxiliares Phase [5.6], the Leader Activation Phase starts with one player activating one of his leaders. Leaders are activated in the order of their Initiative rating, starting with the lowest to highest.
Exception: 1st Turn, Elite Commander [5.5].
In case of ties, roll a die; high roll goes first, with players then alternating among the remaining, similarly-rated leaders. If two leaders on the same side have the same Initiative Rating the owning player decides which one goes first.
5.13 Only Inactive leaders that have not previously been activated in that turn are eligible for activation, with the exception of the Momentum Rule [5.3] and Elite Commanders [5.5].
EXAMPLE OF ORDER OF ACTIVATION [Bibracte]: All Hel-vetian and Roman leaders are available for activation, and it is not the first game-turn [5.5]. Other than the Helvetian TC, all of their leaders are 2’s, so they will all get to go first. Then, when going to the ‘3’ level, we have the Helvetian TC and all Legates (other than Labienus). The Players die roll to see who goes first. If the Roman goes, he is followed by the lone Gaul, then the rest of the Roman Legates. The sequence moves on to Labienus (who is, essentially, stuck in camp), followed by Caesar, a ‘6’. (All of this assumes no Momentum or Trumping.)
5.14 A leader may be activated a maximum of three times in succession in a single game-turn, using Momentum for the last two times (Exceptions: Re-Activation [5.33] and, in reference to the “succession” requirement, Elite Initiative [5.5]).
5.15 A Leader is Finished when one of the following occurs:• The Leader has completed an Orders Phase and does not (or
cannot) make a Momentum attempt; or• The Leader is Trumped by an enemy leader; or • The leader fails a Trump or Momentum attempt; or• A player declines to use that leader when it is his turn (Excep-
tion: Legate Passes [5.17, 4.22] and see also, 5.26)
5.16 When a leader is Finished, flip his counter over to so in-dicate. A Finished leader cannot undertake any further Orders Phases that turn (Re-Activation is an exception, see 5.33)
5.17 Voluntarily “Passed” Legates may be activated by a PC Legion Command [4.28].
5.2 The Orders Phase5.21 Once activated, a leader can give a number of Individual Orders equal to his Initiative rating; or, he can issue Legion/Line Commands [4.2].
EXAMPLE: Thus, when Labienus is activated, he can either
• issue up to four Individual Orders; or • two Legion Commands for that activation [4.25].
5.22 Each Individual Order allows the player to • Move any one unit. Missile units may also fire a missile volley
at any time during their movement; or • Individual Missile Fire with any missile unit; or• Remove two Cohesion Hits [10.14, Roman units only]; or • Attempt to Rally a Routed unit [10.36], or use all his orders
to perform an Aquila Rally [10.44]; or• Change Stacking [6.95]; or• Return Off Map Cavalry by using all his orders (PC, TC, or
any Chief only) [10.55]
Exception: The Proconsul may not use �, 2, or 5 for units in Finished legions.
Each Legion or Line Command allows all the units in one Line/Legion to
1. Move any/all units in that line, including Line Extension [6.67]. Moving units capable of firing missiles may do so; or
2. Any/all units in that line may Missile fire without move-ment. • Leaders may not use a LC for #’s 3-6 in the Individual Orders
section • See 4.34 for multiple Legion Commands.
5.23 Leaders may move under the following conditions:�. An activated leader may issue an Individual Order to himself
and move alone.2. An activated leader may issue an Individual Order to a unit
with which he is stacked and move along with it. The leader must remain with the moving combat unit and end up in the same hex.
3. An activated leader may issue a Legion/Line Command and move along with that legion or Line. He does not have to start or stack with a combat unit.
4. The Proconsul (PC) or Tribal Chief (TC) may issue an Indi-vidual Order to move another leader (which is helpful if that leader is in an enemy ZOC, which requires two such orders). He may use a LC to move another leader only if that leader is stacked with a combat unit in that line.
5. A leader may move with a unit undergoing Orderly Withdrawal [6.5] if he is stacked with that unit [4.62].
6. Legates and (subordinate) Chiefs may not use orders/LCs to move other leaders.
5.24 Although a given combat unit may be ordered to move more than once per game turn, it may not move (and/or Missile Fire) more than once per Order Phase [6.11 and 6.12].
EXAMPLE: If Roman Cavalry unit #1 is ordered to move by P. Licinius, it may not be ordered by Licinius to move again in that Order Phase. It may, however, be so ordered in a subsequent

��
© 2006 GMT Games, LLC
CAESAR: Conquest of Gaul
phase (in the same turn) by Licinius if he gets a second (Mo-mentum) activation.
5.25 Orders/LCs are not used to directly precipitate shock combat, which occurs in a subsequent Segment [5.27 and 8.3]. Individual orders can be used for Missile Fire. Reaction Fire does not require orders; it occurs in response to enemy actions.
5.26 Any leader—other than the Proconsul—who starts an Orders Phase in an enemy ZOC may not issue orders [4.25]. However, his Command Range may still be used to designate units in his “command” to engage in Shock Combat in that segment of the Orders Phase [7.25], so he is not entirely useless. In addition, he may still use his Charisma. Moreover, unless he comes un-der 5.�5, or he has used his Range to allow his combat units to fight (as above), he is not “Finished” simply because he is in an enemy ZOC; just “otherwise occupied.” If, later in the turn, he becomes eligible to issue orders, the player must activate him before any higher-rated leaders. However, leaders so activated “out of order” may not use Momentum. [See 4.38 and 5.23 for moving leaders in an enemy ZOC].
EXAMPLE: Legate Trebonius starts the turn in an enemy ZOC. When it becomes his “turn,” he cannot be activated. However, he is not Finished, so that, when Caesar gets an Orders Phase, he moves Trebonius out of that enemy ZOC. Then, after Caesar is Finished, if Trebonius is still ZOC-free, he gets to go! How-ever, if Trebonius had used his Command Range to have some of his cohorts continue some Shock attacks, he would have been Finished, and not eligible to be activated later.
PLAY NOTE: This means that, if the X Legate is in an enemy ZOC he can still use his range to have any units from the Xth that are within his range Shock attack.
5.27 After a leader has issued all of the orders he wishes (or can), friendly units engage in Shock in the ensuing Shock Segment [introduction to 8.3].
5.28 After Shock combat has been completed that Orders Phase is finished. Two things may now happen:�. The player may attempt to gain a Momentum Orders Phase
[5.3] for the leader who just finished the Orders Phase; or2. The next, eligible leader with the lowest Initiative Rating is
activated (subject to Trumping), returning to Phase “B.”
When all leaders are Finished the players proceed to the Rout and Reload Phase.
5.3 MomentumPLAYER’S NOTE: Momentum (and Trumping, below) are highly useful and powerful gambits, especially for the Player with su-perior leadership. However, there is usually a not insignificant chance of backfiring; when that occurs, Momentum can often provide the opponent with major possibilities.
5.31 At the conclusion of the Orders Phase, if the leader who had issued orders for that Phase �. is not in an enemy Zone of Control, and2. was not previously Trumped [5.44], and 3. was not activated “out of order” [5.26]
the player may attempt to undertake an additional Orders Phase with that same leader. In order to do so, that leader must pass a Momentum die roll.
5.32 The player rolls the die and compares the result to the leader’s Initiative Rating. If it is the same or less than the rating that leader starts another Orders Phase (Phase C); if more than the rating that leader is finished for the turn. Thus, Caesar would need a dieroll of 0-6 to gain Momentum; a 7, 8 or 9 would Finish him. A Legate would have to roll a 0-3 to gain Momentum.
5.33 Dieroll of Doom. If the Momentum die roll is a ‘9’ then the die is immediately rolled again. �. If the second dieroll is a ‘9’ then no further leader activation
may occur this turn, and play goes directly to the Rout and Reload Phase (essentially, the turn is over!)
2. If the second dieroll is a ‘0’ or ‘�’, Re-Activation is possible. Play immediately transfers to the opposing player who may activate any one of his leaders, regardless of whether they are Finished or not! Such a Re-Activated leader may not use Momentum himself.
3. If the second dieroll is a ‘2-8’ the leader attempting Momentum is Finished. Go Back to Phase “B.”
5.34 Momentum dierolls apply only to a leader who has just completed an Orders Phase. You may not apply Momentum to a leader who Finished several phases ago or who was Reactivated [5.33[2]]. However, a leader first activated by the Elite rule [5.5], then activated again later in the turn may still roll for one additional Momentum.
5.4 The Trump OptionDESIGN NOTE: This is a game mechanic that is intended to simulate the effect of superiority in the area of command. As such, it is likely to be used almost exclusively by the player with palpably better leaders (such as Caesar). The “inferior” player will often find that, for him, its best application is when it back-fires on his supposedly better opponent. To that extent, players should be aware that, simply because this option is available doesn’t mean it should be used indiscriminately.
Prior to each leader’s activation, both players are given one op-tion to trump that leader’s activation.
5.41 Active Player Trump Option. The player whose turn it nor-mally would be to activate his lowest-rated leaders may, instead, attempt to activate any other, inactive leader with a higher Initia-tive rating. To do this the player must roll the latter’s Initiative rating or less on the die. If successful that leader is now activated; if unsuccessful, the originally designated leader is activated and

�2
© 2006 GMT Games, LLC
CAESAR: Conquest of Gaul
the one who is attempting the Trump is Finished.
EXAMPLE: The Roman player, instead of activating Legate Ju-nius, could attempt to activate Caesar by Trumping. If he rolled a 0-6 he would be successful; a 7-9 and the Trump attempt fails; Junius is activated and Caesar is Finished.
5.42 Inactive Player Trump Options. The opposing player has two Trump options, each usable under different circumstances.
1. Trumping the Trump: If the Active player is successful with his trump [5.41] the opposing player then has the option of attempting to trump that first trump activation with his own leader if that leader has an equal or higher Initiative rating. If successful this leader is immediately activated; if unsuccessful the initial trump-activated leader goes and the leader attempting the trump is Finished.
EXAMPLE: The Sabis. The Nervii start the turn by Trumping to activate Boduagnatus (4), bypassing the Nervii subordinate chief. The Caesarian Player now attempts to trump-the-trump by rolling for Labienus (4). However, he rolls a ‘7’, so Boduagnatus remains the activated leader and Labienus is Finished for the turn.
2. Momentum Trump: If the active player is successful attempt-ing a Momentum die roll, the opposing player may attempt to trump in the same fashion as #�, above.
EXAMPLE: The Nervii player is successful in having Boduag-natus undergo a second Orders Phase (Momentum). The Roman Player attempts to trump Boduagnatus’ Momentum Phase with Caesar. He rolls a ‘6’ and, instead of Boduagnatus going, it is now Caesar’s Orders Phase, and Boduagnatus is Finished.
After the successfully Trumping leader has finished his set of Orders/LCs, play reverts back to the standard, lowest-available-leader-goes procedure, except that previously by-passed leaders may not use Momentum that turn [5.44].
5.43 Each side is allowed only one Trump attempt per activa-tion.
5.44 A leader who fails a Trump Attempt or has been trumped when trying for Momentum is Finished. An inactive leader who has not yet been activated and who has been “skipped” by a successful trump, and has an Initiative that is the same as or lower than the Trumping leader, is still eligible for activation (he’ll probably still be next in line as the lowest-rated leader). However, the “Bypassed Leader” may not use Momentum that turn. Use the “Trumped / No Momentum” markers to indicate this. There are, thus, two basic premises:• A Trumped Leader is Finished• A Bypassed Leader is still eligible to “go,” but he may not use
Momentum.
PLAY NOTE: The No-Momentum restriction means that if Boduagnatus attempted to gain Momentum, did so, but was then Trumped by Caesar, not only would Boduagnatus be Finished, but all remaining Caesarian and Gallic leaders who had yet to go would get only one Phase (after Caesar completed his turns. They could not attempt Momentum! This is an important con-
sideration when formulating “game” tactics.
5.45 A leader may be activated only once per game-turn, although that activation may be extended by Momentum. Finished leaders may not be activated again that turn, except by Re-activation [5.33[2]].
5.46 A leader that successfully trumps cannot pass. He must issue an order to a unit to move or fight, or he must use his Command Range to have units Shock attack. A unit is considered to have moved for the purpose of this rule if it ends the phase in a hex different from the one in which it started.
5.47 A leader that is in an enemy ZOC may attempt to Trump. However, if successful, he must obey 5.46 and 5.26, otherwise the trumping action is considered to have never occurred.
5.5 Caesar as Elite CommanderDESIGN NOTE: Carpe Diem. Caesar had an exceptional abil-ity to take advantage of late-breaking situations, to “seize the day.” This rule simulates the marked superiority of Caesar to “get going” before the opposition. Caesar is the only “elite” commander in the game.
5.51 Caesar has the option to start the first turn, plus any one other Turn during the game, with a single Elite Initiative Orders Phase, after the Auxiliares Phase. This EI Orders Phase may be undertaken by Caesar or by any one subordinate leader, regardless of Initiative Rating. Caesar may not use Momentum to continue this EI Phase. After that Phase is completed, the elite leader reverts to inactive (but not Finished) status. He has undergone only one Orders Phase for purposes of 5.�4 and may be activated again, using normal activation rules.
5.52 Leaders that have been used in the Elite Phase are not Fin-ished. However, Caesar’s activating a Legate as part of a multi-legion activation, in the Elite Phase, does render the Legate(s) from activating their own Legion later on.EXAMPLE: [First Turn] Caesar, as Elite Commander, designates Legate Trebonius, and the IX Legion, to take the Elite Phase. At the conclusion of that phase, the turn reverts back to the other Legates, including Trebonius When it comes back to Trebonius, he is still eligible to issue orders/LCs , as Caesar did not use his LC capability to activate the X; he used his Elite Capability, and this is not a Momentum-generated Phase!
5.6 The Auxiliares Phase5.61 At the beginning of each turn, before any leaders are acti-vated, there is an Auxiliares Phase. This phase may (not must) be used by the players for activating Skirmishers (SK) only.
5.62 The player with the highest-rated PC (vs. TC) goes first in the Auxiliares Phase. If there is a tie, Elite Commander goes first. Otherwise, dieroll decides.PLAY NOTE: This rule is written “generically,” for “posterity;” obviously, Caesar will have the opportunity to go first in every Auxiliares Phase, based on the above.

�3
© 2006 GMT Games, LLC
CAESAR: Conquest of Gaul
5.63 In the Auxiliares Phase, a player may issue Individual Orders to each and every Skirmisher on the map, regardless of its location.
DESIGN NOTE: Skirmishers rarely had “leaders”; they were fairly independent. However, they did not just run around, willy-nilly. They usually relied on a series of specific trumpet commands, which is what this phase represents.
5.64 There is no Trumping or Momentum in the Auxiliares Phase. Any SK unit activated in this phase may be used again in that turn-in a later phase-but requires a standard Individual Order. It may not be issued a Line Command.
5.65 A player does not have to use an Auxiliares Phase. However, if he does activate SKs in this Phase, his Proconsul/Tribal Chief is considered to have “gone” once, in terms of 5.�4. A PC that has been used to conduct an Auxiliares Phase for his skirmishers can be activated only twice more that turn. However, use of the Auxiliares Phase does not affect Elite Commander capability, nor does it affect ability to Trump or use Momentum later on.
EXAMPLE: [Game-Turn 1] Caesar starts the game by using his Auxiliares Phase to move and fire with all his skirmishers. After they go, Caesar uses his Elite Commander status to issue whatever commands he wishes. When, later in the turn, it is Caesar’s turn to be activated, he has only one activation left; he has already used two of his three possibilities. Even so, it is still a non-Momentum generated activation, and he is free to do whatever he likes.
6.0 Movement6.1 Movement AllowancesDESIGN NOTE: Movement Allowances simulate not only the time it takes a unit to move from point ‘a’ to point ‘b’, but also its maneuverability relative to other, different-type units as well as the tactical doctrines applied to deploying those units.
6.11 A combat unit’s printed Movement Allowance is the basic allowance for a single order. A combat unit receiving an order may move up to its printed MA. Units may always move less than the printed MA.
6.12 The only limit to the number of times a combat unit may move in a single turn is the number of Orders Phases its leader can attain. However, it may move only once per Orders Phase, and, if it’s Legate is “Finished” it may not be activated by any other leader.
6.13 If a combat unit moves again in the game turn, it earns a Cohesion Hit [10.1]. This hit penalty does not apply to advances after combat or units using Orderly Withdrawal [6.52] (compare this, though, to the “terrain-mandated” hits in 8.4.), nor does firing without movement incur a Hit.
PLAY NOTES: We have provided some “Moved” markers to help remember who has/hasn’t moved. Firing without movement is not movement for this section.
6.14 Skirmisher units do not incur Hits for moving more than once per game turn.
6.15 Activated Leaders may move any number of times in a turn or Orders Phase, but they may not exceed their allotted MA of 9 per Phase. Leaders move using cavalry costs. Leaders have no facing.
6.2 Natural TerrainThere is always a cost in Movement Points to enter/cross each type of terrain. In addition, there may be a possible Cohesion Hit penalty to do so, depending on the unit and/or terrain type.
6.21 A unit expends Movement Points for each hex it enters, or hexside crossed [6.28]. There is also an extra MP cost to move into a hex of higher elevation. Thus a Cohort at Bibracte in hex 35�6 would expend 5 MPs to move into 38�5 (� MP for each Clear hex, � MP for each elevation change).
6.22 Movement also tended to disrupt the formations of units that relied on such for some of its fighting capability, although this was not as pronounced as in past eras. Some units (determined by Type and Class; see 6.28) incur Cohesion Hits [10.11] for entering or crossing certain types of terrain. Hits for changing elevation are applied using the same premise as in 6.2�. However, this applies only when moving up and/or down more than one different level per Phase. Moreover, units that are In Column [6.4] usually do better in avoiding Cohesion Hits from movement than units in battle lines. All cohesion penalties for movement (including advances after combat) and facing changes are applied the instant they occur.
EXAMPLE: [Britannia] A Cohort in hex 2225 would earn one Cohesion Hit when moving to 1924 for moving “up” more than one elevation change in a single phase.
PLAY NOTE: Remember to differentiate between the cost in Movement Points to enter a hex and the effect such movement has on Cohesion.
6.23 The following units do not incur the terrain induced Cohe-sion Hits noted on the Movement Costs chart: • Leaders• Skirmishers• Barbarian foot (BI and LI)• Artillery
DESIGN NOTE: The above are units that do not use “forma-tions,” and any terrain will, therefore, not disrupt their formation, as it may for legions.
6.24 A hex containing two types of terrain uses the “majority” terrain. Coastal hexes in Britannia are land hexes for land units, as long as they contain some “land,” and sea hexes for ships.
6.25 Certain hexes/hexsides are impassable: no unit may enter or cross such a hex. For example, chariots may not enter Coastal hexes.
6.26 A moving unit must have enough MPs to pay the terrain cost of entering a hex; if it doesn’t, it cannot enter that hex. Units also

�4
© 2006 GMT Games, LLC
CAESAR: Conquest of Gaul
may have to pay movement point costs to change facing [7.1].
6.27 Elevation, rivers, woods and marsh may also affect shock combat results by adjusting the column under which the play-ers roll to determine losses, as per the Shock Combat Results Table.
6.28 The Movement Cost Chart. This chart gives the Movement and Cohesion costs for each type of unit moving (or changing facing in) into/across a specific type of terrain. Units In Column do not pay any Cohesion costs unless that row has a “COL” indicator.
PLAY NOTE: Cohesion Hits listed in “COL” rows apply to all units.
6.3 Movement Restrictions6.3� As a unit moves it traces a path of contiguous hexes through the hex grid, paying the cost of each hex entered. One unit’s movement must be completed before another can begin.
Exception: See 6.6�; these units may move together, although they do require two Individual Orders if moving by Orders, un-less stacked with a PC [6.96]. [See, also, 9.41.]
6.32 A unit may be moved in any direction or combination of di-rections. However, a unit may only enter a hex which is to its front [7.11]. In order for a unit to change direction to its flank it must first change facing [7.1] by pivoting in the hex it occupies.
6.4 Column MovementDESIGN NOTE: On the battlefield, formed Infantry (which here means COs) moved in a battle formation that would, in later centuries, be called “Line.” They were capable, however, of using much looser, more mobile formation (in modern terms, “Column”) for more rapid movement. In addition, because the units were not in an extended line that constantly needed dressing to be effective, the effects of movement upon a unit’s “cohesion” were not as drastic.
6.41 On being given a move order, any CO unit that is not in an enemy ZOC or Routed may change to (or from) “Column” at the conclusion of its Movement. It costs � MP to change formation, either in or out of Column, so the unit must have at least � MP remaining to do so. In order for a unit to use Column Movement it must start the Orders Phase in Column. Use the “In Column” markers to indicate this status.
6.42 Units In Column increase their MA by one (usually from ‘5’ to ‘6’). In addition, the only Cohesion costs a unit In Column pays are the ones marked with a “COL” on the Terrain Chart.
EXAMPLE: units In Column pay the Cohesion cost for moving through woods, but they do not pay such for crossing a Stream.
6.43 Units in Column must face the hexside (not the vertex) and only the hex directly in front of them is frontal. The change in facing is effected when the change to (or from) Column status is announced. When changing formation from column to normal, the unit is always faced to the vertex on either side of the hexside (and vice versa). There is no cost to do so.
6.44 Column units move into either their frontal hex or the flank hexes adjacent to the frontal hex. There is no cost in MPs to change facing to move into a frontal-flank hex; there is to move into any other hex.
6.45 Units In Column have their TQ ratings temporarily reduced by two (–2). Units in column may not Shock attack or Missile fire. They may move under orders and they may have Hits removed through Recovery. If Shock attacked by an enemy unit (other than Skirmishers), the attacking unit is automatically Attack Superior, regardless of Position or Weapon system. All flank/rear combat penalties apply.
6.46 If an In Column unit is shock attacked, at the conclusion of that Orders Phase the unit automatically goes back to its combat formation at the cost of one (�) additional Cohesion Hit, even if that hit were to cause it to Rout!
6.47 In Column units cannot use Orderly Withdrawal or Reaction Facing Change. They cannot move through a friendly combat unit, nor may a friendly combat unit voluntarily move through an In Column unit. Routed units may move through In Column units – all stacking penalties apply
6.48 Only Cohorts may use Column.
6.5 Orderly WithdrawalOrderly Withdrawal is a form of retreat carried out during the Movement Segment, in the face of an approaching enemy, in which lighter, but faster and more maneuverable units can avoid getting crushed (See 4.62 for OW rules for Leaders).
BI may not use OW.
6.51 During an enemy Movement Segment, any friendly (un-routed) combat unit that is not in an enemy ZOC may avoid contact with an enemy unit the instant it moves within two hexes—or starts Movement two hexes away—of the friendly, “defending” unit, as long as the defending unit has an equal or higher movement allowance than the attacking combat unit.
To do this, the friendly, defending unit Withdraws up to a number of Movement Points (not hexes) equal to the difference between movement allowances—or � MP, whichever is greater—away from the advancing unit. Withdrawal must occur the instant the enemy unit moves into two hex range (stop moving the friendly unit temporarily), or the option is lost [6.57].
PLAY NOTE: Yes, it says within two hexes, so any (eligible) friendly unit can Withdraw if an enemy moves within two hexes, even if that unit doesn’t actually move in his direction. Thus the friendly player must make his decision to withdraw before the moving enemy makes his full intentions clear!

�5
© 2006 GMT Games, LLC
CAESAR: Conquest of Gaul
6.52 The withdrawing unit maintains its original facing through-out withdrawal at no facing change cost in movement points or cohesion hits. It does, however, pay any of the usual cohesion penalties for movement. At the completion of withdrawal, if it wishes to change facing it pays any Cohesion penalties inher-ent in such change. There are two (possible) additional penalty situations:�. Withdrawing foot units (but not skirmishers or cavalry) un-
dergo an immediate TQ check. If the dieroll is higher than the TQ the unit suffers � Cohesion Hit; and
2. If the Withdrawing unit was being approached from a rear or flank hex (i.e., the hex into which the enemy, moving unit intended to move) it suffers a � Cohesion Hit before withdraw-ing. This is cumulative with #�, and applies to all units.
PLAY NOTE: Orderly Withdrawal is a “retreat” in the face of an approaching enemy, long before that enemy can close. This is why the withdrawing unit can return to the original facing (with minimum cohesion cost) it had before the enemy approached. In play/game terms, you simply move the counter backwards.
6.53 If a Withdrawing unit reaches its TQ Rating in Cohesion hits it Routs [10.3].
6.54 A unit may withdraw an unlimited number of times during a game turn, but the 6.52 penalties apply to each, individual withdrawal. No movement points are expended and no orders are needed for combat units.
6.55 A unit may not withdraw into an enemy ZOC, woods, marsh, or river hex. Only Romans may withdraw into their camp (but only through a gate). No unit may withdraw into any hex into which movement would be prohibited. A withdrawing missile unit may not fire as it withdraws. Stacking restrictions [6.9] ap-ply during withdrawal.
CLARIFICATION: As noted in 6.51, the approaching unit does not actually enter the Withdrawing unit’s ZOC; the latter has moved before that can occur. This means that, if the approaching unit is capable of Missile Fire while moving, such fire must take place at a range of ‘2’ or greater.
6.56 Orderly Withdrawal takes place during the opposing player’s Movement; a unit may not Withdraw in the Shock Combat seg-ment. The attacking/moving unit may continue to complete its movement in the face of such withdrawal.
6.6 Line ExtensionThe “manipular” legion was developed by Rome starting some-where around the 3rd century BC. It allowed the Roman strengths of training and discipline to be translated into a tactical flexibility that often proved superior, even when her generals were not. The further development of the “Marian” cohort legion enhanced this flexibility.
This rule applies only to the legionary cohorts. It should be read in conjunction with the special Roman stacking abilities in 6.9.
6.61 Stacked cohorts from the same legion with intervals (i.e., unoccupied flank hexes) have an added capability: Line Exten-
sion. This may either be done:
1. as a reaction to enemy movement. The instant an enemy com-bat unit comes within two hexes of a stack of two cohorts, that stack and the rest of the legion may use Line Extension; Or
2. as a Legion Command. It may not be done by Individual Orders.
6.62 In effecting Line Extension, all the top units in the stacks in the same “Line” [4.23] may move sideways into the vacant flank hexes, as per the diagram, below. The player may make his choice at any time any enemy unit so places itself; that is, he does not have to exercise his Line Extension ability the first time it becomes available. See, however, the ZOC restriction, below.
6.63 The hex into which a unit is extended must be Clear; a hex which costs 1 MP to enter with no Cohesion penalties. If a flank hex is occupied, or it is in an enemy ZOC, Line Extension may not be used to place a unit in that hex. Facing remains the same.
6.64 Line Extension may be combined with Orderly Withdrawal by non-cohort units; both may be undertaken together. Cohorts may not do both. Moreover, once a cohort undertakes Line Extension, none of the cohorts in that legion may use Orderly Withdrawal in that Orders Phase.
EXAMPLE: a Skirmisher unit sitting between two cohort stacks may Withdraw through the gaps in a Cohort line upon approach of, say, an enemy BI and, as soon as that unit is through the gap, the Cohort line may undergo Line Extension.
6.65 When undergoing Line Extension as a Legion Command, it costs each cohort � MP to Extend. Line Extension does not earn any Cohesion Hits. However, this applies only to “un”-stacking the units; it does not apply to stacking them together, which is done using normal movement and stacking rules.
6.66 Cohorts in Column may not use Line Extension
6.7 Camps and LagersThree battles have both Roman camps and Gallic lagers on them. They both served the same idea, a sanctuary of safety and retreat.
DESIGN NOTE: We have greatly simplified these rules, because none of these battles had anything to do with siege warfare. The Gauls had little, if any, expertise in that area.
6.71 Fortifications include the following items of terrain:

�6
© 2006 GMT Games, LLC
CAESAR: Conquest of Gaul
• Walls: What usually surrounded the “Camps” the Romans always built. They were (usually) packed, dirt walls “lined” with wooden palisades, in front of which was a deep ditch. Units may not cross a wall hex.
• Towers: Built at various intervals along ramparts and walls to act as strong points, redoubts, etc. Higher than the walls they supported and used for missile-throwing troops and Catapults. In camps, the towers were usually built to guard the entrances. Gallic units may not cross Tower hexsides. Roman foot units may, but only from inside the camp.
• Gates: Obviously, how one got in and out of a camp, fort, etc. However, they were not really doors; they were more barriers, often consisting of several oblique turns to make defense easier, to which the Romans also added an item called the “hedge-hog,” a series of spikes which made passing or removing the barrier/gate from the outside a bit touchy. Any unit may pass through a gate hexside.
• Wagon Trains: The Gallic lager was formed of a circle of wagons from their train. Only Gallic units may move across a Wagon Train hexside.
6.72 Units may not move, retreat, rout, or withdraw across a fortified hexside
Exceptions:• Romans may do so through a Gates hexside• Gauls may do so across Wagon Trains hexsides
Moreover, if a unit does not have the necessary MPs to cross a given fortified hexside, even if such hexside is directly adjacent, it may not do so.
6.73 Zones of Control [7.2] do not extend across/through forti-fication hexsides of any type.
6.74 There is no Shock combat across fortification hexsides, even Gates. Missile Fire is allowed only by Gauls inside their lager and Roman units in Towers (at a level higher than the hex it is actually in).
6.75 Once inside a camp or lager, a unit may not be moved until/unless Rallied [10.45]. You can shift them around to keep things looking clean and crisp, if you want.
Exception #1: A missile unit in a camp may, in the Auxiliares Phase, be placed in a Tower hex.
Exception #2: Units that start the game inside a camp (Bibracte only) may move outside. See that battle for details.
6.8 Barbarian ImpetuosityAt the start of a battle, the Gauls usually worked themselves into a fevered pitch, which translated into an all-out charge. To reflect this, at the start of a game, all Gallic infantry:• Have their Movement Allowance increase by one (+1)• Subtract one (–1) from all first-try Momentum dierolls
This lasts for all units in a tribe until at least two infantry units of that tribe enter a Roman ZOC, at which point Impetuosity continues for the rest of the turn. It does not exist the following turn.
Important: This rule does not apply to the Germans or Britons, who did not fight in the same fashion as the Gauls.
6.9 StackingStacking refers to having more than one unit in a hex at any one time, whether during movement or at the completion of move-ment. There are two principles involved when considering Stack-ing rules: Voluntary Movement, which usually means combat units moving under orders or Orderly Withdrawal; and Manda-tory Movement, virtually all of which is rout movement.
6.91 The Basic rule is: one combat unit per hex. Leaders, artillery, and informational markers do not count for stacking purposes. A hex may contain any number of leaders/markers. There are three exceptions to this basic rule: • Major Exception: The cohorts of the legions, which have the
capability to stack two to a hex. Cohorts from the same legion are far more efficient at this than those from different legions. Two cohorts in a hex are treated as a “single” unit in terms of another (third) unit entering that hex.
• Skirmisher units, trained in avoidance and dispersal tactics, have certain advantages over other units in this area, specifi-cally in terms of moving into/through other units
• See the Rhine scenario for special rules on German cavalry
6.92 A unit may never move into or through a hex containing an enemy combat unit.
6.93 The restrictions, allowances and Cohesion Hit penalties for stacking are all given on the two Stacking Charts. The actual chart used depend on the type of movement—voluntary or mandatory (see above)—being undertaken by the moving unit. The follow-ing premises and terms are used:
Basic: All units other than Skirmisher and Cohorts.
Stacked Cohorts: If either the moving or stationary unit is a stack of two cohorts, the “Basic” line is used.
PLAY NOTE: If you are reading the rules for the first time, we strongly suggest you take a look at this important chart. [See also, 6.6.]
6.94 It takes two Individual Orders to move two units stacked in the same hex. For leaders, this will have to be done in separate Orders Phases, because one leader cannot order another to move, unless he is the Proconsul or the Tribal Chief.
Exceptions: • a single Order from the Proconsul may move every unit stacked
in a hex with the PC [5.22] • 5.23 [2] • German Cavalry Exception (in battle rules)

�7
© 2006 GMT Games, LLC
CAESAR: Conquest of Gaul
6.95 If two units are stacked in the same hex, the stacking order—which’s on top—may be changed/switched only by an Individual Order; it may not be part of movement or a Legion Command. If the player desires to move only one unit from a stack, only the top unit may move. A unit moving into a hex to stack is always placed on the bottom.
6.96 Combat units may enter a hex containing only a leader—and vice versa—at no movement or cohesion cost. A combat unit stacked with a Leader may withdraw [6.5] together, or the leader may withdraw [4.62] and the combat unit remains. If they withdraw together, they may withdraw to separate hexes or the same hex.
6.97 Both combat units stacked in a hex must have the same fac-ing. If one unit has to change facing to do this, it must (and pay Cohesion costs to do so). This does not apply to a unit passing through an occupied hex.
6.98 Stacking has the following effects on combat:• Stacked units combine Size when using Shock• Only the top unit in a Stack may Fire• Enemy Fire affects only the top unit in the stack, unless the
fire is through the Rear hexsides, in which case it affects only the bottom unit
• For all TQ dierolls for Stacked units, add one (+1). This does not apply to stacked cohorts from the same legion.
• If �0.�2 does not take precedence, Shock hits are distributed equally, with the “odd” hit going to the top unit. If attack is from the rear, the “odd” hit goes to the bottom unit.
• If the top unit Routs, so does the bottom unit. If the bottom unit routs, the top unit undergoes a Pre-Shock TQ Check (see 8.33).
6.99 The Stacking Charts. The Chart lists what type of unit is moving. However, the effects apply to both moving and station-ary units, unless otherwise specified.
7.0 Facing and ZOCs7.1 Facing7.11 All units must be faced in a hex so that the top of the unit (the side with its name) faces into the vertex of the hex (between two hexsides, as below). All units in a hex must be faced the same way. The two hexes to the front are called the Frontal Hexes; those to the side, the Flanks, and those behind, the Rear. A unit may move only into a hex to its Front. [Exception: 6.44]
7.12 In order for a unit to change its facing it must pivot within its hex. All units pay a cost of � MP to change facing in any direction, regardless of the number of vertices shifted.
Exceptions:• Skirmishers change facing at no movement point cost• All Cavalry and Barbarian Infantry pay a cost of � MP for each
vertex shifted • In Column units shifting to move into frontal-flank hexes
[6.44]
7.13 A unit may not change facing while entering, or while in, an enemy ZOC. Exception: Units advancing after combat [8.42] may change facing one vertex [and see 8.6].
7.14 Certain units that change facing (see the 6.28) within a Rough terrain hex suffer a � Cohesion Hit for each vertex for which they do so. “Rough” terrain includes Woods and Marsh.
7.15 Reaction Facing Change. Any unit may change facing one vertex per Phase when an enemy unit moves adjacent to it (and this includes Advances after Combat). It may not do so if it is already in the ZOC of another enemy unit. If the reacting unit is infantry, the player rolls one die after changing facing. If the DR is higher than the unit’s TQ Rating, apply the differ-ence as Cohesion Hits to the reacting unit. There is no die roll for cavalry units.
7.2 Zones of Control (ZOC) and Shock Requirements7.21 All non-SK combat units exert a Zone of Control into both their Front hexes-even those units that are out of missiles. Skir-mishers exert a ZOC into their Front and Flank hexes. However, if they are “Missile No”, SK do not exert any ZOC. Routed units and leaders do not exert ZOCs.
7.22 ZOCs do not extend into a hex into which movement is prohibited. In addition, they do not extend across fortification hexsides.
7.23 A unit must cease movement the instant it enters an enemy ZOC. A unit that begins movement in an enemy ZOC can move out of the enemy ZOC only if:�. It is the Proconsul issuing an Order to himself2. It is a leader issued two Orders or a Line/Legion Command
by his PC or TC3. It is a combat unit that can receive an order to move, has at
least one unoccupied frontal hex, and its printed MA is greater than that of any enemy unit exerting a ZOC on it
A unit leaving an enemy ZOC may immediately enter another enemy ZOC, but it would then cease move-ment for the remainder of that Orders Phase. Units leaving a Missile unit’s ZOC are subject to Retire Reaction Fire [8.21].
7.24 If opposing units extend a ZOC into the same hex they are both considered to “control” that hex.
7.25 Some units must Shock Attack, while others may choose to:

�8
© 2006 GMT Games, LLC
CAESAR: Conquest of Gaul
A. In the Shock Combat Phase, “heavy” combat units—those units noted with a plus [+] on the Superiority Chart—that moved during the current Orders Phase must undertake a Shock Attack against all enemy units in their ZOC.
B. All other “lighter” units that so moved may choose to un-dertake Shock.
C. Any unit issued Fire (only) orders, or those simply within the activated Leader’s command range may choose to attack all enemy combat units in their (friendly) ZOCs [7.26 and 8.31].
7.26 The moving player places a “SHOCK-Must Check TQ” marker on top of each moving “heavy” unit [7.25[A]] the instant that moving unit moves adjacent to an enemy unit. The moving unit must Shock attack in the ensuing Shock segment. Units that are eligible to (but do not have to) attack, because they moved [7.25[B]], also receive a “SHOCK-Must Check TQ” marker the instant they finish movement if, at that instant, the player chooses to shock attack with that unit. Non-moving Units under 7.25 [C] are given “SHOCK-No Check” markers at the beginning of the Shock Combat Segment. These Shock markers delineate which units will have to undergo a pre-Shock TQ check [8.33]. Only units with Shock markers may Shock attack.
EXAMPLE: A Roman Cohort moving adjacent to Nervii BI unit has a “SHOCK-Must Check TQ” marker placed on top of it because it has to attack. A Briton Light cavalry unit moving adjacent to a Cohort unit does not have to shock attack; however, the moving player must state his decision on whether or not to do so as it finishes movement. If he wishes it to attack, he must place a “SHOCK-Must Check TQ” marker on top.
8.0 CombatThere are two kinds of Combat: Missile and Shock. Missile combat occurs as part of—or instead of—movement at any point during the Movement segment of an Orders Phase. Shock combat comes in its own segment—at the conclusion of the Movement Segment, after all orders have been issued and move-ment is completed. A missile unit can participate in both types of combat during the same Order Phase. In Shock Combat, the Type, Class and Size, plus the Troop Quality, of a unit are taken into account, and the effects of combat are Cohesion Hits, which may result in Rout.
8.1 Missile VolleyHISTORICAL NOTE: Missile-firing skirmisher units, with their generally lower TQs and susceptibility to shock by heavier units, appear to be “weak” units. However, they have three abilities which make them quite useful: they can (usually) fire during movement, they have the ability to use Harassment & Dispersal, and a large number of them may fire at the same time. Their combat effectiveness was limited, though, because of a lack of penetrative capability.
8.11 Units with Missile Capability (see 2.24) may Missile Fire. There are three types of non-artillery missiles/missile units: Ar-chers (A), Slingers (S), Axe Throwers (X), and Javelinists (J). When given an Individual Order, individual missile units can
move, fire, or fire during movement. A line of missile units given a Legion/Line Command may fire during (or instead of) their movement. A unit may fire during movement only if it moved “forward” (towards the target) immediately preceding actually firing (see the example, below). Firing during movement does not cost any movement points [however, see 8.17[4]]. And, most importantly, see 8.6 for a major capability of light troops.
8.12 Missile Fire may occur:�. as an Order or Legion/Line Command2. as Reaction Fire
8.13 A Missile unit may volley (fire) at any single target unit which is within its Missile Range—which extends from its frontal and/or flank hexes—and to which it can trace a Line of Sight [8.16]. Missile units must each fire individually; they may not combine fire. If there is more than one combat unit in the target hex, the Cohesion Hit from Missile Fire is applied to the top unit (the bottom unit, if fire is from the rear).
8.14 Missile Supply. A missile unit may volley if it has at least one missile volley remaining. • Archers and Slingers have an unlimited number of
missile volleys until they roll an unadjusted ‘9’ when resolving any missile combat. At the instant one of these units rolls a ‘9’ place a “Missile Low” marker on it, indicating it has one volley remaining.
• Javelin-armed Infantry/Cavalry have an unlimited number of missile volleys until they roll an unadjusted ‘6-9’ when resolving any missile combat, at which point place a “Missile Low” marker on it, indicating it has one volley remaining. Any javelin-armed infantry, of any type, that engages in (or is engaged in) shock, is automatically “Missile No” after the completion of that Shock combat.
• Axe throwers are automatically “Missile Low” the first time they fire
• Cohorts are automatically “Missile No” after the first time they fire
• Artillery never run out of missiles
If a “Missile Low” unit fires, flip the marker over to its “Missile No” side to indicate there are no missiles left to fire. A unit with a “Missile No” marker may not fire at any time.
8.15 Any friendly “Missile Low” or “Missile No” unit that is �. not in an enemy ZOC and2. is not within Missile Fire Range and LOS of an enemy unit
that is not “Missile No”
may Reload by removing any Missile Low/No markers. A mis-sile unit may Reload during the Reload Segment of the Rout and Reload Phase, bringing it up to full missile capability.
8.16 A missile unit can shoot a missile volley only at an enemy target unit to which it has an unobstructed Line Of Sight (LOS). An LOS is calculated by tracing a path of hexes between the center of the hex the missile unit is in and the same for the target unit, through the firing unit’s frontal or flank hexsides. LOS is blocked by camp walls, wagon trains and woods, unless they are

�9
© 2006 GMT Games, LLC
CAESAR: Conquest of Gaul
in hexes at a lower elevation than both the firer and the target. LOS is also blocked if any part of a hex of higher elevation is between the two units. LOS is usually blocked by combat units, unless the blocking combat units are closer to the firer than the target and the firing unit is an archer. If the LOS is blocked, missiles may not be fired.
Exception #1: Missile Units may always fire into adjacent hexes. Exception #2: When tracing a LOS to determine Legion/Line Commands, friendly combat units do not block LOS.
PLAY NOTE: LOS, while not a major problem in most of these battles, because of the flat terrain, is often a cause of “player ten-sion.” We suggest that missile LOS rules be interpreted strictly, while Command Range LOS rules (4.25) be interpreted liberally. The former are trying to shoot at a target; the latter are simply trying to see if everyone is in place.
8.17 The Missile Range and Results Table [9.11] is used to determine the effect of Missile volleys. For each volley, a die is rolled. If the die roll is equal to or less than the strength of the missile unit at that range then the target unit takes � Cohesion Hit. If the die roll was greater than the missile units volley strength then it misses. The following dieroll adjustments are made (and they are cumulative): • If a unit fires at a target at a lower elevation, subtract one (–1)
from the dieroll. Note that units in Towers are one level higher than the terrain they occupy.
DESIGN NOTE: This is a change from previous games in the system, which used elevation to increase range. You may apply this retroactively.
• If the target is in a Woods hex, add one (+1) to the die roll• If fire is directed through any fortification hexside [6.77], add
one (+1) to the die roll• If the target is a Cohort, and an archer or slinger is firing at
a range of one hex (adjacent) through the frontal hexsides of the cohort, add one (+1) to the die roll. This does not apply to javelins, nor to fire from Towers or across walls, etc.
DESIGN NOTE: This represents the fact that the lighter shafts of these skirmisher-type archers were most effective against the for-midable shield-wall and body armor of the heavy infantry when firing “from above” (arced trajectory) into the body of troops; at point-blank, low trajectory range they could not do that.• If a slinger, foot archer unit or any mounted missile unit of
any type, moved/will move, add one (+1) to the die roll. This does not apply to foot with javelins.
DESIGN NOTE: There is no such penalty for moving foot javelin-ists, who use movement to gain momentum for their missiles. Remember, foot missile units and mounted javelinists may not fire during Withdrawal.
• If the firing unit is Depleted, add one (+1) to the dieroll• If the target is a Skirmisher (SK) unit, add two (+2) to the
dieroll
All combat effects from missile combat are immediate and occur before any other unit is moved/fires.
EXAMPLE: Caesarian Balearic Slingers are two hexes distant from a hex containing enemy cavalry. At a range of ‘2’, the slingers’ Missile Strength is “2.” The Caesarian player volleys against the Gaul, rolling a ‘2’. The Gallic cavalry takes one cohesion hit. If the slingers had moved to get within range and then the player had rolled a ‘2’, the added movement penalty (+1) would have caused them to be ineffective. If he had rolled, say, a ‘6’, the volley would have had no effect. If he had rolled a ‘9’, it would have had no effect and he would have had to place a “Missile Low” marker on the slingers.
8.18 If there is a leader in the hex fired at and the Missile Dieroll is a “0,” there is a possibility that the leader has been hit. Roll the die again; if that dieroll is a ‘0’, a Casualty has occurred [8.34]. Players may, if they wish, fire at a hex (in range) in which there is only a leader counter.
8.2 Reaction FireMissile units may volley in reaction to certain enemy move-ments into (Entry Reaction) and out of (Retire Reaction) their ZOCs [6.73] as well against active units that fire against them (Return Fire).
8.21 Retire Reaction: Whenever an un-routed unit leaves the ZOC of an enemy missile unit, or whenever a unit uses Orderly Withdrawal to avoid the enemy missile unit entering its ZOC [6.55], that missile unit, if it has a fire capability of two or more hexes, may fire a volley at the moving unit. Any results are ap-plied before the unit moves.
8.22 All Retire Reaction Fire at units moving away from the firing unit is at a Range of two hexes.
8.23 Entry Reaction: Whenever a friendly unit enters the ZOC of an enemy missile unit—and this includes entry as a result of Advance after Combat—that enemy missile unit may fire a volley at the entering unit before any further movement or friendly fire occurs. All effects from this missile combat occur immediately. When friendly units are moving as a Legion or Line, all move-ment is completed before any Entry Fire takes place. Units may select the range column that offers them the best chance to hit provided that the moving unit was at that range at some point during its move and the firing unit had a clear LOS to that hex.
8.24 Return Fire. Any target unit may Missile Fire “back” at an enemy unit that has fired at it. The active unit’s fire is resolved before the return fire; they are not simultaneous. Entry Reac-tion fire and Return Fire cannot both be used against the same firing unit.
8.25 Reaction Fire does not require an Order; it does require that the missile units have sufficient missiles available to volley.
8.26 Artillery has missile fire capabilities which bypass Reaction Fire [9.3]. Sections 8.21 to 8.25 do not apply to artillery units.

20
© 2006 GMT Games, LLC
CAESAR: Conquest of Gaul
8.3 Shock CombatPLAY NOTE: The Shock system relies on the interaction of the units’ weapons, armor protection, training, experience, size, angle of attack and quality (TQ) to produce a single result. While no factor is unimportant, the rating to pay closest attention to is the TQ, for that rating determines the ability of a unit to withstand the rigors of toe-to-toe ancient warfare.
Procedure:At the completion of the Movement Segment of an Orders Phase, shock combat occurs. Shock is part of a leader’s Orders Phase, and all shock engendered by that leader is resolved before the next leader may be activated (or momentum attempted).All units with either type of ‘shock’ marker—placed according to 7.25 and 7.26—must shock attack
Important: Each shock combat is conducted as a series of steps performed in order for all units participating in shock combat—before the next step of shock combat is conducted. Thus, Step 8.33 is completed, followed by Step 8.34 for all involved units. After which Step 8.35 is undertaken for all units, etc.We suggest undertaking each separate step from left to right, across the map. Players may use any system they wish to note what has happened up-and-down the lines of attack.
DESIGN NOTE: It would be easier to resolve each separate combat as one piece. However, to do so creates a “blitzkrieg” type of effect, wherein the attacker gets to choose which at-tacks he wants to do first so that he can achieve breakthroughs. Despite its simplicity, this would be so far from reality as to render the system (and the game) unrealistic. However, isolated shocks can certainly be resolved as a piece, if doing so would not affect other attacks. The method you choose should keep this intent in mind.
8.31 Shock Designation Segment: This is used to place “SHOCK-No Check” markers on non-moving units that Choose to Shock [7.25 [C]].
8.32 The Basic Pre-Shock Procedure. Units that attack by Shock must attack all units in their ZOC [but see 6.73], unless that defending unit is being attacked by another, friendly unit in that Shock Segment. The attacker determines which units will be involved in each, individual combat resolution, within the restrictions that follow. • A friendly unit may attack more than one unit, as long as the
targeted defenders are all in the attacking unit’s ZOC • An attacking unit may not split its attack capabilities, although
two (or more) units may combine to attack one defender• If more than one unit is defending and/or attacking, total the
Sizes • Each unit may attack only once per Shock Combat Segment• A defending unit may be shocked attacked only once per Orders
Phase• Stacked units (usually cohorts) must attack the same unit(s);
they cannot split attacks into different hexes
Other than the above restrictions, the attacking player may divide his attacks among his units as he sees fit.
EXAMPLE: [Bibracte] A Helvetian cavalry unit in 2419 moves adjacent to a Balearic slinger in 2518. Unfortunately for the poor slingers, there is also an enemy BI unit in 2618. The Gal-lic player may either combine the cavalry and infantry units in the attack, or have the cavalry unit attack (as it must) and the BI sit by and watch.
Shock ResolutionAn Overview of the Combat Resolution Procedure:Sections 8.33 through 8.37 are descriptions of the sequence and procedure used to resolve Shock Combat. While extensive in narrative terms, players will soon realize that these steps are:�. Charge (Shock Must Check TQ) marked units and their de-
fenders Check TQ to see if troops will charge/stand [8.33]; 2. Check for any Leader casualties [8.34];3. Use Clash of Swords Chart to determine which column on
the Shock CRT will be used [8.35];4. Determine whether terrain, leaders and/or relative strengths
and capabilities will have any effect [8.36];5. Determine results using Shock Results Table [8.36];6. Check for Rout [8.37] and Cavalry Pursuit [10.5].
8.33 The Charge. All units with a “SHOCK-Must Check TQ” marker [7.26] and their intended targets undergo a Troop Qual-ity check by rolling the die for each unit, all such checks being simultaneous. Attacking units with “SHOCK-No Check” mark-ers—and their defenders—do not undergo this TQ check. If a unit is to be attacked by both types of units (Shock-Check and Shock-No Check), the defender then checks TQ [9.11].�. If the die roll is higher than a unit’s TQ, it takes a number of
cohesion hits equal to the difference between the die roll result and its TQ.
2. If the defender has taken sufficient Cohesion Hits to be equal to or greater than its TQ Rating it immediately Routs [10.3] and the attacking unit advances into the vacated hex (where it may change its facing one vertex, if desired). A Routed unit that fails this check is eliminated.
Important: See �0.4� for what happens to units earning hits when they advance.
Exception: They do not advance if they are in the ZOC of another enemy unit [8.41].
3. If the attacker has Routed from its TQ check, the defender stays put if not routed.
4. If both units would Rout from their TQ checks, defender re-treats, as per Rout rules, but attacker stays in place (although he is still routed).
Exception #1: All non-SK units shock attacking SK units, and VET and REC Cohorts attacked frontally by LI, do not have to make a pre-Shock TQ Check, even if they must charge [9.11 and 9.15].

2�
© 2006 GMT Games, LLC
CAESAR: Conquest of Gaul
Exception #2: Units attacking Routed units do not make a pre-Shock TQ Check.After the TQ check, if the attacker and the defender did not rout, go to the next step.
8.34 Possible Leader Casualties. Casualties to Leaders are determined prior to resolving the actual shock. If either or both sides have a leader stacked with one of the units involved in combat, the owning player rolls the die for each such leader. If the dieroll is a �-9, nothing has happened; if it is a ‘0’, the leader has suffered a casualty. The affected player must now determine the effect by rolling the die again:• A ‘0-6’ means the Leader is automatically Finished, although
the rest of Shock proceeds normally (as if nothing had hap-pened). However, that leader may do nothing else that turn (other than to exercise Orderly Withdrawal when appli-cable).
• A ‘7’ means the leader has been Wounded. He is Finished for the turn (as above), and, for the remainder of the game, subtract one from all ratings except his LC rating. Elite and Heroic status are likewise unaffected for Caesar. These reductions are cumulative, and if the leader’s Initiative is reduced to ‘0’ he has been Killed.
• An ‘8’ is the same as a ‘7’, except that the ratings are reduced by two (2) each.
• A ‘9’ signals a trip to Pluto. Our hero has been Killed.
Killed leaders are immediately removed from play. [See 4.63 for replacement.]
8.35 The Clash of Swords.The Clash of Swords Chart is now consulted. Cross-index the attacking unit’s Type with the de-fending unit’s Type and its orientation relative to the attacker to determine which Shock CRT column (prior to any adjustments) will be used to resolve the combat. If there is more than one Type of defending unit, the defending player chooses which unit will be used for the determination. If there is more than one type of attacking unit, the attacker chooses the Type; however, if such an attack is coming from more than one “angle”, the at-tacker may choose the angle most advantageous to him (but see 8.36 �.A below).
8.36 The Hand-to-Hand Struggle. Players now determine the effect of any advantages either side has and then resolve the shock combat:
1. Determine Superiority: There are two “types” of Superior-ity: • Position Superiority: what results when one side’s angle/posi-
tion of attack is from the flank or rear; and • Weapon System Superiority: the weapons system, armor/
protection, training and experience of one side is so superior to the other that it will result in a marked increase in “losses” to the inferior side [8.36[4]].
Either one side or the other may (but not must) gain superiority, either as: Attack Superiority (AS; the most common) or Defense
Superiority (DS). Players determine Superiority, using the Shock Superiority Chart (8.62). In many instances there is no Superior-ity. Superiority is determined as follows:
A. If a friendly unit is attacking an enemy through its Flank or Rear it is considered Attack Superior to the defender. How-ever, whichever unit the attacker uses to determine Position Superiority must also be used to determine Shock Column on the Clash of Swords Chart [8.35].
Exception #1: Attacking skirmishers through their Flanks does not produce Superiority.
Exception #2: Skirmishers are never used to determine either Position or Weapon System Superiority [9.1].
B. If no position superiority is attained, the opposing units check their weapon/experience system relationship [see the Shock Superiority Chart, 8.72] to determine if either system is supe-rior (either Attack Superior or Defense Superior) to the other. If more than one unit type is involved on any one side the players use the units they chose to determine Shock column on the Clash of Swords Chart. [See Example #2 in 8.35]
Exception: Cohorts and javelin-armed LI which are “Missile No” (they have thrown their pila) are not Defense Superior (DS) against cavalry.
PLAY NOTE: Many different types of permutations and combi-nations are possible, in terms of unit types and multiple attack angles. The two precepts, above, should cover virtually all of these possibilities. If they don’t, try attain a result that best fits in with the general principles.
2. Determine Size Difference Ratio: Compare the total Size points of the attacking unit(s) to those of the defender(s). For each level of Size Ratio Difference (SRD) greater than 1 to 1 a unit has it gets a Shock Results Table Column Adjustment of one in its favor. The attacker adjusts to the right, the defender to the left. Reduce all ratios to a whole number ratio, rounding off as follows:• If the/any attacker moved to affect the shock, round off in favor
of the attacker! Thus a 5 Size unit attacking a 4 Size unit is 2-�; a 4-5 is �-� and a 2-5 is a �-2.
• If no attacker moved, round off in favor of the defender. Thus a 5 Size unit attacking a 4 Size unit would be �-�; but 4-5 is �-2.
EXAMPLE: Attacking at 10-5 (or 2-1 odds) adjusts the Shock Table one column to the right.
DESIGN NOTE: The “rounding off” rules reflect the advantage of “momentum.”
3. Adjust Columns and Resolve: To resolve shock melee the Attacker consults the Shock Combat Results Table, determines the “base” column and adjusts that column for any Size Ratio Difference and/or Terrain effects. He then rolls the die, modify-ing the dieroll for by the Charisma Rating of any Leader stacked with the units of either side. [See, however, “Heroic Charisma” in 4.1.] For example, if Ariovistus were “leading the attackers” the dieroll adjustment would be +4, if leading the defenders, –4. If

22
© 2006 GMT Games, LLC
CAESAR: Conquest of Gaul
a leader has been killed [8.34], that side suffers a reverse dieroll adjustment equal to that leader’s Charisma Rating.
EXAMPLE: Ariovistus is killed leading an attacking group of German cavalry. The attacker will subtract ‘4’ from the dieroll (his ‘4’ Charisma).
4. Apply Results: Results on the Shock CRT are Cohesion Hits for both attacker and defender The # in parentheses is for the defender. • If the attacker was superior (AS) then double the defender’s
result.• If the defender was superior (DS), then triple the attacker’s
result. If more than one unit (of the same player) was involved in that combat, cohesion hits are distributed according to �0.�2.
8.37 The Collapse: The players now determine which of those units involved in the Shock combat will Rout by conducting the following steps in order:
�. All units that have Cohesion Hits equal to or greater than their TQ automatically Rout [10.3]; then,
2. Roll one die for each unit that is in an enemy ZOC and within one cohesion hit of Rout. If this die roll is higher than its TQ, the unit immediately Routs. If the same or lower, remove one Cohesion Hit instead; then,
3. Attacking units required to advance [8.4] do so now. Attack-ing cavalry units that have routed enemy units must check for Cavalry Pursuit [10.5].
8.4 Advance After Combat8.41 Attacking units must advance into any hex vacated by enemy units as a result of Shock (only), including Pre-Shock TQ check rout. This does not require an Order, but the advancing unit pays all Cohesion penalties engendered by such a move [8.23]. • If the advance would rout the moving unit, it still advances and
does not Rout; it does have a number of cohesion hits equal to TQ minus �
• See �0.4� for a similar situation• See 6.54 for continuing movement in the face of enemy With-
drawal• See, also, 6.�3
Exception: Units that cause an enemy to vacate a hex because of pre-Shock TQ check (not the actual shock) rout and are in another enemy ZOC at the time may not advance.
8.42 Advancing units may change their facing one (�) vertex upon finishing the advance, even if they are in an enemy ZOC. This is an exception to 7.�3.
8.43 If there was more than one attacking unit, the unit that ef-fected Superiority (if any) must advance. If no such unit, the one with the highest TQ must advance. In case of ties, the Attacking Player chooses (see Cavalry Pursuit [10.5]).
8.44 There is no advance after Missile Fire, alone, regardless of what the target unit does. Exception: Cohorts that throw their pila upon moving adjacent to an enemy unit may advance into any hex vacated as a result of such missile fire.
8.5 Barbarian FerocityThis rule represents the feared, initial charge of tribal-style war-fare, into which the locals seem to install all their pent-up anger, determination and initial enthusiasm. Tribal tactics were simple: a big rush designed to swiftly break the back of their opponent. It was usually quite effective, except against a disciplined, professional army.
8.51 At the start of a battle, all Gallic and German BI and LI units start with Ferocity. Ferocity brings the following Shock DRM, as long as it remains in effect:• Defending (Roman) units add two (+2) to all pre-Shock TQ
die rolls• Attacking (Gallic/German) units subtract one (–�) from their
pre-Shock TQ die rolls
To denote Ferocity, place that marker with the Tribal Chief. Ferocity applies to each tribe individually.
8.52 Ferocity continues until the Tribal Chief fails a Tribal Fe-rocity check. A tribal leader makes a Ferocity check whenever one or more of his units rout. At the instant that a unit routs the player rolls the die. • If the die roll is equal to or less than the TC’s Initiative Rating
then the tribe remains ferocious. • If the die roll is greater than the TC’s Initiative, Ferocity is
lost at the instant it occurs. Remove the Ferocity marker. Once Ferocity is lost it cannot be reinstated.
8.53 The Ferocity check is made for each unit of that tribe that routs, until Ferocity is lost. The loss of Ferocity in one tribe has no effect on the other tribes.
This rule does not apply to the Britons, who did not fight in the same fashion as the Gauls.
DESIGN NOTE: So, where’s The Wedge, from “Dictator”? By the time of the Gallic Wars it ceased to exist, as the German tribes—the ones that used it—had found it fairly worthless against good Roman troops. Better off to try to engulf than to penetrate.
8.6 Harassment and DispersalThis rule covers the tactics missile-armed units used to be effec-tive without closing with the enemy.
8.61 H&D capability applies to:• Missile-armed LC (any unit)• Skirmishers (against foot only)• Missile-armed Light Infantry (against foot only)

23
© 2006 GMT Games, LLC
CAESAR: Conquest of Gaul
8.62 Units wishing to use Harassment & Dispersal (H&D) must start:• within four hexes (but not adjacent to) the target unit if the
attacker is cavalry • within two hexes (but not adjacent to) the target unit if the unit
is foot
They may not start in an enemy ZOC, and they must be able to trace a path of hexes clear of enemy units and their ZOC to their intended target unless the ZOC is adjacent to the target.
8.63 The H&D path may be through/into any non-Rough hex (that means no Woods or Marsh). It may cross a stream, but not a minor (or major) river. A unit may use H&D through a friendly combat unit. However, doing so costs the H&D unit and statio-nery unit � Cohesion hit each. PLAY NOTE: Incurring Cohesion Hits for movement is not an issue here.
8.64 If the unit satisfies the above, it may fire its missiles against the enemy target without moving (on the game-map, that is). The procedure is:• Note which unit is using H&D• Note the target, as per above• Fire the missiles as if they were being fired at one hex range• The target may use Entry Reaction Fire. Treat all fire as simul-
taneous.
All of this occurs without moving the firing unit.
DESIGN NOTE: Well, it is moving (to the target and then back to whence it came). We just eliminated the micro-management. Think of it is an early form of the caracole.
8.65 Light Infantry (LI) — not SK or cavalry—may be stopped during H&D by quick moving defenders. Anytime an LI under-takes H&D, instead of the defender using Reaction Fire, he may opt for trying to gain contact with the LI. To do this, he rolls the die. If the defending unit has a higher TQ than the H&D attacker, add one (+1) to the DR.• If the adjusted DR is higher than the LI’s Movement Allow-
ance, the LI must (move the unit to and) stop in the hex adjacent to the defender (after throwing its missile). It may move no further, nor may it change facing.
• If the adjusted DR is the same as or lower, the LI completes its H&D, but the defending unit must move one hex, forward, towards that unit. If the LI unit has a vacant hex to its Rear, it may withdraw to that hex retaining its current facing.
8.7 The Combat Tables8.71 Missile Range and Results Table: This table is used to determine the strength of a missile unit firing at a given range.
8.72 Shock Superiority Chart: This chart is used to compare the superiority (if any) of one type of unit compared to another, depending on which side is attacking or defending. Always read down the column (from the Attacker’s point of view). (Reading across, by row, gives a “false” result.) Superiority is used to augment Cohesion hits.
8.73 Clash of Swords Chart: This chart is used to determine which Column will be used on the Shock Combat Results Table (subject to adjustments).
8.74 Shock Combat Results Table: This table is used to resolve shock combat in terms of Cohesion hits to both attacker and defender [10.11 and 10.12].
8.75 Cohesion Hit and TQ Check Chart: Use this as a sum-mary of when Cohesion Hits are applied and when TQ checks take place.
9.0 Special Combat Units9.1 SkirmishersDESIGN NOTE: Skirmisher units were truly ill-suited to shock combat; they were, in fact, trained to avoid it. Skirmishers rarely had any armor protection, and the only weapons they carried were their bows, slings or javelins. They fought dispersed in “open” formation, and their intent was to delay, harass and screen.
9.11 The following rules apply to SK units:• They may not Shock Attack, nor do they have any affect (in
terms of Position Superiority) on any Shock combat.• When attacking SK units, the attacker does not have to make
a pre-Shock TQ check, even if the attacker must Shock.• When firing missiles at a SK unit, add two (+2) to the dieroll.
This adjustment applies only to the combat effect, not the Missile Availability.
• SK units do not Rout. They are eliminated, instead, when they would Rout
• Skirmishers may use Harassment and Dispersal [8.6] against any foot units
• Extended Movement does not affect Skirmishers [6.14]
9.12 Enhanced Skirmisher Withdrawal• Skirmishers may Orderly Withdraw up to two hexes before
any units whose MA is the same or less (i.e., all foot units), regardless of the MA differential
• The only time Skirmishers suffer a Cohesion penalty when Withdrawing is after being approached from the flank or rear [6.52]
• See 6.9� and 6.99 for special stacking rules for SK’s
9.2 Light InfantryThe following rules apply to missile-armed LI units:• They may use Harassment and Dispersal [8.6]
against any foot units• Veteran and Recruit Cohorts that are shock attacked frontally
by Light Infantry (LI) do not have to undergo a pre-Shock TQ Check, although the LI still does. The reverse is not true; all cohorts undergo a pre-shock TQ check when attacking LI.

24
© 2006 GMT Games, LLC
CAESAR: Conquest of Gaul
9.3 ArtilleryVirtually all legions were equipped with “artillery”: smaller, shaft-propelling units (here, catapults) for field use, larger ones (stone throwers, such as ballistae, etc.) for siege work.
DESIGN & HISTORICAL NOTE: One of the problems with this area is that the Latin terms for artillery were often used interchangeably and indiscriminately. For example, several reliable sources refer to bal-listae as stone-throwing catapults.
9.31 Each legion has its own artillery unit which is considered part of that legion.
9.32 Artillery is in either Fire or Move mode. It requires one Order, or a Legion Command to the catapult’s legion, to change its mode. The mode change is the sole action for that Orders Phase, i.e it cannot move or fire after the mode change. Artil-lery may stack with any one cohort, free of any Cohesion Hit penalties (to either unit).
9.33 Artillery have built-in crews, so they do not have to be “manned.” The crews have a TQ and are treated as LI if attacked. Artillery may not shock attack; their only offensive combat capability is to Fire.
9.34 Artillery may fire only if in Fire Mode. However, they do not need an Order to Fire. • When the Romans are active, regardless where the activated
leader is, Catapults may fire twice per turn (the whole turn, not each Phase). In addition
• When an opponent is active, catapults may fire twice during a single Phase (not turn) at any enemy unit that is presently activated (and in range, etc.)
Artillery units may fire at any time during the phase/turn (and we mean “any;” they may fire even in the midst of enemy move-ment!) They do not have to be “in command.” The firing player simply says, “I’m firing my catapult,” or words to that effect. Use the provided markers to keep track of when (Active or in Reaction) and how many times the unit has Fired.
9.35 Artillery has no facing; they may fire in any direction, regardless of in which direction the actual counter is pointed. They may not fire through walls or ramparts of any kind, unless they are in Towers.
DESIGN NOTE: Catapults were “low trajectory” guns, with almost no ability to raise the angle of fire. They are primarily defensive weapons.
9.36 Only one artillery counter may be placed in any one hex. However, any foot unit may also be placed in that hex, in which case, if attacked, the artillery unit does not contribute its Size or defensive capability to such attack. An artillery unit may fire
regardless of its position in the stack; the same goes for any ac-companying LI/SK.
9.37 Any artillery that is Routed is automatically eliminated.
10.0 The Effects of CombatUnits suffer cohesion penalties (called “hits”) from disruptive and/or excessive movement and/or combat. Too many cohesion losses produce a Rout. Routing units run away and head for their Retreat Edge of the map, or, if cohorts, to their Aquila. A routed unit can be rallied under certain circumstances. In addition, units may also be Depleted, reduced in effectiveness.
10.1 CohesionCohesion is a measure of how organized and effective a unit is at any point during the battle. The loss of cohesion is measured in Cohesion Hits, which are applied against a unit’s Troop Quality — sometimes automatically, sometimes after a dieroll. The Cohe-sion Hit and TQ Check Chart summarizes when these occur.
10.11 Each time that a unit suffers a cohesion hit place a Cohesion Marker, representing the total number of hits taken, on (or under) the unit.
10.12 If there are multiple units involved in a single combat reso-lution, hits must be divided as equally as possible amongst these units, with any extra hits being given to the unit that was:
�st: used to determine Superiority;2nd: used to determine the Shock CRT column3rd: 6.98, if applicable.4th: Player’s choice
This rule applies even if it means that a unit will have to rout.
10.13 When a unit has absorbed cohesion hits equal to or more than its Troop Quality Rating it automatically Routs [10.3]. In addition, in the Collapse Phase of Shock Combat players roll for Rout for units that are in an enemy ZOC and are one Cohesion Hit short of reaching their limit [8.37].
Exceptions: Skirmishers, Artillery, and Depleted (see 10.2) Barbarian units do not Rout; they are instead eliminated.
10.14 Recovery: During an Orders Phase, any un-routed Roman unit (only) with cohesion hits that is not in an enemy ZOC, nor adjacent to an enemy unit, nor within range and LOS of any en-emy missile unit that is not Missile No, and is in “clear” terrain, may remove two (2) cohesion hits by being given an Individual Order to do so. A unit may not remove more than two cohesion hits per Order Phase, and LCs may not be used to do this. A unit that has Cohesion Hits removed cannot move/fire in the same Orders Phase, and a unit that has moved or fired may not have hits removed.
PLAY NOTE: Recovery is not available to the tribes. They were far too brittle for that. However, not being able to use this rule does place them at a disadvantage. For those of you who wish a more competitive level of play, we suggest allowing the tribal

25
© 2006 GMT Games, LLC
CAESAR: Conquest of Gaul
units to remove 1 Hit per Recovery.
10.15 Cohesion hits do not affect a unit’s combat strength or capabilities in any way, other than to show how close it is get-ting to falling apart. Thus, a unit with a TQ=6 and 4 hits has the same combat effect as one with no hits. It is just more likely to rout. [See, however, 10.2.]
10.16 The Cohesion Hit and TQ Check Chart lists the times during the game when a unit must undergo a TQ Check. These instances have also been noted throughout the rules, above. A TQ Check consists of rolling the die and comparing it to the unit’s printed TQ rating. If Routed, that rating is ‘�’. The Cohesion Hit and TQ Check Chart also lists the results, usually one or more Cohesion hits when/if the die exceeds the rating.
10.2 DepletionDepletion reflects the actual loss of men in combat.
10.21 Any time a Routed unit is Rallied, it automatically becomes Depleted. Units that are already Depleted do not suffer additional Depletions (but see 10.13).
10.22 To indicate Depletion, flip the unit to its reverse side. Once Depleted, a unit remains so for the remainder of the game.
10.23 Depletion affects combat as follows:• If any Depleted unit is involved in a shock attack, there is a
�L column adjustment on the Shock Results Table. • If any Depleted unit is defending against a shock attack, there
is a �R column adjustment on the Shock Results Table. • Add one (+1) to all Missile die rolls by a Depleted unit.
10.24 When attempting to Rally [10.41] a Depleted unit, add one (+1) to the Rally die roll.
10.25 When a Routed and Depleted unit has been rallied, in de-termining how many TQ Hits it will return with [10.38], add two (+2) to that dieroll. This does not apply to newly-depleted units, only those that were Depleted prior to the Rally attempt.
10.3 Rout and Retreat10.31 A unit that has routed [10.13] is immediately moved two hexes in its Retreat Direction [10.32]. No Movement points are expended, but the unit must take the most direct path towards either its Retreat Map Edge, Camp/Lager, or, for cohorts, their Aquila, even if this means moving into and/or through friendly units. After being refaced toward the friendly Retreat Direction, a Routing unit uses the following order of preference when deciding which hex to enter:
�. Vacant hex not in enemy ZOC2. Friendly-occupied hex not in enemy ZOC3. Friendly-occupied hex in enemy ZOC
If it cannot so retreat the full distance it is, instead, eliminated. Units that retreat to their Aquila may ignore this requirement. Place a “Routed” marker on that unit when it finishes its re-treat.
PLAY NOTE #1: Remember, SK and Artillery units do not Rout; they are, instead eliminated.
PLAY NOTE #2: Try to use common sense. Fleeing men are run-ning away from the enemy—not towards them. They will always choose the path of least resistance. When we say “use the most direct path,” we mean don’t try to meander around the board trying to avoid the edge of the map.
10.32 Retreat Direction. Retreat direction differs among the armies, depending on the situation:�. Cohorts will retreat towards their Aquila. They may stop when
they get within one hex of their Aquila, and, having achieved that location, do not have to Rout Move again. If there are no vacant hexes within one hex of the cohort’s Aquila, the cohort retreats to the Camp per #2 below.
2. Non-legion Roman units will retreat towards their Camp. Once they enter the Camp, they do not have to Rout Move again.
3. Barbarian units retreat towards their lager. Once inside the lager, they do not have to Rout Move again.
4. If none of the above apply, units retreat towards their Retreat Edge, as defined within each scenario.
10.33 In the Rout Movement Phase all Routed units that do not qualify under 10.32[1-3] are moved their full, printed movement allowance in the same fashion as in �0.3�, even if they moved previously during the turn. Routed units use normal movement rules, except that they may not enter enemy ZOCs unoccupied by friendly units. They do not incur Cohesion Hits from move-ment.
10.34 A unit that either moves off the map (for whatever reason), or cannot complete its rout movement because of the presence of enemy units/ZOCs or impassable terrain, is permanently removed from play and considered eliminated for Army Withdrawal purposes. Units that retreat into their Camps, lager, or near their Aquila, are not eliminated; they may yet be rallied [10.44-5]! However, when determining Rout Points at the end of each turn, treat all of these Routed units as eliminated.
10.35 The movement of Routing units through or into other units is covered on the Stacking Charts [6.98]. The main premise is that routed units may not stack, regardless of country, class or type. If a routed unit were to finish its rout movement in a friendly-occupied hex, instead (and according to the chart) it continues on one more hex (with additional penalties to the non-moving unit). If that “additional” hex is also occupied, the routed unit is automatically eliminated, with the non-moving penalties apply-ing to the units in both those hexes.
10.36 Restrictions on Routed Units: • Routed units retain their Size and Movement Allowance• They have a TQ of ‘�’ • Routed foot missile units are automatically “Missile No.” • Rout-moving units do not incur cohesion hits due to terrain
effects

26
© 2006 GMT Games, LLC
CAESAR: Conquest of Gaul
• Routed units may not receive or use Orders or Commands, other than Rally, nor may they fire missiles for any reason
• Routed units that incur any additional cohesion hits are im-mediately eliminated and removed from play
10.37 If, as a result of Cohesion hits from Shock, all attacking and defending units would rout, the following occurs:
�. Attacker adds to his total hits the number of Hits (if any) that he would accumulate were he to advance after combat.
2. The side that has the unit with the greatest discrepancy be-tween hits and TQ rating Routs. The opponent stays and is not routed; if it was the attacker, he advances (if eligible); the unit now has Cohesion hits equal to his TQ minus one (–�).
3. If the difference between the hits and TQ is the same for both sides, the defender routs and the attacker advances after com-bat (if allowed) and has Cohesion hits equal to its TQ minus one (–�).
If one (or both) sides have more than one unit involved and at least one unit did not reach or exceed its TQ, then all units that did so Rout. The above sections apply only when all units would have routed. Remember 8.37.
EXAMPLE: Caesarian Cohort, TQ of 7 with 5 hits, attacks a Gallic BI, TQ of ‘6’, with two hits. The Shock Results is 2(2), but the Pompeian hits are doubled because the LG cohort is Attack Superior. This means that the Roman cohort now has 7 hits, and the BI has 6 hits. They both have reached their “Rout” level, but, in this case, only the BI Routs. The Cohort adjusts its hit level to ‘6’ (TQ minus 1) and advance after combat (if possible.) The Roman Player may still have to roll for possible “Collapse” for the Cohort at the end of Shock combat
10.38 If a Leader is stacked with a routing/retreating unit that leader may rout move along with that unit. He is otherwise unaf-fected by the rout.
10.4 Rally10.41 Leader Rally. During an Orders Phase a player may attempt to Rally any routed unit which is:
1. Roman: Within its Legate’s or Proconsul’s range. The rally range may not be traced through wall or lager hexsides (including gates), across all-sea hexsides or rivers (of any kind), or through woods. It may be traced into a woods hex.
2. Barbarian: Stacked with or adjacent to any chief from that tribe.
3. Roman & Barbarian: The routed unit is neither adjacent to an enemy unit nor within range (and LOS) of an enemy missile unit that has missiles [10.14].
4. Automatic Rally: A leader may Rally any Routed unit with which it is Stacked, without a dieroll.
10.42 An individual leader may attempt to rally a given unit only once per game-turn. That limitation applies to the leader, not the unit, which may be rallied by another leader in that turn as long
as the unit is within that leader’s command.
10.43 To Leader Rally a routed unit (other than by 10.41[4]), the player rolls the die.• If the die roll is the same as or lower than the Leader’s Charisma
Rating, the unit is Rallied• If the die roll is higher than the Charisma, the unit is im-
mediately placed inside the appropriate camp or lager. If the unit cannot trace a path of non-enemy occupied hexes to that destination or there is no camp/lager, the unit is eliminated.
EXAMPLE: Caesar, with a Charisma of ‘5’, can rally routed units within his range on a dieroll of ‘5’ or lower. At the other end of the scale, most Chiefs would need a DR of ‘2’ or lower.
PLAY NOTE: The “Rally or Die” mechanism is new. However, there are additional ways to Rally.
10.44 Aquila Rally: Roman legion/cohorts have the ability to use the rallying standard of their Aquila to rally. This type of Rally requires that the leader use that Activation Phase as a single Rally Order. He may not issue any other Orders. The Order is to the Aquila, which the Aquila then applies to all eligible units. When an Aquila Rally Order is given, all routed cohorts from that legion that are stacked with or adjacent to their Aquila are automatically Rallied.
PLAY NOTE: Routed units that are adjacent to their Aquila are treated as eliminated for Rout Point purposes, until tallied.
10.45 Camp Rally: In the R&R Phase [E/2] players may attempt to Rally units inside a camp/lager. To do so, a leader must have started and ended the turn inside the camp. The player may then DR for each unit inside, as per 10.43, with those failing staying in the camp.
10.46 Determining hits for Rallied units. When a unit is rallied (regardless of the method by which it is rallied), place a “Rallied” marker on top (rallied units are restricted as to what they can do), and then roll the die (adjusted +2, if previously Depleted) and refer to the Rally Table. Give the unit the Hits listed on the Rally Table, according to that dieroll and the unit’s printed TQ:
EXAMPLE: Labienus, with a Charisma rating of ‘3’, attempts to rally a routed Cohort unit with a TQ of ‘6.’ the Player rolls a ‘2’ (less than Labienus’ Charisma), so the unit is rallied. He places a Rallied marker on the unit, then rolls to determine total Hits for the rallied unit. The roll is a ‘5’, so the unit now has ‘2’ Hits.
10.47 When a unit is Rallied, it may be refaced at no cost in MPs or Cohesion hits.
10.48 Restrictions on Rallied units. Rallied units:• may not receive or use Orders until the next turn • are automatically Depleted• if they are foot missile units, they are automatically “Missile
No”
27
© 2006 GMT Games, LLC
CAESAR: Conquest of Gaul
10.5 Cavalry Pursuit DESIGN NOTE: For a variety of reasons, including the fact that cavalry does not play a major role in these battles, we have greatly simplified a micro-management rule which we felt sorely needed such attention.
10.51 If an enemy unit is routed by a friendly, attacking cavalry unit in Shock combat (the actual combat, not the Collapse/TQ Check), the victorious cavalry unit must check to see if the unit pursues. Roll the die. If it is higher than the attacker’s TQ, it Pursues.• If more than one cavalry unit causes the rout, only one of them
has to Pursue, pursuer’s choice• If the defending unit would be eliminated because it cannot
complete its rout because it is surrounded, and at least one of the surrounding units was not one of the attackers, there is no pursuit
• If a unit shock attacks two separate units at once and only one routs, there is no Pursuit
Otherwise it Breaks Off [10.54].
10.52 After the Routed units undergo their Rout Move, pursing cavalry moves its full MA, or until it places an(y) enemy unit in its ZOC, using the same Path as the fleeing unit. It must immediately attack any unit(s) to which it moves adjacent. If the routed unit moves off the map, so does the pursuing cavalry.
10.53 If a cavalry unit eliminates, by shock, an already routed unit, the victorious cavalry is moved one-half (rounding up) its printed MA (or into an enemy ZOC, whichever comes first) in the direction it was heading at the time. It must immediately attack any unit encountered (as part of the pursuit). If there is no attack, the player may reface the pursuing unit at no cost.
PLAY NOTE: This will usually place the victorious cavalry unit somewhat out of range of its leader, and the Player must then decide what the best course is for this situation.
10.54 Pursuing units are Finished for the turn, as soon as they complete their Pursuit. They may not move (other than to use Orderly Withdraw) or attack, but defend normally. Mark these units with a “Pursuit/Finished” marker.
10.54 Break-Off: The cavalry does not follow the routing unit, although it does Advance after Combat. The cavalry is Finished for the Turn, as above. In addition, it may change facing.
EXAMPLE: Cohort in 2728 is charged by Light Cavalry and routed. The Cohort retreats to 2527, and the cavalry is off in hot pursuit. The cavalry moves into 2628 and rolls a ‘4’ for the pursuit attack. This attack routs (and thus eliminates) the fleeing Cohort. The LC then advances four MPs worth of hexes (half its MA) and stops.
10.55 Off-Map Regroup. It is possible pursuing cavalry may do so, so that they end up off-map. They may not re-enter the game until the player uses a PC or TC (or, for tribes that have no TC, any Chief) to declare that his entire Activation is to Regroup and
Return the cavalry (regardless of range or location). A Cavalry Regroup Order applies to all off-map cavalry from that army. It allows the off-map cavalry to re-enter the map within two hexes of the hex by which it left, using as much of their MA as they wish.
10.56 Cavalry that is off-map because they pursued is not con-sidered when determining Rout Points.
10.6 Army Withdrawal and Victory10.61 A player wins by causing his opponent’s army to Withdraw. An Army will withdraw when it has exceeded its Withdrawal Level (listed in the scenario), at the end of the turn. To determine that level, total the Rout Points [10.62].
10.62 An army (or tribe) incurs Rout Points for:• Eliminated units, which includes units that have routed off the
map• (Romans) Routed units adjacent to an Aquila or in Camp• (Romans) Loss or Capture of an Aquila• (Gauls) Routed units inside their lager
10.63 Generally, a unit’s Rout Points are equal to its TQ, with the following exceptions:• SK units, regardless of TQ, are worth � RP • Killed Proconsuls and Tribal Chiefs are worth five times (5x)
their Initiative. Wounded leaders and killed Legates have no effect.
• Chariots and artillery are worth 0 RP• A Captured Aquila [4.45] incurs 25 RPs for the Roman, while
a Routed [4.46] Aquila incurs 10 RPs
10.64 If a player’s/Army’s Rout Point total is the same or higher than the Army Withdrawal Level, that army has Withdrawn and that player has lost the battle (but see �0.66)
10.65 If both sides reach Army Withdrawal Level at the end of the same turn, the player with the least number of Rout Points above that level wins (but just barely). If both sides are exactly the same, or you are just playing for insight, it’s a draw.
10.66 Withdrawal Levels for Gauls are applied per tribe, un-less indicated otherwise in the scenario. Thus, at The Sabis, the Artabates may withdraw because of losses, while the Nervii and Viromandui continue the Good Fight. When a tribe withdraws, and others are left, simply take all Withdrawing units off the map and continue play. The Gauls lose when all tribes have withdrawn.
10.67 Rout Point Bid Method: For competitive play, we sug-gest using the Rout Point Bid method to determine who plays the favored side in the scenario. The players secretly write down their bids in Rout Points and then simultaneously reveal these amounts. The winner of the bid plays the side of his choice and reduces his Army Withdrawal Level by the bid amount.

28
© 2006 GMT Games, LLC
CAESAR: Conquest of Gaul
GMT Games, LLCP.O. Box �308, Hanford, CA 93232-�308
www.GMTGames.com
Cohesion Penalty to Enter/Cross
Terrain Type MP Cost LIf CO Cav Clear � 0 0 0 Woods [COL] 2 0 1 1 Marsh [COL] 1 1 1 2 Major River (The Sequana) P P P P Change Facing e �(2)C 0 0 0 Change Facing in Woods/Marsh e �(2)C 0 � � Road NE NE NE NE Towers (from inside the camp only) [b] � 0 0 0 Hexside Features: MinorRiver (Sabis) +2 1 1 1 Stream 0 0 � 0 Up 1 Level +1 0 0 0 Down 1 Level 0 0 0 0 Camp Walls P - - - Camp Gates [b] +1 0 0 0 Wagon Lager (Gauls only) +1 0 0 0 Britannia Scenario Only: Beach (from Land hex) � � � 2 Beach (from Sea hex) [b] 2 � � P Shallow Water [b] 2 � 2 P Moderate Water [b] 2 P 3 P All Sea P P P P
Notes:Gallic infantry have their MA increased by � for Barbarian ImpetuosityUnits In Column have their MA increased by
�COL = The Cohesion costs listed also apply to
units In column [See 6.7]. Units In Column do not pay Cohesion costs for those terrain effects without the COL designation.
a = Units not listed never suffer Cohesion penal-ties from Movement.
b = May be entered only by Roman unitsc = All non-Cohort infantry, except for Skir-
mishers, and all cavalry (including Roman) and Chariots pay a cost of � MP for each vertex shifted. Cohorts pay a cost of � MP to change facing in any direction, regardless of the number of vertices shifted. Skirmishers do not pay any MP cost to change facing. See 7.�2 and 7.�3.
d = This line applies to affected units moving up or down more than one level in any given Phase. The “�” Cohesion Hit applies regard-less of how may levels are traversed.
e = cost is per vertexf = Does not apply to Barbarian LIP = Prohibited or Not ApplicableNE = No Effect
Movement Cost Chart
Automatic Cohesion HitsReason Effect “Moved” Unit moves again � Cohesion Hit Terrain Effects for Movement See Movement Costs and/or Facing Changes Chart [6.28] Unit Withdraws when � Cohesion Hit approached from Flank/Rear Voluntary Movement through a � Cohesion Hit friendly unit (see Stacking Chart for exceptions) Rout/Retreat movement through � Cohesion Hit a friendly unit (see Stacking Chart for exceptions) Result of Effective Missile Fire � Cohesion Hit Units forced out of Column � Cohesion Hit by Shock Combat H&D through a friendly unit – 1 Cohesion Hit effects both H&D and stationary unit(s)