Embed Size (px)
Citation preview

How to Create a Personal Website
With WeeblyRowan County Public Library

Learn how to register for and log into Weebly.
Set up a Weebly sub-domain. Instill an understanding of Weebly web-
building tools. Instill a basic understanding of website
construction. Learn to create and manage pages. Set up a personal portfolio website.
Objectives

Navigate to weebly.com
In the Sign Up Free form enter your full name, email, and choose a password.
Hit Get Started. Choose Free
Website.
Registering

When asked to categorize your website, choose Personal and hit Submit.
Here you will see your dashboard.
Next to My Site hit Edit.
Getting Started

When asked about the focus of your site, choose Site.
You will now be asked to choose a theme. I will choose the 6th down on the right.
Getting Started, Cont.

You will now be asked to choose a domain (address) for your website.
Use the top option Use a Subdomain of Weebly.com.
Choose your subdomain. (Ex. bobsbakery.weebly.com) Hit Continue.
Getting Started, Cont.

Hit Build My Site. You will notice that you
already have 3 pages. We’re currently on the homepage.
First let’s add a headline.
Click Click To Add Headline. Enter whatever you like. (Ex. Welcome To My Site.)
The Homepage

Now click Click To Add Description below your headline.
Enter a brief description about your site. (Ex. This is my personal site.)
If you chose my theme you will have a button. Click the button and change the text to My Blog.
The Homepage, Cont.

You will notice various tools on the sidebar.
Drag the Text box into the white area labeled Drag Elements Here.
In the new text field write a brief welcome for your site. Introduce yourself and define the purpose of the site.
The Homepage, Cont.

Now drag an Image element into the text field.
Click on Upload Image. Choose Upload From
Computer. Choose an image you would
like to use to represent yourself or your site.
Finally, if you would like to change the background image or header on your site, hover over it and click Edit Image. Please ask if you need any assistance. I will leave mine as is.
The Homepage, Cont.
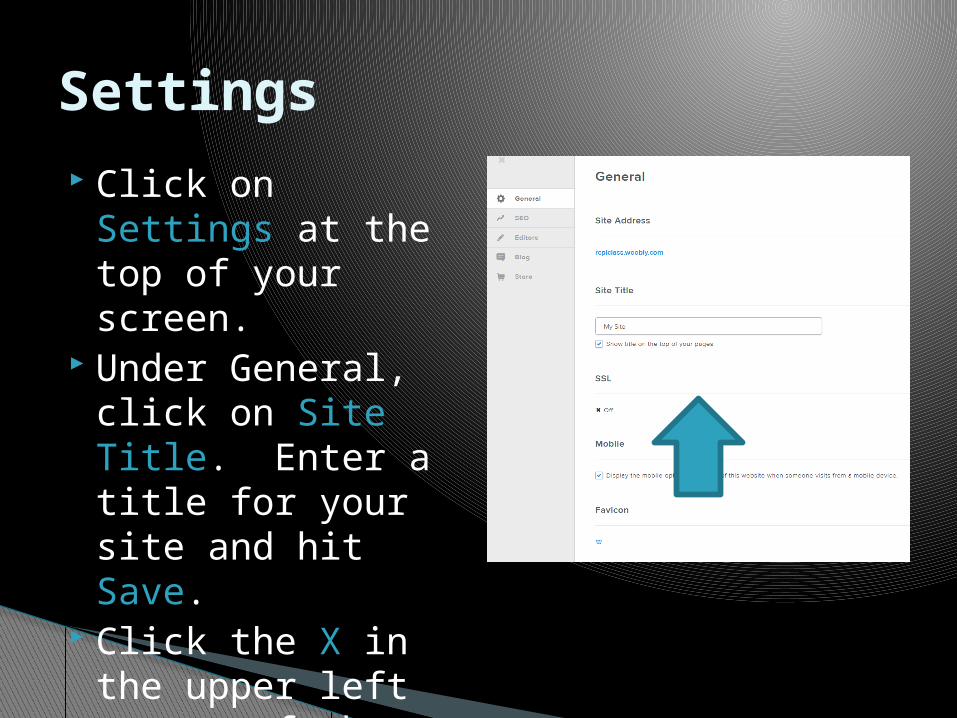
Click on Settings at the top of your screen.
Under General, click on Site Title. Enter a title for your site and hit Save.
Click the X in the upper left corner of the settings page.
Settings

Click the About button at the top of the page.
This is your about page.
Click Click To Add Headline, enter a headline. (Ex. About Me)
The About Page

Drag a Title element into the white area. Add a title. (Ex. About Myself)
Now drag a Text element below the new Title element. Here you can talk about yourself. We’ll make another area for hobbies.
The About Page, Cont.

Repeat the steps from the last slide. This time make both elements about your hobbies.
You can add images or change the header if you like by using the methods we’ve already discussed.
The About Page, Cont.

On the left, click on the Contact Page. Now hit Delete Page.
Now hit Add Page and choose External Link.
Change the Page Name to My Blog.
In the External Link field enter your blog address.
Click Save and Edit.
Managing Pages

You will be returned to the homepage.
If you have a button, click on it.
Click on Link, and type your blog address into the Website URL form.
The Homepage, Revisited

Before you log out, always go to the top right corner of the screen and hit the orange Publish button.
You will get a conformation of your website being published each time. Always hit the X in the top right corner and nothing else.
Publishing Your Site

Click the button to the right of Publish and click Exit Editor.
You will return to your Dashboard.
In the top right corner of the screen, hit Logout.
Logging Out

Enter weebly.com in the address bar.
You will return to the Weebly homepage.
In the top right corner of the screen, hit Log In.
Enter your email and password.
Logging In

You will be returned to your Dashboard.
You can make changes to your site at any time by clicking Edit.
In a new tab, navigate to your website. (Ex. rcpl.weebly.com)
Wrapping Up

Here is your finished website.
Clicking the My Blog button or any of the menu buttons at the top will take you to their respective pages.
Clicking either of the My Blog buttons will take you to your Wordpress blog.
The Finished Product

Questions?We’re here to help.
Thanks for attending our class and for visiting Rowan County Public Library.