Embed Size (px)
Citation preview

Restoration of 1850-1865 Pennsylvania
German Scheitholt
Completed by Ron Cook
September 2008
For Richard Latker

Background
The German Scheitholt has been around in various forms since the 1600s. The earliest known description is from 1614 in Syntagma Musicum II, by Michael Praetorius (see figure below). In it he gave the dimensions of a four stringed instrument with unevenly spaced frets fastened directly to the soundboard. The fret spacing was set up diatonically, not like the chromatic scales of other fretted instruments. A diatonic scale is similar to using only the naturals, or white keys, on a piano. Scales starting on any of the “white keys” are called modes, based on the Grecian modal scales. A C-major scale, starting on the C note, is the Ionian mode. The A-minor scale, starting on the A note, is the Aeolian mode. This style of instrument is known as a “board zither.” Types of board zithers come from many cultures around the world. They can be fretted, like the Mountain dulcimer, or its ancestors: humle (hommel), langelik, langspil, epinette des Vosges, and of course, the scheitholt. Non-fretted board zithers include the Japanese koto and the Persian Qanun.
Germans settled areas around Pennsylvania and Ohio after the American Revolution. The story goes that hundreds, or perhaps thousands, of German soldiers and mercenaries (Hessians) were hired by the British to battle the Revolutionaries. When the war ended, the British headed home, but without any of their “helpers.” The Germans were stuck here with no way to get back to Europe, and ended up settling in the farmlands of Pennsylvania and Ohio. Over the next century, more German immigrants came to the area to be with family and with those who spoke their

language. The memory of their music and instruments came with them, and it was only a matter of time before someone built a scheitholt like the ones they remembered from their past. By the mid-1800s, the scheitholt had evolved into several different styles, some being very similar to the Appalachian Mountain Dulcimers that were evolving from different cultural backgrounds in the Central and Southern Appalachian Mountain regions. Richard Latker’s scheitholt is more like the traditional German scheitholt than the Mountain dulcimer, but with its diatonic fret spacing, double melody strings and two drones, it is still played like the modern dulcimer. The wear on its strum area shows it has been played a lot. It is interesting to note that a few scheitholts and early Pennsylvania and Ohio German dulcimers on exhibit in museums are included with bows. It is known that the scheitholt was often bowed, producing a sound very similar to a hurdy gurdy. Even today, there are people who bow the Mountain dulcimer. There is an organization dedicated to the bowed dulcimer, and there is an article on them in the Summer 2008 Dulcimer Players News. The woods used to make this scheitholt are indigenous to the Eastern United States, especially in the Northern Appalachians. The head and tailpiece are constructed of Yellow Poplar, but if I’ve read the articles correctly, it could be American Tulip due to its grey-green color. The original top and sides are sycamore. The replacement back appears to be maple. All woods except the back look to have been milled and planed by the maker, especially since the thicknesses were not uniform. The back two pieces seem too uniform and were probably bought at a lumberyard. Valuation Instruments of this age and type are usually found only in museums. Once in a great while, one will show up at an estate auction or on an online auction. Auction prices have ranged from a few dollars to several hundred. It is very hard to set a value on this type of instrument since so few have come up for sale. These are the types of simple folk instruments made by family members or friends local to the Pennsylvania and Ohio German communities. No two are alike, which is very evident from the examples in A Catalogue of Pre-Revival Appalachian Dulcimers by L. Allen Smith (University of Missouri Press, 1983). For some, the monetary value is unimportant. What is important is that a piece of American history has been restored to be as close to authentic as possible and can once more make music.

Day 1: Assessment
On the first day, I always look over an instrument to see how much work is needed to repair or restore it. When I opened the shipping box and removed the instrument I let out a slight gasp at the large drips of shellac covering quite a bit of the sides and back. Also, the back had been replaced, not with a single piece of wood, but with two pieces butted end to end. The scroll had broken off, probably over 75 years ago, and the area of the break had been scraped and flattened. The tuning pins were tiny friction pegs that were impossible to turn because the grips hit each other. I knew from research, and from the size of the peg holes, that this scheitholt originally had metal zither-style tuning pins. The holes were exactly 5/16” in diameter, the same size as zither-style tuning pins. Fortunately, the staple-like frets were all still there, as well as the metal nut and bridge. These were made from heavy wire that was cut to length and bent to fit through drilled holes. The bridge was slightly bent, but easily fixable. Three of the hitch pins seemed original. One had been replaced with a small square nail, very similar to the original pins. Besides the drippy shellac, the body had a couple of failed glue joints and an 8” to 10” crack on one side. One piece of wood had broken off the lower s-shaped soundhole, and the playing area below it had a lot of wear and was filled with old wood dough. It appears that this instrument was heavily played.

Day 2: Remove Strings and Tuning Pegs, Remove Small Section of Back
On the second day, I removed the strings and pulled out the small friction pegs. Unfortunately, one of the pegs was broken and only the top came off, leaving the peg stuck in the hole. I used a fine-pointed micro chisel to break apart the remaining peg piece in the hole, finally getting it all out. I test fitted one zither-style peg in each hole and saw that the wood around the holes was stretched out so the zither peg fit too loosely to hold. I would fix that later. A small section of the back, close to the head, had a small glue joint failure, so I took the initiative to remove the small piece to check the inside for any maker’s marks. With part of the back off, it was also easier to get inside to brace and fix the crack in the side. With a pair of inspection mirrors and bright lighting, I was able to see the entire inside of the instrument. Unfortunately, I found no marks or writing. If there were any kind of label or maker’s mark, it was probably on the original back. That makes it impossible to put an accurate date or location of manufacture. However, from my research, this style of instrument was made in the Pennsylvania and Ohio areas, as well as a few communities in other states, from around 1825 to 1885. My gut feeling is this scheitholt was made sometime in the period of 1850 to 1865.
Day 3: Stripping the Old Varnish
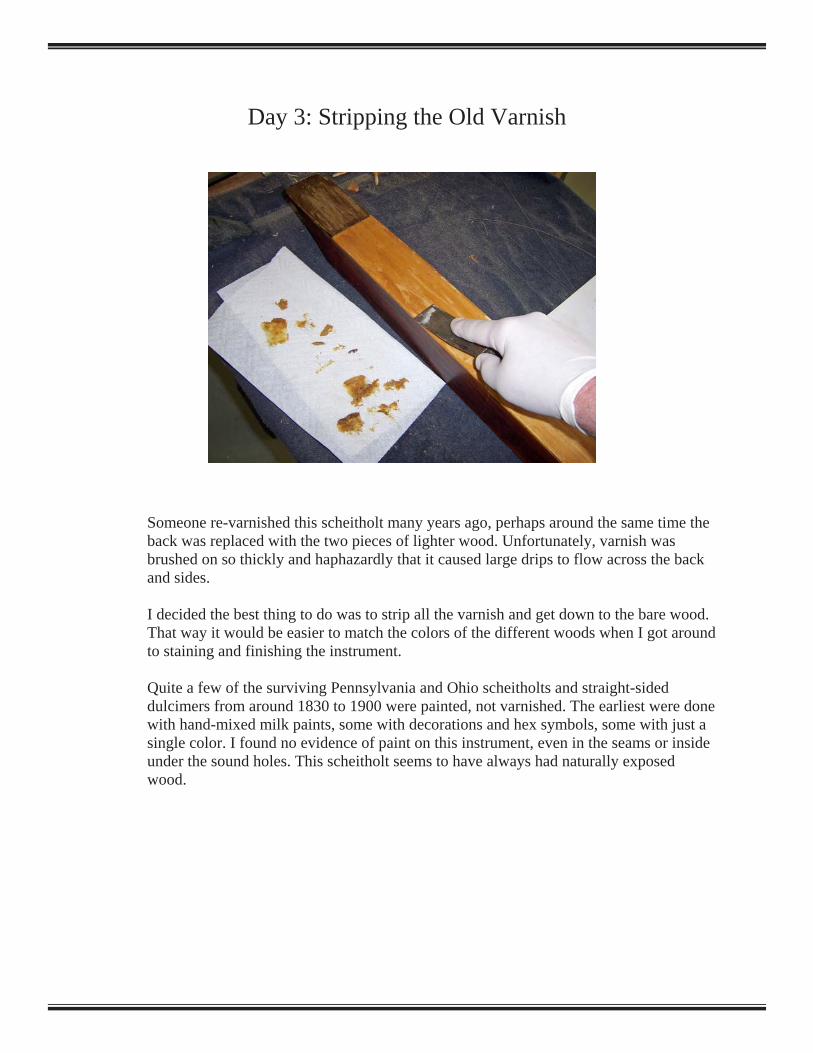
Someone re-varnished this scheitholt many years ago, perhaps around the same time the back was replaced with the two pieces of lighter wood. Unfortunately, varnish was brushed on so thickly and haphazardly that it caused large drips to flow across the back and sides. I decided the best thing to do was to strip all the varnish and get down to the bare wood. That way it would be easier to match the colors of the different woods when I got around to staining and finishing the instrument. Quite a few of the surviving Pennsylvania and Ohio scheitholts and straight-sided dulcimers from around 1830 to 1900 were painted, not varnished. The earliest were done with hand-mixed milk paints, some with decorations and hex symbols, some with just a single color. I found no evidence of paint on this instrument, even in the seams or inside under the sound holes. This scheitholt seems to have always had naturally exposed wood.
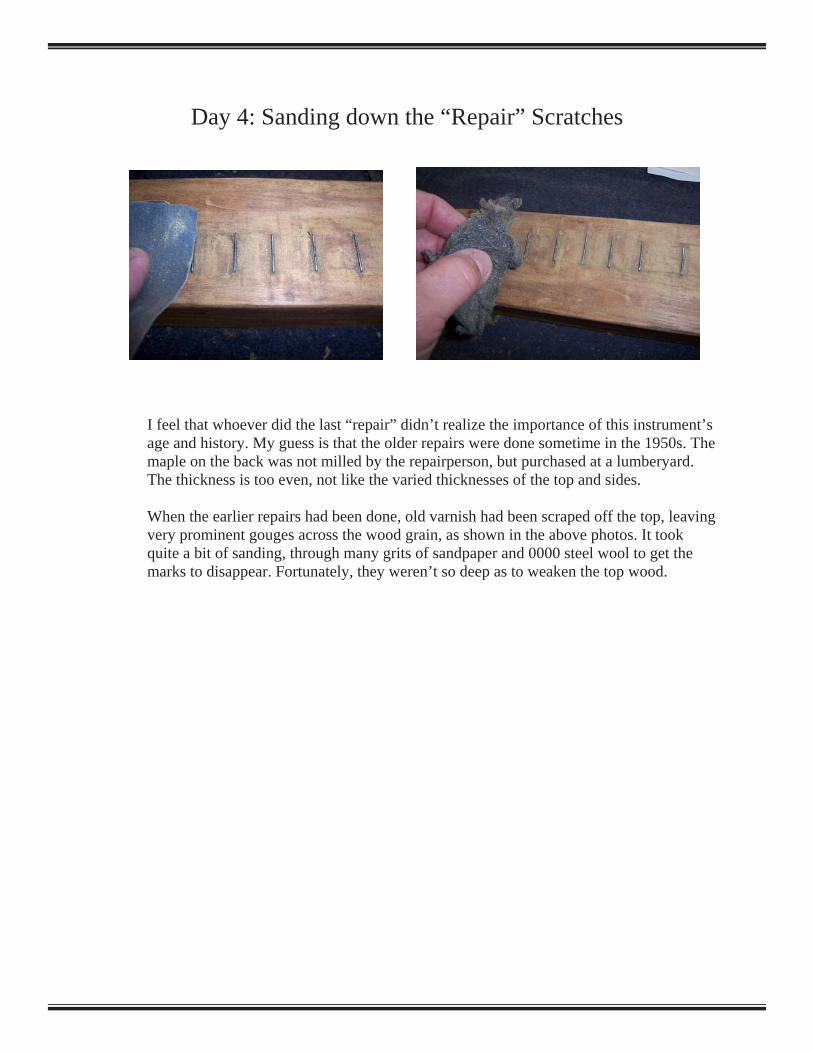
Day 4: Sanding down the “Repair” Scratches I feel that whoever did the last “repair” didn’t realize the importance of this instrument’s age and history. My guess is that the older repairs were done sometime in the 1950s. The maple on the back was not milled by the repairperson, but purchased at a lumberyard. The thickness is too even, not like the varied thicknesses of the top and sides. When the earlier repairs had been done, old varnish had been scraped off the top, leaving very prominent gouges across the wood grain, as shown in the above photos. It took quite a bit of sanding, through many grits of sandpaper and 0000 steel wool to get the marks to disappear. Fortunately, they weren’t so deep as to weaken the top wood.

Day 5: Prepping and Gluing the Side Crack One side, the playing side, had an 8” to 10” crack and slight indentation, like something either hit it, or someone squeezed the body too hard. I couldn’t take all the back off to repair it, but I was able to glue a small brace inside that pushed the indentation back out. I also forced glue into the crack to seal it.

Day 6: Injecting Glue and Fixing Failed Glue Joints
There was one large area of the top and one side that had separated. After using a very fine pointed, thin knife to scrape as much of the crusty old hide glue as possible, I used a hypodermic-style glue injector to force glue into all parts of the crack and clamped it with a few luthier’s clamps.

Day 7: Top and Side Repairs and Fitting a New Head On day 7 I continued to rub out the top scratches some more. I also scraped the top area of the repaired side crack to remove any residual glue and to even up the surface. Also on this day I began the layout and preliminary cutting of the new head. In my research, I found similar instruments with scroll-like heads. Several were very primitive and uncarved with all flat surfaces, and some had violin-style carved scrolls. There was only one I found that had a figurehead, and it was a very primitive dog carving. However, it appears to have been carved later out of the original plain scroll. For this instrument, I decided to do a violin-style scroll. In the above picture, I’m test fitting a piece of poplar to the existing head.

Day 8: Strengthening the Sides and Gluing the Small Back Piece
One of the reasons some of the glue joints failed was not due to old and brittle hide glue, but to the extreme thinness of one of the sides. As I mentioned, the top and side pieces were all different thicknesses. One side, the same side that had the crack, was barely over 1/16” thick. There was just not enough wood to hold a good glue joint. The other side was almost twice as thick, and held the glue much better. Before gluing the small back piece on, I made and glued some short kerf strips not only to allow a larger gluing area, but also to help strengthen the thin sides. Also, before gluing the back piece, I had to scrape all the remaining hide glue off of the head’s glue block. By the end of the day, I was finally able to glue and clamp on the small back section once more.

Day 9: Drilling Out Old Peg and Pin Holes, Making New Ones Today was peg and pin day. The first thing I had to do was to drill out the existing tuning peg holes to be a uniform 3/8”. I then glued and pounded 3/8” maple dowels into the holes. Once the dowels dried, I drilled 5/16” holes in the middle of them for the new zither-style tuning pegs. The dampness seen around the holes in the top right picture is from a liquid called Swellock. It helps swell the wood so the tuning pins hold tighter. On the tail end of the instrument I noticed two small filled holes that obviously had held two guide pins, like the ones at the head. I drilled the bottom holes out with a 1/16” bit and inserted two brass guide pins.

Day 10: Carving the Head Replacement, Fixing Soundhole On Day 10, I started carving the new scroll replacement. Later in the day, I also cut a small piece of maple to repair the lower sound hole. After shaping it, I dry fitted it to make sure it would take glue well and not break off easily. It didn’t work the first time I tried it, so I glued a tiny brace underneath that tied it all together. That worked much better. I also spent a little time continuing to smooth the top. In different lighting, you notice slight imperfections where you thought it was smooth. In the late afternoon, the sun shines brighter through my shop window onto my workbench. This “natural” light shows tiny scratches much better than shop lights.

Day 11: Gluing On the New Head
The next day, I finished carving the head and sanding it down. To glue it to the existing head piece, I drilled a short 5/16” hole in both pieces and glued a short dowel in the new head to line it up and also give a stronger bond. Once in place, one cam clamp held it tightly and in position.
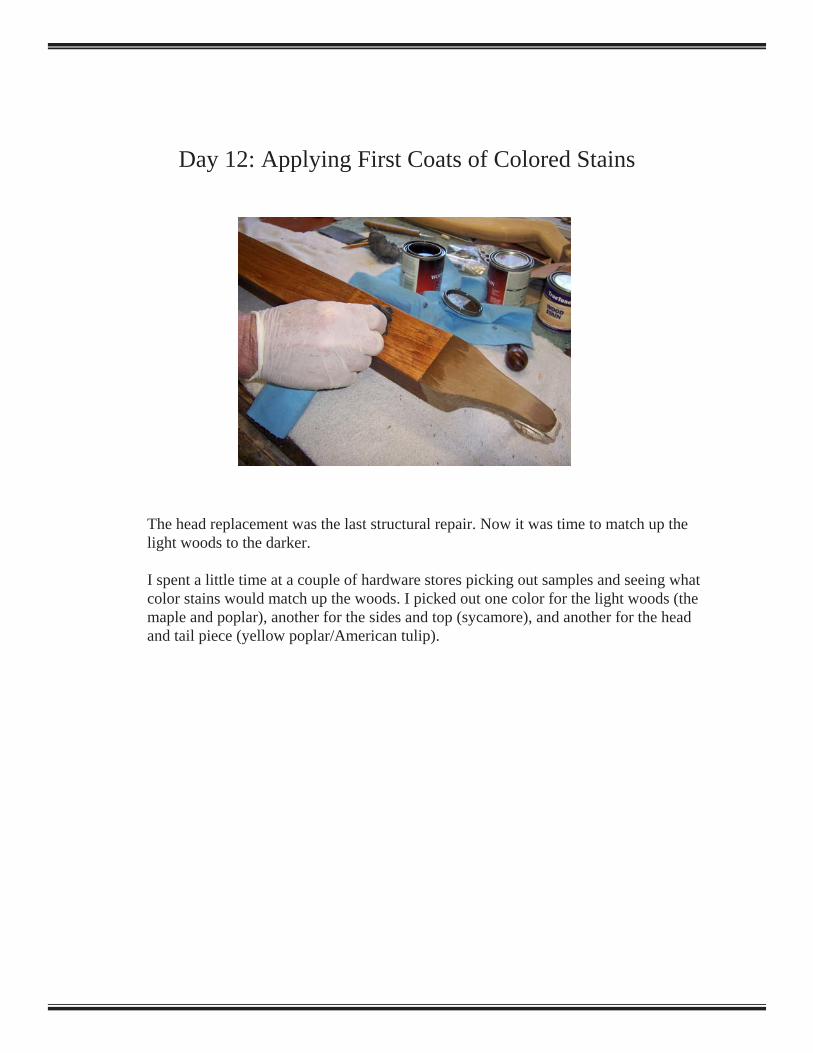
Day 12: Applying First Coats of Colored Stains The head replacement was the last structural repair. Now it was time to match up the light woods to the darker. I spent a little time at a couple of hardware stores picking out samples and seeing what color stains would match up the woods. I picked out one color for the light woods (the maple and poplar), another for the sides and top (sycamore), and another for the head and tail piece (yellow poplar/American tulip).
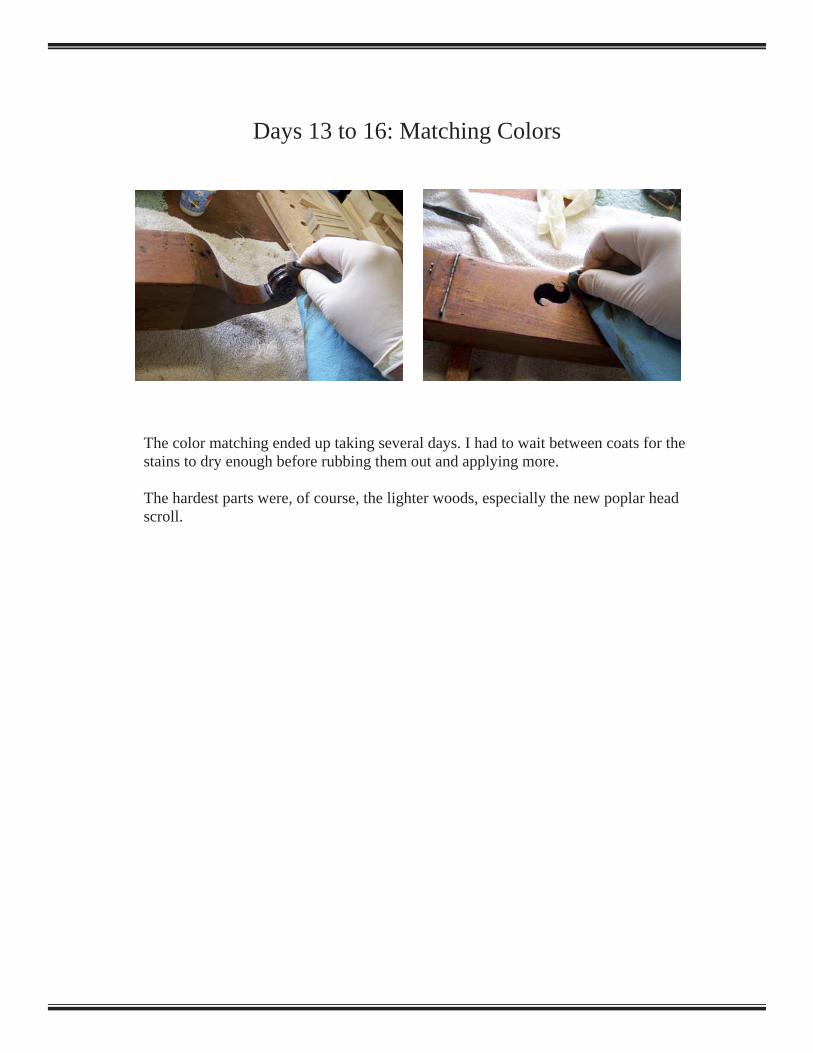
Days 13 to 16: Matching Colors The color matching ended up taking several days. I had to wait between coats for the stains to dry enough before rubbing them out and applying more. The hardest parts were, of course, the lighter woods, especially the new poplar head scroll.

Days 17 to 19: Tung Oil Varnish After finally getting all the colors to match as best as possible, I let the scheitholt dry for a few days. Then I applied three coats of low-gloss tung oil, one coat each day. I used low-gloss tung oil because this type of instrument would not have been polished to a high sheen like a piece of furniture. It is a rustic folk instrument of hand-hewn wood and should have only a matte finish.

Day 20: Light Polish and Stringing
After a few days, the tung oil varnish was very dry. It was now time to do a final rub out with 0000 steel wool to remove any dust spots in the varnish. After that I applied a non-abrasive paste wax, also using 0000 steel wool, to the entire instrument. Using 0000 steel wool impregnated with wax helps give a protective surface without adding gloss. I then installed old style “blued” zither tuning pegs and began stringing it up. I used regular loop-end steel strings, a wound .022 gauge and three plain .012 gauge. These are standard Ionian mode dulcimer strings. (The two melody strings could be changed to .010 for Aeolian or Mixolydian modes.)

Day 20 (later): Tuning and Completion I tuned it up to D-A-AA, the standard dulcimer tuning for Ionian Mode playing, and gave it a little test. Sweet. I played it as a regular lap dulcimer, strumming it and using both my finger and a noter to fret the melody strings. I also bowed the instrument. I noticed in my research that several examples of old Pennsylvania and Ohio scheitholts in museums are displayed with the violin bows that came with them. I’ve also seen an old photo of a woman bowing a scheitholt in Germany. The Icelandic langspil, a type of combination of scheitholt and Norwegian langelik, is more often bowed than strummed. Bowing makes the instrument sound a lot like a hurdy gurdy. It was a pleasure working on this old American treasure. I enjoyed the research, the restoration, and the chance to study an instrument of this age and type. I was able to make measured drawings so that I could replicate it one day. It is, to me, a piece of American musical instrument history that has made music for the last 150 years and is now ready to make music for 150 more.

![LANSINGBURGH HISTORICAL SOCIETY …...Oakwood Cemetery, 1870's-1984, ½ cf. [includes booklet on Crematorium] legal papers, 1830-1865, 12 items [includes 1850 legal opinion on the](https://img.dokumen.tips/doc/110x75/5fdd1c4285ca26704363e88a/lansingburgh-historical-society-oakwood-cemetery-1870s-1984-cf-includes.jpg)