Embed Size (px)
Citation preview

RSF-IIP_12-05
Keep these instructions for future use.
The OPEL AP
Owner's ManualResidential Factory Built Fireplace
Operation • Maintenance • Installation

SAFETY FIRST
3 Do’s and Don’ts
3 Creosote Formation and Need for Removal
GENERAL SPECIFICATIONS
3 Combustion Control System
3 Ash Pan
4 Firescreen
4 Thermostat
4 Internal Circulating Blower
4 Gravity Vent System
4 Central Heat System
4 Catalytic Combustor
OPERATION
5 Lighting
5 First Fire
5 Refueling
5 Refractory Bricks Installation
MAINTENANCE
6 Cleaning
6 Disposal of Ashes
6 Doors
6 Glass
7 Gold Plating
7 Chimney Cleaning
7 Paint
7 Catalytic Combustor
INSTALLATION
8 Location
8 Ceiling Clearance
8 Outside Air Duct
9 General Assembly Illustration
11 Chimney
11 Chimney Installation
12 Masonry Chimney
13 Chase Enclosure
14 Radiation Shield
14 Offset Chimney
14 Framing In
14 Spark Guard
15 Mantel
15 Hearth Extension
15 Beneath Heath Extension
OPTIONS
16 Wall Thermostat
17 Circulating Blower
17 Catalytic Combustor
19 Gold / Pewter Louvers
19 Rock Retainer Kit
21 Remote Venting
21 Gravity Vent System
22 Central Heat System
26 Zone Heating
SCHEMATIC WIRING DIAGRAMS
28 Thermostat
28 Circulating Blower
29 Central Heat System
29 All Systems
30 Zone Heating
FIREPLACE OPTIONS
31 Fireplace Options
REPLACEMENT PARTS
32 Fireplace
33 Assemblies
LABEL
34 Label
WARRANTY
35 Warranty
Page 2
Dear Customer,
The OPEL AP incorporates technology with elegance to give you a beautiful view of the fire with-
out compromising on heating efficiency or environmental quality.
We have designed your new OPEL AP to be easy to install, operate and maintain. It is in your best
interest to become familiar with it. Study your manual to be sure that the installation is correct, then
follow the guidelines for operation and maintenance.
We, at RSF Woodburning Fireplaces, congratulate you on your choice of the OPEL AP, and are
confident that you have purchased a fireplace that is simply, the best.
Sincerely,
The RSF Woodburning Fireplaces Team
April 2003
TABLE OF CONTENTS
OPEL AP

SAFETY FIRST
DO’S AND DON’TS
If this fireplace is not properly installed, a house firemay result. For your safety, follow the installationdirections. Contact local building or fire officialsabout restrictions and installation requirements inyour area.
NOTE: We strongly recommend installers to be WETT orWHERF certified.
To ANYONE using this fireplace:
These DO’s and DO NOTs are for your safety.
1. DO read this instruction manual before lighting your
first fire.
2. DO burn seasoned wood fuel or processed solid fuel
firelogs.
3. To avoid glass breakage, DO NOT slam the fireplace
door.
4. DO NOT use gasoline-type lantern fuel, kerosene,
charcoal lighter fluid or similar liquids to start or
freshen up a fire in this fireplace. Keep all such liq-
uids well away from the fireplace.
5. DO NOT overfire the fireplace. If the chimney
connector behind the top louver glows red, or if
you are unable to slow down the burning rate of
the fire, you are probably overfiring the fireplace.
6. DO operate the fireplace with doors fully open or fully
closed. If doors are left partly open, gas and flame
may be drawn out of the fireplace opening, creating
risks of both fire and smoke.
7. DO keep all combustible materials (furniture, shoes,
etc.) at least 4 feet away from the front of the fire-
place.
8. If the Opel AP is equipped with a catalyst it needs
periodic inspection for proper operation. If you have
the catalyst installed, DO NOT burn chemical chim-
ney cleaners. They contain contaminants that will
render the catalyst inoperative.
9. DO NOT use a fireplace insert or other products not
specified for use with this fireplace.
10. If you use the fireplace with the doors wide open,
install a firescreen (FDFS) to prevent logs and
sparks from burning your floor.
11. Always verify that your ash pan is in place before
igniting a fire.
CREOSOTE: Formation and removal
When wood is burned slowly, it produces tar and other
organic vapours which combine with expelled moisture to
form creosote. The creosote vapours condense in the
relatively cool chimney flue of a slow burning fire. When
ignited, this creosote makes an extremely hot fire. The
chimney should be inspected periodically during the
heating season to see if a creosote build-up has
occurred. If a significant layer of creosote has accumu-
lated (1/4” or more), it should be removed to reduce the
risk of chimney fire.
WARNING: Burn dry wood only! DO NOT BURN: - driftwood
- treated wood
- coal
- garbage
- plastic
Do not use construction scraps (e.g. 2x4 or plywood
scraps) as your only supply of fuel as you may over-
heat and seriously damage the fireplace. Do not use
more than 3 densified fuel logs (e.g. Presto Logs) at a
time. Do not poke or stir the logs while they are burning.
Use only firelogs that have been evaluated for fireplace
use and refer to firelog warnings and caution markings
prior to use.
GENERAL SPECIFICATIONS
THE COMBUSTION CONTROL SYSTEM
Since the doors are sealed, all combustion air must
come through a draft control. This control has a bimetal
coil to allow more air when the unit is cold, and less air
when the unit is hot, guarding against overheating. It can
be controlled either manually through the lever below the
door handles, or automatically through the optional elec-
tric wall thermostat. For the first few days, it is best to
operate the fireplace with the manual control fully on
(moved to the right as far as possible). Just control the
fire as you would any normal fireplace using two or three
large logs at a time for a smaller fire, or more logs for
more heat. Once you become familiar with operating the
fireplace with the control open, you can start experiment-
ing with lower settings. Remember: when the fireplace is
hot, the control will not need as much movement to
reduce the fire as when it is cold. The bimetal coil will
already have shut the damper part way.
THE ASH PAN
The Opel AP is equipped with an ash pan to easily
remove ashes from the firebox. To remove the ashes,
open the doors and, with a poker, remove the ash pan
plug from its hole. Push the ashes through the hole (mak-
ing sure that the ash pan is in proper position). When the
Page 3OPEL AP

ash pan is full, open the bottom louvers of the fireplace.
The louvers can be easily opened by pulling the right
hand side of the louvers. It is held in place by a magnet.
Remove ash pan and dispose of ashes properly. Replace
ash pan and louvers. Replace plug in hole, making sure
it is properly placed before starting a fire. Do not remove
the ashes from the firebox while they are still hot. The
ash pan is not built to resist hot ashes or embers.
Under no circumstances should the fireplace be
operated without the ash pan plug and pan in place.
FIRESCREEN (option)
If you want to use the fireplace with the doors complete-
ly open, you have to run it with the firescreen (FDFS) in
front of the opening. The firescreen will prevent sparks
from falling on the floor. Do not leave the fireplace unat-
tended when using the firescreen.
THERMOSTAT (option)
If you want a constant temperature, day and night, you
will be surprised to see what the wall thermostat option
can do for you. Once you have your fire burning, just set
the manual control on low (push the draft control lever all
the way to the left) and let the automatic thermostat take
over. Your room temperature will stay as even as though
you were heating with oil, gas, or electricity — except you
will find wood heat more comfortable (see options: Wall
Thermostat FDHC4).
NOTE: This thermostat controls the combustion air rate,not the internal circulating blower. Also, when you areusing the automatic thermostat during cold weather, youwill find that the fire burns cleaner if the manual setting ison medium or higher. This will keep the thermostat fromshutting the fireplace right down during the automatic on/ off cycle.
INTERNAL CIRCULATING BLOWER (option)
If you have the optional internal blower installed, adjust
the speed of the blower to the output you require. The
blower speed control should be installed at a convenient
place on the wall. When a fire is burning, the thermal
switch installed inside the fireplace will turn on at 110° F,
allowing the blower to operate. When the Opel AP cools
to 90° F, the switch deactivates the blower. The maxi-
mum heat output of the fireplace is greater with the blow-
er running (see options: Circulating Blower FDHB5-N).
GRAVITY VENT SYSTEM (option)
If there are areas in your home that you would like to
heat either in an upper level or an adjacent room, the
gravity vent system can provide this heat without the use
of a blower. It is controlled by a gravity vent damper.
The handle is located between the top louvers of the fire-
place. Simply turn the lever to adjust the air flow through
the gravity vent ducting. As the hot air rises, it will be dis-
tributed through the insulated ducting to the outlet (see
options: Gravity Vent System FDV).
CENTRAL HEAT SYSTEM (option)
You have the option to heat remote rooms in your home
with the heat generated by your fireplace. If this option
is installed, there will be a wall thermostat installed in the
main room you want to heat, away from the room which
contains the fireplace. This thermostat controls the blow-
er, which brings air to the other rooms in your home,
keeping them at the temperature you desire. When the
blower is running, it takes air from the room the Opel AP
is in, draws it around the fireplace and distributes it (see
options: Central Heating System FDHC6 / FDHB6).
NOTE: The blower (FDHB6) can push warm air either upor down, and can also be zone controlled ( See Options:Zone Heating).
HINT: If some evening you would like to enjoy the ambi-ence of the wood flame, but you are a little too warm, turnup the central heating thermostat and open a window bythe thermostat. This will keep your room in front of thefire from getting too warm.
CATALYTIC COMBUSTOR (option)
If the Opel AP is equipped with a catalyst, it ignites cre-
osote-forming gases in wood smoke at significantly lower
temperatures. As a result, you get less creosote and
more heat from your fire at low to medium burn rates.
Less fuel goes up your chimney in the form of smoke. In
addition to the list on page 3, DO NOT burn chemical
chimney cleaners, as they can contain contaminants that
will render the catalyst inoperative.
The catalytic option comes with a bypass damper which
serves two functions:
a) to eliminate smoking into the room when the doors are
opened;
b) to allow the fire to start quickly when the fireplace is cold.
Make sure the bypass damper above the right door is
pulled all the way out before opening the doors. When
starting a fire, the bypass damper should be left open
long enough to establish sufficient draft (approximately
30 minutes).
The temperature in the firebox and the gases entering
the catalyst must be raised to at least 500° F for catalyt-
ic activity to be initiated. When you start the fire, keep a
medium to high fire for about 30 minutes to stabilize the
Page 4OPEL AP

catalyst at a sufficient operating temperature. If the fire
is allowed to die down too soon after starting, the catalyst
may stop working. After the 30 minutes of a medium to
high burn, however, the catalyst will operate with the heat
generated by the burning smoke, even with a low fire.
OPERATION
LIGHTING
Slide the draft control under the doors all the way to the
right. Light a fire in the fireplace, starting with paper and
kindling only. Then add 2-3" diameter pieces of wood.
After the fire is established, close the doors to prevent
overheating (see the Combustion Control section).
Never use any flammable liquids. Once a coal bed is
established, add standard cord wood. Leave the draft
control open until the fire is well lit, then adjust it to the
level you desire.
WARNING: Do not use a grate or elevate the fire.
THE FIRST FIRE
Before the first fire, be absolutely sure to wipe off all
fingerprints and debris from the gold plating. The
plating undergoes a sealing process during this first fire,
and the acid from your finger prints will permanently etch
the gold plating. You will experience a slow start-up dur-
ing the first fire. The refractory bricks still contain mois-
ture and take a good hot fire to get rid of the moisture.
While there is moisture in the bricks, the bricks will be
black with smoke deposits. When the moisture is gone,
the bricks will be white. You may also experience a slight
odour during the first few fires. This odour results from
curing paint and the burn-off of oil.
REFUELING
Fuel wood can be of any species, however, ensure that
the wood is well seasoned and kept under cover.
Sixteen to eighteen inch lengths work the best.
NOTE: The central heat and internal blowers, ifinstalled, should be shut off during refuelling.
The doors should be opened slowly, moving both
doors together, to keep smoke from spilling into
your room. If you do have smoke spillage, check to
see that all kitchen and bathroom fans have been
shut off. They can cause a vacuum in the house,
which pulls smoke out of the fireplace.
If you have the Opel AP with the catalyst: after refuelling
a cool fire or a fire that has burned down to a cool coal
bed, operate the fire at a medium to high burn rate for at
least 10 minutes to ensure that the catalyst reaches
operating temperature.
REFRACTORY BRICKS INSTALLATION
Before lighting your first fire you must make sure the
refractory is properly installed inside the firebox. This is
easily accomplished with the following instructions. First,
through the front opening of the fireplace pass the baffle
(11.6.P). Next, place the baffle parallel to the opening
with the narrower portion on top. Slide the baffle onto the
bracket at the top of the firebox until it is as far back as it
can go. Install the back left and back right (11.11.P and
11.12.P) at the back of the firebox with the joint in the
center. These will be secured in place by the two side
rear (11.9.P and 11.10.P) refractories. To install these
two refractories, put the top corner into the bracket and
slide the entire refractory into place. The two small front
refractories (11.7.P and 11.8.P) are installed with the fin-
ished side towards the front of the unit. See (Figure 1b)
below for more details.
These refractories have been designed specifically for
the Opel AP and no modifications are required to ensure
a proper fit.
Page 5OPEL AP
Fireplace face
Thick facing
Rod extension
Pull hook
Decorative collar
Set screwbypass eye
Handle
Figure 1a: Bypass control with extension rod
11.7.P
11.9.P
11.6.P
11.11.P
11.12.P
11.10.P
11.8.P
11.14.P
11.15.P
Figure 1b: Refractory bricks installation

Page 6OPEL AP
MAINTENANCE
CLEANING
The high-heat paint and gold plating can be cleaned with
a soft moist cloth. Use a mild detergent and water. Do
not use abrasive cleaners!
DISPOSAL OF ASHES
Clean the ashes before they become too deep, i.e.,
before you have a spillage problem when opening the
doors.
When removed from the ash pan, ashes should be
placed in a metal container with a tight fitting lid. The
closed container of ashes should be placed on a non-
combustible floor or on the ground, well away from all
combustible materials, pending final disposal. If the
ashes are disposed of by burial, or otherwise locally dis-
persed, they should be retained in the closed container
until all cinders have thoroughly cooled.
DOORS
Keep the door latch and hinges lubricated with all-pur-
pose grease at least annually. To adjust the door closer,
tighten the Allen screw (as shown in Figure 2) to ensure
that the door closes tightly. The hinges can be adjust by
loosening the nut underneath (Picture 1). Close the right
hand door while the door closer is not latched. Adjust the
door so that the joint between the two doors is straight
and level. Push the door firmly against the facade of the
fireplace while tightening the hinge nuts. Use a screw-
driver on the bottom of the hinge pin and a wrench to
tighten the nut. Be sure that the door latch can easily go
into its slot on the façade. Adjust the left hand door so
that the top arch and the joint are flush with the right
hand door. With the right hand door open, push on the
left hand door firmly against the façade of the fireplace
while tightening the hinge nuts. Re-tighten the door clos-
er as described above.
If the door seal is damaged to the point where it does not
seal tightly, replace the gasket. The Gasket Replacement
Kit (FDGRK2) is available from your dealer.
It is normal to push on the handle to close the doors
(Picture 3). To verify that the doors are well sealed, insert
a piece of paper between the door and the fireplace
(Picture 4). Along the top of the door you should be able
to tear the paper when it is pulled out. On the side and
bottom part, you should be able to pull out the piece of
paper with some resistance (Picture 5).
NOTE: An improperly adjusted door seal can have a sig-nificant effect of the performance and durability of thefireplace. A poorly adjusted door can result in reducedefficiency, excessive wood consumption and pre-maturefireplace failure.
GLASS
In a controlled combustion firebox temperatures are not
always high enough to keep the glass perfectly clean. A
good hot fire in the morning usually cleans off most of the
deposits that have accumulated during the night.
Remember the drier the wood, the cleaner the glass. A
Figure 2: Door adjustment
Adjusthere
Loosen
Tighten
Picture 1
Picture 2

word of caution: although heat will not break the glass, a
good blow can. Be careful not to hit the glass.
WARNING: Never clean this glass with an abrasivecleaner. Use only a cleaner recommended by yourdealer. Never clean the glass while it is hot, a seriousburn can result. There are a number of excellentwood stove glass cleaners available.
If your glass breaks:
See your dealer for the exact replacement glass. If the
gasket is damaged, it must be replaced with the identical
kind (14.10.2). Place the gasket on the door frame
between the door and the glass (it is self-sticking).
1. Remove the door from the fireplace by lifting it off the
hinges.
2. Remove the clips holding the glass.
3. Clean out any bits of glass and dirt from the gasket.
4. Place the new glass into the opening and replace the
clips being careful not to over-tighten the screws.
5. Check the glass by trying to move it back and forth. It
should feel snug, but move slightly without too much
effort.
GOLD PLATING
If you have gold/pewter doors or gold/pewter louvers you
will be happy to know that they will not tarnish however
they are not scratch resistant. They require a totally
abrasive free cleaner. Use only mild soap and warm
water to clean the gold when the surface is cool. The use
of any household cleaner, such as Windex, abrasive
cleaners, or any form of acid, may permanently etch or
remove some of the gold plating. Before every fire, be
absolutely sure to wipe off all fingerprints from the gold
plating. Acid from debris or your fingerprints may perma-
nently etch the gold plating.
CHIMNEY CLEANING
Check the chimney for creosote build-up every week
until experience shows how often cleaning is necessary.
A build-up of 1/4 inch or more should be cleaned before
more creosote accumulates. Use a 7 inch diameter wire
brush. The baffle in the firebox must be removed to gain
access to the flue from below.
Baffle removal:
1. Remove the secondary air tube and the refractory lin-
ers.
2. Slide the baffle towards the front of the fireplace and
rotate it so that you can lower it to the bottom of the
fireplace opening.
3. Remove the baffle through the door opening.
Follow the reverse procedure to re-install it.
PAINT
You may touch up the face of the Opel AP with STOVE
BRIGHT Flat Black high temperature paint. The correct
paint is available from your dealer. When you paint the
face of the fireplace, remove the gold items (i.e., doors
and louvers), and cover the area surrounding the fire-
place with newspaper. Follow the directions outlined on
the spray can. DO NOT attempt to paint while the fire-
place is still warm. Keep the spray can away from any
source of heat or open flame. Ensure that there is ade-
quate ventilation in the room from the time you start
painting until the paint is dry.
CATALYTIC COMBUSTOR (option)
The catalyst is warranted by the catalyst manufacturer,
please insure that you keep the warranty card. If the cat-
alyst fails, it should be replaced with Applied Ceramics
Model 3621202-52-C. The dimensions of the catalyst are
3.875" x 12.25" x 2".
Page 7OPEL AP
Picture 4Picture 3 Picture 5

It is important to periodically monitor the operation of the
catalyst to ensure that it is functioning properly and to
determine when it needs to be replaced. A non-function-
ing catalyst will result in a loss of heating efficiency, and
an increase in creosote and emissions.
Catalysts should be visually inspected at least three
times during the heating season to determine if physical
degradation has occurred. Actual removal of the catalyst
is not recommended unless a more detailed inspection is
needed because of a noticeable decrease in perform-
ance.
You can get an indication of whether the catalyst is work-
ing by comparing the amount of smoke leaving the chim-
ney when the smoke is going through the chimney after
light-off has been achieved, to the amount of smoke
leaving the chimney when the bypass damper is open:
1. Light the fire in accordance with the instructions
under lighting. After the fireplace is warm, set the
manual control (and the thermostat, if this option is
installed) to low.
2. With the bypass damper closed, the smoke is routed
through the catalyst. Go outside and observe the
emissions leaving the chimney.
3. Open the bypass damper and again observe the
emissions leaving the chimney.
Significantly more smoke should be seen when the
exhaust is not routed through the catalyst, i.e., with the
bypass damper open. Be careful not to confuse smoke
with steam from wet wood.
The catalytic combustor is self-cleaning, and requires
very little maintenance. Any loose ash should be
removed with a paintbrush. If the catalyst is plugged with
creosote, you may try burning it off by leaving the bypass
damper in a partially open position and pushing the draft
control all the way to the right. You may also burn off the
excess creosote with a propane torch.
WARNING: Do not use sharp or hard tools to cleanthe catalytic combustor as this will damage it.
Catalyst removal and replacement
1. Remove the screws holding the brackets, one on
each side of the catalyst.
2. Carefully ease out the catalyst, using a knife blade if
it is tight.
3. Replace the catalyst the same way it was removed. If
the gasket is loose, re-cement it to the outside using
a silicone adhesive. A damaged gasket should be
replaced with 3M “Interam” 1/16” x 2” x 36”.
INSTALLATION
Check local codes concerning restrictions and installa-
tion requirements in your area.
WARNING: Remove the doors before installation andplace them in a safe area to reduce the possibility of:
a) Vandalism ;
b) Sub-trade tool abrasion, chipping, or breaking of
glass ;
c) Gold finish damage because of muriatic acid, plaster,
cement, paint and harmful sprays or liquids.
LOCATION
Your Opel AP fireplace may be installed in many different
ways (see Figure 4) without any special floor reinforce-
ment.
WARNING: If this fireplace is not properly installed, ahouse fire may result. For your safety, follow theinstallation directions and clearances.
1. Note the location of roof and floor joists. Choose a
location that does not require cutting them.
2. Do not build shelves or cupboards in the area above
the fireplace. This space must be kept empty.
3. If at all possible, run the chimney up the inside of the
house. If it must be run up outside, it should be
enclosed in an insulated enclosure (see Installation:
Chase Enclosure). Remember, a cold chimney caus-
es poor draft!
CEILING CLEARANCE
Ceiling clearance is the distance from the top of the fire-
place to the ceiling.
If the space between the top of the fireplace and the ceil-
ing joists is less than 37 inches, the enclosure around the
fireplace MUST be vented. Place a minimum 3" X 10"
vent grille into holes cut within one foot of both the floor
and ceiling levels, to allow room air to circulate through
the fireplace enclosure and reduce heat buildup. These
vent grills may be placed vertically or horizontally. Under
no circumstances is the distance between the ceiling and
the top of the unit to be less than 25 inches (see Figure
3).
OUTSIDE AIR DUCT
After the fireplace is correctly positioned, connect the
combustion air inlet to the outside (see Figure 5).
A 4 inch diameter duct can be used if the total run of the
pipe is less than 25 feet. If the total run is longer than 25
feet, a 5 inch diameter pipe must be used.
Page 8OPEL AP

Page 9OPEL AP
Rain cap
Storm collar
Roof flashing
Radiation shieldand storm collar
Ceiling
Radiationshield
Central heatblower
Back draftdamper
Header
Gravity ventdamper handle
Hearth extension
The hearth can be made of any permanentlyaffixed, non-combustible material
- See the manual for flueheight requirements.
- The central heat blowermay be installed on theleft side.
- Gravity vent may beinstalled on the left, rightor both sides.
B-vent components for
gravity system only
(or Ultrablack double wall
connector made by ICC).
Ceiling clearance
(minimum from the top of
the fireplace) :
25” for vented enclosure
37” for sealed enclosure
Fresh air hood
24” minimum depth ofopening
Electrical knockouts
5” wide sheet metalspark guard
Figure 3: Assembly drawing
Metal sheet and DUROCK© board(see page 16)

1. Find a convenient location for the combustion air duct
and register. The location of the register may be
above or below floor level.
2. Make a 4 1/4"(5 1/4" if using a 5" diameter duct) hole
in the outside wall of the house. Mount the register in
the hole from the outside with the inlet facing down.
3. Place the insulated flexible duct over the register tube
and outside air connector sleeve. At both ends, care-
fully pull back the insulation and plastic cover, expos-
ing the flexible duct. Then at each end, attach the
duct with metal screws to the inlet and tube. Carefully
push the insulation and cover back over the duct.
Tape the plastic cover in place with the 2" aluminum
duct.
CAUTION: When running duct aroundcorners, be sure to prevent crimpingthat would restrict the combustion air-flow.
Use an insulated duct rated at over 200°
F. Our testing has shown that as long
as the 5" diameter insulated duct is uti-
lized properly, there is no restriction on
the length of the run. It is recommended
that the duct does not exceed 12 ft. ver-
tical height rise above the base of the
unit. The air inlet should never be less
than 5 ft. below the top of the chimney
flue and should not terminate in attic
spaces.
Page 10OPEL AP
24”
38 1/2”
8 3/4” min. toside wall
Block
58”
38 1/2”
18”
82”
24”38 1/2”
49”
These framing dimensions
are larger than required for
ease of installation. The fire-
place has a minimum clear-
ance of 0” to standoff (see
unit dimensions Figure 13).
NOTE: When framing with
2x6’s and installing the gravity
vent option, be sure to allow
for the 2” minimum clearance
between the header and the
B-vent pipe. (see Figure 13)
for gravity vent locations.
Figure 4: Location and framing dimensions
Outside airconnection
1 2
Opel AP
Outside air register
2” aluminium duct tape
Insulated flexible air ductOutside wall
Figure 5: Outside air connection and installation options

Outside air control
The Opel AP is designed to use outside air for combus-
tion but you may choose to use inside air for combustion
air instead. To do so, open the sliding door on the bottom
inside right of the fireplace (behind the bottom louvers).
Note that the fireplace uses outside air when the handle
is closer to the back of the fireplace and inside air when
it’s closer to the front. We recommend the use of out-
side air for combustion.
CHIMNEY
This fireplace is certified for use with 7” ICC Model
EXCEL chimney. The chimney system height from the
top of the fireplace must be a minimum of 12 ft. and a max-
imum of 40 ft.
We recommend that the minimum height be increased by
approximately 1 ft. for every 2000 ft. elevation above sea
level. Every 30° or 45° elbow also increases the mini-
mum height by 1 ft. For example, if you are living 6000
ft. above sea level, your chimney should terminate at
least 15 ft. from the top of the fireplace (12 ft. + 3 ft. for
the 6000 ft.). (See Table 1) for more precise recom-
mended flue heights.
CHIMNEY INSTALLATION
NOTE: The clearance between the chimney and com-bustible material must be 2" or more. DO NOT fill thisarea with insulation.
1. Cut and frame the required holes in the floor, ceiling
and roof where the chimney will pass through. Use a
plumb bob. The rough opening in the framing size
is 13 1/4” square.
2. From below, install a radiation shield in each floor
through which the chimney passes. At the attic level,
install a radiation shield and a storm collar as shown
in (Figure 6).
3. Place the first chimney length on the fireplace.
Secure the chimney length to the fireplace with the
three screws provided.
The chimney must extend at least 3 ft. above its point of
contact with the roof and at least 2 ft. higher than any
wall, roof, or building within 10 ft. of it.
NOTE: If the chimney is higher than 5 ft. above the roof,it must be secured using a roof brace.
4. Put the roof flashing into place. Seal the joint between
the roof and the flashing with roofing tar. For sloping
roofs, place the flashing under the upper shingles and
on top of the lower shingles. Nail the flashing to the
roof using roofing nails.
If the chimney is enclosed to the roof:
-USA: use a vented flashing.
-CANADA: use a vented flashing or a
roof radiation shield (ERRS)
and a regular flashing.
5. Place the storm collar over the chimney and flashing.
Seal it around the chimney with silicone sealer (DO
NOT use roofing tar).
6. Fit the rain cap on the chimney. Secure it tightly in
place.
7. Read the EXCEL Chimney installation manual con-
cerning requirements for supports, bracing, anchors,
etc.
8. The maximum height of chimney that can be support-
ed by the top of the fireplace is 18 feet.
Page 11OPEL AP
TABLE 1
MINIMUM RECOMMENDED FLUE HEIGHTS IN FEET FROM THE TOP OF THE FIREPLACE
NUMBER OF ELBOWS
Elevation(ft) 0 2 x 15° 4 x 15° 2 x 30° 4 x 30° 2 x 45° 4 x 45°
0-1000 12’ 13’ 14’ 15’ 18’ 16’ 20’1000-2000 12’6” 13’6” 14’6” 15’6” 19’ 16’6” 20’
2000-3000 13’ 14’ 15’ 16’ 19’6” 17’ 21’6”
3000-4000 13’6” 14’6” 15’6” 17’ 20’ 18’ 22’6”
4000-5000 14’ 15’ 16’ 17’6” 21’ 18’6” 23’
5000-6000 14’6” 15’6” 17’ 18’ 21’6” 19’ 24’
6000-7000 15’ 16’ 17’6” 18’6” 22’ 20’ 24’6”
7000-8000 15’6” 16’6” 18’ 19’ 23’ 20’6” 25’6”
8000-9000 16’ 17’ 18’6” 20’ 24’ 21’ 26’6”
9000-10000 16’6” 17’6” 19’ 20’6” 24’6” 22’ 27’

MASONRY CHIMNEY
WARNING: When contemplating using an existingchimney, it must first be thoroughly inspected by anauthority having jurisdiction to determine the follow-ing:
1. It is a well constructed, lined
masonry chimney, fully in
accordance with Local Building
Codes and the National
Building Code of Canada
NBCC 9.21 or NFPA 211.
2. It has been thoroughly cleaned
of any soot or creosote residue
and inspected to determine that
it is in good condition.
3. There is no attic insulation of
any type in contact with the
chimney and no insulation
stuffed in around the chimney at
any point, for any reason.
4. There is, as per NBCC 9.21 or
NFPA 211, the necessary air
space clearance at all points around the
chimney from floor to roof flashing. If the
chimney is enclosed in drywall, openings will
probably be required in order to verify clear-
ances at all points.
5. Chimney will be used only for the fire-
place and may not be used to vent a fur-
nace, water heater or any other appliance.
6. If major repairs are required to meet the
above conditions, a new chimney should be
constructed.
New chimney installation:
To ensure adequate draft and to facilitate
cleaning, the fireplace must be connected to
the chimney using 7" diameter EXCEL chim-
ney with an elbow, as shown in (Figure 7).
An ICC 7" rigid stainless steel liner and a 45°
stainless steel elbow are attached to the
chimney and secured in place using a liner
adapter (FDM). If you use a 6 x 10 clay liner
you will need to ovalize the stainless steel
liner to fit into the clay liner. It is recom-
mended that you position your fireplace
before building the chimney. The factory
built chimney sections can easily be
installed as the layers of brick are being
placed.
NOTE: If the ceiling is high enough some vertical chim-ney can be installed before the 45° or 30° elbow isinstalled.
Page 12OPEL AP
Rain cap
3’ min.Stormcollar
Flashing
Storm collar
Radiationshield
2” min.
WARNING: DO NOT PACKREQUIRED AIR SPACES WITH INSU-LATION OR OTHER MATERIALS1-hour fire rated enclosure requiredwhen chimney passes occupied livingspace (closets, etc.). 2” min. clearancefrom chimney.
Opel AP
NOTE: openingsmust be framedto adequatelysupport anychimney sup-ports and roofassemblies
10’ min.
2’ min.
37” min. (84 frombase to ceiling) forsealed enclosure
25” min. (72 frombase to ceiling) forvented enclosure
Louverdvents
Figure 6: Chimney installation
Clearance as per NBCC9.21 or NFPA 211
Metalfirestop
Masonry
adaptor
(FDM)
Excel liner or other liner list-ed to ULC-S635, ULC-S640or UL1777
12” min. to combustible ceiling
Excel 7” chimney18” min. length
Excel elbow
Figure 7: Connection to masonry chimney

Existing chimney installation:
If it is difficult to install rigid stainless on an existing chim-
ney, a listed stainless steel flex liner can be used. Special
care is to be taken when installing the flexible liner. A
positive connection is assured with the masonry adaptor
(FDM) available from your dealer. The stainless steel flex
liner connects to the masonry adaptor with a flexible/rigid
adaptor (LAF) and is secured with the 3 stainless steel
rivets provided. The masonry adaptor is then secured to
the Excel chimney with the 3 screws provided. The stain-
less steel liner fits inside the clay liner all the way to the
top of the masonry chimney. It is not meant to replace the
clay liner. After mortaring in place, the connection should
not be visible. Care must be taken when cleaning to
ensure that the stainless steel flex liner is not dislodged.
As depicted in (Figure 7), the EXCEL chimney is to be a
minimum of 18" from the connection point at the elbow to
the masonry adaptor. The uppermost part of the metal
chimney where it enters the masonry chimney must be a
minimum of 12 inches from the ceiling.
1. Sight-in and mark the outline of where the factory-
built chimney will penetrate the masonry chimney.
2. Using a large (3/4" - 2") masonry drill bit, drill a hole
exactly in the center of the oval outline. With a
masonry hammer and drill, slowly enlarge the hole to
the size required. Remember to work from the center
out. Be especially careful with the clay liner behind
the brick because three sides of it must stay in place.
3. Bring the stainless steel liner down from the top of the
chimney. If you are using a rigid liner you will need
enough room to secure an elbow to it with at least two
screws. For chimneys with less than 10" X 10" inside
you may find it easier to install a flex liner and secure
the end with a special adapter (LAF) available from
your dealer.
4. Move the fireplace forward enough to install the
length of EXCEL chimney then move the fireplace
back into position as you connect the masonry adap-
tor to the EXCEL chimney.
CHASE ENCLOSURE
If the chimney runs up the outside of the house, it must
be enclosed in a chase structure. It is best to locate the
chase away from any overhead obstructions and meet all
clearances from such objects. The chase should be con-
structed in such a way that it is an extension of the home.
It should be well insulated between the footings and the
floor of the home to prevent heat loss. If the climate in
your area is mild, insulate the chase at least to the first
fire-stop. If the climate in your area is very cold, insulate
the chase to the top to keep the flue warmer, to increase
the draft, and reduce creosote buildup.
Page 13OPEL AP
10 ft
2 ftmin.
Storm collar
Flashing*
12” min.
Insulation
Chase liner of fire rated gypsum
board is recommended (may be
required by local authorities)
Fire stop, joist radiation shield
2” min. clearanceto com-bustibles
Figure 9: Chimney installation with chase enclosure
In USA: Use vented flashing
In CANADA:Use Roof RadiationShield (ERRS) and a regular flashing
Opel AP
Use offsetsupport
Radiationshield
Offset
Rise
3 metalscrews ineach joint
Radiation shield
Figure 8: Offset chimney installation
Storm collar
Offsetsuport

NOTE: In USA if the chase is enclosed or flashed to theroof as shown in (Figure 9), then the flashing must bevented.
If required by local codes, make certain that the walls
have been properly insulated, vapor sealed and
sheathed with a fire rated gypsum board (see Figure 9).
REMEMBER: Check local codes concerning installationrequirements and restrictions in your area.
RADIATION SHIELD
A radiation shield must be placed where the chimney
passes through each floor level overhead. This will assist
in retarding any spread of fire and act to contain the fire
within the area below the radiation shield.
OFFSET CHIMNEY
Maximum offset angle: 45°
Maximum number of elbows: 4, resulting in two
(2) offsets.
An elbow may be installed directly on top of the fireplaceif required.
Use the offset option if you need to clear a joist or pass
around a cupboard. Install the fireplace and chimney as
described earlier. When you require an elbow, proceed
as follows:
See the detailed offset chart in the EXCEL installationinstructions.
1. Install the required elbow. Turn it in the desired direc-
tion, and fasten it to the other section with the 3 metal
screws provided at the joint.
2. Install enough lengths to obtain the desired offset.
Secure each joint with 3 metal screws.
3. Use another elbow to return the chimney to the verti-
cal direction.
4. Install a roof support, wall support, or an offset support
at each offset to support the weight of the flue (elbows
are not designed to support a flue above an offset).
FRAMING IN
The enclosure walls can be framed with any suitable
materials (2x4 or 2x6 studs, plywood, gypsum board,
etc.). Because of the high heat output potential of the
Opel AP, combustible material must NOT go closer to
the fireplace than the standoffs, top, back and sides.
If you like, framing can be set back to allow the facing to
be flush with the front of the fireplace.
Each top standoff has a notch where the gypsum board
can be inserted when finishing.
In front of each side standoff there is a gypsum board
bracket to lean the finishing wall on. Under no circum-
stance the gypsum board or finishing wall should be
placed below this bracket or notch line.
SPARK GUARD
Install a 5" piece of sheet metal centered under the joint
between the fireplace and the hearth extension. This will
make certain that sparks cannot lodge in the crack and
start a fire. If you are preparing a raised installation, then
Page 14OPEL AP
Z-shaped spark guard for raisedinstallation must be custom suppliedby installer (minimum 26 gaugesteel)
Non-combustibleflooring
Figure 10: Z-shaped spark guard
Raised platform
Opel AP
2 ftmin.
10 ft.
Flashing*
12” min.
2” min. to combustibles
Wall support
Radiation shieldand offset, roofor wall support
Insulated firestop in
angle(30° or 45°)Opel AP
In USA: Use vented flashing
In CANADA: Use Roof Radiation Shield (ERRS) and a regular flashing
Figure 11: Offset chimney through a wall

a “Z” shaped spark guard must be installed. The
height of the Z-shaped spark guard must equal
the distance between the floor and the base of the
unit. The minimum depth the spark guard must
extend beneath the Opel AP is 2 1/2 inches. The
spark guard must run the full length of the fire-
place. (Z-SHAPED GUARD NOT SUPPLIED.)
MANTEL
A masonry or other non-combustible mantel may
be placed directly above the top louvers. If a wood
or other combustible mantel is desired, then it
must be at least 28” (54" from the base of the fire-
place) above the top of the door opening (see
Figure 14).
HEARTH EXTENSION
The area immediately in front of the fireplace must
be protected by a non-combustible material such
as brick, tile, stone, or slate. The protection must
extend at least 16" in front and 8" on both sides of
the fireplace opening. There is no minimum thick-
ness required for the hearth extension.
BENEATH HEARTH EXTENSION
Installation required in the USA only.
The Opel AP must use a metal sheet and
1/2” Durock© cement board beneath the
hearth extension - unless it is raised at
least 4 inches above the base of the
hearth. The metal sheet and Durock©
board must have the same dimension as
the hearth extension, namely, 16” wide
and 38 1/2” long.
If the fireplace is raised 4” or more, the
area in front of the fireplace just needs to
be covered with a non-combustible mate-
rial such as metal, brick, stone or slate, it
does not require the Durock© board.
There is no minimum thickness required
for this non-combustible hearth exten-
sion. The 5” wide spark guard must be
installed underneath either the hearth
extension or the Durock© board.
NOTE: if the Opel AP is installed on aconcrete floor, the Durock© board andspark guard are not required.
Page 15OPEL AP
11” 11”
11¼”
24” to standoff
37” to standoff
1 ½”
Opening forcentral heator gravity ventducting
25”
39 ¼”
1 ¾” 15 ¼”
5 ¾”
36”
18 7/8”
29 ½”
4 1/8”
48” to
top standoff
½” 1 ¼”
Figure 13: Unit dimensions
Opening for gravity vent only
8” max.
Mantel
12” min.from sidewall toedge oflouvers
46 ¾”
54”
23”38 ½”
16”
Insulation ¾”Non-combustiblehearth
Figure 12: Clearance to combustibles
NOTE: Metal sheetand Durock© cementboard (in USA only).

OPEL AP OPTIONS
Just a few comments about your Opel AP options. The
size and shape of your home and how you intend to use
your fireplace will determine the options you require.
For a basic, high-efficiency fireplace, you won’t need any
options or electricity.
Automatic temperature control can be accomplished by
adding the thermostat option (FDHC4). The thermostat
automatically controls the amount of combus-
tion air to the fire, leaving your home at an
even preset temperature. If you seriously plan
to heat your home with the fireplace, the ther-
mostat option will increase comfort, end the
fuss of continued manual adjustment, and
reduce wood consumption.
For more heat output and increased air circu-
lation, you can add the internal blower
(FDHB5). For larger homes in colder climates,
this is an important option if you plan to use
the fireplace as a serious source of heat.
NOTE: It will be difficult to install the internalblower if wiring is not run during framing. Ifthere is any chance that this option will beinstalled in the future, power should be run tothe fireplace and wire must be run to a switchbox at a convenient place on the wall formounting the blower control.
If you have rooms directly above or adjacent to the room
with the fireplace that you would like to heat, you may
consider the gravity vent option (FDV). The gravity vent
distributes hot air to these rooms and requires no blower
to assist its operation. However, with the internal blower
(FDHB5-N) installed, there will be some increase in
warm air movement to rooms serviced by the gravity
vent.
If you desire even heat throughout your home strictly
from your fireplace, or if you want to move heat to a
remote area of your home, it is recommended that you
incorporate the central heat option (parts FDHB6, FDHC6
and FDHC6-1). A thermostatically controlled blower takes
heat from the fireplace, and distributes the warm air
throughout your home even a couple of stories up or
down.
WALL THERMOSTAT (FDHC4)
This optional kit allows you to control the temperature by
a remote mounted electric wall thermostat.
NOTE: It is strongly recommended that this kit beinstalled during framing so that the wiring can be easilyhidden.
1. Remove both top and bottom louvers. The top louver
is held in place by springs underneath, so push down
from the top, then rotate and pull forward. The bottom
louvers can be opened by pulling the right hand side
of the louvers. To completely remove the louvers,
when opened, push up the louver to remove the bot-
tom of the hinge rod from its hole and pull the louvers.
2. The damper motor and transformer are mounted on a
bracket in the bottom right hand corner of the fire-
place (see Figure 15).
Page 16OPEL AP
Combust ib leside facing orsurround mayextend 8” max.from the faceof the fireplace
28” min. to mantel(54” from the base of thefireplace)
23 1/2” min.to com-bustible topfacing (49 3/4” fromthe base ofthe fireplace)
Combustible
top facing
may protrude
1” max. from
the face of
the fireplace
Figure 14: Clearance to combustibles
7 1/4” min. from door openingto combustible facing
BlackWhiteGround (bare)
Top louvers Draft control
Keyholewith pen-dant stops
Wallthermostat(FDHC4)
Terminal block(cover removed)
Damper motor (FDHC4)
Transformer
Mountingbracket
Screws
Pendant endchain(FDHC4 kit)
To thermostat110 V
Figure 15: Thermostat control installation
See wiringdiagram(Figure 34)

Page 17OPEL AP
3. BEFORE fastening the controls with the 2 screws
provided, thread the supplied chain through the spare
keyhole in the draft control and attach a pendant to
the end, just like the chain that is beside it. Let the
chain down on the same side of the heat shield as the
existing chain, and attach it to the lever on the
damper motor with another pendant. Push the pen-
dant snug into the hole in the lever. Then mount the
controls to the bracket.
4. Adjust the chain on the draft control lever until it is just
snug but the damper is still closed. When the damper
motor is energized, the damper should open all the
way. Lock the chain onto the keyhole with another
pendant just like the chain beside it.
5. Wire the thermostat as shown in (Figure 15), making
sure the wall control is sufficiently away from the
direct radiation of the fireplace. Make certain that it is
at least 10 ft. away from the fireplace, but in the same
room.
CIRCULATING BLOWER (FDHB5-N)
NOTE: It is important that the wiring for the blower kit isinstalled during framing so that the wiring can be easilyhidden.
1. Remove the bottom louver. (See operation #1 in the
above section.) Pull the louver from the right hand
side toward you. Lift the louver to remove the bottom
of the hinge rod from its hole. Remove the top of the
hinge rod from the top hole.
2. Remove the ash pan, to do so, you will need to
remove the plug from the inside of the firebox.
3. Remove the ash pan’s drawer. Remove the screw
located on the right hand side of the drawer at its
back.
4. Mount the blower on its 90º bracket. Be sure that the
wires are connected to the blower before mounting.
5. Hold the blower with the outlet facing up from the
back. Fit the blower through the louver opening.
6. Slide the blower into place between the two brackets.
You should see the wheels of the blower.
7. Mount the thermal switch on its support as shown in
(Figure 17). The thermal switch support is located just
beneath the bottom of the firebox on the right hand
side leg. Push the clips on to the support as far as
they will go.
NOTE: One thermal switch is all that is requiredto operate the internal blower, the central heatblower, or both.
8. Locate the provided speed control in a switch
box at a convenient location on the wall and con-
nect it with conventional 90° C 14 gauge wire
(see Figure 16).
9. Replace the ash pan drawer and screw, the
ash pan and the louver.
CATALYTIC COMBUSTOR (FDCCO)
(See also the instruction sheet included with the
catalytic combustor kit.)
The (FDCCO) Catalytic Kit of the Opel AP
includes:
- Cotter pin
- Template
- Bypass rod
- Bypass damper
- Catalytic bypass frame(with rope seal)
- Catalytic converter
- Tapping screws (10) and washers (2)
- Retaining brackets (4)
- Fiberglass rope seal
- Control eye, handle and extension
Circulating blower
Blower speed control
Thermalswitchbypass
Terminal block
Thermodisc
Figure 16: Circulating blower
Terminal switch
Mounting clips
Thermal switch
Circulating blower
Bottom
louver
Louver
retention
Figure 17: Circulating blower location (sectional view)
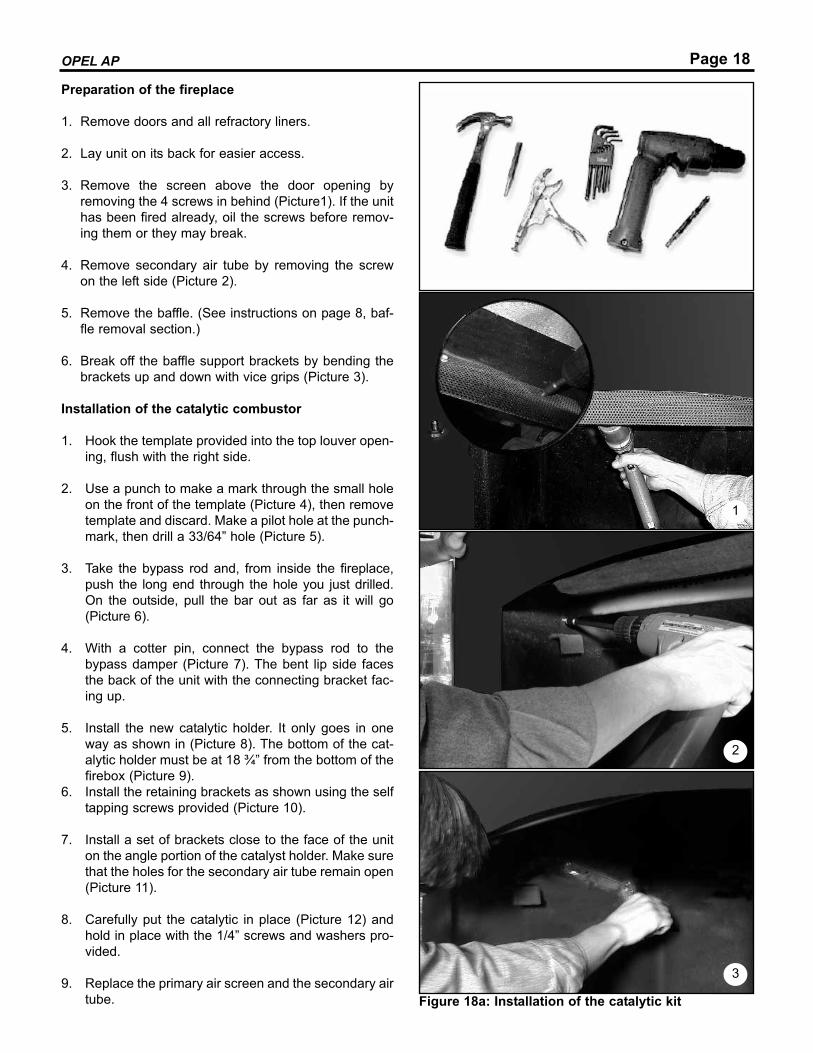
Preparation of the fireplace
1. Remove doors and all refractory liners.
2. Lay unit on its back for easier access.
3. Remove the screen above the door opening by
removing the 4 screws in behind (Picture1). If the unit
has been fired already, oil the screws before remov-
ing them or they may break.
4. Remove secondary air tube by removing the screw
on the left side (Picture 2).
5. Remove the baffle. (See instructions on page 8, baf-
fle removal section.)
6. Break off the baffle support brackets by bending the
brackets up and down with vice grips (Picture 3).
Installation of the catalytic combustor
1. Hook the template provided into the top louver open-
ing, flush with the right side.
2. Use a punch to make a mark through the small hole
on the front of the template (Picture 4), then remove
template and discard. Make a pilot hole at the punch-
mark, then drill a 33/64” hole (Picture 5).
3. Take the bypass rod and, from inside the fireplace,
push the long end through the hole you just drilled.
On the outside, pull the bar out as far as it will go
(Picture 6).
4. With a cotter pin, connect the bypass rod to the
bypass damper (Picture 7). The bent lip side faces
the back of the unit with the connecting bracket fac-
ing up.
5. Install the new catalytic holder. It only goes in one
way as shown in (Picture 8). The bottom of the cat-
alytic holder must be at 18 ¾” from the bottom of the
firebox (Picture 9).
6. Install the retaining brackets as shown using the self
tapping screws provided (Picture 10).
7. Install a set of brackets close to the face of the unit
on the angle portion of the catalyst holder. Make sure
that the holes for the secondary air tube remain open
(Picture 11).
8. Carefully put the catalytic in place (Picture 12) and
hold in place with the 1/4” screws and washers pro-
vided.
9. Replace the primary air screen and the secondary air
tube.
Page 18OPEL AP
Figure 18a: Installation of the catalytic kit
1
2
3

10. You can now stand up the Opel AP again, then put
back the refractory liners and the doors.
After the facing is installed
1. Attach the control eye to the bypass rod by tightening
the setscrew with a 1/8” Allen wrench (Picture 13).
2. If the bypass rod is too short due to thick brick facing,
attach the extension. Measure the required length
from the threaded end and cut off excess before
installing the control eye.
3. Insert the handle into the control eye.
GOLD / PEWTER LOUVERS (FDL)
The standard black louvers above and below the doors
can be replaced with a gold plated louvers or pewter louvers
(OPLG) if you wish. You may order these from your deal-
er.
NOTE: There are 2 positions for the louvers: flush withthe front or protruding from the front.Dismantling and assembling louvers
1. The top louvers are held in place by springs under-
neath. Therefore, push down from the top and pull
out. To remove the bottom, remove the screw on each
side of the louvers.
2. Take the assembly apart by removing the top nuts
from the rods. Note that there are two washers under-
neath the top nuts on the bottom louvers. These
washers are placed to provide space for the air con-
trol lever. Make sure they go back when you
reassemble the louvers.
3. Assemble the new louvers the same way the old ones
came apart, reusing the original rods and spacers.
Leave about 1/4" of the rod protruding above the top
nut. Make sure you replace the washers under the top
nuts of the bottom louvers.
4. Put the reassembled louvers back into the fireplace.
NOTE: Although the gold plating will not tarnish, caremust be taken not to scratch the surface.
ROCK RETAINER KIT (FDK)
Facing
Facing material may only be non-combustible such as
metal, brick, rock, concrete board, or ceramic tile.
Page 19OPEL AP
Figure 18b: Installation of the catalytic kit
4 5
6 7

Gypsum board is NOT an acceptable facing material.
WARNING: DO NOT restrict airflow through the inletand outlet louvers of the stove. If two (2) gravity ventkits are installed with the dampers removed, onlythen may the upper louver area be blocked.
If you desire to fully face the fireplace with thin masonry,
it is recommended that you purchase the rock retainer kit
(part FDK with the upper louvers in place, or the FDK-1
with the upper opening blocked) to help keep the facing
in place. It is NOT recommended for brick or other self-
supporting materials.
Follow these steps:
NOTE: Remove the fireplace doors and louvers, andstore them in a safe place until the masonry work is fin-ished. Acid from the cleaning operation will permanentlydamage the gold plating.Installation
1. Install the expanded metal on the top half of the fire-
place using drill and tap screws at locations shown
(see Figure 19). If there is a bypass rod above the
door, allow for it to come through. For thick rock, the
rod extension (R6414) may be required.
Page 20OPEL AP
8 9
10 11
12 13
18 ¾”
Figure 18c: Installation of the catalytic kit

2. Install the metal edging on each side of the doors,
making sure that the edges fit nicely with the arch
edge above. There are right and left side expanded
metal pieces. The expanded metal is correctly
installed when the expanded metal is facing upwards,
to catch the mortar. A wider steel lintel bar may be
required for heavy rock.
3. Cover the rest of the area with wire mesh, or metal
lath, flush with the heavy expanded metal. Make sure
nails or staples used for fastening mesh penetrate the
studs at least 1".
4. Mortar must be “thin set” or “thin bed” type, inherent-
ly polymer modified. Do not add water to the mixture
(this applies to the grout as well). If the mortar is not
modified, you should add a synthetic latex additive.
Mix to a firm, moist consistency.
5. Using a plasterer or mason’s trowel, apply a scratch
coat that covers the wire mesh. Let the mortar set
before adding another coat. This will take several
hours. Afterwards, apply a thinner coat and the facing.
Do not spread plaster over more than a
workable area so that the mortar will not set before
the facing is applied.
6. If additional mortar is required, use a grout bag to fill
in the joints. Take extra care to avoid smearing on the
surface of the facing.
NOTE: If you wish to cover the top louver using an FDK-1 you must provide access to the air control locatedinside the right side of the top louver opening. The FDK-1 has a removable panel which permits access to the aircontrol. The masonry which covers this panel should beinstalled in such a way that it can beremoved if necessary.
REMOTE VENTING
The gravity vent system can distribute air
to an upper level or a room next door
without an extra blower. If you use two
gravity vent kits you may block off the
upper louver area with the desired fac-
ing. The central heat option allows heat
to be sent up to 50 ft. away. (Figure 21)
illustrates various certified ways of incor-
porating the two systems.
THE GRAVITY VENT SYSTEM (FDV)
The FDV kit includes:
- A grill
- A grill adaptor
- A B-vent starter section
- A shut-off damper (do not use
with upper louvers blocked)
IMPORTANT: No substitution of any of these parts isallowed. These genuine RSF WoodburningFireplaces parts have the correct clearances. Theseclearances must be maintained for your safety.
The FDV system incorporates standard 8" B-vent com-
ponents for installation. Single wall pipe is not allowed
due to the high temperature of the air in a gravity vent
system. Any listed brand of 8" B-vent pipe may be used
and is not a part of the FDV. The maximum pipe length is
15 ft. from the top of the fireplace to the outlet. The B-
vent components can be replaced by UltraBlack double
wall black connector made by ICC only.
NOTE: If two gravity vent lines are installed, then twoFDV kits must be ordered.
(Figure 23) indicates the minimum clearances and fram-
ing dimensions. Passing through a combustible wall or
ceiling requires a minimum clearance of 2" from com-
bustibles.
WARNING: Every measurement and clearance on theillustrations must be followed to assure safety of theinstallation.Installation
CAUTION: Do not replace the grill from the FDV withshutters. Do not allow heat to be trapped in the gravityvent system.
1. Plan the gravity vent run first. Be aware that the max-
imum actual pipe length between the top of the fire-
place and the outlet is 15 feet. There is no maximum
number of elbows in a run, but the run must never go
in a downward direction as this can trap heat in the
gravity vent system.
Page 21OPEL AP
Framing
Metal edging
Drill and tapscrews
Thickness ofsheeting
Figure 19: Installation of rock retainer kit
Use only the
predrilled holes
in the FDK kit to
attach it to the
fireplace.
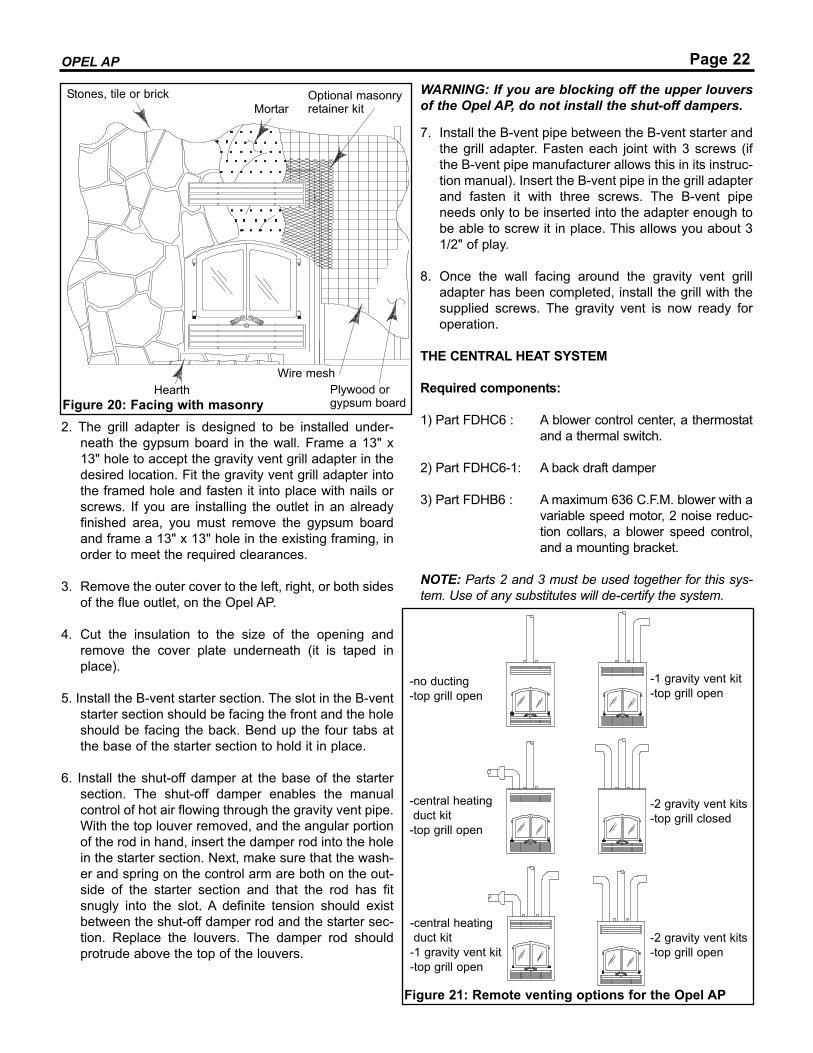
2. The grill adapter is designed to be installed under-
neath the gypsum board in the wall. Frame a 13" x
13" hole to accept the gravity vent grill adapter in the
desired location. Fit the gravity vent grill adapter into
the framed hole and fasten it into place with nails or
screws. If you are installing the outlet in an already
finished area, you must remove the gypsum board
and frame a 13" x 13" hole in the existing framing, in
order to meet the required clearances.
3. Remove the outer cover to the left, right, or both sides
of the flue outlet, on the Opel AP.
4. Cut the insulation to the size of the opening and
remove the cover plate underneath (it is taped in
place).
5. Install the B-vent starter section. The slot in the B-vent
starter section should be facing the front and the hole
should be facing the back. Bend up the four tabs at
the base of the starter section to hold it in place.
6. Install the shut-off damper at the base of the starter
section. The shut-off damper enables the manual
control of hot air flowing through the gravity vent pipe.
With the top louver removed, and the angular portion
of the rod in hand, insert the damper rod into the hole
in the starter section. Next, make sure that the wash-
er and spring on the control arm are both on the out-
side of the starter section and that the rod has fit
snugly into the slot. A definite tension should exist
between the shut-off damper rod and the starter sec-
tion. Replace the louvers. The damper rod should
protrude above the top of the louvers.
WARNING: If you are blocking off the upper louversof the Opel AP, do not install the shut-off dampers.
7. Install the B-vent pipe between the B-vent starter and
the grill adapter. Fasten each joint with 3 screws (if
the B-vent pipe manufacturer allows this in its instruc-
tion manual). Insert the B-vent pipe in the grill adapter
and fasten it with three screws. The B-vent pipe
needs only to be inserted into the adapter enough to
be able to screw it in place. This allows you about 3
1/2" of play.
8. Once the wall facing around the gravity vent grill
adapter has been completed, install the grill with the
supplied screws. The gravity vent is now ready for
operation.
THE CENTRAL HEAT SYSTEM
Required components:
1) Part FDHC6 : A blower control center, a thermostat
and a thermal switch.
2) Part FDHC6-1: A back draft damper
3) Part FDHB6 : A maximum 636 C.F.M. blower with a
variable speed motor, 2 noise reduc-
tion collars, a blower speed control,
and a mounting bracket.
NOTE: Parts 2 and 3 must be used together for this sys-tem. Use of any substitutes will de-certify the system.
Page 22OPEL AP
Stones, tile or brick Optional masonryretainer kitMortar
Hearth
Wire mesh
Plywood orgypsum boardFigure 20: Facing with masonry
-no ducting
-top grill open
-1 gravity vent kit
-top grill open
-central heating
duct kit
-top grill open
-2 gravity vent kits
-top grill closed
-central heating
duct kit
-1 gravity vent kit
-top grill open
-2 gravity vent kits
-top grill open
Figure 21: Remote venting options for the Opel AP

The 8” back-draft damper prevents hot air from travelling
into the C vent (single wall) ducting unless the Central Heat
Blower (FDHB6) is operating. When the thermostat calls for
heat, the blower turns on and opens the one-way valve. At
the same time, the room air is drawn through the upper and
lower louvers, which mixes and reduces the overall tem-
perature of the forced air that travels through the ducting.
WARNING: If the back-draft damper is not installed,the central heat ducting may become too hot for thesurrounding combustible materials. Any substitute forthe FDHC6-1 kit will void all warranty coverage by RSFWoodburning Fireplaces.
Installation
1. Remove the cover left side only.
2. Cut the insulation to the size of the opening and remove
the cover plate underneath (it is taped in place).
3. Install the back draft damper crimped side up, making
sure it is pushed all the way down. Bend out the 4 mid-
dle tabs to fasten the damper to the top of the fireplace.
From the louver opening bend out two of the lower tabs
to prevent the damper from being pulled out.
4. Before proceeding with the installation of the blower,
make sure that the electrical service to the blower is in
the OFF position. All wiring should be in accordance
with local ordinances and the National Electric Code.
NOTE: The blower can basically be installed anywhere inthe home, however some thought should go into the plan-ning to ensure that the blower noise does not affect roomsyou would like kept quiet. If the central heating systemductwork is passing through an area in your home that youdo not wish to be heated, then the ducting should be insu-lated. Length of runs should be as short as possible to con-serve space and minimize cost. Maximum duct lengthshould not exceed 50 feet from the fireplace to the furthestoutlet. There is a loss of about 15% performance at 50 feet.
NOTE: The blower automatically shuts off if the air tem-perature reaches 180° F inside the ducting.
5. Locate the blower in a convenient location. The blow-
er may be installed vertically or horizontally. The hor-
izontal installation can utilize either the supplied
mounting bracket or, if you want to install the blower
farther away from the ceiling, you can use plumber’s
strapping. A vertical installation must include the
mounting bracket.
NOTE: If you have an existing hot air system, you maysafely ‘tie in’ to this hot air sys-tem. However, no hot air duct isto be connected to the return airof another central heating sys-tem.
6. Connect the INLET of the
blower to the ducting coming
from the fireplace, using 8”
diameter metal ducting (rigid or
flex). Any other size will not
work properly. Use only metal
ducting between the fireplace
and the blower. You may use
plastic ducting after the blower,
provided the temperature rating
of the ducting is at least 250° F.
Do not use plastic ducting in a
chase.
NOTE: The central heat ductingmay be run at a 0” clearance tocombustibles.
Page 23OPEL AP
Figure 22: Gravity vent kit (FDV)
Grilladapter Grill B-vent
starter
Grill and adaptater
Optional gravityvent outlet
59”
min
.
4” min.
2”min.
59”
min
.
Side viewFront view
59”
min
.
4” min.
2” min.
2” min.
“B” vent starter(s) here
Figure 23: Gravity vent clearances

7. To install the blower (for the FDHB6 only): attach the
noise reduction collars to either side of the blower
using 1/2” self-tapping screws.
8. Ductwork can then be run to the desired rooms. Up to
six 5" or five 6" diameter runs can be installed from
this system.
NOTE: Runs must be balanced as air travels along thepath of least resistance. Balance the airflow by diameterand length of runs. Longer runs should have larger diam-
eters. Houses vary in size and layout, so duct systemsmust be specifically designed for each home. The dia-grams on this sheet are examples only. The cross sec-tional area of the distribution system must total at least50 square inches. If you have more than 50 square inch-es, some of the system may be shut off, but there mustalways be 50 square inches of ducting open at all times.For example, if 5" pipe is used for distribution, the crosssection of each is 20 square inches. The minimum allow-able ducting would be three runs of 5" pipe.
(Figures 27 & 28) illustrate two examples of “tying-in” to
existing ductwork. Directing air in the right direction will
reduce reverse flow when the existing furnace blower is
off. Some reverse flow will not cause any problems.
CAUTION: Tie-ins into existing ductwork must bedown stream from the existing furnace.
NOTE: When the central heating blower is in operation,it removes air from the room containing the fireplace. Ifthis room can be closed off from the rest of the house(e.g. with a door), a grill with at least a 100 square inchopen area must be installed to allow the air to return tothe fireplace. Otherwise periodic smoking from the fire-place will result.
9. Wire the blower to a 115-volt, 15-amp breaker
through the thermostat provided. The variable speed
switch provided should be installed in a convenient
location near the fireplace so the blower can be shut
off during refueling. The blower control center should
be placed in an accessible location near the blower. It
should be mounted in a 4 x 4 electrician’s box. You
have two options of how you can connect the central
heat blower to the blower control assembly.
Page 24OPEL AP
2 noise reductioncollars
Central heat variablespeed blower
MountingbracketBlower speed
control
Figure 25: Central heat blower kit (FDHB6-1)
Air circulation through fireplace and home with central heat
blower in the ‘OFF’ cycle.
Air circulation through fireplace and home with central heat
blower in the ‘ON’ cycle (blower thermostat calling for heat).
Figure 26: Central heat ducting options (single floor)
Warm airregisters
Ideal blower thermostat location
Central heatblower
Hot air
Cool air
Back draftdamper
(FDHC6-1)
Central heatcontrol kit(FDHC6)
Thermostat
Thermal
switch
Figure 24: Central heating kit (FDHC6)

Page 25OPEL AP
Example 1: tie-in to heat plenum for circulation throughout all rooms
Example 2: tie-in to part of the duct system
Figure 27: Examples of air circulationwhen tying-in to existing ductwork
45° tie-in
Central heat blower
BlowerDeflector
Cold airreturn
Cold airreturn
FurnaceFurnace
Figure 28: Example tie-ins to A) central heat duct and B) central heat plenum
OPEL AP OPEL AP
a) If you would like the blower to turn on when the
thermostat calls for heat, first locate the thermostat in
the principal room heated by the duct system. Do not
install it in the room where the fireplace is installed.
There are yellow black and red wires coming out of
the relay as shown in the wiring diagram. Connect the
wire from #4 of the terminal block to the black wire
and put the wire connector on the red wire for protec-
tion. (See Figures 36 and 37 for schematic wiring dia-
grams.)
b) If the fireplace is in a small room and/or you
would like the central heat blower to remove air from
this room when it becomes too hot, locate the ther-
mostat in the room with the fireplace. Connect the
wire from #4 of the terminal block to the red wire and
put the wire connector on the black wire for protec-
tion. (See Figures 36 and 37 for schematic wiring dia-
grams.)
(Figure 29) shows some ways of ducting the hot air from
the blower. You are not restricted in the size of pipe, as
long as the total cross sectional area of all runs com-
bined is not less than 50 square inches. The diagram
shows alternate blower locations. Only one external
blower can be installed.

Page 26OPEL AP
10. If the blower fails to operate, check the following:
a) Consult the wiring diagram to assure proper con-
nections.
b) To assure proper contact, check the motor lead
wiring, incoming supply wiring and capacitor connec-
tions.
c) If possible, use a meter to test for continuity
between the fan leads. Please note that the capaci-
tor will show no reading if it is tested with a meter.
11. If the blower still fails to operate, consult your local
RSF Woodburning Fireplaces authorized dealer for
repair/replacement instructions.
ZONE HEATING (FDHCZ1 AND FDHCZ2)
For more regional heat control, the OPEL AP is ideally
suited for zone heating. (Figure 31) shows an example of
a three-zone system. The thermostat simultaneously
opens the desired valve and starts the blower when heat
is required. The zone control system consists of:
FDHCZ-1 (Figure 32): - 1 control box
(1 time) - 1 blower transformer relay
- 1 thermal switch
NOTE: The FDHCZ-1 replaces the FDHC6 if you areinstalling the zone system.
FDHCZ-2 (Figure 33): - 1 zone valve (normally
closed)
(1 to 3 depending - 1 thermostat
of how many zone you
want to control)
The system is wired similarly to the central heat system
(Figures 36 and 37) with the addition of the blower con-
trol and the blower center (see Figure 38). The whole
system runs on 24V AC. Make sure that the thermostats
are matched with the correct zone valve.
NOTE: the Opel AP must be installed in accordance withall local codes, if any; if not, follow the current CSA C22.1in Canada or NFPA 70 in the USA. Install and use as perthe manufacturer’s installation and operating instruc-tions.
Alternative blowerlocation
Noise reduction collars
4” min.
B-vent pipe
59”
min
.
Back draftdamper
2 duct 6” diameter runs
Zero
clearance
3 duct 5” diameterruns
Blower
Figure 29: Central heat location options

Page 27OPEL AP
BlackWhite
Ground (bare)
Speedcontrol
Thermo-stat Option1: warn-
ing thermostat
(see schematic
wiring diagram
Figure 36)
Blowercontroldetail
To thermostatTo speed
control
To terminal
Option 2:
cooling ther-
mostat (see
schematic
wiring diagram
Figure 36)BWG
BlowerdetailBlower
BlowercontrolTerminal
bloc
Terminal detail
Figure 30: Central heat system wiring diagram
110 V
RedYellow
To blower
Zone damper
Zone
thermostats
Figure 31: Zone heating - example 3 zone
Zone controlbox
Blower controlcentre
Thermalswitch
Figure 32: Zone control kit (FDHCZ-1)
Zone register
Thermostat
Figure 33: Zone heating kit (FDHCZ-2)

Page 28
Draft damper motor
Draft damperthermostat
Transformer
Terminal block
black
white
ground (bare)
110V
24V
Figure 34: Wiring for the thermostat
Internal blower Thermalswitch
Thermalswitch bypass
(optional)Blower speedcontrol
black
white
110V
ground (bare)
Figure 35: Wiring for the circulating blower
Terminal block
OPEL AP

Page 29
Thermalswitch
Terminalblock
black
white
black
ground (bare)
18 gaLVT
Blower controlthermostat
Central blowerspeed switch
External centralheat blower
*For a warming thermo-stat, 1 should be the redwire and 2 should bethe black wire
*For a cooling thermo-stat, 1 should be theblack wire and 2 shouldbe the red wire
Relay
1*
2*
white
110V
yello
w
white
bla
ck
Figure 36: Wiring for the central heat system
Draftdampermotor
Internalblower
Thermalswitch
Transformer
Terminalblock
Draftdamper
thermostat
Internalblowerspeedcontrol
Blower controlthermostat
Central blowerspeed switch
External centralheat blower
*For a warming ther-mostat, 1 should bethe red wire and 2should be the blackwire
*For a cooling ther-mostat. 1 should bethe black wire and 2should be the redwire
Relay
24V
18ga
LVT
110V
ground (bare)
1*
2*
black
white
black
white
ye
llow
white
bla
ck
Figure 37: Wiring for all systems combined
OPEL AP

Page 30
zone 1 zone 1
zone 2 zone 2
zone 3 zone 3
FuseBlower control
Thermal switch
Zone dampers
Jumper
Zone valves
(8”NC)
bla
ck
Draftdampermotor
Internalblower Thermal
switchTerminalswitch
Draftdamper
thermostat
Internalblower speedcontrol
black
white
black
ground (bare)
110V
relay
yello
w
white
bla
ck
Externalblowercontrol
Externalcentral heat
blower
24V
18ga
LVT
white
Figure 38: Wiring for all systems with a zone heat system
OPEL AP
Zone thermostat(Heat Only)

Page 31OPEL AP
Removable top louvers
Primary air tube
Secondary air tube
Air wash grid
High heat refractory lining
Ceramic glass
Convection chamber
Adjustable hinge pins
Andiron
Adjustable latch
Removable bottom louvers
Combustion air control knob
210 CFM blower, included
rheostat (option)
1
2
3
4
5
6
7
8
9
10
11
12
13
FIREPLACE OPTIONS
FDCCO Opel catalytic kit
FDFS Firescreen
FDGRK2 Gasket replacement kit
FDHB5-N Blower
FDHB6 Blower - central heat
FDHC4 Thermostat kit
FDHC6 Central heat control
FDHC6-1 Back draft damper
FDHZ1 Zone heat control
FDHZ2 Zone damper (elect.)
FDK Rock retainer kit
FDK-1 Rock retainer kit w/o opening
FDL Gold louver kit
FDM Brick chimney adaptor
1
2
3
4
5 6
7
8
9
10
11
1213
OPEL AP cut-away view
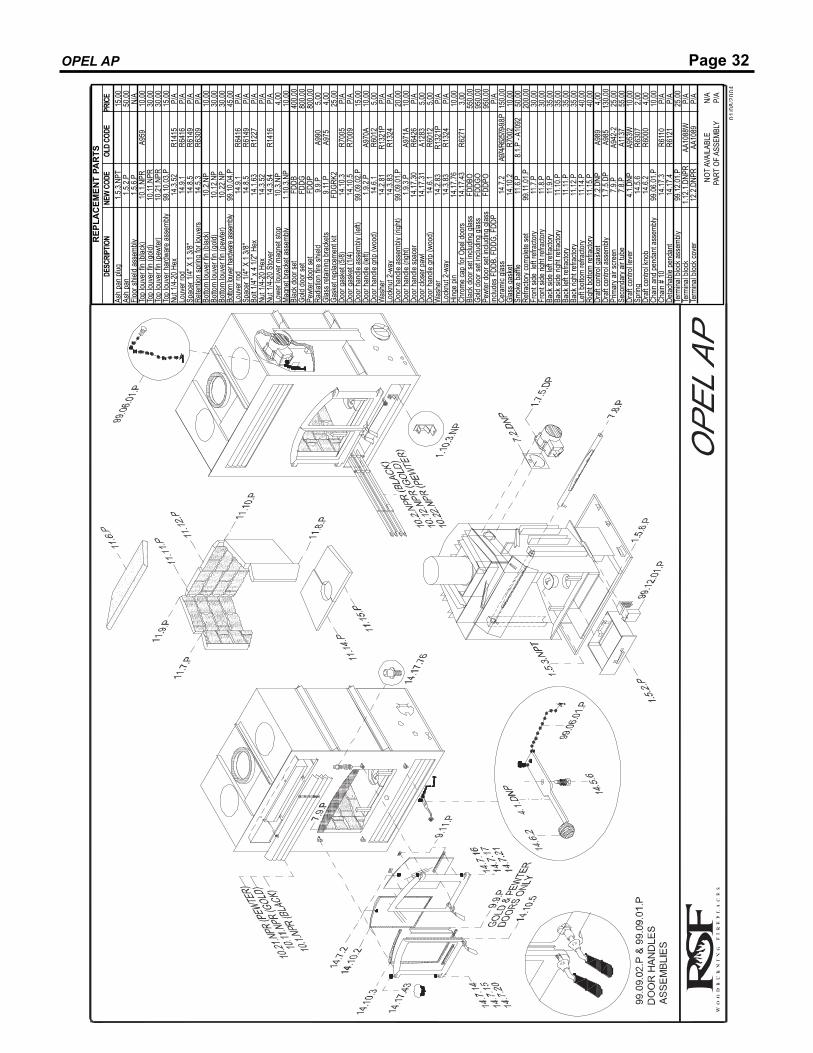
Page 32OPEL AP
RE
PL
AC
EM
EN
T P
AR
TS
NOTA
VAILA
BLE
N/A
PART
OF A
SSEM
BLY
P/A
Ash
pan
plug
Ash
pan
Floor
shiel
d as
semb
lyTo
p lou
ver f
in (b
lack)
Top
louve
r fin
(gold
) To
p lou
ver f
in (p
ewter
) To
p lou
ver h
ardw
are
asse
mbly
Nut 1
/4-20
Hex
Louv
er ro
dSp
acer
1/4"
X 1
3/8"
Reten
tion
sprin
g for
louv
ers
Botto
m lou
ver f
in (b
lack)
Bo
ttom
louve
r fin
(gold
) Bo
ttom
louve
r fin
(pew
ter)
Botto
m lou
ver h
ardwa
re as
semb
lyLo
uver
rod
Spac
er 1
/4" X
1 3
/8"Bo
lt 1/4"
x 4
1/2" H
exNu
t 1/4-
20 H
exNu
t 1/4-
20 S
tover
Lowe
r lou
ver m
agne
t stop
Ma
gnet
brac
ket a
ssem
bly
Blac
k doo
r set
Gold
door
set
Pewt
er d
oor s
etRa
diatio
n fire
shiel
d Gl
ass r
etaini
ng b
rack
etsGa
sket
repla
ceme
nt kit
Door
gas
ket (
5/8)
Door
gas
ket (
1/4)
Door
han
dle a
ssem
bly (l
eft)
Door
han
dle (l
eft)
Door
han
dle g
rip (w
ood)
Was
her
Lock
nut 2
-way
Do
or h
andle
ass
embly
(righ
t) Do
or h
andle
(righ
t)Do
or h
andle
spac
erDo
or cl
oser
paw
lDo
or h
andle
grip
(woo
d)W
ashe
rLo
cknu
t 2-w
ayHi
nge
pin
Chro
me ca
p for
Ope
l doo
rs Bl
ack d
oor s
et inc
luding
glas
s Go
ld do
or se
t inclu
ding
glass
Pe
wter
doo
r set
includ
ing g
lass
includ
es F
DDB,
FDD
G, F
DDP
Cera
mic g
lass
Glas
s gas
ket
Smok
e ba
ffleRe
fracto
ry co
mplet
e se
tFr
ont s
ide le
ft re
fracto
ryFr
ont s
ide ri
ght r
efrac
tory
Back
side
left
refra
ctory
Back
side
righ
t refr
actor
yBa
ck le
ft re
fracto
ry Ba
ck ri
ght r
efrac
tory
Left
botto
m re
fracto
ryRi
ght b
ottom
refra
ctory
Draft
contr
ol ga
sket
Draft
contr
ol as
semb
ly Pr
imar
y air
scre
en
Seco
ndar
y air
tube
Draft
contr
ol lev
erSp
ring
Draft
contr
ol kn
obCh
ain a
nd p
enda
nt as
semb
lyCh
ain #
10
Detac
hable
pen
dant
Term
inal b
lock a
ssem
bly
Term
inal b
lock
Term
inal b
lock c
over
15,00
50
,00
N/A
10,00
30
,00
30,00
15
,00
P/A
P/A
P/A
P/A
10,00
30
,00
30,00
45
,00
P/A
P/A
P/A
P/A
P/A
4,00
10
,00
400,0
0
800,0
0
800,0
0
5,00
4,0
0
25,00
P/
AP/
A15
,00
10,00
5,0
0
P/A
P/A
20,00
10
,00
P/A
5,00
5,0
0
P/A
P/A
10,00
3,0
0
550,0
0
950,0
0
950,0
0
P/A
150,0
0
10,00
50
,00
200,0
0
30,00
30
,00
35,00
35
,00
35,00
35
,00
40,00
40
,00
4,00
13
0,00
25
,00
55,00
10
,00
2,00
4,0
0
10,00
P/
AP/
A25
,00
P/A
P/A
A959
R141
5R6
416
R614
9R6
309
R641
6R6
149
R122
7
R141
6
A990
A9
75
R700
5R7
009
A970
AR6
012
R132
1PR1
324
A971
AR6
426
A128
3 R6
012
R132
1PR1
324
R627
1
A974
/R625
7/9-9.
8.PR7
002
8.1.P
- A10
92
A989
A985
A9
42-2
A1
137
A953
W
R630
7 R6
000
R611
0R6
121
AA10
88W
AA10
89
DESC
RIPT
ION
NEW
COD
E
OLD
COD
E
PRI
CE1.5
.3.NP
T1.5
.2.P
1.5.6.
P10
.1.NP
R10
.11.N
PR
10.21
.NPR
99
.10.03
.P14
.3.52
14.9.
114
.8.5
14.5.
310
.2.NP
10.12
.NP
10.22
.NP
99.10
.04.P
14.9.
114
.8.5
14.1.
6314
.3.52
14.3.
5410
.3.NP
1.10.3
.NP
FDDB
FD
DG
FDDP
9.9.P
9.11.P
FDGR
K214
.10.3
14.10
.5 99
.09.02
.P1.9
.2.P
14.6.
1 14
.2.81
14.3.
8399
.09.01
.P1.9
.3.P
14.17
.3014
.17.31
14.6.
114
.2.83
14.3.
8314
.17.76
14
.17.43
FDDB
O FD
DGO
FDDP
O
14.7.
2 14
.10.2
11.6.
P99
.11.01
.P11
.7.P
11.8.
P11
.9.P
11.10
.P11
.11.P
11.12
.P11
.14.P
11.15
.P7.2
.DNP
1.7.5.
DP7.9
.P7.8
.P4.1
.DNP
14.5.
6 14
.6.2
99.06
.01.P
14.17
.314
.17.4
99.12
.01.P
1.12.1
.DNP
R12
.2.DN
PR
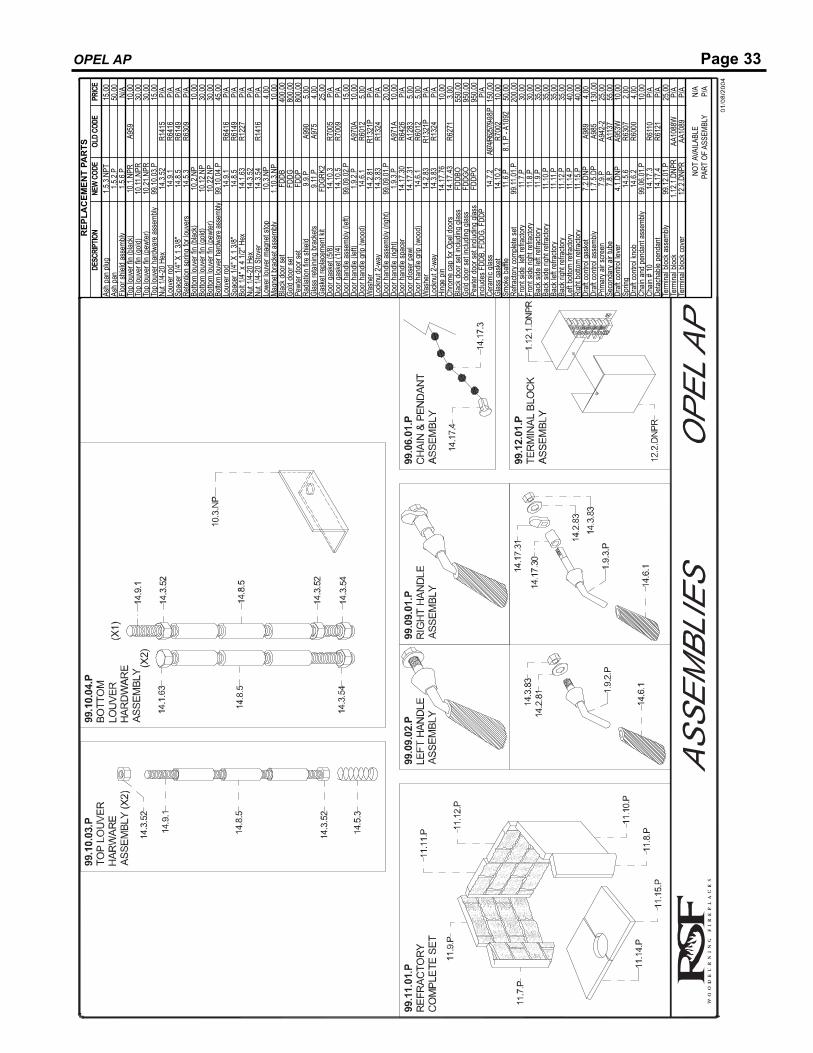
Page 33OPEL APR
EP
LA
CE
ME
NT
PA
RT
S
NOTA
VAILA
BLE
N/A
PART
OF A
SSEM
BLY
P/A
Ash
pan
plug
Ash
pan
Floor
shiel
d as
semb
lyTo
p lou
ver f
in (b
lack)
Top
louve
r fin
(gold
) To
p lou
ver f
in (p
ewter
) To
p lou
ver h
ardw
are
asse
mbly
Nut 1
/4-20
Hex
Louv
er ro
dSp
acer
1/4"
X 1
3/8"
Reten
tion
sprin
g for
louv
ers
Botto
m lou
ver f
in (b
lack)
Bo
ttom
louve
r fin
(gold
) Bo
ttom
louve
r fin
(pew
ter)
Botto
m lou
ver h
ardwa
re as
semb
lyLo
uver
rod
Spac
er 1
/4" X
1 3
/8"Bo
lt 1/4"
x 4
1/2" H
exNu
t 1/4-
20 H
exNu
t 1/4-
20 S
tover
Lowe
r lou
ver m
agne
t stop
Ma
gnet
brac
ket a
ssem
blyBl
ack d
oor s
etGo
ld do
or se
t Pe
wter
doo
r set
Radia
tion
fire sh
ield
Glas
s reta
ining
bra
ckets
Gask
et re
place
ment
kitDo
or g
aske
t (5/8
)Do
or g
aske
t (1/4
)Do
or h
andle
ass
embly
(left
)Do
or h
andle
(left
)Do
or h
andle
grip
(woo
d)W
ashe
rLo
cknu
t 2-w
ay
Door
han
dle a
ssem
bly (r
ight)
Door
han
dle (r
ight)
Door
han
dle sp
acer
Door
clos
er p
awl
Door
han
dle g
rip (w
ood)
Was
her
Lock
nut 2
-way
Hing
e pin
Ch
rome
cap
for O
pel d
oors
Blac
k doo
r set
includ
ing g
lass
Gold
door
set in
cludin
g gla
ss
Pewt
er d
oor s
et inc
luding
glas
sinc
ludes
FDD
B, F
DDG,
FDD
PCe
rami
c glas
s Gl
ass g
aske
t Sm
oke
baffle
Refra
ctory
comp
lete
set
Fron
t side
left
refra
ctory
Fron
t side
righ
t refr
actor
y Ba
ck si
de le
ft re
fracto
ry Ba
ck si
de ri
ght r
efrac
tory
Back
left
refra
ctory
Back
righ
t refr
actor
y Le
ft bo
ttom
refra
ctory
Righ
t bott
om re
fracto
ry Dr
aft co
ntrol
gask
et Dr
aft co
ntrol
asse
mbly
Prim
ary a
ir sc
reen
Se
cond
ary a
ir tub
eDr
aft co
ntrol
lever
Sprin
gDr
aft co
ntrol
knob
Chain
and
pen
dant
asse
mbly
Chain
# 1
0De
tacha
ble p
enda
ntTe
rmina
l bloc
k ass
embly
Te
rmina
l bloc
kTe
rmina
l bloc
k cov
er
15,00
50
,00
N/A
10,00
30
,00
30,00
15
,00
P/A
P/A
P/A
P/A
10,00
30
,00
30,00
45
,00
P/A
P/A
P/A
P/A
P/A
4,00
10
,00
400,0
0
800,0
0
800,0
0
5,00
4,0
0
25,00
P/
AP/
A15
,00
10,00
5,0
0
P/A
P/A
20,00
10
,00
P/A
5,00
5,0
0
P/A
P/A
10,00
3,0
0
550,0
0
950,0
0
950,0
0
P/A
150,0
0
10,00
50
,00
200,0
0
30,00
30
,00
35,00
35
,00
35,00
35
,00
40,00
40
,00
4,00
13
0,00
25
,00
55,00
10
,00
2,00
4,0
0
10,00
P/
AP/
A25
,00
P/A
P/A
A959
R141
5R6
416
R614
9R6
309
R641
6R6
149
R122
7
R141
6
A990
A9
75
R700
5R7
009
A970
AR6
012
R132
1PR1
324
A971
AR6
426
A128
3 R6
012
R132
1PR1
324
R627
1
A974
/R625
7/9-9.
8.PR7
002
8.1.P
- A10
92
A989
A985
A9
42-2
A1
137
A953
W
R630
7 R6
000
R611
0R6
121
AA10
88W
AA10
89
DESC
RIPT
ION
NE
W C
ODE
O
LD C
ODE
P
RICE
1.5.3.
NPT
1.5.2.
P1.5
.6.P
10.1.
NPR
10.11
.NPR
10
.21.N
PR
99.10
.03.P
14.3.
5214
.9.1
14.8.
514
.5.3
10.2.
NP10
.12.N
P10
.22.N
P99
.10.04
.P14
.9.1
14.8.
514
.1.63
14.3.
5214
.3.54
10.3.
NP1.1
0.3.N
PFD
DB
FDDG
FD
DP9.9
.P9.1
1.PFD
GRK2
14.10
.314
.10.5
99.09
.02.P
1.9.2.
P14
.6.1
14.2.
8114
.3.83
99.09
.01.P
1.9.3.
P14
.17.30
14.17
.3114
.6.1
14.2.
8314
.3.83
14.17
.76
14.17
.43FD
DBO
FDDG
O FD
DPO
14.7.
2 14
.10.2
11.6.
P99
.11.01
.P11
.7.P
11.8.
P11
.9.P
11.10
.P11
.11.P
11.12
.P11
.14.P
11.15
.P7.2
.DNP
1.7.5.
DP7.9
.P7.8
.P4.1
.DNP
14.5.
6 14
.6.2
99.06
.01.P
14.17
.314
.17.4
99.12
.01.P
1.12.1
.DNP
R12
.2.DN
PR

Page 34OPEL AP
We recommend that our products be installed and
serviced by professionals who are certified in
the U.S. by NFI (National
Fireplace Institute)
or in Canada by WETT
(Wood Energy Technical
Training).

Page 35OPEL AP
OPEL AP - Limited Warranty
30 Year Limited Warranty
All RSF Woodburning Fireplaces models are warranted against defects in material and workmanship for a period of 30
years, subject to the following conditions:
During the first year RSF Woodburning Fireplaces will repair or replace, at our option, any parts which upon examination by an
authorized RSF Woodburning Fireplaces representative are found to be defective, except the parts listed in the EXCLUSIONS
portion of this warranty. RSF Woodburning Fireplaces will also pay reasonable labor costs for the repair work.
During the second through fifth years RSF Woodburning Fireplaces will repair or replace, at our option, any parts which upon
examination by an authorized RSF Woodburning Fireplaces representative are found to be defective, except the parts listed in
the EXCLUSIONS portion of this warranty. RSF Woodburning Fireplaces shall not be responsible for any labor costs associated
with this repair work.
During the sixth through thirtieth years RSF Woodburning Fireplaces will provide replacement parts, if available, at 50% of the
published retail price, except for the parts listed in the EXCLUSIONS portion of this warranty. RSF Woodburning Fireplaces shall
not be responsible for any labor costs associated with this repair work.
EXCLUSIONS
· Electrical components are warranted for one year only.
· Glass and gold plating.
· Damage due to normal wear and tear, such as paint discoloration, worn gaskets, eroded or cracked refractory components.
· Repairs or replacements necessitated by vandalism, neglect, abuse, over-firing, improper fuel or fuel loads, or failure to adequately
service the unit, as stated in the owner’s manual.
· Repairs or replacements (particularly charges for travel and labor) not authorized by RSF Woodburning Fireplaces in advance.
LIMITATIONS
All items found to be defective will be replaced or repaired upon return of the defective part to an authorized RSF Woodburning
Fireplaces dealer. RSF Woodburning Fireplaces will not be responsible for freight costs related to shipping replacement parts.
Any complete fireplace, or part thereof, that is replaced or serviced under this warranty will be warranted for a period not exceed-
ing the remaining term of the original warranty.
This warranty is not transferable.
This warranty does not apply to damage to the appliance while in transit.
This warranty does not apply if the installation does not conform to the installation requirements in the owner’s manual.
RSF Woodburning Fireplaces is free of liability for any damages caused by the appliance, as well as material and labor charges
incurred in the removal or re-installation of any RSF Woodburning Fireplaces fireplace under this warranty. Incidental or conse-
quential damages are not covered by this warranty.
The remedies set forth herein are exclusive, and the liability of the seller shall not exceed the price of the fireplace or part thereof
upon which the liability is based.
This warranty is expressly in lieu of all other warranties expressed or implied, including the warranties of merchantability and fitness
for use and all other obligations or liabilities on the part of RSF Woodburning Fireplaces.