Embed Size (px)
Citation preview

Research Progress Report IISaccharomyces cerevisiae Growth Characterization:
Aseptic Technique, Growth Media, Culturing, Spectrophotometry & Growth Profiling
Functional Genomics Research Stream • Freshman Research Initiative • by Dr. Patrick J. Killion
EID:
Assigned: January 24, 2012
Due: March 6, 20123:30 PM
Submission: PAI 3.04N Mail Box
Format: Printed & Stapled
1

Evaluation GuidelinesEvaluation GuidelinesEvaluation Guidelines
Section Possible Earned
II - Aseptic Technique Assessment 25
IV - Saccharomyces cerevisiae Growth Assessment 25
VI - Micropipette Accuracy & Precision Assessment 25
I - Safety & Media Production Training 25
IV - Laboratory Notebook Preparation 25
IV - Saccharomyces cerevisiae Growth 25
V - Essential Mathematics 25
VI - Micropipette Accuracy & Precision 25
VII - Differential Growth Characterization 50
VIII - Results Central Progress Report (for IV) 50
VIII - Results Central Progress Report (for VI) 50
VIII - Results Central Progress Report (for VII) 50
Late Penalty -
Final Grade 400
2

Table of Contents
I - Safety & Media Production Training! 4
II - Aseptic Technique! 7
III - Laboratory Notebooks ! 12
IV - Saccharomyces cerevisiae Growth! 15
V - Essential Mathematics! 18
VI - Micropipette Accuracy & Precision! 20
VII - Differential Growth Characterization! 30
VIII - Results Central Progress Reports ! 38
3

I - Safety & Media Production TrainingBackground material and explanation is purposefully omitted from this text. For more background on the subject matter be sure to see the lecture notes and the online course notebook, each found on the course website.
In this section of the report we will be reviewing the basic safety principles of our lab and training requirements.
Safety Contract Review
You will recall the laboratory safety contract from a previous Research Progress Report:
1. Students must be supervised while working in the laboratory. If the research stream staff (mentors, faculty) are not available or in the lab, no work can be performed.
2. Accidents must be immediately reported to onsite staff and to the instructor.
3. Gloves must be worn at all times while working with any type of equipment or reagent.
4. Closed toe shoes and long pants must be worn (as opposed to sandals and shorts) in the lab.
5. No food or beverages are allowed in the laboratory at any time. They can be stored in backpacks but must never be taken out during work in the lab. Additionally, do not dispose of food waste of any kind in the lab as this too is a violation of university safety policy.
6. Do not store book bags, backpacks, or any personal objects on the lab benches (always place them under desks, in drawers, or in available cabinets that have no other reagents or laboratory equipment).
7. All waste (including glass, sharps, needles, caustic chemicals, and biological waste) must be discarded concordant with taught safety and disposal standards.
8. All glassware and equipment must be fully cleaned immediately after use. It is very important that on a daily basis you leave the laboratory environment a small bit better than when you arrived.
9. All stored reagents and tubes must be appropriately marked and dated.
10. Students must immediately comply with equipment and reagent directives that come from research staff working in the laboratory environment.
11. The laboratory is a professional yet informal environment. Conversation, volume, and word selection should be appropriate at all times. Respect, courtesy, and clear communication with research staff and your peers will serve you well.
12. Safety policies may be amended and supplemented at any time. They will always be posted in the laboratory and should be reviewed on a regular basis.
4

Safety Considerations
As each week progresses you work with more equipment and reagents that could pose a danger to you or your research colleagues if not correctly and safely used.
Growing a cell culture requires that we work with the following equipment:
‣ Bunsen Burners
‣ Inoculating Loops
‣ Culture Spreaders
‣ Centrifuges
‣ Autoclaves
Please refer to your course textbook and the online course notebook for more details on how to safely use these devices. Always ask research stream staff if you have questions or concerns.
Specific Textbook Sections: Unit 4.1, 4.2, 5.1, Appendix I. Always check the online course notebook.
Training Session Preparation Questions
In order to prepare for read appropriate sections in Unit 4.1 & 4.2 and then answer the questions:
Question 1: What is the average temperature of autoclaving? _______°C or _______ °F.
Question 2: Extremely high temperatures for the sterilization of both solids and liquids can be achieved in an autoclave through the manipulative use of _______________________.
Question 3: Do the conditions of autoclaving kill all forms of life? (Circle one: yes no)
Question 4: Liquids should be sterilized in a bottle with __________ the needed volume to avoid boil-overs and spills.
Question 5: The caps of liquids must be left ___________ in order to prevent explosions.
Question 6: Cycles that are titled “gravity” are typically for ________________________________________.
Question 7: Cycles that are titled “liquid” are typically for _________________________________________.
Question 8: The term “slow exhaust” is a synonym for ____________________________________________.
Question 9: The term “fast exhaust” is a synonym for _____________________________________________.
5

Question 10: Microwave heating is as effective as autoclave sterilization? (Circle one: true false)
Question 11: Yeast solid media is made of the following components (for plates, online course notebook):______________________________________________________________________________________________________________________________________________________________________________________________________________________________________________________________________________
Question 12: Yeast liquid media is made of the following components (for cultures, online course notebook):__________________________________________________________________________________________ __________________________________________________________________________________________ __________________________________________________________________________________________
Training Sessions
You must attend one of the following sessions in order to learn how to work safely in the lab. Session times and dates will be posted to the course calendar on the course website. They will be specifically offered during the first week of laboratory access. Each session will last approximately 30 minutes.
In this session you will learn:
‣ Safety & Lab Resources Dedicated to Safety (eye-washes, shower)
‣ Waste Disposal
‣ UV Safety (gel doc)
‣ Phenol & Chloroform Safety
‣ Locations of Reagents & Frozen Stocks
‣ Expectations of Daily Cleaning
‣ Basic Aseptic Technique
‣ Media Preparation: Liquid & Solid, Pouring Plates
‣ Sterilization by Autoclave: Media, Equipment, Glassware, Liquids
At the end of session get the signature of a research staff member to verify your attendance:
Research Staff Signature:
Signature: ________________________________
Time & Date: ________________________________
6

II - Aseptic TechniqueUnit 4.1 of your course textbook has perspective and details on the use of laboratory aseptic technique. Read it now! Read it. Read it. Seriously, borrow a book, read it. This introduction is taken from that section of the textbook and is presented as an attempt to define the term:
Aseptic technique is a set of routine measures that are taken to prevent cultures, sterile media stocks, and other solutions from contamination by unwanted microorganisms (i.e., sepsis). While such actions are sometimes called “sterile technique,” that terminology is appropriate only in reference to preventing introduction of any organisms to laboratory or medical equipment and reagents (such those as used for surgery). Since the goal of a biologist is to grow microorganisms or eukaryotic cells without introduction of extraneous organisms, aseptic techniques are crucial for accurate and meaningful experimentation. One should keep in mind that a completely sterile working environment does not exist. However, there are a number of simple, common sense procedures that will reduce the risk of culture contaminations. Examples of aseptic technique are cleaning and disinfecting laboratory surfaces prior to use, limiting the duration that cultures or media are uncapped and exposed to the air, keeping petri dishes closed whenever possible, effectively sterilizing inoculating loops and other equipment that comes into contact with cultures or media, and avoiding breathing on cultures or sterile instruments. These precautions will become second nature after practical laboratory experience.
As you can see, aseptic technique is critical in all of the research we will be doing from here forward.I continue this section by including some notes from the course textbook (which you should own by now).
What is an Inoculating Loop? The inoculating loop is used for the transfer of liquid or solid bacterial cultures. It consists, simply, of a handle with a thin protruding wire that is molded into a circle at the end. Many varieties of loops, made of nickel-chromium or platinum wire, are available from many suppliers. The wire may be permanently attached to a handle or replaceable, and may be obtained as either a straight wire or a twisted loop. The loop shape allows efficient transfer of liquids, which form a film over the loop. Standardized, volumetric loops are commercially available for reproducible transfers of specific volumes of liquid. Both looped and straight wires are suitable for transferring bacteria from solid media.
The inoculating loop must be sterilized immediately before and immediately after use. To sterilize, first place the end of the wire closest to the handle in the blue (hottest) part of a burner flame, until the wire glows red. Then slowly draw the wire through the flame, ensuring that the entire length of the wire glows red. The loop can be cooled quickly by gently touching it to an unused part of an agar plate or in liquid medium. Do not blow on a hot loop or wave it in the air to cool it off.
How are toothpicks or pipette tips used?Autoclaved toothpicks (or pipette tips) can be used for transfer of cultures as an inexpensive and quick alternative, since they do not need to be flamed like a loop. Toothpicks should be placed into a 100-ml beaker with the narrowest end at the bottom of the beaker, covered with aluminum foil, and autoclaved. The sterile container should be turned on its side during removal of individual toothpicks, to prevent contaminants from falling into the open beaker.
7

What is a Culture Spreader (besides a predictably questionable band name)?A spreader is used to evenly distribute bacterial cells from a liquid suspension over the surface of a plate. This will yield either a “lawn” of bacteria on nonselective medium, or isolated colonies on selective medium. A spreader can be easily made by heating and bending a piece of a 4- to 5-mm diameter glass rod, as illustrated in Figure 4.2.2 (course textbook). In a pinch, a much less durable spreader can be quickly made from a Pasteur pipet. For safety in handling, melt away sharp ends of rod as a first step. A pair of needle-nose pliers or similar tool is useful for forming bends in glass. Before each use, sterilize the spreader by immersing the triangular end in a beaker of 95% ethanol, passing the spreader quickly through a flame, then allowing the flame to burn out. Be careful not to let the burning ethanol drip into the beaker or onto flammable objects. Sterilize after use by immersing in the ethanol.
8

Aseptic Technique & Safety Evaluation
This information and much more is presented in Chapter 8 of the online course notebook. Review it.You are now prepared to complete a technique and safety evaluation.
You will be evaluated on your aseptic technique.
In what manner? Orally in the lab.
You will be instructed as to how to schedule a session with an appropriate member of the research staff. During this session you will do a short presentation on aseptic technique. How will you know what to present? It is easy - read Units 4.1 and 4.2 in your course textbook and you will be set.
I will go ahead and give some hints.
I expect to see coverage of the following topics:
‣ General cleanliness; cleaning of bench space.
‣ Required equipment: Bunsen burner, gloves, anything else?
‣ Bunsen burner lighting, components, general use.
‣ Bench-top aseptic work using a Bunsen burner. Flaming of bottles, technique and rationale.
‣ Manipulating vessels, liquids using aseptic technique.
‣ Sterilizing and using an inoculating loop to transfer from one liquid culture to another.
‣ Making a culture spreader from a Pasteur pipet.
‣ Handling of alcohol fires in beakers (occasionally incurred during use of culture spreader).
‣ Each of the following (you will use just one small test plate on which you will do all three):
‣ 1: Use of inoculating loop to streak a culture on a plate.
‣ 2: Use of toothpick or sterile pipette tip to streak a clone on a plate.
‣ 3: Use of a culture spreader to spread a culture on a plate.
Are you expected to read and know how to do all of this?
No, of course not. A lot can be learned from reading - the text is very good and quite clear. It is expected that you do read all of Units 4.1 and 4.2 before seeking assistance. You will clearly need to seek research staff assistance to clarify issues, perhaps see demonstrations, and locate equipment. Do this - seek help, ask questions. Interact with other students who have had questions clarified. Most of these topics were discussed in lecture this week as well and as such should not be foreign.
9

What expectations are there for your presentation?
Just a few but take them seriously:
‣ Completeness: You will cover the material that is stated above.
‣ Participation: All members of a group must participate and/or have a defined section.
‣ Preparation: It should not appear that you read the material once and just rambled through some sub-part of it that you could remember. You should take notes (in your laboratory notebook), come up with a plan, and then present it when you are sure of what you wish to say. It is allowed, even encouraged, that you have your lab notebook open to reference during your talk. Do not spend an inordinate amount of time preparing. This is just one section of the work to be done this week. That said - spend an appropriate amount of time preparing.
‣ Professionalism: We have lots of fun and conversation in the lab. This is not one of those times. This should be considered a serious topic and presented as such. Research staff and students around will be both active and passive audience. You should pretend that these are researchers you do not know but wish to impress.
‣ Duration: The total presentation should last approximately 10 minutes.
In order to do the presentation you simply need to ask one or more of the research staff to come over and witness it. Any students that are in the laboratory are allowed and encouraged to listen in. Give the research staff member this Research Progress Report packet. They will use the assessment form at the end of the packet for the evaluation of your knowledge of this information. Do not remove the assessment from the packet - leave it attached and its presence and score will be included in your overall grade. Do not modify the assessment form in any way after evaluation.
If you missed too many of the essential topics you may be asked to perform it again (for full credit). Worry not. These evaluations are not about grading you - they are about ensuring you use proper technique for the duration of the course.
10

Aseptic Technique Assessment
Instructions: Please check each box as the student addresses the subject. You can prompt the student for subject-areas that are not covered - the student should then be able to elaborate on their own.
Topics:______ General cleanliness; cleaning of bench space.______ Required equipment: Bunsen burner, gloves, anything else?______ Bunsen burner lighting, components, general use.______ Bench-top aseptic work using a Bunsen burner. Flaming of bottles, technique and rationale.______ Manipulating vessels, liquids using aseptic technique.______ Sterilizing and using an inoculating loop to transfer from one liquid culture to another.______ Making a culture spreader from a Pasteur pipet.______ Handling of alcohol fires in beakers (occasionally incurred during use of culture spreader).
Each of the following:______ 1: Use of inoculating loop to streak a culture on a plate.______ 2: Use of toothpick (or pipette tip) to streak a clone on a plate.______ 3: Use of a culture spreader to spread a culture on a plate.
______Preparation:It should not appear that you read the material once and just rambled through some sub-part of it that you could remember. You should take notes (in your laboratory notebook), come up with a plan, and then present it when you are sure of what you wish to say. It is allowed, even encouraged, that you have your lab notebook open to reference during your talk. Do not spend an inordinate amount of time preparing.
______Professionalism:We have lots of fun and conversation in the lab. This is not one of those times. This should be considered a serious topic and presented as such. Research staff and students around will be both active and passive audience. You should pretend that these are researchers you do not know but wish to impress.
______Duration:The total presentation should last approximately 10 minutes.
Student Presenting
EID: ____________________________________________
Name: ____________________________________________
Research Staff
Signature: ________________________________ Date: ____________________________________
11

III - Laboratory NotebooksLaboratory notebooks have been around forever. The standards by which they are used derive from tradition, practicality, and legality. If you search or query colleagues you will find common, unique, and occasionally bizarre recommendations regarding the format, layout, and content of entries placed in lab notebooks.
Our use of laboratory notebooks will be focused upon the following goals:
Research Documentation: The laboratory notebook is the sole source of dependable documentation for experimental parameters and procedures
Training: Teaching laboratory notebook technique that equips you to walk seamlessly into any research facility in the world and begin work
Planning: Good science does not magically happen at the bench; it is planned for well in advance. The laboratory notebook is a central component of that planning.
The follow sections are required for all experiments:
1. Title & DateTitle: One-line summation of workDate: Time and date of when procedure performed.
2. Rationale & PurposeA few sentences describing why you are doing the experiment. Details are important here. Which species are you using? Is there an expected result? Is this a re-attempt from a previous experimental failure? Are any special experimental parameters being used for the first time or tests?
3. Expected Data TablesIf you are collecting data during the procedure it is very good to include a table predicting how the data will be collected. Often this is not full size - it’s just a small estimate of what the actual data tables will look like.
4. Actual Data TablesYou have two choices when it comes to data tables. You can either populate the ones you created in Expected Data Tables or create new ones.
5. Procedure(s)A complete, step by step, every detail included account of what you did and how you did it for the experimental procedure. It is acceptable to include Xerox copies of standard protocols. It is also acceptable to denote or reference standard protocols such as “Total RNA Preparation from FG website”. You should not waste a lot of time writing the procedure in your notebook step-by-step. Remember - the goal is to reproduce your work. Denote information needed.
12

6. Results & ConclusionsThe results of the process. How did things work? Was the overall procedure successful? Will you need to do it again? Where does this procedure lead next?
The two primary goals of most laboratory notebooks:
Goal 1: Your experiments could be understood and recreated step-for-step if you were to disappear and only your lab notebook were to be left behind.
Goal 2: Your primary data could all be transcribed from your notebook or directly located (in the case of computer files, etc).
Please consult your course textbook for a full explanation of these sections (Appendix A2).
I especially encourage you to consult pages A.2.19 through A.2.28 to see an excellent example of an experiment planned for and completed in a laboratory notebook.
See Chapter 4 of the online course notebook for more information on proper laboratory notebook maintenance.
For this section you will do a full laboratory notebook preparation for the work performed in Section IV of this Research Progress Report. This preparation would likely include the following sections:
‣ Title & Date
‣ Rationale or Purpose
‣ Materials: Equipment & Reagents
‣ Preparation: Expected Data Tables
Note that these elements do not encompass all those that go into recording an experiment into a laboratory notebook. These are the ones that can typically be prepared before an experiment is engaged. This preparation makes the experimental session more clear, efficient, and less error prone.
13

Notebook Preparation for Section IV Experiments
Perform this preparation in your lab notebook. Now answer the following questions below that preparation in your lab notebook (label them Q1, Q2, Q3, and Q4).
Question 1: What materials do I need in the lab with me? Textbook? Sections of the online course notebook (perhaps printed)? Perhaps the Appendix on Lab Equipment use?
Question 2: How long is the procedure likely to take? What day and time should I go to the lab to ensure I have enough time to begin and complete the assays? Should I allow a little extra time for mistakes?
Question 3: What could go wrong during the work in the lab and how can I plan for those occurrences?
Question 4: What information or data must I have to be able to do analysis outside of the lab (what data must must copied from my lab notebook before leaving the lab given that the lab notebook will always remain in the lab itself)?
In order to complete this section of the Research Progress Report you must simply follow laboratory notebook policy:
‣ notebook content:what is expected in your notebook for the planning and execution of each and every experiment
‣ notebook storage:where your notebook is kept while you are not in the lab
See the online course notebook (Chapter 4). Seriously, go read it now. Now that you have reviewed this information you should be aware that you will leave your laboratory notebook in the lab at all times.
On what page of your laboratory notebook is this section of the Research Progress Report completed?
Response Required: I have done this preparation on page: ____________.
14

IV - Saccharomyces cerevisiae GrowthIntroduction
Spectrophotometry is a commonly used technique for the quantization of chemical components in solution. Depending on its structure and properties, the component absorbs light of one wavelength and transmits light of other wavelengths.
Yeast cells grown in liquid culture can be analyzed using the spec as a tool to evaluate the growth of cells in the medium. When doing this, we are NOT measuring the concentration of any particular substance, but instead are looking at the light scattering that is caused by the cells growing in the solution.
As the cells grow, the turbidity (i.e. “cloudiness”) of the solution increases and the amount of light scattered can be used to determine the density of the culture.
Consumable Materials
In Section II of this Research Progress Report you attended a training session on plate and media production. At the end of that session you were given access to stocks of both liquid media and plates for the purpose of yeast growth. Both of these media types will generally be available as laboratory stocks. Thus, you will rarely need to make your own media or plates. It is still important that you know how to safely make these items and thus the training provided.
Contamination Issues & Caution
Laboratory stocks are a major source of productivity gain in the lab. The production of reagents and buffers can be laborious, time consuming, and error prone. The controlled creation and use of common stocks allows an entire lab to benefit from a centralized effort to keep them available. This is a good thing. Everyone benefits, productivity is increased, experiments experience far less reagent-induced variance, and time in the lab is generally spent more on real work and less on preparatory work. All of this effort can be undone and worse by contamination of these common laboratory stocks. Contamination is generally undetectable and only shows itself when experiments start to fail or cultures show signs of contamination. You must be extremely rigorous when working with any laboratory stock and use all parts of aseptic technique.
In order to avoid contamination you will always claim and use only your own small aliquot of media and water. Please claim a bottle of media and use tape to label it with your name. Do not store media in a drawer. Media should be stored on the shelf in an upright fashion such that the liquid never touches the lid. Never use anyone else’s media or water under any circumstance. You may take your own aliquot of nanopure water (in the big white jug by the sink) and put it in a 15 mL or 50 mL conical tube to be labeled and kept in your drawer.
15

Growth Experiments
You will not be making YPD liquid media or plates for this Research Progress Report. The protocols for each, however, are in the online course notebook should you ever need to do so. Please pay attention to timing. Once you begin an overnight culture you are committed to performing plate creation the next day.
You will begin plate and liquid media growth from various laboratory stocks of a specific Saccharomyces cerevisiae strain (S288C). These stocks are located in the 4°C refrigerator on the west side of the laboratory. This procedure (both steps) will likely take less than 1 hour to perform.
Step 1: Overnight Culture Creation
You will be creating a small overnight culture in liquid media.
Adapted notes from course textbook on starting an overnight culture (small scale):1. Prepare 10 mL of YPD (from lab stock) in a sterile test tube.2. Follow the instructions for proper sterilization of the inoculating loop. 3. With a cooled loop or sterile toothpick, scoop a small portion of a single isolated colony (solid stock). 4. Insert the loop/toothpick into the liquid medium and shake lightly to dislodge the material. 5. Alternatively, touch the material on the loop to the glass just above the liquid.6. The inoculum will enter the liquid once it is put on a shaker. It is not necessary to see the yeast in the
liquid medium, because even a few cells will grow to a high density after incubation.7. Cover culture with cap or foil (with small holes). Place the culture in a 30°C shaking ( ∼200 rpm) dry
incubator and grow overnight. There are two racks which tightly hold the test tubes in place in the shaking incubator.
Step 2: Plate Creation
You are producing three plates:‣ Plate 1: Use a sterile toothpick or pipette tip to streak a plate of S288C (source is solid stock).‣ Plate 2: Use an inoculating loop to streak a plate of S288C (source is solid or liquid stock).‣ Plate 3: Use a culture spreader to spread a plate of S288C (source must be ~50 µL liquid stock).
Important Note: For these three plates you will be using the really small YPD plates in the 4°C. These plates are small - probably about 5cm in diameter. We will be using these small plates for training so as to limit waste. Please be sure that you are using the correct plates and ask research staff for clarification if needed.
Label all plates completely:‣ Your Name, Time & Date‣ Telephone Number or Email (often helpful if disaster strikes incubator)‣ Strain Plated (S288C), Method Used to Plate (Loop, Pick, Spread)
16

Adapted notes from course textbook on using a Culture Spreader:1. Place a small volume of culture (50µl) in the middle of the agar surface. 2. Sterilize the spreader by immersing the hooked end into 95% ethanol in a small beaker, then 3. Burn off the ethanol by passing through a Bunsen burner flame.
CAUTION: Be careful not to let the burning ethanol drip into the beaker or onto flammable objects. 4. Cool the spreader by touching it lightly to the agar surface, then spread the culture uniformly around the
plate. 5. Return spreader to ethanol. 6. Allow liquid to dry such that there are no drops visible on the surface. 7. Incubate plate with agar facing down at appropriate temperature.
Adapted notes from course textbook on using an inoculating loop or sterilized toothpick:
Clonal populations (a cluster of cells derived from one single cell) can be derived by streak plating. Each successive streak dilutes the previous streak, such that isolated colonies (clones) can be obtained (Fig. 4.2.3).
Note that this same procedure applies to the use of a sterilized toothpick (or pipette tip). A new toothpick is needed each time the instructions say to flame and sterilize the loop. See the figure below and your course textbook.
1. First, streak a loopful of liquid or solid culture across a small (∼3-cm long) area near one side of an agar plate.
2. Flame the loop to sterilize. 3. Touch the loop to an unoccupied area of the plate to cool. 4. Lightly drag the loop once through the first streak, then continue to drag in a zigzag manner over a
section of the agar surface. Be careful not to cross previous lines. 5. Flame the loop again, and cool by touching agar surface.6. Again, drag the loop once through the previous streak, then continue to make a second streak. 7. Repeat for a total of four to five streaks. 8. Incubate plate with agar facing down at appropriate temperature.
These plates will be allowed to grow for one to two days in an incubator that is set to 30°C. After one day of growth the plate is stored at 4°C where growth is slowed such that the plate can be kept for an extended period of time. After 24 to 48 hours of plate growth show your plates to a research staff member who will sign below to indicate you completed this portion of the Research Progress Report successfully. Take and save picture of all three plates together using the protocol on the course website (using the gel-doc system). You can now discard these plates.
Research Staff:After 24 to 48 hours growth have a research staff member evaluate your plates and sign below:
Plate 1: ______ Plate 2: ______ Plate 3: ______ Signature: ______________________ Date:__________
17

V - Essential MathematicsEveryone has seen these concepts before but we need to make sure we are all on the same page in terms of numeric communication and basic operations. Lab experiments will regularly use standard mathematical conversions. Typically, quantities are expressed in either scientific notation or as decimals with metric prefixes. You will answer the following questions using guidelines provided in the online course notebook (Appendix III) and your course textbook. Many web resources are available to address these quantitative questions.
Question 1: Express the following numbers in scientific notation:
Number Scientific Notation
10,200
5,400,000,000
0.000187
0.0000000044
34.5 x 10³
0.77 x 10³
0.033 x 10²
Question 2: Multiply and divide the following numbers (w/o a calculator):
Question Setup (Show Work) Answer (Scientific Notation)
3.0 x 104 * 1.0 x 105
6.0 x 10¹⁰ / 2.0 x 10⁵
Question 3: Convert the following numbers using metric conversion tables:
Starting Value Question
0.000001 g 1.0 ____ g (give prefix)
100 L 1.0 ____ L (give prefix)
10 g 1.0 ____ g (give prefix)
18
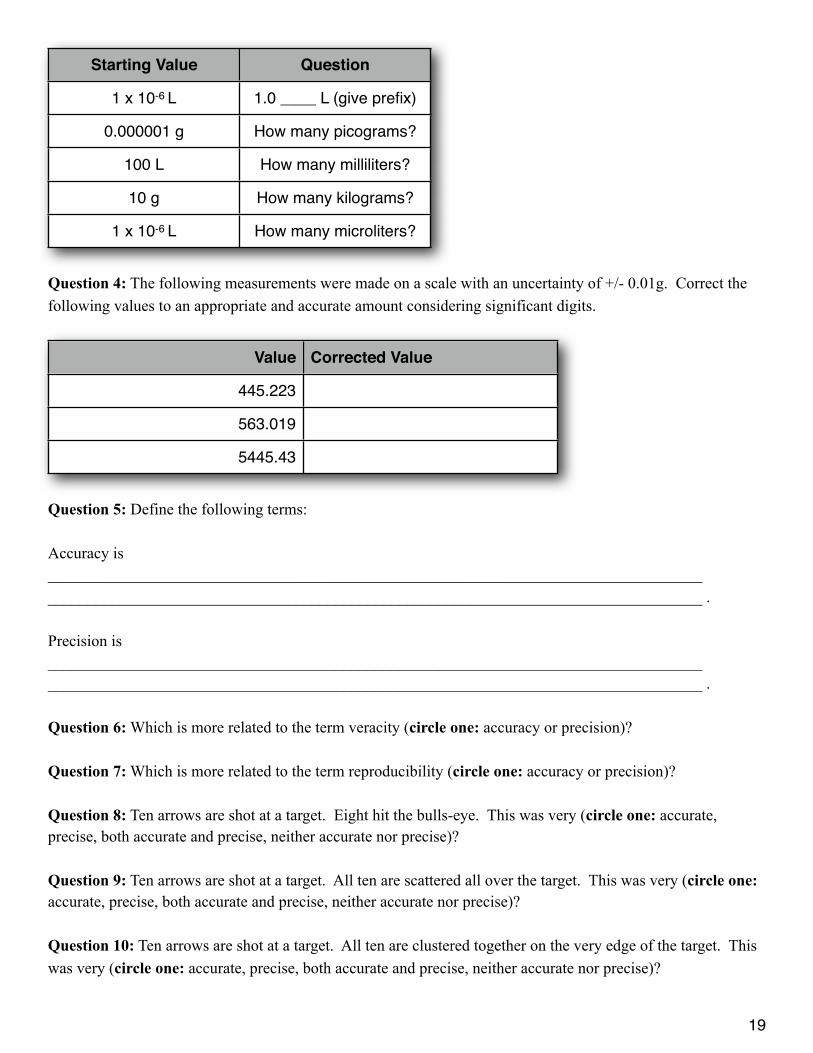
Starting Value Question
1 x 10⁻⁶ L 1.0 ____ L (give prefix)
0.000001 g How many picograms?
100 L How many milliliters?
10 g How many kilograms?
1 x 10⁻⁶ L How many microliters?
Question 4: The following measurements were made on a scale with an uncertainty of +/- 0.01g. Correct the following values to an appropriate and accurate amount considering significant digits.
Value Corrected Value
445.223
563.019
5445.43
Question 5: Define the following terms:
Accuracy is ____________________________________________________________________________________________________________________________________________________________________ .
Precision is ____________________________________________________________________________________________________________________________________________________________________ .
Question 6: Which is more related to the term veracity (circle one: accuracy or precision)?
Question 7: Which is more related to the term reproducibility (circle one: accuracy or precision)?
Question 8: Ten arrows are shot at a target. Eight hit the bulls-eye. This was very (circle one: accurate, precise, both accurate and precise, neither accurate nor precise)?
Question 9: Ten arrows are shot at a target. All ten are scattered all over the target. This was very (circle one: accurate, precise, both accurate and precise, neither accurate nor precise)?
Question 10: Ten arrows are shot at a target. All ten are clustered together on the very edge of the target. This was very (circle one: accurate, precise, both accurate and precise, neither accurate nor precise)?
19

VI - Micropipette Accuracy & PrecisionThe proper use of micropipettors is probably the single most import skill to develop in a molecular biology lab.
Required ReadingCourse Textbook: Chapter 1, Micropipettors
Technique & Information
Model: Rainin Pipet-Lite Magnetic Assist Pipette with LTS (L2, L 20, L 200, L 1000)
Features: Three sizes - each has a different volume range in which it is most accurate.
Description: Micropipettors are the workhorse of the modern biological laboratory. You will use these instruments to manipulate volumes from 1 to 1000 µL.
Use: Some of the the following information has been adapted from the Rainin manual.
Consistency in all aspects of pipetting procedure will significantly contribute to reproducibility.
FIRST - Choosing a Micropipettor
Each of the three micropipettors has a distinct volume range.
‣ Micropipette L 2‣ Volume Range: 0.2 to 2 µL
‣ Micropipette L 20‣ Volume Range: 2 to 20 µL
‣ Micropipette L 200‣ Volume Range: 20 to 200 µL
‣ Micropipette L 1000‣ Volume Range: 100 to 1000 µL
Select the micropipettor that best suits the volume you need to transfer.
SECOND - Setting Desired Sample Volume
Each micropipette has a side-readout of the volume it is set for. These number change in meaning depending on which micropipette you have selected.
In order to change the sample volume the volume lock ring (see figure below) on the top must be turned 1/8 of a turn to the left (unlocked).
20

Once a sample volume has been selected turn the volume lock ring back 1/8th turn to lock the volume in place.
‣ Micropipette L 2‣ Volume Range: 0.2 to 2 µL‣ Lowest Setting: 020‣ Highest Setting: 200
‣ Readout: 023 would mean 0.23 µL‣ Readout: 123 would mean 1.23 µL
‣ Micropipette L 20‣ Volume Range: 2 to 20 µL‣ Lowest Setting: 020‣ Highest Setting: 200
‣ Readout: 023 would mean 2.3 µL‣ Readout: 123 would mean 12.3 µL
‣ Micropipette L 200‣ Volume Range: 20 to 200 µL‣ Lowest Setting: 020‣ Highest Setting: 200
‣ Readout: 023 would mean 23 µL‣ Readout: 123 would mean 123 µL
‣ Micropipette L 1000‣ Volume Range: 100 to 1000 µL‣ Lowest Setting: 020‣ Highest Setting: 100
‣ Readout: 023 would mean 230 µL‣ Readout: 099 would mean 990 µL
THIRD - Selecting a Tip
The micropipette is NEVER submerged into any kind of sample without a disposable tip.
Micropipette tips (pictured above) come in three sizes that correspond to the three sizes of micropipettes we have in the lab. The following information tells you which tips go with which micropipettes and the functional range of each micropipette.
‣ Micropipette L 2‣ Color: RED‣ Volume Range: 0.2 to 20 µL
‣ Micropipette L 20‣ Color: RED‣ Volume Range: 0.2 to 20 µL
21

‣ Micropipette L 200‣ Color: GREEN‣ Volume Range: 20 to 200 µL
‣ Micropipette L 1000‣ Color: BLUE‣ Volume Range: 100 to 1000 µL
FOURTH - Putting a Tip On
Holding the micropipette vertically push the white end down onto a clean tip from the appropriate (of three) micropipette tip boxes (above).
FIFTH - Picking Up a Sample
Depress the plunger button to the first stop before placing the tip in your sample. Place the tip in the sample.
When picking up a sample, immerse the end of the disposable tip beneath the liquid surface:
‣ 1-2 mm for up to 10 µL
‣ 2-3 mm for 20 to 100 µL ‣ 3-6 mm for 100 to 1000 µL
Release the plunger button slowly to a non-depressed state. Maintain consistency in the following areas:
‣ speed and smoothness when you press and release the push button‣ always operate a pipette in a vertical position‣ pipetting rhythm from sample to sample‣ push button pressure at the first stop‣ angle and immersion depth
SIXTH - Dispensing Sample
Dispense sample by touching the tip end against the side wall of the receiving vessel to ensure complete sample flow. Alternatively, dispense sample into sample by using the same immersion depth used during sample pickup. Depress the plunger button to the first stop. As you remove the tip from the sample press the plunger button all the way to the second stop.
22

SEVENTH - Ejecting the Tip
Never touch a stock reagent twice with the same tip (there are exceptions, to be demonstrated). To eject the tip press the large white eject button while pointing the tip at a bench-top trash receptacle.
Below is a single-channel micropipettor and a multi-channel micropipettor. We will regularly be using the single-channel variant and occasionally use a multi-channel for large-scale work.
See Chapter 5 of the online course notebook for more information.
23

Experimental Introduction
Question 1: One L of pure water is expected to have a mass of ______ kg.
Question 2: Therefore, one mL of pure water is expected to have a mass of ______ g.
Now that we have that fact out of the way, we can proceed.
We can use this fact to evaluate:‣ pipetting technique & consistency (accuracy & precision)‣ basic statistical analysis skills
Equipment Familiarity
You must spend some time reading Appendix II of the online course notebook before beginning this lab. This Appendix will be updated each week with new equipment as it comes to be relevant to laboratory procedures.
Please take some time now to review the equipment that is currently presented.
You will want to become familiar with the following equipment:‣ Weigh Boats‣ Analytical Balances‣ Top Loading Balances‣ Microcentrifuge Tubes‣ Microcentrifuge Tube Racks‣ Micropipettors‣ Micropipette Tips
Question 3: Weigh Boats are used with the following two pieces of equipment (listed above):________________________ and ________________________
Question 4: Which is more sensitive (accurate) - a top loading or analytical balance:(circle one: top loading or analytical).
Question 5: Which holds the largest amount of sample (circle one: L2, L 20, L 200, L 1000)?
Question 6: It is acceptable to sometimes use a micropipette without a tip (circle one: true or false)?
Question 7: A reading of 099 on the L 20 Micropipettor is a volume of ________ µL.
Question 8: A reading of 099 on the L 200 Micropipettor is a volume of ________ µL.
24

Experiment Purpose
You will be characterizing your capacity to micropipette.
In doing so you will be exercising the following skills:
‣ Accuracy and precision with micropipettors‣ Familiarity and use of top loading and analytical balances‣ Clear use of laboratory notebook to document the experimental process‣ Problem solving and critical thinking‣ Basic data analysis
Procedure One: Microcentrifuge Tube Analysis
Step 1: Select 3 microcentrifuge tubes. This is nothing, by the way. Graduate students go through hundreds of these things by the day, if not by the hour. Label each tube using a sharpie marker (on the lid) 1 through 3.
Step 2: Using a top loading balance - measure and record the mass of each tube 3 times. Please note that an independent recording of mass always requires a TARE between each mass measurement. You will be performing 9 (3 x 3) total measurements. Please note you should be performing clear data recording in your lab notebook here.
Step 3: Using the analytical balance - measure and record the mass of each tube 3 times. You will be performing 9 (3 x 3) total measurements. Again, please pay attention to data recording (tables) in your lab notebook.
Step 4: You now have the raw data needed to determine an average mass for each tube with a standard deviation.
For each tube, use the Microsoft Excel Research Progress Report II - Micropipette AP.xls template (on Course Website near the PDF for this report) to determine the mean mass and standard deviation of each tube. Note that you will have two means and two standard deviations for each tube: one determined using the measurements from the top loading balance and one from the analytical balance.
Complete the following tables using appropriate significant digits for each device:
Note that each column (tube) is computed from the manipulation of 3 independent measurements for that tube.
Top Loading Balance (tube) Tube 1 Tube 2 Tube 3 MEAN
MEAN (g)
STDEV (g)
25

Analytical Balance (tube) Tube 1 Tube 2 Tube 3 MEAN
MEAN (g)
STDEV (g)
Note that the last column is computing the mean across the tubes. For example, for the top loading balance, a mean and standard deviation will be computed for each tube. Each mean then be used as a value to determine an overall mean mass across the tubes. This number is rather uninteresting. Each standard deviation, however, can be used to determine a mean standard deviation across the tubes. This number is very interesting!
Question 9: Which balance produced the more precise series of measurements for tube replicate weighings?
Defend your answer citing numbers from the tables above.______________________________________________________________________________________________________________________________________________________________________________________________________________________________________________________________________________
Question 10: The accuracy of each of these balances is covered in the online course manual (Course Materials) - Appendix II. Given your calculations above, do you think the balances are performing within their expected accuracy?
Defend your answer citing numbers from the tables above.______________________________________________________________________________________________________________________________________________________________________________________________________________________________________________________________________________
26

Procedure Two: Solution Analysis
Step 1: In a spare tube get ~ 1 mL of water.
Pipetting very carefully perform step 2. You may want to empty and dry tube if you feel you have pipetted inaccurately or without caution. Accurate volume is critical. Close all lids tightly after adding sample.
Step 2: Add water to tubes in the following amounts.
‣ Add 10 µL of water to Tube 1‣ Add 50 µL of water to Tube 2‣ Add 300 µL of water to Tube 3
Step 3: Using the analytical balance - measure and record the mass of each tube with appropriate solution added 3 times. Again, you will be performing 9 mass measurements here. Be sure to TARE appropriately and record all data clearly in your laboratory notebook.
Let us do a state of the union. You have established a believable mass value for each tube before adding solution. You now added solution, in increasing amounts. You then measured each tube, again, three times with the analytical balance.
Step 4: Complete the following table (again using Excel, this time making your own table following my Step 4 guide):
Note that each column (tube) is computed from the manipulation of 3 independent measurements for that tube.
Analytical Balance(tube + solution)
Tube 1 Tube 2 Tube 3
MEAN (g)
STDEV (g)
Step 5: Complete the following table (again using Excel, this time making your own table following my Step 4 guide):
Note that the mass of the solution in the tube is now easily determined using the values from both Step 4(s) (using both Procedure One and Procedure Two) .
Mass of Solution in Tube(tube+solution - tube)
Tube 1 Tube 2 Tube 3
(g)
27

Step 6: Complete the following table.
Recall the volume that you pipetted into each tube. Note that the concentration of the solution in the tube is now easily determined using the mass divided by the volume of the liquid determined in Step 7.
Concentration of Solution in Tube(mass of solution / solution volume)
Tube 1 Tube 2 Tube 3
(g / µL)
Recommendation: You might want to evaluate your pipetting technique before doing this lab all the way through by pipetting some volume of water and using a balance of either kind (top loading, analytical) to tell you whether you have truly loaded the expected mass of water. You will need to first establish the mass of the tube and then subtract it.
Question 11: Which micropipettors did you use for each of the tubes when adding the water?
Tube 1: ______________ Tube 2: ______________ Tube 3: ______________
Question 12: If your pipetting technique is good then the concentration of solution (water) in each tube should be both equal across tubes and equal to that of water. Is it? If your accuracy was off for Tube 1, did it help to re-try it paying careful attention to the exact volume you transferred?
Defend your answer citing numbers from the tables above.__________________________________________________________________________________________________________________________________________________________________________________________________________________________________________________________________________________________________________________________________________________________________________________________________________________________________________________________________________________________________________________________________________________________________________________________________________________________________________________________________________________________________________________________________________________________________________________________________________________________________________
28

Micropipette Accuracy & Precision Assessment
Instructions: Please check each box as the student addresses the subject. You can prompt the student for subject-areas that are not covered - the student should then be able to elaborate on their own. If the student does not have a good understanding of most of these subject areas - please ask them to take a day or two to re-learn, re-evaluate and then ask for an assessment again.
______ Large Volume Micropipetting.The student should clearly demonstrate they understand how to accurately pipette volumes of 100, 200 and 500 µL. Make them demonstrate their technique and choice of micropipettor using water and microcentrifuge tubes.
______ Small Volume Micropipetting.The student should clearly demonstrate they understand how to accurately pipette volumes of 0.5, 2 and 15 µL. Make them demonstrate their technique and choice of micropipettor using water and microcentrifuge tubes. Pay special attention to these motions (especially 0.5) and be sure the student is using good technique throughout in terms of the micropipettor they select, how deeply the tip penetrates the liquid and how they release the liquid into the next tube.
______ L 2 Volume.Set this micropipettor to a random volume - ask the student the volume.
______ L 20 Volume.Set this micropipettor to a random volume - ask the student the volume.
______ L 200 Volume.Set this micropipettor to a random volume - ask the student the volume.
______ L 1000 Volume.Set this micropipettor to a random volume - ask the student the volume.
______ Pipetting Scenarios.The student should clearly demonstrate they understand when a tip can be re-used and when it cannot.Scenario One: Adding primers from a primer stock to five PCR reactions (pre-made, waiting for primers).Scenario Two: Adding primers to five empty tubes.Scenario Three: Adding five different reagents to one tube.
Student PresentingEID: ____________________________________________Name: ____________________________________________
Research StaffSignature: ________________________________ Date: __________________________________
29

VII - Differential Growth CharacterizationDifferential Growth in Liquid Media
This portion of the Research Progress Report is going to teach you how to do two things:
1. Use the 20D+ Spectrophotometer to measure cell density in culture.2. Perform a growth curve characterization of multiple species of yeast.
Chapter 2 of your course textbook has an amazing amount of background material on spectrophotometry. You should really consider reading most of it right about now. Are you done with that? Did you pay particular attention to concepts of transmission and absorbance? Let us now move on to how to actually use the spectrophotometer we have in the laboratory. Chapter 9 of the online course notebook has significant information on the use of the 20D+ Spectrophotometer - both of which inform you as to how to measure cell culture density which will be important in the completion of this Research Progress Report.
Using the Spectrophotometers
Equipment
The procedures for using each of these pieces of equipment are documented in Chapter 9 of the online course notebook. There are laptops conveniently located next to each of these pieces of equipment. Please - no gloves on the keyboards!
Spectronic 20D+ Spectronic 20D+ Cuvettes
Rumor has it this piece of equipment was a critical component in the discovery of the new world.
These are the glass cuvettes that are used with our spectrophotometer. Do not attempt to use any other cuvette.
30

Performing a Growth Curve
This information, as well, is covered in Chapter 9 of the online course notebook. A growth curve is the monitored and quantified growth of any cell culture over a period of time. You start some cells growing and on regular intervals you take a measurement of cell density. At the end of the growth you are able to plot this gathered data as a curve.
General Procedure
1. Start a 5 mL culture of YPD and incubate the cells overnight at 30°C (16 hours is fine).
2. The next day, take an OD 600 measurement.Note: You will need to dilute your overnight culture (likely 1 to 5) in order to take an accurate measurement.See protocol for Using the 20D+ Spectrophotometer. I cannot emphasize strongly enough how important this 1 to 5 dilution is when using the 20D+ to measure the OD of your overnight culture. The 20D+ cannot accurately measure a saturated culture. Thus, the culture must be diluted, measured and then quantified based on the dilution factor used. The culture must also be mixed at all times to prevent settling of the cells.
3. Calculate the amount of overnight culture required to start a new 40 mL YPD culture at an OD600 of 0.20 using the equation S1×V1=S2×V2. Normally cultures are begun at OD600 0.10 but for this section we are going to start the culture off with a higher cell density (0.20). Remember your dilution in step 2 for this calculation!
4. Combine this calculated amount of overnight culture with fresh YPD to start a new culture at OD600 of 0.20.
5. Take an OD600 reading (using 3 mL). This is “Hour 0” (actual measurement).
6. At regular intervals (varies per organism and strain) take OD600 measurements on both cultures and continue to do so until the growth rate levels off.
31

Differential Growth on Solid Media
Plate spotting is a technique used to study the growth of a yeast on a solid surface (a plate). It is typically used to study the relative growth of multiple yeast strains or species on one common growth surface. Serial dilutions of each culture are performed such that each row represents a strain/species while each column represents a dilution. Dilutions are used because it can be difficult to separate a weakly growing strains/species from wild type at high cellular concentrations. This is done by taking a yeast culture (or multiple), making a series of serial dilutions, and plating them (in “spots”) on a plate. For the example below we are giving details for plating one strain/species (a row). The procedure would be performed multiple times for each strain/species that needs to be co-plated.
General Procedure
First you should make or retrieve the plates on which you will be plating your cells. Next you need to prepare 100 µL serial dilutions of an overnight cell culture.
You will likely want to create the following tubes (for each strain/species, thus eight tubes total):
‣ Tube 1 - 1/1
‣ Tube 2 - 1/10
‣ Tube 3 - 1/100
‣ Tube 4 - 1/1000
1. Take 5 µL from Tube 1 and pipette it onto the plate.Try and place the drop about half an inch from the center and toward the left side of the plate as you are going to place the next three drops to the right of this one and in a straight line across the plate.
2. Take 5 µL from Tube 2 and pipette it onto the plate one half an inch to the right of the spot from Tube 1.
3. Do the same for Tube 3, and place it about the same distance from the Tube 2 spot as is the Tube 2 spot from the Tube 1 spot.
4. Do the same for Tube 4, and place it about the same distance from the Tube 3 spot as is the Tube 3 spot from the Tube 2 spot.
5. You can use this plate to measure as many dilutions as you wish so long as you space them out and keep them in sequential order.
6. Place the plate in the appropriate incubator for growth.
After your plates grow overnight they will look something like the figure below.
‣ The columns correlate to tubes (Tubes 1, 2, 3, and 4 in this case).
‣ The rows are different strains/species grown at the same time.
‣ One might say that strains/species A, C, and D grew better than strains/species B and E.
‣ Are you able to see it (especially in the last dilution)?
32

33

Differential Growth in Liquid Media Experiment
Typical Graphical Output
The following graph shows the typical growth of yeast or bacteria in liquid media.
Question 1: Why does the growth take off rapidly from time 2 to 6 hours?______________________________________________________________________________________________________________________________________________________________________________________________________________________________________________________________________________
Question 2: What is this time-period usual referred to as (2 to 6 hours)? There is a specific term.__________________________________________________________________________________________
Question 3: Why are cells usually captured during this time-period (2 to 6 hours) for experiments or measurements?________________________________________________________________________________________________________________________________________________________________________________________________________________________________________________________________________________________________________________________________________________________________________
Question 4: Why does the growth begin to slow after 6 hours?________________________________________________________________________________________________________________________________________________________________________________________________________________________________________________________________________________________________________________________________________________________________________
Question 5: Why does the growth reach a peak around 11 hours and begin to drop thereafter?________________________________________________________________________________________________________________________________________________________________________________________________________________________________________________________________________________________________________________________________________________________________________
34

Liquid Media Growth Experiment
In this section you will be growing two different species of Saccharomyces sensu stricto:1. S288C (Saccharomyces cerevisiae wild type)2. Saccharomyces ____________________ (your choice which)
You will be growing both over a period of 6 hours and capturing data with both the Spectronic 20D+ spectrophotometer so as to render a growth curve for each species.
You will need to grow overnight cultures for both S288C (Saccharomyces cerevisiae) and your OTHER species. You will then dilute these cultures to OD ~ 0.20. Note that it is important that both cultures begin at nearly the same OD. Also note that you will likely wish to complete the Differential Growth on Solid Media section of this report (next section) using these same overnight cultures.
Collect the following data (a data point every 90 minutes, or 1.5 hours):
Species OD Hour 0 (Target)
Hour 0 (Actual)
Hour 1.5 Hour 3 Hour 4.5 Hour 6
S288C OD 600 ~ 0.20
OTHER OD 600 ~ 0.20
Excel Plots
On a single graph plot the growth curve for both S288C and the other species as recorded.
This means that one single line plot will have two curves. Your plot should include a legend to clearly differentiate the two curves. The plot should have a clear title and each axis clearly labeled. Print the graph and staple it to the end of this Research Progress Report. Additionally, you will need to learn how to export your graph as an image for Section VIII - posting your results to Results Central.
Question 6: Did both species seem to grow the same?YES or NO and WHY: __________________________________________________________________________________________________________________________________________________________________________________________________________________________________________________________
Question 7: At what time point did each species begin to exit log-phase growth (or did they)?S288C: ________________________OTHER: ________________________
35

Differential Growth on Solid Media Experiment
In this section you will be plate spotting two different species of Saccharomyces sensu stricto:1. S288C (Saccharomyces cerevisiae wild type)2. Saccharomyces ____________________ (your choice which)
You will need two YPD plates:1. Both species will be plate spotted (two rows) and grown at 30°C.2. Both species will be plate spotted (two rows) and grown at 37°C.
You will need to grow overnight cultures for both S288C (Saccharomyces cerevisiae) and your OTHER species. From each of these cultures take 1 mL and make the following 1 mL dilutions:
S288C:
‣ Tube 1 - 1/1
‣ Tube 2 - 1/10
‣ Tube 3 - 1/100
‣ Tube 4 - 1/1000
OTHER:
‣ Tube 1 - 1/1
‣ Tube 2 - 1/10
‣ Tube 3 - 1/100
‣ Tube 4 - 1/1000
Plate and grow the dilutions such that (top row & blue = S288C dilution series, bottom row & red = OTHER):
Grow one plate in the 30°C incubator and one plate in the 37°C incubator overnight.
Question 8: Did the species show differential growth at 30°C? (YES or NO)Question 9: Did the species show differential growth at 37°C? (YES or NO)Question 10: What were your expectations for both temperature conditions and did the results match them?__________________________________________________________________________________________________________________________________________________________________________________
Take a Picture:Get a picture of your plates using the gel-doc system (and save it).
Sign Off On Plate Growth:Research Staff: _____________________________________________________________________________
36

Saccharomyces cerevisiae Growth Assessment
Instructions: Please check each box as the student addresses the subject. You can prompt the student for subject-areas that are not covered - the student should then be able to elaborate on their own. If the student does not have a good understanding of most of these subject areas - please ask them to take a day or two to re-learn, re-evaluate and then ask for an assessment again.
Topics:______ Overnight Cultures (starting).The student should demonstrate that they know how to start an overnight culture cleanly using a plate stock.
______ Overnight Cultures (purpose).The student should demonstrate that they understand the purpose of an overnight culture.
______ Overnight Cultures (making an OD measurement).The student should demonstrate the understand the process of accurately measuring the OD of an overnight culture. This explanation should include a dilution and then a measurement as well as a clear understanding of why the dilution was performed.
______ Growth Cultures (dilution of overnight culture).The student should clearly demonstrate (with an example) that they can take the OD of an overnight culture and correctly calculate the measurements needed to start a 50 mL growth culture at an OD of 0.2. ______ Growth Cultures (making an OD measurement).The student should clearly demonstrate how they would make an OD measurement of the growing culture without contaminating the culture.
Student Presenting
EID: ____________________________________________
Name: ____________________________________________
Research Staff
Signature: ________________________________ Date: ____________________________________
37

VIII - Results Central Progress ReportsI expect you to make three independent postings to Results Central during the course of this training regimen. I will be looking for them and they will contribute to the overall grade for this Research Progress Report II.
When do I want you to make these posts?
When you complete sections:
‣ IV - Saccharomyces cerevisiae Growth
‣ VI - Micropipette Accuracy & Precision
‣ VII - Differential Growth Characterization
What do I wish for you to post?
Your experiences, perspective and/or results. Section IV had you taking pictures of your plates. I would like (expect) to see these pictures in the post. Section VII has figures worth including as well.
Learn how to export a Microsoft Excel graph as a PNG image that can be posted. Additionally, post images of your plate-spotting assays.
Be creative, be clear, be complete. The point of Results Central is for each of you to share with the research community your progress, experiences, learning perspectives and other research concerns.
Please be sure your three independent posts have the following titles:
‣ Research Progress Report IV - Saccharomyces cerevisiae Growth
‣ Research Progress Report VI - Micropipette Accuracy & Precision
‣ Research Progress Report VII - Differential Growth Characterization
See the protocol on using Results Central for more information.
38


