Embed Size (px)
Citation preview
SaharaRelease 6.0.0.0b2.dev3
OpenStack Foundation
November 17, 2016


Contents
1 Overview 3
2 User guide 9
3 Developer Guide 65
i

ii

Sahara, Release 6.0.0.0b2.dev3
The sahara project aims to provide users with a simple means to provision data processing frameworks (such asHadoop, Spark and Storm) on OpenStack. This is accomplished by specifying configuration parameters such as theframework version, cluster topology, node hardware details and more.
Contents 1

Sahara, Release 6.0.0.0b2.dev3
2 Contents

CHAPTER 1
Overview
1.1 Rationale
1.1.1 Introduction
Apache Hadoop is an industry standard and widely adopted MapReduce implementation, it is one among a growingnumber of data processing frameworks. The aim of this project is to enable users to easily provision and manageclusters with Hadoop and other data processing frameworks on OpenStack. It is worth mentioning that Amazon hasprovided Hadoop for several years as Amazon Elastic MapReduce (EMR) service.
Sahara aims to provide users with a simple means to provision Hadoop, Spark, and Storm clusters by specifyingseveral parameters such as the version, cluster topology, hardware node details and more. After a user fills in all theparameters, sahara deploys the cluster in a few minutes. Also sahara provides means to scale an already provisionedcluster by adding or removing worker nodes on demand.
The solution will address the following use cases:
• fast provisioning of data processing clusters on OpenStack for development and quality assurance(QA).
• utilization of unused compute power from a general purpose OpenStack IaaS cloud.
• “Analytics as a Service” for ad-hoc or bursty analytic workloads (similar to AWS EMR).
Key features are:
• designed as an OpenStack component.
• managed through a REST API with a user interface(UI) available as part of OpenStack Dashboard.
• support for a variety of data processing frameworks:
– multiple Hadoop vendor distributions.
– Apache Spark and Storm.
– pluggable system of Hadoop installation engines.
– integration with vendor specific management tools, such as Apache Ambari and Cloudera ManagementConsole.
• predefined configuration templates with the ability to modify parameters.
1.1.2 Details
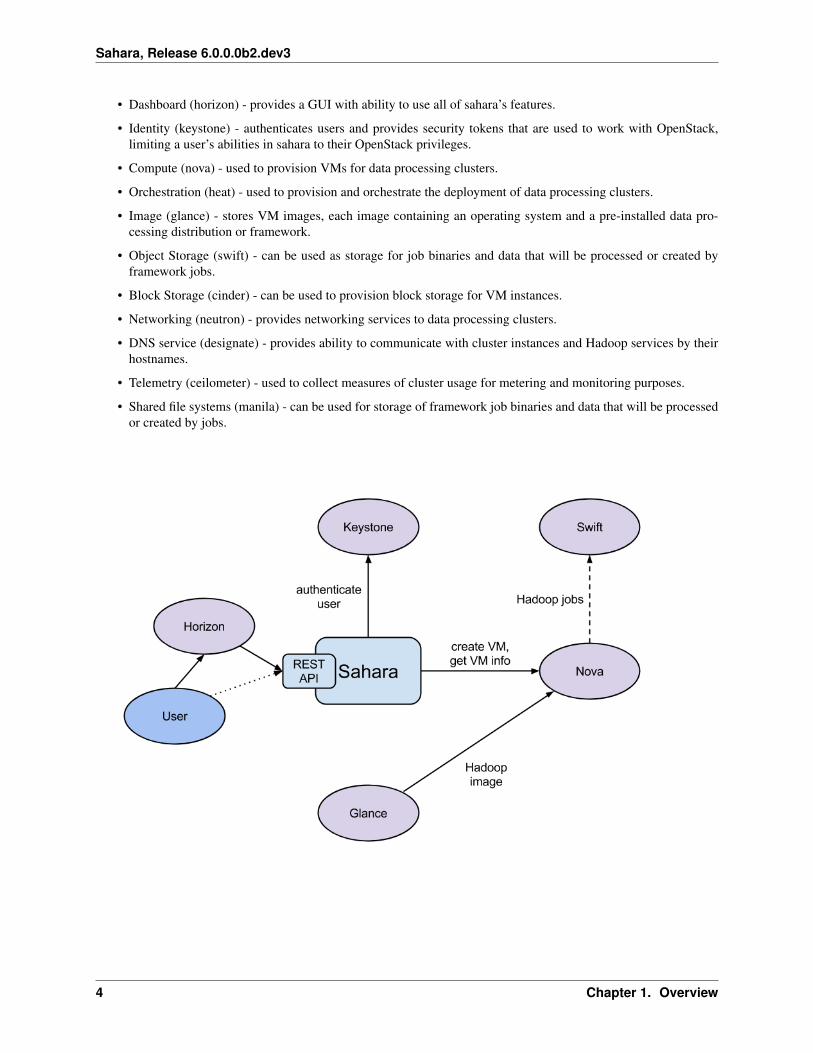
The sahara product communicates with the following OpenStack services:
3
Sahara, Release 6.0.0.0b2.dev3
• Dashboard (horizon) - provides a GUI with ability to use all of sahara’s features.
• Identity (keystone) - authenticates users and provides security tokens that are used to work with OpenStack,limiting a user’s abilities in sahara to their OpenStack privileges.
• Compute (nova) - used to provision VMs for data processing clusters.
• Orchestration (heat) - used to provision and orchestrate the deployment of data processing clusters.
• Image (glance) - stores VM images, each image containing an operating system and a pre-installed data pro-cessing distribution or framework.
• Object Storage (swift) - can be used as storage for job binaries and data that will be processed or created byframework jobs.
• Block Storage (cinder) - can be used to provision block storage for VM instances.
• Networking (neutron) - provides networking services to data processing clusters.
• DNS service (designate) - provides ability to communicate with cluster instances and Hadoop services by theirhostnames.
• Telemetry (ceilometer) - used to collect measures of cluster usage for metering and monitoring purposes.
• Shared file systems (manila) - can be used for storage of framework job binaries and data that will be processedor created by jobs.
4 Chapter 1. Overview

Sahara, Release 6.0.0.0b2.dev3
1.1.3 General Workflow
Sahara will provide two levels of abstraction for the API and UI based on the addressed use cases: cluster provisioningand analytics as a service.
For fast cluster provisioning a generic workflow will be as following:
• select a Hadoop (or framework) version.
• select a base image with or without pre-installed data processing framework:
– for base images without a pre-installed framework, sahara will support pluggable deployment engines thatintegrate with vendor tooling.
– you can download prepared up-to-date images from http://sahara-files.mirantis.com/images/upstream/
• define cluster configuration, including cluster size, topology, and framework parameters (for example, heapsize):
– to ease the configuration of such parameters, configurable templates are provided.
• provision the cluster; sahara will provision VMs, install and configure the data processing framework.
• perform operations on the cluster; add or remove nodes.
• terminate the cluster when it is no longer needed.
For analytics as a service, a generic workflow will be as following:
• select one of the predefined data processing framework versions.
• configure a job:
– choose the type of job: pig, hive, jar-file, etc.
– provide the job script source or jar location.
– select input and output data location.
• set the limit for the cluster size.
• execute the job:
– all cluster provisioning and job execution will happen transparently to the user.
– cluster will be removed automatically after job completion.
• get the results of computations (for example, from swift).
1.1.4 User’s Perspective
While provisioning clusters through sahara, the user operates on three types of entities: Node Group Templates, ClusterTemplates and Clusters.
A Node Group Template describes a group of nodes within cluster. It contains a list of hadoop processes that will belaunched on each instance in a group. Also a Node Group Template may provide node scoped configurations for thoseprocesses. This kind of template encapsulates hardware parameters (flavor) for the node VM and configuration fordata processing framework processes running on the node.
A Cluster Template is designed to bring Node Group Templates together to form a Cluster. A Cluster Templatedefines what Node Groups will be included and how many instances will be created in each. Some data processingframework configurations can not be applied to a single node, but to a whole Cluster. A user can specify these kindsof configurations in a Cluster Template. Sahara enables users to specify which processes should be added to an anti-affinity group within a Cluster Template. If a process is included into an anti-affinity group, it means that VMs wherethis process is going to be launched should be scheduled to different hardware hosts.
1.1. Rationale 5

Sahara, Release 6.0.0.0b2.dev3
The Cluster entity represents a collection of VM instances that all have the same data processing framework installed.It is mainly characterized by a VM image with a pre-installed framework which will be used for cluster deployment.Users may choose one of the pre-configured Cluster Templates to start a Cluster. To get access to VMs after a Clusterhas started, the user should specify a keypair.
Sahara provides several constraints on cluster framework topology. You can see all constraints in the documentationfor the appropriate plugin.
Each Cluster belongs to an Identity service project determined by the user. Users have access only to objects locatedin projects they have access to. Users can edit and delete only objects they have created or exist in their projects.Naturally, admin users have full access to every object. In this manner, sahara complies with general OpenStackaccess policy.
1.1.5 Integration with Object Storage
The swift project provides the standard Object Storage service for OpenStack environments; it is an analog of the Ama-zon S3 service. As a rule it is deployed on bare metal machines. It is natural to expect data processing on OpenStackto access data stored there. Sahara provides this option with a file system implementation for swift HADOOP-8545and Change I6b1ba25b which implements the ability to list endpoints for an object, account or container. This makesit possible to integrate swift with software that relies on data locality information to avoid network overhead.
To get more information on how to enable swift support see Swift Integration.
1.1.6 Pluggable Deployment and Monitoring
In addition to the monitoring capabilities provided by vendor-specific Hadoop management tooling, sahara providespluggable integration with external monitoring systems such as Nagios or Zabbix.
Both deployment and monitoring tools can be installed on standalone VMs, thus allowing a single instance to manageand monitor several clusters at once.
1.2 Architecture
The Sahara architecture consists of several components:
• Auth component - responsible for client authentication & authorization, communicates with the OpenStackIdentity service (keystone).
• DAL - Data Access Layer, persists internal models in DB.
• Secure Storage Access Layer - persists the authentication data like passwords and private keys in a securestorage.
• Provisioning Engine - component responsible for communication with the OpenStack Compute (nova), Orches-tration (heat), Block Storage (cinder), Image (glance), and DNS (designate) services.
• Vendor Plugins - pluggable mechanism responsible for configuring and launching data processing frameworkson provisioned VMs. Existing management solutions like Apache Ambari and Cloudera Management Consolecould be utilized for that purpose as well.
• EDP - Elastic Data Processing (EDP) responsible for scheduling and managing data processing jobs on clustersprovisioned by sahara.
• REST API - exposes sahara functionality via REST HTTP interface.
6 Chapter 1. Overview

Sahara, Release 6.0.0.0b2.dev3
• Python Sahara Client - like other OpenStack components, sahara has its own python client.
• Sahara pages - a GUI for the sahara is located in the OpenStack Dashboard (horizon).
1.2. Architecture 7

Sahara, Release 6.0.0.0b2.dev3
8 Chapter 1. Overview
CHAPTER 2
User guide
Installation
2.1 Sahara Installation Guide
We recommend installing sahara in a way that will keep your system in a consistent state. We suggest the followingoptions:
• Install via Fuel
• Install via RDO
• Install into a virtual environment
2.1.1 To install with Fuel
1. Start by following the MOS Quickstart to install and setup OpenStack.
2. Enable the sahara service during installation.
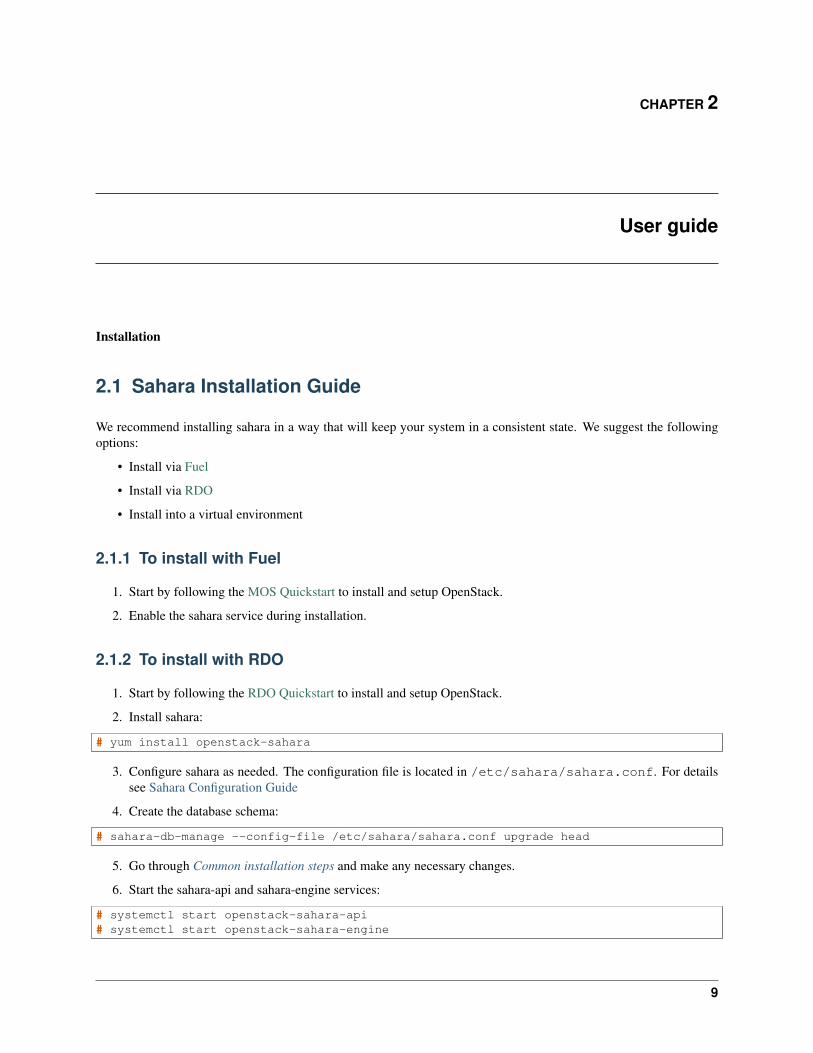
2.1.2 To install with RDO
1. Start by following the RDO Quickstart to install and setup OpenStack.
2. Install sahara:
# yum install openstack-sahara
3. Configure sahara as needed. The configuration file is located in /etc/sahara/sahara.conf. For detailssee Sahara Configuration Guide
4. Create the database schema:
# sahara-db-manage --config-file /etc/sahara/sahara.conf upgrade head
5. Go through Common installation steps and make any necessary changes.
6. Start the sahara-api and sahara-engine services:
# systemctl start openstack-sahara-api# systemctl start openstack-sahara-engine
9

Sahara, Release 6.0.0.0b2.dev3
7. (Optional) Enable sahara services to start on boot
# systemctl enable openstack-sahara-api# systemctl enable openstack-sahara-engine
2.1.3 To install into a virtual environment
1. First you need to install a number of packages with your OS package manager. The list of packages depends onthe OS you use. For Ubuntu run:
$ sudo apt-get install python-setuptools python-virtualenv python-dev
For Fedora:
$ sudo yum install gcc python-setuptools python-virtualenv python-devel
For CentOS:
$ sudo yum install gcc python-setuptools python-devel$ sudo easy_install pip$ sudo pip install virtualenv
2. Setup a virtual environment for sahara:
$ virtualenv sahara-venv
This will install a python virtual environment into sahara-venv directory in your current workingdirectory. This command does not require super user privileges and can be executed in any directorywhere the current user has write permissions.
3. You can get a sahara archive from http://tarballs.openstack.org/sahara/ and install it using pip:
$ sahara-venv/bin/pip install 'http://tarballs.openstack.org/sahara/sahara-master.tar.gz'
Note that sahara-master.tar.gz contains the latest changes and might not be stable at the moment.We recommend browsing http://tarballs.openstack.org/sahara/ and selecting the latest stable release. Forinstallation just execute (where replace the ‘release’ word with release name, e.g. ‘mitaka’):
$ sahara-venv/bin/pip install 'http://tarballs.openstack.org/sahara/sahara-stable-release.tar.gz'
For example, you can get Sahara Mitaka release by executing:
$ sahara-venv/bin/pip install 'http://tarballs.openstack.org/sahara/sahara-stable-mitaka.tar.gz'
4. After installation you should create a configuration file from the sample file located insahara-venv/share/sahara/sahara.conf.sample-basic:
$ mkdir sahara-venv/etc$ cp sahara-venv/share/sahara/sahara.conf.sample-basic sahara-venv/etc/sahara.conf
Make any necessary changes to sahara-venv/etc/sahara.conf. For details see Sahara Config-uration Guide
2.1.4 Common installation steps
The steps below are common to both the RDO and virtual environment installations of sahara.
10 Chapter 2. User guide

Sahara, Release 6.0.0.0b2.dev3
1. If you use sahara with a MySQL database, then for storing big job binaries in the sahara internal databaseyou must configure the size of the maximum allowed packet. Edit the my.cnf file and change themax_allowed_packet parameter as follows:
...[mysqld]...max_allowed_packet = 256M
Then restart the mysql server to ensure these changes are active.
2. Create the database schema:
$ sahara-venv/bin/sahara-db-manage --config-file sahara-venv/etc/sahara.conf upgrade head
3. Start sahara services from different terminals:
# first terminal$ sahara-venv/bin/sahara-api --config-file sahara-venv/etc/sahara.conf
# second terminal$ sahara-venv/bin/sahara-engine --config-file sahara-venv/etc/sahara.conf
4. For sahara to be accessible in the OpenStack Dashboard and for python-saharaclient to work properly you mustregister sahara in the Identity service catalog. For example:
openstack service create --name sahara --description \"Sahara Data Processing" data-processing
openstack endpoint create --region RegionOne \--publicurl http://10.0.0.2:8386/v1.1/%\(project_id\)s \--adminurl http://10.0.0.2:8386/v1.1/%\(project_id\)s \--internalurl http://10.0.0.2:8386/v1.1/%\(project_id\)s \data-processing
Note: You have to install the openstack-client package in order to execute openstack command.
5. For more information on configuring sahara with the OpenStack Dashboard please see OpenStack DashboardConfiguration Guide.
2.1.5 Optional installation of default templates
Sahara bundles default templates that define simple clusters for the supported plugins. These templates may optionallybe added to the sahara database using a simple CLI included with sahara.
The default template CLI is described in detail in a README file included with the sahara sources at<sahara_home>/db/templates/README.rst but it is summarized here.
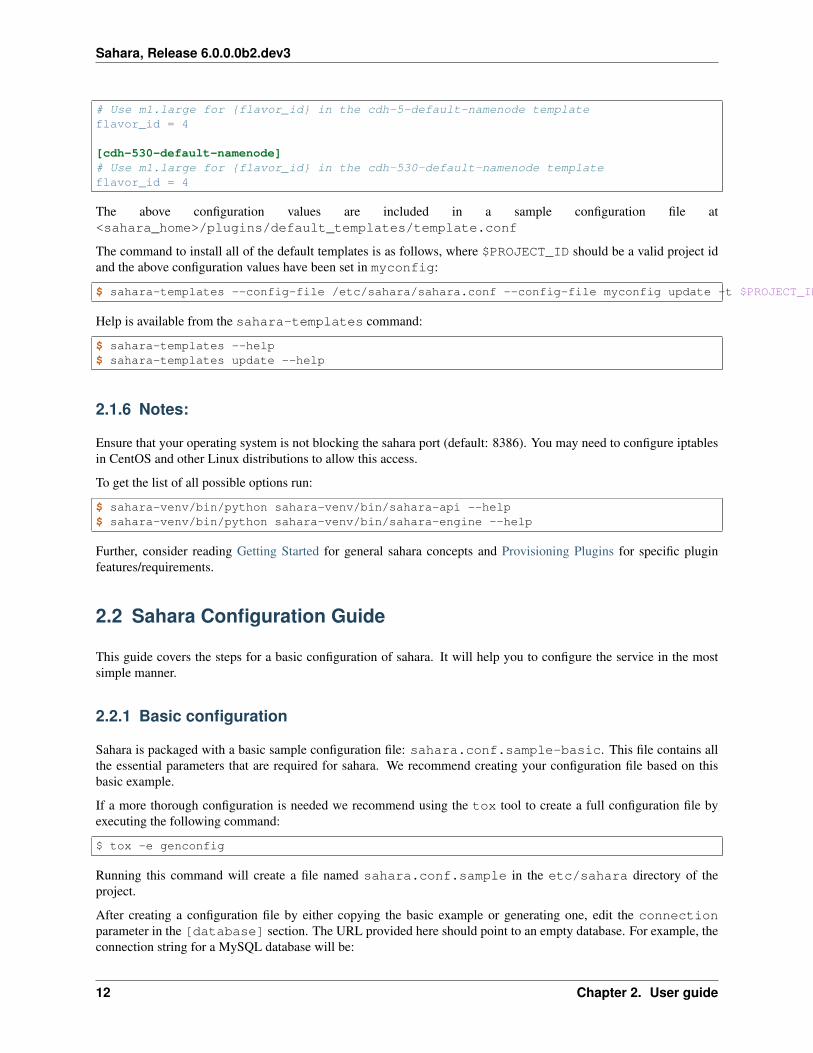
Flavor id values must be specified for the default templates included with sahara. The recommended configura-tion values below correspond to the m1.medium and m1.large flavors in a default OpenStack installation (if theseflavors have been edited, their corresponding values will be different). Values for flavor_id should be added to/etc/sahara/sahara.conf or another configuration file in the sections shown here:
[DEFAULT]# Use m1.medium for {flavor_id} unless specified in another sectionflavor_id = 2
[cdh-5-default-namenode]
2.1. Sahara Installation Guide 11
Sahara, Release 6.0.0.0b2.dev3
# Use m1.large for {flavor_id} in the cdh-5-default-namenode templateflavor_id = 4
[cdh-530-default-namenode]# Use m1.large for {flavor_id} in the cdh-530-default-namenode templateflavor_id = 4
The above configuration values are included in a sample configuration file at<sahara_home>/plugins/default_templates/template.conf
The command to install all of the default templates is as follows, where $PROJECT_ID should be a valid project idand the above configuration values have been set in myconfig:
$ sahara-templates --config-file /etc/sahara/sahara.conf --config-file myconfig update -t $PROJECT_ID
Help is available from the sahara-templates command:
$ sahara-templates --help$ sahara-templates update --help
2.1.6 Notes:
Ensure that your operating system is not blocking the sahara port (default: 8386). You may need to configure iptablesin CentOS and other Linux distributions to allow this access.
To get the list of all possible options run:
$ sahara-venv/bin/python sahara-venv/bin/sahara-api --help$ sahara-venv/bin/python sahara-venv/bin/sahara-engine --help
Further, consider reading Getting Started for general sahara concepts and Provisioning Plugins for specific pluginfeatures/requirements.
2.2 Sahara Configuration Guide
This guide covers the steps for a basic configuration of sahara. It will help you to configure the service in the mostsimple manner.
2.2.1 Basic configuration
Sahara is packaged with a basic sample configuration file: sahara.conf.sample-basic. This file contains allthe essential parameters that are required for sahara. We recommend creating your configuration file based on thisbasic example.
If a more thorough configuration is needed we recommend using the tox tool to create a full configuration file byexecuting the following command:
$ tox -e genconfig
Running this command will create a file named sahara.conf.sample in the etc/sahara directory of theproject.
After creating a configuration file by either copying the basic example or generating one, edit the connectionparameter in the [database] section. The URL provided here should point to an empty database. For example, theconnection string for a MySQL database will be:
12 Chapter 2. User guide

Sahara, Release 6.0.0.0b2.dev3
connection=mysql://username:password@host:port/database
Next you will configure the Identity service parameters in the [keystone_authtoken] section. The auth_uriparameter should point to the public Identity API endpoint. The identity_uri should point to the admin IdentityAPI endpoint. For example:
auth_uri=http://127.0.0.1:5000/v2.0/identity_uri=http://127.0.0.1:35357/
Specify the admin_user, admin_password and admin_tenant_name. These parameters must specify anIdentity user who has the admin role in the given project. These credentials allow sahara to authenticate and authorizeits users.
Next you will configure the default Networking service. If using neutron for networking the following parametershould be set in the [DEFAULT] section:
use_neutron=true
If you are using nova-network for networking then this parameter should be set to false.
With these parameters set, sahara is ready to run.
If you wish to increase the logging levels for troubleshooting there are two parameters in the [DEFAULT] section ofthe configuration file which control the level of logging output; verbose and debug. With verbose set to truesahara’s default logging level will be set to INFO, and with debug set to true it will be set to DEBUG. By defaultthe sahara’s log level is set to WARNING.
2.2.2 Networking configuration
By default sahara is configured to use the nova-network implementation of OpenStack Networking. If an OpenStackcluster uses neutron, then the use_neutron parameter should be set to True in the sahara configuration file.Additionally, if the cluster supports network namespaces the use_namespaces property can be used to enable theirusage.
[DEFAULT]use_neutron=Trueuse_namespaces=True
Note: If a user other than root will be running the Sahara server instance and namespaces are used, some additionalconfiguration is required, please see Non-root users for more information.
Floating IP management
During cluster setup sahara must access instances through a secure shell (SSH). To establish this connection it mayuse either the fixed or floating IP address of an instance. By default sahara is configured to use floating IP addressesfor access. This is controlled by the use_floating_ips configuration parameter. With this setup the user has twooptions for ensuring that the instances in the node groups templates that requires floating IPs gain a floating IP address:
• If using the nova-network, it may be configured to assign floating IP addresses automatically by setting theauto_assign_floating_ip parameter to True in the nova configuration file (usually nova.conf).
• The user may specify a floating IP address pool for each node group that requires floating IPs directly.
From Newton changes were made to allow the coexistence of clusters using floating IPs and clusters using fixed IPs. Ifuse_floating_ips is True it means that the floating IPs can be used by Sahara to spawn clusters. But, differently
2.2. Sahara Configuration Guide 13
Sahara, Release 6.0.0.0b2.dev3
from previous versions, this does not mean that all instances in the cluster must have floating IPs and that all clustersmust use floating IPs. It is possible in a single Sahara deploy to have clusters setup using fixed IPs, clusters usingfloating IPs and cluster that use both.
If not using floating IP addresses (use_floating_ips=False) sahara will use fixed IP addresses for instancemanagement. When using neutron for the Networking service the user will be able to choose the fixed IP network forall instances in a cluster. Whether using nova-network or neutron it is important to ensure that all instances runningsahara have access to the fixed IP networks.
2.2.3 Notifications configuration
Sahara can be configured to send notifications to the OpenStack Telemetry module. To enable this functionalitythe following parameter enable should be set in the [oslo_messaging_notifications] section of theconfiguration file:
[oslo_messaging_notifications]enable = true
And the following parameter driver should be set in the [oslo_messaging_notifications] section of theconfiguration file:
[oslo_messaging_notifications]driver = messaging
By default sahara is configured to use RabbitMQ as its message broker.
If you are using RabbitMQ as the message broker, then you should set the following parameter in the [DEFAULT]section:
rpc_backend = rabbit
You may also need to specify the connection parameters for your RabbitMQ installation. The following exampleshows the default values in the [oslo_messaging_rabbit] section which may need adjustment:
rabbit_host=localhostrabbit_port=5672rabbit_hosts=$rabbit_host:$rabbit_portrabbit_userid=guestrabbit_password=guestrabbit_virtual_host=/
2.2.4 Orchestration configuration
By default sahara is configured to use the heat engine for instance creation. The heat engine uses the OpenStackOrchestration service to provision instances. This engine makes calls directly to the services required for instanceprovisioning.
2.2.5 Policy configuration
Sahara’s public API calls may be restricted to certain sets of users by using a policy configuration file. The locationof the policy file(s) is controlled by the policy_file and policy_dirs parameters in the [oslo_policy]section. By default sahara will search for a policy.json file in the same directory as the sahara.conf configu-ration file.
14 Chapter 2. User guide

Sahara, Release 6.0.0.0b2.dev3
Examples
Example 1. Allow all method to all users (default policy).
{"default": ""
}
Example 2. Disallow image registry manipulations to non-admin users.
{"default": "",
"data-processing:images:register": "role:admin","data-processing:images:unregister": "role:admin","data-processing:images:add_tags": "role:admin","data-processing:images:remove_tags": "role:admin"
}
2.2.6 API configuration
Sahara uses the api-paste.ini file to configure the data processing API service. For middleware injection saharauses pastedeploy library. The location of the api-paste file is controlled by the api_paste_config parameter inthe [default] section. By default sahara will search for a api-paste.ini file in the same directory as theconfiguration file.
2.3 OpenStack Dashboard Configuration Guide
Sahara UI panels are integrated into the OpenStack Dashboard repository. No additional steps are required to en-able Sahara UI in OpenStack Dashboard. However there are a few configurations that should be made to configureOpenStack Dashboard.
Dashboard configurations are applied through the local_settings.py file. The sample configuration file is availablehere.
2.3.1 1. Networking
Depending on the Networking backend (Nova Network or Neutron) used in the cloud, Sahara panels will determineautomatically which input fields should be displayed.
While using Nova Network backend the cloud may be configured to automatically assign floating IPs to instances. IfSahara service is configured to use those automatically assigned floating IPs the same configuration should be done tothe dashboard through the SAHARA_AUTO_IP_ALLOCATION_ENABLED parameter.
Example:
SAHARA_AUTO_IP_ALLOCATION_ENABLED = True
2.3.2 2. Different endpoint
Sahara UI panels normally use data-processing endpoint from Keystone to talk to Sahara service. In some casesit may be useful to switch to another endpoint, for example use locally installed Sahara instead of the one on theOpenStack controller.
2.3. OpenStack Dashboard Configuration Guide 15
Sahara, Release 6.0.0.0b2.dev3
To switch the UI to another endpoint the endpoint should be registered in the first place.
Local endpoint example:
openstack service create --name sahara_local --description \"Sahara Data Processing (local installation)" \data_processing_local
openstack endpoint create --region RegionOne \--publicurl http://127.0.0.1:8386/v1.1/%\(project_id\)s \--adminurl http://127.0.0.1:8386/v1.1/%\(project_id\)s \--internalurl http://127.0.0.1:8386/v1.1/%\(project_id\)s \data_processing_local
Then the endpoint name should be changed in sahara.py under the module of sahara-dashboard/sahara_dashboard/api/sahara.py.
# "type" of Sahara service registered in keystoneSAHARA_SERVICE = 'data_processing_local'
2.4 Sahara Advanced Configuration Guide
This guide addresses specific aspects of Sahara configuration that pertain to advanced usage. It is divided into sectionsabout various features that can be utilized, and their related configurations.
2.4.1 Custom network topologies
Sahara accesses instances at several stages of cluster spawning through SSH and HTTP. Floating IPs and networknamespaces (see Networking configuration) will be automatically used for access when present. When floating IPs arenot assigned to instances and namespaces are not being used, sahara will need an alternative method to reach them.
The proxy_command parameter of the configuration file can be used to give sahara a command to access instances.This command is run on the sahara host and must open a netcat socket to the instance destination port. The {host}and {port} keywords should be used to describe the destination, they will be substituted at runtime. Other keywordsthat can be used are: {tenant_id}, {network_id} and {router_id}.
For example, the following parameter in the sahara configuration file would be used if instances are accessed througha relay machine:
[DEFAULT]proxy_command='ssh relay-machine-{tenant_id} nc {host} {port}'
Whereas the following shows an example of accessing instances though a custom network namespace:
[DEFAULT]proxy_command='ip netns exec ns_for_{network_id} nc {host} {port}'
2.4.2 DNS Hostname Resolution
Sahara can resolve hostnames of cluster instances by using DNS. For this Sahara uses Designate. With this feature,for each instance of the cluster Sahara will create two A records (for internal and external ips) under one hostname andone PTR record. Also all links in the Sahara dashboard will be displayed as hostnames instead of just ip addresses.
You should configure DNS server with Designate. Designate service should be properly installed and registered inKeystone catalog. The detailed instructions about Designate configuration can be found here: Designate manual
16 Chapter 2. User guide
Sahara, Release 6.0.0.0b2.dev3
installation and here: Configuring OpenStack Networking with Designate. Also if you use devstack you can justenable Designate plugin: Designate devstack.
When Designate is configured you should create domain(s) for hostname resolution. This can be done by using theDesignate dashboard or by CLI. Also you have to create in-addr.arpa. domain for reverse hostname resolutionbecause some plugins (e.g. HDP) determine hostname by ip.
Sahara also should be properly configured. In sahara.conf you must specify two config properties:
[DEFAULT]# Use Designate for internal and external hostnames resolution:use_designate=true# IP addresses of Designate nameservers:nameservers=1.1.1.1,2.2.2.2
An OpenStack operator should properly configure the network. It must enable DHCP and specify DNS server ipaddresses (e.g. 1.1.1.1 and 2.2.2.2) in DNS Name Servers field in the Subnet Details. If the subnet alreadyexists and changing it or creating new one is impossible then Sahara will manually change /etc/resolv.conf fileon every instance of the cluster (if nameservers list have been specified in sahara.conf). In this case, though,Sahara cannot guarantee that these changes will not be overwritten by DHCP or other services of the existing network.Sahara has a health check for track this situation (and if it occurs the health status will be red).
In order to resolve hostnames from your local machine you should properly change your /etc/resolv.conf fileby adding appropriate ip addresses of DNS servers (e.g. 1.1.1.1 and 2.2.2.2). Also the VMs with DNS servers shouldbe available from your local machine.
2.4.3 Data-locality configuration
Hadoop provides the data-locality feature to enable task tracker and data nodes the capability of spawning on the samerack, Compute node, or virtual machine. Sahara exposes this functionality to the user through a few configurationparameters and user defined topology files.
To enable data-locality, set the enable_data_locality parameter to true in the sahara configuration file
[DEFAULT]enable_data_locality=true
With data locality enabled, you must now specify the topology files for the Compute and Object Storage services.These files are specified in the sahara configuration file as follows:
[DEFAULT]compute_topology_file=/etc/sahara/compute.topologyswift_topology_file=/etc/sahara/swift.topology
The compute_topology_file should contain mappings between Compute nodes and racks in the followingformat:
compute1 /rack1compute2 /rack2compute3 /rack2
Note that the Compute node names must be exactly the same as configured in OpenStack (host column in admin listfor instances).
The swift_topology_file should contain mappings between Object Storage nodes and racks in the followingformat:
2.4. Sahara Advanced Configuration Guide 17

Sahara, Release 6.0.0.0b2.dev3
node1 /rack1node2 /rack2node3 /rack2
Note that the Object Storage node names must be exactly the same as configured in the object ring. Also, you shouldensure that instances with the task tracker process have direct access to the Object Storage nodes.
Hadoop versions after 1.2.0 support four-layer topology (for more detail please see HADOOP-8468 JIRA issue). Toenable this feature set the enable_hypervisor_awareness parameter to true in the configuration file. In thiscase sahara will add the Compute node ID as a second level of topology for virtual machines.
2.4.4 Distributed mode configuration
Sahara can be configured to run in a distributed mode that creates a separation between the API and engine processes.This allows the API process to remain relatively free to handle requests while offloading intensive tasks to the engineprocesses.
The sahara-api application works as a front-end and serves user requests. It offloads ‘heavy’ tasks to thesahara-engine process via RPC mechanisms. While the sahara-engine process could be loaded with tasks,sahara-api stays free and hence may quickly respond to user queries.
If sahara runs on several hosts, the API requests could be balanced between several sahara-api hosts using a loadbalancer. It is not required to balance load between different sahara-engine hosts as this will be automaticallydone via the message broker.
If a single host becomes unavailable, other hosts will continue serving user requests. Hence, a better scalability isachieved and some fault tolerance as well. Note that distributed mode is not a true high availability. While the failureof a single host does not affect the work of the others, all of the operations running on the failed host will stop. Forexample, if a cluster scaling is interrupted, the cluster will be stuck in a half-scaled state. The cluster might continueworking, but it will be impossible to scale it further or run jobs on it via EDP.
To run sahara in distributed mode pick several hosts on which you want to run sahara services and follow these steps:
• On each host install and configure sahara using the installation guide except:
– Do not run sahara-db-manage or launch sahara with sahara-all
– Ensure that each configuration file provides a database connection string to a single database for all hosts.
• Run sahara-db-manage as described in the installation guide, but only on a single (arbitrarily picked) host.
• The sahara-api and sahara-engine processes use oslo.messaging to communicate with each other. Youwill need to configure it properly on each host (see below).
• Run sahara-api and sahara-engine on the desired hosts. You may run both processes on the same orseparate hosts as long as they are configured to use the same message broker and database.
To configure oslo.messaging, first you will need to choose a message broker driver. Currently there are two driversprovided: RabbitMQ or ZeroMQ. For the RabbitMQ drivers please see the Notifications configuration documentationfor an explanation of common configuration options.
For an expanded view of all the options provided by each message broker driver in oslo.messaging please refer to theoptions available in the respective source trees:
• For Rabbit MQ see
– rabbit_opts variable in impl_rabbit.py
– amqp_opts variable in amqp.py
• For Zmq see
18 Chapter 2. User guide

Sahara, Release 6.0.0.0b2.dev3
– zmq_opts variable in impl_zmq.py
– matchmaker_opts variable in matchmaker.py
– matchmaker_redis_opts variable in matchmaker_redis.py
– matchmaker_opts variable in matchmaker_ring.py
These options will also be present in the generated sample configuration file. For instructions on creating the configu-ration file please see the Sahara Configuration Guide.
2.4.5 Distributed periodic tasks configuration
If sahara is configured to run in distributed mode (see Distributed mode configuration), periodic tasks can also belaunched in distributed mode. In this case tasks will be split across all sahara-engine processes. This will reduceoverall load.
Distributed periodic tasks are based on Hash Ring implementation and the Tooz library that provides group member-ship support for a set of backends. In order to use periodic tasks distribution, the following steps are required:
• One of the supported backends should be configured and started.
• Backend URL should be set in the sahara configuration file with theperiodic_coordinator_backend_url parameter. For example, if the ZooKeeper backend isbeing used:
[DEFAULT]periodic_coordinator_backend_url=kazoo://IP:PORT
• Tooz extras should be installed. When using Zookeeper as coordination backend, kazoo library should beinstalled. It can be done with pip:
pip install tooz[zookeeper]
• Periodic tasks can be performed in parallel. Number of threads to run periodic tasks on a single engine can beset with periodic_workers_number parameter (only 1 thread will be launched by default). Example:
[DEFAULT]periodic_workers_number=2
• coordinator_heartbeat_interval can be set to change the interval between heartbeat execution (1second by default). Heartbeats are needed to make sure that connection to the coordination backend is active.Example:
[DEFAULT]coordinator_heartbeat_interval=2
• hash_ring_replicas_count can be set to change the number of replicas for each engine on a Hash Ring.Each replica is a point on a Hash Ring that belongs to a particular engine. A larger number of replicas leads tobetter task distribution across the set of engines. (40 by default). Example:
[DEFAULT]hash_ring_replicas_count=100
2.4.6 External key manager usage
Sahara generates and stores several passwords during the course of operation. To harden sahara’s usage of passwordsit can be instructed to use an external key manager for storage and retrieval of these secrets. To enable this featurethere must first be an OpenStack Key Manager service deployed within the stack.
2.4. Sahara Advanced Configuration Guide 19

Sahara, Release 6.0.0.0b2.dev3
With a Key Manager service deployed on the stack, sahara must be configured to enable the external storage of secrets.Sahara uses the castellan library to interface with the OpenStack Key Manager service. This library provides config-urable access to a key manager. To configure sahara to use barbican as the key manager, edit the sahara configurationfile as follows:
[DEFAULT]use_barbican_key_manager=true
Enabling the use_barbican_key_manager option will configure castellan to use barbican as its key managementimplementation. By default it will attempt to find barbican in the Identity service’s service catalog.
For added control of the barbican server location, optional configuration values may be added to specify the URL forthe barbican API server.
[castellan]barbican_api_endpoint=http://{barbican controller IP:PORT}/barbican_api_version=v1
The specific values for the barbican endpoint will be dictated by the IP address of the controller for your installation.
With all of these values configured and the Key Manager service deployed, sahara will begin storing its secrets in theexternal manager.
2.4.7 Indirect instance access through proxy nodes
Warning: The indirect VMs access feature is in alpha state. We do not recommend using it in a productionenvironment.
Sahara needs to access instances through SSH during cluster setup. This access can be obtained a number of differentways (see Networking configuration, Floating IP management, Custom network topologies). Sometimes it is impossi-ble to provide access to all nodes (because of limited numbers of floating IPs or security policies). In these cases accesscan be gained using other nodes of the cluster as proxy gateways. To enable this set is_proxy_gateway=truefor the node group you want to use as proxy. Sahara will communicate with all other cluster instances through theinstances of this node group.
Note, if use_floating_ips=true and the cluster contains a node group with is_proxy_gateway=true,the requirement to have floating_ip_pool specified is applied only to the proxy node group. Other instanceswill be accessed through proxy instances using the standard private network.
Note, the Cloudera Hadoop plugin doesn’t support access to Cloudera manager through a proxy node. This means thatfor CDH clusters only nodes with the Cloudera manager can be designated as proxy gateway nodes.
2.4.8 Multi region deployment
Sahara supports multi region deployment. To enable this option each instance of sahara should have theos_region_name=<region> parameter set in the configuration file. The following example demonstrates con-figuring sahara to use the RegionOne region:
[DEFAULT]os_region_name=RegionOne
2.4.9 Non-root users
In cases where a proxy command is being used to access cluster instances (for example, when using namespaces orwhen specifying a custom proxy command), rootwrap functionality is provided to allow users other than root access
20 Chapter 2. User guide

Sahara, Release 6.0.0.0b2.dev3
to the needed operating system facilities. To use rootwrap the following configuration parameter is required to be set:
[DEFAULT]use_rootwrap=true
Assuming you elect to leverage the default rootwrap command (sahara-rootwrap), you will need to perform thefollowing additional setup steps:
• Copy the provided sudoers configuration file from the local project fileetc/sudoers.d/sahara-rootwrap to the system specific location, usually /etc/sudoers.d.This file is setup to allow a user named sahara access to the rootwrap script. It contains the following:
sahara ALL = (root) NOPASSWD: /usr/bin/sahara-rootwrap /etc/sahara/rootwrap.conf *
When using devstack to deploy sahara, please pay attention that you need to change user in script from sahara tostack.
• Copy the provided rootwrap configuration file from the local project file etc/sahara/rootwrap.conf tothe system specific location, usually /etc/sahara. This file contains the default configuration for rootwrap.
• Copy the provided rootwrap filters file from the local project fileetc/sahara/rootwrap.d/sahara.filters to the location specified in the rootwrap configura-tion file, usually /etc/sahara/rootwrap.d. This file contains the filters that will allow the saharauser to access the ip netns exec, nc, and kill commands through the rootwrap (depending onproxy_command you may need to set additional filters). It should look similar to the followings:
[Filters]ip: IpNetnsExecFilter, ip, rootnc: CommandFilter, nc, rootkill: CommandFilter, kill, root
If you wish to use a rootwrap command other than sahara-rootwrap you can set the following parameter in yoursahara configuration file:
[DEFAULT]rootwrap_command='sudo sahara-rootwrap /etc/sahara/rootwrap.conf'
For more information on rootwrap please refer to the official Rootwrap documentation
2.4.10 Object Storage access using proxy users
To improve security for clusters accessing files in Object Storage, sahara can be configured to use proxy users anddelegated trusts for access. This behavior has been implemented to reduce the need for storing and distributing usercredentials.
The use of proxy users involves creating an Identity domain that will be designated as the home for these users. Proxyusers will be created on demand by sahara and will only exist during a job execution which requires Object Storageaccess. The domain created for the proxy users must be backed by a driver that allows sahara’s admin user to createnew user accounts. This new domain should contain no roles, to limit the potential access of a proxy user.
Once the domain has been created, sahara must be configured to use it by adding the domain name and any potentialdelegated roles that must be used for Object Storage access to the sahara configuration file. With the domain enabledin sahara, users will no longer be required to enter credentials for their data sources and job binaries referenced inObject Storage.
2.4. Sahara Advanced Configuration Guide 21
Sahara, Release 6.0.0.0b2.dev3
Detailed instructions
First a domain must be created in the Identity service to hold proxy users created by sahara. This domain must havean identity backend driver that allows for sahara to create new users. The default SQL engine is sufficient but if yourkeystone identity is backed by LDAP or similar then domain specific configurations should be used to ensure sahara’saccess. Please see the Keystone documentation for more information.
With the domain created, sahara’s configuration file should be updated to include the new domain name and any po-tential roles that will be needed. For this example let’s assume that the name of the proxy domain is sahara_proxyand the roles needed by proxy users will be Member and SwiftUser.
[DEFAULT]use_domain_for_proxy_users=trueproxy_user_domain_name=sahara_proxyproxy_user_role_names=Member,SwiftUser
A note on the use of roles. In the context of the proxy user, any roles specified here are roles intended to be delegatedto the proxy user from the user with access to Object Storage. More specifically, any roles that are required for ObjectStorage access by the project owning the object store must be delegated to the proxy user for authentication to besuccessful.
Finally, the stack administrator must ensure that images registered with sahara have the latest version of the Hadoopswift filesystem plugin installed. The sources for this plugin can be found in the sahara extra repository. For moreinformation on images or swift integration see the sahara documentation sections Building Images for Vanilla Pluginand Swift Integration.
2.4.11 Volume instance locality configuration
The Block Storage service provides the ability to define volume instance locality to ensure that instance volumes arecreated on the same host as the hypervisor. The InstanceLocalityFilter provides the mechanism for theselection of a storage provider located on the same physical host as an instance.
To enable this functionality for instances of a specific node group, the volume_local_to_instance field in thenode group template should be set to true and some extra configurations are needed:
• The cinder-volume service should be launched on every physical host and at least one physical host should runboth cinder-scheduler and cinder-volume services.
• InstanceLocalityFilter should be added to the list of default filters(scheduler_default_filters in cinder) for the Block Storage configuration.
• The Extended Server Attributes extension needs to be active in the Compute service (this is true by default innova), so that the OS-EXT-SRV-ATTR:host property is returned when requesting instance info.
• The user making the call needs to have sufficient rights for the property to be returned by the Compute service.This can be done by:
– by changing nova’s policy.json to allow the user access to the extended_server_attributesoption.
– by designating an account with privileged rights in the cinder configuration:
os_privileged_user_name =os_privileged_user_password =os_privileged_user_tenant =
It should be noted that in a situation when the host has no space for volume creation, the created volume will have anError state and can not be used.
22 Chapter 2. User guide

Sahara, Release 6.0.0.0b2.dev3
2.4.12 Autoconfiguration for templates
../userdoc/configs_recommendations
2.4.13 NTP service configuration
By default sahara will enable the NTP service on all cluster instances if the NTP package is included in the im-age (the sahara disk image builder will include NTP in all images it generates). The default NTP server will bepool.ntp.org; this can be overridden using the default_ntp_server setting in the DEFAULT section of thesahara configuration file.
If you are creating cluster templates using the sahara UI and would like to specify a different NTP server for a particularcluster template, use the URL of NTP server setting in the General Parameters section when you createthe template. If you would like to disable NTP for a particular cluster template, deselect the Enable NTP servicecheckbox in the General Parameters section when you create the template.
If you are creating clusters using the sahara CLI, you can specify another NTP server or disable NTP service using theexamples below.
If you want to enable configuring the NTP service, you should specify the following configs for the cluster:
cluster_configs: {"general": {
"URL of NTP server": "your_server.net",}
}
If you want to disable configuring NTP service, you should specify following configs for the cluster:
"cluster_configs": {"general": {
"Enable NTP service": false,}
}
2.4.14 CORS (Cross Origin Resource Sharing) Configuration
Sahara provides direct API access to user-agents (browsers) via the HTTP CORS protocol. Detailed documentation,as well as troubleshooting examples, may be found in the OpenStack Administrator Guide.
To get started quickly, use the example configuration block below, replacing the allowed origin field with thehost(s) from which your API expects access.
[cors]allowed_origin=https://we.example.com:443max_age=3600allow_credentials=true
[cors.additional_domain_1]allowed_origin=https://additional_domain_1.example.com:443
[cors.additional_domain_2]allowed_origin=https://additional_domain_2.example.com:443
For more information on Cross Origin Resource Sharing, please review the W3C CORS specification.
2.4. Sahara Advanced Configuration Guide 23

Sahara, Release 6.0.0.0b2.dev3
2.4.15 Cleanup time for incomplete clusters
Sahara provides maximal time (in hours) for clusters allowed to be in states other than “Active”, “Deleting”or “Error”. If a cluster is not in “Active”, “Deleting” or “Error” state and last update of it was longer thancleanup_time_for_incomplete_clusters hours ago then it will be deleted automatically. You can en-able this feature by adding appropriate config property in the DEFAULT section (by default it set up to 0 value whichmeans that automatic clean up is disabled). For example, if you want cluster to be deleted after 3 hours if it didn’tleave “Starting” state then you should specify:
[DEFAULT]cleanup_time_for_incomplete_clusters = 3
2.4.16 Security Group Rules Configuration
When auto_security_group is used, the amount of created security group rules may be bigger than the default valuesconfigured in neutron.conf. Then the default limit should be raised up to some bigger value which is proportionalto the number of cluster node groups. You can change it in neutron.conf file:
[quotas]quota_security_group = 1000quota_security_group_rule = 10000
Or you can execute openstack CLI command:
openstack quota set --secgroups 1000 --secgroup-rules 10000 $PROJECT_ID
2.5 Sahara Upgrade Guide
This page contains details about upgrading sahara between releases such as configuration file updates, database mi-grations, and architectural changes.
2.5.1 Icehouse -> Juno
Main binary renamed to sahara-all
The All-In-One sahara binary has been renamed from sahara-api to sahara-all. The new name should beused in all cases where the All-In-One sahara is desired.
Authentication middleware changes
The custom auth_token middleware has been deprecated in favor of the keystone middleware. This change requires anupdate to the sahara configuration file. To update your configuration file you should replace the following parametersfrom the [DEFAULT] section with the new parameters in the [keystone_authtoken] section:
Old parameter name New parameter nameos_admin_username admin_useros_admin_password admin_passwordos_admin_tenant_name admin_tenant_name
Additionally, the parameters os_auth_protocol, os_auth_host, and os_auth_port have been combinedto create the auth_uri and identity_uri parameters. These new parameters should be full URIs to the keystonepublic and admin endpoints, respectively.
24 Chapter 2. User guide

Sahara, Release 6.0.0.0b2.dev3
For more information about these configuration parameters please see the Sahara Configuration Guide.
Database package changes
The oslo based code from sahara.openstack.common.db has been replaced by the usage of the oslo.db package. Thischange does not require any update to sahara’s configuration file.
Additionally, the usage of SQLite databases has been deprecated. Please use MySQL or PostgreSQL databasesfor sahara. SQLite has been deprecated because it does not, and is not going to, support the ALTER COLUMNand DROP COLUMN commands required for migrations between versions. For more information please seehttp://www.sqlite.org/omitted.html
Sahara integration into OpenStack Dashboard
The sahara dashboard package has been deprecated in the Juno release. The functionality of the dashboard has beenfully incorporated into the OpenStack Dashboard. The sahara interface is available under the “Project” -> “DataProcessing” tab.
The Data processing service endpoints must be registered in the Identity service catalog for the Dashboard to properlyrecognize and display those user interface components. For more details on this process please see registering Saharain installation guide.
The sahara-dashboard project is now used solely to host sahara user interface integration tests.
Virtual machine user name changes
The HEAT infrastructure engine has been updated to use the same rules for instance user names as the direct engine.In previous releases the user name for instances created by sahara using HEAT was always ‘ec2-user’. As of Juno, theuser name is taken from the image registry as described in the Registering an Image document.
This change breaks backward compatibility for clusters created using the HEAT infrastructure engine prior to the Junorelease. Clusters will continue to operate, but we do not recommended using the scaling operations with them.
Anti affinity implementation changed
Starting with the Juno release the anti affinity feature is implemented using server groups. From the user perspectivethere will be no noticeable changes with this feature. Internally this change has introduced the following behavior:
1. Server group objects will be created for any clusters with anti affinity enabled.
2. Affected instances on the same host will not be allowed even if they do not have common processes. Prior toJuno, instances with differing processes were allowed on the same host. The new implementation guaranteesthat all affected instances will be on different hosts regardless of their processes.
The new anti affinity implementation will only be applied for new clusters. Clusters created with previous versionswill continue to operate under the older implementation, this applies to scaling operations on these clusters as well.
2.5.2 Juno -> Kilo
Sahara requires policy configuration
Sahara now requires a policy configuration file. The policy.json file should be placed in the same directory asthe sahara configuration file or specified using the policy_file parameter. For more details about the policy fileplease see the policy section in the configuration guide.
2.5. Sahara Upgrade Guide 25

Sahara, Release 6.0.0.0b2.dev3
2.5.3 Kilo -> Liberty
Direct engine deprecation
In the Liberty release the direct infrastructure engine has been deprecated and the heat infrastructure engine is nowdefault. This means, that it is preferable to use heat engine instead now. In the Liberty release you can continue tooperate clusters with the direct engine (create, delete, scale). Using heat engine only the delete operation is availableon clusters that were created by the direct engine. After the Liberty release the direct engine will be removed, thismeans that you will only be able to delete clusters created with the direct engine.
Policy namespace changed (policy.json)
The “data-processing:” namespace has been added to the beginning of the all Sahara’s policy based actions, so, youneed to update the policy.json file by prepending all actions with “data-processing:”.
2.5.4 Liberty -> Mitaka
Direct engine is removed.
2.5.5 Mitaka -> Newton
Sahara CLI command is deprecated, please use OpenStack Client.
Note: Since Mitaka release sahara actively uses release notes so you can see all required upgrade actions here:http://docs.openstack.org/releasenotes/sahara/
2.6 Sample sahara.conf file
This is an automatically generated sample of the sahara.conf file.
How To
2.7 Getting Started
2.7.1 Clusters
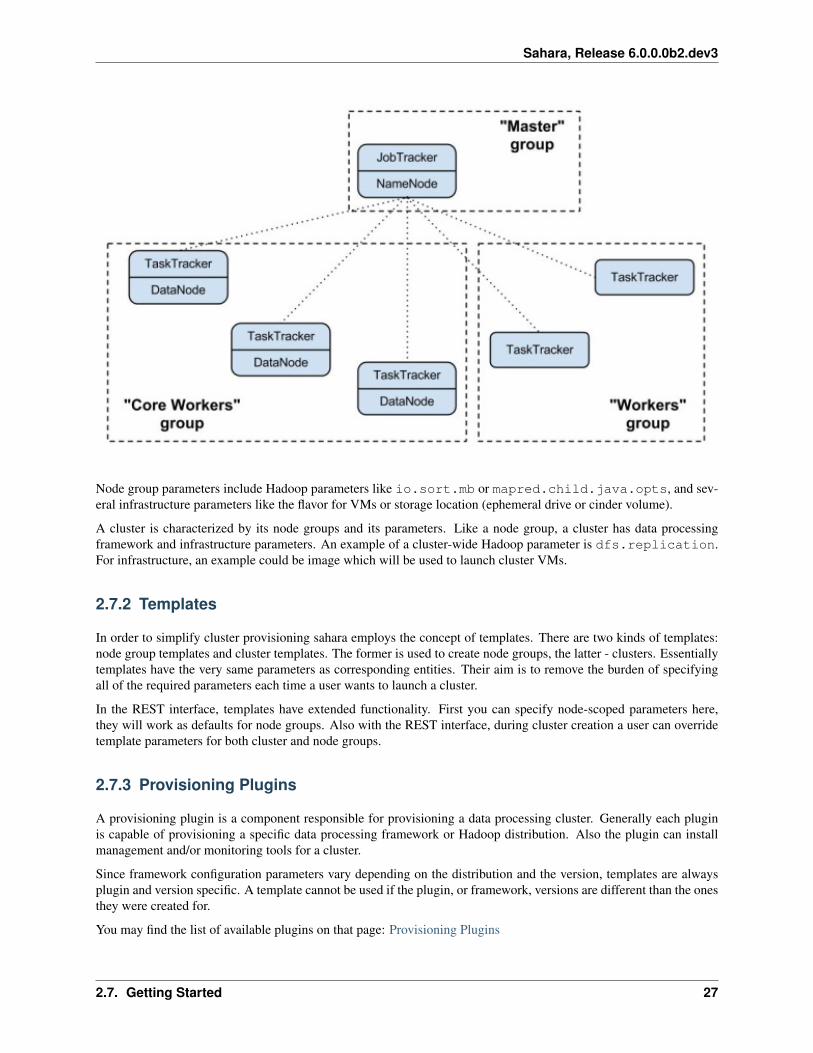
A cluster deployed by sahara consists of node groups. Node groups vary by their role, parameters and number ofmachines. The picture below illustrates an example of a Hadoop cluster consisting of 3 node groups each having adifferent role (set of processes).
26 Chapter 2. User guide
Sahara, Release 6.0.0.0b2.dev3
Node group parameters include Hadoop parameters like io.sort.mb or mapred.child.java.opts, and sev-eral infrastructure parameters like the flavor for VMs or storage location (ephemeral drive or cinder volume).
A cluster is characterized by its node groups and its parameters. Like a node group, a cluster has data processingframework and infrastructure parameters. An example of a cluster-wide Hadoop parameter is dfs.replication.For infrastructure, an example could be image which will be used to launch cluster VMs.
2.7.2 Templates
In order to simplify cluster provisioning sahara employs the concept of templates. There are two kinds of templates:node group templates and cluster templates. The former is used to create node groups, the latter - clusters. Essentiallytemplates have the very same parameters as corresponding entities. Their aim is to remove the burden of specifyingall of the required parameters each time a user wants to launch a cluster.
In the REST interface, templates have extended functionality. First you can specify node-scoped parameters here,they will work as defaults for node groups. Also with the REST interface, during cluster creation a user can overridetemplate parameters for both cluster and node groups.
2.7.3 Provisioning Plugins
A provisioning plugin is a component responsible for provisioning a data processing cluster. Generally each pluginis capable of provisioning a specific data processing framework or Hadoop distribution. Also the plugin can installmanagement and/or monitoring tools for a cluster.
Since framework configuration parameters vary depending on the distribution and the version, templates are alwaysplugin and version specific. A template cannot be used if the plugin, or framework, versions are different than the onesthey were created for.
You may find the list of available plugins on that page: Provisioning Plugins
2.7. Getting Started 27

Sahara, Release 6.0.0.0b2.dev3
2.7.4 Image Registry
OpenStack starts VMs based on a pre-built image with an installed OS. The image requirements for sahara depend onthe plugin and data processing framework version. Some plugins require just a basic cloud image and will install theframework on the VMs from scratch. Some plugins might require images with pre-installed frameworks or Hadoopdistributions.
The Sahara Image Registry is a feature which helps filter out images during cluster creation. See Registering an Imagefor details on how to work with Image Registry.
2.7.5 Features
Sahara has several interesting features. The full list could be found there: Features Overview
2.8 Sahara (Data Processing) UI User Guide
This guide assumes that you already have the sahara service and Horizon dashboard up and running. Don’t forget tomake sure that sahara is registered in Keystone. If you require assistance with that, please see the installation guide.
The sections below give a panel by panel overview of setting up clusters and running jobs. For a description of usingthe guided cluster and job tools, look at Launching a cluster via the Cluster Creation Guide and Running a job via theJob Execution Guide.
2.8.1 Launching a cluster via the sahara UI
2.8.2 Registering an Image
1. Navigate to the “Project” dashboard, then the “Data Processing” tab, then click on the “Clusters” panel andfinally the “Image Registry” tab.
2. From that page, click on the “Register Image” button at the top right
3. Choose the image that you’d like to register with sahara
4. Enter the username of the cloud-init user on the image
5. Choose plugin and version to make the image available only for the intended clusters
6. Click the “Done” button to finish the registration
2.8.3 Create Node Group Templates
1. Navigate to the “Project” dashboard, then the “Data Processing” tab, then click on the “Clusters” panel and thenthe “Node Group Templates” tab.
2. From that page, click on the “Create Template” button at the top right
3. Choose your desired Plugin name and Version from the dropdowns and click “Next”
4. Give your Node Group Template a name (description is optional)
5. Choose a flavor for this template (based on your CPU/memory/disk needs)
6. Choose the storage location for your instance, this can be either “Ephemeral Drive” or “Cinder Volume”. If youchoose “Cinder Volume”, you will need to add additional configuration
28 Chapter 2. User guide

Sahara, Release 6.0.0.0b2.dev3
7. Switch to the Node processes tab and choose which processes should be run for all instances that are spawnedfrom this Node Group Template
8. Click on the “Create” button to finish creating your Node Group Template
2.8.4 Create a Cluster Template
1. Navigate to the “Project” dashboard, then the “Data Processing” tab, then click on the “Clusters” panel andfinally the “Cluster Templates” tab.
2. From that page, click on the “Create Template” button at the top right
3. Choose your desired Plugin name and Version from the dropdowns and click “Next”
4. Under the “Details” tab, you must give your template a name
5. Under the “Node Groups” tab, you should add one or more nodes that can be based on one or more templates
• To do this, start by choosing a Node Group Template from the dropdown and click the “+” button
• You can adjust the number of nodes to be spawned for this node group via the text box or the “-” and “+” buttons
• Repeat these steps if you need nodes from additional node group templates
6. Optionally, you can adjust your configuration further by using the “General Parameters”, “HDFS Parameters”and “MapReduce Parameters” tabs
7. If you have Designate DNS service you can choose the domain name in “DNS” tab for internal and externalhostname resolution
8. Click on the “Create” button to finish creating your Cluster Template
2.8.5 Launching a Cluster
1. Navigate to the “Project” dashboard, then the “Data Processing” tab, then click on the “Clusters” panel andlastly, click on the “Clusters” tab.
2. Click on the “Launch Cluster” button at the top right
3. Choose your desired Plugin name and Version from the dropdowns and click “Next”
4. Give your cluster a name (required)
5. Choose which cluster template should be used for your cluster
6. Choose the image that should be used for your cluster (if you do not see any options here, see Registering anImage above)
7. Optionally choose a keypair that can be used to authenticate to your cluster instances
8. Click on the “Create” button to start your cluster
• Your cluster’s status will display on the Clusters table
• It will likely take several minutes to reach the “Active” state
2.8.6 Scaling a Cluster
1. From the Data Processing/Clusters page (Clusters tab), click on the “Scale Cluster” button of the row thatcontains the cluster that you want to scale
2. You can adjust the numbers of instances for existing Node Group Templates
2.8. Sahara (Data Processing) UI User Guide 29

Sahara, Release 6.0.0.0b2.dev3
3. You can also add a new Node Group Template and choose a number of instances to launch
• This can be done by selecting your desired Node Group Template from the dropdown and clicking the “+”button
• Your new Node Group will appear below and you can adjust the number of instances via the text box or the “+”and “-” buttons
4. To confirm the scaling settings and trigger the spawning/deletion of instances, click on “Scale”
2.8.7 Elastic Data Processing (EDP)
2.8.8 Data Sources
Data Sources are where the input and output from your jobs are housed.
1. From the Data Processing/Jobs page (Data Sources tab), click on the “Create Data Source” button at the topright
2. Give your Data Source a name
3. Enter the URL of the Data Source
• For a swift object, enter <container>/<path> (ie: mycontainer/inputfile). sahara will prepend swift:// for you
• For an HDFS object, enter an absolute path, a relative path or a full URL:
– /my/absolute/path indicates an absolute path in the cluster HDFS
– my/path indicates the path /user/hadoop/my/path in the cluster HDFS assuming the defined HDFS user ishadoop
– hdfs://host:port/path can be used to indicate any HDFS location
4. Enter the username and password for the Data Source (also see Additional Notes)
5. Enter an optional description
6. Click on “Create”
7. Repeat for additional Data Sources
2.8.9 Job Binaries
Job Binaries are where you define/upload the source code (mains and libraries) for your job.
1. From the Data Processing/Jobs (Job Binaries tab), click on the “Create Job Binary” button at the top right
2. Give your Job Binary a name (this can be different than the actual filename)
3. Choose the type of storage for your Job Binary
• For “swift”, enter the URL of your binary (<container>/<path>) as well as the username and password (also seeAdditional Notes)
• For “Internal database”, you can choose from “Create a script” or “Upload a new file”
4. Enter an optional description
5. Click on “Create”
6. Repeat for additional Job Binaries
30 Chapter 2. User guide

Sahara, Release 6.0.0.0b2.dev3
2.8.10 Job Templates (Known as “Jobs” in the API)
Job templates are where you define the type of job you’d like to run as well as which “Job Binaries” are required.
1. From the Data Processing/Jobs page (Job Templates tab), click on the “Create Job Template” button at the topright
2. Give your Job Template a name
3. Choose the type of job you’d like to run
4. Choose the main binary from the dropdown
• This is required for Hive, Pig, and Spark jobs
• Other job types do not use a main binary
5. Enter an optional description for your Job Template
6. Click on the “Libs” tab and choose any libraries needed by your job template
• MapReduce and Java jobs require at least one library
• Other job types may optionally use libraries
7. Click on “Create”
2.8.11 Jobs (Known as “Job Executions” in the API)
Jobs are what you get by “Launching” a job template. You can monitor the status of your job to see when it hascompleted its run
1. From the Data Processing/Jobs page (Job Templates tab), find the row that contains the job template you wantto launch and click either “Launch on New Cluster” or “Launch on Existing Cluster” the right side of that row
2. Choose the cluster (already running–see Launching a Cluster above) on which you would like the job to run
3. Choose the Input and Output Data Sources (Data Sources defined above)
4. If additional configuration is required, click on the “Configure” tab
• Additional configuration properties can be defined by clicking on the “Add” button
• An example configuration entry might be mapred.mapper.class for the Name andorg.apache.oozie.example.SampleMapper for the Value
5. Click on “Launch”. To monitor the status of your job, you can navigate to the Data Processing/Jobs panel andclick on the Jobs tab.
6. You can relaunch a Job from the Jobs page by using the “Relaunch on New Cluster” or “Relaunch on ExistingCluster” links
• Relaunch on New Cluster will take you through the forms to start a new cluster before letting you specifyinput/output Data Sources and job configuration
• Relaunch on Existing Cluster will prompt you for input/output Data Sources as well as allow you to change jobconfiguration before launching the job
2.8.12 Example Jobs
There are sample jobs located in the sahara repository. In this section, we will give a walkthrough on how to run thosejobs via the Horizon UI. These steps assume that you already have a cluster up and running (in the “Active” state).
2.8. Sahara (Data Processing) UI User Guide 31

Sahara, Release 6.0.0.0b2.dev3
You may want to clone into https://git.openstack.org/cgit/openstack/sahara-tests/ so that you will have all of the sourcecode and inputs stored locally.
1. Sample Pig job - https://git.openstack.org/cgit/openstack/sahara-tests/tree/sahara_tests/scenario/defaults/edp-examples/edp-pig/cleanup-string/example.pig
• Load the input data file from https://git.openstack.org/cgit/openstack/sahara-tests/tree/sahara_tests/scenario/defaults/edp-examples/edp-pig/cleanup-string/data/input into swift
– Click on Project/Object Store/Containers and create a container with any name (“samplecontainer” for ourpurposes here)
– Click on Upload Object and give the object a name (“piginput” in this case)
• Navigate to Data Processing/Jobs/Data Sources, Click on Create Data Source
– Name your Data Source (“pig-input-ds” in this sample)
– Type = Swift, URL samplecontainer/piginput, fill-in the Source username/password fields with your user-name/password and click “Create”
• Create another Data Source to use as output for the job
– Name = pig-output-ds, Type = Swift, URL = samplecontainer/pigoutput, Source username/password,“Create”
• Store your Job Binaries in the sahara database
– Navigate to Data Processing/Jobs/Job Binaries, Click on Create Job Binary
– Name = example.pig, Storage type = Internal database, click Browse and find example.pig wherever youchecked out the sahara project <sahara-tests root>/etc/edp-examples/edp-pig/trim-spaces
– Create another Job Binary: Name = edp-pig-udf-stringcleaner.jar, Storage type = Internal database, clickBrowse and find edp-pig-udf-stringcleaner.jar wherever you checked out the sahara project <sahara-testsroot>/sahara_tests/scenario/defaults/edp-examples/ edp-pig/cleanup-string/
• Create a Job Template
– Navigate to Data Processing/Jobs/Job Templates, Click on Create Job Template
– Name = pigsample, Job Type = Pig, Choose “example.pig” as the main binary
– Click on the “Libs” tab and choose “edp-pig-udf-stringcleaner.jar”, then hit the “Choose” button beneaththe dropdown, then click on “Create”
• Launch your job
– To launch your job from the Job Templates page, click on the down arrow at the far right of the screen andchoose “Launch on Existing Cluster”
– For the input, choose “pig-input-ds”, for output choose “pig-output-ds”. Also choose whichever clusteryou’d like to run the job on
– For this job, no additional configuration is necessary, so you can just click on “Launch”
– You will be taken to the “Jobs” page where you can see your job progress through “PENDING, RUNNING,SUCCEEDED” phases
– When your job finishes with “SUCCEEDED”, you can navigate back to Object Store/Containers andbrowse to the samplecontainer to see your output. It should be in the “pigoutput” folder
2. Sample Spark job - https://git.openstack.org/cgit/openstack/sahara-tests/tree/sahara_tests/scenario/defaults/edp-examples/edp-spark You can clone into https://git.openstack.org/cgit/openstack/sahara-tests/ for quicker accessto the files for this sample job.
32 Chapter 2. User guide

Sahara, Release 6.0.0.0b2.dev3
• Store the Job Binary in the sahara database
– Navigate to Data Processing/Jobs/Job Binaries, Click on Create Job Binary
– Name = sparkexample.jar, Storage type = Internal database, Browse to the location <sahara-testsroot>/sahara_tests/scenario/defaults/ edp-examples/edp-spark/ and choose spark-wordcount.jar, Click“Create”
• Create a Job Template
– Name = sparkexamplejob, Job Type = Spark, Main binary = Choose sparkexample.jar, Click “Create”
• Launch your job
– To launch your job from the Job Templates page, click on the down arrow at the far right of the screen andchoose “Launch on Existing Cluster”
– Choose whichever cluster you’d like to run the job on
– Click on the “Configure” tab
– Set the main class to be: sahara.edp.spark.SparkWordCount
– Under Arguments, click Add and fill url for the input file, once more click Add and fill url for the outputfile.
– Click on Launch
– You will be taken to the “Jobs” page where you can see your job progress through “PENDING, RUNNING,SUCCEEDED” phases
– When your job finishes with “SUCCEEDED”, you can see your results in your output file.
– The stdout and stderr files of the command used for executing your job are located at /tmp/spark-edp/<name of job template>/<job id> on Spark master node in case of Spark clusters, or on Spark JobHis-tory node in other cases like Vanilla, CDH and so on.
2.8.13 Additional Notes
1. Throughout the sahara UI, you will find that if you try to delete an object that you will not be able to delete it ifanother object depends on it. An example of this would be trying to delete a Job Template that has an existingJob. In order to be able to delete that job, you would first need to delete any Job Templates that relate to that job.
2. In the examples above, we mention adding your username/password for the swift Data Sources. It should benoted that it is possible to configure sahara such that the username/password credentials are not required. Formore information on that, please refer to: Sahara Advanced Configuration Guide
2.8.14 Launching a cluster via the Cluster Creation Guide
1. Under the Data Processing group, choose “Clusters” and then click on the “Clusters” tab. The “Cluster CreationGuide” button is above that table. Click on it.
2. Click on the “Choose Plugin” button then select the cluster type from the Plugin Name dropdown and chooseyour target version. When done, click on “Select” to proceed.
3. Click on “Create a Master Node Group Template”. Give your template a name, choose a flavor and choosewhich processes should run on nodes launched for this node group. The processes chosen here should be thingsthat are more server-like in nature (namenode, oozieserver, spark master, etc). Optionally, you can set otheroptions here such as availability zone, storage, security and process specific parameters. Click on “Create” toproceed.
2.8. Sahara (Data Processing) UI User Guide 33

Sahara, Release 6.0.0.0b2.dev3
4. Click on “Create a Worker Node Group Template”. Give your template a name, choose a flavor and choosewhich processes should run on nodes launched for this node group. Processes chosen here should be moreworker-like in nature (datanode, spark slave, task tracker, etc). Optionally, you can set other options here suchas availability zone, storage, security and process specific parameters. Click on “Create” to proceed.
5. Click on “Create a Cluster Template”. Give your template a name. Next, click on the “Node Groups” tab andenter the count for each of the node groups (these are pre-populated from steps 3 and 4). It would be commonto have 1 for the “master” node group type and some larger number of “worker” instances depending on youdesired cluster size. Optionally, you can also set additional parameters for cluster-wide settings via the othertabs on this page. Click on “Create” to proceed.
6. Click on “Launch a Cluster”. Give your cluster a name and choose the image that you want to use for allinstances in your cluster. The cluster template that you created in step 5 is already pre-populated. If you wantssh access to the instances of your cluster, select a keypair from the dropdown. Click on “Launch” to proceed.You will be taken to the Clusters panel where you can see your cluster progress toward the Active state.
2.8.15 Running a job via the Job Execution Guide
1. Under the Data Processing group, choose “Jobs” and then click on the “Jobs” tab. The “Job Execution Guide”button is above that table. Click on it.
2. Click on “Select type” and choose the type of job that you want to run.
3. If your job requires input/output data sources, you will have the option to create them via the “Create a DataSource” button (Note: This button will not be shown for job types that do not require data sources). Giveyour data source a name and choose the type. If you have chosen swift, you may also enter the username andpassword. Enter the URL for your data source. For more details on what the URL should look like, see DataSources.
4. Click on “Create a job template”. Give your job template a name. Depending on the type of job that you’vechosen, you may need to select your main binary and/or additional libraries (available from the “Libs” tab). Ifyou have not yet uploaded the files to run your program, you can add them via the “+” icon next to the “Choosea main binary” select box.
5. Click on “Launch job”. Choose the active cluster where you want to run you job. Optionally, you can clickon the “Configure” tab and provide any required configuration, arguments or parameters for your job. Click on“Launch” to execute your job. You will be taken to the Jobs tab where you can monitor the state of your job asit progresses.
2.9 Features Overview
This page highlights some of the most prominent features available in sahara. The guidance provided here is primarilyfocused on the runtime aspects of sahara. For discussions about configuring the sahara server processes please see theSahara Configuration Guide and Sahara Advanced Configuration Guide.
2.9.1 Anti-affinity
One of the problems with running data processing applications on OpenStack is the inability to control where aninstance is actually running. It is not always possible to ensure that two new virtual machines are started on differentphysical machines. As a result, any replication within the cluster is not reliable because all replicas may be co-locatedon one physical machine. To remedy this, sahara provides the anti-affinity feature to explicitly command all instancesof the specified processes to spawn on different Compute nodes. This is especially useful for Hadoop data nodeprocesses to increase HDFS replica reliability.
34 Chapter 2. User guide
Sahara, Release 6.0.0.0b2.dev3
Starting with the Juno release, sahara can create server groups with the anti-affinity policy to enable thisfeature. Sahara creates one server group per cluster and assigns all instances with affected processes to this servergroup. Refer to the Nova documentation on how server groups work.
This feature is supported by all plugins out of the box, and can be enabled during the cluster template creation.
2.9.2 Block Storage support
OpenStack Block Storage (cinder) can be used as an alternative for ephemeral drives on instances. Using BlockStorage volumes increases the reliability of data which is important for HDFS services.
A user can set how many volumes will be attached to each instance in a node group and the size of each volume. Allvolumes are attached during cluster creation and scaling operations.
If volumes are used for the HDFS storage it’s important to make sure that the linear read-write operations as well asIOpS level are high enough to handle the workload. Volumes placed on the same compute host provide a higher levelof performance.
In some cases cinder volumes can be backed by a distributed storage like Ceph. In this type of installation it’simportant to make sure that the network latency and speed do not become a blocker for HDFS. Distributed storagesolutions usually provide their own replication mechanism. HDFS replication should be disabled so that it does notgenerate redundant traffic across the cloud.
2.9.3 Cluster scaling
Cluster scaling allows users to change the number of running instances in a cluster without needing to recreate thecluster. Users may increase or decrease the number of instances in node groups or add new node groups to existingclusters. If a cluster fails to scale properly, all changes will be rolled back.
2.9.4 Data locality
For optimal performance, it is best for data processing applications to work on data local to the same rack, OpenStackCompute node, or virtual machine. Hadoop supports a data locality feature and can schedule jobs to task tracker nodesthat are local for the input stream. In this manner the task tracker nodes can communicate directly with the local datanodes.
Sahara supports topology configuration for HDFS and Object Storage data sources. For more information on config-uring this option please see the Data-locality configuration documentation.
2.9.5 Volume-to-instance locality
Having an instance and an attached volume on the same physical host can be very helpful in order to achieve high-performance disk I/O operations. To achieve this, sahara provides access to the Block Storage volume instance localityfunctionality.
For more information on using volume instance locality with sahara, please see the Volume instance locality configu-ration documentation.
2.9.6 Distributed Mode
The Sahara Installation Guide suggests launching sahara in distributed mode with sahara-api andsahara-engine processes potentially running on several machines simultaneously. Running in distributed modeallows sahara to offload intensive tasks to the engine processes while keeping the API process free to handle requests.
2.9. Features Overview 35

Sahara, Release 6.0.0.0b2.dev3
For an expanded discussion of configuring sahara to run in distributed mode please see the Distributed mode configu-ration documentation.
2.9.7 Hadoop HDFS and YARN High Availability
Currently HDFS and YARN HA are supported with the HDP 2.4 plugin and CDH 5.7 plugins.
Hadoop HDFS and YARN High Availability provide an architecture to ensure that HDFS or YARN will continue towork in the result of an active namenode or resourcemanager failure. They use 2 namenodes and 2 resourcemanagersin an active/passive state to provide this availability.
In the HDP 2.4 plugin, the feature can be enabled through dashboard in the Cluster Template creation form. High avail-ability is achieved by using a set of journalnodes, Zookeeper servers, and ZooKeeper Failover Controllers (ZKFC), aswell as additional configuration changes to HDFS and other services that use HDFS.
In the CDH 5.7 plugin, HA for HDFS and YARN is enabled through adding several HDFS_JOURNALNODE rolesin the node group templates of cluster template. The HDFS HA is enabled when HDFS_JOURNALNODE roles areadded and the roles setup meets below requirements:
• HDFS_JOURNALNODE number is odd, and at least 3.
• Zookeeper is enabled.
• NameNode and SecondaryNameNode are on different physical hosts by setting anti-affinity.
• Cluster has both ResourceManager and StandByResourceManager.
In this case, the original SecondrayNameNode node will be used as the Standby NameNode.
2.9.8 Networking support
Sahara supports both the nova-network and neutron implementations of OpenStack Networking. By default sahara isconfigured to behave as if the nova-network implementation is available. For OpenStack installations that are usingthe neutron project please see Networking configuration.
2.9.9 Object Storage support
Sahara can use OpenStack Object Storage (swift) to store job binaries and data sources utilized by its job executionsand clusters. In order to leverage this support within Hadoop, including using Object Storage for data sources for EDP,Hadoop requires the application of a patch. For additional information about enabling this support, including patchingHadoop and configuring sahara, please refer to the Swift Integration documentation.
2.9.10 Shared Filesystem support
Sahara can also use NFS shares through the OpenStack Shared Filesystem service (manila) to store job binaries anddata sources. See Elastic Data Processing (EDP) for more information on this feature.
2.9.11 Orchestration support
Sahara may use the OpenStack Orchestration engine (heat) to provision nodes for clusters. For more information aboutenabling Orchestration usage in sahara please see Orchestration configuration.
36 Chapter 2. User guide
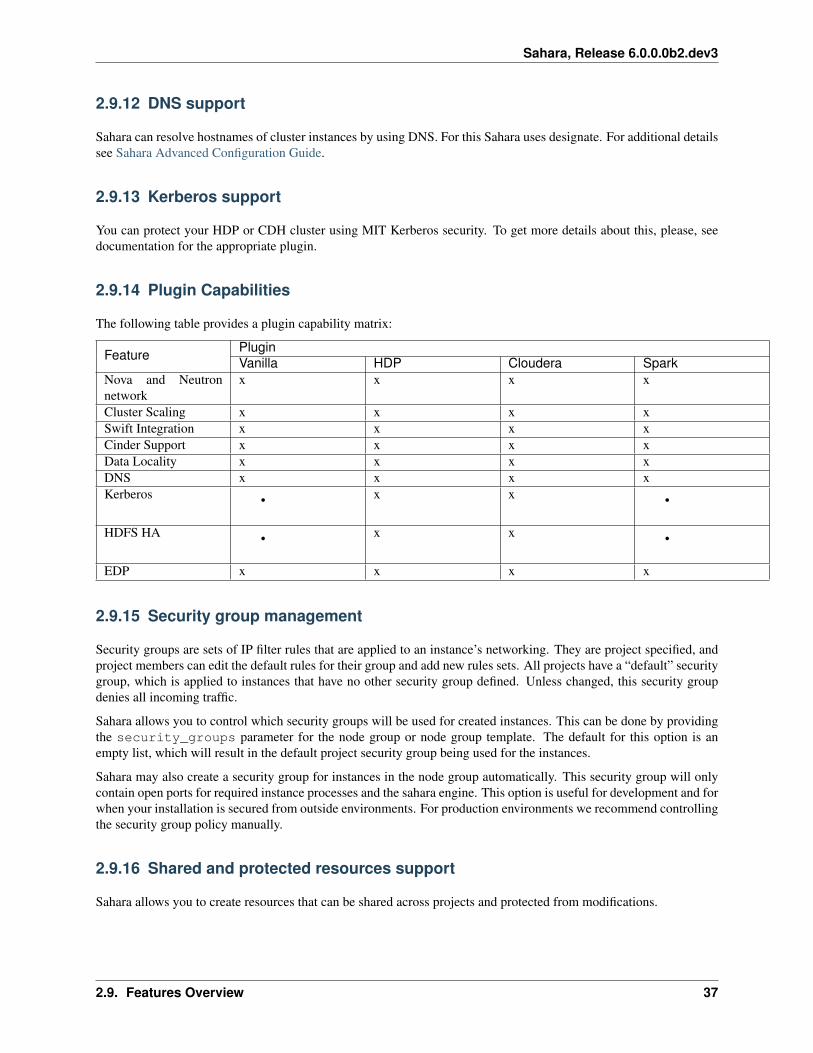
Sahara, Release 6.0.0.0b2.dev3
2.9.12 DNS support
Sahara can resolve hostnames of cluster instances by using DNS. For this Sahara uses designate. For additional detailssee Sahara Advanced Configuration Guide.
2.9.13 Kerberos support
You can protect your HDP or CDH cluster using MIT Kerberos security. To get more details about this, please, seedocumentation for the appropriate plugin.
2.9.14 Plugin Capabilities
The following table provides a plugin capability matrix:
Feature PluginVanilla HDP Cloudera Spark
Nova and Neutronnetwork
x x x x
Cluster Scaling x x x xSwift Integration x x x xCinder Support x x x xData Locality x x x xDNS x x x xKerberos • x x •
HDFS HA • x x •
EDP x x x x
2.9.15 Security group management
Security groups are sets of IP filter rules that are applied to an instance’s networking. They are project specified, andproject members can edit the default rules for their group and add new rules sets. All projects have a “default” securitygroup, which is applied to instances that have no other security group defined. Unless changed, this security groupdenies all incoming traffic.
Sahara allows you to control which security groups will be used for created instances. This can be done by providingthe security_groups parameter for the node group or node group template. The default for this option is anempty list, which will result in the default project security group being used for the instances.
Sahara may also create a security group for instances in the node group automatically. This security group will onlycontain open ports for required instance processes and the sahara engine. This option is useful for development and forwhen your installation is secured from outside environments. For production environments we recommend controllingthe security group policy manually.
2.9.16 Shared and protected resources support
Sahara allows you to create resources that can be shared across projects and protected from modifications.
2.9. Features Overview 37

Sahara, Release 6.0.0.0b2.dev3
To provide this feature all sahara objects that can be accessed through REST API have is_public andis_protected boolean fields. They can be initially created with enabled is_public and is_protectedparameters or these parameters can be updated after creation. Both fields are set to False by default.
If some object has its is_public field set to True, it means that it’s visible not only from the project in which itwas created, but from any other projects too.
If some object has its is_protected field set to True, it means that it can not be modified (updated, scaled,canceled or deleted) unless this field is set to False.
Public objects created in one project can be used from other projects (for example, a cluster can be created from apublic cluster template which is created in another project), but modification operations are possible only from theproject in which object was created.
2.9.17 Data source placeholders support
Sahara supports special strings that can be used in data source URLs. These strings will be replaced with appropriatevalues during job execution which allows the use of the same data source as an output multiple times.
There are 2 types of string currently supported:
• %JOB_EXEC_ID% - this string will be replaced with the job execution ID.
• %RANDSTR(len)% - this string will be replaced with random string of lowercase letters of length len. lenmust be less than 1024.
After placeholders are replaced, the real URLs are stored in the data_source_urls field of the job executionobject. This is used later to find objects created by a particular job run.
2.10 Registering an Image
Sahara deploys a cluster of machines using images stored in Glance.
Each plugin has its own requirements on the image contents (see specific plugin documentation for details). Twogeneral requirements for an image are to have the cloud-init and the ssh-server packages installed.
Sahara requires the images to be registered in the Sahara Image Registry. A registered image must have two propertiesset:
• username - a name of the default cloud-init user.
• tags - certain tags mark image to be suitable for certain plugins. The tags depend on the plugin used, you canfind required tags in the plugin’s documentations.
The default username specified for these images is different for each distribution:
OS usernameUbuntu 12,14 ubuntuFedora fedoraCentOS 6.x cloud-userCentOS 7.x centos
Plugins
38 Chapter 2. User guide

Sahara, Release 6.0.0.0b2.dev3
2.11 Provisioning Plugins
This page lists all available provisioning plugins. In general a plugin enables sahara to deploy a specific data processingframework (for example, Hadoop) or distribution, and allows configuration of topology and management/monitoringtools.
• Vanilla Plugin - deploys Vanilla Apache Hadoop
• Ambari Plugin - deploys Hortonworks Data Platform
• Spark Plugin - deploys Apache Spark with Cloudera HDFS
• MapR Distribution Plugin - deploys MapR plugin with MapR File System
• Cloudera Plugin - deploys Cloudera Hadoop
2.11.1 Managing plugins
Since the Newton release a project admin can configure plugins by specifying additional values for plugin’s labels.
To disable a plugin (Vanilla Apache Hadoop, for example), the admin can run the following command:
cat update_configs.json{
"plugin_labels": {"enabled": {
"status": true}
}}openstack plugin update vanilla update_configs.json
Additionally, specific versions can be disabled by the following command:
cat update_configs.json{
"version_labels": {"2.7.1": {
"enabled": {"status": true
}}
}}openstack plugin update vanilla update_configs.json
Finally, to see all labels of a specific plugin and to see the current status of the plugin (is it stable or not, deprecationstatus) the following command can be executed from the CLI:
openstack plugin show vanilla
The same actions are available from UI respectively.
2.12 Vanilla Plugin
The vanilla plugin is a reference implementation which allows users to operate a cluster with Apache Hadoop.
Since the Newton release Spark is integrated into the Vanilla plugin so you can launch Spark jobs on a Vanilla cluster.
2.11. Provisioning Plugins 39
Sahara, Release 6.0.0.0b2.dev3
For cluster provisioning prepared images should be used. They already have Apache Hadoop 2.7.1 installed.
You may build images by yourself using Building Images for Vanilla Plugin or you could download prepared imagesfrom http://sahara-files.mirantis.com/images/upstream
Vanilla plugin requires an image to be tagged in Sahara Image Registry with two tags: ‘vanilla’ and ‘<hadoop version>’(e.g. ‘2.7.1’).
The default username specified for these images is different for each distribution:
OS usernameUbuntu 14 ubuntuFedora 20 fedoraCentOS 6 cloud-userCentOS 7 centos
2.12.1 Cluster Validation
When user creates or scales a Hadoop cluster using a Vanilla plugin, the cluster topology requested by user is verifiedfor consistency.
Currently there are the following limitations in cluster topology for Vanilla plugin:
For Vanilla Hadoop version 2.x.x:
• Cluster must contain exactly one namenode
• Cluster can contain at most one resourcemanager
• Cluster can contain at most one secondary namenode
• Cluster can contain at most one historyserver
• Cluster can contain at most one oozie and this process is also required for EDP
• Cluster can’t contain oozie without resourcemanager and without historyserver
• Cluster can’t have nodemanager nodes if it doesn’t have resourcemanager
• Cluster can have at most one hiveserver node.
• Cluster can have at most one spark history server and this process is also required for Spark EDP (Spark isavailable since the Newton release).
2.13 Ambari Plugin
The Ambari sahara plugin provides a way to provision clusters with Hortonworks Data Platform on OpenStack usingtemplates in a single click and in an easily repeatable fashion. The sahara controller serves as the glue between Hadoopand OpenStack. The Ambari plugin mediates between the sahara controller and Apache Ambari in order to deployand configure Hadoop on OpenStack. Core to the HDP Plugin is Apache Ambari which is used as the orchestrator fordeploying HDP on OpenStack. The Ambari plugin uses Ambari Blueprints for cluster provisioning.
2.13.1 Apache Ambari Blueprints
Apache Ambari Blueprints is a portable document definition, which provides a complete definition for an ApacheHadoop cluster, including cluster topology, components, services and their configurations. Ambari Blueprints can beconsumed by the Ambari plugin to instantiate a Hadoop cluster on OpenStack. The benefits of this approach is that it
40 Chapter 2. User guide
Sahara, Release 6.0.0.0b2.dev3
allows for Hadoop clusters to be configured and deployed using an Ambari native format that can be used with as wellas outside of OpenStack allowing for clusters to be re-instantiated in a variety of environments.
2.13.2 Images
The sahara Ambari plugin is using minimal (operating system only) images.
For more information about Ambari images, refer to https://github.com/openstack/sahara-image-elements.
You could download well tested and up-to-date prepared images from http://sahara-files.mirantis.com/images/upstream/
HDP plugin requires an image to be tagged in sahara Image Registry with two tags: ‘ambari’ and ‘<plugin version>’(e.g. ‘2.4’).
Also in the Image Registry you will need to specify username for an image. The username specified should be ‘cloud-user’ in case of CentOS 6.x image, ‘centos’ for CentOS 7 images and ‘ubuntu’ for Ubuntu images.
2.13.3 High Availability for HDFS and YARN
High Availability (Using the Quorum Journal Manager) can be deployed automatically with the Ambari plugin. Youcan deploy High Available cluster through UI by selecting NameNode HA and/or ResourceManager HA optionsin general configs of cluster template.
The NameNode High Availability is deployed using 2 NameNodes, one active and one standby. The NameNodes usea set of JournalNodes and Zookepeer Servers to ensure the necessary synchronization. In case of ResourceManagerHA 2 ResourceManagers should be enabled in addition.
A typical Highly available Ambari cluster uses 2 separate NameNodes, 2 separate ResourceManagers and at least 3JournalNodes and at least 3 Zookeeper Servers.
2.13.4 HDP Version Support
The HDP plugin currently supports deployment of HDP 2.3 and 2.4.
2.13.5 Cluster Validation
Prior to Hadoop cluster creation, the HDP plugin will perform the following validation checks to ensure a successfulHadoop deployment:
• Ensure the existence of Ambari Server process in the cluster;
• Ensure the existence of a NameNode, Zookeeper, ResourceManagers processes HistoryServer and App Time-Line Server in the cluster
2.13.6 Enabling Kerberos security for cluster
If you want to protect your clusters using MIT Kerberos security you have to complete a few steps below.
• If you would like to create a cluster protected by Kerberos security you just need to enable Kerberos by checkboxin the General Parameters section of the cluster configuration. If you prefer to use the OpenStack CLIfor cluster creation, you have to put the data below in the cluster_configs section:
2.13. Ambari Plugin 41

Sahara, Release 6.0.0.0b2.dev3
"cluster_configs": {"Enable Kerberos Security": true,
}
Sahara in this case will correctly prepare KDC server and will create principals along with keytabs to enableauthentication for Hadoop services.
• Ensure that you have the latest hadoop-openstack jar file distributed on your cluster nodes. You can downloadone at http://tarballs.openstack.org/sahara/dist/
• Sahara will create principals along with keytabs for system users like oozie, hdfs and spark so that youwill not have to perform additional auth operations to execute your jobs on top of the cluster.
2.14 Spark Plugin
The Spark plugin for sahara provides a way to provision Apache Spark clusters on OpenStack in a single click and inan easily repeatable fashion.
Currently Spark is installed in standalone mode, with no YARN or Mesos support.
2.14.1 Images
For cluster provisioning, prepared images should be used. The Spark plugin has been developed and tested with theimages generated by sahara-image-elements:
• https://github.com/openstack/sahara-image-elements
The latest Ubuntu images generated by sahara-image-elements have Cloudera CDH 5.4.0 HDFS and Apache Sparkinstalled. A prepared image for Spark can be found at the following location:
• http://sahara-files.mirantis.com/images/upstream/
The Spark plugin requires an image to be tagged in the sahara image registry with two tags: ‘spark’ and ‘<Sparkversion>’ (e.g. ‘1.6.0’).
Also you should specify the username of the default cloud-user used in the image. For the images available at theURLs listed above and for all the ones generated with the DIB it is ubuntu.
Note that the Spark cluster is deployed using the scripts available in the Spark distribution, which allow the user to startall services (master and slaves), stop all services and so on. As such (and as opposed to CDH HDFS daemons), Sparkis not deployed as a standard Ubuntu service and if the virtual machines are rebooted, Spark will not be restarted.
2.14.2 Spark configuration
Spark needs few parameters to work and has sensible defaults. If needed they can be changed when creating the saharacluster template. No node group options are available.
Once the cluster is ready, connect with ssh to the master using the ubuntu user and the appropriate ssh key. Spark isinstalled in /opt/spark and should be completely configured and ready to start executing jobs. At the bottom of thecluster information page from the OpenStack dashboard, a link to the Spark web interface is provided.
2.14.3 Cluster Validation
When a user creates an Hadoop cluster using the Spark plugin, the cluster topology requested by user is verified forconsistency.
42 Chapter 2. User guide
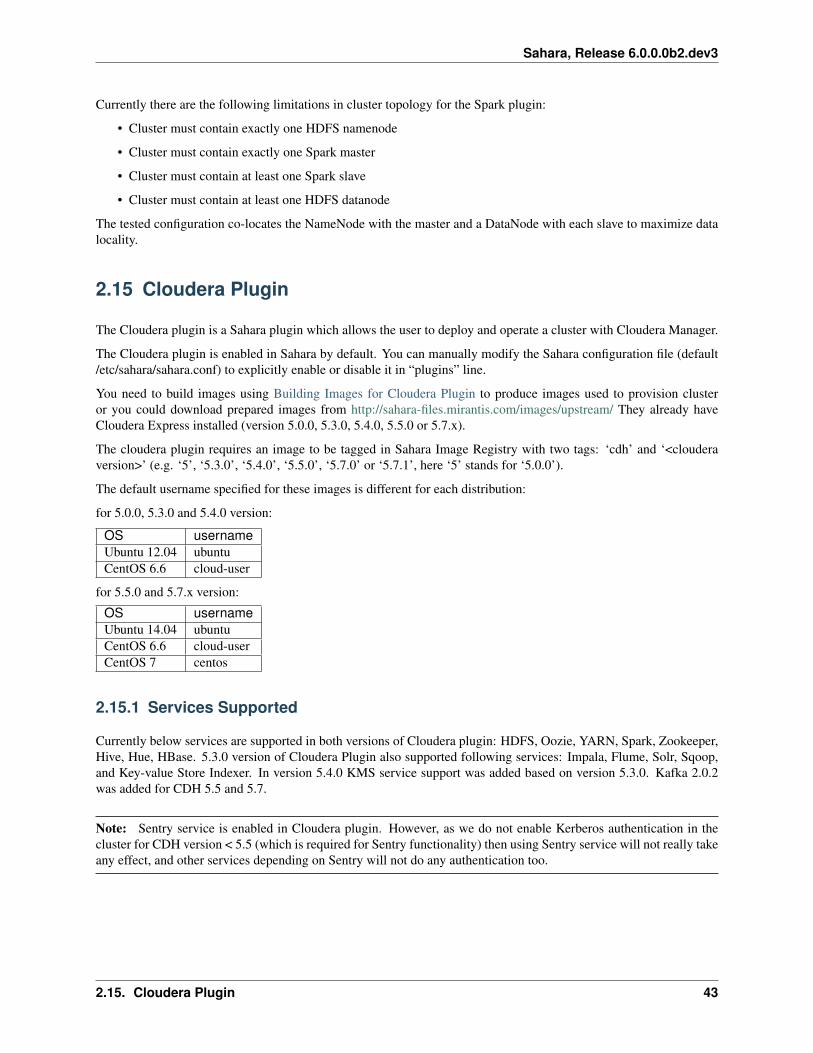
Sahara, Release 6.0.0.0b2.dev3
Currently there are the following limitations in cluster topology for the Spark plugin:
• Cluster must contain exactly one HDFS namenode
• Cluster must contain exactly one Spark master
• Cluster must contain at least one Spark slave
• Cluster must contain at least one HDFS datanode
The tested configuration co-locates the NameNode with the master and a DataNode with each slave to maximize datalocality.
2.15 Cloudera Plugin
The Cloudera plugin is a Sahara plugin which allows the user to deploy and operate a cluster with Cloudera Manager.
The Cloudera plugin is enabled in Sahara by default. You can manually modify the Sahara configuration file (default/etc/sahara/sahara.conf) to explicitly enable or disable it in “plugins” line.
You need to build images using Building Images for Cloudera Plugin to produce images used to provision clusteror you could download prepared images from http://sahara-files.mirantis.com/images/upstream/ They already haveCloudera Express installed (version 5.0.0, 5.3.0, 5.4.0, 5.5.0 or 5.7.x).
The cloudera plugin requires an image to be tagged in Sahara Image Registry with two tags: ‘cdh’ and ‘<clouderaversion>’ (e.g. ‘5’, ‘5.3.0’, ‘5.4.0’, ‘5.5.0’, ‘5.7.0’ or ‘5.7.1’, here ‘5’ stands for ‘5.0.0’).
The default username specified for these images is different for each distribution:
for 5.0.0, 5.3.0 and 5.4.0 version:
OS usernameUbuntu 12.04 ubuntuCentOS 6.6 cloud-user
for 5.5.0 and 5.7.x version:
OS usernameUbuntu 14.04 ubuntuCentOS 6.6 cloud-userCentOS 7 centos
2.15.1 Services Supported
Currently below services are supported in both versions of Cloudera plugin: HDFS, Oozie, YARN, Spark, Zookeeper,Hive, Hue, HBase. 5.3.0 version of Cloudera Plugin also supported following services: Impala, Flume, Solr, Sqoop,and Key-value Store Indexer. In version 5.4.0 KMS service support was added based on version 5.3.0. Kafka 2.0.2was added for CDH 5.5 and 5.7.
Note: Sentry service is enabled in Cloudera plugin. However, as we do not enable Kerberos authentication in thecluster for CDH version < 5.5 (which is required for Sentry functionality) then using Sentry service will not really takeany effect, and other services depending on Sentry will not do any authentication too.
2.15. Cloudera Plugin 43

Sahara, Release 6.0.0.0b2.dev3
2.15.2 High Availability Support
Currently HDFS NameNode High Availability is supported beginning with Cloudera 5.4.0 version. You can refer toFeatures Overview for the detail info.
YARN ResourceManager High Availability is supported beginning with Cloudera 5.4.0 version. This feature addsredundancy in the form of an Active/Standby ResourceManager pair to avoid the failure of single RM. Upon failover,the Standby RM become Active so that the applications can resume from their last check-pointed state.
2.15.3 Cluster Validation
When the user performs an operation on the cluster using a Cloudera plugin, the cluster topology requested by the useris verified for consistency.
The following limitations are required in the cluster topology for all cloudera plugin versions:
• Cluster must contain exactly one manager.
• Cluster must contain exactly one namenode.
• Cluster must contain exactly one secondarynamenode.
• Cluster must contain at least dfs_replication datanodes.
• Cluster can contain at most one resourcemanager and this process is also required by nodemanager.
• Cluster can contain at most one jobhistory and this process is also required for resourcemanager.
• Cluster can contain at most one oozie and this process is also required for EDP.
• Cluster can’t contain oozie without datanode.
• Cluster can’t contain oozie without nodemanager.
• Cluster can’t contain oozie without jobhistory.
• Cluster can’t contain hive on the cluster without the following services: metastore, hive server, webcat andresourcemanager.
• Cluster can contain at most one hue server.
• Cluster can’t contain hue server without hive service and oozie.
• Cluster can contain at most one spark history server.
• Cluster can’t contain spark history server without resourcemanager.
• Cluster can’t contain hbase master service without at least one zookeeper and at least one hbase regionserver.
• Cluster can’t contain hbase regionserver without at least one hbase maser.
In case of 5.3.0, 5.4.0, 5.5.0 or 5.7.x version of Cloudera Plugin there are few extra limitations in the cluster topology:
• Cluster can’t contain flume without at least one datanode.
• Cluster can contain at most one sentry server service.
• Cluster can’t contain sentry server service without at least one zookeeper and at least one datanode.
• Cluster can’t contain solr server without at least one zookeeper and at least one datanode.
• Cluster can contain at most one sqoop server.
• Cluster can’t contain sqoop server without at least one datanode, nodemanager and jobhistory.
• Cluster can’t contain hbase indexer without at least one datanode, zookeeper, solr server and hbase master.
44 Chapter 2. User guide

Sahara, Release 6.0.0.0b2.dev3
• Cluster can contain at most one impala catalog server.
• Cluster can contain at most one impala statestore.
• Cluster can’t contain impala catalogserver without impala statestore, at least one impalad service, at least onedatanode, and metastore.
• If using Impala, the daemons must be installed on every datanode.
In case of version 5.5.0 or 5.7.x of Cloudera Plugin additional services in the cluster topology are available:
• Cluster can have the kafka service and several kafka brokers.
2.15.4 Enabling Kerberos security for cluster
If you want to protect your clusters using MIT Kerberos security you have to complete a few steps below.
• If you would like to create a cluster protected by Kerberos security you just need to enable Kerberos by checkboxin the General Parameters section of the cluster configuration. If you prefer to use the OpenStack CLIfor cluster creation, you have to put the data below in the cluster_configs section:
"cluster_configs": {"Enable Kerberos Security": true,
}
Sahara in this case will correctly prepare KDC server and will create principals along with keytabs to enableauthentication for Hadoop services.
• Ensure that you have the latest hadoop-openstack jar file distributed on your cluster nodes. You can downloadone at http://tarballs.openstack.org/sahara/dist/
• Sahara will create principals along with keytabs for system users like hdfs and spark so that you will nothave to perform additional auth operations to execute your jobs on top of the cluster.
2.16 MapR Distribution Plugin
The MapR Sahara plugin allows to provision MapR clusters on OpenStack in an easy way and do it, quickly, conve-niently and simply.
2.16.1 Operation
The MapR Plugin performs the following four primary functions during cluster creation:
1. MapR components deployment - the plugin manages the deployment of the required software to the target VMs
2. Services Installation - MapR services are installed according to provided roles list
3. Services Configuration - the plugin combines default settings with user provided settings
4. Services Start - the plugin starts appropriate services according to specified roles
2.16.2 Images
The Sahara MapR plugin can make use of either minimal (operating system only) images or pre-populated MapRimages. The base requirement for both is that the image is cloud-init enabled and contains a supported operatingsystem (see http://maprdocs.mapr.com/home/InteropMatrix/r_os_matrix.html).
2.16. MapR Distribution Plugin 45
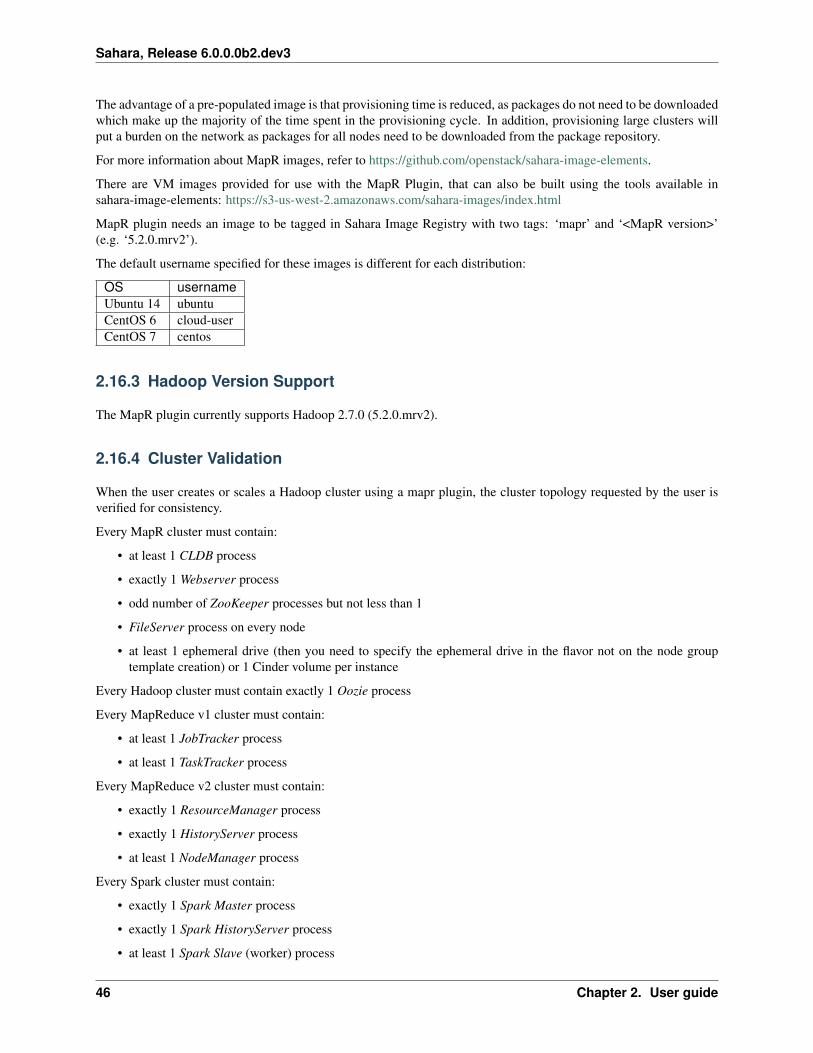
Sahara, Release 6.0.0.0b2.dev3
The advantage of a pre-populated image is that provisioning time is reduced, as packages do not need to be downloadedwhich make up the majority of the time spent in the provisioning cycle. In addition, provisioning large clusters willput a burden on the network as packages for all nodes need to be downloaded from the package repository.
For more information about MapR images, refer to https://github.com/openstack/sahara-image-elements.
There are VM images provided for use with the MapR Plugin, that can also be built using the tools available insahara-image-elements: https://s3-us-west-2.amazonaws.com/sahara-images/index.html
MapR plugin needs an image to be tagged in Sahara Image Registry with two tags: ‘mapr’ and ‘<MapR version>’(e.g. ‘5.2.0.mrv2’).
The default username specified for these images is different for each distribution:
OS usernameUbuntu 14 ubuntuCentOS 6 cloud-userCentOS 7 centos
2.16.3 Hadoop Version Support
The MapR plugin currently supports Hadoop 2.7.0 (5.2.0.mrv2).
2.16.4 Cluster Validation
When the user creates or scales a Hadoop cluster using a mapr plugin, the cluster topology requested by the user isverified for consistency.
Every MapR cluster must contain:
• at least 1 CLDB process
• exactly 1 Webserver process
• odd number of ZooKeeper processes but not less than 1
• FileServer process on every node
• at least 1 ephemeral drive (then you need to specify the ephemeral drive in the flavor not on the node grouptemplate creation) or 1 Cinder volume per instance
Every Hadoop cluster must contain exactly 1 Oozie process
Every MapReduce v1 cluster must contain:
• at least 1 JobTracker process
• at least 1 TaskTracker process
Every MapReduce v2 cluster must contain:
• exactly 1 ResourceManager process
• exactly 1 HistoryServer process
• at least 1 NodeManager process
Every Spark cluster must contain:
• exactly 1 Spark Master process
• exactly 1 Spark HistoryServer process
• at least 1 Spark Slave (worker) process
46 Chapter 2. User guide

Sahara, Release 6.0.0.0b2.dev3
HBase service is considered valid if:
• cluster has at least 1 HBase-Master process
• cluster has at least 1 HBase-RegionServer process
Hive service is considered valid if:
• cluster has exactly 1 HiveMetastore process
• cluster has exactly 1 HiveServer2 process
Hue service is considered valid if:
• cluster has exactly 1 Hue process
• Hue process resides on the same node as HttpFS process
HttpFS service is considered valid if cluster has exactly 1 HttpFS process
Sqoop service is considered valid if cluster has exactly 1 Sqoop2-Server process
2.16.5 The MapR Plugin
For more information, please contact MapR.
Elastic Data Processing
2.17 Elastic Data Processing (EDP)
2.17.1 Overview
Sahara’s Elastic Data Processing facility or EDP allows the execution of jobs on clusters created from sahara. EDPsupports:
• Hive, Pig, MapReduce, MapReduce.Streaming, Java, and Shell job types on Hadoop clusters
• Spark jobs on Spark standalone clusters, MapR (v5.0.0 - v5.2.0) clusters, Vanilla clusters (v2.7.1) and CDHclusters (v5.3.0 or higher).
• storage of job binaries in the OpenStack Object Storage service (swift), the OpenStack Shared file systemsservice (manila), or sahara’s own database
• access to input and output data sources in
– HDFS for all job types
– swift for all types excluding Hive
– manila (NFS shares only) for all types excluding Pig
• configuration of jobs at submission time
• execution of jobs on existing clusters or transient clusters
2.17.2 Interfaces
The EDP features can be used from the sahara web UI which is described in the Sahara (Data Processing) UI UserGuide.
The EDP features also can be used directly by a client through the REST api
2.17. Elastic Data Processing (EDP) 47

Sahara, Release 6.0.0.0b2.dev3
2.17.3 EDP Concepts
Sahara EDP uses a collection of simple objects to define and execute jobs. These objects are stored in the saharadatabase when they are created, allowing them to be reused. This modular approach with database persistence allowscode and data to be reused across multiple jobs.
The essential components of a job are:
• executable code to run
• input and output data paths, as needed for the job
• any additional configuration values needed for the job run
These components are supplied through the objects described below.
Job Binaries
A Job Binary object stores a URL to a single script or Jar file and any credentials needed to retrieve the file. The fileitself may be stored in the sahara internal database (but it is deprecated now), in swift, or in manila.
deprecated: Files in the sahara database are stored as raw bytes in a Job Binary Internal object. This object’s solepurpose is to store a file for later retrieval. No extra credentials need to be supplied for files stored internally.
Sahara requires credentials (username and password) to access files stored in swift unless swift proxy users are config-ured as described in Sahara Advanced Configuration Guide. The swift service must be running in the same OpenStackinstallation referenced by sahara.
To reference a binary file stored in manila, create the job binary with the URL manila://{share_id}/{path}.This assumes that you have already stored that file in the appropriate path on the share. The share will be automaticallymounted to any cluster nodes which require access to the file, if it is not mounted already.
There is a configurable limit on the size of a single job binary that may be retrieved by sahara. This limit is 5MB andmay be set with the job_binary_max_KB setting in the sahara.conf configuration file.
Jobs
A Job object specifies the type of the job and lists all of the individual Job Binary objects that are required for execution.An individual Job Binary may be referenced by multiple Jobs. A Job object specifies a main binary and/or supportinglibraries depending on its type:
Job type Main binary LibrariesHive required optionalPig required optionalMapReduce not used requiredMapReduce.Streaming not used optionalJava not used requiredShell required optionalSpark required optionalStorm required not usedStorm Pyelus required not used
Data Sources
A Data Source object stores a URL which designates the location of input or output data and any credentials neededto access the location.
48 Chapter 2. User guide
Sahara, Release 6.0.0.0b2.dev3
Sahara supports data sources in swift. The swift service must be running in the same OpenStack installation referencedby sahara.
Sahara also supports data sources in HDFS. Any HDFS instance running on a sahara cluster in the same OpenStackinstallation is accessible without manual configuration. Other instances of HDFS may be used as well provided thatthe URL is resolvable from the node executing the job.
Sahara supports data sources in manila as well. To reference a path on an NFS share as a data source, create the datasource with the URL manila://{share_id}/{path}. As in the case of job binaries, the specified share will beautomatically mounted to your cluster’s nodes as needed to access the data source.
Some job types require the use of data source objects to specify input and output when a job is launched. For example,when running a Pig job the UI will prompt the user for input and output data source objects.
Other job types like Java or Spark do not require the user to specify data sources. For these job types, data paths arepassed as arguments. For convenience, sahara allows data source objects to be referenced by name or id. The sectionUsing Data Source References as Arguments gives further details.
Job Execution
Job objects must be launched or executed in order for them to run on the cluster. During job launch, a user specifiesexecution details including data sources, configuration values, and program arguments. The relevant details will varyby job type. The launch will create a Job Execution object in sahara which is used to monitor and manage the job.
To execute Hadoop jobs, sahara generates an Oozie workflow and submits it to the Oozie server running on the cluster.Familiarity with Oozie is not necessary for using sahara but it may be beneficial to the user. A link to the Oozie webconsole can be found in the sahara web UI in the cluster details.
For Spark jobs, sahara uses the spark-submit shell script and executes the Spark job from the master node in case ofSpark cluster and from the Spark Job History server in other cases. Logs of spark jobs run by sahara can be found onthis node under the /tmp/spark-edp directory.
2.17.4 General Workflow
The general workflow for defining and executing a job in sahara is essentially the same whether using the web UI orthe REST API.
1. Launch a cluster from sahara if there is not one already available
2. Create all of the Job Binaries needed to run the job, stored in the sahara database, in swift, or in manila
• When using the REST API and internal storage of job binaries, the Job Binary Internal objects must becreated first
• Once the Job Binary Internal objects are created, Job Binary objects may be created which refer to themby URL
3. Create a Job object which references the Job Binaries created in step 2
4. Create an input Data Source which points to the data you wish to process
5. Create an output Data Source which points to the location for output data
6. Create a Job Execution object specifying the cluster and Job object plus relevant data sources, configurationvalues, and program arguments
• When using the web UI this is done with the Launch On Existing Cluster or Launch on New Clusterbuttons on the Jobs tab
• When using the REST API this is done via the /jobs/<job_id>/execute method
2.17. Elastic Data Processing (EDP) 49

Sahara, Release 6.0.0.0b2.dev3
The workflow is simpler when using existing objects. For example, to construct a new job which uses existing binariesand input data a user may only need to perform steps 3, 5, and 6 above. Of course, to repeat the same job multipletimes a user would need only step 6.
Specifying Configuration Values, Parameters, and Arguments
Jobs can be configured at launch. The job type determines the kinds of values that may be set:
Job type Configuration Values Parameters ArgumentsHive Yes Yes NoPig Yes Yes YesMapReduce Yes No NoMapReduce.Streaming Yes No NoJava Yes No YesShell Yes Yes YesSpark Yes No YesStorm Yes No YesStorm Pyelus Yes No Yes
• Configuration values are key/value pairs.
– The EDP configuration values have names beginning with edp. and are consumed by sahara
– Other configuration values may be read at runtime by Hadoop jobs
– Currently additional configuration values are not available to Spark jobs at runtime
• Parameters are key/value pairs. They supply values for the Hive and Pig parameter substitution mechanisms. InShell jobs, they are passed as environment variables.
• Arguments are strings passed as command line arguments to a shell or main program
These values can be set on the Configure tab during job launch through the web UI or through the job_configs parameterwhen using the /jobs/<job_id>/execute REST method.
In some cases sahara generates configuration values or parameters automatically. Values set explicitly by the userduring launch will override those generated by sahara.
Using Data Source References as Arguments
Sometimes it’s necessary or desirable to pass a data path as an argument to a job. In these cases, a user may simplytype out the path as an argument when launching a job. If the path requires credentials, the user can manually add thecredentials as configuration values. However, if a data source object has been created that contains the desired pathand credentials there is no need to specify this information manually.
As a convenience, sahara allows data source objects to be referenced by name or id in arguments, configuration values,or parameters. When the job is executed, sahara will replace the reference with the path stored in the data source objectand will add any necessary credentials to the job configuration. Referencing an existing data source object is muchfaster than adding this information by hand. This is particularly useful for job types like Java or Spark that do not usedata source objects directly.
There are two job configuration parameters that enable data source references. They may be used with any job typeand are set on the Configuration tab when the job is launched:
• edp.substitute_data_source_for_name (default False) If set to True, causes sahara to look fordata source object name references in configuration values, arguments, and parameters when a job is launched.Name references have the form datasource://name_of_the_object.
50 Chapter 2. User guide

Sahara, Release 6.0.0.0b2.dev3
For example, assume a user has a WordCount application that takes an input path as an argument. If thereis a data source object named my_input, a user may simply set the edp.substitute_data_source_for_nameconfiguration parameter to True and add datasource://my_input as an argument when launching the job.
• edp.substitute_data_source_for_uuid (default False) If set to True, causes sahara to look fordata source object ids in configuration values, arguments, and parameters when a job is launched. A data sourceobject id is a uuid, so they are unique. The id of a data source object is available through the UI or the saharacommand line client. A user may simply use the id as a value.
Creating an Interface for Your Job
In order to better document your job for cluster operators (or for yourself in the future), sahara allows the addition ofan interface (or method signature) to your job template. A sample interface for the Teragen Hadoop example mightbe:
Name Mapping Type Location Value Type Required DefaultExample Class args 0 string false teragenRows args 1 number true unsetOutput Path args 2 data_source false hdfs://ip:port/pathMapper Count configs mapred. map.tasks number false unset
A “Description” field may also be added to each interface argument.
To create such an interface via the REST API, provide an “interface” argument, the value of which consists of a list ofJSON objects, as below:
[{
"name": "Example Class","description": "Indicates which example job class should be used.","mapping_type": "args","location": "0","value_type": "string","required": false,"default": "teragen"
},]
Creating this interface would allow you to specify a configuration for any execution of the job template by passing an“interface” map similar to:
{"Rows": "1000000","Mapper Count": "3","Output Path": "hdfs://mycluster:8020/user/myuser/teragen-output"
}
The specified arguments would be automatically placed into the args, configs, and params for the job, according to themapping type and location fields of each interface argument. The final job_configs map would be:
{"job_configs": {
"configs":{
"mapred.map.tasks": "3"},
"args":[
"teragen",
2.17. Elastic Data Processing (EDP) 51

Sahara, Release 6.0.0.0b2.dev3
"1000000","hdfs://mycluster:8020/user/myuser/teragen-output"
]}
}
Rules for specifying an interface are as follows:
• Mapping Type must be one of configs, params, or args. Only types supported for your job type areallowed (see above.)
• Location must be a string for configs and params, and an integer for args. The set of args locations mustbe an unbroken series of integers starting from 0.
• Value Type must be one of string, number, or data_source. Data sources may be passed as UUIDs oras valid paths (see above.) All values should be sent as JSON strings. (Note that booleans and null values areserialized differently in different languages. Please specify them as a string representation of the appropriateconstants for your data processing engine.)
• args that are not required must be given a default value.
The additional one-time complexity of specifying an interface on your template allows a simpler repeated executionpath, and also allows us to generate a customized form for your job in the Horizon UI. This may be particularly usefulin cases in which an operator who is not a data processing job developer will be running and administering the jobs.
Generation of Swift Properties for Data Sources
If swift proxy users are not configured (see Sahara Advanced Configuration Guide) and a job is run with data sourceobjects containing swift paths, sahara will automatically generate swift username and password configuration valuesbased on the credentials in the data sources. If the input and output data sources are both in swift, it is expected thatthey specify the same credentials.
The swift credentials may be set explicitly with the following configuration values:
Namefs.swift.service.sahara.usernamefs.swift.service.sahara.password
Setting the swift credentials explicitly is required when passing literal swift paths as arguments instead of usingdata source references. When possible, use data source references as described in Using Data Source Referencesas Arguments.
Additional Details for Hive jobs
Sahara will automatically generate values for the INPUT and OUTPUT parameters required by Hive based on thespecified data sources.
Additional Details for Pig jobs
Sahara will automatically generate values for the INPUT and OUTPUT parameters required by Pig based on thespecified data sources.
For Pig jobs, arguments should be thought of as command line arguments separated by spaces and passed to thepig shell.
Parameters are a shorthand and are actually translated to the arguments -param name=value
52 Chapter 2. User guide
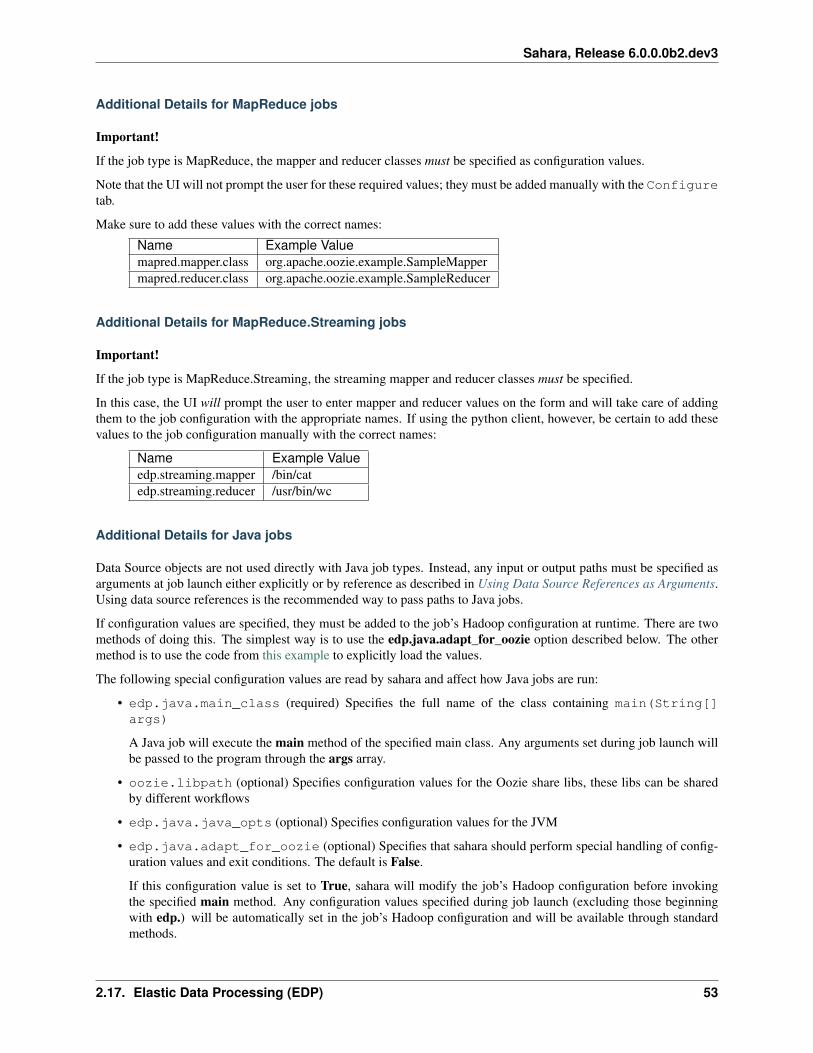
Sahara, Release 6.0.0.0b2.dev3
Additional Details for MapReduce jobs
Important!
If the job type is MapReduce, the mapper and reducer classes must be specified as configuration values.
Note that the UI will not prompt the user for these required values; they must be added manually with the Configuretab.
Make sure to add these values with the correct names:
Name Example Valuemapred.mapper.class org.apache.oozie.example.SampleMappermapred.reducer.class org.apache.oozie.example.SampleReducer
Additional Details for MapReduce.Streaming jobs
Important!
If the job type is MapReduce.Streaming, the streaming mapper and reducer classes must be specified.
In this case, the UI will prompt the user to enter mapper and reducer values on the form and will take care of addingthem to the job configuration with the appropriate names. If using the python client, however, be certain to add thesevalues to the job configuration manually with the correct names:
Name Example Valueedp.streaming.mapper /bin/catedp.streaming.reducer /usr/bin/wc
Additional Details for Java jobs
Data Source objects are not used directly with Java job types. Instead, any input or output paths must be specified asarguments at job launch either explicitly or by reference as described in Using Data Source References as Arguments.Using data source references is the recommended way to pass paths to Java jobs.
If configuration values are specified, they must be added to the job’s Hadoop configuration at runtime. There are twomethods of doing this. The simplest way is to use the edp.java.adapt_for_oozie option described below. The othermethod is to use the code from this example to explicitly load the values.
The following special configuration values are read by sahara and affect how Java jobs are run:
• edp.java.main_class (required) Specifies the full name of the class containing main(String[]args)
A Java job will execute the main method of the specified main class. Any arguments set during job launch willbe passed to the program through the args array.
• oozie.libpath (optional) Specifies configuration values for the Oozie share libs, these libs can be sharedby different workflows
• edp.java.java_opts (optional) Specifies configuration values for the JVM
• edp.java.adapt_for_oozie (optional) Specifies that sahara should perform special handling of config-uration values and exit conditions. The default is False.
If this configuration value is set to True, sahara will modify the job’s Hadoop configuration before invokingthe specified main method. Any configuration values specified during job launch (excluding those beginningwith edp.) will be automatically set in the job’s Hadoop configuration and will be available through standardmethods.
2.17. Elastic Data Processing (EDP) 53

Sahara, Release 6.0.0.0b2.dev3
Secondly, setting this option to True ensures that Oozie will handle program exit conditions correctly.
At this time, the following special configuration value only applies when running jobs on a cluster generated by theCloudera plugin with the Enable Hbase Common Lib cluster config set to True (the default value):
• edp.hbase_common_lib (optional) Specifies that a common Hbase lib generated by sahara in HDFS beadded to the oozie.libpath. This for use when an Hbase application is driven from a Java job. Default is False.
The edp-wordcount example bundled with sahara shows how to use configuration values, arguments, and swift datapaths in a Java job type. Note that the example does not use the edp.java.adapt_for_oozie option but includes thecode to load the configuration values explicitly.
Additional Details for Shell jobs
A shell job will execute the script specified as main, and will place any files specified as libs in the same workingdirectory (on both the filesystem and in HDFS). Command line arguments may be passed to the script through theargs array, and any params values will be passed as environment variables.
Data Source objects are not used directly with Shell job types but data source references may be used as described inUsing Data Source References as Arguments.
The edp-shell example bundled with sahara contains a script which will output the executing user to a file specifiedby the first command line argument.
Additional Details for Spark jobs
Data Source objects are not used directly with Spark job types. Instead, any input or output paths must be specified asarguments at job launch either explicitly or by reference as described in Using Data Source References as Arguments.Using data source references is the recommended way to pass paths to Spark jobs.
Spark jobs use some special configuration values:
• edp.java.main_class (required) Specifies the full name of the class containing the Java or Scala mainmethod:
– main(String[] args) for Java
– main(args: Array[String] for Scala
A Spark job will execute the main method of the specified main class. Any arguments set during job launchwill be passed to the program through the args array.
• edp.spark.adapt_for_swift (optional) If set to True, instructs sahara to modify the job’s Hadoopconfiguration so that swift paths may be accessed. Without this configuration value, swift paths will not beaccessible to Spark jobs. The default is False.
• edp.spark.driver.classpath (optional) If set to empty string sahara will use default classpath forthe cluster during job execution. Otherwise this will override default value for the cluster for particular jobexecution.
The edp-spark example bundled with sahara contains a Spark program for estimating Pi.
2.17.5 Special Sahara URLs
Sahara uses custom URLs to refer to objects stored in swift, in manila, or in the sahara internal database. These URLsare not meant to be used outside of sahara.
Sahara swift URLs passed to running jobs as input or output sources include a ”.sahara” suffix on the container, forexample:
54 Chapter 2. User guide

Sahara, Release 6.0.0.0b2.dev3
swift://container.sahara/object
You may notice these swift URLs in job logs, however, you do not need to add the suffix to the containers yourself.sahara will add the suffix if necessary, so when using the UI or the python client you may write the above URL simplyas:
swift://container/object
Sahara internal database URLs have the form:
internal-db://sahara-generated-uuid
This indicates a file object in the sahara database which has the given uuid as a key.
Manila NFS filesystem reference URLS take the form:
manila://share-uuid/path
This format should be used when referring to a job binary or a data source stored in a manila NFS share.
2.18 EDP Requirements
The OpenStack installation and the cluster launched from sahara must meet the following minimum requirements inorder for EDP to function:
2.18.1 OpenStack Services
When a Hadoop job is executed, binaries are first uploaded to a cluster node and then moved from the node localfilesystem to HDFS. Therefore, there must be an instance of HDFS available to the nodes in the sahara cluster.
If the swift service is not running in the OpenStack installation:
• Job binaries may only be stored in the sahara internal database
• Data sources require a long-running HDFS
If the swift service is running in the OpenStack installation:
• Job binaries may be stored in swift or the sahara internal database
• Data sources may be in swift or a long-running HDFS
2.18.2 Cluster Processes
Requirements for EDP support depend on the EDP job type and plugin used for the cluster. For example a Vanillasahara cluster must run at least one instance of these processes to support EDP:
• For Hadoop version 1:
– jobtracker
– namenode
– oozie
– tasktracker
– datanode
• For Hadoop version 2:
– namenode
2.18. EDP Requirements 55

Sahara, Release 6.0.0.0b2.dev3
– datanode
– resourcemanager
– nodemanager
– historyserver
– oozie
– spark history server
2.19 EDP Technical Considerations
There are several things in EDP which require attention in order to work properly. They are listed on this page.
2.19.1 Transient Clusters
EDP allows running jobs on transient clusters. In this case the cluster is created specifically for the job and is shutdown automatically once the job is finished.
Two config parameters control the behaviour of periodic clusters:
• periodic_enable - if set to ‘false’, sahara will do nothing to a transient cluster once the job it was created for iscompleted. If it is set to ‘true’, then the behaviour depends on the value of the next parameter.
• use_identity_api_v3 - set it to ‘false’ if your OpenStack installation does not provide keystone API v3. In thatcase sahara will not terminate unneeded clusters. Instead it will set their state to ‘AwaitingTermination’ meaningthat they could be manually deleted by a user. If the parameter is set to ‘true’, sahara will itself terminate thecluster. The limitation is caused by lack of ‘trusts’ feature in Keystone API older than v3.
If both parameters are set to ‘true’, sahara works with transient clusters in the following manner:
1. When a user requests for a job to be executed on a transient cluster, sahara creates such a cluster.
2. Sahara drops the user’s credentials once the cluster is created but prior to that it creates a trust allowing it tooperate with the cluster instances in the future without user credentials.
3. Once a cluster is not needed, sahara terminates its instances using the stored trust. sahara drops the trust afterthat.
API
2.20 Sahara REST API v1.1
2.20.1 1 General API information
This section contains base info about the sahara REST API design.
1.1 Authentication and Authorization
The sahara API uses the OpenStack Identity service as the default authentication service. When the Identity service isenabled, users who submit requests to the sahara service must provide an authentication token in the X-Auth-Tokenrequest header. A user can obtain the token by authenticating to the Identity service endpoint. For more informationabout the Identity service, please see the keystone project developer documentation
56 Chapter 2. User guide

Sahara, Release 6.0.0.0b2.dev3
With each request, a user must specify the keystone project in the url path, for example: ‘/v1.1/{project_id}/clusters’.Sahara will perform the requested operation in the specified project using the provided credentials. Therefore, clustersmay be created and managed only within projects to which the user has access.
1.2 Request / Response Types
The sahara API supports the JSON data serialization format. This means that for requests that contain a body, theContent-Type header must be set to the MIME type value application/json. Also, clients should acceptJSON serialized responses by specifying the Accept header with the MIME type value application/json oradding the .json extension to the resource name. The default response format is application/json if the clientdoes not specify an Accept header or append the .json extension in the URL path.
Example:
GET /v1.1/{project_id}/clusters.json
or
GET /v1.1/{project_id}/clustersAccept: application/json
1.3 Navigation by response
Sahara API supports delivering response data by pages. User can pass two parameters in API GET requests whichreturn an array of objects. The parameters are:
limit - maximum number of objects in response data. This parameter must be a positive integer number.
marker - ID of the last element on the list which won’t be in response.
Example: Get 15 clusters after cluster with id=d62ad147-5c10-418c-a21a-3a6597044f29:
GET /v1.1/{project_id}/clusters?limit=15&marker=d62ad147-5c10-418c-a21a-3a6597044f29
For convenience, response contains markers of previous and following pages which are named ‘prev’ and ‘next’ fields.Also there is sort_by parameter for sorting objects. Sahara API supports ascending and descending sorting.
Examples: Sort clusters by name:
GET /v1.1/{project_id}/clusters?sort_by=name
Sort clusters by date of creation in descending order:
GET /v1.1/{project_id}/clusters?sort_by=-created_at
1.4 Faults
The sahara API returns an error response if a failure occurs while processing a request. Sahara uses only standardHTTP error codes. 4xx errors indicate problems in the particular request being sent from the client and 5xx errorsindicate server-side problems.
The response body will contain richer information about the cause of the error. An error response follows the formatillustrated by the following example:
HTTP/1.1 400 BAD REQUESTContent-type: application/jsonContent-length: 126
2.20. Sahara REST API v1.1 57

Sahara, Release 6.0.0.0b2.dev3
{"error_name": "CLUSTER_NAME_ALREADY_EXISTS","error_message": "Cluster with name 'test-cluster' already exists","error_code": 400
}
The error_code attribute is an HTTP response code. The error_name attribute indicates the generic errortype without any concrete ids or names, etc. The last attribute, error_message, contains a human readable errordescription.
2.20.2 2 API
• Sahara REST API Reference (OpenStack API Complete Reference - DataProcessing)
Miscellaneous
2.21 Requirements for Guests
Sahara manages guests of various platforms (for example Ubuntu, Fedora, RHEL, and CentOS) with various versionsof the Hadoop ecosystem projects installed. There are common requirements for all guests, and additional require-ments based on the plugin that is used for cluster deployment.
2.21.1 Common Requirements
• The operating system must be Linux
• cloud-init must be installed
• ssh-server must be installed
– if a firewall is active it must allow connections on port 22 to enable ssh
2.21.2 Vanilla Plugin Requirements
If the Vanilla Plugin is used for cluster deployment the guest is required to have
• ssh-client installed
• Java (version >= 6)
• Apache Hadoop installed
• ‘hadoop’ user created
See Swift Integration for information on using Swift with your sahara cluster (for EDP support Swift integration iscurrently required).
To support EDP, the following components must also be installed on the guest:
• Oozie version 4 or higher
• mysql
• hive
See Building Images for Vanilla Plugin for instructions on building images for this plugin.
58 Chapter 2. User guide

Sahara, Release 6.0.0.0b2.dev3
2.21.3 Hortonworks Plugin Requirements
This plugin does not have any additional requirements. Currently, only the CentOS Linux and Ubuntu distributionsare supported but other distributions will be supported in the future. To speed up provisioning, the HDP packages canbe pre-installed on the image used. The packages’ versions depend on the HDP version being used.
2.21.4 Cloudera Plugin Requirements
Cloudera Plugin does not have any additional requirements, just build a CDH image to deploy the cluster.
See Building Images for Cloudera Plugin for instructions on building images for this plugin.
2.22 Swift Integration
Hadoop and Swift integration are the essential continuation of the Hadoop/OpenStack marriage. The key componentto making this marriage work is the Hadoop Swift filesystem implementation. Although this implementation has beenmerged into the upstream Hadoop project, Sahara maintains a version with the most current features enabled.
• The original Hadoop patch can be found at https://issues.apache.org/jira/browse/HADOOP-8545
• The most current Sahara maintained version of this patch can be found in the Sahara Extra repositoryhttps://github.com/openstack/sahara-extra
• The latest compiled version of the jar for this component can be downloaded fromhttp://tarballs.openstack.org/sahara/dist/hadoop-openstack/master/
Now the latest version of this jar (which uses Keystone API v3) is used in the plugins’ images automatically duringbuild of these images. But for Ambari plugin we need to explicitly put this jar into /opt directory of the base imagebefore cluster launching.
2.22.1 Hadoop patching
You may build the jar file yourself by choosing the latest patch from the Sahara Extra repository andusing Maven to build with the pom.xml file provided. Or you may get the latest jar pre-built athttp://tarballs.openstack.org/sahara/dist/hadoop-openstack/master/
You will need to put this file into the hadoop libraries (e.g. /usr/lib/share/hadoop/lib, it depends on the plugin whichyou use) on each ResourceManager and NodeManager node (for Hadoop 2.x) in the cluster.
2.22.2 Hadoop configurations
In general, when Sahara runs a job on a cluster it will handle configuring the Hadoop installation. In cases where auser might require more in-depth configuration all the data is set in the core-site.xml file on the cluster instancesusing this template:
<property><name>${name} + ${config}</name><value>${value}</value><description>${not mandatory description}</description>
</property>
There are two types of configs here:
1. General. The ${name} in this case equals to fs.swift. Here is the list of ${config}:
2.22. Swift Integration 59

Sahara, Release 6.0.0.0b2.dev3
• .impl - Swift FileSystem implementation. The ${value} isorg.apache.hadoop.fs.swift.snative.SwiftNativeFileSystem
• .connect.timeout - timeout for all connections by default: 15000
• .socket.timeout - how long the connection waits for responses from servers. by default: 60000
• .connect.retry.count - connection retry count for all connections. by default: 3
• .connect.throttle.delay - delay in millis between bulk (delete, rename, copy operations). bydefault: 0
• .blocksize - blocksize for filesystem. By default: 32Mb
• .partsize - the partition size for uploads. By default: 4608*1024Kb
• .requestsize - request size for reads in KB. By default: 64Kb
2. Provider-specific. The patch for Hadoop supports different cloud providers. The ${name} in this case equalsto fs.swift.service.${provider}.
Here is the list of ${config}:
• .auth.url - authorization URL
• .auth.endpoint.prefix - prefix for the service url, e.g. /AUTH_
• .tenant - project name
• .username
• .password
• .domain.name - Domains can be used to specify users who are not in the project specified.
• .domain.id - You can also specify domain using id.
• .trust.id - Trusts are optionally used to scope the authentication tokens of the supplied user.
• .http.port
• .https.port
• .region - Swift region is used when cloud has more than one Swift installation. If region param is notset first region from Keystone endpoint list will be chosen. If region param not found exception will bethrown.
• .location-aware - turn On location awareness. Is false by default
• .apikey
• .public
2.22.3 Example
For this example it is assumed that you have setup a Hadoop instance with a valid configuration and the Swift filesystemcomponent. Furthermore there is assumed to be a Swift container named integration holding an object namedtemp, as well as a Keystone user named admin with a password of swordfish.
The following example illustrates how to copy an object to a new location in the same container. We will use Hadoop’sdistcp command (http://hadoop.apache.org/docs/r0.19.0/distcp.html) to accomplish the copy. Note that the serviceprovider for our Swift access is sahara, and that we will not need to specify the project of our Swift container as itwill be provided in the Hadoop configuration.
60 Chapter 2. User guide
Sahara, Release 6.0.0.0b2.dev3
Swift paths are expressed in Hadoop according to the following template:swift://${container}.${provider}/${object}. For our example source this will appear asswift://integration.sahara/temp.
Let’s run the job:
$ hadoop distcp -D fs.swift.service.sahara.username=admin \-D fs.swift.service.sahara.password=swordfish \swift://integration.sahara/temp swift://integration.sahara/temp1
After that just confirm that temp1 has been created in our integration container.
2.22.4 Limitations
Note: Please note that container names should be a valid URI.
2.23 Building Images for Vanilla Plugin
In this document you will find instruction on how to build Ubuntu, Fedora, and CentOS images with Apache Hadoopversion 2.x.x.
As of now the vanilla plugin works with images with pre-installed versions of Apache Hadoop. To simplify the taskof building such images we use Disk Image Builder.
Disk Image Builder builds disk images using elements. An element is a particular set of code that alters how the imageis built, or runs within the chroot to prepare the image.
Elements for building vanilla images are stored in the Sahara image elements repository
Note: Sahara requires images with cloud-init package installed:
• For Fedora
• For Ubuntu 14
• For CentOS 6
• For CentOS 7
To create vanilla images follow these steps:
1. Clone repository “https://github.com/openstack/sahara-image-elements” locally.
2. Use tox to build images.
You can run the command below in sahara-image-elements directory to build images. By default this script willattempt to create cloud images for all versions of supported plugins and all operating systems (subset of Ubuntu,Fedora, and CentOS depending on plugin).
tox -e venv -- sahara-image-create -u
If you want to build Vanilla 2.7.1 image with centos 7 just execute:
tox -e venv -- sahara-image-create -p vanilla -v 2.7.1 -i centos7
Tox will create a virtualenv and install required python packages in it, clone the repositories“https://github.com/openstack/diskimage-builder” and “https://github.com/openstack/sahara-image-elements”and export necessary parameters.
2.23. Building Images for Vanilla Plugin 61
Sahara, Release 6.0.0.0b2.dev3
• DIB_HADOOP_VERSION - version of Hadoop to install
• JAVA_DOWNLOAD_URL - download link for JDK (tarball or bin)
• OOZIE_DOWNLOAD_URL - download link for OOZIE (we have built Oozie libs here:http://sahara-files.mirantis.com/oozie-4.2.0-hadoop-2.7.1.tar.gz)
• SPARK_DOWNLOAD_URL - download link for Spark
• HIVE_VERSION - version of Hive to install (currently supports only 0.11.0)
• ubuntu_image_name
• fedora_image_name
• DIB_IMAGE_SIZE - parameter that specifies a volume of hard disk of instance. You need to specify itonly for Fedora because Fedora doesn’t use all available volume
• DIB_COMMIT_ID - latest commit id of diskimage-builder project
• SAHARA_ELEMENTS_COMMIT_ID - latest commit id of sahara-image-elements project
NOTE: If you don’t want to use default values, you should set your values of parameters.
Then it will create required cloud images using image elements that install all the necessary packages andconfigure them. You will find created images in the parent directory.
Note: Disk Image Builder will generate QCOW2 images, used with the default OpenStack Qemu/KVM hypervisors.If your OpenStack uses a different hypervisor, the generated image should be converted to an appropriate format.
VMware Nova backend requires VMDK image format. You may use qemu-img utility to convert a QCOW2 image toVMDK.
qemu-img convert -O vmdk <original_image>.qcow2 <converted_image>.vmdk
For finer control of diskimage-create.sh see the official documentation
2.24 Building Images for Cloudera Plugin
In this document you will find instructions on how to build Ubuntu and CentOS images with Cloudera Express (nowonly versions {5.0.0, 5.3.0 5.4.0, 5.5.0, 5.7.x} are supported).
To simplify the task of building such images we use Disk Image Builder.
Disk Image Builder builds disk images using elements. An element is a particular set of code that alters how the imageis built, or runs within the chroot to prepare the image.
Elements for building Cloudera images are stored in Sahara extra repository
Note: Sahara requires images with cloud-init package installed:
• For CentOS 6
• For CentOS 7
• For Ubuntu 14
To create cloudera images follow these steps:
1. Clone repository “https://github.com/openstack/sahara-image-elements” locally.
62 Chapter 2. User guide

Sahara, Release 6.0.0.0b2.dev3
2. Use tox to build images.
You can run “tox -e venv – sahara-image-create” command in sahara-image-elements directory to build images.By default this script will attempt to create cloud images for all versions of supported plugins and all operatingsystems (subset of Ubuntu, Fedora, and CentOS depending on plugin). To only create Cloudera images, youshould use the “-p cloudera” parameter in the command line. If you want to create the image only for a specificoperating system, you should use the “-i ubuntu|centos|centos7” parameter to assign the operating system (thecloudera plugin only supports Ubuntu and Centos). If you want to create the image only for a specific Clouderaversion, you should use the “-v 5.0|5.3|5.4|5.5|5.7” parameter to assign the version. Note that Centos 7 can onlybe used with CDH 5.5 and CDH 5.7. Below is an example to create Cloudera images for both Ubuntu andCentOS with Cloudera Express 5.5.0 version.
tox -e venv -- sahara-image-create -p cloudera -v 5.5
If you want to create only an Ubuntu image, you may use following example for that:
tox -e venv -- sahara-image-create -p cloudera -i ubuntu -v 5.5
For CDH 5.7 we support minor versions. If you want to build a minor version just exportDIB_CDH_MINOR_VERSION before sahara-image-create launch, e.g.:
export DIB_CDH_MINOR_VERSION=5.7.1
NOTE: If you don’t want to use default values, you should explicitly set the values of your required parameters.
The script will create required cloud images using image elements that install all the necessary packages andconfigure them. You will find the created images in the parent directory.
Note: Disk Image Builder will generate QCOW2 images, used with the default OpenStack Qemu/KVM hypervisors.If your OpenStack uses a different hypervisor, the generated image should be converted to an appropriate format.
The VMware Nova backend requires the VMDK image format. You may use qemu-img utility to convert a QCOW2image to VMDK.
qemu-img convert -O vmdk <original_image>.qcow2 <converted_image>.vmdk
For finer control of diskimage-create.sh see the official documentation
2.24. Building Images for Cloudera Plugin 63

Sahara, Release 6.0.0.0b2.dev3
64 Chapter 2. User guide

CHAPTER 3
Developer Guide
Programming HowTos and Tutorials
3.1 Development Guidelines
3.1.1 Coding Guidelines
For all the Python code in Sahara we have a rule - it should pass PEP 8. All Bash code should pass bashate.
To check your code against PEP 8 and bashate run:
$ tox -e pep8
Note: For more details on coding guidelines see file HACKING.rst in the root of Sahara repo.
3.1.2 Static analysis
The static analysis checks are optional in Sahara. but they are still very useful. The gate job will inform you ifthe number of static analysis warnings has increased after your change. We recommend to always check the staticwarnings.
To run the check commit yor change first and execute the following command:
$ tox -e pylint
3.1.3 Modification of Upstream Files
We never modify upstream files in Sahara. Any changes in upstream files should be made in the upstream projectand then merged back in to Sahara. This includes whitespace changes, comments, and typos. Any change requestscontaining upstream file modifications are almost certain to receive lots of negative reviews. Be warned.
Examples of upstream files are default xml configuration files used to configure Hadoop, or code imported from theOpenStack Oslo project. The xml files will usually be found in resource directories with an accompanying READMEfile that identifies where the files came from. For example:
65
Sahara, Release 6.0.0.0b2.dev3
$ pwd/home/me/sahara/sahara/plugins/vanilla/v2_7_1/resources
$ lscore-default.xml hdfs-default.xml oozie-default.xml README.rstcreate_oozie_db.sql mapred-default.xml post_conf.template yarn-default.xml
3.1.4 Testing Guidelines
Sahara has a suite of tests that are run on all submitted code, and it is recommended that developers execute the teststhemselves to catch regressions early. Developers are also expected to keep the test suite up-to-date with any submittedcode changes.
Unit tests are located at sahara/tests/unit.
Sahara’s suite of unit tests can be executed in an isolated environment with Tox. To execute the unit tests run thefollowing from the root of Sahara repo:
$ tox -e py27
3.1.5 Documentation Guidelines
All Sahara docs are written using Sphinx / RST and located in the main repo in the doc directory. You can add or editpages here to update the http://docs.openstack.org/developer/sahara site.
The documentation in docstrings should follow the PEP 257 conventions (as mentioned in the PEP 8 guidelines).
More specifically:
1. Triple quotes should be used for all docstrings.
2. If the docstring is simple and fits on one line, then just use one line.
3. For docstrings that take multiple lines, there should be a newline after the opening quotes, and before the closingquotes.
4. Sphinx is used to build documentation, so use the restructured text markup to designate parameters, returnvalues, etc.
Run the following command to build docs locally.
$ tox -e docs
After it you can access generated docs in doc/build/ directory, for example, main page -doc/build/html/index.html.
To make the doc generation process faster you can use:
$ SPHINX_DEBUG=1 tox -e docs
To avoid sahara reinstallation to virtual env each time you want to rebuild docs you can use the following command(it can be executed only after running tox -e docs first time):
$ SPHINX_DEBUG=1 .tox/docs/bin/python setup.py build_sphinx
Note: For more details on documentation guidelines see HACKING.rst in the root of the Sahara repo.
66 Chapter 3. Developer Guide
Sahara, Release 6.0.0.0b2.dev3
3.1.6 Event log Guidelines
Currently Sahara keeps useful information about provisioning for each cluster. Cluster provisioning can be repre-sented as a linear series of provisioning steps, which are executed one after another. Each step may consist of severalevents. The number of events depends on the step and the number of instances in the cluster. Also each event cancontain information about its cluster, instance, and node group. In case of errors, events contain useful informationfor identifying the error. Additionally, each exception in sahara contains a unique identifier that allows the user to findextra information about that error in the sahara logs. You can see an example of provisioning progress informationhere: http://developer.openstack.org/api-ref/data-processing/#event-log
This means that if you add some important phase for cluster provisioning to the sahara code, it’s recommended to adda new provisioning step for this phase. This will allow users to use event log for handling errors during this phase.
Sahara already has special utils for operating provisioning steps and events in the modulesahara/utils/cluster_progress_ops.py.
Note: It’s strictly recommended not to use conductor event log ops directly to assign events and operate provi-sioning steps.
Note: You should not start a new provisioning step until the previous step has successfully completed.
Note: It’s strictly recommended to use event_wrapper for event handling.
3.1.7 OpenStack client usage guidelines
The sahara project uses several OpenStack clients internally. These clients are all wrapped by utility functions whichmake using them more convenient. When developing sahara, if you need to use an OpenStack client you should checkthe sahara.utils.openstack package for the appropriate one.
When developing new OpenStack client interactions in sahara, it is important to understand thesahara.service.sessions package and the usage of the keystone Session and auth plugin ob-jects (for example, Token and Password). Sahara is migrating all clients to use this authentica-tion methodology, where available. For more information on using sessions with keystone, please seehttp://docs.openstack.org/developer/keystoneauth/using-sessions.html
3.1.8 Storing sensitive information
During the course of development, there is often cause to store sensitive information (for example, login credentials)in the records for a cluster, job, or some other record. Storing secret information this way is not safe. To mitigate therisk of storing this information, sahara provides access to the OpenStack Key Manager service (implemented by thebarbican project) through the castellan library.
To utilize the external key manager, the functions in sahara.service.castellan.utils are provided aswrappers around the castellan library. These functions allow a developer to store, retrieve, and delete secrets from themanager. Secrets that are managed through the key manager have an identifier associated with them. These identifiersare considered safe to store in the database.
The following are some examples of working with secrets in the sahara codebase. These examples are consideredbasic, any developer wishing to learn more about the advanced features of storing secrets should look to the code anddocstrings contained in the sahara.service.castellan module.
3.1. Development Guidelines 67

Sahara, Release 6.0.0.0b2.dev3
Storing a secret
from sahara.service.castellan import utils as key_manager
password = 'SooperSecretPassword'identifier = key_manager.store_secret(password)
Retrieving a secret
from sahara.service.castellan import utils as key_manager
password = key_manager.get_secret(identifier)
Deleting a secret
from sahara.service.castellan import utils as key_manager
key_manager.delete_secret(identifier)
When storing secrets through this interface it is important to remember that if an external key manager is being used,each stored secret creates an entry in an external service. When you are finished using the secret it is good practice todelete it, as not doing so may leave artifacts in those external services.
For more information on configuring sahara to use the OpenStack Key Manager service, see External key managerusage.
3.2 Setting Up a Development Environment
This page describes how to setup a Sahara development environment by either installing it as a part of DevStack orpointing a local running instance at an external OpenStack. You should be able to debug and test your changes withouthaving to deploy Sahara.
3.2.1 Setup a Local Environment with Sahara inside DevStack
See the main article.
3.2.2 Setup a Local Environment with an external OpenStack
1. Install prerequisites
On OS X Systems:
# we actually need pip, which is part of python package$ brew install python mysql postgresql rabbitmq$ pip install virtualenv tox
On Ubuntu:
$ sudo apt-get update$ sudo apt-get install git-core python-dev python-virtualenv gcc libpq-dev libmysqlclient-dev python-pip rabbitmq-server$ sudo pip install tox
On Red Hat and related distributions (CentOS/Fedora/RHEL/Scientific Linux):
68 Chapter 3. Developer Guide

Sahara, Release 6.0.0.0b2.dev3
$ sudo yum install git-core python-devel python-virtualenv gcc python-pip mariadb-devel postgresql-devel erlang$ sudo pip install tox$ sudo wget http://www.rabbitmq.com/releases/rabbitmq-server/v3.2.2/rabbitmq-server-3.2.2-1.noarch.rpm$ sudo rpm --import http://www.rabbitmq.com/rabbitmq-signing-key-public.asc$ sudo yum install rabbitmq-server-3.2.2-1.noarch.rpm
On openSUSE-based distributions (SLES 12, openSUSE, Factory or Tumbleweed):
$ sudo zypper in gcc git libmysqlclient-devel postgresql-devel python-devel python-pip python-tox python-virtualenv
2. Grab the code
$ git clone git://github.com/openstack/sahara.git$ cd sahara
3. Generate Sahara sample using tox
tox -e genconfig
4. Create config file from the sample
$ cp ./etc/sahara/sahara.conf.sample ./etc/sahara/sahara.conf
5. Look through the sahara.conf and modify parameter values as needed For details see Sahara Configuration Guide
6. Create database schema
$ tox -e venv -- sahara-db-manage --config-file etc/sahara/sahara.conf upgrade head
7. To start Sahara API and Engine processes call
$ tox -e venv -- sahara-api --config-file etc/sahara/sahara.conf --debug$ tox -e venv -- sahara-engine --config-file etc/sahara/sahara.conf --debug
3.2.3 Setup local OpenStack dashboard with Sahara plugin
Sahara UI Dev Environment Setup
This page describes how to setup Horizon for developing Sahara by either installing it as part of DevStack with Saharaor installing it in an isolated environment and running from the command line.
Install as a part of DevStack
See the DevStack guide for more information on installing and configuring DevStack with Sahara.
Sahara UI can be installed as a DevStack plugin by adding the following line to your local.conf file
# Enable sahara-dashboardenable_plugin sahara-dashboard git://git.openstack.org/openstack/sahara-dashboard
Isolated Dashboard for Sahara
These installation steps serve two purposes:
1. Setup a dev environment
2. Setup an isolated Dashboard for Sahara
3.2. Setting Up a Development Environment 69

Sahara, Release 6.0.0.0b2.dev3
Note The host where you are going to perform installation has to be able to connect to all OpenStack endpoints. Youcan list all available endpoints using the following command:
$ openstack endpoint list
You can list the registered services with this command:
$ openstack service list
Sahara service should be present in keystone service list with service type data-processing
1. Install prerequisites
$ sudo apt-get update$ sudo apt-get install git-core python-dev gcc python-setuptools \
python-virtualenv node-less libssl-dev libffi-dev libxslt-dev
On Ubuntu 12.10 and higher you have to install the following lib as well:
$ sudo apt-get install nodejs-legacy
2. Checkout Horizon from git and switch to your version of OpenStack
Here is an example:
$ git clone https://git.openstack.org/cgit/openstack/horizon/ {HORIZON_DIR}
Then install the virtual environment:
$ python {HORIZON_DIR}/tools/install_venv.py
3. Create a local_settings.py file
$ cp {HORIZON_DIR}/openstack_dashboard/local/local_settings.py.example{HORIZON_DIR}/openstack_dashboard/local/local_settings.py
4. Modify {HORIZON_DIR}/openstack_dashboard/local/local_settings.py
Set the proper values for host and url variables:
OPENSTACK_HOST = "ip of your controller"
If you are using Nova-Network with auto_assign_floating_ip=True add the following param-eter:
SAHARA_AUTO_IP_ALLOCATION_ENABLED = True
5. Clone sahara-dashboard repository and checkout the desired branch
$ git clone https://git.openstack.org/cgit/openstack/sahara-dashboard/ \{SAHARA_DASHBOARD_DIR}
6. Copy plugin-enabling files from sahara-dashboard repository to horizon
$ cp -a {SAHARA_DASHBOARD_DIR}/sahara_dashboard/enabled/* {HORIZON_DIR}/openstack_dashboard/local/enabled/
7. Install sahara-dashboard project into your horizon virtualenv in editable mode
$ source {HORIZON_DIR}/.venv/bin/activate$ pip install -e {SAHARA_DASHBOARD_DIR}
8. Start Horizon
70 Chapter 3. Developer Guide

Sahara, Release 6.0.0.0b2.dev3
$ source {HORIZON_DIR}/.venv/bin/activate$ python {HORIZON_DIR}/manage.py runserver 0.0.0.0:8080
This will start Horizon in debug mode. That means the logs will be written to console and if any exceptionshappen, you will see the stack-trace rendered as a web-page.
Debug mode can be disabled by changing DEBUG=True to False in local_settings.py. In thatcase Horizon should be started slightly differently, otherwise it will not serve static files:
$ source {HORIZON_DIR}/.venv/bin/activate$ python {HORIZON_DIR}/manage.py runserver --insecure 0.0.0.0:8080
Note: It is not recommended to use Horizon in this mode for production.
3.2.4 Tips and tricks for dev environment
1. Pip speedup
Add the following lines to ~/.pip/pip.conf
[global]download-cache = /home/<username>/.pip/cacheindex-url = <mirror url>
Note that the ~/.pip/cache folder should be created manually.
2. Git hook for fast checks
Just add the following lines to .git/hooks/pre-commit and do chmod +x for it.
#!/bin/sh# Run fast checks (PEP8 style check and PyFlakes fast static analysis)tox -epep8
You can add also other checks for pre-push, for example pylint (see below) and tests (tox -epy27).
3. Running static analysis (PyLint)
Just run the following command
tox -e pylint
3.3 Setup DevStack
DevStack can be installed on Fedora, Ubuntu, and CentOS. For supported versions see DevStack documentation
We recommend that you install DevStack in a VM, rather than on your main system. That way you may avoidcontamination of your system. You may find hypervisor and VM requirements in the next section. If you still want toinstall DevStack on your baremetal system, just skip the next section and read further.
3.3.1 Start VM and set up OS
In order to run DevStack in a local VM, you need to start by installing a guest with Ubuntu 14.04 server. Downloadan image file from Ubuntu’s web site and create a new guest from it. Virtualization solution must support nested vir-
3.3. Setup DevStack 71

Sahara, Release 6.0.0.0b2.dev3
tualization. Without nested virtualization VMs running inside the DevStack will be extremely slow lacking hardwareacceleration, i.e. you will run QEMU VMs without KVM.
On Linux QEMU/KVM supports nested virtualization, on Mac OS - VMware Fusion. VMware Fusion requiresadjustments to run VM with fixed IP. You may find instructions which can help below.
Start a new VM with Ubuntu Server 14.04. Recommended settings:
• Processor - at least 2 cores
• Memory - at least 8GB
• Hard Drive - at least 60GB
When allocating CPUs and RAM to the DevStack, assess how big clusters you want to run. A single Hadoop VMneeds at least 1 cpu and 1G of RAM to run. While it is possible for several VMs to share a single cpu core, rememberthat they can’t share the RAM.
After you installed the VM, connect to it via SSH and proceed with the instructions below.
3.3.2 Install DevStack
The instructions assume that you’ve decided to install DevStack into Ubuntu 14.04 system.
1. Clone DevStack:
$ sudo apt-get install git-core$ git clone https://git.openstack.org/openstack-dev/devstack.git
2. Create the file local.conf in devstack directory with the following content:
[[local|localrc]]ADMIN_PASSWORD=novaMYSQL_PASSWORD=novaRABBIT_PASSWORD=novaSERVICE_PASSWORD=$ADMIN_PASSWORDSERVICE_TOKEN=nova
# Enable Swiftenable_service s-proxy s-object s-container s-account
SWIFT_HASH=66a3d6b56c1f479c8b4e70ab5c2000f5SWIFT_REPLICAS=1SWIFT_DATA_DIR=$DEST/data
# Force checkout prerequisites# FORCE_PREREQ=1
# keystone is now configured by default to use PKI as the token format# which produces huge tokens.# set UUID as keystone token format which is much shorter and easier to# work with.KEYSTONE_TOKEN_FORMAT=UUID
# Change the FLOATING_RANGE to whatever IPs VM is working in.# In NAT mode it is the subnet VMware Fusion provides, in bridged mode# it is your local network. But only use the top end of the network by# using a /27 and starting at the 224 octet.FLOATING_RANGE=192.168.55.224/27
72 Chapter 3. Developer Guide

Sahara, Release 6.0.0.0b2.dev3
# Enable loggingSCREEN_LOGDIR=$DEST/logs/screen
# Set ``OFFLINE`` to ``True`` to configure ``stack.sh`` to run cleanly# without Internet access. ``stack.sh`` must have been previously run# with Internet access to install prerequisites and fetch repositories.# OFFLINE=True
# Enable saharaenable_plugin sahara git://git.openstack.org/openstack/sahara
In cases where you need to specify a git refspec (branch, tag, or commit hash) for the sahara in-tree devstack plugin(or sahara repo), it should be appended to the git repo URL as follows:
enable_plugin sahara git://git.openstack.org/openstack/sahara <some_git_refspec>
3. Sahara can send notifications to Ceilometer, if Ceilometer is enabled. If you want to enable Ceilometer add thefollowing lines to the local.conf file:
enable_plugin ceilometer git://git.openstack.org/openstack/ceilometer
4. Start DevStack:
$ ./stack.sh
5. Once the previous step is finished Devstack will print a Horizon URL. Navigate to this URL and login withlogin “admin” and password from local.conf.
6. Congratulations! You have OpenStack running in your VM and you’re ready to launch VMs inside that VM. :)
3.3.3 Managing sahara in DevStack
If you install DevStack with sahara included you can rejoin screen with the rejoin-stack.sh command andswitch to the sahara tab. Here you can manage the sahara service as other OpenStack services. Sahara source codeis located at $DEST/sahara which is usually /opt/stack/sahara.
3.3.4 Setting fixed IP address for VMware Fusion VM
1. Open file /Library/Preferences/VMware Fusion/vmnet8/dhcpd.conf
2. There is a block named “subnet”. It might look like this:
subnet 192.168.55.0 netmask 255.255.255.0 {range 192.168.55.128 192.168.55.254;
3. You need to pick an IP address outside of that range. For example - 192.168.55.20
4. Copy VM MAC address from VM settings->Network->Advanced
5. Append the following block to file dhcpd.conf (don’t forget to replace VM_HOSTNAME andVM_MAC_ADDRESS with actual values):
host VM_HOSTNAME {hardware ethernet VM_MAC_ADDRESS;fixed-address 192.168.55.20;
}
6. Now quit all the VMware Fusion applications and restart vmnet:
3.3. Setup DevStack 73

Sahara, Release 6.0.0.0b2.dev3
$ sudo /Applications/VMware\ Fusion.app/Contents/Library/vmnet-cli --stop$ sudo /Applications/VMware\ Fusion.app/Contents/Library/vmnet-cli --start
7. Now start your VM; it should have new fixed IP address.
3.4 Quickstart guide
3.4.1 Launching a cluster via Sahara CLI commands
This guide will help you setup a vanilla Hadoop cluster using a combination of OpenStack command line tools andthe sahara REST API.
1. Install sahara
• If you want to hack the code follow Setting Up a Development Environment.
OR
• If you just want to install and use sahara follow Sahara Installation Guide.
2. Identity service configuration
To use the OpenStack command line tools you should specify environment variables with the configuration details foryour OpenStack installation. The following example assumes that the Identity service is at 127.0.0.1:5000, witha user admin in the admin project whose password is nova:
$ export OS_AUTH_URL=http://127.0.0.1:5000/v2.0/$ export OS_PROJECT_NAME=admin$ export OS_USERNAME=admin$ export OS_PASSWORD=nova
3. Upload an image to the Image service
You will need to upload a virtual machine image to the OpenStack Image service. You can download pre-built imageswith vanilla Apache Hadoop installed, or build the images yourself. This guide uses the latest available Ubuntuupstream image, referred to as sahara-vanilla-latest-ubuntu.qcow2 and the latest version of vanillaplugin as an example. Sample images are available here:
Sample Images
• Download a pre-built image
Note: For the steps below, substitute <openstack_release> with the appropriate OpenStack release and<sahara_image> with the image of your choice.
$ ssh user@hostname$ wget http://sahara-files.mirantis.com/images/upstream/<openstack_release>/<sahara_image>.qcow2
Upload the image downloaded above into the OpenStack Image service:
$ openstack image create sahara-vanilla-latest-ubuntu --disk-format qcow2 \--container-format bare --file sahara-vanilla-latest-ubuntu.qcow2
+------------------+--------------------------------------+| Field | Value |
74 Chapter 3. Developer Guide

Sahara, Release 6.0.0.0b2.dev3
+------------------+--------------------------------------+| checksum | 3da49911332fc46db0c5fb7c197e3a77 || container_format | bare || created_at | 2016-02-29T10:15:04.000000 || deleted | False || deleted_at | None || disk_format | qcow2 || id | 71b9eeac-c904-4170-866a-1f833ea614f3 || is_public | False || min_disk | 0 || min_ram | 0 || name | sahara-vanilla-latest-ubuntu || owner | 057d23cddb864759bfa61d730d444b1f || properties | || protected | False || size | 1181876224 || status | active || updated_at | 2016-02-29T10:15:41.000000 || virtual_size | None |+------------------+--------------------------------------+
OR
• Build the image using: diskimage-builder script
Remember the image name or save the image ID. This will be used during the image registration with sahara. You canget the image ID using the openstack command line tool as follows:
$ openstack image list --property name=sahara-vanilla-latest-ubuntu+--------------------------------------+------------------------------+| ID | Name |+--------------------------------------+------------------------------+| 71b9eeac-c904-4170-866a-1f833ea614f3 | sahara-vanilla-latest-ubuntu |+--------------------------------------+------------------------------+
4. Register the image with the sahara image registry
Now you will begin to interact with sahara by registering the virtual machine image in the sahara image registry.
Register the image with the username ubuntu.
Note: The username will vary depending on the source image used, as follows: Ubuntu: ubuntuCentOS 7: centosCentOS 6: cloud-user Fedora: fedoraNote that the Sahara team recommends using CentOS 7 instead of CentOS6 as a base OS wherever possible; it is better supported throughout OpenStack image maintenance infrastructure andits more modern filesystem is much more appropriate for large-scale data processing. For more please see VanillaPlugin
$ openstack dataprocessing image register sahara-vanilla-latest-ubuntu \--username ubuntu
Tag the image to inform sahara about the plugin and the version with which it shall be used.
Note: For the steps below and the rest of this guide, substitute <plugin_version> with the appropriate versionof your plugin.
3.4. Quickstart guide 75

Sahara, Release 6.0.0.0b2.dev3
$ openstack dataprocessing image tags add sahara-vanilla-latest-ubuntu \--tags vanilla <plugin_version>
+-------------+--------------------------------------+| Field | Value |+-------------+--------------------------------------+| Description | None || Id | 71b9eeac-c904-4170-866a-1f833ea614f3 || Name | sahara-vanilla-latest-ubuntu || Status | ACTIVE || Tags | <plugin_version>, vanilla || Username | ubuntu |+-------------+--------------------------------------+
5. Create node group templates
Node groups are the building blocks of clusters in sahara. Before you can begin provisioning clusters you must definea few node group templates to describe node group configurations.
You can get information about available plugins with the following command:
$ openstack dataprocessing plugin list
Also you can get information about available services for a particular plugin with the plugin show command. Forexample:
$ openstack dataprocessing plugin show vanilla --plugin-version <plugin_version>+---------------------+-----------------------------------------------------------------------------------------------------------------------+| Field | Value |+---------------------+-----------------------------------------------------------------------------------------------------------------------+| Description | The Apache Vanilla plugin provides the ability to launch upstream Vanilla Apache Hadoop cluster without any || | management consoles. It can also deploy the Oozie component. || Name | vanilla || Required image tags | <plugin_version>, vanilla || Title | Vanilla Apache Hadoop || | || Service: | Available processes: || | || HDFS | datanode, namenode, secondarynamenode || Hadoop | || Hive | hiveserver || JobFlow | oozie || Spark | spark history server || MapReduce | historyserver || YARN | nodemanager, resourcemanager |+---------------------+-----------------------------------------------------------------------------------------------------------------------+
Note: These commands assume that floating IP addresses are being used. For more details on floating IP please seeFloating IP management.
Create a master node group template with the command:
$ openstack dataprocessing node group template create \--name vanilla-default-master --plugin vanilla \--plugin-version <plugin_version> --processes namenode resourcemanager \--flavor 2 --auto-security-group --floating-ip-pool <pool-id>
+---------------------+--------------------------------------+
76 Chapter 3. Developer Guide

Sahara, Release 6.0.0.0b2.dev3
| Field | Value |+---------------------+--------------------------------------+| Auto security group | True || Availability zone | None || Flavor id | 2 || Floating ip pool | dbd8d1aa-6e8e-4a35-a77b-966c901464d5 || Id | 0f066e14-9a73-4379-bbb4-9d9347633e31 || Is default | False || Is protected | False || Is proxy gateway | False || Is public | False || Name | vanilla-default-master || Node processes | namenode, resourcemanager || Plugin name | vanilla || Security groups | None || Use autoconfig | False || Version | <plugin_version> || Volumes per node | 0 |+---------------------+--------------------------------------+
Create a worker node group template with the command:
$ openstack dataprocessing node group template create \--name vanilla-default-worker --plugin vanilla \--plugin-version <plugin_version> --processes datanode nodemanager \--flavor 2 --auto-security-group --floating-ip-pool <pool-id>
+---------------------+--------------------------------------+| Field | Value |+---------------------+--------------------------------------+| Auto security group | True || Availability zone | None || Flavor id | 2 || Floating ip pool | dbd8d1aa-6e8e-4a35-a77b-966c901464d5 || Id | 6546bf44-0590-4539-bfcb-99f8e2c11efc || Is default | False || Is protected | False || Is proxy gateway | False || Is public | False || Name | vanilla-default-worker || Node processes | datanode, nodemanager || Plugin name | vanilla || Security groups | None || Use autoconfig | False || Version | <plugin_version> || Volumes per node | 0 |+---------------------+--------------------------------------+
Alternatively you can create node group templates from JSON files:
If your environment does not use floating IPs, omit defining floating IP in the template below.
Sample templates can be found here:
Sample Templates
Create a file named my_master_template_create.json with the following content:
{"plugin_name": "vanilla","hadoop_version": "<plugin_version>",
3.4. Quickstart guide 77

Sahara, Release 6.0.0.0b2.dev3
"node_processes": ["namenode","resourcemanager"
],"name": "vanilla-default-master","floating_ip_pool": "<floating_ip_pool_id>","flavor_id": "2","auto_security_group": true
}
Create a file named my_worker_template_create.json with the following content:
{"plugin_name": "vanilla","hadoop_version": "<plugin_version>","node_processes": [
"nodemanager","datanode"
],"name": "vanilla-default-worker","floating_ip_pool": "<floating_ip_pool_id>","flavor_id": "2","auto_security_group": true
}
Use the openstack client to upload the node group templates:
$ openstack dataprocessing node group template create \--json my_master_template_create.json
$ openstack dataprocessing node group template create \--json my_worker_template_create.json
List the available node group templates to ensure that they have been added properly:
$ openstack dataprocessing node group template list --name vanilla-default+------------------------+--------------------------------------+-------------+--------------------+| Name | Id | Plugin name | Version |+------------------------+--------------------------------------+-------------+--------------------+| vanilla-default-master | 0f066e14-9a73-4379-bbb4-9d9347633e31 | vanilla | <plugin_version> || vanilla-default-worker | 6546bf44-0590-4539-bfcb-99f8e2c11efc | vanilla | <plugin_version> |+------------------------+--------------------------------------+-------------+--------------------+
Remember the name or save the ID for the master and worker node group templates, as they will be used during clustertemplate creation.
For example:
• vanilla-default-master: 0f066e14-9a73-4379-bbb4-9d9347633e31
• vanilla-default-worker: 6546bf44-0590-4539-bfcb-99f8e2c11efc
6. Create a cluster template
The last step before provisioning the cluster is to create a template that describes the node groups of the cluster.
Create a cluster template with the command:
$ openstack dataprocessing cluster template create \--name vanilla-default-cluster \--node-groups vanilla-default-master:1 vanilla-default-worker:3
78 Chapter 3. Developer Guide
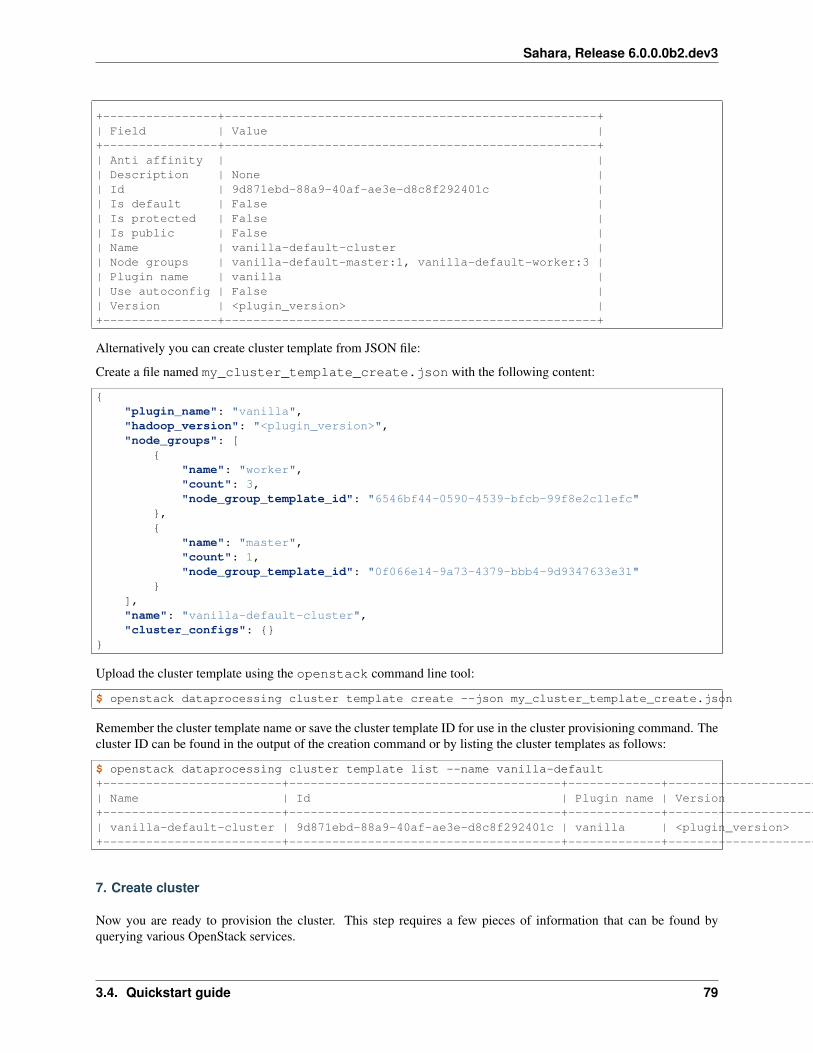
Sahara, Release 6.0.0.0b2.dev3
+----------------+----------------------------------------------------+| Field | Value |+----------------+----------------------------------------------------+| Anti affinity | || Description | None || Id | 9d871ebd-88a9-40af-ae3e-d8c8f292401c || Is default | False || Is protected | False || Is public | False || Name | vanilla-default-cluster || Node groups | vanilla-default-master:1, vanilla-default-worker:3 || Plugin name | vanilla || Use autoconfig | False || Version | <plugin_version> |+----------------+----------------------------------------------------+
Alternatively you can create cluster template from JSON file:
Create a file named my_cluster_template_create.json with the following content:
{"plugin_name": "vanilla","hadoop_version": "<plugin_version>","node_groups": [
{"name": "worker","count": 3,"node_group_template_id": "6546bf44-0590-4539-bfcb-99f8e2c11efc"
},{
"name": "master","count": 1,"node_group_template_id": "0f066e14-9a73-4379-bbb4-9d9347633e31"
}],"name": "vanilla-default-cluster","cluster_configs": {}
}
Upload the cluster template using the openstack command line tool:
$ openstack dataprocessing cluster template create --json my_cluster_template_create.json
Remember the cluster template name or save the cluster template ID for use in the cluster provisioning command. Thecluster ID can be found in the output of the creation command or by listing the cluster templates as follows:
$ openstack dataprocessing cluster template list --name vanilla-default+-------------------------+--------------------------------------+-------------+--------------------+| Name | Id | Plugin name | Version |+-------------------------+--------------------------------------+-------------+--------------------+| vanilla-default-cluster | 9d871ebd-88a9-40af-ae3e-d8c8f292401c | vanilla | <plugin_version> |+-------------------------+--------------------------------------+-------------+--------------------+
7. Create cluster
Now you are ready to provision the cluster. This step requires a few pieces of information that can be found byquerying various OpenStack services.
3.4. Quickstart guide 79

Sahara, Release 6.0.0.0b2.dev3
Create a cluster with the command:
$ openstack dataprocessing cluster create --name my-cluster-1 \--cluster-template vanilla-default-cluster --user-keypair my_stack \--neutron-network private --image sahara-vanilla-latest-ubuntu
+----------------------------+----------------------------------------------------+| Field | Value |+----------------------------+----------------------------------------------------+| Anti affinity | || Cluster template id | 9d871ebd-88a9-40af-ae3e-d8c8f292401c || Description | || Id | 1f0dc6f7-6600-495f-8f3a-8ac08cdb3afc || Image | 71b9eeac-c904-4170-866a-1f833ea614f3 || Is protected | False || Is public | False || Is transient | False || Name | my-cluster-1 || Neutron management network | fabe9dae-6fbd-47ca-9eb1-1543de325efc || Node groups | vanilla-default-master:1, vanilla-default-worker:3 || Plugin name | vanilla || Status | Validating || Use autoconfig | False || User keypair id | my_stack || Version | <plugin_version> |+----------------------------+----------------------------------------------------+
Alternatively you can create a cluster template from a JSON file:
Create a file named my_cluster_create.json with the following content:
{"name": "my-cluster-1","plugin_name": "vanilla","hadoop_version": "<plugin_version>","cluster_template_id" : "9d871ebd-88a9-40af-ae3e-d8c8f292401c","user_keypair_id": "my_stack","default_image_id": "71b9eeac-c904-4170-866a-1f833ea614f3","neutron_management_network": "fabe9dae-6fbd-47ca-9eb1-1543de325efc"
}
The parameter user_keypair_id with the value my_stack is generated by creating a keypair. You can createyour own keypair in the OpenStack Dashboard, or through the openstack command line client as follows:
$ openstack keypair create my_stack --public-key $PATH_TO_PUBLIC_KEY
If sahara is configured to use neutron for networking, you will also need to include the --neutron-networkargument in the cluster create command or the neutron_management_network parameter inmy_cluster_create.json. If your environment does not use neutron, you should omit these arguments. Youcan determine the neutron network id with the following command:
$ openstack network list
Create and start the cluster:
$ openstack dataprocessing cluster create --json my_cluster_create.json
Verify the cluster status by using the openstack command line tool as follows:
80 Chapter 3. Developer Guide

Sahara, Release 6.0.0.0b2.dev3
$ openstack dataprocessing cluster show my-cluster-1 -c Status+--------+--------+| Field | Value |+--------+--------+| Status | Active |+--------+--------+
The cluster creation operation may take several minutes to complete. During this time the “status” returned from theprevious command may show states other than Active. A cluster also can be created with the wait flag. In thatcase the cluster creation command will not be finished until the cluster is moved to the Active state.
8. Run a MapReduce job to check Hadoop installation
Check that your Hadoop installation is working properly by running an example job on the cluster manually.
• Login to the NameNode (usually the master node) via ssh with the ssh-key used above:
$ ssh -i my_stack.pem ubuntu@<namenode_ip>
• Switch to the hadoop user:
$ sudo su hadoop
• Go to the shared hadoop directory and run the simplest MapReduce example:
$ cd /opt/hadoop-<plugin_version>/share/hadoop/mapreduce$ /opt/hadoop-<plugin_version>/bin/hadoop jar hadoop-mapreduce-examples-<plugin_version>.jar pi 10 100
Congratulations! Your Hadoop cluster is ready to use, running on your OpenStack cloud.
3.4.2 Elastic Data Processing (EDP)
Job Binaries are the entities you define/upload the source code (mains and libraries) for your job. First you need todownload your binary file or script to swift container and register your file in Sahara with the command:
(openstack) dataprocessing job binary create --url "swift://integration.sahara/hive.sql" \--username username --password password --description "My first job binary" hive-binary
Data Sources
Data Sources are entities where the input and output from your jobs are housed. You can create data sources whichare related to Swift, Manila or HDFS. You need to set the type of data source (swift, hdfs, manila, maprfs), name andurl. The next two commands will create input and output data sources in swift.
$ openstack dataprocessing data source create --type swift --username admin --password admin \--url "swift://integration.sahara/input.txt" input
$ openstack dataprocessing data source create --type swift --username admin --password admin \--url "swift://integration.sahara/output.txt" input
If you want to create data sources in hdfs, use valid hdfs urls:
$ openstack dataprocessing data source create --type hdfs --url "hdfs://tmp/input.txt" input
$ openstack dataprocessing data source create --type hdfs --url "hdfs://tmp/output.txt" output
3.4. Quickstart guide 81
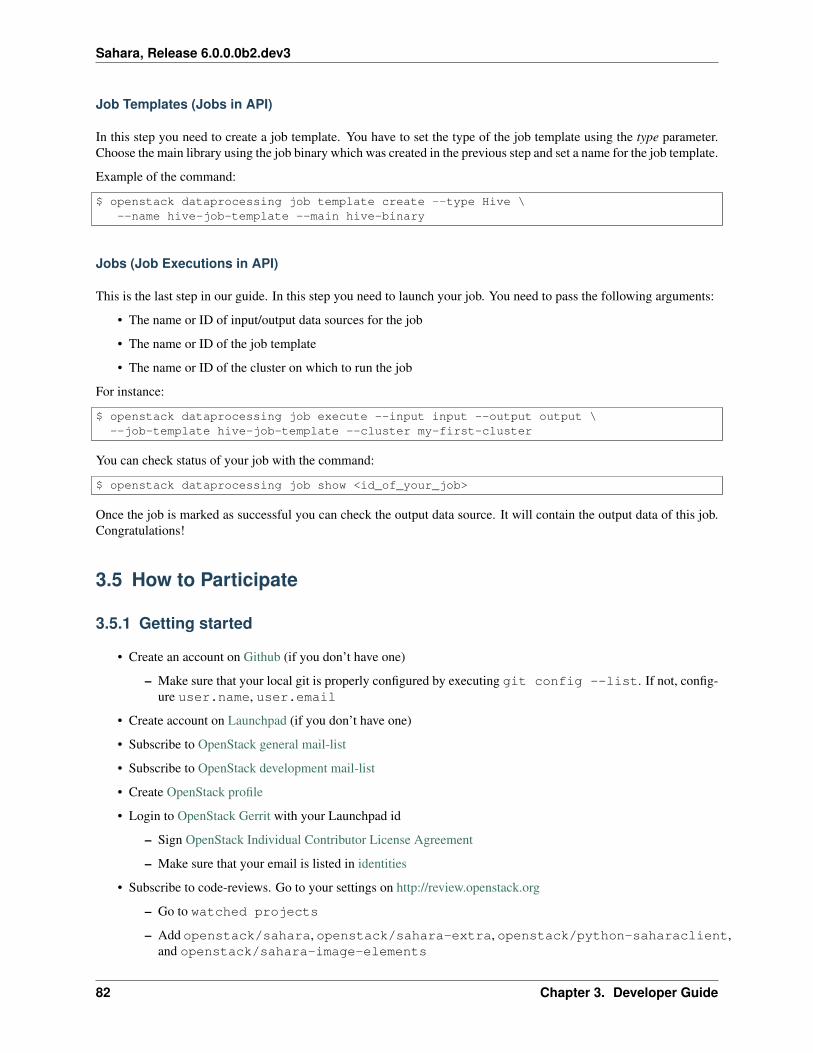
Sahara, Release 6.0.0.0b2.dev3
Job Templates (Jobs in API)
In this step you need to create a job template. You have to set the type of the job template using the type parameter.Choose the main library using the job binary which was created in the previous step and set a name for the job template.
Example of the command:
$ openstack dataprocessing job template create --type Hive \--name hive-job-template --main hive-binary
Jobs (Job Executions in API)
This is the last step in our guide. In this step you need to launch your job. You need to pass the following arguments:
• The name or ID of input/output data sources for the job
• The name or ID of the job template
• The name or ID of the cluster on which to run the job
For instance:
$ openstack dataprocessing job execute --input input --output output \--job-template hive-job-template --cluster my-first-cluster
You can check status of your job with the command:
$ openstack dataprocessing job show <id_of_your_job>
Once the job is marked as successful you can check the output data source. It will contain the output data of this job.Congratulations!
3.5 How to Participate
3.5.1 Getting started
• Create an account on Github (if you don’t have one)
– Make sure that your local git is properly configured by executing git config --list. If not, config-ure user.name, user.email
• Create account on Launchpad (if you don’t have one)
• Subscribe to OpenStack general mail-list
• Subscribe to OpenStack development mail-list
• Create OpenStack profile
• Login to OpenStack Gerrit with your Launchpad id
– Sign OpenStack Individual Contributor License Agreement
– Make sure that your email is listed in identities
• Subscribe to code-reviews. Go to your settings on http://review.openstack.org
– Go to watched projects
– Add openstack/sahara, openstack/sahara-extra, openstack/python-saharaclient,and openstack/sahara-image-elements
82 Chapter 3. Developer Guide
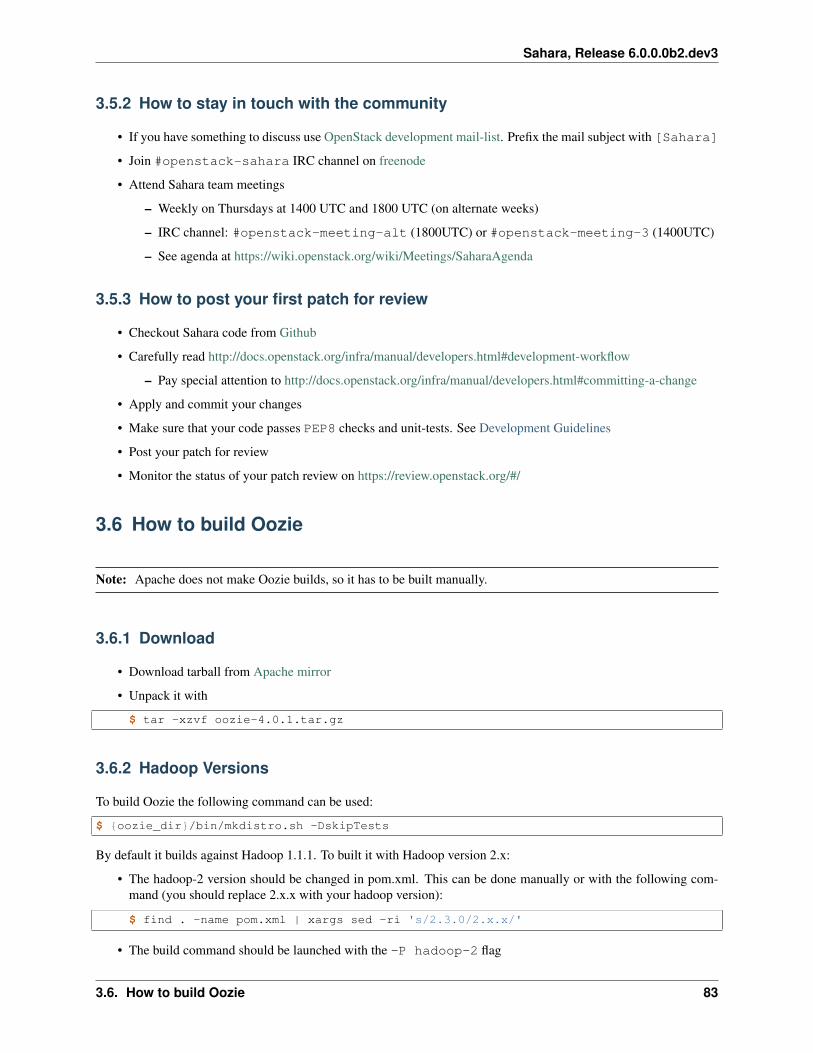
Sahara, Release 6.0.0.0b2.dev3
3.5.2 How to stay in touch with the community
• If you have something to discuss use OpenStack development mail-list. Prefix the mail subject with [Sahara]
• Join #openstack-sahara IRC channel on freenode
• Attend Sahara team meetings
– Weekly on Thursdays at 1400 UTC and 1800 UTC (on alternate weeks)
– IRC channel: #openstack-meeting-alt (1800UTC) or #openstack-meeting-3 (1400UTC)
– See agenda at https://wiki.openstack.org/wiki/Meetings/SaharaAgenda
3.5.3 How to post your first patch for review
• Checkout Sahara code from Github
• Carefully read http://docs.openstack.org/infra/manual/developers.html#development-workflow
– Pay special attention to http://docs.openstack.org/infra/manual/developers.html#committing-a-change
• Apply and commit your changes
• Make sure that your code passes PEP8 checks and unit-tests. See Development Guidelines
• Post your patch for review
• Monitor the status of your patch review on https://review.openstack.org/#/
3.6 How to build Oozie
Note: Apache does not make Oozie builds, so it has to be built manually.
3.6.1 Download
• Download tarball from Apache mirror
• Unpack it with
$ tar -xzvf oozie-4.0.1.tar.gz
3.6.2 Hadoop Versions
To build Oozie the following command can be used:
$ {oozie_dir}/bin/mkdistro.sh -DskipTests
By default it builds against Hadoop 1.1.1. To built it with Hadoop version 2.x:
• The hadoop-2 version should be changed in pom.xml. This can be done manually or with the following com-mand (you should replace 2.x.x with your hadoop version):
$ find . -name pom.xml | xargs sed -ri 's/2.3.0/2.x.x/'
• The build command should be launched with the -P hadoop-2 flag
3.6. How to build Oozie 83
Sahara, Release 6.0.0.0b2.dev3
3.6.3 JDK Versions
By default, the build configuration enforces that JDK 1.6.* is being used.
There are 2 build properties that can be used to change the JDK version requirements:
• javaVersion specifies the version of the JDK used to compile (default 1.6).
• targetJavaVersion specifies the version of the generated bytecode (default 1.6).
For example, to specify JDK version 1.7, the build command should contain the -D javaVersion=1.7 -DtagetJavaVersion=1.7 flags.
3.6.4 Build
To build Oozie with Hadoop 2.6.0 and JDK version 1.7, the following command can be used:
$ {oozie_dir}/bin/mkdistro.sh assembly:single -P hadoop-2 -D javaVersion=1.7 -D targetJavaVersion=1.7 -D skipTests
Also, the pig version can be passed as a maven property with the flag -D pig.version=x.x.x.
You can find similar instructions to build oozie.tar.gz here: http://oozie.apache.org/docs/4.0.0/DG_QuickStart.html#Building_Oozie
3.7 Adding Database Migrations
The migrations in sahara/db/migration/alembic_migrations/versions contain the changes neededto migrate between Sahara database revisions. A migration occurs by executing a script that details the changes neededto upgrade or downgrade the database. The migration scripts are ordered so that multiple scripts can run sequentially.The scripts are executed by Sahara’s migration wrapper which uses the Alembic library to manage the migration.Sahara supports migration from Icehouse or later.
Any code modifications that change the structure of the database require a migration script so that previously existingdatabases will continue to function when the new code is released. This page gives a brief overview of how to add themigration.
3.7.1 Generate a New Migration Script
New migration scripts can be generated using the sahara-db-manage command.
To generate a migration stub to be filled in by the developer:
$ sahara-db-manage --config-file /path/to/sahara.conf revision -m "description of revision"
To autogenerate a migration script that reflects the current structure of the database:
$ sahara-db-manage --config-file /path/to/sahara.conf revision -m "description of revision" --autogenerate
Each of these commands will create a file of the form revision_description where revision is a stringgenerated by Alembic and description is based on the text passed with the -m option.
3.7.2 Follow the Sahara Naming Convention
By convention Sahara uses 3-digit revision numbers, and this scheme differs from the strings generated by Alembic.Consequently, it’s necessary to rename the generated script and modify the revision identifiers in the script.
84 Chapter 3. Developer Guide

Sahara, Release 6.0.0.0b2.dev3
Open the new script and look for the variable down_revision. The value should be a 3-digit numeric string, and itidentifies the current revision number of the database. Set the revision value to the down_revision value + 1.For example, the lines:
# revision identifiers, used by Alembic.revision = '507eb70202af'down_revision = '006'
will become:
# revision identifiers, used by Alembic.revision = '007'down_revision = '006'
Modify any comments in the file to match the changes and rename the file to match the new revision number:
$ mv 507eb70202af_my_new_revision.py 007_my_new_revision.py
3.7.3 Add Alembic Operations to the Script
The migration script contains method upgrade(). Sahara has not supported downgrades since the Kilo release. Fillin this method with the appropriate Alembic operations to perform upgrades. In the above example, an upgrade willmove from revision ‘006’ to revision ‘007’.
3.7.4 Command Summary for sahara-db-manage
You can upgrade to the latest database version via:
$ sahara-db-manage --config-file /path/to/sahara.conf upgrade head
To check the current database version:
$ sahara-db-manage --config-file /path/to/sahara.conf current
To create a script to run the migration offline:
$ sahara-db-manage --config-file /path/to/sahara.conf upgrade head --sql
To run the offline migration between specific migration versions:
$ sahara-db-manage --config-file /path/to/sahara.conf upgrade <start version>:<end version> --sql
To upgrade the database incrementally:
$ sahara-db-manage --config-file /path/to/sahara.conf upgrade --delta <# of revs>
To create a new revision:
$ sahara-db-manage --config-file /path/to/sahara.conf revision -m "description of revision" --autogenerate
To create a blank file:
$ sahara-db-manage --config-file /path/to/sahara.conf revision -m "description of revision"
This command does not perform any migrations, it only sets the revision. Revision may be any existing revision. Usethis command carefully:
3.7. Adding Database Migrations 85
Sahara, Release 6.0.0.0b2.dev3
$ sahara-db-manage --config-file /path/to/sahara.conf stamp <revision>
To verify that the timeline does branch, you can run this command:
$ sahara-db-manage --config-file /path/to/sahara.conf check_migration
If the migration path does branch, you can find the branch point via:
$ sahara-db-manage --config-file /path/to/sahara.conf history
3.8 Sahara Testing
We have a bunch of different tests for Sahara.
3.8.1 Unit Tests
In most Sahara sub-repositories we have a directory that contains Python unit tests, located at _package_/tests/unit or_package_/tests.
3.8.2 Scenario integration tests
New scenario integration tests were implemented for Sahara. They are available in the sahara-tests repository(https://git.openstack.org/cgit/openstack/sahara-tests).
3.8.3 Tempest tests
Sahara has a Tempest plugin in the sahara-tests repository covering all major API features.
3.8.4 Additional tests
Additional tests reside in the sahara-tests repository (as above):
• REST API tests checking to ensure that the Sahara REST API works. The only partsthat are not tested are cluster creation and EDP. For more info about api tests seehttp://docs.openstack.org/developer/tempest/field_guide/api.html
• CLI tests check read-only operations using the Sahara CLI. For more info seehttp://docs.openstack.org/developer/tempest/field_guide/cli.html
3.9 Log Guidelines
3.9.1 Levels Guidelines
During the Kilo release cycle the sahara community defined the following log levels:
• Debug: Shows everything and is likely not suitable for normal production operation due to the sheer size of logsgenerated (e.g. scripts executions, process execution, etc.).
86 Chapter 3. Developer Guide

Sahara, Release 6.0.0.0b2.dev3
• Info: Usually indicates successful service start/stop, versions and such non-error related data. This shouldinclude largely positive units of work that are accomplished (e.g. service setup and configuration, cluster start,job execution information).
• Warning: Indicates that there might be a systemic issue; potential predictive failure notice (e.g. job executionfailed).
• Error: An error has occurred and the administrator should research the error information (e.g. cluster failed tostart, plugin violations of operation).
• Critical: An error has occurred and the system might be unstable, anything that eliminates part of sahara’sintended functionalities; immediately get administrator assistance (e.g. failed to access keystone/database, failedto load plugin).
3.9.2 Formatting Guidelines
Sahara uses string formatting defined in PEP 3101 for logs.
LOG.warning(_LW("Incorrect path: {path}").format(path=path))
3.9.3 Translation Guidelines
All log levels except Debug require translation. None of the separate CLI tools packaged with sahara contain logtranslations.
• Debug: no translation
• Info: _LI
• Warning: _LW
• Error: _LE
• Critical: _LC
3.10 API Version 2 Development
The sahara project is currently in the process of creating a new RESTful application programming interface (API).This interface is experimental and will not be enabled until it has achieved feature parity with the current (version 1.1)API.
This document defines the steps necessary to enable and communicate with the new API. This API has a few funda-mental changes from the previous APIs and they should be noted before proceeding with development work.
Warning: This API is currently marked as experimental. It is not supported by the sahara python client. Theseinstructions are included purely for developers who wish to help participate in the development effort.
3.10.1 Enabling the experimental API
There are a few changes to the WSGI pipeline that must be made to enable the new v2 API. These changes will leavethe 1.0 and 1.1 API versions in place and will not adjust their communication parameters.
To begin, uncomment, or add, the following sections in your api-paste.ini file:
3.10. API Version 2 Development 87

Sahara, Release 6.0.0.0b2.dev3
[app:sahara_apiv2]paste.app_factory = sahara.api.middleware.sahara_middleware:RouterV2.factory
[filter:auth_validator_v2]paste.filter_factory = sahara.api.middleware.auth_valid:AuthValidatorV2.factory
These lines define a new authentication filter for the v2 API, and define the application that will handle the new calls.
With these new entries in the paste configuration, we can now enable them with the following changes to the api-paste.ini file:
[pipeline:sahara]pipeline = cors request_id acl auth_validator_v2 sahara_api
[composite:sahara_api]use = egg:Paste#urlmap/: sahara_apiv2
There are 2 significant changes occurring here; changing the authentication validator in the pipline, and changing theroot “/” application to the new v2 handler.
At this point the sahara API server should be configured to accept requests on the new v2 endpoints.
3.10.2 Communicating with the v2 API
The v2 API makes at least one major change from the previous versions, removing the OpenStack project identi-fier from the URL. Instead of adding this UUID to the URL, it is now required to be included as a header namedOpenStack-Project-ID.
For example, in previous versions of the API, a call to get the list of clusters for project “12345678-1234-1234-1234-123456789ABC” would have been made as follows:
GET /v1.1/12345678-1234-1234-1234-123456789ABC/clustersX-Auth-Token: {valid auth token}
This call would now be made to the following URL, while including the project identifier in a header namedOpenStack-Project-ID:
GET /v2/clustersX-Auth-Token: {valid auth token}OpenStack-Project-ID: 12345678-1234-1234-1234-123456789ABC
Using a tool like HTTPie, the same request could be made like this:
$ httpie http://{sahara service ip:port}/v2/clusters \X-Auth-Token:{valid auth token} \OpenStack-Project-ID:12345678-1234-1234-1234-123456789ABC
3.10.3 Following the implementation progress
As the creation of this API will be under regular change until it moves out of the experimental phase, a wiki page hasbeen established to help track the progress.
https://wiki.openstack.org/wiki/Sahara/api-v2
This page will help to coordinate the various reviews, specs, and work items that are a continuing facet of this work.
88 Chapter 3. Developer Guide

Sahara, Release 6.0.0.0b2.dev3
3.10.4 The API service layer
When contributing to the version 2 API, it will be necessary to add code that modifies the data and behavior of HTTPcalls as they are sent to and from the processing engine and data abstraction layers. Most frequently in the saharacodebase, these interactions are handled in the modules of the sahara.service.api package. This packagecontains code for all versions of the API and follows a namespace mapping that is similar to the routing functions ofsahara.api
Although these modules are not the definitive end of all answers to API related code questions, they are a solid startingpoint when examining the extent of new work. Furthermore, they serve as a central point to begin API debuggingefforts when the need arises.
Background Concepts for Sahara
3.11 Pluggable Provisioning Mechanism
Sahara can be integrated with 3rd party management tools like Apache Ambari and Cloudera Management Console.The integration is achieved using the plugin mechanism.
In short, responsibilities are divided between the Sahara core and a plugin as follows. Sahara interacts with the userand uses Heat to provision OpenStack resources (VMs, baremetal servers, security groups, etc.) The plugin installsand configures a Hadoop cluster on the provisioned instances. Optionally, a plugin can deploy management andmonitoring tools for the cluster. Sahara provides plugins with utility methods to work with provisioned instances.
A plugin must extend the sahara.plugins.provisioning:ProvisioningPluginBase class and implement all the requiredmethods. Read Plugin SPI for details.
The instance objects provided by Sahara have a remote property which can be used to interact with instances. Theremote is a context manager so you can use it in with instance.remote: statements. The list of available commands canbe found in sahara.utils.remote.InstanceInteropHelper. See the source code of the Vanilla plugin for usage examples.
3.12 Plugin SPI
3.12.1 Plugin interface
get_versions()
Returns all available versions of the plugin. Depending on the plugin, this version may map directly to the HDFSversion, or it may not; check your plugin’s documentation. It is responsibility of the plugin to make sure that allrequired images for each hadoop version are available, as well as configs and whatever else that plugin needs to createthe Hadoop cluster.
Returns: list of strings representing plugin versions
Example return value: [“1.2.1”, “2.3.0”, “2.4.1”]
get_configs( hadoop_version )
Lists all configs supported by the plugin with descriptions, defaults, and targets for which this config is applicable.
Returns: list of configs
Example return value: ((“JobTracker heap size”, “JobTracker heap size, in MB”, “int”, “512”, “mapreduce”, “node”,True, 1))
3.11. Pluggable Provisioning Mechanism 89
Sahara, Release 6.0.0.0b2.dev3
get_node_processes( hadoop_version )
Returns all supported services and node processes for a given Hadoop version. Each node process belongs to a singleservice and that relationship is reflected in the returned dict object. See example for details.
Returns: dictionary having entries (service -> list of processes)
Example return value: {“mapreduce”: [”tasktracker”, “jobtracker”], “hdfs”: [”datanode”, “namenode”]}
get_required_image_tags( hadoop_version )
Lists tags that should be added to OpenStack Image via Image Registry. Tags are used to filter Images by plugin andhadoop version.
Returns: list of tags
Example return value: [”tag1”, “some_other_tag”, ...]
validate( cluster )
Validates a given cluster object. Raises a SaharaException with a meaningful message in the case of validation failure.
Returns: None
Example exception: <NotSingleNameNodeException {code=’NOT_SINGLE_NAME_NODE’, message=’Hadoopcluster should contain only 1 NameNode instance. Actual NN count is 2’ }>
validate_scaling( cluster, existing, additional )
To be improved.
Validates a given cluster before scaling operation.
Returns: list of validation_errors
update_infra( cluster )
This method is no longer used now that Sahara utilizes Heat for OpenStack resource provisioning, and is not currentlyutilized by any plugin.
Returns: None
configure_cluster( cluster )
Configures cluster on the VMs provisioned by sahara. In this function the plugin should perform all actions likeadjusting OS, installing required packages (including Hadoop, if needed), configuring Hadoop, etc.
Returns: None
start_cluster( cluster )
Start already configured cluster. This method is guaranteed to be called only on a cluster which was already preparedwith configure_cluster(...) call.
Returns: None
90 Chapter 3. Developer Guide
Sahara, Release 6.0.0.0b2.dev3
scale_cluster( cluster, instances )
Scale an existing cluster with additional instances. The instances argument is a list of ready-to-configure instances.Plugin should do all configuration operations in this method and start all services on those instances.
Returns: None
get_edp_engine( cluster, job_type )
Returns an EDP job engine object that supports the specified job_type on the given cluster, or None if there is nosupport. The EDP job engine object returned must implement the interface described in Elastic Data Processing(EDP) SPI. The job_type is a String matching one of the job types listed in Job Types.
Returns: an EDP job engine object or None
decommission_nodes( cluster, instances )
Scale cluster down by removing a list of instances. The plugin should stop services on the provided list of instances.The plugin also may need to update some configurations on other instances when nodes are removed; if so, this methodmust perform that reconfiguration.
Returns: None
on_terminate_cluster( cluster )
When user terminates cluster, sahara simply shuts down all the cluster VMs. This method is guaranteed to be invokedbefore that, allowing the plugin to do some clean-up.
Returns: None
get_open_ports( node_group )
When user requests sahara to automatically create a security group for the node group (auto_security_groupproperty set to True), sahara will call this plugin method to get a list of ports that need to be opened.
Returns: list of ports to be open in auto security group for the given node group
def get_edp_job_types( versions )
Optional method, which provides the ability to see all supported job types for specified plugin versions.
Returns: dict with supported job types for specified versions of plugin
def recommend_configs( self, cluster, scaling=False )
Optional method, which provides recommendations for cluster configuration before creating/scaling operation.
def get_image_arguments( self, hadoop_version ):
Optional method, which gets the argument set taken by the plugin’s image generator, or NotImplemented if the plugindoes not provide image generation support. See image-gen.
Returns: A sequence with items of type sahara.plugins.images.ImageArgument.
3.12. Plugin SPI 91

Sahara, Release 6.0.0.0b2.dev3
def pack_image( self, hadoop_version, remote, reconcile=True, ... ):
Optional method which packs an image for registration in Glance and use by Sahara. This method is called from theimage generation CLI rather than from the Sahara api or engine service. See image-gen.
Returns: None (modifies the image pointed to by the remote in-place.)
def validate_images( self, cluster, reconcile=True, image_arguments=None ):
Validates the image to be used to create a cluster, to ensure that it meets the specifications of the plugin. Seeimage-gen.
Returns: None; may raise a sahara.plugins.exceptions.ImageValidationError
3.13 Object Model
Here is a description of all the objects involved in the API.
Notes:
• clusters and node_groups have ‘extra’ fields allowing the plugin to persist any supplementary info about thecluster.
• node_process is just a process that runs on some node in cluster.
Example list of node processes:
1. jobtracker
2. namenode
3. tasktracker
4. datanode
• Each plugin may have different names for the same processes.
3.13.1 Config
An object, describing one configuration entry
Property Type Descriptionname string Config name.description string A hint for user, what this config is used for.config_type enum possible values are: ‘string’, ‘integer’, ‘boolean’, ‘enum’.con-fig_values
list List of possible values, if config_type is enum.
de-fault_value
string Default value for config.
applica-ble_target
string The target could be either a service returned by get_node_processes(...) call in form of‘service:<service name>’, or ‘general’.
scope enum Could be either ‘node’ or ‘cluster’.is_optional bool If is_optional is False and no default_value is specified, user must provide a value.priority int 1 or 2. A Hint for UI. Configs with priority 1 are always displayed. Priority 2 means user
should click a button to see the config.
92 Chapter 3. Developer Guide

Sahara, Release 6.0.0.0b2.dev3
3.13.2 User Input
Value provided by user for a specific config.
Property Type Descriptionconfig config A config object for which this user_input is provided.value ... Value for the config. Type depends on Config type.
3.13.3 Instance
An instance created for cluster.
Property Type Descriptioninstance_id string Unique instance identifier.instance_name string OpenStack instance name.internal_ip string IP to communicate with other instances.management_ip string IP of instance, accessible outside of internal network.volumes list List of volumes attached to instance. Empty if ephemeral drive is used.nova_info object Nova instance object.username string Username, that sahara uses for establishing remote connections to instance.hostname string Same as instance_name.fqdn string Fully qualified domain name for this instance.remote helpers Object with helpers for performing remote operations.
3.13.4 Node Group
Group of instances.
Property Type Descriptionname string Name of this Node Group in Cluster.flavor_id string OpenStack Flavor used to boot instances.image_id string Image id used to boot instances.node_processes list List of processes running on each instance.node_configs dict Configs dictionary, applied to instances.vol-umes_per_node
int Number of volumes mounted to each instance. 0 means use ephemeral drive.
volumes_size int Size of each volume (GB).vol-umes_mount_prefix
string Prefix added to mount path of each volume.
floating_ip_pool string Floating IP Pool name. All instances in the Node Group will have Floating IPsassigned from this pool.
count int Number of instances in this Node Group.username string Username used by sahara to establish remote connections to instances.configuration dict Merged dictionary of node configurations and cluster configurations.storage_paths list List of directories where storage should be placed.
3.13.5 Cluster
Contains all relevant info about cluster. This object is is provided to the plugin for both cluster creation and scaling.The “Cluster Lifecycle” section below further specifies which fields are filled at which moment.
3.13. Object Model 93

Sahara, Release 6.0.0.0b2.dev3
Property Type Descriptionname string Cluster name.project_id string OpenStack Project id where this Cluster is available.plugin_name string Plugin name.hadoop_version string Hadoop version running on instances.default_image_id string OpenStack image used to boot instances.node_groups list List of Node Groups.cluster_configs dict Dictionary of Cluster scoped configurations.cluster_template_id string Cluster Template used for Node Groups and Configurations.user_keypair_id string OpenStack keypair added to instances to make them accessible for user.neu-tron_management_network
string Neutron network ID. Instances will get fixed IPs in this network if‘use_neutron’ config is set to True.
anti_affinity list List of processes that will be run on different hosts.description string Cluster Description.info dict Dictionary for additional information.
3.13.6 Validation Error
Describes what is wrong with one of the values provided by user.
Property Type Descriptionconfig config A config object that is not valid.error_message string Message that describes what exactly is wrong.
3.14 Elastic Data Processing (EDP) SPI
The EDP job engine objects provide methods for creating, monitoring, and terminating jobs on Sahara clusters. Pro-visioning plugins that support EDP must return an EDP job engine object from the get_edp_engine( cluster, job_type) method described in Plugin SPI.
Sahara provides subclasses of the base job engine interface that support EDP on clusters running Oozie, Spark, and/orStorm. These are described below.
3.14.1 Job Types
Some of the methods below test job type. Sahara supports the following string values for job types:
• Hive
• Java
• Pig
• MapReduce
• MapReduce.Streaming
• Spark
• Shell
• Storm
Note: Constants for job types are defined in sahara.utils.edp.
94 Chapter 3. Developer Guide

Sahara, Release 6.0.0.0b2.dev3
3.14.2 Job Status Values
Several of the methods below return a job status value. A job status value is a dictionary of the form:
{‘status’: job_status_value}
where job_status_value is one of the following string values:
• DONEWITHERROR
• FAILED
• TOBEKILLED
• KILLED
• PENDING
• RUNNING
• SUCCEEDED
Note, constants for job status are defined in sahara.utils.edp
3.14.3 EDP Job Engine Interface
The sahara.service.edp.base_engine.JobEngine class is an abstract class with the following interface:
cancel_job(job_execution)
Stops the running job whose id is stored in the job_execution object.
Returns: None if the operation was unsuccessful or an updated job status value.
get_job_status(job_execution)
Returns the current status of the job whose id is stored in the job_execution object.
Returns: a job status value.
run_job(job_execution)
Starts the job described by the job_execution object
Returns: a tuple of the form (job_id, job_status_value, job_extra_info).
• job_id is required and must be a string that allows the EDP engine to uniquely identify the job.
• job_status_value may be None or a job status value
• job_extra_info may be None or optionally a dictionary that the EDP engine uses to store extra information onthe job_execution_object.
3.14. Elastic Data Processing (EDP) SPI 95

Sahara, Release 6.0.0.0b2.dev3
validate_job_execution(cluster, job, data)
Checks whether or not the job can run on the cluster with the specified data. Data contains values passed to the/jobs/<job_id>/execute REST API method during job launch. If the job cannot run for any reason, including jobconfiguration, cluster configuration, or invalid data, this method should raise an exception.
Returns: None
get_possible_job_config(job_type)
Returns hints used by the Sahara UI to prompt users for values when configuring and launching a job. Note that nohints are required.
See Elastic Data Processing (EDP) for more information on how configuration values, parameters, and arguments areused by different job types.
Returns: a dictionary of the following form, containing hints for configs, parameters, and arguments for the job type:
{‘job_config’: {‘configs’: [], ‘params’: {}, ‘args’: []}}
• args is a list of strings
• params contains simple key/value pairs
• each item in configs is a dictionary with entries for ‘name’ (required), ‘value’, and ‘description’
get_supported_job_types()
This method returns the job types that the engine supports. Not all engines will support all job types.
Returns: a list of job types supported by the engine.
3.14.4 Oozie Job Engine Interface
The sahara.service.edp.oozie.engine.OozieJobEngine class is derived from JobEngine. It provides implementationsfor all of the methods in the base interface but adds a few more abstract methods.
Note that the validate_job_execution(cluster, job, data) method does basic checks on the job configuration but probablyshould be overloaded to include additional checks on the cluster configuration. For example, the job engines for pluginsthat support Oozie add checks to make sure that the Oozie service is up and running.
get_hdfs_user()
Oozie uses HDFS to distribute job files. This method gives the name of the account that is used on the data nodes toaccess HDFS (such as ‘hadoop’ or ‘hdfs’). The Oozie job engine expects that HDFS contains a directory for this userunder /user/.
Returns: a string giving the username for the account used to access HDFS on the cluster.
create_hdfs_dir(remote, dir_name)
The remote object remote references a node in the cluster. This method creates the HDFS directory dir_name underthe user specified by get_hdfs_user() in the HDFS accessible from the specified node. For example, if the HDFS useris ‘hadoop’ and the dir_name is ‘test’ this method would create ‘/user/hadoop/test’.
96 Chapter 3. Developer Guide

Sahara, Release 6.0.0.0b2.dev3
The reason that this method is broken out in the interface as an abstract method is that different versions of Hadooptreat path creation differently.
Returns: None
get_oozie_server_uri(cluster)
Returns the full URI for the Oozie server, for example http://my_oozie_host:11000/oozie. This URI is used by anOozie client to send commands and queries to the Oozie server.
Returns: a string giving the Oozie server URI.
get_oozie_server(self, cluster)
Returns the node instance for the host in the cluster running the Oozie server.
Returns: a node instance.
get_name_node_uri(self, cluster)
Returns the full URI for the Hadoop NameNode, for example http://master_node:8020.
Returns: a string giving the NameNode URI.
get_resource_manager_uri(self, cluster)
Returns the full URI for the Hadoop JobTracker for Hadoop version 1 or the Hadoop ResourceManager for Hadoopversion 2.
Returns: a string giving the JobTracker or ResourceManager URI.
3.14.5 Spark Job Engine
The sahara.service.edp.spark.engine.SparkJobEngine class provides a full EDP implementation for Spark standaloneclusters.
Note: The validate_job_execution(cluster, job, data) method does basic checks on the job configuration but probablyshould be overloaded to include additional checks on the cluster configuration. For example, the job engine returnedby the Spark plugin checks that the Spark version is >= 1.0.0 to ensure that spark-submit is available.
get_driver_classpath(self)
Returns driver class path.
Returns: a string of the following format ‘ –driver-class-path class_path_value‘.
3.14. Elastic Data Processing (EDP) SPI 97

Sahara, Release 6.0.0.0b2.dev3
3.15 Sahara Cluster Statuses Overview
All Sahara Cluster operations are performed in multiple steps. A Cluster object has a Status attribute whichchanges when Sahara finishes one step of operations and starts another one. Also a Cluster object has a Statusdescription attribute which changes whenever Cluster errors occur.
Sahara supports three types of Cluster operations:
• Create a new Cluster
• Scale/Shrink an existing Cluster
• Delete an existing Cluster
3.15.1 Creating a new Cluster
1. Validating
Before performing any operations with OpenStack environment, Sahara validates user input.
There are two types of validations, that are done:
• Check that a request contains all necessary fields and that the request does not violate any constraints likeunique naming, etc.
• Plugin check (optional). The provisioning Plugin may also perform any specific checks like a Clustertopology validation check.
If any of the validations fails during creating, the Cluster object will still be kept in the database with an Error status.If any validations fails during scaling the Active Cluster, it will be kept with an Active status. In both cases statusdescription will contain error messages about the reasons of failure.
2. InfraUpdating
This status means that the Provisioning plugin is performing some infrastructure updates.
3. Spawning
Sahara sends requests to OpenStack for all resources to be created:
• VMs
• Volumes
• Floating IPs (if Sahara is configured to use Floating IPs)
It takes some time for OpenStack to schedule all the required VMs and Volumes, so sahara will wait until all of theVMs are in an Active state.
4. Waiting
Sahara waits while VMs’ operating systems boot up and all internal infrastructure components like networks andvolumes are attached and ready to use.
98 Chapter 3. Developer Guide

Sahara, Release 6.0.0.0b2.dev3
5. Preparing
Sahara prepares a Cluster for starting. This step includes generating the /etc/hosts file or changing/etc/resolv.conf file (if you use Designate service), so that all instances can access each other by a hostname.Also Sahara updates the authorized_keys file on each VM, so that VMs can communicate without passwords.
6. Configuring
Sahara pushes service configurations to VMs. Both XML and JSON based configurations and environmental variablesare set on this step.
7. Starting
Sahara is starting Hadoop services on Cluster’s VMs.
8. Active
Active status means that a Cluster has started successfully and is ready to run EDP Jobs.
3.15.2 Scaling/Shrinking an existing Cluster
1. Validating
Sahara checks the scale/shrink request for validity. The Plugin method called for performing Plugin specific checks isdifferent from the validation method in creation.
2. Scaling
Sahara performs database operations updating all affected existing Node Groups and creating new ones to join theexisting Node Groups.
3. Adding Instances
Status is similar to Spawning in Cluster creation. Sahara adds required amount of VMs to the existing Node Groupsand creates new Node Groups.
4. Configuring
Status is similar to Configuring in Cluster creation. New instances are being configured in the same man-ner as already existing ones. The VMs in the existing Cluster are also updated with a new /etc/hosts file or/etc/resolv.conf file.
5. Decommissioning
Sahara stops Hadoop services on VMs that will be deleted from a Cluster. Decommissioning a Data Node may takesome time because Hadoop rearranges data replicas around the Cluster, so that no data will be lost after that Data Nodeis deleted.
3.15. Sahara Cluster Statuses Overview 99

Sahara, Release 6.0.0.0b2.dev3
6. Deleting Instances
Sahara sends requests to OpenStack to release unneeded resources:
• VMs
• Volumes
• Floating IPs (if they are used)
7. Active
The same Active status as after Cluster creation.
3.15.3 Deleting an existing Cluster
1. Deleting
The only step, that releases all Cluster’s resources and removes it from the database.
3.15.4 Error State
If the Cluster creation fails, the Cluster will enter the Error state. This status means the Cluster may not be able toperform any operations normally. This cluster will stay in the database until it is manually deleted. The reason forfailure may be found in the sahara logs. Also, the status description will contain information about the error.
If an error occurs during the Adding Instances operation, Sahara will first try to rollback this operation. If arollback is impossible or fails itself, then the Cluster will also go into an Error state. If a rollback was successful,Cluster will get into an Active state and status description will contain a short message about the reason of AddingInstances failure.
3.16 How do run a Sahara cluster on bare metal servers
Hadoop clusters are designed to store and analyze extremely large amounts of unstructured data in distributed com-puting environments. Sahara enables you to boot Hadoop clusters in both virtual and bare metal environments. WhenBooting Hadoop clusters with Sahara on bare metal servers, you benefit from the bare metal performance with self-service resource provisioning.
1. Create a new OpenStack environment using Devstack as described in the Devstack Guide
2. Install Ironic as described in the Ironic Installation Guide
3. Install Sahara as described in the Sahara Installation Guide
4. Build the Sahara image and prepare it for uploading to Glance:
• Build an image for Sahara plugin with the -b flag. Use sahara image elements when building the image.See https://github.com/openstack/sahara-image-elements
• Convert the qcow2 image format to the raw format. For example:
$ qemu-img convert -O raw image-converted.qcow image-converted-from-qcow2.raw
• Mount the raw image to the system.
• chroot to the mounted directory and remove the installed grub.
100 Chapter 3. Developer Guide
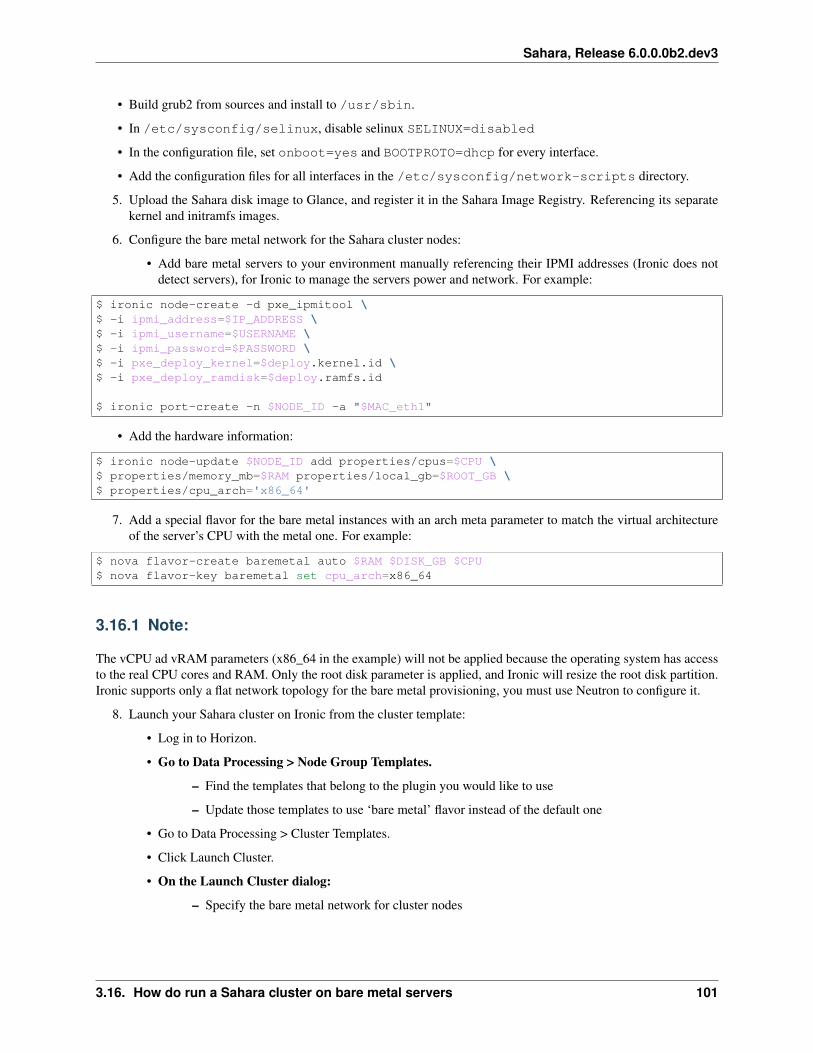
Sahara, Release 6.0.0.0b2.dev3
• Build grub2 from sources and install to /usr/sbin.
• In /etc/sysconfig/selinux, disable selinux SELINUX=disabled
• In the configuration file, set onboot=yes and BOOTPROTO=dhcp for every interface.
• Add the configuration files for all interfaces in the /etc/sysconfig/network-scripts directory.
5. Upload the Sahara disk image to Glance, and register it in the Sahara Image Registry. Referencing its separatekernel and initramfs images.
6. Configure the bare metal network for the Sahara cluster nodes:
• Add bare metal servers to your environment manually referencing their IPMI addresses (Ironic does notdetect servers), for Ironic to manage the servers power and network. For example:
$ ironic node-create -d pxe_ipmitool \$ -i ipmi_address=$IP_ADDRESS \$ -i ipmi_username=$USERNAME \$ -i ipmi_password=$PASSWORD \$ -i pxe_deploy_kernel=$deploy.kernel.id \$ -i pxe_deploy_ramdisk=$deploy.ramfs.id
$ ironic port-create -n $NODE_ID -a "$MAC_eth1"
• Add the hardware information:
$ ironic node-update $NODE_ID add properties/cpus=$CPU \$ properties/memory_mb=$RAM properties/local_gb=$ROOT_GB \$ properties/cpu_arch='x86_64'
7. Add a special flavor for the bare metal instances with an arch meta parameter to match the virtual architectureof the server’s CPU with the metal one. For example:
$ nova flavor-create baremetal auto $RAM $DISK_GB $CPU$ nova flavor-key baremetal set cpu_arch=x86_64
3.16.1 Note:
The vCPU ad vRAM parameters (x86_64 in the example) will not be applied because the operating system has accessto the real CPU cores and RAM. Only the root disk parameter is applied, and Ironic will resize the root disk partition.Ironic supports only a flat network topology for the bare metal provisioning, you must use Neutron to configure it.
8. Launch your Sahara cluster on Ironic from the cluster template:
• Log in to Horizon.
• Go to Data Processing > Node Group Templates.
– Find the templates that belong to the plugin you would like to use
– Update those templates to use ‘bare metal’ flavor instead of the default one
• Go to Data Processing > Cluster Templates.
• Click Launch Cluster.
• On the Launch Cluster dialog:
– Specify the bare metal network for cluster nodes
3.16. How do run a Sahara cluster on bare metal servers 101

Sahara, Release 6.0.0.0b2.dev3
The cluster provisioning time is slower compared to the cluster provisioning of the same size that runs on VMs. Ironicdoes real hardware reports which is time consuming, and the whole root disk is filled from /dev/zero for securityreasons.
3.17 Known limitations:
• Security groups are not applied.
• When booting a nova instance with a bare metal flavor, the user can not provide a pre-created neutron port tonova boot command. LP1544195
• Nodes are not isolated by projects.
• VM to Bare Metal network routing is not allowed.
• The user has to specify the count of ironic nodes before Devstack deploys an OpenStack.
• The user cannot use the same image for several ironic node types. For example, if there are 3 ironic node types,the user has to create 3 images and 3 flavors.
• Multiple interfaces on a single node are not supported. Devstack configures only one interface.
Other Resources
3.18 Project hosting
Launchpad hosts the Sahara project. The Sahara project homepage on Launchpad is http://launchpad.net/sahara.
3.18.1 Launchpad credentials
Creating a login on Launchpad is important even if you don’t use the Launchpad site itself, since Launchpad credentialsare used for logging in on several OpenStack-related sites. These sites include:
• Wiki
• Gerrit (see Code Reviews with Gerrit)
• Jenkins (see Continuous Integration with Jenkins)
3.18.2 Mailing list
The mailing list email is [email protected]; use the subject prefix [sahara]to address the team. To participate in the mailing list subscribe to the list at http://lists.openstack.org/cgi-bin/mailman/listinfo
3.18.3 Bug tracking
Report Sahara bugs at https://bugs.launchpad.net/sahara
102 Chapter 3. Developer Guide
Sahara, Release 6.0.0.0b2.dev3
3.18.4 Feature requests (Blueprints)
Sahara uses specs to track feature requests. Blueprints are at https://blueprints.launchpad.net/sahara. They providea high-level summary of proposed changes and track associated commits. Sahara also uses specs for in-depth de-scriptions and discussions of blueprints. Specs follow a defined format and are submitted as change requests to theopenstack/sahara-specs repository. Every blueprint should have an associated spec that is agreed on and merged tothe sahara-specs repository before it is approved, unless the whole team agrees that the implementation path for thefeature described in the blueprint is completely understood.
3.18.5 Technical support
Sahara uses Ask OpenStack to track Sahara technical support questions. Questions related to Sahara should be taggedwith ‘sahara’.
3.19 Code Reviews with Gerrit
Sahara uses the Gerrit tool to review proposed code changes. The review site is http://review.openstack.org.
Gerrit is a complete replacement for Github pull requests. All Github pull requests to the Sahara repository will beignored.
See Development Workflow for information about how to get started using Gerrit.
3.20 Continuous Integration with Jenkins
Each change made to Sahara core code is tested with unit and integration tests and style checks using flake8.
Unit tests and style checks are performed on public OpenStack Jenkins managed by Zuul.
Unit tests are checked using python 2.7.
The result of those checks and Unit tests are represented as a vote of +1 or -1 in the Verify column in code reviewsfrom the Jenkins user.
Integration tests check CRUD operations for the Image Registry, Templates, and Clusters. Also a test job is launchedon a created Cluster to verify Hadoop work.
All integration tests are launched by Jenkins on the internal Mirantis OpenStack Lab.
Jenkins keeps a pool of VMs to run tests in parallel. Even with the pool of VMs integration testing may take a while.
Jenkins is controlled for the most part by Zuul which determines what jobs are run when.
Zuul status is available at this address: Zuul Status.
For more information see: Sahara Hadoop Cluster CI.
The integration tests result is represented as a vote of +1 or -1 in the Verify column in a code review from the SaharaHadoop Cluster CI user.
You can put sahara-ci-recheck in comment, if you want to recheck sahara-ci jobs. Also, you can put recheck incomment, if you want to recheck both Jenkins and sahara-ci jobs. Finally, you can put reverify in a comment, if youonly want to recheck Jenkins jobs.
3.19. Code Reviews with Gerrit 103


![[Mirantis Day 2015] Проект Sahara - BigData на OpenStack](https://img.dokumen.tips/doc/110x75/55a543041a28abb2478b45be/mirantis-day-2015-sahara-bigdata-openstack.jpg)