Embed Size (px)
Citation preview
Red Hat JBoss Web Server 5.1
Installation Guide
Install and Configure Red Hat JBoss Web Server 5.1
Last Updated: 2019-05-07


Red Hat JBoss Web Server 5.1 Installation Guide
Install and Configure Red Hat JBoss Web Server 5.1

Legal Notice
Copyright © 2019 Red Hat, Inc.
The text of and illustrations in this document are licensed by Red Hat under a Creative CommonsAttribution–Share Alike 3.0 Unported license ("CC-BY-SA"). An explanation of CC-BY-SA isavailable athttp://creativecommons.org/licenses/by-sa/3.0/. In accordance with CC-BY-SA, if you distribute this document or an adaptation of it, you mustprovide the URL for the original version.
Red Hat, as the licensor of this document, waives the right to enforce, and agrees not to assert,Section 4d of CC-BY-SA to the fullest extent permitted by applicable law.
Red Hat, Red Hat Enterprise Linux, the Shadowman logo, JBoss, OpenShift, Fedora, the Infinitylogo, and RHCE are trademarks of Red Hat, Inc., registered in the United States and othercountries.
Linux ® is the registered trademark of Linus Torvalds in the United States and other countries.
Java ® is a registered trademark of Oracle and/or its affiliates.
XFS ® is a trademark of Silicon Graphics International Corp. or its subsidiaries in the United Statesand/or other countries.
MySQL ® is a registered trademark of MySQL AB in the United States, the European Union andother countries.
Node.js ® is an official trademark of Joyent. Red Hat Software Collections is not formally related toor endorsed by the official Joyent Node.js open source or commercial project.
The OpenStack ® Word Mark and OpenStack logo are either registered trademarks/service marksor trademarks/service marks of the OpenStack Foundation, in the United States and othercountries and are used with the OpenStack Foundation's permission. We are not affiliated with,endorsed or sponsored by the OpenStack Foundation, or the OpenStack community.
All other trademarks are the property of their respective owners.
Abstract
This book contains information related to installation and basic configuration of Red Hat JBoss WebServer.

. . . . . . . . . . . . . . . . . . . . . . . . . . . . . . . . . . . . . . . . . . . . . . . . . . . . . . . . . . . . . . . . . . . . . . . . . . . . . . . . . . . . . . . . . . . . . . . . . . . . . . . . . . . . . . . . . . . . . . . . . . . . . . . . . . . . . . . . . . . . . . . . . . . . . . . . . . . . . . . . . . . . . . . . . . . . . . . . . . . . . . . . . . . . . . . . . . . . . . . . . . . . . . . . . . . . . . . . . . . . . . . . . . . . . . . . . . . . . . . . . . . . . . . . . . . . . . . . . . . . . . . . . . . . . . . . . . . . . . . .
. . . . . . . . . . . . . . . . . . . . . . . . . . . . . . . . . . . . . . . . . . . . . . . . . . . . . . . . . . . . . . . . . . . . . . . . . . . . . . . . . . . . . . . . . . . . . . . . . . . . . . . . . . . . . . . . . . . . . . . . . . . . . . . . . . . . . . . . . . . . . . . . . . . . . . . . . . . . . . . . . . . . . . . . . . . . . . . . . . . . . . . . . . . . . . . . . . . . . . . . . . . . . . . . . . . . . . . . . . . . . . . . . . . . . . . . . . . . . . . . . . . . . . . . . . . . . . . . . . . . . . . . . . . . . . . . . . . . . . . .
. . . . . . . . . . . . . . . . . . . . . . . . . . . . . . . . . . . . . . . . . . . . . . . . . . . . . . . . . . . . . . . . . . . . . . . . . . . . . . . . . . . . . . . . . . . . . . . . . . . . . . . . . . . . . . . . . . . . . . . . . . . . . . . . . . . . . . . . . . . . . . . . . . . . . . . . . . . . . . . . . . . . . . . . . . . . . . . . . . . . . . . . . . . . . . . . . . . . . . . . . . . . . . . . . . . . . . . . . . . . . . . . . . . . . . . . . . . . . . . . . . . . . . . . . . . . . . . . . . . . . . . . . . . . . . . . . . . . . . . .
. . . . . . . . . . . . . . . . . . . . . . . . . . . . . . . . . . . . . . . . . . . . . . . . . . . . . . . . . . . . . . . . . . . . . . . . . . . . . . . . . . . . . . . . . . . . . . . . . . . . . . . . . . . . . . . . . . . . . . . . . . . . . . . . . . . . . . . . . . . . . . . . . . . . . . . . . . . . . . . . . . . . . . . . . . . . . . . . . . . . . . . . . . . . . . . . . . . . . . . . . . . . . . . . . . . . . . . . . . . . . . . . . . . . . . . . . . . . . . . . . . . . . . . . . . . . . . . . . . . . . . . . . . . . . . . . . . . . . . . .
. . . . . . . . . . . . . . . . . . . . . . . . . . . . . . . . . . . . . . . . . . . . . . . . . . . . . . . . . . . . . . . . . . . . . . . . . . . . . . . . . . . . . . . . . . . . . . . . . . . . . . . . . . . . . . . . . . . . . . . . . . . . . . . . . . . . . . . . . . . . . . . . . . . . . . . . . . . . . . . . . . . . . . . . . . . . . . . . . . . . . . . . . . . . . . . . . . . . . . . . . . . . . . . . . . . . . . . . . . . . . . . . . . . . . . . . . . . . . . . . . . . . . . . . . . . . . . . . . . . . . . . . . . . . . . . . . . . . . . . .
. . . . . . . . . . . . . . . . . . . . . . . . . . . . . . . . . . . . . . . . . . . . . . . . . . . . . . . . . . . . . . . . . . . . . . . . . . . . . . . . . . . . . . . . . . . . . . . . . . . . . . . . . . . . . . . . . . . . . . . . . . . . . . . . . . . . . . . . . . . . . . . . . . . . . . . . . . . . . . . . . . . . . . . . . . . . . . . . . . . . . . . . . . . . . . . . . . . . . . . . . . . . . . . . . . . . . . . . . . . . . . . . . . . . . . . . . . . . . . . . . . . . . . . . . . . . . . . . . . . . . . . . . . . . . . . . . . . . . . . .
Table of Contents
CHAPTER 1. INTRODUCTION1.1. ABOUT RED HAT JBOSS WEB SERVER1.2. SUPPORTED OPERATING SYSTEMS AND CONFIGURATIONS1.3. INSTALLATION METHODS1.4. COMPONENT DOCUMENTATION BUNDLE
CHAPTER 2. MIGRATION FROM BASE OS RHEL 7 TOMCAT TO JWS-5 TOMCAT2.1. GENERAL DIFFERENCES2.2. BUILD DEPENDENCIES2.3. JWS-5 FEATURES NOT AVAILABLE IN TOMCAT 7 FROM RHEL 72.4. USING TOMCAT 9 FROM JWS-5 ON RHEL
CHAPTER 3. INSTALLING JBOSS WEB SERVER ON RED HAT ENTERPRISE LINUX3.1. PREREQUISITES
3.1.1. Installing a Java Development Kit (JDK)Installing a JDK using the YUM package managerInstalling a JDK from a compressed archive (such as .zip or .tar)
3.1.2. Red Hat Enterprise Linux Package Prerequisites3.2. ZIP INSTALLATION
3.2.1. Downloading and Extracting JBoss Web Server3.2.2. Managing JBoss Web Server on Red Hat Enterprise Linux
3.2.2.1. Managing JBoss Web Server using a system daemon for .zip installations on Red Hat Enterprise Linux
3.2.2.1.1. Setting up and using the JBoss Web Server with SysVPrerequisitesSetting up the JBoss Web Server for SysVControlling the JBoss Web Server with SysV
3.2.2.1.2. Setting up and using the JBoss Web Server with systemdSetting up the JBoss Web Server for systemdControlling the JBoss Web Server with systemd
3.2.2.2. Managing JBoss Web Server on a command line3.2.2.2.1. Configuring the JBoss Web Server Installation
Setting the JAVA_HOME Environment VariableCreating a Tomcat UserMove the ownership of tomcat directory to the tomcat user
3.2.2.2.2. Starting JBoss Web Server3.2.2.2.3. Stopping JBoss Web Server
3.3. RPM INSTALLATION3.3.1. Installing JBoss Web Server from RPM packages3.3.2. Starting JBoss Web Server3.3.3. Stopping JBoss Web Server3.3.4. Configuring JBoss Web Server Services to Start at Boot
3.4. SELINUX POLICIES3.4.1. SELinux Policy Information3.4.2. SELinux Policies for an RPM Installation3.4.3. SELinux Policies for a ZIP Installation
CHAPTER 4. USING JSVC TO START TOMCAT
CHAPTER 5. HIBERNATE ON JBOSS WEB SERVER
CHAPTER 6. ENABLING HTTP/2 FOR THE RED HAT JBOSS WEB SERVERPrerequisites
44455
66667
88889999
10
101111111111
121212121313131313131415161616161717
19
20
2222
Table of Contents
1

. . . . . . . . . . . . . . . . . . . . . . . . . . . . . . . . . . . . . . . . . . . . . . . . . . . . . . . . . . . . . . . . . . . . . . . . . . . . . . . . . . . . . . . . . . . . . . . . . . . . . . . . . . . . . . . . . . . . . . . . . . . . . . . . . . . . . . . . . . . . . . . . . . . . . . . . . . . . . . . . . . . . . . . . . . . . . . . . . . . . . . . . . . . . . . . . . . . . . . . . . . . . . . . . . . . . . . . . . . . . . . . . . . . . . . . . . . . . . . . . . . . . . . . . . . . . . . . . . . . . . . . . . . . . . . . . . . . . . . . .
. . . . . . . . . . . . . . . . . . . . . . . . . . . . . . . . . . . . . . . . . . . . . . . . . . . . . . . . . . . . . . . . . . . . . . . . . . . . . . . . . . . . . . . . . . . . . . . . . . . . . . . . . . . . . . . . . . . . . . . . . . . . . . . . . . . . . . . . . . . . . . . . . . . . . . . . . . . . . . . . . . . . . . . . . . . . . . . . . . . . . . . . . . . . . . . . . . . . . . . . . . . . . . . . . . . . . . . . . . . . . . . . . . . . . . . . . . . . . . . . . . . . . . . . . . . . . . . . . . . . . . . . . . . . . . . . . . . . . . . .
ProcedureNext StepsAdditional Resources
CHAPTER 7. USING A PASSWORD VAULT WITH RED HAT JBOSS WEB SERVER 5.17.1. USING A PASSWORD VAULT WITH RED HAT JBOSS WEB SERVER 5.1
Installing the JBoss Web Server password vault from .zip archiveInstalling the JBoss Web Server password vault on Red Hat Enterprise Linux using the YUM package manager
7.1.1. Enabling the Password Vault7.1.2. Creating a Java Keystore7.1.3. Storing the tomcat-vault vault.properties file outside of the JWS_HOME directory7.1.4. Initializing the Password Vault
7.1.4.1. Initializing the Vault for Apache Tomcat interactivelyConfiguring Tomcat to Use the Password Vault
7.1.4.2. Initializing the Vault for Apache Tomcat non-interactively (silent setup)7.1.5. Storing a Sensitive String in the Password Vault7.1.6. Using a Stored Sensitive String in Your Tomcat Configuration
APPENDIX A. JAVA IPV4/IPV6 PROPERTIESConfiguring Java PropertiesConfiguring Tomcat Bindings
222324
252525
25252526262627282828
303030
Red Hat JBoss Web Server 5.1 Installation Guide
2

Table of Contents
3

CHAPTER 1. INTRODUCTION
1.1. ABOUT RED HAT JBOSS WEB SERVER
The JBoss Web Server is a fully integrated and certified set of components for hosting Java webapplications. It consists of:
Apache Tomcat: a servlet container in accordance with the Java Servlet Specification. JBossWeb Server contains Apache Tomcat 9.
The Apache Tomcat Native Library: a Tomcat library, which improves Tomcat scalability,performance, and integration with native server technologies.
The tomcat-vault: an extension for the JBoss Web Server used for securely storing passwordsand other sensitive information used by a JBoss Web Server.
The mod_cluster library: a library that allows communication between Apache Tomcat and theApache HTTP Server’s mod_proxy_cluster module. This allows the Apache HTTP Server to beused as a load balancer for JBoss Web Server. For information on the configuration ofmod_cluster, or for information on the installation and configuration of the alternative loadbalancers mod_jk and mod_proxy, see the HTTP Connectors and Load Balancing Guide .
NOTE
If you need clustering or session replication support for Java applications, RedHat recommends that you use Red Hat JBoss Enterprise Application Platform(JBoss EAP).
Component Version
Apache Tomcat 9 9.0.7-20
Tomcat Vault 1.1.7.Final-redhat-2
Tomcat Native 1.2.17-28
mod_cluster 1.4.0-9.Final-redhat-1
JBoss logging 3.3.1-5.Final-redhat-1
This Installation Guide includes procedures for the installation, minor upgrade, and basic configurationof the Tomcat servers from JBoss Web Server on supported operating systems. Installation andconfiguration instructions for the Apache HTTP Server are covered in the JBoss Core ServicesDocumentation.
1.2. SUPPORTED OPERATING SYSTEMS AND CONFIGURATIONS
Red Hat JBoss Web Server 5.1 Installation Guide
4

Operating System Chipset Architecture Java Virtual Machine
Red Hat Enterprise Linux 8 x86_64 OpenJDK 1.8, OpenJDK 11,OracleJDK 11
1.3. INSTALLATION METHODS
JBoss Web Server can be installed on supported Red Hat Enterprise Linux, Microsoft Windows, andSolaris systems using ZIP installation files available for each platform. JBoss Web Server can also beinstalled on supported Red Hat Enterprise Linux systems using RPM packages.
For ZIP installations, below is a summary of the components that are included in the ZIP files which formthe core part of a JBoss Web Server installation.
jws-application-server-5.1.0.zip
Tomcat 9
mod_cluster
tomcat-vault
jws-application-server-5.1.0-<platform>-<architecture>.zip
Platform-specific utilities
1.4. COMPONENT DOCUMENTATION BUNDLE
JBoss Web Server includes an additional documentation bundle that includes the original vendordocumentation for each component. This documentation bundle, jws-docs-5.1.0.zip, is available at theRed Hat Customer Portal, and contains additional documentation for the following:
tomcat
tomcat-native
tomcat-vault
CHAPTER 1. INTRODUCTION
5

CHAPTER 2. MIGRATION FROM BASE OS RHEL 7 TOMCAT TOJWS-5 TOMCAT
For RHEL 8, Tomcat will be provided by the Red Hat JBoss Web Server team, where as previously it wasprovided by the Red Hat Enterprise Linux team. This section will cover the major differences betweenRHEL 7’s Tomcat package and the package provided by the JBoss Web Server project.
2.1. GENERAL DIFFERENCES
The package directories are all located within the SCL directories, i.e.: /opt/rh/jws5/root/usr/share/tomcat vs /usr/share/tomcat
The jws5-tomcat-webapps package doesn’t include the examples webapps, for securitypurposes
The jws5-tomcat-webapps package drops its dependency on jakarta-taglibs-standard whichwas needed by examples (not shipped).
The Tomcat version is Tomcat 9 instead of Tomcat 7. See the Tomcat Migration Guides forhelp migrating your Tomcat version.
The systemd service unit’s named changed from tomcat to jws5-tomcat, but functions thesame.
The jws5-tomcat package increases the minor version of java required from version 7 to version8.
The jws5-tomcat package drops the previous dependencies on apache-commons-daemon, apache-commons-logging, apache-commons-collections, apache-commons-pool, and apache-commons-dbcp.
The jws5-tomcat package drops jsvc support. *The jws5-tomcat package drops the RHEL ECJversion requirement and replaces it with a requirement for the jws5-ecj package (This is to getthe minimum version required).
The jws5-tomcat package includes a new package jws5-tomcat-selinux which is not installedby default. This means selinux is NOT enabled by default.
2.2. BUILD DEPENDENCIES
The jws5-tomcat package includes no patch files, it’s built from our own fork.
The jws5-tomcat package drops several build time dependencies while adding a few builddependencies from JBCS (these only matter if customers want to rebuild the RPM, which isn’tsupported).
2.3. JWS-5 FEATURES NOT AVAILABLE IN TOMCAT 7 FROM RHEL 7
Access to use Tomcat-Native
Access to use Tomcat-Vault
Access to JBCS httpd, which is utilized as a load balancer for Tomcat
Red Hat JBoss Web Server 5.1 Installation Guide
6

Access to use mod_cluster as a load balancer of httpd
Access to JWS zips to use instead of the RPM distribution, allows for running multiple instancesof Tomcat.
2.4. USING TOMCAT 9 FROM JWS-5 ON RHEL
Once you have the JWS/Runtimes SKU, then you can execute the commands given in the ManagingJBoss Web Server on Red Hat Enterprise Linux section of this installation guide.
CHAPTER 2. MIGRATION FROM BASE OS RHEL 7 TOMCAT TO JWS-5 TOMCAT
7
CHAPTER 3. INSTALLING JBOSS WEB SERVER ON RED HATENTERPRISE LINUX
You can install JBoss Web Server on Red Hat Enterprise Linux using one of two methods:
ZIP files
RPM packages
Regardless of which method you choose, you must first install a supported Java Development Kit (JDK) .
3.1. PREREQUISITES
3.1.1. Installing a Java Development Kit (JDK)
Before installing JBoss Web Server, you must first install a supported Java Development Kit (JDK).
Full list of supported JDKs for Red Hat JBoss Web Server 5.1:
Operating System Chipset Architecture Java Virtual Machine
Red Hat Enterprise Linux 8 x86_64 OpenJDK 1.8, OpenJDK 11,OracleJDK 11
Installing a JDK using the YUM package manager
1. Subscribe your Red Hat Enterprise Linux system to the appropriate channel:
OpenJDK:
rhel-8-server-rpms
2. As the root user, execute the command to install a 1.8 JDK:
# yum install java-1.8.0-openjdk-devel
3. Run the following commands as the root user to ensure the correct JDK is in use:
# alternatives --config java
# alternatives --config javac
These commands return lists of available JDK versions with the selected version marked with aplus (+) sign. If the selected JDK is not the desired one, change to the desired JDK as instructedin the shell prompt.
IMPORTANT
All software that use the java and javac commands uses the JDK set by alternatives. Changing Java alternatives may impact on the running of othersoftware.
Red Hat JBoss Web Server 5.1 Installation Guide
8
Installing a JDK from a compressed archive (such as .zip or .tar)If the JDK was downloaded from the vendor’s website (Oracle or OpenJDK), use the installationinstructions provided by the vendor and set the JAVA_HOME environment variable.
If the JDK has was installed from a compressed archive, set the JAVA_HOME environment variable forTomcat before running JBoss Web Server.
In the bin directory of Tomcat (JWS_HOME/tomcat/bin), create a file named setenv.sh, and insert the JAVA_HOME path definition.
For example:
$ cat JWS_HOME/tomcat/bin/setenv.sh
export JAVA_HOME=/usr/lib/jvm/jre-1.8.0-openjdk.x86_64
3.1.2. Red Hat Enterprise Linux Package Prerequisites
Before installing JBoss Web Server on Red Hat Enterprise Linux, ensure the following prerequisites aremet.
A supported JDK is installed.
Additionally, RHEL-8 users needing to run JSSE+OpenSSL or APR, you will need to useTomcat-Native for it to work properly. The file for Tomcat-Native can be found in the native zipdirectory. To install OpenSSL and APR, run the following commands:
# yum install openssl
# yum install apr
You must remove the tomcatjss package before installing the tomcat-native package. The tomcatjss package uses an underlying NSS security model rather than the OpenSSL securitymodel.
Removing the tomcatjss Package
1. As the root user, run the following command to remove tomcatjss:
# yum remove tomcatjss
3.2. ZIP INSTALLATION
Ensure that all of the prerequisites are met before installing JBoss Web Server.
3.2.1. Downloading and Extracting JBoss Web Server
To install JBoss Web Server, download and extract the installation ZIP files.
1. Open a browser and log in to the Red Hat Customer Portal .
2. Click Downloads.
CHAPTER 3. INSTALLING JBOSS WEB SERVER ON RED HAT ENTERPRISE LINUX
9
3. Click Red Hat JBoss Web Server in the Product Downloads list.
4. Select the correct JBoss Web Server version from the Version drop-down menu.
5. Click Download for each of the following files, ensuring that you select the correct platform andarchitecture for your system:
The Red Hat JBoss Web Server 5.1 Application Server (jws-application-servers-5.1.0.zip).
The Red Hat JBoss Web Server 5.1 Native Components for RHEL (jws-application-servers-5.1.0-<platform>-<architecture>.zip).
6. Unzip the downloaded ZIP files to your installation directory.For example:
# unzip jws-application-server-5.1.0.zip -d /opt/# unzip -o jws-application-server-5.1.0-<platform>-<architecture>.zip -d /opt/
The directory created by extracting the ZIP archives is the top-level directory for JBoss Web Server.This is referred to as JWS_HOME.
3.2.2. Managing JBoss Web Server on Red Hat Enterprise Linux
There are two supported methods for running and managing Red Hat JBoss Web Server on Red HatEnterprise Linux:
using a system daemon
on a command line
The recommended method for managing the JBoss Web Server is using a system daemon.
3.2.2.1. Managing JBoss Web Server using a system daemon for .zip installations on Red HatEnterprise Linux
Using the JBoss Web Server with a system daemon provides a method of starting the JBoss WebServer services at system boot. The system daemon also provides start, stop and status checkfunctions.
The default system daemon for Red Hat Enterprise Linux 8 and Red Hat Enterprise Linux 7 is systemdand for Red Hat Enterprise Linux 6 the default is SysV.
NOTE
Red Hat JBoss Web Server 5.1 Installation Guide
10

NOTE
To determine which system daemon is running, issue ps -p 1 -o comm=.
For systemd:
$ ps -p 1 -o comm=
systemd
For SysV:
$ ps -p 1 -o comm=
init
3.2.2.1.1. Setting up and using the JBoss Web Server with SysV
Prerequisites
The redhat-lsb-core package. To install, run: yum install redhat-lsb-core
Setting up the JBoss Web Server for SysVAs the root user, execute the .postinstall.sysv script:
# cd JWS_HOME/tomcat# sh .postinstall.sysv
Controlling the JBoss Web Server with SysVSysV commands can only be issued by the root user.
To enable the JBoss Web Server services to start at boot using SysV:
# chkconfig jws5-tomcat on
To start the JBoss Web Server using SysV:
# service jws5-tomcat start
To stop the JBoss Web Server using SysV:
# service jws5-tomcat stop
To verify the status of the JBoss Web Server using SysV (the status operation can be executedby any user):
$ service jws5-tomcat status
For more information on using SysV, see: Red Hat Enterprise Linux 6 Deployment Guide: RunningServices
3.2.2.1.2. Setting up and using the JBoss Web Server with systemd
CHAPTER 3. INSTALLING JBOSS WEB SERVER ON RED HAT ENTERPRISE LINUX
11

Setting up the JBoss Web Server for systemdAs the root user, execute the .postinstall.systemd script:
# cd JWS_HOME/tomcat# sh .postinstall.systemd
Controlling the JBoss Web Server with systemdSystemd commands can only be issued by the root user.
To enable the JBoss Web Server services to start at boot using systemd:
# systemctl enable jws5-tomcat.service
To start the JBoss Web Server using systemd:
# systemctl start jws5-tomcat.service
To stop the JBoss Web Server using systemd:
# systemctl stop jws5-tomcat.service
To verify the status of the JBoss Web Server using systemd (the status operation can beexecuted by any user):
# systemctl status jws5-tomcat.service
For more information on using systemd, see: RHEL 7 System Administrator’s Guide: Managing SystemServices
NOTE
There is currently no RHEL 8 System Administrator’s Guide available. This document willbe updated to include it when it is made available.
3.2.2.2. Managing JBoss Web Server on a command line
3.2.2.2.1. Configuring the JBoss Web Server Installation
NOTE
The following configuration steps are performed by the .postinstall.sysv script and the .postinstall.systemd script described in Managing JBoss Web Server using a systemdaemon for .zip installations on Red Hat Enterprise Linux
Some configuration is required before running JBoss Web Server. This section includes the followingconfiguration procedures:
Setting the JAVA_HOME Environment Variable .
Creating the tomcat user for simple and secure user management: Creating a Tomcat User .
Grant the tomcat user access to the JBoss Web Server by moving the ownership of tomcat
Red Hat JBoss Web Server 5.1 Installation Guide
12
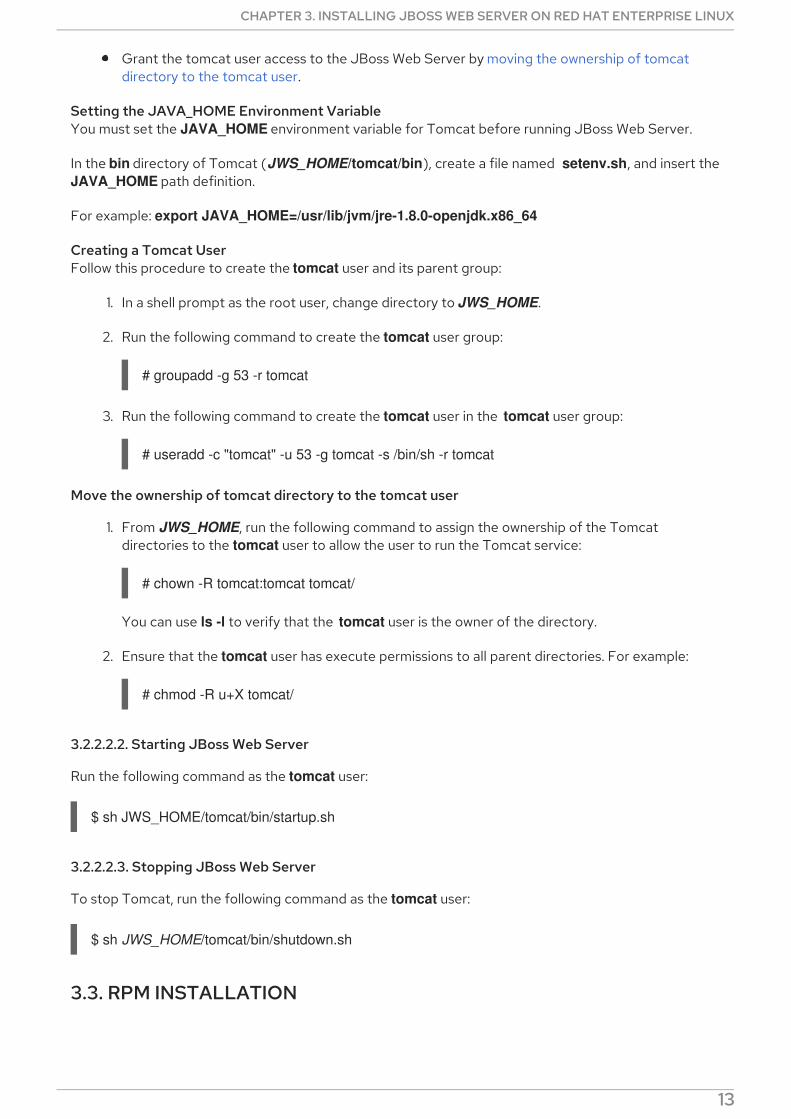
Grant the tomcat user access to the JBoss Web Server by moving the ownership of tomcatdirectory to the tomcat user.
Setting the JAVA_HOME Environment VariableYou must set the JAVA_HOME environment variable for Tomcat before running JBoss Web Server.
In the bin directory of Tomcat (JWS_HOME/tomcat/bin), create a file named setenv.sh, and insert the JAVA_HOME path definition.
For example: export JAVA_HOME=/usr/lib/jvm/jre-1.8.0-openjdk.x86_64
Creating a Tomcat UserFollow this procedure to create the tomcat user and its parent group:
1. In a shell prompt as the root user, change directory to JWS_HOME.
2. Run the following command to create the tomcat user group:
# groupadd -g 53 -r tomcat
3. Run the following command to create the tomcat user in the tomcat user group:
# useradd -c "tomcat" -u 53 -g tomcat -s /bin/sh -r tomcat
Move the ownership of tomcat directory to the tomcat user
1. From JWS_HOME, run the following command to assign the ownership of the Tomcatdirectories to the tomcat user to allow the user to run the Tomcat service:
# chown -R tomcat:tomcat tomcat/
You can use ls -l to verify that the tomcat user is the owner of the directory.
2. Ensure that the tomcat user has execute permissions to all parent directories. For example:
# chmod -R u+X tomcat/
3.2.2.2.2. Starting JBoss Web Server
Run the following command as the tomcat user:
$ sh JWS_HOME/tomcat/bin/startup.sh
3.2.2.2.3. Stopping JBoss Web Server
To stop Tomcat, run the following command as the tomcat user:
$ sh JWS_HOME/tomcat/bin/shutdown.sh
3.3. RPM INSTALLATION
Installing JBoss Web Server from RPM packages installs Tomcat as service, and installs its resources
CHAPTER 3. INSTALLING JBOSS WEB SERVER ON RED HAT ENTERPRISE LINUX
13

Installing JBoss Web Server from RPM packages installs Tomcat as service, and installs its resourcesinto absolute paths. The RPM installation option is available for Red Hat Enterprise Linux 6, Red HatEnterprise Linux 7, and Red Hat Enterprise Linux 8.
RPM installation packages for JBoss Web Server are available from Red Hat Subscription Management.
3.3.1. Installing JBoss Web Server from RPM packages
Prerequisites
Install a Java Development Kit (JDK) .
Ensure that the tomcatjss package is removed .
Before downloading and installing the RPM packages, you must register your system with Red HatSubscription Management and subscribe to the respective Content Delivery Network (CDN)repositories.
For information on registering Red Hat Enterprise Linux, see:
Configuring the Subscription Service for Red Hat Enterprise Linux 6
OR
The Subscription Manager for Red Hat Enterprise Linux 7
OR
The Subscription Manager for Red Hat Enterprise Linux 8
Attaching subscriptions to Red Hat Enterprise Linux (if required)
If the system does not have a subscription attached that provides JBoss Web Server:
1. Log in to the Red Hat Subscription Manager .
2. Click on the Systems tab.
3. Click on the Name of the system to add the subscription to.
4. Change from the Details tab to the Subscriptions tab, then click Attach Subscriptions.
5. Select the check box beside the subscription to attach, then click Attach Subscriptions.
NOTE
To verify that a subscription provides the required CDN repositories:
1. Log in to: https://access.redhat.com/management/subscriptions.
2. Click the Subscription Name.
3. Under Products Provided, you require:
JBoss Enterprise Web Server.
Red Hat JBoss Core Services.
Red Hat JBoss Web Server 5.1 Installation Guide
14

Installing JBoss Web Server from RPM packages using YUM
1. On a command line, subscribe to the JBoss Web Server CDN repositories for your operatingsystem version using subscription-manager:
# subscription-manager repos --enable <repository>
For Red Hat Enterprise Linux 6:
jws-5-for-rhel-6-server-rpms
jb-coreservices-1-for-rhel-6-server-rpms
For Red Hat Enterprise Linux 7:
jws-5-for-rhel-7-server-rpms
jb-coreservices-1-for-rhel-7-server-rpms
2. Issue the following command as the root user to install JBoss Web Server:
# yum groupinstall jws5
NOTE
Although not recommended, instead of using the group install, you can installeach of the packages and their dependencies individually.
The Red Hat JBoss Core Services repositories above are required for theinstallation of JBoss Web Server.
3.3.2. Starting JBoss Web Server
In a shell prompt as the root user, start the Tomcat service.
For Red Hat Enterprise Linux 6:
# service jws5-tomcat start
For Red Hat Enterprise Linux 7:
# systemctl start jws5-tomcat.service
This is the only supported method of starting JBoss Web Server for an RPM installation.
To verify that Tomcat is running, the output of the service status command should be reviewed.This can be executed as any user.
For Red Hat Enterprise Linux 6:
# service jws5-tomcat status
For Red Hat Enterprise Linux 7:
# systemctl status jws5-tomcat.service
CHAPTER 3. INSTALLING JBOSS WEB SERVER ON RED HAT ENTERPRISE LINUX
15

NOTE
For complete instructions on installing and configuring HTTPD on RHEL 8, please seethis link
3.3.3. Stopping JBoss Web Server
In a shell prompt as the root user, stop the Tomcat service.
For Red Hat Enterprise Linux 6:
# service jws5-tomcat stop
For Red Hat Enterprise Linux 7:
# systemctl stop jws5-tomcat.service
To verify that Tomcat is no longer running, the output of the service status command should bereviewed. This can be executed as any user.
For Red Hat Enterprise Linux 6:
# service jws5-tomcat status
For Red Hat Enterprise Linux 7:
# systemctl status jws5-tomcat.service
NOTE
For complete instructions on installing and configuring HTTPD on RHEL 8, please seethis link
3.3.4. Configuring JBoss Web Server Services to Start at Boot
Use the following commands to enable the JBoss Web Server services to start at boot.
For Red Hat Enterprise Linux 6:
# chkconfig jws5-tomcat on
For Red Hat Enterprise Linux 7:
# systemctl enable jws5-tomcat.service
3.4. SELINUX POLICIES
3.4.1. SELinux Policy Information
The following table contains information about the SELinux policies provided in the jws5-tomcat-selinux
Red Hat JBoss Web Server 5.1 Installation Guide
16
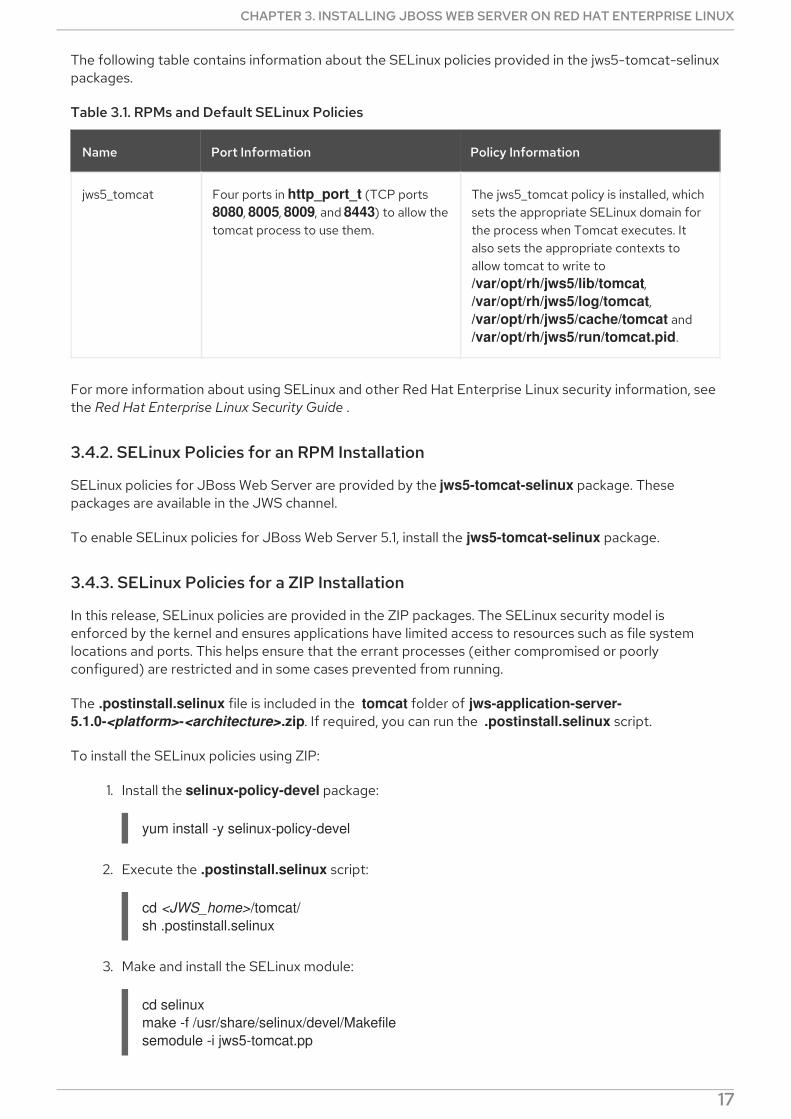
The following table contains information about the SELinux policies provided in the jws5-tomcat-selinuxpackages.
Table 3.1. RPMs and Default SELinux Policies
Name Port Information Policy Information
jws5_tomcat Four ports in http_port_t (TCP ports 8080, 8005, 8009, and 8443) to allow thetomcat process to use them.
The jws5_tomcat policy is installed, whichsets the appropriate SELinux domain forthe process when Tomcat executes. Italso sets the appropriate contexts toallow tomcat to write to /var/opt/rh/jws5/lib/tomcat, /var/opt/rh/jws5/log/tomcat, /var/opt/rh/jws5/cache/tomcat and /var/opt/rh/jws5/run/tomcat.pid.
For more information about using SELinux and other Red Hat Enterprise Linux security information, seethe Red Hat Enterprise Linux Security Guide .
3.4.2. SELinux Policies for an RPM Installation
SELinux policies for JBoss Web Server are provided by the jws5-tomcat-selinux package. Thesepackages are available in the JWS channel.
To enable SELinux policies for JBoss Web Server 5.1, install the jws5-tomcat-selinux package.
3.4.3. SELinux Policies for a ZIP Installation
In this release, SELinux policies are provided in the ZIP packages. The SELinux security model isenforced by the kernel and ensures applications have limited access to resources such as file systemlocations and ports. This helps ensure that the errant processes (either compromised or poorlyconfigured) are restricted and in some cases prevented from running.
The .postinstall.selinux file is included in the tomcat folder of jws-application-server-5.1.0-<platform>-<architecture>.zip. If required, you can run the .postinstall.selinux script.
To install the SELinux policies using ZIP:
1. Install the selinux-policy-devel package:
yum install -y selinux-policy-devel
2. Execute the .postinstall.selinux script:
cd <JWS_home>/tomcat/sh .postinstall.selinux
3. Make and install the SELinux module:
cd selinuxmake -f /usr/share/selinux/devel/Makefilesemodule -i jws5-tomcat.pp
CHAPTER 3. INSTALLING JBOSS WEB SERVER ON RED HAT ENTERPRISE LINUX
17
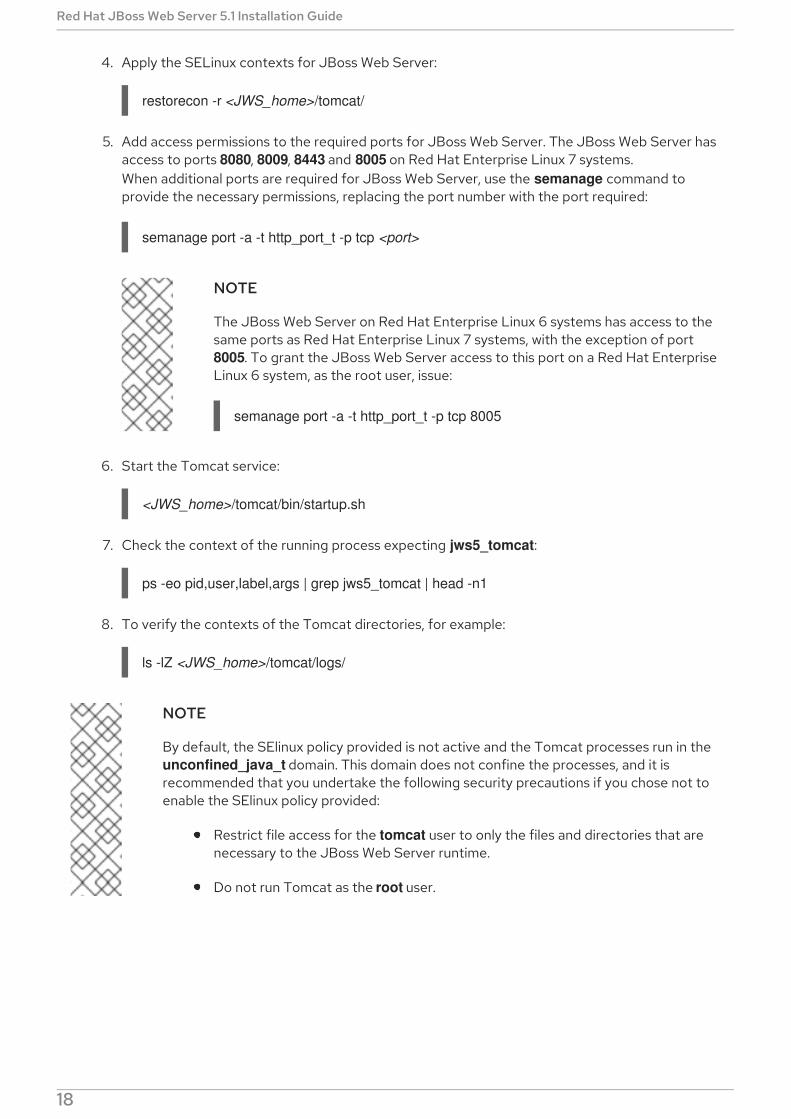
4. Apply the SELinux contexts for JBoss Web Server:
restorecon -r <JWS_home>/tomcat/
5. Add access permissions to the required ports for JBoss Web Server. The JBoss Web Server hasaccess to ports 8080, 8009, 8443 and 8005 on Red Hat Enterprise Linux 7 systems.When additional ports are required for JBoss Web Server, use the semanage command toprovide the necessary permissions, replacing the port number with the port required:
semanage port -a -t http_port_t -p tcp <port>
NOTE
The JBoss Web Server on Red Hat Enterprise Linux 6 systems has access to thesame ports as Red Hat Enterprise Linux 7 systems, with the exception of port 8005. To grant the JBoss Web Server access to this port on a Red Hat EnterpriseLinux 6 system, as the root user, issue:
semanage port -a -t http_port_t -p tcp 8005
6. Start the Tomcat service:
<JWS_home>/tomcat/bin/startup.sh
7. Check the context of the running process expecting jws5_tomcat:
ps -eo pid,user,label,args | grep jws5_tomcat | head -n1
8. To verify the contexts of the Tomcat directories, for example:
ls -lZ <JWS_home>/tomcat/logs/
NOTE
By default, the SElinux policy provided is not active and the Tomcat processes run in the unconfined_java_t domain. This domain does not confine the processes, and it isrecommended that you undertake the following security precautions if you chose not toenable the SElinux policy provided:
Restrict file access for the tomcat user to only the files and directories that arenecessary to the JBoss Web Server runtime.
Do not run Tomcat as the root user.
Red Hat JBoss Web Server 5.1 Installation Guide
18

CHAPTER 4. USING JSVC TO START TOMCATAs JSVC is no longer supported from Tomcat on RHEL, this section no longer exists. It will be removedentirely in the next Service Pack.
Instead, please see using a system daemon and follow the instructions there.
CHAPTER 4. USING JSVC TO START TOMCAT
19

CHAPTER 5. HIBERNATE ON JBOSS WEB SERVERHibernate is an object-relational mapping framework. It is provided by the JBoss Web Server MavenRepository (jboss-web-server-5.1.0-maven-repository.zip). This packaged version is used on allsupported platforms.
Hibernate is used in the same way it is used for a regular Tomcat installation: the Hibernate JAR files areadded into a deployment WAR file. Tomcat provides a default connection pooling mechanism, which isdefined in context.xml. However, persistence.xml and web.xml are also required. The example belowshows a configuration with the Tomcat connection pooling mechanism.
/META-INF/context.xml defines the connection pools Tomcat should create.
context.xml
/WEB-INF/classes/META-INF/persistence.xml is a JPA configuration file. It defines how theapplication configures Hibernate to consume connections from the Tomcat pool. If you areusing the Hibernate API directly, use a similar configuration to that shown in hibernate.cfg.xml.
persistence.xml
/WEB-INF/web.xml is a regular web application deployment file, which instructs Tomcat whichdatasource to consume. In the example below, the datasource is jdbc/DsWebAppDB.
web.xml
<Context> <Resource name="jdbc/DsWebAppDB" auth="Container" type="javax.sql.DataSource" username="sa" password="" driverClassName="org.h2.Driver" url="jdbc:h2:mem:target/test/db/h2/hibernate" maxActive="8" maxIdle="4"/></Context>
<persistence version="1.0" xmlns="http://java.sun.com/xml/ns/persistence" xmlns:xsi="http://www.w3.org/2001/XMLSchema-instance" xsi:schemaLocation="http://java.sun.com/xml/ns/persistence http://java.sun.com/xml/ns/persistence/persistence_1_0.xsd">
<persistence-unit name="dswebapp"> <provider>org.hibernate.ejb.HibernatePersistence</provider> <properties> <property name="hibernate.dialect" value="org.hibernate.dialect.H2Dialect" /> <property name="hibernate.connection.datasource" value="java:comp/env/jdbc/DsWebAppDB"/> </properties> </persistence-unit></persistence>
Red Hat JBoss Web Server 5.1 Installation Guide
20

For details, see the Hibernate documentation for JBoss Web Server.
<?xml version="1.0" encoding="UTF-8"?><web-app version="2.5" xmlns="http://java.sun.com/xml/ns/javaee" xmlns:xsi="http://www.w3.org/2001/XMLSchema-instance" xsi:schemaLocation="http://java.sun.com/xml/ns/javaee http://java.sun.com/xml/ns/javaee/web-app_2_5.xsd">
<resource-env-ref> <resource-env-ref-name>jdbc/DsWebAppDB</resource-env-ref-name> <resource-env-ref-type>javax.sql.DataSource</resource-env-ref-type> </resource-env-ref></web-app>
CHAPTER 5. HIBERNATE ON JBOSS WEB SERVER
21
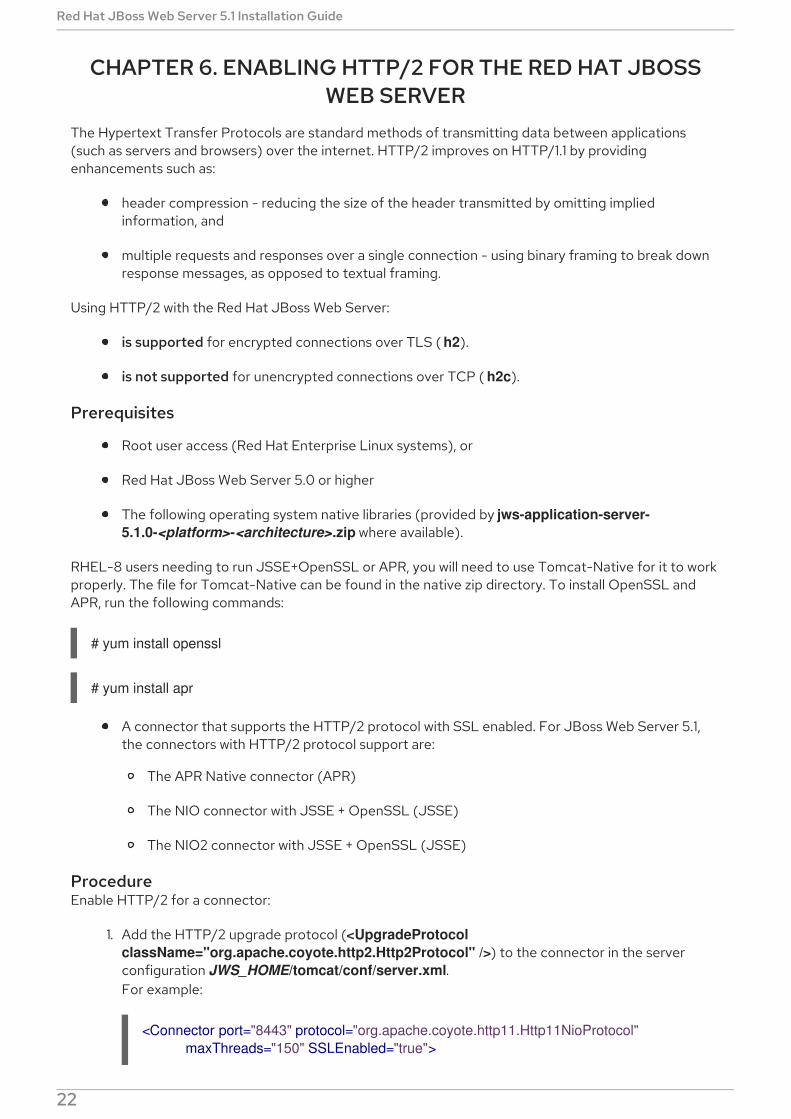
CHAPTER 6. ENABLING HTTP/2 FOR THE RED HAT JBOSSWEB SERVER
The Hypertext Transfer Protocols are standard methods of transmitting data between applications(such as servers and browsers) over the internet. HTTP/2 improves on HTTP/1.1 by providingenhancements such as:
header compression - reducing the size of the header transmitted by omitting impliedinformation, and
multiple requests and responses over a single connection - using binary framing to break downresponse messages, as opposed to textual framing.
Using HTTP/2 with the Red Hat JBoss Web Server:
is supported for encrypted connections over TLS ( h2).
is not supported for unencrypted connections over TCP ( h2c).
Prerequisites
Root user access (Red Hat Enterprise Linux systems), or
Red Hat JBoss Web Server 5.0 or higher
The following operating system native libraries (provided by jws-application-server-5.1.0-<platform>-<architecture>.zip where available).
RHEL-8 users needing to run JSSE+OpenSSL or APR, you will need to use Tomcat-Native for it to workproperly. The file for Tomcat-Native can be found in the native zip directory. To install OpenSSL andAPR, run the following commands:
# yum install openssl
# yum install apr
A connector that supports the HTTP/2 protocol with SSL enabled. For JBoss Web Server 5.1,the connectors with HTTP/2 protocol support are:
The APR Native connector (APR)
The NIO connector with JSSE + OpenSSL (JSSE)
The NIO2 connector with JSSE + OpenSSL (JSSE)
ProcedureEnable HTTP/2 for a connector:
1. Add the HTTP/2 upgrade protocol (<UpgradeProtocol className="org.apache.coyote.http2.Http2Protocol" />) to the connector in the serverconfiguration JWS_HOME/tomcat/conf/server.xml.For example:
<Connector port="8443" protocol="org.apache.coyote.http11.Http11NioProtocol" maxThreads="150" SSLEnabled="true">
Red Hat JBoss Web Server 5.1 Installation Guide
22

server.xml contains an example connector definition for the APR protocol with the upgradeprotocol to HTTP/2:
2. Restart the Red Hat JBoss Web Server as the root user, to apply the changed configuration.
a. For SysV (Red Hat Enterprise Linux 6) users:
# service jws5-tomcat restart
b. For systemd (Red Hat Enterprise Linux 7) users:
# systemctl restart jws5-tomcat.service
c. For Red Hat Enterprise Linux users running Red Hat JBoss Web Server using startup.sh:
# JWS_HOME/sbin/shudown.sh# JWS_HOME/sbin/startup.sh
d. For Solaris users:
# sh JWS_HOME/tomcat/bin/daemon.sh stop# sh JWS_HOME/tomcat/bin/daemon.sh start
e. For Windows Server users:
# net restart tomcat9
Next StepsVerify that HTTP/2 is enabled by reviewing the Red Hat JBoss Web Server logs or by using the curlcommand:
Check the console output log (JWS_HOME/tomcat/logs/catalina.out) to verify that the"connector has been configured to support negotiation to [h2]":
<UpgradeProtocol className="org.apache.coyote.http2.Http2Protocol" /> <SSLHostConfig> <Certificate certificateKeystoreFile="/KeyStore.jks" certificateKeystorePassword="changeit" type="RSA" /> </SSLHostConfig></Connector>
<Connector port="8443" protocol="org.apache.coyote.http11.Http11AprProtocol" maxThreads="150" SSLEnabled="true" > <UpgradeProtocol className="org.apache.coyote.http2.Http2Protocol" /> <SSLHostConfig> <Certificate certificateKeyFile="conf/localhost-rsa-key.pem" certificateFile="conf/localhost-rsa-cert.pem" certificateChainFile="conf/localhost-rsa-chain.pem" type="RSA" /> </SSLHostConfig></Connector>
CHAPTER 6. ENABLING HTTP/2 FOR THE RED HAT JBOSS WEB SERVER
23

$ cat JWS_HOME/tomcat/logs/catalina.out | grep 'h2'
06-Apr-2018 04:49:26.201 INFO [main] org.apache.coyote.http11.AbstractHttp11Protocol.configureUpgradeProtocol The ["https-openssl-apr-8443"] connector has been configured to support negotiation to [h2] via ALPN
Or verify using curl (for versions of curl that support HTTP2):
NOTE
To check curl for HTTP/2 support:
$ curl -V
curl 7.55.1 (x86_64-redhat-linux-gnu) ...Release-Date: 2017-08-14Protocols: dict file ftp ftps gopher http https ...Features: AsynchDNS IDN IPv6 Largefile GSS-API Kerberos SPNEGO NTLM NTLM_WB SSL libz TLS-SRP HTTP2 UnixSockets HTTPS-proxy Metalink PSL
For example, when the HTTP/2 protocol is inactive:
$ curl -I http://<JBoss_Web_Server>:8080/
HTTP/1.1 200...
But if the HTTP/2 protocol is active, curl returns:
$ curl -I https://<JBoss_Web_Server>:8443/
HTTP/2 200...
Where <JBoss_Web_Server> is the URI of the modified connector (such as example.com),and the port number is dependent on your configuration.
Additional Resources
For additional information on using HTTP/2, see: Apache Tomcat 9 Configuration Reference:The HTTP Connector - HTTP/2 Support.
For information on the HTTP/2 Upgrade Protocol and the supported attributes, see: ApacheTomcat 9 Configuration Reference: The HTTP2 Upgrade Protocol.
The proposed internet standard for HTTP/2: IETF: RFC 7540 - Hypertext Transfer ProtocolVersion 2 (HTTP/2)
Red Hat JBoss Web Server 5.1 Installation Guide
24

CHAPTER 7. USING A PASSWORD VAULT WITH RED HATJBOSS WEB SERVER 5.1
7.1. USING A PASSWORD VAULT WITH RED HAT JBOSS WEB SERVER5.1
A password vault is used to mask passwords and other sensitive strings, and store them in an encryptedJava keystore. This allows you to eliminate storing clear-text passwords in your Tomcat configurationfiles, as Tomcat can lookup passwords and other sensitive strings from a keystore using the vault.
Installing the JBoss Web Server password vault from .zip archiveThe tomcat password vault is pre-installed by the jws-application-server-5.1.0.zip file. The passwordvault can be used once configured and is located at: JWS_HOME/tomcat/lib/tomcat-vault.jar.
Installing the JBoss Web Server password vault on Red Hat Enterprise Linux using the YUMpackage managerWhere the JBoss Web Server has been installed from RPMs on Red Hat Enterprise Linux, install thepassword vault as the root user by executing:
yum install jws5-tomcat-vault
The examples and commands below use JWS_HOME as the JBoss Web Server installation directory.Replace JWS_HOME with the path to your JBoss Web Server installation. Also, the paths below use /for directory separators.
7.1.1. Enabling the Password Vault
1. Stop Tomcat if it is running.
2. Edit JWS_HOME/tomcat/conf/catalina.properties, and add the following line:
org.apache.tomcat.util.digester.PROPERTY_SOURCE=org.apache.tomcat.vault.util.PropertySourceVault
7.1.2. Creating a Java Keystore
To use a password vault, you must first create a Java keystore. You can do this using the keytool -genseckey command. For example:
$ keytool -genseckey -keystore JWS_HOME/tomcat/vault.keystore -alias my_vault -storetype jceks -keyalg AES -keysize 128 -storepass <vault_password> -keypass <vault_password> -validity 730
IMPORTANT
The values above are examples only. Replace them with values specific to yourenvironment.
For an explanation of the parameters, use the keytool -genseckey -help command.
7.1.3. Storing the tomcat-vault vault.properties file outside of the JWS_HOME
CHAPTER 7. USING A PASSWORD VAULT WITH RED HAT JBOSS WEB SERVER 5.1
25
7.1.3. Storing the tomcat-vault vault.properties file outside of the JWS_HOMEdirectory
The vault.properties file for the tomcat-vault can be stored outside of JWS_HOME/tomcat/conf/ in a CATALINA_BASE/conf/ directory (if set).
To set the CATALINA_BASE directory, follow the instructions in the section ' Advanced Configuration -Multiple Tomcat Instances' in the Running The Apache Tomcat 9.0 Servlet/JSP Container documentfound on the Apache Tomcat Website.
NOTE
The default location for CATALINA_BASE is JWS_HOME/tomcat/ also known asCATALINA_HOME.
For more information on setting CATALINA_BASE, see:
Apache Tomcat 9: Introduction - Directories and Files
Running The Apache Tomcat 9.0 Servlet/JSP Container: Advanced Configuration - MultipleTomcat Instances
7.1.4. Initializing the Password Vault
The vault must be initialized before it can be used to store sensitive strings. This is done using the JWS_HOME/tomcat/bin/tomcat-vault.sh vault script. For Microsoft Windows, the script is tomcat-vault.bat.
The script can be run interactively or non-interactively. Below is an example of an interactive executionof the script to initialize a password vault, with the values shown below using the example keystore fromthe previous step.
7.1.4.1. Initializing the Vault for Apache Tomcat interactively
IMPORTANT
The values below are examples only. Replace them with values appropriate for yourenvironment.
# JWS_HOME/tomcat/bin/tomcat-vault.sh
WARNING JBOSS_HOME may be pointing to a different installation - unpredictable results may occur.
=========================================================================
JBoss Vault
JBOSS_HOME: JWS_HOME/tomcat
JAVA: java
=========================================================================
Red Hat JBoss Web Server 5.1 Installation Guide
26

************************************** JBoss Vault *************************************************Please enter a Digit::0: Start Interactive Session1: Remove Interactive Session2: Exit
0
Starting an interactive sessionEnter directory to store encrypted files: JWS_HOME/tomcat/Enter Keystore URL: JWS_HOME/tomcat/vault.keystoreEnter Keystore password: <vault_password>Enter Keystore password again: <vault_password>Values matchEnter 8 character salt: 1234abcdEnter iteration count as a number (Eg: 44): 120Enter Keystore Alias: my_vaultInitializing VaultJun 16, 2018 10:24:27 AM org.apache.tomcat.vault.security.vault.PicketBoxSecurityVault initINFO: PBOX000361: Default Security Vault Implementation Initialized and ReadyVault Configuration in tomcat properties file:********************************************...KEYSTORE_URL=JWS_HOME/tomcat/vault.keystoreKEYSTORE_PASSWORD=MASK-3CuP21KMHn7G6iH/A3YpM/KEYSTORE_ALIAS=my_vaultSALT=1234abcdITERATION_COUNT=120ENC_FILE_DIR=JWS_HOME/tomcat/...********************************************Vault is initialized and ready for useHandshake with Vault completePlease enter a Digit::0: Store a secured attribute1: Check whether a secured attribute exists2: Exit
2
Note the output for the Tomcat properties file, as you will need this to configure Tomcat to use thevault.
Configuring Tomcat to Use the Password VaultIn JWS_HOME/tomcat/conf/, create a file named vault.properties containing the vault configurationproduced when initializing the vault. The values provided below use the example vault initialized in theprevious steps.
NOTE
For KEYSTORE_PASSWORD, you must use the masked value that was generated wheninitializing the vault.
CHAPTER 7. USING A PASSWORD VAULT WITH RED HAT JBOSS WEB SERVER 5.1
27

KEYSTORE_URL=JWS_HOME/tomcat/vault.keystoreKEYSTORE_PASSWORD=MASK-3CuP21KMHn7G6iH/A3YpM/KEYSTORE_ALIAS=my_vaultSALT=1234abcdITERATION_COUNT=120ENC_FILE_DIR=JWS_HOME/tomcat/
7.1.4.2. Initializing the Vault for Apache Tomcat non-interactively (silent setup)
The Vault for Apache Tomcat can be created non-interactively by providing the required input asarguments to the tomcat-vault.sh script. The vault.properties file is also created as output of the tomcat-vault.sh script when the -g, --generate-config option is used.
IMPORTANT
The values below are examples only. Replace them with values appropriate for yourenvironment.
$ JWS_HOME/tomcat/bin/tomcat-vault.sh \ --keystore JWS_HOME/tomcat/vault.keystore \ --keystore-password <vault_password> \ --alias my_vault \ --enc-dir JWS_HOME/tomcat/ \ --iteration 120 \ --salt 1234abcd \ --generate-config JWS_HOME/tomcat/conf/vault.properties
7.1.5. Storing a Sensitive String in the Password Vault
The vault script used in the previous steps is also used to store sensitive strings in the password vault.The script can be run interactively or non-interactively.
When adding a string to a password vault, the sensitive string needs a name that it will be referred by.For a password vault, this name is called an attribute name, and the password itself is called a secured attribute.
The example below demonstrates using the vault script non-interactively to store a password. It uses thevault that was initialized in the previous steps, and stores the sensitive string P@SSW0#D with theattribute name manager_password.
$ JWS_HOME/tomcat/bin/tomcat-vault.sh --keystore JWS_HOME/tomcat/vault.keystore --keystore-password <vault_password> --alias my_vault --enc-dir JWS_HOME/tomcat/ --iteration 120 --salt 1234abcd --vault-block my_block --attribute manager_password --sec-attr P@SSW0#D
NOTE
You can optionally specify a vault block to store the password in. If you don’t specify ablock, one will be automatically created for you. In the above example, my_block is used.
7.1.6. Using a Stored Sensitive String in Your Tomcat Configuration
After storing a sensitive string in the password vault, you can refer to it in your configuration files by
Red Hat JBoss Web Server 5.1 Installation Guide
28

After storing a sensitive string in the password vault, you can refer to it in your configuration files byentering the stored string’s attribute as ${VAULT::block_name::attribute_name::}.
For example, to use the password stored in the previous steps, replace:
with:
As a result, only a reference to the password is visible in the Tomcat configuration file, and the actualpassword is only stored in the password vault.
<user username="manager" password="P@SSW0#D" roles="manager-gui"/>
<user username="manager" password="${VAULT::my_block::manager_password::}" roles="manager-gui"/>
CHAPTER 7. USING A PASSWORD VAULT WITH RED HAT JBOSS WEB SERVER 5.1
29

APPENDIX A. JAVA IPV4/IPV6 PROPERTIES
Configuring Java PropertiesIn Java there are 2 properties that are used to configure IPv4 and IPv6. These are java.net.preferIPv4Stack and java.net.preferIPv6Addresses.
java.net.preferIPv4Stack (default: false)
If IPv6 is available then the underlying native socket, by default, is an IPv6 socket. This socket letsapplications connect and accept connections from IPv4 and IPv6 hosts. If application use only IPv4sockets, then set this property to true. However, it will not be possible for the application tocommunicate with IPv6 only hosts.
java.net.preferIPv6Addresses (default: false)
If a host has both IPv4 and IPv6 addresses, and IPv6 is available, then the default behavior is to use IPv4addresses over IPv6. This allows backward compatibility. If applications that depend on an IPv4 addressrepresentation, for example: 192.168.1.1. Then, set this property to true to change the preference and useIPv6 addresses over IPv4 where possible.
To pass these properties to Tomcat, set CATALINA_OPTS in the JWS_HOME/tomcat/bin/setenv.*file.
NOTE
If the JWS_HOME/tomcat/bin/setenv.sh or JWS_HOME/tomcat/bin/setenv.bat filedoes not exist, then you need to create one.
On Linux:
export "CATALINA_OPTS=-Djava.net.preferIPv4Stack=YOUR_VALUE -Djava.net.preferIPv6Addresses=YOUR_VALUE"
On Windows:
set "CATALINA_OPTS=-Djava.net.preferIPv4Stack=YOUR_VALUE -Djava.net.preferIPv6Addresses=YOUR_VALUE"
Configuring Tomcat BindingsThe Tomcat bindings can be set in JWS_HOME/tomcat/conf/server.xml with the IPv6 address:
Specify the Tomcat binding address:<Server … address="TOMCAT_BINDING_ADDRESS">
Specify the HTTP connector address:<Connector protocol="HTTP/1.1" … address="HTTP_CONNECTOR_ADDRESS">
Specify the AJP connector address:<Connector protocol="AJP/1.3" … address="AJP_CONNECTOR_ADDRESS">
Red Hat JBoss Web Server 5.1 Installation Guide
30