Embed Size (px)
Citation preview

Red Hat JBoss Fuse 6.3
Fabric Guide
A system for provisioning containers deployed across a network
Last Updated: 2018-02-07


Red Hat JBoss Fuse 6.3 Fabric Guide
A system for provisioning containers deployed across a network
JBoss A-MQ Docs TeamContent [email protected]

Legal Notice
Copyright © 2016 Red Hat.
The text of and illustrations in this document are licensed by Red Hat under a Creative CommonsAttribution–Share Alike 3.0 Unported license ("CC-BY-SA"). An explanation of CC-BY-SA isavailable athttp://creativecommons.org/licenses/by-sa/3.0/. In accordance with CC-BY-SA, if you distribute this document or an adaptation of it, you mustprovide the URL for the original version.
Red Hat, as the licensor of this document, waives the right to enforce, and agrees not to assert,Section 4d of CC-BY-SA to the fullest extent permitted by applicable law.
Red Hat, Red Hat Enterprise Linux, the Shadowman logo, JBoss, OpenShift, Fedora, the Infinitylogo, and RHCE are trademarks of Red Hat, Inc., registered in the United States and othercountries.
Linux ® is the registered trademark of Linus Torvalds in the United States and other countries.
Java ® is a registered trademark of Oracle and/or its affiliates.
XFS ® is a trademark of Silicon Graphics International Corp. or its subsidiaries in the United Statesand/or other countries.
MySQL ® is a registered trademark of MySQL AB in the United States, the European Union andother countries.
Node.js ® is an official trademark of Joyent. Red Hat Software Collections is not formally related toor endorsed by the official Joyent Node.js open source or commercial project.
The OpenStack ® Word Mark and OpenStack logo are either registered trademarks/service marksor trademarks/service marks of the OpenStack Foundation, in the United States and other countriesand are used with the OpenStack Foundation's permission. We are not affiliated with, endorsed orsponsored by the OpenStack Foundation, or the OpenStack community.
All other trademarks are the property of their respective owners.
Abstract
Fabric enables you to install, start up, and provision remote containers across a network withsupport for centralized, highly available container configuration, based on Apache Zookeeper.

. . . . . . . . . . . . . . . . . . . . . . . . . . . . . . . . . . . . . . . . . . . . . . . . . . . . . . . . . . . . . . . . . . . . . . . . . . . . . . . . . . . . . . . . . . . . . . . . . . . . . . . . . . . . . . . . . . . . . . . . . . . . . . . . . . . . . . . . . . . . . . . . . . . . . . . . . . . . . . . . . . . . . . . . . . . . . . . . . . . . . . . . . . . . . . . . . . . . . . . . . . . . . . . . . . . . . . . . . . . . . . . . . . . . . . . . . . . . . . . . . . . . . . . . . . . . . . . . . . . . . . . . . . . . . . . . . . . . . . . .
. . . . . . . . . . . . . . . . . . . . . . . . . . . . . . . . . . . . . . . . . . . . . . . . . . . . . . . . . . . . . . . . . . . . . . . . . . . . . . . . . . . . . . . . . . . . . . . . . . . . . . . . . . . . . . . . . . . . . . . . . . . . . . . . . . . . . . . . . . . . . . . . . . . . . . . . . . . . . . . . . . . . . . . . . . . . . . . . . . . . . . . . . . . . . . . . . . . . . . . . . . . . . . . . . . . . . . . . . . . . . . . . . . . . . . . . . . . . . . . . . . . . . . . . . . . . . . . . . . . . . . . . . . . . . . . . . . . . . . . .
. . . . . . . . . . . . . . . . . . . . . . . . . . . . . . . . . . . . . . . . . . . . . . . . . . . . . . . . . . . . . . . . . . . . . . . . . . . . . . . . . . . . . . . . . . . . . . . . . . . . . . . . . . . . . . . . . . . . . . . . . . . . . . . . . . . . . . . . . . . . . . . . . . . . . . . . . . . . . . . . . . . . . . . . . . . . . . . . . . . . . . . . . . . . . . . . . . . . . . . . . . . . . . . . . . . . . . . . . . . . . . . . . . . . . . . . . . . . . . . . . . . . . . . . . . . . . . . . . . . . . . . . . . . . . . . . . . . . . . . .
. . . . . . . . . . . . . . . . . . . . . . . . . . . . . . . . . . . . . . . . . . . . . . . . . . . . . . . . . . . . . . . . . . . . . . . . . . . . . . . . . . . . . . . . . . . . . . . . . . . . . . . . . . . . . . . . . . . . . . . . . . . . . . . . . . . . . . . . . . . . . . . . . . . . . . . . . . . . . . . . . . . . . . . . . . . . . . . . . . . . . . . . . . . . . . . . . . . . . . . . . . . . . . . . . . . . . . . . . . . . . . . . . . . . . . . . . . . . . . . . . . . . . . . . . . . . . . . . . . . . . . . . . . . . . . . . . . . . . . . .
. . . . . . . . . . . . . . . . . . . . . . . . . . . . . . . . . . . . . . . . . . . . . . . . . . . . . . . . . . . . . . . . . . . . . . . . . . . . . . . . . . . . . . . . . . . . . . . . . . . . . . . . . . . . . . . . . . . . . . . . . . . . . . . . . . . . . . . . . . . . . . . . . . . . . . . . . . . . . . . . . . . . . . . . . . . . . . . . . . . . . . . . . . . . . . . . . . . . . . . . . . . . . . . . . . . . . . . . . . . . . . . . . . . . . . . . . . . . . . . . . . . . . . . . . . . . . . . . . . . . . . . . . . . . . . . . . . . . . . . .
. . . . . . . . . . . . . . . . . . . . . . . . . . . . . . . . . . . . . . . . . . . . . . . . . . . . . . . . . . . . . . . . . . . . . . . . . . . . . . . . . . . . . . . . . . . . . . . . . . . . . . . . . . . . . . . . . . . . . . . . . . . . . . . . . . . . . . . . . . . . . . . . . . . . . . . . . . . . . . . . . . . . . . . . . . . . . . . . . . . . . . . . . . . . . . . . . . . . . . . . . . . . . . . . . . . . . . . . . . . . . . . . . . . . . . . . . . . . . . . . . . . . . . . . . . . . . . . . . . . . . . . . . . . . . . . . . . . . . . . .
. . . . . . . . . . . . . . . . . . . . . . . . . . . . . . . . . . . . . . . . . . . . . . . . . . . . . . . . . . . . . . . . . . . . . . . . . . . . . . . . . . . . . . . . . . . . . . . . . . . . . . . . . . . . . . . . . . . . . . . . . . . . . . . . . . . . . . . . . . . . . . . . . . . . . . . . . . . . . . . . . . . . . . . . . . . . . . . . . . . . . . . . . . . . . . . . . . . . . . . . . . . . . . . . . . . . . . . . . . . . . . . . . . . . . . . . . . . . . . . . . . . . . . . . . . . . . . . . . . . . . . . . . . . . . . . . . . . . . . . .
. . . . . . . . . . . . . . . . . . . . . . . . . . . . . . . . . . . . . . . . . . . . . . . . . . . . . . . . . . . . . . . . . . . . . . . . . . . . . . . . . . . . . . . . . . . . . . . . . . . . . . . . . . . . . . . . . . . . . . . . . . . . . . . . . . . . . . . . . . . . . . . . . . . . . . . . . . . . . . . . . . . . . . . . . . . . . . . . . . . . . . . . . . . . . . . . . . . . . . . . . . . . . . . . . . . . . . . . . . . . . . . . . . . . . . . . . . . . . . . . . . . . . . . . . . . . . . . . . . . . . . . . . . . . . . . . . . . . . . . .
. . . . . . . . . . . . . . . . . . . . . . . . . . . . . . . . . . . . . . . . . . . . . . . . . . . . . . . . . . . . . . . . . . . . . . . . . . . . . . . . . . . . . . . . . . . . . . . . . . . . . . . . . . . . . . . . . . . . . . . . . . . . . . . . . . . . . . . . . . . . . . . . . . . . . . . . . . . . . . . . . . . . . . . . . . . . . . . . . . . . . . . . . . . . . . . . . . . . . . . . . . . . . . . . . . . . . . . . . . . . . . . . . . . . . . . . . . . . . . . . . . . . . . . . . . . . . . . . . . . . . . . . . . . . . . . . . . . . . . . .
. . . . . . . . . . . . . . . . . . . . . . . . . . . . . . . . . . . . . . . . . . . . . . . . . . . . . . . . . . . . . . . . . . . . . . . . . . . . . . . . . . . . . . . . . . . . . . . . . . . . . . . . . . . . . . . . . . . . . . . . . . . . . . . . . . . . . . . . . . . . . . . . . . . . . . . . . . . . . . . . . . . . . . . . . . . . . . . . . . . . . . . . . . . . . . . . . . . . . . . . . . . . . . . . . . . . . . . . . . . . . . . . . . . . . . . . . . . . . . . . . . . . . . . . . . . . . . . . . . . . . . . . . . . . . . . . . . . . . . . .
. . . . . . . . . . . . . . . . . . . . . . . . . . . . . . . . . . . . . . . . . . . . . . . . . . . . . . . . . . . . . . . . . . . . . . . . . . . . . . . . . . . . . . . . . . . . . . . . . . . . . . . . . . . . . . . . . . . . . . . . . . . . . . . . . . . . . . . . . . . . . . . . . . . . . . . . . . . . . . . . . . . . . . . . . . . . . . . . . . . . . . . . . . . . . . . . . . . . . . . . . . . . . . . . . . . . . . . . . . . . . . . . . . . . . . . . . . . . . . . . . . . . . . . . . . . . . . . . . . . . . . . . . . . . . . . . . . . . . . . .
Table of Contents
CHAPTER 1. AN OVERVIEW OF FUSE FABRIC1.1. CONCEPTS1.2. CONTAINERS1.3. PROVISIONING AND CONFIGURATION
PART I. BASIC FABRIC DEPLOYMENT
CHAPTER 2. GETTING STARTED WITH FUSE FABRIC2.1. CREATE A FABRIC2.2. DEPLOY A PROFILE2.3. UPDATE A PROFILE2.4. SHUTTING DOWN THE CONTAINERS
CHAPTER 3. CREATING A NEW FABRICSTATIC IP ADDRESS REQUIRED FOR FABRIC SERVERMAKE QUICKSTART EXAMPLES AVAILABLEPROCEDUREFABRIC CREATION PROCESSEXPANDING A FABRIC
CHAPTER 4. FABRIC CONTAINERS4.1. CHILD CONTAINERS4.2. SSH CONTAINERS4.3. FABRIC CONTAINERS ON WINDOWS
CHAPTER 5. SHUTTING DOWN A FABRICOVERVIEWSHUTTING DOWN A MANAGED CONTAINERSHUTTING DOWN A FABRIC SERVERSHUTTING DOWN AN ENTIRE FABRICNOTE ON SHUTTING DOWN A COMPLETE FABRIC
CHAPTER 6. FABRIC PROFILES6.1. INTRODUCTION TO PROFILES6.2. WORKING WITH PROFILES6.3. PROFILE VERSIONS6.4. ENVIRONMENT SPECIFIC VALUES IN FABRIC PROFILES.
CHAPTER 7. FABRIC8 MAVEN PLUG-IN7.1. PREPARING TO USE THE PLUG-IN7.2. USING THE PLUG-IN TO DEPLOY A MAVEN PROJECT7.3. CONFIGURING THE PLUG-IN7.4. CONFIGURATION PROPERTIES
CHAPTER 8. ACTIVEMQ BROKERS AND CLUSTERS8.1. CREATING A SINGLE BROKER INSTANCE8.2. CONNECTING TO A BROKER8.3. TOPOLOGIES8.4. ALTERNATIVE MASTER-SLAVE CLUSTER8.5. BROKER CONFIGURATION
PART II. FABRIC IN PRODUCTION
CHAPTER 9. FABRIC ENSEMBLE AND REGISTRY
5578
9
1010121314
161616171819
20202123
262626262627
2929303638
4040404144
474749495558
68
69
Table of Contents
1

. . . . . . . . . . . . . . . . . . . . . . . . . . . . . . . . . . . . . . . . . . . . . . . . . . . . . . . . . . . . . . . . . . . . . . . . . . . . . . . . . . . . . . . . . . . . . . . . . . . . . . . . . . . . . . . . . . . . . . . . . . . . . . . . . . . . . . . . . . . . . . . . . . . . . . . . . . . . . . . . . . . . . . . . . . . . . . . . . . . . . . . . . . . . . . . . . . . . . . . . . . . . . . . . . . . . . . . . . . . . . . . . . . . . . . . . . . . . . . . . . . . . . . . . . . . . . . . . . . . . . . . . . . . . . . . . . . . . . . . .
. . . . . . . . . . . . . . . . . . . . . . . . . . . . . . . . . . . . . . . . . . . . . . . . . . . . . . . . . . . . . . . . . . . . . . . . . . . . . . . . . . . . . . . . . . . . . . . . . . . . . . . . . . . . . . . . . . . . . . . . . . . . . . . . . . . . . . . . . . . . . . . . . . . . . . . . . . . . . . . . . . . . . . . . . . . . . . . . . . . . . . . . . . . . . . . . . . . . . . . . . . . . . . . . . . . . . . . . . . . . . . . . . . . . . . . . . . . . . . . . . . . . . . . . . . . . . . . . . . . . . . . . . . . . . . . . . . . . . . . .
. . . . . . . . . . . . . . . . . . . . . . . . . . . . . . . . . . . . . . . . . . . . . . . . . . . . . . . . . . . . . . . . . . . . . . . . . . . . . . . . . . . . . . . . . . . . . . . . . . . . . . . . . . . . . . . . . . . . . . . . . . . . . . . . . . . . . . . . . . . . . . . . . . . . . . . . . . . . . . . . . . . . . . . . . . . . . . . . . . . . . . . . . . . . . . . . . . . . . . . . . . . . . . . . . . . . . . . . . . . . . . . . . . . . . . . . . . . . . . . . . . . . . . . . . . . . . . . . . . . . . . . . . . . . . . . . . . . . . . . .
. . . . . . . . . . . . . . . . . . . . . . . . . . . . . . . . . . . . . . . . . . . . . . . . . . . . . . . . . . . . . . . . . . . . . . . . . . . . . . . . . . . . . . . . . . . . . . . . . . . . . . . . . . . . . . . . . . . . . . . . . . . . . . . . . . . . . . . . . . . . . . . . . . . . . . . . . . . . . . . . . . . . . . . . . . . . . . . . . . . . . . . . . . . . . . . . . . . . . . . . . . . . . . . . . . . . . . . . . . . . . . . . . . . . . . . . . . . . . . . . . . . . . . . . . . . . . . . . . . . . . . . . . . . . . . . . . . . . . . . .
. . . . . . . . . . . . . . . . . . . . . . . . . . . . . . . . . . . . . . . . . . . . . . . . . . . . . . . . . . . . . . . . . . . . . . . . . . . . . . . . . . . . . . . . . . . . . . . . . . . . . . . . . . . . . . . . . . . . . . . . . . . . . . . . . . . . . . . . . . . . . . . . . . . . . . . . . . . . . . . . . . . . . . . . . . . . . . . . . . . . . . . . . . . . . . . . . . . . . . . . . . . . . . . . . . . . . . . . . . . . . . . . . . . . . . . . . . . . . . . . . . . . . . . . . . . . . . . . . . . . . . . . . . . . . . . . . . . . . . . .
. . . . . . . . . . . . . . . . . . . . . . . . . . . . . . . . . . . . . . . . . . . . . . . . . . . . . . . . . . . . . . . . . . . . . . . . . . . . . . . . . . . . . . . . . . . . . . . . . . . . . . . . . . . . . . . . . . . . . . . . . . . . . . . . . . . . . . . . . . . . . . . . . . . . . . . . . . . . . . . . . . . . . . . . . . . . . . . . . . . . . . . . . . . . . . . . . . . . . . . . . . . . . . . . . . . . . . . . . . . . . . . . . . . . . . . . . . . . . . . . . . . . . . . . . . . . . . . . . . . . . . . . . . . . . . . . . . . . . . . .
. . . . . . . . . . . . . . . . . . . . . . . . . . . . . . . . . . . . . . . . . . . . . . . . . . . . . . . . . . . . . . . . . . . . . . . . . . . . . . . . . . . . . . . . . . . . . . . . . . . . . . . . . . . . . . . . . . . . . . . . . . . . . . . . . . . . . . . . . . . . . . . . . . . . . . . . . . . . . . . . . . . . . . . . . . . . . . . . . . . . . . . . . . . . . . . . . . . . . . . . . . . . . . . . . . . . . . . . . . . . . . . . . . . . . . . . . . . . . . . . . . . . . . . . . . . . . . . . . . . . . . . . . . . . . . . . . . . . . . . .
. . . . . . . . . . . . . . . . . . . . . . . . . . . . . . . . . . . . . . . . . . . . . . . . . . . . . . . . . . . . . . . . . . . . . . . . . . . . . . . . . . . . . . . . . . . . . . . . . . . . . . . . . . . . . . . . . . . . . . . . . . . . . . . . . . . . . . . . . . . . . . . . . . . . . . . . . . . . . . . . . . . . . . . . . . . . . . . . . . . . . . . . . . . . . . . . . . . . . . . . . . . . . . . . . . . . . . . . . . . . . . . . . . . . . . . . . . . . . . . . . . . . . . . . . . . . . . . . . . . . . . . . . . . . . . . . . . . . . . . .
. . . . . . . . . . . . . . . . . . . . . . . . . . . . . . . . . . . . . . . . . . . . . . . . . . . . . . . . . . . . . . . . . . . . . . . . . . . . . . . . . . . . . . . . . . . . . . . . . . . . . . . . . . . . . . . . . . . . . . . . . . . . . . . . . . . . . . . . . . . . . . . . . . . . . . . . . . . . . . . . . . . . . . . . . . . . . . . . . . . . . . . . . . . . . . . . . . . . . . . . . . . . . . . . . . . . . . . . . . . . . . . . . . . . . . . . . . . . . . . . . . . . . . . . . . . . . . . . . . . . . . . . . . . . . . . . . . . . . . . .
9.1. FABRIC REGISTRY9.2. ADMINISTERING A FABRIC ENSEMBLE9.3. PURGING THE ZOOKEEPER SNAPSHOT AND TRANSACTION LOGS
CHAPTER 10. FABRIC AGENTS10.1. INTRODUCTION10.2. THE CONFIGURATION ADMIN BRIDGE10.3. THE DEPLOYMENT AGENT
CHAPTER 11. ALLOCATING PORTS11.1. PORTS USED IN A FABRIC ENVIRONMENT11.2. THE PORT SERVICE11.3. USING THE PORT SERVICE
CHAPTER 12. GATEWAY12.1. GATEWAY ARCHITECTURE12.2. RUNNING THE GATEWAY12.3. CONFIGURING THE GATEWAY12.4. MAP CLIENT CONNECTIONS TO BROKER INSTANCES12.5. VERSIONING12.6. URI TEMPLATE EXPRESSIONS
CHAPTER 13. SECURING FABRIC CONTAINERSDEFAULT AUTHENTICATION SYSTEMMANAGING USERSOBFUSCATING STORED PASSWORDSENABLING LDAP AUTHENTICATION
CHAPTER 14. FABRIC MAVEN PROXIES14.1. CLUSTER OF FABRIC MAVEN PROXIES14.2. HOW A MANAGED CONTAINER RESOLVES ARTIFACTS14.3. HOW A MAVEN PROXY RESOLVES ARTIFACTS14.4. CONFIGURING MAVEN PROXIES DIRECTLY14.5. CONFIGURING MAVEN PROXIES AND HTTP PROXIES THROUGH SETTINGS.XML14.6. AUTOMATED DEPLOYMENT14.7. FABRIC MAVEN CONFIGURATION REFERENCE
CHAPTER 15. OFFLINE REPOSITORIES15.1. OFFLINE REPOSITORY FOR A PROFILE15.2. OFFLINE REPOSITORY FOR A VERSION15.3. OFFLINE REPOSITORY FOR A MAVEN PROJECT
CHAPTER 16. CONFIGURING WITH GIT16.1. HOW GIT WORKS INSIDE FABRIC16.2. USING A GIT CLUSTER16.3. USING AN EXTERNAL GIT REPOSITORY16.4. USING AN HTTP PROXY WITH A GIT CLUSTER
CHAPTER 17. PATCHING17.1. PATCHING A FABRIC CONTAINER WITH A ROLLUP PATCH17.2. PATCHING A FABRIC CONTAINER WITH AN INCREMENTAL PATCH
CHAPTER 18. ENABLING SSL FOR JMX CONNECTORSOBTAIN OR CREATE CERTIFICATESIMPORT CERTIFICATES WITH CHAINSELECT STANDARD LOCATION FOR KEYSTORE
697072
73737374
77777881
84848485878989
9191919192
93939599
100102105106
113113113113
115115117123127
128128134
137137137138
Red Hat JBoss Fuse 6.3 Fabric Guide
2

. . . . . . . . . . . . . . . . . . . . . . . . . . . . . . . . . . . . . . . . . . . . . . . . . . . . . . . . . . . . . . . . . . . . . . . . . . . . . . . . . . . . . . . . . . . . . . . . . . . . . . . . . . . . . . . . . . . . . . . . . . . . . . . . . . . . . . . . . . . . . . . . . . . . . . . . . . . . . . . . . . . . . . . . . . . . . . . . . . . . . . . . . . . . . . . . . . . . . . . . . . . . . . . . . . . . . . . . . . . . . . . . . . . . . . . . . . . . . . . . . . . . . . . . . . . . . . . . . . . . . . . . . . . . . . . . . . . . . . . .
. . . . . . . . . . . . . . . . . . . . . . . . . . . . . . . . . . . . . . . . . . . . . . . . . . . . . . . . . . . . . . . . . . . . . . . . . . . . . . . . . . . . . . . . . . . . . . . . . . . . . . . . . . . . . . . . . . . . . . . . . . . . . . . . . . . . . . . . . . . . . . . . . . . . . . . . . . . . . . . . . . . . . . . . . . . . . . . . . . . . . . . . . . . . . . . . . . . . . . . . . . . . . . . . . . . . . . . . . . . . . . . . . . . . . . . . . . . . . . . . . . . . . . . . . . . . . . . . . . . . . . . . . . . . . . . . . . . . . . . .
. . . . . . . . . . . . . . . . . . . . . . . . . . . . . . . . . . . . . . . . . . . . . . . . . . . . . . . . . . . . . . . . . . . . . . . . . . . . . . . . . . . . . . . . . . . . . . . . . . . . . . . . . . . . . . . . . . . . . . . . . . . . . . . . . . . . . . . . . . . . . . . . . . . . . . . . . . . . . . . . . . . . . . . . . . . . . . . . . . . . . . . . . . . . . . . . . . . . . . . . . . . . . . . . . . . . . . . . . . . . . . . . . . . . . . . . . . . . . . . . . . . . . . . . . . . . . . . . . . . . . . . . . . . . . . . . . . . . . . . .
. . . . . . . . . . . . . . . . . . . . . . . . . . . . . . . . . . . . . . . . . . . . . . . . . . . . . . . . . . . . . . . . . . . . . . . . . . . . . . . . . . . . . . . . . . . . . . . . . . . . . . . . . . . . . . . . . . . . . . . . . . . . . . . . . . . . . . . . . . . . . . . . . . . . . . . . . . . . . . . . . . . . . . . . . . . . . . . . . . . . . . . . . . . . . . . . . . . . . . . . . . . . . . . . . . . . . . . . . . . . . . . . . . . . . . . . . . . . . . . . . . . . . . . . . . . . . . . . . . . . . . . . . . . . . . . . . . . . . . . .
CREATE BLUEPRINT CONFIGURATION FOR LOADING KEYSTORESET KEYSTORE ENVIRONMENT VARIABLES ON FUSE CONTAINERSSTART FUSE AND CREATE FABRIC CLUSTERCONFIGURE THE CLUSTER FOR JMXUPGRADE FUSE CONTAINERSTEST THE CONFIGURATION
APPENDIX A. EDITING PROFILES WITH THE BUILT-IN TEXT EDITORA.1. EDITING AGENT PROPERTIESA.2. EDITING OSGI CONFIG ADMIN PROPERTIESA.3. EDITING OTHER RESOURCESA.4. PROFILE ATTRIBUTES
APPENDIX B. FABRIC URL HANDLERSB.1. PROFILE URL HANDLERB.2. ZK URL HANDLERB.3. BLUEPRINT URL HANDLERB.4. SPRING URL HANDLERB.5. MVEL
APPENDIX C. PROFILE PROPERTY RESOLVERSC.1. SUBSTITUTING SYSTEM PROPERTIESC.2. SUBSTITUTING ENVIRONMENT VARIABLESC.3. SUBSTITUTING CONTAINER ATTRIBUTESC.4. SUBSTITUTING PID PROPERTIESC.5. SUBSTITUTING ZOOKEEPER NODE CONTENTSC.6. CHECKSUM PROPERTY RESOLVERC.7. PORT PROPERTY RESOLVER
APPENDIX D. TECHNOLOGY-SPECIFIC DISCOVERY MECHANISMSD.1. ACTIVEMQ ENDPOINT DISCOVERYD.2. CAMEL ENDPOINT DISCOVERYD.3. CXF ENDPOINT DISCOVERYD.4. OSGI SERVICE DISCOVERY
138139139140141141
143143146147149
151151151151152152
154154154155156157158158
159159159160160
Table of Contents
3

Red Hat JBoss Fuse 6.3 Fabric Guide
4

CHAPTER 1. AN OVERVIEW OF FUSE FABRIC
Abstract
Fuse Fabric is a lightweight runtime environment that focuses on centralizing provisioning andconfiguration spanning from small environments, limited to a few JVMs or systems, to larger productionenvironments which utilize an open hybrid cloud consisting of containers on both cloud services andphysical hosts. The Fuse Fabric technology layer supports the scalable deployment of JBoss Fusecontainers across a network, and it enables a variety of advanced features, such as remote installationand provisioning of containers, phased rollout of new versions of libraries and applications, load-balancing, and failover of deployed endpoints.
1.1. CONCEPTS
Fabric
A fabric is a collection of containers that share a fabric registry, where the fabric registry is a replicateddatabase that stores all information related to provisioning and managing the containers. A fabric isintended to manage a distributed network of containers, where the containers are deployed acrossmultiple hosts.
A sample fabric
Figure 1.1, “Containers in a Fabric” shows an example of a distributed collection of containers thatbelong to a single fabric.
Figure 1.1. Containers in a Fabric
CHAPTER 1. AN OVERVIEW OF FUSE FABRIC
5

Registry
JBoss Fuse Fabric uses Apache ZooKeeper (a highly reliable, distributed coordination service) as itsregistry to store the cluster configuration and the node registration data.
ZooKeeper is designed to provide data consistency and high availability across data centers. ZooKeeperprotects against network splits using a quorum of ZooKeeper servers: for example, you might run fiveZooKeeper servers and so long as you have quorum (that is, at least three out of the five serversavailable) you are reliable and are not affected by a network split.
Conceptually, the Fabric registry consists of two main parts:
Configuration Registry—the logical configuration of your fabric, which typically contains nophysical machine information. It contains details of the applications to be deployed and theirdependencies.
Runtime Registry—contains details of how many machines are actually running, their physicallocation, and what services they are implementing.
Fabric Ensemble
A Fabric Ensemble is a collection of Fabric Servers that collectively maintain the state of the fabricregistry. The Fabric Ensemble implements a replicated database and uses a quorum-based votingsystem to ensure that data in the fabric registry remains consistent across all of the fabric's containers.To guard against network splits in a quorum-based system, it is a requirement that the number of FabricServers in a Fabric Ensemble is always an odd number.
The number of Fabric Servers in a fabric is typically 1, 3, or 5. A fabric with just one Fabric Server issuitable for experimentation only. A live production system should have at least 3 or 5 Fabric Servers,installed on separate hosts, to provide fault tolerance.
Fabric Server
A Fabric Server has a special status in the fabric, because it is responsible for maintaining a replica ofthe fabric registry. In each Fabric Server, a registry service is installed (labeled R in Figure 1.1,“Containers in a Fabric”). The registry service (based on Apache ZooKeeper) maintains a replica of theregistry database and provides a ZooKeeper server, which ordinary agents can connect to in order toretrieve registry data.
Fabric Container (managed container)
A Fabric container (or managed container) is aware of the locations of all of the Fabric Servers, and itcan retrieve registry data from any Fabric Server in the Fabric Ensemble. A Fabric agent (labeled A inFigure 1.1, “Containers in a Fabric”) is installed in each Fabric container. The Fabric Agent activelymonitors the fabric registry, and whenever a relevant modification is made to the registry, it immediatelyupdates its container to keep the container consistent with the registry settings.
Fabric Agent
Fabric defines a provisioning agent or Fabric agent, which relies on profiles. The Fabric agent runs oneach managed container and its role is to provision the container according to the profiles assigned to it.The Fabric agent retrieves the configuration, bundles and features (as defined in the profile overlay),calculates what needs to be installed (or uninstalled) and, finally, performs the required actions.
Red Hat JBoss Fuse 6.3 Fabric Guide
6

The Fabric agent does not just provision applications; it is also capable of provisioning Fabric and theOSGi framework.
The Fabric agent retrieves any required Maven artifacts from the Maven repositories specified by itsprofile, which are accessed through the Maven proxies managed by the fabric.
Git
JBoss Fuse Fabric has git as the distributed version control mechanism for all configurations allowing fora full audit history; in addition, all changes are versioned and replicated onto each machine. Byleveraging a well known technology users can easily perform diffs, merges, and continuous integration.
Profile
A Fabric profile is an abstract unit of deployment, capable of holding all of the data required for deployingan application into a Fabric Container. Profiles are used exclusively in the context of fabrics.
A profile consists of a collection of OSGi bundles and Karaf features to be provisioned, and a list ofconfigurations for the OSGi Configuration Administration service. Multiple profiles can be associated witha given container, allowing the container to serve multiple purposes.
In theory, if you have a fabric in which each managed container runs exactly the same set of features,with exactly the same configuration, you need only one profile. However, in most real-world use cases,you need to provision different features across the nodes, or at least have different configurations.
For example, you might want to run different kinds of applications on different nodes: message brokers,web applications, ESBs, transformation engines, or proxies. Each kind of application can be defined by aprofile that you manage as a single logical entity, irrespective of how many instances are deployed.Alternatively, you might want to run the same features everywhere, but with location specificconfigurations. You might deploy message brokers in different locations, or cache services in differentdata centres or geographical regions.
Profiles can also use inheritance, so that parts of a configuration can be shared across multiple profiles(which is conceptually similar to the use of trees in an LDAP repository). The aggregate of configurationsettings is computed using an overlay mechanism, which allows a profile to override values from itsparents. This approach provides power and flexibility, while avoiding the unnecessary repetition ofconfiguration values.
Profiles are stored in the master node's git repository, which means that they are automatically andimmediately propagated to all nodes in the fabric.
IMPORTANT
The presence of a Fabric agent in a container completely changes the deployment model,requiring you to use profiles exclusively as the unit of deployment. Although it is stillpossible to deploy an individual bundle or feature (using osgi:install or features:install, respectively), these modifications are impermanent. As soon asyou restart the container or refresh its contents, the Fabric agent replaces the container'sexisting contents with whatever is specified by the deployed profiles.
1.2. CONTAINERS
Fuse Fabric is designed to have a number of containers, each of which may be running on a differentplatform. For instance, all of the following are supported:
Java processes running directly on hardware.
CHAPTER 1. AN OVERVIEW OF FUSE FABRIC
7

Java processes running directly on hardware.
A PaaS (Platform as a Service) such as OpenShift for either a public or private cloud.
OpenStack as an IaaS (Infrastructure as a Service).
Amazon Web Services, Rackspace or some other IaaS to manage services.
Docker containers for each service.
An open hybrid cloud composing all of the above entries.
1.3. PROVISIONING AND CONFIGURATION
Overview
Each node in the cluster has a logical name and on startup the provisioning agent registers anephemeral node in ZooKeeper. It then looks in the configuration using its logical name for its profile ofwhat configuration to use and what services to provision. If there is no configuration or the logical name ituses the default profile.
Each node watches the relevant parts of the ZooKeeper tree for changes; so that as soon as any profileis updated the dependent nodes refresh and re-apply any provisioning or configuration changes.
Changing the configuration
You can use the Fabric command line shell to modify a profile's configuration at run time, which meansyou can dynamically control configuration and provisioning.
Profiles make it possible to control a group of nodes (or all nodes) in a single operation. For example,you could set global configuration properties that affect all nodes, or properties that affect only a group ofnodes (for example, affecting only message brokers, or affecting only web servers).
How discovery works
Each container registers details of its machine, host name and connection URLs (for example, its JMXURL) with the ZooKeeper runtime registry. Consequently, it is relatively easy to discover a node'slocation and its connection details by introspecting the fabric. For example, to perform operations on aremote fabric container from within the fuse console, all that you need to know is the container's name.
In addition, Fabric supports a number of discovery mechanisms for discovering application endpointsand services in the fabric—see Appendix D, Technology-specific Discovery Mechanisms for details.
Red Hat JBoss Fuse 6.3 Fabric Guide
8

PART I. BASIC FABRIC DEPLOYMENT
Abstract
Get started with Fuse Fabric and learn how to perform basic administration tasks.
PART I. BASIC FABRIC DEPLOYMENT
9

CHAPTER 2. GETTING STARTED WITH FUSE FABRIC
Abstract
This tutorial provides basic information and explains how to set up the simplest Fabric system, bycreating some containers that run on your local machine and then deploying an example profile to a childcontainer.
Additional information on setting up a Fabric is covered in more detail in both Chapter 3, Creating a NewFabric and Section 4.1, “Child Containers”.
2.1. CREATE A FABRIC
Overview
Figure 2.1 shows an overview of a sample fabric that you will create. The Fabric Ensemble consists ofjust one Fabric Server (making this fabric suitable only for experimental use) and two managed childcontainers.
Figure 2.1. A Sample Fabric with Child Containers
Steps to create the fabric
To create the simple fabric shown in Figure 2.1, “A Sample Fabric with Child Containers” , follow thesesteps:
1. To create the first fabric container, which acts as the seed for the new fabric, enter this consolecommand:
JBossFuse:karaf@root> fabric:create --new-user AdminUser --new-user-password AdminPass --new-user-role Administrator --zookeeper-
Red Hat JBoss Fuse 6.3 Fabric Guide
10

The current container, named root by default, becomes a Fabric Server with a registry serviceinstalled. Initially, this is the only container in the fabric. The --new-user, --new-user-password, and --new-user-role options specify the credentials for a new Administratoruser. The Zookeeper password is used to protect sensitive data in the Fabric registry service (allof the nodes under /fabric). The --manual-ip option specifies the loopback address, 127.0.0.1, as the Fabric Server's IP address.
NOTE
A Fabric Server requires a static IP address. For simple trials and tests, you canuse the loopback address, 127.0.0.1, to work around this requirement. But ifyou are deploying a fabric in production or if you want to create a distributedensemble, you must assign a static IP address to the each of the Fabric Serverhosts.
NOTE
Most of the time, you are not prompted to enter the Zookeeper password whenaccessing the registry service, because it is cached in the current session. Whenyou join a container to a fabric, however, you must provide the fabric's Zookeeperpassword.
2. Create a child container. Assuming that your root container is named root, enter this consolecommand:
3. Invoke the following command to monitor the status of the child container, as it is beingprovisioned:
After the deployment of the child has completed, you should see a listing something like this:
Press the Return key to get back to the JBoss Fuse console prompt.
password ZooPass --resolver manualip --manual-ip 127.0.0.1 --wait-for-provisioning
JBossFuse:karaf@root> fabric:container-create-child root childCreating new instance on SSH port 8102 and RMI ports 1100/44445 at: /tmp/jboss-fuse-6.3.0.redhat-254/instance/childThe following containers have been created successfully: Container: child.
JBossFuse:karaf@root> shell:watch container-list
JBossFuse:karaf@root> shell:watch container-list[id] [version] [type] [connected] [profiles] [provision status]root* 1.0 karaf yes fabric success fabric-ensemble-0000-1 jboss-fuse-full child 1.0 karaf yes default success
CHAPTER 2. GETTING STARTED WITH FUSE FABRIC
11

2.2. DEPLOY A PROFILE
Deploy a profile to the child container
Having created the child container, as described in Section 2.1, “Create a Fabric”, you can now deploy aprofile to it. To do so, follow these steps:
1. Open a terminal and cd to the $FUSE_HOME/quickstarts/beginner/camel-log directory.
2. Build the camel-log quickstart by entering this command:
3. Upload the camel-log quickstart profile to the fabric container by entering this command:
NOTE
If this is the first time you've run this command, it prompts you to enter the username and password to use to log into the fabric container.
4. Deploy the quickstarts-beginner-camel.log profile into the child container by enteringthis console command:
5. Verify that the camel-log quickstart profile, quickstarts-beginner-camel.log, wasuploaded successfully by entering the fabric:status console command:
6. Verify that the quickstarts-beginner-camel.log profile deployed successfully to the child container, issuing the fabric:container-list command:
until the child container's status changes to success:
$ mvn clean install
$ mvn fabric8:deploy
JBossFuse:karaf@root> fabric:container-change-profile child quickstarts-beginner-camel.log
JBossFuse:karaf@root> fabric:status[profile] [instances] [health]fabric 1 100%fabric-ensemble-0000-1 1 100%jboss-fuse-full 1 100%quickstarts-beginner-camel.log 1 100%
JBossFuse:karaf@root> fabric:container-list
[id] [version] [type] [connected] [profiles] [provision status]root* 1.0 karaf yes fabric success fabric-ensemble-0000-1
Red Hat JBoss Fuse 6.3 Fabric Guide
12

View the sample output
When it is running, the quickstarts-beginner-camel.log profile writes a message to thecontainer's log every five seconds. To verify that the profile is running properly, you can look for thesemessages in the child container's log, as follows:
1. Connect to the child container, by entering the following console command:
2. After logging on to the child container, view the child container's log using the log:tailcommand, as follows:
You should see some output like the following:
3. Type Ctrl-C to exit the log view and return to the child container's console prompt.
4. Type Ctrl-D to exit the child container's console, which returns you to the root container'sconsole.
2.3. UPDATE A PROFILE
Atomic container upgrades
Normally, when you edit a profile that is already deployed in a container, the modification takes effectimmediately. This is because the Fabric Agent in the affected container (or containers) actively monitorsthe fabric registry in real time.
In practice, however, immediate propagation of profile modifications is often undesirable. In a productionsystem, you typically want to roll out changes incrementally: for example, initially trying out the changeon just one container to check for problems, before you make changes globally to all containers.Moreover, sometimes several edits must be made together to reconfigure an application in a consistentway.
Profile versioning
For quality assurance and consistency, it is typically best to modify profiles atomically, where severalmodifications are applied simultaneously. To support atomic updates, fabric implements profileversioning. Initially, the container points at version 1.0 of a profile. When you create a new profile version
jboss-fuse-full child 1.0 karaf yes quickstarts-beginner-camel.log success
JBossFuse:karaf@root> container-connect child
JBossFuse:karaf@root> log:tail
2016-06-16 11:47:51,012 | INFO | #2 - timer://foo | log-route | ? ? | 153 - org.apache.camel.camel-core - 2.17.1.redhat-630187 | >>> Hello from Fabric based Camel route! : child2016-06-16 11:47:56,011 | INFO | #2 - timer://foo | log-route | ? ? | 153 - org.apache.camel.camel-core - 2.17.1.redhat-630187 | >>> Hello from Fabric based Camel route! : child
CHAPTER 2. GETTING STARTED WITH FUSE FABRIC
13

(for example, version 1.1), the changes are invisible to the container until you upgrade it. After you arefinished editing the new profile, you can apply all of the modifications simultaneously by upgrading thecontainer to use the new version 1.1 of the profile.
Upgrade to a new profile
For example, to modify the default profile, when it is deployed and running in a container, follow therecommended procedure:
1. Create a new version, 1.1, to hold the pending changes by entering this console command:
The new version is initialised with a copy of all of the profiles from version 1.0.
2. Use the fabric:profile-edit command to change the help text for the default profile.Enter the following profile-edit command to edit the Summary.md resource:
This opens the built-in text editor for editing profile resources (see Appendix A, Editing Profileswith the Built-In Text Editor).
Remember to specify version 1.1 to the fabric:profile-edit command, so that themodifications are applied to version 1.1 of the default profile.
When you are finished editing, type Ctrl-S to save your changes and then type Ctrl-X to quitthe text editor and get back to the console prompt.
3. Upgrade the child container to version 1.1 by entering this console command:
Roll back to an old profile
You can easily roll back to the old version of the default profile, using the fabric:container-rollback command like this:
2.4. SHUTTING DOWN THE CONTAINERS
Shutting down the containers
Because the child containers run in their own JVMs, they do not automatically stop when you shut downthe root container. To shut down a container and its children, first stop the child containers by using the fabric:container-stop command. For example, to shut down the current fabric completely, enterthese console commands:
JBossFuse:karaf@root> fabric:version-createCreated version: 1.1 as copy of: 1.0
JBossFuse:karaf@root> fabric:profile-edit --resource Summary.md default 1.1
JBossFuse:karaf@root> fabric:container-upgrade 1.1 child
JBossFuse:karaf@root> fabric:container-rollback 1.0 child
JBossFuse:karaf@root> fabric:container-stop child
Red Hat JBoss Fuse 6.3 Fabric Guide
14
After you restart the root container, you must explicitly restart its child containers by invoking the fabric:container-start console command.
For instructions for shutting down a fabric that has more than one ensemble, see Chapter 5, ShuttingDown a Fabric.
JBossFuse:karaf@root> shutdown -f
CHAPTER 2. GETTING STARTED WITH FUSE FABRIC
15

CHAPTER 3. CREATING A NEW FABRIC
Abstract
When there are no existing fabrics to join, or you want to start a new fabric, you can create a new onefrom a standalone container.
STATIC IP ADDRESS REQUIRED FOR FABRIC SERVER
The IP address and hostname associated with the Fabric Servers in the Fabric ensemble are of criticalimportance to the fabric. Because these IP addresses and hostnames are used for configuration andservice discovery (through the Zookeeper registry), they must not change during the lifetime of the fabric.
You can take either of the following approaches to specifying the IP address:
For simple examples and tests (with a single Fabric Server) you can work around the static IPrequirement by using the loopback address, 127.0.0.1.
For distributed tests (multiple Fabric Servers) and production deployments, you must assign astatic IP address to each of the Fabric Server hosts.
IMPORTANT
Beware of volatile IP addresses resulting from VPN connections, WiFi connections, andeven LAN connections. If a Fabric Server binds to one of these volatile IP addresses, itwill cease to function after the IP address has gone away. It is recommended that youalways use the --resolver manualip --manual-ip StaticIPAddress options tospecify the static IP address explicitly, when creating a new Fabric Server.
MAKE QUICKSTART EXAMPLES AVAILABLE
The default behavior is that profiles for quickstart examples are not available in a new fabric. To create afabric in which you can run the quickstart examples, edit the $FUSE_HOME/fabric/io.fabric8.import.profiles.properties file by uncommenting the linethat starts with the following:
# importProfileURLs =
If you create a fabric without doing this and you want to run the quickstart examples, follow these stepsto make them available:
1. Check that the fabric is running.
2. In the $FUSE_HOME/quickstarts directory, change to the directory in which the quickstartexample you want to run is located, for example:
cd beginner
3. In that directory, execute the following command:
mvn fabric8:deploy
Red Hat JBoss Fuse 6.3 Fabric Guide
16

You would need to run this command in each directory that contains a quickstart example thatyou want to run.
PROCEDURE
To create a new fabric:
1. (Optional) Customise the name of the root container by editing the InstallDir/etc/system.properties file and specifying a different name for this property:
NOTE
For the first container in your fabric, this step is optional. But at some later stage,if you want to join a root container to the fabric, you might need to customise thecontainer's name to prevent it from clashing with any existing root containers inthe fabric.
2. Any existing users in the InstallDir/etc/users.properties file are automatically used toinitialize the fabric's user data, when you create the fabric. You can populate the users.properties file, by adding one or more lines of the following form:
But there must not be any users in this file that have administrator privileges (Administrator, SuperUser, or admin roles). If the InstallDir/etc/users.properties already containsusers with administrator privileges, you should delete those users before creating the fabric.
IMPORTANT
If you leave some administrator credentials in the users.properties file, thisrepresents a security risk because the file could potentially be accessed by othercontainers in the fabric.
NOTE
The initialization of user data from users.properties happens only once, atthe time the fabric is created. After the fabric has been created, any changes youmake to users.properties will have no effect on the fabric's user data.
3. If you use a VPN (virtual private network) on your local machine, it is advisable to log off VPNbefore you create the fabric and to stay logged off while you are using the local container.
NOTE
A local Fabric Server is permanently associated with a fixed IP address orhostname. If VPN is enabled when you create the fabric, the underlying Javaruntime is liable to detect and use the VPN hostname instead of your permanentlocal hostname. This can also be an issue with multi-homed machines.
karaf.name=root
Username=Password[,RoleA][,RoleB]...
CHAPTER 3. CREATING A NEW FABRIC
17

4. Start up your local container.
In JBoss Fuse, start the local container as follows:
5. Create a new fabric by entering the following command:
The current container, named root by default, becomes a Fabric Server with a registry serviceinstalled. Initially, this is the only container in the fabric. The --new-user, --new-user-password, and --new-user-role options specify the credentials for a new Administratoruser. The Zookeeper password is used to protect sensitive data in the Fabric registry service (allof the nodes under /fabric). The --manual-ip option specifies the Fabric Server's static IPaddress StaticIPAddress (see the section called “Static IP address required for FabricServer”).
For more details on fabric:create see section "fabric:create" in "Console Reference".
For more details about resolver policies, see section "fabric:container-resolver-list" in "ConsoleReference" and section "fabric:container-resolver-set" in "Console Reference" .
FABRIC CREATION PROCESS
Several things happen when a fabric is created from a standalone container:
1. The container installs the requisite OSGi bundles to become a Fabric Server.
2. The Fabric Server starts a registry service, which listens on TCP port 2181 (which makes fabricconfiguration data available to all of the containers in the fabric).
NOTE
You can customize the value of the registry service port by specifying the --zookeeper-server-port option.
3. The Fabric Server installs a new JAAS realm (based on the ZooKeeper login module), whichoverrides the default JAAS realm and stores its user data in the ZooKeeper registry.
4. The new Fabric Ensemble consists of a single Fabric Server (the current container).
5. A default set of profiles is imported from InstallDir/fabric/import (can optionally beoverridden).
6. After the standalone container is converted into a Fabric Server, the previously installed OSGibundles and Karaf features are completely cleared away and replaced by the default FabricServer configuration. For example, some of the shell command sets that were available in thestandalone container are no longer available in the Fabric Server.
cd InstallDir/bin./fuse
JBossFuse:karaf@root> fabric:create --new-user AdminUser --new-user-password AdminPass --new-user-role Administrator --zookeeper-password ZooPass --resolver manualip --manual-ip StaticIPAddress --wait-for-provisioning
Red Hat JBoss Fuse 6.3 Fabric Guide
18

EXPANDING A FABRIC
You can expand a fabric by creating new managed containers. Fabric supports the container providerplug-in mechanism, which makes it possible to define how to create new containers in different contexts.Currently, Fabric makes container providers available for the following kinds of container:
Child container, created on the local machine as a child process in its own JVM.
Instructions on creating a child container are found in Child Containers.
SSH container, created on any remote machine for which you have ssh access.
Instructions on creating a SSH container are found in SSH Containers.
Fabric provides container creation commands that make it easy to create new containers. Using thesecommands, Fabric can automatically install JBoss Fuse on a remote host (uploading whateverdependencies are needed), start up the remote container process, and join the container to the existingfabric, so that it becomes a fully-fledged managed container in the fabric.
CHAPTER 3. CREATING A NEW FABRIC
19

CHAPTER 4. FABRIC CONTAINERS
4.1. CHILD CONTAINERS
Abstract
Child containers are the easiest kind of container to create. They are created on the same host as anexisting container and are piggybacked on the same JBoss Fuse installation.
Overview
If you want to run multiple JBoss Fuse containers on a single physical host, typically the best approach isto create child containers. A child container is a relatively lightweight way to create a new container,because it re-uses most of the files in a JBoss Fuse installation. It is also convenient for administration,because the children are defined to have a parent container, so that the containers form an orderlyhierarchy.
One container or many?
In principle, a single OSGi container can host multiple applications (even applications with differentdependencies). So, why might you need to define extra child containers on the same host? One reasonfor using child containers is simply to provide a degree of isolation between applications or betweencomponents of an application. A child container runs in its own JVM process, so it is well insulated fromother containers running on the same host. Using child containers also gives your application a coarse-grained structure that can be useful for managing the system (for example, each child container can beindependently stopped and started).
Creating a child container
To create a new child container, invoke the fabric:container-create-child command, specifyingthe parent container name and the name of the new child container. For example, to create the new childcontainer, onlychild, with root as its parent, enter the following command:
If you want to create multiple child containers, an easy way to do this is to add an extra parameter, whichspecifies the number of new children. For example, to create three new child containers, enter acommand like the following:
The preceding command would create the following new child containers:
Stopping and starting a child container
Because each child container runs as a separate process, its lifecycle is independent of the parentcontainer. That is, when you shut down a parent container, it does not automatically shut down the
fabric:container-create-child root onlychild
fabric:container-create-child root child 3
child1child2child3
Red Hat JBoss Fuse 6.3 Fabric Guide
20

children. To shut down a child container, you must explicitly invoke the fabric:container-stopcommand. For example, to shut down the child1 container:
To restart a stopped child container, invoke the fabric:container-start command, as follows:
NOTE
You can also stop a child container using the standard UNIX process managementutilities, ps and kill.
Deleting a child container
To delete a child container (that is, permanently removing all trace of the container from the fabric,including Fabric registry entries, and data stored in the local filesystem), invoke the fabric:container-delete command, as follows:
NOTE
Using a wildcard, you can delete all child containers; for example, fabric:container-delete child*.
4.2. SSH CONTAINERS
Abstract
Fabric allows you to install containers in a local network using SSH. Fabric installs the container fromscratch and configures the container to join the Fabric cluster automatically.
Overview
An SSH container is just a Fabric container that is running on a remote host on your local network, wherethat host is accessible through the SSH protocol. This section describes some basic administration tasksfor these SSH containers.
Prerequisites
The requirements for creating an SSH container on a remote host are:
Linux or UNIX operating system,
SSHD running on the target host and:
A valid account credentials, or
Configured public key authentication
fabric:container-stop child1
fabric:container-start child1
fabric:container-delete child1
CHAPTER 4. FABRIC CONTAINERS
21

Java is installed (for supported versions, see Red Hat JBoss Fuse Supported Configurations).
Curl installed.
GNU tar installed.
Telnet installed.
Creating an SSH container
Fabric provides the fabric:container-create-ssh console command, for creating SSHcontainers.
Given the host, myhost (accessible from the local network) with the SSH user account, myuser, andthe password, mypassword, your could create an SSH container on myhost, using the followingconsole command:
If the myuser user on myhost has configured public key authentication for SSH, you can skip thepassword option:
Where the preceding command uses the key located in ~/.ssh/id_rsa for authentication. If you needto use a different key, you can specify the key location explicitly with the --private-key option:
The last command also supports the --pass-phrase option, in case your key requires a pass phrase.
Update SSH Credentials for Remote SSH Containers
You may need to change the credentials held in ZooKeeper for a remote SSH container. To do so, usethe following command:
container is the name of the container for which you want to change the credentials.
The arguments are:
--user the username of the user performing the action
--password the password of the user performing the action
Creating a Fabric server using SSH
Sometimes you do not have an existing fabric and you want to create one on a remote host. The startingpoint for any fabric is a Fabric server instance, which can act as a seed for the rest of the fabric. So, to
fabric:container-create-ssh --host myhost --user myuser --password mypassword myremotecontainername
fabric:container-create-ssh --host myhost --user myuser myremotecontainername
fabric:container-create-ssh --host myhost --user myuser --private-key ~/.ssh/fabric_pk myremotecontainername
fabric:container-update-ssh-credentials [options] container
Red Hat JBoss Fuse 6.3 Fabric Guide
22

enable you to create a new fabric on a remote host, the fabric:container-create-ssh supportsthe --ensemble-server option, which can be invoked to create a container which is a Fabric server.For example, the following container-create-ssh command creates a new fabric consisting of oneFabric server on the myhost host:
NOTE
The --ensemble-server option has been deprecated as of version 6.3. Therecommended way to create a fabric on a remote host is to manually install JBoss Fuseon the remote host, then create the fabric there as you normally wouuld.
References
NOTE
The commands for creating and updating SSH containers are available for containerscreated as part of an existing fabric and are provisioned with the fabric profile.
For more details about the SSH container console commands, see the "Console Reference".
4.3. FABRIC CONTAINERS ON WINDOWS
Abstract
Fabric supports the deployment of containers on Windows platforms. In this case, however, it isnecessary to install the container manually on the target host.
Overview
Because Windows does not support the Secure Shell (SSH) protocol, it is not possible to install thecontainer software remotely on to a Windows machine. The installation must be performed manually. Butthe remote deployment of applications (by assigning profiles to the container) is fully supported.
Creating a Fabric container on Windows
Perform the following steps to create a Fabric container on Windows (assuming the container is to joinan existing fabric):
1. Following the instructions in the JBoss Fuse Installation Guide, manually install the JBoss Fuseproduct on the Windows target host.
2. Open a new command prompt and enter the following commands to start the container on thetarget host:
fabric:container-create-ssh --host myhost --user myuser --ensemble-server myremotecontainername
cd InstallDir\binfuse.bat
CHAPTER 4. FABRIC CONTAINERS
23

3. If the Fabric servers from the Fabric ensemble are not already running, start them now.
4. Join the container to the existing fabric, by entering the following console command:
Where ZooPass is the ZooKeeper password for the Fabric ensemble (specified when youcreate the fabric with fabric:create); ZooHost is the hostname (or IP address) where theFabric server is running and ZooPort is the ZooKeeper port (defaults to 2181). If necessary,you can discover the ZooKeeper host and port by logging into the Fabric server and entering thefollowing console command:
The Name argument (which is optional) specifies a new name for the container after it joins thefabric. It is good practice to provide this argument, because all freshly installed containers havethe name root by default. If you do not specify a new container name when you join the fabric,there are bound to be conflicts.
NOTE
The container where you run the fabric:join command must be a standalonecontainer. It is an error to invoke fabric:join in a container that is already partof a fabric.
After joining the fabric, the container becomes a managed Fabric container and has the fabric profiledeployed on it.
Creating a Fabric server on Windows
If you don't have an existing fabric, you can create a new fabric on the Windows host. The starting pointfor any fabric is a Fabric server instance, which can act as a seed for the rest of the fabric. Perform thefollowing steps to create a Fabric server on Windows:
1. Following the instructions in the JBoss Fuse Installation Guide, manually install the JBoss Fuseproduct on the Windows target host.
2. To start the container on the target host, open a new command prompt and enter the followingcommands:
3. To create a new fabric (thereby turning the current host into a Fabric server), enter the followingconsole command:
JBossFuse:karaf@root> fabric:join --zookeeper-password ZooPass ZooHost:ZooPort Name
config:proplist --pid io.fabric8.zookeeper
cd InstallDir\binfuse.bat
JBossFuse:karaf@root> fabric:create --new-user AdminUser --new-user-password AdminPass --new-user-role Administrator --zookeeper-password ZooPass --resolver manualip --manual-ip StaticIPAddress --wait-for-provisioning
Red Hat JBoss Fuse 6.3 Fabric Guide
24

The current container, named root by default, becomes a Fabric Server with a registry serviceinstalled. Initially, this is the only container in the fabric. The --new-user, --new-user-password, and --new-user-role options specify the credentials for a new Administratoruser. The Zookeeper password is used to protect sensitive data in the Fabric registry service (allof the nodes under /fabric). The --manual-ip option specifies the Fabric Server's static IPaddress StaticIPAddress (see the section called “Static IP address required for FabricServer”).
Managing remote containers on Windows
Because a Fabric container on Windows is added to the fabric by joining (that is, using fabric:join),there are certain restrictions on which commands you can use to manage it. In particular, the followingcommands are not supported:
To stop and start a Fabric container running on Windows, you must log on to the Windows host and usethe regular Windows system commands to manage the container process (in particular, you couldpotentially install the container as a Windows service and use the Windows service commands tomanage the container lifecycle).
fabric:container-stopfabric:container-startfabric:container-delete
CHAPTER 4. FABRIC CONTAINERS
25
CHAPTER 5. SHUTTING DOWN A FABRIC
OVERVIEW
This chapter describes how to shut down part or all of a fabric.
SHUTTING DOWN A MANAGED CONTAINER
You can shut down a managed container from the console at any time. Invoke the fabric:container-stop command and specify the name of the managed container, for example:
NOTE
The -f flag is required when shutting down a container that belongs to the ensemble.
The fabric:container-stop command looks up the container name in the registry and retrieves thedata it needs to shut down that container. This approach works no matter where the container isdeployed: whether locally or on a remote host.
SHUTTING DOWN A FABRIC SERVER
Occasionally, you might want to shut down a Fabric Server for maintenance reasons. It is possible to dothis without disabling the fabric, as long as more than half of the Fabric Servers in the ensemble remainup and running. For example, suppose you have an ensemble that consists of three servers, registry1, registry2, and registry3. You can shut down only one of these Fabric Servers at atime by using the fabric:container-stop command, for example:
After performing the necessary maintenance, you can restart the Fabric Server as follows:
SHUTTING DOWN AN ENTIRE FABRIC
In a production environment, it is rarely necessary to shut down an entire fabric. A fabric providesredundancy by enabling you to shut down part of the fabric and restart that part without having to shutdown the whole fabric. You can even apply patches to a fabric without shutting down containers.
Red Hat recommends that you minimize the number of times you shut down a complete fabric. This isbecause shutting down and restarting an entire fabric requires execution of the fabric:ensemble-remove and fabric:ensemble-add commands. Each time you execute one of these commands, itcreates a new ensemble. This new ensemble URL is propagated to all containers in the fabric and allcontainers need to reconnect to the new ensemble. There is a risk for TCP port numbers to bereallocated, which means that your network configuration might become out-of-date because servicesmight start up on different ports.
fabric:container-stop -f ManagedContainerName
fabric:container-stop -f registry3
fabric:container-start registry3
Red Hat JBoss Fuse 6.3 Fabric Guide
26

However, if you must shut down an entire fabric, follow the steps below. These steps show examplesthat reflect this configuration:
Three Fabric Servers (ensemble servers): registry1, registry2, registry3.
Four managed containers: managed1, managed2, managed3, managed4.
To shut down a complete fabric:
1. Use the client console utility to log on to one of the Fabric Servers in the ensemble. Forexample, to log on to the registry1 server, enter a command in the following format:
Replace AdminUser and AdminPass with the credentials of a user with administrationprivileges. Replace Registry1Host with name of the host where registry1 is running. It isassumed that the registry1 server is listening for console connections on the default TCP port(that is, 8101)
2. Ensure that all managed containers in the fabric are running. Execution of fabric:container-list should display true in the alive column for each container. Thisis required for execution of the fabric:ensemble-remove command, which is the next step.
3. Remove all but one of the Fabric Servers from the ensemble. For example, if you logged on to registry1, enter:
4. Shut down all managed containers in the fabric, except the container on the Fabric Server youare logged into. In the following example, the first command shuts down managed1, managed2, managed3 and managed4:
5. Shut down the last container that is still running. This is the container that is on the Fabric Serveryou are logged in to. For example:
After you complete the work that required the fabric to be shut down, you restart the fabric by recreatingit. For example:
1. Use the client console utility to log in to the registry1 container host.
2. Start all containers in the fabric.
3. Add the other Fabric Servers, for example:
NOTE ON SHUTTING DOWN A COMPLETE FABRIC
./client -u AdminUser -p AdminPass -h Registry1Host
fabric:ensemble-remove registry2 registry3
fabric:container-stop -f managed*fabric:container-stop -f registry2fabric:container-stop -f registry3
shutdown -f
fabric:ensemble-add registry2 registry3
CHAPTER 5. SHUTTING DOWN A FABRIC
27

If you are logged on to a container that is connected to a fabric, you might be tempted to shut down theentire fabric by stopping the containers on the Fabric Servers. For example:
This does not work because a fabric requires a quorum (a simple majority) of Fabric Servers to berunning in order to stop a container that is in the fabric. In this example, the third invocation of fabric:container-stop fails and throws an error because only one Fabric Server is still running. Atleast two Fabric Servers must be running to stop a container. With only one Fabric Server running, theregistry shuts down and refuses service requests because a quorum of Fabric Servers is no longeravailable. The fabric:container-stop command needs the registry to be running so it can retrievedetails about the container it is trying to shut down.
The correct way to shut down a complete fabric is to follow the steps in the previous section. That is,remove all Fabric Servers except one and then stop all containers.
fabric:container-stop -f registry1fabric:container-stop -f registry2fabric:container-stop -f registry3
Red Hat JBoss Fuse 6.3 Fabric Guide
28

CHAPTER 6. FABRIC PROFILES
Abstract
A profile is the basic unit of deployment in a fabric. This chapter describes how to create, edit, anddeploy profiles into containers. You can also create different versions of a profile, which makes itpossible to support rolling upgrades across the containers in your fabric.
6.1. INTRODUCTION TO PROFILES
Overview
A profile is a description of how to provision a logical group of containers. Each profile can have none,one, or more parents, which allows you to have profile hierarchies. A container can be assigned one ormore profiles. Profiles are also versioned, which enables you to maintain different versions of eachprofile, and then upgrade or roll back containers, by changing the version of the profiles they use.
What is in a profile?
A profile can contain one or more of the following resources:
OSGi bundle URLs
Web ARchive (WAR) URLs
Fuse Application Bundle (FAB) URLs
OSGi Configuration Admin PIDs
Apache Karaf feature repository URLs
Apache Karaf features
Maven artifact repository URLs
Blueprint XML files or Spring XML files (for example, for defining broker configurations or Camelroutes)
Any kind of resource that might be needed by an application (for example, Java properties file,JSON file, XML file, YML file)
System properties that affect the Apache Karaf container (analogous to editing etc/config.properties)
System properties that affect installed bundles (analogous to editing etc/system.properties)
Profile hierarchies
Frequently, multiple profiles share a lot of configuration details: such as common frameworks, libraries,and so on. Defining these details separately for each profile would create a considerable maintenanceheadache. To avoid duplication across profiles, therefore, Fabric uses a hierarchical model for profiles.
CHAPTER 6. FABRIC PROFILES
29

You can define a generic profile (base profile) containing the common configuration details, and thendefine child profiles that inherit these generic configuration details.
Some basic profiles
Fabric provides a rich set of predefined profiles, which can be used as the basic building blocks fordefining your own profiles. Some of the more interesting predefined profiles are:
[default]
The default profile defines all of the basic requirements for a Fabric container. For example itspecifies the fabric-agent feature, the Fabric registry URL, and the list of Maven repositories fromwhich artifacts can be downloaded.
[karaf]
Inherits from the default profile and defines the Karaf feature repositories, which makes the ApacheKaraf features accessible.
[feature-camel]
Inherits from karaf, defines the Camel feature repositories, and installs some core Camel features:such as camel-core and camel-blueprint. If you are deploying a Camel application, it isrecommended that you inherit from this profile.
[feature-cxf]
Inherits from karaf, defines the CXF feature repositories, and installs some core CXF features. Ifyou are deploying a CXF application, it is recommended that you inherit from this profile.
[mq-base]
Inherits from the karaf profile and installs the mq-fabric feature
[mq-default]
Inherits from the mq-base profile and provides the configuration for an A-MQ broker. Use this profile,if you want to deploy a minimal installation of an ActiveMQ broker.
[jboss-fuse-full]
Includes all of the features and bundles required for the JBoss Fuse full container.
6.2. WORKING WITH PROFILES
Changing the profiles in a container
To change the profiles assigned to a Fabric container, invoke the fabric:container-change-profile command as follows:
Where the preceding command deploys the myprofile profile to the mycontainer container. Allprofiles previously assigned to the container are removed. You can also deploy multiple profiles to thecontainer, with the following command:
fabric:container-change-profile mycontainer myprofile
Red Hat JBoss Fuse 6.3 Fabric Guide
30
Adding a profile to a container
The fabric:container-add-profile command gives you a simple way to add profiles to acontainer, without having to list all of the profiles that were already assigned. For example, to add the example-camel profile to the mycontainer container:
Listing available profiles
To see the list of available profiles, invoke the fabric:profile-list console command:
The command displays all available profiles, showing their parents and the number of containers eachprofile is deployed into.
Inspecting profiles
To see exactly what a profile defines, enter the fabric:profile-display command. For example, todisplay what is defined in the feature-camel profile, enter the following command:
Which outputs something like the following to the console window:
fabric:container-change-profile mycontainer myprofile myotherprofile
fabric:container-add-profile mycontainer example-camel
fabric:profile-list
fabric:profile-display feature-camel
Profile id: feature-camelVersion : 1.0Attributes: parents: karaf
Containers:
Container settings----------------------------Repositories : mvn:org.apache.camel.karaf/apache-camel/${version:camel}/xml/features
Features : camel-core camel-blueprint fabric-camel
Configuration details----------------------------
Other resources----------------------------
CHAPTER 6. FABRIC PROFILES
31

The preceding output does not take into account the definitions inherited from any parent profiles,however. To see the effective definitions for the feature-camel profile, taking into account all of itsancestors, you must specify the --overlay switch, as follows:
Resource files stored in the profile are listed under the heading Other resources. If you want to displaythe contents of these resource files as well, add the --display-resources switch (or -r for short) tothe profile-display command, as follows:
Creating a new profile
To create a new profile for an application, invoke the fabric:profile-create command, as follows:
To specify one ore more parents for the profile when it is being created, add the --parents option tothe command:
After the profile is created, you can start to modify the profile, providing details of what should bedeployed in the profile.
Adding or removing features
To edit one of the existing profiles, you can use the fabric:profile-edit command. For example, toadd the camel-jclouds feature to the feature-camel profile.
Now invoke the fabric:profile-display command to see what the camel profile looks like now.You should see that the camel-jclouds feature appears in the list of features for the feature-camelprofile.
If you want to remove a feature from the profile, use the --delete option. For example, if you need toremove the camel-jclouds feature, you could use the following command:
Resource: io.fabric8.insight.metrics.json Resource: icon.svgResource: Summary.md
fabric:profile-display --overlay feature-camel
fabric:profile-display -r feature-camel
fabric:profile-create myprofile
fabric:profile-create --parents feature-camel myprofile
fabric:profile-edit --feature camel-jclouds feature-camel
Features : camel-jclouds camel-blueprint/2.9.0.fuse-7-061 camel-core/2.9.0.fuse-7-061 fabric-camel/99-master-SNAPSHOT
fabric:profile-edit --delete --feature camel-jclouds feature-camel
Red Hat JBoss Fuse 6.3 Fabric Guide
32

Editing PID properties
An OSGi Config Admin Persistent ID (PID) consists essentially of a list of key-value pairs. You can editPID properties using either of the following approaches:
Edit the PID using the built-in text editor—the Karaf console has a built-in text editor which youcan use to edit profile resources such as PID properties. To start editing a PID using the texteditor, enter the following console command:
For more details about the built-in text editor, see Appendix A, Editing Profiles with the Built-InText Editor.
Edit the PID inline, using console commands—alternatively, you can edit PIDs directly from theconsole, using the appropriate form of the fabric:profile-edit command. This approach isparticularly useful for scripting. For example, to set a specific key-value pair, Key=Value, in aPID, enter the following console command:
Editing a PID inline
To edit a PID inline, use the following variants of the fabric:profile-edit command:
Assign a value to a PID property, as follows:
Append a value to a delimited list (that is, where the property value is a comma-separated list),as follows:
Remove a value from a delimited list, as follows:
Delete a specific property key, as follows:
Delete a complete PID, as follows:
Example of editing a PID inline
In the following example, we modify the io.fabric8.agent PID, changing the Maven repository listsetting. The default profile contains a section like this:
fabric:profile-edit --pid PID ProfileName
fabric:profile-edit --pid PID/Key=Value ProfileName
fabric:profile-edit --pid PID/Key=Value ProfileName
fabric:profile-edit --append --pid PID/Key=ListItem ProfileName
fabric:profile-edit --remove --pid PID/Key=ListItem ProfileName
fabric:profile-edit --delete --pid PID/Key ProfileName
fabric:profile-edit --delete --pid PID ProfileName
CHAPTER 6. FABRIC PROFILES
33

The agent properties section is represented by the io.fabric8.agent PID. So, by modifying the io.fabric8.agent PID, we effectively change the agent properties. You can modify the list of Mavenrepositories in the agent properties PID as follows:
Now when you invoke fabric:profile-display on the default profile, you should see agentproperties similar to the following:
Setting encrypted PID property values
In some cases, you might prefer to store PID property values in encrypted format instead of plain text.For example, passwords and other sensitive data should usually be stored in encrypted form. To store aproperty value in encrypted form, perform the following steps:
1. Use the fabric:encrypt-message command to encrypt the property value, as follows:
This command returns the encrypted property value, EncryptedValue.
NOTE
The default encryption algorithm used by Fabric is PBEWithMD5AndDES.
2. You can now set the property to the encrypted value, EncryptedValue, using the followingsyntax:
For example, using the fabric:profile-edit command, you can set an encrypted value asfollows:
Agent Properties : org.ops4j.pax.url.mvn.repositories= http://repo1.maven.org/maven2@id=maven.central.repo, https://maven.repository.redhat.com/ga@id=redhat.ga.repo, https://maven.repository.redhat.com/earlyaccess/all@id=redhat.ea.repo, https://repository.jboss.org/nexus/content/groups/ea@id=fuseearlyaccess
fabric:profile-edit --pid io.fabric8.agent/org.ops4j.pax.url.mvn.repositories=http://repositorymanager.mylocalnetwork.net default
Agent Properties : org.ops4j.pax.url.mvn.repositories = http://repositorymanager.mylocalnetwork.net
fabric:encrypt-message PropValue
my.sensitive.property = ${crypt:EncryptedValue}
fabric:profile-edit --pid com.example.my.pid/my.sensitive.property=${crypt:EncryptedValue} Profile
Red Hat JBoss Fuse 6.3 Fabric Guide
34

IMPORTANT
These encrypted values are protected by the master password, which is accessible toanyone who can log on to a Fabric container. To keep these encrypted values safe, youmust restrict access to the containers in the fabric.
When using encrypted property values in Blueprint, the property-placeholder element mustdepend on the Fabric service as shown in the following example:
Alternative method for encrypting PID property values
The underlying encryption mechanism for PID properties is based on the Jasypt encryption toolkit.Consequently, it is also possible to encrypt PID properties directly, using the Jasypt toolkit, as follows:
1. Download and install Jasypt, to gain access to the Jasypt encrypt and decrypt command-linetools.
2. Use the Jasypt encrypt command-line tool to encrypt the property value, as follows:
This command returns the encrypted property value, EncryptedValue.
NOTE
The default encryption algorithm used by Fabric is PBEWithMD5AndDES. Youmust ensure that the encrypt.sh utility is using the same algorithm as Fabric.
Customizing the PID property encryption mechanism
You can customize the PID property encryption mechanism, as follows:
Customize the master password for encryption—using the following console command:
You can retrieve the current master password by entering the fabric:crypt-password-getcommand. The default value is the ensemble password (as returned by fabric:ensemble-password).
Customize the encryption algorithm—using the following console command:
<reference id="fabricService" interface="io.fabric8.api.FabricService" availability="mandatory"/><cm:property-placeholder id="properties" persistent-id="encrypted.properties" depends-on="fabricService"/>
./encrypt.sh input="Property value to be encrypted" password=ZooPass verbose=false
fabric:crypt-password-set MasterPassword
fabric:crypt-algorithm-set Algorithm
CHAPTER 6. FABRIC PROFILES
35

Where the encryption algorithm must be one of the algorithms supported by the underlyingJasypt encryption toolkit. You can retrieve the current encryption algorithm by entering the fabric:crypt-algorithm-get command. The default is PBEWithMD5AndDES.
Profile editor
If you want to make extensive edits to a profile, it is not very convenient to make changes one setting at atime. There is a more convenient approach for making extensive profile edits, and that is to use theconsole's built-in profile editor, which is a simple screen-based text editor.
For example, to open the agent properties resource for editing, simply invoke the fabric:profile-edit command without any options, as follows:
A simple text editor opens, enabling to edit the configuration settings in the agent properties.
For full details of how to edit profiles using the built-in text editor, see Appendix A, Editing Profiles withthe Built-In Text Editor.
Editing resources with the profile editor
A practical way to edit a general profile resource (such as an XML configuration resource) is to use thebuilt-in text editor. For example, to start editing the broker.xml file in the mq-amq profile, enter thefollowing console command:
6.3. PROFILE VERSIONS
Overview
Every profile has at least one version. When assigning a profile to a container, you actually assign boththe profile and the version. The fabric-agent, will choose the defined version and retrieve all theinformation provided by the specific version of the profile.
Any change to a profile takes immediate effect. This means that any container using a profile that wasjust modified will pick up the change immediately. It is recommended that you create a new version of aprofile whenever you need to make changes. You can then upgrade containers to use the new version.This enables you to perform atomic updates, test updates on specific containers, and possibly roll backto the previous version, if you encounter any problems.
IMPORTANT
Karaf does not handle leading and trailing zeros in version numbers. Numbers such as1.10, 01.1, 1.1 will all be interpreted as 1.1. When specifying version numbers, anynumbers with leading or trailing zeros must be enclosed in double quotes. For example,"1.10". This will force the number to be interpreted as presented.
Creating a new version
fabric:profile-edit Profile [Version]
fabric:profile-edit --resource broker.xml mq-amq
Red Hat JBoss Fuse 6.3 Fabric Guide
36

You can create a new version using the fabric:version-create command (analogous to creating anew branch in the underlying Git repository). The default version is 1.0. To create version 1.1, enter thefollowing command:
NOTE
To note what is changing in the new version, include the --description argument andenclose the text within double quotes; for example, fabric:version-create --description "expanding all camel routes" 1.1.
After the 1.1 version is created, a new instance of every profile is created for the new version (copiedfrom the previous latest version, which was 1.0). Now you can display or modify the 1.1 version of eachprofile. For example, enter the following command to display the details of the feature-camel profile:
Initially, the output is identical to the 1.0 version of the profile, because we have not yet modified the newversion of the profile. But how do you modify a specific version of a profile? All you need to do is toinvoke the fabric:profile-edit command, specifying the version right after the profile argument.For example, to add the camel-jclouds feature to version 1.1 of the feature-camel profile, enterthe following command:
IMPORTANT
The changes made to version 1.1 of the profile do not (yet) affect any of your existingcontainers. The changes do not take effect until you upgrade your containers to use the1.1 version.
Rolling upgrades and rollbacks
Fabric provides commands for upgrading (incrementing the effective version) and rolling back(decrementing the effective version) the profiles assigned to a container. For example, to upgrade the mycontainer container to the 1.1 version, invoke the fabric:container-upgrade command asfollows:
The preceding command makes mycontainer to use version 1.1 of all the profiles currently assigned toit.
If for any reason you want to roll back to the previous version, you can invoke the fabric:container-rollback command, as follows:
fabric:version-create 1.1
fabric:profile-display --version 1.1 feature-camel
fabric:profile-edit --feature camel-jclouds feature-camel 1.1
fabric:container-upgrade 1.1 mycontainer
fabric:container-rollback 1.0 mycontainer
CHAPTER 6. FABRIC PROFILES
37

It is strongly recommended that you test any profile changes on a single container, before applying thechanges to the whole cluster. Applying an upgrade to all containers can be achieved by specifying the --all option, as follows:
6.4. ENVIRONMENT SPECIFIC VALUES IN FABRIC PROFILES.
If you run a number of Fuse systems you may want to define environment-specific configurations. To dothis you can create a profile containing properties as key-value pairs, and assign it to a container. Whenit is assigned to a container, every profile in that container can refer to the information stored in it.
For example, use the following commands to set up a proxy server and define environment-specificvalues for it.
1. Create a profile called local_values
2. Edit the new profile to include the hostname information.
The contents of the io.fabric8.examplesystem PID in the local_values profile will be:
3. Add the new profile to the proxy-server container.
4. Create another new profile.
5. Set the values in profile:io.fabric8.examplesystem to local_values_test.
The content of pid:csp.test will be:
6. Add the local_values profile to the abc container.
fabric:container-upgrade --all 1.1 mycontainer
JBossFuse:karaf@root> profile-create local_values
JBossFuse:karaf@root> fabric:profile-edit --pid io.fabric8.examplesystem/url=www.example.com local_values
url=www.example.com
JBossFuse:karaf@root> container-add-profile proxy-server local_values
JBossFuse:karaf@root> profile-create local_values_test
JBossFuse:karaf@root> fabric:profile-edit --pid 'csp.test/testUrl=${profile:io.fabric8.examplesystem/url}' local_values_testSetting value:${profile:io.fabric8.examplesystem/url} key:testUrl on pid:csp.test and profile:local_values_test version:1.0
testUrl=${profile:io.fabric8.examplesystem/url}
Red Hat JBoss Fuse 6.3 Fabric Guide
38

7. Add the local_values_test profile to the abc container.
8. Sign on to the abc container.
9. Issue the config:proplist command to show resolved environment settings.
JBossFuse:karaf@root> container-add-profile abc local_values
JBossFuse:karaf@root> container-add-profile abc local_values_test
JBossFuse:karaf@root> fabric:container-connect abc
JBossFuse:admin@abc> config:proplist --pid csp.test fabric.zookeeper.pid = csp.test service.pid = csp.test testUrl = www.example.com
CHAPTER 6. FABRIC PROFILES
39

CHAPTER 7. FABRIC8 MAVEN PLUG-IN
Abstract
This maven plug-in makes it easy to create or update a fabric profile from your Maven project.
7.1. PREPARING TO USE THE PLUG-IN
Edit your Maven settings
First you will need to edit your ~/.m2/settings.xml file to add the fabric server's user and passwordso that the maven plugin can log in to the fabric. For example, you could add the following serverelement to your settings.xml file:
Where Username and Password are the credentials of a Fabric user with administrative privileges (forexample, the credentials you would use to log on to the Management Console).
Customising the repository ID
The default Fabric Maven repository ID is fabric8.upload.repo. You can specify additional serverelements in your settings.xml file for each of the fabrics you need to work with. To select the relevantcredentials, you can set the serverId property in the Fabric8 Maven plug-in configuration section(see Section 7.4, “Configuration Properties”) or set the fabric8.serverId Maven property.
7.2. USING THE PLUG-IN TO DEPLOY A MAVEN PROJECT
Prerequisites
You must ensure the following prerequisites are satisfied before attempting to run the Fabric8 Mavenplug-in:
1. Your Maven ~/.m2/settings.xml file is configured as described in Section 7.1, “Preparing toUse the Plug-In”.
2. A JBoss Fuse container instance is running on your local machine (alternatively, if the containerinstance is running on a remote host, you must configure the plug-in's jolokiaUrl propertyappropriately).
Running the plug-in on any Maven project
<settings> <servers> <server> <id>fabric8.upload.repo</id> <username>Username</username> <password>Password</password> </server> ... </servers></settings>
Red Hat JBoss Fuse 6.3 Fabric Guide
40

To use the Fabric8 plug-in to deploy any maven project into a fabric profile, enter the following Mavencommand:
Adding the plug-in to a Maven POM
If you add the Fabric8 plug-in to your pom.xml file as follows:
Where the plugin/configuration/version element specifies the Fabric8 version of the targetsystem (which is not necessarily the same as the version of the Fabric8 Maven plug-in).
You can now use the following more concise Maven goal:
What does the plug-in do?
When you deploy your project to a Fabric profile with this plug-in, the plug-in does the following:
Uploads any artifacts into the fabric's maven repository,
Lazily creates the Fabric profile or version you specify,
Adds/updates the maven project artifact into the profile configuration,
Adds any additional parent profile, bundles or features to the profile.
Example
You can try out the plug-in with one of the JBoss Fuse quickstart examples, as follows:
You should see a new profile created on the quickstart profile page, which should have a bundle andsome features (click the Bundle tab and then the Feature tab).
7.3. CONFIGURING THE PLUG-IN
mvn io.fabric8:fabric8-maven-plugin:1.2.0.redhat-630187:deploy
<plugins> <plugin> <groupId>io.fabric8</groupId> <artifactId>fabric8-maven-plugin</artifactId> <version>1.2.0.redhat-630187</version> <configuration> <profile>testprofile</profile> <version>1.2</version> </configuration> </plugin></plugins>
mvn fabric8:deploy
cd InstallDir/quickstarts/cxf/restmvn io.fabric8:fabric8-maven-plugin:1.2.0.redhat-630187:deploy
CHAPTER 7. FABRIC8 MAVEN PLUG-IN
41

Specifying profile information
You can explicitly configure the name of the profile to create, by adding a configuration element tothe plug-in configuration in your pom.xml file, as follows:
Multi-module Maven projects
For multi-module Maven projects, a more flexible way to configure the plug-in is to use Maven properties.For example if you have a multi-module maven project such as this:
You could define the plug-in once in the root pom.xml file, as follows:
While in the foo/pom.xml file you need only define the fabric8.profile property, as follows:
<plugins> <plugin> <groupId>io.fabric8</groupId> <artifactId>fabric8-maven-plugin</artifactId> <configuration> <profile>my-thing</profile> </configuration> </plugin></plugins>
pom.xmlfoo/ pom.xml a/pom.xml b/pom.xml ...bar/ pom.xml c/pom.xml d/pom.xml ...
<plugins> <plugin> <groupId>io.fabric8</groupId> <artifactId>fabric8-maven-plugin</artifactId> </plugin></plugins>
<project> ... <properties> <fabric8.profile>my-foo</fabric8.profile> ... </properties> ...</project>
Red Hat JBoss Fuse 6.3 Fabric Guide
42

All of the projects within the foo folder, such as foo/a and foo/b, will deploy to the same profile (in thiscase the profile, my-foo). You can use the same approach to put all of the projects under the bar folderinto a different profile too.
At any point in your tree of maven projects you can define a maven fabric8.profile property tospecify exactly where it gets deployed; along with any other property on the plug-in (see the PropertyReference below).
Specifying features, additional bundles, repositories and parent profiles
You can specify additional configuration in the maven plug-in, as follows:
Note that the features element allows you to specify a space-separated list of features to include in theprofile.
This example specifies space-separated lists for the parent profile IDs, features, repositories andbundles so that it is easy to reuse Maven properties for these values (for example, to add some extrafeatures to a child maven project while inheriting from the parent project).
Configuring with Maven properties
You can also use maven property values (or command line arguments) to specify the configurationvalues by prefixing the property name with fabric8.. For example, to deploy a maven project to the cheese profile name, enter the command:
By default, the project artifacts are uploaded to the Maven repository inside the fabric. If you want todisable this beahvior and just update the profile configuration (for example, if you are already pointingyour fabric's Maven repository to your local Maven repository), you can set fabric8.upload=false—for example:
Specifying profile resources
If you create the directory, src/main/fabric8, in your Maven project and add any resource files or a ReadMe.md file to your project, they will automatically be uploaded into the profile as well. For example,if you run the following commands from your Maven project directory:
<plugins> <plugin> <groupId>io.fabric8</groupId> <artifactId>fabric8-maven-plugin</artifactId> <configuration> <profile>my-rest</profile> <features>fabric-cxf-registry fabric-cxf cxf war swagger</features> <featureRepos>mvn:org.apache.cxf.karaf/apache-cxf/${version:cxf}/xml/features</featureRepos> </configuration> </plugin></plugins>
mvn fabric8:deploy -Dfabric8.profile=cheese
mvn fabric8:deploy -Dfabric8.upload=false
CHAPTER 7. FABRIC8 MAVEN PLUG-IN
43

The newly deployed profile will include a ReadMe.md wiki page.
7.4. CONFIGURATION PROPERTIES
Specifying properties
Properties can be specified either as elements inside the configuration element of the plug-in in yourproject's pom.xml file. For example, the profile property can be set as follows:
Or you can specify the properties on the command line or as Maven build properties (where the propertynames must be prefixed with fabric8.. For example, to set the profile name, you could add thefollowing property to your pom.xml file:
Or you can specify properties on the command line:
Property reference
The Fabric8 Maven plug-in supports the following properties (which can be set either as elements insidethe configuration element in the pom.xml file or as Maven properties, when prefixed by fabric8.):
Parameter Description
abstractProfile Specifies whether the profile is abstract. Default is false.
mkdir -p src/main/fabric8echo "## Hello World" >> src/main/fabric8/ReadMe.mdmvn fabric8:deploy
<plugins> <plugin> <groupId>io.fabric8</groupId> <artifactId>fabric8-maven-plugin</artifactId> <configuration> <profile>${fabric8.profile}</profile> </configuration> </plugin></plugins>
<project> ... <properties> <fabric8.profile>my-foo</fabric8.profile> ... </properties> ...
mvn fabric8:deploy -Dfabric8.profile=my-foo
Red Hat JBoss Fuse 6.3 Fabric Guide
44

artifactBundleType Type to use for the project artifact bundle reference.
artifactBundleClassifier Classifier to use for the project artifact bundlereference.
baseVersion If the version does not exist, the baseVersionprovides the initial values for the newly createdversion. This is like creating a branch from the baseVersion for a new version branch in git.
bundles Space-separated list of additional bundle URLs (ofthe form mvn:groupId/artifactId/version) to addto the newly created profile. Note you do not have toinclude the current Maven project artifact; thisconfiguration is intended as a way to list dependentrequired bundles.
featureRepos Space-separated list of feature repository URLs toadd to the profile. The URL has the general form mvn:groupId/artifactId/version/xml/features.
features Space-separated list of features to add to the profile.For example, the following setting would include boththe camel feature and the cxf feature: <features>camel cxf</features>
generateSummaryFile Whether or not to generate a Summary.md file fromthe pom.xml file's description element textvalue. Default is true.
ignoreProject Whether or not we should ignore this maven projectin goals like fabric8:deploy or fabric8:zip. Default is false.
includeArtifact Whether or not we should add the Mavendeployment unit to the Fabric profile. Default is true.
includeReadMe Whether or not to upload the Maven project'sReadMe file, if no specific ReadMe file exists in theyour profile configuration directory (as set by profileConfigDir). Default is true.
jolokiaUrl The Jolokia URL of the JBoss Fuse ManagementConsole. Defaults to http://localhost:8181/jolokia.
locked Specifies whether or not the profile should be locked.
CHAPTER 7. FABRIC8 MAVEN PLUG-IN
45

minInstanceCount The minimum number of instances of this profilewhich we require to run. Default is 1.
parentProfiles Space-separated list of parent profile IDs to be addedto the newly created profile. Defaults to karaf.
profile The name of the Fabric profile to deploy your projectto. Defaults to the groupId-artifactId of yourMaven project.
profileConfigDir The folder in your Maven project containing resourcefiles to be deployed into the profile, along with theartifact configuration. Defaults to src/main/fabric8. You should create thedirectory and add any configuration files ordocumentation you wish to add to your profile.
profileVersion The profile version in which to update the profile. Ifnot specified, it defaults to the current version of thefabric.
replaceReadmeLinksPrefix If provided, then any links in the ReadMe.md fileswill be replaced to include the given prefix.
scope The Maven scope to filter by, when resolving thedependency tree. Possible values are: compile, provided, runtime, test, system, import.
serverId The server ID used to lookup in ~/.m2/settings/xml for the server elementto find the username and password to log in to thefabric. Defaults to fabric8.upload.repo.
upload Whether or not the deploy goal should upload thelocal builds to the fabric's Maven repository. You candisable this step if you have configured your fabric'sMaven repository to reuse your local Mavenrepository. Defaults to true.
useResolver Whether or not the OSGi resolver is used for bundlesor Karaf based containers to deduce the additionalbundles or features that need to be added to yourprojects dependencies to be able to satisfy the OSGipackage imports. Defaults to true.
webContextPath The context path to use for Web applications, forprojects using war packaging.
Red Hat JBoss Fuse 6.3 Fabric Guide
46

CHAPTER 8. ACTIVEMQ BROKERS AND CLUSTERS
Abstract
Fabric provides predefined profiles for deploying a single (unclustered) broker and, in addition, you canuse the powerful fabric:mq-create command to create and deploy clusters of brokers.
8.1. CREATING A SINGLE BROKER INSTANCE
MQ profiles
The following profiles are important for creating broker instances:
mq-base
An abstract profile, which defines some important properties and resources for the broker, but shouldnever be used directly to instantiate a broker.
mq-default
A basic single broker, which inherits most of its properties from the mq-base profile.
To examine the properties defined in these profiles, you can invoke the fabric:profile-displaycommand, as follows:
Creating a new broker instance
A Fuse MQ broker is a Karaf container instance running a message broker profile. The profile defines thebroker dependencies (through features) and the configuration for the broker. The simplest approach tocreating a new broker is to use the provided mq-default profile.
For example, to create a new mq-default broker instance called broker1, enter the following consolecommand:
This command creates a new container called broker1 with a broker of the same name running on it.
fabric:mq-create command
JBossFuse:karaf@root> fabric:profile-display mq-default...JBossFuse:karaf@root> fabric:profile-display mq-base...
JBossFuse:karaf@root> fabric:container-create-child --profile mq-default root broker1Creating new instance on SSH port 8102 and RMI ports 1100/44445 at: /Users/jdoe/Downloads/jboss-fuse-6.3.0-254/instances/broker1The following containers have been created successfully: Container: broker1.
CHAPTER 8. ACTIVEMQ BROKERS AND CLUSTERS
47

The fabric:mq-create command provides a shortcut to creating a broker, but with more flexibility,because it also creates a new profile. To create a new broker instance called brokerx using fabric:mq-create, enter the following console command:
Just like the basic fabric:container-create-child command, fabric:mq-create creates acontainer called broker1 and runs a broker instance on it. There are some differences, however:
The new broker1 container is implicitly created as a child of the current container,
The new broker has its own profile, mq-broker-default.brokerx, which is based on the mq-base profile template,
It is possible to edit the mq-broker-default.brokerx profile, to customize the configurationof this new broker.
The --replicas option lets you specify the number of master/slave broker replicas (for moredetails, see Section 8.3.2, “Master-Slave Cluster”). In this example, we specify one replica (thedefault is two).
NOTE
The new profile gets the name mq-broker-Group.BrokerName by default. If you wantthe profile to have the same name as the broker (which was the default in JBoss Fuseversion 6.0), you can specify the profile name explicitly using the --profile option.
IMPORTANT
The new broker is created with SSL enabled by default. The initial certificates andpasswords created by default are not secure, however, and must be replaced by customcertificates and passwords. See the section called “Customizing the SSL keystore.jks andtruststore.jks file” for details of how to do this.
Starting a broker on an existing container
The fabric:mq-create command can be used to deploy brokers on existing containers. Consider thefollowing example, which creates a new Fuse MQ broker in two steps:
The preceding example firstly creates a default child container, and then creates and deploys the new mq-broker-default.brokerx profile to the container, by invoking fabric:mq-create with the --assign-container option. Of course, instead of deploying to a local child container (as in this
JBossFuse:karaf@root> fabric:mq-create --create-container broker --replicas 1 brokerxMQ profile mq-broker-default.brokerx ready
JBossFuse:karaf@root> fabric:container-create-child root broker1Creating new instance on SSH port 8102 and RMI ports 1100/44445 at: /Users/jdoe/Downloads/jboss-fuse-6.3.0-254/instances/broker1The following containers have been created successfully: broker1.
JBossFuse:karaf@root> fabric:mq-create --assign-container broker1 brokerxMQ profile mq-broker-default.brokerx ready
Red Hat JBoss Fuse 6.3 Fabric Guide
48

example), we could assign the broker to an SSH container.
Broker groups
Brokers created using the fabric:mq-create command are always registered with a specific brokergroup. If you do not specify the group name explicitly at the time you create the broker, the broker getsregistered with the default group by default.
If you like, you can specify the group name explicitly using the --group option of the fabric:mq-create command. For example, to create a new broker that registers with the west-coast group,enter the following console command:
If the west-coast group does not exist prior to running this command, it is automatically created byFabric. Broker groups are important for defining clusters of brokers, providing the underlying mechanismfor creating load-balancing clusters and master-slave clusters. For details, see Section 8.3, “Topologies”.
8.2. CONNECTING TO A BROKER
Overview
This section describes how to connect a client to a broker. In order to connect to a JBoss MQ broker,you need to know its group name. Every MQ broker is associated with a group when it is created: if noneis specified explicitly, it automatically gets associated with the default group.
Client URL
To connect to an MQ broker, the client must specify a discovery URL, in the following format:
For example, to connect to a broker associated with the default group, the client would use thefollowing URL:
The connection factory then looks for available brokers in the group and connects the client to one ofthem.
8.3. TOPOLOGIES
8.3.1. Load-Balancing Cluster
Overview
Fabric exploits the concept of broker groups to implement cluster functionality. To set up a load-balancing cluster, all of the brokers in the cluster should register with the same group name, but usingunique broker names.
JBossFuse:karaf@root> fabric:mq-create --create-container broker --replicas 1 --group west-coast brokeryMQ profile mq-broker-west-coast.brokery ready
discovery:(fabric:GroupName)
discovery:(fabric:default)
CHAPTER 8. ACTIVEMQ BROKERS AND CLUSTERS
49

For example, Figure 8.1, “Load-Balancing Cluster” shows a load-balancing cluster with the group name, loadbal, and with three brokers registered in the group: brokerx, brokery, and brokerz. Thistopology is most useful in a scenario where producer is generating a heavy load but does not care if allthe messages are delivered to the consumer. In this scenario non persistent messages are used. Thistopology does not have shared storage. For scenarios where better guarantees regarding delivery ofmessages is required it is best to combine networks and master slave as defined in subsequentsections.
Figure 8.1. Load-Balancing Cluster
brokerx
Broker Name URL
. . . . . .
brokery
brokerz
Group: l oadbal
Create brokers in a load-balancing cluster
The basic rules for creating a load-balancing cluster of brokers are as follows:
Choose a group name for the load-balancing cluster.
Each broker in the cluster registers with the chosen group.
Each broker must be identified by a unique broker name.
Normally, each broker is deployed in a separate container.
For example, consider the cluster shown in Figure 8.1, “Load-Balancing Cluster”. The group name is loadbal and the cluster consists of three broker instances with broker names: brokerx, brokery, andbrokerz.
To create this cluster, perform the following steps:
1. First of all create some containers:
JBossFuse:karaf@root> container-create-child root broker 3Creating new instance on SSH port 8102 and RMI ports 1100/44445 at: /Users/jdoe/Downloads/jboss-fuse-6.3.0.redhat-254/instances/broker2Creating new instance on SSH port 8104 and RMI ports 1102/44447 at: /Users/jdoe/Downloads/jboss-fuse-6.3.0.redhat-254/instances/broker3Creating new instance on SSH port 8103 and RMI ports 1101/44446 at: /Users/jdoe/Downloads/jboss-fuse-6.3.0.redhat-254/instances/broker1The following containers have been created successfully: Container: broker2. Container: broker3. Container: broker1.
Red Hat JBoss Fuse 6.3 Fabric Guide
50

2. Wait until the containers are successfully provisioned. You can conveniently monitor them usingthe watch command, as follows:
3. You can then assign broker profiles to each of the containers, using the fabric:mq-createcommand, as follows:
4. You can use the fabric:profile-list command to see the new profiles created for thesebrokers:
5. You can use the fabric:cluster-list command to view the cluster configuration for thisload balancing cluster:
Configure clients of a load-balancing cluster
JBossFuse:karaf@root> watch container-list
JBossFuse:karaf@root> mq-create --group loadbal --assign-container broker1 brokerxMQ profile mq-broker-loadbal.brokerx ready
JBossFuse:karaf@root> mq-create --group loadbal --assign-container broker2 brokeryMQ profile mq-broker-loadbal.brokery ready
JBossFuse:karaf@root> mq-create --group loadbal --assign-container broker3 brokerzMQ profile mq-broker-loadbal.brokerz ready
JBossFuse:karaf@root> profile-list --hidden[id] [# containers] [parents]...mq-broker-loadbal.brokerx 1 mq-basemq-broker-loadbal.brokery 1 mq-basemq-broker-loadbal.brokerz 1 mq-basemq-client-loadbal ...
JBossFuse:karaf@root> cluster-list[cluster] [masters] [slaves] [services]...amq/loadbal brokerx broker1 - tcp://MyLocalHost.61616 mqtt://MyLocalHost.61424 amqp://MyLocalHost.61426 stomp://MyLocalHost.61428 brokery broker2 - tcp://MyLocalHost.61437 mqtt://MyLocalHost.61439 amqp://MyLocalHost.61441 stomp://MyLocalHost.61443 brokerz broker3 - tcp://MyLocalHost.61453 mqtt://MyLocalHost.61455 amqp://MyLocalHost.61457 stomp://MyLocalHost.61459
CHAPTER 8. ACTIVEMQ BROKERS AND CLUSTERS
51

To connect a client to a load-balancing cluster, use a URL of the form, discovery:(fabric:GroupName), which automatically load balances the client across the available brokers in thecluster. For example, to connect a client to the loadbal cluster, you would use a URL like the following:
For convenience, the mq-create command automatically generates a profile named mq-client-GroupName, which provides an ActiveMQConnectionFactory instance in the registry. Ifyou deploy this profile together with a Camel route that uses JMS endpoints, the Camel route willautomatically find and use the ActiveMQConnectionFactory instance to connect to the brokercluster.
8.3.2. Master-Slave Cluster
Overview
In the master-slave pattern, multiple peer brokers provide the same service and all compete to be themaster. Only one master can exist at a given time, while the rest remain on standby as slaves. If themaster stops, the remaining brokers (slaves) compete to become the new master. If the brokercontainers are deployed across different machines or data centres, the result is a highly available broker.
For example, Figure 8.2, “Master-Slave Cluster” shows a master-slave cluster with the group name, masterslave, and three brokers that compete with each other to register as the broker, hq-broker. Abroker becomes the master by acquiring a lock (where the lock implementation is provided by theunderlying ZooKeeper registry). The other two brokers that fail to acquire the lock remain as slaves (butthey continue trying to acquire the lock, at regular time intervals).
Figure 8.2. Master-Slave Cluster
broker1
hq- br oker
Broker Name URL
. . .. . .
Group: maste rsla ve
Create brokers in a master-slave cluster
The basic rules for creating a master-slave cluster of brokers are as follows:
Choose a group name for the master-slave cluster.
Each broker in the cluster registers with the chosen group.
Each broker must be identified by the same virtual broker name.
Normally, each broker is deployed in a separate container.
discovery:(fabric:loadbal)
Red Hat JBoss Fuse 6.3 Fabric Guide
52

For example, consider the cluster shown in Figure 8.2, “Master-Slave Cluster”. The group name is masterslave and the cluster consists of three broker instances, each with the same broker name: hq-broker. You can create this cluster by entering a single fabric:mq-create command, as follows:
Alternatively, if you have already created three containers, broker1, broker2 and broker3 (possiblyrunning on separate machines), you can deploy a cluster of three brokers to the containers by enteringthe following command:
The first broker that starts becomes the master, while the others are slaves. When you stop the master,one of the slaves will take over and clients will reconnect. If brokers are persistent, you need to ensurethat they all use the same store—for details of how to configure this, see the section called “Configuringpersistent data”.
Configure clients of a master-slave cluster
To connect a client to a master-slave cluster, use a URL of the form, discovery:(fabric:GroupName), which automatically connects the client to the current master server. Forexample, to connect a client to the masterslave cluster, you would use a URL like the following:
You can use the automatically generated client profile, mq-client-masterslave, to create sampleclients (by referencing the corresponding ActiveMQConnectionFactory instance in the registry).
Locking mechanism
One benefit of this kind of master-slave architecture is that it does not depend on shared storage forlocking, so it can be used even with non-persistent brokers. The broker group uses ZooKeeper tomanage a shared distributed lock that controls ownership of the master status.
Re-using containers for multiple clusters
Fabric supports re-using the same containers for multiple master-slave clusters, which is a convenientway to economize on hardware resources. For example, given the three containers, broker1, broker2, and broker3, already running the hq-broker cluster, it is possible to reuse the samecontainers for another highly available broker cluster, web-broker. You can assign the web-brokerprofile to the existing containers with the following command:
This command assigns the new web-broker profile to the same containers already running hq-broker. Fabric automatically prevents two masters from running on the same container, so the masterfor hq-broker will run on a different container from the master for web-broker. This arrangementmakes optimal use of the available resources.
Configuring persistent data
JBossFuse:karaf@root> mq-create --create-container broker --replicas 3 --group masterslave hq-broker
JBossFuse:karaf@root> mq-create --assign-container broker1,broker2,broker3 --group masterslave hq-broker
discovery:(fabric:masterslave)
mq-create --assign-container broker1,broker2,broker3 web-broker
CHAPTER 8. ACTIVEMQ BROKERS AND CLUSTERS
53

When you run a master-slave configuration with persistent brokers, it is important to specify where yourstore is located, because you need to be able to access it from multiple hosts. To support this scenario,the fabric:mq-create command enables you to specify the location of the data directory, as follows:
The preceding command creates the hq-broker virtual broker, which uses the /var/activemq/hq-broker directory for the data (and store) location. You can then mount some shared storage to this pathand share the storage amongst the brokers in the master-slave cluster.
8.3.3. Broker Networks
Overview
It is possible to combine broker clusters with broker networks, giving you a hybrid broker network thatcombines the benefits of broker clusters (for example, high availability) with the benefits of brokernetworks (managing the flow of messages between different geographical sites).
Broker networks
A broker network in JBoss Fuse is a form of federation where brokers are linked together using networkconnectors. This can be used as a way of forwarding messages between different geographicallocations. Messages can be forwarded either statically (where specified categories of messages arealways forwarded to a specific broker), or dynamically (where messages are forwarded only in responseto a client that connects to a broker and subscribes to particular queues or topics).
Creating network connectors
In the context of Fabric, network connectors can be created by passing the --network option to the fabric:mq-create command.
Example broker network
Consider the scenario shown in Figure 8.3, “Broker Network with Master-Slave Clusters”.
Figure 8.3. Broker Network with Master-Slave Clusters
us-west2
us-west1
B
Master
us-w est network connectors
The figure shows two master-slave clusters:
The first cluster has the group name, us-west, and provides high-availability with a master-slave cluster of two brokers, us-west1 and us-west2.
mq-create --assign-container broker1 --data /var/activemq/hq-broker hq-broker
Red Hat JBoss Fuse 6.3 Fabric Guide
54

The second cluster has the group name, us-east, and provides high-availability with a master-slave cluster of two brokers, us-east1 and us-east2.
Network connectors link the master brokers between each of the geographical locations (there are, infact, two network connectors in this topology: from west to east and from east to west).
To create the pair of master-slave brokers for the us-east group (consisting of the two containers us-east1 and us-east2), you would log on to a root container running in the US East location and enter acommand like the following:
Where the --network option specifies the name of the broker group you want to connect to, and the User and Pass are the credentials required to log on to the us-west broker cluster. By default, the fabric:mq-create command creates a master/slave pair of brokers.
And to create the pair of master-slave brokers for the us-west group (consisting of the two containers us-west1 and us-west2), you would log on to a root container running in the US West location andenter a command like the following:
Where User and Pass are the credentials required to log on to the us-east broker cluster.
NOTE
In a real scenario, you would probably first create the containers on separate machinesand then assign brokers to the containers, using the --assign-container option inplace of --create-container.
Connecting to the example broker network
At the US East location, any clients that need to connect to the broker network should use the followingclient URL:
And at the US West location, any clients that need to connect to the broker network should use thefollowing client URL:
Any messages that need to be propagated between locations, from US East to US West (or from USWest to US East), are transmitted over the broker network through one of the network connectors.
8.4. ALTERNATIVE MASTER-SLAVE CLUSTER
Why use an alternative master-slave cluster?
The standard master-slave cluster in Fabric uses Apache Zookeeper to manage the locking mechanism:
mq-create --group us-east --network us-west --networks-username User --networks-password Pass --create-container us-east us-east
mq-create --group us-west --network us-east --networks-username User --networks-password Pass --create-container us-west us-west
discovery:(fabric:us-east)
discovery:(fabric:us-west)
CHAPTER 8. ACTIVEMQ BROKERS AND CLUSTERS
55

in order to be promoted to master, a broker connects to a Fabric server and attempts to acquire the lockon a particular entry in the Zookeeper registry. If the master broker loses connectivity to the Fabricensemble, it automatically becomes dormant (and ceases to accept incoming messages). A potentiallyundesirable side effect of this behaviour is that when you perform maintenance on the Fabric ensemble(for example, by shutting down one of the Fabric servers), you will find that the broker cluster shuts downas well.
In some deployment scenarios, therefore, you might get better up times and more reliable brokerperformance by disabling the Zookeeper locking mechanism (which Fabric employs by default) andusing an alternative locking mechanism instead.
Alternative locking mechanism
The Apache ActiveMQ persistence layer supports alternative locking mechanisms which can be used toenable a master-slave broker cluster. In order to use an alternative locking mechanism, you need tomake at least the following basic configuration changes:
1. Disable the default Zookeeper locking mechanism (which can be done by setting standalone=true in the broker's io.fabric8.mq.fabric.server-BrokerName PID).
2. Enable the shared file system master/slave locking mechanism in the KahaDB persistence layer(see ).
NOTE
In fact, the KahaDB locking mechanism is usually enabled by default. This does not causeany problems with Fabric, because it operates at a completely different level from theZookeeper locking mechanism. The Zookeeper coordination and locking works at thebroker level to coordinate the broker start. The KahaDB lock coordinates the persistenceadapter start.
standalone property
The standalone property belongs to the io.fabric8.mq.fabric.server-BrokerName PID andis normally used for a non-Fabric broker deployment (for example, it is set to true in the etc/io.fabric8.mq.fabric.server-broker.cfg file). By setting this property to true, youinstruct the broker to stop using the discovery and coordination services provided by Fabric (but it is stillpossible to deploy the broker in a Fabric container). One consequence of this is that the broker stopsusing the Zookeeper locking mechanism. But this setting has other side effects as well.
Side effects of setting standalone=true
Setting the property, standalone=true, on a broker deployed in Fabric has the following effects:
Fabric no longer coordinates the locks for the brokers (hence, the broker's persistence adapterneeds to be configured as shared file system master/slave instead).
The broker no longer uses the ZookeeperLoginModule for authentication and falls back tousing the PropertiesLoginModule instead. This requires users to be stored in the etc/users.properties file or added to the PropertiesLoginModule JAAS Realm in thecontainer where the broker is running for the brokers to continue to accept connections
Fabric discovery of brokers no longer works (which affects client configuration).
Red Hat JBoss Fuse 6.3 Fabric Guide
56

Configuring brokers in the cluster
Brokers in the cluster must be configured as follows:
1. Set the property, standalone=true, in each broker's io.fabric8.mq.fabric.server-BrokerName PID. For example, given a broker with thebroker name, brokerx, which is configured by the profile, mq-broker-default.brokerx,you could set the standalone property to true using the following console command:
2. To customize the broker's configuration settings further, you need to create a unique copy of thebroker configuration file in the broker's own profile (instead of inheriting the broker configurationfile from the base profile, mq-base). If you have not already done so, follow the instructions inthe section called “Customizing the broker configuration file” to create a custom brokerconfiguration file for each of the broker's in the cluster.
3. Configure each broker's KahaDB persistence adapter to use the shared file system lockingmechanism. For this you must customize each broker configuration file, adding or modifying (asappropriate) the following XML snippet:
You can edit this profile resource either though the Fuse Management Console, through the Gitconfiguration approach (see Section 8.5, “Broker Configuration”), or using the fabric:profile-edit command.
NOTE
For more details about configuring brokers, see Section 8.5, “Broker Configuration”.
Configuring authentication data
When you set standalone=true on a broker, it can no longer use the default ZookeeperLoginModule authentication mechanism and falls back on the PropertiesLoginModule.This implies that you must populate authentication data in the etc/users.properties file on each ofthe hosts where a broker is running. Each line of this file takes an entry in the following format:
profile-edit --pid io.fabric8.mq.fabric.server-brokerx/standalone=true mq-broker-default.brokerx
<broker ... > ... <persistenceAdapter> <kahaDB directory="/sharedFileSystem/sharedBrokerData" lockKeepAlivePeriod="2000"> <locker> <shared-file-locker lockAcquireSleepInterval="10000" /> </locker> </kahaDB> </persistenceAdapter> ...</broker>
Username=Password,Role1,Role2,...
CHAPTER 8. ACTIVEMQ BROKERS AND CLUSTERS
57

Where each entry consists of Username and Password credentials and a list of one or more roles, Role1, Role2,....
IMPORTANT
Using such a decentralized approach to authentication in a distributed system such asFabric is potentially problematic. For example, if you move a broker from one host toanother, the authentication data would not automatically become available on the newhost. You should, therefore, carefully consider the impact this might have on youradministrative procedures.
Configuring a client
Clients of the alternative master-slave cluster cannot use Fabric discovery to connect to the cluster. Thismakes the client configuration slightly less flexible, because you cannot abstract away the brokerlocations. In this scenario, it is necessary to list the host locations explicitly in the client connection URL.
For example, to connect to a shared file system master-slave cluster that consists of three brokers, youcould use a connection URL like the following:
8.5. BROKER CONFIGURATION
Overview
The examples presented so far have demonstrated how to create brokers with default configurationsettings. In practice, you will usually need to customize the broker configurations and this can be done byediting the properties of the corresponding Fabric profiles.
Setting OSGi Config Admin properties
Many of the broker configuration settings can be altered by editing OSGi Config Admin properties (whichare organized into collections identified by a persistent ID or PID). For example, consider the broker1profile created by entering the following fabric:mq-create command:
The preceding command creates the new profile, mq-broker-default.brokerx, and assigns thisprofile to the newly created broker1 container.
NOTE
The new profile gets the name mq-broker-Group.BrokerName by default. If you wantthe profile to have the same name as the broker (which was the default in JBoss Fuseversion 6.0), you can specify the profile name explicitly using the --profile option.
You can inspect the details of the mq-broker-default.brokerx profile using the fabric:profile-display command, as follows:
failover:(tcp://broker1:61616,tcp://broker2:61616,tcp://broker3:61616)
fabric:mq-create --create-container broker --replicas 1 --network us-west brokerx
Red Hat JBoss Fuse 6.3 Fabric Guide
58

Associated with the io.fabric8.mq.fabric.server-brokerx PID are a variety of propertysettings, such as network and group. You can now modify the existing properties or add moreproperties to this PID to customize the broker configuration.
Modifying basic configuration properties
You can modify the basic configuration properties associated with the io.fabric8.mq.fabric.server-brokerx PID by invoking the fabric:profile-editcommand, with the appropriate syntax for modifying PID properties.
For example, to change the value of the network property to us-east, enter the following consolecommand:
Customizing the SSL keystore.jks and truststore.jks file
JBossFuse:karaf@root> profile-display mq-broker-default.brokerx Profile id: mq-broker-default.brokerxVersion : 1.0Attributes: parents: mq-baseContainers:
Container settings----------------------------
Configuration details----------------------------PID: io.fabric8.mq.fabric.server-brokerx connectors openwire mqtt amqp stomp data ${runtime.data}brokerx standby.pool default keystore.file profile:keystore.jks kind MasterSlave keystore.password mca^e.Xg broker-name brokerx ssl true truststore.password mca^e.Xg keystore.cn localhost keystore.url profile:keystore.jks truststore.file profile:truststore.jks config profile:ssl-broker.xml group default network us-west
Other resources----------------------------Resource: truststore.jksResource: keystore.jks
profile-edit --pid io.fabric8.mq.fabric.server-brokerx/network=us-east mq-broker-default.brokerx
CHAPTER 8. ACTIVEMQ BROKERS AND CLUSTERS
59

When using a broker with SSL security, it is necessary to replace the default keystore files with your owncustom versions. The following JKS resources are stored in the mq-broker-default.brokerx profilewhen SSL is enabled (which is the default case):
keystore.jks
A Java keystore file containing this broker's own X.509 certificate. The broker uses this certificate toidentify itself to other brokers in the network. The password for this file is stored in the io.fabric8.mq.fabric.server-brokerx/keystore.password property.
truststore.jks
A Java truststore file containing one or more Certificate Authority (CA) certificates or othercertificates, which are used to verify the certificates presented by other brokers during the SSLhandshake. The password for this file is stored in the io.fabric8.mq.fabric.server-brokerx/truststore.password property.
For replacing entire resource files in a profile, the easiest approach to take is to make a git clone of theprofile data from the Fabric ensemble server (which also acts as a git server) and then use git to updatethe profile data. For more details about how to use git in Fabric, see Chapter 16, Configuring with Git.
For example, to customize the SSL settings for the mq-broker-default.brokerx profile, perform thefollowing steps:
1. If you have not done so already, clone the git repository that stores all of the profile data in yourFabric. Enter a command like the following:
Where Username and Password are the credentials of a Fabric user with Administratorrole and we assume that you are currently working with profiles in version 1.0 (whichcorresponds to the git branch named 1.0).
NOTE
In this example, it is assumed that the fabric is set up to use the git clusterarchitecture (which is the default) and also that the Fabric server running on localhost is currently the master instance of the git cluster.
2. The keystore.jks file and the truststore.jks file can be found at the following locationsin the git repository:
Copy your custom versions of the keystore.jks file and truststore.jks file to theselocations, over-writing the default versions of these files.
3. You also need to modify the corresponding passwords for the keystore and truststore. To modifythe passwords, edit the following file in a text editor:
git clone -b 1.0 http://Username:Password@localhost:8181/git/fabriccd fabric
fabric/profiles/mq/broker/default.brokerx.profile/keystore.jksfabric/profiles/mq/broker/default.brokerx.profile/truststore.jks
fabric/profiles/mq/broker/default.brokerx.profile/io.fabric8.mq.fabric.server-brokerx.properties
Red Hat JBoss Fuse 6.3 Fabric Guide
60

Modify the keystore.password and truststore.password settings in this file, to specifythe correct password values for your custom JKS files.
4. When you are finished modifying the profile configuration, commit and push the changes back tothe Fabric server using git, as follows:
5. For these SSL configuration changes to take effect, a restart of the affected broker (or brokers) isrequired. For example, assuming that the modified profile is deployed on the broker container,you would restart the broker container as follows:
Customizing the broker configuration file
Another important aspect of broker configuration is the ActiveMQ broker configuration file, which isspecified as a Spring XML file. There are two alternative versions of the broker configuration file: ssl-broker.xml, for an SSL-enabled broker; and broker.xml, for a non-SSL-enabled broker.
If you want to customize the broker configuration, it is recommended that you create a copy of the brokerconfiguration file in your broker's own profile (instead of inheriting the broker configuration from the mq-base parent profile). The easiest way to make this kind of change is to use a git repository of profile datathat has been cloned from a Fabric ensemble server.
For example, to customize the broker configuration for the mq-broker-default.brokerx profile,perform the following steps:
1. It is assumed that you have already cloned the git repository of profile data from the Fabricensemble server (see the section called “Customizing the SSL keystore.jks and truststore.jksfile”). Make sure that you have checked out the branch corresponding to the profile version thatyou want to edit (which is assumed to be 1.0 here). It is also a good idea to do a git pull toensure that your local git repository is up-to-date. In your git repository, enter the following gitcommands:
2. The default broker configuration files are stored at the following location in the git repository:
Depending on whether your broker is configured with SSL or not, you should copy either the ssl-broker.xml file or the broker.xml file into your broker's profile. For example, assumingthat your broker uses the mq-broker-default.brokerx profile and is configured to use SSL,you would copy the broker configuration as follows:
git commit -a -m "Put a description of your changes here!"git push
fabric:container-stop brokerfabric:container-start broker
git checkout 1.0git pull
fabric/profiles/mq/base.profile/ssl-broker.xmlfabric/profiles/mq/base.profile/broker.xml
cp fabric/profiles/mq/base.profile/ssl-broker.xml fabric/profiles/mq/broker/default.brokerx.profile/
CHAPTER 8. ACTIVEMQ BROKERS AND CLUSTERS
61

3. You can now edit the copy of the broker configuration file, customizing the broker's Spring XMLconfiguration as required.
4. When you are finished modifying the broker configuration, commit and push the changes back tothe Fabric server using git, as follows:
5. For the configuration changes to take effect, a restart of the affected broker (or brokers) isrequired. For example, assuming that the modified profile is deployed on the broker container,you would restart the broker container as follows:
Additional broker configuration templates in mq-base
If you like, you can add extra broker configurations to the mq-base profile, which can then be used astemplates for creating new brokers with the fabric:mq-create command. Additional templateconfigurations must be added to the following location in the git repository:
You can then reference one of the templates by supplying the --config option to the fabric:mq-create command.
For example, given that a new broker configuration, mybrokertemplate.xml, has just been installed:
You could use this custom mybrokertemplate.xml configuration template by invoking the fabric:mq-create command with the --config option, as follows:
The --config option assumes that the configuration file is stored in the current version of the mq-baseprofile, so you need to specify only the file name (that is, the full ZooKeeper path is not required).
Setting network connector properties
You can specify additional configuration for network connectors, where the property names have theform network.NetworkPropName. For example, to add the setting, network.bridgeTempDestinations=false, to the PID for brokerx (which has the profile name, mq-broker-default.brokerx), enter the following console command:
The deployed broker dynamically detects the change to this property and updates the network connectoron the fly.
git commit -a -m "Put a description of your changes here!"git push
fabric:container-stop brokerfabric:container-start broker
fabric/profiles/mq/base.profile/
fabric/profiles/mq/base.profile/mybrokertemplate.xml
fabric:mq-create --config mybrokertemplate.xml brokerx
profile-edit --pid io.fabric8.mq.fabric.server-brokerx/network.bridgeTempDestinations=false mq-broker-default.brokerx
Red Hat JBoss Fuse 6.3 Fabric Guide
62

Network connector properties by reflection
Fabric uses reflection to set network connector properties. That is, any PID property of the form network.OptionName can be used to set the corresponding OptionName property on the org.apache.activemq.network.NetworkBridgeConfiguration class. In particular, this impliesyou can set any of the following network.OptionName properties:
Property Default Description
name bridge Name of the network - for morethan one network connectorbetween the same two brokers,use different names
userName None Username for logging on to theremote broker port, ifauthentication is enabled.
password None Password for logging on to theremote broker port, ifauthentication is enabled.
dynamicOnly false If true, only activate anetworked durable subscriptionwhen a corresponding durablesubscription reactivates, bydefault they are activated on start-up.
dispatchAsync true Determines how the networkbridge sends messages to thelocal broker. If true, the networkbridge sends messagesasynchronously.
decreaseNetworkConsumerPriority
false If true, starting at priority -5,decrease the priority fordispatching to a network Queueconsumer the further away it is (innetwork hops) from the producer.If false, all network consumersuse same default priority (that is, 0) as local consumers.
consumerPriorityBase -5 Sets the starting priority forconsumers. This base value willbe decremented by the length ofthe broker path when decreaseNetworkConsumerPriority is set.
CHAPTER 8. ACTIVEMQ BROKERS AND CLUSTERS
63

networkTTL 1 The number of brokers in thenetwork that messages andsubscriptions can pass through(sets both messageTTL and consumerTTL)
messageTTL 1 The number of brokers in thenetwork that messages can passthrough.
consumerTTL 1 The number of brokers in thenetwork that subscriptions canpass through (keep to 1 in amesh).
conduitSubscriptions true Multiple consumers subscribing tothe same destination are treatedas one consumer by the network.
duplex false If true, a network connection isused both to produce and toconsume messages. This isuseful for hub and spokescenarios, when the hub is behinda firewall, and so on.
prefetchSize 1000 Sets the prefetch size on thenetwork connector's consumer. Itmust be greater than 0, becausenetwork consumers do not poll formessages
Property Default Description
Red Hat JBoss Fuse 6.3 Fabric Guide
64

suppressDuplicateQueueSubscriptions
false If true, duplicate subscriptionsin the network that arise fromnetwork intermediaries aresuppressed. For example,consider brokers A, B, and C,networked using multicastdiscovery. A consumer on A givesrise to a networked consumer on B and C. In addition, C networksto B (based on the networkconsumer from A) and B networksto C. When true, the networkbridges between C and B (beingduplicates of their existingnetwork subscriptions to A) will besuppressed. Reducing the routingchoices in this way providesdeterminism when producers orconsumers migrate across thenetwork as the potential for deadroutes (stuck messages) areeliminated. The networkTTLvalue needs to match or exceedthe broker count to require thisintervention.
suppressDuplicateTopicSubscriptions
true If true, duplicate network topicsubscriptions (in a cyclic network)are suppressed.
Property Default Description
CHAPTER 8. ACTIVEMQ BROKERS AND CLUSTERS
65

bridgeTempDestinations true Whether to broadcast advisorymessages for temporarydestinations created in thenetwork of brokers. Temporarydestinations are typically createdfor request-reply messages.Broadcasting the informationabout temp destinations is turnedon by default, so that consumersof a request-reply message canbe connected to another broker inthe network and still send backthe reply on the temporarydestination specified in the JMSReplyTo header. In anapplication scenario where mostor all of the messages use therequest-reply pattern, thisgenerates additional traffic on thebroker network, because everymessage typically sets a unique JMSReplyTo address (whichcauses a new temp destination tobe created and broadcasted withan advisory message in thenetwork of brokers).
If you disable this feature, thisnetwork traffic can be reduced,but in this case the producers andconsumers of a request-replymessage need to be connected tothe same broker. Remoteconsumers (that is, connectedthrough another broker in yournetwork) will not be able to sendthe reply message, but insteadwill raise a temp destination does not exist exception.
alwaysSyncSend false If true, non-persistent messagesare sent to the remote brokerusing request/reply semanticsinstead of oneway messagesemantics. This setting affectsboth persistent and non-persistentmessages the same way.
staticBridge false If true, the broker does notrespond dynamically to newconsumers. It uses only staticallyIncludedDestinations to create demandsubscriptions.
Property Default Description
Red Hat JBoss Fuse 6.3 Fabric Guide
66

useCompression false Compresses the message bodywhen sending it over the network.
advisoryForFailedForward
false If true, send an advisorymessage when the broker fails toforward the message to thetemporary destination across thebridge.
useBrokerNamesAsIdSeed true Add the broker name as a prefixto connections and consumerscreated by the network bridge. Ithelps with visibility.
gcDestinationViews true If true, remove any MBeans fordestinations that have not beenused for a while.
gcSweepTime 60000 The period of inactivity inmilliseconds, after which weremove MBeans.
checkDuplicateMessagesOnDuplex
false If true, check for duplicates onthe duplex connection.
Property Default Description
CHAPTER 8. ACTIVEMQ BROKERS AND CLUSTERS
67

PART II. FABRIC IN PRODUCTION
Abstract
Deepen your understanding and understand the principles of running Fabric in a production environment.
Red Hat JBoss Fuse 6.3 Fabric Guide
68

CHAPTER 9. FABRIC ENSEMBLE AND REGISTRY
Abstract
The Fabric ensemble and registry is a critical part of the Fabric infrastructure. In a productionenvironment, it is particularly important to understand the correct approach to creating and maintaining aFabric ensemble.
9.1. FABRIC REGISTRY
Overview
Fuse Fabric uses Apache ZooKeeper (a highly reliable distributed coordination service) as its registry forstoring cluster configuration and node registration.
ZooKeeper is designed with consistency and high availability in mind, while protecting against networksplits, using the concept of a server quorum. For example, you might run five ZooKeeper servers and, solong as you have a quorum (three or more servers available), the ZooKeeper cluster is reliable and not ina network split.
Registry structure
The structure of the registry is a tree-like structure, similar to a filesystem. Each node of the tree (aznode) can hold data and can have children.
For example, the following shows an outline of the registry structure:
Parts of the registry
Conceptually, the Fabric registry consists of two main parts:
fabric | +----registry (runtime registry) | | | +----containers | | | +----root | +----configs (configuration registry) | +----versions | | | +----1.0 | | | +----profiles | | | +----default | +----containers
CHAPTER 9. FABRIC ENSEMBLE AND REGISTRY
69

Configuration Registry—the logical configuration of your fabric, which typically contains nophysical machine information. It contains details of the applications to be deployed and theirdependencies.
Runtime Registry—contains details of how many machines are actually running, their physicallocation, and what services they are implementing.
Making the registry highly available
With a single container hosting the registry, high availability is not supported. In order to have a highlyavailable Fabric registry, you need to replicate the registry on multiple containers (on different physicalhosts). The common term used to describe a group of servers that replicate the Fabric registry is anensemble.
9.2. ADMINISTERING A FABRIC ENSEMBLE
Recommendations for an ensemble in production
To assure high availability of the Fabric registry in a production environment, it is recommended that youobserve the following guidelines for a Fabric ensemble:
Deploy a minimum of five Fabric servers in production (if one server is taken down formaintenance, one other server can fail, and the Fabric registry will still be available).
Fabric servers should be deployed on separate host machines.
Each Fabric server should only have a Fabric registry agent deployed inside it. No other profilesshould be deployed in it.
The size of the ensemble should be fixed at the outset, and not changed later (if yousubsequently add or remove containers from the ensemble, the ZooKeeper IP ports would be re-assigned).
Creating an ensemble
A Fabric ensemble is created in two stages, as follows:
1. Create an initial ensemble, consisting of one Fabric server.
2. Expand the ensemble, by adding an even number of containers.
Creating an initial ensemble
An initial ensemble is usually created by invoking the fabric:create console command (whichconverts the current container into a Fabric server, which is a sole member of the newly createdensemble). Alternatively, when creating a new container with the fabric:container-create-sshcommand, you can pass the --ensemble-server option.
NOTE
The --ensemble-server option has been deprecated as of version 6.3. Therecommended way to create a fabric on a remote host is to manually install JBoss Fuseon the remote host, then create the fabric there as you normally wouuld.
Red Hat JBoss Fuse 6.3 Fabric Guide
70

For details of how to create an initial ensemble using the fabric:create command, see Chapter 3,Creating a New Fabric.
Expanding the ensemble
Once you have an initial ensemble, consisting of one Fabric server, you can expand the ensemble byinvoking the fabric:ensemble-add command. To expand the ensemble, perform the following steps:
1. Create some new managed containers in the current fabric, which you can then add to theensemble. Use the default profile for these new containers. For a production environment, it isrecommended that you create at least four new managed containers (must be an even number),each running on their own host.
2. While logged on to a container in the fabric, use the fabric:ensemble-add command to addthe managed containers to the ensemble. For example, given the four managed containers, container1, container2, container3, and container4, you would enter the followingcommand:
NOTE
You must specify an even number of containers to the fabric:ensemble-addcommand.
3. To check that the ensemble has been successfully created, invoke the fabric:container-list command.
IMPORTANT
Do not attempt to expand (or shrink) a Fabric ensemble in a production environment.When you add containers to (or remove containers from) an ensemble, the ZooKeeper IPports are all re-assigned, which typically causes the containers in the fabric to loseconnectivity with the ensemble.
Changing an ensemble password
Each ensemble has a password. When you create an ensemble you can specify the --zookeeper-password option to define the ensemble password. If you do not then Zookeeper creates an ensemblepassword for you. You might want to change the ensemble password when a test ensemble becomes aproduction ensemble. To display the current ensemble password, execute the following command:
To change the ensemble password, execute the fabric:ensemble-password command and specifythe new password. For example, to change the password to tiger, enter the following command:
Zookeeper responds with a message to wait while it updates the password on each node. A node mustbe running for it to be updated with the new password. Zookeeper also instructs you to enter thefollowing command when the prompt reappears. This command saves the updated password:
> fabric:ensemble-add container1 container2 container3 container4
> fabric:ensemble-password
> fabric:ensemble-password tiger
CHAPTER 9. FABRIC ENSEMBLE AND REGISTRY
71

Taking a Fabric server down for maintenance
If you need to perform any maintenance on the host where a Fabric server is running, you can do thiswhile maintaining availability of the Fabric registry, so long as a quorum (more than half) of the Fabricservers are still running. To stop a Fabric server, simply invoke the fabric:container-stopcommand, specifying the name of the Fabric server.
In general, it is recommended to have at least five Fabric servers in the ensemble. Three is not anadequate number. For example, with three servers in the ensemble consider what happens when youtake a Fabric server down for maintenance. The two remaining Fabric servers form a quorum, but thereis now no tolerance for failure. If one of the remaining Fabric servers fails, the whole fabric fails. In orderto maintain high availability during maintenance, it is therefore essential to have at least five Fabricservers in the ensemble.
9.3. PURGING THE ZOOKEEPER SNAPSHOT AND TRANSACTIONLOGS
Overview
The ZooKeeper Data Directory contains snapshot and transactional log files which are persistent copy ofthe znodes stored by an ensemble. Any changes to znodes are appended to transaction log and whenthe log file size increases, a snapshot of the current state of znodes is written to the filesystem.ZooKeeper tracks a fuzzy state of its own data tree within the snapshot files. This data tree is constantlyevolving.
To clean up and purge the snapshot and transaction logs from ZooKeeper, you can invoke theZooKeeper autopurge functionality using the --zookeeper-purge-interval and --zookeeper-snap-retain-count parameters on the fabric:create command.
fabric:create Parameters for Zookeeper autopurge
Table 9.1. Zookeeper autopurge Parameters
Parameter Description
--zookeeper-purge-interval Set the interval in hours between triggers of theautopurge task. Must be set to a positive integer (1and above). The default is 0.
--zookeeper-snap-retain-count Define the number of recent Snapshots andcorresponding transaction logs in the dataDir and dataLogDir to retain on autopurge. The minimumnumber is 3.
> fabric:ensemble-password --commit
Red Hat JBoss Fuse 6.3 Fabric Guide
72

CHAPTER 10. FABRIC AGENTS
Abstract
The Fabric agent, which is responsible for provisioning on each container instance, is a key componentof the Fabric infrastructure. When it comes to troubleshooting the behavior of a Fabric container, it isvaluable to have an understanding of what the Fabric agent does and how it works.
10.1. INTRODUCTION
Fabric agent
The Fabric agent is the part of Fabric that is responsible for applying profiles to containers. The agentcan run in any container and its role is to retrieve profile information from the registry and apply them tothe container.
To be specific, the Fabric agent performs the following actions:
1. Retrieves the profiles and versions assigned to the container on which it is running.
2. Reconfigures the container.
3. Calculates what needs to be installed, removed or updated on the container.
4. Performs the requisite install, remove, and update actions.
Agent modules
In reality, the Fabric agent is composed of the following two modules:
[fabric-configadmin]
The Fabric configuration admin bridge. Translates the registry information into configurationinformation.
[fabric-agent]
The deployment agent. Reads the translated configuration and provisions the container accordingly.
Often, the term, agent, refers just to the deployment agent ([fabric-agent] module), but here we discussboth of the agent modules and describe the role of each in some detail.
10.2. THE CONFIGURATION ADMIN BRIDGE
Overview
The configuration admin bridge is responsible for bridging between the ZooKeeper registry and the OSGiConfiguration Admin service. After the bridge connects to the ZooKeeper registry, it discovers whatversion is assigned to the container, retrieves the appropriate versions of the profiles assigned to thecontainer, translates the profiles into configuration data, and applies the profile data to the container.
Information in a profile
CHAPTER 10. FABRIC AGENTS
73

Profiles can contain two distinct kinds of information:
Configuration information—which includes:
System configuration
OSGi configuration
Provisioning information—which includes lists of:
Bundles
Karaf features
Actions performed
The configuration admin bridge reads all of the relevant profiles and creates an OSGi configuration torepresent them. The provisioning and system information are then stored under the io.fabric8.agent PID (in the context of the OSGi Configuration Admin service, a PID is a namedcollection of property settings).
If an assigned profile belongs to a hierarchy (profile inheritance) or if multiple profiles are assigned to thecontainer, the configuration admin bridge takes this into account, resolving any overlapping configurationsettings to produce an overlay view of the profiles. There is only one io.fabric8.agent PID, evenwhen there are multiple assigned profiles.
The output from the configuration admin bridge is just a set of key-value pairs stored under the io.fabric8.agent PID.
Configuration updates
The configuration admin bridge watches the Fabric registry for changes, so that any updates to thecontainer's assigned profiles are tracked and immediately applied to the local container's OSGiconfiguration.
10.3. THE DEPLOYMENT AGENT
Actions performed
The deployment agent listens for local configuration changes on the io.fabric8.agent PID. Anychange in that configuration will trigger the deployment agent.
When the deployment agent is triggered, it performs the following actions:
1. The deployment agent reads the whole io.fabric8.agent PID and calculates what bundlesare to be installed in the container.
2. If the profiles assigned to the container specify any Karaf features, the deployment agenttranslates them into a list of bundles, so that the agent obtains a complete list of bundles toinstall.
3. The deployment agent compares the list of bundles to install with the list of bundles currentlyinstalled, in order to identify:
Bundles to uninstall,
Red Hat JBoss Fuse 6.3 Fabric Guide
74

Bundles to install,
Bundles to update.
4. The deployment agent then performs the bundle uninstalling, installing, and updating in thecontainer.
Downloading artifacts
The deployment agent is capable of downloading artifacts from two different types of maven repository:
Registered Fabric Maven proxies
Configured Maven repositories (any Maven repository configured in the profile overlay).
Priority is always given to the Fabric Maven proxies. If more than one Maven proxy is registered in thefabric, the proxies are used in order, from the oldest to the newest.
If the target artifact is not found in the Maven proxies, the configured Maven repositories are usedinstead. The list of repositories is determined by the org.ops4j.pax.url.mvn.repositoriesproperty of the io.fabric8.agent PID.
To change the list of repositories for a specific profile, you can simply change the org.ops4j.pax.url.mvn.repositories property using the fabric:profile-edit command:
It is recommended that you specify this configuration in one profile only, and have the rest of profilesinherit from it. The default profile, which is the ancestor of all of the standard profiles, is the ideal placefor this.
Container restarts
In most cases, when a container is provisioned by the provisioning agent, the container is kept alive andno restart is needed. A restart becomes necessary, however, whenever the following changes are made:
Changes to the OSGi framework;
Changes to the OSGi framework configuration.
The normal case is where the container stays alive during provisioning, because it is rarely necessary tomake changes to the underlying OSGi framework. If a container does need to restart, the restart isperformed automatically by the deployment agent and, after the restart, the container reconnects to thecluster without any manual intervention.
Monitoring the provisioning status
Throughout the whole process of deploying and provisioning, the deployment agent stores theprovisioning status in the runtime registry, so that it is available to the whole cluster. The user can checkthe provisioning status at any time using the fabric:container-list command.
fabric:profile-edit --pid io.fabric8.agent/org.ops4j.pax.url.mvn.repositories=http://repositorymanager.mylocalnetwork.net default
JBossFuse:karaf@root> fabric:container-list
CHAPTER 10. FABRIC AGENTS
75

To monitor the provisioning status in real time, you can pass the fabric:container-list commandas an argument to the shell:watch command, as follows:
Resolution and startup ordering
To figure out what bundles need to be installed and what bundles need to be removed, the Fabric agentuses the OSGi Bundle Repository (OBR) resolver. The OBR resolver makes sure that all requirementsare met (usually package requirements, but potentially also service requirements). To discover abundle's requirements, the OBR reads the following bundle headers:
Import-Package
For each package listed here, the OBR resolver searches for a bundle that declares the package in acorresponding Export-Package header.
Import-Service
For each service listed here, the OBR resolver searches for a bundle that declares the service in acorresponding Export-Service header.
If you are using Blueprint configuration files, it is especially important to be aware of the need to add an Export-Service header to bundles that implement services. Blueprint configuration files withmandatory references to services will automatically be packaged with the Import-Service bundleheader (assuming that you use the maven-bundle-plugin). If the bundle that exports the servicedoes not explicitly specify an Export-Service header, resolution will fail. To fix this error, either theexporter bundle must add an Export-Service declaration, or the importer bundle must remove the Import-Service directive.
If resolution is successful, the Fabric agent will start the bundles. Even though you should try to avoidhaving requirements in the startup order of your bundles, the Fabric agent will attempt to start thebundles based on their expressed requirements and capabilities. This will not solve all issues, especiallyin cases where asynchronous service registration is involved. The best way to deal with this kind ofissues is to use OSGi services.
[id] [version] [alive] [profiles] [provision status]root* 1.0 true fabric, fabric-ensemble-0000-1 successmq1 1.0 true mq successmq2 1.0 true mq downloadingbilling-broker 1.0 true billing success admin-console 1.0 true web, admin-console success
shell:watch fabric:container-list
Red Hat JBoss Fuse 6.3 Fabric Guide
76

CHAPTER 11. ALLOCATING PORTS
Abstract
In a fabric environment, Fuse uses TCP/IP ports for communication between containers. If you need toimplement a firewall, you must consider these ports and how to handle communication between Fusecontainers. You can use the port service to take care of allocating ports for your services, where the portservice allocates ports in such a way as to avoid port clashes.
11.1. PORTS USED IN A FABRIC ENVIRONMENT
In a Fabric environment, Fuse uses a number of TCP/IP ports for inter-container communication, aslisted in the following table.
You can change these ports in configuration files or fabric profiles.
The minimum set of ports needed for a working fabric is the HTTP port (8181) and Zookeeper serverport (2181). However, with only these ports open you cannot configure ensemble operation, which relieson a full set of Zookeeper ports, nor can you use any kind of JMX administration.
TCP-IP Ports used in a Fabric environment
Port Default Value Purpose
Standard SSH 22 To provision containers by using container-create-ssh
Karaf SSH 8101 For attaching remoteadministration clients
Zookeeper server 2181 For reading the configurationrepository
ZooKeeper peer 2888 For synchronizing theconfiguration repository
ZooKeeper election 3888 For coordinating ZooKeeperensemble roles
RMI server 1099 For JMX administration operationsover RMI
RMI registry 44444 For JMX administration operationsover RMI
Standard HTTP 8181 Used by the web-basedadministration console; the defaultfor web services endpoints
CHAPTER 11. ALLOCATING PORTS
77

Standard HTTPS 8443 Encrypted; used by the web-basedadministration console; the defaultfor web services endpoints
Elasticsearch ports
If you enable the Elasticsearch feature on the Fabric node, the Fabric environment uses two ports thatare set by properties that belong to the io.fabric8.elasticsearch-insight PID. These PIDproperties are set to corresponding Fabric environment variable values:
To change the ports that Elasticsearch uses, you can customize these port settings for your Fabricprofile. For example, if your profile name is myprofile, you can run the following command to changethe HTTP port that Elasticsearch uses from the default value to port 1234:
For more information on Fabric profiles, see Section 6.2, “Working with Profiles”.
Managing ports when using a firewall
While Red Hat does not recommend placing firewall restrictions between container hosts in a fabric,sometimes it is unavoidable. To ensure that the fabric works correctly when you configure a firewall,address the following concerns:
Fuse expects to have access to public Maven repositories using HTTP, in order to satisfydependencies when applications are deployed. While there may be a need to block incomingconnections to Fuse services, blocking outbound connections could be highly problematic,because Fuse will not be able to connect to the repositories it needs. If there is no alternative toblocking outbound connections, then you must either configure an HTTP proxy with Internetaccess or you must replicate all the artifacts required from the public repositories in a localshared file system.
You might notice sockets in the LISTENING state other that are not listed in the "TCP-IP Portsused in a Fabric environment table. These sockets are used by services exposed by the JVM fordebugging and diagnostic purposes. They typically have machine-generated port numbers. inproduction set-ups, you do not need to expose these ports in the firewall.
If you're using a clustered JMS broker setup, then you should make provision for the routing oftraffic between brokers, as well as between the brokers and their clients.
The ZooKeeper ports can change at runtime,for example, when a ZooKeeper ensemble isresized. If you are implementing a firewall, you should make provision for this port change. Forexample, rather than opening port 2181 for ZooKeeper, you should open a range of ports startingwith 2181, if the ensemble is likely to be re-sized before settling on a final configuration.
11.2. THE PORT SERVICE
http.port = FABRIC8_ES_HTTP_PORT
Transport.tcp.port = FABRIC8_ES_TCP_PORT
fabric:profile-edit --pid io.fabric8.elasticsearch-insight/http.port=1234 myprofile
Red Hat JBoss Fuse 6.3 Fabric Guide
78

What is the port service?
The port service is designed to address the problem of clashing IP port values, which frequently arises ina production environment. The following kinds of problem commonly arise:
Ports clashing with third-party services—a server machine in a production environment often hasmultiple services deployed on it, with a wide range of IP ports in use. In this environment, thereis a relatively large risk that a Fabric container could clash with existing IP ports.
Ports clashing with other Fabric containers—when multiple Fabric containers are deployed onthe same host, it is necessary to configure their standard services with different IP ports. Settingthe IP ports manually would be a considerable nuisance (and error prone).
Ports clashing within a container—a port clash can also occur within a single container, ifmultiple services are competing for the same ports (for example, multiple routes binding to thesame ports). Because Fabric containers are highly dynamic, we need to be able to prevent portclashes in this case, and ports must be allocated and de-allocated as services come and go.
The port service addresses this problem by taking over the process of allocating ports. A service thatuses the port service can specify a range of ports that it is willing to use, and the port service takes careof allocating a port that does not clash with any of the existing services.
Benefits of the port service
The port service offers the following benefits at run time:
Avoiding port clashes for standard container services
Avoiding port clashes for custom services
Avoiding port clashes for standard container services
When you start up multiple containers on the same host, the port service ensures that the containersautomatically choose different IP ports for their standard services, thus avoiding port clashes betweencontainers. You get this benefit for free: the standard container services are already configured to usethe port service.
Avoiding port clashes for custom services
You can also use the port service for your own applications, enabling your custom services to avoid portclashes. This requires you to configure your custom services, as appropriate, to use the port service.
Using the port service in your own applications
To use the port service in your own application, proceed as follows:
1. Use the OSGi Config Admin service to define a key, whose value is a port range. Use thefollowing syntax to define a key:
The preceding syntax defines the key, KeyID, where MinValue specifies the minimum value ofthe IP port, and MaxValue specifies the maximum value of the IP port. You can create this keyusing the standard Karaf commands for editing persistent IDs (PIDs) and their keys (using the fabric:profile-edit command with the --pid option in a Fabric container).
KeyID = ${port:MinValue,MaxValue}
CHAPTER 11. ALLOCATING PORTS
79
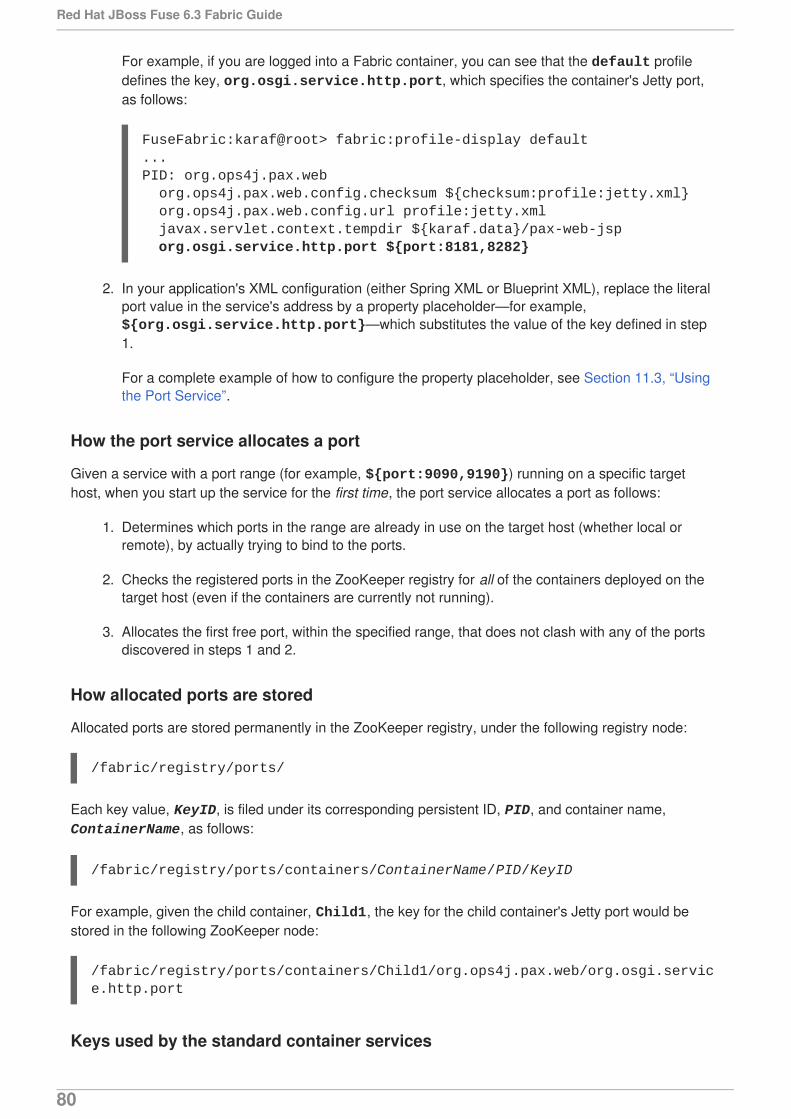
For example, if you are logged into a Fabric container, you can see that the default profiledefines the key, org.osgi.service.http.port, which specifies the container's Jetty port,as follows:
2. In your application's XML configuration (either Spring XML or Blueprint XML), replace the literalport value in the service's address by a property placeholder—for example, ${org.osgi.service.http.port}—which substitutes the value of the key defined in step1.
For a complete example of how to configure the property placeholder, see Section 11.3, “Usingthe Port Service”.
How the port service allocates a port
Given a service with a port range (for example, ${port:9090,9190}) running on a specific targethost, when you start up the service for the first time, the port service allocates a port as follows:
1. Determines which ports in the range are already in use on the target host (whether local orremote), by actually trying to bind to the ports.
2. Checks the registered ports in the ZooKeeper registry for all of the containers deployed on thetarget host (even if the containers are currently not running).
3. Allocates the first free port, within the specified range, that does not clash with any of the portsdiscovered in steps 1 and 2.
How allocated ports are stored
Allocated ports are stored permanently in the ZooKeeper registry, under the following registry node:
Each key value, KeyID, is filed under its corresponding persistent ID, PID, and container name, ContainerName, as follows:
For example, given the child container, Child1, the key for the child container's Jetty port would bestored in the following ZooKeeper node:
Keys used by the standard container services
FuseFabric:karaf@root> fabric:profile-display default...PID: org.ops4j.pax.web org.ops4j.pax.web.config.checksum ${checksum:profile:jetty.xml} org.ops4j.pax.web.config.url profile:jetty.xml javax.servlet.context.tempdir ${karaf.data}/pax-web-jsp org.osgi.service.http.port ${port:8181,8282}
/fabric/registry/ports/
/fabric/registry/ports/containers/ContainerName/PID/KeyID
/fabric/registry/ports/containers/Child1/org.ops4j.pax.web/org.osgi.service.http.port
Red Hat JBoss Fuse 6.3 Fabric Guide
80

Some of keys used by standard container services are as follows:
Behavior upon stopping and restarting a container
When you stop a container, the ports used by that container are stored in the ZooKeeper registry andcontinue to be reserved for that container by the port service. Subsequently, when you restart thecontainer, Fabric reads the port values stored in ZooKeeper and restarts the container's services usingthe stored values. This behavior has the following consequences:
The ports used by the container's services remain constant (after the initial allocation hasoccurred). You can advertise the ports to clients and be confident that the ports will remain validover the long term.
If, while the container is stopped, another service binds to one of the container's ports, there is aport clash when the container restarts, and the affected service fails to start (but at least we canguarantee that Fabric will not cause such a clash, because Fabric deliberately avoids re-usingallocated container ports).
Deallocating ports
When you destroy a container (by invoking the fabric:container-delete command), Fabricdeallocates all of the ports assigned to that container, so that they become available for use again byservices in other containers. In other words, when the ContainerName container is deleted, all of thekey entries under /fabric/registry/ports/containers/ContainerName are deleted from theZooKeeper registry.
11.3. USING THE PORT SERVICE
Overview
This section explains how to use the port service in you own applications, taking the example-camel-cxf profile as an example. There are two basic steps to configuring the port service in your application:
At development time—using the property placeholder service, replace a service's fixed portnumber by a key.
At deployment time—using the OSGi Config Admin service, specify the key value as a portrange. For example, you can specify the key value as a PID property setting in a Fabric profile.
It is possible to configure the property placeholder in Blueprint XML, or in Java (using the relevant OSGiAPI).
/fabric/registry/ports/containers/ContainerName/org.apache.karaf.shell/sshPort/fabric/registry/ports/containers/ContainerName/org.ops4j.pax.web/org.osgi.service.http.port/fabric/registry/ports/containers/ContainerName/org.apache.karaf.management/rmiServerPort/fabric/registry/ports/containers/ContainerName/org.apache.karaf.management/rmiRegistryPort
CHAPTER 11. ALLOCATING PORTS
81

NOTE
The property placeholder syntax in Spring XML is deprecated (it belongs to thedeprecated Spring-DM component).
Demonstration code
This example is based on the example-camel-cxf profile. The source code for the example is takenfrom the fabric-camel-cxf example on Github, which is available from the following URL:
Property placeholder in XML configuration
The following Spring XML configuration shows the definition of an endpoint for the greeter Web service(taken from the file, src/main/resources/OSGI-INF/blueprint/cxf.xml, in the fabric-camel-cxf demonstration):
The CXF endpoint (which binds to a Camel route) is defined by the cxf:cxfEndpoint element. In the address attribute, the port number is specified by substituting the greeterPort key, ${greeterPort}. The property placeholder mechanism is configured by the cm:property-
https://github.com/fabric8io/fabric8/tree/1.x/fabric/fabric-examples/fabric-camel-cxf
<blueprint xmlns="http://www.osgi.org/xmlns/blueprint/v1.0.0" xmlns:xsi="http://www.w3.org/2001/XMLSchema-instance" xmlns:cxf="http://camel.apache.org/schema/blueprint/cxf" xmlns:cm="http://aries.apache.org/blueprint/xmlns/blueprint-cm/v1.1.0" xsi:schemaLocation=" http://www.osgi.org/xmlns/blueprint/v1.0.0 https://www.osgi.org/xmlns/blueprint/v1.0.0/blueprint.xsd http://camel.apache.org/schema/blueprint/cxf http://camel.apache.org/schema/blueprint/cxf/camel-cxf.xsd">
<cm:property-placeholder id="placeholder" persistent-id="io.fabric8.examples.camel.cxf" update-strategy="reload"> <cm:default-properties> <cm:property name="greeterPort" value="9090"/> </cm:default-properties> </cm:property-placeholder>
<cxf:cxfEndpoint id="greeterEndpoint" address="http://localhost:${greeterPort}/greeter" serviceClass="io.fabric8.examples.camelcxf.Greeter"> <cxf:features> <bean class="io.fabric8.cxf.endpoint.ManagedApiFeature"/> </cxf:features> </cxf:cxfEndpoint> ...</blueprint>
Red Hat JBoss Fuse 6.3 Fabric Guide
82

placeholder element, which specifies that the greeterPort property belongs to the io.fabric8.examples.camel.cxf PID. The property placeholder mechanism is integrated with theOSGi Config Admin service, which allows you to override the port number at deployment time.
Specifying a port range using OSGi Config Admin
At deployment time, you can override the default port number of the greeter Web service. In thisparticular example, where the deployment is described by the example-camel-cxf profile, the portnumber is integrated with the port service and specified as a port range.
Because the port range is defined at deployment time, it is not specified in the example source code, butis instead specified in the example-camel-cxf Fabric profile. You can see the configured port rangeby entering the following console command:
In the output of this command, you should see the following configuration setting for the io.fabric8.examples.camel.cxf persistent ID:
The preceding output shows that the greeterPort key is set to ${port:9090,9190}.
Modifying the port range
If you want to modify the port range configured in the example-camel-cxf profile, you can do so usingthe fabric:profile-edit console command. For example, to change the value of greeterPort tothe range, ${port:7070,7170}, you would enter the following console command:
Where the $ sign and the curly braces, { }, must be escaped by the backslash character, \, as shown.Alternatively, if you prefer to edit the port range using the built-in text editor, you can enter the followingconsole command instead:
JBossFuse:karaf@root> fabric:profile-display example-camel-cxf
...Configuration details----------------------------PID: io.fabric8.examples.camel.cxf greeterPort ${port:9090,9190}...
JBossFuse:karaf@root> fabric:profile-edit --pid io.fabric8.examples.camel.cxf/greeterPort=\$\{port:7070,7170\} example-camel-cxf
JBossFuse:karaf@root> fabric:profile-edit --pid io.fabric8.examples.camel.cxf example-camel-cxf
CHAPTER 11. ALLOCATING PORTS
83
CHAPTER 12. GATEWAY
Abstract
The Fabric Gateway provides a TCP and HTTP gateway for discovery, load balancing and failover ofservices running in a fabric. The Fabric Gateway enables you to use standard HTTP URLs to accessWeb applications or Web services running in a fabric. In JBoss Fuse, messaging clients can discoverand connect to brokers over any supported messaging protocol (OpenWire, STOMP, MQTT, AMQP orWebSockets), letting the gateway handle the connection management to the real services running insidethe fabric.
12.1. GATEWAY ARCHITECTURE
How the gateway works
The gateway monitors and detects any changes in the ZooKeeper registry for all Web applications, Webservices, servlets and message brokers. For all of the registered services, the gateway applies mappingrules to figure out how to expose those services through TCP or HTTP.
The ZooKeeper registry is automatically populated by Fabric when you deploy Web archives (WARs) orCXF based Web services.
Fabric 8 MQ Gateway
The MQ gateway binds to a single IP port and can accept connections from OpenWire, MQTT, STOMP,AMQP or HTTP clients. When it receives an HTTP connection, it will pass that connection to the HTTPGateway. For the other protocols, it uses the host the client was trying to connect to to look up a brokerfabric group by the same name.
12.2. RUNNING THE GATEWAY
Deploy a gateway profile
To run the gateway, simply deploy one (or more) of the predefined profiles to a Fabric container. Thefollowing gateway profiles are provided:
gateway-mq
Profile for a messaging gateway (for accessing Apache ActiveMQ brokers in the fabric).
gateway-http
Profile for a HTTP gateway (for Web applications or Web services).
Deployment Strategies
There are two main deployment strategies for a gateway:
Run the gateway on each machine that needs to discover services and communicate with itthrough localhost. In this case, you do not need to hard code any host names in yourmessaging or Web clients and the connection to the gateway on localhost is nice and fast.
Red Hat JBoss Fuse 6.3 Fabric Guide
84

Run the gateway on one or more known hosts using DNS or VIP load balancing (mapping hostnames to machines). In this case, you can use a fixed host name for all your services.
12.3. CONFIGURING THE GATEWAY
Configuring with the Management Console
To configure the gateway using the Management Console UI, navigate to the Profiles page then clickon the Configuration tab, then select either the Fabric8 HTTP Gateway or the Fabric8 MQ Gateway to configure its settings.
Deploying the CXF REST quickstart
To try out the examples described in this section, you must first build and deploy the CXF RESTquickstart example, which is provided in the InstallDir/quickstarts/cxf/rest directory of yourJBoss Fuse installation.
Build and deploy the CXF REST quickstart as follows:
1. Start your local JBoss Fuse console (which should be a Fabric server):
2. Build the quickstart project and install it in your local Maven repository, by entering the followingcommands:
3. Install the quickstarts-cxf-rest profile into your fabric, by entering the following command:
NOTE
By default, the fabric8-maven-plugin connects to the local Fabric serverrunning on the same host. You might also need to set up credentials in your ~/.m2/settings.xml file in order to connect to the local Fabric server. Fordetails, see Section 7.1, “Preparing to Use the Plug-In”.
4. Use the Fuse Management Console (http://localhost:8181/hawtio) to deploy the quickstarts-cxf-rest profile to one of the containers in your fabric.
HTTP mapping rules
When using the HTTP gateway, it is a common requirement to map different versions of Webapplications or Web services to different URI paths on the gateway. You can perform very flexiblemappings using URI templates.
The default behavior is to expose all Web applications and Web services at the context path they are
cd InstallDir/bin./fuse
cd InstallDir/quickstarts/cxf/restmvn clean install
mvn fabric8:deploy
CHAPTER 12. GATEWAY
85

running in the target server. For example, if you deploy the quickstarts-cxf-rest profile, that usesa URI like /cxf/crm/customerservice/customers/123 on whatever host and port it is deployedon. Hence, by default, it is visible on the gateway athttp://localhost:9000/cxf/crm/customerservice/customers/123. For this example, the URI template is:
Which means take the context path (in the above case, /cxf/crm) and append /, giving /cxf/crm/.Any request within that path is then passed to an instance of the CXF crm service.
Selecting part of the ZooKeeper registry
The mapping rules for the MQ gateway and the HTTP gateway are tied to particular regions of theZooKeeper registry. If you specify a ZooKeeper path for a mapping rule, any services registered underthat path become associated with that rule.
For example, in the case of messaging, you could associate a messaging gateway with all messagebrokers worldwide. Alternatively, you could provide continent-specific, country-specific or region-specificgateways, just by specifying different ZooKeeper paths for each gateway configuration. For regionalmessaging clusters, use different ZooKeeper folders for geographically distinct broker clusters.
With HTTP then REST APIs, SOAP Web Services, servlets and web applications all live in different partsof the ZooKeeper registry. From the Management Console UI, you can browse the contents of theregistry in the Runtime | Registry section of the console (in the Fabric view).
Here are the common ZooKeeper paths:
ZooKeeper Path Description
/fabric/registry/clusters/apis/rest REST based web services
/fabric/registry/clusters/apis/ws SOAP based web services
/fabric/registry/clusters/servlets Servlets (registered usually individually via the OSGIAPIs)
/fabric/registry/clusters/webapps Web Applications (i.e. WARs)
Segregating URI paths
You might want to segregate servlets, Web services, or Web applications into different URI spaces.
For example, if you want all Web services to be available under /api/ and Web applications to beavailable under /app/, update the URI templates as follows:
For the Web services mapping rule:
For the Web applications mapping rule:
{contextPath}/
ZooKeeperPath: /fabric/registry/clusters/apisURI template: /api{contextPath}/
Red Hat JBoss Fuse 6.3 Fabric Guide
86

If you want to split RESTful APIs and SOAP web services into different URI paths, replace the precedingmapping rule with the following rules:
12.4. MAP CLIENT CONNECTIONS TO BROKER INSTANCES
Map Client Connections to Broker Instances
The MQ Gateway includes a configuration PID, io.fabric8.gateway.detecting. It sets thefollowing properties:
The defaultVirtualHost setting is used to specify the broker group name to be used by default forall clients. For example, if you have a Fabric broker group called us-east, with one or more brokerinstances running under this group (created using mq-create -group us-east). You can configure defaultVirtualHost to be us-east using the setting defaultVirtualHost=us-east.
How to Connect to a Specific Broker on the MQ Gateway
You can map to a broker group other than the default specified in defaultVirtualHost.
For example, if you had a broker group called us-west, set up in the same way as us-east above,you can map directly to it by configuring the MQ Gateway in the following way:
1. Set up the Fabric broker group us-west using mq-create -group us-west
2. Add the Fabric broker group name us-west as a virtual hostname for the machine that runsyour MQ Gateway. This will require proper DNS configuration so that this virtual hostname canbe resolved by any client.
ZooKeeperPath: /fabric/registry/clusters/webappsURI template: /app{contextPath}/
ZooKeeperPath: /fabric/registry/clusters/apis/restURI template: /rest{contextPath}/
ZooKeeperPath: /fabric/registry/clusters/apis/wsURI template: /ws{contextPath}/
# configures the protocol detecting gatewayport=61616httpEnabled=trueopenWireEnabled=truestompEnabled=truemqttEnabled=trueamqpEnabled=truesslEnabled=false
defaultVirtualHost=defaultzooKeeperPath=/fabric/registry/clusters/amq
loadBalancerType=roundrobinstickyLoadBalancerCacheSize=10000
CHAPTER 12. GATEWAY
87

3. When your broker clients contact the MQ Gateway, use the hostname us-west in the broker url.For example,
The Gateway will map the request it receives via the virtual hostname us-west to one of your brokerinstances in the broker group us-west.
An alternative approach to that shown above is to define multiple instances of MQ Gateway. Configureeach instance to a different default broker group in defaultVirtualHost and have broker clientsexplicitly connect to the instance of MQ Gateway that will bridge clients to the specific broker group.
For OpenWire only, you can use the following parameter to specify which broker group you want to beconnected to:
If this command parameter is not specified, then the request is directed to the value in defaultVirtualHost.
MQ Gateway Client Connections for For Openwire and STOMP
An MQ Gateway can have its services exposed over multiple host names. When it receives a connectionrequest, it uses the host the client was trying to connect to to look up a broker fabric group by the samename. The client is then connected to one of the brokers in the group that supports the protocol the clientis connecting with. If the host the client is trying to connect to cannot be determined or does not matchany of the fabric broker groups, then the client will be connected to a broker group that matches the defaultVirtualHost configuration.
AMQP and MQTT connections do not pass the hostname information so they always connect to thebroker group that matches the defaultVirtualHost configuration.
Using MQ Gateway with SSL/HTTPS
The HTTP gateway does not directly support SSL/HTTPS, but the MQ Gateway does. If MQ Gateway isdeployed alongside the HTTP Gateway, it will re-direct the decrypted http traffic to the HTTP Gateway.
Configuration changes need to be made to accommodate SSL/HTTPS. Edit io.fabric8.gateway.detecting to change the following properties:
You can also optionally configure the following properties:
tcp://us-west:61616
?wireFormat.host=groupname
sslEnabled=truetrustStoreURL must be configured along with trustStorePasswordkeyStoreURL must be configured along with keyStorePasswordkeyAliaskeyPassword
sslProtocol,sslStoreType,sslAlgorithm,enabledCipherSuites,disabledCypherSuites
Red Hat JBoss Fuse 6.3 Fabric Guide
88

Change the Listening Port on MQ Gateway
To change the listening port on MQ Gateway, edit io.fabric8.gateway.detecting using the followingcommand:
12.5. VERSIONING
Explicit URIs
You might want to expose all available versions of each Web service and Web application at a differentURI. For example, consider the case where you change your URI template to the following:
If you have 1.0 and 1.1 versions of a profile that packages Web services or Web applications, you cannow access the different versions using version-specific URIs. For example, if you are running version 1.0 and version 1.1 implementations of the quickstarts-cxf-rest profile, you can access eitherone through the following URIs:
Version 1.0 through http://localhost:9000/version/1.0/cxf/crm/customerservice/customers/123
Version 1.1 through http://localhost:9000/version/1.1/cxf/crm/customerservice/customers/123
Both versions are available to the gateway, provided you include the version information in the URI.
Rolling upgrades
Another approach to dealing with versions of Web services and Web applications is to expose only asingle version at a time of each Web service or Web application in a single gateway. This is the defaultconfiguration.
For example, if you deploy a 1.0 version of the gateway-http profile and run a few services, you willsee all 1.0 versions of them. If you run some 1.1 versions of these services, the gateway will not seethem. If you now do a rolling upgrade of your gateway to version 1.1, it will switch to showing only the 1.1 versions of the services.
Alternatively, you can specify the exact profile version to use, on the mapping configuration screen.
Another approach you can use with Web applications is to specify the maven coordinates and mavenversion of a web application in the ZooKeeper path.
12.6. URI TEMPLATE EXPRESSIONS
Variables
The following table shows the variables you can use in a URI template expression:
profile-edit --pid io.fabric8.gateway.detecting/port=61619 gateway-mq or gateway_mq profile -> configurations -> Detecting Gateway -> Bind Port on
/version/{version}{contextPath}/
CHAPTER 12. GATEWAY
89

Expression Description
{bundleName} The name of the bundle that registers the Webservice, servlet or application. This variable iscurrently not supported for Web services, but worksfor Web applications and servlets in an OSGicontainer.
{bundleVersion} The version of the bundle that registers the Webservice, servlet or application. This variable iscurrently not supported for Web services, but worksfor Web applications and servlets in an OSGicontainer.
{container} The container ID of the container where the Webservice or Web application is deployed.
{contextPath} The context path (the part of the URL after the hostand port) of the Web service or Web applicationimplementation.
{servicePath} The relative path within ZooKeeper that a service isregistered. This is usually is made up of, for webservices as the service name and version. For webapplications its often the maven coordinates
{version} The profile version of the Web service or Webapplication.
Red Hat JBoss Fuse 6.3 Fabric Guide
90

CHAPTER 13. SECURING FABRIC CONTAINERS
Abstract
By default, fabric containers uses text-based username/password authentication. Setting up a morerobust access control system involves creating and deploying a new JAAS realm to the containers in thefabric.
DEFAULT AUTHENTICATION SYSTEM
By default, Fabric uses a simple text-based authentication system (implemented by the JAAS loginmodule, io.fabric8.jaas.ZookeeperLoginModule). This system allows you to define useraccounts and assign passwords and roles to the users. Out of the box, the user credentials are stored inthe Fabric registry, unencrypted.
MANAGING USERS
You can manage users in the default authentication system using the jaas:* family of consolecommands. First of all you need to attach the jaas:* commands to the ZookeeperLoginModule loginmodule, as follows:
Which attaches the jaas:* commands to the ZookeeperLoginModule login module. You can thenadd users and roles, using the jaas:useradd and jaas:roleadd commands. Finally, when you arefinished editing the user data, you must commit the changes by entering the jaas:update command,as follows:
Alternatively, you can abort the pending changes by entering jaas:cancel.
OBFUSCATING STORED PASSWORDS
By default, the JAAS ZookeeperLoginModule stores passwords in plain text. You can provideadditional protection to passwords by storing them in an obfuscated format. This can be done by addingthe appropriate configuration properties to the io.fabric8.jaas PID and ensuring that they areapplied to all of the containers in the fabric.
For more details, see section "Using Encrypted Property Placeholders" in "Security Guide".
JBossFuse:karaf@root> jaas:realms Index Realm Module Class 1 karaf org.apache.karaf.jaas.modules.properties.PropertiesLoginModule 2 karaf org.apache.karaf.jaas.modules.publickey.PublickeyLoginModule 3 karaf io.fabric8.jaas.ZookeeperLoginModule JBossFuse:karaf@root> jaas:manage --index 3
JBossFuse:karaf@root> jaas:update
CHAPTER 13. SECURING FABRIC CONTAINERS
91

NOTE
Although message digest algorithms are not easy to crack, they are not invulnerable toattack (for example, see the Wikipedia article on cryptographic hash functions). Alwaysuse file permissions to protect files containing passwords, in addition to using passwordencryption.
ENABLING LDAP AUTHENTICATION
Fabric supports LDAP authentication (implemented by the Apache Karaf LDAPLoginModule), whichyou can enable by adding the requisite configuration to the default profile.
For details of how to enable LDAP authentication in a fabric, see chapter "LDAP Authentication Tutorial"in "Security Guide".
Red Hat JBoss Fuse 6.3 Fabric Guide
92

CHAPTER 14. FABRIC MAVEN PROXIES
Abstract
Container hosts often have limited or no access to the Internet, which can make it difficult for Fabriccontainers to download and install Maven artifacts. This problem can be mitigated using a Maven proxy,which serves as a central cache of Maven artifacts for the Fabric containers. Managed containers try todownload from the Maven proxy, before trying to download from the Internet. This chapter explains howthe Maven proxy works and how to customize the configuration of the Maven proxy to suit your networkenvironment.
14.1. CLUSTER OF FABRIC MAVEN PROXIES
Overview
Fabric Maven proxies are deployed only on Fabric servers (ensemble members), not on regularmanaged containers. So, if there is just a single Fabric server in your fabric, there will be just one Mavenproxy. But if your Fabric ensemble consists of multiple servers (for example, three or five), a Mavenproxy is deployed on each server, forming a cluster.
Figure 14.1, “Maven Proxy Cluster” shows the outline of a Maven proxy cluster consisting of three Fabricservers (which constitute the Fabric ensemble).
Figure 14.1. Maven Proxy Cluster
Maven proxy
A Maven proxy is a HTTP Web server that behaves very like a standard Maven repository, such asMaven Central.
The purpose of the Maven proxy is to serve Maven artifacts on the local network. It has its own localcache of Maven artifacts, which it can serve up quickly. But if necessary, the Maven proxy can also
CHAPTER 14. FABRIC MAVEN PROXIES
93

download artifacts from remote repositories (in a proxy role). This architecture offers a number ofadvantages:
The Maven proxy builds up a large cache over time, which can be served up quickly to othercontainers in the Fabric.
It is not necessary for every container to download Maven artifacts from remote repositories—theMaven proxy performs this service for the other containers.
In a network with limited Internet access, you can arrange to deploy the Maven proxy on a hostwith Internet access, while the other containers in the fabric are deployed on hosts withoutInternet access.
Managed container
A managed container is a regular Fabric container (not part of the Fabric ensemble), whose contents aremanaged by a Fabric8 agent.
Fabric8 agent
The Fabric8 agent is responsible for ensuring that the bundles deployed in the container are consistentwith what is specified in this container's Fabric profiles. Whenever necessary, the Fabric8 agent willcontact the Maven proxy to download new Maven artifacts for deploying inside the container.
Resolving a Maven artifact
The Fabric8 agent attempts to locate a Maven artifact by searching the following locations, in order:
1. Default repositories.
2. Local Maven repository (by default, ${karaf.data}/repository-agent).
3. Maven proxy.
4. Remote Maven repositories.
For a more detailed outline of this process, see Section 14.2, “How a Managed Container ResolvesArtifacts”.
Maven proxy endpoint discovery
Before the Fabric8 agent can connect to the Maven proxy, it needs to discover the list of available Mavenproxy URLs. The discovery mechanism is based on the Apache Zookeeper registry: by queryingZookeeper, the Fabric8 agent can discover the list of available Maven proxy URLs (that is, the Fabric8agent fetches all the children of the /fabric/registry/maven/proxy/download path inZookeeper).
No replication
Within the Maven proxy cluster, there is no automatic replication of artifacts between different Mavenproxies in the cluster. You will notice the effects of this, when one of the Maven proxies becomesunavailable, so that clients are obliged to contact the next Maven proxy in the list:
Any client that does not have the complete list of Maven proxy URLs would need to bereconfigured manually to use one of the remaining available Maven proxies.
Red Hat JBoss Fuse 6.3 Fabric Guide
94

If you have been automatically uploading artifacts to the Maven proxy as part of your buildprocess (see Section 14.6, “Automated Deployment”), you will need to reconfigure the uploadURL.
It is likely that the next Maven proxy has a much smaller cache of Maven artifacts than theoriginal one. This could result in noticeable delays, because many previously cached artifactshave to be downloaded again.
Managing the Maven artifact data
Although Fabric does not support replication of the local Maven caches, there are some strategies youcan adopt to compensate for this. The Maven proxy caches its artifacts in its local Maven repository(normally in ${karaf.home}/data/repository). You could simply do a manual copy of the contentsof the local Maven repository from one Maven proxy host to another. Or for a more sophisticatedapproach, you could try storing the local Maven repository on a networked file system.
14.2. HOW A MANAGED CONTAINER RESOLVES ARTIFACTS
Overview
Maven proxies play a critically important role in the way managed containers resolve Maven artifacts.When a managed container fails to locate a needed artifact locally (that is, from one of the repositorieson the local file system, as specified in the io.fabric8.agent PID's org.ops4j.pax.url.mvn.defaultRepositories property or org.ops4j.pax.url.mvn.localRepository property), it tries to download the needed artifact fromone of the remote repositories, starting with the Maven proxies. In other words, downloading from aMaven proxy is the primary mechanism for managed containers to obtain new artifacts.
The process for resolving artifacts in a managed container is controlled by the Fabric8 agent, whichdetects when new artifacts need to be deployed (for example, as a result of editing a Fabric profile) andthen calls into the Eclipse Aether layer to resolve the artifacts.
Fabric profiles drive bundle provisioning
In the context of Fabric, it is the Fabric profiles that drive provisioning of OSGi bundles and otherresource. Provisioning is triggered whenever you edit and save properties from a current bundle—forexample by adding a bundle.BundleName entry to the profile's agent properties. Provisioning can alsobe triggered when you edit other resources (not directly associated with OSGi Config Admin) in a profile—for example, by referencing a resource through a checksum property resolver (see Section C.6,“Checksum property resolver”).
In some cases, you might not want provisioning to be triggered right away. A more controlled way to rollout profile updates is to take advantage of profile versioning—see Section 6.3, “Profile Versions” fordetails.
Fabric8 agent
After provisioning has been triggered in a managed container, the Fabric8 agent automatically scans thechanged profiles to check for any OSGi bundles or Karaf features that were added to (or deleted from)the profile. If there are any new bundles referenced using the mvn URL scheme, the Fabric8 agent isresponsible for locating these new bundles through Maven. In the context of Fabric, the Fabric8 agenteffectively plays the same role that the Pax URL Aether component plays in a standalone (non-Fabric)container.
CHAPTER 14. FABRIC MAVEN PROXIES
95

In order to locate a Maven artifact, the Fabric8 agent parses the mvn URL, reads the relevant Mavenconfiguration properties, and calls directly into the Eclipse Aether layer to resolve the referenced artifact.
Eclipse Aether layer
The Eclipse Aether layer is fundamental to Maven artifact resolution in Apache Karaf. Ultimately,resolution of Maven artifacts for the Karaf container is always performed by the Aether layer. Note thatthe Aether layer itself is stateless: the parameters required to perform resolution of a Maven artifact arepassed to the Aether layer with every invocation.
Provisioning a managed container
Figure 14.2, “Provisioning a Managed Container” shows an outline of the process for resolving a MavenURL at run time in a managed container.
Figure 14.2. Provisioning a Managed Container
Provisioning steps
The steps followed to locate the required Maven artifacts are:
1. Provisioning of a profile is triggered when the properties of a current profile are updated. Inparticular, whenever new bundles or features are added to a profile, the Fabric8 agent isresponsible for resolving the new Maven artifacts (referenced through the mvn URL protocol).
2. The Fabric8 agent reads its Maven configuration from the io.fabric8.agent PID in the default profile (and possibly also from the maven-settings.xml file, if so configured).
3. The Fabric8 agent contacts Zookeeper to discover the URLs of the Fabric8 Maven proxyinstances—see Section 14.1, “Cluster of Fabric Maven Proxies”. The Fabric8 agent then insertsthe list of Maven proxy URLs at the head of the list of remote Maven repositories.
Red Hat JBoss Fuse 6.3 Fabric Guide
96

The Fabric8 agent parses the requested mvn URL and combines this information with thespecified configuration—including the list of Maven proxy URLs—in order to invoke the EclipseAether library.
4. When the Aether library is invoked, the first step is to look up the Maven default repositories totry and find the Maven artifact. The following default repositories are configured by default:
InstallDir/system
The JBoss Fuse system directory, which contains all of the Maven artifacts bundled with theJBoss Fuse distribution.
InstallDir/data/maven/upload
If this container is an ensemble container (running a Maven proxy), this directory wouldcontain any artifacts explicitly uploaded to the Maven proxy. In a managed container, thisdirectory is normally empty.
UserHome/.m2/repository
The user's own local Maven repository in the user's home directory, UserHome.
If the Maven artifact is found in a default repository, skip straight to step 8.
5. The Aether library now begins the process of consulting the remote repositories (as specified bythe io.fabric8.agent/org.ops4j.pax.url.mvn.repositories PID property andaugmented by the list of Maven proxy URLs). This process works in tandem with the localMaven repository (as specified by the io.fabric8.agent/org.ops4j.pax.url.mvn.localRepository PID property), whichacts as a cache for the remote repositories.
The Aether library searches the repositories in the following order:
Local Maven repository—by default, InstallDir/data/repository-agent,
Maven proxies—iterating over the list of Maven proxy URLs added to the org.ops4j.pax.url.mvn.repositories argument.
NOTE
If you are using a HTTP proxy, you should configure the Fabric8 agent to bypassthe HTTP proxy when it accesses the Maven proxy hosts. To bypass the HTTPproxy in this case, configure the Maven proxy hosts to be HTTP non-proxy hosts—see the section called “Configuring a HTTP proxy”.
6. The Aether library continues the process of consulting the remote repositories, by accessing theremote repositories configured in the io.fabric8.agent/org.ops4j.pax.url.mvn.repositories PID property.
NOTE
If your local network requires you to use a HTTP proxy to access the Internet, it ispossible to configure Fabric8 to use a HTTP proxy. For example, see the sectioncalled “Configuring a HTTP proxy” for details.
CHAPTER 14. FABRIC MAVEN PROXIES
97

7. If the Maven artifact is found in the Maven proxy or in a remote repository, Aether automaticallyinstalls the artifact into the local Maven repository, InstallDir/data/repository-agent,so that another remote lookup will not be required.
8. Finally, assuming that the Maven artifact has been successfully resolved, Karaf installs theartifact in the Karaf bundle cache, InstallDir/data/cache, and loads the artifact (usually,an OSGi bundle) into the container runtime. At this point, the artifact is effectively installed in thecontainer.
io.fabric8.agent configuration
The resolution of Maven artifacts in a managed container is configured by setting properties from the io.fabric8.agent PID (also known as agent properties). The Maven properties are normally set inthe default profile, which ensures that the same settings are used throughout the entire fabric(recommended).
For example, you can see how the Maven properties are set in the default profile using the fabric:profile-display command, as follows:
The properties prefixed by org.ops4j.pax.url.mvn.* are the Maven properties used by the Fabric8agent.
IMPORTANT
The org.ops4j.pax.url.mvn.* properties are not related to the Pax URL Aethercomponent. There is some potential for confusion here, because the Fabric8 agent usesthe same property names as Pax URL Aether. These properties are read by the Fabric8agent, however, not by Pax URL Aether (and are associated with the io.fabric8.agent PID, not the org.ops4j.pax.url.mvn PID).
JBossFuse:karaf@root> profile-display default...Agent Properties : ... org.ops4j.pax.url.mvn.globalUpdatePolicy = daily org.ops4j.pax.url.mvn.defaultRepositories = file:${runtime.home}/${karaf.default.repository}@snapshots@id=karaf-default, file:${runtime.data}/maven/upload@snapshots@id=fabric-upload, file:${user.home}/.m2/repository@snapshots@id=local ... org.ops4j.pax.url.mvn.globalChecksumPolicy = warn org.ops4j.pax.url.mvn.settings = ${karaf.etc}/maven-settings.xml ... org.ops4j.pax.url.mvn.localRepository = ${karaf.data}/repository-agent ... org.ops4j.pax.url.mvn.repositories = http://repo1.maven.org/maven2@id=maven.central.repo, https://maven.repository.redhat.com/ga@id=redhat.ga.repo, https://maven.repository.redhat.com/earlyaccess/all@id=redhat.ea.repo, https://repository.jboss.org/nexus/content/groups/ea@id=fuseearlyaccess ...
Red Hat JBoss Fuse 6.3 Fabric Guide
98

14.3. HOW A MAVEN PROXY RESOLVES ARTIFACTS
Overview
A Maven proxy is essentially a Web server that is configured to behave like a standard Maven repositoryserver. Remember that the purpose of the Maven proxy is to serve artifacts to remote HTTP clients, notto install artifacts locally. So, although Maven proxy configuration properties have similar names to themanaged container case, they ultimately serve quite a different purpose.
Fabric8 Maven proxy server
The Fabric8 Maven proxy server is a HTTP server, implemented as a servlet inside the container'sdefault Jetty container. Hence, the Maven proxy server shares the same port number, 8181, as many ofthe other Karaf container services. On a given host, Host, the Maven proxy can be accessed through thefollowing URL:
The Fabric8 Maven proxy server is configured by setting properties from the io.fabric8.maven PIDand these properties are normally set in the default profile (recommended).
NOTE
Some other properties are configurable through the io.fabric8.maven.proxy PID,but these properties do not play an important role in artifact resolution.
Serving artifacts through the Maven proxy
Figure 14.3, “Maven Proxy Serving an Artifact” shows how a Maven proxy processes a HTTP downloadrequest, by locating the requested Maven artifact and then returning it to the client.
Figure 14.3. Maven Proxy Serving an Artifact
http://Host:8181/maven/download
CHAPTER 14. FABRIC MAVEN PROXIES
99

Steps to serve artifacts
The steps to serve the required Maven artifacts are, as follows:
1. Resolution of a Maven artifact is triggered when a managed container sends a request to theMaven proxy server.
2. The Maven proxy server parses the incoming HTTP request and then makes a call to the io.fabric8.maven layer, asking it to resolve the requested Maven artifact.
3. The io.fabric8.maven layer reads its Maven configuration from the io.fabric8.mavenPID in the default profile (and possibly also from the maven-settings.xml file, if soconfigured).
4. When the Aether library is invoked, the first step is to look up the Maven default repositories totry and find the Maven artifact. The following default repositories are configured by default:
InstallDir/system
The JBoss Fuse system directory, which contains all of the Maven artifacts that are bundledwith the JBoss Fuse distribution.
InstallDir/data/maven/upload
The Maven proxy's upload directory, which is used to store artifacts that have been directlyuploaded to the Maven proxy—see Section 14.6, “Automated Deployment”.
UserHome/.m2/repository
The user's own local Maven repository in the user's home directory, UserHome.
If the Maven artifact is found locally, skip straight to step 7.
5. The Aether library now begins the process of consulting the remote repositories (as specified bythe io.fabric8.maven/io.fabric8.maven.repositories PID property whichreferences the io.fabric8.agent/org.ops4j.pax.url.mvn.repositories PIDproperty). This process works in tandem with the local Maven repository (as specified by the io.fabric8.maven/io.fabric8.maven.localRepository PID property), which acts asa cache for the remote repositories.
NOTE
If your local network requires you to use a HTTP proxy to access the Internet, it ispossible to configure Fabric8 to use a HTTP proxy. For example, see the sectioncalled “Configuring a HTTP proxy” for details.
6. If the Maven artifact is found in a remote repository, Aether automatically installs the artifact intothe local Maven repository, InstallDir/data/repository, so that another remote lookupwill not be required.
7. The Maven proxy server returns the successfully located Maven artifact to the client (or an errormessage, if the artifact could not be found).
14.4. CONFIGURING MAVEN PROXIES DIRECTLY
Red Hat JBoss Fuse 6.3 Fabric Guide
100

Overview
The default approach to configuring the Maven proxy settings is to edit the properties from the io.fabric8.agent PID and the io.fabric8.maven PID. Because these properties are set in aprofile, they are immediately available to all containers in a fabric.
NOTE
In order to use the direct configuration approach, you must at least set the org.ops4j.pax.url.mvn.repositories property in the io.fabric8.agent PID.If this property is not set, the Fabric8 agent falls back to reading configuration from theMaven settings file, InstallDir/etc/maven-settings.xml file.
NOTE
If you also need to configure a HTTP proxy, it is recommended that you take the approachof configuring through the Maven settings file. See Section 14.5, “Configuring MavenProxies and HTTP Proxies through settings.xml”.
Tools for editing configuration
The examples in the following sections show how to modify Maven proxy configuration using Karafconsole commands (for example, by invoking fabric:profile-edit). It is worth recalling, however,that there are several different tools you can use to modify the settings in a fabric:
Karaf console—use the fabric:* family of commands (for example, fabric:profile-edit).
Fuse Management Console (Hawtio)—you can edit profile settings through the Profile tab orthe Wiki tab in the Fabric perspective of the Hawtio console,http://localhost:8181/hawtio/login.
Git configuration—you can edit profile settings by cloning the Git profile repository. SeeChapter 16, Configuring with Git for details.
Rolling out configuration changes
The examples in the following sections show the form of command for editing the current version of theprofile, which causes the changes to take effect immediately in the current fabric. If you prefer to have amore controlled rollout of configuration changes, however, you should use profile versioning to roll outthe changes (see Section 6.3, “Profile Versions”).
For example, instead of adding a remote repository to the current version of the default profile, asfollows:
You could implement a phased rollout using versions, as follows (assuming the current version is 1.0):
profile-edit --pid io.fabric8.agent/org.ops4j.pax.url.mvn.repositories='http://foo/bar@id=myfoo' --append default
version-create 1.1profile-edit --pid io.fabric8.agent/org.ops4j.pax.url.mvn.repositories='http://foo/bar@id=myf
CHAPTER 14. FABRIC MAVEN PROXIES
101

You can now upgrade a specific container to version 1.1, using the following command:
Adding a remote Maven repository
To add another remote Maven repository to the list of remote repositories used by the Maven proxy, addthe relevant repository URL to the comma-separated list of repository URLs in the org.ops4j.pax.url.mvn.repositories property of the io.fabric8.agent PID in the defaultprofile (not forgetting to specify the mandatory @id suffix in the repository URL).
For example, to add the http://foo/bar Maven repository to the list of remote repositories, enter thefollowing console command:
Note the following points about this configuration approach:
The preceding setting simultaneously updates the io.fabric8.maven/io.fabric8.maven.repositories property (which, by default,references the io.fabric8.agent/org.ops4j.pax.url.mvn.repositories property),which configures the Maven proxy.
By editing this property in the default profile (which is normally the base profile of everyprofile), you ensure that this setting is propagated to all containers and to all Maven proxies inthe Fabric.
The preceding command immediately changes the configuration of all containers at the currentversion. If you prefer to implement a phased rollout of the new configuration, use profileversions, as described in Section 6.3, “Profile Versions”.
NOTE
The @id option specifies the name of the repository and is required. You can choose anarbitrary value for this ID.
14.5. CONFIGURING MAVEN PROXIES AND HTTP PROXIES THROUGHSETTINGS.XML
Overview
You can optionally configure the Maven proxy using a standard Maven settings.xml file. Forexample, this approach is particularly convenient in a development environment, because it makes itpossible to store your build time settings and your run time settings in one place.
The Maven settings.xml approach is not used by default. You must explicitly enable it.
Adding a remote Maven repository
oo' --append default 1.1
container-upgrade 1.1 mycontainer
profile-edit --pid io.fabric8.agent/org.ops4j.pax.url.mvn.repositories='http://foo/bar@id=myfoo' --append default
Red Hat JBoss Fuse 6.3 Fabric Guide
102

A default settings.xml file is provided for you in InstallDir/etc/maven-settings.xml. To adda new remote Maven repository to the InstallDir/etc/maven-settings.xml file, open the maven-settings.xml file in a text editor and add a new repository XML element. For example, tocreate an entry for the Red Hat GA public Maven repository, add a repository element as shown:
IMPORTANT
Do not forget to activate your profile, by adding an activeProfile element thatreferences the profile ID (in this example, the profile ID is default).
Enabling the settings.xml configuration approach
To configure Fabric to read its Maven configuration from a Maven settings.xml file, perform thefollowing steps:
1. Configure the Maven repositories you need in the InstallDir/etc/maven-settings.xmlfile (see the section called “Adding a remote Maven repository”).
2. Copy the Maven repositories from the io.fabric8.agent/org.ops4j.pax.url.mvn.settings property into the maven-settings.xml file (normally, you need to preserve access to these repositories). To see thelist of repositories from the io.fabric8.agent/org.ops4j.pax.url.mvn.settingsproperty in the default profile, enter the following Fabric8 command:
<settings xmlns="http://maven.apache.org/SETTINGS/1.0.0" xmlns:xsi="http://www.w3.org/2001/XMLSchema-instance" xsi:schemaLocation="http://maven.apache.org/SETTINGS/1.0.0 http://maven.apache.org/xsd/settings-1.0.0.xsd"> ... <!-- If org.ops4j.pax.url.mvn.repositories property is _prepended_ with '+' sign, repositories from all active profiles will be _appended_ to the list of searched remote repositories --> <profiles> <profile> <id>default</id> <repositories> <repository> <id>redhat-ga-repository</id> <url>https://maven.repository.redhat.com/ga</url> </repository> </repositories> </profile> </profiles>
<activeProfiles> <activeProfile>default</activeProfile> </activeProfiles>
</settings>
JBossFuse:karaf@root> profile-display default
CHAPTER 14. FABRIC MAVEN PROXIES
103
Follow the instructions in the section called “Adding a remote Maven repository” to add theserepositories set in io.fabric8.agent/org.ops4j.pax.url.mvn.settings to the maven-settings.xml file (if they are not already present).
3. (Optional) If you want to combine the list of repositories appearing in the maven-settings.xml file with the list of repositories from the io.fabric8.maven/io.fabric8.maven.repositories property, prepend a + sign to thelist of repositories in io.fabric8.maven.repositories. For example:
4. Delete the org.ops4j.pax.url.mvn.repositories property setting from the io.fabric8.agent PID in the default profile, using the following console command:
When the repositories setting is absent, Fabric implicitly switches to the maven-settings.xmlconfiguration approach.
NOTE
By default, this step simultaneously clears both the repository list used by theFabric8 agent and the repository list used by the Maven proxy server (becausethe Maven proxy's repository list normally references the Fabric8 agent'srepository list).
Changing the default location of Maven settings.xml
Fabric is pre-configured to use the InstallDir/etc/maven-settings.xml file. That is, thefollowing settings are configured by default:
If you need to customize the location of your Maven settings.xml file, edit the value of theseproperties in the default profile.
Configuring a HTTP proxy
To configure a HTTP proxy (which will be used when connecting to remote Maven repositories), open theetc/maven-settings.xml file in a text editor and add a new proxy XML element as a child of the proxies XML element. The definition of the proxy follows the standard Maven syntax. For example, tocreate a proxy for the HTTP (insecure) protocol with host, 127.0.0.1, and port, 3128, add a proxyelement as follows:
io.fabric8.maven.repositories=+http://repo1.maven.org/maven2@id=maven.central.repo,https://maven.repository.redhat.com/ga@id=redhat.ga.repo,https://maven.repository.redhat.com/earlyaccess/all@id=redhat.ea.repo,https://repository.jboss.org/nexus/content/groupsea@id=fuseearlyaccess
profile-edit --delete --pid io.fabric8.agent/org.ops4j.pax.url.mvn.repositories default
io.fabric8.maven/io.fabric8.maven.settings = ${karaf.etc}/maven-settings.xmlio.fabric8.agent/org.ops4j.pax.url.mvn.settings = ${karaf.etc}/maven-settings.xml
<settings xmlns="http://maven.apache.org/SETTINGS/1.0.0"
Red Hat JBoss Fuse 6.3 Fabric Guide
104

You must remember to add the ensemble hosts (where the Maven proxy servers are running) to the listof HTTP non-proxy hosts in the nonProxyHosts element. This ensures that the Fabric8 agents do notattempt to connect to the Maven proxies through the HTTP proxy, but make a direct connection instead.In the preceding example, the ensemble host names are ensemble1, ensemble2, and ensemble3.
By default, HTTPS connections use the same proxy settings as the HTTP protocol. If you need separateconfiguration for HTTPS, you can optionally add another proxy element configured with the httpsprotocol.
Reference
For a detailed description of the syntax of the Maven settings.xml file, see the Maven SettingsReference. But please note that not all of the features documented there are necessarily supported byFabric.
14.6. AUTOMATED DEPLOYMENT
Overview
The Maven proxy supports not just downloading artifacts, but also uploading artifacts. Hence, if you wantto make an artifact available to all of the containers in the fabric, a simple way of doing this is to uploadthe artifact to the Maven proxy. For ultimate convenience in a development environment, you canautomate the deployment step by installing the Fabric8 Maven plug-in in your project POM file.
Discover the upload URL of the current master
To discover the upload URL of the current Maven proxy master instance, invoke the fabric:cluster-list command, as follows:
xmlns:xsi="http://www.w3.org/2001/XMLSchema-instance" xsi:schemaLocation="http://maven.apache.org/SETTINGS/1.0.0 http://maven.apache.org/xsd/settings-1.0.0.xsd"> ... <!-- This is the place to configure http proxies used by Aether. If there's no proxy for "https" protocol, proxy for "http" will be used when accessing remote repository --> <proxies> <!-- <proxy> <id>proxy</id> <host>127.0.0.1</host> <port>3128</port> <protocol>http</protocol> <username></username> <password></password> <nonProxyHosts>127.0.0.*|ensemble1|ensemble2|ensemble3</nonProxyHosts> </proxy> --> </proxies> ...</settings>
CHAPTER 14. FABRIC MAVEN PROXIES
105

In this example, the upload URL of the current master is http://127.0.0.1:8181/maven/upload.
Manually deploy a Maven project
You can build a Maven project and upload the resulting artifact directly to the Maven proxy server, byinvoking mvn deploy with the altDeploymentRepository command-line option. The value of altDeploymentRepository is specified in the following format:
Where the format segments can be explained as follows:
ID
Can be used to pick up the relevant credentials from the settings.xml file (from the matching settings/servers/server/id element). Otherwise, the credentials must be specified in therepository URL. If necessary, you can simply specify a dummy value for the ID.
Layout
Can be either default (for Maven3 or Maven2) or legacy (for Maven1, which is not compatiblewith JBoss Fuse).
RepositoryURL
The Maven proxy upload URL. For example, http://User:Password@localhost:8181/maven/upload/.
For example, to deploy a Maven project to a Maven proxy server running on the localhost (127.0.0.1),authenticating with the admin/admin credentials, enter a command like the following:
Automatically deploy a Maven project
When working in a build environment, the most convenient way to interact with the Maven proxy serveris to configure the Fabric8 Maven plug-in. The Fabric8 Maven plug-in can automatically deploy yourproject to the local Maven proxy and, in addition, has the capability to create or update a Fabric profilefor your application. For more details, see Chapter 7, Fabric8 Maven Plug-In.
14.7. FABRIC MAVEN CONFIGURATION REFERENCE
JBossFuse:karaf@root> cluster-list servlets/io.fabric8.fabric-maven-proxy[cluster] [masters] [slaves] [services] []1.2.0.redhat-621084/maven/download root root - http://127.0.0.1:8181/maven/download 1.2.0.redhat-621084/maven/upload root root - http://127.0.0.1:8181/maven/upload
ID::Layout::RepositoryURL
mvn deploy -DaltDeploymentRepository=releaseRepository::default::http://admin:[email protected]:8181/maven/upload/
Red Hat JBoss Fuse 6.3 Fabric Guide
106

Overview
This section provides a configuration reference for the Maven proxy configuration settings, whichincludes properties from the io.fabric8.agent PID, the io.fabric8.maven PID, and the io.fabric8.maven.proxy PID.
Repository URL syntax
You can specify a repository location using a URL with a file:, http:, or https: scheme, optionallyappending one or more of the following suffixes:
@snapshots
Allow snapshot versions to be read from the repository.
@noreleases
Do not allow release versions to be read from the repository.
@id=RepoName
(Required) Specifies the repository name. This setting is required by the Aether handler.
@multi
Marks the path as a parent directory of multiple repository directories. At run time the parent directoryis scanned for subdirectories and each subdirectory is used as a remote repository.
@update=UpdatePolicy
Specifies the Maven updatePolicy, overriding the value of org.ops4j.pax.url.mvn.globalUpdatePolicy.
@releasesUpdate=UpdatePolicy
Specifies the Maven updatePolicy specifically for release artifacts (overriding the value of @update).
@snapshotsUpdate=UpdatePolicy
Specifies the Maven updatePolicy specifically for snapshot artifacts (overriding the value of @update).
@checksum=ChecksumPolicy
Specifies the Maven checksumPolicy, which specifies how to react if a downloaded Maven artifacthas a missing or incorrect checksum. The policy value can be: ignore, fail, or warn.
@releasesChecksum=ChecksumPolicy
Specifies the Maven checksumPolicy specifically for release artifacts (overriding the value of @checksum).
@snapshotsChecksum=ChecksumPolicy
Specifies the Maven checksumPolicy specifically for snapshot artifacts (overriding the value of @checksum).
CHAPTER 14. FABRIC MAVEN PROXIES
107

For example:
io.fabric8.agent PID
The io.fabric8.agent PID configures the Fabric8 agent. The io.fabric8.agent PID supportsthe following properties relating specifically to Maven configuration:
org.ops4j.pax.url.mvn.connection.bufferSize
Configure buffer size for HTTP connections (output and input buffers), defaults to 8192 bytes.
org.ops4j.pax.url.mvn.connection.retryCount
Number of connection retries after failure is detected in HTTP client. Default is 3.
org.ops4j.pax.url.mvn.defaultRepositories
Specifies a list of default (local) Maven repositories that are checked before looking up the remoterepositories. Specified as a comma-separated list of file: repository URLs, where each repositoryURL has the syntax defined in the section called “Repository URL syntax”.
org.ops4j.pax.url.mvn.globalChecksumPolicy
Specifies the Maven checksumPolicy. The default profile sets this property to warn.
org.ops4j.pax.url.mvn.globalUpdatePolicy
Specifies the Maven updatePolicy, which determines how often Aether attempts to update localMaven artifacts from remote repositories. Can take the following values:
always—always resolve the latest SNAPSHOT from remote Maven repositories.
never—never check for newer remote SNAPSHOTS.
daily—check on the first run of the day (local time).
interval:Mins—check every Mins minutes.
The default profile sets this property to daily. If not set, default is daily.
org.ops4j.pax.url.mvn.localRepository
Specifies the local Maven repository, which is used to cache artifacts downloaded from remoterepositories (as specified in org.ops4j.pax.url.mvn.repositories).
The default profile sets this property to ${karaf.data}/repository-agent.
org.ops4j.pax.url.mvn.repositories
Specifies a list of remote Maven repositories that can be searched for Maven artifacts. This propertycan be used in any of the following ways:
Use this property and disable settings.xml
Normally, the org.ops4j.pax.url.mvn.repositories property is set as a comma-
https://repo.example.org/maven/repository@id=example.repo
Red Hat JBoss Fuse 6.3 Fabric Guide
108

separated list of repository URLs, where the \ character can be used for line continuation. Inthis case, any Maven settings.xml file is ignored (that is, the org.ops4j.pax.url.mvn.settings property setting is ignored). For example, thisproperty is set as follows in the default profile:
Use settings.xml and disable this property
If you want to use a Maven settings.xml file to configure the list of remote repositoriesinstead of this property, you must remove the org.ops4j.pax.url.mvn.repositoriesproperty settings from the profile. For example, assuming that this property is set in thedefault profile, you can delete it with the following command:
org.ops4j.pax.url.mvn.settings
Specifies a path on the file system to override the default location of the Maven settings.xml file.The Fabric8 agent resolves the location of the Maven settings.xml file in the following order:
1. The location specified by org.ops4j.pax.url.mvn.settings.
2. ${user.home}/.m2/settings.xml
3. ${maven.home}/conf/settings.xml
4. M2_HOME/conf/settings.xml
NOTE
All settings.xml files are ignored, if the org.ops4j.pax.url.mvn.repositories property is set.
org.ops4j.pax.url.mvn.socket.connectionTimeout
Timeout in milliseconds when establishing a HTTP connection during artifact resolution.
org.ops4j.pax.url.mvn.socket.keepAlive
SO_KEEPALIVE option for sockets. Defaults to false.
org.ops4j.pax.url.mvn.socket.linger
SO_LINGER option for sockets. Defaults to -1.
org.ops4j.pax.url.mvn.repositories = http://repo1.maven.org/maven2@id=maven.central.repo, https://maven.repository.redhat.com/ga@id=redhat.ga.repo, https://maven.repository.redhat.com/earlyaccess/all@id=redhat.ea.repo, https://repository.jboss.org/nexus/content/groups/ea@id=fuseearlyaccess
profile-edit --delete --pid io.fabric8.agent/org.ops4j.pax.url.mvn.repositories default
CHAPTER 14. FABRIC MAVEN PROXIES
109

org.ops4j.pax.url.mvn.socket.readTimeout
Timeout in milliseconds when reading data after connecting to a remote repository.
org.ops4j.pax.url.mvn.socket.reuseAddress
SO_REUSEADDR option for sockets. Defaults to false.
org.ops4j.pax.url.mvn.socket.tcpNoDelay
TCP_NODELAY option for sockets. Defaults to true.
org.ops4j.pax.url.mvn.timeout
Default value for connection and read timeouts, when socket.readTimeout and socket.connectionTimeout are not specified.
io.fabric8.maven PID
The io.fabric8.maven PID configures the io.fabric8.maven bundle (which is used by the Mavenproxy server) and supports the following properties:
io.fabric8.maven.connection.bufferSize
Configure buffer size for HTTP connections (output and input buffers), defaults to 8192 bytes.
io.fabric8.maven.connection.retryCount
Number of connection retries after failure is detected in HTTP client. Default is 3.
io.fabric8.maven.defaultRepositories
Specifies a list of default (local) Maven repositories that are checked before looking up the remoterepositories. Specified as a comma-separated list of file: repository URLs, where each repositoryURL has the syntax defined in the section called “Repository URL syntax”.
The default profile sets this property to reference the org.ops4j.pax.url.mvn.defaultRepositories property from the io.fabric8.agent PID.
io.fabric8.maven.globalChecksumPolicy
Specifies the Maven checksumPolicy. The default profile sets this property to warn.
io.fabric8.maven.globalUpdatePolicy
Specifies the Maven updatePolicy, which determines how often Aether attempts to update localMaven artifacts from remote repositories.
The default profile sets this property to daily. If not set, default is daily.
io.fabric8.maven.localRepository
Specifies the local Maven repository, which is used to cache artifacts downloaded from remoterepositories (as specified in io.fabric8.maven.repositories).
The default profile sets this property to ${karaf.data}/repository.
Red Hat JBoss Fuse 6.3 Fabric Guide
110

io.fabric8.maven.proxies
(Obsolete) This option does not work any more. In older Fabric8 releases it was used to configure aHTTP proxy port.
io.fabric8.maven.repositories
Specifies a list of remote Maven repositories that can be searched for Maven artifacts. This settingnormally references the contents of the io.fabric8.agent/org.ops4j.pax.url.mvn.repositories property.
If you decide to use a Maven settings.xml file to configure the Fabric8 agent (see Section 14.5,“Configuring Maven Proxies and HTTP Proxies through settings.xml”), you can combine the remoterepositories specified in this setting and the remote repositories configured in a settings.xml fileusing a special syntax for the list of repository URLs. In this case, you prefix a single + character tothe comma-separated list of repository URLs, where the repository URLs are listed on a single line(the \ line continuation character is not supported in this syntax). For example:
io.fabric8.maven.settings
Specifies a path on the file system to override the default location of the Maven settings.xml file.
The default profile sets this property to ${karaf.etc}/maven-settings.xml.
io.fabric8.maven.useFallbackRepositories
This option is deprecated and should always be set to false.
The default profile sets this property to false.
io.fabric8.maven.socket.connectionTimeout
Timeout in milliseconds when establishing a HTTP connection during artifact resolution.
io.fabric8.maven.socket.keepAlive
SO_KEEPALIVE option for sockets. Defaults to false.
io.fabric8.maven.socket.linger
SO_LINGER option for sockets. Defaults to -1.
io.fabric8.maven.socket.readTimeout
Timeout in milliseconds when reading data after connecting to a remote repository.
io.fabric8.maven.socket.reuseAddress
SO_REUSEADDR option for sockets. Defaults to false.
io.fabric8.maven.socket.tcpNoDelay
TCP_NODELAY option for sockets. Defaults to true.
io.fabric8.maven.repositories=+http://repo1.maven.org/maven2@id=maven.central.repo,https://maven.repository.redhat.com/ga@id=redhat.ga.repo,https://maven.repository.redhat.com/earlyaccess/all@id=redhat.ea.repo,https://repository.jboss.org/nexus/content/groupsea@id=fuseearlyaccess
CHAPTER 14. FABRIC MAVEN PROXIES
111

io.fabric8.maven.timeout
Default value for connection and read timeouts, when socket.readTimeout and socket.connectionTimeout are not specified.
io.fabric8.maven.proxy PID
The io.fabric8.maven.proxy PID configures the Fabric8 Maven proxy server and supports thefollowing properties:
appendSystemRepos
The fabric profile sets this property to false.
role
Specifies a comma-separated list of security roles that are allowed to access the Maven proxy server.For details of role-based access control, see section "Role-Based Access Control" in "SecurityGuide".
The default profile sets this property to the following list:
updatePolicy
Specifies the Maven updatePolicy.
The fabric profile sets this property to always.
uploadRepository
Specifies the location of the directory used to store artifacts uploaded to the Maven proxy server.
The fabric profile sets this property to ${runtime.data}/maven/upload.
admin,manager,viewer,Monitor,Operator,Maintainer,Deployer,Auditor,Administrator,SuperUser
Red Hat JBoss Fuse 6.3 Fabric Guide
112

CHAPTER 15. OFFLINE REPOSITORIES
Abstract
Its quite common a common requirement to need offline repositories: either as a local cache of remoteMaven repositories, or in cases where production machines do not have access to the Internet.
15.1. OFFLINE REPOSITORY FOR A PROFILE
Download into a specified directory
To download all the bundles and features of a given profile, ProfileName, enter the following consolecommand:
This command downloads all the bundles and features for the default version of the given profile into the /tmp/myrepo directory.
Download into the system folder
If you omit the path, the fabric:profile-download command installs the files to the system folderinside the current Fuse container (thereby populating the local maven repository for the container). Forexample:
15.2. OFFLINE REPOSITORY FOR A VERSION
Download the current version
To download all the bundles and features for all the profiles in the default version, enter the followingconsole command:
Download a specific version
You can specify the version to download using the --version option, as follows:
If you omit the path the fabric:profile-download command installs the files into thesystem folderinside the current Fuse container (thereby populating the local maven repository for the container).
15.3. OFFLINE REPOSITORY FOR A MAVEN PROJECT
Download repository for Maven project
fabric:profile-download-artifacts --profile ProfileName /tmp/myrepo
fabric:profile-download-artifacts --profile ProfileName
fabric:profile-download-artifacts /tmp/myrepo
fabric:profile-download-artifacts --version 1.0 /tmp/myrepo
CHAPTER 15. OFFLINE REPOSITORIES
113

If you have a Maven project and you need to create an offline repository for building this project and itsruntime dependencies, you can use the maven dependency plugin.
For example, from the top-level directory of a Maven project (such that the current directory has a pom.xml file), you should be able to run the following Maven command:
Which downloads all the Maven dependencies and plug-ins required to build the project to the /tmp/cheese directory.
mvn org.apache.maven.plugins:maven-dependency-plugin:2.8:go-offline -Dmaven.repo.local=/tmp/cheese
Red Hat JBoss Fuse 6.3 Fabric Guide
114

CHAPTER 16. CONFIGURING WITH GIT
Abstract
Fabric implicitly uses Git to store much of its configuration data (in particular, for storing versioned profiledata). Normally, this aspect of Fabric is completely transparent, and there is no need to be concernedwith the Git functionality inside Fabric. But if you want to, you have the option of tapping directly into theGit layer inside Fabric, in order to manage Fabric configurations.
16.1. HOW GIT WORKS INSIDE FABRIC
Cluster architecture
When Fabric is configured as a Git cluster, the Git configuration layer works as follows:
Each Fabric server has its own clone of the Git configuration.
One Fabric server is elected to be the master instance, and serves as the master remoterepository for the other Fabric servers.
All configuration changes made in the other Fabric servers (the slave instances) are pushed tothe master instance.
When changes occur in the master, the slaves automatically pull the new configuration from themaster.
If the master instance is stopped, another container is elected to be the master (failover).
An administrator can access the Git configuration layer by cloning a local Git repository from themaster instance. By pushing updates from this local repository, the administrator can change theconfiguration of the fabric.
External Git repository architecture
When Fabric is configured with an external Git repository, the Git configuration layer works as follows:
The external Git repository is created in an external Git server (for example, using a servicesuch as GitLab or Gerrit).
When the Fabric is created, it automatically populates the external Git repository with the defaultconfiguration (which is initialized by reading the InstallDir/fabric/import directory).
Each Fabric server maintains a synchronized state with the external Git repository.
All configuration changes made in the Fabric servers are pushed to the external Git repository.
When changes occur in the external Git repository, the Fabric servers automatically pull the newconfiguration from the external Git repository.
An administrator can access the Git configuration layer by cloning a local Git repository from theexternal Git repository. By pushing updates from this local repository to the external Gitrepository, the administrator can change the configuration of the fabric.
CHAPTER 16. CONFIGURING WITH GIT
115
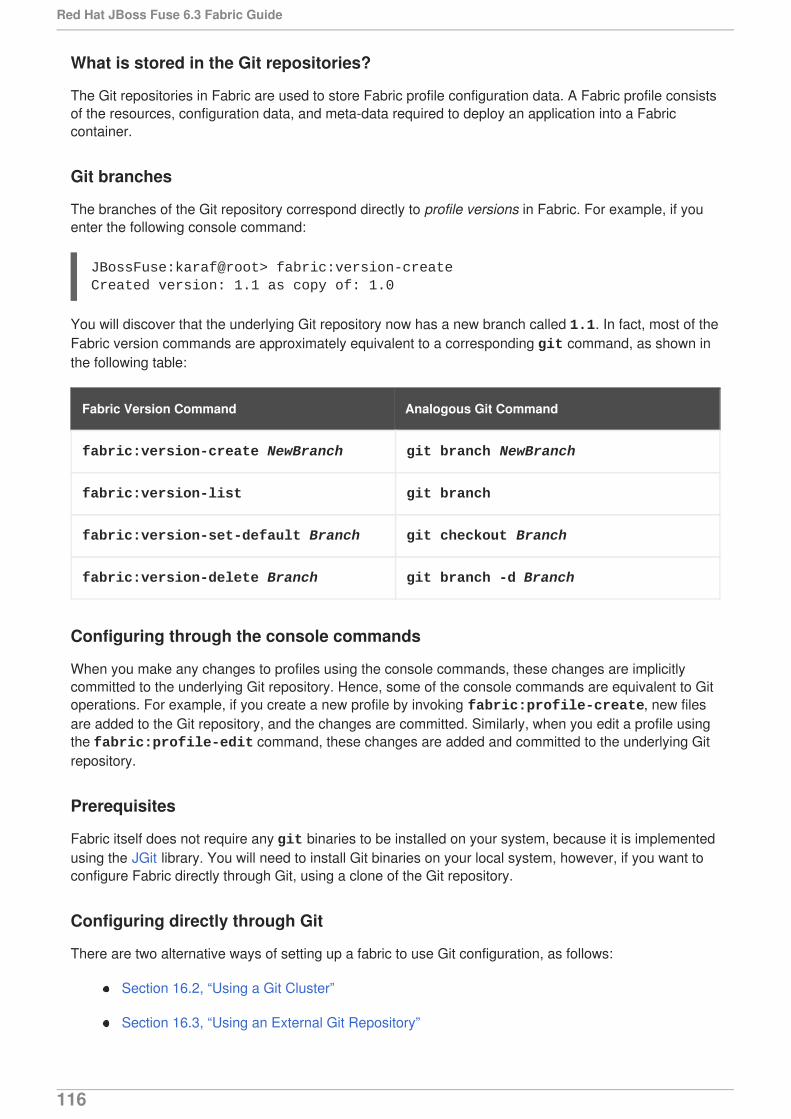
What is stored in the Git repositories?
The Git repositories in Fabric are used to store Fabric profile configuration data. A Fabric profile consistsof the resources, configuration data, and meta-data required to deploy an application into a Fabriccontainer.
Git branches
The branches of the Git repository correspond directly to profile versions in Fabric. For example, if youenter the following console command:
You will discover that the underlying Git repository now has a new branch called 1.1. In fact, most of theFabric version commands are approximately equivalent to a corresponding git command, as shown inthe following table:
Fabric Version Command Analogous Git Command
fabric:version-create NewBranch git branch NewBranch
fabric:version-list git branch
fabric:version-set-default Branch git checkout Branch
fabric:version-delete Branch git branch -d Branch
Configuring through the console commands
When you make any changes to profiles using the console commands, these changes are implicitlycommitted to the underlying Git repository. Hence, some of the console commands are equivalent to Gitoperations. For example, if you create a new profile by invoking fabric:profile-create, new filesare added to the Git repository, and the changes are committed. Similarly, when you edit a profile usingthe fabric:profile-edit command, these changes are added and committed to the underlying Gitrepository.
Prerequisites
Fabric itself does not require any git binaries to be installed on your system, because it is implementedusing the JGit library. You will need to install Git binaries on your local system, however, if you want toconfigure Fabric directly through Git, using a clone of the Git repository.
Configuring directly through Git
There are two alternative ways of setting up a fabric to use Git configuration, as follows:
Section 16.2, “Using a Git Cluster”
Section 16.3, “Using an External Git Repository”
JBossFuse:karaf@root> fabric:version-create Created version: 1.1 as copy of: 1.0
Red Hat JBoss Fuse 6.3 Fabric Guide
116

16.2. USING A GIT CLUSTER
Overview
Figure 16.1, “Git Cluster Architecture” shows an overview of the Fabric architecture when the fabric isconfigured to use a Git cluster.
Figure 16.1. Git Cluster Architecture
Clone the Git repository
When a fabric is configured with a Git cluster, the current master behaves as a Git server. This meansthat you can clone the Git repository directly from the Fabric server that is the master.
Clone the Git repository using a command like the following:
$ git clone -b 1.0 http://Hostname:Port/git/fabric
CHAPTER 16. CONFIGURING WITH GIT
117

Where Hostname and Port are the hostname and IP port of the master Fabric server. Note thefollowing points:
The port number, Port, is usually 8181, by default. But if you deploy multiple Fabric containerson the same host, their HTTP ports are automatically incremented, 8182, 8183, (or whichever isthe next available port number at the time the container is created).
The -b option is used to check out the 1.0 Git branch, which corresponds to version 1.0 of theFabric profile data. There is also a master branch, but it is normally not used by the Fabricservers.
You can also see a sample clone command in the Fuse Management Console, if you navigate tothe Container: page for the relevant container, click on the URLs tag, and go to the Git: field.Note, however, that if you try to clone from a slave instance, you will get an error (the FuseManagement Console currently does not indicate whether the container is a slave or a master).
IMPORTANT
Do not attempt to clone your repository directly from the InstallDir/data/git/local/fabric directory (which holds the container's local Gitrepository). This approach does not work. When you push and pull to the container'sHTTP port, it automatically triggers synchronization events within the Git cluster. Thesenecessary synchronizations would be bypassed, if you cloned from a directory.
Authentication
The Git server exposed by the Fabric is deployed into the container's Jetty container and shares thesame security configuration as other default HTTP services. In particular, the HTTP port is configured torequest credentials through the HTTP BASIC authentication protocol, and these credentials are thenauthenticated in the container using the standard JAAS authentication infrastructure. In practice, thismeans you can use any of the JAAS credentials configured in the fabric to log on to the Git server.
You can use one of the following alternatives to specify the credentials for Git:
Let Git prompt you for credentials—this is the default, if you use a Git URL of the form, http://Hostname:Port/git/fabric.
Embed credentials in the Git URL—you can embed the credentials directly in the Git URL, usingthe following syntax:
Basic tasks with Git
You can now use standard Git commands to perform basic configuration tasks in Fabric:
Push to the Fabric Git server—you can use your local Git repository to edit profile configurationsand push the changes up to the fabric. For example, to edit the Camel route in the quickstarts-beginner-camel.log.wiki profile:
1. Make sure that you are working in the correct branch (initially, this should be branch 1.0):
http://User:Pass@Hostname:Port/git/fabric
$ cd LocalGitRepo$ git checkout 1.0
Red Hat JBoss Fuse 6.3 Fabric Guide
118

2. Edit the following Blueprint XML file in your local Git repository, to alter the Camel route:
3. Add and commit the changes locally, using Git commands:
4. Push the changes to the fabric:
This updates the configuration in all of the Fabric servers in the Git cluster. If any of thecontainers in your fabric have deployed the quickstarts-beginner-camel.log.wikiprofile, they will immediately be updated with the changes.
Pull from the Fabric Git server—if you change the profile configuration using commands in theKaraf console, you can synchronize those changes with your local Git repository by doing a git pull. For example, to edit the Camel route in the quickstarts-beginner-camel.log.wiki profile from the Karaf console:
1. In the Karaf console, you can edit the Camel route from the quickstarts-beginner-camel.log.wiki profile by entering the following console command:
2. You can now synchronize your local Git repository to these changes. Open a commandprompt, and enter the following commands:
3. Pull the changes from the fabric:
What happens after a failover?
So far, we have been assuming that the master instance remains unchanged, so that the masterinstance is synonymous with the origin upstream repository. But what happens if there is a failover?For example, if the Fabric server that is the master instance is stopped and restarted. If your ensembleconsists of only one Fabric server, this makes no difference, because there is no other server to fail overto. But if there are three (or five) servers in your ensemble, one of the other Fabric servers willautomatically be elected as the new master.
The consequence for your local Git repository is that the origin repository is no longer the masterinstance. Hence, if you try to do a git push or a git pull after failover, you will get the followingerror:
LocalGitRepo/fabric/profiles/quickstarts/beginner/camel.log.wiki.profile/camel-log.xml
$ git add -u$ git commit -m "Changed the route in camel.log.wiki"
$ git push
fabric:profile-edit --resource camel-log.xml quickstarts-beginner-camel.log.wiki
$ cd LocalGitRepo$ git checkout 1.0
$ git pull
CHAPTER 16. CONFIGURING WITH GIT
119

Adding multiple upstream repositories
Currently, there is no mechanism in Git for failing over automatically to an alternative Git server. Butwhat you can do in Git is to add multiple upstream repositories. It then becomes possible to push to andpull from alternative Git repositories, as long as you name them explicitly in the command line.
For example, consider the case where there are two additional Fabric servers in a Git cluster (makingthree in total). You can add the two additional servers as upstream repositories, using the following Gitcommands:
You can then push to either of these repositories explicitly, using a command of the form:
For example, to push to branch 1.0 of the ensemble2 Git server:
Only one of the repositories, origin, ensemble2, ensemble3, is accessible at one time, however(whichever is the master).
Git cluster tutorial
The following tutorial explains how to create a fabric, which demonstrates a master-slave cluster of Gitrepositories:
1. (Optional) Prepare the container for a cold start. Delete the following directories:
IMPORTANT
Performing a cold start completely wipes the current state of the root container,including all of the deployed bundles, and features, and most of the stored data.Do not perform this operation on a production system.
2. Start up the container, by entering the following command:
3. Create a new fabric. At the container prompt, enter the following console command:
$ git pullfatal: repository 'http://Hostname:8181/git/fabric/' not found
$ git remote add ensemble2 Ensemble2GitURL$ git remote add ensemble3 Ensemble3GitURL
$ git push UpstreamName BranchName
$ git push ensemble2 1.0
InstallDir/dataInstallDir/instances
./bin/fuse
fabric:create --new-user admin --new-user-password AdminPass --new-user-role Administrator \
Red Hat JBoss Fuse 6.3 Fabric Guide
120

You need to substitute your own values for AdminPass and ZooPass. This sample commanduses the --manual-ip option to assign the loopback address, 127.0.0.1, to the rootcontainer. If your host has a static IP address and hostname assigned to it, however, it would bebetter to use the assigned hostname here instead.
You need to wait a minute or two for this command to complete.
4. Create two new child containers in the fabric, by entering the following console command:
This command returns quickly, with the following message:
But it takes a couple of more minutes for the new child containers to be completely provisioned.Check the status of the child containers, by entering the following command:
Wait until the child containers have a [provision status] of success before proceeding.
5. Add the two child containers to the Fabric ensemble, so that the Fabric ensemble consists ofthree containers in all: root, ensemble, and ensemble2. Enter the following consolecommand:
Wait until the ensemble containers have been successfully provisioned before proceeding.
6. Clone the Git repository. The three containers in the Fabric ensemble now constitute a Gitcluster. Initially, the root container is the master instance of the cluster, so you should attemptto clone the Git repository from the HTTP port exposed by the root container.
Open a new command prompt and, at a convenient location in the file system, enter the followingcommand:
This command clones the Fabric Git repository and checks out the 1.0 branch. You should nowbe able to see the profile configuration files under the fabric/profiles subdirectory.
If the root container is not the current master, you can expect to see an error message like thefollowing when you attempt to clone:
--zookeeper-password ZooPass --global-resolver manualip \ --resolver manualip --manual-ip 127.0.0.1 --wait-for-provisioning
fabric:container-create-child --profile fabric root ensemble 2
The following containers have been created successfully: Container: ensemble. Container: ensemble2.
fabric:container-list
fabric:ensemble-add ensemble ensemble2
git clone -b 1.0 http://127.0.0.1:8181/git/fabric
Cloning into 'fabric'...fatal: repository 'http://127.0.0.1:8181/git/fabric/' not found
CHAPTER 16. CONFIGURING WITH GIT
121

7. In the next few steps, we explore the failover behaviour of the Git cluster. First of all, we stop the root container (the current Git master), in order to force a failover. In the root container console,enter the shutdown command, as follows:
8. Now restart the root container, by entering the following command:
9. Return to the command prompt where you cloned the Git repository and try to do a git pull,as follows:
You will get an error like the following:
Because the root container (listening on IP port 8181) is no longer the master.
NOTE
In this example, because all of the ensemble containers are running on the samehost, the ensemble containers are distinguished by having different IP portnumbers (8181, 8182, and 8183). If you created the other ensemble containerson separate hosts, however, they would all have the same port number (8181),but different host names.
10. One of the other Fabric servers (ensemble or ensemble2) is now the master. To gain accessto the master, try adding both of the alternative Git URLs as upstream repositories. From adirectory in the cloned Git repository, enter the following commands:
11. You can now try pulling from one of the other Fabric servers. You can either pull from the ensemble container (pulling branch 1.0), as follows:
Or from the ensemble2 container (pulling branch 1.0), as follows:
Only one of these alternatives can succeed (pulling from the master). Pulling from the slaveinstance returns an error.
JBossFuse:karaf@root> shutdownConfirm: shutdown instance root (yes/no): yes
./bin/fuse
cd fabricgit pull
$ git pullfatal: repository 'http://127.0.0.1:8181/git/fabric/' not found
$ git remote add ensemble http://127.0.0.1:8182/git/fabric$ git remote add ensemble2 http://127.0.0.1:8183/git/fabric
$ git pull ensemble 1.0
$ git pull ensemble2 1.0
Red Hat JBoss Fuse 6.3 Fabric Guide
122

12. After you have identified the current master, you can proceed to push and pull using the longform of the git commands (for example, git pull RemoteName BranchName).
16.3. USING AN EXTERNAL GIT REPOSITORY
Overview
Figure 16.2, “External Git Repository Architecture” shows an overview of the Fabric architecture whenthe fabric is configured to use an external Git repository.
Figure 16.2. External Git Repository Architecture
External git repository architecture
When you configure a fabric with an external Git repository (which must be done at fabric creation time),the external Git repository becomes the primary Git repository for all of the containers in the Fabric. All ofthe Fabric servers in the ensemble maintain their own copy of the Git repository (under their respective data/ directories), but this local copy is kept up-to-date by regularly polling the external Git repositoryfor updates. If a change is detected in the external Git repository, every Fabric server will do a git pull to update it's local copy of the Git repository.
CHAPTER 16. CONFIGURING WITH GIT
123

It is also possible for an administrator to clone a local copy of the external Git repository. Using standard git commands, the administrator can now edit the configuration files in the local copy and push thechanges to the external Git repository. As soon as those changes are received by the external Gitrepository, the Fabric servers will detect that an update has occurred and pull the latest configuration.
Preparing an external Git repository
When setting up this type of Fabric architecture, the first step is to prepare an external Git repository.When setting up this repository, you should pay attention to the following points:
The Git repository must be initialized. For example, if you were creating a new Git repository onyour local file system, you would initialize it using the command git init. If you are using aGit server to host your repository (for example, Gerrit, GitLab, or GitHub), the Git repository isusually initialized automatically, after you create it.
You must ensure that all of your Fabric servers are able to access the external Git repository.For example, if your Git server uses a HTTP based protocol to access the repository, you aregenerally required to have username/password credentials for the HTTP BASIC authenticationprotocol.
Authentication
In this architecture, authentication is handled by the external Git repository (and the Git server that hostsit). The most common cases are:
HTTP URL—in this case, the Git server is likely to use HTTP with TLS (HTTPS), to verify theserver identity, and HTTP BASIC authentication, to verify the client identity. When creating thefabric (with the fabric:create command), you need to specify the following additional optionsin this case:
--external-git-url ExternalGitHttpUrl
--external-git-user ExternalGitUser
--external-git-password ExternalGitPass
File URL—in this case, no authentication is required. You can specify the Git URL either in theform /path/to/repo (recommended) or file:///path/to/repo (slower). If the Fabricservers are deployed on separate hosts, you must make sure that they all have access to thespecified directory (for example, through a Network File Server). When creating the fabric (withthe fabric:create command), you need to specify the following additional options in thiscase:
--external-git-url ExternalGitFileUrl
Creating a fabric with an external Git repository
Typically, to create a fabric with an external Git repository, you would enter a console command like thefollowing:
fabric:create --new-user admin --new-user-password AdminPass --new-user-role Administrator \ --zookeeper-password ZooPass --global-resolver manualip \ --resolver manualip --manual-ip StaticIPAddress --wait-for-provisioning \
Red Hat JBoss Fuse 6.3 Fabric Guide
124

Note the following points:
A new user is created with username, admin, password, AdminPass, and role, Administrator. You can use these JAAS credentials to log on to any of the containers in thefabric.
The Zookeeper password is set to ZooPass (the only time you are prompted to enter theZookeeper password is when joining a container to the fabric).
The resolver policy for the root container is set to manualip (using the --resolver option)and the global resolver policy (which becomes the default resolver policy for containers createdin this fabric) is also set to manualip. This enables you to specify the root container's IPaddress, StaticIPAddress, explicitly. It is essential that you assign a static IP address to theFabric server host (for demonstrations and tests on a single machine, you can use the loopbackaddress, 127.0.0.1).
The Git URL, ExternalGitHttpUrl, is specified through the --external-git-url option.
Assuming that you use a HTTP Git URL with BASIC authentication enabled, you will also needto specify credentials, using the --external-git-user and --external-git-passwordoptions.
What happens if the external Git repository fails?
Because the external Git repository is the primary Git repository, which is used to synchronizeconfiguration data with the other Fabric servers, it is technically a single point of failure. The effect of afailure of the external Git repository is not as serious as you might think, however. It does not lead to afailure of the Fabric servers. In case of an external Git repository failure (or a loss of connectivity) theFabric servers continue to operate with the configuration data they have already cached in their localcopies of the Git repository. As soon as the external Git repository comes back on line, they will re-synchronize their configuration data.
External Git repository tutorial
The following tutorial explains how to create a fabric, which synchronizes its configuration with anexternal Git repository:
1. Create a new (empty) Git repository, which you can use as the external Git repository. Typically,you would create the Git repository in a hosting service, such as GitLab, Gerrit, or GitHub. Makea note of the new repository's HTTP URL, ExternalGitHttpUrl, and make sure that it ispossible to access the external Git repository from the hosts where you will be deploying yourFabric servers.
2. (Optional) Prepare the container for a cold start. Delete the following directories:
--external-git-url ExternalGitHttpUrl \ --external-git-user ExternalGitUser --external-git-password ExternalGitPass
InstallDir/dataInstallDir/instances
CHAPTER 16. CONFIGURING WITH GIT
125

IMPORTANT
Performing a cold start completely wipes the current state of the root container,including all of the deployed bundles, and features, and most of the stored data.Do not perform this operation on a production system.
3. Start up the container, by entering the following command:
4. Create a new fabric. At the container prompt, enter the following console command:
You need to substitute your own values for AdminPass and ZooPass. The ExternalGitHttpUrl is the HTTP URL of the external Git repository you created earlier andthe ExternalGitUser value and the ExternalGitPass value are the username/passwordcredentials required to access the external Git repository (using HTTP BASIC authentication).
This sample command uses the --manual-ip option to assign the loopback address, 127.0.0.1, to the root container. If your host has a static IP address and hostname assigned toit, however, it would be better to use the assigned hostname here instead.
You need to wait a minute or two for this command to complete.
5. After your fabric has been created, navigate to the contents of the external Git repository in yourbrowser (assuming that your Git server supports this functionality). The external repositoryshould now be populated with the default configuration of your fabric, with two branchesavailable: master and 1.0. The 1.0 branch is the branch that is initially used by your fabric.
6. Create a local clone of the external Git repository, which you can then use to push or pull profileconfigurations. Open a new command prompt and, in a convenient location on the file system,enter the following command:
This git command will prompt you to enter the username and password credentials for theexternal Git repository.
This command clones the Fabric Git repository and checks out the 1.0 branch. You should nowbe able to see the profile configuration files under the fabric/profiles subdirectory.
7. You can now use regular git commands to configure your Fabric profiles. Simply edit the filesin your local Git repository, add the changes, commit, and then push the changes to the externalGit repository (working in the 1.0 branch). Shortly after the changes are pushed to the externalGit repository, the containers in your Fabric ensemble (the Fabric servers) will poll therepository, pull the changes, and redeploy any changed profiles..
./bin/fuse
fabric:create --new-user admin --new-user-password AdminPass --new-user-role Administrator \ --zookeeper-password ZooPass --global-resolver manualip \ --resolver manualip --manual-ip 127.0.0.1 --wait-for-provisioning \ --external-git-url ExternalGitHttpUrl \ --external-git-user ExternalGitUser --external-git-password ExternalGitPass
git clone -b 1.0 ExternalGitHttpUrl
Red Hat JBoss Fuse 6.3 Fabric Guide
126

16.4. USING AN HTTP PROXY WITH A GIT CLUSTER
Using fabric's built-in Git cluster, all nodes communicate directly with each other over HTTP. If you needto secure this communication, you can configure an HTTP proxy by configuring the GitProxyService.
1. Start up JBoss Fuse, and create a fabric. For details, see the section called “Steps to create thefabric”.
2. At the JBossFuse:karaf@root> command line, type:
These commands specify the hostname and port to use, and the default profile is updatedwith the new configuration.
For example:
All changes made to the fabric configuration will now be redirected to the Git HTTP proxy onhost 10.8.50.60's port 3128.
profile-edit --pid io.fabric8.git.proxy/proxyHost=serverName default profile-edit --pid io.fabric8.git.proxy/proxyPort=portNumber default
profile-edit --pid io.fabric8.git.proxy/proxyHost=10.8.50.60 default profile-edit --pid io.fabric8.git.proxy/proxyPort=3128 default
CHAPTER 16. CONFIGURING WITH GIT
127

CHAPTER 17. PATCHING
17.1. PATCHING A FABRIC CONTAINER WITH A ROLLUP PATCH
Abstract
Follow the procedures described in this section to patch a Fabric container with a rollup patch.
Overview
A rollup patch updates bundle JARs, other Maven artifacts, libraries, and static files in a Fabric. Thefollowing aspects of the fabric are affected:
Distribution of patched artifacts
Profiles
Configuration of the underlying container
Root container
Throughout this section, we refer to a root container, which is just a container chosen from the Fabricensemble. Throughout the patching procedure, you invoke the patch:* commands from the console ofthe root container. If you are planning to distribute patch artifacts through the Maven proxy, it isconvenient to choose the root container to be the ensemble container that is currently the master of theMaven proxy cluster (see Chapter 14, Fabric Maven Proxies). This would ensure that patch artifacts canimmediately be downloaded by other containers in the cluster.
Distribution of patch artifacts
When patching an entire fabric of containers, you need to consider how the patch artifacts are distributedto the containers in the fabric. You can adopt one of the following approaches:
Through the Maven proxy (default approach)—when you add a rollup patch to your rootcontainer (using the patch:add command), the patch artifacts are installed into the rootcontainer's system/ directory, whose directory structure is laid out like a Maven repository. Theroot container can then serve up these patch artifacts to remote containers by behaving as aMaven proxy, enabling remote containers to download the required Maven artifacts (this processis managed by the Fabric agent running on each Fabric container). Alternatively, if you haveinstalled the rollup patch to a container that is not hosting the Maven proxy, you can ensure thatthe patch artifacts are uploaded to the Maven proxy by invoking the patch:fabric-installcommand with the --upload option.
There is a limitation to the Maven proxy approach, however, if the Fabric ensemble consists ofmultiple containers. In this case, it can happen that the Maven proxy fails over to a differentensemble container (not the original root container). This can result in the patch artifactssuddenly becoming unavailable to other containers in the fabric. If this occurs during thepatching procedure, it will cause problems.
Red Hat JBoss Fuse 6.3 Fabric Guide
128

NOTE
Containers that are added to an ensemble do not automatically deploy the Mavenproxy. To enable the Maven proxy, make sure that the fabric profile is deployedin the container.
For more details, see Chapter 14, Fabric Maven Proxies.
Through a local repository (recommended approach)—to overcome the limitations of the Mavenproxy approach, we recommend that you make the patch artifacts available directly to all of thecontainers in the Fabric by setting up a local repository on the file system. Assuming that youhave a networked file system, all containers will be able to access the patch artifacts directly.
For example, you might set up a local repository of patch artifacts, as follows:
1. Given a rollup patch file, extract the contents of the system/ directory from the rollup patchfile into the repositories/ subdirectory of a local Maven repository (which could be ~/.m2/repositories or any other location).
2. Configure the Fabric agent and the Maven proxy to pick up artifacts from the local repositoryby editing the current version of the default profile, as follows:
Replace PathToRepository by the actual location of the local repository on your filesystem.
NOTE
Make sure that you make the edits to the default profile for all relevantprofile versions. If some of your containers are using a non-default profileversion, repeat the profile-edit commands while specifying the profileversion explicitly as the last parameter.
Profiles
The rollup patching process updates all of the standard profiles, so that they reference the patcheddependencies. Any custom profiles that you created yourself remain unaffected by these updates.However, in cases where you have already made some changes directly to the standard profiles (suchas default, fabric, karaf, and so on), the patching mechanism attempts to merge your changeswith the changes introduced by the patch.
IMPORTANT
In the case where you have modified standard profiles, it is recommended that you verifyyour custom changes are preserved after patching. This is particularly important withrespect to any changes made to the location of Maven repositories (which are usuallyconfigured in the default profile).
Configuration of the underlying container
If required, the rollup patching mechanism is capable of patching the underlying container (that is, files
profile-edit --append --pid io.fabric8.agent/org.ops4j.pax.url.mvn.defaultRepositories="file:///PathToRepository" default
CHAPTER 17. PATCHING
129

located under etc/, lib/, and so on). When a Fabric container is upgraded to a patched version (forexample, using the fabric:container-upgrade command), the container's Fabric agent checkswhether the underlying container must be patched. If yes, the Fabric agent triggers the patchingmechanism to update the underlying container. Moreover, if certain critical files are updated (forexample, lib/karaf.jar), the container status changes to requires full restart after thecontainer is upgraded. This status indicates that a full manual restart is required (an automatic restart isnot possible in this case).
io.fabric.version in the default profile
The io.fabric.version resource in the default profile plays a key role in the patching mechanism.This resource defines the version and build of JBoss Fuse and of all of its main components. Whenupgrading (or rolling back) a Fabric container to a new version, the Fabric agent checks the version andbuild of JBoss Fuse as defined in the io.fabric.version resource. If the JBoss Fuse versionchanges between the original profile version and the upgraded profile version, the Fabric agent knowsthat an upgrade of the underlying container is required when upgrading to this profile version.
Patching the patch mechanism
(Recommended, if applicable) If there is no patch management package corresponding to the rolluppatch you are about to install, then you can skip this procedure and install the rollup patch directly.
From time to time, important changes and improvements are made to the patch mechanism. In order topick up these improvements, we recommend that you patch the patch mechanism to a higher levelbefore upgrading JBoss Fuse with a rollup patch. If you were to upgrade straight to the latest rollup patchversion of JBoss Fuse, the improved patch mechanism would become available after you completed theupgrade. But at that stage, it would be too late to benefit from the improvements in the patch mechanism.
To circumvent this bootstrap problem, the improved patch mechanism is made available as a separatedownload, so that you can patch the patch mechanism itself, before you upgrade to the new patch level.To patch the patch mechanism, proceed as follows:
1. Download the appropriate patch management package. From the JBoss Fuse 6.3.0 SoftwareDownloads page, select a package named Red Hat JBoss Fuse 6.3.0 Rollup N on Karaf Update Installer, where N is the number of the particular rollup patch you areabout to install.
IMPORTANT
The rollup number, N, of the downloaded patch management package mustmatch the rollup number of the rollup patch you are about to install. For somerollup patches, there is no corresponding patch management package, in whichcase you can skip directly to the instructions for installing the rollup patch.
2. Install the patch management package, patch-management-for-fuse-630-TargetVersion.zip, on top of the root container (that is, the Fabric container that will beused to invoke the patch:add and patch:fabric-install commands). Use an archiveutility to extract the contents on top of the root container installation (installing files under the system/ and patches/ subdirectories).
NOTE
It does not matter whether the root container is running or not when you extractthese files.
Red Hat JBoss Fuse 6.3 Fabric Guide
130
3. Start the root container, if it is not already running.
4. Create a new version, using the fabric:version-create command (where we assume thatthe current profile version is 1.0):
IMPORTANT
Version names are important! The tooling sorts version names based on thenumeric version string, according to major.minor numbering, to determine theversion on which to base a new one. You can safely add a text description to aversion name as long as you append it to the end of the generated default namelike this: 1.3 [.description]. If you abandon the default naming conventionand use a textual name instead (for example, Patch051312), the next version youcreate will be based, not on the last version (Patch051312), but on the highest-numbered version determined by dot syntax.
5. Update the patch property in the io.fabric8.version PID in the version 1.0.1 of the default profile, by entering the following Karaf console command:
Where you must replace 1.2.0.redhat-630xxx with the actual build version of the patchcommands you are installing (for example, the build version xxx can be taken from the lastthree digits of the TargetVersion in the downloaded patch management package file name).
6. Upgrade the root container to use the new patching mechanism, as follows:
7. Likewise, for all other containers in your fabric that need to be patched (SSH, child, and so on),provision them with the new patching mechanism by upgrading them to profile version 1.0.1.For example:
Applying a rollup patch
To apply a rollup patch to a Fabric container:
1. Before applying the rollup patch to your fabric, you must patch the patch mechanism, asdescribed in the section called “Patching the patch mechanism”.
2. For every top-level container (that is, any container that is not a child container), perform thesesteps, one container at a time:
1. In the corresponding Karaf installation, remove the lib/endorsed/org.apache.karaf.exception-2.4.0.redhat-630xxx.jar file(where the build number, xxx, depends on the build being patched).
JBossFuse:karaf@root> fabric:version-create --parent 1.0 1.0.1Created version: 1.0.1 as copy of: 1.0
profile-edit --pid io.fabric8.version/patch=1.2.0.redhat-630xxx default 1.0.1
container-upgrade 1.0.1 root
container-upgrade 1.0.1 container1 container2 container3
CHAPTER 17. PATCHING
131

2. Restart the container.
3. Add the patch to the root container's environment using the patch:add command. Forexample, to add the patch.zip patch file:
IMPORTANT
If you have decided to use a local repository to distribute the patch artifacts(recommended), set up the local repository now—see the section called“Distribution of patch artifacts”.
4. Create a new version, using the fabric:version-create command:
IMPORTANT
Version names are important! The tooling sorts version names based on thenumeric version string, according to major.minor numbering, to determine theversion on which to base a new one. You can safely add a text description to aversion name as long as you append it to the end of the generated default namelike this: 1.3[.description]. If you abandon the default naming conventionand use a textual name instead (for example, Patch051312), the next version youcreate will be based, not on the last version (Patch051312), but on the highest-numbered version determined by dot syntax.
5. Apply the patch to the new version, using the patch:fabric-install command. Note that inorder to run this command you must provide the credentials, Username and Password, of auser with Administrator privileges. For example, to apply the PatchID patch to version 1.1:
NOTE
When you invoke the patch:fabric-install command with the --uploadoption, Fabric looks up the ZooKeeper registry to discover the URL of thecurrently active Maven proxy, and uploads all of the patch artifacts to this URL.Using this approach it is possible to make the patch artifacts available through theMaven proxy, even if the container you are currently logged into is not hosting theMaven proxy.
6. Synchronize the patch information across the fabric, to ensure that the profile changes in version1.1 are propagated to all containers in the fabric (particularly remote SSH containers). Enter thefollowing console command:
JBossFuse:karaf@root> patch:add file://patch.zip[name] [installed] [description] PatchID false Description
JBossFuse:karaf@root> fabric:version-create 1.1Created version: 1.1 as copy of: 1.0.1
patch:fabric-install --username Username --password Password --upload --version 1.1 PatchID
Red Hat JBoss Fuse 6.3 Fabric Guide
132

7. Upgrade each existing container in the fabric using the fabric:container-upgradecommand (but leaving the root container, where you installed the patch, until last). For example,to upgrade a container named remote, enter the following command:
At this point, not only does the Fabric agent download and install the patched bundles into thespecified container, but the agent also applies the patch to the underlying container (updatingany static files in the container, if necessary). If necessary, the agent will then restart the targetcontainer automatically or set the container status to requires full restart (if anautomatic restart is not possible), so that any changes made to the static files are applied to therunning container.
IMPORTANT
It is recommended that you upgrade only one or two containers to the patchedprofile version, to ensure that the patch does not introduce any new issues.
8. If the current status of the upgraded container is requires full restart, you must now useone of the standard mechanisms to stop and restart the container manually. In some cases, itwill be possible to do this using Fabric commands from the console of the root container.
For example, you could stop the remote container as follows:
And restart the remote container as follows:
9. Upgrade the root container last (that is, the container that you originally installed the patch on):
10. (Windows only) If the root container status has changed to requires full restart and it isrunning on a Windows operating system, you must first shut down all of the root container's childcontainers (if any) before manually restarting the root container.
For example, if the root container has three child containers, child1, child2, and child3,you would first shut them down, as follows:
You can then shut down the root container with the shutdown command:
Rolling back a rollup patch
patch:fabric-synchronize
JBossFuse:karaf@root> fabric:container-upgrade 1.1 remoteUpgraded container remote from version 1.0.1 to 1.1
fabric:container-stop remote
fabric:container-start remote
fabric:container-upgrade 1.1 root
fabric:container-stop child1 child2 child3
shutdown
CHAPTER 17. PATCHING
133

To roll back a rollup patch on a Fabric container, use the fabric:container-rollback command.For example, assuming that 1.0 is an unpatched profile version, you can roll the remote container backto the unpatched version 1.0 as follows:
At this point, not only does the Fabric agent roll back the installed profiles to an earlier version, but theagent also rolls back the patch on the underlying container (restoring any static files to the state theywere in before the patch was applied, if necessary). If necessary, the agent will then restart the targetcontainer automatically or set the container status to requires full restart (if an automatic restartis not possible), so that any changes made to the static files are applied to the running container.
17.2. PATCHING A FABRIC CONTAINER WITH AN INCREMENTALPATCH
Abstract
Follow the procedures described in this section to patch a Fabric container with an incremental patch.
Overview
An incremental patch makes updates only to the bundle JARs in a Fabric. The following aspects of thefabric are affected:
Distribution of patched artifacts through Maven proxy
Profiles
Distribution of patched artifacts through Maven proxy
When you install the incremental patch on your local container, the patch artifacts are installed into thelocal system/ directory, whose directory structure is laid out like a Maven repository. The localcontainer distributes these patch artifacts to remote containers by behaving as a Maven proxy, enablingremote containers to upload bundle JARs as needed (this process is managed by the Fabric agentrunning on each Fabric container). For more details, see Chapter 14, Fabric Maven Proxies.
Profiles
The incremental patching process defines bundle overrides, so that profiles switch to use the patcheddependencies (bundle JARs). This mechanism works as follows:
1. The patch mechanism creates a new profile, patch-PatchProfileID, which defines bundleoverrides for all of the patched bundles.
2. The new patch profile, patch-PatchProfileID, is inserted as the parent of the defaultprofile (at the base of the entire profile tree).
3. All of the profiles that inherit from default now use the bundle versions defined by the overrides inpatch-PatchProfileID. The contents of the existing profiles themselves are not modified inany way.
Is it necessary to patch the underlying container?
fabric:container-rollback 1.0 remote
Red Hat JBoss Fuse 6.3 Fabric Guide
134

Usually, when patching a fabric with an incremental patch, it is not necessary to patch the underlyingcontainer as well. Fabric has its own mechanisms for distributing patch artifacts (for example, using a gitrepository for the profile data, and Apache Maven for the OSGi bundles), which are independent of theunderlying container installation.
In exceptional cases, however, it might be necessary to patch the underlying container (for example, ifthere was an issue with the fabric:create command). Always read the patch README file to find outwhether there are any special steps required to install a particular patch. In these cases, however, it ismore likely that the patch would be distributed in the form of a rollup patch, which has the capability topatch the underlying container automatically—see Section 17.1, “Patching a Fabric Container with aRollup Patch”.
Applying an incremental patch
To apply an incremental patch to a Fabric container:
1. Before you proceed to install the incremental patch, make sure to read the text of the READMEfile that comes with the patch, as there might be additional manual steps required to install aparticular incremental patch.
2. Create a new version, using the fabric:version-create command:
IMPORTANT
Version names are important! The tooling sorts version names based on thenumeric version string, according to major.minor numbering, to determine theversion on which to base a new one. You can safely add a text description to aversion name as long as you append it to the end of the generated default namelike this: 1.3 <.description > .If you abandon the default namingconvention and use a textual name instead (for example, Patch051312), the nextversion you create will be based, not on the last version (Patch051312), but on thehighest-numbered version determined by dot syntax.
3. Apply the patch to the new version, using the fabric:patch-apply command. For example,to apply the activemq.zip patch file to version 1.1:
4. Upgrade a container using the fabric:container-upgrade command, specifying whichcontainer you want to upgrade. For example, to upgrade the child1 container, enter thefollowing command:
JBossFuse:karaf@root> fabric:version-create 1.1Created version: 1.1 as copy of: 1.0
JBossFuse:karaf@root> fabric:patch-apply --version 1.1 file:///patches/activemq.zip
JBossFuse:karaf@root> fabric:container-upgrade 1.1 child1Upgraded container child1 from version 1.0 to 1.1
CHAPTER 17. PATCHING
135

IMPORTANT
It is recommended that you upgrade only one or two containers to the patchedprofile version, to ensure that the patch does not introduce any new issues.Upgrade the root container (the one that you applied the patch to, using the fabric:patch-apply command) last.
5. You can check that the new patch profile has been created using the fabric:profile-listcommand, as follows:
Where we presume that the patch was applied to profile version 1.1.
NOTE
If you want to avoid specifying the profile version (with --version) every timeyou invoke a profile command, you can change the default profile version usingthe fabric:version-set-default Version command.
You can also check whether specific JARs are included in the patch, for example:
Rolling back an incremental patch
To roll back an incremental patch on a Fabric container, use the fabric:container-rollbackcommand. For example, assuming that 1.0 is an unpatched profile version, you can roll the child1container back to the unpatched version 1.0 as follows:
BossFuse:karaf@root> fabric:profile-list --version 1.1 | grep patchdefault 0 patch-activemq-patchpatch-activemq-patch
JBossFuse:karaf@root> list | grep -i activemq[ 131] [Active ] [Created ] [ ] [ 50] activemq-osgi (5.9.0.redhat-61037X)[ 139] [Active ] [Created ] [ ] [ 50] activemq-karaf (5.9.0.redhat-61037X)[ 207] [Active ] [ ] [ ] [ 60] activemq-camel (5.9.0.redhat-61037X)
fabric:container-rollback 1.0 child1
Red Hat JBoss Fuse 6.3 Fabric Guide
136

CHAPTER 18. ENABLING SSL FOR JMX CONNECTORS
Abstract
Under Fabric, to enable SSL for JMX connectors:
1. Obtain or create a certificate for each server host that will be used in the fabric cluster.
2. Import the certificates with chain into a Java keystore (JKS).
3. Select a standard location for keystore and related artifacts.
4. Create a blueprint configuration for loading the keystore.
5. Set keystore environment variables on Fuse containers.
6. Start Fuse and create Fabric cluster.
7. Configure the cluster for JMX.
8. Upgrade Fuse containers.
9. Test the configuration.
The procedure described here assumes that you can use the same filenames and the same file locationson all hosts in the fabric cluster. If your configuration does not allow this, you can use environmentvariables to customize the configuration on individual hosts. The recommendation is to work through thesteps described here and then see Fabric Profiles for information about flexibly configuriing particularhosts.
OBTAIN OR CREATE CERTIFICATES
Obtain or create a certificate for each server host to be used in the fabric cluster.
The process of enabling SSL for JMX connectors is easier if the certificates are signed by a certificateauthority (CA). Steps for creating a certificate authority are outside the scope of this documentation. Anexample of the process for creating a root and intermediate certificate authority and signing servercertificates is in the JBoss Fuse Security Guide appendix.
IMPORT CERTIFICATES WITH CHAIN
Import the certificates with chain into a Java keystore (JKS). This is a generic procedure documentedelsewhere. While this step overlaps with the process for creating certificates, the details are herebecause you must customize some of the final steps for creating the certificates for this example.
If you have PEM-encoded (Privacy Enhanced Mail) certificates then you must include the chain with theroot CA, intermediate CA and server certificate in the chain. To do this, follow these steps:
1. Concatenate the PEM-encoded certificates into a single chain, for example:
$ cat intermediate/certs/serverx.example.com.cert.pem intermediate/certs/ca-chain.cert.pem > intermediate/certs/serverx.example.com.cert.export.pem
CHAPTER 18. ENABLING SSL FOR JMX CONNECTORS
137

2. Convert the chain file into a PKCS12 keystore, for example:
3. Import the keystore and CA certificates into a Java keystore, for example:
4. Ensure that the alias for the server key/certificate is the same for each keystore. This avoidsneeding a separate configuration for each host, for example:
In the previous example, 1 is the default alias of the server key originally imported into thekeystore.
The result of these steps includes:
A keystore for each host in the cluster.
Each keystore has the same final filename. After you create and move them, you can rename allof them as something like server-chain.jks.
Each keystore contains the server key/certificate for the host on which it is deployed.
Each keystore uses the same alias for the server certificate, for example, server or jboss.This makes the configuration portable across hosts.
The CA certificates are also in the keystore and are marked as trusted so the keystore can alsofunction as a trust store.
You might be able to configure keystores with other types of certificates, such as self-signed certificatesor a single certificate with multiple server names. Doing this is outside the scope of this documentation.
SELECT STANDARD LOCATION FOR KEYSTORE
Select a standardized location for the keystore file and related artifacts. For example, on each server, /opt/fuse/keystore could contain the keystore file for that server.
CREATE BLUEPRINT CONFIGURATION FOR LOADING KEYSTORE
Create a blueprint configuration for loading the keystore.
$ openssl pkcs12 -export -inkey intermediate/private/serverx.example.com.key.pem -in intermediate/certs/serverx.example.com.cert.export.pem -out serverx.chain.pkcs12
$ keytool -importkeystore -trustcacerts -srckeystore serverx.chain.pkcs12 -srcstoretype PKCS12 -destkeystore server-chain.jks$ keytool -import -file intermediate/certs/intermediate.cert.pem -alias intermediate -trustcacerts -keystore server-chain.jks -storepass changepass$ keytool -import -file certs/ca.cert.pem -alias root -trustcacerts -keystore server-chain.jks -storepass changepass
keytool -changealias -alias "1" -destalias "server" -keypass changepass -keystore server-chain.jks -storepass changepass
Red Hat JBoss Fuse 6.3 Fabric Guide
138

You use the blueprint configuration later when you assign it to a profile. On each server, the blueprintconfiguration file should have the same name and contents. For example, the /opt/fuse/keystoredirectory might contain the jmx.keystore.xml file with this content:
SET KEYSTORE ENVIRONMENT VARIABLES ON FUSE CONTAINERS
Set environment variables on each Fuse container to specify that the keystore file is the trust store for thecontainer. For example, you can use the EXTRA_JAVA_OPTS parameter in $KARAF_HOME/bin/setenv:
This ensures that the JMX client trusts the certificates passed by other hosts because of the trusted CAs.
START FUSE AND CREATE FABRIC CLUSTER
Start your Fuse instance and create a Fabric cluster, for example:
If you already have a working ensemble then you must add the JVM parameters in the setenv or setenv.bat scripts for each ensemble container and then restart each container one by one. Forexample, the setenv script in the bin directory of the node13 container should be something like this:
<blueprint xmlns="http://www.osgi.org/xmlns/blueprint/v1.0.0" xmlns:jaas="http://karaf.apache.org/xmlns/jaas/v1.0.0" default-activation="lazy">
<jaas:keystore name="server_keystore" rank="1" path="file:///opt/fuse/keystore/server-chain.jks" keystorePassword="changepass" keyPasswords="server=changepass" /></blueprint>
export EXTRA_JAVA_OPTS="-Djavax.net.ssl.trustStore=/opt/fuse/keystore/server-chain.jks -Djavax.net.ssl.trustStorePassword=changepass"
> fabric:create --wait-for-provisioning --zookeeper-password admin --global-resolver manualip --resolver manualip --manual-ip node11.redhat.com --bind-address node11.redhat.com> container-create-ssh --resolver manualip --manual-ip node12.redhat.com --bind-address node12.redhat.com --zookeeper-password admin --user rlee --private-key /home/rlee/.ssh/id_rsa --host node12.redhat.com --profile fabric --profile jboss-fuse-full --jvm-opts '-Djavax.net.ssl.trustStore=/opt/fuse/keystore/server-chain.jks -Djavax.net.ssl.trustStorePassword=changepass' --path /opt/fuse/containers node12> container-create-ssh --resolver manualip --manual-ip node13.redhat.com --bind-address node13.redhat.com --zookeeper-password admin --user rlee --private-key /home/rlee/.ssh/id_rsa --host node13.redhat.com --profile fabric --profile jboss-fuse-full --jvm-opts '-Djavax.net.ssl.trustStore=/opt/fuse/keystore/server-chain.jks -Djavax.net.ssl.trustStorePassword=changepass' --path /opt/fuse/containers node13> fabric:ensemble-add node12 node13
CHAPTER 18. ENABLING SSL FOR JMX CONNECTORS
139

If you have existing child containers then you need to update their JVM properties to include the truststore and the trust store password. You can do this by using the Hawtio console or by editing the instance.properties file in the parent container instances directory, for example:
CONFIGURE THE CLUSTER FOR JMX
The previous steps put the required infrastructure in place. This includes certificates and blueprintconfigurations in common locations and updated JVM arguments to scripts. To configure the cluster forJMX over SSL/TLS:
1. Create a new version for the changes. This lets you roll back or roll forward as needed. Forexample:
2. Modify the profile. You might want to use the default profile for configuration because it is theparent of all other profiles. It is also possible to add a special profile for SSL configuration andadd the following properties to that. Using a special SSL profile means that you must assign theprofile to each container in the cluster. The following example edits the default profile:
export JAVA_OPTS="-Djavax.net.ssl.trustStore=/opt/fuse/keystore/server-chain.jks -Djavax.net.ssl.trustStorePassword=changepass -XX:+UnlockDiagnosticVMOptions -XX:+UnsyncloadClass"
item.1.name = apps11item.1.root = falseitem.1.loc = /opt/fuse/jboss-fuse-6.3.0.redhat-187/instances/apps11item.1.pid = 13219item.1.opts = -server -Dcom.sun.management.jmxremote -Dorg.jboss.gravia.repository.storage.dir=data/repository -Dzookeeper.url=\"node11.redhat.com:2182,node12.redhat.com:2182,node13.redhat.com:2182\" -Dzookeeper.password.encode=\"true\" -Dzookeeper.password=\"admin\" -Xmx768m -XX:MaxPermSize=256m -Djavax.net.ssl.trustStore=/opt/fuse/keystore/server-chain.jks -Djavax.net.ssl.trustStorePassword=changepass -XX:+UnlockDiagnosticVMOptions -XX:+UnsyncloadClass -Dbind.address=node11.redhat.com -Dlocal.resolver=manualip -Dmanualip=node11.redhat.com -Dio.fabric8.datastore.gitRemotePollInterval=60000 -Dio.fabric8.datastore.importDir=fabric -Dio.fabric8.datastore.felix.fileinstall.filename=file:/opt/fuse/jboss-fuse-6.3.0.redhat-187/etc/io.fabric8.datastore.cfg -Dio.fabric8.datastore.service.pid=io.fabric8.datastore -Dio.fabric8.datastore.component.name=io.fabric8.datastore
> fabric:version-create 1.1
> profile-edit --bundle 'blueprint:file:///opt/fuse/keystore/jmx.keystore.xml;start-level=29' default 1.1> profile-edit --pid org.apache.karaf.management/secured=true default 1.1> profile-edit --pid org.apache.karaf.management/secureProtocol=TLSv1 default 1.1> profile-edit --pid org.apache.karaf.management/keyAlias=server default 1.1
Red Hat JBoss Fuse 6.3 Fabric Guide
140

To ensure availability of the certificate when the JMX connector is initialized, the profile specifies start-level for the keystore blueprint configuration. To ensure correct operation on child containers, the fabric.config.merge property is enabled. To make the profile portable, the profile uses the generickey alias of server.
UPGRADE FUSE CONTAINERS
To apply the SSL JMX configuration, upgrade each container in turn. The recommendation is to waitbetween container upgrades to avoid breaking Zookeeper quorum. For example:
TEST THE CONFIGURATION
Test the configuration by starting jconsole with a trust store that contains the CA certificates used to signthe server keys or with a trust store that contains all self-signed server keys, for example:
You should be able to negotiate an SSL connection by specifying the JMX address for the container andsupplying the username and password of an administrator (admin/admin). You should not receive awarning that prompts you to indicate whether you want to try an unencrypted connection. For example:
To add new containers to the cluster, specify the version. Once provisioned, the new containers shouldbe enabled for JMX over SSL. For example, the following command creates an SSH container:
The following command creates a child container:
> profile-edit --pid org.apache.karaf.management/keyStore=server_keystore default 1.1> profile-edit --pid org.apache.karaf.management/trustStore=server_keystore default 1.1> profile-edit --pid org.apache.karaf.management/keyStoreAvailabilityTimeout=60000 default 1.1> profile-edit --pid org.apache.karaf.management/fabric.config.merge=true default 1.1
> container-upgrade 1.1 node11> container-upgrade 1.1 node12> container-upgrade 1.1 node13
jconsole -J-Djavax.net.ssl.trustStore=client1-chain.jks -J-Djavax.net.ssl.trustStoreType=JKS -J-Djavax.net.ssl.trustStorePassword=changepass
service:jmx:rmi://node11.redhat.com:44444/jndi/rmi://node11.redhat.com:1099/karaf-node11
container-create-ssh --resolver manualip --manual-ip node1.redhat.com --bind-address node1.redhat.com --zookeeper-password admin --user rlee --private-key /home/rlee/.ssh/id_rsa --host node1.redhat.com --profile fabric --profile jboss-fuse-full --jvm-opts '-Djavax.net.ssl.trustStore=/opt/fuse/keystore/server-chain.jks -Djavax.net.ssl.trustStorePassword=changepass' --path /opt/fuse/containers --version 1.1 node1
CHAPTER 18. ENABLING SSL FOR JMX CONNECTORS
141

The recommendation is to specify the resolver and the bind address and use fully-qualified names. Whiledoing this might not be required, experience shows that it lets you avoid issues with JMX and, inparticular, Zookeeper.
container-create-child --resolver manualip --manual-ip node11.redhat.com --version 1.1 --bind-address node11.redhat.com --zookeeper-password admin --jmx-user rlee --jmx-password admin --jvm-opts '-Djavax.net.ssl.trustStore=/opt/fuse/keystore/server-chain.jks -Djavax.net.ssl.trustStorePassword=changepass' node11 apps11
Red Hat JBoss Fuse 6.3 Fabric Guide
142
APPENDIX A. EDITING PROFILES WITH THE BUILT-IN TEXTEDITOR
Abstract
When you have a lot of changes and additions to make to a profile's configuration, it is usually moreconvenient to do this interactively, using the built-in text editor for profiles. The editor can be accessed byentering the profile-edit command with no arguments except for the profile's name (and optionally,version); or adding the --pid option for editing OSGi PID properties; or adding the --resource optionfor editing general resources.
A.1. EDITING AGENT PROPERTIES
Overview
This section explains how to use the built-in text editor to modify a profile's agent properties, which aremainly used to define what bundles and features are deployed by the profile.
Open the agent properties resource
To start editing a profile's agent properties using the built-in text editor, enter the following consolecommand:
Where Profile is the name of the profile to edit and you can optionally specify the profile version,Version, as well. The text editor opens in the console window, showing the current profile name andversion in the top-left corner of the Window. The bottom row of the editor screen summarizes theavailable editing commands and you can use the arrow keys to move about the screen.
Specifying feature repository locations
To specify the location of a feature repository, add a line in the following format:
Where ID is an arbitrary unique identifier and URL gives the location of a single feature repository (onlyone repository URL can be specified on a line).
Specifying deployed features
To specify a feature to deploy (which must be available from one of the specified feature repositories),add a line in the following format:
Where ID is an arbitrary unique identifier and FeatureName is the name of a feature.
Specifying deployed bundles
JBossFuse:karaf@root> profile-edit Profile [Version]
repository.ID=URL
feature.ID=FeatureName
APPENDIX A. EDITING PROFILES WITH THE BUILT-IN TEXT EDITOR
143

To specify a bundle to deploy, add a line in the following format:
Where ID is an arbitrary unique identifier and URL specifies the bundle's location.
NOTE
A bundle entry can be used in combination with a blueprint: (or spring:) URLhandler to deploy a Blueprint XML resource (or a Spring XML resource) as an OSGibundle.
Specifying bundle overrides
To specify a bundle override, add a line in the following format:
Where ID is an arbitrary unique identifier and URL specifies the bundle's location.
NOTE
A bundle override is used to override a bundle installed by a feature, replacing it with adifferent version of the bundle. For example, this functionality is used by the patchingsystem to install a patched bundle in a container.
Specifying etc/config.properties properties
To specify Java system properties that affect the Apache Karaf container (analogous to editing etc/config.properties in a standalone container), add a line in the following format:
Specifying etc/system.properties properties
To specify Java system properties that affect the bundles deployed in the container (analogous to editingetc/system.properties in a standalone container), add a line in the following format:
If the system property, Property, is already set at the JVM level (for example, through the --jvm-opts option to the fabric:container-create command), the preceding fabric:profile-editcommand will not override the JVM level setting. To override a JVM level setting, set the system propertyas follows:
Specifying libraries to add to Java runtime lib/
To specify a Java library to deploy (equivalent to adding a library to the lib/ directory of the underlyingJava runtime), add a line in the following format:
bundle.ID=URL
override.ID=URL
config.Property=Value
system.Property=Value
system.karaf.override.Property=Value
Red Hat JBoss Fuse 6.3 Fabric Guide
144

Where ID is an arbitrary unique identifier and URL specifies the library's location.
Specifying libraries to add to Java runtime lib/ext/
To specify a Java extension library to deploy (equivalent to adding a library to the lib/ext/ directory ofthe underlying Java runtime), add a line in the following format:
Where ID is an arbitrary unique identifier and URL specifies the extension library's location.
Specifying libraries to add to Java runtime lib/endorsed/
To specify a Java endorsed library to deploy (equivalent to adding a library to the lib/endorsed/directory of the underlying Java runtime), add a line in the following format:
Where ID is an arbitrary unique identifier and URL specifies the endorsed library's location.
Example
To open the mq-client profile's agent properties for editing, enter the following console command:
The text editor starts up, and you should see the following screen in the console window:
lib.ID=URL
ext.ID=URL
endorsed.ID=URL
JBossFuse:karaf@root> profile-edit mq-client
Profile:mq-client 1.0 L:1 C:1## Copyright (C) Red Hat, Inc.# http://redhat.com## Licensed under the Apache License, Version 2.0 (the "License");# you may not use this file except in compliance with the License.# You may obtain a copy of the License at## http://www.apache.org/licenses/LICENSE-2.0## Unless required by applicable law or agreed to in writing, software# distributed under the License is distributed on an "AS IS" BASIS,# WITHOUT WARRANTIES OR CONDITIONS OF ANY KIND, either express or implied.# See the License for the specific language governing permissions and# limitations under the License.#
repository.activemq=mvn:org.apache.activemq/activemq-karaf/${version:activemq}/xml/featuresrepository.karaf-
APPENDIX A. EDITING PROFILES WITH THE BUILT-IN TEXT EDITOR
145

Type ̂ X to quit the text editor and get back to the console prompt.
A.2. EDITING OSGI CONFIG ADMIN PROPERTIES
Overview
This section explains how to use the built-in text editor to edit the property settings associated with aspecific persistent ID.
Persistent ID
In the context of the OSGi Config Admin service, a persistent ID (PID) refers to and identifies a set ofrelated properties. In particular, when defining PID property settings in a profile, the propertiesassociated with the PID persistent ID are defined in the PID.properties resource.
Open the Config Admin properties resource
To start editing the properties associated with the PID persistent ID, enter the following consolecommand:
NOTE
It is also possible to edit PID properties by specifying --resource PID.propertiesin the profile-edit command, instead of using the --pid PID option.
Specifying OSGi config admin properties
The text editor opens, showing the contents of the specified profile's PID.properties resource (whichis actually stored in the ZooKeeper registry). To edit the properties, add, modify, or delete lines of thefollowing form:
Example
To edit the properties for the io.fabric8.hadoop PID in the hadoop-base profile, enter the followingconsole command:
The text editor starts up, and you should see the following screen in the console window:
standard=mvn\:org.apache.karaf.assemblies.features/standard/${version:karaf}/xml/features
^X Quit ^S Save ^Z Undo ^R Redo ^G Go To ^F Find ^N Next ^P Previous
JBossFuse:karaf@root> profile-edit --pid PID Profile [Version]
Property=Value
JBossFuse:karaf@root> profile-edit --resource io.fabric8.hadoop.properties hadoop-base 1.0
Red Hat JBoss Fuse 6.3 Fabric Guide
146

You might notice that colon characters are escaped in this example (as in \:). Strictly speaking, it is onlynecessary to escape a colon if it appears as part of a property name (left hand side of the equals sign),but the profile-edit command automatically escapes all colons when it writes to a resource. Whenmanually editing resources using the text editor, however, you do not need to escape colons in URLsappearing on the right hand side of the equals sign.
Type ̂ X to quit the text editor and get back to the console prompt.
A.3. EDITING OTHER RESOURCES
Overview
In addition to agent properties and PID properties, the built-in text editor makes it possible for you editany resource associated with a profile. This is particularly useful, if you need to store additionalconfiguration files in a profile. The extra configuration files can be stored as profile resources (which arestored in a Fabric server's built-in Git repository) and then can be accessed by your applications at runtime.
Creating and editing an arbitrary resource
You can create and edit arbitrary profile resources using the following command syntax:
Profile:hadoop-base 1.0 L:1 C:1## Copyright (C) Red Hat, Inc.# http://redhat.com## Licensed under the Apache License, Version 2.0 (the "License");# you may not use this file except in compliance with the License.# You may obtain a copy of the License at## http://www.apache.org/licenses/LICENSE-2.0## Unless required by applicable law or agreed to in writing, software# distributed under the License is distributed on an "AS IS" BASIS,# WITHOUT WARRANTIES OR CONDITIONS OF ANY KIND, either express or implied.# See the License for the specific language governing permissions and# limitations under the License.#
fs.default.name=hdfs\://localhost\:9000dfs.replication=1mapred.job.tracker=localhost\:9001dfs.name.dir=${karaf.data}/hadoop/dfs/namedfs.http.address=0.0.0.0\:9002dfs.data.dir=${karaf.data}/hadoop/dfs/datadfs.name.edits.dir=${karaf.data}/hadoop/dfs/name
^X Quit ^S Save ^Z Undo ^R Redo ^G Go To ^F Find ^N Next ^P Previous
JBossFuse:karaf@root> profile-edit --resource Resource Profile [Version]
APPENDIX A. EDITING PROFILES WITH THE BUILT-IN TEXT EDITOR
147

Where Resource is the name of the profile resource you want to edit. If Resource does not alreadyexist, it will be created.
broker.xml example
For example, the mq-base profile has the broker.xml resource, which stores the contents of anApache ActiveMQ broker configuration file. To edit the broker.xml resource, enter the followingconsole command:
The text editor starts up, and you should see the following screen in the console window:
Any changes you make to this file will take effect whenever the broker restarts.
Type ̂ X to quit the text editor and get back to the console prompt.
JBossFuse:karaf@root> profile-edit --resource broker.xml mq-base 1.0
Profile:mq-base 1.0 L:1 C:1<!-- Copyright (C) FuseSource, Inc. http://fusesource.com
Licensed under the Apache License, Version 2.0 (the "License"); you may not use this file except in compliance with the License. You may obtain a copy of the License at
http://www.apache.org/licenses/LICENSE-2.0
Unless required by applicable law or agreed to in writing, software distributed under the License is distributed on an "AS IS" BASIS, WITHOUT WARRANTIES OR CONDITIONS OF ANY KIND, either express or implied. See the License for the specific language governing permissions and limitations under the License. --><beans xmlns="http://www.springframework.org/schema/beans" xmlns:amq="http://activemq.apache.org/schema/core" xmlns:xsi="http://www.w3.org/2001/XMLSchema-instance" xsi:schemaLocation="http://www.springframework.org/schema/beans http://www.springframework.org/schema/beans/spring-beans.xsd http://activemq.apache.org/schema/core http://activemq.apache.org/schema/core/activemq-core.xsd">
<!-- Allows us to use system properties and fabric as variables in this configuration file --> <bean class="org.springframework.beans.factory.config.PropertyPlaceholderConfigurer"> <property name="properties"> <bean class="io.fabric8.mq.fabric.ConfigurationProperties"/> </property>
^X Quit ^S Save ^Z Undo ^R Redo ^G Go To ^F Find ^N Next ^P Previous
Red Hat JBoss Fuse 6.3 Fabric Guide
148

Referencing a profile resource
In order to use an arbitrary profile resource, you must be able to reference it. You can use the profileURL to access resources stored under the current profile or parent profile. It has the following format: profile:ResourceName A key characteristic of the profile URL is that the location of a resource canchange dynamically at run time, as follows:
The profile URL handler first tries to find the named resource,ResourceName, in the currentversion of the current profile (where the current version is a property of the container in which theprofile is running).
If the specified resource is not found under the current profile, the profile URL tries to find theresource in the current version of the parent profile.
For example, the default profile provides the jetty.xml resource and this resource is accessed by settingthe
A.4. PROFILE ATTRIBUTES
Overview
In addition to the resources described in the other sections, a profile also has certain attributes that affectits behavior. You cannot edit profile attributes directly using the text editor.
For completeness, this section describes what the profile attributes are and what console commands youcan use to modify them.
parents attribute
The parents attribute is a list of one or more parent profiles. This attribute can be set using the profile-change-parents console command. For example, to assign the parent profiles camel and cxf to the my-camel-cxf-profile profile, you would enter the following console command:
abstract attribute
When a profile's abstract attribute is set to true, the profile cannot be directly deployed to acontainer. This is useful for profiles that are only intended to be the parents of other profiles—forexample, mq-base. You can set the abstract attribute from the Management Console.
locked attribute
A locked profile cannot be changed or edited until it is unlocked. You can lock or unlock a profile fromthe Management Console.
hidden attribute
org.ops4j.pax.web.config.url=${profile:jetty.xml}
JBossFuse:karaf@root> profile-change-parents --version 1.0 my-camel-cxf-profile camel cxf
APPENDIX A. EDITING PROFILES WITH THE BUILT-IN TEXT EDITOR
149

The hidden attribute is a flag that is typically set on profiles that Fabric creates automatically (forexample, to customize the setup of a registry server). By default, hidden profiles are not shown when yourun the profile-list command, but you can see them when you add the --hidden flag, as follows:
JBossFuse:karaf@root> profile-list --hidden...fabric 1 karaffabric-ensemble-0000 0 fabric-ensemble-0000-1 1 fabric-ensemble-0000fmc 0 default...
Red Hat JBoss Fuse 6.3 Fabric Guide
150

APPENDIX B. FABRIC URL HANDLERS
Abstract
The Fabric runtime provides a variety of URL handlers, which can be used in application code deployedin a Fabric-enabled container. These URLs are intended to be used in profile configuration files to locateconfiguration resources.
B.1. PROFILE URL HANDLER
The profile URL is used to access resources stored under the current profile (or parent profile). It has thefollowing format:
A key characteristic of the profile URL is that the location of a resource can change dynamically at runtime, as follows:
1. The profile URL handler first tries to find the named resource, ResourceName, in the currentversion of the current profile (where the current version is a property of the container in which theprofile is running).
2. If the specified resource is not found in the current profile, the profile URL tries to find theresource in the current version of the parent profile.
This behavior implies that whenever you change the version assigned to a container (for example, byinvoking the fabric:container-upgrade or fabric:container-rollback console commands),the referenced resources are also, automatically, upgraded or rolled back.
B.2. ZK URL HANDLER
You can reference the contents of a ZooKeeper node using the zk URL. The URL can be specified eitheras an absolute node:
Or you can reference configuration properties from a specific container using the following syntax:
The preceding syntax is effectively a short cut to the following URL reference:
B.3. BLUEPRINT URL HANDLER
The Blueprint URL handler enables you to deploy a Blueprint XML resource directly as an OSGi bundle,without needing to create any of the usual OSGi bundle packaging in advance. The blueprint:scheme can be prefixed to any of the usual location URL handlers (for example, file:, http:, profile:, zk:).
profile:ResourceName
zk:/PathToNode
zk:ContainerName/Property
zk:/fabric/registry/containers/config/ContainerName/Property
APPENDIX B. FABRIC URL HANDLERS
151

To use the Blueprint URL handler, create a bundle entry in the agent properties (equivalent to the io.fabric8.agent PID) in the following format:
For example, to activate the camel.xml resource (Blueprint file) from the current profile, you would addthe following bundle entry:
NOTE
The Blueprint URL handler has an important side effect. If the referenced Blueprintresource is changed at run time, the Blueprint URL handler detects this change andautomatically reloads the resource. This means, for example, that if you edit a deployedCamel route in a Blueprint resource, the route automatically gets updated in real time.
B.4. SPRING URL HANDLER
The Spring URL handler enables you to deploy a Spring XML resource directly as an OSGi bundle,without needing to create any of the usual OSGi bundle packaging in advance. The spring: schemecan be prefixed to any of the usual location URL handlers (for example, file:, http:, profile:, zk:).
To use the Spring URL handler, create a bundle entry in the agent properties (equivalent to the io.fabric8.agent PID) in the following format:
For example, to load the Spring resource, camel-spring.xml, from the current profile, you could addthe following entry to the profile's agent properties:
NOTE
If the referenced Spring resource is changed at run time, the Spring URL handler detectsthis change and automatically reloads the resource.
B.5. MVEL
The mvel:URL handler allows you to render templates based on the effective profile or runtimeproperties. You can access the profile object by using the profile variable and runtime properties byusing the runtime variable.
For example, the mvel:profile:jetty.xml file refers to the template file called jetty.xml either inthe current profile or in a parent profile directory. For more information about the mvel language, see theMVEL Language Guide
bundle.ID=blueprint:LocationScheme:LocationOfBlueprintXML
bundle.camel-fabric=blueprint:profile:camel.xml
bundle.ID=spring:LocationScheme:LocationOfBlueprintXML
bundle.spring-resource=spring:profile:camel-spring.xml
Red Hat JBoss Fuse 6.3 Fabric Guide
152

For the Profile URL handler, you can start up blueprints or spring XML files as a bundle by using theURL with the blueprint or spring URL handlers. bundle.foo = blueprint:mvel:profile:foo.xml bundle.bar = spring:mvel:profile:bar.xml
APPENDIX B. FABRIC URL HANDLERS
153

APPENDIX C. PROFILE PROPERTY RESOLVERS
Abstract
When defining properties for a profile, you can use a variable substitution mechanism, which has thegeneral syntax ${ResourceReference}. This variable substitution mechanism can be used in anyprofile resource, including the agent properties, PID properties, and other resources—for example, the mq-base profile's broker.xml resource references the ${broker.name} and ${data} variables.
C.1. SUBSTITUTING SYSTEM PROPERTIES
Syntax
System properties can be substituted in a profile resource, using the following syntax:
Where PropName can be the name of any Java system property. In particular, Java system propertiescan be defined in the following locations:
The etc/system.properties file, relative to the container's home directory.
System property settings in the profile's agent properties.
Some of the more useful system properties defined in the etc/system.properties file are, asfollows:
Table C.1. System Properties
System Property Description
${karaf.home} The directory where Red Hat JBoss Fuse is installed.
${karaf.data} Location of the current container's data directory,which is usually ${karaf.home}/data for amain container or ${karaf.home}/instances/InstanceName/data for a child container.
${karaf.name} The name of the current container.
C.2. SUBSTITUTING ENVIRONMENT VARIABLES
Syntax
You can substitute the value of a system environment variable using the environment property resolver,which has the following syntax:
${PropName}
${env:VarName}
Red Hat JBoss Fuse 6.3 Fabric Guide
154
C.3. SUBSTITUTING CONTAINER ATTRIBUTES
Syntax
You can substitute the value of a container attribute using the container attribute property resolver, whichhas the following syntax:
You can substitute any of the following container attributes:
Table C.2. Container Attributes
Attribute Description
${container:resolver} The effective resolver policy for the current container.Possible values are: localip, localhostname, publicip, publichostname, manualip.
${container:ip} The effective IP address used by the currentcontainer, which has been selected by applying theresolver policy. This is the form of host address thatis advertised to other containers and applications.
${container:localip} The numerical IP address of the current container,which is suitable for accessing the container on aLAN.
${container:localhostname} The host name of the current container, which issuitable for accessing the container on a LAN.
${container:publicip} The numerical IP address of the current container,which is suitable for accessing the container from aWAN (on the Internet).
${container:publichostname} The host name of the current container, which issuitable for accessing the container from a WAN (onthe Internet).
${container:manualip} An IP address that is specified manually, by settingthe value of the relevant node in the ZooKeeperregistry.
${container:bindaddress}
${container:sshurl} The URL of the SSH service, which can be used tolog on to the container console.
${container:jmxurl} The URL of the JMX service, which can be used tomonitor the container.
${container:Attribute}
APPENDIX C. PROFILE PROPERTY RESOLVERS
155

${container:jolokiaurl} The URL of the Jolokia service, which is used by theFuse Management Console to access the container.
${container:httpurl} The base URL of the container's default Jetty HTTPserver.
${container:domains} List of JMX domains registered by the container.
${container:processid} Returns the process ID of the container process (onLinux-like and UNIX-like operating systems).
${container:openshift} A boolean flag that returns true, if the container isrunning on OpenShift; otherwise, false.
${container:blueprintstatus} The aggregate status of all the deployed Blueprintcontexts. If all of the deployed contexts are ok, thestatus is ok; if one or more deployed contexts havefailed, the status is failed.
${container:springstatus} The aggregate status of all the deployed Springcontexts. If all of the deployed contexts are ok, thestatus is ok; if one or more deployed contexts havefailed, the status is failed.
${container:provisionstatus} Returns the container provision status.
${container:provisionexception} If the container provisioning has failed, this variablereturns the provisioning exception.
${container:provisionlist} The list of provisioned artefacts in the container.
${container:geolocation} The geographic location of the container (which isobtained by making a Web request to a public servicethat gives the GPS coordinates of the containerhost).
Attribute Description
C.4. SUBSTITUTING PID PROPERTIES
Syntax
The profile property resolver is used to access PID properties from the current profile (or parent profile). Ithas the following format:
${profile:PID/Property}
Red Hat JBoss Fuse 6.3 Fabric Guide
156

NOTE
This should not be confused with the syntax of a profile URL, which is used to accessgeneral resource files (not PID properties) and which is not resolved immediately (incontrast to the profile property resolver, which substitutes the corresponding propertyvalue as soon as the configuration file is read).
Example using a profile property resolver
For example, the fabric profile's io.fabric8.maven.properties PID resource includes thefollowing property setting:
So that the remoteRepositories property is set to the value of the org.ops4j.pax.url.mvn.repositories agent property (io.fabric8.agent is the PID for theagent properties).
C.5. SUBSTITUTING ZOOKEEPER NODE CONTENTS
Syntax
You can substitute the contents of a ZooKeeper node using the zk property resolver. The propertyresolver can be specified either as an absolute node:
Or you can reference configuration properties from a specific container using the following syntax:
The preceding syntax is effectively a short cut to the following property resolver:
Recursive variable substitution
It is also possible to use a variable within a variable (recursive substitution). For example, the dosgiprofile's io.fabric8.dosgi.properties resource defines the following property:
How to reference the current version of a resource
A potential problem arises with ZooKeeper property resolver if you need to reference a ZooKeeper nodethat has a version number embedded in it. For example, suppose you want to reference the my-profile profile's my-resource resource, which can be done using the following ZooKeeper URL:
remoteRepositories=${profile:io.fabric8.agent/org.ops4j.pax.url.mvn.repositories}
${zk:/PathToNode}
${zk:ContainerName/Property}
${zk:/fabric/registry/containers/config/ContainerName/Property}
exportedAddress=${zk:${karaf.name}/ip}
${zk:/fabric/configs/versions/1.0/profiles/my-profile/my-resource}
APPENDIX C. PROFILE PROPERTY RESOLVERS
157

Notice that the profile version number, 1.0, is embedded in this path. But if you decide to upgrade thisprofile to version 1.1, this means you must manually edit all occurrences of this ZooKeeper URL,changing the version number to 1.1 in order to reference the upgraded resource. To avoid this extrawork, and to ensure that the resolver always references the current version of the resource, you can usethe following trick which exploits recursive variable substitution:
This works because the /fabric/configs/containers/${karaf.name} ZooKeeper nodecontains the current profile version deployed in the container.
C.6. CHECKSUM PROPERTY RESOLVER
Syntax
The checksum property resolver can be used, if you want a resource to reload automatically at run time,whenever it is updated. The checksum: scheme can be prefixed to any of the usual location URLhandlers (for example, file:, http:, profile:, zk:).
For example, the default profile defines the following checksum property in the org.ops4j.pax.webPID:
C.7. PORT PROPERTY RESOLVER
Syntax
The port property resolver is used to access the port service, which can automatically allocate an IP portwithin a specified range. It has the following syntax:
Where Min and Max specify the minimum and maximum values of the allocated IP port.
${zk:/fabric/configs/versions/${zk:/fabric/configs/containers/${karaf.name}}/profiles/my-profile/my-resource}
org.ops4j.pax.web.config.checksum=${checksum:profile\:jetty.xml}
${port:Min,Max}
Red Hat JBoss Fuse 6.3 Fabric Guide
158

APPENDIX D. TECHNOLOGY-SPECIFIC DISCOVERYMECHANISMS
Abstract
In addition to the core provisioning, configuration, and management features described above, Fabricalso provides a number of technology specific extensions.
D.1. ACTIVEMQ ENDPOINT DISCOVERY
If you were to deploy ActiveMQ brokers into a collection of standalone containers, you would have toprovide an explicit list of broker locations to any messaging clients. In the case of a cloud deployment,where servers are frequently shut down and restarted in different locations, this type of configuration isvery difficult to maintain.
Deploying the ActiveMQ brokers on a fabric, however, is much easier to manage, because you canexploit the Fabric discovery mechanism, which enables location transparency. When they start up, thebrokers register themselves with the Fabric registry. Clients can then consult the Fabric registry todiscover brokers. Moreover, because the discovery mechanism automatically detects when brokers failand when new brokers start, there is also support for real-time discovery and load balancing.
For example, in the context of a Fabric deployment, it is typically sufficient to configure clients with adiscovery URL like the following:
Where us-east represents a cluster of brokers deployed in the us-east cloud.
D.2. CAMEL ENDPOINT DISCOVERY
When deploying Camel endpoints in a cloud, it is often useful to enable location transparency for someCamel endpoints. In a dynamic cloud environment, where server machines are frequently shut down andrestarted in a different location, you might want to have the capability to reconnect routes across differenthosts. This kind of location transparency and reconnection functionality is supported by two special URIprefixes, which integrate Camel endpoints with the Fabric discovery mechanism:
fabric:
The fabric: prefix provides location transparency and load-balancing functionality for Camelendpoints. A consumer endpoint (acting like a server port), defines its endpoint URI using thefollowing syntax:
So that the Camel endpoint URI, EndpointURI, is stored in the Fabric registry under the cluster ID,ClusterID. Producer endpoints (acting like clients) can then access the Camel endpoint by specifyingjust the ClusterID, as follows:
discovery:(fabric:us-east)
fabric:ClusterID:EndpointURI
fabric:ClusterID
APPENDIX D. TECHNOLOGY-SPECIFIC DISCOVERY MECHANISMS
159

Fabric then resolves the cluster ID to the registered endpoint URI. If multiple endpoint URIs areregistered under the same cluster ID, Fabric randomly selects one of the available URIs, thusproviding load-balancing functionality.
master:
The master: prefix provides failover functionality for Camel endpoints. Two or more consumerendpoints (server ports) must register their URIs with the Fabric registry, using the following syntax:
Producer endpoints (acting like clients) can then access the failover cluster by defining a URI with thefollowing syntax:
Initially, Fabric chooses one of the consumer endpoints to be the master instance and alwaysresolves the client URIs to this master location. If the master fails, however, Fabric will fail over to oneof the other registered endpoint URIs and start resolving to that endpoint instead.
For more details, see chapter "Master Component" in "Apache Camel Component Reference".
D.3. CXF ENDPOINT DISCOVERY
For connections between Web service clients and Web services within the cloud, you have the option ofsupporting location transparency and load balancing through the Fabric discovery mechanism. Thismechanism is not supported for connections coming into the cloud, however, so that you cannotadvertise a Web service externally using this discovery mechanism.
To enable Fabric discovery on the server side, you must install the requisite Fabric load balancer featureinto the CXF bus object. When this feature is installed, all Web services created in this bus willautomatically be registered in the Fabric registry.
On the client side, you must install the fabric load balancer feature directly in the client proxy instance.The Web service client will then look up the server's location in the Fabric registry, ignoring the addressconfigured in the client endpoint (you can use a dummy value for the URL).
For more details, see chapter "Enabling High Availability in Fuse Fabric" in "Apache CXF DevelopmentGuide".
D.4. OSGI SERVICE DISCOVERY
The OSGi registry typically stores references to local services. However, it is also relatively easy toconfigure Fabric to store remote OSGi services in the Fabric registry, so that you can realize invisibleremoting of OSGi services, with support for dynamic discovery, load balancing and fail over. Fabricfollows the OSGi Remote Services specification: any service exported to the OSGi registry with the service.exported.interfaces property (having a value of * or an explicit list of interfaces toexport) is automatically exported to the Fabric registry and becomes accessible to other remotecontainers in the same fabric.
For example, to expose an OSGi service in the fabric using Blueprint XML, define the OSGi service asfollows:
master:ClusterID:EndpointURI
master:ClusterID
<blueprint xmlns="http://www.osgi.org/xmlns/blueprint/v1.0.0">
Red Hat JBoss Fuse 6.3 Fabric Guide
160

To import an OSGi service from the fabric, simply reference the OSGi service in the usual way (forexample, using Blueprint XML or through the OSGi Java API).
<bean id="theBean" class="foo.bar.Example" /> <service ref="theBean" auto-export="interfaces"> <service-properties> <entry key="service.exported.interfaces" value="*"/> </service-properties> </service></blueprint>
APPENDIX D. TECHNOLOGY-SPECIFIC DISCOVERY MECHANISMS
161