Embed Size (px)
Citation preview

Red Hat Ceph Storage 4
Installation Guide
Installing Red Hat Ceph Storage on Red Hat Enterprise Linux
Last Updated: 2020-07-31


Red Hat Ceph Storage 4 Installation Guide
Installing Red Hat Ceph Storage on Red Hat Enterprise Linux

Legal Notice
Copyright © 2020 Red Hat, Inc.
The text of and illustrations in this document are licensed by Red Hat under a Creative CommonsAttribution–Share Alike 3.0 Unported license ("CC-BY-SA"). An explanation of CC-BY-SA isavailable athttp://creativecommons.org/licenses/by-sa/3.0/. In accordance with CC-BY-SA, if you distribute this document or an adaptation of it, you mustprovide the URL for the original version.
Red Hat, as the licensor of this document, waives the right to enforce, and agrees not to assert,Section 4d of CC-BY-SA to the fullest extent permitted by applicable law.
Red Hat, Red Hat Enterprise Linux, the Shadowman logo, the Red Hat logo, JBoss, OpenShift,Fedora, the Infinity logo, and RHCE are trademarks of Red Hat, Inc., registered in the United Statesand other countries.
Linux ® is the registered trademark of Linus Torvalds in the United States and other countries.
Java ® is a registered trademark of Oracle and/or its affiliates.
XFS ® is a trademark of Silicon Graphics International Corp. or its subsidiaries in the United Statesand/or other countries.
MySQL ® is a registered trademark of MySQL AB in the United States, the European Union andother countries.
Node.js ® is an official trademark of Joyent. Red Hat is not formally related to or endorsed by theofficial Joyent Node.js open source or commercial project.
The OpenStack ® Word Mark and OpenStack logo are either registered trademarks/service marksor trademarks/service marks of the OpenStack Foundation, in the United States and othercountries and are used with the OpenStack Foundation's permission. We are not affiliated with,endorsed or sponsored by the OpenStack Foundation, or the OpenStack community.
All other trademarks are the property of their respective owners.
Abstract
This document provides instructions on installing Red Hat Ceph Storage on Red Hat EnterpriseLinux 8 running on AMD64 and Intel 64 architectures.

. . . . . . . . . . . . . . . . . . . . . . . . . . . . . . . . . . . . . . . . . . . . . . . . . . . . . . . . . . . . . . . . . . . . . . . . . . . . . . . . . . . . . . . . . . . . . . . . . . . . . . . . . . . . . . . . . . . . . . . . . . . . . . . . . . . . . . . . . . . . . . . . . . . . . . . . . . . . . . . . . . . . . . . . . . . . . . . . . . . . . . . . . . . . . . . . . . . . . . . . . . . . . . . . . . . . . . . . . . . . . . . . . . . . . . . . . . . . . . . . . . . . . . . . . . . . . . . . . . . . . . . . . . . . . . . . . . . . . . . .
. . . . . . . . . . . . . . . . . . . . . . . . . . . . . . . . . . . . . . . . . . . . . . . . . . . . . . . . . . . . . . . . . . . . . . . . . . . . . . . . . . . . . . . . . . . . . . . . . . . . . . . . . . . . . . . . . . . . . . . . . . . . . . . . . . . . . . . . . . . . . . . . . . . . . . . . . . . . . . . . . . . . . . . . . . . . . . . . . . . . . . . . . . . . . . . . . . . . . . . . . . . . . . . . . . . . . . . . . . . . . . . . . . . . . . . . . . . . . . . . . . . . . . . . . . . . . . . . . . . . . . . . . . . . . . . . . . . . . . . .
. . . . . . . . . . . . . . . . . . . . . . . . . . . . . . . . . . . . . . . . . . . . . . . . . . . . . . . . . . . . . . . . . . . . . . . . . . . . . . . . . . . . . . . . . . . . . . . . . . . . . . . . . . . . . . . . . . . . . . . . . . . . . . . . . . . . . . . . . . . . . . . . . . . . . . . . . . . . . . . . . . . . . . . . . . . . . . . . . . . . . . . . . . . . . . . . . . . . . . . . . . . . . . . . . . . . . . . . . . . . . . . . . . . . . . . . . . . . . . . . . . . . . . . . . . . . . . . . . . . . . . . . . . . . . . . . . . . . . . . .
. . . . . . . . . . . . . . . . . . . . . . . . . . . . . . . . . . . . . . . . . . . . . . . . . . . . . . . . . . . . . . . . . . . . . . . . . . . . . . . . . . . . . . . . . . . . . . . . . . . . . . . . . . . . . . . . . . . . . . . . . . . . . . . . . . . . . . . . . . . . . . . . . . . . . . . . . . . . . . . . . . . . . . . . . . . . . . . . . . . . . . . . . . . . . . . . . . . . . . . . . . . . . . . . . . . . . . . . . . . . . . . . . . . . . . . . . . . . . . . . . . . . . . . . . . . . . . . . . . . . . . . . . . . . . . . . . . . . . . . .
. . . . . . . . . . . . . . . . . . . . . . . . . . . . . . . . . . . . . . . . . . . . . . . . . . . . . . . . . . . . . . . . . . . . . . . . . . . . . . . . . . . . . . . . . . . . . . . . . . . . . . . . . . . . . . . . . . . . . . . . . . . . . . . . . . . . . . . . . . . . . . . . . . . . . . . . . . . . . . . . . . . . . . . . . . . . . . . . . . . . . . . . . . . . . . . . . . . . . . . . . . . . . . . . . . . . . . . . . . . . . . . . . . . . . . . . . . . . . . . . . . . . . . . . . . . . . . . . . . . . . . . . . . . . . . . . . . . . . . . .
Table of Contents
CHAPTER 1. WHAT IS RED HAT CEPH STORAGE?
CHAPTER 2. REQUIREMENTS FOR INSTALLING RED HAT CEPH STORAGE2.1. PREREQUISITES2.2. REQUIREMENTS CHECKLIST FOR INSTALLING RED HAT CEPH STORAGE2.3. OPERATING SYSTEM REQUIREMENTS FOR RED HAT CEPH STORAGE2.4. REGISTERING RED HAT CEPH STORAGE NODES TO THE CDN AND ATTACHING SUBSCRIPTIONS2.5. ENABLING THE RED HAT CEPH STORAGE REPOSITORIES2.6. CONSIDERATIONS FOR USING A RAID CONTROLLER WITH OSD NODES2.7. CONSIDERATIONS FOR USING NVME WITH OBJECT GATEWAY2.8. VERIFYING THE NETWORK CONFIGURATION FOR RED HAT CEPH STORAGE2.9. CONFIGURING A FIREWALL FOR RED HAT CEPH STORAGE2.10. CREATING AN ANSIBLE USER WITH SUDO ACCESS2.11. ENABLING PASSWORD-LESS SSH FOR ANSIBLE2.12. CONFIGURING ANSIBLE INVENTORY LOCATION
CHAPTER 3. INSTALLING RED HAT CEPH STORAGE USING THE COCKPIT WEB INTERFACE3.1. PREREQUISITES3.2. INSTALLATION REQUIREMENTS3.3. INSTALL AND CONFIGURE THE COCKPIT CEPH INSTALLER3.4. COPY THE COCKPIT CEPH INSTALLER SSH KEY TO ALL NODES IN THE CLUSTER3.5. LOG IN TO COCKPIT3.6. COMPLETE THE ENVIRONMENT PAGE OF THE COCKPIT CEPH INSTALLER3.7. COMPLETE THE HOSTS PAGE OF THE COCKPIT CEPH INSTALLER3.8. COMPLETE THE VALIDATE PAGE OF THE COCKPIT CEPH INSTALLER3.9. COMPLETE THE NETWORK PAGE OF THE COCKPIT CEPH INSTALLER3.10. REVIEW THE INSTALLATION CONFIGURATION3.11. DEPLOY THE CEPH CLUSTER
CHAPTER 4. INSTALLING RED HAT CEPH STORAGE USING ANSIBLE4.1. PREREQUISITES4.2. INSTALLING A RED HAT CEPH STORAGE CLUSTER4.3. CONFIGURING OSD ANSIBLE SETTINGS FOR ALL NVME STORAGE4.4. INSTALLING METADATA SERVERS4.5. INSTALLING THE CEPH CLIENT ROLE4.6. INSTALLING THE CEPH OBJECT GATEWAY4.7. CONFIGURING MULTISITE CEPH OBJECT GATEWAYS
4.7.1. Prerequisites4.7.2. Configuring a multisite Ceph Object Gateway with one realm4.7.3. Configuring a multisite Ceph Object Gateway with multiple realms4.7.4. Configuring a multisite Ceph Object Gateway with multiple realms and multiple RGW instances
4.8. DEPLOYING OSDS WITH DIFFERENT HARDWARE ON THE SAME HOST4.9. INSTALLING THE NFS-GANESHA GATEWAY4.10. UNDERSTANDING THE LIMIT OPTION4.11. THE PLACEMENT GROUP AUTOSCALER
4.11.1. Configuring the placement group autoscaler4.12. ADDITIONAL RESOURCES
CHAPTER 5. COLOCATION OF CONTAINERIZED CEPH DAEMONS5.1. HOW COLOCATION WORKS AND ITS ADVANTAGES
How Colocation Works5.2. SETTING DEDICATED RESOURCES FOR COLOCATED DAEMONS
4
66678
1214151516
202123
252525252930323640434647
5353536768697173737477828891
92939495
96969698
Table of Contents
1
. . . . . . . . . . . . . . . . . . . . . . . . . . . . . . . . . . . . . . . . . . . . . . . . . . . . . . . . . . . . . . . . . . . . . . . . . . . . . . . . . . . . . . . . . . . . . . . . . . . . . . . . . . . . . . . . . . . . . . . . . . . . . . . . . . . . . . . . . . . . . . . . . . . . . . . . . . . . . . . . . . . . . . . . . . . . . . . . . . . . . . . . . . . . . . . . . . . . . . . . . . . . . . . . . . . . . . . . . . . . . . . . . . . . . . . . . . . . . . . . . . . . . . . . . . . . . . . . . . . . . . . . . . . . . . . . . . . . . . . .
. . . . . . . . . . . . . . . . . . . . . . . . . . . . . . . . . . . . . . . . . . . . . . . . . . . . . . . . . . . . . . . . . . . . . . . . . . . . . . . . . . . . . . . . . . . . . . . . . . . . . . . . . . . . . . . . . . . . . . . . . . . . . . . . . . . . . . . . . . . . . . . . . . . . . . . . . . . . . . . . . . . . . . . . . . . . . . . . . . . . . . . . . . . . . . . . . . . . . . . . . . . . . . . . . . . . . . . . . . . . . . . . . . . . . . . . . . . . . . . . . . . . . . . . . . . . . . . . . . . . . . . . . . . . . . . . . . . . . . . .
. . . . . . . . . . . . . . . . . . . . . . . . . . . . . . . . . . . . . . . . . . . . . . . . . . . . . . . . . . . . . . . . . . . . . . . . . . . . . . . . . . . . . . . . . . . . . . . . . . . . . . . . . . . . . . . . . . . . . . . . . . . . . . . . . . . . . . . . . . . . . . . . . . . . . . . . . . . . . . . . . . . . . . . . . . . . . . . . . . . . . . . . . . . . . . . . . . . . . . . . . . . . . . . . . . . . . . . . . . . . . . . . . . . . . . . . . . . . . . . . . . . . . . . . . . . . . . . . . . . . . . . . . . . . . . . . . . . . . . . .
. . . . . . . . . . . . . . . . . . . . . . . . . . . . . . . . . . . . . . . . . . . . . . . . . . . . . . . . . . . . . . . . . . . . . . . . . . . . . . . . . . . . . . . . . . . . . . . . . . . . . . . . . . . . . . . . . . . . . . . . . . . . . . . . . . . . . . . . . . . . . . . . . . . . . . . . . . . . . . . . . . . . . . . . . . . . . . . . . . . . . . . . . . . . . . . . . . . . . . . . . . . . . . . . . . . . . . . . . . . . . . . . . . . . . . . . . . . . . . . . . . . . . . . . . . . . . . . . . . . . . . . . . . . . . . . . . . . . . . . .
. . . . . . . . . . . . . . . . . . . . . . . . . . . . . . . . . . . . . . . . . . . . . . . . . . . . . . . . . . . . . . . . . . . . . . . . . . . . . . . . . . . . . . . . . . . . . . . . . . . . . . . . . . . . . . . . . . . . . . . . . . . . . . . . . . . . . . . . . . . . . . . . . . . . . . . . . . . . . . . . . . . . . . . . . . . . . . . . . . . . . . . . . . . . . . . . . . . . . . . . . . . . . . . . . . . . . . . . . . . . . . . . . . . . . . . . . . . . . . . . . . . . . . . . . . . . . . . . . . . . . . . . . . . . . . . . . . . . . . . .
. . . . . . . . . . . . . . . . . . . . . . . . . . . . . . . . . . . . . . . . . . . . . . . . . . . . . . . . . . . . . . . . . . . . . . . . . . . . . . . . . . . . . . . . . . . . . . . . . . . . . . . . . . . . . . . . . . . . . . . . . . . . . . . . . . . . . . . . . . . . . . . . . . . . . . . . . . . . . . . . . . . . . . . . . . . . . . . . . . . . . . . . . . . . . . . . . . . . . . . . . . . . . . . . . . . . . . . . . . . . . . . . . . . . . . . . . . . . . . . . . . . . . . . . . . . . . . . . . . . . . . . . . . . . . . . . . . . . . . . .
. . . . . . . . . . . . . . . . . . . . . . . . . . . . . . . . . . . . . . . . . . . . . . . . . . . . . . . . . . . . . . . . . . . . . . . . . . . . . . . . . . . . . . . . . . . . . . . . . . . . . . . . . . . . . . . . . . . . . . . . . . . . . . . . . . . . . . . . . . . . . . . . . . . . . . . . . . . . . . . . . . . . . . . . . . . . . . . . . . . . . . . . . . . . . . . . . . . . . . . . . . . . . . . . . . . . . . . . . . . . . . . . . . . . . . . . . . . . . . . . . . . . . . . . . . . . . . . . . . . . . . . . . . . . . . . . . . . . . . . .
. . . . . . . . . . . . . . . . . . . . . . . . . . . . . . . . . . . . . . . . . . . . . . . . . . . . . . . . . . . . . . . . . . . . . . . . . . . . . . . . . . . . . . . . . . . . . . . . . . . . . . . . . . . . . . . . . . . . . . . . . . . . . . . . . . . . . . . . . . . . . . . . . . . . . . . . . . . . . . . . . . . . . . . . . . . . . . . . . . . . . . . . . . . . . . . . . . . . . . . . . . . . . . . . . . . . . . . . . . . . . . . . . . . . . . . . . . . . . . . . . . . . . . . . . . . . . . . . . . . . . . . . . . . . . . . . . . . . . . . .
. . . . . . . . . . . . . . . . . . . . . . . . . . . . . . . . . . . . . . . . . . . . . . . . . . . . . . . . . . . . . . . . . . . . . . . . . . . . . . . . . . . . . . . . . . . . . . . . . . . . . . . . . . . . . . . . . . . . . . . . . . . . . . . . . . . . . . . . . . . . . . . . . . . . . . . . . . . . . . . . . . . . . . . . . . . . . . . . . . . . . . . . . . . . . . . . . . . . . . . . . . . . . . . . . . . . . . . . . . . . . . . . . . . . . . . . . . . . . . . . . . . . . . . . . . . . . . . . . . . . . . . . . . . . . . . . . . . . . . . .
. . . . . . . . . . . . . . . . . . . . . . . . . . . . . . . . . . . . . . . . . . . . . . . . . . . . . . . . . . . . . . . . . . . . . . . . . . . . . . . . . . . . . . . . . . . . . . . . . . . . . . . . . . . . . . . . . . . . . . . . . . . . . . . . . . . . . . . . . . . . . . . . . . . . . . . . . . . . . . . . . . . . . . . . . . . . . . . . . . . . . . . . . . . . . . . . . . . . . . . . . . . . . . . . . . . . . . . . . . . . . . . . . . . . . . . . . . . . . . . . . . . . . . . . . . . . . . . . . . . . . . . . . . . . . . . . . . . . . . . .
5.3. ADDITIONAL RESOURCES
CHAPTER 6. UPGRADING A RED HAT CEPH STORAGE CLUSTER6.1. SUPPORTED RED HAT CEPH STORAGE UPGRADE SCENARIOS6.2. PREPARING FOR AN UPGRADE6.3. UPGRADING THE STORAGE CLUSTER USING ANSIBLE6.4. UPGRADING THE STORAGE CLUSTER USING THE COMMAND-LINE INTERFACE
CHAPTER 7. MANUALLY UPGRADING A RED HAT CEPH STORAGE CLUSTER AND OPERATING SYSTEM
7.1. PREREQUISITES7.2. MANUALLY UPGRADING CEPH MONITOR NODES AND THEIR OPERATING SYSTEMS7.3. MANUALLY UPGRADING CEPH OSD NODES AND THEIR OPERATING SYSTEMS7.4. MANUALLY UPGRADING CEPH OBJECT GATEWAY NODES AND THEIR OPERATING SYSTEMS7.5. MANUALLY UPGRADING THE CEPH DASHBOARD NODE AND ITS OPERATING SYSTEM7.6. RECOVERING FROM AN OPERATING SYSTEM UPGRADE FAILURE ON AN OSD NODE7.7. ADDITIONAL RESOURCES
CHAPTER 8. WHAT TO DO NEXT?
APPENDIX A. TROUBLESHOOTINGA.1. ANSIBLE STOPS INSTALLATION BECAUSE IT DETECTS LESS DEVICES THAN EXPECTED
APPENDIX B. USING THE COMMAND-LINE INTERFACE TO INSTALL THE CEPH SOFTWAREB.1. INSTALLING THE CEPH COMMAND LINE INTERFACEB.2. MANUALLY INSTALLING RED HAT CEPH STORAGE
Monitor BootstrappingOSD Bootstrapping
B.3. MANUALLY INSTALLING CEPH MANAGERB.4. MANUALLY INSTALLING CEPH BLOCK DEVICEB.5. MANUALLY INSTALLING CEPH OBJECT GATEWAY
APPENDIX C. OVERRIDING CEPH DEFAULT SETTINGS
APPENDIX D. IMPORTING AN EXISTING CEPH CLUSTER TO ANSIBLE
APPENDIX E. PURGING STORAGE CLUSTERS DEPLOYED BY ANSIBLE
APPENDIX F. GENERAL ANSIBLE SETTINGS
APPENDIX G. OSD ANSIBLE SETTINGS
99
100101102105
111
114114114117121123124126
127
128128
129129129130135139140143
146
147
148
150
153
Red Hat Ceph Storage 4 Installation Guide
2

Table of Contents
3

CHAPTER 1. WHAT IS RED HAT CEPH STORAGE?Red Hat Ceph Storage is a scalable, open, software-defined storage platform that combines anenterprise-hardened version of the Ceph storage system with a Ceph management platform,deployment utilities, and support services.
Red Hat Ceph Storage is designed for cloud infrastructure and web-scale object storage. Red Hat CephStorage clusters consist of the following types of nodes:
Red Hat Ceph Storage Ansible administration
This type of node acts as the traditional Ceph Administration node did for previous versions of Red HatCeph Storage. This type of node provides the following functions:
Centralized storage cluster management.
The Ceph configuration files and keys.
Optionally, local repositories for installing Ceph on nodes that cannot access the Internet forsecurity reasons.
Ceph Monitor
Each Ceph Monitor node runs the ceph-mon daemon, which maintains a master copy of the storagecluster map. The storage cluster map includes the storage cluster topology. A client connecting to theCeph storage cluster retrieves the current copy of the storage cluster map from the Ceph Monitor,which enables the client to read from and write data to the storage cluster.
IMPORTANT
The storage cluster can run with only one Ceph Monitor; however, to ensure highavailability in a production storage cluster, Red Hat will only support deployments with atleast three Ceph Monitor nodes. Red Hat recommends deploying a total of 5 CephMonitors for storage clusters exceeding 750 Ceph OSDs.
Ceph OSD
Each Ceph Object Storage Device (OSD) node runs the ceph-osd daemon, which interacts with logicaldisks attached to the node. The storage cluster stores data on these Ceph OSD nodes.
Ceph can run with very few OSD nodes, which the default is three, but production storage clustersrealize better performance beginning at modest scales. For example, 50 Ceph OSDs in a storage cluster.Ideally, a Ceph storage cluster has multiple OSD nodes, allowing for the possibility to isolate failuredomains by configuring the CRUSH map accordingly.
Ceph MDS
Each Ceph Metadata Server (MDS) node runs the ceph-mds daemon, which manages metadata relatedto files stored on the Ceph File System (CephFS). The Ceph MDS daemon also coordinates access tothe shared storage cluster.
Ceph Object Gateway
Ceph Object Gateway node runs the ceph-radosgw daemon, and is an object storage interface built ontop of librados to provide applications with a RESTful access point to the Ceph storage cluster. TheCeph Object Gateway supports two interfaces:
Red Hat Ceph Storage 4 Installation Guide
4

S3Provides object storage functionality with an interface that is compatible with a large subset ofthe Amazon S3 RESTful API.
SwiftProvides object storage functionality with an interface that is compatible with a large subset ofthe OpenStack Swift API.
Additional Resources
For details on the Ceph architecture, see the Red Hat Ceph Storage Architecture Guide.
For the minimum hardware recommendations, see the Red Hat Ceph Storage HardwareSelection Guide.
CHAPTER 1. WHAT IS RED HAT CEPH STORAGE?
5

CHAPTER 2. REQUIREMENTS FOR INSTALLING RED HATCEPH STORAGE
Figure 2.1. Prerequisite Workflow
Before installing Red Hat Ceph Storage, review the following requirements and prepare each Monitor,OSD, Metadata Server, and client nodes accordingly.
2.1. PREREQUISITES
Verify the hardware meets the minimum requirements for Red Hat Ceph Storage 4.
2.2. REQUIREMENTS CHECKLIST FOR INSTALLING RED HAT CEPHSTORAGE
Task Required Section Recommendation
Verifying theoperating systemversion
Yes Section 2.3,“Operating systemrequirements for RedHat Ceph Storage”
Registering Cephnodes
Yes Section 2.4,“Registering Red HatCeph Storage nodesto the CDN andattachingsubscriptions”
Enabling Cephsoftware repositories
Yes Section 2.5, “Enablingthe Red Hat CephStorage repositories”
Using a RAIDcontroller with OSDnodes
No Section 2.6,“Considerations forusing a RAIDcontroller with OSDnodes”
Enabling write-back caches on a RAIDcontroller might result in increasedsmall I/O write throughput for OSDnodes.
Red Hat Ceph Storage 4 Installation Guide
6

Configuring thenetwork
Yes Section 2.8, “Verifyingthe networkconfiguration for RedHat Ceph Storage”
At minimum, a public network isrequired. However, a private networkfor cluster communication isrecommended.
Configuring a firewall No Section 2.9,“Configuring a firewallfor Red Hat CephStorage”
A firewall can increase the level oftrust for a network.
Creating an Ansibleuser
Yes Section 2.10,“Creating an Ansibleuser with sudoaccess”
Creating the Ansible user is requiredon all Ceph nodes.
Enabling password-less SSH
Yes Section 2.11, “Enablingpassword-less SSHfor Ansible”
Required for Ansible.
Task Required Section Recommendation
NOTE
By default, ceph-ansible installs NTP/chronyd as a requirement. If NTP/chronyd iscustomized, refer to Configuring the Network Time Protocol for Red Hat Ceph Storage inManually Installing Red Hat Ceph Storage section to understand how NTP/chronyd mustbe configured to function properly with Ceph.
2.3. OPERATING SYSTEM REQUIREMENTS FOR RED HAT CEPHSTORAGE
Red Hat Ceph Storage 4 is supported on Red Hat Enterprise Linux 7 or Red Hat Enterprise Linux 8. Ifusing Red Hat Enterprise Linux 7, use 7.7 or higher. If using Red Hat Enterprise Linux 8, use 8.1 or higher.
Red Hat Ceph Storage 4 is supported on RPM-based deployments or container-based deployments.
IMPORTANT
Deploying Red Hat Ceph Storage 4 in containers on Red Hat Enterprise Linux 7.7 willdeploy Red Hat Ceph Storage 4 on a Red Hat Enterprise Linux 8 container image.
Use the same operating system version, architecture, and deployment type across all nodes. Forexample, do not use a mixture of nodes with both AMD64 and Intel 64 architectures, a mixture of nodeswith both Red Hat Enterprise Linux 7 and Red Hat Enterprise Linux 8 operating systems, or a mixture ofnodes with both RPM-based deployments and container-based deployments.
IMPORTANT
CHAPTER 2. REQUIREMENTS FOR INSTALLING RED HAT CEPH STORAGE
7

IMPORTANT
Red Hat does not support clusters with heterogeneous architectures, operating systemversions, or deployment types.
SELinux
By default, SELinux is set to Enforcing mode and the ceph-selinux packages are installed. Foradditional information on SELinux please see the Data Security and Hardening Guide , Red Hat EnterpriseLinux 7 SELinux User’s and Administrator’s Guide, and Red Hat Enterprise Linux 8 Using SELinux Guide .
Additional Resources
The documentation set for Red Hat Enterprise Linux 8 is available athttps://access.redhat.com/documentation/en-us/red_hat_enterprise_linux/8/
The documentation set for Red Hat Enterprise Linux 7 is available athttps://access.redhat.com/documentation/en-us/red_hat_enterprise_linux/7/.
Return to requirements checklist
2.4. REGISTERING RED HAT CEPH STORAGE NODES TO THE CDNAND ATTACHING SUBSCRIPTIONS
Register each Red Hat Ceph Storage node to the Content Delivery Network (CDN) and attach theappropriate subscription so that the node has access to software repositories. Each Red HatCeph Storage node must be able to access the full Red Hat Enterprise Linux 8 base content and theextras repository content. Perform the following steps on all bare-metal and container nodes in thestorage cluster, unless otherwise noted.
NOTE
For bare-metal Red Hat Ceph Storage nodes that cannot access the Internet during theinstallation, provide the software content by using the Red Hat Satellite server.Alternatively, mount a local Red Hat Enterprise Linux 8 Server ISO image and point theRed Hat Ceph Storage nodes to the ISO image. For additional details, contact Red HatSupport.
For more information on registering Ceph nodes with the Red Hat Satellite server, seethe How to Register Ceph with Satellite 6 and How to Register Ceph with Satellite 5articles on the Red Hat Customer Portal.
Prerequisites
A valid Red Hat subscription.
Red Hat Ceph Storage nodes must be able to connect to the Internet.
Root-level access to the Red Hat Ceph Storage nodes.
Procedure
1. For container deployments only, when the Red Hat Ceph Storage nodes do NOT have access
Red Hat Ceph Storage 4 Installation Guide
8

1. For container deployments only, when the Red Hat Ceph Storage nodes do NOT have accessto the Internet during deployment. You must follow these steps first on a node with Internetaccess:
a. Start a local Docker registry:
Red Hat Enterprise Linux 7
# docker run -d -p 5000:5000 --restart=always --name registry registry:2
Red Hat Enterprise Linux 8
# podman run -d -p 5000:5000 --restart=always --name registry registry:2
b. Verify registry.redhat.io is in the container registry search path.Open for editing the /etc/containers/registries.conf file:
[registries.search]registries = [ 'registry.access.redhat.com', 'registry.fedoraproject.org', 'registry.centos.org', 'docker.io']
If registry.redhat.io is not included in the file, add it:
[registries.search]registries = ['registry.redhat.io', 'registry.access.redhat.com', 'registry.fedoraproject.org', 'registry.centos.org', 'docker.io']
c. Pull the Red Hat Ceph Storage 4 image, Prometheus image, and Dashboard image from theRed Hat Customer Portal:
Red Hat Enterprise Linux 7
# docker pull registry.redhat.io/rhceph/rhceph-4-rhel8# docker pull registry.redhat.io/openshift4/ose-prometheus-node-exporter:v4.1# docker pull registry.redhat.io/rhceph/rhceph-4-dashboard-rhel8# docker pull registry.redhat.io/openshift4/ose-prometheus:4.1# docker pull registry.redhat.io/openshift4/ose-prometheus-alertmanager:4.1
Red Hat Enterprise Linux 8
# podman pull registry.redhat.io/rhceph/rhceph-4-rhel8# podman pull registry.redhat.io/openshift4/ose-prometheus-node-exporter:v4.1# podman pull registry.redhat.io/rhceph/rhceph-4-dashboard-rhel8# podman pull registry.redhat.io/openshift4/ose-prometheus:4.1# podman pull registry.redhat.io/openshift4/ose-prometheus-alertmanager:4.1
NOTE
Red Hat Enterprise Linux 7 and 8 both use the same container image, basedon Red Hat Enterprise Linux 8.
d. Tag the image:
CHAPTER 2. REQUIREMENTS FOR INSTALLING RED HAT CEPH STORAGE
9

Red Hat Enterprise Linux 7
# docker tag registry.redhat.io/rhceph/rhceph-4-rhel8 LOCAL_NODE_FQDN:5000/rhceph/rhceph-4-rhel8 # docker tag registry.redhat.io/openshift4/ose-prometheus-node-exporter:v4.1 LOCAL_NODE_FQDN:5000/openshift4/ose-prometheus-node-exporter:v4.1 # docker tag registry.redhat.io/rhceph/rhceph-4-dashboard-rhel8 LOCAL_NODE_FQDN:5000/rhceph/rhceph-4-dashboard-rhel8 # docker tag registry.redhat.io/openshift4/ose-prometheus-alertmanager:4.1 LOCAL_NODE_FQDN:5000/openshift4/ose-prometheus-alertmanager:4.1 # docker tag registry.redhat.io/openshift4/ose-prometheus:4.1 LOCAL_NODE_FQDN:5000/openshift4/ose-prometheus:4.1
Replace
LOCAL_NODE_FQDN with your local host FQDN.
Red Hat Enterprise Linux 8
# podman tag registry.redhat.io/rhceph/rhceph-4-rhel8 LOCAL_NODE_FQDN:5000/rhceph/rhceph-4-rhel8 # podman tag registry.redhat.io/openshift4/ose-prometheus-node-exporter:v4.1 LOCAL_NODE_FQDN:5000/openshift4/ose-prometheus-node-exporter:v4.1 # podman tag registry.redhat.io/rhceph/rhceph-4-dashboard-rhel8 LOCAL_NODE_FQDN:5000/rhceph/rhceph-4-dashboard-rhel8 # podman tag registry.redhat.io/openshift4/ose-prometheus-alertmanager:4.1 LOCAL_NODE_FQDN:5000/openshift4/ose-prometheus-alertmanager:4.1 # podman tag registry.redhat.io/openshift4/ose-prometheus:4.1 LOCAL_NODE_FQDN:5000/openshift4/ose-prometheus:4.1
Replace
LOCAL_NODE_FQDN with your local host FQDN.
e. Push the image to the local Docker registry you started:
Red Hat Enterprise Linux 7
# docker push LOCAL_NODE_FQDN:5000/rhceph/rhceph-4-rhel8 # docker push LOCAL_NODE_FQDN:5000/openshift4/ose-prometheus-node-exporter:v4.1 # docker push LOCAL_NODE_FQDN:5000/rhceph/rhceph-4-dashboard-rhel8 # docker push LOCAL_NODE_FQDN:5000/openshift4/ose-prometheus-alertmanager:4.1 # docker push LOCAL_NODE_FQDN:5000/openshift4/ose-prometheus:4.1
Replace
LOCAL_NODE_FQDN with your local host FQDN.
Red Hat Enterprise Linux 8
Red Hat Ceph Storage 4 Installation Guide
10

# podman push LOCAL_NODE_FQDN:5000/rhceph/rhceph-4-rhel8 # podman push LOCAL_NODE_FQDN:5000/openshift4/ose-prometheus-node-exporter:v4.1 # podman push LOCAL_NODE_FQDN:5000/rhceph/rhceph-4-dashboard-rhel8 # podman push LOCAL_NODE_FQDN:5000/openshift4/ose-prometheus-alertmanager:4.1 # podman push LOCAL_NODE_FQDN:5000/openshift4/ose-prometheus:4.1
Replace
LOCAL_NODE_FQDN with your local host FQDN.
f. Edit the /etc/containers/registries.conf file and add the host FQDN with the port in thefile, and save:
[registries.insecure]registries = ['LOCAL_NODE_FQDN:5000']
g. For Red Hat Enterprise Linux 7, restart the docker service:
# systemctl restart docker
NOTE
See the Installing a Red Hat Ceph Storage cluster for an example of the all.yml file when the Red Hat Ceph Storage nodes do NOT have access tothe Internet during deployment.
2. For all deployments, bare-metal or in containers:
a. Register the node, and when prompted, enter the appropriate Red Hat Customer Portalcredentials:
# subscription-manager register
b. Pull the latest subscription data from the CDN:
# subscription-manager refresh
c. List all available subscriptions for Red Hat Ceph Storage:
# subscription-manager list --available --all --matches="*Ceph*"
Identify the appropriate subscription and retrieve its Pool ID.
d. Attach the subscription:
# subscription-manager attach --pool=POOL_ID
Replace
POOL_ID with the Pool ID identified in the previous step.
e. Disable the default software repositories, and enable the server and the extras repositories
CHAPTER 2. REQUIREMENTS FOR INSTALLING RED HAT CEPH STORAGE
11

e. Disable the default software repositories, and enable the server and the extras repositorieson the respective version of Red Hat Enterprise Linux:
Red Hat Enterprise Linux 7
# subscription-manager repos --disable=*# subscription-manager repos --enable=rhel-7-server-rpms# subscription-manager repos --enable=rhel-7-server-extras-rpms
Red Hat Enterprise Linux 8
# subscription-manager repos --disable=*# subscription-manager repos --enable=rhel-8-for-x86_64-baseos-rpms# subscription-manager repos --enable=rhel-8-for-x86_64-appstream-rpms
3. Update the system to receive the latest packages.
a. For Red Hat Enterprise Linux 7:
# yum update
b. For Red Hat Enterprise Linux 8:
# dnf update
Additional Resources
See the Using and Configuring Red Hat Subscription Manager guide for Red Hat SubscriptionManagement.
See the Enabling the Red Hat Ceph Storage repositories .
Return to requirements checklist
2.5. ENABLING THE RED HAT CEPH STORAGE REPOSITORIES
Before you can install Red Hat Ceph Storage, you must choose an installation method. Red HatCeph Storage supports two installation methods:
Content Delivery Network (CDN)For Ceph Storage clusters with Ceph nodes that can connect directly to the internet, use RedHat Subscription Manager to enable the required Ceph repository.
Local RepositoryFor Ceph Storage clusters where security measures preclude nodes from accessing theinternet, install Red Hat Ceph Storage 4 from a single software build delivered as an ISO image,which will allow you to install local repositories.
Prerequisites
Valid customer subscription.
For CDN installations:
Red Hat Ceph Storage 4 Installation Guide
12
Red Hat Ceph Storage nodes must be able to connect to the internet.
Register the cluster nodes with CDN.
If enabled, then disable the Extra Packages for Enterprise Linux (EPEL) software repository:
[root@monitor ~]# yum install yum-utils vim -y[root@monitor ~]# yum-config-manager --disable epel
Procedure
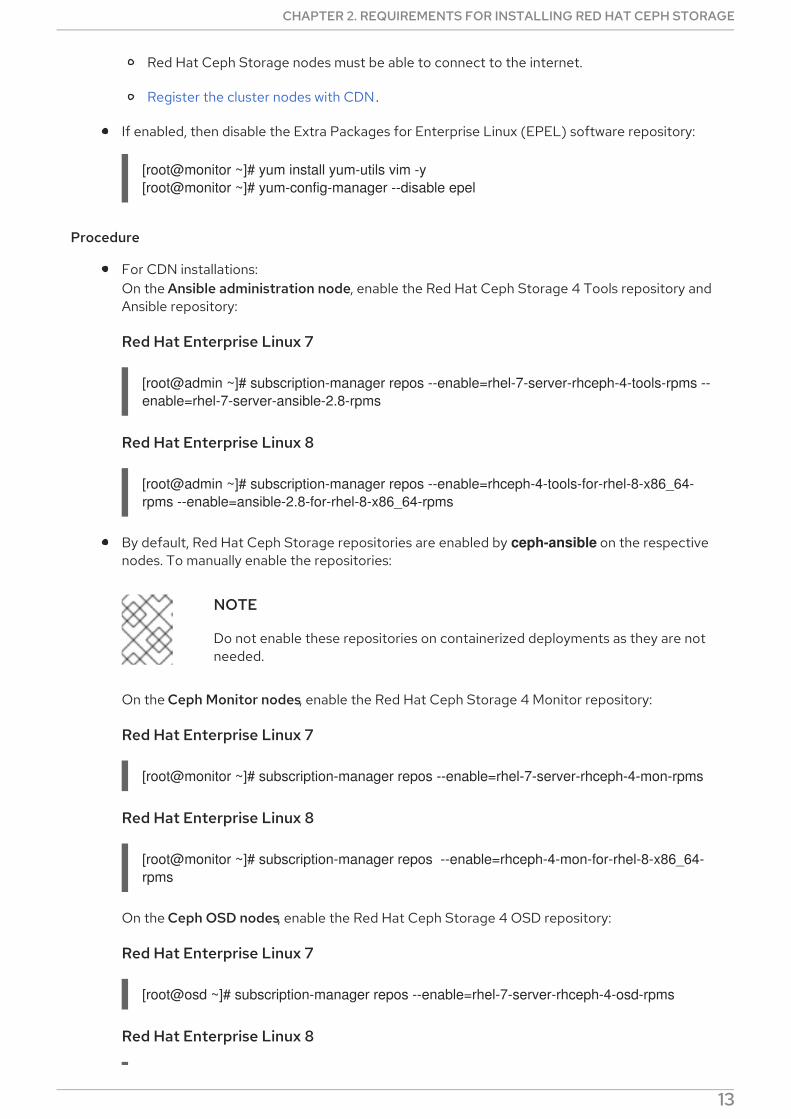
For CDN installations:On the Ansible administration node, enable the Red Hat Ceph Storage 4 Tools repository andAnsible repository:
Red Hat Enterprise Linux 7
[root@admin ~]# subscription-manager repos --enable=rhel-7-server-rhceph-4-tools-rpms --enable=rhel-7-server-ansible-2.8-rpms
Red Hat Enterprise Linux 8
[root@admin ~]# subscription-manager repos --enable=rhceph-4-tools-for-rhel-8-x86_64-rpms --enable=ansible-2.8-for-rhel-8-x86_64-rpms
By default, Red Hat Ceph Storage repositories are enabled by ceph-ansible on the respectivenodes. To manually enable the repositories:
NOTE
Do not enable these repositories on containerized deployments as they are notneeded.
On the Ceph Monitor nodes, enable the Red Hat Ceph Storage 4 Monitor repository:
Red Hat Enterprise Linux 7
[root@monitor ~]# subscription-manager repos --enable=rhel-7-server-rhceph-4-mon-rpms
Red Hat Enterprise Linux 8
[root@monitor ~]# subscription-manager repos --enable=rhceph-4-mon-for-rhel-8-x86_64-rpms
On the Ceph OSD nodes, enable the Red Hat Ceph Storage 4 OSD repository:
Red Hat Enterprise Linux 7
[root@osd ~]# subscription-manager repos --enable=rhel-7-server-rhceph-4-osd-rpms
Red Hat Enterprise Linux 8
CHAPTER 2. REQUIREMENTS FOR INSTALLING RED HAT CEPH STORAGE
13

[root@osd ~]# subscription-manager repos --enable=rhceph-4-osd-for-rhel-8-x86_64-rpms
Enable the Red Hat Ceph Storage 4 Tools repository on the following node types: RBDmirroring, Ceph clients, Ceph Object Gateways, Metadata Servers, NFS, iSCSI gateways, andDashboard servers.
Red Hat Enterprise Linux 7
[root@client ~]# subscription-manager repos --enable=rhel-7-server-rhceph-4-tools-rpms
Red Hat Enterprise Linux 8
[root@client ~]# subscription-manager repos --enable=rhceph-4-tools-for-rhel-8-x86_64-rpms
For ISO installations:
1. Log in to the Red Hat Customer Portal.
2. Click Downloads to visit the Software & Download center.
3. In the Red Hat Ceph Storage area, click Download Software to download the latest versionof the software.
Additional Resources
The Using and Configuring Red Hat Subscription Manager guide for Red Hat SubscriptionManagement 1
Return to requirements checklist
2.6. CONSIDERATIONS FOR USING A RAID CONTROLLER WITH OSDNODES
Optionally, you can consider using a RAID controller on the OSD nodes. Here are some things toconsider:
If an OSD node has a RAID controller with 1-2GB of cache installed, enabling the write-backcache might result in increased small I/O write throughput. However, the cache must be non-volatile.
Most modern RAID controllers have super capacitors that provide enough power to drainvolatile memory to non-volatile NAND memory during a power-loss event. It is important tounderstand how a particular controller and its firmware behave after power is restored.
Some RAID controllers require manual intervention. Hard drives typically advertise to theoperating system whether their disk caches should be enabled or disabled by default. However,certain RAID controllers and some firmware do not provide such information. Verify that disklevel caches are disabled to avoid file system corruption.
Create a single RAID 0 volume with write-back for each Ceph OSD data drive with write-backcache enabled.
If Serial Attached SCSI (SAS) or SATA connected Solid-state Drive (SSD) disks are also present
Red Hat Ceph Storage 4 Installation Guide
14

on the RAID controller, then investigate whether the controller and firmware support pass-through mode. Enabling pass-through mode helps avoid caching logic, and generally results inmuch lower latency for fast media.
Return to requirements checklist
2.7. CONSIDERATIONS FOR USING NVME WITH OBJECT GATEWAY
Optionally, you can consider using NVMe for the Ceph Object Gateway.
If you plan to use the object gateway feature of Red Hat Ceph Storage and the OSD nodes are usingNVMe-based SSDs, then consider following the procedures found in the Using NVMe with LVMoptimally section of the Ceph Object Gateway for Production Guide . These procedures explain how touse specially designed Ansible playbooks which will place journals and bucket indexes together on SSDs,which can increase performance compared to having all journals on one device.
Return to requirements checklist
2.8. VERIFYING THE NETWORK CONFIGURATION FOR RED HAT CEPHSTORAGE
All Red Hat Ceph Storage nodes require a public network. You must have a network interface cardconfigured to a public network where Ceph clients can reach Ceph monitors and Ceph OSD nodes.
You might have a network interface card for a cluster network so that Ceph can conduct heart-beating,peering, replication, and recovery on a network separate from the public network.
Configure the network interface settings and ensure to make the changes persistent.
IMPORTANT
Red Hat does not recommend using a single network interface card for both a public andprivate network.
Prerequisites
Network interface card connected to the network.
Procedure
Do the following steps on all Red Hat Ceph Storage nodes in the storage cluster, as the root user.
1. Verify the following settings are in the /etc/sysconfig/network-scripts/ifcfg-* filecorresponding the public-facing network interface card:
a. The BOOTPROTO parameter is set to none for static IP addresses.
b. The ONBOOT parameter must be set to yes.If it is set to no, the Ceph storage cluster might fail to peer on reboot.
c. If you intend to use IPv6 addressing, you must set the IPv6 parameters such as IPV6INIT to yes, except the IPV6_FAILURE_FATAL parameter.Also, edit the Ceph configuration file, /etc/ceph/ceph.conf, to instruct Ceph to use IPv6,otherwise, Ceph uses IPv4.
Additional Resources
CHAPTER 2. REQUIREMENTS FOR INSTALLING RED HAT CEPH STORAGE
15

Additional Resources
For details on configuring network interface scripts for Red Hat Enterprise Linux 8, see theConfiguring ip networking with ifcfg files chapter in the Configuring and managing networkingguide for Red Hat Enterprise Linux 8.
For more information on network configuration see the Network Configuration Referencechapter in the Configuration Guide for Red Hat Ceph Storage 4.
Return to requirements checklist
2.9. CONFIGURING A FIREWALL FOR RED HAT CEPH STORAGE
Red Hat Ceph Storage uses the firewalld service.
The Monitor daemons use port 6789 for communication within the Ceph storage cluster.
On each Ceph OSD node, the OSD daemons use several ports in the range 6800-7300:
One for communicating with clients and monitors over the public network
One for sending data to other OSDs over a cluster network, if available; otherwise, over thepublic network
One for exchanging heartbeat packets over a cluster network, if available; otherwise, over thepublic network
The Ceph Manager (ceph-mgr) daemons use ports in range 6800-7300. Consider colocating the ceph-mgr daemons with Ceph Monitors on same nodes.
The Ceph Metadata Server nodes (ceph-mds) use port range 6800-7300.
The Ceph Object Gateway nodes are configured by Ansible to use port 8080 by default. However, youcan change the default port, for example to port 80.
To use the SSL/TLS service, open port 443.
The following steps are optional if firewalld is enabled. By default, ceph-ansible includes the belowsetting in group_vars/all.yml, which automatically opens the appropriate ports:
configure_firewall: True
Prerequisite
Network hardware is connected.
Having root or sudo access to all nodes in the storage cluster.
Procedure
1. On all nodes in the storage cluster, start the firewalld service. Enable it to run on boot, andensure that it is running:
# systemctl enable firewalld# systemctl start firewalld# systemctl status firewalld
Red Hat Ceph Storage 4 Installation Guide
16

2. On all monitor nodes, open port 6789 on the public network:
[root@monitor ~]# firewall-cmd --zone=public --add-port=6789/tcp[root@monitor ~]# firewall-cmd --zone=public --add-port=6789/tcp --permanent
To limit access based on the source address:
firewall-cmd --zone=public --add-rich-rule="rule family="ipv4" \source address="IP_ADDRESS/NETMASK_PREFIX" port protocol="tcp" \port="6789" accept"
firewall-cmd --zone=public --add-rich-rule="rule family="ipv4" \source address="IP_ADDRESS/NETMASK_PREFIX" port protocol="tcp" \port="6789" accept" --permanent
Replace
IP_ADDRESS with the network address of the Monitor node.
NETMASK_PREFIX with the netmask in CIDR notation.
Example
[root@monitor ~]# firewall-cmd --zone=public --add-rich-rule="rule family="ipv4" \source address="192.168.0.11/24" port protocol="tcp" \port="6789" accept"
[root@monitor ~]# firewall-cmd --zone=public --add-rich-rule="rule family="ipv4" \source address="192.168.0.11/24" port protocol="tcp" \port="6789" accept" --permanent
3. On all OSD nodes, open ports 6800-7300 on the public network:
[root@osd ~]# firewall-cmd --zone=public --add-port=6800-7300/tcp[root@osd ~]# firewall-cmd --zone=public --add-port=6800-7300/tcp --permanent
If you have a separate cluster network, repeat the commands with the appropriate zone.
4. On all Ceph Manager (ceph-mgr) nodes, open ports 6800-7300 on the public network:
[root@monitor ~]# firewall-cmd --zone=public --add-port=6800-7300/tcp[root@monitor ~]# firewall-cmd --zone=public --add-port=6800-7300/tcp --permanent
If you have a separate cluster network, repeat the commands with the appropriate zone.
5. On all Ceph Metadata Server (ceph-mds) nodes, open ports 6800-7300 on the public network:
[root@monitor ~]# firewall-cmd --zone=public --add-port=6800-7300/tcp[root@monitor ~]# firewall-cmd --zone=public --add-port=6800-7300/tcp --permanent
If you have a separate cluster network, repeat the commands with the appropriate zone.
CHAPTER 2. REQUIREMENTS FOR INSTALLING RED HAT CEPH STORAGE
17

6. On all Ceph Object Gateway nodes, open the relevant port or ports on the public network.
a. To open the default Ansible configured port of 8080:
[root@gateway ~]# firewall-cmd --zone=public --add-port=8080/tcp[root@gateway ~]# firewall-cmd --zone=public --add-port=8080/tcp --permanent
To limit access based on the source address:
firewall-cmd --zone=public --add-rich-rule="rule family="ipv4" \source address="IP_ADDRESS/NETMASK_PREFIX" port protocol="tcp" \port="8080" accept"
firewall-cmd --zone=public --add-rich-rule="rule family="ipv4" \source address="IP_ADDRESS/NETMASK_PREFIX" port protocol="tcp" \port="8080" accept" --permanent
Replace
IP_ADDRESS with the network address of the Monitor node.
NETMASK_PREFIX with the netmask in CIDR notation.
Example
[root@gateway ~]# firewall-cmd --zone=public --add-rich-rule="rule family="ipv4" \source address="192.168.0.31/24" port protocol="tcp" \port="8080" accept"
[root@gateway ~]# firewall-cmd --zone=public --add-rich-rule="rule family="ipv4" \source address="192.168.0.31/24" port protocol="tcp" \port="8080" accept" --permanent
b. Optionally, if you installed Ceph Object Gateway using Ansible and changed the default portthat Ansible configures the Ceph Object Gateway to use from 8080, for example, to port 80,then open this port:
[root@gateway ~]# firewall-cmd --zone=public --add-port=80/tcp[root@gateway ~]# firewall-cmd --zone=public --add-port=80/tcp --permanent
To limit access based on the source address, run the following commands:
firewall-cmd --zone=public --add-rich-rule="rule family="ipv4" \source address="IP_ADDRESS/NETMASK_PREFIX" port protocol="tcp" \port="80" accept"
firewall-cmd --zone=public --add-rich-rule="rule family="ipv4" \source address="IP_ADDRESS/NETMASK_PREFIX" port protocol="tcp" \port="80" accept" --permanent
Red Hat Ceph Storage 4 Installation Guide
18

Replace
IP_ADDRESS with the network address of the Monitor node.
NETMASK_PREFIX with the netmask in CIDR notation.
Example
[root@gateway ~]# firewall-cmd --zone=public --add-rich-rule="rule family="ipv4" \source address="192.168.0.31/24" port protocol="tcp" \port="80" accept"
[root@gateway ~]# firewall-cmd --zone=public --add-rich-rule="rule family="ipv4" \source address="192.168.0.31/24" port protocol="tcp" \port="80" accept" --permanent
c. Optional. To use SSL/TLS, open port 443:
[root@gateway ~]# firewall-cmd --zone=public --add-port=443/tcp[root@gateway ~]# firewall-cmd --zone=public --add-port=443/tcp --permanent
To limit access based on the source address, run the following commands:
firewall-cmd --zone=public --add-rich-rule="rule family="ipv4" \source address="IP_ADDRESS/NETMASK_PREFIX" port protocol="tcp" \port="443" accept"
firewall-cmd --zone=public --add-rich-rule="rule family="ipv4" \source address="IP_ADDRESS/NETMASK_PREFIX" port protocol="tcp" \port="443" accept" --permanent
Replace
IP_ADDRESS with the network address of the Monitor node.
NETMASK_PREFIX with the netmask in CIDR notation.
Example
[root@gateway ~]# firewall-cmd --zone=public --add-rich-rule="rule family="ipv4" \source address="192.168.0.31/24" port protocol="tcp" \port="443" accept"[root@gateway ~]# firewall-cmd --zone=public --add-rich-rule="rule family="ipv4" \source address="192.168.0.31/24" port protocol="tcp" \port="443" accept" --permanent
Additional Resources
For more information about public and cluster network, see Verifying the NetworkConfiguration for Red Hat Ceph Storage.
For additional details on firewalld, see the Using and configuring firewalls chapter in the
CHAPTER 2. REQUIREMENTS FOR INSTALLING RED HAT CEPH STORAGE
19

For additional details on firewalld, see the Using and configuring firewalls chapter in theSecuring networks guide for Red Hat Enterprise Linux 8.
Return to requirements checklist
2.10. CREATING AN ANSIBLE USER WITH SUDO ACCESS
Ansible must be able to log into all the Red Hat Ceph Storage (RHCS) nodes as a user that has rootprivileges to install software and create configuration files without prompting for a password. You mustcreate an Ansible user with password-less root access on all nodes in the storage cluster whendeploying and configuring a Red Hat Ceph Storage cluster with Ansible.
Prerequisite
Having root or sudo access to all nodes in the storage cluster.
Procedure
1. Log into the node as the root user:
ssh root@HOST_NAME
Replace
HOST_NAME with the host name of the Ceph node.
Example
# ssh root@mon01
Enter the root password when prompted.
2. Create a new Ansible user:
adduser USER_NAME
Replace
USER_NAME with the new user name for the Ansible user.
Example
# adduser admin
IMPORTANT
Do not use ceph as the user name. The ceph user name is reserved forthe Ceph daemons. A uniform user name across the cluster can improveease of use, but avoid using obvious user names, because intruderstypically use them for brute-force attacks.
Red Hat Ceph Storage 4 Installation Guide
20

3. Set a new password for this user:
# passwd USER_NAME
Replace
USER_NAME with the new user name for the Ansible user.
Example
# passwd admin
Enter the new password twice when prompted.
4. Configure sudo access for the newly created user:
cat << EOF >/etc/sudoers.d/USER_NAME$USER_NAME ALL = (root) NOPASSWD:ALLEOF
Replace
USER_NAME with the new user name for the Ansible user.
Example
# cat << EOF >/etc/sudoers.d/adminadmin ALL = (root) NOPASSWD:ALLEOF
5. Assign the correct file permissions to the new file:
chmod 0440 /etc/sudoers.d/USER_NAME
Replace
USER_NAME with the new user name for the Ansible user.
Example
# chmod 0440 /etc/sudoers.d/admin
Additional Resources
The Managing user accounts section in the Configuring basic system settings guide Red HatEnterprise Linux 8
Return to requirements checklist
2.11. ENABLING PASSWORD-LESS SSH FOR ANSIBLE
CHAPTER 2. REQUIREMENTS FOR INSTALLING RED HAT CEPH STORAGE
21

Generate an SSH key pair on the Ansible administration node and distribute the public key to each nodein the storage cluster so that Ansible can access the nodes without being prompted for a password.
NOTE
This procedure is not required if installing Red Hat Ceph Storage using the Cockpit web-based interface. This is because the Cockpit Ceph Installer generates its own SSH key.Instructions for copying the Cockpit SSH key to all nodes in the cluster are in the chapterInstalling Red Hat Ceph Storage using the Cockpit web interface .
Prerequisites
Access to the Ansible administration node.
Creating an Ansible user with sudo access.
Procedure
1. Generate the SSH key pair, accept the default file name and leave the passphrase empty:
[ansible@admin ~]$ ssh-keygen
2. Copy the public key to all nodes in the storage cluster:
ssh-copy-id USER_NAME@HOST_NAME
Replace
USER_NAME with the new user name for the Ansible user.
HOST_NAME with the host name of the Ceph node.
Example
[ansible@admin ~]$ ssh-copy-id ceph-admin@ceph-mon01
3. Create the user’s SSH config file:
[ansible@admin ~]$ touch ~/.ssh/config
4. Open for editing the config file. Set values for the Hostname and User options for each nodein the storage cluster:
Host node1 Hostname HOST_NAME User USER_NAMEHost node2 Hostname HOST_NAME User USER_NAME...
Replace
HOST_NAME with the host name of the Ceph node.
Red Hat Ceph Storage 4 Installation Guide
22

HOST_NAME with the host name of the Ceph node.
USER_NAME with the new user name for the Ansible user.
Example
Host node1 Hostname monitor User adminHost node2 Hostname osd User adminHost node3 Hostname gateway User admin
IMPORTANT
By configuring the ~/.ssh/config file you do not have to specify the -u USER_NAME option each time you execute the ansible-playbookcommand.
5. Set the correct file permissions for the ~/.ssh/config file:
[admin@admin ~]$ chmod 600 ~/.ssh/config
Additional Resources
The ssh_config(5) manual page.
See the Using secure communications between two systems with OpenSSH chapter in theSecuring networks for Red Hat Enterprise Linux 8.
Return to requirements checklist
2.12. CONFIGURING ANSIBLE INVENTORY LOCATION
As an option, you can configure inventory location files for the ceph-ansible staging and productionenvironments.
Prerequisites
An Ansible administration node.
Root-level access to the Ansible administration node.
The ceph-ansible package installed on the node.
Procedure
1. Navigate to the /usr/share/ceph-ansible directory:
[root@admin ~]# cd /usr/share/ceph-ansible
CHAPTER 2. REQUIREMENTS FOR INSTALLING RED HAT CEPH STORAGE
23

2. Create subdirectories for staging and production:
[root@admin ~]# mkdir -p inventory/staging inventory/production
3. Edit the ansible.cfg file and add the following lines:
[defaults]+ inventory = ./inventory/staging # Assign a default inventory directory
4. Create an inventory 'hosts' file for each environment:
[root@admin ~]# touch inventory/staging/hosts[root@admin ~]# touch inventory/production/hosts
a. Open and edit each hosts file and add the Ceph Monitor nodes under the [mons] section:
[mons]MONITOR_NODE_NAME_1MONITOR_NODE_NAME_1MONITOR_NODE_NAME_1
Example
[mons]mon-stage-node1mon-stage-node2mon-stage-node3
NOTE
By default, playbooks run in the staging environment. To run the playbook inthe production environment:
[root@admin ~]# ansible-playbook -i inventory/production playbook.yml
Additional Resources
For more information about installing the ceph-ansible package, see Installing a Red HatStorage Cluster.
Red Hat Ceph Storage 4 Installation Guide
24

CHAPTER 3. INSTALLING RED HAT CEPH STORAGE USINGTHE COCKPIT WEB INTERFACE
This chapter describes how to use the Cockpit web-based interface to install a Red Hat Ceph Storagecluster and other components, such as Metadata Servers, the Ceph client, or the Ceph Object Gateway.
The process consists of installing the Cockpit Ceph Installer, logging into Cockpit, and configuring andstarting the cluster install using different pages within the installer.
NOTE
The Cockpit Ceph Installer uses Ansible and the Ansible playbooks provided by the ceph-ansible RPM to perform the actual install. It is still possible to use these playbooks toinstall Ceph without Cockpit. That process is relevant to this chapter and is referred to asa direct Ansible install , or using the Ansible playbooks directly .
IMPORTANT
The Cockpit Ceph installer does not currently support IPv6 networking. If you requireIPv6 networking, install Ceph using the Ansible playbooks directly .
NOTE
The dashboard web interface, used for administration and monitoring of Ceph, is installedby default by the Ansible playbooks in the ceph-ansible RPM, which Cockpit uses on theback-end. Therefore, whether you use Ansible playbooks directly, or use Cockpit to installCeph, the dashboard web interface will be installed as well.
3.1. PREREQUISITES
Complete the general prerequisites required for direct Ansible Red Hat Ceph Storage installs.
A recent version of Firefox or Chrome.
If using multiple networks to segment intra-cluster traffic, client-to-cluster traffic, RADOSGateway traffic, or iSCSI traffic, ensure the relevant networks are already configured on thehosts. For more information, see network considerations in the Hardware Guide and the sectionin this chapter on completing the Network page of the Cockpit Ceph Installer
Ensure the default port for Cockpit web-based interface, 9090, is accessible.
3.2. INSTALLATION REQUIREMENTS
One node to act as the Ansible administration node.
One node to provide the performance metrics and alerting platform. This may be colocated withthe Ansible administration node.
One or more nodes to form the Ceph cluster. The installer supports an all-in-one installationcalled Development/POC. In this mode all Ceph services can run from the same node, and datareplication defaults to disk rather than host level protection.
3.3. INSTALL AND CONFIGURE THE COCKPIT CEPH INSTALLER
CHAPTER 3. INSTALLING RED HAT CEPH STORAGE USING THE COCKPIT WEB INTERFACE
25

Before you can use the Cockpit Ceph Installer to install a Red Hat Ceph Storage cluster, you must installthe Cockpit Ceph Installer on the Ansible administration node.
Prerequisites
Root-level access to the Ansible administration node.
The ansible user account for use with the Ansible application.
Procedure
1. Verify Cockpit is installed.
$ rpm -q cockpit
Example:
[admin@jb-ceph4-admin ~]$ rpm -q cockpitcockpit-196.3-1.el8.x86_64
If you see similar output to the example above, skip to the step Verify Cockpit is running . If theoutput is package cockpit is not installed, continue to the step Install Cockpit .
2. Optional: Install Cockpit.
a. For Red Hat Enterprise Linux 8:
# dnf install cockpit
b. For Red Hat Enterprise Linux 7:
# yum install cockpit
3. Verify Cockpit is running.
# systemctl status cockpit.socket
If you see Active: active (listening) in the output, skip to the step Install the Cockpit plugin forRed Hat Ceph Storage. If instead you see Active: inactive (dead), continue to the step EnableCockpit.
4. Optional: Enable Cockpit.
a. Use the systemctl command to enable Cockpit:
# systemctl enable --now cockpit.socket
You will see a line like the following:
Created symlink /etc/systemd/system/sockets.target.wants/cockpit.socket → /usr/lib/systemd/system/cockpit.socket.
b. Verify Cockpit is running:
Red Hat Ceph Storage 4 Installation Guide
26
# systemctl status cockpit.socket
You will see a line like the following:
Active: active (listening) since Tue 2020-01-07 18:49:07 EST; 7min ago
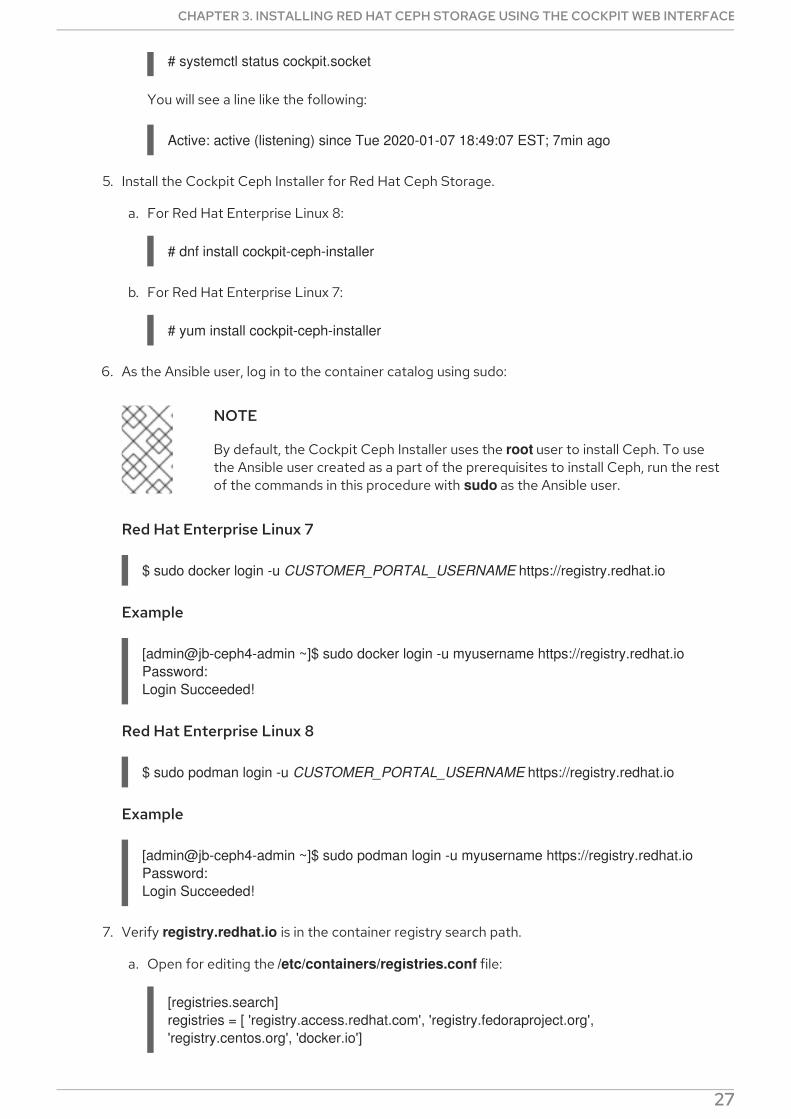
5. Install the Cockpit Ceph Installer for Red Hat Ceph Storage.
a. For Red Hat Enterprise Linux 8:
# dnf install cockpit-ceph-installer
b. For Red Hat Enterprise Linux 7:
# yum install cockpit-ceph-installer
6. As the Ansible user, log in to the container catalog using sudo:
NOTE
By default, the Cockpit Ceph Installer uses the root user to install Ceph. To usethe Ansible user created as a part of the prerequisites to install Ceph, run the restof the commands in this procedure with sudo as the Ansible user.
Red Hat Enterprise Linux 7
$ sudo docker login -u CUSTOMER_PORTAL_USERNAME https://registry.redhat.io
Example
[admin@jb-ceph4-admin ~]$ sudo docker login -u myusername https://registry.redhat.ioPassword:Login Succeeded!
Red Hat Enterprise Linux 8
$ sudo podman login -u CUSTOMER_PORTAL_USERNAME https://registry.redhat.io
Example
[admin@jb-ceph4-admin ~]$ sudo podman login -u myusername https://registry.redhat.ioPassword:Login Succeeded!
7. Verify registry.redhat.io is in the container registry search path.
a. Open for editing the /etc/containers/registries.conf file:
[registries.search]registries = [ 'registry.access.redhat.com', 'registry.fedoraproject.org', 'registry.centos.org', 'docker.io']
CHAPTER 3. INSTALLING RED HAT CEPH STORAGE USING THE COCKPIT WEB INTERFACE
27

If registry.redhat.io is not included in the file, add it:
[registries.search]registries = ['registry.redhat.io', 'registry.access.redhat.com', 'registry.fedoraproject.org', 'registry.centos.org', 'docker.io']
8. As the Ansible user, start the ansible-runner-service using sudo.
$ sudo ansible-runner-service.sh -s
Example
[admin@jb-ceph4-admin ~]$ sudo ansible-runner-service.sh -sChecking environment is readyChecking/creating directoriesChecking SSL certificate configurationGenerating RSA private key, 4096 bit long modulus (2 primes)..................................................................................................................................................................................................................................++++......................................................++++e is 65537 (0x010001)Generating RSA private key, 4096 bit long modulus (2 primes)........................................++++..............................................................................................................................................................................++++e is 65537 (0x010001)writing RSA keySignature oksubject=C = US, ST = North Carolina, L = Raleigh, O = Red Hat, OU = RunnerServer, CN = jb-ceph4-adminGetting CA Private KeyGenerating RSA private key, 4096 bit long modulus (2 primes).....................................................................................................++++..++++e is 65537 (0x010001)writing RSA keySignature oksubject=C = US, ST = North Carolina, L = Raleigh, O = Red Hat, OU = RunnerClient, CN = jb-ceph4-adminGetting CA Private KeySetting ownership of the certs to your user account(admin)Setting target user for ansible connections to adminApplying SELINUX container_file_t context to '/etc/ansible-runner-service'Applying SELINUX container_file_t context to '/usr/share/ceph-ansible'Ansible API (runner-service) container set to rhceph/ansible-runner-rhel8:latestFetching Ansible API container (runner-service). Please wait...Trying to pull registry.redhat.io/rhceph/ansible-runner-rhel8:latest...Getting image source signaturesCopying blob c585fd5093c6 doneCopying blob 217d30c36265 doneCopying blob e61d8721e62e doneCopying config b96067ea93 doneWriting manifest to image destinationStoring signaturesb96067ea93c8d6769eaea86854617c63c61ea10c4ff01ecf71d488d5727cb577
Red Hat Ceph Storage 4 Installation Guide
28

Starting Ansible API container (runner-service)Started runner-service containerWaiting for Ansible API container (runner-service) to respondThe Ansible API container (runner-service) is available and responding to requests
Login to the cockpit UI at https://jb-ceph4-admin:9090/cockpit-ceph-installer to start the install
The last line of output includes the URL to the Cockpit Ceph Installer. In the example above theURL is https://jb-ceph4-admin:9090/cockpit-ceph-installer. Take note of the URL printed inyour environment.
3.4. COPY THE COCKPIT CEPH INSTALLER SSH KEY TO ALL NODESIN THE CLUSTER
The Cockpit Ceph Installer uses SSH to connect to and configure the nodes in the cluster. In order for itto do this automatically the installer generates an SSH key pair so it can access the nodes without beingprompted for a password. The SSH public key must be transferred to all nodes in the cluster.
Prerequisites
An Ansible user with sudo access has been created.
The Cockpit Ceph Installer is installed and configured.
Procedure
1. Log in to the Ansible administration node as the Ansible user.
ssh ANSIBLE_USER@HOST_NAME
Example:
$ ssh admin@jb-ceph4-admin
2. Copy the SSH public key to the first node:
sudo ssh-copy-id -f -i /usr/share/ansible-runner-service/env/ssh_key.pub _ANSIBLE_USER_@_HOST_NAME_
Example:
$ sudo ssh-copy-id -f -i /usr/share/ansible-runner-service/env/ssh_key.pub admin@jb-ceph4-mon/bin/ssh-copy-id: INFO: Source of key(s) to be installed: "/usr/share/ansible-runner-service/env/ssh_key.pub"[email protected]'s password:
Number of key(s) added: 1
Now try logging into the machine, with: "ssh 'admin@jb-ceph4-mon'"and check to make sure that only the key(s) you wanted were added.
Repeat this step for all nodes in the cluster
CHAPTER 3. INSTALLING RED HAT CEPH STORAGE USING THE COCKPIT WEB INTERFACE
29

3.5. LOG IN TO COCKPIT
You can view the Cockpit Ceph Installer web interface by logging into Cockpit.
Prerequisites
The Cockpit Ceph Installer is installed and configured.
You have the URL printed as a part of configuring the Cockpit Ceph Installer
Procedure
1. Open the URL in a web browser.
2. Enter the Ansible user name and its password.
Red Hat Ceph Storage 4 Installation Guide
30

3. Click the radio button for Reuse my password for privileged tasks .
4. Click Log In .
5. Review the welcome page to understand how the installer works and the overall flow of theinstallation process.
CHAPTER 3. INSTALLING RED HAT CEPH STORAGE USING THE COCKPIT WEB INTERFACE
31

Click the Environment button at the bottom right corner of the web page after you havereviewed the information in the welcome page.
3.6. COMPLETE THE ENVIRONMENT PAGE OF THE COCKPIT CEPHINSTALLER
The Environment page allows you to configure overall aspects of the cluster, like what installation sourceto use and how to use Hard Disk Drives (HDDs) and Solid State Drives (SSDs) for storage.
Prerequisites
The Cockpit Ceph Installer is installed and configured.
You have the URL printed as a part of configuring the Cockpit Ceph Installer.
You have created a registry service account .
NOTE
In the dialogs to follow, there are tooltips to the right of some of the settings. To viewthem, hover the mouse cursor over the icon that looks like an i with a circle around it.
Procedure
Red Hat Ceph Storage 4 Installation Guide
32
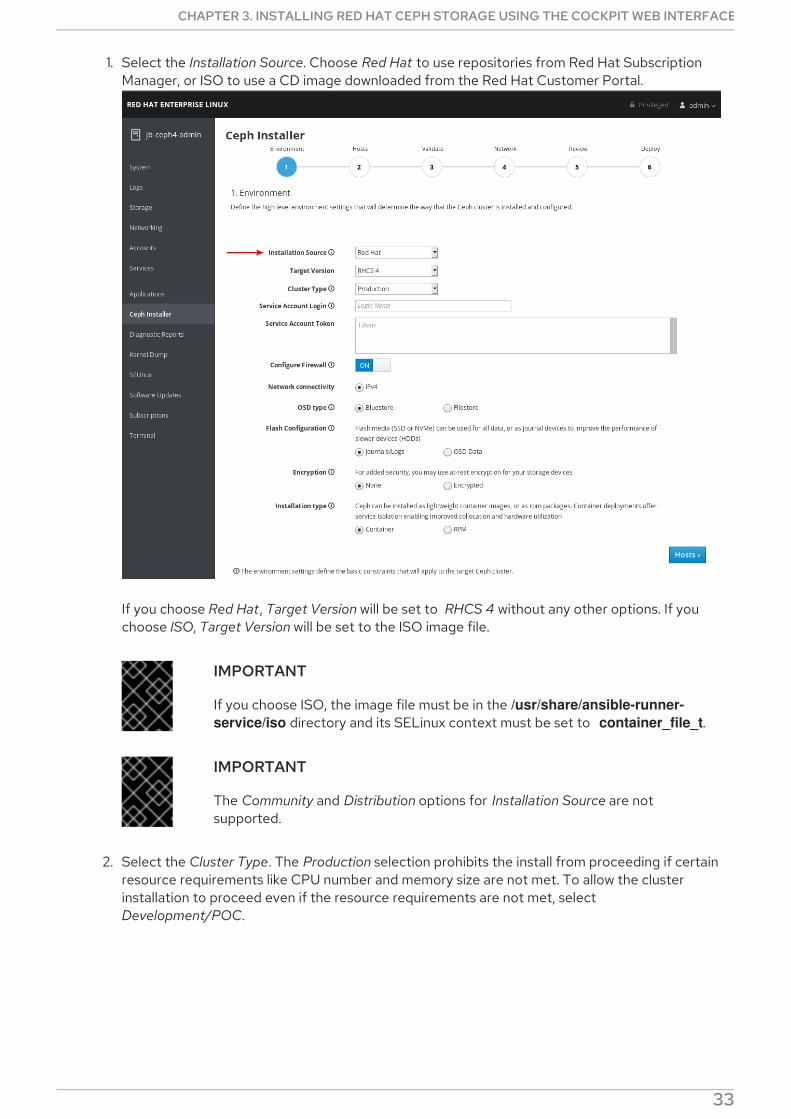
1. Select the Installation Source. Choose Red Hat to use repositories from Red Hat SubscriptionManager, or ISO to use a CD image downloaded from the Red Hat Customer Portal.
If you choose Red Hat, Target Version will be set to RHCS 4 without any other options. If youchoose ISO, Target Version will be set to the ISO image file.
IMPORTANT
If you choose ISO, the image file must be in the /usr/share/ansible-runner-service/iso directory and its SELinux context must be set to container_file_t.
IMPORTANT
The Community and Distribution options for Installation Source are notsupported.
2. Select the Cluster Type. The Production selection prohibits the install from proceeding if certainresource requirements like CPU number and memory size are not met. To allow the clusterinstallation to proceed even if the resource requirements are not met, selectDevelopment/POC.
CHAPTER 3. INSTALLING RED HAT CEPH STORAGE USING THE COCKPIT WEB INTERFACE
33

IMPORTANT
Do not use Development/POC mode to install a Ceph cluster that will be used inproduction.
3. Set the Service Account Login and Service Account Token . If you do not have a Red Hat RegistryService Account, create one using the Registry Service Account webpage .
4. Set Configure Firewall to ON to apply rules to firewalld to open ports for Ceph services. Use theOFF setting if you are not using firewalld.
Red Hat Ceph Storage 4 Installation Guide
34

5. Currently, the Cockpit Ceph Installer only supports IPv4. If you require IPv6 support,discountinue use of the Cockpit Ceph Installer and proceed with installing Ceph using theAnsible scripts directly.
6. Set OSD Type to BlueStore or FileStore.
IMPORTANT
BlueStore is the default OSD type. Previously, Ceph used FileStore as the objectstore. This format is deprecated for new Red Hat Ceph Storage 4.0 installsbecause BlueStore offers more features and improved performance. It is stillpossible to use FileStore, but using it requires a support exception. For moreinformation on BlueStore, see Ceph BlueStore in the Architecture Guide.
7. Set Flash Configuration to Journal/Logs or OSD data. If you have Solid State Drives (SSDs),whether they use NVMe or a traditional SATA/SAS interface, you can choose to use them justfor write journaling and logs while the actual data goes on Hard Disk Drives (HDDs), or you canuse the SSDs for journaling, logs, and data, and not use HDDs for any Ceph OSD functions.
8. Set Encryption to None or Encrypted. This refers to at rest encryption of storage devices usingthe LUKS1 format.
9. Set Installation type to Container or RPM. Traditionally, Red Hat Package Manager (RPM) wasused to install software on Red Hat Enterprise Linux. Now, you can install Ceph using RPM orcontainers. Installing Ceph using containers can provide improved hardware utilization sinceservices can be isolated and collocated.
10. Review all the Environment settings and click the Hosts button at the bottom right corner of thewebpage.
CHAPTER 3. INSTALLING RED HAT CEPH STORAGE USING THE COCKPIT WEB INTERFACE
35

3.7. COMPLETE THE HOSTS PAGE OF THE COCKPIT CEPHINSTALLER
The Hosts page allows you inform the Cockpit Ceph Installer what hosts to install Ceph on, and whatroles each host will be used for. As you add the hosts, the installer will check them for SSH and DNSconnectivity.
Prerequisites
The Environment page of the Cockpit Ceph Installer has been completed.
The Cockpit Ceph Installer SSH key has been copied to all nodes in the cluster .
Procedure
1. Click the Add Host(s) button.
Red Hat Ceph Storage 4 Installation Guide
36

2. Enter the hostname for a Ceph OSD node, check the box for OSD, and click the Add button.
The first Ceph OSD node is added.
For production clusters, repeat this step until you have added at least three Ceph OSD nodes.
CHAPTER 3. INSTALLING RED HAT CEPH STORAGE USING THE COCKPIT WEB INTERFACE
37

3. Optional: Use a host name pattern to define a range of nodes. For example, to add jb-ceph4-osd2 and jb-ceph4-osd3 at the same time, enter jb-ceph4-osd[2-3].
Both jb-ceph4-osd2 and jb-ceph4-ods3 are added.
4. Repeat the above steps for the other nodes in your cluster.
a. For production clusters, add at least three Ceph Monitor nodes. In the dialog, the role islisted as MON.
b. Add a node with the Metrics role. The Metrics role installs Grafana and Prometheus toprovide real-time insights into the performance of the Ceph cluster. These metrics arepresented in the Ceph Dashboard, which allows you to monitor and manage the cluster. Theinstallation of the dashboard, Grafana, and Prometheus are required. You can colocate themetrics functions on the Ansible Administration node. If you do, ensure the systemresources of the node are greater than what is required for a stand alone metrics node .
c. Optional: Add a node with the MDS role. The MDS role installs the Ceph Metadata Server(MDS). Metadata Server daemons are necessary for deploying a Ceph File System.
d. Optional: Add a node with the RGW role. The RGW role installs the Ceph Object Gateway,also know as the RADOS gateway, which is an object storage interface built on top of thelibrados API to provide applications with a RESTful gateway to Ceph storage clusters. Itsupports the Amazon S3 and OpenStack Swift APIs.
e. Optional: Add a node with the iSCSI role. The iSCSI role installs an iSCSI gateway so you
Red Hat Ceph Storage 4 Installation Guide
38

e. Optional: Add a node with the iSCSI role. The iSCSI role installs an iSCSI gateway so youcan share Ceph Block Devices over iSCSI. To use iSCSI with Ceph, you must install the iSCSIgateway on at least two nodes for multipath I/O.
5. Optional: Colocate more than one service on the same node by selecting multiple roles whenadding the node.
For more information on colocating daemons, see Colocation of containerized Ceph daemonsin the Installation Guide.
6. Optional: Modify the roles assigned to a node by checking or unchecking roles in the table.
7. Optional: To delete a node, on the far right side of the row of the node you want to delete, clickthe kebab icon and then click Delete.
CHAPTER 3. INSTALLING RED HAT CEPH STORAGE USING THE COCKPIT WEB INTERFACE
39

8. Click the Validate button at the bottom right corner of the page after you have added all thenodes in your cluster and set all the required roles.
NOTE
For production clusters, the Cockpit Ceph installer will not proceed unless you have threeor five monitors. In these examples Cluster Type is set to Development/POC so the installcan proceed with only one monitor.
3.8. COMPLETE THE VALIDATE PAGE OF THE COCKPIT CEPHINSTALLER
The Validate page allows you to probe the nodes you provided on the Hosts page to verify they meetthe hardware requirements for the roles you intend to use them for.
Prerequisites
The Hosts page of the Cockpit Ceph Installer has been completed.
Procedure
1. Click the Probe Hosts button.
Red Hat Ceph Storage 4 Installation Guide
40

To continue you must select at least three hosts which have an OK Status.
2. Optional: If warnings or errors were generated for hosts, click the arrow to the left of the checkmark for the host to view the issues.
IMPORTANT
If you set Cluster Type to Production, any errors generated will cause Status tobe NOTOK and you will not be able to select them for installation. Read the nextstep for information on how to resolve errors.
CHAPTER 3. INSTALLING RED HAT CEPH STORAGE USING THE COCKPIT WEB INTERFACE
41

IMPORTANT
If you set Cluster Type to Development/POC, any errors generated will be listedas warnings so Status is always OK. This allows you to select the hosts and installCeph on them regardless of whether the hosts meet the requirements orsuggestions. You can still resolve warnings if you want to. Read the next step forinformation on how to resolve warnings.
3. Optional: To resolve errors and warnings use one or more of the following methods.
a. The easiest way to resolve errors or warnings is to disable certain roles completely or todisable a role on one host and enable it on another host which has the required resources.Experiment with enabling or disabling roles until you find a combination where, if you areinstalling a Development/POC cluster, you are comfortable proceeding with any remainingwarnings, or if you are installing a Production cluster, at least three hosts have all theresources required for the roles assigned to them and you are comfortable proceeding withany remaining warnings.
b. You can also use a new host which meets the requirements for the roles required. First goback to the Hosts page and delete the hosts with issues.
Then, add the new hosts .
c. If you want to upgrade the hardware on a host or modify it in some other way so it will meetthe requirements or suggestions, first make the desired changes to the host, and then clickProbe Hosts again. If you have to reinstall the operating system you will have to copy theSSH key again.
4. Select the hosts to install Red Hat Ceph Storage on by checking the box next to the host.
IMPORTANT
If installing a production cluster, you must resolve any errors before you canselect them for installation.
Red Hat Ceph Storage 4 Installation Guide
42

5. Click the Network button at the bottom right corner of the page to review and configurenetworking for the cluster.
3.9. COMPLETE THE NETWORK PAGE OF THE COCKPIT CEPHINSTALLER
The Network page allows you to isolate certain cluster communication types to specific networks. Thisrequires multiple different networks configured across the hosts in the cluster.
IMPORTANT
The Network page uses information gathered from the probes done on the Validate pageto display the networks your hosts have access to. Currently, if you have alreadyproceeded to the Network page, you cannot add new networks to hosts, go back to theValidate page, reprobe the hosts, and proceed to the Network page again and use thenew networks. They will not be displayed for selection. To use networks added to thehosts after already going to the Network page you must refresh the web page completelyand restart the install from the beginning.
IMPORTANT
For production clusters you must segregate intra-cluster-traffic from client-to-clustertraffic on separate NICs. In addition to segregating cluster traffic types, there are othernetworking considerations to take into account when setting up a Ceph cluster. For moreinformation, see Network considerations in the Hardware Guide.
Prerequisites
The Validate page of the Cockpit Ceph Installer has been completed.
Procedure
1. Take note of the network types you can configure on the Network page. Each type has its own
CHAPTER 3. INSTALLING RED HAT CEPH STORAGE USING THE COCKPIT WEB INTERFACE
43

1. Take note of the network types you can configure on the Network page. Each type has its owncolumn. Columns for Cluster Network and Public Network are always displayed. If you areinstalling hosts with the RADOS Gateway role, the S3 Network column will be displayed. If youare installing hosts with the iSCSI role, the iSCSI Network column will be displayed. In theexample below, columns for Cluster Network , Public Network , and S3 Network are shown.
2. Take note of the networks you can select for each network type. Only the networks which areavailable on all hosts that make up a particular network type are shown. In the example below,there are three networks which are available on all hosts in the cluster. Because all threenetworks are available on every set of hosts which make up a network type, each network typelists the same three networks.
The three networks available are 192.168.122.0/24, 192.168.123.0/24, and 192.168.124.0/24.
3. Take note of the speed each network operates at. This is the speed of the NICs used for theparticular network. In the example below, 192.168.123.0/24, and 192.168.124.0/24 are at 1,000mbps. The Cockpit Ceph Installer could not determine the speed for the 192.168.122.0/24network.
Red Hat Ceph Storage 4 Installation Guide
44

4. Select the networks you want to use for each network type. For production clusters, you mustselect separate networks for Cluster Network and Public Network . For development/POCclusters, you can select the same network for both types, or if you only have one networkconfigured on all hosts, only that network will be displayed and you will not be able to selectother networks.
The 192.168.122.0/24 network will be used for the Public Network , the 192.168.123.0/24network will be used for the Cluster Network , and the 192.168.124.0/24 network will be used forthe S3 Network.
5. Click the Review button at the bottom right corner of the page to review the entire clusterconfiguration before installation.
CHAPTER 3. INSTALLING RED HAT CEPH STORAGE USING THE COCKPIT WEB INTERFACE
45

3.10. REVIEW THE INSTALLATION CONFIGURATION
The Review page allows you to view all the details of the Ceph cluster installation configuration that youset on the previous pages, and details about the hosts, some of which were not included in previouspages.
Prerequisites
The Network page of the Cockpit Ceph Installer has been completed.
Procedure
1. View the review page.
2. Verify the information from each previous page is as you expect it as shown on the Review page.A summary of information from the Environment page is at 1, followed by the Hosts page at 2,the Validate page at 3, the Network page at 4, and details about the hosts, including someadditional details which were not included in previous pages, are at 5.
Red Hat Ceph Storage 4 Installation Guide
46

3. Click the Deploy button at the bottom right corner of the page to go to the Deploy page whereyou can finalize and start the actual installation process.
3.11. DEPLOY THE CEPH CLUSTER
The Deploy page allows you save the installation settings in their native Ansible format, review or modifythem if required, start the install, monitor its progress, and view the status of the cluster after the installfinishes successfully.
Prerequisites
CHAPTER 3. INSTALLING RED HAT CEPH STORAGE USING THE COCKPIT WEB INTERFACE
47

Installation configuration settings on the Review page have been verified.
Procedure
1. Click the Save button at the bottom right corner of the page to save the installation settings tothe Ansible playbooks that will be used by Ansible to perform the actual install.
2. Optional: View or further customize the settings in the Ansible playbooks located on the Ansibleadministration node. The playbooks are located in /usr/share/ceph-ansible. For moreinformation about the Ansible playbooks and how to use them to customize the install, seeInstalling a Red Hat Ceph Storage cluster .
3. Secure the default user names and passwords for Grafana and dashboard. Starting withRed Hat Ceph Storage 4.1, you must uncomment or set dashboard_admin_password and grafana_admin_password in /usr/share/ceph-ansible/group_vars/all.yml. Set securepasswords for each. Also set custom user names for dashboard_admin_user and grafana_admin_user.
4. Click the Deploy button at the bottom right corner of the page to start the install.
Red Hat Ceph Storage 4 Installation Guide
48

5. Observe the installation progress while it is running.The information at 1 shows whether the install is running or not, the start time, and elapsed time.The information at 2 shows a summary of the Ansible tasks that have been attempted. Theinformation at 3 shows which roles have been installed or are installing. Green represents a rolewhere all hosts that were assigned that role have had that role installed on them. Bluerepresents a role where hosts that have that role assigned to them are still being installed. At 4you can view details about the current task or view failed tasks. Use the Filter by menu to switchbetween current task and failed tasks.
CHAPTER 3. INSTALLING RED HAT CEPH STORAGE USING THE COCKPIT WEB INTERFACE
49

The role names come from the Ansible inventory file. The equivalency is: mons are Monitors, mgrs are Managers, note the Manager role is installed alongside the Monitor role, osds areObject Storage Devices, mdss are Metadata Servers, rgws are RADOS Gateways, metrics areGrafana and Prometheus services for dashboard metrics. Not shown in the example screenshot:iscsigws are iSCSI Gateways.
6. After the installation finishes, click the Complete button at the bottom right corner of the page.This opens a window which displays the output of the command ceph status, as well asdashboard access information.
Red Hat Ceph Storage 4 Installation Guide
50

7. Compare cluster status information in the example below with the cluster status information onyour cluster. The example shows a healthy cluster, with all OSDs up and in, and all servicesactive. PGs are in the active+clean state. If some aspects of your cluster are not the same, referto the Troubleshoting Guide for information on how to resolve the issues.
8. At the bottom of the Ceph Cluster Status window, the dashboard access information isdisplayed, including the URL, user name, and password. Take note of this information.
CHAPTER 3. INSTALLING RED HAT CEPH STORAGE USING THE COCKPIT WEB INTERFACE
51

9. Use the information from the previous step along with the Dashboard Guide to access thedashboard.
The dashboard provides a web interface so you can administer and monitor the Red HatCeph Storage cluster. For more information, see the Dashboard Guide.
10. Optional: View the cockpit-ceph-installer.log file. This file records a log of the selections madeand any associated warnings the probe process generated. It is located in the home directory ofthe user that ran the installer script, ansible-runner-service.sh.
Red Hat Ceph Storage 4 Installation Guide
52

CHAPTER 4. INSTALLING RED HAT CEPH STORAGE USINGANSIBLE
This chapter describes how to use the Ansible application to deploy a Red Hat Ceph Storage cluster andother components, such as Metadata Servers or the Ceph Object Gateway.
To install a Red Hat Ceph Storage cluster, see Section 4.2, “Installing a Red Hat Ceph Storagecluster”.
To install Metadata Servers, see Section 4.4, “Installing Metadata servers” .
To install the ceph-client role, see Section 4.5, “Installing the Ceph Client Role” .
To install the Ceph Object Gateway, see Section 4.6, “Installing the Ceph Object Gateway” .
To configure a multisite Ceph Object Gateway, see Section 4.7, “Configuring multisite CephObject Gateways”.
To learn about the Ansible --limit option, see Section 4.10, “Understanding the limit option”.
4.1. PREREQUISITES
Obtain a valid customer subscription.
Prepare the cluster nodes, by doing the following on each node:
Register the node to the Content Delivery Network (CDN) and attach subscriptions .
Enable the appropriate software repositories .
Create an Ansible user .
Enable passwordless SSH access .
Optionally, configure a firewall .
Before installing with ceph-ansible, edit the inventory file and specify a node by its hostname orIP address under the [grafana-server] group where the Grafana and Prometheus instance forthe Dashboard will be installed.
4.2. INSTALLING A RED HAT CEPH STORAGE CLUSTER
Use the Ansible application with the ceph-ansible playbook to install Red Hat Ceph Storage on bare-metal or in containers. Using a Ceph storage clusters in production must have a minimum of threemonitor nodes and three OSD nodes containing multiple OSD daemons. A typical Ceph storage clusterrunning in production usually consists of ten or more nodes.
In the following procedure, run the commands from the Ansible administration node, unless instructedotherwise. This procedure applies to both bare-metal and container deployments, unless specified.
CHAPTER 4. INSTALLING RED HAT CEPH STORAGE USING ANSIBLE
53
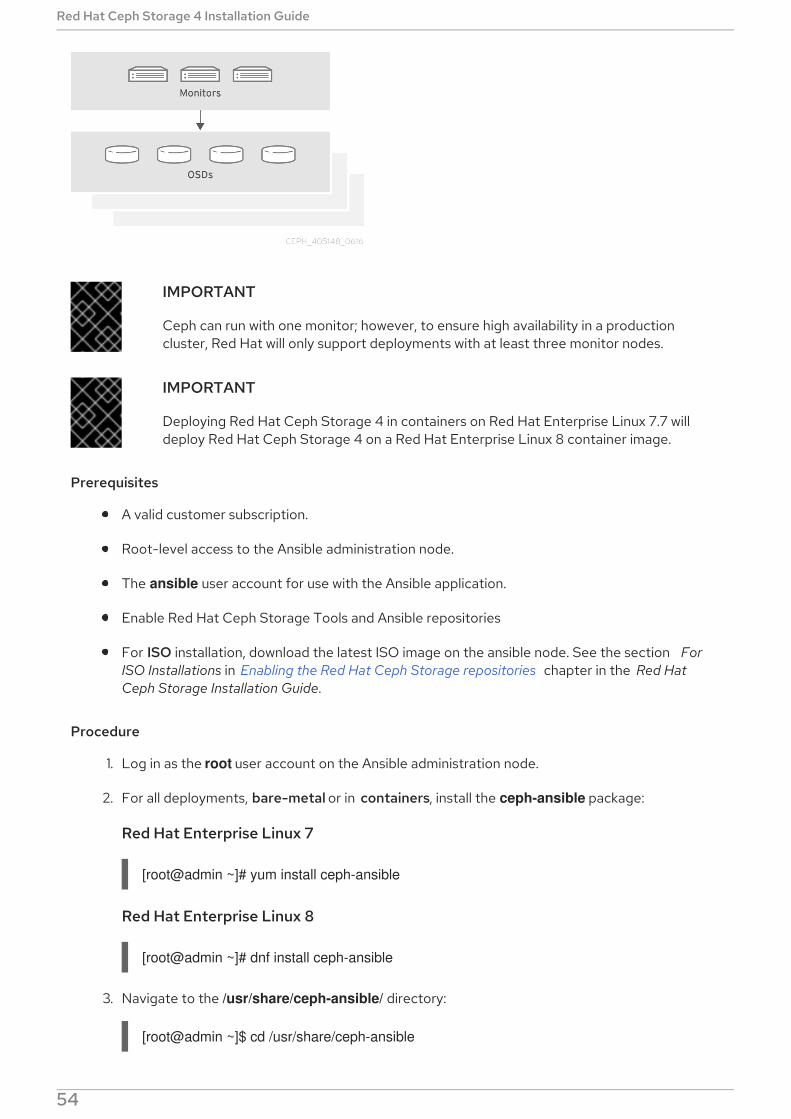
IMPORTANT
Ceph can run with one monitor; however, to ensure high availability in a productioncluster, Red Hat will only support deployments with at least three monitor nodes.
IMPORTANT
Deploying Red Hat Ceph Storage 4 in containers on Red Hat Enterprise Linux 7.7 willdeploy Red Hat Ceph Storage 4 on a Red Hat Enterprise Linux 8 container image.
Prerequisites
A valid customer subscription.
Root-level access to the Ansible administration node.
The ansible user account for use with the Ansible application.
Enable Red Hat Ceph Storage Tools and Ansible repositories
For ISO installation, download the latest ISO image on the ansible node. See the section ForISO Installations in Enabling the Red Hat Ceph Storage repositories chapter in the Red HatCeph Storage Installation Guide.
Procedure
1. Log in as the root user account on the Ansible administration node.
2. For all deployments, bare-metal or in containers, install the ceph-ansible package:
Red Hat Enterprise Linux 7
[root@admin ~]# yum install ceph-ansible
Red Hat Enterprise Linux 8
[root@admin ~]# dnf install ceph-ansible
3. Navigate to the /usr/share/ceph-ansible/ directory:
[root@admin ~]$ cd /usr/share/ceph-ansible
Red Hat Ceph Storage 4 Installation Guide
54

4. Create new yml files:
[root@admin ceph-ansible]# cp group_vars/all.yml.sample group_vars/all.yml[root@admin ceph-ansible]# cp group_vars/osds.yml.sample group_vars/osds.yml
a. Bare-metal deployments:
[root@admin ceph-ansible]# cp site.yml.sample site.yml
b. Container deployments:
[root@admin ceph-ansible]# cp site-docker.yml.sample site-docker.yml
5. Edit the new files.
a. Open for editing the group_vars/all.yml file.
IMPORTANT
Using a custom storage cluster name is not supported. Do not set the cluster parameter to any value other than ceph. Using a custom storagecluster name is only supported with Ceph clients, such as: librados, the CephObject Gateway, and RADOS block device mirroring.
WARNING
By default, Ansible attempts to restart an installed, but masked firewalld service, which can cause the Red Hat Ceph Storagedeployment to fail. To work around this issue, set the configure_firewall option to false in the all.yml file. If you are runningthe firewalld service, then there is no requirement to use the configure_firewall option in the all.yml file.
NOTE
Having the ceph_rhcs_version option set to 4 will pull in the latest versionof Red Hat Ceph Storage 4.
NOTE
Red Hat recommends leaving the dashboard_enabled option set to True inthe group_vars/all.yml file, and not changing it to False. If you want todisable the dashboard, see Disabling the Ceph Dashboard
NOTE
CHAPTER 4. INSTALLING RED HAT CEPH STORAGE USING ANSIBLE
55

NOTE
Dashboard related components are containerized. Therefore, for Bare-metalor Container deployment, 'ceph_docker_registry_username' and'ceph_docker_registry_password' parameters have to be included so thatceph-ansible can fetch container images required for the dashboard.
NOTE
If you do not have a Red Hat Registry Service Account, create one using theRegistry Service Account webpage . See the Red Hat Container RegistryAuthentication Knowledgebase article for details on how to create andmanage tokens.
i. Bare-metal example of the all.yml file for CDN installation:
fetch_directory: ~/ceph-ansible-keysceph_origin: repositoryceph_repository: rhcsceph_repository_type: cdnceph_rhcs_version: 4bootstrap_dirs_owner: "167"bootstrap_dirs_group: "167"monitor_interface: eth0public_network: 192.168.0.0/24ceph_docker_registry: registry.redhat.ioceph_docker_registry_auth: trueceph_docker_registry_username: SERVICE_ACCOUNT_USER_NAMEceph_docker_registry_password: TOKENdashboard_admin_user:dashboard_admin_password:node_exporter_container_image: registry.redhat.io/openshift4/ose-prometheus-node-exporter:v4.1grafana_admin_user:grafana_admin_password:grafana_container_image: registry.redhat.io/rhceph/rhceph-4-dashboard-rhel8prometheus_container_image: registry.redhat.io/openshift4/ose-prometheus:4.1alertmanager_container_image: registry.redhat.io/openshift4/ose-prometheus-alertmanager:4.1
IMPORTANT
Starting with Red Hat Ceph Storage 4.1, you must uncomment or set dashboard_admin_password and grafana_admin_password in /usr/share/ceph-ansible/group_vars/all.yml. Set secure passwords foreach. Also set custom user names for dashboard_admin_user and grafana_admin_user.
ii. Bare-metal example of the all.yml file for ISO installation:
fetch_directory: ~/ceph-ansible-keysceph_origin: repositoryceph_repository: rhcsceph_repository_type: iso
Red Hat Ceph Storage 4 Installation Guide
56

1
1
ceph_rhcs_iso_path: /home/rhceph-4-rhel-8-x86_64.isoceph_rhcs_version: 4bootstrap_dirs_owner: "167"bootstrap_dirs_group: "167"monitor_interface: eth0 1public_network: 192.168.0.0/24ceph_docker_registry: registry.redhat.ioceph_docker_registry_auth: trueceph_docker_registry_username: SERVICE_ACCOUNT_USER_NAMEceph_docker_registry_password: TOKENdashboard_admin_user:dashboard_admin_password:node_exporter_container_image: registry.redhat.io/openshift4/ose-prometheus-node-exporter:v4.1grafana_admin_user:grafana_admin_password:grafana_container_image: registry.redhat.io/rhceph/rhceph-4-dashboard-rhel8prometheus_container_image: registry.redhat.io/openshift4/ose-prometheus:4.1alertmanager_container_image: registry.redhat.io/openshift4/ose-prometheus-alertmanager:4.1
This is the interface on the public network.
iii. Containers example of the all.yml file:
fetch_directory: ~/ceph-ansible-keysmonitor_interface: eth0 1public_network: 192.168.0.0/24ceph_docker_image: rhceph/rhceph-4-rhel8containerized_deployment: trueceph_docker_registry: registry.redhat.ioceph_docker_registry_auth: trueceph_docker_registry_username: SERVICE_ACCOUNT_USER_NAMEceph_docker_registry_password: TOKENceph_origin: repositoryceph_repository: rhcsceph_repository_type: cdnceph_rhcs_version: 4bootstrap_dirs_owner: "167"bootstrap_dirs_group: "167"dashboard_admin_user:dashboard_admin_password:node_exporter_container_image: registry.redhat.io/openshift4/ose-prometheus-node-exporter:v4.1grafana_admin_user:grafana_admin_password:grafana_container_image: registry.redhat.io/rhceph/rhceph-4-dashboard-rhel8prometheus_container_image: registry.redhat.io/openshift4/ose-prometheus:4.1alertmanager_container_image: registry.redhat.io/openshift4/ose-prometheus-alertmanager:4.1
This is the interface on the public network.
iv. Containers example of the all.yml file, when the Red Hat Ceph Storage nodes do NOT
CHAPTER 4. INSTALLING RED HAT CEPH STORAGE USING ANSIBLE
57

1
iv. Containers example of the all.yml file, when the Red Hat Ceph Storage nodes do NOThave access to the Internet during deployment:
fetch_directory: ~/ceph-ansible-keysmonitor_interface: eth0 1public_network: 192.168.0.0/24ceph_docker_image: rhceph/rhceph-4-rhel8containerized_deployment: trueceph_docker_registry: LOCAL_NODE_FQDN:5000ceph_docker_registry_auth: falseceph_origin: repositoryceph_repository: rhcsceph_repository_type: cdnceph_rhcs_version: 4bootstrap_dirs_owner: "167"bootstrap_dirs_group: "167"dashboard_admin_user:dashboard_admin_password:node_exporter_container_image: LOCAL_NODE_FQDN:5000/openshift4/ose-prometheus-node-exporter:v4.1grafana_admin_user:grafana_admin_password:grafana_container_image: LOCAL_NODE_FQDN:5000/rhceph/rhceph-4-dashboard-rhel8prometheus_container_image: LOCAL_NODE_FQDN:5000/openshift4/ose-prometheus:4.1alertmanager_container_image: LOCAL_NODE_FQDN:5000/openshift4/ose-prometheus-alertmanager:4.1
This is the interface on the public network.
Replace
LOCAL_NODE_FQDN with your local host FQDN.
b. For all deployments, bare-metal or in containers, open for editing the group_vars/osds.yml file.
IMPORTANT
Do not install an OSD on the device the operating system is installed on.Sharing the same device between the operating system and OSDs causesperformance issues.
Ceph-ansible uses the ceph-volume tool to prepare storage devices for Ceph usage. Youcan configure osds.yml to use your storage devices in different ways to optimizeperformance for your particular workload.
IMPORTANT
Red Hat Ceph Storage 4 Installation Guide
58

IMPORTANT
All the examples below use the BlueStore object store, which is the formatCeph uses to store data on devices. Previously, Ceph used FileStore as theobject store. This format is deprecated for new Red Hat Ceph Storage 4.0installs because BlueStore offers more features and improved performance.It is still possible to use FileStore, but using it requires a Red Hat supportexception. For more information on BlueStore, see Ceph BlueStore in theRed Hat Ceph Storage Architecture Guide.
i. Auto discovery
osd_auto_discovery: true
The above example uses all empty storage devices on the system to create the OSDs,so you do not have to specify them explicitly. The ceph-volume tool checks for emptydevices, so devices which are not empty will not be used.
ii. Simple configuration
First Scenario
devices: - /dev/sda - /dev/sdb
or
Second Scenario
devices: - /dev/sda - /dev/sdb - /dev/nvme0n1 - /dev/sdc - /dev/sdd - /dev/nvme1n1
or
Third Scenario
lvm_volumes: - data: /dev/sdb - data: /dev/sdc
or
Fourth Scenario
lvm_volumes: - data: /dev/sdb - data:/dev/nvme0n1
CHAPTER 4. INSTALLING RED HAT CEPH STORAGE USING ANSIBLE
59

When using the devices option alone, ceph-volume lvm batch mode automaticallyoptimizes OSD configuration.
In the first scenario, if the devices are traditional hard drives or SSDs, then one OSDper device is created.
In the second scenario, when there is a mix of traditional hard drives and SSDs, the datais placed on the traditional hard drives (sda, sdb) and the BlueStore database iscreated as large as possible on the SSD (nvme0n1). Similarly, the data is placed on thetraditional hard drives (sdc, sdd), and the BlueStore database is created on the SSD nvme1n1 irrespective of the order of devices mentioned.
In the third scenario, data is placed on the traditional hard drives (sdb, sdc), and theBlueStore database is collocated on the same devices.
In the fourth scenario, data is placed on the traditional hard drive (sdb) and on the SSD(nvme1n1), and the BlueStore database is collocated on the same devices. This isdifferent from using the devices directive, where the BlueStore database is placed onthe SSD.
IMPORTANT
The ceph-volume lvm batch mode command creates the optimizedOSD configuration by placing data on the traditional hard drives and theBlueStore database on the SSD. If you want to specify the logicalvolumes and volume groups to use, you can create them directly byfollowing the Advanced configuration scenarios below.
iii. Advanced configuration
First Scenario
devices: - /dev/sda - /dev/sdbdedicated_devices: - /dev/sdx - /dev/sdy
or
Second Scenario
devices: - /dev/sda - /dev/sdbdedicated_devices: - /dev/sdx - /dev/sdybluestore_wal_devices: - /dev/nvme0n1 - /dev/nvme0n2
In the first scenario, there are two OSDs. The sda and sdb devices each have their own
Red Hat Ceph Storage 4 Installation Guide
60

In the first scenario, there are two OSDs. The sda and sdb devices each have their owndata segments and write-ahead logs. The additional dictionary dedicated_devices isused to isolate their databases, also known as block.db, on sdx and sdy, respectively.
In the second scenario, another additional dictionary, bluestore_wal_devices, is usedto isolate the write-ahead log on NVMe devices nvme0n1 and nvme0n2. Using the devices, dedicated_devices, and bluestore_wal_devices, options together, thisallows you to isolate all components of an OSD onto separate devices. Laying out theOSDs like this can increase overall performance.
iv. Pre-created logical volumes
First Scenario
lvm_volumes: - data: data-lv1 data_vg: data-vg1 db: db-lv1 db_vg: db-vg1 wal: wal-lv1 wal_vg: wal-vg1 - data: data-lv2 data_vg: data-vg2 db: db-lv2 db_vg: db-vg2 wal: wal-lv2 wal_vg: wal-vg2
or
Second Scenario
lvm_volumes: - data: /dev/sdb db: db-lv1 db_vg: db-vg1 wal: wal-lv1 wal_vg: wal-vg1
By default, Ceph uses Logical Volume Manager to create logical volumes on the OSDdevices. In the Simple configuration and Advanced configuration examples above, Cephcreates logical volumes on the devices automatically. You can use previously createdlogical volumes with Ceph by specifying the lvm_volumes dictionary.
In the first scenario, the data is placed on dedicated logical volumes, database, andWAL. You can also specify just data, data and WAL, or data and database. The data:line must specify the logical volume name where data is to be stored, and data_vg:must specify the name of the volume group the data logical volume is contained in.Similarly, db: is used to specify the logical volume the database is stored on and db_vg:is used to specify the volume group its logical volume is in. The wal: line specifies thelogical volume the WAL is stored on and the wal_vg: line specifies the volume groupthat contains it.
In the second scenario, the actual device name is set for the data: option, and doing so,
CHAPTER 4. INSTALLING RED HAT CEPH STORAGE USING ANSIBLE
61

In the second scenario, the actual device name is set for the data: option, and doing so,does not require specifying the data_vg: option. You must specify the logical volumename and the volume group details for the BlueStore database and WAL devices.
IMPORTANT
With lvm_volumes:, the volume groups and logical volumes must becreated beforehand. The volume groups and logical volumes will not becreated by ceph-ansible.
NOTE
If using all NVMe SSDs, then set osds_per_device: 2. For moreinformation, see Configuring OSD Ansible settings for all NVMe Storagein the Red Hat Ceph Storage Installation Guide.
NOTE
After rebooting a Ceph OSD node, there is a possibility that the blockdevice assignments will change. For example, sdc might become sdd.You can use persistent naming devices, such as the /dev/disk/by-path/device path, instead of the traditional block device name.
6. For all deployments, bare-metal or in containers, create the Ansible inventory file and thenopen it for editing:
[root@admin ~]# cd /usr/share/ceph-ansible/[root@admin ceph-ansible]# touch hosts
Edit the hosts file accordingly.
NOTE
For information about editing the Ansible inventory location, see Configuring theAnsible inventory location.
a. Add a node under [grafana-server]. This role installs Grafana and Prometheus to providereal-time insights into the performance of the Ceph cluster. These metrics are presented inthe Ceph Dashboard, which allows you to monitor and manage the cluster. The installationof the dashboard, Grafana, and Prometheus are required. You can colocate the metricsfunctions on the Ansible Administration node. If you do, ensure the system resources of thenode are greater than than what is required for a stand alone metrics node .
[grafana-server]GRAFANA-SERVER_NODE_NAME
b. Add the monitor nodes under the [mons] section:
[mons]MONITOR_NODE_NAME_1MONITOR_NODE_NAME_2MONITOR_NODE_NAME_3
Red Hat Ceph Storage 4 Installation Guide
62

c. Add OSD nodes under the [osds] section:
[osds]OSD_NODE_NAME_1OSD_NODE_NAME_2OSD_NODE_NAME_3
NOTE
You can add a range specifier ([1:10]) to the end of the node name, if thenode names are numerically sequential. For example:
[osds]example-node[1:10]
NOTE
For OSDs in a new installation, the default object store format is BlueStore.
d. Optionally, in container deployments, colocate Ceph Monitor daemons with the Ceph OSDdaemons on one node by adding the same node under the [mon] and [osd] sections. Seethe link on colocating Ceph daemons in the Additional Resources section below for moreinformation.
e. Add the Ceph Manager (ceph-mgr) nodes under the [mgrs] section. This is colocating theCeph Manager daemon with Ceph Monitor daemon.
[mgrs]MONITOR_NODE_NAME_1MONITOR_NODE_NAME_2MONITOR_NODE_NAME_3
7. Optionally, if you want to use host specific parameters, for all deployments, bare-metal or incontainers, create the host_vars directory with host files to include any parameters specific tohosts.
a. Create the host_vars directory:
$ mkdir /usr/share/ceph-ansible/host_vars
b. In the host_vars directory, create host files. Use the host-name-short-name format for thename of the files, for example:
$ touch tower-osd6
c. Update the file with any host specific parameters, for example:
i. In bare-metal deployments use the devices parameter to specify devices that theOSD nodes will use. Using devices is useful when OSDs use devices with differentnames or when one of the devices failed on one of the OSDs.
CHAPTER 4. INSTALLING RED HAT CEPH STORAGE USING ANSIBLE
63
devices: DEVICE_1 DEVICE_2
Example
devices: /dev/sdb /dev/sdc
NOTE
When specifying no devices, set the osd_auto_discovery parameter to true in the osds.yml file.
ii. For all deployments, bare-metal or in containers, if you want Ansible to create a customCRUSH hierarchy, specify where you want the OSD hosts to be in the CRUSH map’shierarchy by using the osd_crush_location parameter in a specific host file. You mustspecify at least two CRUSH bucket types to specify the location of the OSD, and onebucket type must be host. By default, these include root, datacenter, room, row, pod, pdu, rack, chassis and host.
osd_crush_location: root: ROOT_BUCKET rack: RACK_BUCKET pod: POD_BUCKET host: CEPH_NODE_NAME
Example
osd_crush_location: root: my-root rack: my-rack pod: my-pod host: tower-osd6
8. For all deployments, bare-metal or in containers, log in with or switch to the ansible user.
a. Create the ceph-ansible-keys directory where Ansible stores temporary values generatedby the ceph-ansible playbook:
[ansible@admin ~]$ mkdir ~/ceph-ansible-keys
b. Verify that Ansible can reach the Ceph nodes:
[ansible@admin ~]$ ansible all -m ping -i hosts
c. Change to the /usr/share/ceph-ansible/ directory:
[ansible@admin ~]$ cd /usr/share/ceph-ansible/
9. Run the ceph-ansible playbook.
Red Hat Ceph Storage 4 Installation Guide
64

a. Bare-metal deployments:
[ansible@admin ceph-ansible]$ ansible-playbook site.yml -i hosts
b. Container deployments:
[ansible@admin ceph-ansible]$ ansible-playbook site-docker.yml -i hosts
NOTE
If you deploy Red Hat Ceph Storage to Red Hat Enterprise Linux AtomicHost hosts, use the --skip-tags=with_pkg option:
[user@admin ceph-ansible]$ ansible-playbook site-docker.yml --skip-tags=with_pkg -i hosts
NOTE
To increase the deployment speed, use the --forks option to ansible-playbook. By default, ceph-ansible sets forks to 20. With this setting, up totwenty nodes will be installed at the same time. To install up to thirty nodesat a time, run ansible-playbook --forks 30 PLAYBOOK FILE -i hosts. Theresources on the admin node must be monitored to ensure they are notoverused. If they are, lower the number passed to --forks.
10. Wait for the Ceph deployment to finish.
11. Verify the status of the Ceph storage cluster.
a. Bare-metal deployments:
[root@monitor ~]# ceph healthHEALTH_OK
b. Container deployments:
Red Hat Enterprise Linux 7
[root@ocp ~]# docker exec ceph-mon-ID ceph health
Red Hat Enterprise Linux 8
[root@ocp ~]# podman exec ceph-mon-ID ceph health
Replace
ID with the host name of the Ceph Monitor node:
Example
[root@ocp ~]# podman exec ceph-mon-mon0 ceph healthHEALTH_OK
CHAPTER 4. INSTALLING RED HAT CEPH STORAGE USING ANSIBLE
65
12. For all deployments, bare-metal or in containers, verify the storage cluster is functioning using rados.
a. From a Ceph Monitor node, create a test pool with eight placement groups (PG):
Syntax
[root@mon ~]# ceph osd pool create POOL_NAME PG_NUMBER
Example
[root@mon ~]# ceph osd pool create test 8
b. Create a file called hello-world.txt:
Syntax
[root@monitor ~]# vim FILE_NAME
Example
[root@monitor ~]# vim hello-world.txt
c. Upload hello-world.txt to the test pool using the object name hello-world:
Syntax
[root@monitor ~]# rados --pool POOL_NAME put OBJECT_NAME OBJECT_FILE_NAME
Example
[root@monitor ~]# rados --pool test put hello-world hello-world.txt
d. Download hello-world from the test pool as file name fetch.txt:
Syntax
[root@monitor ~]# rados --pool POOL_NAME get OBJECT_NAME OBJECT_FILE_NAME
Example
[root@monitor ~]# rados --pool test get hello-world fetch.txt
e. Check the contents of fetch.txt:
[root@monitor ~]# cat fetch.txt"Hello World!"
NOTE
Red Hat Ceph Storage 4 Installation Guide
66

NOTE
In addition to verifying the storage cluster status, you can use the ceph-medic utility to overall diagnose the Ceph Storage cluster. See the Installingand Using ceph-medic to Diagnose a Ceph Storage Cluster chapter in theRed Hat Ceph Storage 4 Troubleshooting Guide.
Additional Resources
List of the common Ansible settings.
List of the common OSD settings.
See Colocation of containerized Ceph daemons for details.
4.3. CONFIGURING OSD ANSIBLE SETTINGS FOR ALL NVMESTORAGE
To increase overall performance, you can configure Ansible to use only non-volatile memory express(NVMe) devices for storage. Normally only one OSD is configured per device, which underutilizes thethroughput potential of an NVMe device.
NOTE
If you mix SSDs and HDDs, then SSDs will be used for the database, or block.db, not fordata in OSDs.
NOTE
In testing, configuring two OSDs on each NVMe device was found to provide optimalperformance. Red Hat recommends setting the osds_per_device option to 2, but it isnot required. Other values might provide better performance in your environment.
Prerequisites
Access to an Ansible administration node.
Installation of the ceph-ansible package.
Procedure
1. Set osds_per_device: 2 in group_vars/osds.yml:
osds_per_device: 2
2. List the NVMe devices under devices:
devices: - /dev/nvme0n1 - /dev/nvme1n1 - /dev/nvme2n1 - /dev/nvme3n1
CHAPTER 4. INSTALLING RED HAT CEPH STORAGE USING ANSIBLE
67

3. The settings in group_vars/osds.yml will look similar to this example:
osds_per_device: 2devices: - /dev/nvme0n1 - /dev/nvme1n1 - /dev/nvme2n1 - /dev/nvme3n1
NOTE
You must use devices with this configuration, not lvm_volumes. This is because lvm_volumes is generally used with pre-created logical volumes and osds_per_deviceimplies automatic logical volume creation by Ceph.
Additional Resources
See the Installing a Red Hat Ceph Storage Cluster in the Red Hat Ceph Storage InstallationGuide for more details.
4.4. INSTALLING METADATA SERVERS
Use the Ansible automation application to install a Ceph Metadata Server (MDS). Metadata Serverdaemons are necessary for deploying a Ceph File System.
Prerequisites
A working Red Hat Ceph Storage cluster.
Procedure
Perform the following steps on the Ansible administration node.
1. Add a new section [mdss] to the /etc/ansible/hosts file:
[mdss]NODE_NAMENODE_NAMENODE_NAME
Replace NODE_NAME with the host names of the nodes where you want to install the CephMetadata servers.
Alternatively, you can colocate the Metadata server with the OSD daemon on one node byadding the same node under the [osds] and [mdss] sections.
2. Navigate to the /usr/share/ceph-ansible directory:
[root@admin ~]# cd /usr/share/ceph-ansible
3. Optionally, you can change the default variables.
a. Create a copy of the group_vars/mdss.yml.sample file named mdss.yml:
Red Hat Ceph Storage 4 Installation Guide
68

[root@admin ceph-ansible]# cp group_vars/mdss.yml.sample group_vars/mdss.yml
b. Optionally, edit the parameters in mdss.yml. See mdss.yml for details.
4. As the ansible user, run the Ansible playbook:
Bare-metal deployments:
[user@admin ceph-ansible]$ ansible-playbook site.yml --limit mdss -i hosts
Container deployments:
[ansible@admin ceph-ansible]$ ansible-playbook site-docker.yml --limit mdss -i hosts
5. After installing the Metadata servers, you can now configure them. For details, see theConfiguring Metadata Server Daemons chapter in the Ceph File System Guide.
Additional Resources
The Ceph File System Guide for Red Hat Ceph Storage 4
See Colocation of containerized Ceph daemons for details.
See Understanding the limit option for details.
4.5. INSTALLING THE CEPH CLIENT ROLE
The ceph-ansible utility provides the ceph-client role that copies the Ceph configuration file and theadministration keyring to nodes. In addition, you can use this role to create custom pools and clients.
Prerequisites
A running Ceph storage cluster, preferably in the active + clean state.
Perform the tasks listed in requirements.
Procedure
Perform the following tasks on the Ansible administration node.
1. Add a new section [clients] to the /etc/ansible/hosts file:
[clients]CLIENT_NODE_NAME
Replace CLIENT_NODE_NAME with the host name of the node where you want to install the ceph-client role.
2. Navigate to the /usr/share/ceph-ansible directory:
[root@admin ~]# cd /usr/share/ceph-ansible
3. Create a new copy of the clients.yml.sample file named clients.yml:
CHAPTER 4. INSTALLING RED HAT CEPH STORAGE USING ANSIBLE
69

[root@admin ceph-ansible ~]# cp group_vars/clients.yml.sample group_vars/clients.yml
4. Open the group_vars/clients.yml file, and uncomment the following lines:
keys: - { name: client.test, caps: { mon: "allow r", osd: "allow class-read object_prefix rbd_children, allow rwx pool=test" }, mode: "{{ ceph_keyring_permissions }}" }
a. Replace client.test with the real client name, and add the client key to the client definitionline, for example:
key: "ADD-KEYRING-HERE=="
Now the whole line example would look similar to this:
- { name: client.test, key: "AQAin8tUMICVFBAALRHNrV0Z4MXupRw4v9JQ6Q==", caps: { mon: "allow r", osd: "allow class-read object_prefix rbd_children, allow rwx pool=test" }, mode: "{{ ceph_keyring_permissions }}" }
NOTE
The ceph-authtool --gen-print-key command can generate a new client key.
5. Optionally, instruct ceph-client to create pools and clients.
a. Update clients.yml.
Uncomment the user_config setting and set it to true.
Uncomment the pools and keys sections and update them as required. You can definecustom pools and client names altogether with the cephx capabilities.
b. Add the osd_pool_default_pg_num setting to the ceph_conf_overrides section in the all.yml file:
ceph_conf_overrides: global: osd_pool_default_pg_num: NUMBER
Replace NUMBER with the default number of placement groups.
6. As the ansible user, run the Ansible playbook:
a. Bare-metal deployments:
[ansible@admin ceph-ansible]$ ansible-playbook site.yml --limit clients -i hosts
b. Container deployments:
[ansible@admin ceph-ansible]$ ansible-playbook site-docker.yml --limit clients -i hosts
Additional Resources
Red Hat Ceph Storage 4 Installation Guide
70

See Understanding the limit option for details.
4.6. INSTALLING THE CEPH OBJECT GATEWAY
The Ceph Object Gateway, also know as the RADOS gateway, is an object storage interface built on topof the librados API to provide applications with a RESTful gateway to Ceph storage clusters.
Prerequisites
A running Red Hat Ceph Storage cluster, preferably in the active + clean state.
On the Ceph Object Gateway node, perform the tasks listed in Chapter 2, Requirements forInstalling Red Hat Ceph Storage.
WARNING
If you intend to use Ceph Object Gateway in a multisite configuration, onlycomplete steps 1 - 7. Do not run the Ansible playbook before configuring multisiteas this will start the Object Gateway in a single site configuration. Ansible cannotreconfigure the gateway to a multisite setup after it has already been started in asingle site configuration. After you complete steps 1-7, proceed to the Configuringmultisite Ceph Object Gateways section to set up multisite.
Procedure
Perform the following tasks on the Ansible administration node.
1. Add gateway hosts to the /etc/ansible/hosts file under the [rgws] section to identify their rolesto Ansible. If the hosts have sequential naming, use a range, for example:
[rgws]<rgw_host_name_1><rgw_host_name_2><rgw_host_name[3..10]>
2. Navigate to the Ansible configuration directory:
[root@ansible ~]# cd /usr/share/ceph-ansible
3. Create the rgws.yml file from the sample file:
[root@ansible ~]# cp group_vars/rgws.yml.sample group_vars/rgws.yml
4. Open and edit the group_vars/rgws.yml file. To copy the administrator key to the CephObject Gateway node, uncomment the copy_admin_key option:
copy_admin_key: true
5. In the all.yml file, you MUST specify a radosgw_interface.
CHAPTER 4. INSTALLING RED HAT CEPH STORAGE USING ANSIBLE
71

radosgw_interface: <interface>
Replace:
<interface> with the interface that the Ceph Object Gateway nodes listen to
For example:
radosgw_interface: eth0
Specifying the interface prevents Civetweb from binding to the same IP address as anotherCivetweb instance when running multiple instances on the same host.
For additional details, see the all.yml file.
6. Generally, to change default settings, uncomment the settings in the rgws.yml file, and makechanges accordingly. To make additional changes to settings that are not in the rgws.yml file,use ceph_conf_overrides: in the all.yml file. For example, set the rgw_dns_name: with thehost of the DNS server and ensure the cluster’s DNS server to configure it for wild cards toenable S3 subdomains.
ceph_conf_overrides: client.rgw.rgw1: rgw_dns_name: <host_name> rgw_override_bucket_index_max_shards: 16 rgw_bucket_default_quota_max_objects: 1638400
For advanced configuration details, see the Red Hat Ceph Storage 4 Ceph Object Gateway forProduction guide. Advanced topics include:
Configuring Ansible Groups
Developing Storage Strategies . See the Creating the Root Pool , Creating System Pools , andCreating Data Placement Strategies sections for additional details on how create andconfigure the pools.See Bucket Sharding for configuration details on bucket sharding.
7. Run the Ansible playbook:
WARNING
Do not run the Ansible playbook if you intend to set up multisite. Proceed tothe Configuring multisite Ceph Object Gateways section to set up multisite.
a. Bare-metal deployments:
[user@admin ceph-ansible]$ ansible-playbook site.yml --limit rgws -i hosts
b. Container deployments:
Red Hat Ceph Storage 4 Installation Guide
72

[user@admin ceph-ansible]$ ansible-playbook site-docker.yml --limit rgws -i hosts
NOTE
Ansible ensures that each Ceph Object Gateway is running.
For a single site configuration, add Ceph Object Gateways to the Ansible configuration.
For multi-site deployments, you should have an Ansible configuration for each zone. That is, Ansible willcreate a Ceph storage cluster and gateway instances for that zone.
After installation for a multi-site cluster is complete, proceed to the Multi-site chapter in the Red HatCeph Storage 4 Object Gateway Guide for details on configuring a cluster for multi-site.
Additional Resources
Section 4.10, “Understanding the limit option”
The Red Hat Ceph Storage 4 Object Gateway Guide
4.7. CONFIGURING MULTISITE CEPH OBJECT GATEWAYS
As a system administrator, you can configure multisite Ceph Object Gateways to mirror data acrossclusters for disaster recovery purposes.
You can configure multisite with one or more RGW realms. A realm allows the RGWs inside of it to beindependent and isolated from RGWs outside of the realm. This way, data written to an RGW in onerealm cannot be accessed by an RGW in another realm.
WARNING
Do not use Ansible to configure multisite Ceph Object Gateways on clusters withexisting single site Ceph Object Gateways. Ansible cannot reconfigure gateways toa multisite setup after they have already been started in single site configurations.
NOTE
From Red Hat Ceph Storage 4.1, you do not need to set the value of rgw_multisite_endpoints_list in group_vars/all.yml file.
4.7.1. Prerequisites
Two Red Hat Ceph Storage clusters.
On the Ceph Object Gateway nodes, perform the tasks listed in the Requirements for InstallingRed Hat Ceph Storage found in the Red Hat Ceph Storage Installation Guide.
For each Object Gateway node, perform steps 1 - 7 in Installing the Ceph Object Gateway .
CHAPTER 4. INSTALLING RED HAT CEPH STORAGE USING ANSIBLE
73

4.7.2. Configuring a multisite Ceph Object Gateway with one realm
Ansible will configure Ceph Object Gateways to mirror data in one realm across multiple clusters.
WARNING
Do not use Ansible to configure multisite Ceph Object Gateways on clusters withexisting single site Ceph Object Gateways. Ansible cannot reconfigure gateways toa multisite setup after they have already been started in single site configurations.
Prerequisites
Two running Red Hat Ceph Storage clusters.
On the Ceph Object Gateway nodes, perform the tasks listed in the Requirements for InstallingRed Hat Ceph Storage found in the Red Hat Ceph Storage Installation Guide.
For each Object Gateway node, perform steps 1 - 7 in Installing the Ceph Object Gateway .
Procedure
1. Do the following steps on Ansible node for the primary storage cluster:
a. Generate the system keys and capture their output in the multi-site-keys.txt file:
[root@ansible ~]# echo system_access_key: $(cat /dev/urandom | tr -dc 'a-zA-Z0-9' | fold -w 20 | head -n 1) > multi-site-keys.txt[root@ansible ~]# echo system_secret_key: $(cat /dev/urandom | tr -dc 'a-zA-Z0-9' | fold -w 40 | head -n 1) >> multi-site-keys.txt
b. Navigate to the Ansible configuration directory, /usr/share/ceph-ansible:
[root@ansible ~]# cd /usr/share/ceph-ansible
c. Open and edit the group_vars/all.yml file. Configure the following settings, along withupdating the ZONE_NAME, ZONE_GROUP_NAME, ZONE_USER_NAME,ZONE_DISPLAY_NAME, and REALM_NAME accordingly. Use the random strings saved inthe multi-site-keys.txt file for ACCESS_KEY and SECRET_KEY.
Syntax
rgw_multisite: truergw_zone: ZONE_NAMErgw_zonegroup: ZONE_GROUP_NAMErgw_realm: REALM_NAMErgw_zonemaster: truergw_zonesecondary: falsergw_zonegroupmaster: truergw_zone_user: ZONE_USER_NAMErgw_zone_user_display_name: ZONE_DISPLAY_NAME
Red Hat Ceph Storage 4 Installation Guide
74

system_access_key: ACCESS_KEYsystem_secret_key: SECRET_KEYrgw_multisite_proto: "http"
Example
rgw_multisite: truergw_zone: juneaurgw_zonegroup: alaskargw_realm: usargw_zonemaster: truergw_zonesecondary: falsergw_zonegroupmaster: truergw_zone_user: synchronization-userrgw_zone_user_display_name: "Synchronization User"rgw_multisite_proto: "http"system_access_key: 86nBoQOGpQgKxh4BLMyqsystem_secret_key: NTnkbmkMuzPjgwsBpJ6o
d. Run the Ansible playbook:
[ansible@ansible ceph-ansible]$ ansible-playbook site.yml
2. Do the following steps on the Ansible node for the secondary storage cluster:
a. Navigate to the Ansible configuration directory, /usr/share/ceph-ansible:
[root@ansible ~]# cd /usr/share/ceph-ansible
b. Open and edit the group_vars/all.yml file. Configure the following settings. Use the samevalues as used on the first cluster for ZONE_USER_NAME, ZONE_DISPLAY_NAME,ACCESS_KEY, SECRET_KEY, REALM_NAME, and ZONE_GROUP_NAME. Use a differentvalue for ZONE_NAME from the first cluster. Set MASTER_RGW_NODE_NAME to the CephObject Gateway node for the master zone. Note that, compared to the first cluster, thesettings for rgw_zonemaster and rgw_zonesecondary are reversed.
Syntax
rgw_multisite: truergw_zone: ZONE_NAMErgw_zonegroup: ZONE_GROUP_NAMErgw_realm: REALM_NAMErgw_zonemaster: falsergw_zonesecondary: truergw_zonegroupmaster: truergw_zone_user: ZONE_USER_NAMErgw_zone_user_display_name: ZONE_DISPLAY_NAMEsystem_access_key: ACCESS_KEYsystem_secret_key: SECRET_KEYrgw_multisite_proto: "http"rgw_pull_proto: httprgw_pull_port: 8080rgw_pullhost: MASTER_RGW_NODE_NAME
CHAPTER 4. INSTALLING RED HAT CEPH STORAGE USING ANSIBLE
75

Example
rgw_multisite: truergw_zone: fairbanksrgw_zonegroup: alaskargw_realm: usargw_zonemaster: truergw_zonesecondary: falsergw_zonegroupmaster: truergw_zone_user: synchronization-userrgw_zone_user_display_name: "Synchronization User"system_access_key: 86nBoQOGpQgKxh4BLMyqsystem_secret_key: NTnkbmkMuzPjgwsBpJ6orgw_multisite_proto: "http"rgw_pull_proto: httprgw_pull_port: 8080rgw_pullhost: cluster0-rgw-000
3. Run the Ansible playbook on the primary cluster
a. Bare-metal deployments:
[user@ansible ceph-ansible]$ ansible-playbook site.yml -i hosts
b. Container deployments:
[user@ansible ceph-ansible]$ ansible-playbook site-docker.yml -i hosts
4. Verify the secondary cluster can access the API on the primary cluster.From the Object Gateway nodes on the secondary cluster, use curl or another HTTP client toconnect to the API on the primary cluster. Compose the URL using the information used toconfigure rgw_pull_proto, rgw_pullhost, and rgw_pull_port in all.yml. Following the exampleabove, the URL is http://cluster0-rgw-000:8080. If you cannot access the API, verify the URL isright and update all.yml if required. Once the URL works and any network issues are resolved,continue with the next step to run the Ansible playbook on the secondary cluster.
5. Run the Ansible playbook on the secondary cluster
a. Bare-metal deployments:
[user@ansible ceph-ansible]$ ansible-playbook site.yml -i hosts
b. Container deployments:
[user@ansible ceph-ansible]$ ansible-playbook site-docker.yml -i hosts
After running the Ansible playbook on the master and secondary storage clusters, the CephObject Gateways run in an active-active state.
6. Verify the multisite Ceph Object Gateway configuration:
a. From the Ceph Monitor and Object Gateway nodes at each site, primary and secondary,use curl or another HTTP client to verify the API is accessible from the other site.
b. Run the radosgw-admin sync status command on both sites.
Red Hat Ceph Storage 4 Installation Guide
76

4.7.3. Configuring a multisite Ceph Object Gateway with multiple realms
Ansible will configure Ceph Object Gateways to mirror data in multiple realms across multiple clusters.
WARNING
Do not use Ansible to configure multisite Ceph Object Gateways on clusters withexisting single site Ceph Object Gateways. Ansible cannot reconfigure gateways toa multisite setup after they have already been started in single site configurations.
Prerequisites
Two running Red Hat Ceph Storage clusters.
At least two Object Gateway nodes in each cluster.
On the Ceph Object Gateway nodes, perform the tasks listed in the Requirements for InstallingRed Hat Ceph Storage found in the Red Hat Ceph Storage Installation Guide.
For each Object Gateway node, perform steps 1 - 7 in Installing the Ceph Object Gateway .
Procedure
1. On any node, generate the system access keys and secret keys for realm one and two, and savethem in files named multi-site-keys-realm-1.txt and multi-site-keys-realm-2.txt, respectively:
# echo system_access_key: $(cat /dev/urandom | tr -dc 'a-zA-Z0-9' | fold -w 20 | head -n 1) > multi-site-keys-realm-1.txt[root@ansible ~]# echo system_secret_key: $(cat /dev/urandom | tr -dc 'a-zA-Z0-9' | fold -w 40 | head -n 1) >> multi-site-keys-realm-1.txt
# echo system_access_key: $(cat /dev/urandom | tr -dc 'a-zA-Z0-9' | fold -w 20 | head -n 1) > multi-site-keys-realm-2.txt[root@ansible ~]# echo system_secret_key: $(cat /dev/urandom | tr -dc 'a-zA-Z0-9' | fold -w 40 | head -n 1) >> multi-site-keys-realm-2.txt
2. Do the following steps on the Ansible node for the primary storage cluster:
a. Navigate to the Ansible configuration directory, /usr/share/ceph-ansible:
[root@ansible ~]# cd /usr/share/ceph-ansible
b. Create a host_vars directory in /usr/share/ceph-ansible
[root@ansible ceph-ansible]# mkdir host_vars
c. Open and edit the group_vars/all.yml file. Uncomment the rgw_multisite line and set it totrue.
rgw_multisite: true
CHAPTER 4. INSTALLING RED HAT CEPH STORAGE USING ANSIBLE
77

d. Create a file in host_vars for the first Object Gateway node on the primary cluster. The filename should be the same name as used in the Ansible inventory file. For example, if the firstObject Gateway node is named rgw-001, create the file host_vars/rgw-001
touch host_vars/NODE_NAME
Example:
[root@ansible ceph-ansible]# touch host_vars/rgw-001
e. Open and edit the file, for example host_vars/rgw-001. Configure the following settings,along with updating the ZONE_NAME_1, ZONE_GROUP_NAME_1, ZONE_USER_NAME_1,ZONE_DISPLAY_NAME_1, and REALM_NAME_1 accordingly. Use the random strings saved inthe multi-site-keys-realm-1.txt file for ACCESS_KEY_1 and SECRET_KEY_1.
Syntax
rgw_zone: ZONE_NAME_1rgw_zonegroup: ZONE_GROUP_NAME_1rgw_realm: REALM_NAME_1rgw_zonemaster: truergw_zonesecondary: falsergw_zonegroupmaster: truergw_zone_user: ZONE_USER_NAME_1rgw_zone_user_display_name: "ZONE_DISPLAY_NAME_1"system_access_key: ACCESS_KEY_1system_secret_key: SECRET_KEY_1rgw_multisite_proto: "http"radosgw_address: "{{ _radosgw_address }}"radosgw_frontend_port: 8080
Example
rgw_zone: parisrgw_zonegroup: idfrgw_realm: francergw_zonemaster: truergw_zonesecondary: falsergw_zonegroupmaster: truergw_zone_user: jacques.chiracrgw_zone_user_display_name: "Jacques Chirac"system_access_key: P9Eb6S8XNyo4dtZZUUMysystem_secret_key: qqHCUtfdNnpHq3PZRHW5un9l0bEBM812Uhow0XfBrgw_multisite_proto: "http"radosgw_address: "{{ _radosgw_address }}"radosgw_frontend_port: 8080
f. Create a file in host_vars for the second Object Gateway node. The file should be thesame name as used in the Ansible inventory file. For example, if the first Object Gatewaynode is named rgw-002, create the file host_vars/rgw-002
touch host_vars/NODE_NAME
Example:
Red Hat Ceph Storage 4 Installation Guide
78

[root@ansible ceph-ansible]# touch host_vars/rgw-002
g. Open and edit the file, for example host_vars/rgw-002. Configure the following settings,along with updating the ZONE_NAME_2, ZONE_GROUP_NAME_2, ZONE_USER_NAME_2,ZONE_DISPLAY_NAME_2, and REALM_NAME_2 accordingly. Use the random strings savedin the multi-site-keys-realm-2.txt file for ACCESS_KEY_2 and SECRET_KEY_2.
Syntax
rgw_zone: ZONE_NAME_2rgw_zonegroup: ZONE_GROUP_NAME_2rgw_realm: REALM_NAME_2rgw_zonemaster: truergw_zonesecondary: falsergw_zonegroupmaster: truergw_zone_user: ZONE_USER_NAME_2rgw_zone_user_display_name: ZONE_DISPLAY_NAME_2system_access_key: ACCESS_KEY_2system_secret_key: SECRET_KEY_2rgw_multisite_proto: "http"radosgw_address: "{{ _radosgw_address }}"radosgw_frontend_port: 8080
Example
rgw_zone: juneaurgw_zonegroup: alaskargw_realm: usargw_zonemaster: truergw_zonesecondary: falsergw_zonegroupmaster: truergw_zone_user: edward.lewisrgw_zone_user_display_name: "Edward Lewis"system_access_key: yu17wkvAx3B8Wyn08XoFsystem_secret_key: 5YZfaSUPqxSNIkZQQA3lBZ495hnIV6k2HAz710BY=rgw_multisite_proto: "http"radosgw_address: "{{ _radosgw_address }}"radosgw_frontend_port: 8080
3. Run the Ansible playbook on the primary cluster:
a. Bare-metal deployments:
[user@ansible ceph-ansible]$ ansible-playbook site.yml -i hosts
b. Container deployments:
[user@ansible ceph-ansible]$ ansible-playbook site-docker.yml -i hosts
4. Do the following steps on the Ansible node for the secondary storage cluster:
a. Navigate to the Ansible configuration directory, /usr/share/ceph-ansible:
[root@ansible ~]# cd /usr/share/ceph-ansible
CHAPTER 4. INSTALLING RED HAT CEPH STORAGE USING ANSIBLE
79

b. Create a host_vars directory in /usr/share/ceph-ansible
[root@ansible ceph-ansible]# mkdir host_vars
c. Open and edit the group_vars/all.yml file. Uncomment the rgw_multisite line and set it totrue.
rgw_multisite: true
d. Create a file in host_vars for the first Object Gateway node on the secondary cluster. Thefile name should be the same name as used in the Ansible inventory file. For example, if thefirst Object Gateway node in the secondary cluster is named rgw-003, create the file host_vars/rgw-003
touch host_vars/NODE_NAME
Example:
[root@ansible ceph-ansible]# touch host_vars/rgw-003
e. Open and edit the file, for example host_vars/rgw-003. Configure the following settings,along with updating the ZONE_NAME_1, ZONE_GROUP_NAME_1, ZONE_USER_NAME_1,ZONE_DISPLAY_NAME_1, and REALM_NAME_1 accordingly. The PULLHOST_1 variableshould be set to the hostname for the first Object Gateway node on the primary cluster. Usethe random strings saved in the multi-site-keys-realm-1.txt file for ACCESS_KEY_1 andSECRET_KEY_1. Note that, compared to the first cluster, the settings for rgw_zonemasterand rgw_zonesecondary are reversed.
Syntax
rgw_zone: ZONE_NAME_1rgw_zonegroup: ZONE_GROUP_NAME_1rgw_realm: REALM_NAME_1rgw_zonemaster: falsergw_zonesecondary: truergw_zonegroupmaster: truergw_zone_user: ZONE_USER_NAME_1rgw_zone_user_display_name: "ZONE_DISPLAY_NAME_1"system_access_key: ACCESS_KEY_1system_secret_key: SECRET_KEY_1rgw_multisite_proto: "http"radosgw_address: "{{ _radosgw_address }}"radosgw_frontend_port: 8080rgw_pull_proto: httprgw_pull_port: 8080rgw_pullhost: PULLHOST_1
Example
rgw_zone: parisrgw_zonegroup: idfrgw_realm: francergw_zonemaster: true
Red Hat Ceph Storage 4 Installation Guide
80

rgw_zonesecondary: falsergw_zonegroupmaster: truergw_zone_user: jacques.chiracrgw_zone_user_display_name: "Jacques Chirac"system_access_key: P9Eb6S8XNyo4dtZZUUMysystem_secret_key: qqHCUtfdNnpHq3PZRHW5un9l0bEBM812Uhow0XfBrgw_multisite_proto: "http"radosgw_address: "{{ _radosgw_address }}"radosgw_frontend_port: 8080rgw_pull_proto: httprgw_pull_port: 8080rgw_pullhost: rgw-001
f. Create a file in host_vars for the second Object Gateway node. The file should be thesame name as used in the Ansible inventory file. For example, if the second Object Gatewaynode in the secondary cluster is named rgw-004, create the file host_vars/rgw-004.
touch host_vars/NODE_NAME
Example:
[root@ansible ceph-ansible]# touch host_vars/rgw-004
g. Open and edit the file, for example host_vars/rgw-004 file. Configure the followingsettings, along with updating the ZONE_NAME_2, ZONE_GROUP_NAME_2,ZONE_USER_NAME_2, ZONE_DISPLAY_NAME_2, and REALM_NAME_2 accordingly. ThePULLHOST_2 variable should be set to the hostname for the second Object Gateway nodeon the primary cluster. Use the random strings saved in the multi-site-keys-realm-2.txt filefor ACCESS_KEY_2 and SECRET_KEY_2. Note that, compared to the first cluster, thesettings for rgw_zonemaster and rgw_zonesecondary are reversed.
Syntax
rgw_zone: ZONE_NAME_2rgw_zonegroup: ZONE_GROUP_NAME_2rgw_realm: REALM_NAME_2rgw_zonemaster: falsergw_zonesecondary: truergw_zonegroupmaster: truergw_zone_user: ZONE_USER_NAME_2rgw_zone_user_display_name: ZONE_DISPLAY_NAME_2system_access_key: ACCESS_KEY_2system_secret_key: SECRET_KEY_2rgw_multisite_proto: "http"radosgw_address: "{{ _radosgw_address }}"radosgw_frontend_port: 8080rgw_pullhost: PULLHOST_2
Example
rgw_zone: juneaurgw_zonegroup: alaskargw_realm: usargw_zonemaster: false
CHAPTER 4. INSTALLING RED HAT CEPH STORAGE USING ANSIBLE
81

rgw_zonesecondary: truergw_zonegroupmaster: truergw_zone_user: edward.lewisrgw_zone_user_display_name: "Edward Lewis"system_access_key: yu17wkvAx3B8Wyn08XoFsystem_secret_key: 5YZfaSUPqxSNIkZQQA3lBZ495hnIV6k2HAz710BY=rgw_multisite_proto: "http"radosgw_address: "{{ _radosgw_address }}"radosgw_frontend_port: 8080rgw_pull_port: 8080rgw_pullhost: rgw-002
5. Run the Ansible playbook on the secondary cluster:
a. Bare-metal deployments:
[user@ansible ceph-ansible]$ ansible-playbook site.yml -i hosts
b. Container deployments:
[user@ansible ceph-ansible]$ ansible-playbook site-docker.yml -i hosts
After running the Ansible playbook on the primary and secondary storage clusters, the CephObject Gateways run in an active-active state.
6. Verify the multisite Ceph Object Gateway configuration:
a. From the Ceph Monitor and Object Gateway nodes at each site, primary and secondary,use curl or another HTTP client to verify the APIs are accessible from the other site.
b. Run the radosgw-admin sync status command on both sites.
4.7.4. Configuring a multisite Ceph Object Gateway with multiple realms andmultiple RGW instances
Ansible will configure Ceph Object Gateways to mirror data in multiple realms across multiple clusterswith multiple RGW instances.
WARNING
Do not use Ansible to configure multisite Ceph Object Gateways on clusters withexisting single site Ceph Object Gateways. Ansible cannot reconfigure gateways toa multisite setup after they have already been started in single site configurations.
Prerequisites
Two running Red Hat Ceph Storage clusters.
One Object Gateway node in each cluster.
On the Ceph Object Gateway nodes, perform the tasks listed in the Requirements for Installing
Red Hat Ceph Storage 4 Installation Guide
82

On the Ceph Object Gateway nodes, perform the tasks listed in the Requirements for InstallingRed Hat Ceph Storage found in the Red Hat Ceph Storage Installation Guide.
For each Object Gateway node, perform steps 1 - 7 in Installing the Ceph Object Gateway .
Procedure
1. On any node, generate the system access keys and secret keys for realm one and two, and savethem in files named multi-site-keys-realm-1.txt and multi-site-keys-realm-2.txt, respectively:
# echo system_access_key: $(cat /dev/urandom | tr -dc 'a-zA-Z0-9' | fold -w 20 | head -n 1) > multi-site-keys-realm-1.txt[root@ansible ~]# echo system_secret_key: $(cat /dev/urandom | tr -dc 'a-zA-Z0-9' | fold -w 40 | head -n 1) >> multi-site-keys-realm-1.txt
# echo system_access_key: $(cat /dev/urandom | tr -dc 'a-zA-Z0-9' | fold -w 20 | head -n 1) > multi-site-keys-realm-2.txt[root@ansible ~]# echo system_secret_key: $(cat /dev/urandom | tr -dc 'a-zA-Z0-9' | fold -w 40 | head -n 1) >> multi-site-keys-realm-2.txt
2. Do the following steps on the Ansible node for the primary storage cluster:
a. Navigate to the Ansible configuration directory, /usr/share/ceph-ansible:
[root@ansible ~]# cd /usr/share/ceph-ansible
b. Create a host_vars directory in /usr/share/ceph-ansible
[root@ansible ceph-ansible]# mkdir host_vars
c. Open and edit the group_vars/all.yml file. Uncomment the rgw_multisite line and set it totrue.
rgw_multisite: true
d. Create a file in host_vars for the Object Gateway node on the primary cluster. The filename should be the same name as used in the Ansible inventory file. For example, if theObject Gateway node is named rgw-primary, create the file host_vars/rgw-primary
touch host_vars/NODE_NAME
Example:
[root@ansible ceph-ansible]# touch host_vars/rgw-primary
e. Open and edit the file, for example host_vars/rgw-primary. Configure the settings thatapply to all instances on the primary cluster:
rgw_zonemaster: truergw_zonesecondary: falsergw_zonegroupmaster: truergw_multisite_proto: "http"rgw_instances:
f. Add an item under rgw_instances for the first realm. Configure the following settings,
CHAPTER 4. INSTALLING RED HAT CEPH STORAGE USING ANSIBLE
83

f. Add an item under rgw_instances for the first realm. Configure the following settings,along with updating the INSTANCE_NAME_1, ZONE_NAME_1, ZONE_GROUP_NAME_1,ZONE_USER_NAME_1, ZONE_DISPLAY_NAME_1, and REALM_NAME_1 accordingly. Use therandom strings saved in the multi-site-keys-realm-1.txt file for ACCESS_KEY_1 andSECRET_KEY_1.
Syntax
- instance_name: INSTANCE_NAME_1 rgw_zone: ZONE_NAME_1 rgw_zonegroup: ZONE_GROUP_NAME_1 rgw_realm: REALM_NAME_1 rgw_zone_user: ZONE_USER_NAME_1 rgw_zone_user_display_name: "ZONE_DISPLAY_NAME_1" system_access_key: ACCESS_KEY_1 system_secret_key: SECRET_KEY_1 radosgw_address: "{{ _radosgw_address }}" radosgw_frontend_port: 8080
Example
- instance_name: rgw1 rgw_zone: paris rgw_zonegroup: idf rgw_realm: france rgw_zone_user: jacques.chirac rgw_zone_user_display_name: "Jacques Chirac" system_access_key: P9Eb6S8XNyo4dtZZUUMy system_secret_key: qqHCUtfdNnpHq3PZRHW5un9l0bEBM812Uhow0XfB radosgw_address: "{{ _radosgw_address }}" radosgw_frontend_port: 8080
g. Add an item under rgw_instances for the second realm. Configure the following settings,along with updating the INSTANCE_NAME_2, ZONE_NAME_2_, ZONE_GROUP_NAME_2,ZONE_USER_NAME_2, ZONE_DISPLAY_NAME_2, and REALM_NAME_2 accordingly. Usethe random strings saved in the multi-site-keys-realm-2.txt file for ACCESS_KEY_2 andSECRET_KEY_2.
Syntax
- instance_name: INSTANCE_NAME_2 rgw_zone: ZONE_NAME_2 rgw_zonegroup: ZONE_GROUP_NAME_2 rgw_realm: REALM_NAME_2 rgw_zone_user: ZONE_USER_NAME_2 rgw_zone_user_display_name: "ZONE_DISPLAY_NAME_2" system_access_key: ACCESS_KEY_2 system_secret_key: SECRET_KEY_2 radosgw_address: "{{ _radosgw_address }}" radosgw_frontend_port: 8081
Example
- instance_name: rgw2
Red Hat Ceph Storage 4 Installation Guide
84

rgw_zone: juneau rgw_zonegroup: alaska rgw_realm: usa rgw_zone_user: edward.lewis rgw_zone_user_display_name: "Edward Lewis" system_access_key: yu17wkvAx3B8Wyn08XoF system_secret_key: 5YZfaSUPqxSNIkZQQA3lBZ495hnIV6k2HAz710BY= radosgw_address: "{{ _radosgw_address }}" radosgw_frontend_port: 8081
h. Verify the complete host_vars file for the primary gateway looks like this example:
rgw_zonemaster: truergw_zonesecondary: falsergw_zonegroupmaster: truergw_multisite_proto: "http"rgw_instances: - instance_name: rgw1 rgw_zone: paris rgw_zonegroup: idf rgw_realm: france rgw_zone_user: jacques.chirac rgw_zone_user_display_name: "Jacques Chirac" system_access_key: P9Eb6S8XNyo4dtZZUUMy system_secret_key: qqHCUtfdNnpHq3PZRHW5un9l0bEBM812Uhow0XfB radosgw_address: "{{ _radosgw_address }}" radosgw_frontend_port: 8080 - instance_name: rgw2 rgw_zone: juneau rgw_zonegroup: alaska rgw_realm: usa rgw_zone_user: edward.lewis rgw_zone_user_display_name: "Edward Lewis" system_access_key: yu17wkvAx3B8Wyn08XoF system_secret_key: 5YZfaSUPqxSNIkZQQA3lBZ495hnIV6k2HAz710BY= radosgw_address: "{{ _radosgw_address }}" radosgw_frontend_port: 8081
3. Run the Ansible playbook on the primary cluster:
a. Bare-metal deployments:
[user@ansible ceph-ansible]$ ansible-playbook site.yml -i hosts
b. Container deployments:
[user@ansible ceph-ansible]$ ansible-playbook site-docker.yml -i hosts
4. Do the following steps on the Ansible node for the secondary storage cluster:
a. Navigate to the Ansible configuration directory, /usr/share/ceph-ansible:
[root@ansible ~]# cd /usr/share/ceph-ansible
b. Create a host_vars directory in /usr/share/ceph-ansible
CHAPTER 4. INSTALLING RED HAT CEPH STORAGE USING ANSIBLE
85

[root@ansible ceph-ansible]# mkdir host_vars
c. Open and edit the group_vars/all.yml file. Uncomment the rgw_multisite line and set it totrue.
rgw_multisite: true
d. Create a file in host_vars for the Object Gateway node on the secondary cluster. The filename should be the same name as used in the Ansible inventory file. For example, if theObject Gateway node is named rgw-secondary, create the file host_vars/rgw-secondary
touch host_vars/NODE_NAME
Example:
[root@ansible ceph-ansible]# touch host_vars/rgw-secondary
e. Open and edit the file, for example host_vars/rgw-secondary. Configure the settings thatapply to all instances on the secondary cluster:
rgw_zonemaster: falsergw_zonesecondary: truergw_zonegroupmaster: truergw_multisite_proto: "http"rgw_instances:
f. Add an item under rgw_instances for the first realm. Configure the following settings,along with updating the INSTANCE_NAME_3, ZONE_NAME_1, ZONE_GROUP_NAME_1,ZONE_USER_NAME_1, ZONE_DISPLAY_NAME_1, and REALM_NAME_1 accordingly. Use therandom strings saved in the multi-site-keys-realm-1.txt file for ACCESS_KEY_1 andSECRET_KEY_1. Set RGW_PRIMARY_HOSTNAME to the Object Gateway node in theprimary cluster.
Syntax
- instance_name: INSTANCE_NAME_3 rgw_zone: ZONE_NAME_1 rgw_zonegroup: ZONE_GROUP_NAME_1 rgw_realm: REALM_NAME_1 rgw_zone_user: ZONE_USER_NAME_1 rgw_zone_user_display_name: "ZONE_DISPLAY_NAME_1" system_access_key: ACCESS_KEY_1 system_secret_key: SECRET_KEY_1 radosgw_address: "{{ _radosgw_address }}" radosgw_frontend_port: 8080 endpoint: http://RGW_PRIMARY_HOSTNAME:8080
Example
- instance_name: rgw3 rgw_zone: paris rgw_zonegroup: idf rgw_realm: france
Red Hat Ceph Storage 4 Installation Guide
86

rgw_zone_user: jacques.chirac rgw_zone_user_display_name: "Jacques Chirac" system_access_key: P9Eb6S8XNyo4dtZZUUMy system_secret_key: qqHCUtfdNnpHq3PZRHW5un9l0bEBM812Uhow0XfB radosgw_address: "{{ _radosgw_address }}" radosgw_frontend_port: 8080 endpoint: http://rgw-primary:8080
g. Add an item under rgw_instances for the second realm. Configure the following settings,along with updating the INSTANCE_NAME_4, ZONE_NAME_2_, ZONE_GROUP_NAME_2,ZONE_USER_NAME_2, ZONE_DISPLAY_NAME_2, and REALM_NAME_2 accordingly. Usethe random strings saved in the multi-site-keys-realm-2.txt file for ACCESS_KEY_2 andSECRET_KEY_2. Set RGW_PRIMARY_HOSTNAME to the Object Gateway node in theprimary cluster.
Syntax
- instance_name: INSTANCE_NAME_4 rgw_zone: ZONE_NAME_2 rgw_zonegroup: ZONE_GROUP_NAME_2 rgw_realm: REALM_NAME_2 rgw_zone_user: ZONE_USER_NAME_2 rgw_zone_user_display_name: "ZONE_DISPLAY_NAME_2" system_access_key: ACCESS_KEY_2 system_secret_key: SECRET_KEY_2 radosgw_address: "{{ _radosgw_address }}" radosgw_frontend_port: 8081 endpoint: http://RGW_PRIMARY_HOSTNAME:8081
Example
- instance_name: rgw4 rgw_zone: juneau rgw_zonegroup: alaska rgw_realm: usa rgw_zone_user: edward.lewis rgw_zone_user_display_name: "Edward Lewis" system_access_key: yu17wkvAx3B8Wyn08XoF system_secret_key: 5YZfaSUPqxSNIkZQQA3lBZ495hnIV6k2HAz710BY= radosgw_address: "{{ _radosgw_address }}" radosgw_frontend_port: 8081 endpoint: http://rgw-primary:8081
h. Verify the complete host_vars file for the secondary gateway looks like this example:
rgw_zonemaster: truergw_zonesecondary: falsergw_zonegroupmaster: truergw_multisite_proto: "http"rgw_instances: - instance_name: rgw3 rgw_zone: paris rgw_zonegroup: idf rgw_realm: france rgw_zone_user: jacques.chirac
CHAPTER 4. INSTALLING RED HAT CEPH STORAGE USING ANSIBLE
87

rgw_zone_user_display_name: "Jacques Chirac" system_access_key: P9Eb6S8XNyo4dtZZUUMy system_secret_key: qqHCUtfdNnpHq3PZRHW5un9l0bEBM812Uhow0XfB radosgw_address: "{{ _radosgw_address }}" radosgw_frontend_port: 8080 endpoint: http://rgw-primary:8080 - instance_name: rgw4 rgw_zone: juneau rgw_zonegroup: alaska rgw_realm: usa rgw_zone_user: edward.lewis rgw_zone_user_display_name: "Edward Lewis" system_access_key: yu17wkvAx3B8Wyn08XoF system_secret_key: 5YZfaSUPqxSNIkZQQA3lBZ495hnIV6k2HAz710BY= radosgw_address: "{{ _radosgw_address }}" radosgw_frontend_port: 8081 endpoint: http://rgw-primary:8081
5. Run the Ansible playbook on the secondary cluster:
a. Bare-metal deployments:
[user@ansible ceph-ansible]$ ansible-playbook site.yml -i hosts
b. Container deployments:
[user@ansible ceph-ansible]$ ansible-playbook site-docker.yml -i hosts
After running the Ansible playbook on the primary and secondary storage clusters, the CephObject Gateways run in an active-active state.
6. Verify the multisite Ceph Object Gateway configuration:
a. From the Ceph Monitor and Object Gateway nodes at each site, primary and secondary,use curl or another HTTP client to verify the APIs are accessible from the other site.
b. Run the radosgw-admin sync status command on both sites.
4.8. DEPLOYING OSDS WITH DIFFERENT HARDWARE ON THE SAMEHOST
You can deploy mixed OSDs, for example, HDDs and SSDs, on the same host, with the device_classfeature in Ansible.
Prerequisites
A valid customer subscription.
Root-level access to Ansible Administration node.
Enable Red Hat Ceph Storage Tools and Ansible repositories.
The ansible user account for use with the Ansible application.
OSDs are deployed.
Red Hat Ceph Storage 4 Installation Guide
88

Procedure
1. Create crush_rules in the group_vars/mons.yml file:
Example
create_crush_tree: truecrush_rule_config: truecrush_rules: name: HDD root: default type: host class: hdd default: true name: SDD root: default type: host class: sdd default: true
NOTE
If you are not using SDD or HDD devices in the cluster, do not define the crush_rules for that device.
2. Create pools, with created crush_rules in group_vars/clients.yml file.
Example
copy_admin_key: Trueuser_config: Truepool1: name: "pool1" pg_num: 128 pgp_num: 128 rule_name: "HDD" type: "replicated" device_class: "hdd"pools: - "{{ pool1 }}"
3. Sample the inventory file to assign roots to OSDs:
Example
[mons]mon1
[osds]osd1 osd_crush_location="{ 'root': 'default', 'rack': 'rack1', 'host': 'osd1' }"osd2 osd_crush_location="{ 'root': 'default', 'rack': 'rack1', 'host': 'osd2' }"osd3 osd_crush_location="{ 'root': 'default', 'rack': 'rack2', 'host': 'osd3' }"osd4 osd_crush_location="{ 'root': 'default', 'rack': 'rack2', 'host': 'osd4' }"osd5 devices="['/dev/sda', '/dev/sdb']" osd_crush_location="{ 'root': 'default', 'rack': 'rack3',
CHAPTER 4. INSTALLING RED HAT CEPH STORAGE USING ANSIBLE
89

'host': 'osd5' }"osd6 devices="['/dev/sda', '/dev/sdb']" osd_crush_location="{ 'root': 'default', 'rack': 'rack3', 'host': 'osd6' }"
[mgrs]mgr1
[clients]client1
4. View the tree.
Syntax
[root@mon ~]# ceph osd tree
Example
TYPE NAME
root default rack rack1 host osd1 osd.0 osd.10 host osd2 osd.3 osd.7 osd.12 rack rack2 host osd3 osd.1 osd.6 osd.11 host osd4 osd.4 osd.9 osd.13 rack rack3 host osd5 osd.2 osd.8 host osd6 osd.14 osd.15
5. Validate the pools.
Example
# for i in $(rados lspools);do echo "pool: $i"; ceph osd pool get $i crush_rule;done
pool: pool1crush_rule: HDD
Red Hat Ceph Storage 4 Installation Guide
90

Additional Resources
See the Installing a Red Hat Ceph Storage Cluster in the Red Hat Ceph Storage InstallationGuide for more details.
See Device Classes in Red Hat Ceph Storage Storage Strategies Guide for more details.
4.9. INSTALLING THE NFS-GANESHA GATEWAY
The Ceph NFS Ganesha Gateway is an NFS interface built on top of the Ceph Object Gateway toprovide applications with a POSIX filesystem interface to the Ceph Object Gateway for migrating fileswithin filesystems to Ceph Object Storage.
Prerequisites
A running Ceph storage cluster, preferably in the active + clean state.
At least one node running a Ceph Object Gateway.
Disable any running kernel NFS service instances on any host that will run NFS-Ganesha beforeattempting to run NFS-Ganesha. NFS-Ganesha will not start if another NFS instance is running.
Ensure the rpcbind service is running:
# systemctl start rpcbind
NOTE
The rpcbind package that provides rpcbind is usually installed by default. If that isnot the case, install the package first.
If the nfs-service service is running, stop and disable it:
# systemctl stop nfs-server.service# systemctl disable nfs-server.service
Procedure
Perform the following tasks on the Ansible administration node.
1. Create the nfss.yml file from the sample file:
[root@ansible ~]# cd /etc/ansible/group_vars[root@ansible ~]# cp nfss.yml.sample nfss.yml
2. Add gateway hosts to the /etc/ansible/hosts file under an [nfss] group to identify their groupmembership to Ansible.
[nfss]NFS_HOST_NAME_1NFS_HOST_NAME_2NFS_HOST_NAME[3..10]
If the hosts have sequential naming, then you can use a range specifier, for example: [3..10].
CHAPTER 4. INSTALLING RED HAT CEPH STORAGE USING ANSIBLE
91

3. Navigate to the Ansible configuration directory:
[root@ansible ~]# cd /usr/share/ceph-ansible
4. To copy the administrator key to the Ceph Object Gateway node, uncomment the copy_admin_key setting in the /usr/share/ceph-ansible/group_vars/nfss.yml file:
copy_admin_key: true
5. Configure the FSAL (File System Abstraction Layer) sections of the /usr/share/ceph-ansible/group_vars/nfss.yml file. Provide an export ID ( NUMERIC_EXPORT_ID), S3 user ID(S3_USER), S3 access key ( ACCESS_KEY) and secret key (SECRET_KEY):
# FSAL RGW Config #
ceph_nfs_rgw_export_id: NUMERIC_EXPORT_ID#ceph_nfs_rgw_pseudo_path: "/"#ceph_nfs_rgw_protocols: "3,4"#ceph_nfs_rgw_access_type: "RW"ceph_nfs_rgw_user: "S3_USER"ceph_nfs_rgw_access_key: "ACCESS_KEY"ceph_nfs_rgw_secret_key: "SECRET_KEY"
WARNING
Access and secret keys are optional, and can be generated.
6. Run the Ansible playbook:
a. Bare-metal deployments:
[ansible@admin ceph-ansible]$ ansible-playbook site.yml --limit nfss -i hosts
b. Container deployments:
[ansible@admin ceph-ansible]$ ansible-playbook site-docker.yml --limit nfss -i hosts
Additional Resources
Understanding the limit option
Object Gateway Configuration and Administration Guide
4.10. UNDERSTANDING THE LIMIT OPTION
This section contains information about the Ansible --limit option.
Ansible supports the --limit option that enables you to use the site and site-docker Ansible playbooks
Red Hat Ceph Storage 4 Installation Guide
92

Ansible supports the --limit option that enables you to use the site and site-docker Ansible playbooksfor a particular role of the inventory file.
ansible-playbook site.yml|site-docker.yml --limit osds|rgws|clients|mdss|nfss|iscsigws -i hosts
Bare-metal
For example, to redeploy only OSDs on bare-metal, run the following command as the Ansible user:
[ansible@ansible ceph-ansible]$ ansible-playbook site.yml --limit osds -i hosts
Containers
For example, to redeploy only OSDs on containers, run the following command as the Ansible user:
[ansible@ansible ceph-ansible]$ ansible-playbook site-docker.yml --limit osds -i hosts
IMPORTANT
If you colocate Ceph components on one node, Ansible applies a playbook to allcomponents on the node despite that only one component type was specified with the limit option. For example, if you run the site playbook with the --limit osds option on anode that is listed under OSDs and Metadata Servers (MDS) group in the inventory file,Ansible will run the tasks of both the components, OSDs and MDSs, on the node.
4.11. THE PLACEMENT GROUP AUTOSCALER
Placement group (PG) tuning use to be a manual process of plugging in numbers for pg_num by usingthe PG calculator. Starting with Red Hat Ceph Storage 4.1, PG tuning can be done automatically byenabling the pg_autoscaler Ceph manager module. The PG autoscaler is configured on a per-poolbasis, and scales the pg_num by a power of two. The PG autoscaler only proposes a change to pg_num, if the suggested value is more than three times the actual value.
The PG autoscaler has three modes:
warn
The default mode for new and existing pools. A health warning is generated if the suggested pg_num value varies too much from the current pg_num value.
on
The pool’s pg_num is adjusted automatically.
off
The autoscaler can be turned off for any pool, but storage administrators will need to manually setthe pg_num value for the pool.
Once the PG autoscaler in enabled for a pool, you can view the value adjustments by running the ceph osd pool autoscale-status command. The autoscale-status command displays the current state of thepools. Here are the autoscale-status column descriptions:
SIZE
Reports the total amount of data, in bytes, that are stored in the pool. This size includes object dataand OMAP data.
TARGET SIZE
CHAPTER 4. INSTALLING RED HAT CEPH STORAGE USING ANSIBLE
93

Reports the expected size of the pool as provided by the storage administrator. This value is used tocalculate the pool’s ideal number of PGs.
RATE
The replication factor for replicated buckets or the ratio for erasure-coded pools.
RAW CAPACITY
The raw storage capacity of a storage device that a pool is mapped to based on CRUSH.
RATIO
The ratio of total storage being consumed by the pool.
TARGET RATIO
A ratio specifying what fraction of the total storage cluster’s space is consumed by the pool asprovided by the storage administrator.
PG_NUM
The current number of placement groups for the pool.
NEW PG_NUM
The proposed value. This value might not be set.
AUTOSCALE
The PG autoscaler mode set for the pool.
Additional Resources
The Placement group pool calculator .
4.11.1. Configuring the placement group autoscaler
You can configure Ceph Ansible to enable and configure the PG autoscaler for new pools in theRed Hat Ceph Storage cluster. By default, the placement group (PG) autoscaler is off.
IMPORTANT
Currently, you can only configure the placement group autoscaler on new Red HatCeph Storage deployments, and not existing Red Hat Ceph Storage installations.
Prerequisites
Access to the Ansible administration node.
Access to a Ceph Monitor node.
Procedure
1. On the Ansible administration node, open the group_vars/all.yml file for editing.
2. Set the pg_autoscale_mode option to True, and set the target_size_ratio value for a new orexisting pool:
Example
openstack_pools: - {"name": backups, "target_size_ratio": 0.1, "pg_autoscale_mode": True, "application": rbd}
Red Hat Ceph Storage 4 Installation Guide
94
- {"name": volumes, "target_size_ratio": 0.5, "pg_autoscale_mode": True, "application": rbd} - {"name": vms, "target_size_ratio": 0.2, "pg_autoscale_mode": True, "application": rbd} - {"name": images, "target_size_ratio": 0.2, "pg_autoscale_mode": True, "application": rbd}
NOTE
The target_size_ratio value is the weight percentage relative to other pools inthe storage cluster.
3. Save the changes to the group_vars/all.yml file.
4. Run the appropriate Ansible playbook:
Bare-metal deployments
[ansible@admin ceph-ansible]$ ansible-playbook site.yml -i hosts
Containers deployments
[ansible@admin ceph-ansible]$ ansible-playbook site-docker.yml -i hosts
5. Once the Ansible playbook finishes, check the autoscaler status from a Ceph Monitor node:
[user@mon ~]$ ceph osd pool autoscale-status
4.12. ADDITIONAL RESOURCES
The Ansible Documentation
CHAPTER 4. INSTALLING RED HAT CEPH STORAGE USING ANSIBLE
95

CHAPTER 5. COLOCATION OF CONTAINERIZED CEPHDAEMONS
This section describes:
How colocation works and its advantages
How to set dedicated resources for colocated daemons
5.1. HOW COLOCATION WORKS AND ITS ADVANTAGES
You can colocate containerized Ceph daemons on the same node. Here are the advantages ofcolocating some of Ceph’s services:
Significant improvement in total cost of ownership (TCO) at small scale
Reduction from six nodes to three for the minimum configuration
Easier upgrade
Better resource isolation
How Colocation WorksYou can colocate one daemon from the following list with an OSD daemon by adding the same node toappropriate sections in the Ansible inventory file.
Ceph Object Gateway (radosgw)
Ceph Metadata Server (MDS)
RBD mirror (rbd-mirror)
Ceph Monitor and the Ceph Manager daemon (ceph-mgr)
NFS Ganesha
The following example shows how the inventory file with colocated daemons can look like:
Ansible inventory file with colocated daemons
[mons]MONITOR_NODE_NAME_1MONITOR_NODE_NAME_2MONITOR_NODE_NAME_3
[mgrs]MONITOR_NODE_NAME_1MONITOR_NODE_NAME_2MONITOR_NODE_NAME_3
[osds]OSD_NODE_NAME_1OSD_NODE_NAME_2OSD_NODE_NAME_3
Red Hat Ceph Storage 4 Installation Guide
96

[rgws]RGW_NODE_NAME_1RGW_NODE_NAME_2
The Figure 5.1, “Colocated Daemons” and Figure 5.2, “Non-colocated Daemons” images shows thedifference between clusters with colocated and non-colocated daemons.
Figure 5.1. Colocated Daemons
Figure 5.2. Non-colocated Daemons
When you colocate two containerized Ceph daemons on a same node, the ceph-ansible playbookreserves dedicated CPU and RAM resources to each. By default, ceph-ansible uses values listed in theRecommended Minimum Hardware chapter in the Red Hat Ceph Storage Hardware Guide . To learn howto change the default values, see the Setting Dedicated Resources for Colocated Daemons section.
CHAPTER 5. COLOCATION OF CONTAINERIZED CEPH DAEMONS
97

5.2. SETTING DEDICATED RESOURCES FOR COLOCATED DAEMONS
When colocating two Ceph daemon on the same node, the ceph-ansible playbook reserves CPU andRAM resources for each daemon. The default values that ceph-ansible uses are listed in theRecommended Minimum Hardware chapter in the Red Hat Ceph Storage Hardware Selection Guide. Tochange the default values, set the needed parameters when deploying Ceph daemons.
Procedure
1. To change the default CPU limit for a daemon, set the ceph_daemon-type_docker_cpu_limitparameter in the appropriate .yml configuration file when deploying the daemon. See thefollowing table for details.
Daemon Parameter Configuration file
OSD ceph_osd_docker_cpu_limit
osds.yml
MDS ceph_mds_docker_cpu_limit
mdss.yml
RGW ceph_rgw_docker_cpu_limit
rgws.yml
For example, to change the default CPU limit to 2 for the Ceph Object Gateway, edit the /usr/share/ceph-ansible/group_vars/rgws.yml file as follows:
ceph_rgw_docker_cpu_limit: 2
2. To change the default RAM for OSD daemons, set the osd_memory_target in the /usr/share/ceph-ansible/group_vars/all.yml file when deploying the daemon. For example, tolimit the OSD RAM to 6 GB:
ceph_conf_overrides: osd: osd_memory_target=6000000000
IMPORTANT
In an hyperconverged infrastructure (HCI) configuration, you can also use the ceph_osd_docker_memory_limit parameter in the osds.yml configuration fileto change the Docker memory CGroup limit. In this case, set ceph_osd_docker_memory_limit to 50% higher than osd_memory_target, sothat the CGroup limit is more constraining than it is by default for an HCIconfiguration. For example, if osd_memory_target is set to 6 GB, set ceph_osd_docker_memory_limit to 9 GB:
ceph_osd_docker_memory_limit: 9g
Additional Resources
The sample configuration files in the /usr/share/ceph-ansible/group_vars/ directory
Red Hat Ceph Storage 4 Installation Guide
98

5.3. ADDITIONAL RESOURCES
The Red Hat Ceph Storage Hardware Selection Guide
CHAPTER 5. COLOCATION OF CONTAINERIZED CEPH DAEMONS
99

CHAPTER 6. UPGRADING A RED HAT CEPH STORAGECLUSTER
As a storage administrator, you can upgrade a Red Hat Ceph Storage cluster to a new major version orto a new minor version or to just apply asynchronous updates to the current version. The rolling_update.yml Ansible playbook performs upgrades for bare-metal or containerized deploymentsof Red Hat Ceph Storage. Ansible upgrades the Ceph nodes in the following order:
Monitor nodes
MGR nodes
OSD nodes
MDS nodes
Ceph Object Gateway nodes
All other Ceph client nodes
NOTE
Starting with Red Hat Ceph Storage 3.1 new Ansible playbooks were added to optimizestorage for performance when using Object Gateway and high speed NVMe based SSDs(and SATA SSDs). The playbooks do this by placing journals and bucket indexes togetheron SSDs, this increases performance compared to having all journals on one device.These playbooks are designed to be used when installing Ceph. Existing OSDs continue towork and need no extra steps during an upgrade. There is no way to upgrade a Cephcluster while simultaneously reconfiguring OSDs to optimize storage in this way. To usedifferent devices for journals or bucket indexes requires reprovisioning OSDs. For moreinformation see Using NVMe with LVM optimally in Ceph Object Gateway for ProductionGuide.
IMPORTANT
The rolling_update.yml playbook includes the serial variable that adjusts the number ofnodes to be updated simultaneously. Red Hat strongly recommends to use the defaultvalue (1), which ensures that Ansible will upgrade cluster nodes one by one.
IMPORTANT
When upgrading a Red Hat Ceph Storage cluster from a previous version to version 4, theCeph Ansible configuration will default the object store type to BlueStore. If you still wantto use FileStore as the OSD object store, then explicitly set the Ceph Ansibleconfiguration to FileStore. This ensures newly deployed and replaced OSDs are usingFileStore.
IMPORTANT
When using the rolling_update.yml playbook to upgrade to any Red Hat Ceph Storage4.x version, and if you are using a multisite Ceph Object Gateway configuration, then youdo not have to manually update the all.yml file to specify the multisite configuration.
Red Hat Ceph Storage 4 Installation Guide
100

WARNING
If upgrading a multisite setup from Red Hat Ceph Storage 3 to Red HatCeph Storage 4, heed the following recommendations or else replication may break.Set rgw_multisite: false in all.yml before running rolling_update.yml. Onlyupgrade a Red Hat Ceph Storage 3 cluster at version 3.3z5 or higher to Red HatCeph Storage 4. If you cannot update to 3.3z5 or a higher, disable synchronizationbetween sites before upgrading the clusters. To disable synchronization, set rgw_run_sync_thread = false and restart the RADOS Gateway daemon. Upgradethe primary cluster first. Upgrade to Red Hat Ceph Storage 4.1 or later. To see thepackage versions that correlate to 3.3z5 see What are the Red Hat Ceph Storagereleases and corresponding Ceph package versions?
6.1. SUPPORTED RED HAT CEPH STORAGE UPGRADE SCENARIOS
Red Hat supports the following upgrade scenarios. Read the tables for bare-metal, containerized, andbare-metal with operating system (OS) upgrade to understand what pre-upgrade state your clustermust be in to move to certain post-upgrade states.
Use ceph-ansible to perform bare-metal and containerized upgrades where the bare-metal or host OSdoes not change major versions. To change the bare-metal OS from Red Hat Enterprise Linux 7.8 toRed Hat Enterprise Linux 8.2 as a part of updgrading Red Hat Ceph Storage (RHCS), see the chapteron Manually upgrading a Red Hat Ceph Storage cluster and operating system .
Table 6.1. Bare-metal
Pre-upgrade state Post-upgrade state Supported
OS version RHCS version OS version RHCS version
Red HatEnterprise Linux7.7
Red HatCeph Storage 4.0
Red HatEnterprise Linux7.8
Red HatCeph Storage 4.1
Yes
Red HatEnterprise Linux7.7
Red HatCeph Storage3.3z4
Red HatEnterprise Linux7.8
Red HatCeph Storage 4.1
Yes
Red HatEnterprise Linux8.1
Red HatCeph Storage 4.0
Red HatEnterprise Linux8.2
Red HatCeph Storage 4.1
Yes
Red HatEnterprise Linux8.2
Red HatCeph Storage 4.0
Red HatEnterprise Linux8.2
Red HatCeph Storage 4.1
Yes
Table 6.2. Containerized
CHAPTER 6. UPGRADING A RED HAT CEPH STORAGE CLUSTER
101

Pre-upgrade state Post-upgrade state Supported
Host OSversion
ContainerOS version
RHCSversion
Host OSversion
ContainerOS version
RHCSversion
Red HatEnterprise Linux 7.7
Red HatEnterprise Linux 7.7
Red HatCeph Storage 3.3z4
Red HatEnterprise Linux 7.8
Red HatEnterprise Linux 8.2
Red HatCeph Storage 4.1
Yes
Red HatEnterprise Linux 7.8
Red HatEnterprise Linux 8.1
Red HatCeph Storage 4.0
Red HatEnterprise Linux 7.8
Red HatEnterprise Linux 8.2
Red HatCeph Storage 4.1
Yes
Red HatEnterprise Linux 8.1
Red HatEnterprise Linux 8.1
Red HatCeph Storage 4.0
Red HatEnterprise Linux 8.2
Red HatEnterprise Linux 8.2
Red HatCeph Storage 4.1
Yes
Table 6.3. Bare-metal with OS upgrade
Pre-upgrade state Post-upgrade state Supported
OS version RHCS version OS version RHCS version
Red HatEnterprise Linux7.8
Red HatCeph Storage 4.0
Red HatEnterprise Linux8.2
Red HatCeph Storage 4.1
Yes*
Red HatEnterprise Linux7.8
Red HatCeph Storage3.3z4
Red HatEnterprise Linux8.2
Red HatCeph Storage 4.1
Yes*
* Upgrading from Red Hat Enterprise Linux 7 to Red Hat Enterprise Linux 8 is not supported with ceph-ansible. It is supported using the procedures in Manually upgrading a Red Hat Ceph Storage cluster andoperating system.
6.2. PREPARING FOR AN UPGRADE
There are a few things to complete before you can start an upgrade of a Red Hat Ceph Storage cluster.These steps apply to both bare-metal and container deployments of a Red Hat Ceph Storage cluster,unless specified for one or the other.
Prerequisites
Root-level access to all nodes in the storage cluster.
If upgrading from version 3, the version 3 cluster is upgraded to the latest version of Red HatCeph Storage 3.
IMPORTANT
Red Hat Ceph Storage 4 Installation Guide
102

IMPORTANT
You can only upgrade to the latest version of Red Hat Ceph Storage 4. For example, ifversion 4.1 is available, you cannot upgrade from 3 to 4.0, you must go directly to 4.1.
IMPORTANT
If using the FileStore object store, after upgrading from Red Hat Ceph Storage 3 toRed Hat Ceph Storage 4, you must migrate to BlueStore.
IMPORTANT
You cannot use ceph-ansible to upgrade Red Hat Ceph Storage while also upgradingRed Hat Enterprise Linux 7 to Red Hat Enterprise Linux 8. You must stay on Red HatEnterprise Linux 7. To upgrade the operating system as well, see manually upgrading to anew version of Red Hat Ceph Storage and a new major release of Red HatEnterprise Linux.
Procedure
1. Log in as the root user on all nodes in the storage cluster.
2. If the Ceph nodes are not connected to the Red Hat Content Delivery Network (CDN), you canuse an ISO image to upgrade Red Hat Ceph Storage by updating the local repository with thelatest version of Red Hat Ceph Storage.
3. If upgrading Red Hat Ceph Storage from version 3 to version 4, remove an existing Cephdashboard installation.
a. On the Ansible administration node, change to the cephmetrics-ansible directory:
[root@admin ~]# cd /usr/share/cephmetrics-ansible
b. Run the purge.yml playbook to remove an existing Ceph dashboard installation:
[root@admin cephmetrics-ansible]# ansible-playbook -v purge.yml
4. If upgrading Red Hat Ceph Storage from version 3 to version 4, enable the Ceph and Ansiblerepositories on the Ansible administration node:
Red Hat Enterprise Linux 7
[root@admin ~]# subscription-manager repos --enable=rhel-7-server-rhceph-4-tools-rpms --enable=rhel-7-server-ansible-2.8-rpms
Red Hat Enterprise Linux 8
[root@admin ~]# subscription-manager repos --enable=rhceph-4-tools-for-rhel-8-x86_64-rpms --enable=ansible-2.8-for-rhel-8-x86_64-rpms
5. On the Ansible administration node, ensure the latest versions of the ansible and ceph-ansiblepackages are installed.
Red Hat Enterprise Linux 7
CHAPTER 6. UPGRADING A RED HAT CEPH STORAGE CLUSTER
103

[root@admin ~]# yum update ansible ceph-ansible
Red Hat Enterprise Linux 8
[root@admin ~]# dnf update ansible ceph-ansible
6. Edit the group_vars/osds.yml file. Add and set the following options:
nb_retry_wait_osd_up: 50delay_wait_osd_up: 30
7. Edit the infrastructure-playbooks/rolling_update.yml playbook and change the health_osd_check_retries and health_osd_check_delay values to 50 and 30 respectively:
health_osd_check_retries: 50health_osd_check_delay: 30
For each OSD node, these values cause Ansible to wait for up to 25 minutes, and will check thestorage cluster health every 30 seconds, waiting before continuing the upgrade process.
NOTE
Adjust the health_osd_check_retries option value up or down based on theused storage capacity of the storage cluster. For example, if you are using 218 TBout of 436 TB, basically using 50% of the storage capacity, then set the health_osd_check_retries option to 50.
8. If the storage cluster you want to upgrade contains Ceph Block Device images that use the exclusive-lock feature, ensure that all Ceph Block Device users have permissions to blacklistclients:
ceph auth caps client.ID mon 'allow r, allow command "osd blacklist"' osd 'EXISTING_OSD_USER_CAPS'
9. If the storage cluster was originally installed using Cockpit, create a symbolic link in the /usr/share/ceph-ansible directory to the inventory file where Cockpit created it, at /usr/share/ansible-runner-service/inventory/hosts:
a. Change to the /usr/share/ceph-ansible directory:
# cd /usr/share/ceph-ansible
b. Create the symbolic link:
# ln -s /usr/share/ansible-runner-service/inventory/hosts hosts
10. If the storage cluster was originally installed using Cockpit, copy the Cockpit generated SSHkeys to the Ansible user’s ~/.ssh directory:
a. Copy the keys:
# cp /usr/share/ansible-runner-service/env/ssh_key.pub
Red Hat Ceph Storage 4 Installation Guide
104

/home/ANSIBLE_USERNAME/.ssh/id_rsa.pub# cp /usr/share/ansible-runner-service/env/ssh_key /home/ANSIBLE_USERNAME/.ssh/id_rsa
Replace ANSIBLE_USERNAME with the username for Ansible, usually admin.
Example
# cp /usr/share/ansible-runner-service/env/ssh_key.pub /home/admin/.ssh/id_rsa.pub# cp /usr/share/ansible-runner-service/env/ssh_key /home/admin/.ssh/id_rsa
b. Set the appropriate owner, group, and permissions on the key files:
# chown ANSIBLE_USERNAME:_ANSIBLE_USERNAME_ /home/ANSIBLE_USERNAME/.ssh/id_rsa.pub# chown ANSIBLE_USERNAME:_ANSIBLE_USERNAME_ /home/ANSIBLE_USERNAME/.ssh/id_rsa# chmod 644 /home/ANSIBLE_USERNAME/.ssh/id_rsa.pub# chmod 600 /home/ANSIBLE_USERNAME/.ssh/id_rsa
Replace ANSIBLE_USERNAME with the username for Ansible, usually admin.
Example
# chown admin:admin /home/admin/.ssh/id_rsa.pub# chown admin:admin /home/admin/.ssh/id_rsa# chmod 644 /home/admin/.ssh/id_rsa.pub# chmod 600 /home/admin/.ssh/id_rsa
Additional Resources
See Enabling the Red Hat Ceph Storage repositories for details.
6.3. UPGRADING THE STORAGE CLUSTER USING ANSIBLE
Using the Ansible deployment tool, you can upgrade a Red Hat Ceph Storage cluster by doing a rollingupgrade. These steps apply to both bare-metal and container deployment, unless otherwise noted.
Prerequisites
Root-level access to the Ansible administration node.
An ansible user account.
Procedure
1. Navigate to the /usr/share/ceph-ansible/ directory:
[root@admin ~]# cd /usr/share/ceph-ansible/
2. If upgrading from Red Hat Ceph Storage 3 to Red Hat Ceph Storage 4, make backup copies ofthe group_vars/all.yml, group_vars/osds.yml, and group_vars/clients.yml files:
CHAPTER 6. UPGRADING A RED HAT CEPH STORAGE CLUSTER
105

[root@admin ceph-ansible]# cp group_vars/all.yml group_vars/all_old.yml[root@admin ceph-ansible]# cp group_vars/osds.yml group_vars/osds_old.yml[root@admin ceph-ansible]# cp group_vars/clients.yml group_vars/clients_old.yml
3. If upgrading from Red Hat Ceph Storage 3 to Red Hat Ceph Storage 4, create new copies of thegroup_vars/all.yml.sample, group_vars/osds.yml.sample and group_vars/clients.yml.sample files, and rename them to group_vars/all.yml, group_vars/osds.yml, and group_vars/clients.yml respectively. Open and edit themaccordingly, basing the changes on your previously backed up copies.
[root@admin ceph-ansible]# cp group_vars/all.yml.sample group_vars/all.yml[root@admin ceph-ansible]# cp group_vars/osds.yml.sample group_vars/osds.yml[root@admin ceph-ansible]# cp group_vars/clients.yml.sample group_vars/clients.yml
4. If upgrading to a new minor version of Red Hat Ceph Storage 4, verify the value for grafana_container_image in group_vars/all.yml is the same as in group_vars/all.yml.sample.If it is not the same, edit it so it is.
Example
grafana_container_image: registry.redhat.io/rhceph/rhceph-4-dashboard-rhel8:4
NOTE
The image path shown is included in ceph-ansible version 4.0.23-1.
5. Copy the latest site.yml or site-docker.yml file from the sample files:
a. For bare-metal deployments:
[root@admin ceph-ansible]# cp site.yml.sample site.yml
b. For container deployments:
[root@admin ceph-ansible]# cp site-docker.yml.sample site-docker.yml
6. Open the group_vars/all.yml file and edit the following options.
a. Add the fetch_directory option:
fetch_directory: FULL_DIRECTORY_PATH
Replace
FULL_DIRECTORY_PATH with a writable location, such as the Ansible user’s homedirectory.
b. If the cluster you want to upgrade contains any Ceph Object Gateway nodes, add the radosgw_interface option:
radosgw_interface: INTERFACE
Red Hat Ceph Storage 4 Installation Guide
106

Replace
INTERFACE with the interface that the Ceph Object Gateway nodes listen to.
c. The default OSD object store is BlueStore. To keep the traditional OSD object store, youmust explicitly set the osd_objectstore option to filestore:
osd_objectstore: filestore
NOTE
With the osd_objectstore option set to filestore, replacing an OSD will useFileStore, instead of BlueStore.
IMPORTANT
Starting with Red Hat Ceph Storage 4, FileStore is a deprecated feature.Red Hat recommends migrating the FileStore OSDs to BlueStore OSDs.
d. Starting with Red Hat Ceph Storage 4.1, you must uncomment or set dashboard_admin_password and grafana_admin_password in /usr/share/ceph-ansible/group_vars/all.yml. Set secure passwords for each. Also set custom user namesfor dashboard_admin_user and grafana_admin_user.
IMPORTANT
When upgrading from 4.0 to 4.1, due to a bug, you cannot change grafana_admin_user or grafana_admin_password during or afterupgrade. For the time being, ensure grafana_admin_user and grafana_admin_password are uncommented and set to the original valuesused before upgrade. This issue is being tracked in Bug 1848753.
e. For both bare-metal and containers deployments:
i. Uncomment the upgrade_ceph_packages option and set it to True:
upgrade_ceph_packages: True
ii. Set the ceph_rhcs_version option to 4:
ceph_rhcs_version: 4
NOTE
Setting the ceph_rhcs_version option to 4 will pull in the latest versionof Red Hat Ceph Storage 4.
iii. Add the ceph_docker_registry information to all.yml:
CHAPTER 6. UPGRADING A RED HAT CEPH STORAGE CLUSTER
107

ceph_docker_registry: registry.redhat.ioceph_docker_registry_username: USER_NAMEceph_docker_registry_password: PASSWORD
f. For containers deployments:
i. Change the ceph_docker_image option to point to the Ceph 4 container version:
ceph_docker_image: rhceph/rhceph-4-rhel8
7. If upgrading from Red Hat Ceph Storage 3 to Red Hat Ceph Storage 4, open the Ansibleinventory file for editing, /etc/ansible/hosts by default, and add the Ceph dashboard nodename or IP address under the [grafana-server] section. If this section does not exist, then alsoadd this section along with the node name or IP address.
8. Switch to or log in as the Ansible user, then run the rolling_update.yml playbook:
[ansible@admin ceph-ansible]$ ansible-playbook infrastructure-playbooks/rolling_update.yml -i hosts
To use the playbook only for a particular group of nodes on the Ansible inventory file, you canuse the --limit option.
9. As the root user on the RBD mirroring daemon node, upgrade the rbd-mirror package manually:
[root@rbd ~]# yum upgrade rbd-mirror
10. Restart the rbd-mirror daemon:
systemctl restart ceph-rbd-mirror@CLIENT_ID
11. Verify the health status of the storage cluster.
a. For bare-metal deployments, log into a monitor node as the root user and run the Cephstatus command:
[root@mon ~]# ceph -s
b. For container deployments, log into a Ceph Monitor node as the root user.
i. List all running containers:
Red Hat Enterprise Linux 7
[root@mon ~]# docker ps
Red Hat Enterprise Linux 8
[root@mon ~]# podman ps
ii. Check health status:
Red Hat Enterprise Linux 7
Red Hat Ceph Storage 4 Installation Guide
108

[root@mon ~]# docker exec ceph-mon-MONITOR_NAME ceph -s
Red Hat Enterprise Linux 8
[root@mon ~]# podman exec ceph-mon-MONITOR_NAME ceph -s
Replace
MONITOR_NAME with the name of the Ceph Monitor container found in theprevious step.
Example
[root@mon ~]# podman exec ceph-mon-mon01 ceph -s
12. Once the upgrade finishes, and if you choose to migrate the FileStore OSDs to BlueStoreOSDs, then run the following Ansible playbook:
Syntax
ansible-playbook infrastructure-playbooks/filestore-to-bluestore.yml --limit OSD_NODE_TO_MIGRATE
Example
[ansible@admin ceph-ansible]$ ansible-playbook infrastructure-playbooks/filestore-to-bluestore.yml --limit osd01
Once the migration completes do the following sub steps.
a. Open for editing the group_vars/osds.yml file, and set the osd_objectstore option to bluestore, for example:
osd_objectstore: bluestore
b. If you are using the lvm_volumes variable, then change the journal and journal_vgoptions to db and db_vg respectively, for example:
Before
lvm_volumes: - data: /dev/sdb journal: /dev/sdc1 - data: /dev/sdd journal: journal1 journal_vg: journals
After
lvm_volumes: - data: /dev/sdb
CHAPTER 6. UPGRADING A RED HAT CEPH STORAGE CLUSTER
109

db: /dev/sdc1 - data: /dev/sdd db: journal1 db_vg: journals
13. If working in an OpenStack environment, update all the cephx users to use the RBD profile forpools. The following commands must be run as the root user:
a. Glance users:
Syntax
ceph auth caps client.glance mon 'profile rbd' osd 'profile rbd pool=GLANCE_POOL_NAME'
Example
[root@mon ~]# ceph auth caps client.glance mon 'profile rbd' osd 'profile rbd pool=images'
b. Cinder users:
Syntax
ceph auth caps client.cinder mon 'profile rbd' osd 'profile rbd pool=CINDER_VOLUME_POOL_NAME, profile rbd pool=NOVA_POOL_NAME, profile rbd-read-only pool=GLANCE_POOL_NAME'
Example
[root@mon ~]# ceph auth caps client.cinder mon 'profile rbd' osd 'profile rbd pool=volumes, profile rbd pool=vms, profile rbd-read-only pool=images'
c. OpenStack general users:
Syntax
ceph auth caps client.openstack mon 'profile rbd' osd 'profile rbd-read-only pool=CINDER_VOLUME_POOL_NAME, profile rbd pool=NOVA_POOL_NAME, profile rbd-read-only pool=GLANCE_POOL_NAME'
Example
[root@mon ~]# ceph auth caps client.openstack mon 'profile rbd' osd 'profile rbd-read-only pool=volumes, profile rbd pool=vms, profile rbd-read-only pool=images'
IMPORTANT
Do these CAPS updates before performing any live client migrations. Thisallows clients to use the new libraries running in memory, causing the oldCAPS settings to drop from cache and applying the new RBD profile settings.
Red Hat Ceph Storage 4 Installation Guide
110

14. Optional: On client nodes, restart any applications that depend on the Ceph client-side libraries.
NOTE
If you are upgrading OpenStack Nova compute nodes that have running QEMUor KVM instances or use a dedicated QEMU or KVM client, stop and start theQEMU or KVM instance because restarting the instance does not work in thiscase.
Additional Resources
See Understanding the limit option for more details.
See How to migrate the object store from FileStore to BlueStore in the Red Hat Ceph StorageAdministration Guide for more details.
6.4. UPGRADING THE STORAGE CLUSTER USING THE COMMAND-LINE INTERFACE
You can upgrade from Red Hat Ceph Storage 3.3 to Red Hat Ceph Storage 4 while the storage clusteris running. An important difference between these versions is that Red Hat Ceph Storage 4 uses the msgr2 protocol by default, which uses port 3300. If it is not open, the cluster will issue a HEALTH_WARN error.
Here are the constraints to consider when upgrading the storage cluster:
Red Hat Ceph Storage 4 uses msgr2 protocol by default. Ensure port 3300 is open on CephMonitor nodes
Once you upgrade the ceph-monitor daemons from Red Hat Ceph Storage 3 to Red HatCeph Storage 4, the Red Hat Ceph Storage 3 ceph-osd daemons cannot create new OSDsuntil you upgrade them to Red Hat Ceph Storage 4.
Do not create any pools while the upgrade is in progress.
Prerequisites
Root-level access to the Ceph Monitor, OSD, and Object Gateway nodes.
Procedure
1. Ensure that the cluster has completed at least one full scrub of all PGs while running Red HatCeph Storage 3. Failure to do so can cause your monitor daemons to refuse to join the quorumon start, leaving them non-functional. To ensure the cluster has completed at least one fullscrub of all PGs, execute the following:
# ceph osd dump | grep ^flags
To proceed with an upgrade from Red Hat Ceph Storage 3 to Red Hat Ceph Storage 4, theOSD map must include the recovery_deletes and purged_snapdirs flags.
2. Ensure the cluster is in a healthy and clean state.
CHAPTER 6. UPGRADING A RED HAT CEPH STORAGE CLUSTER
111

# ceph healthHEALTH_OK
3. For nodes running ceph-mon and ceph-manager, execute:
# subscription-manager repos --enable=rhel-7-server-rhceph-4-mon-rpms
Once the Red Hat Ceph Storage 4 package is enabled, execute the following on each of the ceph-mon and ceph-manager nodes:
# firewall-cmd --add-port=3300/tcp# firewall-cmd --add-port=3300/tcp --permanent# yum update -y# systemctl restart ceph-mon@<mon-hostname># systemctl restart ceph-mgr@<mgr-hostname>
Replace <mon-hostname> and <mgr-hostname> with the hostname of the target host.
4. Before upgrading OSDs, set the norebalance flag on a Ceph Monitor node to prevent OSDsfrom rebalancing during upgrade.
# ceph osd unset norebalance
5. On each OSD node, execute:
# subscription-manager repos --enable=rhel-7-server-rhceph-4-osd-rpms
Once the Red Hat Ceph Storage 4 package is enabled, update the OSD node:
# yum update -y
For each OSD daemon running on the node, execute:
# systemctl restart ceph-osd@<osd-num>
Replace <osd-num> with the osd number to restart. Ensure all OSDs on the node haverestarted before proceeding to the next OSD node.
6. After upgrading all OSD nodes, unset the noout flag on a Ceph Monitor node.
# ceph osd unset noout
7. On Ceph Object Gateway nodes, execute:
# subscription-manager repos --enable=rhel-7-server-rhceph-4-tools-rpms
Once the Red Hat Ceph Storage 4 package is enabled, update the node and restart the ceph-rgw daemon:
# yum update -y# systemctl restart ceph-rgw@<rgw-target>
Red Hat Ceph Storage 4 Installation Guide
112

Replace <rgw-target> with the rgw target to restart.
8. For the administration node, execute:
# subscription-manager repos --enable=rhel-7-server-rhceph-4-tools-rpms# yum update -y
9. Ensure the cluster is in a healthy and clean state.
# ceph healthHEALTH_OK
10. Optional: On client nodes, restart any applications that depend on the Ceph client-side libraries.
NOTE
If you are upgrading OpenStack Nova compute nodes that have running QEMUor KVM instances or use a dedicated QEMU or KVM client, stop and start theQEMU or KVM instance because restarting the instance does not work in thiscase.
CHAPTER 6. UPGRADING A RED HAT CEPH STORAGE CLUSTER
113

CHAPTER 7. MANUALLY UPGRADING A RED HATCEPH STORAGE CLUSTER AND OPERATING SYSTEM
Normally, using ceph-ansible, it is not possible to upgrade Red Hat Ceph Storage and Red HatEnterprise Linux to a new major release at the same time. For example, if you are on Red Hat EnterpriseLinux 7, using ceph-ansible, you must stay on that version. As a system administrator, you can do thismanually, however.
Use this chapter to manually upgrade a Red Hat Ceph Storage cluster at version 4.0 or 3.3z4 running onRed Hat Enterprise Linux 7.8, to a Red Hat Ceph Storage cluster at version 4.1 running on Red HatEnterprise Linux 8.2.
7.1. PREREQUISITES
A running Red Hat Ceph Storage cluster.
The nodes are running Red Hat Enterprise Linux 7.8.
The nodes are using Red Hat Ceph Storage version 3.3z4 or 4.0
Access to the installation source for Red Hat Enterprise Linux 8.2.
7.2. MANUALLY UPGRADING CEPH MONITOR NODES AND THEIROPERATING SYSTEMS
As a system administrator, you can manually upgrade the Ceph Monitor software on a Red HatCeph Storage cluster node and the Red Hat Enterprise Linux operating system to a new major releaseat the same time.
IMPORTANT
Perform the procedure on only one Monitor node at a time. To prevent cluster accessissues, ensure the current upgraded Monitor node has returned to normal operation priorto proceeding to the next node.
Prerequisites
A running Red Hat Ceph Storage cluster.
The nodes are running Red Hat Enterprise Linux 7.8.
The nodes are using Red Hat Ceph Storage version 3.3z4 or 4.0
Access to the installation source for Red Hat Enterprise Linux 8.2.
Procedure
1. Stop the monitor service:
# systemctl stop ceph-mon@MONITOR_ID
Replace MONITOR_ID with the Monitor’s ID number.
Red Hat Ceph Storage 4 Installation Guide
114

2. If using Red Hat Ceph Storage 3, disable the Red Hat Ceph Storage 3 repositories.
a. Disable the tools repository:
# subscription-manager repos --disable=rhel-7-server-rhceph-3-tools-rpms
b. Disable the mon repository:
# subscription-manager repos --disable=rhel-7-server-rhceph-3-mon-rpms
3. If using Red Hat Ceph Storage 4, disable the Red Hat Ceph Storage 4 repositories.
a. Disable the tools repository:
# subscription-manager repos --disable=rhel-7-server-rhceph-4-tools-rpms
b. Disable the mon repository:
# subscription-manager repos --disable= rhel-7-server-rhceph-4-mon-rpms
4. Install the leapp utility. See Upgrading from Red Hat Enterprise Linux 7 to Red Hat EnterpriseLinux 8.
5. Run through the leapp preupgrade checks. See Assessing upgradability from the command line .
6. Set PermitRootLogin yes in /etc/ssh/sshd_config.
7. Restart the OpenSSH SSH daemon:
# systemctl restart sshd.service
8. Remove the iSCSI module from the Linux kernel:
# modprobe -r iscsi
9. Perform the upgrade by following Performing the upgrade from RHEL 7 to RHEL 8 .
10. Reboot the node.
11. Enable the repositories for Red Hat Ceph Storage 4 for Red Hat Enterprise Linux 8.
a. Enable the tools repository:
# subscription-manager repos --enable=rhceph-4-tools-for-rhel-8-x86_64-rpms
b. Enable the mon repository:
# subscription-manager repos --enable=rhceph-4-mon-for-rhel-8-x86_64-rpms
12. Install the ceph-mon package:
# dnf install ceph-mon
CHAPTER 7. MANUALLY UPGRADING A RED HAT CEPH STORAGE CLUSTER AND OPERATING SYSTEM
115

13. If the manager service is colocated with the monitor service, install the ceph-mgr package:
# dnf install ceph-mgr
14. Restore the ceph-client-admin.keyring and ceph.conf files from a Monitor node which has notbeen upgraded yet or from a node that has already had those files restored.
15. Install the leveldb package:
# dnf install leveldb
16. Start the monitor service:
# systemctl start ceph-mon.target
17. If the manager service is colocated with the monitor service, start the manager service too:
# systemctl start ceph-mgr.target
18. Verify the monitor service came back up and is in quorum.
# ceph -s
On the mon: line under services:, ensure the node is listed as in quorum and not as out ofquorum.
Example
mon: 3 daemons, quorum jb-ceph4-mon,jb-ceph4-mon2,jb-ceph4-mon3 (age 2h)
19. If the manager service is colocated with the monitor service, verify it is up too:
# ceph -s
Look for the manager’s node name on the mgr: line under services.
Example
mgr: jb-ceph4-mon(active, since 2h), standbys: jb-ceph4-mon3, jb-ceph4-mon2
20. Repeat the above steps on all Monitor nodes until they have all been upgraded.
Additional Resources
See Manually upgrading a Red Hat Ceph Storage cluster and operating system in theInstallation Guide for more information.
See Upgrading from Red Hat Enterprise Linux 7 to Red Hat Enterprise Linux 8 for moreinformation.
7.3. MANUALLY UPGRADING CEPH OSD NODES AND THEIR
Red Hat Ceph Storage 4 Installation Guide
116

7.3. MANUALLY UPGRADING CEPH OSD NODES AND THEIROPERATING SYSTEMS
As a system administrator, you can manually upgrade the Ceph OSD software on a Red HatCeph Storage cluster node and the Red Hat Enterprise Linux operating system to a new major releaseat the same time.
IMPORTANT
This procedure should be performed for each OSD node in the Ceph cluster, but typicallyonly for one OSD node at a time. A maximum of one failure domains worth of OSD nodesmay be performed in parallel. For example, if per-rack replication is in use, one entirerack’s OSD nodes can be upgraded in parallel. To prevent data access issues, ensure thecurrent OSD node’s OSDs have returned to normal operation and all of the cluster’s PGsare in the active+clean state prior to proceeding to the next OSD.
IMPORTANT
This procedure will not work with encrypted OSD partitions as the Leapp upgrade utilitydoes not support upgrading with OSD encryption.
IMPORTANT
If the OSDs were created using ceph-disk, and are still managed by ceph-disk, you mustuse ceph-volume to take over management of them. This is covered in an optional stepbelow.
Prerequisites
A running Red Hat Ceph Storage cluster.
The nodes are running Red Hat Enterprise Linux 7.8.
The nodes are using Red Hat Ceph Storage version 3.3z4 or 4.0
Access to the installation source for Red Hat Enterprise Linux 8.2.
Procedure
1. Set the OSD noout flag to prevent OSDs from getting marked down during the migration:
# ceph osd set noout
2. Set the OSD nobackfill, norecover, norrebalance, noscrub and nodeep-scrub flags to avoidunnecessary load on the cluster and to avoid any data reshuffling when the node goes down formigration:
# ceph osd set nobackfill# ceph osd set norecover# ceph osd set norebalance# ceph osd set noscrub# ceph osd set nodeep-scrub
3. Gracefully shut down all the OSD processes on the node:
CHAPTER 7. MANUALLY UPGRADING A RED HAT CEPH STORAGE CLUSTER AND OPERATING SYSTEM
117

# systemctl stop ceph-osd.target
4. If using Red Hat Ceph Storage 3, disable the Red Hat Ceph Storage 3 repositories.
a. Disable the tools repository:
# subscription-manager repos --disable=rhel-7-server-rhceph-3-tools-rpms
b. Disable the osd repository:
# subscription-manager repos --disable=rhel-7-server-rhceph-3-osd-rpms
5. If using Red Hat Ceph Storage 4, disable the Red Hat Ceph Storage 4 repositories.
a. Disable the tools repository:
# subscription-manager repos --disable=rhel-7-server-rhceph-4-tools-rpms
b. Disable the osd repository:
# subscription-manager repos --disable= rhel-7-server-rhceph-4-osd-rpms
6. Install the leapp utility. See Upgrading from Red Hat Enterprise Linux 7 to Red Hat EnterpriseLinux 8.
7. Run through the leapp preupgrade checks. See Assessing upgradability from the command line .
8. Set PermitRootLogin yes in /etc/ssh/sshd_config.
9. Restart the OpenSSH SSH daemon:
# systemctl restart sshd.service
10. Remove the iSCSI module from the Linux kernel:
# modprobe -r iscsi
11. Perform the upgrade by following Performing the upgrade from RHEL 7 to RHEL 8 .
12. Reboot the node.
13. Enable the repositories for Red Hat Ceph Storage 4 for Red Hat Enterprise Linux 8.
a. Enable the tools repository:
# subscription-manager repos --enable=rhceph-4-tools-for-rhel-8-x86_64-rpms
b. Enable the osd repository:
# subscription-manager repos --enable=rhceph-4-osd-for-rhel-8-x86_64-rpms
14. Install the ceph-osd package:
Red Hat Ceph Storage 4 Installation Guide
118

# dnf install ceph-osd
15. Install the leveldb package:
# dnf install leveldb
16. Restore the ceph.conf file from a node which has not been upgraded yet or from a node thathas already had those files restored.
17. Unset the noout, nobackfill, norecover, norrebalance, noscrub and nodeep-scrub flags:
# ceph osd unset noout# ceph osd unset nobackfill# ceph osd unset norecover# ceph osd unset norebalance# ceph osd unset noscrub# ceph osd unset nodeep-scrub
18. Optional: If the OSDs were created using ceph-disk, and are still managed by ceph-disk, youmust use ceph-volume to take over management of them.
a. Mount each object storage device:
# /dev/DRIVE /var/lib/ceph/osd/ceph-OSD_ID
Replace DRIVE with the storage device name and partition number.
Replace OSD_ID with the OSD ID.
Example
[root@magna023 ~]# mount /dev/sdb1 /var/lib/ceph/osd/ceph-0
Verify the ID_NUMBER is correct.
# cat /var/lib/ceph/osd/ceph-OSD_ID/whoami
Replace OSD_ID with the OSD ID.
Example
[root@magna023 ~]# cat /var/lib/ceph/osd/ceph-0/whoami0
Repeat the above steps for any additional object store devices.
b. Scan the newly mounted devices:
# ceph-volume simple scan /var/lib/ceph/osd/ceph-OSD_ID
Replace OSD_ID with the OSD ID.
Example
CHAPTER 7. MANUALLY UPGRADING A RED HAT CEPH STORAGE CLUSTER AND OPERATING SYSTEM
119

[root@magna023 ~]# ceph-volume simple scan /var/lib/ceph/osd/ceph-0 stderr: lsblk: /var/lib/ceph/osd/ceph-0: not a block device stderr: lsblk: /var/lib/ceph/osd/ceph-0: not a block device stderr: Unknown device, --name=, --path=, or absolute path in /dev/ or /sys expected.Running command: /usr/sbin/cryptsetup status /dev/sdb1--> OSD 0 got scanned and metadata persisted to file: /etc/ceph/osd/0-0c9917f7-fce8-42aa-bdec-8c2cf2d536ba.json--> To take over management of this scanned OSD, and disable ceph-disk and udev, run:--> ceph-volume simple activate 0 0c9917f7-fce8-42aa-bdec-8c2cf2d536ba
Repeat the above step for any additional object store devices.
c. Activate the device:
# ceph-volume simple activate OSD_ID UUID
Replace OSD_ID with the OSD ID and UUID with the UUID printed in the scan output fromearlier.
Example
[root@magna023 ~]# ceph-volume simple activate 0 0c9917f7-fce8-42aa-bdec-8c2cf2d536baRunning command: /usr/bin/ln -snf /dev/sdb2 /var/lib/ceph/osd/ceph-0/journalRunning command: /usr/bin/chown -R ceph:ceph /dev/sdb2Running command: /usr/bin/systemctl enable ceph-volume@simple-0-0c9917f7-fce8-42aa-bdec-8c2cf2d536ba stderr: Created symlink /etc/systemd/system/multi-user.target.wants/ceph-volume@simple-0-0c9917f7-fce8-42aa-bdec-8c2cf2d536ba.service → /usr/lib/systemd/system/[email protected] command: /usr/bin/ln -sf /dev/null /etc/systemd/system/[email protected]> All ceph-disk systemd units have been disabled to prevent OSDs getting triggered by UDEV eventsRunning command: /usr/bin/systemctl enable --runtime ceph-osd@0 stderr: Created symlink /run/systemd/system/ceph-osd.target.wants/[email protected] → /usr/lib/systemd/system/[email protected] command: /usr/bin/systemctl start ceph-osd@0--> Successfully activated OSD 0 with FSID 0c9917f7-fce8-42aa-bdec-8c2cf2d536ba
Repeat the above step for any additional object store devices.
19. Optional: If your OSDs were created with ceph-volume and you did not complete the previousstep, start the OSD service now:
# systemctl start ceph-osd.target
20. Activate the OSDs:
Filestore
# ceph-volume lvm activate --all --filestore
BlueStore
Red Hat Ceph Storage 4 Installation Guide
120

# ceph-volume lvm activate --all
21. Verify that the OSDs are up and in, and that they are in the active+clean state.
# ceph -s
On the osd: line under services:, ensure that all OSDs are up and in:
Example
osd: 3 osds: 3 up (since 8s), 3 in (since 3M)
22. Repeat the above steps on all OSD nodes until they have all been upgraded.
Additional Resources
See Manually upgrading a Red Hat Ceph Storage cluster and operating system in theInstallation Guide for more information.
See Upgrading from Red Hat Enterprise Linux 7 to Red Hat Enterprise Linux 8 for moreinformation.
7.4. MANUALLY UPGRADING CEPH OBJECT GATEWAY NODES ANDTHEIR OPERATING SYSTEMS
As a system administrator, you can manually upgrade the Ceph Object Gateway (RGW) software on aRed Hat Ceph Storage cluster node and the Red Hat Enterprise Linux operating system to a new majorrelease at the same time.
IMPORTANT
This procedure should be performed for each RGW node in the Ceph cluster, but only forone RGW node at a time. Ensure the current upgraded RGW has returned to normaloperation prior to proceeding to the next node to prevent any client access issues.
Prerequisites
A running Red Hat Ceph Storage cluster.
The nodes are running Red Hat Enterprise Linux 7.8.
The nodes are using Red Hat Ceph Storage version 3.3z4 or 4.0
Access to the installation source for Red Hat Enterprise Linux 8.2.
Procedure
1. Stop the Ceph Object Gateway service:
# systemctl stop ceph-radosgw.target
2. If using Red Hat Ceph Storage 3, disable the Red Hat Ceph Storage 3 tool repository:
CHAPTER 7. MANUALLY UPGRADING A RED HAT CEPH STORAGE CLUSTER AND OPERATING SYSTEM
121

# subscription-manager repos --disable=rhel-7-server-rhceph-3-tools-rpms
3. If using Red Hat Ceph Storage 4, disable the Red Hat Ceph Storage 4 tools repository:
# subscription-manager repos --disable=rhel-7-server-rhceph-4-tools-rpms
4. Install the leapp utility. See Upgrading from Red Hat Enterprise Linux 7 to Red Hat EnterpriseLinux 8.
5. Run through the leapp preupgrade checks. See Assessing upgradability from the command line .
6. Set PermitRootLogin yes in /etc/ssh/sshd_config.
7. Restart the OpenSSH SSH daemon:
# systemctl restart sshd.service
8. Remove the iSCSI module from the Linux kernel:
# modprobe -r iscsi
9. Perform the upgrade by following Performing the upgrade from RHEL 7 to RHEL 8 .
10. Reboot the node.
11. Enable the tools repositories for Red Hat Ceph Storage 4 for Red Hat Enterprise Linux 8.
# subscription-manager repos --enable=rhceph-4-tools-for-rhel-8-x86_64-rpms
12. Install the ceph-radosgw package:
# dnf install ceph-radosgw
13. Optional: Install the packages for any Ceph services that are colocated on this node. Enableadditional Ceph repositories if needed.
14. Optional: Install the leveldb package which is needed by other Ceph services.
# dnf install leveldb
15. Restore the ceph-client-admin.keyring and ceph.conf files from a node which has not beenupgraded yet or from a node that has already had those files restored.
16. Start the RGW service:
# systemctl start ceph-radosgw.target
17. Verify the daemon is active:
# ceph -s
There is an rgw: line under services:.
Red Hat Ceph Storage 4 Installation Guide
122

Example
rgw: 1 daemon active (jb-ceph4-rgw.rgw0)
18. Repeat the above steps on all Ceph Object Gateway nodes until they have all been upgraded.
Additional Resources
See Manually upgrading a Red Hat Ceph Storage cluster and operating system in theInstallation Guide for more information.
See Upgrading from Red Hat Enterprise Linux 7 to Red Hat Enterprise Linux 8 for moreinformation.
7.5. MANUALLY UPGRADING THE CEPH DASHBOARD NODE AND ITSOPERATING SYSTEM
As a system administrator, you can manually upgrade the Ceph Dashboard software on a Red HatCeph Storage cluster node and the Red Hat Enterprise Linux operating system to a new major releaseat the same time.
Prerequisites
A running Red Hat Ceph Storage cluster.
The node is running Red Hat Enterprise Linux 7.8.
The node is running Red Hat Ceph Storage version 3.3z4 or 4.0
Access to the installation source for Red Hat Enterprise Linux 8.2.
Procedure
1. Uninstall the existing dashboard from the cluster.
a. Change to the /usr/share/cephmetrics-ansible directory:
# cd /usr/share/cephmetrics-ansible
b. Run the purge.yml Ansible playbook:
# ansible-playbook -v purge.yml
2. If using Red Hat Ceph Storage 3, disable the Red Hat Ceph Storage 3 tools repository:
# subscription-manager repos --disable=rhel-7-server-rhceph-3-tools-rpms
3. If using Red Hat Ceph Storage 4, disable the Red Hat Ceph Storage 4 tools repository:
# subscription-manager repos --disable=rhel-7-server-rhceph-4-tools-rpms
4. Install the leapp utility. See Upgrading from Red Hat Enterprise Linux 7 to Red Hat EnterpriseLinux 8.
CHAPTER 7. MANUALLY UPGRADING A RED HAT CEPH STORAGE CLUSTER AND OPERATING SYSTEM
123

5. Run through the leapp preupgrade checks. See Assessing upgradability from the command line .
6. Set PermitRootLogin yes in /etc/ssh/sshd_config.
7. Restart the OpenSSH SSH daemon:
# systemctl restart sshd.service
8. Remove the iSCSI module from the Linux kernel:
# modprobe -r iscsi
9. Perform the upgrade by following Performing the upgrade from RHEL 7 to RHEL 8 .
10. Reboot the node.
11. Enable the tools repository for Red Hat Ceph Storage 4 for Red Hat Enterprise Linux 8:
# subscription-manager repos --enable=rhceph-4-tools-for-rhel-8-x86_64-rpms
12. Enable the Ansible repository:
# subscription-manager repos --enable=ansible-2.8-for-rhel-8-x86_64-rpms
13. Configure ceph-ansible to manage the cluster. It will install dashboard. Follow the InstallationGuide instructions in Installing Red Hat Ceph Storage using Ansible , including the prerequisites.
14. After you run ansible-playbook site.yml as a part of the above procedures, the URL for thedashboard will be printed. See Installing dashboard using Ansible in the Dashboard guide formore information on locating the URL and accessing the dashboard.
Additional Resources
See Manually upgrading a Red Hat Ceph Storage cluster and operating system in theInstallation Guide for more information.
See Upgrading from Red Hat Enterprise Linux 7 to Red Hat Enterprise Linux 8 for moreinformation.
See Installing dashboard using Ansible in the Dashboard guide for more information.
7.6. RECOVERING FROM AN OPERATING SYSTEM UPGRADE FAILUREON AN OSD NODE
As a system administrator, if you have a failure when using the procedure Manually upgrading Ceph OSDnodes and their operating systems, you can recover from the failure using the following procedure. In theprocedure you will do a fresh install of Red Hat Enterprise Linux 8.2 on the node and still be able torecover the OSDs without any major backfilling of data besides the writes to the OSDs that were downwhile they were out.
IMPORTANT
Red Hat Ceph Storage 4 Installation Guide
124
IMPORTANT
DO NOT touch the media backing the OSDs or their respective wal.db or block.dbdatabases.
Prerequisites
A running Red Hat Ceph Storage cluster.
An OSD node that failed to upgrade.
Access to the installation source for Red Hat Enterprise Linux 8.2.
Procedure
1. Perform a standard installation of Red Hat Enterprise Linux 8.2 on the failed node and enablethe Red Hat Enterprise Linux repositories.
Performing a standard RHEL installation
2. Enable the repositories for Red Hat Ceph Storage 4 for Red Hat Enterprise Linux 8.
a. Enable the tools repository:
# subscription-manager repos --enable=rhceph-4-tools-for-rhel-8-x86_64-rpms
b. Enable the osd repository:
# subscription-manager repos --enable=rhceph-4-osd-for-rhel-8-x86_64-rpms
3. Install the ceph-osd package:
# dnf install ceph-osd
4. Restore the ceph.conf file to /etc/ceph from a node which has not been upgraded yet or from anode that has already had those files restored.
5. Start the OSD service:
# systemctl start ceph-osd.target
6. Activate the object store devices:
ceph-volume lvm activate --all
7. Watch the recovery of the OSDs and cluster backfill writes to recovered OSDs:
# ceph -w
Monitor the output until all PGs are in state active+clean.
Additional Resources
See Manually upgrading a Red Hat Ceph Storage cluster and operating system in the
CHAPTER 7. MANUALLY UPGRADING A RED HAT CEPH STORAGE CLUSTER AND OPERATING SYSTEM
125

See Manually upgrading a Red Hat Ceph Storage cluster and operating system in theInstallation Guide for more information.
See Upgrading from Red Hat Enterprise Linux 7 to Red Hat Enterprise Linux 8 for moreinformation.
7.7. ADDITIONAL RESOURCES
If you do not need to upgrade the operating system to a new major release, see Upgrading aRed Hat Ceph Storage cluster.
Red Hat Ceph Storage 4 Installation Guide
126

CHAPTER 8. WHAT TO DO NEXT?This is only the beginning of what Red Hat Ceph Storage can do to help you meet the challengingstorage demands of the modern data center. Here are links to more information on a variety of topics:
Benchmarking performance and accessing performance counters, see the BenchmarkingPerformance chapter in the Administration Guide for Red Hat Ceph Storage 4.
Creating and managing snapshots, see the Snapshots chapter in the Block Device Guide forRed Hat Ceph Storage 4.
Expanding the Red Hat Ceph Storage cluster, see the Managing Cluster Size chapter in theAdministration Guide for Red Hat Ceph Storage 4.
Mirroring Ceph Block Devices, see the Block Device Mirroring chapter in the Block Device Guidefor Red Hat Ceph Storage 4.
Process management, see the Process Management chapter in the Administration Guide forRed Hat Ceph Storage 4.
Tunable parameters, see the Configuration Guide for Red Hat Ceph Storage 4.
Using Ceph as the back end storage for OpenStack, see the Back-ends section in the StorageGuide for Red Hat OpenStack Platform.
Monitor the health and capacity of the Red Hat Ceph Storage cluster with the Ceph Dashboard.See the link: Dashboard Guide for additional details.
CHAPTER 8. WHAT TO DO NEXT?
127

APPENDIX A. TROUBLESHOOTING
A.1. ANSIBLE STOPS INSTALLATION BECAUSE IT DETECTS LESSDEVICES THAN EXPECTED
The Ansible automation application stops the installation process and returns the following error:
- name: fix partitions gpt header or labels of the osd disks (autodiscover disks) shell: "sgdisk --zap-all --clear --mbrtogpt -- '/dev/{{ item.0.item.key }}' || sgdisk --zap-all --clear --mbrtogpt -- '/dev/{{ item.0.item.key }}'" with_together: - "{{ osd_partition_status_results.results }}" - "{{ ansible_devices }}" changed_when: false when: - ansible_devices is defined - item.0.item.value.removable == "0" - item.0.item.value.partitions|count == 0 - item.0.rc != 0
What this means:
When the osd_auto_discovery parameter is set to true in the /etc/ansible/group_vars/osds.yml file,Ansible automatically detects and configures all the available devices. During this process, Ansibleexpects that all OSDs use the same devices. The devices get their names in the same order in whichAnsible detects them. If one of the devices fails on one of the OSDs, Ansible fails to detect the faileddevice and stops the whole installation process.
Example situation:
1. Three OSD nodes (host1, host2, host3) use the /dev/sdb, /dev/sdc, and dev/sdd disks.
2. On host2, the /dev/sdc disk fails and is removed.
3. Upon the next reboot, Ansible fails to detect the removed /dev/sdc disk and expects that onlytwo disks will be used for host2, /dev/sdb and /dev/sdc (formerly /dev/sdd).
4. Ansible stops the installation process and returns the above error message.
To fix the problem:
In the /etc/ansible/hosts file, specify the devices used by the OSD node with the failed disk ( host2 inthe Example situation above):
[osds]host1host2 devices="[ '/dev/sdb', '/dev/sdc' ]"host3
See Chapter 4, Installing Red Hat Ceph Storage using Ansible for details.
Red Hat Ceph Storage 4 Installation Guide
128

APPENDIX B. USING THE COMMAND-LINE INTERFACE TOINSTALL THE CEPH SOFTWARE
As a storage administrator, you can choose to manually install various components of the Red HatCeph Storage software.
B.1. INSTALLING THE CEPH COMMAND LINE INTERFACE
The Ceph command-line interface (CLI) enables administrators to execute Ceph administrativecommands. The CLI is provided by the ceph-common package and includes the following utilities:
ceph
ceph-authtool
ceph-dencoder
rados
Prerequisites
A running Ceph storage cluster, preferably in the active + clean state.
Procedure
1. On the client node, enable the Red Hat Ceph Storage 4 Tools repository:
[root@gateway ~]# subscription-manager repos --enable=rhceph-4-mon-for-rhel-8-x86_64-rpms
2. On the client node, install the ceph-common package:
# yum install ceph-common
3. From the initial monitor node, copy the Ceph configuration file, in this case ceph.conf, and theadministration keyring to the client node:
Syntax
# scp /etc/ceph/ceph.conf <user_name>@<client_host_name>:/etc/ceph/# scp /etc/ceph/ceph.client.admin.keyring <user_name>@<client_host_name:/etc/ceph/
Example
# scp /etc/ceph/ceph.conf root@node1:/etc/ceph/# scp /etc/ceph/ceph.client.admin.keyring root@node1:/etc/ceph/
Replace <client_host_name> with the host name of the client node.
B.2. MANUALLY INSTALLING RED HAT CEPH STORAGE
IMPORTANT
APPENDIX B. USING THE COMMAND-LINE INTERFACE TO INSTALL THE CEPH SOFTWARE
129

IMPORTANT
Red Hat does not support or test upgrading manually deployed clusters. Therefore, RedHat recommends to use Ansible to deploy a new cluster with Red Hat Ceph Storage 4.See Chapter 4, Installing Red Hat Ceph Storage using Ansible for details.
You can use command-line utilities, such as Yum, to upgrade manually deployed clusters,but Red Hat does not support or test this approach.
All Ceph clusters require at least one monitor, and at least as many OSDs as copies of an object storedon the cluster. Red Hat recommends using three monitors for production environments and a minimumof three Object Storage Devices (OSD).
Bootstrapping the initial monitor is the first step in deploying a Ceph storage cluster. Ceph monitordeployment also sets important criteria for the entire cluster, such as:
The number of replicas for pools
The number of placement groups per OSD
The heartbeat intervals
Any authentication requirement
Most of these values are set by default, so it is useful to know about them when setting up the cluster forproduction.
Installing a Ceph storage cluster by using the command line interface involves these steps:
Bootstrapping the initial Monitor node
Adding an Object Storage Device (OSD) node
Monitor BootstrappingBootstrapping a Monitor and by extension a Ceph storage cluster, requires the following data:
Unique Identifier
The File System Identifier (fsid) is a unique identifier for the cluster. The fsid was originally usedwhen the Ceph storage cluster was principally used for the Ceph file system. Ceph now supportsnative interfaces, block devices, and object storage gateway interfaces too, so fsid is a bit of amisnomer.
Monitor Name
Each Monitor instance within a cluster has a unique name. In common practice, the Ceph Monitorname is the node name. Red Hat recommend one Ceph Monitor per node, and no co-locating theCeph OSD daemons with the Ceph Monitor daemon. To retrieve the short node name, use the hostname -s command.
Monitor Map
Bootstrapping the initial Monitor requires you to generate a Monitor map. The Monitor map requires:
The File System Identifier (fsid)
The cluster name, or the default cluster name of ceph is used
At least one host name and its IP address.
Red Hat Ceph Storage 4 Installation Guide
130

Monitor Keyring
Monitors communicate with each other by using a secret key. You must generate a keyring with aMonitor secret key and provide it when bootstrapping the initial Monitor.
Administrator Keyring
To use the ceph command-line interface utilities, create the client.admin user and generate itskeyring. Also, you must add the client.admin user to the Monitor keyring.
The foregoing requirements do not imply the creation of a Ceph configuration file. However, as a bestpractice, Red Hat recommends creating a Ceph configuration file and populating it with the fsid, the mon initial members and the mon host settings at a minimum.
You can get and set all of the Monitor settings at runtime as well. However, the Ceph configuration filemight contain only those settings which overrides the default values. When you add settings to a Cephconfiguration file, these settings override the default settings. Maintaining those settings in a Cephconfiguration file makes it easier to maintain the cluster.
To bootstrap the initial Monitor, perform the following steps:
1. Enable the Red Hat Ceph Storage 4 Monitor repository:
[root@monitor ~]# subscription-manager repos --enable=rhceph-4-mon-for-rhel-8-x86_64-rpms
2. On your initial Monitor node, install the ceph-mon package as root:
# yum install ceph-mon
3. As root, create a Ceph configuration file in the /etc/ceph/ directory.
# touch /etc/ceph/ceph.conf
4. As root, generate the unique identifier for your cluster and add the unique identifier to the [global] section of the Ceph configuration file:
# echo "[global]" > /etc/ceph/ceph.conf# echo "fsid = `uuidgen`" >> /etc/ceph/ceph.conf
5. View the current Ceph configuration file:
$ cat /etc/ceph/ceph.conf[global]fsid = a7f64266-0894-4f1e-a635-d0aeaca0e993
6. As root, add the initial Monitor to the Ceph configuration file:
Syntax
# echo "mon initial members = <monitor_host_name>[,<monitor_host_name>]" >> /etc/ceph/ceph.conf
Example
APPENDIX B. USING THE COMMAND-LINE INTERFACE TO INSTALL THE CEPH SOFTWARE
131

# echo "mon initial members = node1" >> /etc/ceph/ceph.conf
7. As root, add the IP address of the initial Monitor to the Ceph configuration file:
Syntax
# echo "mon host = <ip-address>[,<ip-address>]" >> /etc/ceph/ceph.conf
Example
# echo "mon host = 192.168.0.120" >> /etc/ceph/ceph.conf
NOTE
To use IPv6 addresses, you set the ms bind ipv6 option to true. For details, seethe Bind section in the Configuration Guide for Red Hat Ceph Storage 4.
8. As root, create the keyring for the cluster and generate the Monitor secret key:
# ceph-authtool --create-keyring /tmp/ceph.mon.keyring --gen-key -n mon. --cap mon 'allow *'creating /tmp/ceph.mon.keyring
9. As root, generate an administrator keyring, generate a ceph.client.admin.keyring user and addthe user to the keyring:
Syntax
# ceph-authtool --create-keyring /etc/ceph/ceph.client.admin.keyring --gen-key -n client.admin --set-uid=0 --cap mon '<capabilites>' --cap osd '<capabilites>' --cap mds '<capabilites>'
Example
# ceph-authtool --create-keyring /etc/ceph/ceph.client.admin.keyring --gen-key -n client.admin --set-uid=0 --cap mon 'allow *' --cap osd 'allow *' --cap mds 'allow'creating /etc/ceph/ceph.client.admin.keyring
10. As root, add the ceph.client.admin.keyring key to the ceph.mon.keyring:
# ceph-authtool /tmp/ceph.mon.keyring --import-keyring /etc/ceph/ceph.client.admin.keyringimporting contents of /etc/ceph/ceph.client.admin.keyring into /tmp/ceph.mon.keyring
11. Generate the Monitor map. Specify using the node name, IP address and the fsid, of the initialMonitor and save it as /tmp/monmap:
Syntax
$ monmaptool --create --add <monitor_host_name> <ip-address> --fsid <uuid> /tmp/monmap
Example
Red Hat Ceph Storage 4 Installation Guide
132

$ monmaptool --create --add node1 192.168.0.120 --fsid a7f64266-0894-4f1e-a635-d0aeaca0e993 /tmp/monmapmonmaptool: monmap file /tmp/monmapmonmaptool: set fsid to a7f64266-0894-4f1e-a635-d0aeaca0e993monmaptool: writing epoch 0 to /tmp/monmap (1 monitors)
12. As root on the initial Monitor node, create a default data directory:
Syntax
# mkdir /var/lib/ceph/mon/ceph-<monitor_host_name>
Example
# mkdir /var/lib/ceph/mon/ceph-node1
13. As root, populate the initial Monitor daemon with the Monitor map and keyring:
Syntax
# ceph-mon --mkfs -i <monitor_host_name> --monmap /tmp/monmap --keyring /tmp/ceph.mon.keyring
Example
# ceph-mon --mkfs -i node1 --monmap /tmp/monmap --keyring /tmp/ceph.mon.keyringceph-mon: set fsid to a7f64266-0894-4f1e-a635-d0aeaca0e993ceph-mon: created monfs at /var/lib/ceph/mon/ceph-node1 for mon.node1
14. View the current Ceph configuration file:
# cat /etc/ceph/ceph.conf[global]fsid = a7f64266-0894-4f1e-a635-d0aeaca0e993mon_initial_members = node1mon_host = 192.168.0.120
For more details on the various Ceph configuration settings, see the Configuration Guide forRed Hat Ceph Storage 4. The following example of a Ceph configuration file lists some of themost common configuration settings:
Example
[global]fsid = <cluster-id>mon initial members = <monitor_host_name>[, <monitor_host_name>]mon host = <ip-address>[, <ip-address>]public network = <network>[, <network>]cluster network = <network>[, <network>]auth cluster required = cephxauth service required = cephxauth client required = cephxosd journal size = <n>
APPENDIX B. USING THE COMMAND-LINE INTERFACE TO INSTALL THE CEPH SOFTWARE
133

osd pool default size = <n> # Write an object n times.osd pool default min size = <n> # Allow writing n copy in a degraded state.osd pool default pg num = <n>osd pool default pgp num = <n>osd crush chooseleaf type = <n>
15. As root, create the done file:
Syntax
# touch /var/lib/ceph/mon/ceph-<monitor_host_name>/done
Example
# touch /var/lib/ceph/mon/ceph-node1/done
16. As root, update the owner and group permissions on the newly created directory and files:
Syntax
# chown -R <owner>:<group> <path_to_directory>
Example
# chown -R ceph:ceph /var/lib/ceph/mon# chown -R ceph:ceph /var/log/ceph# chown -R ceph:ceph /var/run/ceph# chown ceph:ceph /etc/ceph/ceph.client.admin.keyring# chown ceph:ceph /etc/ceph/ceph.conf# chown ceph:ceph /etc/ceph/rbdmap
NOTE
If the Ceph Monitor node is co-located with an OpenStack Controller node, thenthe Glance and Cinder keyring files must be owned by glance and cinderrespectively. For example:
# ls -l /etc/ceph/...-rw-------. 1 glance glance 64 <date> ceph.client.glance.keyring-rw-------. 1 cinder cinder 64 <date> ceph.client.cinder.keyring...
17. As root, start and enable the ceph-mon process on the initial Monitor node:
Syntax
# systemctl enable ceph-mon.target# systemctl enable ceph-mon@<monitor_host_name># systemctl start ceph-mon@<monitor_host_name>
Red Hat Ceph Storage 4 Installation Guide
134

Example
# systemctl enable ceph-mon.target# systemctl enable ceph-mon@node1# systemctl start ceph-mon@node1
18. As root, verify the monitor daemon is running:
Syntax
# systemctl status ceph-mon@<monitor_host_name>
Example
# systemctl status ceph-mon@node1● [email protected] - Ceph cluster monitor daemon Loaded: loaded (/usr/lib/systemd/system/[email protected]; enabled; vendor preset: disabled) Active: active (running) since Wed 2018-06-27 11:31:30 PDT; 5min ago Main PID: 1017 (ceph-mon) CGroup: /system.slice/system-ceph\x2dmon.slice/[email protected] └─1017 /usr/bin/ceph-mon -f --cluster ceph --id node1 --setuser ceph --setgroup ceph
Jun 27 11:31:30 node1 systemd[1]: Started Ceph cluster monitor daemon.Jun 27 11:31:30 node1 systemd[1]: Starting Ceph cluster monitor daemon...
To add more Red Hat Ceph Storage Monitors to the storage cluster, see the Adding a Monitor section inthe Administration Guide for Red Hat Ceph Storage 4.
OSD BootstrappingOnce you have your initial monitor running, you can start adding the Object Storage Devices (OSDs).Your cluster cannot reach an active + clean state until you have enough OSDs to handle the number ofcopies of an object.
The default number of copies for an object is three. You will need three OSD nodes at minimum.However, if you only want two copies of an object, therefore only adding two OSD nodes, then updatethe osd pool default size and osd pool default min size settings in the Ceph configuration file.
For more details, see the OSD Configuration Reference section in the Configuration Guide for Red HatCeph Storage 4.
After bootstrapping the initial monitor, the cluster has a default CRUSH map. However, the CRUSH mapdoes not have any Ceph OSD daemons mapped to a Ceph node.
To add an OSD to the cluster and updating the default CRUSH map, execute the following on each OSDnode:
1. Enable the Red Hat Ceph Storage 4 OSD repository:
[root@osd ~]# subscription-manager repos --enable=rhceph-4-osd-for-rhel-8-x86_64-rpms
2. As root, install the ceph-osd package on the Ceph OSD node:
# yum install ceph-osd
APPENDIX B. USING THE COMMAND-LINE INTERFACE TO INSTALL THE CEPH SOFTWARE
135

3. Copy the Ceph configuration file and administration keyring file from the initial Monitor node tothe OSD node:
Syntax
# scp <user_name>@<monitor_host_name>:<path_on_remote_system> <path_to_local_file>
Example
# scp root@node1:/etc/ceph/ceph.conf /etc/ceph# scp root@node1:/etc/ceph/ceph.client.admin.keyring /etc/ceph
4. Generate the Universally Unique Identifier (UUID) for the OSD:
$ uuidgenb367c360-b364-4b1d-8fc6-09408a9cda7a
5. As root, create the OSD instance:
Syntax
# ceph osd create <uuid> [<osd_id>]
Example
# ceph osd create b367c360-b364-4b1d-8fc6-09408a9cda7a0
NOTE
This command outputs the OSD number identifier needed for subsequent steps.
6. As root, create the default directory for the new OSD:
Syntax
# mkdir /var/lib/ceph/osd/ceph-<osd_id>
Example
# mkdir /var/lib/ceph/osd/ceph-0
7. As root, prepare the drive for use as an OSD, and mount it to the directory you just created.Create a partition for the Ceph data and journal. The journal and the data partitions can belocated on the same disk. This example is using a 15 GB disk:
Syntax
# parted <path_to_disk> mklabel gpt# parted <path_to_disk> mkpart primary 1 10000
Red Hat Ceph Storage 4 Installation Guide
136

# mkfs -t <fstype> <path_to_partition># mount -o noatime <path_to_partition> /var/lib/ceph/osd/ceph-<osd_id># echo "<path_to_partition> /var/lib/ceph/osd/ceph-<osd_id> xfs defaults,noatime 1 2" >> /etc/fstab
Example
# parted /dev/sdb mklabel gpt# parted /dev/sdb mkpart primary 1 10000# parted /dev/sdb mkpart primary 10001 15000# mkfs -t xfs /dev/sdb1# mount -o noatime /dev/sdb1 /var/lib/ceph/osd/ceph-0# echo "/dev/sdb1 /var/lib/ceph/osd/ceph-0 xfs defaults,noatime 1 2" >> /etc/fstab
8. As root, initialize the OSD data directory:
Syntax
# ceph-osd -i <osd_id> --mkfs --mkkey --osd-uuid <uuid>
Example
# ceph-osd -i 0 --mkfs --mkkey --osd-uuid b367c360-b364-4b1d-8fc6-09408a9cda7a... auth: error reading file: /var/lib/ceph/osd/ceph-0/keyring: can't open /var/lib/ceph/osd/ceph-0/keyring: (2) No such file or directory... created new key in keyring /var/lib/ceph/osd/ceph-0/keyring
9. As root, register the OSD authentication key.
Syntax
# ceph auth add osd.<osd_id> osd 'allow *' mon 'allow profile osd' -i /var/lib/ceph/osd/ceph-<osd_id>/keyring
Example
# ceph auth add osd.0 osd 'allow *' mon 'allow profile osd' -i /var/lib/ceph/osd/ceph-0/keyringadded key for osd.0
10. As root, add the OSD node to the CRUSH map:
Syntax
# ceph osd crush add-bucket <host_name> host
Example
# ceph osd crush add-bucket node2 host
11. As root, place the OSD node under the default CRUSH tree:
Syntax
APPENDIX B. USING THE COMMAND-LINE INTERFACE TO INSTALL THE CEPH SOFTWARE
137

# ceph osd crush move <host_name> root=default
Example
# ceph osd crush move node2 root=default
12. As root, add the OSD disk to the CRUSH map
Syntax
# ceph osd crush add osd.<osd_id> <weight> [<bucket_type>=<bucket-name> ...]
Example
# ceph osd crush add osd.0 1.0 host=node2add item id 0 name 'osd.0' weight 1 at location {host=node2} to crush map
NOTE
You can also decompile the CRUSH map, and add the OSD to the device list. Addthe OSD node as a bucket, then add the device as an item in the OSD node,assign the OSD a weight, recompile the CRUSH map and set the CRUSH map.For more details, see the Editing a CRUSH map section in the Storage StrategiesGuide for Red Hat Ceph Storage 4 for more details.
13. As root, update the owner and group permissions on the newly created directory and files:
Syntax
# chown -R <owner>:<group> <path_to_directory>
Example
# chown -R ceph:ceph /var/lib/ceph/osd# chown -R ceph:ceph /var/log/ceph# chown -R ceph:ceph /var/run/ceph# chown -R ceph:ceph /etc/ceph
14. The OSD node is in your Ceph storage cluster configuration. However, the OSD daemon is down and in. The new OSD must be up before it can begin receiving data. As root, enable andstart the OSD process:
Syntax
# systemctl enable ceph-osd.target# systemctl enable ceph-osd@<osd_id># systemctl start ceph-osd@<osd_id>
Example
Red Hat Ceph Storage 4 Installation Guide
138

# systemctl enable ceph-osd.target# systemctl enable ceph-osd@0# systemctl start ceph-osd@0
Once you start the OSD daemon, it is up and in.
Now you have the monitors and some OSDs up and running. You can watch the placement groups peerby executing the following command:
$ ceph -w
To view the OSD tree, execute the following command:
$ ceph osd tree
Example
ID WEIGHT TYPE NAME UP/DOWN REWEIGHT PRIMARY-AFFINITY-1 2 root default-2 2 host node2 0 1 osd.0 up 1 1-3 1 host node3 1 1 osd.1 up 1 1
To expand the storage capacity by adding new OSDs to the storage cluster, see the Adding an OSDsection in the Administration Guide for Red Hat Ceph Storage 4.
B.3. MANUALLY INSTALLING CEPH MANAGER
Usually, the Ansible automation utility installs the Ceph Manager daemon (ceph-mgr) when you deploythe Red Hat Ceph Storage cluster. However, if you do not use Ansible to manage Red Hat CephStorage, you can install Ceph Manager manually. Red Hat recommends to colocate the Ceph Managerand Ceph Monitor daemons on a same node.
Prerequisites
A working Red Hat Ceph Storage cluster
root or sudo access
The rhceph-4-mon-for-rhel-8-x86_64-rpms repository enabled
Open ports 6800-7300 on the public network if firewall is used
Procedure
Use the following commands on the node where ceph-mgr will be deployed and as the root user or withthe sudo utility.
1. Install the ceph-mgr package:
[root@node1 ~]# yum install ceph-mgr
APPENDIX B. USING THE COMMAND-LINE INTERFACE TO INSTALL THE CEPH SOFTWARE
139

2. Create the /var/lib/ceph/mgr/ceph-hostname/ directory:
mkdir /var/lib/ceph/mgr/ceph-hostname
Replace hostname with the host name of the node where the ceph-mgr daemon will bedeployed, for example:
[root@node1 ~]# mkdir /var/lib/ceph/mgr/ceph-node1
3. In the newly created directory, create an authentication key for the ceph-mgr daemon:
[root@node1 ~]# ceph auth get-or-create mgr.`hostname -s` mon 'allow profile mgr' osd 'allow *' mds 'allow *' -o /var/lib/ceph/mgr/ceph-node1/keyring
4. Change the owner and group of the /var/lib/ceph/mgr/ directory to ceph:ceph:
[root@node1 ~]# chown -R ceph:ceph /var/lib/ceph/mgr
5. Enable the ceph-mgr target:
[root@node1 ~]# systemctl enable ceph-mgr.target
6. Enable and start the ceph-mgr instance:
systemctl enable ceph-mgr@hostnamesystemctl start ceph-mgr@hostname
Replace hostname with the host name of the node where the ceph-mgr will be deployed, forexample:
[root@node1 ~]# systemctl enable ceph-mgr@node1[root@node1 ~]# systemctl start ceph-mgr@node1
7. Verify that the ceph-mgr daemon started successfully:
ceph -s
The output will include a line similar to the following one under the services: section:
mgr: node1(active)
8. Install more ceph-mgr daemons to serve as standby daemons that become active if the currentactive daemon fails.
Additional resources
Requirements for Installing Red Hat Ceph Storage
B.4. MANUALLY INSTALLING CEPH BLOCK DEVICE
The following procedure shows how to install and mount a thin-provisioned, resizable Ceph Block
Red Hat Ceph Storage 4 Installation Guide
140

The following procedure shows how to install and mount a thin-provisioned, resizable Ceph BlockDevice.
IMPORTANT
Ceph Block Devices must be deployed on separate nodes from the Ceph Monitor andOSD nodes. Running kernel clients and kernel server daemons on the same node canlead to kernel deadlocks.
Prerequisites
Ensure to perform the tasks listed in the Section B.1, “Installing the Ceph Command LineInterface” section.
If you use Ceph Block Devices as a back end for virtual machines (VMs) that use QEMU,increase the default file descriptor. See the Ceph - VM hangs when transferring large amountsof data to RBD disk Knowledgebase article for details.
Procedure
1. Create a Ceph Block Device user named client.rbd with full permissions to files on OSD nodes(osd 'allow rwx') and output the result to a keyring file:
ceph auth get-or-create client.rbd mon 'profile rbd' osd 'profile rbd pool=<pool_name>' \-o /etc/ceph/rbd.keyring
Replace <pool_name> with the name of the pool that you want to allow client.rbd to haveaccess to, for example rbd:
# ceph auth get-or-create \client.rbd mon 'allow r' osd 'allow rwx pool=rbd' \-o /etc/ceph/rbd.keyring
See the User Management section in the Red Hat Ceph Storage 4 Administration Guide formore information about creating users.
2. Create a block device image:
rbd create <image_name> --size <image_size> --pool <pool_name> \--name client.rbd --keyring /etc/ceph/rbd.keyring
Specify <image_name>, <image_size>, and <pool_name>, for example:
$ rbd create image1 --size 4G --pool rbd \--name client.rbd --keyring /etc/ceph/rbd.keyring
APPENDIX B. USING THE COMMAND-LINE INTERFACE TO INSTALL THE CEPH SOFTWARE
141

WARNING
The default Ceph configuration includes the following Ceph Block Devicefeatures:
layering
exclusive-lock
object-map
deep-flatten
fast-diff
If you use the kernel RBD (krbd) client, you may not be able to map theblock device image.
To work around this problem, disable the unsupported features. Use one ofthe following options to do so:
Disable the unsupported features dynamically:
rbd feature disable <image_name> <feature_name>
For example:
# rbd feature disable image1 object-map deep-flatten fast-diff
Use the --image-feature layering option with the rbd create commandto enable only layering on newly created block device images.
Disable the features be default in the Ceph configuration file:
rbd_default_features = 1
This is a known issue, for details see the Known Issues chapter in theRelease Notes for Red Hat Ceph Storage 4.
All these features work for users that use the user-space RBD client toaccess the block device images.
3. Map the newly created image to the block device:
rbd map <image_name> --pool <pool_name>\--name client.rbd --keyring /etc/ceph/rbd.keyring
For example:
Red Hat Ceph Storage 4 Installation Guide
142

# rbd map image1 --pool rbd --name client.rbd \--keyring /etc/ceph/rbd.keyring
4. Use the block device by creating a file system:
mkfs.ext4 /dev/rbd/<pool_name>/<image_name>
Specify the pool name and the image name, for example:
# mkfs.ext4 /dev/rbd/rbd/image1
This action can take a few moments.
5. Mount the newly created file system:
mkdir <mount_directory>mount /dev/rbd/<pool_name>/<image_name> <mount_directory>
For example:
# mkdir /mnt/ceph-block-device# mount /dev/rbd/rbd/image1 /mnt/ceph-block-device
Additional Resources
The Block Device Guide for Red Hat Ceph Storage 4.
B.5. MANUALLY INSTALLING CEPH OBJECT GATEWAY
The Ceph object gateway, also know as the RADOS gateway, is an object storage interface built on topof the librados API to provide applications with a RESTful gateway to Ceph storage clusters.
Prerequisites
A running Ceph storage cluster, preferably in the active + clean state.
Perform the tasks listed in Chapter 2, Requirements for Installing Red Hat Ceph Storage .
Procedure
1. Enable the Red Hat Ceph Storage 4 Tools repository:
[root@gateway ~]# subscription-manager repos --enable=rhceph-4-tools-for-rhel-8-x86_64-debug-rpms
2. On the Object Gateway node, install the ceph-radosgw package:
# yum install ceph-radosgw
3. On the initial Monitor node, do the following steps.
a. Update the Ceph configuration file as follows:
APPENDIX B. USING THE COMMAND-LINE INTERFACE TO INSTALL THE CEPH SOFTWARE
143

[client.rgw.<obj_gw_hostname>]host = <obj_gw_hostname>rgw frontends = "civetweb port=80"rgw dns name = <obj_gw_hostname>.example.com
Where <obj_gw_hostname> is a short host name of the gateway node. To view the shorthost name, use the hostname -s command.
b. Copy the updated configuration file to the new Object Gateway node and all other nodes inthe Ceph storage cluster:
Syntax
# scp /etc/ceph/ceph.conf <user_name>@<target_host_name>:/etc/ceph
Example
# scp /etc/ceph/ceph.conf root@node1:/etc/ceph/
c. Copy the ceph.client.admin.keyring file to the new Object Gateway node:
Syntax
# scp /etc/ceph/ceph.client.admin.keyring <user_name>@<target_host_name>:/etc/ceph/
Example
# scp /etc/ceph/ceph.client.admin.keyring root@node1:/etc/ceph/
4. On the Object Gateway node, create the data directory:
# mkdir -p /var/lib/ceph/radosgw/ceph-rgw.`hostname -s`
5. On the Object Gateway node, add a user and keyring to bootstrap the object gateway:
Syntax
# ceph auth get-or-create client.rgw.`hostname -s` osd 'allow rwx' mon 'allow rw' -o /var/lib/ceph/radosgw/ceph-rgw.`hostname -s`/keyring
Example
# ceph auth get-or-create client.rgw.`hostname -s` osd 'allow rwx' mon 'allow rw' -o /var/lib/ceph/radosgw/ceph-rgw.`hostname -s`/keyring
IMPORTANT
Red Hat Ceph Storage 4 Installation Guide
144

IMPORTANT
When you provide capabilities to the gateway key you must provide the readcapability. However, providing the Monitor write capability is optional; if youprovide it, the Ceph Object Gateway will be able to create pools automatically.
In such a case, ensure to specify a reasonable number of placement groups in apool. Otherwise, the gateway uses the default number, which is most likely notsuitable for your needs. See Ceph Placement Groups (PGs) per Pool Calculatorfor details.
6. On the Object Gateway node, create the done file:
# touch /var/lib/ceph/radosgw/ceph-rgw.`hostname -s`/done
7. On the Object Gateway node, change the owner and group permissions:
# chown -R ceph:ceph /var/lib/ceph/radosgw# chown -R ceph:ceph /var/log/ceph# chown -R ceph:ceph /var/run/ceph# chown -R ceph:ceph /etc/ceph
8. On the Object Gateway node, open TCP port 8080:
# firewall-cmd --zone=public --add-port=8080/tcp# firewall-cmd --zone=public --add-port=8080/tcp --permanent
9. On the Object Gateway node, start and enable the ceph-radosgw process:
Syntax
# systemctl enable ceph-radosgw.target# systemctl enable ceph-radosgw@rgw.<rgw_hostname># systemctl start ceph-radosgw@rgw.<rgw_hostname>
Example
# systemctl enable ceph-radosgw.target# systemctl enable [email protected]# systemctl start [email protected]
Once installed, the Ceph Object Gateway automatically creates pools if the write capability is set on theMonitor. See the Pools chapter in the Storage Strategies Guide for details on creating pools manually.
Additional Resources
The Red Hat Ceph Storage 4 Object Gateway Configuration and Administration Guide
APPENDIX B. USING THE COMMAND-LINE INTERFACE TO INSTALL THE CEPH SOFTWARE
145
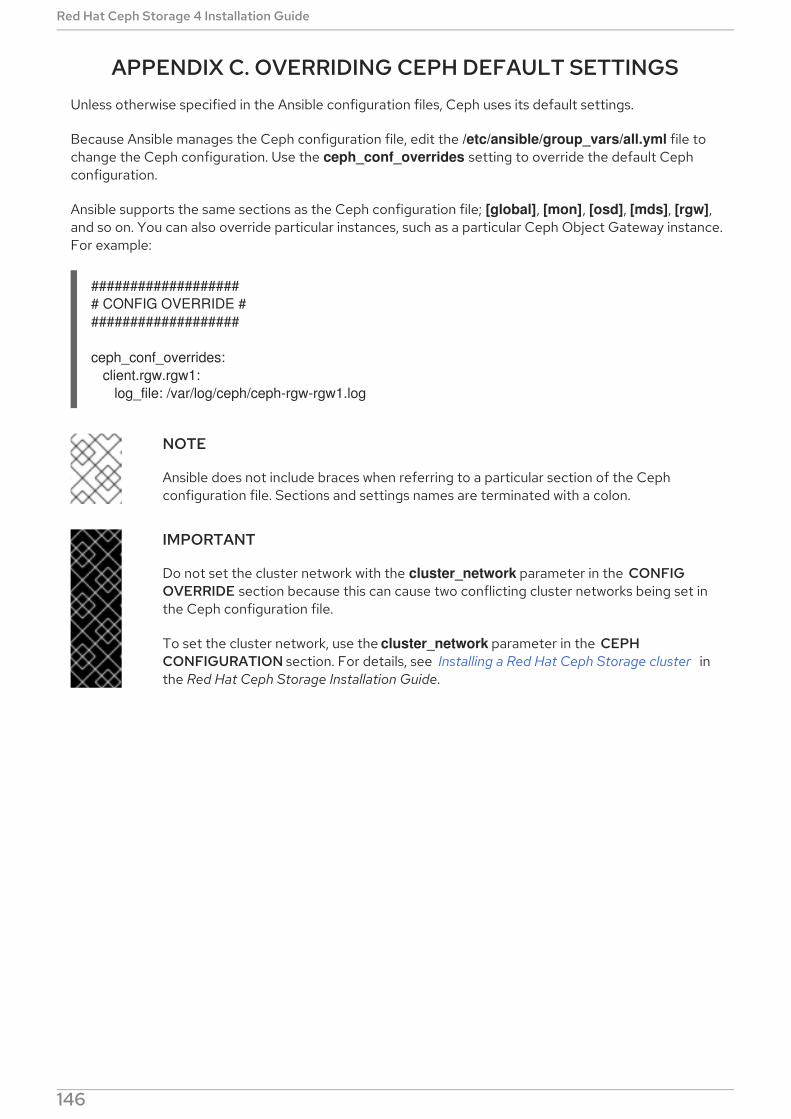
APPENDIX C. OVERRIDING CEPH DEFAULT SETTINGSUnless otherwise specified in the Ansible configuration files, Ceph uses its default settings.
Because Ansible manages the Ceph configuration file, edit the /etc/ansible/group_vars/all.yml file tochange the Ceph configuration. Use the ceph_conf_overrides setting to override the default Cephconfiguration.
Ansible supports the same sections as the Ceph configuration file; [global], [mon], [osd], [mds], [rgw],and so on. You can also override particular instances, such as a particular Ceph Object Gateway instance.For example:
#################### CONFIG OVERRIDE ####################
ceph_conf_overrides: client.rgw.rgw1: log_file: /var/log/ceph/ceph-rgw-rgw1.log
NOTE
Ansible does not include braces when referring to a particular section of the Cephconfiguration file. Sections and settings names are terminated with a colon.
IMPORTANT
Do not set the cluster network with the cluster_network parameter in the CONFIGOVERRIDE section because this can cause two conflicting cluster networks being set inthe Ceph configuration file.
To set the cluster network, use the cluster_network parameter in the CEPHCONFIGURATION section. For details, see Installing a Red Hat Ceph Storage cluster inthe Red Hat Ceph Storage Installation Guide.
Red Hat Ceph Storage 4 Installation Guide
146

APPENDIX D. IMPORTING AN EXISTING CEPH CLUSTER TOANSIBLE
You can configure Ansible to use a cluster deployed without Ansible. For example, if you upgraded RedHat Ceph Storage 1.3 clusters to version 2 manually, configure them to use Ansible by following thisprocedure:
1. After manually upgrading from version 1.3 to version 2, install and configure Ansible on theadministration node.
2. Ensure that the Ansible administration node has passwordless ssh access to all Ceph nodes inthe cluster. See Section 2.11, “Enabling password-less SSH for Ansible” for more details.
3. As root, create a symbolic link to the Ansible group_vars directory in the /etc/ansible/directory:
# ln -s /usr/share/ceph-ansible/group_vars /etc/ansible/group_vars
4. As root, create an all.yml file from the all.yml.sample file and open it for editing:
# cd /etc/ansible/group_vars# cp all.yml.sample all.yml# vim all.yml
5. Set the generate_fsid setting to false in group_vars/all.yml.
6. Get the current cluster fsid by executing ceph fsid.
7. Set the retrieved fsid in group_vars/all.yml.
8. Modify the Ansible inventory in /etc/ansible/hosts to include Ceph hosts. Add monitors under a [mons] section, OSDs under an [osds] section and gateways under an [rgws] section toidentify their roles to Ansible.
9. Make sure ceph_conf_overrides is updated with the original ceph.conf options used for [global], [osd], [mon], and [client] sections in the all.yml file.Options like osd journal, public_network and cluster_network should not be added in ceph_conf_overrides because they are already part of all.yml. Only the options that are notpart of all.yml and are in the original ceph.conf should be added to ceph_conf_overrides.
10. From the /usr/share/ceph-ansible/ directory run the playbook.
# cd /usr/share/ceph-ansible/# ansible-playbook infrastructure-playbooks/take-over-existing-cluster.yml -u <username> -i hosts
APPENDIX D. IMPORTING AN EXISTING CEPH CLUSTER TO ANSIBLE
147

APPENDIX E. PURGING STORAGE CLUSTERS DEPLOYED BYANSIBLE
If you no longer want to use a Ceph storage cluster, then use the purge-docker-cluster.yml playbook toremove the cluster. Purging a storage cluster is also useful when the installation process failed and youwant to start over.
WARNING
After purging a Ceph storage cluster, all data on the OSDs is permanently lost.
Prerequisites
Root-level access to the Ansible administration node.
Access to the ansible user account.
For bare-metal deployments:
If the osd_auto_discovery option in the /usr/share/ceph-ansible/group-vars/osds.ymlfile is set to true, then Ansible will fail to purge the storage cluster. Therefore, comment out osd_auto_discovery and declare the OSD devices in the osds.yml file.
Ensure that the /var/log/ansible/ansible.log file is writable by the ansible user account.
Procedure
1. Navigate to the /usr/share/ceph-ansible/ directory:
[root@admin ~]# cd /usr/share/ceph-ansible
2. As the ansible user, run the purge playbook.
a. For bare-metal deployments, use the purge-cluster.yml playbook to purge the Cephstorage cluster:
[ansible@admin ceph-ansible]$ ansible-playbook infrastructure-playbooks/purge-cluster.yml
b. For container deployments:
i. Use the purge-docker-cluster.yml playbook to purge the Ceph storage cluster:
[ansible@admin ceph-ansible]$ ansible-playbook infrastructure-playbooks/purge-docker-cluster.yml
NOTE
Red Hat Ceph Storage 4 Installation Guide
148
NOTE
This playbook removes all packages, containers, configuration files, andall the data created by the Ceph Ansible playbook.
ii. To specify a different inventory file other than the default (/etc/ansible/hosts), use -iparameter:
Syntax
[ansible@admin ceph-ansible]$ ansible-playbook infrastructure-playbooks/purge-docker-cluster.yml -i INVENTORY_FILE
Replace
INVENTORY_FILE with the path to the inventory file.
Example
[ansible@admin ceph-ansible]$ ansible-playbook infrastructure-playbooks/purge-docker-cluster.yml -i ~/ansible/hosts
iii. To skip the removal of the Ceph container image, use the --skip-tags=”remove_img”option:
[ansible@admin ceph-ansible]$ ansible-playbook --skip-tags="remove_img" infrastructure-playbooks/purge-docker-cluster.yml
iv. To skip the removal of the packages that were installed during the installation, use the --skip-tags=”with_pkg” option:
[ansible@admin ceph-ansible]$ ansible-playbook --skip-tags="with_pkg" infrastructure-playbooks/purge-docker-cluster.yml
Additional Resources
See the OSD Ansible settings for more details.
APPENDIX E. PURGING STORAGE CLUSTERS DEPLOYED BY ANSIBLE
149

APPENDIX F. GENERAL ANSIBLE SETTINGSThese are the most common configurable Ansible parameters. There are two sets of parametersdepending on the deployment method, either bare-metal or containers.
NOTE
This is not an exhaustive list of all the available Ansible parameters.
Bare-metal and Containers Settings
monitor_interface
The interface that the Ceph Monitor nodes listen on.
Value
User-defined
Required
Yes
Notes
Assigning a value to at least one of the monitor_* parameters is required.
monitor_address
The address that the Ceph Monitor nodes listen too.
Value
User-defined
Required
Yes
Notes
Assigning a value to at least one of the monitor_* parameters is required.
monitor_address_block
The subnet of the Ceph public network.
Value
User-defined
Required
Yes
Notes
Use when the IP addresses of the nodes are unknown, but the subnet is known. Assigning a valueto at least one of the monitor_* parameters is required.
ip_version
Value
ipv6
Required
Yes, if using IPv6 addressing.
Red Hat Ceph Storage 4 Installation Guide
150

public_network
The IP address and netmask of the Ceph public network, or the corresponding IPv6 address, if usingIPv6.
Value
User-defined
Required
Yes
Notes
For more information, see Verifying the Network Configuration for Red Hat Ceph Storage .
cluster_network
The IP address and netmask of the Ceph cluster network, or the corresponding IPv6 address, if usingIPv6.
Value
User-defined
Required
No
Notes
For more information, see Verifying the Network Configuration for Red Hat Ceph Storage .
configure_firewall
Ansible will try to configure the appropriate firewall rules.
Value
true or false
Required
No
Bare-metal-specific Settings
ceph_origin
Value
repository or distro or local
Required
Yes
Notes
The repository value means Ceph will be installed through a new repository. The distro valuemeans that no separate repository file will be added, and you will get whatever version of Cephthat is included with the Linux distribution. The local value means the Ceph binaries will be copiedfrom the local machine.
ceph_repository_type
Value
cdn or iso
Required
APPENDIX F. GENERAL ANSIBLE SETTINGS
151

Yes
ceph_rhcs_version
Value
4
Required
Yes
ceph_rhcs_iso_path
The full path to the ISO image.
Value
User-defined
Required
Yes, if ceph_repository_type is set to iso.
Container-specific Settings
ceph_docker_image
Value
rhceph/rhceph-4-rhel8, or cephimageinlocalreg, if using a local Docker registry.
Required
Yes
containerized_deployment
Value
true
Required
Yes
ceph_docker_registry
Value
registry.redhat.io, or LOCAL_FQDN_NODE_NAME, if using a local Docker registry.
Required
Yes
Red Hat Ceph Storage 4 Installation Guide
152

APPENDIX G. OSD ANSIBLE SETTINGSThese are the most common configurable OSD Ansible parameters.
devices
List of devices where Ceph’s data is stored.
Value
User-defined
Required
Yes, if specifying a list of devices.
Notes
Cannot be used when osd_auto_discovery setting is used. When using the devices option, ceph-volume lvm batch mode creates the optimized OSD configuration.
dmcrypt
To encrypt the OSDs.
Value
true
Required
No
Notes
The default value is false.
lvm_volumes
A list of FileStore or BlueStore dictionaries.
Value
User-defined
Required
Yes, if storage devices are not defined using the devices parameter.
Notes
Each dictionary must contain a data, journal and data_vg keys. Any logical volume or volumegroup must be the name and not the full path. The data, and journal keys can be a logical volume(LV) or partition, but do not use one journal for multiple data LVs. The data_vg key must be thevolume group containing the data LV. Optionally, the journal_vg key can be used to specify thevolume group containing the journal LV, if applicable.
osds_per_device
The number of OSDs to create per device.
Value
User-defined
Required
No
Notes
The default value is 1.
APPENDIX G. OSD ANSIBLE SETTINGS
153

osd_objectstore
The Ceph object store type for the OSDs.
Value
bluestore or filestore
Required
No
Notes
The default value is bluestore. Required for upgrades.
Red Hat Ceph Storage 4 Installation Guide
154