Embed Size (px)
Citation preview

Thank you for choosing the Epygi QX50/QX200.This instruction guide briefly describes the installation, connection and basic configuration of the QX50/QX200. This procedure will guide you through the installation of a QX IP PBX system with some basic features enabled. To configure advanced settings, please refer to the QX50/QX200 Administrator’s Manual.
The content of this guide may be changed without notice. The most recent version of the installation guide can be downloaded from http://support.epygi.com. In addition, you can find more information about updates for the product, software and technical documentation at http://www.epygi.com.
1. Verify the product package contents are complete.
2. After removing the packing material and verifying the contents of the box, connect the Ethernet port on your PC to the Local Area Network (LAN) of the QX via an Ethernet switch.
3. Connect analog telephones and fax machines to the FXS ports on the QX’s rear panel. Connect IP phones to the QX LAN via the switch.
4. Connect at least one of the QX Foreign Exchange Office (FXO) ports to telephone service from the PSTN.
5. Connect the WAN port of the QX directly to the ISP network via our broadband access device.
6. If your QX is installed behind a router, connect the WAN port of the QX to the LAN of the router.
7. Power the QX by connecting the power cable to a power strip with surge protection and a UPS.
1. Installing the QX50/QX200 IP PBX
1. WAN RJ45 socket to attach the Internet Uplink (WAN) via an Ethernet CAT 5 cable.
2. LAN RJ45 socket to attach to the IP phone in the QX IP PBX’s LAN via an Ethernet CAT 5 cable. For connecting multiple IP phones, a switch is used.
3. AUDIO IN connector connects the QX IP PBX to the radio or any other audio resource to be used for the hold music.
4. AUDIO OUT connector connects QX IP PBX to a speaker. AUDIO OUT is used for paging group service.
5. The reset button may be used in two ways: (1) to initiate a normal reset or (2) to carry out a factory reset. A normal reset is executed by pressing the reset button with a paper clip for an instant. Pressing the reset button and holding it down for three seconds or more will execute a factory reset. This will restore the factory defaults and clear all settings including the IP address and the administration password you entered.
3. Logging In to the QX50/QX200Please note: A factory reset forces the default LAN IP address of 172.30.0.1 (default username - admin and password – 19).
6. Phone sockets with RJ11 connectors enable connectivity of regular analog telephones. These are Foreign Exchange Station (FXS) analog ports.
7. Line sockets to connect the QX IP PBX to the PSTN network using standard analog phone service. These are FXO analog ports.
8. AUX PWR (DC Power) connector to connect two units together. The first unit will power the second by using a 12V DC power connector.
9. AC power supply socket to connect a power cable
10. The SD card socket enables connectivity of SD memory card providing expansion for additional voicemails and record data. Please note: Power down the QX IP PBX before inserting/removing the SD memory card.
2. QX50/QX200 Connector Panels
1. Connect the admin PC to the QX’s LAN port.2. Assign the IP address 172.30.0.100 with the net mask
255.255.0.0 to the admin PC.3. Type http://172.30.0.1 into the address field of your web
browser on the PC attached to the QX’s LAN.
The default access credentials:Username: admin
Password: 19
QX50’s connector panel, front
QX200’s connector panel, front
QX50/QX200’s connector panel, back
Attach the cables to the panel according to the following steps to connect the devices.
Quick Installation Guide – Epygi QX50/QX200
1. Go to the Status - System Status - IP Lines Registration Status page to see if the IP Line registration is successful.
2. Dial *74 to get the line information.3. Make outgoing and accept incoming calls. (Dial 88888#
to make a test VoIP call to Epygi. Dial 9+ a known PSTN number to test the PSTN connection.)
1. From the Setup – Basic Setup menu, select System (LAN) and complete the wizard. Please note: Upload a Language Pack from the Setup – Language Pack menu if you want to change the QX’s default system language. The Choose System Language field in the Regional Settings and Preferences page of the wizard is only present when the custom Language Pack is uploaded. Please note: DHCP Server should be enabled for IP phone auto configuration.
2. From the Setup – Basic Setup menu, select Internet (WAN) and complete the wizard.
4. Basic Setup – System (LAN) and Internet (WAN) Configuration Wizards
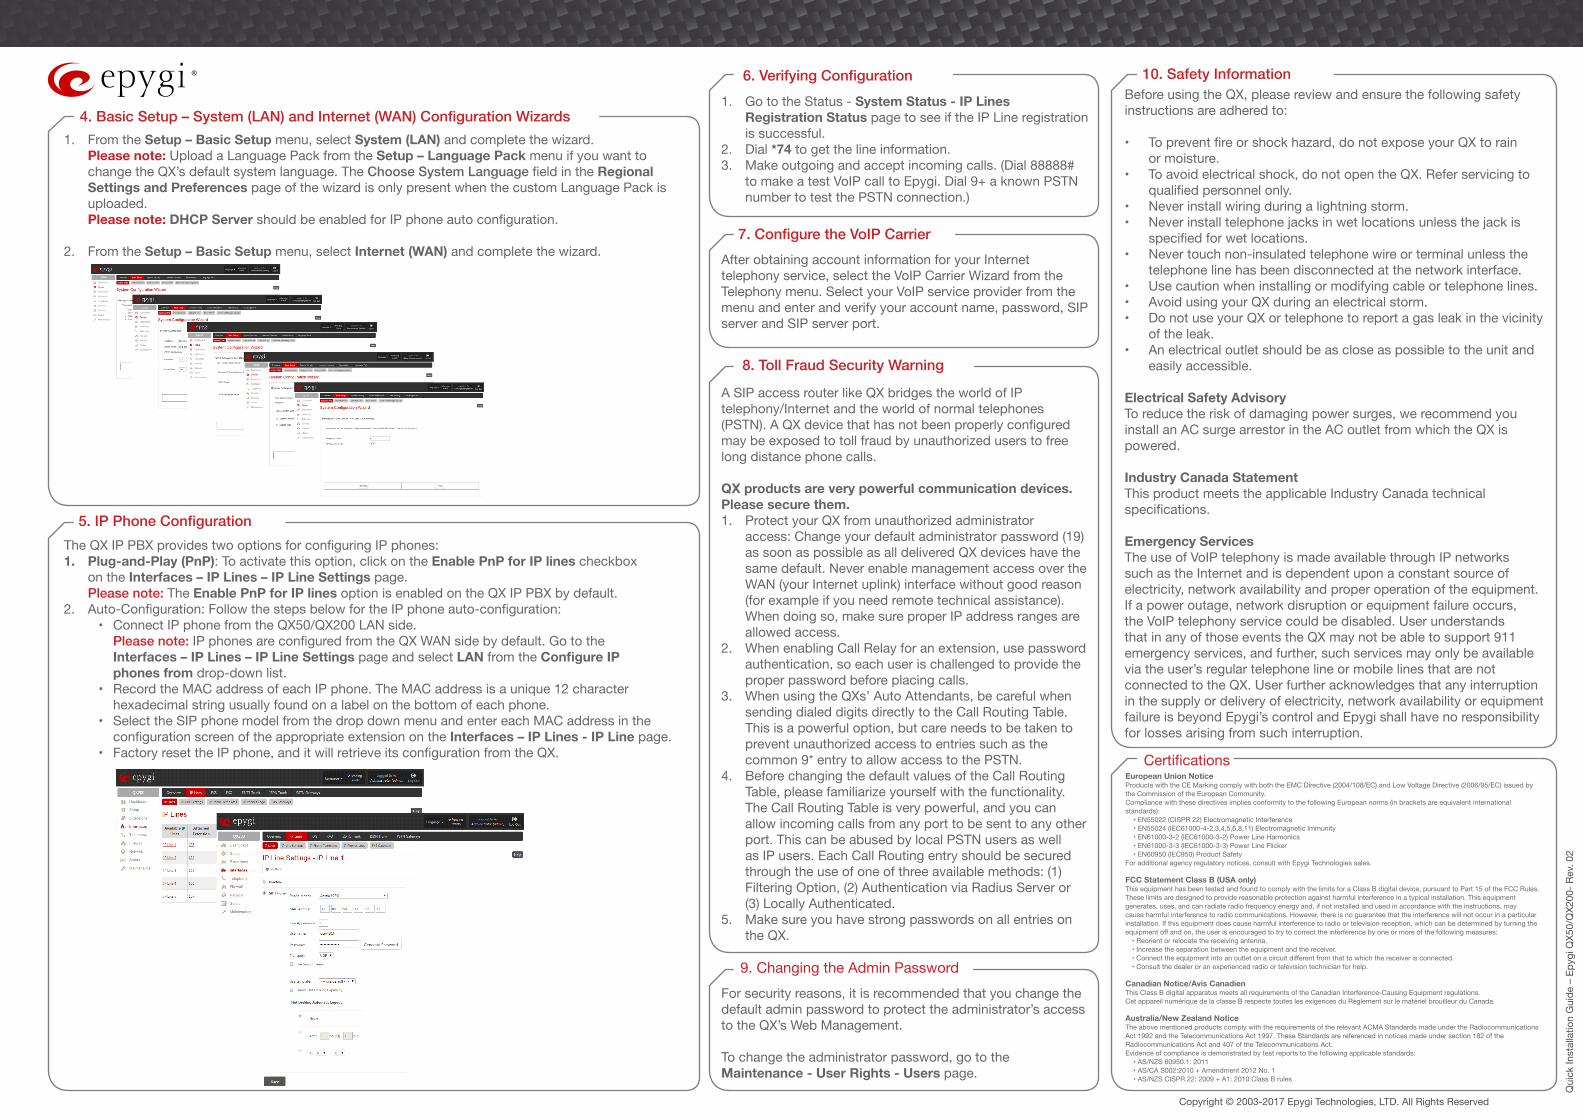
The QX IP PBX provides two options for configuring IP phones: 1. Plug-and-Play (PnP): To activate this option, click on the Enable PnP for IP lines checkbox
on the Interfaces – IP Lines – IP Line Settings page. Please note: The Enable PnP for IP lines option is enabled on the QX IP PBX by default.
2. Auto-Configuration: Follow the steps below for the IP phone auto-configuration:• Connect IP phone from the QX50/QX200 LAN side.
Please note: IP phones are configured from the QX WAN side by default. Go to the Interfaces – IP Lines – IP Line Settings page and select LAN from the Configure IP phones from drop-down list.
• Record the MAC address of each IP phone. The MAC address is a unique 12 character hexadecimal string usually found on a label on the bottom of each phone.
• Select the SIP phone model from the drop down menu and enter each MAC address in the configuration screen of the appropriate extension on the Interfaces – IP Lines - IP Line page.
• Factory reset the IP phone, and it will retrieve its configuration from the QX.
5. IP Phone Configuration
6. Verifying Configuration
After obtaining account information for your Internet telephony service, select the VoIP Carrier Wizard from the Telephony menu. Select your VoIP service provider from the menu and enter and verify your account name, password, SIP server and SIP server port.
7. Configure the VoIP Carrier
A SIP access router like QX bridges the world of IP telephony/Internet and the world of normal telephones (PSTN). A QX device that has not been properly configured may be exposed to toll fraud by unauthorized users to free long distance phone calls.
QX products are very powerful communication devices. Please secure them.1. Protect your QX from unauthorized administrator
access: Change your default administrator password (19) as soon as possible as all delivered QX devices have the same default. Never enable management access over the WAN (your Internet uplink) interface without good reason (for example if you need remote technical assistance). When doing so, make sure proper IP address ranges are allowed access.
2. When enabling Call Relay for an extension, use password authentication, so each user is challenged to provide the proper password before placing calls.
3. When using the QXs’ Auto Attendants, be careful when sending dialed digits directly to the Call Routing Table. This is a powerful option, but care needs to be taken to prevent unauthorized access to entries such as the common 9* entry to allow access to the PSTN.
4. Before changing the default values of the Call Routing Table, please familiarize yourself with the functionality. The Call Routing Table is very powerful, and you can allow incoming calls from any port to be sent to any other port. This can be abused by local PSTN users as well as IP users. Each Call Routing entry should be secured through the use of one of three available methods: (1) Filtering Option, (2) Authentication via Radius Server or (3) Locally Authenticated.
5. Make sure you have strong passwords on all entries on the QX.
8. Toll Fraud Security Warning
Before using the QX, please review and ensure the following safety instructions are adhered to:
• To prevent fire or shock hazard, do not expose your QX to rain or moisture.
• To avoid electrical shock, do not open the QX. Refer servicing to qualified personnel only.
• Never install wiring during a lightning storm.• Never install telephone jacks in wet locations unless the jack is
specified for wet locations.• Never touch non-insulated telephone wire or terminal unless the
telephone line has been disconnected at the network interface.• Use caution when installing or modifying cable or telephone lines.• Avoid using your QX during an electrical storm.• Do not use your QX or telephone to report a gas leak in the vicinity
of the leak.• An electrical outlet should be as close as possible to the unit and
easily accessible.
Electrical Safety Advisory To reduce the risk of damaging power surges, we recommend you install an AC surge arrestor in the AC outlet from which the QX is powered.
Industry Canada StatementThis product meets the applicable Industry Canada technical specifications.
Emergency ServicesThe use of VoIP telephony is made available through IP networks such as the Internet and is dependent upon a constant source of electricity, network availability and proper operation of the equipment. If a power outage, network disruption or equipment failure occurs, the VoIP telephony service could be disabled. User understands that in any of those events the QX may not be able to support 911 emergency services, and further, such services may only be available via the user’s regular telephone line or mobile lines that are not connected to the QX. User further acknowledges that any interruption in the supply or delivery of electricity, network availability or equipment failure is beyond Epygi’s control and Epygi shall have no responsibility for losses arising from such interruption.
10. Safety Information
For security reasons, it is recommended that you change the default admin password to protect the administrator’s access to the QX’s Web Management.
To change the administrator password, go to the Maintenance - User Rights - Users page.
9. Changing the Admin Password
Copyright © 2003-2017 Epygi Technologies, LTD. All Rights Reserved
Qui
ck In
stal
latio
n G
uide
– E
pygi
QX5
0/Q
X200
- Rev
. 02
European Union NoticeProducts with the CE Marking comply with both the EMC Directive (2004/108/EC) and Low Voltage Directive (2006/95/EC) issued by the Commission of the European Community.Compliance with these directives implies conformity to the following European norms (in brackets are equivalent international standards):
• EN55022 (CISPR 22) Electromagnetic Interference• EN55024 (IEC61000-4-2,3,4,5,6,8,11) Electromagnetic Immunity• EN61000-3-2 (IEC61000-3-2) Power Line Harmonics• EN61000-3-3 (IEC61000-3-3) Power Line Flicker• EN60950 (IEC950) Product Safety
For additional agency regulatory notices, consult with Epygi Technologies sales.
FCC Statement Class B (USA only)This equipment has been tested and found to comply with the limits for a Class B digital device, pursuant to Part 15 of the FCC Rules. These limits are designed to provide reasonable protection against harmful interference in a typical installation. This equipment generates, uses, and can radiate radio frequency energy and, if not installed and used in accordance with the instructions, may cause harmful interference to radio communications. However, there is no guarantee that the interference will not occur in a particular installation. If this equipment does cause harmful interference to radio or television reception, which can be determined by turning the equipment off and on, the user is encouraged to try to correct the interference by one or more of the following measures:
• Reorient or relocate the receiving antenna.• Increase the separation between the equipment and the receiver.• Connect the equipment into an outlet on a circuit different from that to which the receiver is connected.• Consult the dealer or an experienced radio or television technician for help.
Canadian Notice/Avis CanadienThis Class B digital apparatus meets all requirements of the Canadian Interference-Causing Equipment regulations. Cet appareil numérique de la classe B respecte toutes les exigences du Règlement sur le matériel brouilleur du Canada.
Australia/New Zealand NoticeThe above mentioned products comply with the requirements of the relevant ACMA Standards made under the Radiocommunications Act 1992 and the Telecommunications Act 1997. These Standards are referenced in notices made under section 182 of the Radiocommunications Act and 407 of the Telecommunications Act.Evidence of compliance is demonstrated by test reports to the following applicable standards:
• AS/NZS 60950.1: 2011 • AS/CA S002:2010 + Amendment 2012 No. 1• AS/NZS CISPR 22: 2009 + A1: 2010 Class B rules
Certifications