Embed Size (px)
Citation preview

Professional
En
Technical Guide — Useful Features —

2
Table of ContentsLive View: Pinpoint AF ........................................................ 4Focus Stacking (Focus Shift Photography) .................... 8• “FocusShiftShooting”..................................................................10• BeforeShooting.............................................................................12• FocusShiftPhotography..............................................................13• SuggestedSettings.......................................................................16• ChoosingtheNumberofShots..................................................18• FocusShift:Tips..............................................................................21• BeforeStacking..............................................................................22• SomeExamplesofFocusStacking............................................23
White Balance Tips and Tricks ......................................... 25• WhiteBalanceOptions.................................................................25• AutoWhiteBalanceforIncandescentLighting......................27• NaturalLightAuto.........................................................................28• ColorTemperatureInformation.................................................29• MeasuringPresetManualWhiteBalance................................30
Digitizing 35 mm Film ...................................................... 32• WhatYou’llNeed............................................................................33• HandlingFilm.................................................................................36• DigitizingNegatives......................................................................36• DigitizingPositives(Slides).........................................................39• RetouchingDigitizedPhotos......................................................41

3
Muffling the Shutter ......................................................... 44• “Quiet”Versus“Silent”...................................................................44• QuietShutter-ReleaseMode.......................................................45• SilentPhotography.......................................................................46• MovieStills......................................................................................47
Focus Peaking .................................................................... 48Cropping and Zoom ......................................................... 49On-Camera Batch NEF (RAW) Processing ..................... 50• TheBenefitsofOn-CameraProcessing....................................50• On-CameraNEF(RAW)Processing............................................51
Auto AF Fine-Tuning ......................................................... 56Unavailable Menu Options ............................................. 59• ThePhotoShootingMenu..........................................................59• Thei-ButtonMenu(LiveViewPhotography)........................60
4
Live View: Pinpoint AF
The D850’s live view features a new pinpoint AF-area mode for more precise focus than ever before.
Pinpoint AF: The camera focuses precisely on the intended point (in this case, the sta-mens).
Intended focus point (enlarged)
Normal-area AF: The wider focus area may result in the camera not focus-ing on the intended point.
Intended focus point (enlarged)

5
Follow the steps below to take pictures using pinpoint AF. Before proceeding, we recommend that you mount the camera on a tripod and select single-servo autofocus (AF-S).
1 Start live view.Pinpoint AF is available in live view only. Press the a button to start live view.
2 Select 3.Keeping the AF-mode button pressed, rotate the sub-command dial until 3 (pinpoint AF) appears in the display.

6
3 Position the focus point.Use the multi selector or touch controls to position the focus point, or press the center of the multi selector to return the focus point to the center of the frame.
4 Zoom in.For greater accuracy, press the X button to zoom in on the se-lected focus point.
5 Take the picture.Although you can take pictures using the shutter-re-lease button, to prevent blur caused by camera shake we recommend that you use the remote photography feature in the SnapBridge app or an optional accesso-ry such as a wireless remote controller or remote cord.

7
Live View: Pinpoint AF
Touch ControlsWhen using touch controls to position the focus point, note that at default settings, the shutter will be released when you lift your finger from the dis‑play (“touch shutter”); for more accu‑rate focus, tap the touch shutter icon to turn the touch shutter off (X).

8
“Focus stacking” combines photos shot at different focus positions into a single image with increased depth of field. The D850’s new focus shift feature, which automatically varies focus over a series of shots, is used to take photos that will later be combined using focus stacking.
Normal photograph Focus-stacked image (for camera settings, see page 23)
Normal photograph Focus-stacked image (for camera settings, see page 24)
Focus Stacking (Focus Shift Photography)

9
When shooting is complete, you can copy the photos to a computer and use third-party focus-stacking software to combine the areas that are in focus into a single image.
The camera takes a se-ries of shots (150 in this example), which are used to create a com-posite image contain-ing only the areas that are in focus.
Focus-Stacking SoftwareThe following applications support focus stacking. Note that Nikon neither endorses this software nor guarantees its op-eration.• Adobe: Photoshop CC• Helicon Soft: Helicon Focus• Zerene Systems: Zerene Stacker

10
“Focus Shift Shooting”The Focus shift shooting item in the photo shooting menu is used to adjust settings for focus shift pho-tography. The following options are available:• Start: Start shooting. The camera will
change the focus distance by the selected amount with each shot.
• No. of shots: Choose the number of shots (up to 300) that you will need when performing focus stacking.
• Focus step width: Choose the amount the focus distance changes with each shot. The options available range from 1 to 10: choose lower values for smaller steps, high-er values for larger steps.
• Interval until next shot: The time between shots, in seconds. Select 00 to take photos at approximately 5 fps (release modes S, Cl, Ch, and Mup) or 3 fps (release modes Q and QC).
• Exposure smoothing: If On is selected, the camera will adjust the exposure for each new shot to match the immedi-ately preceding shot.
• Silent photography: Select On to silence the shutter during shooting.
l

11
Focus Stacking (Focus Shift Photography)
• Starting storage folder: Highlight options and press 2 to select or deselect. Choose New folder to create a new folder for each new focus shift sequence, Reset file num-bering to reset file numbering to 0001 when a new folder is created.

12
Before ShootingUse an AF-S or AF-P lens. After mounting the appropriate lens, choose an exposure mode of A or M so that aperture does not change during shooting (recommended). Once settings have been adjusted to your satisfaction, close the viewfinder eyepiece shutter to prevent light entering via the viewfinder interfering with photographs and expo-sure.
Before shooting begins, mount the camera on a tripod, disable lens vibration reduction (VR), and select a release mode other than E. To ensure that shooting is not inter-rupted, be sure the camera battery is fully charged. If in doubt, charge the battery before use or use an AC adapter and power connector (available separately).
Focus shift is available at all image quality settings. Note that focus shift is unavailable in some situations, includ-ing when multiple exposure or HDR shooting is in prog-ress, the camera clock is not set, an incompatible lens is attached, or no memory card is inserted.
l

13
Focus Stacking (Focus Shift Photography)
Focus Shift PhotographyFollow the steps below to take photographs using focus shift.
1 Rotate the focus-mode selector to AF.Focus shift is not available with manual focus lenses.
2 Focus.The camera takes a series of shots starting from a se-lected focus position and continuing toward infinity. The starting focus position should be slightly in front of the closest point on the subject. Do not move the camera after focusing.
l

14
3 Select Focus shift shooting.In the photo shooting menu, highlight Focus shift shooting and press 2 to display focus shift options.
4 Adjust settings.Adjust settings as described on “Focus Shift Shooting” (page 10). For more information, see “Sug-gested Settings” (page 16).

15
Focus Stacking (Focus Shift Photography)
5 Start shooting.Highlight Start and press J. Shooting starts after about 3 s. The camera takes photographs at the selected interval, begin-ning at the focus distance se-lected at the start of shooting and progressing out toward infinity by the selected focus step distance with each shot. Shooting ends when the selected number of shots has been taken or focus reaches infinity. To end shooting before all shots have been taken, select Off for Focus shift shooting in the photo shooting menu or wait until the camera is between shots and then press J or press the shutter-release button halfway.
During ShootingDuring focus shift photography, the Q icon will flash in the control pan‑el. Immediately before the next shot, the shutter speed display will show the number of shots remaining.
16
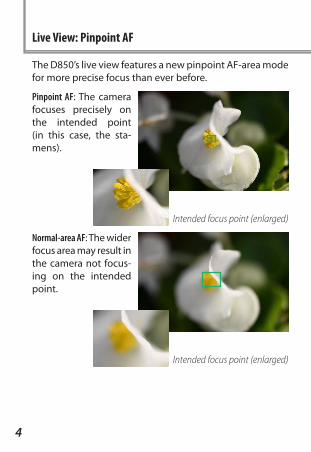
Suggested SettingsFor focus shift photography, we recommend that settings be adjusted as described below.
ApertureFor improved contrast out to the edges of the frame, we generally recommend an aperture 2 to 3 stops from the maximum for the lens.
ISO SensitivityWe recommend that you select Off for ISO sensitivity set-tings > Auto ISO sensitivity control and do not change ISO sensitivity while shooting is in progress.
Focus Shift SettingsNo. of shots: You may need over a 100 shots for a close-up or an insect or other small object, while only a few are required when photographing a landscape from front to back with a wide-angle lens. We recommend taking more shots than you think you’ll need and winnowing them down during focus stacking. See “Choosing the Number of Shots” (page 18).
Focus step width: A value of 5 or less is recommended, as higher settings increase the risk that some areas will be out of focus when the photos are stacked (page 21). Try experi-menting with different settings before shooting.
Interval until next shot: 00 is recommended unless you are using a flash, in which case the interval needs to be long enough for the flash to charge.
l

17
Focus Stacking (Focus Shift Photography)
Exposure smoothing: Off is recommended if lighting and other conditions will not change during shooting, On when pho-tographing landscapes and the like under variable lighting.
Silent photography: Choosing On (recommended) limits cam-era shake and reduces power consumption and wear on the shutter. Choose Off to prevent flicker when shooting under fluorescent or mercury-vapor lighting (if flicker per-sists, enable Flicker reduction in the photo shooting menu or choose a shutter speed adapted to the frequency of the local power supply: ¹⁄₁₂₅ s, ¹⁄₆₀ s, or ¹⁄₃₀ s for 60 Hz; ¹⁄₁₀₀ s, ¹⁄₅₀ s, or ¹⁄₂₅ s for 50 Hz).
Starting storage folder: We recommend that you select both New folder and Reset file numbering. Each sequence of photos will be numbered from 0001 and stored in its own folder, which you may find helpful when copying the im-ages to a computer.

18
Choosing the Number of ShotsThe recommended number of shots varies with the lens, aperture, subject size, focus step width, and the distance to the subject, measured from the closest point on the subject to the focal plane mark (E) on the camera body. The figures given on pages 19 to 20 assume that the camera and subject are positioned as shown below.
l
Distance to subject
Subject size

19
Focus Stacking (Focus Shift Photography)
Table 1: AF-S Micro NIKKOR 60 mm f/2.8G ED, aperture f/5.6, distance 20 cm (7.9 in.)
Focus step width1 2 3 4 5 6 7 8 9 10Subject size (in.)
1 110 110 90 80 50 45 40 30 25 20
5 — — 240 200 135 110 90 65 55 45
10 — — 300 250 170 140 115 85 65 55
15 — — — 275 185 155 125 90 75 60
For example, around 135 shots would be needed to photo-graph a 5-inch subject at a focus step width of 5.
Table 2: AF-S Micro NIKKOR 60 mm f/2.8G ED, aperture f/8, distance 20 cm (7.9 in.)
Focus step width1 2 3 4 5 6 7 8 9 10Subject size (in.)
1 120 80 70 60 40 35 30 20 15 15
5 — 200 165 140 90 75 65 45 40 35
10 — 250 210 175 115 95 80 60 45 40
15 — 275 230 190 125 105 90 65 50 45
20
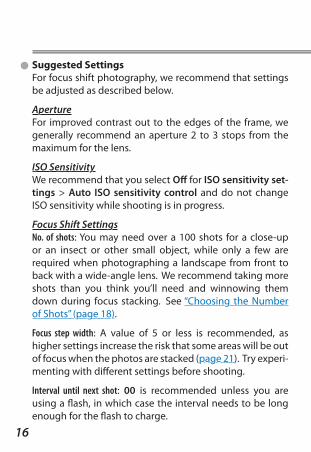
Table 3: AF-S VR Micro-Nikkor 105 mm f/2.8G IF-ED, aperture f/5.6, distance 35 cm (13.8 in.)
Focus step width1 2 3 4 5 6 7 8 9 10Subject size (in.)
1 130 80 70 65 60 55 40 30 25 25
5 — 220 200 185 150 130 100 85 70 60
10 — 300 270 255 200 175 135 110 90 80
15 — — — 290 225 195 155 125 100 90
Table 4: AF-S VR Micro-Nikkor 105 mm f/2.8G IF-ED, aperture f/8, distance 35 cm (13.8 in.)
Focus step width1 2 3 4 5 6 7 8 9 10Subject size (in.)
1 95 70 60 55 45 35 30 25 20 20
5 250 175 155 140 105 90 75 60 55 45
10 — 230 205 185 140 120 100 80 70 60
15 — 260 230 210 160 135 115 90 80 70

21
Focus Stacking (Focus Shift Photography)
Focus Shift: TipsAlthough you can reduce the number of shots by increas-ing the step width, if the step width is greater than the depth of field, you may notice a mix of in- and out-of-focus areas when the photos are stacked.
The photos for this stack were shot with a focus step width of 10. A mix of in- and out-of-focus areas is visible on the wings.
Setting the focus step width to 3 produces a smooth stack with no out-of-focus areas.
Out-of-focus areas will be less obvious at lower resolu-tions. Check for out-of-focus areas after scaling the image to the desired size.
l

22
If the subject moves during shooting (for example, be-cause you are shooting outdoors), focus stacking may not produce the desired results.
Zooming in on the petals reveals that they have been stacked in over-lapping positions, giving the effect of a multiple exposure.
Before StackingDelete any photos not in the desired focus range before stacking.
l

23
Focus Stacking (Focus Shift Photography)
Some Examples of Focus StackingHere are some sample images, together with the gear and settings used to create them.
Lens AF‑S Micro NIKKOR 60 mm f/2.8G EDDistance to subject 20 cm/8 in. Focus step width 3Subject size 5 cm/2 in. Interval until next shot 0Aperture f/5.6 Exposure smoothing OnShots taken/used * 160/150 Silent photography On
* The total number of shots taken/the number of shots actually used for focus stacking.
l

24
Focus Stacking (Focus Shift Photography)
Lens AF‑S NIKKOR 24–70 mm f/2.8E ED VRFocal length 70 mm Focus step width 5Distance to subject Approx. 1.5 m/4.9 ft Interval until next shot 0Subject size — Exposure smoothing OnAperture f/8 Silent photography OnShots taken/used 15/10
Lens AF‑S Micro NIKKOR 60 mm f/2.8G EDDistance to subject 30 cm/12 in. Focus step width 3Subject size 15 cm/6 in. Interval until next shot 0Aperture f/5.6 Exposure smoothing OnShots taken/used 250/190 Silent photography On

25
Auto white balance is recommended with most light sources. If the desired results cannot be achieved with auto white balance, choose an option from the list below or use preset white balance.
White Balance OptionsChoose from the following options:
Option K * Descriptionv Auto
3500–8000
White balance is adjusted automati‑cally. Suitable for most light sources; if an optional flash unit is used, white balance is adjusted to match. See page 27 for more on v options.
Keep white (reduce warm colors)NormalKeep warm lighting colors
D Natural light auto4500–8000
White balance is adjusted for natural light, producing colors closer to those seen by the naked eye (page 28).
J Incandescent 3000 Use under incandescent lighting.I Fluorescent Use with the light sources below.
Sodium-vapor lamps 2700• Sodium vapor lighting (found in
sports venues)Warm-white fluorescent 3000 • Warm white fluorescent lightsWhite fluorescent 3700 • White fluorescent lightsCool-white fluorescent 4200 • Cool‑white fluorescent lightsDay white fluorescent 5000 • Daylight white fluorescent lightsDaylight fluorescent 6500 • Daylight fluorescent lightsHigh temp. mercury-vapor
7200• High color temperature light sourc‑
es (e.g., mercury‑vapor lamps)
l
White Balance Tips and Tricks

26
Option K * DescriptionH Direct sunlight 5200 Use with subjects lit by direct sunlight.N Flash 5400 Use with optional flash units.G Cloudy 6000 Use in daylight under overcast skies.
M Shade 8000Use in daylight with subjects in the shade.
KChoose color temp.
2500–10,000
Choose a color temperature from a list of values.
L Preset manual —Use your subject or light source or an existing photo as a reference (page 30).
* Color temperature. All values are approximate and do not reflect fine‑tuning; colors can be fine‑tuned if desired.

27
White Balance Tips and Tricks
Auto White Balance for Incandescent Lightingv offers a choice of AUTO 0 Keep white (reduce warm colors), AUTO 1 Normal, and AUTO 2 Keep warm lighting colors. The warm cast of in-candescent lighting can be eliminat-ed by selecting Keep white (reduce warm colors) or preserved by select-ing Keep warm lighting colors.
AUTO 0 Keep white (reduce warm colors)
AUTO 1 Normal
AUTO 2 Keep warm lighting colors
l

28
Natural Light AutoAdapted as it is to natural light sources, D Natural light auto produces better results under natural lighting than comparable auto white balance options. White balance adapts to changes in lighting, producing results close to those seen by the naked eye whether your subject is a sun-set or fall colors.
AUTO 0 Keep white (reduce warm colors)
Natural light auto
AUTO 0 Keep white (reduce warm colors)
Natural light auto
l

29
White Balance Tips and Tricks
Color Temperature InformationThe color temperature chosen for auto white balance can be viewed in the playback photo information display. Use this value as a reference when selecting a value for Choose color temp.
To view color temperature, go to Playback display options in the playback menu and place a check next to Shooting data.
Color temperature and other photo information can then be viewed by pressing 3 during full-frame playback.
The camera does not display the color temperature for pho‑tos with white balance set to v and On (Mode 2) selected for Silent live view photography (page 46).
l

30
Measuring Preset Manual White BalanceIn live view, you can measure white balance from any white or grey object in the frame (spot white balance).
1 Select preset manual white balance.Press and hold the U button and rotate the main command dial until L (Preset manual) is displayed in the monitor.
2 Select a preset.Keeping the U button pressed, rotate the sub-command dial until the desired white balance preset (d-1 to d-6) is displayed.
3 Select direct measurement mode.Release the U button briefly and then press it again until the L icon starts to flash. A spot white balance target (r) will be displayed at the selected focus point.
l

31
White Balance Tips and Tricks
4 Position the target over a white or grey area.While L flashes in the display, use the multi selector to posi-tion the target over a white or grey area of the frame. To zoom in for more precise positioning, press the X button. You can also measure white balance anywhere in the frame by tap-ping your subject in the monitor, in which case you can proceed directly to Step 6.
5 Measure white balance.Press the center of the multi selector or press the shutter-release button all the way down to measure white balance.
6 Exit direct measurement mode.Press the U button to exit direct measurement mode.
Viewing White Balance PresetsWhite balance presets d1–d6 can be viewed by selecting Preset manual for White balance in the photo or movie shooting menu. The white balance target is shown on the preset.

32
Digitizing 35 mm Film
Digitizing film is a snap with an ES-2 film digitizing adapter. With an ES-2 and a bright light source configured as shown below, you can use the D850’s Negative digitizer to create positive copies of film negatives.
ES-2FH-4 strip film holder
Studio LED lamp or similar light source

33
What You’ll NeedReview the required equipment and settings before pro-ceeding.
Required EquipmentBefore scanning 35 mm negatives, ready the items below.• An ES-2 film digitizing adapter, which includes:
ES-2 62 mm adapter A 62 mm adapter B
FH-4 FH-5• A compatible lens. Any of the following can be used:‣‣ AF-S DX Micro NIKKOR 40 mm f/2.8G‣‣ AF-S Micro NIKKOR 60 mm f/2.8G ED (requires 62 mm adapter A)*‣‣ AI AF Micro-Nikkor 60 mm f/2.8D (requires 62 mm adapter B)*
* Users of this lens can employ an ES‑1 slide copy adapter in place of the ES‑2 and FH‑5 when digitizing slides. A BR‑5 ring (avail‑able separately) is required when using the ES‑1.
l

34
Equipment and Settings for Scanning Negative FilmIn addition to the ES-2 and one of the lenses listed on page 33, you’ll need the following when scanning negatives.
Film
Color or monochrome negativesFilm holder FH‑4 *
Light source
We recommend shooting in a sunny spot by a win‑dow or using a photo light box, a studio LED lamp, or a light source with a high Ra (color rendering in‑dex)
Technique Use the Negative digitizer option. The camera func‑tions in mode A (aperture‑priority auto).
Focus mode Manual focus is recommended.Image quality Photographs are saved in JPEG format.* The scannable area is approximately 36 mm × 24 mm. Some
portions of the frame cannot be photographed.

35
Digitizing 35 mm Film
Equipment and Settings for Scanning Positive FilmIn addition to the ES-2 and one of the lenses listed on page 33, you’ll need the following when scanning positives.
Strip film Slides
Film
Positive film Mounted positivesFilm holder FH‑4 1 FH‑5 2
Light source
We recommend shooting in a sunny spot by a win‑dow or using a photo light box, a studio LED lamp, or a light source with a high Ra (color rendering in‑dex)
Technique We recommend shooting in mode A (aperture‑pri‑ority auto) using live view.
Focus mode Manual focus is recommended.Image quality Choose from NEF (RAW), TIFF, and JPEG options.1. The scannable area is approximately 36 mm × 24 mm. Some
portions of the frame cannot be photographed.2. Use with slide mounts under 2 mm thick. The scannable area
varies with the dimensions of the mount window. An ES‑1 slide copy adapter can be used in place of the ES‑2 and FH‑5 to digitize mounted positives.

36
Handling FilmWear gloves to keep film free of smudges and fingerprints. Dust and lint can be removed with a blower.
Digitizing NegativesThe recommended procedure for digitizing negatives us-ing the ES-2 is described below.
1 Ready the equipment.Set up the equipment as shown on page 32.
2 Start live view.Rotate the live view selector to C (live view photography) and press the a button to start live view.
3 Select Negative digitizer.Press the i button to display the i-button menu, then highlight Negative digitizer and press 2. The colors in the display will be reversed.
l
l

37
Digitizing 35 mm Film
4 Choose the film type.Highlight Color negatives or Monochrome negatives and press J.
5 Frame and focus.Position the FH-4 so that the portion of the frame you wish to digitize is framed in the camera moni-tor. Additional adjustments can be made by rotating the ES-2 or sliding it in or out while adjusting focus as necessary (manual focus is recommended, as autofo-cus may fail to produce the desired results depending on the content of the frame). For precise focus, press X to view your subject a higher magnification. After positioning the ES-2 to your satisfaction, tighten the locking screw.
6 Adjust exposure.Press J to display brightness adjustment options and press 1 or 3 to adjust exposure. Press J to proceed once expo-sure has been adjusted to your satisfaction.

38
7 Take the photograph.Press the shutter-release button all the way down to take the photograph and save it in JPEG format.
Using the Negative DigitizerNo options are available for correcting dust, scratches, or uneven colors due to faded film. Photos are saved in JPEG format regardless of the option selected for image quality; photos taken with a JPEG option selected will be saved at the chosen setting, while photos taken with NEF (RAW) or TIFF (RGB) selected will be saved in JPEG fine★ format. Some menu items and features, including bracketing and focus shift (page 60), are unavailable, and optional flash units cannot be used.
Pictures are taken in mode A regardless of the mode selected before shooting begins; aperture defaults to f/8 but can be adjusted as required. Should you notice flicker when shoot‑ing under fluorescent lighting or the like, try stopping aper‑ture down or reducing ISO sensitivity to slow shutter speed to the point that the flicker is eliminated.
39
Digitizing 35 mm Film
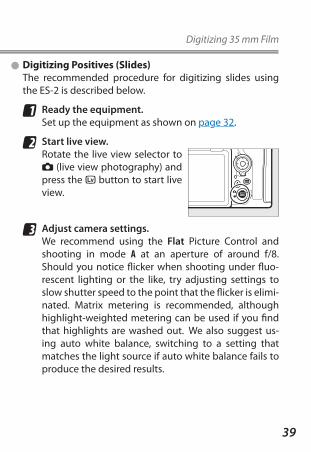
Digitizing Positives (Slides)The recommended procedure for digitizing slides using the ES-2 is described below.
1 Ready the equipment.Set up the equipment as shown on page 32.
2 Start live view.Rotate the live view selector to C (live view photography) and press the a button to start live view.
3 Adjust camera settings.We recommend using the Flat Picture Control and shooting in mode A at an aperture of around f/8. Should you notice flicker when shooting under fluo-rescent lighting or the like, try adjusting settings to slow shutter speed to the point that the flicker is elimi-nated. Matrix metering is recommended, although highlight-weighted metering can be used if you find that highlights are washed out. We also suggest us-ing auto white balance, switching to a setting that matches the light source if auto white balance fails to produce the desired results.
l

40
4 Frame and focus.Position the FH-5 so that the portion of the slide you wish to digitize is framed in the camera monitor. Ad-ditional adjustments can be made by rotating the ES-2 or sliding it in or out while adjusting focus as neces-sary (manual focus is recommended, as autofocus may fail to produce the desired results depending on the content of the frame). For precise focus, press X to view your subject a higher magnification. After positioning the ES-2 to your satisfaction, tighten the locking screw.
5 Take the photograph.Press the shutter-release button all the way down to take the photograph and save it at the setting cur-rently selected for image quality.

41
Digitizing 35 mm Film
Retouching Digitized PhotosDigitized photos can be retouched using Capture NX-D or other image editing software. The principal editing tools in Capture NX-D are outlined below.
Levels & CurvesAdjust contrast, tones, and color bal-ance.
LCHAdjust lightness, chroma, and hue.
l

42
The Straighten ToolStraighten pictures by up to ±10°.
The Crop ToolCrop unwanted areas from images.
The Auto Retouch Brush ToolRemove dust and scratches.

43
Digitizing 35 mm Film
ExampleThe following example shows how Levels & Curves can be used to remove a green cast from an image.
Before using other applications to view images processed us‑ing Capture NX‑D, save the images in another format using the Convert Files option in Capture NX‑D.

44
“Quiet” Versus “Silent”The differences between quiet shutter release and silent photography are summarized in the following table.
Quiet shutter release
Silent photographyMode 1 Mode 2
Framing Viewfinder Live viewFlash Available Not availableShutter release Quiet SilentFrame advance rate
QC: Approx. 3 fps
Cl: 3 fps 1
Ch: 6 fpsQC/Cl: 15 fps 2
Ch: 30 fps 2
Image area All All DX (24 × 16) 3
Rolling shutter effect? No Yes Some
Suggested for Ballet, orchestras
Weddings, astron‑omy, landscapes
Birds, wildlife
1. The maximum frame rate is approximately 3 fps, regardless of option selected for Custom Setting d1 (CL mode shooting speed).
2. For up to 3 seconds at a time.3. Image quality and size fixed at Normal★, 3600 × 2400.
l
Choose quiet or silent photography where camera noise might be a distraction, for example at stage performances, during interviews, or when photographing wildlife.
Muffling the Shutter

45
Quiet Shutter-Release ModeIf quiet shutter-release mode is selected for viewfinder photography, the mirror stays up while the shutter-release button is pressed all the way down. The mirror is lowered (more quietly than in single-frame mode) only when the shutter-release button returns to the halfway position, al-lowing you to control the timing of the click made by the mirror.
To choose quiet shutter-release mode, press the release mode dial lock release and rotate the dial to Q. Note that this mode is associated with a certain amount of shutter lag.
l
Quiet Continuous Shutter ReleaseFor quiet burst photography with a frame rate of about 3 fps, rotate the release mode dial to QC (quiet continuous).
46
Camera SoundsEven when silent photography is in effect, the sound of the camera focusing may still be audible in autofocus mode and the sound of the aperture mechanism will still be audible when you adjust aperture in modes A and M or the camera adjusts aperture in modes p and S.
Silent PhotographyIn silent photography, the shutter remains open between shots, eliminating shutter noise altogether during live view.
To enable silent photography, press the i button during live view and select On (Mode 1) or On (Mode 2) for Silent live view photography.• On (Mode 1): Reduce vibrations caused
by the shutter when shooting land-scapes and other static subjects. ISO sensitivity can be set to values of from Lo 1 to 25600.
• On (Mode 2): As for On (Mode 1) except that photos can be taken at a higher rate.
When silent photography is in effect, the mirror will only be audible when it is raised and lowered at the start and end of live view. Note that during burst photography, fo-cus and exposure are fixed at the values in effect at the start of each burst.
l

47
Muffling the Shutter
Movie StillsAnother way to reduce camera noise is to film movies si-lently and later make JPEG stills using Save current frame.
1 Pause playback on the desired frame.Press 3 to pause playback and then press 4 or 2 to display the desired frame.
2 Choose Save current frame.Press i or J, then highlight Save current frame and press J to create a JPEG copy of the current frame.
l
Save Current FrameMovie stills are recorded at the dimensions selected for Frame size/frame rate in the movie shooting menu. If two memory cards are inserted, the still will be saved to the card chosen using Primary slot selection in the photo shooting menu.
JPEG movie stills created with the Save current frame op‑tion cannot be retouched and lack some categories of photo information.

48
In manual focus mode, the Peaking level item in the i-button menu can be used to enable focus peaking, which employs colored outlines to indicate objects that are in focus.
Area in focus
The options in the Peaking level menu are 3 (high sensitivity), 2 (stan-dard), 1 (low sensitivity), and Off; the higher the setting, the greater the depth shown as being in focus.
Focus Peaking
Focus PeakingPeaking remains in effect during focus zoom. The color can be selected using Custom Setting d8 (Peaking highlight color). Choose from Red, Yellow, Blue, and White.

49
Quick crop can be used during playback to save the crop currently visible in the monitor, creating a copy with an aspect ratio of 4∶3. Use it for quick “what-you-see-is-what-you-get” cropping (for other aspect ratios, use the Trim op-tion in the retouch menu).
1 Zoom in.Press the X button to zoom in on the image currently dis-played in full-frame playback. Note that Quick crop is not available when an RGB histo-gram is displayed. X button
2 Choose a crop.Use the multi selector to scroll the image until the desired area is displayed in the monitor.
3 Press the i button.Press the i button to display the i-button menu.
4 Select Quick crop.Highlight Quick crop and press J to save the cropped copy. JPEG images are saved in the same format as the original, while copies created from NEF (RAW) and TIFF images are saved in JPEG fine★ format.
Cropping and Zoom

50
JPEG copies can be created from NEF (RAW) images using the NEF (RAW) processing option in the camera retouch menu.
The Benefits of On-Camera ProcessingOn-camera batch NEF (RAW) processing lets you apply identical settings to multiple images in a single pass; for greater efficiency, you can even select images by date. Processing images on the camera is much faster than on a computer, as can be seen from the following comparison of the times needed to process 500 NEF (RAW) images shot at a bit depth of 14 bits using lossless compression.• Computer: approximately 97 minutes (Windows 10, 3.3 GHz
Core i7-6567U processor, 16 GB RAM, batch processing performed using Capture NX-D version 1.4.6)
• Camera: approximately 17 minutes (images read from a 256 GB SONY G-series XQD card and written to a 256 GB Lexar Professional 1000× UHS-II SDHC/SDXC card)
l
On-Camera Batch NEF (RAW) Processing

51
On-Camera NEF (RAW) ProcessingFollow the steps below to create JPEG copies of NEF (RAW) images using the camera NEF (RAW) processing option.
1 Select NEF (RAW) processing.Highlight NEF (RAW) process-ing in the retouch menu and press 2.
2 Choose a destination.If two memory cards are inserted, the NEF (RAW) im-ages can be read from one card and the JPEG copies saved to the other, further reducing processing time (if only one memory card is inserted, proceed to Step 3).
To choose the destination for the JPEG copies, highlight Choose destination and press 2.
Highlight a card slot and press J when prompted.
l

52
3 Choose how images are selected.Choose from the options below.• Select image(s): Select images
manually (proceed to Step 5). Use this option to process a sin-gle image or to select multiple images for batch processing.
• Select date: Create JPEG copies of all the NEF (RAW) images taken on selected dates (proceed to Step 4).
• Select all images: Create JPEG copies of all the NEF (RAW) images on the memory card (proceed to Step 4).
4 Select the source slot.If two memory cards are in-serted, you will be prompted to select the slot with the card containing the NEF (RAW) im-ages. Highlight the desired slot and press 2. If you chose Select all images in Step 3, pro-ceed to Step 6.
53
On-Camera Batch NEF (RAW) Processing
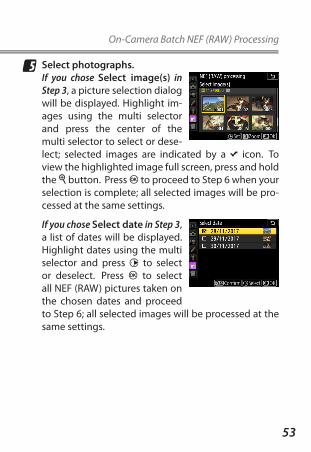
5 Select photographs.If you chose Select image(s) in Step 3, a picture selection dialog will be displayed. Highlight im-ages using the multi selector and press the center of the multi selector to select or dese-lect; selected images are indicated by a L icon. To view the highlighted image full screen, press and hold the X button. Press J to proceed to Step 6 when your selection is complete; all selected images will be pro-cessed at the same settings.
If you chose Select date in Step 3, a list of dates will be displayed. Highlight dates using the multi selector and press 2 to select or deselect. Press J to select all NEF (RAW) pictures taken on the chosen dates and proceed to Step 6; all selected images will be processed at the same settings.

54
6 Choose settings for the JPEG copies.Adjust the settings listed below.
13
24
5
1 Image quality2 Image size3 White balance4 Exposure compensation5 Picture Control
68
79
6 High ISO NR7 Color space8 Vignette control9 Active D‑Lighting
7 Copy the photographs.Highlight EXE and press J to create the JPEG copies (if mul-tiple photos are selected, a confirmation dialog will be dis-played; highlight Yes and press J). To exit without copying the photographs, press the G button.

55
On-Camera Batch NEF (RAW) Processing
NEF (RAW) ProcessingNEF (RAW) processing is available only with NEF (RAW) im‑ages created with D850 cameras. Photos in other formats or shot with other cameras will not be listed in the photo selec‑tion dialog in Step 5. In addition, white balance and vignette control cannot be applied to multiple exposures or pictures created with image overlay.
Exposure compensation for NEF (RAW) processing can only be set to values between –2 and +2 EV.

56
The D850 can fine-tune autofocus automatically. The re-sults can be used with all lenses of the same type.
Use only as required. AF fine‑tuning should be performed at the focus distance at which the lens is normally used; fine‑tuning performed at short focus distances may be less effec‑tive with distant subjects and vice versa.
1 Ready the camera.Mount the camera on a tripod and aim the camera at a flat, high-contrast subject parallel to the camera fo-cal plane. Note that auto AF fine-tuning works best at maximum aperture and may not function in dark surroundings.
Auto AF Fine-Tuning

57
Auto AF Fine-Tuning
2 Start live view.Rotate the live view selector to C and press the a button.
3 Adjust focus settings.Rotate the focus-mode selec-tor to AF and use the AF-mode button and command dials to select the following:• Autofocus mode: AF-S• AF-area mode: 5 (wide), 6 (nor-
mal), or 3 (pinpoint)
4 Select the center focus point.Press the center of the multi se-lector to select the center focus point.
5 Focus.Press the shutter-release button halfway to focus, then zoom in on the view through the lens to confirm that the subject is in focus. Focus can be adjusted manu-ally if necessary.

58
Auto AF Fine-Tuning
6 Perform auto AF fine-tuning.Press the AF-mode and movie-record buttons simultaneously and keep them pressed until the dialog shown in Step 7 is displayed (this should take slightly over two seconds).
AF-mode button
Movie-record button
7 Save the new value.Highlight Yes and press J to add the AF fine-tuning value for the current lens to the saved values list (CPU lenses only). Note that only one value can be stored for each type of lens.
8 Enable AF fine-tuning.In the camera setup menu, select AF fine-tune > AF fine-tune (On/Off), then highlight On and press J.

59
Unavailable Menu Options
If you find that the menu items mentioned in this manual are grayed out, you may be able to access them by chang-ing camera settings as described below.
The Photo Shooting MenuWhite balance (page 30)
“Preset manual” > “Copy from existing photograph” unavailable• Check that a memory card is selected as the destination and
that it is inserted, formatted, undamaged, and contains at least one photo.
• Ensure the selected preset is not protected.• Wait for recording (including multiple exposure photography)
to end.Focus shift shooting (page 8)
“Focus shift shooting” unavailable• Use an AF‑S or AF‑P lens.• Rotate the focus‑mode selector to AF.• End multiple exposure, interval timer, bracketing, HDR, nega‑
tive digitizer, and time‑lapse recording.• Set the camera clock.• Exit image transfer mode.
“Focus shift shooting” > “Start” unavailable• If Record movies is selected for Custom Setting g1 (Custom
control assignment) > Shutter release button, rotate the live view selector to C.
• End self‑timer photography.
l

60
Unavailable Menu Options
The i-Button Menu (Live View Photography)Negative digitizer (page 32)
“Negative digitizer” unavailable• End bracketing, HDR, and silent photography.• Exit image transfer mode.• End the connection to the SnapBridge app.
l