Embed Size (px)
Citation preview

Pocket Earth Help Page 1 of 16
Pocket Earth Version 3.0
Contents
z Introducing Pocket Earthz What's new in version 3.0z Existing Featuresz System Requirementsz Descriptionz Usagez Disclaimer
Introducing Pocket Earth
Pocket Earth is a powerful PocketPC application that displays an interactive 3D Earth in your palm. We have introduced several new features in this major release (3.0) of Pocket Earth, the prominent ones being GPS support and real-time weather.
To learn about all the new and enhanced features of Pocket Earth, click here.
What's new in version 3.0
z Updated 36,000+ city databasez GPS support (NMEA 0183 standard)z Real-time weather for select cities with auto-updatez Moon phase, rise/set, elevation and azimuthz Search by city populationz Support for multiple skins and fontsz Improved graphicsz Several other user defined options
Existing Features
z Display city time and datez Display Sunrise/Sunset times for any cityz Display city's next DST transitionz Distinct twilight modes: civil, nautical and astronomicalz Locate any city by namez Animated rotation to located cityz Automatic update of Earth's shadowz Automatic pseudo rotation of Earthz Suspend modez Interactive 3D Earth rotationz Colorful Physical, Political and other mapsz Dual mapping channels with several overlay modesz Dynamic multi-point visual distance measurement toolz Distances in kilometers, miles and nautical milesz Coarse and fine zoom controlsz Zoom to selectionz 10, 15 or 30 degree lat/lon grid lines
file://C:\Projects\Pocket%20Earth%203.0\docs\pearth.htm 4/19/2004

Pocket Earth Help Page 2 of 16
z Spherical and planar viewsz Sun spot and Earth shadow in real timez Special Day/Night overlay modez Sun's azimuth and elevation at any point on earth in real timez Snap any point on earth to nearest known cityz User defined snap radiusz Lat/lon and antipode information at any point on earthz Tropical and Polar circlesz Texture brightness controlz Texture smoothingz User defined Route files (for ex. Historical Routes etc.)
System Requirements
This program is designed to be run under PocketPC version of Windows CE 3.0 and has also been successfully tested with PocketPC 2002 and 2003. Minimum system requirements include:
z PocketPC, PocketPC 2002 or 2003 z About 2.0 MB of storage space and 4 MB of available runtime memory
Description
Pocket Earth features two major interactive screens, the Main screen and the Options screen.
Main Screen When the program is launched, the user is normally taken to the main display screen where the user can directly interact with the globe. The main screen has a collapsible toolbar panel at the bottom of the screen that consists of the following buttons:
z Lat/Lon Grid toggles the latitude/longitude gridz Show Day and Night toggles earth shadow z Options brings up the Options screen z Distance allows distance calculations z Pan/Rotate enables view to be panned or rotated z Spherical/Planar View toggles between 3D and planar modes z Point Information enables user selected cities to be displayed z Zoom Selection zooms view to user’s selection rectangle z Zoom Out zooms out of current viewz Find City dialog allows locating a city by name z Help brings up this help z Close closes or suspends the application z Panel Rollout rolls out or collapses the toolbar panel
Options Screen
file://C:\Projects\Pocket%20Earth%203.0\docs\pearth.htm 4/19/2004

Pocket Earth Help Page 3 of 16
The Options screen presents the user a 'tabbed' view of several options and settings. The following links describe various options available under each tab:
z General Tab z Display Tab z Sun/Moon Tab z Maps Tab z Cities Tab z GPS Tab z Weather Tab z Routes Tab z Advanced Tab z Colors Tab z Appearance Tab z About Tab
General Tab
z Animated rotation to city brings the located city into view z Animation Speed controls the speed of the animated rotation z Auto update of Earth's shadow automatically updates Earth's shadow after a specified intervalz Interval (mins) specifies a time interval in minutes for the automatic update of shadow z Rotate Globe enables a psuedo rotation of Earth in 3D viewz Rotation Speed controls the speed of the pseudo rotation z Snap to nearest populous place snaps current stylus point to the nearest most populous place or cityz Snap to nearest known point snaps current stylus point to the nearest known city z Snap to nearest displayed point snaps current stylus point to the nearest displayed cityz Show Country Name at Snap Point displays country names for all displayed citiesz Snap Radius allows user to adjust snap distance (in nautical miles)
Display Tab
z Lat/Lon displays latitude and longitude for the current stylus point z Antipodes displays antipodes (diametrically opposite points) for the current stylus point z Lat/Lon Format displays latitude and longitude as either decimal degrees or as degrees-minutes z City Time shows current time at snapped cityz City Date shows current date at snapped city (disabled if City Time is unchecked)z City's next DST Transition shows when the next Daylight Begin/End transition will occur for the snapped
city z City Population shows population info for the snapped city z Tropic and Polar circles displays tropic circles (cancer and capricorn) and polar circles z Show all countries displays the names of all countries z Time Format allows time to be displayed in 12hr, 24hr or HHMM formats z Grid Step displays latitude-longitude grid in steps of either 10, 15 or 30 degrees z Distance allows distance measurement in kilometers(km), statute miles(mi) or nautical miles (nm)
Sun/Moon Tab
z Sun Spot displays point on earth’s surface where the sun is directly overhead z Sunrise and Sunset Times shows sun's rise/set times for snapped city z Sun's Azimuth and Elevation shows sun's azimuth and elevation in degrees at current stylus point
file://C:\Projects\Pocket%20Earth%203.0\docs\pearth.htm 4/19/2004

Pocket Earth Help Page 4 of 16
z Moon Spot displays point on earth’s surface where the moon is directly overhead z Moonrise and Moonset Times shows moon's rise/set times for snapped city z Moon's Azimuth and Elevation shows moon's azimuth and elevation in degrees at current stylus point z Show Distinct Twilight shows distinct twilight zone in Earth's shadow z Civil, Nautical, Astronomical are the supported twilight modesz Specularity allows user to adjust specular level of the bright partz Darkness allows user to adjust darkness of Earth's shadow
Maps Tab
z Main Map specifies file name for main map (default is "Day.gif") z Overlay Map specifies file name for overlay map(default is "Night.gif") z Use Overlay Map enables operations with overlay mapz Overlay Operation performs one of the following operations between main and overlay maps:
{ Union: binary OR { Intersection: binary AND { Exclusion: binary XOR { Merge: color averaging{ Overlay: alpha channel { Day/Night: main map is used as day map and the overlay is shown as night map
Cities Tab
z Cityname allows user to select a city by entering the first few characters of its namez Country allows user to select a country name to narrow down the list of cities to select fromz Population allows user to specify a population bracket to narrow down the list of cities to select fromz Available Cities shows a list of cities that the user can choose from z Displayed Cities shows a list of user's selected cities that will be displayed on the globe z Add button adds selected cities to the Display boxz AddAll button adds all cities in the Select box to the Display box z Remove button removes selected cities from the Display box z RemoveAll button removes all cities from the Display box
GPS Tab
z GPS Port allows user to select the COM port where the GPS unit is connected z GPS Baud allows user to select a specific baud rate for communication with the GPS unitz Detect is used to automatically detect a GPS (if any) connected to the user's PocketPCz Open GPS opens communication with a GPS device that has been connected to the specified COM portz Close GPS closes any previously opened GPS communicationz Show Course displays current location and course as reported by the GPS z Show Compass displays a compass image depicting the current bearing and ground speedz Show Time To Destination displays how long it will take to reach a destination based on current ground
speed z Show History displays a trail of consecutive locations reported by the GPS z As Route shows the GPS trail as a route as opposed to just points z Auto Update allows automatic update of the trail at specific intervals (specified in minutes) z Add Current adds the current GPS position to the trail z Clear History deletes the current trail
Weather Tab
file://C:\Projects\Pocket%20Earth%203.0\docs\pearth.htm 4/19/2004

Pocket Earth Help Page 5 of 16
z Countries allows user to select a country to obtain its citiesz Available Cities shows a list of cities for the selected country for which weather data is available z Displayed Cities shows a list of cities the user would like weather information obtained for z >, < and << buttons allow the user to add or remove cities from the Displayed Cities list z Show Place Name instructs the program to include place name in the weather data obatined from the
server z Auto Update allow automatic refresh of weather information for the selected cities z Update Interval specifies the interval (in minutes) between consecutive auto-updates z Temperature instructs program to fetch temperature information in either Celsius or Farenheit units from
the server z Show Weather enables or disables display of weather information z Update Now refreshes weather information immediately, bypassing any auto-update cycle
Routes Tab
z Select Routes/Places to Show displays selected route or points of interest XML files z Clear Selection clears current selection in the list
The program comes with a set of Route/Places files encoded as plain XML text. Users can create their own XML files in the supported route format.
Advanced Tab
z Distance Arc Smoothing specifies number of intermediate points used during distance measurement in 3D and planar modes
z Advanced Texture Parameters controls texture brightness and 3D smoothing for better foreground contrast z Anti-aliased Lines smoothens out lines drawn on the screen such as distance arc and grid lines z Direction Pointers for Distance Arc displays an arrow at the center of the arc to indicate direction z Semi-transparent Text Background dims out background under any text for better readability
Colors TabAllows user to specify colors for the following:
z main screen backgroundz Distance Arc z Lat/Lon Grid lines z Equator and Greenwich meridian lines z Arctic/Antarctic Circlesz Tropic Circlesz Displayed City names z City at snap point z Displayed Countries z GPS Course line z GPS History linez Weather Information
Appearance Tab
z Select Skin specifies color scheme to use for options screen, dialog boxes and command panelz Select Font specifies font used in text drawingz Apply updates current scheme using the selected skin and font settings
file://C:\Projects\Pocket%20Earth%203.0\docs\pearth.htm 4/19/2004

Pocket Earth Help Page 6 of 16
About Tab
z Displays product information and other credits
Usage
z Interactive 3D earth rotationz Earth Texture Mapsz Dual mapping channels with overlayz Dynamic multi-point distance toolz Zoom Controlz Find City Dialogz Using Find City Dialog to measure distancesz Latitude/Longitude Grid Lines and Polar/Tropic circlesz Spherical and Planar Viewsz Automatic pseudo rotation of the Earthz Displaying City Informationz Using the "Cities" tabz Advanced Texture Optionsz Sun/Moon Spots and Earth Shadowz Automatic Update of Earth Shadowz Distinct Twilight Modesz Using GPS with Pocket Earthz Using a different compass imagez Displaying Weather Informationz Suspend Modez Routes and Points of Interestz Appearance - Skins and Fonts
Interactive 3D earth rotation
To rotate the globe in 3D, ensure that the "Pan/Rotate" button on the toolbar panel is turned ON. Using the stylus, tap and hold at any point on the globe and move the stylus in the desired direction.
The globe may be rotated 360 degrees in the east-west direction and 90 degrees each in the north and south directions. In planar mode, using the above steps will allow the user to pan the 2D image to any desired location. When the image is panned horizontally, it is allowed a smooth rollover from -180 to +180 logitude.
Earth Texture Maps
Pocket Earth comes with a set of seven 1224x612 texture files in GIF format rendered in equidistant rectangular projection. Additional texture files (in 1800x900 and also in 2448x1224 sizes) are available for free download at our website at www.bluepointstudio.com.
Users may also create their own texture map files for use in Pocket Earth. All maps must be in GIF format and in equidistant rectangular projection - with a width/height ratio of 2:1. Note: The overlay map selected must be of the same size as the main map selected.
Following is a brief description of the standard supplied maps:
z Day.gif shows the daytime physical earth (see credits below) z Night.gif shows the night time physical earth (see credits below)
file://C:\Projects\Pocket%20Earth%203.0\docs\pearth.htm 4/19/2004

Pocket Earth Help Page 7 of 16
z Political.gif depicts a colored map of the earth with political boundariesz Continents.gif depicts the various continents z Continents Mask.gif may be used as a texture mask to filter out the continental land massz Oceans Mask.gif may be used as a mask to filter out the oceansz Clouds.gif adds realism to the final image when combined with the physical maps (see credits below)
Texture map credits:Day.gif, Night.gif and Clouds.gif have been adapted from the original images available at http://earthobservatory.nasa.gov (Courtesy of NASA Goddard Space Flight Center)
Dual mapping channels with overlay modes
Pocket Earth allows two channels of texture mapping - main and overlay. To select the main channel specify a main map file from the drop down box under maps tab in the Options screen. To use dual channels, check the "Use Overlay Map" check box and specify an overlay map file.
The user will need to select from among the several overlay operation radio buttons to produce a specific desired effect. For example, choosing "Day.gif" as main channel and "Clouds.gif" as overlay channel and selecting "overlay" radio button will produce a near photo-realistic image of the earth as viewed from space.
Pocket Earth supports a special Day-Night overlay mode. If this mode is selected, the main map becomes the day (bright) portion of earth's surface and the overlay map becomes the night (dark) portion. In all other modes, the night portion of the earth is computed as a darker overtone of the day portion.
Dynamic multi-point visual distance measurement tool
To measure distance across two or more points on the globe, first ensure that the "Distance" button on the toolbar panel is enabled and the "Pan/Rotate" button is disabled. Then select a starting point by tapping and moving the stylus on the globe. Release the stylus to fix the starting point. Tap again and move to desired end point on the globe. The current running distance will be displayed in the selected measurement units in the upper left portion of the screen. You will also notice the time zone difference (as hrs:mins) between the first and the last cities displayed beneath the distance.
To continue with additional points repeat the last step. To change measurement units, open the General tab on Options screen. Tapping the "distance" button twice will drop the current distance measurement.
Pocket Earth allows you to reposition or delete distance arc points without having to recreate an entirely new distance path. To reposition a point, simply tap and hold the stylus on the point and drag it. To delete a point double tap the point with the stylus. When a point is deleted, the distance arc completes itself between the previous and the next points (if any).
Distances may be measured in kilometers, statute miles or nautical miles. One nautical mile is the distance covered by 1 minute (or 1/60 degree) of latitude on the surface of the earth. It approximately equals 1.15 statute miles or 1.852 kilometers.
The smoothness of the distance arc depends on the "Distance Arc Smoothing" parameters under the Advanced tab. These parameters specify the number of intermediate points used during distance measurement in 3D and planar modes. Larger values result in smoother arcs. This smoothness indicates the number of straight-line segments that the distance arc is made out of. However, for smoothing out the arc at the pixel level, turn on Antialiased Lines option under the "Advanced" tab.
To get a visual indication of each arc's start and end points, turn on the option called Direct Pointers for Distance Arc located under the "Advanced" tab. This will display an arrow that points in the direction the arc has traveled.
file://C:\Projects\Pocket%20Earth%203.0\docs\pearth.htm 4/19/2004

Pocket Earth Help Page 8 of 16
In order to measure distances between specific cities, you may use the Find City dialog. For more information click here.
Zoom Control
Pocket Earth allows the globe displayed in both Spherical and Planar modes to be zoomed in and out. Use the "up" and "right" navigational buttons on your PDA to perform coarse and fine zoom-in operations respectively. Use the "bottom" and "left" navigational buttons to perform coarse and fine zoom-out operations respectively. Pressing the "enter" PDA button will restore the current view to fit-to-screen mode.
There are two buttons on the toolbar panel that allow you to zoom in to a selected area or zoom out of the current view. To zoom in to a selected area, enable the "Zoom Selection" button, select a rectangular area on the globe by tapping and moving and then release the stylus. To zoom out, simply tap the "Zoom Out" button. Each tap zooms out of the current view one step further.
Find City Dialog
Pocket Earth allows you to locate a specific city on the globe. To use this feature, tap the "Find City" button on the toolbar panel. Make sure the "Distance" button is disabled. A "Find City" dialog pops up on the screen. This dialog is created to occupy just the optimum screen real estate such as not to overly hinder viewability of the globe/map. For this reason this dialog is not resizable.
To obtain a specific city, you could use one of three options:
z Search a city by its name z Select from a list of cities for a specific country z select from a list of cities falling under a specific population bracket
To locate a city by its name, select the "Cty" radio button. Now, tap the edit box just below it to enable the keyboard panel. Use the keyboard to enter the first few letters of the desired city name. As soon as you enter the first letter, you will notice that the list box of the "Find City" dialog fills up with a list of cities beginning with that letter. As you continue typing more letters, the city list starts to narrow down. You may scroll the list box to find your city or continue typing the entire name of the desired city.
To locate a city belonging to a specific country, select the "Ctry" radio button. The edit box changes to a drop down box which when opened will display a list of countries. As soon as you select a country, the bottom list box fills up with cities belonging to that country.
To locate a city falling under a specific population bracket, select the "Pop" radio button. The edit box changes to a drop down box which when opened will display a list of different population brackets. As soon as you select a population bracket, the bottom list box fills up with cities falling under that bracket.
When you click on the desired city in the list box, the city information shows up and the globe rotates to position the city at the center of the screen. In planar mode, the map pans to center the located city. If the "Animated rotation to city" checkbox under General tab in the options screen is unchecked, the rotation is unanimated and instantaneous. If this checkbox is checked, the rotation is animated and the "Animation Speed" slider control determines the speed of animation.
Using Find City Dialog to measure distances
You may use the Find City dialog to measure distances across multiple cities. To use this feature, ensure that the "Distance" button on the toolbar panel is enabled. Tap the "Find City" button to bring up the dialog. Use the procedure outlined in the Find City Dialog section to locate and fix the starting city. Use the same procedure to locate and fix the next city.
file://C:\Projects\Pocket%20Earth%203.0\docs\pearth.htm 4/19/2004

Pocket Earth Help Page 9 of 16
As you keep locating and fixing the cities on the globe, you will see distance arcs joining each city with the next. The total distance across all fixed cities will be displayed in the upper left portion of the screen. The time zone difference between the first and the last cities as well as the initial bearing from the first to the second city will also be displayed.
Latitude/Longitude Grid Lines and Polar/Tropic circles
To show or hide the Lat/Lon grid lines tap the "Lat/Lon" button on the toolbar panel. Grid lines may be displayed in steps of 10, 15 or 30 degrees. To change the grid step, use the "Grid Step" radio buttons under General tab in the Options screen. Equator and Greenwich Meridian lines are displayed in different colors. To display polar circles and the Tropics of Cancer and Capricorn, enable "Tropical and Polar Circles" check box under the General tab in the Options screen.
To customize colors, use the Colors tab in the Options screen. For smoother lines, turn on Antialiased Lines option under the "Advanced" tab.
Spherical and Planar Views
Pocket Earth supports two viewing modes - Spherical (3D) and Planar (2D). To see the globe as a 3D sphere, enable the "Spherical/Planar View" button on the toolbar panel. Disabling this button switches to planar mode where the globe is displayed in equidistant rectangular projection. It is recommended to use the planar mode if display speed becomes a factor.
Automatic pseudo rotation of the Earth
Pocket Earth 2.0 supports a pseudo rotation of the globe in the west-to-east direction about its polar axis. This is supported only in Spherical mode. The rotational speed is user selectable. This pseudo rotation is not real-time and is provided here only as a visual effect.
To enable this feature, check the "Rotate Globe" checkbox under the General tab in Options screen. Use the "Rotation Speed" slider control to adjust the speed of rotation
Displaying City Information
To see lat/lon and other information at current stylus point on the globe, disable "Distance Mode" and "Pan/Rotate" buttons on the toolbar panel. Tap and hold at any point on the globe to see information related to the point. Various options listed under the Display tab in the Options screen decide what information will be displayed for the current stylus point.
z Lat/Lon displays latitude and longitude for the snapped city or current stylus point z Antipodes displays antipodes (diametrically opposite point) for the snapped city or current stylus point z City Time shows current time at snapped city in the time format selected z City Date shows current date at snapped city z City's next DST Transition shows when the next Daylight Begin/End transition will occur for the snapped
city z City Population shows population info for the snapped city z Sunrise and Sunset Times shows sun's rise/set times for snapped city z Sun's Azimuth and Elevation shows sun's azimuth and elevation in degrees at the snapped city or current
stylus point z Show Country Name at Snap Point displays country names for all displayed cities z Sunrise and Sunset Times shows sun's rise/set times for snapped city z Sun's Azimuth and Elevation shows sun's azimuth and elevation in degrees at current stylus point z Moonrise and Moonset Times shows moon's rise/set times for snapped city
file://C:\Projects\Pocket%20Earth%203.0\docs\pearth.htm 4/19/2004

Pocket Earth Help Page 10 of 16
z Moon's Azimuth and Elevation shows moon's azimuth and elevation in degrees at current stylus point
When the stylus is moved over the globe, if one of the "Snap To..." options under General tab is selected, the snap distance specified by the "Snap Radius" slider control is used. Snap distance is specified in nautical miles.
The Daylight Saving Time (DST) information that is displayed for a snapped city refers to the next DST transition slated to occur for that city. If the city does not observe DST the information reads "No DST observed". When a DST transition occurs, the city's time is automatically adjusted.
Population data for a snapped city is based on 2003 figures. If a city does not contain associated population data, an "NA" is displayed meaning "Not Available". The following figure describes the icons representing various types of points:
Using the "Cities" tab
The program allows the user to select and display any number of cities from a database containing over 36,000 cities. To use this feature, enable "Show Selected Cities" button on the toolbar panel and switch to " Cities" tab in the Options screen.
To obtain a specific city, you could use one of three options:
z Search a city by its name z Select from a list of cities for a specific country z select from a list of cities falling under a specific population bracket
To list cities by name, select the "City Name" radio button. Now, tap the edit box just below it to enable the keyboard panel. Use the keyboard to enter the first few letters of the desired city name. As soon as you enter the first letter, you will notice that the "Available Cities" list box fills up with an alphabetical list of cities beginning with that letter. As you continue typing more letters, the city list starts to narrow down.
To obtain cities belonging to a specific country, select the "Country" radio button. The edit box changes to a drop down box which when opened will display a list of countries. As soon as you select a country, the "Available Cities" list box fills up with cities belonging to that country.
To obtain cities falling under a specific population bracket, select the "Population" radio button. The edit box changes to a drop down box which when opened will display a list of different population brackets. As soon as you select a population bracket, the "Available Cities" list box fills up with cities falling under that bracket.
Select and add cities from the "Available Cities" list box to the "Displayed Cities" list box by using the "Add" button. The "Add All" button adds all cities displayed in the "Available Cities" list box. To remove specific cities from the "Displayed Cities" list box, select those cities and click the "Remove" button. Use "Remove All" button to clear the "Displayed Cities" list box.
Advanced Texture Options
To adjust brightness of the background globe texture, use the "Brightness" slider under Advanced tab in the Options screen. The slider value is specified as percentage of original brightness. In the 3D Spherical mode, to
file://C:\Projects\Pocket%20Earth%203.0\docs\pearth.htm 4/19/2004

Pocket Earth Help Page 11 of 16
reduce "jagged" land boundaries, check the "3D Texture Smoothing" check box under "Advanced" tab in the Options screen.
Note: Enabling the "3D Texture Smoothing" affects performance beacuse of the extra computing involved.
Sun/Moon Spots and Earth Shadow
Pocket Earth uses the PDA’s system time and regional settings to display the Sun spot, the Moon spot and earth shadow. To see earth shadow, enable the "Show Day and Night" button on the toolbar panel. To show sun spot, check the "Sun Spot" check box under Sun/Moon tab in the Options screen.
Likewise, to display moon spot, check the "Moon Spot" check box. Each time the moon spot is drawn, calculations are performed and the moon spot image is updated to show the correct moon phase.
To adjust the darkness of earth shadow and the specular level of the bright part on earth’s surface, use the "Earth Shadow Parameters" under Sun/Moon tab. Specular level controls the area on the surface of the earth that receives the maximum brightness. Larger the specular level, larger the area. Specular level selection will be used only if the "Show Distinct Twilight" checkbox is unchecked. For more information on twilight modes supported, see Distinct Twilight Modes.
Automatic Update of Earth Shadow
Pocket Earth can automatically update earth's shadow with respect to the most current position of the sun. To enable this feature, check the "Auto update of Earth's shadow" checkbox under General tab in the Options screen. You may specify an update interval (in minutes) by using the "Interval" slider control. For example, an interval of 5 indicates that the shadow will be updated every 5 minutes.
When the shadow is being updated, a progress bar will be displayed and all other activity will be suspended until the update is done. Larger maps will usually take several seconds to update.
Distinct Twilight Modes
Pocket Earth allows the user to view the day-night transition portion of the earth's shadow as a distinct twilight zone. Three twilight modes are supported and are listed below (along with the sun's angle below horizon):
z Civil (<= 6°) z Nautical (<= 12°) z Astronomical (<= 18°)
To use this feature, navigate to the Sun/Moon tab in the Options screen and check the "Show Distinct Twilight" checkbox. Select the desired twilight mode by clicking on the appropriate radio button. Ensure that the "Show Day and Night" button on the toolbar panel is enabled.
Using GPS with Pocket Earth
Pocket Earth may be configured to communicate with an installed GPS device to display exciting information such as the user's current location on the Earth, the user's current ground speed and course (bearing). This information comes in handy and may aid in navigation.
Note: It is not recommended to rely solely on information presented by Pocket Earth for navigation purposes.
Pocket Earth is designed to operate with an NMEA-0183 standard version 2.0 or higher GPS device only and currently only supports the "RMC" sentence output from the GPS device. Please check with your GPS user's
file://C:\Projects\Pocket%20Earth%203.0\docs\pearth.htm 4/19/2004
Pocket Earth Help Page 12 of 16
manual if your GPS outputs RMC sentences and follows the NMEA-0183 version 2.0 or higher standard.
Once you have your GPS connected to your PocketPC, open the GPS tab on the "Options" screen.
If you know the communications port (COM) where your GPS is connected, select the port from the "GPS Port" drop down list box. Also, select a communication speed (baud) from the "GPS Baud" drop down list box. The baud rate usually refers to the number of bits/sec at which the communication succeeds. Most GPS devices support at least 4800 baud so this would be the first baud rate to try. Now, click the "Open GPS" button to start a communication with the GPS device.
If you are not aware of your GPS connectivity, click the "Auto Detect" button. The information list box on the "GPS" tab will start to display activity progress. Pocket Earth loops through each of the available COM ports and baud rate settings to check the availability of a GPS device on your PocketPC. If a device is found, the auto-detect stops and the "GPS Port" and "GPS Baud" list boxes are updated to show the correct port name and baud rate. If you have a GPS connected and auto-detect fails to detect it, try detecting it manually by walking through each of the port and baud settings and clicking the "Open GPS" button. You may also want to switch your PocketPC OFF and then back ON so as to reset your GPS device.
As soon as a communication with a GPS device is established, the infomation list box begins to show GPS sentences (like $GPRMC, $GPGGA etc) depending upon your GPS device. You may now start using the GPS information through various other options available on the GPS tab.
Note: In order for the GPS to work, it should have an unobstructed view of the sky. Using a GPS device from inside a vehicle is fine as long as a good view of the sky is available to the GPS. In any case, it could take a few minutes for the GPS device to detect satellite signals and provide meaningful data. If necessary, please consult your GPS manual for information regarding Cold, Warm and Hot starts, WAAS support and 2D/3D fixes.
To display your current geographic location and course as a dotted line, turn on the "Show Course" check box. Turn on the "Show Compass" checkbox to display a compass that shows your bearing (clockwise with respect to north) as well as your current ground speed in either kmph, mph or knots (depending upon the distance units selected from the Display) tab.
If you check the "Show Time To Destination" checkbox, Pocket Earth will display the time it will take to traverse the currently shown distance path (if any) at the current ground speed.
When you return to the main screen, Pocket Earth will display the current location and course as soon as it starts getting valid information from the GPS device. Initially, only the current location may be displayed or the course shown may be pointing at 0.0 N. This may indicate lack of enough information to show the actual course and speed. This will improve when your GPS device starts seeing more satellites.
What is more powerful is that you can create a distance path with its starting point (or any point for that matter) snapped to your current GPS location. Let's say you would like to know your position with respect to some specific city or point. The procedure to do this is similar to that outlined for computing distances. All you need to do is start a distance arc with its first point snapped to your current GPS location point. The current GPS position is normally displayed as an amber cicle with a blinking dot. When a distance point is snapped to it, the GPS point shows with an outer green circle. Now, create a second point for the distance arc by tapping on your desired city or any point on the globe.
A distance arc is displayed with the current distance, bearing and time taken to destination. When your GPS position updates, the starting point of your distance path updates automatically with it. So you will always be shown the updated distance and bearing to destination. You could use this approach, for example, when you are sailing in the ocean and would like to stay on course to your destination as you sail. The bearing displayed is always with respect to the true north and not the magnetic north.
file://C:\Projects\Pocket%20Earth%203.0\docs\pearth.htm 4/19/2004
Pocket Earth Help Page 13 of 16
You can also see a history or trail of all the GPS points you traversed. To do this, enable the "Show History" check box under the "GPS" tab. Also, check the "As Route" check box if you would see the history as a route (with dotted lines). Enabling the "Auto-update" check box automatically updates the history with the most current position at regular intervals (specified in minutes). At any time, you could manually add the latest position to the history by clicking on the "Add Current" button. The "Clear History" button clears all history points.
Using a Different Compass Image
Although not explicitly provided in the user interface, you may change the default compass image to a different one by following this small procedure:
z Using a file explorer, browse to the installation folder of Pocket Earth. Typically, this would be \Program Files\Blue Point Studio\Pocket Earth on your device, but could be different if you chose a different folder at the time of install.
z Pocket Earth comes bundled with three compass face images - compass.gif (default), compass1.gif and compass2.gif
z All you need to do now is rename compass.gif to say compass_orig.gif. z Then rename your desired compass image to compass.gif. z Restart Pocket Earth and you will start seeing the new image when your GPS is active.
Displaying Weather Information
Pocket Earth can display information on current weather for specific cities selected by the user. This feature requires internet connectivity on your PocketPC. If your PocketPC has a wireless modem, is capable of wirelessly connecting to a LAN or is connected to an internet enabled desktop PC through ActiveSync, you can configure Pocket Earth to access weather information over the internet.
Once you have established that your PocketPC is able to connect to the internet, open the Weather tab on the "Options" screen. Now, select a country from the "Country" drop down box. Pocket Earth tries to connect to the internet to fetch a list of cities for the selected country. If it is unable to connect, a message box will be displayed.
When the list of cities is received, the "Available Cities" list box will be populated with these cities. You may select one or more cities from this list box and click the '>' button to add them to the "Displayed Cities" list box. The displayed cities list box currently accepts a maximum of 40 cities to display weather information for.
If you would like the name of the place to be returned along with the weather information, check the "Show Place Name" check box. You can also instruct Pocket Earth to automatically update weather information for the selected cities at regular intervals (specified in minutes). For this, enable the "Auto-update" check box and select a desired update interval.
Select temperature units (Celsius or Farenheit) using the "Temperature" radio buttons. Then click the "Update Now" button. This will cause the program to send a request to the server to access weather information for the selected cities. While this information is being requested, a status message appears to the left of the "Update Now" button indicating that the "Fetch" is in progress.
As soon as the weather information is received, the status message reads "Weather data is current". Exit out to the main application screen and see the weather information displayed for the selected cities. This would include the place name (if selected), the temperature and the sky condition (e.g. partly cloudy, clear, etc.)
The list of selected cities will be saved between sessions. So the next time Pocket Earth is started and if the autoupdate is enabled, the program will try to fetch the current weather data for the selected cities. This process takes place in the background and you will be able to interact with the program as usual. When the weather information is more than a day old, the status message on the "Weather" tab reads "Weather data is outdated".
file://C:\Projects\Pocket%20Earth%203.0\docs\pearth.htm 4/19/2004
Pocket Earth Help Page 14 of 16
Please note that obtaining weather information could potentially take a long time depending upon how busy the server is. If the server is down or very busy, there could be a significant delay in fetching weather data. You will still be able to continue working normally with the application since the weather fetch is a background process.
Suspend Mode
Pocket Earth allows itself to be temporarily suspended without actually exiting. This allows you to switch to other programs (like checking your inbox etc) or run new applications. Once you are ready to switch back, simply rerun Pocket Earth from the Start Menu. Pocket Earth will resume operating at the point you left off. While in this mode, however, the program continues to perform various auto-updates that have been enabled such as Earth's shadow, date/time, GPS position (if any) etc.
Routes and Points of Interest
Pocket Earth can display specific points of interests like historical routes and oceans stored as XML files. Some sample route files come bundled with the product. Additional files will be made available for download at www.bluepointstudio.com . Users may also create their own route files. To display specific route/places files, select one or more items from a list of files in the "Select Routes/Places to Show" list box under Routes tab in the Options screen.
These files are stored in the "routes" folder under the current installation path (\Program Files\Blue Point Studio\Pocket Earth). These files are in a specific format and stored as XML text files. The following describes the format used:
The <data> tag specifies type and color of line. Supported line types are: "solid", "dot", "dash" and "none". Colors may be specified as one of the following: "white", "black", "blue", "brown", "cyan", "green", "red", "yellow", "silver" and "gold". Alternatively, a color may be specified as its individual RGB components preceded by the '#' symbol, such as "#FFFF00" (for yellow). When the line type is not "none", it indicates that a route is being described. Adjacent points are joined by an appropriate line (dashed, dotted, etc). In this case, the total distance between the first and the last points in the route is shown in the upper left portion of the screen.
The <point> tag specifies the latitude, longitude and point description and optionally an image to display at the point. Latitude values may range from –90.00 degrees (at south pole) to +90.00 degrees (at north pole). Longitude values may range from –180.00 degrees (West) to +180.00 degrees (East) with 0.00 longitude located on the Greenwich meridian.
An image may be specified in a <point> tag as shown below: <point lat="35.4" lon="138.7"
img = "volcano.gif" imgx="-5" imgy="-5">
Fuji, Honshu, Japan </point>
The 'img' attribute specifies the image file that contains the image to be shown at the point. Currently the only supported image file format is GIF. Some standard image files will be made available at www.bluepointstudio.com.
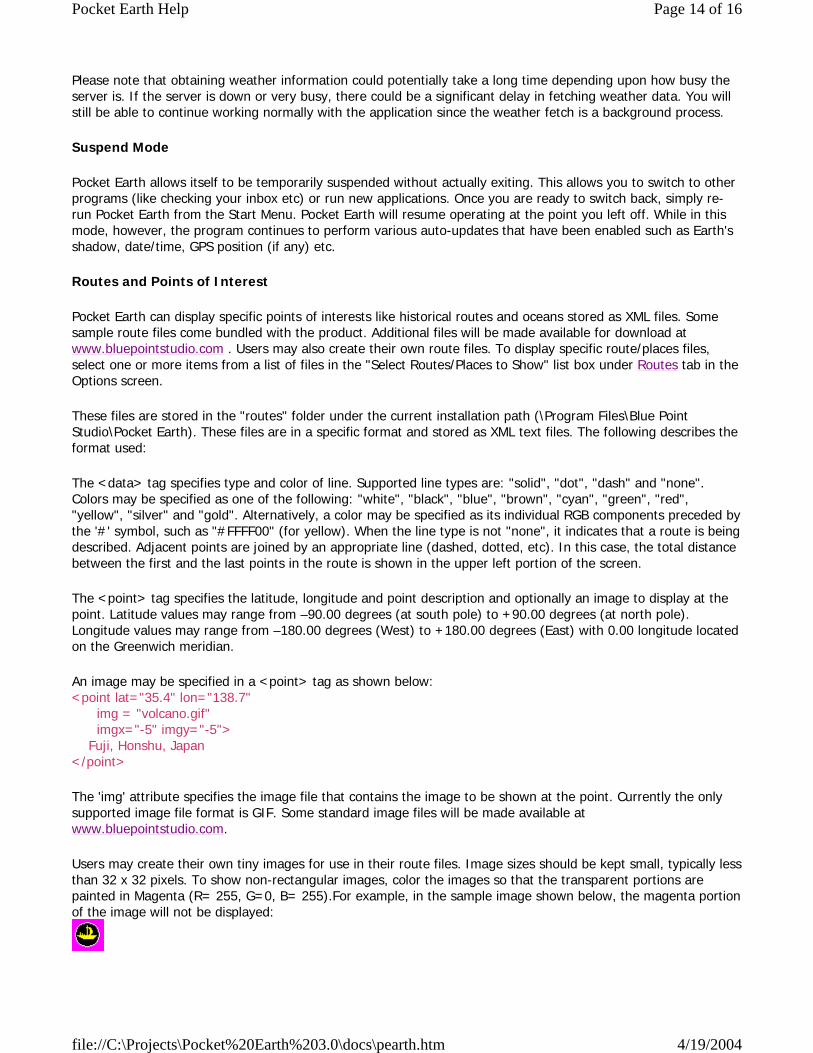
Users may create their own tiny images for use in their route files. Image sizes should be kept small, typically less than 32 x 32 pixels. To show non-rectangular images, color the images so that the transparent portions are painted in Magenta (R= 255, G=0, B= 255).For example, in the sample image shown below, the magenta portion of the image will not be displayed:
file://C:\Projects\Pocket%20Earth%203.0\docs\pearth.htm 4/19/2004

Pocket Earth Help Page 15 of 16
The image files must reside along with the route files in the 'routes' folder of the program's installation path on your PDA. This will usually be /Program Files/Blue Point Studio/Pocket Earth/Routes.
The 'imgx' and 'imgy' attributes specify the x and y offsets of the image on the screen with respect to the actual point being displayed. In the above example, x and y offsets of -5 indicate that the image's top-left corner will be positioned 5 pixels above and 5 pixels to the left of the actual point. If the image were to be 10x10 pixels, the image would be centered at the actual point in the above example. This feature is also useful when you want to show a point and also an image adjacent to it. The following example illustrates this:
<point lat="35.4" lon="138.7"> Fuji, Honshu, Japan
</point> <point lat="35.4" lon="138.7"
img="volcano.gif"< BR> imgx="2" imgy="2"> </point>
Here, the first point tag displays as a point along with the textual information. The second point tag displays a volcano image 2 pixels below and to the right of the actual point.
Please note: If the 'img' attribute is used, the point description (that appears before the ending </point> tag) is optional. When the 'img' attribute is omitted, the point description text is required for the point to show up.
Here is an example of a valid route file:
<data line="none" color="red"> <point lat="35.4" lon="138.7">
Fuji, Honshu, Japan </point> <point lat="35.4" lon="138.7"
img="volcano.gif" imgx="2" imgy="2">
</point> <point lat="0.15" lon="37.15">
Mt. Kenya, Kenya </point> <point lat="0.15" lon="37.15">
img="volcano.gif" imgx="2" imgy="2">
</point> </data>
Any number of <point> tags may be enclosed inside the <data> tag. Note the end tags </point> and </data>. These will be required for the correct parsing of the XML file.
Appearance - Skins and Fonts
Pocket Earth comes with several different skins that are used to draw controls and background on the options page, dialog boxes and the toolbar panel. To choose a different skin, navigate to the Appearance and select a skin from the "Select Skins" drop down box.
Pocket Earth supports three different fonts to draw textual information. To change the font, select a font from the "Select Font" drop down box. There is an "Apply" button provided to update the scheme using the selected skin and font. Pressing the "OK" button will also update the scheme but will also close the options screen.
file://C:\Projects\Pocket%20Earth%203.0\docs\pearth.htm 4/19/2004
Pocket Earth Help Page 16 of 16
Disclaimer
Data and information in this program is provided for general informational purposes only. BluePointStudio shall not be held liable for any errors or discrepancies in the content, or for any actions taken in reliance thereon. This program and all information and data contained therein should be used for personal use only and may not be distributed without prior permission from BluePointStudio. BluePointStudio shall not be liable for any damages or costs of any type arising out of or in any way connected with your use of this program.
Copyright © 2002-2004 BluePointStudio All rights reserved.
Please send your valuable feedback and suggestions to [email protected]
file://C:\Projects\Pocket%20Earth%203.0\docs\pearth.htm 4/19/2004


