Embed Size (px)
Citation preview

Inte
rmed
iate
Pha
se
Teac
her’s
Gui
de
Grade
6
Social Sciences

- 1 -
GEOGRAPHY GRADE 6 TEACHER’S GUIDE
NOTE: 1. History and Geography must each be allocated 90 minutes per week. It is strongly
suggested, that each must be broken into sessions of one half hour and an hour lesson. Both disciplines must be taught and assessed each term.
2. The three Learning Outcomes (with the appropriate Assessment Standards) are always
used together throughout the teaching, learning and assessment process.
3. The knowledge focus framework (content) and the appropriate Assessment Standards (skills) must be taught and explained during lessons and practised by the learners in their workbooks.
4. New concepts must be explained to learners as they work through the knowledge focus
framework for Social Sciences. Use the terminology that would be used in the assessment tasks.
5. The Social Sciences learning area is based on the enquiry skills learning process. The
process should encourage learners to work with evidence and consider the logic of arguments and give them opportunities to consider their own values, opinions and judgements in relation to those of their peers.
6. The construction of knowledge and the development of interpretation skills are based on
the foundation of enquiry. Teachers and learners are encouraged to always ask questions. The use of Key Questions is important to the development of critical thinking. Learners need to be encouraged to create and frame their own questions. Encourage critical thinking by doing the following:
• Challenge learners to question • Develop the learners’ questioning skills • Ask learners for their own understanding • Encourage learners to seek alternatives before deciding on an answer • Encourage learners to give reasons for saying or suggesting certain things • Ask learners to justify their choices • Provide opportunities for learners to classify, analyse and create • Engage learners in dialogue • Provide opportunities for focussed discussion with their peers • Challenge stereotypes and prejudice
7. Whenever possible use real things (authenticity) in the classroom: look at real objects and
handle real documentary and visual sources. Find sources that appeal to the learner rather than to the teacher. For History, use items from the past and for Geography use fieldwork maps, photographs and current newspapers.
8. Use fewer sources in greater depth. Care needs to be taken when choosing sources to
make sure that there is enough information for meaningful work. Do smaller topics in more detail. Real learning comes when learners are given the opportunity to do in-depth investigations rather than skimming over a number of topics.
9. Learners must be able to communicate their findings to the rest of the class and to
others within and outside of the school community: • In Grade 4 through writing a paragraph, discussion, constructing a book, a collage,
using a poster, artwork, drama, dance and music • In Grade 5 through short paragraphs, simple graphs, maps, diagrams, creating
artwork, posters, music, dance and drama, projects, discussion, debates and charts • In Grade 6 through structured writing, discussion and guided debate, graphs,
tables, maps and diagrams, artwork and drama.

- 2 -
10. THERE ARE 6 FORMAL ASSESSMENT TASKS FOR SOCIAL SCIENCES
Number Term Date/ week History / Geography Task Minimum Mark Allocation
1 1 Week 10 History & Geography Test
H = 20 G = 20
Total: 40
2 2 Week 13 History Source Based and Extended Writing Assignment
Source work: 25 Extended writing: 15
Total: 40
3 2 Week 20 Geography * Project (Research Assignment/ Creative Response)
40
4 3 Week 26 Geography Map Work and Data Handling Assignment
40
5 3 Week 30 History * Project (Research Assignment/ Creative Response)
40
6 4 Week 40 History & Geography
Examination H = 40 G = 40
• All assessment tasks must be developed within the context of the learners. • All the learning outcomes (with the appropriate assessment standards) and the
content (knowledge focus framework) are assessed together.
• If the project in History is a research assignment, then the project for Geography must be a creative response assignment or vice versa.
• Instructions must be clear to the learners. All the formal assessment tasks have the
same weight.
• Evidence of all the content, exercises and activities (informal assessment) must be evident in learner workbooks, before the formal assessment task for recording and reporting is done. (Look in the work schedule). A good practice to ensure that learners do their own work is to do these tasks in the class under controlled circumstances. This practice will ensure authenticity. It might also ensure that all the learners hand their tasks in.
• Map work and data handling skills, together with the content, must be
continuously taught and informally assessed each term. A formal assessment for map work and data handling takes place during the third term. Map work and data handling skills must also be assessed in the test and the exam. Consult the Social Sciences Policy document for the map work skills and concepts for each grade – note the progression.

- 3 -
11. Different types of sources.
The following diagram shows the variety of sources, which can be used in both History and Geography within Social Sciences.
ORAL Interviews and Reminiscences Oral traditions Myths and legends Poems Songs Stories Questionnaire responses
WRITTEN Textbooks Books Newspapers Magazines Census data Documents Letters Journals Diaries, Reports Pamphlets Advertisements Internet, CD ROM
VISUAL Photographs Cartoons Maps and plans Atlases Topographic maps Aerial Photographs Satellite images Paintings and drawings Film, television, video Statues and carvings Internet, CD ROM
POSSIBLE SOURCE
ARCHAEOLOGICAL
Ruined or buried sites and buildings Pollen traces Fossils Artefacts (objects found on sites), e.g. pottery, bone, coins, charcoal, tools, weapons
PHYSICAL
Objects surviving from the past, e.g. passes Historic buildings Monuments Statues and sculptures Carvings Everyday objects, e.g. furniture, clothing, jewellery, vehicles
LANDSCAPE
Settlements and their plans Buildings and sites Roads, tracks, paths Bridges, railways, harbours Effects of human activity on the environment Aerial photographs Physical landscape features, e.g. passes, plains, bays, caves
(Adapted from: Teacher’s Guide for the Development of Learning Programmes: Social Sciences 2003, p.27. Geographical Sources on p. 31.)

- 4 -
GRADE 6 WEEK 1 Methodology Step 1: Revision of previous knowledge using questions and answers and class discussion
• Introduce the global concept. • An introduction to Geography as a discipline of Social Sciences.
Step 2: The educator will lead a discussion, using relevant pictures as sources, to answer the following questions. • What is Geography? • Where can you apply Geography in real life? • What will we learn in Geography? • What is a source? • Why are newspapers, maps and atlases important in Geography? • What is the enquiry process?
Step 3: Important information is written on the board by the educator so that the learners can rewrite it in their work books.
Step 4: Learners answer the following questions: • What are physical features? (mountains, rivers, valleys) • What is Geography on a global scale? The educator uses pictures and atlases to explain where necessary.
Questions remain much the same as in Grade 5, although you expect a better explanation by learners and a better understanding of concepts.
Resources: Atlases, globe, textbooks, magazines, videos, pictures, etc. Integration: Languages, History, Mathematics, Natural Sciences. WEEK 2 Map work: Mercator's Projection and introduce latitude and longitude Methodology: Step 1: The educator revises direction and explains that we need to be accurate when locating a
town, city, mountain or country on a map, e.g. north, south, east, west etc. Step 2: With the emphasis on the Mercator's Projection, the teacher introduces the different map
projections to the learners to show them the development of maps over the years. They are also introduced to the globe as the most appropriate representation of our planet.
Step 3: The educator introduces the following to the learners, by asking questions about them and also by explaining and giving practical demonstrations of them: latitude, longitude, hemisphere, equator, sphere, Greenwich Meridian, International Date Line, map projection, measurements in degrees, continents, co-ordinates, Arctic and Antarctic Circles, axis, Tropics of Cancer and Capricorn.
Step 4: Informal Assessment Task: Educator supplies learners with a blank world map. Learners draw the above features on the map in their workbooks. Learners can also locate and label key cities, regions and countries on the map, if necessary.
Step 5: Now the educator can explain how to use an atlas and how areas of the globe are projected onto a flat surface - show an example of the Mercator's Projection.
Resources: Atlases, globe, textbooks, magazines, videos, pictures, etc. Integration: Languages, History, Mathematics, Natural Sciences.

- 5 -
WEEK 3 Map work: How to understand and use the above features on maps Methodology: Step 1: The educator explains that we have 180 lines of latitude and 360 lines of longitude and
that all of them are imaginary lines. Lines of latitudes are all full circles, because they encircle a particular area of the globe, while lines of longitude are all semi-circles (or half-circles). That is also the reason why we have twice as many lines of longitude as lines of latitude.
Step 2: The educator explains that latitude refers to how far north or south a place is from the equator (0°) The educator explains that longitude refers to how far east or west a place is from the Greenwich Meridian. The educator also explains the implications of the International Date Line at 180° longitude.
Step 3: Introduce the Northern and Southern Hemispheres - the earth is divided by the Equator. (Revise direction)
Step 4: Introduce the Eastern and the Western Hemisphere – The earth is divided by the Greenwich Meridian and the International Date Line. (Revise direction)
Step 5: Do an oral revision exercise on aspects of latitude and longitude covered in previous weeks.
Step 6: Teach the co-ordinates (where lines of latitude and longitude intersect). Use a simple grid until all learners understand.
Step 7: Introduce degrees and minutes. Explain the rotation of the earth - how often and why the earth rotates.
Step 8: Complete the lesson with an exercise in which learners must use co-ordinates to identify features on a map. The atlas is appropriate for this exercise. Use a world map.
Resources: Atlases, the globe, textbooks, magazines, videos, pictures, etc. Integration: Languages, History, Mathematics, Natural Sciences. WEEK 4 Global population distribution and density: Key cities (comparisons) Methodology: Step 1: The educator asks the learners a key question (They must discuss this in their groups and
report back to class): Key question: Why do more people live in some places than in others? (Guide the learners with leading questions.) • Look at our own country. Some provinces have more people than others. Why? • Some provinces are bigger than others, but have far fewer people than smaller
provinces and vice versa. Why? • The same happens in other countries of the world. What do you think the reasons are
for the above phenomena? After 10 minutes of discussion, groups report back to the class. The educator can write answers on the board to see how many answers are the same or different, or to see how good their understanding of the situation is.
Step 2: Informal assessment: Use a global population map, indicating the most densely populated cities. The educator provides the longitude and latitude co-ordinates of densely populated cities. Learners record the different key cities on a blank world map (template). (Map work from sources)
Step 3: Informal assessment: List reasons for the dense population discovered in the previous exercise.
Resources: Atlases, globe, textbooks, magazines, videos, pictures, etc. Integration: Languages, History, Mathematics, Natural Sciences.
- 6 -
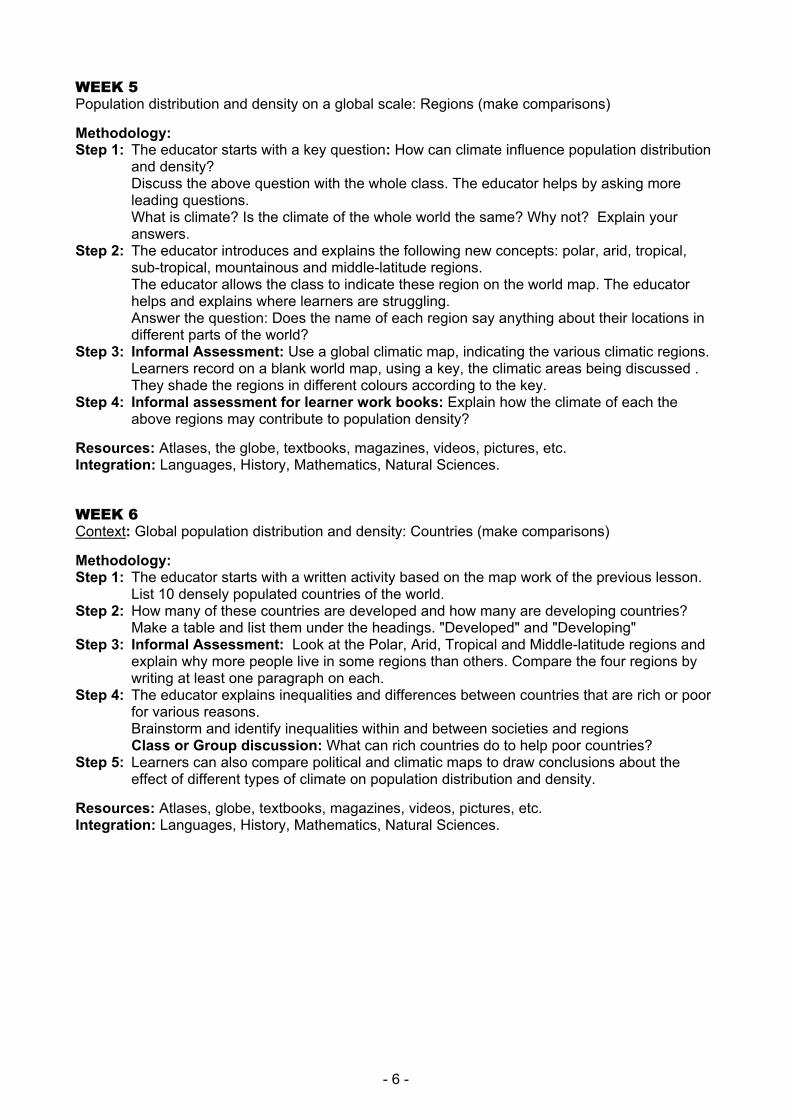
WEEK 5 Population distribution and density on a global scale: Regions (make comparisons) Methodology: Step 1: The educator starts with a key question: How can climate influence population distribution
and density? Discuss the above question with the whole class. The educator helps by asking more leading questions. What is climate? Is the climate of the whole world the same? Why not? Explain your answers.
Step 2: The educator introduces and explains the following new concepts: polar, arid, tropical, sub-tropical, mountainous and middle-latitude regions. The educator allows the class to indicate these region on the world map. The educator helps and explains where learners are struggling. Answer the question: Does the name of each region say anything about their locations in different parts of the world?
Step 3: Informal Assessment: Use a global climatic map, indicating the various climatic regions. Learners record on a blank world map, using a key, the climatic areas being discussed . They shade the regions in different colours according to the key.
Step 4: Informal assessment for learner work books: Explain how the climate of each the above regions may contribute to population density?
Resources: Atlases, the globe, textbooks, magazines, videos, pictures, etc. Integration: Languages, History, Mathematics, Natural Sciences. WEEK 6 Context: Global population distribution and density: Countries (make comparisons) Methodology: Step 1: The educator starts with a written activity based on the map work of the previous lesson.
List 10 densely populated countries of the world. Step 2: How many of these countries are developed and how many are developing countries?
Make a table and list them under the headings. "Developed" and "Developing" Step 3: Informal Assessment: Look at the Polar, Arid, Tropical and Middle-latitude regions and
explain why more people live in some regions than others. Compare the four regions by writing at least one paragraph on each.
Step 4: The educator explains inequalities and differences between countries that are rich or poor for various reasons. Brainstorm and identify inequalities within and between societies and regions Class or Group discussion: What can rich countries do to help poor countries?
Step 5: Learners can also compare political and climatic maps to draw conclusions about the effect of different types of climate on population distribution and density.
Resources: Atlases, globe, textbooks, magazines, videos, pictures, etc. Integration: Languages, History, Mathematics, Natural Sciences.

- 7 -
WEEK 7 Global population distribution and density Context: Population of countries Methodology: Step 1: Educator ask a key question: Why are some countries more densely populated than
others? What is the difference between a developed and a developing country? The educator guides the above discussion and explains the following new concepts that are linked to the discussion. New concepts: countries, borders, developed, developing, wealth, energy, technology
Step 2: The educator can now use a population distribution map of the world and ask questions about population density and population distribution in the world and how these affect development in the different regions.
Step 3: Overlay transparencies can be used to help learners to understand the two concepts.– one transparency showing population density of the world – the other showing the countries of the world.
Step 4: The educator explains how to draw and read a bar graph and how one can reflect world population on such a graph. Informal assessment: Compare the population densities of the top ten countries by drawing a bar graph from the given information.
Resources: Atlases, globe, textbooks, magazines, videos, pictures, etc. Integration: Languages, History, Mathematics, Natural Sciences. WEEK 8 Population distribution and density on a Global scale Context: Developed and developing countries. Methodology: Step 1: The educator does revision on the previous week’s work and gives the learners a
research task whereby they will investigate and identify the characteristics of developing countries, as compared compared with developed countries. Table your findings under the two headings: "Developed countries" and "Developing countries"
Step 2: Informal Assessment: Use the following criteria to draw a pie chart to reflect all developing countries of the world: This activity can also involve a bar graph to compare the developed with the developing countries using the following criteria: • Percentage of the world’s population • Percentage of the world’s wealth • Percentage of the world’s energy used
Step 3: Learners must discuss in groups what they think developed countries can do to assist developing countries to eradicate their poverty. Why do you think it is necessary for developed countries provide such assistance? Report back after 10 minutes to class.
Step 4: The educator explains: The G8 Summit and its role. This exercise can also be given to learners as a research project, where they have to find information about the G8 countries and their role. Do the G8 countries fulfil this role? How successful are they in playing that role? After research done at home, the teacher can initiate a class discussion. (Educator gives guidance)
Step 5: Learners critically evaluate the delivery of promises made by the G8 summit via a class debate. (Educator gives guidance)
Resources: Atlases, the globe, textbooks, magazines, videos, pictures, etc. Integration: Languages, History, Mathematics, Natural Sciences.

- 8 -
WEEK 9 Map work Context: Location and distance of air and trade routes Methodology: Step 1: The educator revises the following map work skills with learners: latitude, longitude,
degrees, northern- and southern hemispheres, continents, oceans, scale on maps, etc. Step 2: The educator explains the following new concepts:
trade, communication, products, export, raw materials, industrial, manufacture, fluctuate, transport routes
Step 3: The educator explains once again what a scale is and why it is necessary for each map to have a scale. A scale shows that a certain distance on a map represents a certain distance in reality, e.g. 1:50 000 The educator gives each learner a world map and a 60cm piece of string. The educator teaches them how to use the piece of string to measure distance on the map and how to work out the distance in reality.
Step 4: Work out the real distance in kilometres from London to Cape Town as the crow flies. Compare the air route to the sea route between the same two cities and determine the difference in distance.
Step 5: Work out the real distance in kilometres between Johannesburg and Cape Town along the railway.
Resources: Atlases, globe, textbooks, magazines, videos, pictures, etc. Integration: Languages, History, Mathematics, Natural Sciences. WEEK 10 FORMAL ASSESSMENT TASK 1: Test Methodology Step 1: All 3 LOs, with the appropriate ASs, must be assessed. Step 2: The test must consist of:
• Knowledge questions on topics covered in the first term, map work and data handling. • Sources must be contextualised.
Step 3: Remember that tests should focus on measuring the level of achievement relative to the particular Learning Outcomes or Assessment Standards covered during the term.
Step 4: Tests should have a range of questions that assess skills and levels of cognitive understanding and not be based on simple recall. (E.g. Bloom’s Taxonomy)
Step 5: Use short answer questions for a maximum of 40% of the test. E.g. name, list, identify, classify, etc.
Step 6: True/False questions require an alternative response. E.g., give a reason for your answer. Step 7: Matching items in two columns is useful for testing concepts. There should be more
options of responses than stimuli. There should only be a few (5-6) of these questions asked.
Step 8: Use sources to ask longer responses that test cognitive skills e.g. appraise, analyse, classify, compare, contrast, etc.
Resources: Assessment Guidelines for Social Sciences (Intermediate and Senior Phase) pp. 25 – 30.

- 9 -
WEEK 11 Context: Climate and vegetation regions of the World Key question: What is a biome? Methodology Step 1: The educator explains the following concepts: biomes, tropical and sub-tropical, rain
forests, deciduous forests, grasslands, savannah, temperature, seasons, climate zones, ecosystems.
Step 2: The educator asks leading questions regarding the different biomes in our country. The educator encourages a class discussion by asking more questions, like: • Do we have different biomes in our country? • How do we know that? • Name any area in our country where vegetation is different from what we have here in
the Western Cape. What about the southern Cape? Step 3: Use a world map as resource to identify the different biomes in the world.
Informal Assessment: Learners are given a blank world map on which to shade and label the different biomes.
Step 4: Informal Assessment: Learners are asked to use co-ordinates to locate the position of certain biomes on a world map.
NOTE TO THE EDUCATOR: A biome is a region with its own climate and a specific plant and animal life. Resources: Atlases, globe, textbooks, magazines, videos, pictures, etc. Integration: Languages, History, Mathematics, Natural Sciences. WEEKS 12 and 13 Climate and vegetation regions of the world Context: Tropical rainforests, temperate forests and coniferous forests Methodology: Step 1: The educator poses a key question to start a class discussion: What is climate and how
does it affect vegetation around the world? The educator also introduces the above climatic regions to them.
Step 2: Group work: Learners are asked to do research on the climatic regions (tropical rainforests, temperate forests and coniferous forests). They must bring pictures, maps and other information which can be used in a discussion with the class.
Step 3: The educator supplies a world map and explains the names and location of each region. Using written sources, pictures, videos and maps, the learners now investigate the various climatic conditions and vegetation found in the different biomes.
Step 4: Optional activity Educator can arrange an educational excursion to the nearest botanical gardens, if possible. Plan it well and prepare learners well for it. It must contribute to what you want the learners to learn and experience. Give them a questionnaire or a checklist which needs to be completed in the course of the excursion. After the excursion the educator initiates an oral discussion about their findings and compares their answers on their questionnaires. Answers can even be written on the board.
Step 5: Now that learners know much more about climate, vegetation and biomes, let them work in groups on the following topic: What is the negative impact of deforestation on our globe in general and how can we prevent it? Substantiate your answers thoroughly. Report back in your groups to the class.
Step 6: Educator explains deforestation to learners and asks them why they think it takes place in most communities across the world. Informal Assessment: Learners must now write at least 3 paragraphs about the negative impact of deforestation on our globe, how it can be prevented and why it is of utmost importance to prevent it.

- 10 -
Resources: Atlases, globe, textbooks, magazines, videos, pictures, etc. Integration: Languages, History, Mathematics, Natural Sciences. WEEKS 14 and 15 Climate and vegetation regions of the world Context: Sub-tropical savannahs, Mediterranean regions, grasslands and mountains Methodology Step 1: The educator does revision with learners about the climatic and vegetation regions they
have studied so far and introduces sub-tropical savannahs, mediterranean regions , grasslands and mountains. The educator must also illustrate on a world map the location of each region in relation to the previous weeks' topics.
Step 2: From sources such as books, magazines, pictures, maps and videos, learners investigate various climatic conditions and vegetation found in the different biomes. Through questions, learners communicate their findings orally to the class.
Step 3: Informal assessment: Use the resource information and tabulate the above regions under the following headings: Climatic region, vegetation (types of plants) and animals.
Resources: Atlases, globe, textbooks, magazines, videos, pictures, etc. Integration: Languages, History, Mathematics, Natural Sciences. WEEKS 16 and 17 Climate and vegetation regions of the World: Context: Deserts, semi-deserts and tundra and ice regions Methodology: Step 1: The educator revises completed climatic regions orally and explains the following new
regions: deserts, semi-deserts, tundra and ice caps.
Step 2: The educator demonstrates on world map where the new climatic regions are found and initiates a class discussion via questions and answers, e.g. Do you think these regions are densely populated areas? Give a reason for your answer. What kind of vegetation would you find there? Why is it that kind of vegetation?
Step 3: Informal assessment: Use the sources and write a paragraph of at least 8 sentences about the location, vegetation, animal life and population on each of the above climatic regions.
Step 4: Group work: Learners investigate the various climatic conditions, vegetation and animal life found in the different biomes. Use written sources, pictures and maps to make a poster for class display. The group presents their poster to the class.
Step 5: Class discussion: Study the climate, vegetation and animal life of the tundra and ice regions. Do you think there is a lot of human activity? What is the negative impact of human activity on this region? How do you think the discovery of minerals will impact on such a biome?
Resources: Atlases, globe, textbooks, magazines, videos, pictures, etc. Integration: Languages, History, Mathematics, Natural Sciences.

- 11 -
WEEK 18 Climate and vegetation regions of the world Context: Link biomes to countries and population. Methodology: Step 1: The educator does revision on climatic regions and explains the following concepts:
Population density and resources. Step 2: Informal assessment: Use the sources and determine the climatic region, vegetation,
animal life, natural resources, population and latitude of the following cities and countries of the world: New Dehli, Windhoek, Alaska, New York, Perth, Japan and Marion Island. Tabulate it in your work book as in the table below. The first one has been done for you.
Country or city
Climatic region
Vegetation Animal life Population size
Latitude Natural resources
India / New Delhi
Tropical
Tropical Rainforest
Tigers, elephants
12 050 000
Between 0 and 23ْ N
Coal
Japan / Tokyo
Note: The educator must select countries with various economic strengths and a variety of climatic and vegetation regions. This is just an example. The educator may make his or her own selection.
Resources: Atlases, the globe, textbooks, magazines, videos, pictures, etc. Integration: Languages, History, Mathematics, Natural Sciences. WEEK 19 Climate and vegetation regions of the world - Context: Link biomes to countries and population. Methodology Step 1: The educator assesses the previous informal assessment orally. Step 2: Class discussion: The educator guides learners in a discussion in response to the
following question: If a person finds oil or any other valuable mineral in an area like the Sahara Desert in North Africa, which has a very low population, what do you think will happen? How will this affect the landscape, its people and the development of the area? Work in groups and report back to class within 10 minutes.
Step 3: As individuals, identify and record in your work books, how access to different kinds of resources, like minerals, will influence development in different places, areas or regions.
Step 4: Using the Week 18 table in your work book as a resource, investigate two countries e.g. Japan (developed country) and India (developing country) to identify social inequalities e.g. cast system in India, environmental inequalities e.g. harsh climates Monsoon in India, tsunamis etc.) and access to resources.
Resources: Atlases, globe, textbooks, magazines, videos, pictures, etc. Integration: Languages, History, Mathematics, Natural Sciences.
- 12 -
WEEK 20 FORMAL ASSESSMENT TASK 3: Project (Research Assignment OR Creative Response) If the History Project is going to be a creative response, then this Geography project must be a research assignment and vice versa. This assessment task should have been handed out 2 to 3 weeks earlier than WEEK 20 and must be completed in class under supervision, so as to ensure authenticity, by the end of the term. The project should assess whether the learner is able to use enquiry skills to investigate geographical and environmental concepts and processes and whether they are able to select, giving reasons, key information. If the learners complete a creative response project, ensure that it is a learning experience, not just a creative task. Give the learners guidelines. Research Task: Step 1: Give clear instructions. Step 2: When completing a research task, learners are expected to follow the enquiry process.
• We work with sources (evidence) (LO 1) • Ask a key question • Identify information • Answer questions • Communicate the answer
Step 3: The educator must provide a framework for the research project. Stipulate what must be covered, what LOs and ASs will be covered, and what skills, knowledge and values will be assessed.
Step 4: Discuss the project with the learners. Discuss what the research entails and issue and discuss the criterion-referenced assessment grid with the learners.
Step 5: Ensure that the task is criteria- and age-appropriate. Step 6: Monitor the progress of the learners by setting deadlines for different stages of the
research task. Creative Response Task: Step 1: Give clear instructions. Step 2: These include creating models, posters, collages and role-play. Step 3: The creative response can be incorporated with another form of assessment, e.g. source-
based and research. Step 4: Poster-making entails organizing information in a logical way on a specific topic. Step 5: Discuss the project with the learners. Discuss what the poster, model, art work or collage
entails and issue and discuss a criterion referenced assessment grid with the learners. Step 6: Ensure that the task is criteria- and age-appropriate. Resources: Assessment Guidelines for Social Sciences (Intermediate and Senior Phase) pp. 35 – 47.

- 13 -
WEEK 21 Trade and Development Context: Ways in which primary products and exploitation of resources and labour in developing countries support economies of the rich, developed countries Methodology: Step 1: The educator does revision of the following concepts by asking questions on work
previously done, like map work skills and knowledge, e.g. latitude, longitude, hemispheres, continents, oceans, directions, trade, development, etc. The educator explains where necessary.
Step 2: The educator initiates a class discussion on rich and poor countries of the world. The educator ask key questions. • When does one refer to a country as poor or rich? • What are the characteristics of poor and rich countries? Note to the educator: The educator lists them on the board to distinguish between the two. That does not mean that a rich country does not have poor people or that a poor country does not have rich people.
Step 3: Informal Assessment: Study the given sources (table with rich and poor countries), identify and select all the rich and poor countries from the world map and locate their positions on the given world map. Shade them in two different colours. Determine their latitude and indicate how many poor countries are south of the equator and how many are north of the equator. Write your findings underneath your map and share your findings with the class.
Resources: Atlases, globe, textbooks, magazines, videos, pictures, etc. Integration: Languages, History, Mathematics, Natural Sciences. WEEK 22 Trade and Development Context: Developed and developing countries Methodology Step 1: The educator does revision of the previous week’s work and explains the difference
between developed and developing countries. This links with the poor and rich countries of the previous week. What are First- and Third World countries? The educator explains the concepts and how they link with developed and developing countries.
Step 2: From the given statistics about the two types of countries, draw a bar graph to show the inequalities between developed and developing countries. The educator gives guidance on how to draw a bar graph.
Step 3: Look at the map which indicates rich and poor countries and discuss in your groups why poor countries are situated in the southern hemisphere OR why many southern hemisphere countries so much poorer than countries in the northern hemisphere?
Step 4: Informal assessment: Brainstorm the following question in groups and report back to the class with the aid of a poster: What effect does poverty have on a country's education, health, crime rate and technology?
Resources: Atlases, globe, textbooks, magazines, videos, pictures, etc. Integration: Languages, History, Mathematics, Natural Sciences.

- 14 -
WEEK 23 Trade and Development Context: Developed and developing countries Methodology Step 1: The educator tests the learner’s previous knowledge by asking questions.
Now that you know the difference and similarities between developed and developing countries, table the characteristics of each in your work book. Make two columns.
Step 2: Debate the following issue: South Africa is faced with the challenge of a high crime rate. How would you assure the safety of the tourists for the 2010 Soccer World Cup? This question should be rephrased annually to keep it relevant.
Step 3: Informal Assessment: Design a brochure to inform and encourage our citizens about the importance of safety measures in our country. This brochure must be colourful and have a clear message: “Stop crime and save our country”
Resources: Atlases, globe, textbooks, magazines, videos, pictures, etc. Integration: Languages, History, Mathematics, Natural Sciences. WEEK 24 Trade and Development Context: Trade in raw materials (from the south) and trade in finished products (from the north) Methodology Step 1: The educator explains the following new concepts by asking questions.
The educator explains in detail and writes meaning on the board. The educator allows the learners to write these important concepts in their workbooks: exploitation, colonisation, raw material, economies, industries, labourer, agriculture, services, process, manufacturing
Step 2: The educator asks the learners how they would describe or explain any trade process. The educator then explains how trade took place between the northern and southern hemisphere countries in the past and what it should have been.
Step 3: Read through the given sources about the economies of the USA and Tanzania and compare what percentage of each country’s people work in: Agriculture, Industries and Services.
Resources: Atlases, globe, textbooks, magazines, videos, pictures, etc. Integration: Languages, History, Mathematics, Natural Sciences. WEEK 25 Trade and Development Context: Trade in raw materials (from the south) and in finished products (from the north) Methodology Step 1: The educator explains the importance of trade over hundreds of years all over the world.
People need each other, but also the skills and resources of other countries. That is how trade developed. Just think back about your history with the old Southern African societies. They already had their own trading system hundreds of years ago. Today we not only trade one article for another, we also use money. However, trade hundreds of years ago was a lot different.
Step 2: Draw a world map highlighting the sea trade-route between England and South Africa. Identify how their trading affected people’s lives on this specific route. What were most of the things these 2 countries traded since the 1600s? Do you think trade was fair between these two countries? Explain your answers.
Step 3: Do the following activity in your work books. Explain where, why and how most development takes place around the world?

- 15 -
Resources: Atlases, globe, textbooks, magazines, videos, pictures, etc. Integration: Languages, History, Mathematics, Natural Sciences. WEEK 26 FORMAL ASSESSMENT TASK 4: Map Work and Data Handling Assignment Step 1: Give clear instructions. Step 2: The task should provide the learners with the opportunity to demonstrate their ability to
read and interpret different types of maps and to work with different kinds of data. Step 3: Learners must also be able to make deductions in different contexts. Step 4: Learners glean information from maps by reading map symbols, locate using latitude,
longitude and map projections, locate different countries. Step 5: Learners use maps to develop special orientation – scale, direction, etc. Step 6: Learners use maps to ascertain impacts in certain contexts, e.g. political, environmental,
human, economic, etc. WEEKS 27 and 28 Development issues: Causes of poverty Context: Exploitation Methodology Step 1: The educator asked the learners to explain the following concepts through discussion:
exploitation, child labour, child abuse, poverty, opportunities, environment, colonialism, unemployment, production, poverty-line (bread line), sustainable and over-population. The educator initiates a class discussion. What is poverty? Is South Africa a rich or a poor country? Are we a developed or a developing country? Explain your answer. Why are some people so much poorer or richer than other people?
Step 2: Brainstorm in groups: The factors contributing to poverty and the strategies can be put in place to reduce poverty. Report back to class and explain your answers. Educator can write key answers on the board. Learners than write the answers in their work books after the report- back session.
Step 3: From the given sources, draw a pie graph that shows how certain African countries were exploited over the last few hundred years by European countries. Look specifically at things that were taken away from Africans.
Step 4: Group discussion: What is child labour and why is it wrong? Report back to class about your group’s opinion. What is our country’s legislation about child labour and schooling? What can happen to employers who employ children as labourers? Why are there so many countries in which children are used to perform cheap labour? Did you hear about the Children’s Charter? After reporting back, learners can write at least 3 paragraphs about why child labour is wrong and make suggestions to the government, stating ways in which they can prevent child labour across the world.
Resources: Atlases, globe, textbooks, magazines, videos, pictures, etc. Integration: Languages, History, Mathematics, Natural Sciences, EMS.

- 16 -
WEEK 29 Development issues: Causes of poverty or exploitation Context: Disrespect for human rights Methodology Step 1: The educators ask a key question: Why does exploitation still take place in a world where
every person is suppose to be aware of human rights? The educator asks learners to brainstorm in their groups the following new concepts: Each group gets 1 or 2 concepts to brainstorm: disrespect, human rights, starvation, dignity, empowerment, redistribution, capacity building, gender equity Groups report back to class and educator explain where necessary until there is clear understanding.
Step 2: Discuss how families and communities can contribute to the improvement of their standard of living. The educator can list these contributions on the boards. Learners can even rewrite them in work books.
Step 3: What do you think the government can do to redress the country’s historic imbalances (poverty, unemployment, starvation, disrespect, etc.) ? After class discussion write the answers to the above 2 questions in your work book.
Resources: Atlases, globe, textbooks, magazines, videos, pictures, etc. Integration: Languages, History, Mathematics, Natural Sciences, EMS. WEEKS 30 and 31 Development Issues: Context: Causes of poverty / exploitation Methodology Step 1: The educator ask a key question: Why does exploitation still take place in a world where
every person is supposed to be aware of human rights? The educator explains that many African countries were exploited by the Europeans. This discussion can be taken much further by educator and the process of slavery over the years, through to apartheid, can be taken up as a point of oral research and discussion in order for learners to understand exploitation better.
Step 2: Draw a map of Africa showing or shading or highlighting the countries negatively affected by European exploitation.
Step 3: Make a list of all the things that other countries and organisations can do to address the environmental destruction that took place over the years of exploitation in Africa?
Step 4: Compare the bread-line statistics of the following countries: South Africa and any other African country. Discuss in your groups and report back to class: What are the negative effects of poverty in the above countries and how should South Africa treat these problems?
Step 5: Learners brainstorm the following question in groups and report back to class: What can we (the children), do today while we are still learners, to prevent us from becoming unemployed and poor adults? Do you think, as individuals, you can make a difference?
Resources: Atlases, globe, textbooks, magazines, videos, pictures, etc. Integration: Languages, History, Mathematics, Natural Sciences, EMS.
- 17 -
WEEKS 32 and 33 Development Issues: Context: Case studies of positive development projects that exemplify ways of sharing resources and reducing poverty. Methodology Step 1: The educator explains the following new concepts thoroughly and remind learners that
these concepts are actually dealt with in EMS. Learners are encouraged to explain or add to educator’s explanation: poverty, basic needs, economic growth, opportunities, employment, environment, builds wealth, Masakhane (Building together).
Step 2: The educator explains the changes our government made after our first democratic elections on 27 April 1994. After 1994, the government of our country implemented different strategies to address the poverty problem and imbalances of apartheid (unemployment, shortage of housing, squatter camps, shortage of land, etc.) in our country. The educator gives each group one of the following topics to brainstorm. Learners report back after 10 minutes. Educator writes their findings on the board. • The Reconstruction and Development Programme (RDP). • Growth, employment and Redistribution Programme ( GEAR) • Truth and Reconciliation Commission ( TRC) • Affirmative Action ( AA)
Step 3: Learners must explain what they think are the advantages and disadvantages of these strategies for the people of the country. How did the implementation of these strategies affect all the people of our country? (It is important to look at it from different perspectives.) This exercise can be done as a debate in class. This will give learners a better understanding of the government of our country and hopefully contribute to self-respect and respect for others.
Resources: Atlases, globe, textbooks, magazines, videos, pictures, etc. Integration: Languages, History, Mathematics, Natural Sciences, EMS. WEEKS 34 and 35 Environmental Issues: The contribution of societies to the loss of biodiversity Context: Disappearing wetlands Methodology Step 1: The educator asks learners a key question to start this section of the work: Why is it
important to conserve our wetlands? The educator explains the following new concepts: (In most cases they will definitely be new concepts): wetlands, saturated, swamps, marshes, bogs, fens, vernal pools, puddles, lakes, adaptation, estuary, fresh water, salt water, bird life, ecology, eco-tourist, World Heritage Site (Lake St Lucia)
Step 2: Tip: Educator can show them a video about a wetland, e.g. Lake St. Lucia. (These are available at your Edulist Libraries. The educator can even use a National Geographic programme on bird and animal life in and around wetlands to demonstrate the eco systems that wetlands offer.) The educator also needs to explain to the class what an Ecosystem is, how it works and how much humans, animals and plants depend on it. It can also be described as a chain where every living organism is a link in this chain.
Step 3: After listening to all the explanations of wetlands and ecosystems, use the given sources and do more research about these very important parts of our country’s natural features. Discuss in your groups: Why do you think we must, at all cost, try to keep our wetlands free of pollution? Why should these areas be maintained? Report back to the class. The educator writes important points on the board while groups report back.

- 18 -
Step 4: Write in your work books at least 3 paragraphs, each under one of the following instructions or questions: • Describe in detail what you think a wetland is and how it works. • Why is it so important for us to look after our wetlands and conserve them for future
generations? • What advantages do wetlands hold for us as human beings? (holidaymakers, farmers,
bird watchers, etc.) Step 5: To make sure all learners have a good understanding of wetlands, they can be asked to
make their own individual wetland models as an informal assessment task. The educator may use the sample on page 15 to 17 of the Assessment Guidelines for Social Sciences. Resources: Atlases, globe, textbooks, magazines, videos, pictures, etc. Integration: Languages, History, Mathematics, Natural Sciences, EMS. WEEK 36 Environmental Issues: The contribution of societies to the loss of biodiversity Context: Soil erosion Methodology Step 1: Educator starts with key question for oral discussion: Why do you think environmental
conservation is of utmost importance? The educator gives learners time to respond and to discuss the question posed.
Step 2: The educator writes the following words on the board or, if possible, uses flashcards and asks learners which of those they know and can explain to the class. New Concepts: soil erosion, deforestation, drought, overgrazing, over- farming or over-cultivation, topsoil, extinction, destruction of vegetation. The educator explains where necessary and writes the meaning of each on the board, which learners can copy into work books. The educator emphasizes the meaning of soil erosion and asks learners to discuss the disadvantages of it.
Step 3: Educator may show learners a video or pictures showing the effects of soil erosion. Step 4: Given the videos and or pictures that we have looked at, what can we, as human beings
do, to prevent soil erosion and the loss of our fertile soil into dams or the sea? This exercise can first be done in groups and than, after discussing it with the class, in the learner work books.
Step 5: The educator can also replace one of the above activities with the following, or do them all if time permits. Complete the following table on soil erosion. The first row has been completed for you.
Causes of
soil erosion Negative response
Consequence to negative response
Positive response
Deforestation Cutting down trees and natural vegetation
Exposed soil and soil erosion
Replace trees that are cut down, feed the soil
Drought
Overgrazing
Over farming
Polluted wetlands

- 19 -
Resources: Atlases, globe, textbooks, magazines, videos, pictures, etc. Integration: Languages, History, Mathematics, Natural Sciences, EMS. WEEK 37 Environmental issues: The contribution of societies to the loss of biodiversity Context: Deforestation Methodology Step 1: The educator asks the following key questions:
• Why are trees so very important to us? • What is deforestation and how does it occur? The educator explains the above questions, where necessary, as well as the following new concepts: Valuable material, bio-fuel, rainforests, ecosystem, atmosphere, oxygen, carbon-dioxide, temperature, over-population, destruction and water cycle.
Step 2: Do you think there is a similarity between wetlands and forests? If your answer is "Yes", explain to the class why you say so. The educator leads them into a class discussion. There are indeed similarities. The educator can help to explain if learners struggle to see the similarities. Remember the micro organisms, the ecosystem, the bird life, the monkeys and other animals, etc. The trees also keep the soil intact and prevent soil erosion - and don’t forget all the oxygen we get from it. Tropical and sub-tropical forests grow normally in the higher rainfall regions of the earth.
Step 3: Did you know that some towns in S.A. there is a rule that any person chopping down a tree must plant another tree immediately to prevent prosecution. Why do you think we celebrate and plant trees annually on National Arbour Day? Write 2 paragraphs in your workbooks about the importance of trees and why all human beings should prevent deforestation at all cost.
Step 4: Look at a world map of climatic regions and identify places where deforestation occurs. For homework: Find out as much as you can about the greenhouse effect as preparation for class debate.
Step 5: Educator guides learners and initiates class debate about the greenhouse effect and deforestation
Resources: Atlases, globe, textbooks, magazines, videos, pictures, etc. Integration: Languages, History, Mathematics, Natural Sciences, EMS.
WEEKS 38 and 39 Environmental issues: The contribution of societies to the loss of biodiversity Context: Extinction of plants and animals Methodology Step 1: A key question is asked by the educator: What is an indigenous plant or animal and why
must we conserve it? The educator starts a class discussion about indigenous plants and animals. After learners have explained what they think, the educator explains where necessary. The educator also explains the following new concepts, write their meanings on the board for learners to record in work books: endangered, species, fauna, flora, alien, extinction.
Step 2: Why do you think we have endangered plants and animals across the world? The educator explains the importance of looking after what we have and conserving it for the future generations – plants and animals. Because there are almost none left, we need to look after what we have. It will be a very sad day when we will only be able to show pictures of certain animals or plants to our children and grandchildren because we did not look the natural environment.
Step 3: Informal Assessment: Learners use given and other relevant sources and write three paragraphs in work books about any endangered plant or animal and why we need to protect it for generations to come. (Give possible solutions.)

- 20 -
Step 4: Informal assessment: Learners design an awareness poster or collage or art work (to be displayed) about the importance of conserving the endangered animals or plant life in our country. Highlight the plight of these plants or animals in your presentation.
Resources: Atlases, globe, textbooks, magazines, videos, pictures, etc. Integration: Languages, History, Mathematics, Natural Sciences, EMS.
WEEK 40 FORMAL ASSESSMENT TASK 6: Examination The examination should be on the work covered during the last 10 weeks of the year. It should count a minimum of 40 marks. Use a variety of question techniques: source- based questions, basic questions such as "What is the ….?, questions highlighting similarity and difference, questions on cause and effect, and higher-order questions. Step 1: Give clear instructions. Step 2: The exam must consist of the following:
• Knowledge questions on topics covered in the last term and on map work. • Sources must be included in the exam, e.g. written sources, pictures, photographs,
maps, data. Step 3: Remember that the exam should focus on measuring the level of achievement relative to
the particular learning outcomes or assessment standards covered during the term. Step 4: Include a range of questions that assess skills and levels of cognitive understanding, and
not only questions based on simple recall. Step 5: Use short-answer questions for a maximum of 40% of the exam, e.g. name, list, identify,
classify, etc. Step 6: True/False questions require an additional response, e.g. Give a reason for your answer. Step 7: Matching items in two columns is useful for testing concepts. There should be more
answer options than stimuli. There should be only a few (5-6) of these questions asked. Step 8: Use sources to ask longer responses that test cognitive skills e.g. appraise, analyse,
classify, compare, contrast, etc. Resources: Assessment Guidelines for Social Sciences (Intermediate and Senior Phase) pp. 25 – 30.

- 1 -
HISTORY GRADE 6 TEACHER’S GUIDE
NOTE: 1. History and Geography must each be allocated 90 minutes per week. It is strongly
suggested, that each must be broken into sessions of one half hour and an hour lesson. Both disciplines must be taught and assessed each term.
2. The three Learning Outcomes (with the appropriate Assessment Standards) are always
used together throughout the teaching, learning and assessment process.
3. The knowledge focus framework (content) and the appropriate Assessment Standards (skills) must be taught and explained during lessons and practised by the learners in their workbooks.
4. New concepts must be explained to learners as they work through the knowledge focus
framework for Social Sciences. Use the terminology that would be used in the assessment tasks.
5. The Social Sciences learning area is based on the enquiry skills learning process. The
process should encourage learners to work with evidence and consider the logic of arguments and give them opportunities to consider their own values, opinions and judgements in relation to those of their peers.
6. The construction of knowledge and the development of interpretation skills are based on
the foundation of enquiry. Teachers and learners are encouraged to always ask questions. The use of Key Questions is important to the development of critical thinking. Learners need to be encouraged to create and frame their own questions. Encourage critical thinking by doing the following:
• Challenge learners to question • Develop the learners’ questioning skills • Ask learners for their own understanding • Encourage learners to seek alternatives before deciding on an answer • Encourage learners to give reasons for saying or suggesting certain things • Ask learners to justify their choices • Provide opportunities for learners to classify, analyse and create • Engage learners in dialogue • Provide opportunities for focussed discussion with their peers • Challenge stereotypes and prejudice
7. Whenever possible use real things (authenticity) in the classroom: look at real objects and
handle real documentary and visual sources. Find sources that appeal to the learner rather than to the teacher. For History, use items from the past and for Geography use fieldwork maps, photographs and current newspapers.
8. Use fewer sources in greater depth. Care needs to be taken when choosing sources to
make sure that there is enough information for meaningful work. Do smaller topics in more detail. Real learning comes when learners are given the opportunity to do in-depth investigations rather than skimming over a number of topics.
9. Learners must be able to communicate their findings to the rest of the class and to
others within and outside of the school community: • In Grade 4 through writing a paragraph, discussion, constructing a book, a collage,
using a poster, artwork, drama, dance and music • In Grade 5 through short paragraphs, simple graphs, maps, diagrams, creating
artwork, posters, music, dance and drama, projects, discussion, debates and charts • In Grade 6 through structured writing, discussion and guided debate, graphs,
tables, maps and diagrams, artwork and drama.

- 2 -
10. THERE ARE 6 FORMAL ASSESSMENT TASKS FOR SOCIAL SCIENCES
Number Term Date/ week History / Geography Task Minimum Mark Allocation
1 1 Week 10 History & Geography Test
H = 20 G = 20
Total: 40
2 2 Week 13 History
Source Based and Extended Writing Assignment
Source Work: 25 Extended Writing:
15 Total: 40
3 2 Week 20 Geography * Project (Research Assignment/ Creative Response)
40
4 3 Week 26 Geography Map Work and Data Handling Assignment
40
5 3 Week 30 History * Project (Research Assignment/ Creative Response)
40
6 4 Week 40 History & Geography
Examination H = 40 G = 40
• All assessment tasks must be developed within the context of the learners. • All the learning outcomes (with the appropriate assessment standards) and the
content (knowledge focus framework) are assessed together.
• If the project in History is a research assignment, then the project for Geography must be a creative response assignment or vice versa.
• Instructions must be clear to the learners. All the formal assessment tasks have the
same weight.
• Evidence of all the content, exercises and activities (informal assessment) must be evident in learner workbooks, before the formal assessment task for recording and reporting is done. (Look in the work schedule). A good practice to ensure that learners do their own work is to do these tasks in the class under controlled circumstances. This practice will ensure authenticity. It might also ensure that all the learners hand their tasks in.
• Map work and data handling skills, together with the content, must be
continuously taught and informally assessed each term. A formal assessment for map work and data handling takes place during the third term. Map work and data handling skills must also be assessed in the test and the exam. Consult the Social Sciences Policy document for the map work skills and concepts for each grade – note the progression.

- 3 -
11. Different types of sources. The following diagram shows the variety of sources, which can be used in both History and Geography within Social Sciences.
ORAL Interviews and Reminiscences Oral traditions Myths and legends Poems Songs Stories Questionnaire responses
WRITTEN Textbooks Books Newspapers Magazines Census data Documents Letters Journals Diaries, Reports Pamphlets Advertisements Internet, CD ROM
VISUAL Photographs Cartoons Maps and plans Atlases Topographic maps Aerial Photographs Satellite images Paintings and drawings Film, television, video Statues and carvings Internet, CD ROM
POSSIBLE SOURCE
ARCHAEOLOGICAL
Ruined or buried sites and buildings Pollen traces Fossils Artefacts (objects found on sites), e.g. pottery, bone, coins, charcoal, tools, weapons, etc.
PHYSICAL
Objects surviving from the past, e.g. passes Historic buildings Monuments Statues and sculptures Carvings Everyday objects, e.g. furniture, clothing, jewellery, vehicles
LANDSCAPE
Settlements and their plans Buildings and sites Roads, tracks, paths Bridges, railways, harbours Effects of human activity on the environment Aerial photographs Physical landscape features, e.g. passes, plains, bays, caves
(Adapted from: Teacher’s Guide for the Development of Learning Programmes: Social Sciences 2003, p.27. Geographical Sources on p. 31.)

- 4 -
GRADE 6 WEEK 1 Introduction to History Methodology: Step 1: Introduce glossary of new words to the learners.
Introduce the Social Sciences Learning Area and explain that History is one of the disciplines of Social Sciences.
Step 2: Identify and explain the three Learning Outcomes for History: • Historical enquiry • Historical knowledge and understanding • Historical interpretation
Step 3: Explain the enquiry process and put emphasis on the asking of a key question by a historian.
Step 4: Explain the importance of sources, which serve as proof of investigation, e.g. Written sources, oral sources, audio visual sources and artefacts.
Step 5: Explain how each of the above sources is used by the historian and allow the learners to record notes in their work books.
Integration: Geography, Arts and Culture, Languages, LO, Natural Sciences. Resources: Textbooks, atlases, magazines, newspapers, pictures, videos, DVDs, artefacts. WEEK 2 Organisation of African Societies: Mapungubwe, Thulamela and Great Zimbabwe Context: Origin of these African societies Methodology: Step 1: Start this section with a key question: Where, when and how did these Southern African
societies develop? Lead learners into a class discussion on possible viewpoints. Step 2: Explain the following new concepts: equipment, resources, archaeologist, artefacts,
Southern Africa, enquiry; and allow learners to record notes in work books. Step 3: Issue learners with a political map of Africa and locate where these societies developed. Step 4: Group discussion: Learners extract information from sources – how these societies were
discovered. Step 5: Explain to learners the role of water, fertile soil and minerals in the development of these
societies. Step 6: Expose learners to artefacts (which educator has brought to class) and discuss what
possible historical information can derived from each item. Integration: Geography, Arts and Culture, Languages, LO, Natural Sciences Resources: Textbooks, atlases, magazines, newspapers, pictures, videos, DVDs, artefacts

- 5 -
WEEK 3 Organisation of African Societies: Mapungubwe Context: Origin of Mapungubwe Methodology: Step 1: Start with a key question: Look at the location of Mapungubwe on your map and discuss in
groups the following questions: • How did this society develop? • Why did it develop at that specific location? Learners discuss the above questions in groups and report back to class.
Step 2: Learners use sources and answer the given questions on the origin and life of the people of Mapungubwe.
Step 3: From the sources, learners draw a timeline on the origin and development of Mapungubwe.
Integration: Geography, Arts and Culture, Languages, LO, Natural Sciences Resources: Textbooks, atlases, magazines, newspapers, pictures, videos, DVDs, artefacts WEEK 4 Organisation of African Societies: Mapungubwe Context: Technology and trade Methodology: Step 1: Initiate class discussion by asking a key question: Was there any development and proof
of trade in this society? Step 2: Introduce and explain the concepts of technology and trade and how these were evident
in Mapungubwe. Step 3: Learners use sources to write three paragraphs about the role of natural resources (gold,
ivory and iron) in the making and development of objects such as tools, weapons, jewellery, and household equipment. Note: The format of extended writing must be emphasised (Introduction, body and conclusion).
Step 4: From given sources, learners explain the processes of mining, smelting and forging. Step 5: Groupwork: Discuss in groups how trade with other societies has taken place. (Use
available sources.) Step 6: Learners report back to class whilst educator lists important points on the board to be
recorded in work books. Integration: Geography, Arts and Culture, Languages, LO, Natural Sciences Resources: Textbooks, atlases, magazines, newspapers, pictures, videos, DVDs, artefacts
WEEK 5 Organisation of African Societies: Mapungubwe Context: Belief systems Methodology: Step 1: Start with the key questions for oral discussion:
• What is a belief system? • What do you think these people believe in? Explain why? • Does this have any link with what we believe today?
Step 2: Issue learners with various sources about the belief system of the Mapungubwe people. Learners have to write two paragraphs about the belief system in work books.
Step 3: From given sources, learners must identify any interesting symbol representing this society and make a drawing / poster / model for class display.
Integration: Geography, Arts and Culture, Languages, LO, Natural Sciences Resources: Textbooks, atlases, magazines, newspapers, pictures, videos, DVDs, artefacts

- 6 -
WEEK 6 Organisation of African Societies: Mapungubwe Context: Farming Methodology: Step 1: Start an oral discussion by asking a key question: Given the location and proof from
artefacts, what do you think the farming was like in Mapungubwe? Educator makes note on board of learners’ viewpoints.
Step 2: Learners use sources to record the farming methods of Mapungubwe. Educator helps with the interpretation of these sources with leading questions.
Step 3: Learners discuss in groups what the farming methods are in S.A. and report back to class. Step 4: Learners draw a comparison (similarities and differences) between the farming methods of
Mapungubwe and South Africa under the following headings: farming products, tools, transport etc.
Step 5: Initiate a class discussion about the paying of a tribute to the king from harvest, gold, cattle, ivory, etc. and compare it with our system of paying tax on our income.
Step 6: Learners record the above comparison in work books. Integration: Geography, Arts and Culture, Languages, LO, Natural Sciences Resources: Textbooks, atlases, magazines, newspapers, pictures, videos, DVDs, artefacts WEEK 7 Organisation of African Societies: Mapungubwe Context: Co-operation and conflict Methodology: Step 1: Start oral discussion with the following question: What role did cattle, gold and ivory play
during trade and in their relations with other people? Step 2: From sources, learners must select and record the role cattle, gold, ivory and iron played
during trade with other people. Step 3: Group discussion: How does this compare to the oral discussion? How does this
compare to trade in the world today? Step 4: Learners record their findings about trade and conflict handling in work books. Step 5: Initiate a class debate: Two opposing viewpoints on the hierarchy of the kingdom of
Mapungubwe: For and against. Each group is given sources expressing different points of view.
Step 6: From sources, learners record the important role cattle played in the social life of the society.
Integration: Geography, Arts and Culture, Languages, LO, Natural Sciences Resources: Textbooks, atlases, magazines, newspapers, pictures, videos, DVDs, artefacts WEEK 8 Organisation of African Societies: Thulamela Context: Origin Methodology: Step 1: Start with a key question: Look at the location of Thulamela on your map and discuss in
groups the following questions: • How did this society develop? • Why did it develop at that specific location? Learners discuss the above questions in groups and report back to class.
Step 2: Learners use sources and answer the given questions on the origin and life of the people of Thulamela.
Step 3: From the sources, learners draw a timeline on the origin and development of Thulamela.

- 7 -
Integration: Geography, Arts and Culture, Languages, LO, Natural Sciences Resources: Textbooks, atlases, magazines, newspapers, pictures, videos, DVDs, artefacts WEEK 9 Organisation of African Societies: Thulamela Context: Technology and Trade Methodology: Step 1: Initiate class discussion by asking a key question: Was there any development and proof
of trade in this society? Step 2: Introduce and explain the concepts of technology and trade and how these were evident
in Thulamela. Step 3: Learners use sources to write three paragraphs about the role of natural resources (gold,
ivory and iron) in the making and development of objects such as tools, weapons, jewellery and household equipment.
Step 4: From given sources, learners explain the processes of mining, smelting and forging. Step 5: Groupwork: Discuss in groups how trade with other societies has taken place. (Use
available sources.) Step 6: Learners report back to class whilst educator lists important points on the board to be
recorded in work books. Integration: Geography, Arts and Culture, Languages, LO, Natural Sciences Resources: Textbooks, atlases, magazines, newspapers, pictures, videos, DVDs, artefacts WEEK 10 FORMAL ASSESSMENT TASK 1: Test Methodology Step 1: All 3 LOs, with the appropriate ASs, must be assessed. Step 2: The test must consist of the following:
• Questions testing knowledge about topics covered in the first term • At least 3 sources must be included in the test, e.g. census data, documents, letters,
newspapers, magazines, diaries, reports, pamphlets, books, advertisements, photographs, cartoons, maps, plans, aerial photographs, satellite images, paintings and drawings
• Sources must be contextualized and include a key question • An extended writing piece, consisting of at least 3 paragraphs, based on the sources
provided. • Minimum mark allocation: 25 marks for the source work and 15 marks for the extended
writing. Step 3: Remember that tests should focus on measuring the level of achievement relative to the
particular learning outcomes or assessment standards covered during the term. Step 4: Tests should have a range of questions that assess skills and levels of cognitive
understanding (see Bloom's Taxonomy) and should not be based on simple recall. Step 5: Use short answer questions for a maximum of 40% of the test, e.g. name, list, identify,
classify. Step 6: True/False questions also require an additional response, e.g. Give a reason for your
answer. Step 7: Matching items in two columns is useful for testing concepts. There should be more
answer options than stimuli. There should be only a few (5-6) of these questions asked. Step 8: Use sources to ask longer responses that test cognitive skills e.g. appraise, analyse,
classify, compare, contrast, etc. Step 9: The extended writing must be based on all sources. Learners must write in their own
words. Provide an assessment grid for the extended writing. Note: The format of extended writing must be emphasised (Introduction, body and conclusion).

- 8 -
Resources: Assessment Guidelines for Social Sciences (Intermediate and Senior Phase) pp. 25 – 30. WEEK 11 Organisation of African Societies: Thulamela Context: Belief systems Methodology: Step 1: Start with the key questions for oral discussion:
• What is a belief system? • What do you think these people believed in? Explain why. • Does this have any link with what we believe today?
Step 2: Issue learners with various sources about the belief system of the Thulamela people. Learners have to write two paragraphs about their belief system in work books.
Step 3: From given sources, learners must identify any interesting symbol representing this society and make a drawing / poster / model for class display.
Step 4: Learners draw a comparison between the belief systems of Thulamela and Mapungubwe, to be recorded.
Integration: Geography, Arts and Culture, Languages, LO, Natural Sciences Resources: Textbooks, atlases, magazines, newspapers, pictures, videos, DVDs, artefacts WEEK 12 Organisation of African Societies: Thulamela Context: Farming Methodology: Step 1: Start an oral discussion by asking a key question: Use the location and proof from
artefacts to highlight what the farming was like in Thulamela. Educator makes note on board of learners’ viewpoints.
Step 2: Learners use sources to record the farming methods of Thulamela. Educator helps with the interpretation of these sources with leading questions.
Step 3: Learners discuss in groups what the farming methods are of S.A. and report back to class. Step 4: Learners draw a comparison (similarities and differences) between the farming methods of
Thulamela and South Africa. Which of Thulamela’s methods do we still use today? Write at least three paragraphs
Step 5: Learners record the above comparison in work books Integration: Geography, Arts and Culture, Languages, LO, Natural Sciences Resources: Textbooks, atlases, magazines, newspapers, pictures, videos, DVDs, artefacts

- 9 -
WEEK 13 Organisation of African Societies: Thulamela Context: Co-operation and conflict Methodology: Step 1: Start oral discussion with the following question: What role did cattle, gold and ivory play
during trade and in their relations with other people? Step 2: From sources, learners must select and record the role cattle, gold, ivory and iron played
during trade with other people. Step 3: Group discussion: How does this compare to the oral discussion? How does this
compare to trade in the world today? Step 4: Learners record their findings about trade and conflict handling in work books. Step 5: From sources, learners record the important role cattle played in the social life of the
society Step 6: Group discussion: Compare the way the Thulamela handled conflict with any other
developed country today. Step 7: Learners share findings with class. Step 8: Class discussion: Compare paying tribute to the king with Mapungubwe. Integration: Geography, Arts and Culture, Languages, LO, Natural Sciences Resources: Textbooks, atlases, magazines, newspapers, pictures, videos, DVDs, artefacts WEEK 13 FORMAL ASSESSMENT TASK 2: Source Based and Extended Writing Assignment It is important to note that, in about Week 16 or 17, a formal assessment task will need to be completed. It should be a source-based task. It may be on any one of the sections of work recently covered. Learners must complete the task individually and under controlled circumstances to ensure authenticity. Step 1: Give clear instructions. Step 2: The educator must supply contextualized sources. Use at least 3 sources, e.g. census
data, documents, letters, newspapers, magazines, diaries, reports, pamphlets, books, advertisements, photographs, cartoons, maps and plans, aerial photographs, paintings and drawings
Step 3: Set a variety of questions on the sources. These questions must include lower, middle and higher order questions. Questions should be based on the learning outcomes and assessment standards - we are not only assessing comprehension, e.g. learners should be able to answer questions from written and visual sources; work with chronology and time lines; be able to represent the past by means of a drawing mind map, etc.; recognise that there can be more than one version of a story; give reasons and explanations; identify similarities and differences; answer questions based on source interpretation, and cause and effect.
Step 4: Ask the learners to use the relevant sources to write at least 3 paragraphs focussing on the key question.
Step 5: Minimum mark allocation: 25 marks for source work and 15 marks for the extended writing.

- 10 -
WEEK 14 Organisation of African Societies: Great Zimbabwe Context: Origin Methodology: Step 1: Start with a key question: Look at the location of Great Zimbabwe on your map and
discuss in groups the following questions: • How did this society develop? • Why did it develop at that specific location? • In which African country did this society develop? Learners discuss the above questions in groups and report back to class.
Step 2: Learners use sources and answer the given questions on the origin and life of the people of Great Zimbabwe.
Step 3: From the sources, learners extract information to draw a timeline on the origin and development of Great Zimbabwe.
Step 4: Group discussion: Learners study pictures of remains that were found by archaeologists near Great Zimbabwe and discuss their lifestyle with explanations.
Step 5: Learners report their findings to class. Integration: Geography, Arts and Culture, Languages, LO, Natural Sciences Resources: Textbooks, atlases, magazines, newspapers, pictures, videos, DVDs, artefacts WEEK 15 Organisation of African Societies: Great Zimbabwe Context: Technology and Trade Methodology: Step 1: Initiate class discussion by asking a key question: Was there any development and proof
of trade in this society? Step 2: Introduce and explain the concepts of technology and trade and how these were evident
in Great Zimbabwe. Step 3: Learners use sources to write three paragraphs about the role of natural resources (gold,
ivory and iron) in the making and development of objects such as tools, weapons, jewellery and household equipment.
Step 4: From given sources, learners explain the processes of mining, smelting and forging. Step 5: Group work: Discuss in groups how trade with other societies has taken place. (Use
available sources.) Step 6: Learners report back to class, whilst educator lists important points on the board to be
recorded in work books. Integration: Geography, Arts and Culture, Languages, LO, Natural Sciences Resources: Textbooks, atlases, magazines, newspapers, pictures, videos, DVDs, artefacts

- 11 -
WEEK 16 Organisation of African Societies: Great Zimbabwe Context: Belief systems Methodology: Step 1: Start with the key questions for oral discussion: Why do you think the Great Zimbabwe
kingdom had a belief system and what was it all about? Step 2: Issue learners with various sources about the belief system of the Great Zimbabwe people
and explain where necessary. Step 3: Learners write three paragraphs about the belief system in work books. Step 4: From given sources, learners must identify any interesting symbol representing this
society and make a drawing / poster / model for class display. Step 4: Learners draw a comparison between the belief systems of Mapungubwe and Great
Zimbabwe and record it. Integration: Geography, Arts and Culture, Languages, LO, Natural Sciences Resources: Textbooks, atlases, magazines, newspapers, pictures, videos, DVDs, artefacts WEEK 17 Organisation of African Societies: Great Zimbabwe Context: Farming Methodology: Step 1: Start an oral discussion by asking a key question: Given the location and proof from
artefacts, what do you think farming was like in Great Zimbabwe. Educator makes notes on blackboard of learners’ viewpoints.
Step 2: Learners use sources to record the farming methods of Great Zimbabwe. Educator helps with the interpretation of these sources with leading questions.
Step 3: From sources, learners draw a comparison (similarities and differences) between the farming methods of Great Zimbabwe and Mapungubwe. Which of these methods do we still use today? Write at least three paragraphs.
Step 4: Learners record the above comparison in work books. Integration: Geography, Arts and Culture, Languages, LO, Natural Sciences Resources: Textbooks, atlases, magazines, newspapers, pictures, videos, DVDs, artefacts WEEK 18 Organisation of African Societies: Great Zimbabwe Context: Co-operation and conflict Methodology: Step 1: Start oral discussion with the following question: What role did cattle, gold and ivory play
during trade and in their relations with other people? Step 2: From sources, select and record the role cattle, gold, ivory and iron played during trade
with other people. Step 3: Group discussion: How does this compare to the oral discussion? How does this
compare to trade in the world today? Step 4: Learners record their findings about trade and conflict handling in work books. Step 5: From sources, learners record the important role cattle played in the social life of the
society. Step 6: Group discussion: Compare the handling of conflict of Great Zimbabwe with any other
developed country today. Step 7: Learners share findings with class. Step 8: Class discussion: What do you think were the reasons and explanations for the decline of
the three kingdoms? Distinguish between facts and opinions. Reminder: A historian always needs evidence to support his / her theories / deductions.

- 12 -
Integration: Geography, Arts and Culture, Languages, LO, Natural Sciences Resources: Textbooks, atlases, magazines, newspapers, pictures, videos, DVDs, artefacts
WEEKS 19 and 20 Exploration and Exploitation from the fourteenth century onwards Context: Early mapping of the Representation of Africa Methodology: Step 1: Start with key question: Why do you think it is important for explorers to use maps? Step 2: Explain new concepts: exploration, exploitation, early mapping, representation,
development, commodities, perceived and cartographers. Step 3: Explain that the history of the development of maps and issue learners with a world map
to identify early trade routes. Issue learners with an old map of the world to compare with a current world map.
Step 4: Learners compare and record differences between the different maps and discuss in groups.
Step 5: Learners identify and locate different routes by discovered by explorers. Step 6: From sources, learners identify and record how early cartographers perceived the world
because of their lack of knowledge and technology. Step 7: Learners discuss in groups how the lack of technology would have impacted on the
exploration of the world. Step 8: Learners share their findings with the rest of the class. Integration: Geography, Arts and Culture, Languages, LO, Natural Sciences Resources: Textbooks, atlases, magazines, newspapers, pictures, videos, DVDs, artefacts WEEKS 21 and 22 Exploration and Exploitation from the fourteenth century onwards Context: Development of Science and Technology Methodology: Step 1: Start oral discussion with a key question: What effect did the development of new
inventions have on explorations? Educator guides the discussion by explanation and more questions.
Step 2: Explain the following concepts: navigation, instruments, science, scientific, improved, technological, invention, archive, museum, explorers.
Step 3: Learners record the above concepts and the meaning of each in work books. Step 4: Learners use resources to draw a timeline of the different navigation instruments
developed over the years. Step 5: Learners draw / make any navigation instrument, which was used in the fourteenth
century by the explorers. Step 6: Learners discuss in groups the importance of the improvement in navigation instruments Step 7: Learners report to class and record in work books. Integration: Geography, Arts and Culture, Languages, LO, Natural Sciences Resources: Textbooks, atlases, magazines, newspapers, pictures, videos, DVDs, artefacts

- 13 -
WEEK 23 Exploration and Exploitation from the fourteenth century onwards Context: Contributions from Europe Methodology: Step 1: Initiate a class discussion with the following key question: What effect did the discovery of
new inventions (from Europe) have on explorations (of the world)? Educator supports where necessary.
Step 2: Explain the following concepts: navigation, instruments, science, scientific, improved, technological, invention, archive, museum, explorers and distinguish.
Step 3: List and explain some of the most important inventions from Europe and how they made navigation easier.
Step 4: From sources, learners identify and record all new inventions from Europe and the positive effect each had on exploration. Distinguish between opinion and facts.
Step 5: Learners draw a timeline on the exploration history of any European explorer and draw a map of route taken, e.g. Prince Henry the navigator, Marco Polo, Vasco da Gama, Bartolomeu Dias or Christopher Columbus.
Step 6: From sources and discussions so far, learners must describe what they think life was like on an expedition ship: - write at least 3 paragraphs. This activity can also be done in groups as a role-play.
Integration: Geography, Arts and Culture, Languages, LO, Natural Sciences Resources: Textbooks, atlases, magazines, newspapers, pictures, videos, DVDs, artefacts WEEK 24 Exploration and Exploitation from the fourteenth century onwards Context: Contributions from Asia Methodology: Step 1: Start with a key question to initiate an oral discussion: What were the contributions of the
Chinese and Arabs and how do they compare to the contributions of the Europeans? Step 2: From sources, learners identify and record new inventions and technology discovered by
the Chinese and Arabs. How do these compare to the European inventions? Step 3: Draw a timeline about the Chinese discoveries and draw a map to locate the routes taken. Step 4: Learners make a drawing or model of any outstanding navigating invention of the Chinese
people. Integration: Geography, Arts and Culture, Languages, LO, Natural Sciences Resources: Textbooks, atlases, magazines, newspapers, pictures, videos, DVDs, artefacts WEEK 25 Exploration and Exploitation from the fourteenth century onwards Context: Contributions from the Americas Methodology: Step 1: Start with key question: Were the explorations and expeditions from the Americas to the
advantage/disadvantage of those countries e.g. Africa, India etc? Step 2: Learners select and report information about the discoveries and contributions from the
Americas, e.g. Christopher Columbus. Step 3: From sources, learners write at least three paragraphs on the exploration of Christopher
Columbus. Step 4: On a world map, learners locate the exploration routes of Christopher Columbus. Integration: Geography, Arts and Culture, Languages, LO, Natural Sciences Resources: Textbooks, atlases, magazines, newspapers, pictures, videos, DVDs, artefacts
- 14 -
WEEK 26 Exploration and Exploitation from the fourteenth century onwards Context: Contributions from Africa Methodology: Step 1: Explain that little exploration took place from Africa, but that the continent suffered a lot
because of exploitation by explorers, e.g. from Europe and America. Step 2: Class discussion: Why did Africa suffer so much? Step 3: From sources, learners must identify and record the negative impact of explorers on
African countries. Step 4: Group discussion: Learners must discuss and plan role play as African people who
came in contact with European explorers in the 14th century. Concentrate on language, clothing, trade and the exploitation that took place.
Step 5: Learners must write at least three paragraphs about relationships between the indigenous people of Africa and explorers. Distinguish between facts and opinions.
Integration: Geography, Arts and Culture, Languages, LO, Natural Sciences Resources: Textbooks, atlases, magazines, newspapers, pictures, videos, DVDs, artefacts WEEKS 27 and 28 History of medicine Context: Indigenous medicine and traditional healing Methodology: Step 1: Initiate class discussion with a key question: What health care was available to the early
African societies before hospitals and clinics were available? Step 2: Explain new concepts: indigenous medicine, traditional healing, diseases, remedies,
sicknesses, illnesses, technology, scientists, vaccinations and archive. Step 3: Group work: Learners must investigate and locate different traditional herbs used by
early African people and the healing purpose of each. (Investigate in community.) Step 4: Learners must list and locate different herbs used by people in the past with the healing
purpose next to each herb. Step 5: Learners must create herb chart in groups with the names and purposes displayed below
or above each herb (at least eight to ten different herbs). Step 6: Learners must discuss from sources, in groups, how different cultures still use indigenous
medicines and traditional healing methods. Step 7: After report back, learners record these methods in their work books. (Distinguish between
facts and opinions.) Integration: Geography, Arts and Culture, Languages, LO, Natural Sciences Resources: Textbooks, atlases, magazines, newspapers, pictures, videos, DVDs, artefacts WEEKS 29 and 30 History of medicine Context: Important medical discoveries Methodology: Step 1: Start discussion with a key question: How did medical discoveries develop over the years?
• Learners name and explain any major medical discovery that they know of and explain its contribution.
Step 2: Explain the development of medicine by highlighting the major breakthroughs over the past hundred years, e.g. X-rays, penicillin, organ transplants, vaccinations, etc.
Step 3: From sources, learners must draw a timeline / do a poster to display the history of medicine over the past hundred years.

- 15 -
Step 4: Learners must use a World map and determine the location of the following people who contributed towards medicine, e.g. Edward Jenner, Louis Pasteur, Alexander Fleming, Marie Curie and Chris Barnard.
Step 5: From sources, learners must answer a questionnaire with regard to medical discoveries, e.g. • Who discovered X-rays and how did this discovery impact on health? • Who received the first successful heart transplant and by whom was it done? • In which hospital, province and country did this transplant take place?
Step 6: Learners must write a paragraph about the medical contribution of each of the following people: Florence Nightingale, Marie Curie, Louis Pasteur and Chris Barnard.
Step 7: Discuss in groups: Why it is important that scientists continually keep on doing research in the medicine field?
Step 8: Discuss in groups: Why is it important for the world to find a cure for HIV/Aids? Step 9: Ask a local doctor to speak to the learners about the profession and how each pupil can
contribute to preventing Aids from spreading. Integration: Geography, Arts and Culture, Languages, LO, Natural Sciences Resources: Textbooks, atlases, magazines, newspapers, pictures, videos, DVDs, artefacts FORMAL ASSESSMENT TASK 5: Project (Research Assignment / Creative Response) If the Geography Project was a creative response, then this project for History must be a research assignment and vice versa. This assessment task should be handed out 2 to 3 weeks earlier than WEEK 30 and must be completed in class under supervision, so as to ensure authenticity, by the end of the term. The project should assess whether the learner is able to use enquiry skills to investigate past and present and whether they are able to select, with reasons, key information to represent the past. If the learners complete a creative response project, ensure that it is a learning experience, not just a creative task. Give the learners guidelines – the project should show a timeline creatively and should include descriptors. Research Task: Step 1: Give clear instructions. Step 2: When completing a research task, learners are expected to follow the enquiry process.
• We work with sources (evidence) (LO 1) • Ask a key question • Identify information • Answer questions • Communicate the answer
Step 3: The educator must provide a framework for the research project. Stipulate what must be covered, what LOs and ASs will be covered, and what skills, knowledge and values will be assessed.
Step 4: Discuss the project with the learners. Discuss what the research entails and issue and discuss the criterion-referenced assessment grid with the learners.
Step 5: Ensure that the task is criteria- and age-appropriate. Step 6: Monitor the progress of the learners by setting deadlines for different stages of the
research task.

- 16 -
Creative Response Task: Step 1: Give clear instructions. Step 2: These include creating models, posters, collages and role-play. Step 3: The creative response can be incorporated with another form of assessment, e.g. source-
based and research. Step 4: Poster-making entails organising information in a logical way on a specific topic. Step 5: Discuss the project with the learners. Discuss what the poster, model, art work or collage
entails and issue and discuss a criterion referenced assessment grid with the learners. Step 6: Ensure that the task is criteria- and age-appropriate. Resources: Assessment Guidelines for Social Sciences (Intermediate and Senior Phase) pp. 35 – 47. WEEKS 31 and 32 Democracy in South Africa Context: Definition and meaning Methodology: Step 1: Start oral discussion with a key question: What is democracy and why is it important for
any country? Step 2: Explain the following concepts: democracy, constitution, elected, apartheid, government,
elections, electoral officer, candidates, voters, ballot paper, ID document, voters roll Step 3: Learners record the above concepts and explanations in work books. Step 4: Explain the democratic process in South Africa and why it is important for all South African
citizens to obey our constitution. Step 5: Learners must use given sources to draw a timeline about the history of South Africa from
Apartheid to Democracy (From 1910 to 1994). Step 6: Learners must record the negative effects of apartheid on the majority of its people (three
paragraphs). Step 7: Learners must write a letter to a friend in another country, explaining how different it is to
live in a democratic country compared to the apartheid system of the past. Integration: Geography, Arts and Culture, Languages, LO, Natural Sciences Resources: Textbooks, atlases, magazines, newspapers, pictures, videos, DVDs, artefacts WEEKS 33, 34 and 35 Democracy in South Africa Context: How is South Africa governed? Methodology: Step 1: Starts a group discussion by issuing each group with one of the following tasks:
• Explain how the school is governed. • Explain how a church is governed. • Explain how a household is governed. • Explain how the town / city is governed.
Step 2: Learners must brainstorm the above topics and report back to class while the educator notes important facts on the blackboard.
Step 3: Explain that our country is governed in a similar way and indicate the different levels of governance in South Africa (national, provincial and local government).
Step 4: Learners must identify and record the levels of governance in work books, as well as the role of each in our country.
Step 5: Explain the role of the constitution and the history of the compiling of this document. Step 6: Explain the election process and prepare learners for a mock election. Step 7: Divide class into groups to represent all the respective role players for the mock elections.

- 17 -
Step 8: Learners must prepare themselves for the mock elections and present the election in the form of a role play.
Integration: Geography, Arts and Culture, Languages, LO, Natural Sciences Resources: Textbooks, atlases, magazines, newspapers, pictures, videos, DVDs, artefacts WEEKS 36 and 37 Democracy in South Africa Context: National symbols Methodology: Step 1: Start with key question for oral discussion: Why do we need national symbols and what do
they mean to the citizens of the country? Step 2: Learners must identify and discuss all national symbols of South Africa in groups and
report back to class. Step 3: List the national symbols on the blackboard and explain the meaning of each. Step 4: Learners must draw and record the national symbols and the meaning of each in work
books (National State emblem, Anthem, Flag, Galjoen fish, Secretary bird, etc.). Step 5: Explain that the National State emblem consists of indigenous plants, animals and
language. Step 6: Learners must investigate the meaning of each symbol on the state emblem, record it in
their work books and share it with class. Step 7: Class discussion: Learners must explain where, when and why we fly our national flag.
Educator must explain where necessary. Step 8: Learners must design a flag for the class and describe the meaning of the shape and
colours they used. Integration: Geography, Arts and Culture, Languages, LO, Natural Sciences Resources: Textbooks, atlases, magazines, newspapers, pictures, videos, DVDs, artefacts WEEKS 38 and 39 Democracy in South Africa Context: The Children’s Charter Methodology: Step 1: Start with a key question for class discussion: Why does our country have a constitution? Step 2: Explain that as the constitution protects all people in the country, so the Children’s Charter
protects children. Step 3: Group discussion: Why is it important to have rights and responsibilities? Step 4: Learners must report their findings to class. Step 5: From sources, learners must identify and discuss the ten rights in the Children’s Charter. Step 6: Learners must record these rights in their work books and explain what the government
can do to ensure that these rights are implemented by all citizens. Step 7: Oral discussion: What is the Earth Charter and why is it important to have such a
document? Step 8: Group discussion: Issues each group with one or two rights from the Earth Charter to be
discussed and explained to the rest of the class. Step 9: Compare the Earth Charter with the Children’s Charter and identify the comparisons. Step 10: Learners must make a poster / collage / art work depicting the importance of Children’s /
Earth Charter Integration: Geography, Arts and Culture, Languages, LO, Natural Sciences Resources: Textbooks, atlases, magazines, newspapers, pictures, videos, DVDs, artefacts

- 18 -
WEEK 40 FORMAL ASSESSMENT TASK 6: Examination The examination should be on the work covered during the last 10 weeks of the year. It should count a minimum of 40 marks. Use a variety of question techniques: source- based questions, basic questions such as "What year did …?”, questions highlighting similarity and difference, questions on cause and effect, and higher-order questions. Step 1: Give clear instructions. Step 2: The exam must consist of the following:
• Knowledge questions on topics covered in the last term. • Sources must be included in the exam, e.g. written sources, pictures and photographs.
See Weeks 2 & 3. • An extended writing piece consisting of at least 3 paragraphs based on the sources
provided. • Minimum mark allocation: 25 marks for the source work and 15 marks for the extended
writing. Step 3: Remember that the exam should focus on measuring the level of achievement relative to
the particular learning outcomes or assessment standards covered during the term. Step 4: Include a range of questions that assess skills and levels of cognitive understanding, and
not only questions based on simple recall. Step 5: Use short-answer questions for a maximum of 40% of the exam, e.g. name, list, identify,
classify, etc. Step 6: True/False questions require an additional response, e.g. Give a reason for your answer. Step 7: Matching items in two columns is useful for testing concepts. There should be more
answer options than stimuli. There should be only a few (5-6) of these questions asked. Step 8: Use sources to ask longer responses that test cognitive skills, e.g. appraise, analyse,
classify, compare, contrast, etc. Resources: Assessment Guidelines for Social Sciences (Intermediate and Senior Phase) pp. 25 – 30.