Embed Size (px)
Citation preview

21.0 Pharmacy System Administrator Participant Workbook
1
ABOUT OMNICELL
Omnicell, Inc. (NASDAQ: OMCL) is a leading provider of medication and supply automation, business analytics,
and medication adherence packaging systems. Hospitals, post‐acute care sites, and pharmacies worldwide rely
on Omnicell systems to increase patient safety and medication adherence, streamline workflow, address
regulations, and reduce costs through improved inventory management of medications and supplies.
This guide and accompanying software and/or hardware described in it are protected under copyright laws and
may not be reproduced, adapted, or translated, wholly or in part, without the express written consent of
Omnicell, Inc. The same proprietary and copyright notices must be attached to any permitted copies as were
attached to the original documents.
Omnicell, Inc.
590 E. Middlefield Road
Mountain View, CA 94043
(650) 251‐6100
www.omnicell.com
The following terms are trademarks of Omnicell, Inc. in the United States, other countries, or both.
OMNICELL® NEXTCART Anesthesia TT™ Pandora™
OMNICENTER® NEXTCENTRAL Anesthesia Workstation™ PandoraVIA™
OMNIRX® NEXTRX Anywhere RN™ Point-to-Point Med Safety™
OMNISUPPLIER® OMNICELL Executive Advisor™ ProServ1™
SAFETYMED® OMNIRX FlexBin™ See & Touch™
SAFETYSTOCK® SAFETYMED M5000™ Touch & Go™
SINGLEPOINTE® SECUREVAULT Medication Surveillance™ vSuite™
SureMed® SINGLEPOINTE Omni TT™ WorkflowRx™
SureMed OmniBuyer™ See & Touch™
OnDemand™ Touch & Go™
Open Touch™ vSuite™
OptiFlex™ WorkflowRx™
OptiFlex MobileTrack™
All other trademarks and trade names are the property of their respective owners. © 2017 Omnicell, Inc. All
rights reserved.


21.0 Pharmacy System Administrator Participant Workbook
3
TABLE OF CONTENTS
1. SYSTEM OVERVIEW ......................................................................................................................................... 13
1.1. System Components and Cabinet Types .................................................................................................... 13 1.2. System Architecture ................................................................................................................................... 14 1.3. OmniCenter Navigation .............................................................................................................................. 15 1.4. Status Dashboard: Five Areas to Review .................................................................................................... 17
2. USERS ............................................................................................................................................................... 21
2.1. User Records ............................................................................................................................................... 22 2.2. Active Directory .......................................................................................................................................... 23 2.3. Access Levels .............................................................................................................................................. 24 2.4. OmniSupplier Privileges ............................................................................................................................. 25 2.5. Item Access ................................................................................................................................................. 26 2.6. OmniSupplier Access .................................................................................................................................. 27 2.7. User Templates ........................................................................................................................................... 28 2.8. Respiratory Therapists ................................................................................................................................ 30 2.9. Temporary Users ........................................................................................................................................ 31 2.10. System Security .......................................................................................................................................... 34 2.11. Password Reset .......................................................................................................................................... 35 2.12. Customize Password Assistance Message .................................................................................................. 36
3. ITEMS ............................................................................................................................................................... 39
3.1. Anatomy of an Item .................................................................................................................................... 40 3.2. The Master Omni and the Items Database ................................................................................................ 41 3.3. Standardized Items ..................................................................................................................................... 42 3.4. Optional Standardized Fields ...................................................................................................................... 44 3.5. Valid Items (Rule of 2 or Rule of 6) ............................................................................................................. 45 3.6. Item Issue/Restock Fields ........................................................................................................................... 48 3.7. Par, Reorder, and Critical Levels ................................................................................................................. 49 3.8. Item Re‐Order Source ................................................................................................................................. 50 3.9. Item Alias (Brand Name vs. Trade Name) ................................................................................................. 50 3.10. Dose Reconciliation .................................................................................................................................... 52 3.11. Multi‐Use, Multi‐day Admin, and MultiDose Items ................................................................................... 53 3.12. Copy an Item to an OmniSupplier .............................................................................................................. 55 3.13. Auto‐copy ................................................................................................................................................... 56
4. OMNISUPPLIERS .............................................................................................................................................. 59
4.1. Tour of Omnicell’s Automated Dispensing Cabinet ................................................................................... 60 4.2. Areas ........................................................................................................................................................... 61 4.4. Copy an OmniSupplier ................................................................................................................................ 63 4.5. OmniSupplier Delete .................................................................................................................................. 63 4.6. Cabinet‐Server Communication ................................................................................................................. 64 4.7. OmniSupplier List Maintenance ................................................................................................................. 67 4.8. Cells and Zones ........................................................................................................................................... 68 4.9. Drawers, Shelves, and Bins ......................................................................................................................... 71 4.10. Auto‐Detection ........................................................................................................................................... 81 4.12. Emergency Access ...................................................................................................................................... 82 4.13. SafetyStock Option ..................................................................................................................................... 83

21.0 Pharmacy System Administrator Participant Workbook
4
4.14. Med Label Printer ....................................................................................................................................... 87 4.15. FlexLock ...................................................................................................................................................... 89 4.16. Biometric Fingerprint System ..................................................................................................................... 90
5. COLOR TOUCH CONFIGURATIONS .................................................................................................................. 95
5.1. Configuration Definitions ........................................................................................................................... 96 5.2. Locating Configurations .............................................................................................................................. 97
6. PHARMACY WORKFLOWS ............................................................................................................................. 101
6.1. Pharmacy Workflows ............................................................................................................................... 102 6.2. Witness Requirements for Pharmacy Workflows .................................................................................... 103 6.3. Assign/Unassign ....................................................................................................................................... 104 6.4. Restock ..................................................................................................................................................... 106 6.5. Prevent Stockouts and Outdates .............................................................................................................. 109 6.6. Search for Expired Items .......................................................................................................................... 111
7. NURSING WORKFLOWS ................................................................................................................................. 115
7.1. Cabinet Set Up for Nursing Workflows .................................................................................................... 117 7.2. Tabs for Removing Items .......................................................................................................................... 118 7.3. Patient Medication Profiling ..................................................................................................................... 119 7.4. Scheduled Meds ....................................................................................................................................... 121 7.5. Patient Medication Accounts ................................................................................................................... 123 7.7. Overrides .................................................................................................................................................. 127 7.8. Kits ............................................................................................................................................................ 128 7.9. Dispensing Alerts ...................................................................................................................................... 129 7.10. Discrepancies ............................................................................................................................................ 130 7.11. Guided Cycle Count .................................................................................................................................. 135
8. SYSTEM ADMINISTRATOR WORKFLOWS ....................................................................................................... 137
8.1. Dose Reconciliation .................................................................................................................................. 138 8.3. Discrepancy Resolution ............................................................................................................................ 140 8.4. Temp Patient Billing Reonciliation ........................................................................................................... 143 8.5. Inventory Management ............................................................................................................................ 145 8.6. Par vs. Usage Report................................................................................................................................. 147 8.7. Inventory Aging ........................................................................................................................................ 148 8.8. Drug Shortages ......................................................................................................................................... 149 8.9. Diversion Monitoring and Compliance ..................................................................................................... 151

21.0 Pharmacy System Administrator Participant Workbook
5
WELCOME
In this class, you will work individually and in small teams to build, optimize, and administer medication
dispensing cabinets. At the end of our time together, you will be considered an Omnicell Pharmacy System
Administrator.
Our goal is to convey information, provide tools, and deliver meaningful experiences that engage and challenge
you. We encourage you to participate in discussions, exercises and group activities and welcome you to share
your knowledge and experiences with the rest of the class.
This participant workbook is yours to keep. Feel free to take notes as needed and ask questions at any time.
Let’s get started!
Education & Training Services
Omnicell, Inc.


21.0 Pharmacy System Administrator Participant Workbook
7
WORKBOOK NAVIGATION
Each section of this workbook is divided into sections based on skills you will need as a Pharmacy System
Administrator. The icons below will help guide you through each section.
Guide Icons
Icon Representation Description
Objective Learning goals for each topic
Information Information on a specific topic
Facility Tasks Tasks to complete when you return to your facility
Estimated Time Estimated duration of a task or activity
Activity Hands‐on activity to support your learning
Group Activity Group activity to reinforce learning
Tips/Best Practice Tips or best practices to help you when you leave class
Tools Tools to help you when you return to your facility
Reports List of OmniCenter/Color Touch reports on a specific topic
Review Questions End of topic questions for review


21.0 Pharmacy System Administrator Participant Workbook
9
SELF‐ASSESSMENT
Think about your work as a System Administrator. Using the scale below, assess your current skill level in
Column A. After this workshop is completed, assess your skill level in Column B to determine what
skills/knowledge you may have gained during this workshop and where you still may need support.
Skill level: 0 = None 1 = Minimal 2 = Average 3 = Above Average
Column A
Skill Column
B
Use the Status tab to analyze data about communication with cabinets, on‐hand inventory, and restock information.
Manage items effectively.
Manage users effectively.
Globally modify items and users.
Demonstrate patient care tasks, such as removing, returning and wasting patient medications.
Resolve discrepancies at the cabinet as well as in the OmniCenter.
Perform inventory menu functions, such as restock, destock, modify bin and cycle count.
Review, print, and interpret cabinet and OmniCenter reports.
Change cabinet configurations at the cabinet as well as the OmniCenter.
Activity: Personal Objectives/Burning Questions
Directions: Identify your personal objectives (goals/ expectations) that would make this learning experience worthwhile.
1.
2.
3.

21.0 Pharmacy System Administrator Participant Workbook
10
SYSTEM ADMINISTRATOR CHECKLIST
Track the daily, weekly, and monthly tasks of the System Administrator.
Daily Tasks
1. Ensure all cabinets are communicating (Status Screen on OmniCenter)
2. Ensure all Interfaces are operating (Status Screen on OmniCenter)
3. Ensure there are no error messages (Status Screen on OmniCenter)
4. Ensure there are no In/Out server error message (Status Screen on OmniCenter)
5. Ensure Restock reports have run and meds are being pulled to restock cabinets
6. Restock cabinets in a timely manner and empty return bin. Review the Return Audit Report
7. Verify restocks are generated and completed via status screen
8. Review all Medication Overrides to ensure Med Order has been received and the correct med was administered
9. Check Reconciliation Functions
Temp. Patient Billing Reconciliation: Replace temporary patient records with the actual admitted patient record, including sending billing transactions
Pharmacy Discrepancies Reconciliation: Ensure users have reconciled pharmacy discrepancies
Dose Reconciliation: Review of medication dispenses to ensure proper documentation
Anesthesia Workstation Reconciliation: If your facility has Anesthesia Workstation and uses My Items, ensure My Items are being used and documented correctly. If your facility has Anesthesia Workstation and uses PCR, ensure all cases are reconciled.
10. If your facility has a FlexLock, review FlexLock Temp report to check on temp of unit refrigerators.
Weekly Tasks
1. Verify patient census on each OmniSupplier. Consider doing this task daily immediately after go‐live in order to ensure that all patients are coming through the interface.
2. Monitor null transactions
3. Monitor billing (patient charge) exception report

21.0 Pharmacy System Administrator Participant Workbook
11
Monthly/Quarterly
1. Compare Par vs. Usage
2. Review Inventory Aging report and list items not issued within a specific time period
Facility Schedule
1. Cycle count of all items
2. Ensure cabinet count equals actual quantity and check for outdates


21.0 Pharmacy System Administrator Participant Workbook
13
1. SYSTEM OVERVIEW
Objectives
1. Recognize the components of the Omnicell system and flow of data to the OmniCenter
2. Navigate the OmniCenter
3. Identify issues when reviewing the OmniCenter status screen
1.1. System Components and Cabinet Types
System Components
Cabinet Types
Automated Dispensing Cabinet (ADC)
OmniSupplier
OmniCenter
Quarter Height Half Height
Two‐Cell One‐Cell Three‐Cell

21.0 Pharmacy System Administrator Participant Workbook
14
1.2. System Architecture
Hospital Systems:
ADT Billing Inventory Pharmacy
Omnicell Server (Physical or Virtual)
• Control PC (CPC01)
OmniCenter
System Software
Databases
• Omnicell Interface Server (OIS)
OmniCenter Remote Access (OCRA) Sessions

21.0 Pharmacy System Administrator Participant Workbook
15
1.3. OmniCenter Navigation
OmniCenter Tabs
Exit – used to shut down the OmniCenter
Status Dashboard – used to view communication with cabinets, on‐hand inventory, and restock information
Restock – used to generate restock routes
Reports – used to run, print and schedule reports
Administration – used to manage the entire system
Database – create and modify database tables – e.g., Users, Items, OmniSuppliers

21.0 Pharmacy System Administrator Participant Workbook
16
Activity: OmniCenter Navigation
Estimated Time
5 minutes
Instructions
Step Task Notes
1. On the computer desktop, open the OCRA icon. Log on using your credentials.
2. Go to the Database tab. Then, use your keyboard to navigate to different tables:
i: Opens the Items table
v: Open the Users table
p: Open the OmniSuppliers table
3. Open up the Items table (“i”)
4. Let’s search for Ibuprofen. First, click Search to bring up the list of items.
5. Sort the table by clicking on the header, Item Description
6. Then, click on the item description of any one item (e.g., Amoxicillin 250 CAP)
7. Finally, start typing in the item description for the product you are searching for – Ibuprofen

21.0 Pharmacy System Administrator Participant Workbook
17
1.4. Status Dashboard: Five Areas to Review
The Status tab displays the default screen for the OmniCenter, the Status Dashboard. This tab provides a quick review of all cabinets, servers, and interface activity. It also allows the system administrator to review error and functionality messages or generate a critically low restock list. As the OmniCenter contacts each cabinet throughout the day, it updates its database.
Five areas to observe:
Omni Status Types:
Connected: Cabinet is currently in use.
Down: Communication is down for the cabinet.
Fail: Attempted contacted fail. If more than 12 cabinets are failing at one time, contact Omnicell.
Future Time: The cabinet’s clock does not match the time in the OmniCenter.
IP Mismatch: The cabinet’s IP address does not match the IP address listed in the OmniCenter database. No communication is possible. (Cabinet must be using MSMQ in order to show this error.)
Off Line/Unmonitored: OmniCenter has been configured not to contact the cabinet. Term is dependent on communication type: NetJet or MSMQ.
Time: Most recent contact by OmniCenter to cabinet with in the previous 24 hours. A date indicates no contact.

21.0 Pharmacy System Administrator Participant Workbook
18
Activity: The Status Tab
A nurse calls down and lets you know that you are running low on Morphine. Check the cabinet and determine the level of stock at nearby cabinets.
Estimated Time
5 minutes
Instructions
Step Task Notes
1. On the computer desktop, open the OCRA icon. Log on.
2. From the Status Dashboard, select the OC22South OmniSupplier
3. Click Critically Low Items
4. Select Morphine 6mG/1ml SYRIN from the list
5. Click Show Item Availability
6. How many other cabinets is the item located in? __________
Tip
If your facility has OmniExplorer, nurses can look up the availability of items on their own.

21.0 Pharmacy System Administrator Participant Workbook
19
Section Wrap‐up
Review Questions
1. What are the five areas of the Status Dashboard that you should review?
2. You have a cabinet showing the Omni Status of Fail. What would you do to resolve it?
3. Does nursing have the ability to view drug availability from a cabinet?
4. Additional questions or notes?


21.0 Pharmacy System Administrator Participant Workbook
21
2. USERS
Objectives
1. Build your user management strategies around ISMP best practices
2. Set up a user template
3. Build multiple users using templates
4. Locate security/password settings
5. Reset a user’s password
Tools
Security Access Level for the Color Touch Cabinets, OmniCenter User Access Level Defaults (See Tools Section)
ISMP Core Process #2 ‐ Ensure ADC System Security
Security processes must be established to ensure adequate control of medications outside of the pharmacy and
to reduce the potential for medication diversion from Automated Dispensing Cabinets (ADCs).
Core Process Course Section
Define user privileges based on their need to access specific medications or patient care areas
User Setup
Create a plan/policy on password assignment to include weekends, holidays, or after hours
User Setup
Security Setup
Conduct frequent reviews of temporary users to remove users who should not have access to the system
User Reports
Update the system database daily to remove users that should no longer be active

21.0 Pharmacy System Administrator Participant Workbook
22
2.1. User Records
As a system administrator, you are responsible for monitoring changes to the User’s database, including the addition or deletion of user records. When you are not in the pharmacy, you want to ensure that your coworkers continue to build user records following policies/procedures that adhere to best practices.
User Record
User ID
Password
Cabinet/Server Access Levels
OmniSupplier Privileges
Item Access
OmniSupplier Access

21.0 Pharmacy System Administrator Participant Workbook
23
2.2. Active Directory
Active Directory Setup
Microsoft Active Directory setup occurs in OmniCenter. System‐wide Active Directory integration is set up under Administration > Security Setup > Active Directory tab.
User‐related Fields
Default Site: Omnicell recommends specifying a site instead of leaving the field blank in order to expedite user authentication
AD Logon Name: User's domain logon name. This could be known by different terms within the facility, like the logon ID, or user name. This is what the user enters to access resources within the facility network, like their intranet email or other third‐party system. Some facilities have set up users in OmniCenter so that the Omnicell User ID matches the Active Directory logon name. If this is the case, you can leave this field blank.
Domain: Enter the name of the domain that the user belongs to. For best results, this field should be populated. If left blank, authentication is slower.
AD Exempt: When checked, requires that users log on with Omnicell credentials instead of domain credentials. This setting is unchecked by default. Users who you wish to be exempt will not be able to log on unless "AD Exempt" is checked.

21.0 Pharmacy System Administrator Participant Workbook
24
2.3. Access Levels
Fields for Determining Access Levels
Omni User Type (Cabinet Access Type) is a setting that determines what screens a user will see and what capabilities a user will have at a cabinet. ISMP recommends that facilities define user privileges based on a user’s need to access specific medications or patient care areas. When creating a new user in the OmniCenter, use the Omni User Type to assign access rights and restrictions. Each user type is set up with a list of defined privileges. For a full list of Access Levels for the Color Touch Cabinet see the Tools section of this workbook.
Server Access Type determines a user’s access level to the OmniCenter. Certain privileges may be restricted by a server access type. For example, access to add a barcode. For a full list of OmniCenter User Access Level Defaults see the Tools section of this workbook.

21.0 Pharmacy System Administrator Participant Workbook
25
2.4. OmniSupplier Privileges
Fields for Determining Access Levels:
Omni User Type (Cabinet Access Type) is a setting that determines what screens a user will see and what capabilities a user will have at a cabinet. ISMP recommends that facilities define user privileges based on a user’s need to access specific medications or patient care areas. When creating a new user in the OmniCenter, use the Omni User Type to assign access rights and restrictions. Each user type is set up with a list of defined privileges. For a full list of Access Levels for the Color Touch Cabinet see the Tools section of this workbook.
Server Access Type determines a user’s access level to the OmniCenter. Certain privileges may be restricted by a server access type. For example, access to add a barcode. For a full list of OmniCenter User Access Level Defaults see the Tools section of this workbook.
Zone Access
Access to a cabinet’s zones is based on user access rights. A system administrator must specify user access to particular zones in the Users table.
The three defined zones include:
Supply: Gives users access to medical supplies only.
Pharmacy: Gives users access to Pharmacy zones. To ensure compliance, respiratory medications must be stored in a Pharmacy zone. This designation is equivalent to zones configured as Pharmacy on the cabinet.
Respiratory: Gives users access to respiratory supplies. Access to the Respiratory zone provides access to respiratory supplies only. Respiratory therapists may require access to Pharmacy zones.
Respiratory Zone
PC Box
Pharmacy Zone
Supply Zone
Sample Cabinet Setup

21.0 Pharmacy System Administrator Participant Workbook
26
2.5. Item Access
Item Access
A user’s access to control levels is set in Item Access. Specify one or more item groups to grant user access. For a list of control levels, please see Tools.
Item Groups
An Item Group specifies one or more item groups to grant user access:
All Groups: Setting this field allows the user to access all current and future groups. This setting should be reserved for users whose privileges normally do not change.
General: this setting is the default item group. Setting this field allows the user to access items that are not specified in another group.
Respiratory: Setting this field allows the user to access items that are marked for respiratory use.

21.0 Pharmacy System Administrator Participant Workbook
27
2.6. OmniSupplier Access
OmniGroups
OmniGroups are cabinets grouped by area. OmniGroups preceded by an asterisk are system generated. System Administrators can also create OmniGroups. User‐defined groups will not be preceded by an asterisk.
Active Directory
If Microsoft Active Directory is enabled, access to enabled Omnicell products will also be through Active Directory. Users can log on with their network user ID and password.

21.0 Pharmacy System Administrator Participant Workbook
28
2.7. User Templates
There are two ways to create a user:
1. Copy another user with like privileges
2. Create a user template and use it to build new users.
Keep the following in mind when creating user templates:
Create a template for each standard user type
When creating a new user from a template, you will be able to modify individual fields
When creating a new user, use a unique generic password for temporary use. Save the user and then select modify user again to select password expired, this forces the user to create a new password the first time they log in.
Activity: Create a User Template and Add Users
You are ready to begin creating your user templates. Create a template for an RN using the directions below. Then, use the template to create a nurse user.
Estimated Time
10 minutes
Instructions
Step Task Notes
1. Log on to OmniCenter
2. Go to the Database tab > Users table > Click Add
3. Use these settings:
User ID: #TEMPLATERN + Your Workstation Number (e.g., #TEMPLATERN8)
User Name: Template, RN
Password: Same as User ID
Omni Access Type: Regular Nurse
Server Access Type: Regular Nurse
Select Acct Age Exempt (Account Aging)
4. Click Save
5. Click the back arrow to go back to the user list to make sure your template is saved correctly
6. Select the nurse template you created. Click Copy

21.0 Pharmacy System Administrator Participant Workbook
29
7. Build a nurse user with the following information:
User ID: RN + First Initial Last Initial (e.g., RNMH)
User Name: Your Last name, First name
Password: Same as User ID
Remove checkmarks for Acct Age Exempt and PW Age Exempt
8. Click Save. Write down the username and password below.
User Type Sample User ID User ID Password (same as User ID)
RN RN +Initials (e.g., RNMH)

21.0 Pharmacy System Administrator Participant Workbook
30
2.8. Respiratory Therapists
Use Zone Access, Control Level, and Item Groups to create a respiratory therapist users.

21.0 Pharmacy System Administrator Participant Workbook
31
2.9. Temporary Users

21.0 Pharmacy System Administrator Participant Workbook
32
Monitor Temp Users with the Transaction by User Report

21.0 Pharmacy System Administrator Participant Workbook
33
Activity: Run the Transaction by User Report
You need to monitor temporary users. Run the Transaction by User report to get more information.
Estimated Time
10 minutes
Instructions
Step Task Notes
1. Log on to OmniCenter
2. Go to the Reports tab > Set the Type to Operational
3. Select the Transaction by User report and click Continue
4. Use these settings:
Date Range: Select 24 hours
Omni: All
User: Click Select
Set the limits to Omni User Type = TEMPORARY then click Search
To select all users, click the double arrow next to the user names. Then click OK.
Click Preview to review the report
5. How many temp users did you find? _______________
How many had transactions? _______________
6. Click the Exit icon to return to the list

21.0 Pharmacy System Administrator Participant Workbook
34
2.10. System Security
Complex Passwords (Strong Passwords)
Omnicell complex passwords must have at least 6 characters and three of the following:
Upper‐case letters (ABCDE)
Lower‐case letters (abcde)
Example: Michael_034
Numerals (12345)
Non‐alphanumeric characters (‐, !, #)
Go to Admin Type = Setup > Security Setup
Best Practices for Security Setup
OmniCenter requires users to change their password to a complex password when their password expires next, not all on the day you make that change. This allows for a gradual, phased‐in approach.
Keep a written policy on which requires all users to keep their password confidential.
If you decide to have users change their password on a periodic basis, consider setting this on the same schedule that IT has set for other systems

21.0 Pharmacy System Administrator Participant Workbook
35
2.11. Password Reset
Only certain user types can reset the password of other user types. Omnitech can set any user's password. NurseMgr, Anesthesia, PharmacistA, and PharmacistB can only reset the password of the following user types:
CNA
LPN
Out Pat Rehab Specialist
Regular Nurse
Regular Nurse B
Respiratory Therapist
Temp LPN and Temp Nurse
Password Reset in OmniCenter and the Cabinet
In OmniCenter, open the user record > delete the password > click Save. This will force the user to enter a new password at next log on.
On the cabinet, press User Menus > Press the Reset Users Password > Select the desired user from the list > Press OK to confirm the password reset
Password Reset Recommendations
Train a backup who can reset passwords
Train your end users on who to call when they need their password reset
Passwords can also be reset at the cabinet by the nurse manager (Head Nurse)
When Active Directory authentication is configured, passwords are reset by the facility’s IT staff.
Forgotten Password Password Comprised

21.0 Pharmacy System Administrator Participant Workbook
36
2.12. Customize Password Assistance Message
When a user enters an incorrect password at the cabinet, a default message appears on the screen. Since Omnicell does not assist with user access, the message can be customized to provide quick reference information about the appropriate person or department to contact.
To customize the message site‐wide:
1. Go to the Sites table in OmniCenter
2. Choose the site and click Modify
3. Under the General radio button, enter the desired message in the Pwd Assist Msg field, then click Save
To apply the message to an area OR customize the message for an area:
1. Go to the Areas table in OmniCenter
2. Select the area and click Modify
3. Under the General radio button, either enter a customized, area‐specific message in the Pwd Assist Msg field or check the Use Site Password Assistance Message checkbox.

21.0 Pharmacy System Administrator Participant Workbook
37
Section Wrap‐up
When you return to your facility:
Do user IDs meet facility requirements?
Are user rights consistent and appropriate for each user type?
Is a users' access limited to cabinets in which they provide care?
Are Respiratory users limited to Respiratory groups/items?
Are complex passwords in use?
Is there a policy/plan in place to ensure the User’s table is maintained and updated consistently?
Additional User‐related Reports
User Events Report
User Fingerprint Activity
User Fingerprint Enrollment
User Password Security Feature Settings Report
User Record Audit
Review Questions
1. Where in the OmniCenter do you set the standards for user passwords?
2. What is the recommended length of time before requiring users to change their password?
3. Check Security Settings in the OmniCenter. Log on to the OmniCenter using your username and password. Go to the Administration tab > Set the Type to Setup. Click on Security Setup and click Continue. Identify the security settings in the Password Security tab. Do they match best practices?
4. Additional questions?


21.0 Pharmacy System Administrator Participant Workbook
39
3. ITEMS
Objectives
1. Identify best practices for the Items database
2. Follow the Rule of 2/Rule of 6
3. Standardize items and set up an optional standardized field
4. Copy items to an OmniSupplier
5. Run items‐related reports
ISMP Core Process #5 ‐ Select and Maintain Proper ADC Inventory
The ADC inventory should be determined based on the needs of the patients served and replenished on a
regular basis. Medications should be routinely reviewed and adjusted based on medication prescribing patterns,
utilization, and specific unit needs (taking into account typical patient ages and diagnoses). Standard stock
medication should be identified, and approved, for each patient care area.
Best Practices for Items
Core Process Course Section
Establish appropriate maximum par levels designed to prevent multifold overdosing
Set Par, Reorder, and Critical Levels
Best Practice Course Section
Maintain item standardization to promote system‐wide data integrity Standardize Items
Ensure items meet requirements for a valid solid or liquid Ensure Item Validity
Multi‐dose items were reviewed and found to be defined correctly Set Up Multi‐dose Items

21.0 Pharmacy System Administrator Participant Workbook
40
3.1. Anatomy of an Item
An item is a supply or medication that exists in your facility’s inventory. Every item has a series of characteristics that determine how the item will be managed.
General
Restocking
Notifications
Aliases
Miscellaneous
Bar CodePharmacy
Dispensing Alerts
Allergies
Label Printer
Bins
Naproxen 250 MG

21.0 Pharmacy System Administrator Participant Workbook
41
3.2. The Master Omni and the Items Database
The Master Omni virtual “Omni” that contains a master list of items. Another way to think about the Master Omni is that it is a copy of your facility's formulary. Your Omnicell Project Manager will name your formulary the Master Omni. A master Omni is required and only one Omni can be the master. Keeping a clean database starts at the Master Omni. Any change made to an item should start with the Master Omni.
The Items Database is one of the most commonly used tables in the OmniCenter. It houses the Master Omni and information on all items available to each cabinet.
Items Sent from the Formulary Interface
*For some facilities, an item cannot be copied to another Omni until pharmacy completes the review. To review a new item, select the Items table from the Database tab and set the Master Reviewed limit to N – No. Then, carefully review the item before checking the Master Reviewed checkbox. Some facilities have the Master Reviewed checked automatically when it flows from the interface in to the Master.
Items Added Manually
Item
Manually add the item to the Master Omni. Review it.
Copy the item
to the
OmniSupplier
Item is stored in the Master Omni
Item reviewed*
New item is sent from the formulary interface
Item added to an OmniSupplier

21.0 Pharmacy System Administrator Participant Workbook
42
3.3. Standardized Items
Standardization will help you protect the integrity of your items table. This means that the information for specific fields for an item is identical on all cabinets.
When the standardized box is checked, a green asterisk marks the fields that must match for all items sharing the same Item ID. Other data fields can be standardized as optional standardized fields. When modifying a standardized item, all items with the same Item ID are identically and automatically modified (standardized fields only) across all cabinets.
Why Should Items be Standardized? Items must be standardized to add to equivalent dose groups and kits. Standardization is also required for SafetyStock, patient‐specific bins (PSB), item bar code support, patient medication accounts (PMAs), medication label printing, and more.

21.0 Pharmacy System Administrator Participant Workbook
43
Activity: Search for Non‐Standardized Items
To protect your database, ensure all items are standardized. Use this simple technique to check for non‐standardized items.
Estimated Time
5 minutes
Instructions
Step Task Notes
1. Log on to OmniCenter
2. Go to the Database tab > Type the letter “i” on your keyboard to get to the Items table
3. Set the Limit to Standardized, equals N
4. Click Search to review the list of non‐standardized items
5. How many non‐standardized items did you find? ______________

21.0 Pharmacy System Administrator Participant Workbook
44
3.4. Optional Standardized Fields
Table Standardization Setup can be used to set optional data fields for standardization. If a field is consistent in Table Standardization Setup, the field’s setting may be changed to make it an optional standardized field. Common fields to make standardized include Billing Type and Expiration Date.
Activity: Optional Standardized Field Review
You are working on maintenance of your items table and want to look at setting up Billing Type as an optional standardized field. You use the Table Standardization Reports to investigate.
Estimated Time
10 minutes
Instructions
Step Task Notes
1. Log on to OmniCenter
2. Go to the Reports tab > Set the Type to Operational
3. Select Table Standardization Reports and click Continue
4. Make sure the Items table is selected and then, under Report Type, select List optional standardizable fields inconsistencies
5. In the drop‐down, select Billing Type and click Preview
6. Describe the inconsistency do you find?
________________________________________________
7. Click the Exit icon to return to the OmniCenter
Optional Standardized Fields Standardized Fields
Data must be the same across all OmniSuppliers
You may activate optional standardized fields for those that are useful to maintain consistency (e.g.,
Expiration Tracking, Billing Type)

21.0 Pharmacy System Administrator Participant Workbook
45
3.5. Valid Items (Rule of 2 or Rule of 6)
Valid Items
Proper setup requires each item have Dosage Form and either two or six of the following fields defined: Strength Amount, Strength Units, Dosage Volume Amount, Dosage Volume Unit, Total Volume Amount, Total Volume Units
Each item must have either two or six fields defined to be valid. This is called the Rule of 2 or the Rule of 6.
Valid vs. Invalid Item
Why is it important for items to be valid? Applying the Rule of 2 or the Rule of 6 helps support the following nursing and patient safety features: dose calculation and dose exceeded warning, waste/return balance calculation, quantity to remove based on med order, equivalent dose groups, and post‐case reconciliation.
Morphine Acetaminophen

21.0 Pharmacy System Administrator Participant Workbook
46
Types of Valid Items
Type Applicable Rule Required Fields Valid Solid (e.g., Acetaminophen 325 MG)
Rule of 2 Strength Amount
Strength Units
Valid Oral Solid Combo Med (e.g., Hydrocodone/APAP 5/500 MG)
Rule of 2 Strength Amount
Strength Units
Valid Liquid, No Concentration (Sodium Chloride 0.9%)
Rule of 2 Strength Amount
Strength Units
Valid Injectable Item (Meperidine 50mG/1mL SYRIN)
Rule of 6 Strength Amount
Strength Units
Dosage Volume Amount
Dosage Volume Unit
Total Volume Amount
Total Volume Units
Challenge Examples
Put an X in the Rule of 2 or Rule of 6 column
Albuterol Inhaler
Rule of 2
Rule of 6
Insulin Novolog (Vial)
Rule of 2
Rule of 6
Hydrocortisone Cream
Rule of 2
Rule of 6

21.0 Pharmacy System Administrator Participant Workbook
47
Activity: Search for Invalid Items
Estimated Time
10 minutes
Instructions
Step Task Notes
1. Log on to OmniCenter
2. Go to the Database tab > Select the Items table
3. Select the limits and parameters to search the database for Valid Solid = N (No) and Valid Liquid = N (No)
4. Click Search
5. How many invalid items did you find? ________________
6. Open up one of the invalid items. Go to the Pharmacy radio button and review the item.
What fields need to be completed in order to make the item valid?
__________________________________________________
If no fields are missing, what else might be making the item invalid?
__________________________________________________

21.0 Pharmacy System Administrator Participant Workbook
48
3.6. Item Issue/Restock Fields
Unit of Issue: Ea, tab, vial etc., as removed from the cabinet to give to patient (four character limit)
Unit of Stocking: Ea, vial, bottle, box, unit by which a cabinet is restocked
Unit of Order: Ea, vial, bottle, box, unit by which a cabinet orders items
Qty/Stock Unit: Number of items (units of issue) per unit of stock, such as quantity of items in a box
Qty/Order Unit: Number of items ordered (units of issue per units of order), such as the quantity of bandages in a case
Order Rounding: If your facility stocks and dispenses items in multiples (of five, for example) rather than by single item, you can minimize pick list editing by configuring your items for Order Rounding. OmniCenter will then round reorder quantities down to the nearest specified multiple.
Unit Cost: Charge to facility per unit of issue*
Unit Price: Charge to patient per unit of issue*
Expiration Tracking: Check to enable expiration date at cabinet during issue/restock; select by specific time, day, or last day of month.
Return Permitted: Check to permit return of item to original bin as opposed to return/waste bin (e.g., a returning an item to a refrigerator)
*Information for unit cost and unit price is not used for accounting functions. Instead, these fields can be used to run reports such as lost charges. These fields provide one way to put a dollar amount on null transactions. The data for these fields may come from a formulary download from the PIS or be entered by hand.

21.0 Pharmacy System Administrator Participant Workbook
49
Unit Conversion Examples
Acetaminophen
EA/EA/EA
Insulin Regular UNIT/VIAL/VIAL
3.7. Par, Reorder, and Critical Levels
Field Description
Par Level Qty Ideal amount to maintain in a cabinet (max)
Reorder Level Quantity at which to reorder in order to maintain par (min)
Critical Level Quantity at which to re‐order need is vital. The item is acutely low, depleted.

21.0 Pharmacy System Administrator Participant Workbook
50
3.8. Item Re‐Order Source
3.9. Item Alias (Brand Name vs. Trade Name)
Alias: The trade name(s) for an item are put in the alias field.
Note: When multiple alias entries exist for an item, the first one on the list (alphabetic sort) will display with the Item Name Rx during a Remove Med activity from either Scheduled Meds or Active Med Orders. On the Stocked Meds Tab, all of the alias listings will appear as individual listings.
Trade Name
Brand Name

21.0 Pharmacy System Administrator Participant Workbook
51
Activity: Add an Item to the Master Omni
Follow the directions below to manually add an item to your Master Omni.
Instructions
Step Task
1. Log on to OmniCenter
2. Go to the Database tab > Type the letter “i” on your keyboard to get to the Items table
3. Click Add
4. In the General tab, complete the following information:
Omni ID: OCMaster
Item ID: 9999 + Your Initials
Charge ID: 9999 + Your Initials
Item Name: Naproxen
Item Group: General
Control Level: 6
Billing Type: Billable
Standardized: Yes (Check)
5. Go to the Pharmacy radio button and enter the following information:
Strength Amt: 250
Strength Units: mg
Dosage Form: TAB
Unit of Stocking: EA
Unit of Order: EA
Unit of Issue: EA
Qty/Stock Unit: 1
Qty/Order Unit: 1
Order Rounding: 10
Expiration Tracking: Yes
Return Permitted (Uncheck if checked)
Note: Ignore the Drug Identifier field
6. Go to the Restocking radio button and set the Re‐order source to Pharmacy.
7. Go to the Aliases radio button and add Naprosyn and Aleve as the aliases for your Naproxen
8. Click Save. Ignore any errors that appear.
Tip: Use the copy feature to build new strengths from a pre‐existing item.

21.0 Pharmacy System Administrator Participant Workbook
52
3.10. Dose Reconciliation
Dose Reconciliation should be monitored regularly to ensure proper nursing documentation of controlled meds. As such, nurses should be required to reconcile usage for controlled substances and high‐price items. Such items must be flagged in the OmniCenter as Reconcile Dose “Yes” to require users reconcile the item.
Tip: The time allowed for nursing to reconcile a dose is configurable and can be increased from the default. To change the setting, go to the Admin tab > Type = Setup > General System Settings > Click Continue > Go to the Accounts tab > Hours before aging Unreconciled Dose accounts

21.0 Pharmacy System Administrator Participant Workbook
53
3.11. Multi‐Use, Multi‐day Admin, and MultiDose Items
Descriptions Patient (s) Examples
Multi‐use: Multi‐use items include medications that can be issued multiple times to a single patient. These item can be used multiple times by one patient. This is often used for items in patient specific bins (SinglePointe).
Ointment
Inhalant
Multi Day Admin: Multi‐day Admin items can be administered over more than one day. Multi Day Admin items are not eligible for My Items or post‐case reconciliation.
The time allowed for nursing to reconcile a Multi Day Admin item is configurable and can be increased from the default. To change the setting, go to the Admin tab > Type = Setup > System Settings > Click Continue > Go to the Accounts tab > Hours before aging Multi Day Admin accounts
Fentanyl Patch
IV
MultiDose: MultiDose items hold more than one dose; may be returned without incrementing count. Quantity equals unit of issue, not the total package.
Insulin
Tip: Important Factors in MultiDose Setup
Making sure the item is a valid liquid
In the General section for the item, the Unit of Issue and the Unit of Stocking must be different. The unit of issue is how they will take it out (mL, Units, etc.) and the Unit of Stocking is how you will restock (Vial, Btl, etc.). You will also indicate in the Qty Stock Unit how many units of issue are in the unit of stocking (package size).
The Par, Reorder and Critical levels are based on the Unit of Issue. So, if you are issuing by mL, then these inventory levels will indicate mLs.
The Par level must be > or = to the Qty Stock Unit (or multiples thereof) + Reorder level. If this is not setup properly, the item will not reorder. When you make an update to this item, the warning box will tell you this on Save.
Be sure to check BOTH Return Permitted (General) and MultiDose (Pharmacy)

21.0 Pharmacy System Administrator Participant Workbook
54
Activity: Build Multi‐Day Admin and MultiDose Items
Use the information below to build items in the OC Master
Estimated Time
10 minutes
Instructions
Field Multi‐Day Admin MultiDose
Omni ID OCMaster OCMaster
Item ID 9996 + Initials 9995 + Initials
Charge ID 9996 + Initials 9995 + Initials
Item Name Fentanyl Insulin Regular
Item Group General General
Control Level 2 6
Billing Type Billable Billable
MultiDose Yes
Multi‐Day Admin Yes
Strength Amount 25 100
Strength Units mcg UNITS
Dosage Volume Amt 1
Dosage Volume Unit ML
Total Volume Amt 10
Total Volume Units ML
Dosage Form PATCH INJ
Return Permitted Yes
Reconcile Dose Yes Yes
Re‐order Source Narcotic Pharmacy
Alias Duragesic Novolin R

21.0 Pharmacy System Administrator Participant Workbook
55
3.12. Copy an Item to an OmniSupplier
Prior to physically loading an item to the cabinet, an item must be setup within each cabinet’s database. You can copy an item from the Master Omni to any OmniSupplier database.
2 1 Copy the item from the Items Master to the OmniSupplier
Physically add the item to the OmniSupplier

21.0 Pharmacy System Administrator Participant Workbook
56
Activity: Copy three items from the Master to a cabinet (Naproxen, Fentanyl Patch, Insulin Regular)
Estimated Time
5 minutes
Instructions
Step Task Notes
1. From the Items master, select one of your items, click Copy
2. Set the Omni ID to your assigned workstation (e.g., Workstation 4 would choose OC4West)
3. Then set the par level for the your three items:
Par: 8, Reorder: 3, Critical: 2
4. Click Save. (Ignore any errors that appear.)
5. Continue until you have completed all three items
3.13. Auto‐copy
You can configure OmniCenter to automatically copy items from the Master Omni inventory to a cabinet. The auto‐copy process begins when a new medication order is created and the items that make up the order are not part of a cabinet’s inventory. Auto‐copy moves those items with the corresponding medication orders wherever they are routed. The items are included in the cabinet’s item database, available for bin assignment.
To set up auto‐copy, go to Administration > Type = Setup > Medication Order Setup > Med Orders > Automatically Copy Med Order Components to Non‐PSB Omnis*
*A non‐PSB Omni is a cabinet that is not enabled for SinglePointe. non‐SinglePointe cabinet. A cabinet enabled for SinglePointe will always auto‐copy regardless of the auto‐copy setting. An item has to be in the cabinet db so it can be assigned. With SP if the item isn't in the master to copy from it can't be assigned and will be on the exception report.
Omnicell recommends using auto‐copy for any site that stocks nurse‐prepared medication orders.
Med Order Routing
With auto‐copy, items follow the same route medication orders do. There are two route options that support the auto‐copy feature.
When set to Patient Route, medication orders are sent wherever the patient record is sent.
When set to Patient Area,medication orders are sent to all cabinets that reside in the same area as the patient.
21.0 Pharmacy System Administrator Participant Workbook
57
Section Wrap‐up
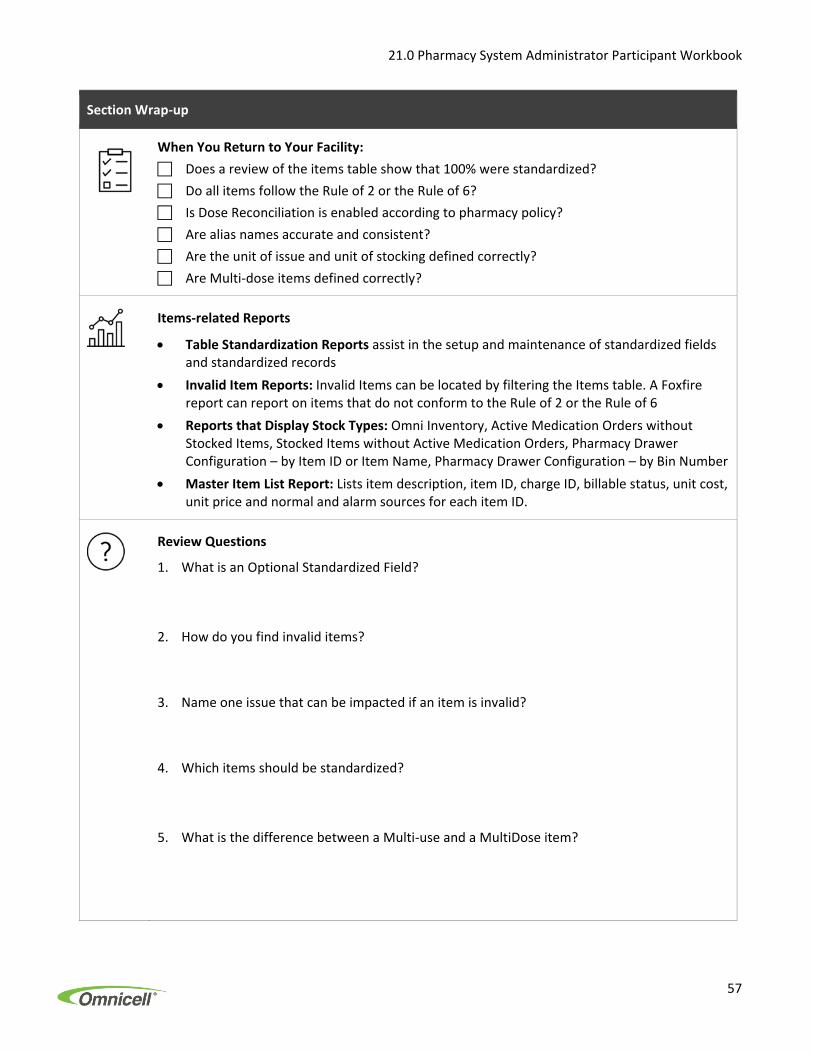
When You Return to Your Facility:
Does a review of the items table show that 100% were standardized?
Do all items follow the Rule of 2 or the Rule of 6?
Is Dose Reconciliation is enabled according to pharmacy policy?
Are alias names accurate and consistent?
Are the unit of issue and unit of stocking defined correctly?
Are Multi‐dose items defined correctly?
Items‐related Reports
Table Standardization Reports assist in the setup and maintenance of standardized fields and standardized records
Invalid Item Reports: Invalid Items can be located by filtering the Items table. A Foxfire report can report on items that do not conform to the Rule of 2 or the Rule of 6
Reports that Display Stock Types: Omni Inventory, Active Medication Orders without Stocked Items, Stocked Items without Active Medication Orders, Pharmacy Drawer Configuration – by Item ID or Item Name, Pharmacy Drawer Configuration – by Bin Number
Master Item List Report: Lists item description, item ID, charge ID, billable status, unit cost, unit price and normal and alarm sources for each item ID.
Review Questions
1. What is an Optional Standardized Field?
2. How do you find invalid items?
3. Name one issue that can be impacted if an item is invalid?
4. Which items should be standardized?
5. What is the difference between a Multi‐use and a MultiDose item?


21.0 Pharmacy System Administrator Participant Workbook
59
4. OMNISUPPLIERS
ISMP Core Process #6 Select Appropriate ADC Configuration
Restricting access to medications limits the potential for inadvertently selecting the wrong medication.
Medications stocked in ADCs may be high‐alert or high‐cost, and it is important to ensure that only the right
drug is selected. For these reasons, it is important that each drug have its own unique and segregated location
within the ADC, so only the specific drug needed is accessible.
Core Process Course Section
Store each medication and strength in an individual lidded ADC compartment that opens only when the specific medication is selected.
Drawer Guidelines If matrix drawers (compartments) must be utilized, limit them to medications such as non‐opiate analgesics (e.g., acetaminophen, ibuprofen) and antacids.
Take steps to differentiate look‐ and sound‐alike medications within the ADC. This may include a more secured configuration of lidded drawers or locked lidded drawers.
Provide refrigerated storage within close proximity to the ADC for medications and vaccines.
FlexLock
Provide a remote locking mechanism for refrigerated storage associated with the ADC.
Objectives
1. Identify hardware features of an OmniSupplier (cabinet)
2. Add an Area
3. Add/copy an OmniSupplier
4. Establish communication between the OmniCenter and a cabinet
5. Use OmniSupplier List Maintenance to move users, items, etc. to a cabinet
6. Configure zones and cells
7. Use drawer guidelines to choose appropriate drawer types for a cabinet
8. Swap drawers, move shelves, and set up matrix bins
9. Enable licenses for cabinet features
10. Calibrate the touchscreen, volume, and brightness

21.0 Pharmacy System Administrator Participant Workbook
60
Joint Commission Guidelines
Joint Commission Guideline Course Section
MM.05.01.09:
Medication containers are labeled whenever medications are prepared but not immediately administered.
Medication Label Printer
MM.03.01.01:
The hospital safely stores medications.
The hospital stores medications according to the manufacturers' recommendations or, in the absence of such recommendations, according to a pharmacist's instructions.
FlexLock
4.1. Tour of Omnicell’s Automated Dispensing Cabinet
Button Bars and Shelves
SafetyStock Scanner
Fingerprint Scanner
Pharmacy Drawers
Med Label Printer
Receipt Printer
External Return Bin
Plastic Bins

21.0 Pharmacy System Administrator Participant Workbook
61
4.2. Areas
Areas
Prior to adding new OmniSuppliers, you will need to make sure that your areas are set up correctly. Areas designate locations for OmniSuppliers. Examples of an area are CCU (Critical Care Unit), Med Surg, ER (Emergency Room), etc. Areas are critical in the patient mapping process. Work with your IT contact to establish your Area designations in your Admit, Discharge and Transfer System. Areas also help group ADCs for reports.
Types of Areas
Admin‐based – Administrations are documented. (Requires a license.)
Cabinet Only – No remote integration system
Issue‐based – Anywhere RN for remote issue and return requests. Administrations are not explicitly documented. (Requires a license.)
Auto‐Commit
The Auto‐commit function is used to “convert” the intended amount of a dose to the administered amount. That is, when an issue is “Auto‐Committed”, the intended amount is considered to be administered and is no longer available to be wasted.
Ask – Request nurse user confirmation before committing
No – Disable feature.
Yes – Enable feature; nurse user confirmation not required
OR CCU Med Surg
21.0 Pharmacy System Administrator Participant Workbook
62
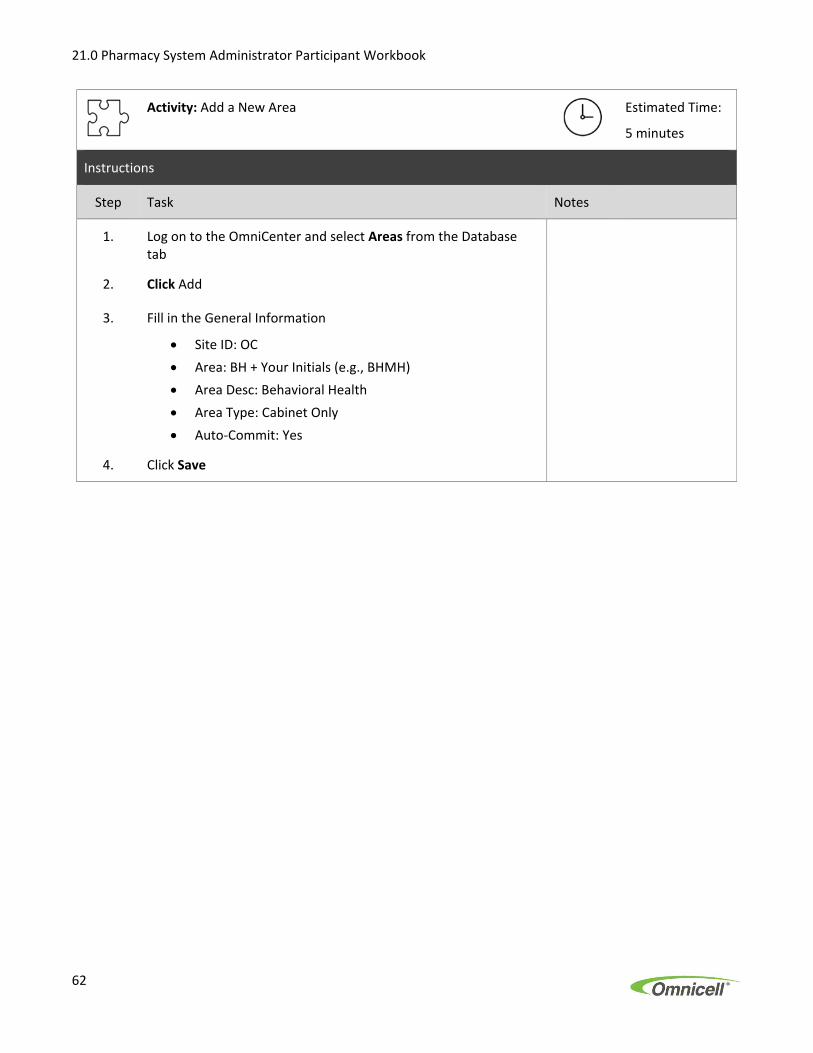
Activity: Add a New Area
Estimated Time:
5 minutes
Instructions
Step Task Notes
1. Log on to the OmniCenter and select Areas from the Database tab
2. Click Add
3. Fill in the General Information
Site ID: OC
Area: BH + Your Initials (e.g., BHMH)
Area Desc: Behavioral Health
Area Type: Cabinet Only
Auto‐Commit: Yes
4. Click Save

21.0 Pharmacy System Administrator Participant Workbook
63
4.4. Copy an OmniSupplier
Copy an OmniSupplier
If your database already contains OmniSuppliers and you wish to add one, it may be easier to use the copy function instead of creating a brand new OmniSupplier.
Omni Type
The Omni Type field shows the type of the OmniSupplier. It defaults to Color Touch System. If you are adding, for example, a CSM cabinet, select it from the drop‐down menu.
Omni Status
The Omni Status field allows you to manually change the communication status for the cabinet.
Up: Enable communication
Down (Not In Use): Prevent communication. This setting can be used if you know that you have a cabinet that will be out‐of service.
Unmonitored/Off‐Line: Temporarily suspend communication. Information will be sent when status is changed to Up
4.5. OmniSupplier Delete
OmniSupplier Delete
The OmniSupplier Delete function allows users to completely delete an OmniSupplier from the database. This will delete current items, routes, etc. and remove the OmniSupplier from multiple tables.
USE EXTREME CAUTION. This will delete the cabinet; however, this will not delete the historical transactions records. Select the correct cabinet. The first cabinet highlighted is the first cabinet alphabetically.

21.0 Pharmacy System Administrator Participant Workbook
64
4.6. Cabinet‐Server Communication
Definitions
IP Address (Internet Protocol Address): A unique numeric address for a computer on a network. This address is supplied by the IT/IS department and is required for communication between computers on a network.
Subnet Mask: A subnet mask splits a network into logical groups and it is assigned to each piece of equipment. This address is issued by the facility IT/IS.
Gateway: A server that decodes the initial IP addresses to determine if it should be allowed into the system
Settings
To check the current IP, subnet mask, and gateway addresses, click the About this Omni button on your cabinet
To change these settings, follow the steps below. Change the IP address when you get to Step 8.
About this Omni

21.0 Pharmacy System Administrator Participant Workbook
65
Activity: Review OmniSupplier Communication
Note: DO NOT change the IP, Subnet or Gateway addresses for your assigned workstations
Estimated Time
15 minutes
Instructions
Step Task Notes
1. Log on to your assigned cabinet as an omnitech
2. From the Admin menus, click Exit to Shell and then click OK to confirm
3. Click Configure Connections
4. Follow the steps below to update the IP address, Subnet Mask, and Default Gateway of your cabinet. Then click OK.
5. Fill in the blanks below:
IP Address: __________________________
Subnet Mask: ________________________
Default Gateway: _____________________
6. Close the window. From the shell, click Start Supplier.
CONTINUED ON THE NEXT PAGE

21.0 Pharmacy System Administrator Participant Workbook
66
Step Task Notes
7. Log on. From the Admin menu, click Configuration Options and then Communications. Verify that the IP Address, Subnet Mask and Default Gateway match the information you found.
8. From the Admin Menu, go to Configuration Options ‐> Omni
Fill in the blanks below:
Omni Area: ________________________
Omni Name: _______________________
Site Name: ________________________
9. Ping the Server to check Communication
1. From the Admin Menu, click Exit to Shell. Click OK. Enter your Omnitech password.
2. Ensure that Just Quit on Exit is selected and click Exit the Shell
3. The Windows desktop opens.
4. Double‐click the Command Prompt icon.
5. Test Communication with the OmniCenter:
• At the Mt View Training Center: Type “ping 10.6.150.228” to the MSMQ Server IP Address
• At the Cranberry Training Center: Type “ping 10.180.150.228” to test communication to the MSMQ Server IP Address
6. Ensure that you receive a reply message showing the communication parameters
7. Close the Command Prompt Window
8. Double‐click the Start OmniCT icon
10. On your cabinet, go to About this Omni. What is the MSMQ
Status (e.g., Processing Up)? _______________________

21.0 Pharmacy System Administrator Participant Workbook
67
4.7. OmniSupplier List Maintenance
OmniSupplier List Maintenance
List maintenance can be used to send or receive quick, selection‐specific data between any OmniSupplier and the OmniCenter; to delete such data on the OmniSupplier, only; and to synchronize all data.
List maintenance can be helpful when data between the server and cabinet do not match. Using list maintenance will synchronize the data on your cabinets and server.
IMPORTANT: Do not use the Get from Cabinet function (to pull information from the OmniSupplier to the OmniCenter server) without support and direction from your Omnicell Project Manager or Omnicell Technical Support Desk representative.
Activity: Send items, patients, and users to your cabinet
Estimated Time
10 minutes
Instructions
Step Task Notes
1. Log on to the OmniCenter. Go to the Administrative tab and set the type to OmniSupplier. Select OmniSupplier List Maintenance and then click Continue.
2. Put a check mark by your assigned OmniSupplier
3. Go to the Basic Actions tab. In the Send to Cabinet list, choose to send Items, Patients, Users, and Med Orders.
4. Check Use Deferred Posting (This allows the continued use of OmniCenter during the data transfer process.)
5. Click Process

21.0 Pharmacy System Administrator Participant Workbook
68
4.8. Cells and Zones
Cells and Zones
A cell is a vertical column in the cabinet. A full‐height cabinet can contain up to three cells. Half‐height and quarter‐height cabinets have only one cell.
A zone is an area of a cabinet used to define user access (such as a pharmacy, supply, or respiratory zone). A full height cell has three zones.
Cell 1 Cell 2 Cell 3
Zone 0: Above the PC/Aux box
PC or Auxiliary Box: Not
Zone 2
Zone 1
Zone 1
Zone 2

21.0 Pharmacy System Administrator Participant Workbook
69
Cabinet 1
Cells and Zones:
Maximum of three cells per cabinet. (Only three fit on an elevator!)
Maximum of 3 zones per cell
Maximum of 9 zones per cabinet
Start with zone zero above the PC box
Examples of Cells and Zones
Cabinet 0
Cabinet 0 Cabinet 2

21.0 Pharmacy System Administrator Participant Workbook
70
Activity: Define Zones
Estimated Time
5 minutes
Instructions
Step Task Notes
1. Fill in the zones below:
Bonus questions:
What is the last zone in Auxiliary 2?
How many physical zones are there in this illustration?

21.0 Pharmacy System Administrator Participant Workbook
71
4.9. Drawers, Shelves, and Bins
Omnicell Drawer Types
Omnicell drawers accommodate many types of medications, including oral solids and liquids, syringes, ampules, vials, IV solutions, and PCA medications. The drawers can be configured within the cabinet in a variety of ways. Follow recommendations by drug classification to configure your drawers and shelves.
For a list of drawer recommendations by control level, please see the Tools section of this workbook.
Metal Locking Lid Drawers
Durable metal locking lids keep medications secure. All drawers include Guiding Lights.
10‐Bin Larger bin fits up to two 60 mL PCA units
18‐Bin Securely stores a variety of items, including prefilled syringes
36‐Bin Securely stores oral solids, vials, and small par level items
27‐Bin Larger bin accommodates prefilled syringes and other larger items.
6‐Bin Double Deep Large locked bin—fits IV bags and other bulky items

21.0 Pharmacy System Administrator Participant Workbook
72
Open Configurable Drawers
Open configurable drawers were designed with greater configurability and brighter Guiding Lights
Single‐Deep Drawer
This drawer provides a low level of security in width configurable open bins. Placing this drawer within a pharmacy zone created in the cabinet can further control access to pharmacy items.
The Single‐Deep Drawer is customer configurable from 1 to 48 bins per drawer.
Double Deep Drawer
This drawer provides a low level of security in width configurable open bins. The shelf provides a low level of security. The drawer is configurable from 1 to 24 bins per drawer.
Shelf Trays
Bulk Shelf Tray
Bulkier items like IVs
‘Mini‐Tray’ for shorter shelf
Can support 150 50ml bags

21.0 Pharmacy System Administrator Participant Workbook
73
Activity: Modify a Matrix Bin (Lit Matrix Drawer)
Estimated Time
20 minutes
Instructions
Step Task Notes
Open configurable bins use a locking feature to prevent dividers from lifting up. These dividers can be locked and unlocked using a coin or a flat head screwdriver.
1. In this example, we are going to make one large bin out of bins 7, 8, 15, and 16.
To do so, delete all items from the bins and remove the contents.
2. Log on to your cabinet with your Omnitech credentials. Go to Inventory menus and click Modify Bin.
CONTINUED ON THE NEXT PAGE

21.0 Pharmacy System Administrator Participant Workbook
74
Step Task Notes
3. Unclip the vertical dividers between the left bins and right bins. You can use a coin to flip up the lock.
Set the dividers aside.
Remove the horizontal dividers between the top bins and the bottom bins to make the larger bin.
If needed, you can breakaway the horizontal dividers to accommodate a larger bin. Be sure to make clean, crisp breaks to ensure a snug fit.
6. The bin corner limits are now 7, 8, 15, 16.
The software will display the Assign Item button. Click Assign Item. Enter the Bin Corner Limit. This will always be the upper right corner of the bin. In this case, it is Bin 16. Enter the Bin Corner Limit.
Then, assign an item to the bin.

21.0 Pharmacy System Administrator Participant Workbook
75
Pharmacy drawers can be easily moved from one location to another within an Omnicell cabinet. The drawers can also be swapped out and replaced if additional drawers are present in the facility.
Activity: Remove/Replace a Drawer in a Pharmacy XT Cabinet Note: This requires a flat head screwdriver, camlock key #8001, and a tool to retrieve the drawer arm (e.g., tape measure)
Estimated Time
20 minutes
Instructions
Step Task Notes
It is recommended that drawer installation be performed by two people. One person to hold and insert the drawer while watching one side rail, the second person helping to guide the drawer and watching the other side rail.
1. Unlock the drawer or engage the override switch for the cabinet allowing you to open the drawer you plan to remove.
2. Use a flat head screwdriver to loosen the screws on both sides of the drawer until they stop turning This allows the front releases to be pulled forward.
Note: When removing a double‐deep drawer you must loosen the slotted screw on the bottom rail and then pull all four of the front releases at the same time.
3. Pull the front releases forward and then pull the drawer away from the cabinet until it stops.

21.0 Pharmacy System Administrator Participant Workbook
76
4. Pull the drawer out until the cable arm cover is exposed.
5. Using the camlock key (8001), unlock the cable cover by rotating key counterclockwise.
6. Remove the cable arm cover by sliding the cover to the right and away from the drawer allowing the hooks to disengage and to expose the cable connector.

21.0 Pharmacy System Administrator Participant Workbook
77
7. Disconnect the drawer cable by pushing the release levers outward, left and right.
8. Pull forward on the rear set of releases and carefully remove the drawer by pulling straight out of the cabinet, keeping level as you pull out to prevent damaging the rails.
9. To install a new drawer on the rail, make sure the ball bearing part of the rail is pulled all the way forward.

21.0 Pharmacy System Administrator Participant Workbook
78
10. Then, push the rails inward.
11. Carefully align the rails of the drawer with the rails of the frame.
12. Push the drawer in slightly and then pull it back out.
13. Slide the rail away from the cabinet.

21.0 Pharmacy System Administrator Participant Workbook
79
14. Use a tape measure or other tool to hook and move the arm forward.
15. Reconnect the drawer cable. Make sure the connector tabs are engaged and securing the cable arm connector to the drawer. If power is on, the green LED will blink.
16. Then make sure the cable arm is clicked in and slid to the left.
Note: If the cable arm is not locked the cable can come loose inside the cabinet.
17. Using the camlock key (8001), lock the cable cover by rotating key clockwise.

21.0 Pharmacy System Administrator Participant Workbook
80
18. Pull the front releases forward.
19. Push the drawer forward part way.
20. Tighten the stop screws on both sides of the drawer. Be sure the front releases are pushed all the way back so the screws can be completely screwed into the drawer.
21. Carefully and slowly push the drawer into the cabinet until it stops. Ensure there drawer slides completely into the cabinet.
22. At the console, log on. (The screen should show a System Message.) Navigate to Admin Menus > Diagnostics > Hardware Changes and confirm the change to add the new drawer.

21.0 Pharmacy System Administrator Participant Workbook
81
4.10. Auto‐Detection
Auto‐Detection ensures that hardware changes to the system are confirmed and saved.
When a hardware change such as removing or adding drawer is made the system displays a red system message alerting the user that a change has been detected—pending hardware changes. The message lists the items that have changed by name and location (zone and component number).
In this example, the system has already detected that hardware changes have occurred.

21.0 Pharmacy System Administrator Participant Workbook
82
4.12. Emergency Access
Only use emergency access when a cabinet experiences a power interruption. Emergency access does not permit the tracking of dispensed medications. Omnicell cabinets are supplied with manual access keys for use during emergencies. It is highly recommended that key access to the interior of all Color Touch cabinets be restricted to trained service personnel according to the facility’s equipment access protocols and procedures
For detailed procedures on emergency access, please see your Color Touch Administration guide. Tip: It is recommended that you label keys according to the purpose of the lock (Flexlock, ERB, One cell cabinet, PC box, etc.)

21.0 Pharmacy System Administrator Participant Workbook
83
4.13. SafetyStock Option
SafetyStock® Bar Code Confirmation is a licensed feature that enables 2D bar code scanning to confirm the identity of a medication or supply at all points of access: restock, selected issues, and returns.
Barcode‐assisted dispensing systems are associated with 93% to 96% reductions in dispensing errors, and 85% reductions in potential adverse drug events in dispensing.*
Adding a SafetyStock License
SafetyStock is a licensed feature.
You can view or modify the
license key in the Database tab >
Global Settings.

21.0 Pharmacy System Administrator Participant Workbook
84
Enable SafetyStock on each OmniSupplier
SafetyStock Configurations
In OmniCenter, go to the Client Configs radio button, select the Items category and set the bin confirmation support parameters for SafetyStock:
Bin Confirmation: Bin confirmation verifies that the medication is being restocked or returned to the correct bin.
Issue Confirmation: Issue confirmation verifies that the medication that was pre‐selected for removal matches the medication that was removed.
Restock Confirmation: Restock confirmation verifies that the medication that is being restocked or returned matches the medications that was pre‐selected for return or restock.
The default confirmation support for SafetyStock is set to “No” for all three types. To change this setup, double click each individual option and change the default value to “Yes.”
Item Setup
In OmniCenter, open the Items table and select an item. Go to the Client Configs radio button, select the Items category and set the bin confirmation support parameters for SafetyStock.
SafetyStock must be enabled for
each OmniSupplier

21.0 Pharmacy System Administrator Participant Workbook
85
Bin Confirmation Labels
SafetyStock uses Bin Confirmation Labels to provide independent confirmation that the location where an item is to be placed is the correct bin location.
Avery Labels are recommended at: 0.5" x 1.75"; white, laser, permanent‐adhesive, 80 labels per 8.5"x11" sheet.
#5167 = 8000 labels per package
#5267 = 2000 per package
Print Bin Confirmation Labels for a Cabinet
The OmniCenter automatically numbers bar codes during the first printing. When bar codes are printed again, the next number in sequence is the first bar code to print. OmniCenter remembers the numbers and tracks the order.
In the OmniCenter, go to Administration > OmniSupplier > Bin Confirmation Labels
* From A safe practice standard for barcode technology. Leung AA, Denham CR, Gandhi TK, et al. J Patient Saf. 2015;11:89‐99.

21.0 Pharmacy System Administrator Participant Workbook
86
Activity: Review SafetyStock Settings on Your Assigned Cabinet
Check SafetyStock configurations on your assigned cabinet
Estimated Time
5 minutes
Instructions
Step Task Notes
1. Log on to OmniCenter and go to the Admin tab
2. Select Color Touch Configurations and click Continue
3. Select your assigned cabinet
4. Set the category to Items
5. List the settings for your assigned cabinet:
SafetyStock Bin Confirmation Support: ______
SafetyStock Issue Confirmation Support: ______
SafetyStock Restock Confirmation Support: ______
6. Return to the Status Screen
7. A pharmacy technician plans to restock an item to a cabinet. Based on your cabinet’s configurations, what will the technician be required to scan? ______________________________________________
8. Bonus: Where else in OmniCenter can you set up SafetyStock configurations for a specific cabinet?
______________________________________________

21.0 Pharmacy System Administrator Participant Workbook
87
4.14. Med Label Printer
Omnicell’s integrated medication label printer allows users to print patient‐specific labels for meds that are removed from their original packaging or that will not be administered immediately (e.g. IVs and inhalers). Label printing is available for all items except supplies, pharmacy‐prepared med orders, and items issued from AWS.
Depending on how the medication is set up in the database, the medication label can print:
Automatically ‐ label prints when users accesses bin, including OmniDispenser and remote item.
On Demand ‐ label prints only when user presses the Print Label button.
On Confirm Issue ‐ label prints only when the user performs a successful bar code scan (with SafetyStock only).
With Bar Code on Label ‐ label prints with a bar code if the user performs a successful bar code scan. If unsuccessful, the label prints without the bar code (SafetyStock).

21.0 Pharmacy System Administrator Participant Workbook
88
Med Label Printer: Items Table Settings
Multi‐use items, such as
Hydrocortisone, are automatically
set to print a label at issue.
Set Calculate Beyond Use date to print date
on the label if it does not exceed expiration
date (this is selected by default if Expiration
tracking is enabled.
You can choose to have a bar code printed
on the label and have users scan the
medication to confirm that the correct med
is being removed (for SafetyStock only).

21.0 Pharmacy System Administrator Participant Workbook
89
4.15. FlexLock
FlexLock offers security for supplies or refrigerated medications. It can be attached to a refrigerator storing thermally sensitive medications or to a supply cabinet. It is then cabled to an Omnicell cabinet. A maximum of two FlexLocks can be attached to one Omnicell cabinet.
The Omnicell FlexLock features:
Decimal point display of temperature to tenths
Default temperature reading interval of 15 minutes
Three calibration process types to choose from: o Ice Point o Traceable o Other
The FlexLock Temperature Report lists a detail or summary report by date/time, Omni Site + ID and lock ID which indicates individual readings (totals for summary) of when the temperature was out of range (low, high, error, or disconnected).

21.0 Pharmacy System Administrator Participant Workbook
90
4.16. Biometric Fingerprint System
Fingerprint Configurations
IMPORTANT: Do not change Fingerprint Configurations without contacting your Omnicell Project Manager. This could result in users being unable to access the system.
Omnicell’s biometric fingerprint system (Touch & Go) enables users to access the cabinet via fingerprint, which helps prevent unauthorized users from gaining access.

21.0 Pharmacy System Administrator Participant Workbook
91
The chart below compares the differences between iden
tification and verification.
Short List?
Yes
No
* Short list: A list of fingerprint users within a defined
window of activity. W
hen
users register their fingerprint, inform
ation is stored in
a m
aster database.
The short list is a subset of these users who have recently logged
onto a specific cabinet.
What is the
system
doing?
The system
is
looking at the
short list to try to
find a m
atch. The
system
must
compare the
user’s biometric
sample to each
sample on the
short list.
After the user
enters a User ID,
the system
brings
up the user’s
stored sam
ple.
The system
tries
to verify that the
biometric
samples match.
Requirem
ents
Req
uires login with
User ID at each
cabinet at beginning
of shift. User scans
fingerprint for each
additional login.
User en
ters ID
and
then
scans
fingerprint.
Type of Comparison
1 to m
any
1 to 1
What kind of
comparison does the
system
perform
?
Iden
tify a user out of
many possible users
Make sure a user is
who they claim
to be
What does
the user
present at
login?
Fingerprint
ONLY
User ID*
+
Fingerprint
Authen
tication
Factor
Single‐factor
Two‐factor
Purpose
Iden
tification
Verification

21.0 Pharmacy System Administrator Participant Workbook
92
Fingerprint Registration
The initial fingerprint enrollment process requires two people—the registrar and the user being enrolled. The purpose of the registrar is to oversee the enrollment of others.
Activity: Enroll Your Fingerprint
Estimated Time
5 minutes
Instructions
Step Task Notes
1. Log on to OmniCenter and open the Users table
2. Find your RN users (RN + Initials) and click Modify
3. Change FP Registrar to Yes
4. Click Save
5. Go to your assigned workstation in the lab. Partner with the instructor or other learner.
6. Log on to the cabinet. From the Main Menu, press User Menus.
7. Press Add User Fingerprint
8. Follow the onscreen instructions to complete registration
9. Once enrollment is complete, press Exit to conclude

21.0 Pharmacy System Administrator Participant Workbook
93
Section Wrap‐up
When You Return to Your Facility:
Is SafetyStock being used fully for restock?
Is the product barcode label scanned (versus a printed label) in order to ensure the highest standard of safety?
Is SafetyStock being used to scan high‐risk items on issue? (Applicable if items are not being scanned into a bedside system)
Are Fingerprint configurations consistent?
Are refrigerated items managed through the use of remote items and/or FlexLocks?
OmniSupplier‐related Reports
Omni/Site: Lists the sites, areas, Omni names, Omni IDs and associated cost centers for one or all OmniSuppliers.
Consumption Cost per Omni:* Provides cost summary with detail per item. This report totals cost for all chargeable items and non‐chargeable items and lists a grand total for supply/or pharmacy consumption cost. Useful to reveal consumption levels per Omni.
Omni Inventory: A catalog of assigned items for one or all OmniSuppliers. Provides par management information for inventory control.
SafetyStock Items: Lists item SafetyStock confirmation settings and bin locations.
SafetyStock Override Report: This patient safety report lists transactions where a SafetyStock bar code confirmation scan was required, but was not done. The report includes the percentage of overridden versus overridable transactions per group (Omni, user ID or item ID).
FlexLock Temperature Report: Lists a detail or summary report by date/time, Omni Site + ID and lock ID which indicates individual readings (totals for summary) of when the temperature was out of range (low, high, error, or disconnected).
Review Questions
1. You see that your OmniSupplier status is Not‐communicating. How would you investigate the issue?
2. Your facility decides to implement two‐factor identification (User ID + fingerprint). Will each cabinet retain a shortlist?
3. Complete the OmniSupplier Review Card exercise.


21.0 Pharmacy System Administrator Participant Workbook
95
5. COLOR TOUCH CONFIGURATIONS
Objectives
1. Locate configurations at the cabinet and within the OmniCenter
2. Manage cabinet behaviors with configurations
3. Use reports to ensure configurations are consistent on most cabinets and follow best practice guidelines
Omnicell cabinets can be configured to support your facility’s best practices and the needs of individual departments.
Around 20 can only
be set directly at
the cabinet
420 Color Touch
Configurations
Around 400
accessible from
the OmniCenter

21.0 Pharmacy System Administrator Participant Workbook
96
5.1. Configuration Definitions
Activity: Run Color Touch Configuration Descriptions Report
Run the Color Touch Configuration report to determine the configuration options for the Screen Saver Time Out
Estimated Time
5 minutes
Instructions
Step Task Notes
1. Log on to OmniCenter and go to the Reports tab
2. Select Color Touch Configuration Descriptions
3. Select Continue
4. Set Omni Config Category = Display and the Order By = Omni Config Name. Then, click Preview.
5. What is the definition for Screen Saver Time Out?
_____________________________________________________
6. What is the default time for Screen Saver Time Out?
________________
7. Then, click the Close button to return to OmniCenter

21.0 Pharmacy System Administrator Participant Workbook
97
5.2. Locating Configurations
Global Configurations in the Admin Tab
To review or modify configurations for a group of cabinets, log on to OmniCenter > Admin tab > Color Touch Configurations > Click Continue > Select Cabinet(s) and choose the Category.
Color Touch Configurations in the OmniSuppliers Table
To review or modify configurations for a single cabinet, open the OmniSuppliers table > Click Modify > Select Client Configs (Specific Workflows) or Shared Configs (Global).

21.0 Pharmacy System Administrator Participant Workbook
98
Color Touch Configurations at the Cabinet (Use to test a new configuration prior to making global changes)
To change configurations at a cabinet > Select the Admin menu > Omni Config >
Choose the Category (e.g., Display) > Select the Configuration Option to change the settings

21.0 Pharmacy System Administrator Participant Workbook
99
Activity: Run the Color Touch Configuration Settings Report
Run the Color Touch Configuration Settings Report and compare some of your Behavioral Health cabinet configurations with best practices
Estimated Time
10 minutes
Instructions
Step Task Notes
1. Log on to OmniCenter
2. Go to the Reports tab > Select the Operational report type
3. Select Color Touch Configuration Settings report > Click Continue
4. Under Omni ID, select your assigned cabinet
5. Set the Omni Config Category to Pharmacy and keep the OmniConfig Option set to include all
6. Set the report to run by Omni Name
7. Click Preview
8. Investigate the settings for these six best practices on your assigned cabinet:
Config Best Practice My Cabinet
Calculate Qty based on Med Order
Yes
Countback/cycle count shows current qty
No
Enable Med Order Verification
Yes (Profiled for profiled cabinets)
Issue by Dose or Qty Recommended By Dose for most cabinets
Med Order Dose Editing
Up to MO
1. Before you make configuration changes, it can be a good idea to print out the current configurations in case you need to undo changes later
2. Print the report to Excel in order to do sorting or to do quick searches

21.0 Pharmacy System Administrator Participant Workbook
100
Section Wrap‐up
When You Return to Your Facility:
Download the Best Practice Configuration Settings for Omnicell Automated Dispensing Cabinets (part # 60‐0342) from myOmnicell
Do your configurations follow best practice settings?
Are your configurations consistent across cabinets in similar environments?
Configurations‐related Reports
Color Touch Configuration Descriptions: Serves as a catalogue of available Color Touch Configurations with filters for Category, and Option
Color Touch Configurations Settings: Provides a way to report on current configuration settings across one or all Color Touch cabinet, including filtering of categories and options
Review Questions
1. Where would you go to assess the impact a configuration has on a cabinet?
2. You want to ensure the configurations on a new cabinet are consistent with other cabinets in the same area. What are two ways you could check this?

21.0 Pharmacy System Administrator Participant Workbook
101
6. PHARMACY WORKFLOWS
Objectives
1. Set witness requirements
2. Set up restock routes
3. Assign and load items to the cabinet and remote locations
4. Handle outdates and recalls
5. Manage drug shortages
6. Conduct cycle counts and manage returns
ISMP Core Process #7 Define Safe ADC Restocking Processes
The restocking process encompasses a number of sub‐processes that can involve both pharmacy and nursing
staff. It is important that the process contain redundancies to ensure that the correct medication is placed in the
correct location within the ADC. In the past, mistakes in drug selection resulting from incorrectly stocked items
have resulted in fatal medication errors. It is also important that the process be defined and organized so staff
involved can only follow the correct pathway and the potential for process variation is limited.
Core Process Course Section
Use bar‐code scanning to confirm that the medication selected for distribution to the ADC matches the medication listed on ADC fill report.
SafetyStock Ideally, use bar‐code scanning to identify the correct drawer and pocket/container and to scan the drug being delivered to promote accurate placement in the designated ADC location. When bar‐code restocking is not available, have a nurse verify the accuracy of restocking for high‐alert medications and narcotics.
Par levels should reflect real‐time notification of low ADC inventory Restock
Establish a process to notify pharmacy when par levels reach low critical levels

21.0 Pharmacy System Administrator Participant Workbook
102
6.1. Pharmacy Workflows
From a pharmacy perspective, there are five primary cabinet workflows:
Assign/Unassign
Normal and Supplemental Restock
Cycle Count
Destock
Outdates

21.0 Pharmacy System Administrator Participant Workbook
103
6.2. Witness Requirements for Pharmacy Workflows
Some pharmacy workflows may require witnesses. Witness requirements are determined based on control level; however, the witness required list can be modified as needed.
To require a witness for pharmacy workflows (cycle count, restock and destock), go to the Database tab > Items table > select an item > Pharmacy radio button > Item Attributes > click Save.

21.0 Pharmacy System Administrator Participant Workbook
104
6.3. Assign/Unassign
Assigns and un‐assigns are limited by the space in the cabinet, interface functionality, decisions about what to house in the cabinets, and prescribing patterns. There should be enough bins so that you are not unassigning and assigning the same medication within 30 days.
Considerations for Emergency Medications/Supplies
Emergency medications and their associated supplies should be readily accessible in patient care areas. These items can be modified by Stock Type (Items table > Restocking > General tab).
Stock Type Description
Standard User may not remove the last item assigned to a bin.
If a standard stock item is assigned to multiple bins, it may be unassigned until there is only one assigned item bin left.
Modify the stock type option to remove it from the inventory. Restricted User may not assign the item to single‐item bin cabinet inventory from
OmniCenter or cabinet.
User may only unassign restricted items.
Modify the stock type option to assign to inventory. Unrestricted No assign or remove restrictions for this item.
May assign or remove item from cabinet inventory at will.

21.0 Pharmacy System Administrator Participant Workbook
105
Activity: Assign Items to an OmniSupplier
Estimated Time
10 minutes
Instructions
Step Task Notes
1. Pick 3 Naproxen from the pharmacy stock.
2. Log on to your assigned cabinet with your Omnitech credentials
3. From the cabinet’s Inventory menu, select Modify Bin
4. Identify a lit matrix drawer (for your Naproxen), and press the green button to unlock the drawer
5. Enter the bin to modify
6. Touch Assign Item
7. Enter a bin limit corner
8. Select Naproxen
9. Enter the Expiration Date
10. Select Bin Level. Enter the number of items you are adding to the location. Then, place the tablets into the bin. Click OK.
11. To complete item assignment, close the drawer.
12. Log off the cabinet by clicking Exit.

21.0 Pharmacy System Administrator Participant Workbook
106
6.4. Restock
Restock
The number of restocks per cabinet will be determined by the difference between the Par and the Restock (Max and Min) level.
• Should be less work than cart‐fill
• Should occur before a “stock‐out”
• Should be done no more than once a day for each cabinet location
• Should average 2 ‐ 4 times per month for non‐controlled medications
Restock Route Maintenance
Route Maintenance is used to create and modify restock routes. Restocking is normally scheduled at specific days/times for all cabinets in an area, or specific cabinets, regardless of location. As needs change, routes may need to be updated.
Pick List: Quantities are aggregated into a sum total for each item.
Restock List: Items and quantities list per cabinet. Cabinets list separately.
Activity: Create a new restock route for your area
Estimated Time
15 minutes
Properties
Step Task Notes
1. Log on with your Omnitech credentials (e.g., rx1, rx2, etc.)
2. On the Administration tab, choose the OmniCenter type.
3. Select Restock Route Maintenance and click Continue
4. Click Add
5. Name the route ( Your Last Name + 1:00 pm) and select the Normal route type
6. Add your assigned workstation to the list
CONTINUED ON THE NEXT PAGE
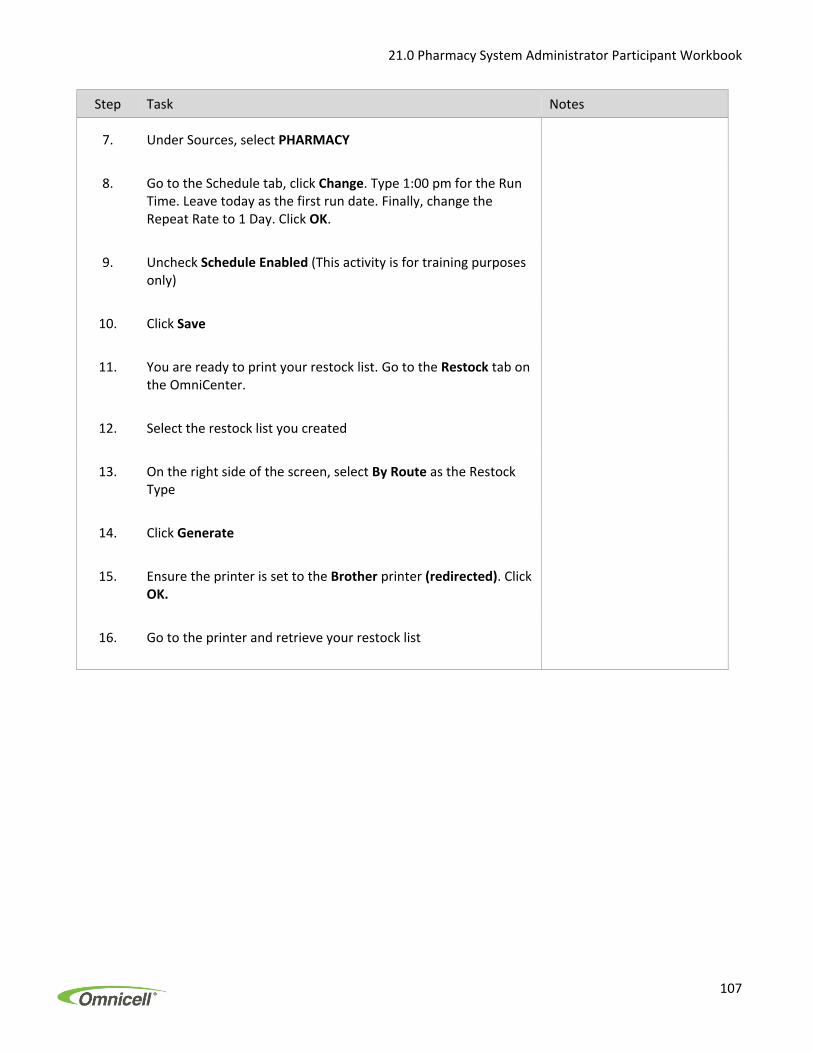
21.0 Pharmacy System Administrator Participant Workbook
107
Step Task Notes
7. Under Sources, select PHARMACY
8. Go to the Schedule tab, click Change. Type 1:00 pm for the Run Time. Leave today as the first run date. Finally, change the Repeat Rate to 1 Day. Click OK.
9. Uncheck Schedule Enabled (This activity is for training purposes only)
10. Click Save
11. You are ready to print your restock list. Go to the Restock tab on the OmniCenter.
12. Select the restock list you created
13. On the right side of the screen, select By Route as the Restock Type
14. Click Generate
15. Ensure the printer is set to the Brother printer (redirected). Click OK.
16. Go to the printer and retrieve your restock list

21.0 Pharmacy System Administrator Participant Workbook
108
Activity: Restock your cabinet Note: In this activity, you will only be restocking Naproxen. Your restock list may show additional items.
Estimated Time
15 minutes
Instructions
Step Task Notes
1. Pick Naproxen from your pharmacy supply
2 Take your printed restock list with you to your assigned cabinet
3. Log on using your Omnitech credentials
4. Press Inventory Menus
5. Press Normal Restock
6. Scan your restock list
7. Follow the flashing lights and press the flashing green button. Open the matrix drawer.
8. Select Naproxen on the screen
9. Scan the item bar code
10. Add items to the bin
11. To complete restock for the item, close the drawer. Then, press Exit to conclude.

21.0 Pharmacy System Administrator Participant Workbook
109
6.5. Prevent Stockouts and Outdates
Stockouts
A well‐managed system should strive for NO stock‐outs. Stock‐outs are caused by the bin level (Quantity On Hand) hitting zero.
To Eliminate Stock‐ Outs:
Look at the average daily use of each medication per nursing unit (Par vs. Usage Report)
Identify how much variation there is in the use of this medication
Carefully set the initial minimum level
The recommended average usage is 2‐days’ supply for setting the minimum
Control and Correct Stock‐outs:
The Omnicell System Administrator should incrementally increase the MIN/MAX level for this drug, according to the Hospital's philosophy (if your ratio is 1:4, increase the MIN by 1 and MAX by 4). These adjustments will eliminate almost all stock‐outs after ~ 60 days.
Regularly monitor the Par v. Usage Report, which will indicate the number of times an item has hit Critical Low and Stock‐Out.
It is important to note that stock‐outs and blind stock‐outs are managed differently from a pharmacy perspective, even though they may seem like the same thing to nursing.
You can set up Automatic Stock‐Out Restock configuration in the Items table under the Restocking tab.
Additionally, you can set up a custom message to notify pharmacy when an item is stocked out. Go to the Admin tab > Message Filter Setup > Add > General tab ‐> Name the message (e.g., Item Out of Stock) and enable it > Customer message tab = "Item <item> [ina] is out of stock in cabinet <osi>!" > Click Save

21.0 Pharmacy System Administrator Participant Workbook
110
Outdates
Some strategies employed to reduce the chance of having outdated medications in the cabinets include:
Use the “Inventory Aging Report” regularly. This will assist in continually removing slow‐moving and non‐used items, and reduce the amount of time needed to perform periodic review of the meds at each nurse unit. It will also reduce costs by not stocking meds that are not needed by that unit.
Minimize the items that must be unit‐dosed by the Pharmacy. If unit‐dose items are available from a non‐bid manufacturer, the extended dating is usually worth the extra cost. If you must unit‐dose items in‐house, use a different color label for each month of expiration. It is very easy to open a matrix drawer and pull pending outdates for these drugs by the color.
Have your purchasing agent carefully check the length of dating when medications arrive in the pharmacy. If dating is too short for the items on bid discuss this with your wholesaler or move to a slightly more expensive “off bid” equivalent with a longer shelf life.
Manage with “Expiration Tracking” turned on for all meds. This can be time consuming for technicians to refill because they must look at outdates for every med they touch. However, this reduces or eliminates the monthly inspection of all meds at each unit for outdates. It will require nurses to check outdates on returning unused meds to a bin.
Turn Expiration Tracking on for all standard stocked Meds, and any meds commonly pre‐packaged in Pharmacy. These meds are usually only given 6 months dating from the time of packing and causes the majority of outdate trouble. If all these are tracked via the “Inventory Aging” report, and they eliminate meds not used in 60 days, then this should take care of most outdates.
Run the OmniCenter “housekeeping” reports to identify slow moving and outdated items. Using the Inventory Aging or Stocked Items without Active Med Orders reports and removing any medication that has not been used in two to three months will help reduce the chance of outdates. For those infrequently used standard stocked items you want left in the OmniRx, this report will tell which items have the biggest chance of outdating.
Train staff members to rotate stock during the refills. Set minimum stock levels of a 2‐day supply to make this easier for the technician. If you reduce the number of refills that must be performed each day by 50‐75%, the small increase in time required to rotate stock will not be noticed.
Check each machine on a rotating basis (this ties in with the Joint Commission requirement that “periodic unit inspections” be done). Many hospitals incorporate numerous things into this inspection such as, cleanliness of machine, correct counts, and correct med/correct bin. These inspections are done many different ways:
To keep the best utilization, it is recommended to:
Put cabinets on a schedule that allows for review of inventory at least once every 90 days
Make sure the max/min is set appropriately
Are cabinets getting two to three restocks/month on all items?
What items can be unassigned from the cabinets?
Meds not used in 60‐90 days should be removed if they are not standard stocked drugs
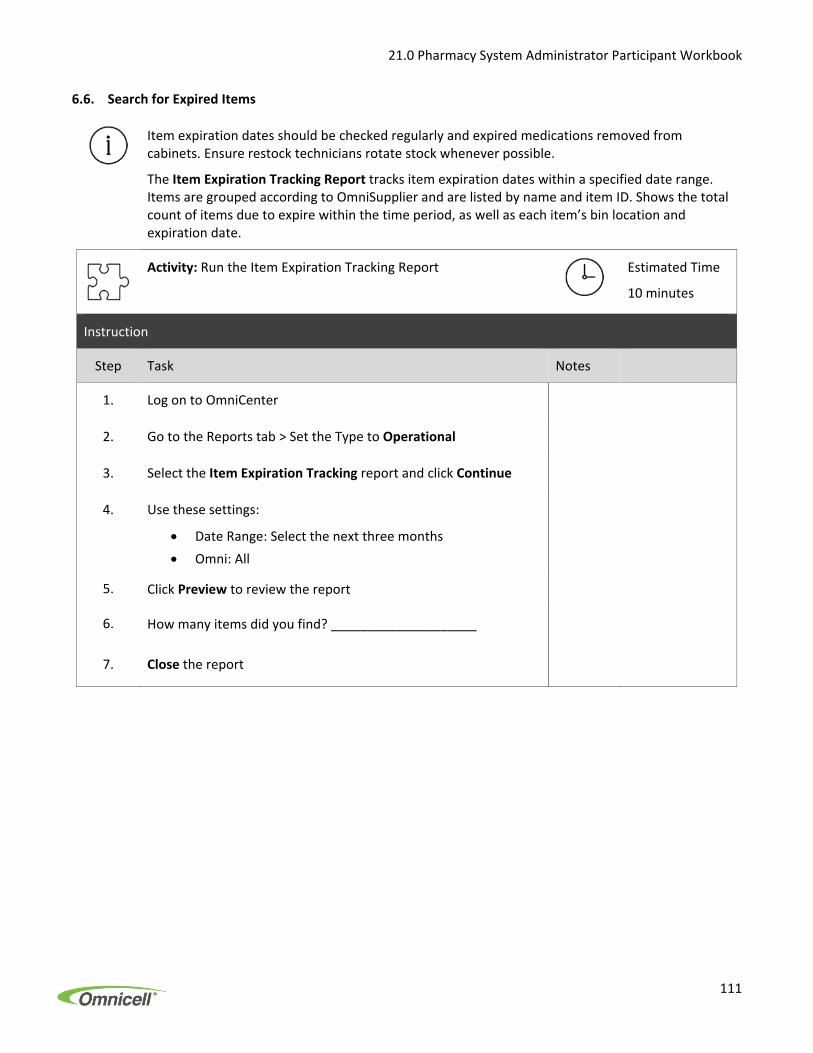
21.0 Pharmacy System Administrator Participant Workbook
111
6.6. Search for Expired Items
Item expiration dates should be checked regularly and expired medications removed from cabinets. Ensure restock technicians rotate stock whenever possible.
The Item Expiration Tracking Report tracks item expiration dates within a specified date range. Items are grouped according to OmniSupplier and are listed by name and item ID. Shows the total count of items due to expire within the time period, as well as each item’s bin location and expiration date.
Activity: Run the Item Expiration Tracking Report
Estimated Time
10 minutes
Instruction
Step Task Notes
1. Log on to OmniCenter
2. Go to the Reports tab > Set the Type to Operational
3. Select the Item Expiration Tracking report and click Continue
4. Use these settings:
Date Range: Select the next three months
Omni: All
5. Click Preview to review the report
6. How many items did you find? ____________________
7. Close the report

21.0 Pharmacy System Administrator Participant Workbook
112
An open cycle count is used to count all of the items in a particular drawer.
Note: Guided Cycle Count is covered in nursing workflows.
Activity: Cycle count a drawer in a cabinet
Estimated Time
5 minutes
Instructions
Step Task Notes
1. Log on to your assigned workstation as Pharmacist A
2. From the Inventory menu, select Cycle Count
3. Press the button on the front of the matrix drawer (Drawer 2)
4. You will be counting bins 21‐24. Start by entering 21 as the bin to count. Then click OK.
5. Count the items in the bin and enter the count. Then click OK. Repeat these steps for bins 22‐24.
6. After counting each bin, close the drawer. Then, click Exit to conclude.

21.0 Pharmacy System Administrator Participant Workbook
113
Section Wrap‐up
When You Return to Your Facility:
Are emergency medications and their associated supplies readily accessible in cabinets? (Use of standard stock configuration)
Has the facility set up email or pager notifications when items are at critical low or stocked out?
Have cabinets been audited for expired items? Is there a process in place for routine auditing of expired items?
Are re‐order and critical low sources set up correctly to ensure proper ordering?
Are return bins being cleared on a regular basis?
Pharmacy Workflow Reports
Omni Inventory: This is a catalog of assigned items, in alphabetical order, for one or all cabinets. It provides par management information for inventory control
Active Medication Orders without Stocked Items Report: Lists active medication order items not stocked in the associated patient’s area to assist in identifying items that need to be stocked in an area to fill an active medication order.
Restock Audit Report: Identifies incomplete or partially completed restocks and to identify restock discrepancies.
Restock‐Destock Matching Report: This security report matches destocks (the removal of items) from one cabinet with restocks at another. Users can filter by item, user, and item control level.
Item Expiration Tracking Report: Useful in determining when date‐sensitive items need attention, this report displays item expiration date information for a user‐defined date range. Filter options include area/Omni, item, and control level.
Review Questions
1. What is one strategy for using your Omnicell system to manage a drug shortage?
2. How would you prevent an item from being assigned to a cabinet?

21.0 Pharmacy System Administrator Participant Workbook
115
7. NURSING WORKFLOWS
Objectives
1. Use configurations to set up nursing workflows
2. Set a cabinet to profiled mode
3. Set witness requirements
4. Manage overrides
5. Build kits that consist of pharmacy and supply items
6. Use dispensing alerts during the issue, return, or waste of a medication
Tools
Override Grid (See Tools Section)
Core Process #8 Develop Procedures to Ensure the Accurate Withdrawal of Medications from the ADC
Processes must be developed that reduce the risk or mitigate the harm associated with the administration of the
wrong medication, dose, route, or frequency due to retrieval errors of medications from the ADC. The contents
(variety, concentrations, and volume) and configuration of the ADC play a large role in the practitioner’s ability
to safely select and remove medications from the ADC.
Core Process #9 Establish Criteria for ADC System Overrides
Use of ADC overrides should be situationally dependent, and not based merely on a medication or a list of
medications. While there may be a list of drugs with the potential to be obtained emergently, there may be
many other situations when there is sufficient time for the pharmacist to review the medication prior to
retrieving the dose. Criteria for system overrides should be established that allow emergency access in
circumstances in which waiting for a pharmacist to review the order before accessing the medication could
adversely impact the patient’s condition.
Core Process Course Section
Configure all ADCs in the inpatient units (and ideally outpatient areas) to dispense in a pharmacy‐profiled mode, which only allows medication retrieval after orders have been verified by a pharmacist. Do not allow users to select medications using the inventory or unit stock mode, unless in an emergency.
Profiling

21.0 Pharmacy System Administrator Participant Workbook
116
Core Process Course Section
Requiring documentation of override rationale.
Overrides Routinely reviewing override reports to identify and address barriers to the pharmacist’s review of the medication order prior to drug administration.
Document narcotic medication waste and record this waste with an independent witness.
Witness Requirements
Configure the ADC to require a blind count of the remaining product for the removal of narcotics or controlled substances from multi‐dose bins.
Countback

21.0 Pharmacy System Administrator Participant Workbook
117
7.1. Cabinet Set Up for Nursing Workflows
A cabinet’s configuration must be aligned with the nursing workflows in particular areas/units of a facility.
Please keep in mind these specific settings, features and configurations:
Type Location(s)
Witness Requirements Items Table
Patient Medication Profiling Configuration Options: Pharmacy
Patient Medication Accounts Items Table: Reconcile Dose (Track PMA)
Areas Table: Auto‐commit
Overrides Users Table
Items Table
Kits Kits Table
Cycle Count Requirements Configuration Options: Misc
Dispensing Alerts Dispensing Alerts Table
Scheduled Meds (Licensed Feature) Lic. Feature
Configurations: Pharmacy

21.0 Pharmacy System Administrator Participant Workbook
118
7.2. Tabs for Removing Items
The Display Items to Remove tab shows a list of items selected for a specific patient.
The Active Med Orders tab displays a list of “profiled” (medication orders entered by pharmacy) or patient‐specific medications.
The Scheduled Meds tab displays a filtered list of patient‐specific medications due to be administered. Your facility may or may not be set up with this option. Because PRN (“as needed”), STAT (“now”) are not able to be scheduled, they do not display in this list.
The Stocked Items tab displays a list of all items in the cabinet. This list is not patient specific and can contain more than 500 items. Use this feature when you cannot locate an item in the Scheduled Items or Active Med Orders tab.
The Inactive Med Orders list shows orders that are currently inactive, on hold, that have not yet started, or those that are discontinued.
The PRN Only tab displays a filtered list of pro re nata (as needed) med orders only. These PRN med orders will remain displayed on the Active Med Orders tab as well.

21.0 Pharmacy System Administrator Participant Workbook
119
7.3. Patient Medication Profiling
If enabled at the cabinet, Patient Medication Profiling allows the healthcare provider to see a pharmacy‐verified medication order at the cabinet. It ensures that a Pharmacist has reviewed and approved a patient medication order before a medication is administered to a patient. Hospital policy, medication frequency, and pre‐defined time windows are used to automatically calculate when a medication is due.
Profiling Options:
Non‐profiled: Nurse can pull anything, no overrides needed
Profiled but not restricted: Profile is shown but nurse can still select All Stocked Meds and remove anything without override
Fully Profiled: Nurse sees profiles and is limited to pulling out those items or overriding anything not on profile (based on individual item restrictions)
The Active Med Orders tab displays a list of medication orders for the patient that have been reviewed and approved by a pharmacist.

21.0 Pharmacy System Administrator Participant Workbook
120
Activity: Profiled Cabinets
Determine whether your cabinet is fully profiled
Estimated Time
5 minutes
Instructions
Step Task Notes
1. Log on to cabinet using your Omnitech ID (OT + Your initials)
2. From the Admin Menus, select OmniConfig
3. Select Pharmacy and the select Med Order Support Mode
4. What is the current value? ___________________
5. Go back to Pharmacy Configurations and select Enable Med Order Verification
What is the current value? __________________
6. Given these settings, which of the following describes your cabinet:
Non‐profiled ___
Profiled but not restricted ____
Fully Profiled ____

21.0 Pharmacy System Administrator Participant Workbook
121
7.4. Scheduled Meds
Scheduled Meds is an Omnicell feature that allows a nurse to pick from a list of due medications.
Once a medication is removed, it no longer appears on the “due” list. (User must exit and log in again to see this screen.)
If a medicine is not given to a patient and returned to the cabinet via RETURN MEDS, it will reappear on the due list
No wasted medicines re‐appear on the list
Items that do not appear as Scheduled Meds:
PRN (as needed) medicines and STAT (now) medicines
Multi‐use items (inhalers, creams, lotions, etc.)
Frequency Table
The Frequency table drives the timeline for when the med orders show up on the cabinet. Examples of frequencies: BID (twice a day), Q6H (every 6 hours), and QOD (every other day).
The benefit of a Frequency table is that it provides a dose‐specific window. For example, when using SinglePointe, Omnicell’s patient‐specific solution, a patient might have a medication that is not stocked in the cabinet. When pharmacy prepares to send a 3‐day supply, the frequency table is used to calculate the number of doses needed during the 3 days.
Frequencies provided at install or upgrade list the area as DEFAULT. DEFAULT‐area frequencies are available globally. A user‐defined frequency may also be DEFAULT or area‐specific.
Early / Late Window = Lead / Lag Time
Setting is applied to all medication orders if frequency is known to OC database
Early/Late Window: The number of minutes before or after the frequency due time in which, an order becomes available to the clinician on the scheduled meds list and can be dispensed
Frequency: The dosing interval of how often a medication is to be administered. Medication order frequencies are written as short codes and times for these frequencies can be hospital and nursing unit specific. Hospital sites will define frequency times within the OmniCenter. Examples of frequencies: BID (twice a day), Q6H (every 6 hours), and QOD (every other day).

21.0 Pharmacy System Administrator Participant Workbook
122
Scheduled Meds Tips
What if the medication I need is not listed on the Scheduled Meds list? The nurse can still remove any medication from the Active Med Orders list.
What does an empty list mean? All doses that are scheduled for that time frame have been removed. If a medication is needed, then select the Active Med Orders list.
What does the message “Unable to Load Scheduled Meds” mean? This message could appear if there are network problems or the Omnicell server is not responding. Go to Active Meds Orders Tab to remove your medications.
What does the message “Loading Scheduled Meds” mean? This message could appear if there are network delays or a delay in responding from the Omnicell server. If the medications do not appear within 2 or 3 seconds, you should select the Active Med Orders Tab to obtain your medications.

21.0 Pharmacy System Administrator Participant Workbook
123
7.5. Patient Medication Accounts
A Patient Medication Account (PMA) is a user, patient and item specific account that is created when the user issues a medication to a patient. The PMA is created in the user’s name and indicates the amount of medication removed for that patient. Once again, PMA is supported system‐wide. This means that user can issue, waste and return medication at any cabinet.
Benefits of PMAs
Benefit: Site‐wide tracking of narcotics
Example: A PCA (patient controlled analgesia) is issued at a cabinet in the PACU. The patient is transferred to ICU and discharged three days later. The ICU nurse connects the PCA waste to the original issue in the PACU.
Benefit: Linking multiple transactions to a single issue
Example: A GI Lab nurse removes 6 mg Versed (3 vials of 2mg) for a patient. The nurse needs to do the following:
Administer: 3mg
Waste: 1mg
Return: 2mg

21.0 Pharmacy System Administrator Participant Workbook
124
Closing the Loop
When a nurse issues an item for a patient, she creates a patient medication account (PMA). If the item is enabled for dose reconciliation at the OmniCenter, she is responsible for reconciling this PMA by documenting what happened with that item.
The nurse can:
Indicate on screen how much of the medication was actually administered to the patient.
Return the medication back to the cabinet.
Document a waste amount.
Reconciling PMAs
All medications are tracked system‐wide, which means that any medication can be issued, returned and wasted from any cabinet. However, not all the medications will require dose reconciliation. Typically, only controlled substances (e.g. Morphine, Fentanyl) will require users to reconcile outstanding amounts. These items must be set as reconcile dose items in the OmniCenter. Lower‐security medications will not be set as dose reconcile items. Facilities must decide which items require dose reconciliation and which do not.
For reconcile dose items users are required to enter more detailed information than for the non‐reconcile dose items. The user is responsible for all outstanding amounts of reconcile dose items.

21.0 Pharmacy System Administrator Participant Workbook
125
Closing PMAs
Patient Medication Accounts can be closed automatically to prevent a cluttered list from being shown to the user. When an account is closed the user can no longer document a waste or return against that account at the cabinet. However, the medication is still available on the OmniCenter Dose Reconciliation screen.
Rules for the automatic PMA closure
Undocumented amount is 0 Intended doses are not considered
documentation, only the entry of
actual administration amounts
Unreconciled Multi‐Day
Admin items
close 96 hours (4 days)
after the last account
activity
Configurable at OC
Administration tab > General System
Settings > Accounts tab > Hours
before aging Multi‐day accounts
Unreconciled Dose items close 72 hours (3 days)
after the last account
activity
Configurable at OC
Administration tab > General System
Settings > Accounts tab > Hours
before aging Unreconciled Dose
accounts
End of Shift Accounts close 12 hours after the
last account activity
Configurable at OC
Administration tab > General System
Settings > Accounts tab > Hours
before aging End of Shift accounts
PMA Tips
It is the user’s responsibility to reconcile the outstanding amount for all reconcile dose items.
Users can have multiple PMAs open for single or multiple patients.
A user can waste and return against another user’s PMA, but can only issue to his/her own.
Once a PMA for a specific patient is closed and a user issues the same item to the same patient again, a new PMA will be generated.

21.0 Pharmacy System Administrator Participant Workbook
126
Auto‐Commit
The perception of nursing is that when the intended dose matches the administered amount, no further action is required by the nurse. However, until the system is explicitly told by the nurse that the whole dose was administered, the cabinet keeps the account open for further corrections.
To keep nursing from needing to explicitly close all of these accounts, the system can consider the intended dose to be administered. Auto‐commit function is to “convert” the intended amount of a dose to the administered amount. That is, when an issue is “Auto‐Committed”, the intended amount is considered to be administered and is no longer available to be wasted.
Example of Auto‐Commit: During a shift, a nurse issues a medication 4 times. At the end of the shift, the nurse needs to account for the PMA.
Issue Intended Dose/Waste Actual
4mg vial 3mg/Waste 1mg at time of issue Completed
4mg vial 3mg/Waste 1mg at time of issue Completed
4mg vial 3mg/Forgets to waste at time of issue Open
4mg vial 3mg/Waste 1mg at time of issue Pending
Dose 3 (not completed by RN) = 4 mg
+
Dose 4 (not auto‐committed because of end of shift) = 3 mg
_____________________
Outstanding amount: 7 mg

21.0 Pharmacy System Administrator Participant Workbook
127
7.7. Overrides
Overrides bypass the pharmacist’s review of a medication order to obtain a medication from the cabinet when assessment of the patient indicates that a delay in therapy (to wait for a pharmacist’s review of the order) would harm the patient.
Overrides are managed in the Items and Users table.
Activity: Medication Override Chart (See Tools)
You are reviewing override access for some of your nurses. Use your Medication Override Chart to complete the following activity.
Estimated Time:
5 minutes
Override Scenarios
User User Item Issue?
Nurse 1 Override: Yes Med Order Required: Yes
Nurse 1 Override: Yes Med Order Required: No
Nurse 1 Override: Yes Med Order Required: Override
Nurse 2 Override: All Med Order Required: Yes
Bonus: If you finish early, go in to the OmniCenter and check the override privileges of your nurse user. What are her override privileges set to?
If your nurse was issuing an item with Med Order Required set to No, what would happen when your nurse user attempted an override?
2
1
Users
Managed Users
Items
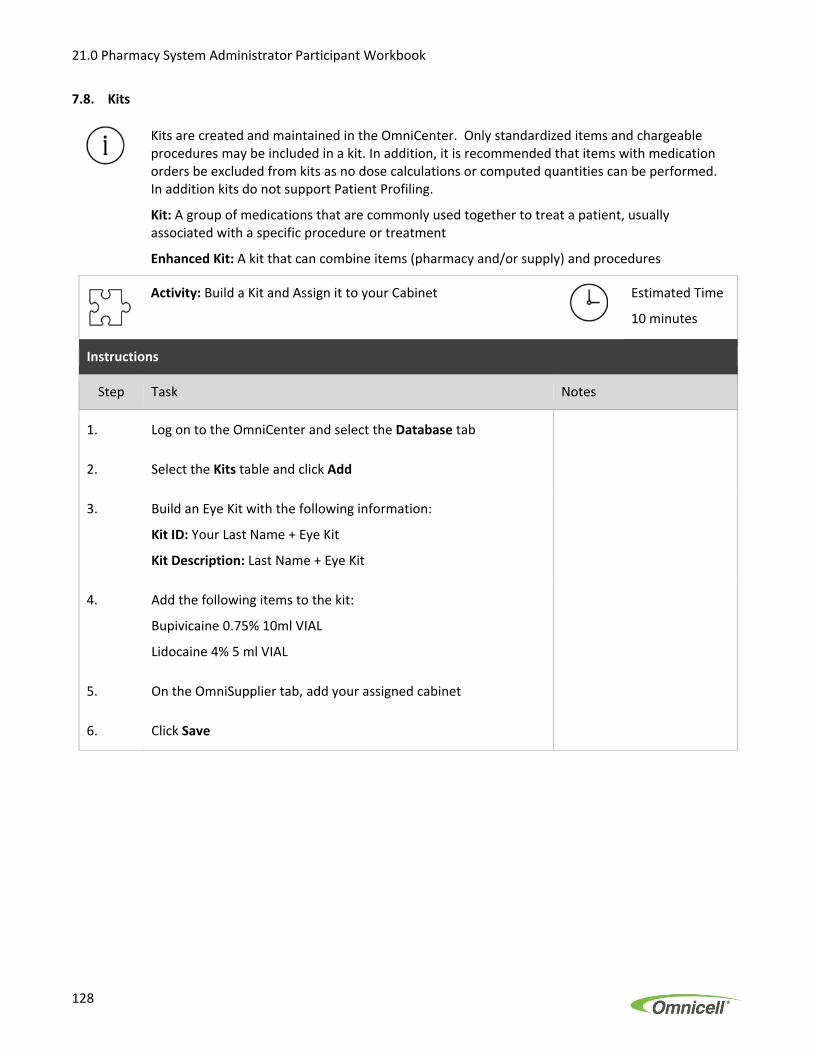
21.0 Pharmacy System Administrator Participant Workbook
128
7.8. Kits
Kits are created and maintained in the OmniCenter. Only standardized items and chargeable procedures may be included in a kit. In addition, it is recommended that items with medication orders be excluded from kits as no dose calculations or computed quantities can be performed. In addition kits do not support Patient Profiling.
Kit: A group of medications that are commonly used together to treat a patient, usually associated with a specific procedure or treatment
Enhanced Kit: A kit that can combine items (pharmacy and/or supply) and procedures
Activity: Build a Kit and Assign it to your Cabinet
Estimated Time
10 minutes
Instructions
Step Task Notes
1. Log on to the OmniCenter and select the Database tab
2. Select the Kits table and click Add
3. Build an Eye Kit with the following information:
Kit ID: Your Last Name + Eye Kit
Kit Description: Last Name + Eye Kit
4. Add the following items to the kit:
Bupivicaine 0.75% 10ml VIAL
Lidocaine 4% 5 ml VIAL
5. On the OmniSupplier tab, add your assigned cabinet
6. Click Save

21.0 Pharmacy System Administrator Participant Workbook
129
7.9. Dispensing Alerts
Dispensing Alerts are informational messages, notifications, or sets of questions and answers to alert users. Alerts are created on the OmniCenter and are item specific. Cabinets must be enabled to receive them.
Dispensing alerts can be used for the following workflows: Administration, Issue, Response Check, Restock, Return, Supplemental Restock, Waste
Activity: Add a Dispensing Alert for Metformin
Estimated Time
10 minutes
Instructions
Step Task Notes
1. Log on to OmniCenter and select the Database tab
2. Select the Dispensing Alert table
3. Name the dispensing alert ‐ High Alert + Your Initials
4. Set the Transfer type to Issue
4. On the Alert Setup tab, add the following question text: Watch for symptoms of hypoglycemia: nervousness, sweating, intense hunger, trembling, weakness, and palpitations! On the answer type, select None
Click Try It to preview your dispensing alert
5. On Items tab, add the following item:
Metformin 500 mg TAB
6. On the OmniSuppliers tab, add the alert to your assigned OmniSupplier
7. Select Enabled
8. Click Save

21.0 Pharmacy System Administrator Participant Workbook
130
7.10. Discrepancies
When an item is accessed and the quantity in the bin differs from what the system expects it to be, then a discrepancy is created.
Common Reasons for Discrepancies
A user indicates one item to remove on screen but actually removes two
A user removes a remote item without accessing or indicating it in the system
A user closes the drawer without actually removing the item
The count was off during restock or countback
Training Users on Resolving Discrepancies:
When training users on use of cabinets, be sure to introduce best practices for resolving discrepancies (Three Rs):
Remember to resolve discrepancies before the end of shift.
Research the discrepancy through the Resolve Discrepancy menu, the Discrepancy by User report, or by reviewing a Discrepancy receipt
Resolve the discrepancy through the Resolve Discrepancy Menu

21.0 Pharmacy System Administrator Participant Workbook
131
Activity
Waste Partial Dose during Removal/Create a Discrepancy
Estimated Time
10 minutes
Instructions
Step Task Notes
1. Log on to your assigned cabinet using your nurse ID (RN + Your Initials)
2. Select a patient based on your Workstation:
Workstation 1: Vena Aarons
Workstation 2: Shelley Arms
Workstation 3: Randal Beach
Workstation 4: Pernell Blake
Workstation 5: Sheila Crosswhite
Workstation 6: Miriam Damas
Workstation 7: Sonia Morton
Workstation 8: Logan Paci
Workstation 9: Jae West
3. Click Remove Items
4. Click on the Active Meds tab
5. Select Morphine 10mG/1mL 1mL VIAL
6. The intended dose is 8mG. Click OK to confirm the dose amount. Then, confirm that the issue amount exceeds the intended dose by clicking OK.
7. Click Remove Now
8. You will receive a warning that a witness is required to waste a partial dose. Press OK to continue.
9. Follow the guiding lights and open the drawer and the bin
10. You will be asked if the current bin level is correct prior to dispensing. Create a discrepancy by pressing No. Then, enter an incorrect count (for example, 4).
CONTINUED ON THE NEXT PAGE

21.0 Pharmacy System Administrator Participant Workbook
132
Step Task Notes
11. Click OK and remove the item
12. Press Waste Partial Dose. Click OK to confirm the waste amount of 2mG.
13. Use the following nurse ID to witness the waste:
Username: RN
Password: 99
14. Close the bin and the drawer. If a receipt prints for the discrepancy, remove it from the printer.
15. Click Exit
It is recommended that a cycle count be performed when a discrepancy has been discovered. Sometimes by re‐counting the bin, it is determined that the initial countback was done incorrectly.
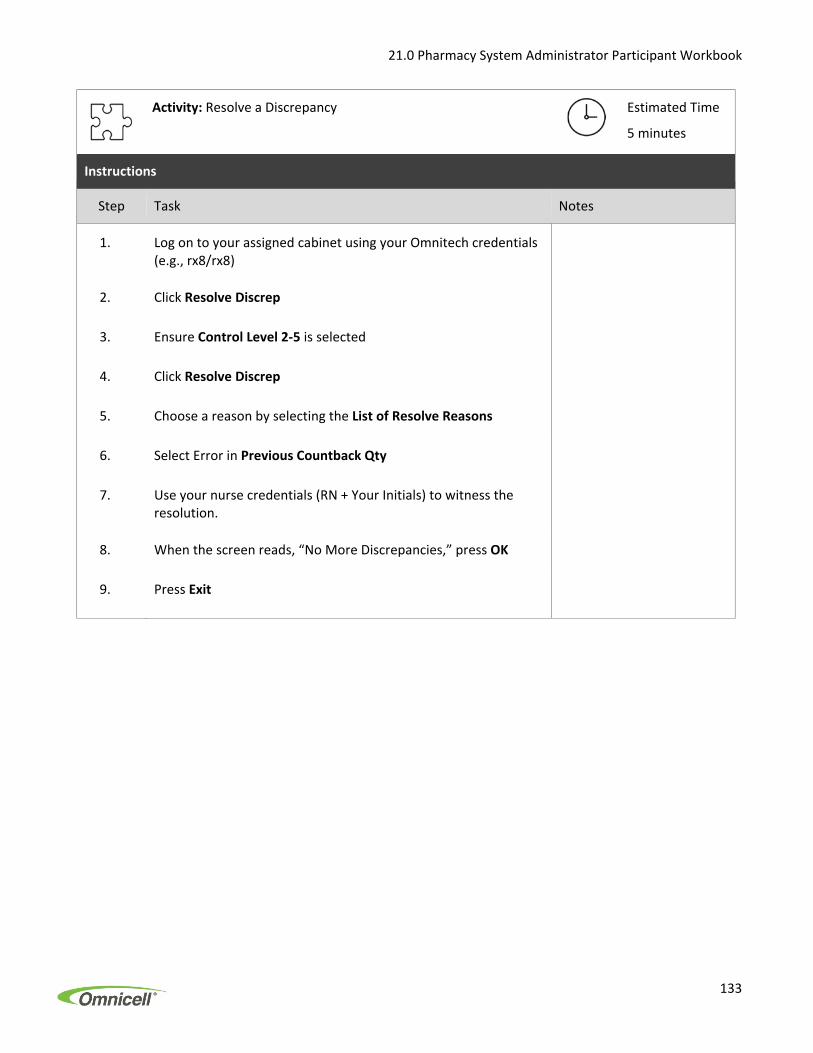
21.0 Pharmacy System Administrator Participant Workbook
133
Activity: Resolve a Discrepancy
Estimated Time
5 minutes
Instructions
Step Task Notes
1. Log on to your assigned cabinet using your Omnitech credentials (e.g., rx8/rx8)
2. Click Resolve Discrep
3. Ensure Control Level 2‐5 is selected
4. Click Resolve Discrep
5. Choose a reason by selecting the List of Resolve Reasons
6. Select Error in Previous Countback Qty
7. Use your nurse credentials (RN + Your Initials) to witness the resolution.
8. When the screen reads, “No More Discrepancies,” press OK
9. Press Exit

21.0 Pharmacy System Administrator Participant Workbook
134
Activity: Issue an Item with a Dispensing Alert
Estimated Time
5minutes
Instructions
Step Task Notes
1. Log on to your assigned cabinet using your nurse ID (RN + Your Initials)
2. Select a patient based on your Workstation:
Workstation 1: Vena Aarons
Workstation 2: Shelley Arms
Workstation 3: Randal Beach
Workstation 4: Pernell Blake
Workstation 5: Sheila Crosswhite
Workstation 6: Miriam Damas
Workstation 7: Sonia Morton
Workstation 8: Logan Paci
Workstation 9: Jae West
3. Click Remove Items
4. Click on the Active Med Orders tab
5. Select Metformin XR 500mG TAB.
6. Click OK. Then, click Remove Now.
7. Your dispensing alert should appear. Click OK to acknowledge the alert. Then, click OK.
8. Click Remove Now
9. After retrieving your item, shut the drawer. Then click Exit.

21.0 Pharmacy System Administrator Participant Workbook
135
7.11. Guided Cycle Count
An Open Cycle Count is used to count all of the items in a particular drawer.
A Guided Cycle Count is managed by three configurations in the Misc Configuration Options:
Cycle Count Pause Age‐Off (In Hours): Paused cycle count is deleted automatically, if it is not completed within the ‘age‐off’ hours
Cycle Count: All Bins Touched after Restart: All bins may be considered ‘touched’ if a cabinet is restarted. This includes midnight processing and upgrades.
Cycle Count: Preferred Option: This option determines the default cycle count workflow.
Guided Cycle Count Tips
Users can select between open and guided cycle count.
Users can pause guided cycle count by pressing the Exit button. Uncounted list is saved for the user to be resumed. When the user logs in later, the Resume Count button is available.
Run the Cycle Count Non‐Compliance Report to view all items that have not been counted within a specified number of days. Items can be cycle counted using either open or guided workflow.
Activity: Cycle Count a Drawer using Guided Cycle Count
Estimated Time
5 minutes
Instructions
Step Task Notes
1. Log on to your assigned workstation using your Nurse ID (RN + Your Initials)
2. From the Inventory menu, select Cycle Count
3. Select items for cycle count (Choose Touched and Control Levels 2‐4) and press Count Now
4. Open the flashing door or drawer
5. Select the bin
6. Enter witness credentials if necessary
7. Count the items in the bin and enter the amount
8. Continue to the next bin
9. After counting two bins, click the Exit button to conclude the exercise

21.0 Pharmacy System Administrator Participant Workbook
136
Section Wrap‐up
When You Return to Your Facility
When appropriate, is Patient Medication Profiling turned on for improved patient safety?
Is Auto‐commit set to “yes” in the Areas table to allow documentation of a full dose given of a reconcile dose medication?
Is the Frequency table accurate and updated?
Are dispensing alerts used to monitor high‐risk medications, look‐alike‐sound‐alike medications and adverse reaction identification? Dispensing Alerts are used to monitor high‐risk medications, look‐alike‐sound‐alike medications. Refer to www.ismp.org for a list of high‐risk and look‐alike‐sound‐alike medications.
Are Enhanced Kits in use? Enhanced Kits can be used to facilitate easy access to items that are frequently used together in procedural areas (e.g. GI cocktail or RSI kit).
Nursing Workflow‐related Reports
Med Order Override Report: Lists transactions for items dispensed using the medication override feature, helping the pharmacy identify medications that have been issued without a medication order.
Enhanced Kit Report: Lists all enhanced kits. A detail option displays all items and chargeable procedures assigned to a kit. This report may be helpful in managing kit contents.
Dispensing Alert Maintenance Report: This patient safety report lists dispensing alerts and shows the decision tree, cabinets, items, users, and notifications for each alert.
Cycle Count Noncompliance Report: This report lists the cabinet and bin locations that haven't been cycle counted for a particular number of days.
Waste Audit Report: Lists all waste transactions for wastes not put into the return bin.
Review Questions
1. Auto‐commit is turned on for a med‐surg area. A nurse plans to issue a 6 mg vial of morphine. She enters the intended dose of 6 mg. Will she be asked to auto‐commit this amount?
2. What is an Enhanced Kit?
21.0 Pharmacy System Administrator Participant Workbook
137
8. SYSTEM ADMINISTRATOR WORKFLOWS
Objectives
1. Use the OmniCenter for reconciliation tasks
2. Establish PAR levels
3. Run inventory management reports
4. Run compliance and diversion detection reports
Check Reconciliation Functions
A System Administrator is responsible for ensuring daily reconciliation tasks are performed:
Temp. Patient Billing Reconciliation‐ Replace temporary patient records with the actual admitted patient record, including sending billing transactions
Pharmacy Discrepancies Reconciliation‐ Ensure users have reconciled pharmacy discrepancies.
Dose Reconciliation‐ review of medication dispenses to ensure proper documentation
If your facility has Anesthesia Workstation and uses My Items, ensure My Items are being used and documented correctly
If your facility has Anesthesia Workstation and uses PCR, ensure all cases are reconciled

21.0 Pharmacy System Administrator Participant Workbook
138
8.1. Dose Reconciliation
Medications that require the strictest level of accounting where all amounts are required to be reconciled are known as reconcile dose items.
Unreconciled doses are available to reconcile on the cabinet for a certain number of hours. The default setting is 72 hours. After this default time, the unreconciled doses are no longer available on the cabinet and must be reconciled by pharmacy.
To check or adjust the configuration, go to Administration tab > General System Settings > Accounts tab > Hours before aging Unreconciled Dose accounts

21.0 Pharmacy System Administrator Participant Workbook
139
Run the Dose Reconciliation Report:
Daily for unreconciled transactions
Monthly for reconciled transactions
To reconcile outstanding amounts go to Administration tab > Select the Reconciliation type > choose Dose Reconciliation. Select an item and click Reconcile.

21.0 Pharmacy System Administrator Participant Workbook
140
8.3. Discrepancy Resolution
Set the Unresolved Discrepancy Aging configuration at the OmniCenter:
Process
A nurse creates a discrepancy.
The discrepancy is not resolved.
Pharmacy runs the Pharmacy Discrepancy
Report
Pharmacy runs the Transaction
by Item/Procedure
Report to investigate the discrepancy
Pharmacy resolves the discrepancy

21.0 Pharmacy System Administrator Participant Workbook
141
Run the Pharmacy Discrepancy Report regularly to look for unreconciled discrepancies.
Remember, User Name identifies the person who reported the discrepancy not the person who created it.
For each discrepancy, run the Transactions by Item/Procedure Report for that item on the previous day, when the discrepancy was most likely created. On this report, User Name refers to the person who made the transaction. Note the Omni Bin number, and compare both reports to identify the cause of the discrepancy. You may need to follow up with nurses identified in the report and investigate further.

21.0 Pharmacy System Administrator Participant Workbook
142
Go to the Administration tab > Select the Reconcile type > Choose Pharmacy Discrepancy Reconciliation. Select the item and resolution reason. Then, click Reconcile:

21.0 Pharmacy System Administrator Participant Workbook
143
8.4. Temp Patient Billing Reonciliation
Temporary Patient Billing Reconciliation matches temporary patient profiles created at the cabinet with verified patient records received from ADT to process for billing. Temporary patients will appear in the list only after transactions have occurred.
1. Select the Administration tab. Choose Reconciliation from the Type drop‐down. Select Temp Patient Billing Reconciliation. Click Continue.
2. The system attempts to match the temp patients to the active patients based on text only, not on Patient IDs. The system lists unreconciled transaction groups.
3. Select a patient from Active Patients that appears to match a temp patient. Verify transaction information. Click Match to reconcile
4. The matched ID number changes to the Patient ID of the active patient. Pair all temporary patients with active patients. Click Process All when matching is complete.

21.0 Pharmacy System Administrator Participant Workbook
144
Creation of temporary patients requires manual reconciliation later. A cabinet can be configured to require fields in temporary patient that subsequently allow OmniCenter to automatically reconcile those patient transactions. This allows less manual interaction to manage temporary patients and more accurate patient transaction records.

21.0 Pharmacy System Administrator Participant Workbook
145
8.5. Inventory Management
Setting proper par levels reduce the demands on pharmacy by:
Minimizing stock‐outs
Decreasing the costs of carrying inventory
Eliminating the risk of “missing meds”
Avoiding the need for unscheduled refills
Reducing the number of medication expirations
Hospital Inventory $$
• More $ on shelves • Lower labor cost (fewer techs) • Techs don’t replenish as often
Extreme: 1:5 Ratio Overstock and replenish less
frequently
• Less $ on shelves • Higher labor cost (more techs) • Techs replenish often
Extreme: 1:2 Ratio Real‐time stock

21.0 Pharmacy System Administrator Participant Workbook
146
To Set the Max Level
1. Multiply the Min times 4 for the Max. This gets you to a 1:4.
2. Refill meds approximately 4 times a month (1/week).
3. Keep in mind, there can be exceptions to this rule, such as narcotics and expensive medications
Setting Par Levels to Decrease Refills
Min Max Ratio Days Between
Restocks Restocks per
Month
2‐day supply 4‐day supply 1:2 (50%) 2 15
2‐day supply 6‐day supply 1:3 (33%) 4 7‐8
2‐day supply 8‐day supply 1:4 (25%) 6 4‐5
2‐day supply 10‐day supply 1:5 (20%) 8 4
There may be exceptions to the rule. For example, you may choose to stock fewer high cost items or stock more low‐cost items.
Best Practices
Limit the number of strengths of each medication you carry. For example, instead of carrying Lasix 20 mg, 40mg, and 80mg PO, carry only 20 mg and 80mg tabs. This approach allows twenty to thirty more medications to be added per cabinet.
If you elect to reduce the number of medication sizes you carry, make sure that you remove the medication strength from your Pharmacy Information System order entry menu. If you do not, it will continue to be entered and assigned in Omnicell.
Removal of the Formulary Item from the CDM, Pharmacy Information System, and from stock should avoid possible fraud allegations that might result from billing for two Lasix 20 tabs instead of one Lasix 40mg tab if you were to continue to carry Lasix 40mg tabs.
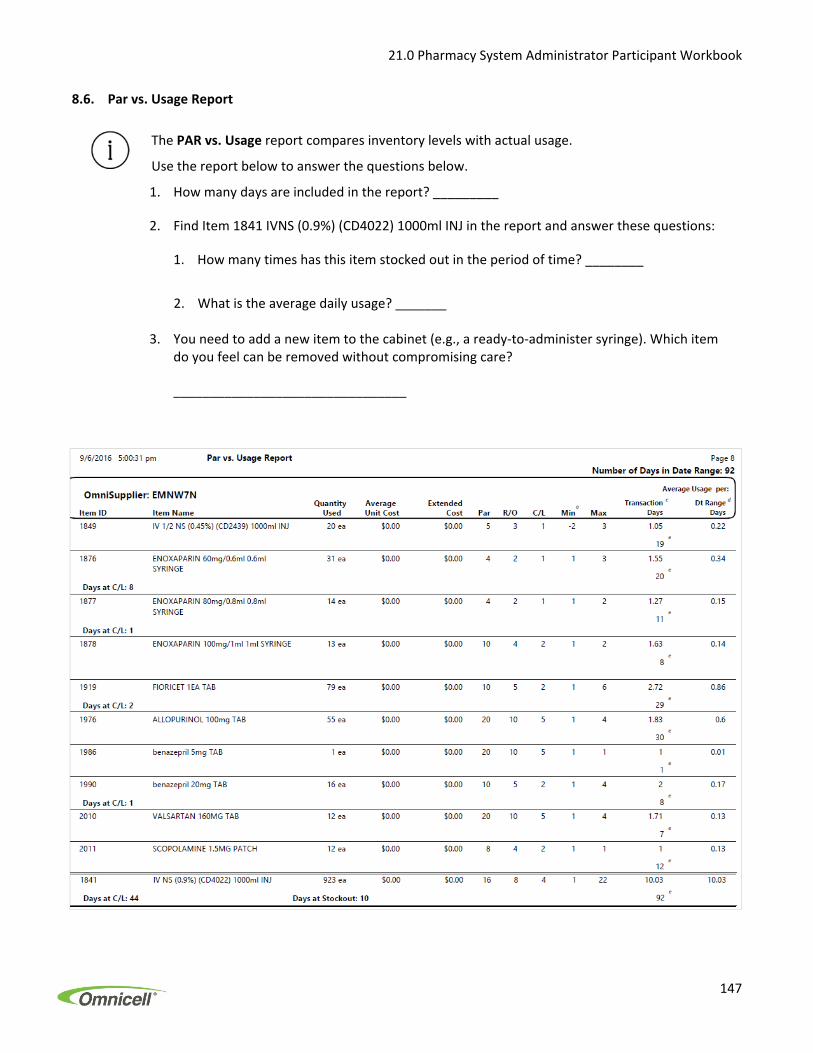
21.0 Pharmacy System Administrator Participant Workbook
147
8.6. Par vs. Usage Report
The PAR vs. Usage report compares inventory levels with actual usage.
Use the report below to answer the questions below.
1. How many days are included in the report? _________
2. Find Item 1841 IVNS (0.9%) (CD4022) 1000ml INJ in the report and answer these questions:
1. How many times has this item stocked out in the period of time? ________
2. What is the average daily usage? _______
3. You need to add a new item to the cabinet (e.g., a ready‐to‐administer syringe). Which item do you feel can be removed without compromising care?
________________________________

21.0 Pharmacy System Administrator Participant Workbook
148
8.7. Inventory Aging
The Inventory Aging report identifies all unused items from a cabinet for the number of days specified and the date and time that the item was last used and totals the number of items that have not been used.
Activity: Run the Inventory Aging Report
Run the Inventory Aging Report to identify slow‐movers and unused items in your assigned cabinet
Estimated Time
15 minutes
Instructions
Step Task Notes
1. After logging into the OmniCenter, click the Reports tab > Set the Type to Financial > Click Continue
2. Set the Days Unused to 90 days
3. Set the Omi ID to your assigned cabinet and include all control levels
4. Click Preview
5. List two items you would recommend removing and explain why.
_____________________________________________________
_____________________________________________________

21.0 Pharmacy System Administrator Participant Workbook
149
8.8. Drug Shortages
The Omnicell system processes restock orders based on quantity needed to meet the expected par level. If a drug shortage occurs, the Omnicell system will continue to request that these items be filled to the cabinet. The restock order in the OmniCenter server is based on route – the source of these medications.
To simplify the management of the drug shortages, create a Drug Shortage route in the system, then initiate a process to eliminate them from restocks.
To add a re‐order source:
1. Open an item.
2. Go to the Restocking radio button.
3. Type in the re‐order source and click Save.
The new re‐order source will be available in the future.
To delete a re‐order source, make sure that it is not selected for any items. This will cause it to fall off the list.
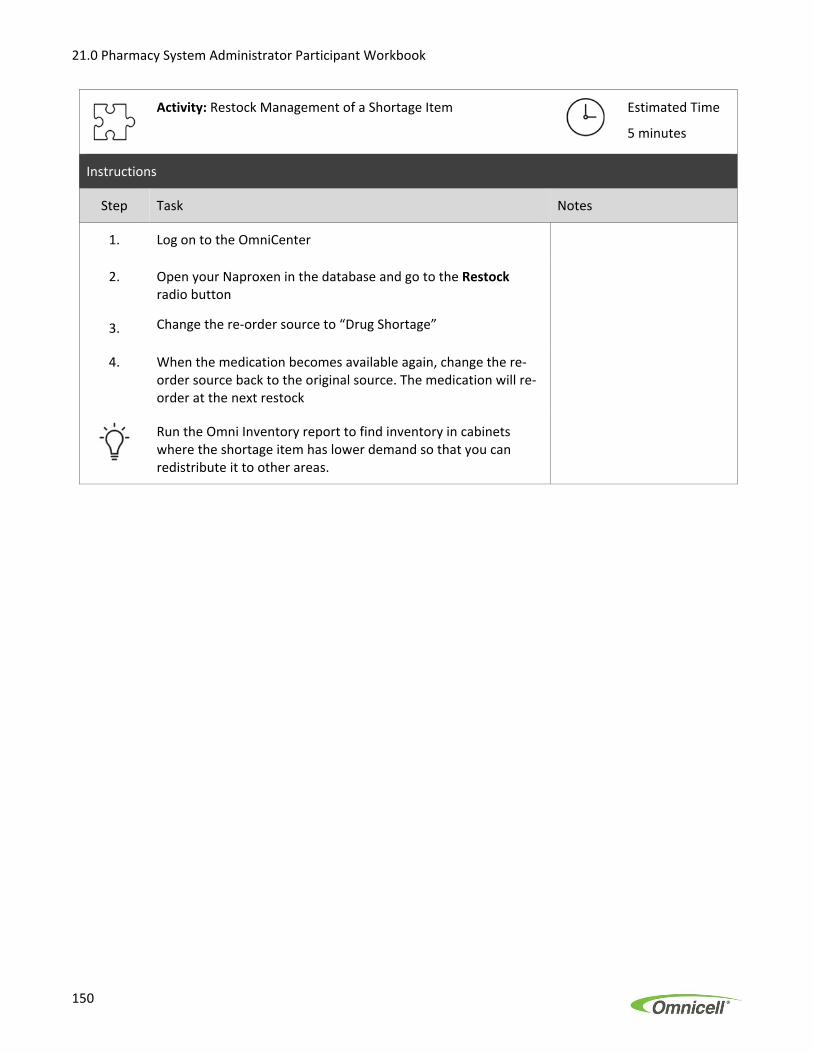
21.0 Pharmacy System Administrator Participant Workbook
150
Activity: Restock Management of a Shortage Item
Estimated Time
5 minutes
Instructions
Step Task Notes
1. Log on to the OmniCenter
2. Open your Naproxen in the database and go to the Restock radio button
3. Change the re‐order source to “Drug Shortage”
4. When the medication becomes available again, change the re‐order source back to the original source. The medication will re‐order at the next restock
Run the Omni Inventory report to find inventory in cabinets where the shortage item has lower demand so that you can redistribute it to other areas.

21.0 Pharmacy System Administrator Participant Workbook
151
8.9. Diversion Monitoring and Compliance
According to National Council of State Boards of Nursing, approximately 15% of healthcare professionals struggle with drug dependence at some point in their careers.
Diversion Behavior and OmniCenter Reports
Potential Diverter Behavior OmniCenter Report Options
Excessive Discrepancies Pharmacy Discrepancy Report
Excessive Dispenses Dispensing Practices
Interrupted Cabinet Access Null Transactions
Undocumented Meds Dose Reconciliation
Overrides Medication Order Overrides
Possible User Collusion User Team
Other Suspected Behavior or Greater Investigation
Specific Criteria Report Transactions by User

21.0 Pharmacy System Administrator Participant Workbook
152
Dispensing Practices Report
Review the average number of doses dispensed per day by users within a specified area. Averages may be compared with other users to reveal irregularities.
Frequency
Weekly based on 30 days activity
Activity
Which user’s dispensing practices should be investigated further? ________________________

21.0 Pharmacy System Administrator Participant Workbook
153
Null Transaction Report
Null transactions are created when a user does not complete a command. The Null Transaction Report helps identify the need to monitor personnel more closely or provide additional training. Look for patterns as opposed to isolated incidents.
Frequency: Daily
Null Transaction Types:
WC= wrong bin opened during cycle count.
OC=bin opened without completing cycle count
BO= failed to scan item barcode during restock
OM=bin opened without completing modify bin
BI= failed to scan item during issue
FE= forced entry
Activity
Which user’s null transactions would you review more closely? __________________________

21.0 Pharmacy System Administrator Participant Workbook
154
Med Overrides Report
Identify items that have been issued or administered without a medication order.
For an item to show up in the report:
MO Required to Disp must be checked for the item
Patient Medication Profiling must be enabled on the OmniSuppliers
An active Pharmacy Profile interface is needed
Frequency: Monthly
Activity
What percentage of medications were overridden during the time period? __________

21.0 Pharmacy System Administrator Participant Workbook
155
User Team Report
Log the occasions when pharmacy transactions required a team, the user and witness who comprise the team, and statistically measure the number of transactions per team.
Best results achieved in mid‐size to large departments.
Frequency: Monthly

21.0 Pharmacy System Administrator Participant Workbook
156
Specific Criteria Report
Helps to track other suspected behavior or to conduct further investigation. To use this report, filter on the user in question. Then select the appropriate time period (e.g., six months) and the drug of choice, if this information is known. If the drug of choice is not known, then use control levels 2‐5 and whittle down the data until you see a clearer picture.
Frequency: As needed
Activity
Do you see any concerning patterns? Describe: _____________________________________
____________________________________________________________________________

21.0 Pharmacy System Administrator Participant Workbook
157
Transaction by User
Helps with review of transactions for a suspicious user
Frequency: As needed
Activity
Do you see any suspicious transactions? Describe: ___________________________________
____________________________________________________________________________

21.0 Pharmacy System Administrator Participant Workbook
158
Section Wrap‐up
When You Return to Your Facility
Are discrepancies monitored daily in order to ensure their resolution?
Is Dose Reconciliation being monitored regularly to ensure proper nursing documentation of controlled medications?
Is Temporary Patient Reconciliation completed regularly? It is Omnicell’s best practice recommendation to complete this on a daily basis.
For facilities with Anesthesia Workstation, is Post Case Reconciliation being monitored regularly to ensure proper documentation of controlled medications?
Is the Inventory Aging report being run monthly or as needed to free up cabinet space?
Is the Par vs. Usage report run regularly to optimize cabinet space?
Is there a strategy for routinely reviewing null transactions, user teams, and med overrides?
Is the Dispensing Practices report being run weekly (based on 30 days activity)?
System Administrator Workflow‐related Reports
Reconciliation
Dose Reconciliation Report: Lists dose dispensing transactions that are Reconciled, Un‐Reconciled and (or) have a Reconciliation Reason.
Pharmacy Discrepancy Report: This security report lists all Medication System discrepancies within a given date range, providing dates, times, and names of users who reported the discrepancies. It also indicates whether a discrepancy is resolved or unresolved.
Inventory
Inventory Aging Report: Lists transactions for items dispensed using the medication override feature, helping the pharmacy identify medications that have been issued without a medication order.
Null Transaction Report: This security report lists all authorized entries into an automated cabinet where no transactions were recorded, indicating the possibility of an unaccounted transaction.
Par vs. Usage Report: Provides statistical usage information for all items specified for a given date range and compares these data with prices and par levels for each specified item.
Diversion Monitoring and Compliance
Dispensing Practices Report: Calculates the average number of doses dispensed per transaction day by nurses within a specified area. Comparing individuals to their aggregate average allows quick identification of users whose dispensing habits differ from their peers. This report is also available in graph form.
Specific Criteria Report: Use a specific criteria report to sort transaction criteria for detailed reports about users, patients, items, and others.
Transactions by Patient, Physician, User, Item/Procedure, and Date Reports: These five reports list all transactions by item or date and time for any number of cabinets in the system and summarize the number of transactions for a particular patient, physician, user, item, or procedure, as well as the quantities of items used in the transactions.

21.0 Pharmacy System Administrator Participant Workbook
159
User Events Report: Helps identify user activity within the system, including logging in and out, accessing screens, and generating reports.
User Team Report: Displays the number of times a team of users was involved in witnessing transactions over a specified date range. It is also available in graph form.
Review Questions
1. Name one OmniCenter report you could use to help optimize the space in your Omnicell cabinets.
2. Match the report purpose on the left with the report on the right:
Excessive discrepancies Specific Criteria
Interrupted cabinet access Pharmacy Discrepancy
Greater investigation Dose Reconciliation
Undocumented meds User team
Overrides Dispensing Practices
Excessive dispenses Null Transactions
Possible user collusion Medication Order Overrides

Secu
rity
Acc
ess
Leve
ls f
or
the
Co
lor
Tou
ch C
abin
ets
User
Acce
ss –
Sta
nd
ard
De
fau
lts
P
ati
en
t C
are
R
ep
ort
s
Res
olv
e
Dis
cre
p
Inven
tory
U
ser
Me
nu
s
Ad
min
Men
us
Title for User Level
Control Level Access
Item Group Access14
Access Restricted Item
Eligible Witness
Override Med Order
UD Access
Web Access
Local Patient List
Global Patient List
Add a New Patient
Find Item/Kit
Sort by Room
Transaction Report
Admin Report
Inventory Report
Med Order Report
Discrepancy Resolution
Normal Restock
Supplemental Restock
Modify Bin
Clear Return Bin
Kit/Alias Setup
Cycle Count
Find Item/Kit
Destock
Expired/Recall
Display Temp Nurse
Delete Temp Nurse
Add a Temp Nurse
Change Your Password
Reset Users Password
Change Access
Diagnostics
Omni Config
Exit to Shell
Reboot
Run Midnight
Processing
Delete Patient
Test Printer
Hea
d N
urse
02
3456
S
G
Y
Y
Y
N
Y
x x
x x
x x
x x
x 02
3456
S
x3 x5
x x6
x7 x
x x8
x
x 9
x x
x
Tem
p N
urse
02
3456
S
G
Y
Y
N
N
Y
x x
x x
x x
x x
x N
/A
x4 x
x
Nur
se
0234
56S
G
Y
Y
N
N
Y
x
x x
x x
x x
x x
0234
56S
2 x4
x x
x
Tem
p LP
N
0234
56S
G
N
Y
N
N
Y
x
x x
x x
x x
x x
N/A
x4
x
x
LPN
02
3456
S
G
N
Y
N
N
Y
x x
x x
x x
x x
x N
/A
x4 x6
x
x
Nur
se B
02
3456
S
G
Y
Y
Y
N
Y
x x
x x
x x
x x
x 02
3456
S2
x4 x6
x
x
Pha
rmac
ist A
01
2345
6S
G
Y
Y
Y
Y
Y
x x
x x
x x
x x
x 01
2345
6S
x x
x x
x x
x x
x x
x x8
x
x 9
x x
x x
Pha
rmac
ist B
01
2345
6S
G
Y
Y
Y
Y
Y
x x
x x
x x
x x
x 01
2345
6S
x x
x x
x x
x x
x
x x8
x
x 9
x x
x x
Pha
rm T
ech
A
0234
56
G
Y
N
N
Y
N
x x
x x
x x
x x
x 02
3456
x
x x
x x
x x
x x
x
x x
Pha
rm T
ech
B
06
G
N
N
N
Y
N
x 06
x
x x
x x
x x
x x
x
Res
tock
Tec
h S
G
N
N
N
N
N
x
N/A
x
x x
x x
x x
x
Mat
erie
l Mgr
S
G
N
N
N
N
Y
x
x x
S
x x
x x
x x
x
x x
x x
Ane
sthe
sia
0234
56S
G
Y
Y
A
N
Y
x
x x
x x
x x
x x
0123
456S
x1 0
x1 1 x
x 12
x x13
x
x x8
x
x 9
x x
x
Ane
s T
ech
S
G
N
N
N
N
N
x x
x x
N/A
x
x x
x x
x x
x
Om
nite
ch
S
G
N
N
A
Y
Y
x x
x x
x x
x x
x 01
2345
6S
x x
x x
x x
x x
x x
x x8
x
x 9
x x
x x
x x
x x
CN
A
S
G
N
N
N
N
Y
x x
x x
x x
x x
x S
2
x x
x
Out
Pat
Reh
ab
S
G
N
N
N
N
Y
x x
x x
x x
x x
x S
2
x x
x
Res
p T
hera
pist
23
456S
G
N
N
N
N
Y
x
x x
x x
x x
x x
2345
6S2
x x
x
1 A
cces
s to
med
s de
term
ined
by
clas
ses
gran
ted
to in
divi
dual
use
r w
hen
adde
d at
ser
ver.
Cha
nged
ret
rosp
ectiv
ely
with
Glo
bal M
odify
. Cha
nged
for
new
add
s by
cha
ngin
g G
loba
l Res
ourc
es.
2 C
abin
et c
onfig
<U
sers
><
Allo
w N
urse
s to
Res
olve
Dis
crep
anci
es>
turn
s on
or
off f
or N
urs
e/LP
N/N
urse
B/T
emp
Nur
se/T
emp
LPN
/CN
A, H
ard
code
d fu
nctio
n fo
r H
ead
Nur
se/P
harm
acy
Use
rs/O
mni
tech
3 C
abin
et c
onfig
<U
sers
><
Sup
plem
enta
l Res
tock
Con
trol
Lev
el A
cces
s fo
r N
urse
Man
ager
>. A
cces
s to
at l
east
one
cla
ss a
ctiv
ates
Sup
plem
enta
l Res
tock
but
ton.
4 C
abin
et c
onfig
<U
sers
><
Ena
ble
Sup
plem
enta
l Res
tock
> tu
rns
on/o
ff fo
r N
urse
/LP
N/N
urse
B/T
emp
Nur
se/T
emp
LPN
. Acc
ess
base
d on
acc
ess
for
disp
ense
.
5 M
odify
Bin
dur
ing
Inve
ntor
y F
unct
ion
for
Hea
d N
urse
turn
ed o
n/of
f by
Cab
inet
con
fig <
Use
rs>
<M
odify
Bin
Con
trol
Lev
el A
cces
s fo
r N
urse
Man
ager
>. A
cces
s to
at l
east
one
cla
ss tu
rns
on b
utto
n.
6 C
lass
es c
onfig
ured
at c
abin
et <
Use
rs>
<C
ycle
Cou
nt C
ontr
ol L
evel
Acc
ess
for
Nur
ses>
. Can
not e
xcee
d us
er a
cces
s cl
ass
for
disp
ensi
ng. H
ead
Nur
se c
onfig
ured
sep
arat
ely
from
oth
er n
urse
s <
Cyc
le C
ount
Con
trol
Lev
el A
cces
s fo
r N
urse
Man
ager
s>.
7 C
abin
et c
onfig
<U
sers
><
Des
tock
Con
trol
Lev
el A
cces
s fo
r N
urse
Man
ager
>. M
ust h
ave
acce
ss to
at l
east
one
cla
ss to
act
ivat
e bu
tton.
Des
tock
from
Uni
t Dos
e C
ompa
rtm
ent a
ctu
ally
doe
s a
disp
ense
to th
e di
spen
se d
raw
er. R
esto
ck D
oor
does
not
ope
n.
8 C
abin
et c
onfig
<T
emp
Nur
se>
<A
llow
Tem
p N
urse
Cre
atio
n> N
o=N
o U
ser
can
crea
te T
emp
Nur
se Y
es=U
sers
with
‘x’ c
an c
reat
e T
emp
Nu
rse
or T
emp
LPN
.
9 C
abin
et c
onfig
<P
assw
ord
><
Allo
w c
erta
in u
sers
to r
eset
pas
swor
ds>
No=
Use
rs c
anno
t for
ce o
ther
use
rs to
res
et th
eir
pass
wor
ds. Y
es=
Use
rs w
ith ‘x
’ can
forc
e ot
her
user
s to
res
et th
eir
pass
wor
d.
10 C
abin
et c
onfig
<U
sers
><S
uppl
emen
tal R
esto
ck C
ontr
ol L
evel
Acc
ess
for
Ane
sthe
sia>
. Acc
ess
to a
t lea
st o
ne c
lass
act
ivat
es S
uppl
emen
tal R
esto
ck b
utto
n.
11 M
odify
Bin
dur
ing
Inve
nto
ry F
unct
ion
for
Ane
sthe
sia
turn
ed o
n/of
f by
Cab
inet
Con
fig <
Use
rs>
<M
odify
Bin
Con
trol
Lev
el A
cces
s fo
r A
nest
hesi
a>. A
cces
s to
at l
east
one
cla
ss tu
rns
on b
utto
n.
12 C
lass
es c
onfig
ured
at c
abin
et <
Use
rs>
<C
ycle
Cou
nt C
ontr
ol L
evel
Acc
ess
for
Ane
sthe
sia>
. Can
not e
xcee
d us
er a
cces
s cl
ass
for
disp
ensi
ng.
13 C
lass
es c
onfig
<U
sers
><
Des
tock
Con
trol
Lev
el A
cces
s fo
r A
nest
hesi
a>. M
ust h
ave
acce
ss to
at l
east
one
cla
ss to
act
ivat
e bu
tton.
Des
tock
from
Uni
t Dos
e co
mpa
rtm
ent a
ctua
lly d
oes
a di
spen
se to
the
disp
ense
dra
wer
. Res
tock
Doo
r do
es n
ot o
pen.
14 A
cces
s to
Item
Gro
ups
may
be
mod
ified
for
indi
vidu
al u
sers
at t
he s
erve
r. D
efau
lts p
rovi
ded
abov
e. A
cces
s to
all
item
gro
ups
gran
ted
to P
harm
acis
t A, P
harm
acis
t B, a
nd O
mni
tech
onl
y, in
dica
ted
by *
abo
ve.
NO
TE
: A
bili
ty t
o C
han
ge
Bin
Lev
el d
uri
ng
dis
pen
se is
a p
aram
eter
th
at f
un
ctio
ns
for
AL
L u
ser
leve
ls a
nd
is c
on
tro
lled
by
cab
inet
co
nfi
gu
rati
on
op
tio
n <
Use
rs>
<A
llow
Bin
Lev
el c
han
ge>
.
160

AccessResource Subtype Jr
. Nurs
e/Ass
t.
Regula
r Nurs
e
Sr. Nurs
e
Resto
ck T
ech
Data
Clerk
Hosp. A
dmin
Sta
ff
Syste
m A
dmin
Omnic
ell T
ech
Sr. Om
nicel
l Tec
h
Pharm
Tec
h A
Pharm
Tec
h B
Pharm
A
Pharm
B
.
*GUIDE 1 2 3 4 5 6 7 8 9 A B C D Defines level of access (0-7) for each user level
ALLERGY 0 0 0 0 0 0 2 0 7 7 0 2 0 Allergy table accessAREAS 0 0 0 0 0 0 0 0 7 7 7 7 7 Areas table accessBATTHIST 2 2 2 2 2 2 7 7 7 2 2 7 2 Battery history table accessCASEBILL 2 5 5 0 6 6 7 7 7 0 0 7 0 Case table accessCASEPREF 2 5 5 0 6 6 7 7 7 0 0 7 0 Case preference table accessCASES 2 5 5 0 6 6 7 7 7 0 0 0 0 Cases table accessCHGPROC 0 2 5 0 5 7 7 7 7 0 0 7 0 Chargeable procedure table accessCONS_RSTK 0 0 0 3 3 3 7 7 7 3 3 7 3 Restock screen access within ConsoleCONSOLE 1 1 1 1 1 1 7 7 7 1 1 7 1 Basic Console access, full includes FF reportsCOSTTYPE 1 1 1 0 1 1 7 7 7 0 0 0 0 Cost types table accessCSMAREA 0 0 0 0 0 0 7 7 7 2 0 7 0 CSM Area table accessCUSTYPE 2 2 2 2 2 2 7 7 7 2 2 7 2 Custom Choice table accessDALERT 0 0 0 0 0 0 7 0 7 0 0 7 0 Dispensing alerts table accessDAYSHEET 0 0 0 0 0 0 7 7 7 2 0 7 0 Day Sheet table accessDSAREA 0 0 0 0 0 0 7 7 7 2 0 7 0 Day Sheet Area table accessDSITEM 0 0 0 0 0 0 7 7 7 2 0 7 0 Day Sheet Item table accessEADDRESS 0 0 0 0 0 0 7 0 7 0 0 7 0 Email address table accessEDGROUPS 0 0 0 0 0 0 0 0 7 0 0 7 0 Equivalent dose groups table accessEDITEMS 0 0 0 0 0 0 0 0 7 0 0 7 0 Equivalent dose items table accessEXIT 0 0 0 0 0 0 7 7 7 0 0 0 0 Security for ExitFLAC 0 0 0 0 0 0 7 7 7 0 0 7 0 Flac table accessFOXFIRE 0 0 0 0 0 3 3 3 7 3 0 7 0 Access to the FoxFire report generator screensGBLMODIFY 0 0 0 0 0 0 7 7 7 0 0 7 0 Global modify screen accessI/O PROC 0 0 0 0 0 0 7 7 7 0 0 7 0 I/O Server screen access (0 & 7 only)INTRFACE 0 0 0 0 0 0 7 0 7 0 0 7 0 Interface table accessITEM_MOD_ID 0 0 0 0 0 0 7 7 7 0 0 0 0 Modify Item ID screen accessITEMAL 0 0 0 0 0 0 2 0 7 7 0 2 0 Item allergy table accessITEMALAS 0 2 5 0 5 7 7 7 7 0 0 7 0 Item alias table accessITEMBINS 0 2 5 0 5 7 7 7 7 2 0 7 0 Item bin table accessITEMKITS 0 2 5 0 5 7 7 7 7 0 0 7 0 OmniSupplier "Item Kit Delete" screen accessITEMS 0 2 5 0 5 7 7 7 7 3 0 7 0 Items table accessITEMSCAN 0 2 2 0 2 2 7 2 7 0 0 7 0 Itemscan table accessKIT_ITEM 0 2 5 0 5 7 7 7 7 0 0 7 0 Kit item table accessKIT_OMNI 0 2 5 0 5 7 7 7 7 0 0 7 0 Kit omni table accessKITS 0 2 5 0 5 7 7 7 7 0 0 7 0 Kits table accessLOC_RSC 0 0 0 0 0 0 2 5 7 0 0 2 0 Local resource table accessMACHINES 2 2 2 2 2 5 7 7 7 2 2 7 2 Machines table accessMAINT 0 0 0 0 0 0 0 0 7 0 0 0 0 Basic maintenance screen access levelsMEDFREQ 0 0 0 0 0 0 0 0 7 5 5 7 0 Frequency table accessMEDITEM 0 0 0 0 0 0 0 7 7 5 5 7 5 Med order items table accessMEDORDER 0 0 0 0 0 0 0 7 7 5 5 7 5 Medication order table accessMEDROUTE 0 0 0 0 0 0 0 0 7 5 5 7 0 Medication order route table accessMEDSITE 0 0 0 0 0 0 3 7 7 0 0 7 7 Medication administration site table accessMFILTER 0 0 0 0 0 0 7 0 7 0 0 7 0 Message Filter table accessMFSTEXT 0 0 0 0 0 0 7 0 7 0 0 7 0 Message Filter Search Text table accessMOREASON 0 0 0 0 0 0 3 7 7 0 0 7 7 MO override reason table accessOCMSG 0 0 0 0 0 0 7 0 7 0 0 7 0 OmniCenter messages table accessOCONFIGS 0 0 0 0 0 0 7 7 7 0 0 7 2 OmniSupplier configurations table accessOGOMNIS 0 0 0 0 0 0 7 7 7 0 0 7 0 Omni group items table accessOGROUPS 0 0 0 0 0 0 7 7 7 0 0 7 0 Omni groups table accessOMNICELL 2 2 2 2 2 5 7 7 7 2 2 7 2 Omnicell drawer config table accessOMNIROUT 2 2 2 2 2 5 7 7 7 2 2 7 2 Omni patient routing table accessOMNIS 2 2 2 2 2 5 7 7 7 3 2 7 2 Omnis table accessOMNISN 2 2 2 2 2 5 7 7 7 3 2 7 2 Omni S/N table accessOMNISW 0 0 0 0 0 0 0 0 7 0 0 0 0 OmniSupplier version information table accessOMNITEMP 0 0 0 0 0 0 2 0 2 2 0 2 0 Omnitemp table accessPATAL 0 0 0 0 0 0 2 0 7 0 0 2 0 Patient allergy table accessPATBINS 0 0 0 0 0 0 2 0 2 0 0 2 0 Patbins table accessPATIENTS 2 5 5 0 6 6 7 7 7 3 0 7 0 Patients table accessPATTYPE 1 1 1 0 1 1 7 7 7 0 0 0 0 Patient types table accessPERM 0 0 0 0 0 0 7 7 7 2 0 7 0 Permission table accessPHYSICAN 1 1 1 0 1 1 7 7 7 0 0 0 0 Physican table access
0 – None 4 – Add1 – R-Low 5 – Modify2 – View 6 – Delete3 – R-High 7 – Full
Access Levels
161

AccessResource Subtype Jr
. Nurs
e/Ass
t.
Regula
r Nurs
e
Sr. Nurs
e
Resto
ck T
ech
Data
Clerk
Hosp. A
dmin
Sta
ff
Syste
m A
dmin
Omnic
ell T
ech
Sr. Om
nicel
l Tec
h
Pharm
Tec
h A
Pharm
Tec
h B
Pharm
A
Pharm
B
.
*GUIDE 1 2 3 4 5 6 7 8 9 A B C D Defines level of access (0-7) for each user level
0 – None 4 – Add1 – R-Low 5 – Modify2 – View 6 – Delete3 – R-High 7 – Full
Access Levels
PREFCARD 0 2 5 0 5 7 7 7 7 0 0 7 0 Preference card table accessPREFITEM 0 2 5 0 5 7 7 7 7 0 0 7 0 Preference card item table accessPREFOMNI 0 2 5 0 5 7 7 7 7 0 0 7 0 Preference card omni table accessPRIORITIES 0 2 2 2 2 2 7 7 7 2 2 7 2 Priorities table accessPRIORITYDETAILS 0 2 2 0 2 2 7 2 7 0 0 7 0 Priority details table accessPROCEDUR 2 5 5 0 6 6 7 7 7 3 0 7 0 Procedure table accessRESTOCK 0 2 2 5 5 6 7 7 7 5 5 7 5 Restock table accessROLEPERM 0 0 0 0 0 0 7 7 7 2 0 7 0 Roles Permission table accessROLES 0 0 0 0 0 0 7 7 7 2 0 7 0 Roles table accessROLEUSER 0 0 0 0 0 0 7 7 7 2 0 7 0 Roles User table accessROOMS 0 0 0 0 0 0 0 0 7 7 7 7 7 Rooms table accessRTE 0 0 0 0 0 0 7 7 7 0 0 7 0 Restock routes table accessRX_REPORTS 0 0 0 0 0 0 0 0 7 7 0 7 0 Pharmacy reports accessRXDISRECONCILE 0 0 7 0 0 0 0 0 7 7 7 7 0 Pharmacy discrepancy reconciliation screen accessSCHED RPTS 0 0 7 0 0 7 7 7 7 7 0 7 7 Report schedule setup screen access (0 & 7 only)SITEPARTNERIDS 0 2 2 0 0 2 5 7 7 0 0 5 0 Partner site ID table accessSITES 0 2 2 0 0 2 5 7 7 0 0 5 0 Sites table accessSVR_RSC 0 0 0 0 0 0 2 5 7 0 0 2 0 Global resource table accessUBEVENTS 0 0 0 0 0 0 7 0 7 0 0 7 0 Ubevents table accessUEVENTS 0 0 0 0 0 0 7 0 7 0 0 7 0 Uevents table accessUFFILES 0 0 0 0 0 0 7 7 7 2 0 7 0 Usage form files table accessUSEROG 0 0 0 0 0 0 7 7 7 0 0 7 0 User omni groups table accessUSEROMNI 0 0 0 0 0 0 7 7 7 0 0 7 0 User omnis table accessUSERPARTNERIDS 0 0 0 0 0 0 7 7 7 0 0 7 0 User partner ID table accessUSERPATS 0 0 0 0 0 0 7 7 7 0 0 7 0 User patients table accessUSERS 0 0 0 0 0 0 7 7 7 2 0 7 0 Users table accessVENDORITEMACTIVESITE 0 2 2 0 2 2 7 2 7 0 0 7 0 Vendor items active site table access
VENDORITEMS 0 2 2 0 2 2 7 2 7 0 0 7 0 Vendor items table accessVENDORS 0 2 2 2 2 2 7 7 7 2 2 7 2 Vendor table accessXACTIONS 0 2 2 2 5 5 5 5 5 2 2 5 2 Transactions table access
162

Recommended Drawers by Med Classification
Drug
Level
Description Definition Examples
(Trade)
Examples
(Generic)
Recommended
Drawer Type
0 Over The
Counter
(OTC)
These pharmaceuticals
can be purchased in most
drug stores without a
prescription.
Tylenol
Motrin IB
Sudafed
Benadryl
Acetaminophen
Ibuprofen
Pseudoephedrine
Diphenhydramine
Matrix Drawers
1 DEA
Schedule I
Medication
s
Some hospitals use these
drugs for investigational
studies.
LSD
Marijuana
Heroin
none
2 DEA
Schedule II
Medication
s
This class is strictly
controlled and requires
100% accountability.
Percocet
Demerol
Roxanol
Oxycodone and
Acetaminophen
Meperidine
Morphine
Locking Drawers
3 DEA
Schedule III
Medication
s
These drugs have the
next highest potential for
abuse, but may not be as
strictly controlled as
Schedule II medications.
Winstrol
Tylenol with
Codeine (T#3)
Stanozolol
********
Locking Drawers
4 DEA
Schedule IV
Medication
s
These drugs have less
potential for abuse than
Schedule III, but are still
classified as controlled
drugs.
Valium
Restoril
Ativan
Versed
Diazepam
Temazepam
Lorazepam
Midazolam
Locking Drawers
5 DEA
Schedule V
Medication
s
These drugs have a low
potential for abuse, but
are still classified as
controlled drugs. Over-
the-counter cold
medicines with codeine
are classified in this
category.
Lomotil
Robitussin A-C
Phenergan with
Codeine Syrup
Diphenoxylate/At
ropine
Robitussin with
Codeine
Locking Drawers
6 Legend
Drugs
All drugs within this class
require a prescription
and are not contained
within classes 0 – 5.
Medications such as
antibiotics, cardiac,
diabetic, pain, hormones,
cholesterol, and some
anti-inflammatory agents
are listed in this category.
Vioxx
Oscal
Lanoxin
Lasix
Rofecoxib
Calcium and
Vitamin D
Digoxin
Matrix Drawers
163

MED
ICATION
OVER
RIDE GRID
ME
DIC
AT
ION
OR
DE
R A
CC
ES
S
ITE
MS
Me
dic
ati
on
Ord
ers
MO
Re
qu
ire
d =
N
No
ord
er
req
uir
ed
to
dis
pe
nse
th
is i
tem
MO
Re
qu
ire
d =
Y
Me
dic
ati
on
ord
er
req
uir
ed
to d
isp
en
se t
his
ite
m
MO
Re
qu
ire
d =
O
Me
dic
ati
on
ord
er
is r
eq
uir
ed
to
dis
pe
nse
th
is i
tem
, h
ow
ev
er
a
use
r w
ith
ov
err
ide
pri
vil
eg
es
ma
y a
cce
ss t
his
ite
m
USERS
Override Privileges
Ov
err
ide
MO
= N
Un
ab
le t
o o
ve
rrid
e m
ed
ica
tio
n
ord
er
Ye
s N
o
No
Ov
err
ide
MO
= Y
Ab
le t
o o
ve
rrid
e m
ed
ica
tio
n o
rde
r
wh
en
ite
m d
ata
set
is s
et
to O
Ye
s N
o
Ye
s
Ov
err
ide
MO
= A
Ab
le t
o o
ve
rrid
e a
ll m
ed
ica
tio
n
ord
ers
at
all
tim
es
Ye
s Y
es
Ye
s
164