Embed Size (px)
Citation preview
Petri-nets packages
Franck Pommereau ([email protected])
Last update: 2006-03-02
Abstract
This paper describes Petri-nets, a set of TEX/LATEX packages aboutPetri nets and related models. One package allows to draw Petri-netsin PostScript or PDF documents. One other defines macros related toPBC, M-nets and B(PN)2 models. A last package just gathers togetherthe two previous.
Contents
1 Introduction 21.1 Installation . . . . . . . . . . . . . . . . . . . . . . . . . . . . . . . . 21.2 Loading the packages . . . . . . . . . . . . . . . . . . . . . . . . . . . 41.3 Things to do, known bugs and problems . . . . . . . . . . . . . . . . 51.4 Legal stuff . . . . . . . . . . . . . . . . . . . . . . . . . . . . . . . . . 51.5 Contributors . . . . . . . . . . . . . . . . . . . . . . . . . . . . . . . 5
2 Text commands: package pntext 6
3 Drawing nets: package pndraw 73.1 Some words about PSTricks . . . . . . . . . . . . . . . . . . . . . . . 73.2 Beginning and ending nets . . . . . . . . . . . . . . . . . . . . . . . . 93.3 Drawing nodes . . . . . . . . . . . . . . . . . . . . . . . . . . . . . . 10
3.3.1 Additional labels . . . . . . . . . . . . . . . . . . . . . . . . . 113.3.2 Free text . . . . . . . . . . . . . . . . . . . . . . . . . . . . . 12
3.4 Linking nodes . . . . . . . . . . . . . . . . . . . . . . . . . . . . . . . 123.4.1 Additional labels . . . . . . . . . . . . . . . . . . . . . . . . . 153.4.2 Arcs . . . . . . . . . . . . . . . . . . . . . . . . . . . . . . . . 15
4 Tips, tricks and troubleshooting 15
5 Producing PDF documents 17
1
A Reference pages 20A.1 Text commands: package pntext . . . . . . . . . . . . . . . . . . . . 20A.2 Drawing command: package pndraw . . . . . . . . . . . . . . . . . . 20
1 Introduction
Petri-nets is a set of packages which I use to write my papers about Petrinets and related models (essentially: PBC, M-nets and B(PN)2). It featuresthree packages: one for drawing net, one other which defines additionalmacros for textual purpose (like the name “B(PN)2”) and a last one forboth purposes. The first package has been designed with a precise goal:saving me a lot of work when I have to draw nets. This goal explains somechoices I did: typesetting labels in math mode by default, ending commandswith the line, etc. I feel this results in an intuitive and high-level way todefine Petri nets, but if you have ideas to improve this, don’t hesitate tocontact me. The text command package is more classical and if it saves alsoa lot of typing, its main goal is to ensure uniform notations.
All these packages may evolve and grow up and if you (or I) feel that afeature is missing, you can send me an e-mail explaining your needs (TEXcode is welcome too). Notice that I don’t pretend being a specialist inPetri nets and I’m only used to work on three or four models; so I mayignore particular things in particular models. This may explain some missingfeatures.
1.1 Installation
The last version of the package may be downloaded on the web at the URLhttp://www.univ-paris12.fr/lacl/pommereau/petrinets.tar.gz , a copy shouldbe available on CTAN/macros/generic/petri-nets; the distribution containsthe following files:
• pnets.tex is the main TEX package;
• pnets.sty is its LATEX counterpart;
• pndraw.tex and pndraw.sty are the TEX and LATEX sub-packages fordrawing nets;
• pntext.tex and pntext.sty are the TEX and LATEX sub-packages fortext commands;
• pnversion.tex defines macro \pnversion;
2
• pndoc.ps, pndoc.pdf and pndoc.tex are the present paper and itssource;
• COPYING is the text of the GNU GPL;
• ChangeLog collects all changes done to Petri-nets;
• README is a short introduction text;
• pn2pdf is a Perl script used to produce PDF files with pdfLATEX.
In order to have Petri-nets working, you need to copy files pnets.*,pndraw.*, pntext.* and pnversion.tex in a place where TEX will be ableto find them. This can be somewhere in the default search path (see yourlocal TEX documentation) or in a directory included in your TEXINPUT en-vironment variable.
Packages from Petri-nets have been developed and tested with teTEX-1.0.2 for Linux. TEX packages should work with any TEX version greaterthan or equal to 3 (my version is 3.14159, Web2C 7.3.7). LATEX packageshave been designed for LATEX2ε so you may experiment troubles with anolder version.
In order to typeset symbols for classical sets of numbers (N, R, etc.)Petri-nets uses fonts from AMS. So you must have package amsfonts in-stalled for LATEX or fonts bbm for TEX (I think these conditions are more orless equivalent).
The drawing basis are provided by package PSTricks, my version isPST97 but I used only macros described in the manual of version 0.93aso I hope it should work with it.
Using PSTricks has an important consequence: actual drawings are donein PostScript, so, you may not see them directly from the DVI viewer (atleast not correctly); additionally, you must use a PostScript driver in order toproduce your final document (for example, dvips works well). Some supportto produce PDF documents with pdfLATEX is provided (see section 5).
PSTricks conflicts with packages color, graphics and graphicx, Petri-nets thus inherits this conflict. If you wish to use them together, you shouldfirst load package pstcol, then Petri-nets and at last, color, graphics orgraphicx. The following is quoted from PSTricks’ README:
To use the standard ‘color’ package (which is available both forplain TEX and LATEX) with PSTricks, you must load the ‘pstcol’extra package written by David Carlisle, which interface the twopackages, loading them in the right order, and overriding some
3
small parts of PSTricks to allow it to use the ‘color’ packagesystem for specifying color. We strongly recommend that youuse this way today.
LATEX users must also take care that the ‘pstcol’ package isrequired in place of the ‘pstricks’ one if the ‘graphics’ or‘graphicx’ package is also loaded.
If you wish to produce PDF files using pdfLATEX, you also need to copythe script pn2pdf in a directory from which it can be executed. This scriptrequires a working Perl with the packages Digest::MD5 and Getopt::Longinstalled. Moreover, the script calls the following programs: latex, dvipsand epstopdf which must be installed on your system (there should be notproblem for the first two). In order to include the PDF pictures, the packagegraphicx is used (in this case, it does not lead to any conflict since PSTricksis not loaded when running pdfLATEX). Finally, the package ifpdf is usedto detect whether a document is compiled using LATEX or pdfLATEX. Thispackage should be thus installed.
You can test your installation by recompiling the present manual whichis written in LATEX. If it compiles successfully, this means that Petri-netsand PSTricks have been found by TEX. If one file is not found, TEX willcomplain, giving the file name. Then, running dvips will ensure that thePostScript headers of PSTricks can be found. You may also test the PDFsupport by producing the PDF version of this manual, see section 5 for theway to proceed.
If you successfully use Petri-nets under another configuration, feel free tosend me an e-mail at [email protected]. You may also send bugreports or comments, they are welcome. Of course, bug fixes are welcometoo.
1.2 Loading the packages
From TEX, you can load the package with \input pnets, from LATEX, youshould put \usepackage{pnets} in the preamble of your document. Sinceyou may want to use only the drawing macros, you can use \input pndrawor from LATEX: \usepackage{pndraw}. Similarly, in order to load only textcommands, you can use \input pntext or \usepackage{pntext}.
Both packages define a macro \pnversion which gives the date of thelast update of the package. The date is given as a triple of numbers of theform year-month-day.
4

1.3 Things to do, known bugs and problems
In order to draw additional labels at the right position, pndraw has to per-form some time consuming floating point computing. I plane in the futureto perform this directly in PostScript, in order to speed-up TEX compilationstage.
Only transitions are allowed to change their size according to their innerlabel, it may be nice to have this feature for the other nodes. But it’s maybe a little bit difficult or quite ugly for some nodes.
I also could add looping arcs. This is useless for Petri nets but it wouldallow one to use the packages for other purposes, like drawing automata.
The PDf pictures are clipped to the bounding box of the correspondingnet. I’ve seen on the newsgroups that there exists a solution, but it waswritten in German which I can’t read.
When one looks at a PDF document using Acrobat Reader, small blurpoints appear at the top-right and bottom-left corners of the Petri nets.This comes from two white points added in order to force dvips to producethe right bounding box when a net is generated alone in an EPS file. So,this is a bug of Acrobat Reader rather than one of Petri-nets.
In a late future, I’d like to make the package independent of PSTricks,so it would be more portable (but maybe less powerful).
1.4 Legal stuff
Petri-nets is c© 2002 Franck Pommereau ([email protected]).This program is free software; you can redistribute it and/or modify it
under the terms of the GNU General Public License as published by the FreeSoftware Foundation; either version 2 of the License, or any later version(see file COPYING).
This program is distributed in the hope that it will be useful, but with-out any warranty ; without even the implied warranty of merchantability orfitness for a particular purpose. See the GNU General Public License formore details.
You should have received a copy of the GNU General Public Licensealong with this program; if not, write to the Free Software Foundation, Inc.,59 Temple Place, Suite 330, Boston, MA 02111-1307 USA
1.5 Contributors
I am very grateful to all the persons who contributed to my work, in par-ticular:
5

Denis Girou, Hanna Klaudel, Andre Steenveld.
2 Text commands: package pntext
This section lists the commands defined in package pntext, they are allavailable from TEX as well as from LATEX.
Math sets. Command \mathset{A} produces symbol A (and of courseit works for any text). Shortcuts are defined: \setN for \mathset{N} andsimilarly for \setZ, \setQ, \setR and \setC.
Status of places. Commands \iplace, \eplace and \xplace producerespectively characters i, e and x. Command \placestatus{n} typesetscharacter n (in the case you would like a new place type).
Operators for communication. Synchronization operator (sy) is avail-able through command \sy, in math mode, this command is surroundedby additional white space as usual for binary operators. Similar operatorsare \rs for restriction and \tie for asynchronous links. Scoping is availablewith commands \lscope and \rscope which produce respectively a left anda right double bracket, you may also use \scope{A}{N} to produce [[A : N ]].
If you use \lscope (resp. \rscope) without the corresponding \rscope(resp. \lscope) in the same equation or array cell, TEX will complain aboutsome missing \right (resp. \left). In order to close (resp. open) a scopewithout drawing the bracket, you may use macro \Rscope (resp. \Lscope).
Choice. Choice operator � is produced with command \choice. In mathmode, it behaves like any binary operator.
B(PN)2. The logo of B(PN)2 is typeset using command \bpn. A B(PN)2
keyword (say program) is typeset with \bpnkw{program} and for a non-terminal in the syntax (say scope) you may use \bpnnt{scope}. FunctionMnet is defined as \mnet.
Sets of values and variables. Var and Val are typeset using commands\Var and \Val. They are better to use than directly the text they type-set because they adjust their spacing in math mode: compare “V ar” with“Var”.
6

-1 0 1 2 3 4 5-1
0
1
2
3
�(4, 2)
�(0, 0)
� (2.5,−.5)
Figure 1: The Cartesian coordinate system.
To be continued. . .
3 Drawing nets: package pndraw
3.1 Some words about PSTricks
Reading PSTricks manual could be a good idea, but if you don’t want to,you should know a few things about it in order to use Petri-nets successfully.
In PSTricks, any point is designated by two coordinates in a grid, cen-tered on a reference point which has coordinates (0, 0). The figure 1 showsan example.
The distance from the origin (0, 0) to a point (x, y) depends on threeparameters. units is a global scale, if unit=1.2cm, (4, 2) becomes an abbre-viation for (4×1.2 cm, 2×1.2 cm). There’s also xunit and yunit which actrespectively only on horizontal or vertical scale; for example, if xunit=20ptand yunit=1in, (4, 2) stands for (4×20 pt, 2×1 in). As you can see on theseshort examples, unit, xunit and yunit can be affected any value which isa valid TEX dimen (or LATEX length).
The default value for all these three parameters is 1 cm; to change it, youcan use the \psset command as in \psset{unit=.5cm} or in a combinedway as in \psset{xunit=1cm,yunit=2cm}.
Since coordinates are formed as a comma separated couple of numbers,you must not use comma as decimal separator here: (4.5,2.3) is correctbut (4,5,2,3) is not.
Sometime you’ll be asked to give an angle value as a macro parameter. In
7
–
–
–
–
–
–
–
–
0 = r
45 = tr/rt
90 = t
135 = tl/lt
180 = l
225 = bl/lb
270 = b
315 = br/rb
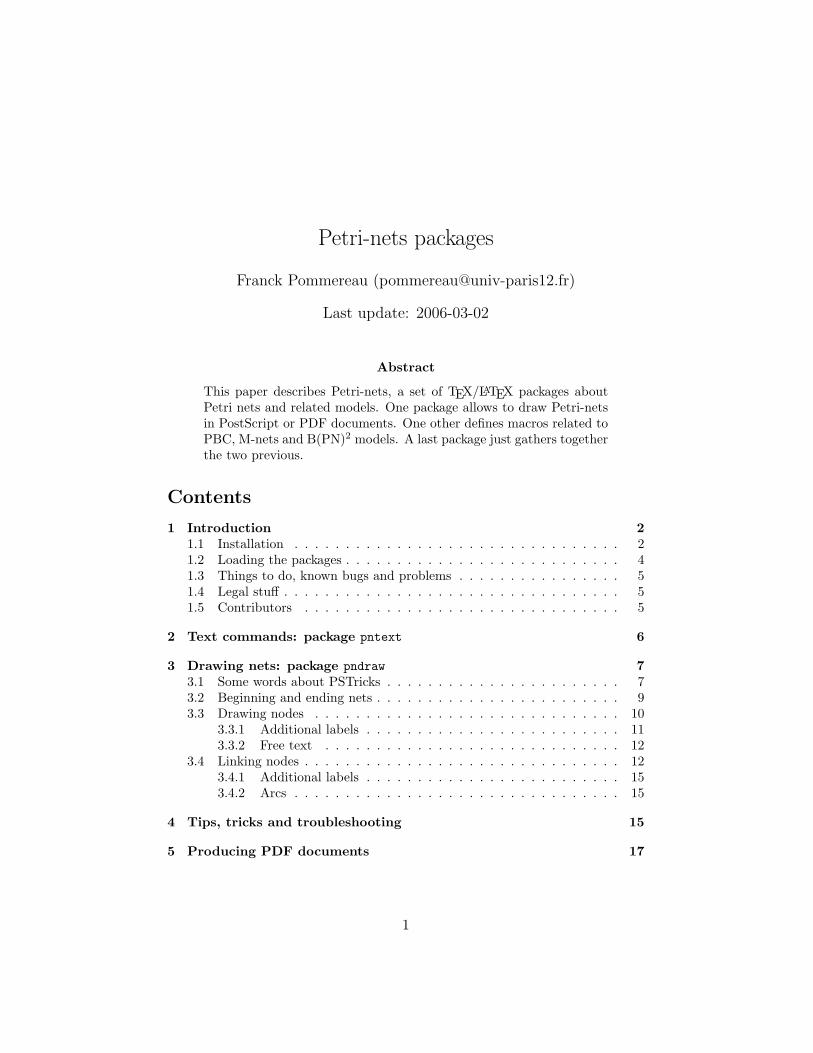
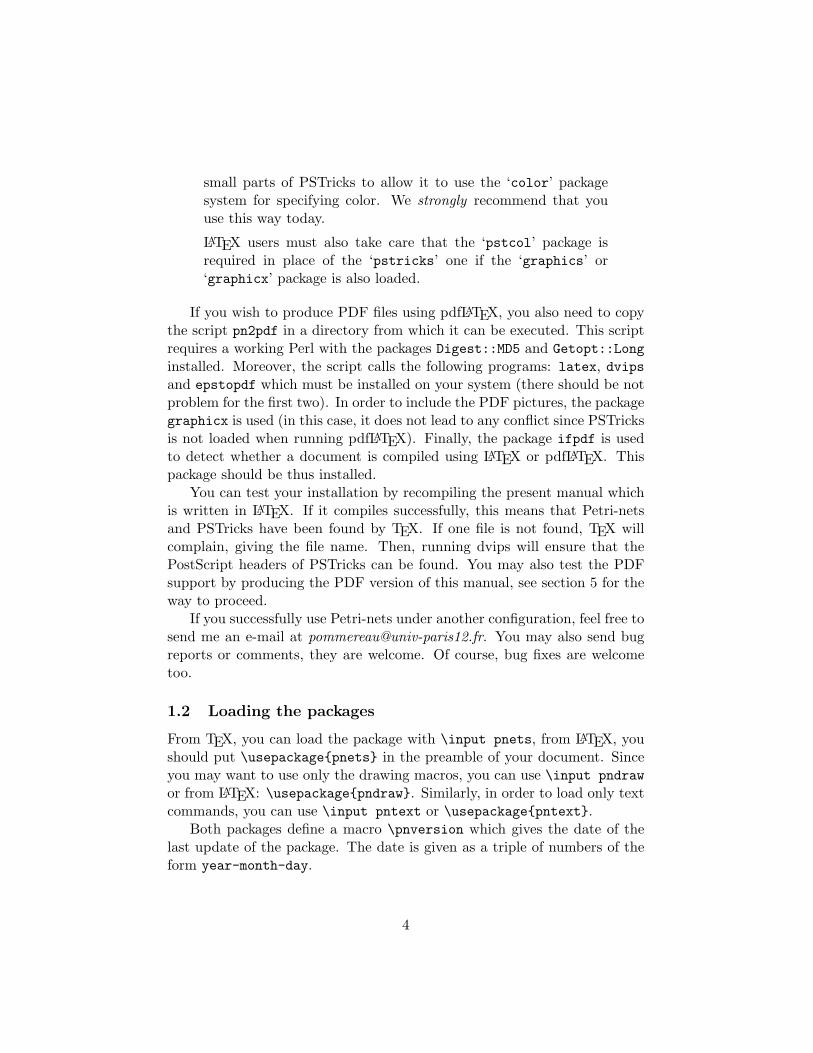
Figure 2: Translation from angle values to letter code. r is for right, t fortop, l for left and b for bottom.
Petri-nets, angles are measured in degrees; they can be given as a numericalvalue or with a one/two letter(s) code as shown in the figure 2. Of course,when you specify an angle by its numerical value, you can use any number,even negative, and not only one of the eight values shown on figure 2.
The macro \psset is used to change PSTricks default parameters, ittakes one argument which is a comma-separated list of name=value pairs.For example, pndraw.tex itself uses:
\psset{linewidth=.5pt,doublesep=.5pt,labelsep=2pt}
As you can see, blank spaces before a name are ignored. You alreadyknow how to change units, some additional names should be useful for Petri-nets:
• linewidth is the default width for any line drawn by PSTricks;
• doubleline can be true or false, when set to true, any line drawnis doubled;
• doublesep is the distance between the two lines of a doubled line;
• labelsep is the distance between an arc and its label(s);
8

• linecolor is the color used to draw lines, it can be, for example,black, darkgray, gray, lightgray, white, red, blue, green, cyan,magenta or yellow;
• fillcolor is the color used to fill shapes; you can use for it the samecolors as for linecolor.
PSTricks recognizes many other parameters and you should refer to itsmanual for all the details.
3.2 Beginning and ending nets
To begin a net, just type \beginnet for TEX or \begin{petrinet} underLATEX; both this commands are expecting two pairs of coordinates to givethe bottom-left and up-right extrema of the net.
For example, \begin{petrinet}(-1,-2)(5,3) starts a net which shouldextend in the rectangular area, which we call the bounding box, delimitedby (−1,−2) at the lower left corner and (5, 3) at the upper right. Thesecoordinates are sensitive to current values of unit, xunit and yunit.
The real effect of these two pairs is to fix the size of the bounding boxwhich carry the net drawn (it is actually a \hbox set in horizontal modebut who cares?). If some parts of the net extends outside of the declaredbounding box, it will be drawn outside and that’s all. In other words, thebounding box announced just reserves room for the net and the drawingitself is invisible to TEX. This allows you to lies about the real dimension ofyour drawings: you can declare a bigger or a smaller bounding box, if youwant more or less white space around your nets. This behaviour is differentwhen running pdfLATEX, see the section 5 for details.
Before to give the coordinates of the bounding box for a net, you cangive optional parameters inside square brackets. These parameters are inter-preted as PSTricks options which are applied to the following net and staylocal to it. For example, if we have unit=1cm before starting a net, command\begin{petrinet}[unit=2cm](0,0)(1,1) starts a net with unit=2cm forits bounding box and any coordinate given inside the net. But as the netends, the previous value of unit is restored.
In order to have bounding boxes drawn in your nets: you may use com-mand \showbb, optionally followed by bracketed options. For the figure 4, Iadded \showbb at the beginning of the net. The starred version of \showbbfills the background and so, command \showbb*[fillcolor=red] draws afilled red rectangle over the bounding box.
9
p
place
t
transition
m
module
s
source store
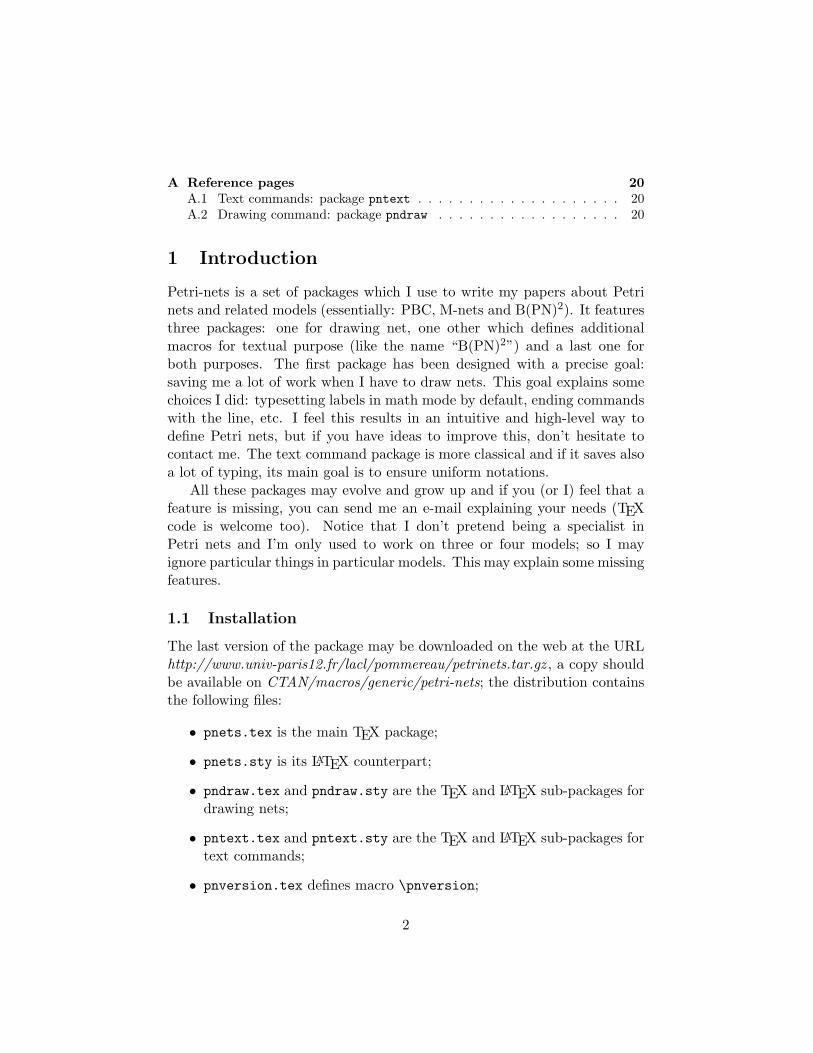
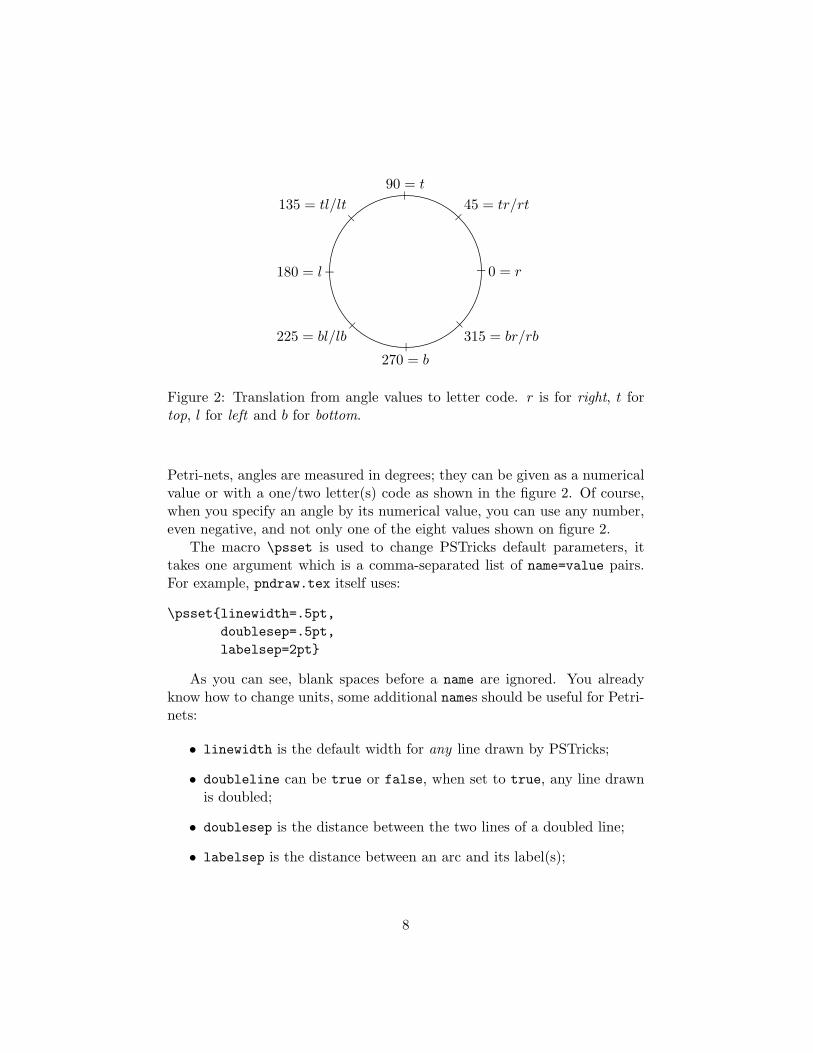
Figure 3: The nodes available in Petri-nets.
To end the drawing, you should use \endnet or \end{petrinet} (didyou guess?). All macros between these two ones are interpreted as PSTricksor Petri-nets commands. In the following, we call a net all the stuff inclosedbetween \begin{petrinet} and \end{petrinet} (if you use LATEX). Onepoint has to be remembered: inside a net, the end of line has a specialmeaning because it is used to end most Petri-nets drawing commands. So ifyou want to use commands spread over several lines, you have to end everyline but the last with a comment (%). Also notice that if you call the \pssetcommand inside a net, its effect will remain local to this particular net.
If you wish something to be done every time a net begins, you mayset token list \everynet to what you want to be inserted between com-mand \begin{petrinet} and your drawing commands. For example, with\everynet={\small}, all the following nets will be set in small types.
Except for beginning and ending nets, all the macros are the same underTEX or LATEX.
3.3 Drawing nodes
The available node shapes are places, transitions, modules, sources andstores, which are drawn in figure 3. They are produced with the macros\place, \trans, \module, \source and \store respectively. Their sizeis controlled with the dimensions \placesize, \transsize, \modulesize,\sourcesize and \storesize respectively. For instance, \transsize=8mmsets the size of transitions to 8mm; \nodessize{5mm} sets the size of all thenodes to 5mm.
Creating a node is possible using the command “node{name}(x, y)label”where:
• “node” is one of the above node commands;
• “name” is the name of this node which should be unique for a givennet (if not, the new node overwrites the old one). This name is casesensitive and should not contain any special characters (as $, \, etc.);
10
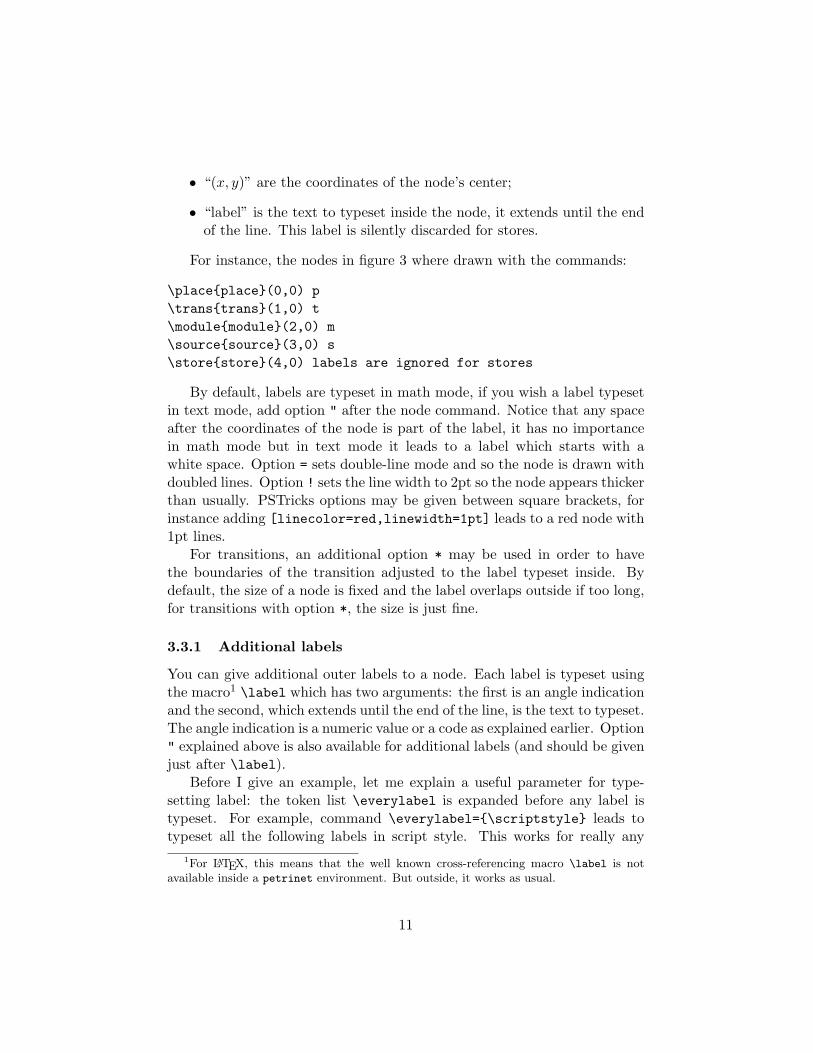
• “(x, y)” are the coordinates of the node’s center;
• “label” is the text to typeset inside the node, it extends until the endof the line. This label is silently discarded for stores.
For instance, the nodes in figure 3 where drawn with the commands:
\place{place}(0,0) p\trans{trans}(1,0) t\module{module}(2,0) m\source{source}(3,0) s\store{store}(4,0) labels are ignored for stores
By default, labels are typeset in math mode, if you wish a label typesetin text mode, add option " after the node command. Notice that any spaceafter the coordinates of the node is part of the label, it has no importancein math mode but in text mode it leads to a label which starts with awhite space. Option = sets double-line mode and so the node is drawn withdoubled lines. Option ! sets the line width to 2pt so the node appears thickerthan usually. PSTricks options may be given between square brackets, forinstance adding [linecolor=red,linewidth=1pt] leads to a red node with1pt lines.
For transitions, an additional option * may be used in order to havethe boundaries of the transition adjusted to the label typeset inside. Bydefault, the size of a node is fixed and the label overlaps outside if too long,for transitions with option *, the size is just fine.
3.3.1 Additional labels
You can give additional outer labels to a node. Each label is typeset usingthe macro1 \label which has two arguments: the first is an angle indicationand the second, which extends until the end of the line, is the text to typeset.The angle indication is a numeric value or a code as explained earlier. Option" explained above is also available for additional labels (and should be givenjust after \label).
Before I give an example, let me explain a useful parameter for type-setting label: the token list \everylabel is expanded before any label istypeset. For example, command \everylabel={\scriptstyle} leads totypeset all the following labels in script style. This works for really any
1For LATEX, this means that the well known cross-referencing macro \label is notavailable inside a petrinet environment. But outside, it works as usual.
11
• transition
more text{
1, 2, 3
4, 5, 6
}
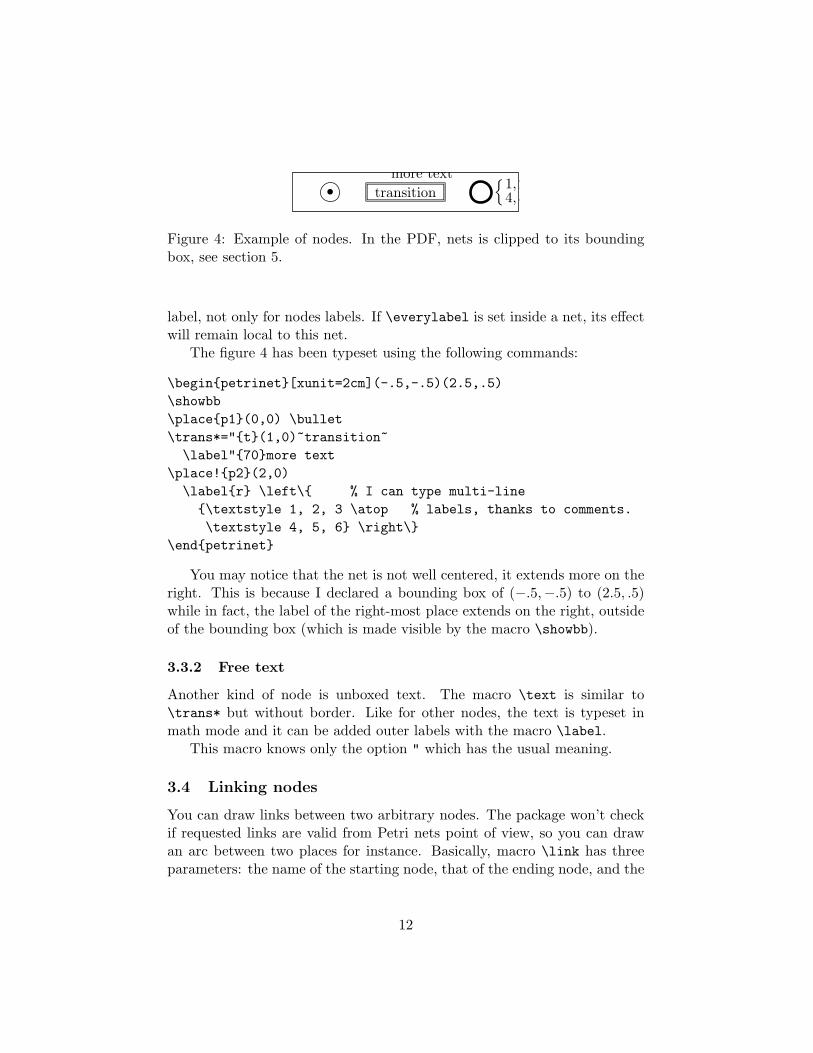
Figure 4: Example of nodes. In the PDF, nets is clipped to its boundingbox, see section 5.
label, not only for nodes labels. If \everylabel is set inside a net, its effectwill remain local to this net.
The figure 4 has been typeset using the following commands:
\begin{petrinet}[xunit=2cm](-.5,-.5)(2.5,.5)\showbb\place{p1}(0,0) \bullet\trans*="{t}(1,0)~transition~
\label"{70}more text\place!{p2}(2,0)
\label{r} \left\{ % I can type multi-line{\textstyle 1, 2, 3 \atop % labels, thanks to comments.\textstyle 4, 5, 6} \right\}
\end{petrinet}
You may notice that the net is not well centered, it extends more on theright. This is because I declared a bounding box of (−.5,−.5) to (2.5, .5)while in fact, the label of the right-most place extends on the right, outsideof the bounding box (which is made visible by the macro \showbb).
3.3.2 Free text
Another kind of node is unboxed text. The macro \text is similar to\trans* but without border. Like for other nodes, the text is typeset inmath mode and it can be added outer labels with the macro \label.
This macro knows only the option " which has the usual meaning.
3.4 Linking nodes
You can draw links between two arbitrary nodes. The package won’t checkif requested links are valid from Petri nets point of view, so you can drawan arc between two places for instance. Basically, macro \link has threeparameters: the name of the starting node, that of the ending node, and the
12

text to typeset on the link (which extends until the end of the line). Youcan add optional parameters, before the first node name:
• options inside square brackets are PSTricks options, as usual;
• a real number, between 0 and 1, enclosed in angle brackets (e.g., <.3>)can be used to specify the position of the label, between starting andending nodes. Value 0 stands for “on the starting node” while 1 means“on the ending node”; the default value is .5 (i.e., on the middle ofthe link);
• the characters ^, _ or * may be used to specify the side of the linkwhere the label is typeset. For an link which extends from the left tothe right, ^ means “above”, _ means “below” and * means “over”. Ifnothing is specified, the label is placed above the link;
• the options ", = and ! have their usual meanings;
• arrowheads and such can be specified between two signs /. The avail-able values are shown in the figure 5, default is no arrow.
The order in which you use these options has no importance, providedthat all options are given before the starting node. Additionally, if you usecontradicting options, only the last used is taken into account. For instance,the two following lines are equivalent:
\link_[linecolor=gray,linewidth=5pt]*<.2>^[linewidth=1pt]\link^<.2>[linecolor=gray,linewidth=1pt].To draw curved links, you should use PSTricks’ arcangle option which
is an angle in degrees (you cannot use a letter code here), measuring thedeviation from a straight line between nodes, at the starting and at theending of the link. Try, it’s easy.
To change the appearance of the arrowhead, you must change PSTricks’parameters arrowsize, arrowlength and arrowinset. Petri-nets uses thefollowing:
\psset{arrowlength=1.4,arrowinset=0,arrowsize=2pt 2}
I wont explain how it works, just try, it’s easy too. (Or read the manual ofPSTricks where all the details are given.)
13

none (default)-
arrowheads<->
reverse arrowheads>-<
double arrowheads<<->>
reverse double arrowheads>>-<<
T-bar flush to endpoints|-|
T-bar centred on endpoints|*-|*
square brackets[-]
rounded brackets(-)
circles centred on endpointso-o
circles flush to endpointsoo-oo
disks centred on endpoints*-*
disks flush to endpoints**-**
extended rounded endsc-c
flush rounded endscc-cc
extended square endsC-C
Figure 5: The different types of links termination. They can be freely mixed.
14
3.4.1 Additional labels
Like for nodes, links can be added more labels. This is also made withthe macro \label, but here, its syntax is like for the macro \link, exceptthat you must not specify the starting and ending nodes (but the options of\link are available).
3.4.2 Arcs
Since links are almost always draw with a single arrowhead at the end (andthen called arcs), a shortcut is provided: the macro \arc may be usedinstead of \link/->/.
4 Tips, tricks and troubleshooting
Nets as macro arguments. If you try to define a net inside the argumentof a macro, you will have an error. For instance, the code
\centerline{\begin{petrinet}(0,0)(1,1)\place{p}(0,0) p\trans{t}(1,1) t\arc{p}{t}\arc{t}{p}\end{petrinet}}
produces an error such as:
! Argument of \net:place:draw has an extra }.<inserted text>
\parl.11 \end{petrinet}}
The reason is that the macro \centerline reads all the net and treatthe end of lines as spaces. Similar things occur with the other characterswhich are considered in a special way inside nets. The right way to producethe desired effect is to use the macro \savenet:
\savenet\begin{petrinet}(0,0)(1,1)\place{p}(0,0) p\trans{t}(1,1) t\arc{p}{t}
15
\arc{t}{p}\end{petrinet}\centerline{\shownet}
the form \savenet\begin{petrinet} works as well and from plain TEXyou should use the form \savenet\beginnet. After one \savenet you mayeven use \shownet several times in order to duplicate the saved net.
Error messages. Sometimes, you’ll get an error message such as:
! Argument of \net:place:draw has an extra }.<inserted text>
\parl.785 \place{i3}(2,0) i_3
?
This usually means that the error was just before the line for which TEXcomplains (here line 785 which is correct). And usually, this error is anomission of one of the arguments of a drawing macro.
Another kind of message occurs quite often:
PSTricks error. See User’s Guide for further information.Type H <return> for immediate help.
! Graphics parameter ‘rcangle’ not defined..\@pstrickserr ... immediate help.}\errmessage {#1}
\endgroupl.794 \arc[rcangle=30]
{ab2}{i3} \bullet?
This is because on line 794, you misspelled the word “arcangle”, giv-ing “rcangle” instead. This error is detected by PSTricks since bracketedarguments are sent verbatim to it.
In general, since the package pndraw uses a lot of tricks in order to readthe arguments of the commands, you should not trust too much the errormessages: just look at the line indicated in the message and seek for amistake in it or in the lines before. (Actually, this advice can be used foralmost any error message issued by LATEX. . . )
16

Figure 6: An arc anchored on empty texts
Drawing commands on multiple lines. Inside a net, label argumentsare delimited by the end of the line. To type an argument which extends onmore than one line, you should end each line but the last with a comment %.
Empty node. If you want to draw “floating” arcs, i.e., arcs wich are notattached to a place or a transition, you just can anchor them on empty texts:the following net is depicted in the figure 6.
\begin{petrinet}(0,0)(2,0)\text{from}(0,0)\text{to}(2,0)\arc{from}{to}\end{petrinet}
Text mode labels. Take care of the interaction between \everylabeland the option " which typesets a label in text mode. For example, setting\everylabel{\scriptstyle} leads to an error every time a text mode labelis typeset because \scriptstyle is a math command. So you should pre-fer the longer but safer form: \everylabel{\ifmmode\scriptstyle\else\scriptsize\fi}.
Labels at the wrong position. If the additional labels of a node ap-pear centered on it instead of outside, this may come from the way youvisualize your document. DVI viewers usually do not interpret correctly allof the PostScript commands used by PSTricks. Trying a PostScript viewer(GhostView is certainly a good choice) may solve your problem.
To be continued. . .
5 Producing PDF documents
The LATEX version of pndraw provides some support for pdfLATEX throughthe Perl script pn2pdf included in the archive. The usage is quite automated,
17
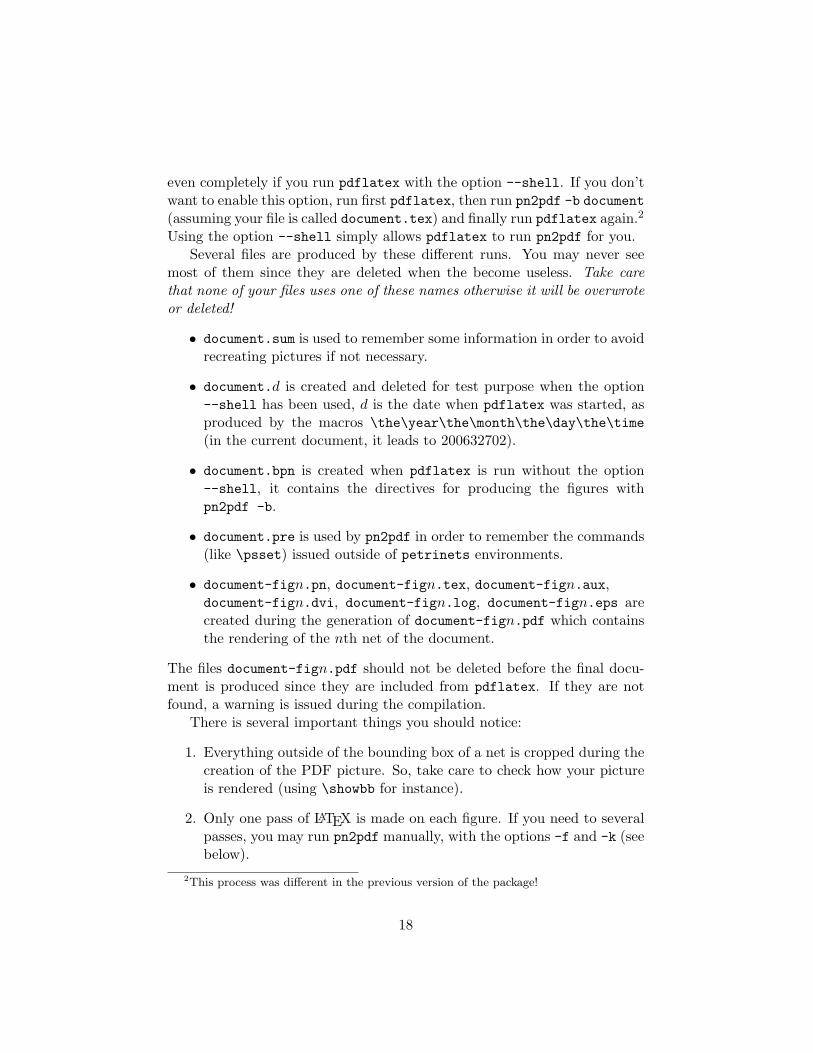
even completely if you run pdflatex with the option --shell. If you don’twant to enable this option, run first pdflatex, then run pn2pdf -b document(assuming your file is called document.tex) and finally run pdflatex again.2
Using the option --shell simply allows pdflatex to run pn2pdf for you.Several files are produced by these different runs. You may never see
most of them since they are deleted when the become useless. Take carethat none of your files uses one of these names otherwise it will be overwroteor deleted!
• document.sum is used to remember some information in order to avoidrecreating pictures if not necessary.
• document.d is created and deleted for test purpose when the option--shell has been used, d is the date when pdflatex was started, asproduced by the macros \the\year\the\month\the\day\the\time(in the current document, it leads to 200632702).
• document.bpn is created when pdflatex is run without the option--shell, it contains the directives for producing the figures withpn2pdf -b.
• document.pre is used by pn2pdf in order to remember the commands(like \psset) issued outside of petrinets environments.
• document-fign.pn, document-fign.tex, document-fign.aux,document-fign.dvi, document-fign.log, document-fign.eps arecreated during the generation of document-fign.pdf which containsthe rendering of the nth net of the document.
The files document-fign.pdf should not be deleted before the final docu-ment is produced since they are included from pdflatex. If they are notfound, a warning is issued during the compilation.
There is several important things you should notice:
1. Everything outside of the bounding box of a net is cropped during thecreation of the PDF picture. So, take care to check how your pictureis rendered (using \showbb for instance).
2. Only one pass of LATEX is made on each figure. If you need to severalpasses, you may run pn2pdf manually, with the options -f and -k (seebelow).
2This process was different in the previous version of the package!
18

3. LATEX and pdfLATEX do not always produce identical rendering of thesame document. However, Petri-nets pictures should be the same sincethey are always typeset by LATEX.
To conclude, here is a summary of the ways to run pn2pdf:
• pn2pdf document-fign.pngenerate pn2pdf document-fign.pdf
• the option -f or --force may be used to force the creation of PDFfiles even if their source did not change.
• pn2pdf -t FILES or pn2pdf --test FILESused by pdfLATEX in order to check is the option --shell was used ornot.
• pn2pdf -b document or pn2pdf --batch documentreads the file document.bpn in order to produce the figures.
• pn2pdf -d FILES or pn2pdf --delete FILESdeletes FILES (which may be patterns like *.aux), this is use bypdflatex in order to remove some temporary files.
• the option -k or --keep prevents pn2pdf from deleting the temporaryfiles.
• the option -h or --help prints a short help and exit.
19
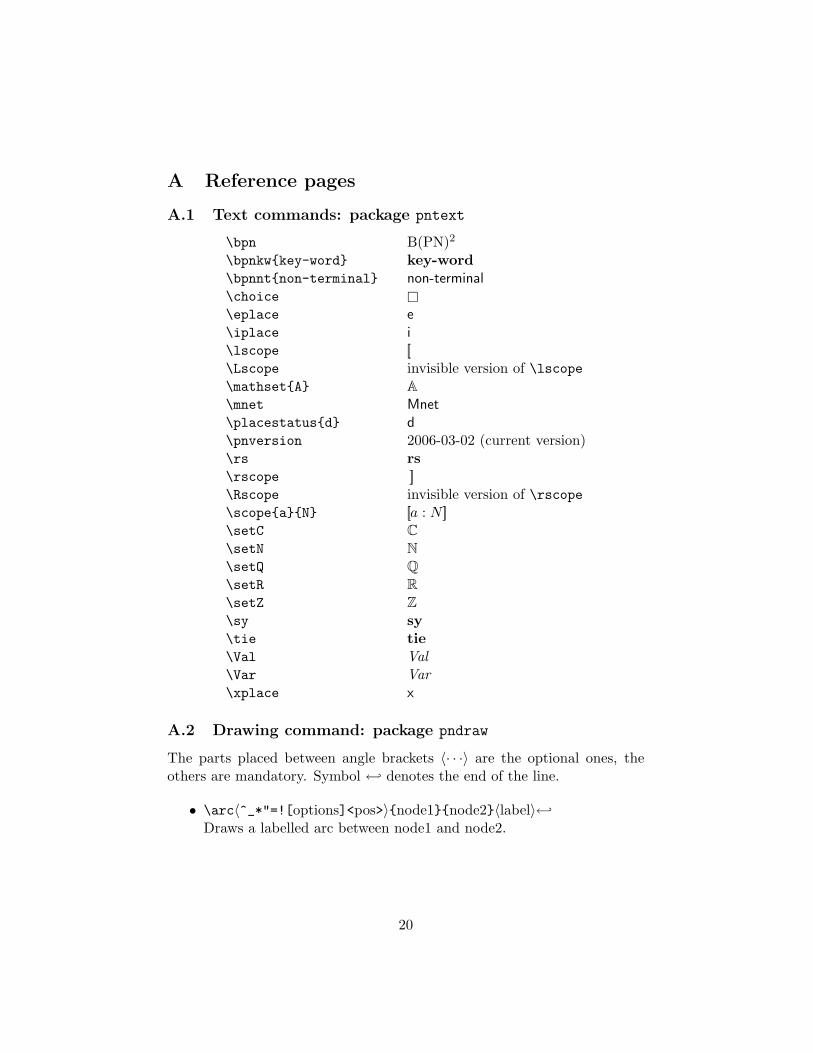
A Reference pages
A.1 Text commands: package pntext
\bpn B(PN)2
\bpnkw{key-word} key-word\bpnnt{non-terminal} non-terminal\choice �\eplace e\iplace i\lscope [[\Lscope invisible version of \lscope\mathset{A} A\mnet Mnet\placestatus{d} d\pnversion 2006-03-02 (current version)\rs rs\rscope ]]\Rscope invisible version of \rscope\scope{a}{N} [[a : N ]]\setC C\setN N\setQ Q\setR R\setZ Z\sy sy\tie tie\Val Val\Var Var\xplace x
A.2 Drawing command: package pndraw
The parts placed between angle brackets 〈· · ·〉 are the optional ones, theothers are mandatory. Symbol ←↩ denotes the end of the line.
• \arc〈^_*"=![options]<pos>〉{node1}{node2}〈label〉←↩Draws a labelled arc between node1 and node2.
20
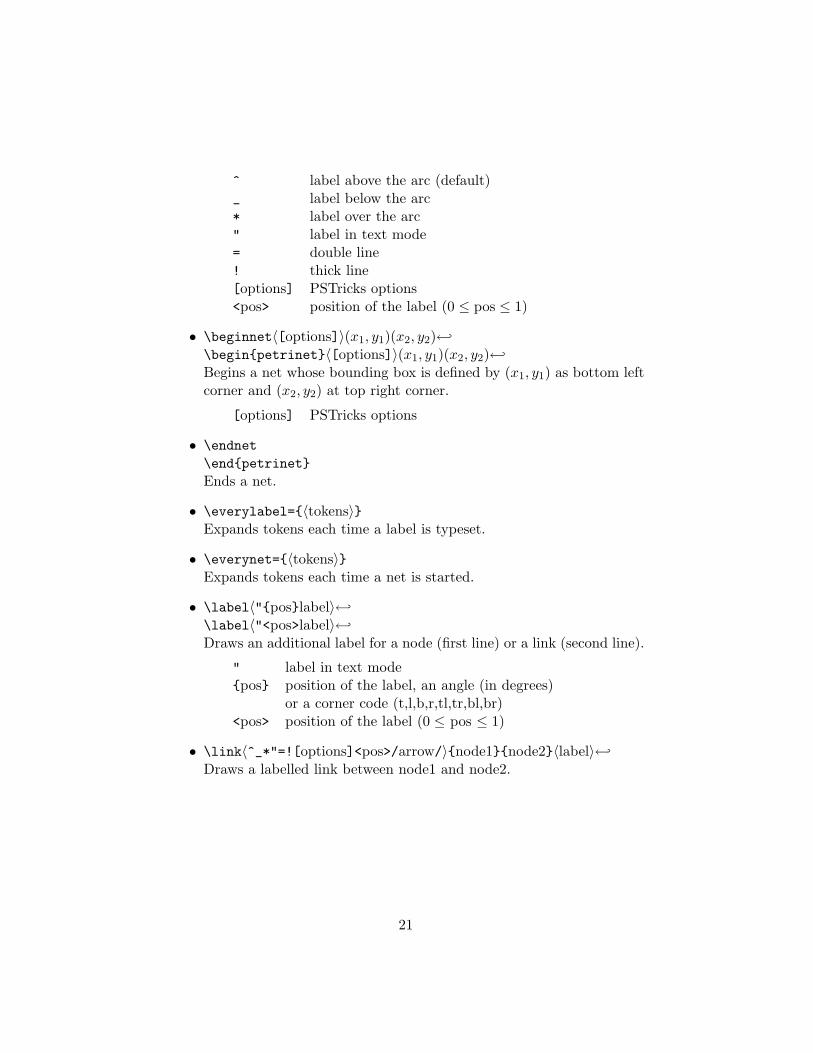
^ label above the arc (default)_ label below the arc* label over the arc" label in text mode= double line! thick line[options] PSTricks options<pos> position of the label (0 ≤ pos ≤ 1)
• \beginnet〈[options]〉(x1, y1)(x2, y2)←↩\begin{petrinet}〈[options]〉(x1, y1)(x2, y2)←↩Begins a net whose bounding box is defined by (x1, y1) as bottom leftcorner and (x2, y2) at top right corner.
[options] PSTricks options
• \endnet\end{petrinet}Ends a net.
• \everylabel={〈tokens〉}Expands tokens each time a label is typeset.
• \everynet={〈tokens〉}Expands tokens each time a net is started.
• \label〈"{pos}label〉←↩\label〈"<pos>label〉←↩Draws an additional label for a node (first line) or a link (second line).
" label in text mode{pos} position of the label, an angle (in degrees)
or a corner code (t,l,b,r,tl,tr,bl,br)<pos> position of the label (0 ≤ pos ≤ 1)
• \link〈^_*"=![options]<pos>/arrow/〉{node1}{node2}〈label〉←↩Draws a labelled link between node1 and node2.
21

^ label above the arc (default)_ label below the arc* label over the arc" label in text mode= double line! thick line[options] PSTricks options<pos> position of the label (0 ≤ pos ≤ 1)/arrow/ arrows specifications (see the figure 5
• \module〈"=![options]〉{name}(x, y)〈label〉←↩Draws a labelled module centered on (x, y).
" label in text mode= double line! thick line[options] PSTricks options
• \modulesize=dimenSets the size of the modules.
• \nodessize{dimen}Sets the size of all nodes.
• \place〈"=![options]〉{name}(x, y)〈label〉←↩Draws a labelled place centered on (x, y).
" label in text mode= double line! thick line[options] PSTricks options
• \placesize=dimenSets the size of the places.
• \psset{name=value〈,...〉}Sets PSTricks options.
22

arcangle=angle angle at the ends of linksarrowinset=real size of arrowheads insetsarrowlength=real length of arrowheadsarrowsize=dim integer size of arrowheadsdoubleline=boolean double lines on/offdoublesep=dim distance between double linesfillcolor=color background colorlabelsep=dim distance between labels and nodeslinecolor=color lines colorlinewidth=dim lines thicknessunit=dim global scalexunit=dim horizontal scaleyunit=dim vertical scale
• \savenetJust before the beginning of a net: saves it without displaying it.
• \showbb〈*[options]〉←↩Draws the bounding box of a net.
* background filled[options] PSTricks options
• \shownetDisplays the last net saved by \savenet.
• \source〈"=![options]〉{name}(x, y)〈label〉←↩Draws a labelled source centered on (x, y).
" label in text mode= double line! thick line[options] PSTricks options
• \sourcesize=dimenSets the size of sources.
• \store〈"=![options]〉{name}(x, y)←↩Draws a store centered on (x, y).
" label in text mode= double line! thick line[options] PSTricks options
23

• \storesize=dimenSets the size of stores.
• \text〈"〉{name}(x, y)〈label〉←↩Draws an unboxed labelled node centered on (x, y).
" label in text mode
• \trans〈*"=![options]〉{name}(x, y)〈label〉←↩Draws a labelled transition centered on (x, y).
* automatic size" label in text mode= double line! thick line[options] PSTricks options
• \transsize=dimenSets the size of transitions.
24