Embed Size (px)
Citation preview

ThinLinX TLXOS RPi Installation Guide
ThinLinX has created an optimized version of ThinLinX OS (TLXOS) for the Rasperry Pi by leveragingthe NEON instruction set; we also use the H.264 hardware decoder built into the RPi to deliver outstanding Citrix HDX Performance on the RPi2 for single Displays. All standard resolutions up to andincluding 1920 x 1200 are supported, we recommend setting 1920 x 1080 (1080p) as this is the native resolution for many Monitors
Installation is very easy using the newly released TLXOS Installer available from one of our Mirror sitesreached by clicking on the link below.
http://thinlinx.com/download.html
During installation it is essential that there is a DHCP server and Internet connectivity on the attached Network.
Creating the Installer (Step 1)
1. Click on the link below to download the ThinLinX highly compressed 265 MB Installer image to a Windows PC or Windows Laptop.
http://thinlinx.com/download.html
Do NOT Download the image direct to the installation Micro SD Card, please ensure you save the image to the Windows PC or Laptop's Hard Drive. The saved image will be be written to the Micro SD Card using the procedure below.
To download the ThinLinX installer, select the closest ThinLinX Download Mirror, click on the TLXOS Raspberry Pi Installer link, then save the installer image file to the PC or Laptop's Directory of your choice.
You can either download and install the ThinLinX Management Software (TMS) onto a Windows PC or Laptop or change the Protocol on any Rpi to TMS mode. TMS is Free when used with any device running TLXOS.

Figure 1
2. Insert a Micro SD Card into a USB to SD Card adapter and insert the adapter into the PC or Laptop. Windows may pop up a box saying, “You need to format the disk in drive X: before you can use it”, if soclick on Cancel as there is no need to format it. Navigate to the location where you downloaded the installation file to, right click on the file and select “Run as administrator”, click on Yes when asked the question below
Figure 2
3. This will unpack the ThinLinX Installer image and launch Win32Disk Imager which will prompt you to write the Installer to the SD Card. Win32 Disk Imager will only write to removable storage, the SD Card is selected automatically in the Device menu, click on the “Write” button to create the ThinLinX installer. The 265MB ThinLinX installer image will only take a few minutes to be written to the SD Card.
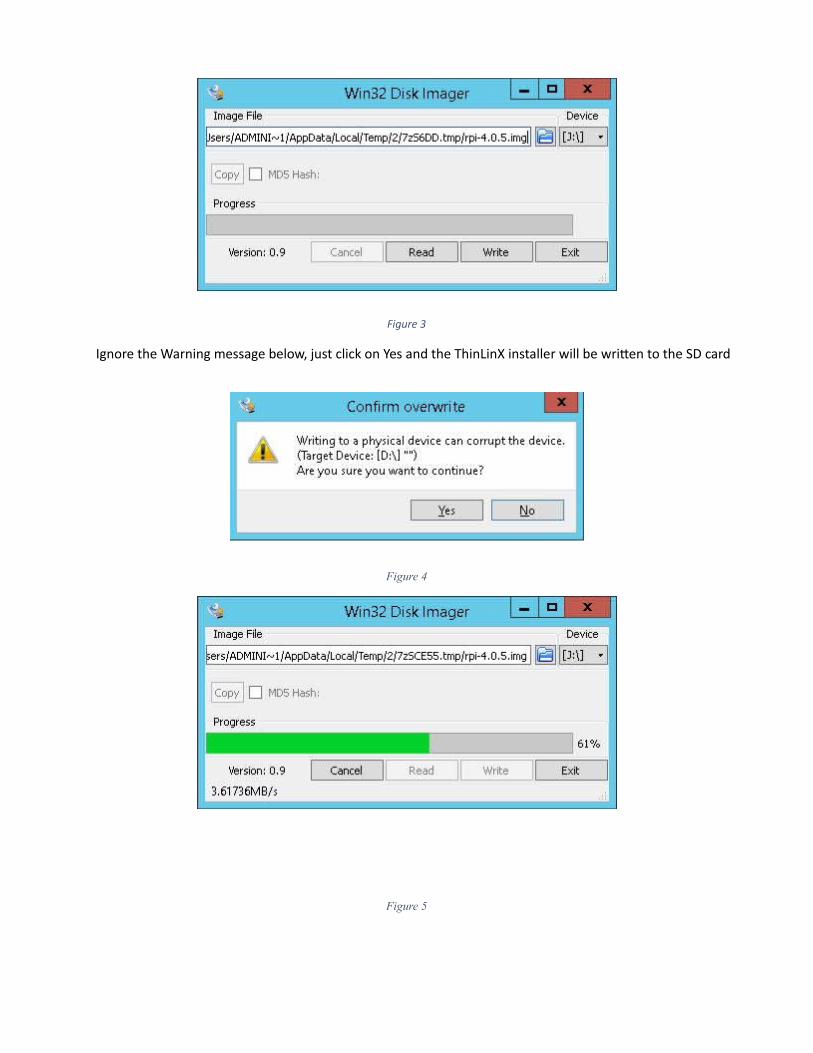
Figure 3
Ignore the Warning message below, just click on Yes and the ThinLinX installer will be written to the SD card
Figure 4
Figure 5
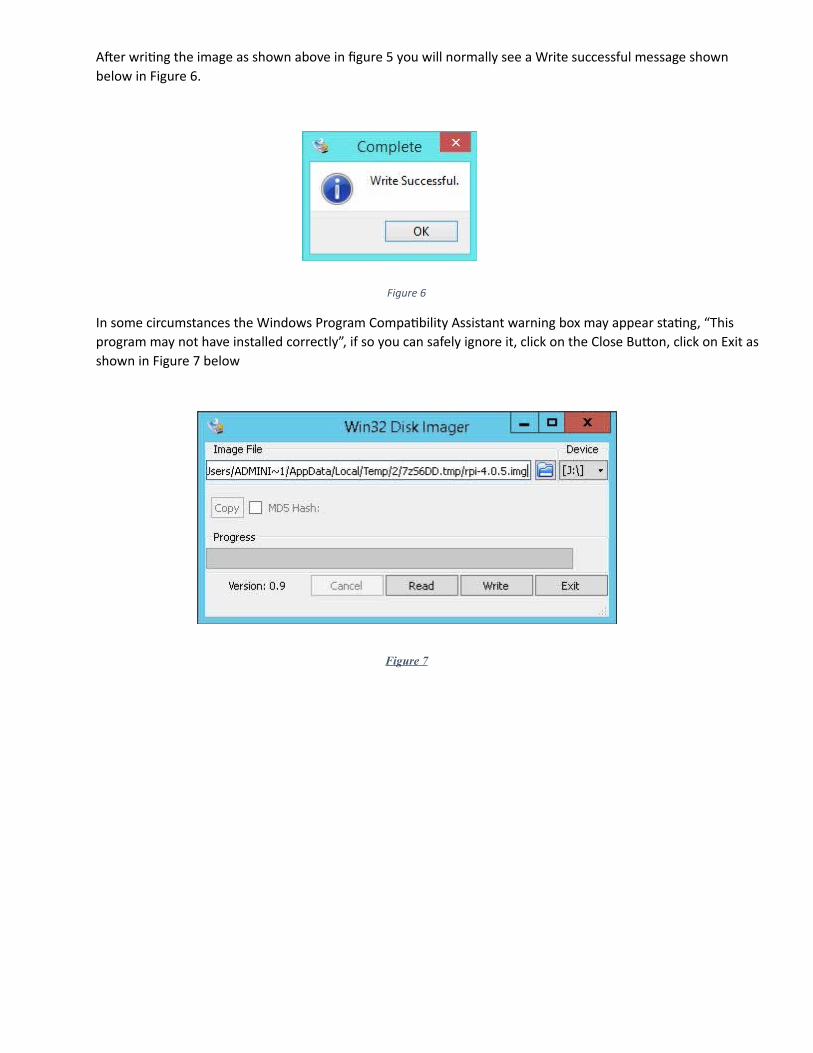
After writing the image as shown above in figure 5 you will normally see a Write successful message shown below in Figure 6.
Figure 6
In some circumstances the Windows Program Compatibility Assistant warning box may appear stating, “This program may not have installed correctly”, if so you can safely ignore it, click on the Close Button, click on Exit as shown in Figure 7 below
Figure 7

Installing the image on the RPi
3. Unplug the USB to SD Card adapter from the PC or Laptop, remove the Micro SD Card and insert into the RPi
4. Boot the RPi, the TLXOS installer will partition and configure the SD Card with TLXOS, this proceduretakes less than 5 minutes, the Rpi reboots running TLXOS. (see image below) You can click on the Configure button to launch the local Configuration menu. See Figure 9
Figure 8

5. Many features can be configured with the local configuration menu, see images below
Figure 9
Figure 10

Figure 11
Figure 12

Figure 13
Figure 14

Figure 15
If you wish to use a Rpi as a TLXOS Device Management console you can switch the Protocol to ThinLinX Management Software (TMS) mode. This allows you to remotely manage all your TLXOS devices. See Figure 16 below showing initial TMS installation, you should accept the default installationlocation as it is writable by TMS. Also as shown in the image below, please ensure that you “untick” the pre-selected “Run TMS wizard now” as the Wizard is not used by the Rpi

Figure 16 above
Figure 17
Figure 17 shows TMS running on the Rpi, you can see that the Rpi has detected itself as a TLX Rpi device. At any time during the 30 Day Free Trial or after the Trial has completed you can use TMS to permanently Register the Rpi. To do this you need to buy a Rpi License from the ThinLinX online store, reached by clicking on this link
https://tls.thinlinx.com/store/index.php/thinclient/tlxos-rpi-firmware-license.html
To Register your Rpi choose the TMS / Tools / Product Registration selection, another Dialog box titled “ThinLinX TLS Credentials” appears, enter the email address and password that you chose for Registration when you purchased RPi Licenses at the ThinLinX online store
If you have any issues with the Product Registration with the Windows version of TMS, you can log intothe ThinLinX License Server (TLS) using a Web Browser to check your Licenses used and Registered devices. https://tls.thinlinx.com/
Note, on some versions of Windows you must use Internet Explorer to Log into https://tls.thinlinx.com/ before the TMS Product Registration is successful. You can find more information on TMS at this link below
http://thinlinx.com/tms.html
See an image of the Windows version of TMS below showing that the Rpi is Registered

Figure 18
To change the Rpi Screen Resolution, click on the TMS Display Icon to bring up a menu which allows you to configure any resolution that you want, in most cases this is 1920 x 1080
Figure 19
In Figure 19 above you can see that I have set the resolution to 1920 x 1080, you must ensure that both Output 2 and Output 3 are set to None as shown above. After configuring the Display you must click on

OK and then the Reboot Icon to save the changes. If you are using the local configuration menu to set the Screen resolution you must click on Save, then reboot the Rpi.
TLXOS is under continuous development with new features and optimizations being added regularly. After TLXOS first boots you should use either the TMS Protocol Icon or the local configuration menu Protocol Tab to select the Protocol that you wish to use for your Remote Desktop connection. In the caseof Citrix HDX mode, you can select HDX to run the native Citrix HDX mode or use the local Web Browser to connect to your Citrix HDX session. The default Citrix HDX mode on the RPi is H.264 which delivers excellent performance at 1080p resolution.
TLXOS uses a “Read Only” Filesystem with a Ramdisk overlay, in some circumstances the local ChromeWeb Browser fails to, or is very slow to load, if this happens simply unplug the power and reboot. We are investigating this issue…
TLXOS supports many different Protocols, the best performance is Citrix HDX mode as the RPi H.264 Hardware decoder is used to decode the screen. We have plans to add Smart Card support to future releases of TLXOS.
TLXOS is also available for the entire Intel NUC range, Intel Compute Stick and the Re-Purpose PC or Laptop market. We have plans to add support for the Rockchip and NVIDIA Tegra.
When running TMS, never run more than one instance of TMS on the same Network subnet...TMS default client discovery is a UDP Broadcast, the devices running TLXOS will connect to the first instance of TMS that they discover. This can cause operator confusion if some TLXOS devices are connected to one system running TMS and other devices are connected to another instance of TMS. If this happens close both instances of TMS and just launch one instance.
The devices running TLXOS can be configured using TMS to connect to a specific IP Address and Port number where an instance of TMS is running, this is very useful to remotely manage a large number of devices that may be behind Firewalls. TMS uses a SSL connection to Devices running TLXOS to allow those Devices to be managed even when they are located behind Firewalls. The default UDP discovery mode will only discover TLXOS devices on the local LAN. If you wish to manage TLXOS devices that are NOT on the local LAN you must configure each Device with the IP ADDRESS and PORT number of the System that is running TMS. To do this select any TLXOS Devices that have been discovered and are visible on TMS, then select TMS / Tools / Configuration / TMS Server Configuration, see Figure 20 below. You can also set DHCP Option flags on your DHCP Servers to point your TLXOS Devices to the System running TMS
You should also use TMS / Set Tlxconfig password to change the default configuration password on each Rpi, this will ensure your users can not change the configuration of the Rpi.

Figure 20