Embed Size (px)
Citation preview
Module 2:
Elementary Programming
The Basics of Java

Module 2: The Basics of Java page 2© Dr Jonathan Cazalas
Motivations
In the preceding module, you learned how
to create, compile, and run a Java program.
Starting from this module, you will learn
how to solve practical problems
programmatically.
– Through these problems, you will learn Java
primitive data types and related subjects, such
as variables, constants, data types, operators,
expressions, and input and output.
Module 2: The Basics of Java page 3© Dr Jonathan Cazalas
Objectives To write Java programs to perform simple computations (§2.2).
To obtain input from the console using the Scanner class (§2.3).
To use identifiers to name variables, constants, methods, and classes (§2.4).
To use variables to store data (§§2.5–2.6).
To program with assignment statements and assignment expressions (§2.6).
To use constants to store permanent data (§2.7).
To name classes, methods, variables, and constants by following their naming conventions (§2.8).
To explore Java numeric primitive data types: byte, short, int, long, float, and double (§2.9.1).
To read a byte, short, int, long, float, or double value from the keyboard (§2.9.2).
To perform operations using operators +, -, *, /, and % (§2.9.3).
To perform exponent operations using Math.pow(a, b) (§2.9.4).
To write integer literals, floating-point literals, and literals in scientific notation (§2.10).
To write and evaluate numeric expressions (§2.11).
To obtain the current system time using System.currentTimeMillis() (§2.12).
To use augmented assignment operators (§2.13).
To distinguish between postincrement and preincrement and between postdecrement and predecrement (§2.14).
To cast the value of one type to another type (§2.15).
To describe the software development process and apply it to develop the loan payment program (§2.16).
To write a program that converts a large amount of money into smaller units (§2.17).
To avoid common errors and pitfalls in elementary programming (§2.18).

Module 2: The Basics of Java page 4© Dr Jonathan Cazalas
Writing a Simple Program
Write a program that will calculate the area
of a circle.
Remember:
– Step 1: Problem-solving Phase
– Step 2: Implementation Phase

Module 2: The Basics of Java page 5© Dr Jonathan Cazalas
Writing a Simple Program
Write a program that will calculate the area
of a circle.
Step 1: Design your algorithm
1. Get the radius of the circle.
2. Compute the area using the following
formula:
area = radius x radius x π
3. Display the result

Module 2: The Basics of Java page 6© Dr Jonathan Cazalas
Writing a Simple Program
Write a program that will calculate the area
of a circle.
Step 2: Implementation (code the algorithm)
public class ComputeArea {
public static void main(String[] args) {
// Step 1: get radius
// Step 2: calculate area
// Step 3: display the result
}
}

Module 2: The Basics of Java page 7© Dr Jonathan Cazalas
Writing a Simple Program
Write a program that will calculate the area
of a circle.
Step 2: Implementation (code the algorithm)
– In order to store the radius, the program must
declare a symbol called a variable.
– A variable represents a value stored in the
computer’s memory
– You should choose good names for variables
Do not choose “x” or “y”…these have no meaning
Choose names with meaning…“area” or “radius”
Module 2: The Basics of Java page 8© Dr Jonathan Cazalas
Writing a Simple Program
Write a program that will calculate the area
of a circle.
Step 2: Implementation (code the algorithm)
– What value do you want to store in radius?
– What about area?
Integer? Real number? Something else maybe?
– The variable’s data type is the kind of data that
you can store in that particular variable.
– So when you declare (create) a variable, you
must state its data type and the variable name.
Module 2: The Basics of Java page 9© Dr Jonathan Cazalas
Writing a Simple Program
Write a program that will calculate the area
of a circle.
Step 2: Implementation (code the algorithm)
– Java provides simple data types for integers, real
numbers, characters, and Boolean types.
– These basic data types are known as primitives.
– Here are two example primitive data types:
int : used to store an integer
double : used to store a real number

Module 2: The Basics of Java page 10© Dr Jonathan Cazalas
Writing a Simple Program
Write a program that will calculate the area
of a circle.
Step 2: Implementation (code the algorithm)
public class ComputeArea {
public static void main(String[] args) {
double radius, area;
// Step 1: get radius
// Step 2: calculate area
// Step 3: display the result
}
}

Module 2: The Basics of Java page 11© Dr Jonathan Cazalas
Writing a Simple Program
Write a program that will calculate the area
of a circle.
Step 2: Implementation (code the algorithm)
– Now, we set a value for radius.
Later we will learn how to ask the user to input the
value for radius!
– We then perform the calculation to get the area.
– And we print/display the result.

Module 2: The Basics of Java page 12© Dr Jonathan Cazalas
Writing a Simple Program
Write a program that will calculate the area
of a circle.
Step 2: Implementation (code the algorithm)
public class ComputeArea {
public static void main(String[] args) {
double radius, area;
// Step 1: set radius
radius = 20;
// Step 2: calculate area
area = radius * radius * 3.14159;
// Step 3: display the result
System.out.println(“The area for the circle of radius ” +
radius + “ is ” + area + “.”);
}
}

Module 2: The Basics of Java page 13© Dr Jonathan Cazalas
Trace a Program Executionpublic class ComputeArea {
public static void main(String[] args) {
double radius;
double area;
// Assign a radius
radius = 20;
// Compute area
area = radius * radius * 3.14159;
// Display results
System.out.println("The area for the circle of radius " +
radius + " is " + area);
}
}
no valueradius
allocate memory
for radius
animation
1
2
3
4
5
6
7
8
9
10
11
12
13
14
15
16

Module 2: The Basics of Java page 14© Dr Jonathan Cazalas
Trace a Program Executionpublic class ComputeArea {
public static void main(String[] args) {
double radius;
double area;
// Assign a radius
radius = 20;
// Compute area
area = radius * radius * 3.14159;
// Display results
System.out.println("The area for the circle of radius " +
radius + " is " + area);
}
}
no valueradius
memory
no valuearea
allocate memory
for area
animation
1
2
3
4
5
6
7
8
9
10
11
12
13
14
15
16

Module 2: The Basics of Java page 15© Dr Jonathan Cazalas
Trace a Program Executionpublic class ComputeArea {
public static void main(String[] args) {
double radius;
double area;
// Assign a radius
radius = 20;
// Compute area
area = radius * radius * 3.14159;
// Display results
System.out.println("The area for the circle of radius " +
radius + " is " + area);
}
}
20radius
no valuearea
assign 20 to radius
animation
1
2
3
4
5
6
7
8
9
10
11
12
13
14
15
16

Module 2: The Basics of Java page 16© Dr Jonathan Cazalas
Trace a Program Executionpublic class ComputeArea {
public static void main(String[] args) {
double radius;
double area;
// Assign a radius
radius = 20;
// Compute area
area = radius * radius * 3.14159;
// Display results
System.out.println("The area for the circle of radius " +
radius + " is " + area);
}
}
20radius
memory
1256.636area
compute area and assign it
to variable area
animation
1
2
3
4
5
6
7
8
9
10
11
12
13
14
15
16

Module 2: The Basics of Java page 17© Dr Jonathan Cazalas
Trace a Program Executionpublic class ComputeArea {
public static void main(String[] args) {
double radius;
double area;
// Assign a radius
radius = 20;
// Compute area
area = radius * radius * 3.14159;
// Display results
System.out.println("The area for the circle of radius " +
radius + " is " + area);
}
}
20radius
memory
1256.636area
print a message to the
console
animation
1
2
3
4
5
6
7
8
9
10
11
12
13
14
15
16
Module 2: The Basics of Java page 18© Dr Jonathan Cazalas
Writing a Simple Program
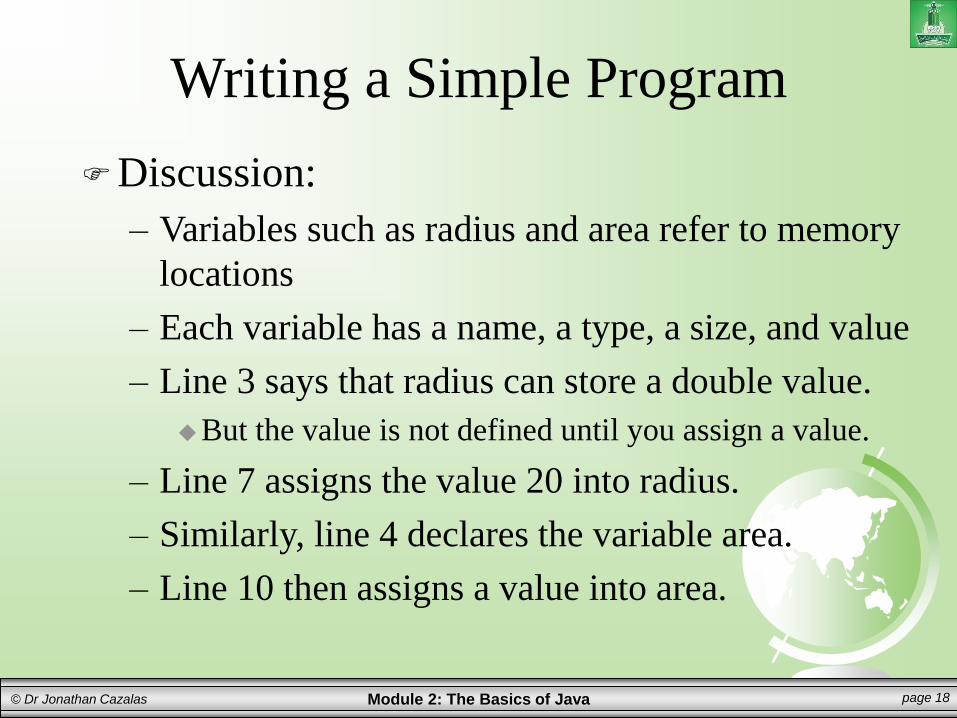
Discussion:
– Variables such as radius and area refer to memory
locations
– Each variable has a name, a type, a size, and value
– Line 3 says that radius can store a double value.
But the value is not defined until you assign a value.
– Line 7 assigns the value 20 into radius.
– Similarly, line 4 declares the variable area.
– Line 10 then assigns a value into area.

Module 2: The Basics of Java page 19© Dr Jonathan Cazalas
Writing a Simple Program
Discussion:
– The following table shows the value in memory
for the variables area and radius as the program is
executed.
– This method of reviewing a program is called
“tracing a program”.
– Helps you to understand how programs work.

Module 2: The Basics of Java page 20© Dr Jonathan Cazalas
Writing a Simple Program
Discussion:
– The plus sign (+) has two meanings in Java:
Addition
Concatenation (combining two strings together)
– The plus sign (+) in lines 13-14 is called a string
concatenation operator.
It combines two strings into one string.
If a string is concatenated with a number, the number is
converted into a string and then concatenated with the
other string.
See sample program: StringPractice.java

Module 2: The Basics of Java page 21© Dr Jonathan Cazalas
Writing a Simple Program
Discussion:
– In Java, a string cannot be written across multiple
lines in the source code.
– The following statement would result in a compile
error:
– To fix the error, break the string into separate
substrings and use concatenation (+) to combine:
System.out.println(“Introduction to Java Programming, by
Y. Daniel Liang”);
System.out.println(“Introduction to Java Programming, ” +
“ by Y. Daniel Liang”);

Module 2: The Basics of Java page 22© Dr Jonathan Cazalas
Reading Input from the Console
In the last example, the radius was fixed.
Your program can be better, and more
interactive, by letting the user enter the radius.
Java uses the Scanner class for console input
– System.out refers to the standout output device
By default, standard output is the monitor
– System.in refers to the standard input device
By default, standard input is the keyboard
Module 2: The Basics of Java page 23© Dr Jonathan Cazalas
Reading Input from the Console
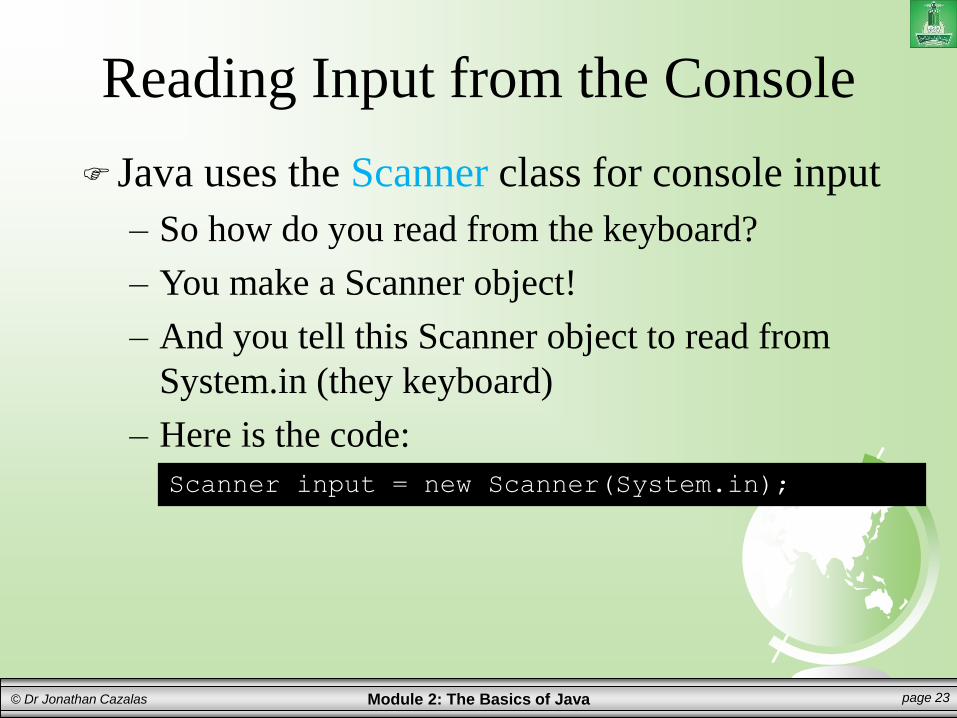
Java uses the Scanner class for console input
– So how do you read from the keyboard?
– You make a Scanner object!
– And you tell this Scanner object to read from
System.in (they keyboard)
– Here is the code:
Scanner input = new Scanner(System.in);

Module 2: The Basics of Java page 24© Dr Jonathan Cazalas
Reading Input from the Console
– new Scanner(System.in) creates an object
of the Scanner type.
– Scanner input says that input is a variable
whose type is Scanner.
– The whole line creates a Scanner object and then
saves the reference of this object into the variable
called input.
– Now, we can use this new Scanner object.
Specifically, this Scanner object has helpful methods
that allow us to read/scan data from the user.
Scanner input = new Scanner(System.in);

Module 2: The Basics of Java page 25© Dr Jonathan Cazalas
Reading Input from the Console
Methods of Scanner object:
– We can invoke a method on the Scanner object.
– What does this mean?
– It means we are asking the Scanner object to
perform a specific task.
– Example:
We can invoke the nextDouble() method
This allows us to read a double value from the input
double radius = input.nextDouble();
Module 2: The Basics of Java page 26© Dr Jonathan Cazalas
Reading Input from the Console
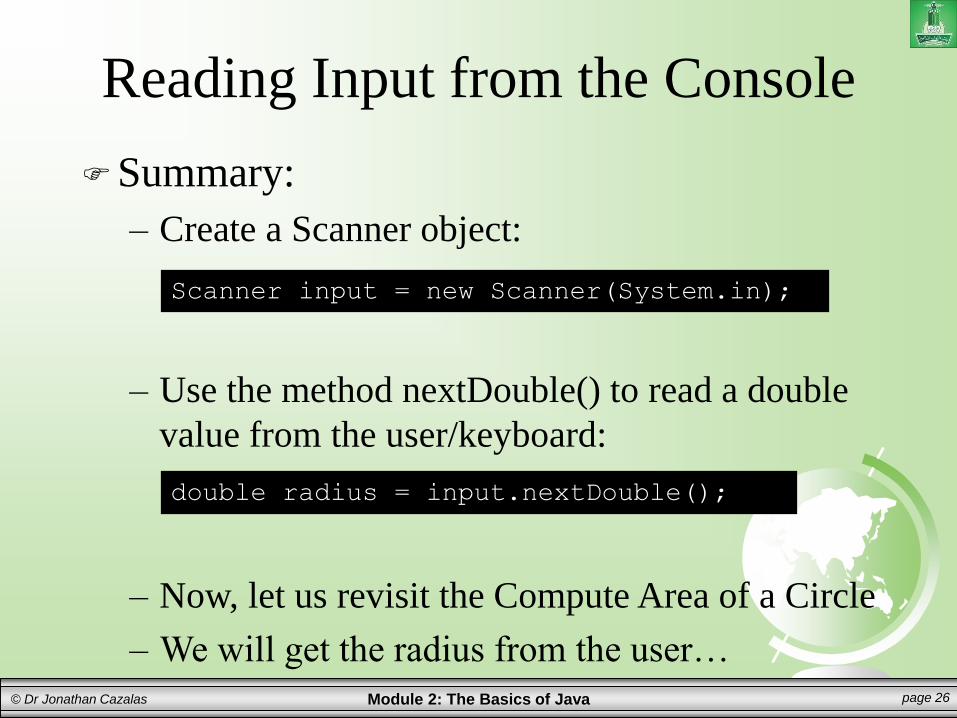
Summary:
– Create a Scanner object:
– Use the method nextDouble() to read a double
value from the user/keyboard:
– Now, let us revisit the Compute Area of a Circle
– We will get the radius from the user…
double radius = input.nextDouble();
Scanner input = new Scanner(System.in);

Module 2: The Basics of Java page 27© Dr Jonathan Cazalas
Program 2: Compute Area with
Console/User Input
See sample program: AreaCircle.java

Module 2: The Basics of Java page 28© Dr Jonathan Cazalas
Program 2: Compute Area with
Console/User InputDiscussion:
– Before you can use the Scanner class, you must
import it!
– The Scanner class is in the java.util package.
– We import this on Line 1 of the program.
– Notice that we do this import before we start
coding our actual class.

Module 2: The Basics of Java page 29© Dr Jonathan Cazalas
Program 2: Compute Area with
Console/User InputDiscussion:
– There are two types of import statements:
Specific import: specifies a single class that should be
imported
– Example:import java.util.Scanner;
Wildcard import: imports all the classes in a package
by using the asterisk as the wildcard.
– Example:import java.util.*;
– You can use either methods to import classes.
– The choice is up to you! You are the programmer!

Module 2: The Basics of Java page 30© Dr Jonathan Cazalas
Program 3: Compute Average
Write a program to get three values from the
user and compute their average.
Remember:
– Step 1: Problem-solving Phase
– Step 2: Implementation Phase

Module 2: The Basics of Java page 31© Dr Jonathan Cazalas
Program 3: Compute Average
Write a program to get three values from the
user and compute their average.
Step 1: Design your algorithm
1. Get three numbers from the user.
Use Scanner object
2. Compute the average of the three numbers:
average = (num1 + num2 + num3) / 3
3. Display the result

Module 2: The Basics of Java page 32© Dr Jonathan Cazalas
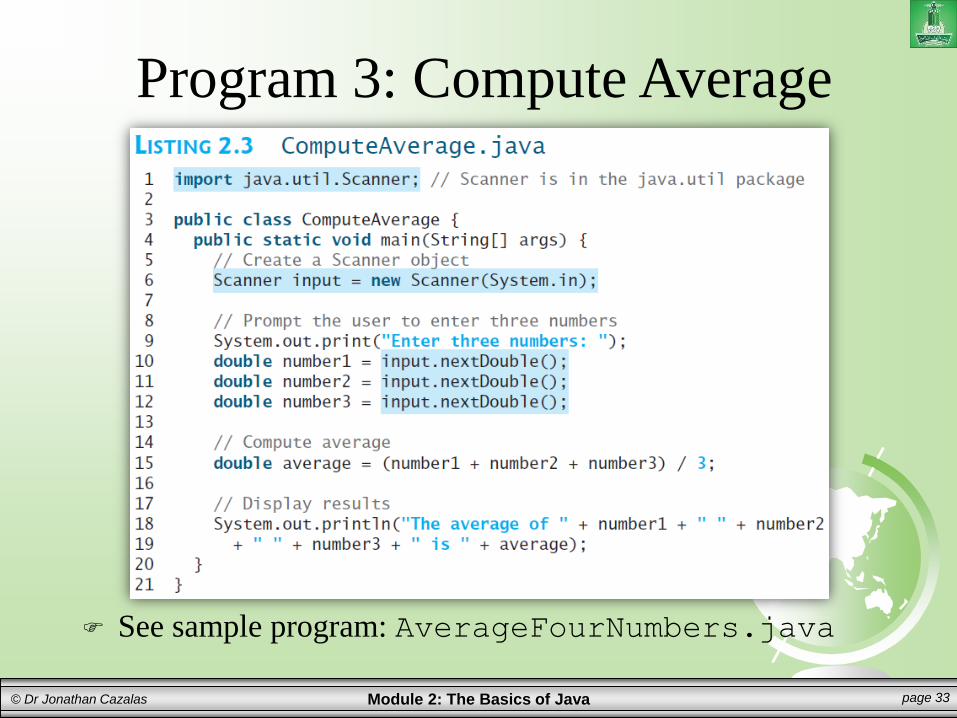
Program 3: Compute Average
Write a program to get three values from the
user and compute their average.
Step 2: Implementation (code the algorithm)
import java.util.Scanner;
public class ComputeAverage {
public static void main(String[] args) {
Scanner input = new Scanner(System.in);
// Step 1: ask user to enter three values
// Step 2: calculate average
// Step 3: display the results
}
}
Module 2: The Basics of Java page 33© Dr Jonathan Cazalas
Program 3: Compute Average
See sample program: AverageFourNumbers.java
Module 2: The Basics of Java page 34© Dr Jonathan Cazalas
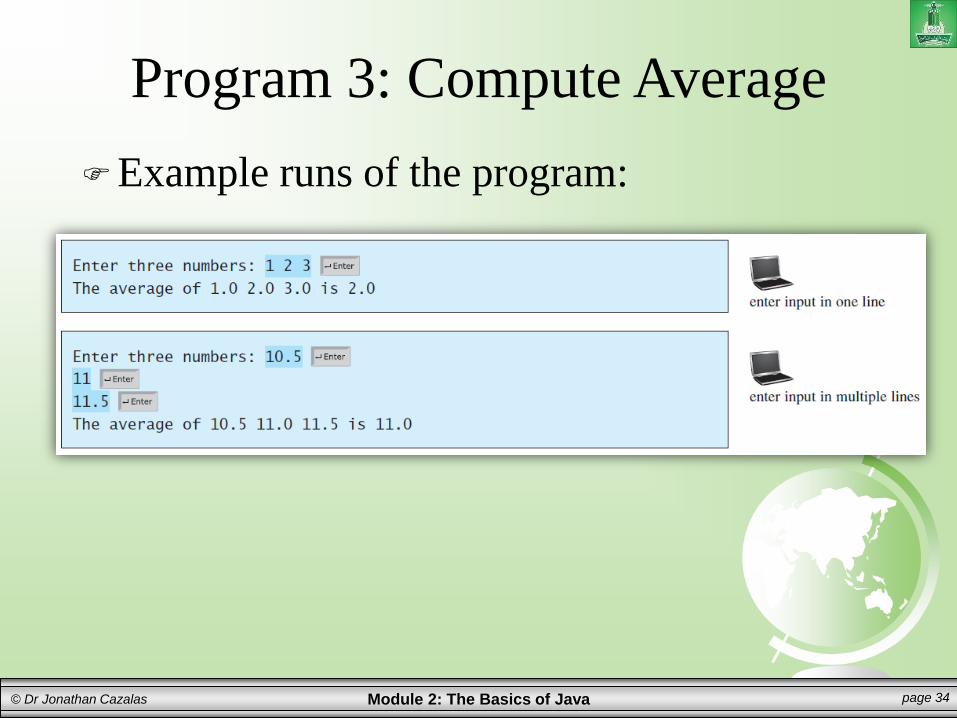
Program 3: Compute Average
Example runs of the program:
Module 2: The Basics of Java page 35© Dr Jonathan Cazalas
Identifiers
What is an identifier?
Identifiers are the names that identify elements of your
program, such as classes, methods, and variables.
– An identifier is a sequence of characters that consist of letters,
digits, underscores (_), and dollar signs ($).
– An identifier must start with a letter, an underscore (_), or a
dollar sign ($). It cannot start with a digit.
– An identifier cannot be a reserved word. (See Appendix A,
“Java Keywords,” for a list of reserved words).
– An identifier cannot be true, false, or
null.
– An identifier can be of any length.

Module 2: The Basics of Java page 36© Dr Jonathan Cazalas
Identifiers
Examples of legal identifiers:
– area, radius, ComputeArea, $2, average
Examples of illegal identifiers:
– 2A and d+4
These two do not follow the rules
Java will report that you have a syntax error!
Note: Java is case sensitive
– area, Area, and AREA all are different identifiers

Module 2: The Basics of Java page 37© Dr Jonathan Cazalas
Variables
Variables are used to represent values that may be
changed in the program.
– In the previous programs, we used variables to store
values
area, radius, average, etc.
They are called variables because their values can
be changed!
Module 2: The Basics of Java page 38© Dr Jonathan Cazalas
Variables
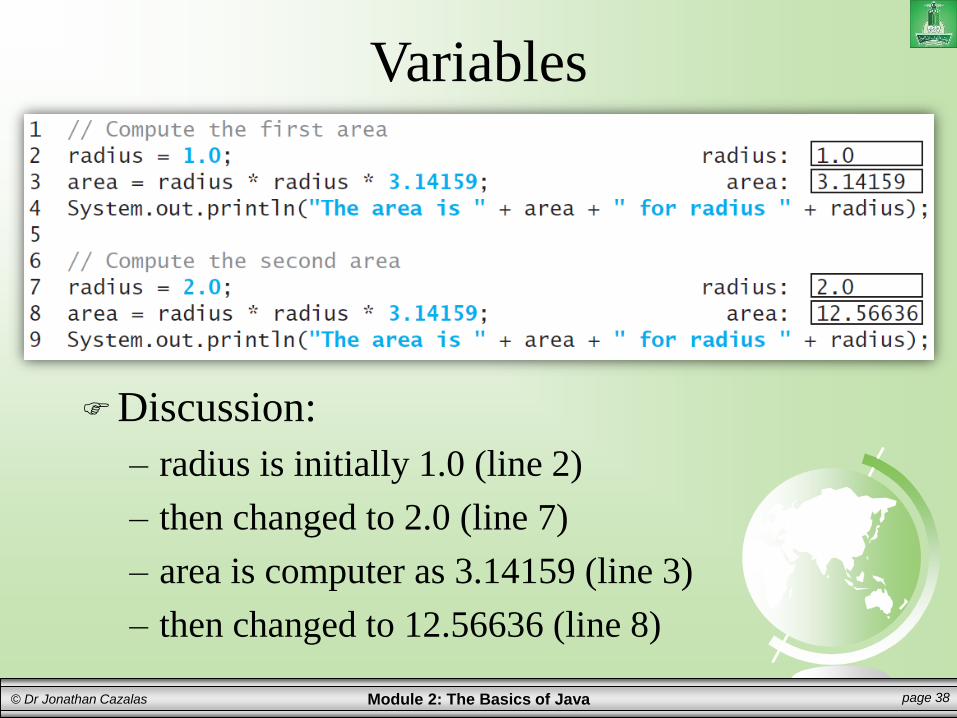
Discussion:
– radius is initially 1.0 (line 2)
– then changed to 2.0 (line 7)
– area is computer as 3.14159 (line 3)
– then changed to 12.56636 (line 8)

Module 2: The Basics of Java page 39© Dr Jonathan Cazalas
Declaring Variables
int x; // Declare x to be an
// integer variable;
double radius; // Declare radius to
// be a double variable;
char a; // Declare a to be a
// character variable;
Syntax for declaring a variable:
datatype variableName;
Examples:

Module 2: The Basics of Java page 40© Dr Jonathan Cazalas
Declaring Variables
If variables are of the dame data type, they can be
declared together:
datatype var1, var2, var3,…, varn;
Example:
int i, j, k;
Variables often have initial values
You can declare and initialize in one step:
int count = 1;
double pi = 3.14159;

Module 2: The Basics of Java page 41© Dr Jonathan Cazalas
Declaring Variables
You can also use shorthand form to declare and initialize variables of the same type together:
Example:
int i = 62, j = 78, k = 35;
Tip:
– A variable must be declared before it can be assigned
a value, and a value must be assigned to the variable
before it can be used.
– Try to declare and initialize in one step.
This makes program easier to read and helps to avoid errors

Module 2: The Basics of Java page 42© Dr Jonathan Cazalas
Assignment Statements
After a variable has been declared, we can give
that variable a value.
This is called “assigning a value” to the variable.
In Java, we do this with the assignment statement.
– The equal sign (=) is used as the assignment operator.
– The syntax for assignment statement is as follows:
variable = value;
or
variable = expression;

Module 2: The Basics of Java page 43© Dr Jonathan Cazalas
Assignment Statements
Sometimes we assign an exact values into
variables:
– Examples:
int y = 1; // assign 1 to y
double w = 3.0; // assign 3.0 to w
Other times we assign the value of an expression
into the variable:
– Examples:
int x = 5 * (3 / 2);
double area = radius * radius * 3.14159;

Module 2: The Basics of Java page 44© Dr Jonathan Cazalas
Assignment Statements
If a value is assigned to multiple variables, you
can use this syntax:i = j = k = 5;
This is equivalent to:k = 5;
j = k;
i = j;

Module 2: The Basics of Java page 45© Dr Jonathan Cazalas
Assignment Statements
You can also use the same variable on both sides
of the assignment statement
Example:x = x + 1;
– First, the right side of the assignment is calculated.
– Then, the new value is assigned into the variable on
the left (x).
So if the value of x was 7 before the statement is executed,
then x will become 8 after the statement is executed.
See sample program: VariablePractice.java

Module 2: The Basics of Java page 46© Dr Jonathan Cazalas
Assignment Statements
Note: in an assignment statement, the data type of
the variable on the left must be compatible with
the data type of the value on the right.
Example:
int x = 1.0;
– This would be illegal!
– The data type of x is an int.
– You cannot assign a double value (1.0) into an int
variable unless you use type casting.
Type casting is coming later…
Module 2: The Basics of Java page 47© Dr Jonathan Cazalas
Named Constants
A named constant is an identifier that represents a
permanent value.
– The value of a variable can change during execution
of a program.
– However, a named constant, or simply constant,
represents a permanent data that never changes.
– Here is the syntax:
final datatype CONSTANTNAME = value;
– Example:
final double PI = 3.14159;
final int SIZE = 15;

Module 2: The Basics of Java page 48© Dr Jonathan Cazalas
Program 4: Compute Area with a
Constant

Module 2: The Basics of Java page 49© Dr Jonathan Cazalas
Named Constants
So what are the benefits of using constants?
1. You don’t have to repeatedly type the same value if
it is used multiple times
2. If you have to change the value, you only need to
change it in a single location in the code
Instead of changing it at all locations
3. A descriptive name for a constant makes the
program easier to read
Module 2: The Basics of Java page 50© Dr Jonathan Cazalas
Naming Conventions
Choose meaningful and descriptive names.
– Do not use abbreviations
Variables and method names:
– Use lowercase. If the name consists of several
words, concatenate all in one, use lowercase
for the first word, and capitalize the first letter
of each subsequent word in the name.
– For example, the variables radius and area,
and the method computeArea.

Module 2: The Basics of Java page 51© Dr Jonathan Cazalas
Naming Conventions
Class names:
– Capitalize the first letter of each word in the name.
– For example, the class name ComputeArea.
Constants:
– Capitalize all letters in constants, and use underscores to connect words.
– For example, the constants PI and MAX_VALUE
Do you have to follow these rules?
– No. But it makes your program MUCH easier to read!!!

Module 2: The Basics of Java page 52© Dr Jonathan Cazalas
Numerical Data Types
Every data type has a range of possible valuesthat it can have/hold
Whenever you make a variable or constant, thecompiler will allocate (create) memory basedon the data type requested
Java provides eight primitive data types
The following table lists the six numeric datatypes and their ranges and storage sizes

Module 2: The Basics of Java page 53© Dr Jonathan Cazalas
Numerical Data Types
Name Range Storage Size
byte –27 to 27 – 1 (-128 to 127) 8-bit signed
short –215 to 215 – 1 (-32768 to 32767) 16-bit signed
int –231 to 231 – 1 (-2147483648 to 2147483647) 32-bit signed
long –263 to 263 – 1 64-bit signed
(i.e., -9223372036854775808 to 9223372036854775807)
float Negative range: 32-bit IEEE 754
-3.4028235E+38 to -1.4E-45
Positive range:
1.4E-45 to 3.4028235E+38
double Negative range: 64-bit IEEE 754
-1.7976931348623157E+308 to -4.9E-324
Positive range:
4.9E-324 to 1.7976931348623157E+308

Module 2: The Basics of Java page 54© Dr Jonathan Cazalas
Numerical Data Types
Example:
– The largest value you can save into an integer datatype is 2,147,483,647.
This is just over 2 billion
– So what if you try to store a value larger than thisinto an integer data type?
int x = 2147483648;
– Answer: you will get an error.
– This will not work.
– Solution: use a different data type
double, float, long

Module 2: The Basics of Java page 55© Dr Jonathan Cazalas
Numerical Data Types
Java uses four data types for integers:
– byte, short, int, long
Which should you use?
– Choose the type that is most appropriate for yourvariable.
– Long is usually unnecessary for most int types
It is larger than needed.
Normal usage:
– int is normally used for integers
– double is normally used for real numbers
Module 2: The Basics of Java page 56© Dr Jonathan Cazalas
Number Literals
A literal is a constant value that appears directly in the program.
For example, 34, 1,000,000, and 5.0 are literals in the following statements:
int i = 34;
long x = 1000000;
double d = 5.0;
Module 2: The Basics of Java page 57© Dr Jonathan Cazalas
Integer Literals
An integer literal can be assigned to an integervariable as long as it can fit into the variable.
A compilation error would occur if the literalwere too large for the variable to hold.
For example, the statementbyte b = 1000;
– would cause a compilation error
– 1000 cannot be stored in a variable of the bytetype.
– The range for byte is -128 to 127
Anything smaller or larger will result in an error!
Module 2: The Basics of Java page 58© Dr Jonathan Cazalas
Integer Literals
An integer literal is assumed to be of the inttype
– The range for int is between -231 (-2147483648)to 231–1 (2147483647).
– If you want an int, but you need to store a largernumber, then you should use the type long
– To denote an integer literal of the long type,append it with the letter L or l.
L is preferred because l (lowercase L) can easily beconfused with 1 (the digit one).
Module 2: The Basics of Java page 59© Dr Jonathan Cazalas
Floating-Point Literals
Floating-point literals are written with adecimal point.
– By default, a floating-point literal is treated as adouble type value.
– For example, 5.0 is considered a double value, nota float value.
– You can make a number a float by appending theletter f or F, and make a number a double byappending the letter d or D.
For example, you can use 100.2f or 100.2F for a floatnumber, and 100.2d or 100.2D for a double number.
Module 2: The Basics of Java page 60© Dr Jonathan Cazalas
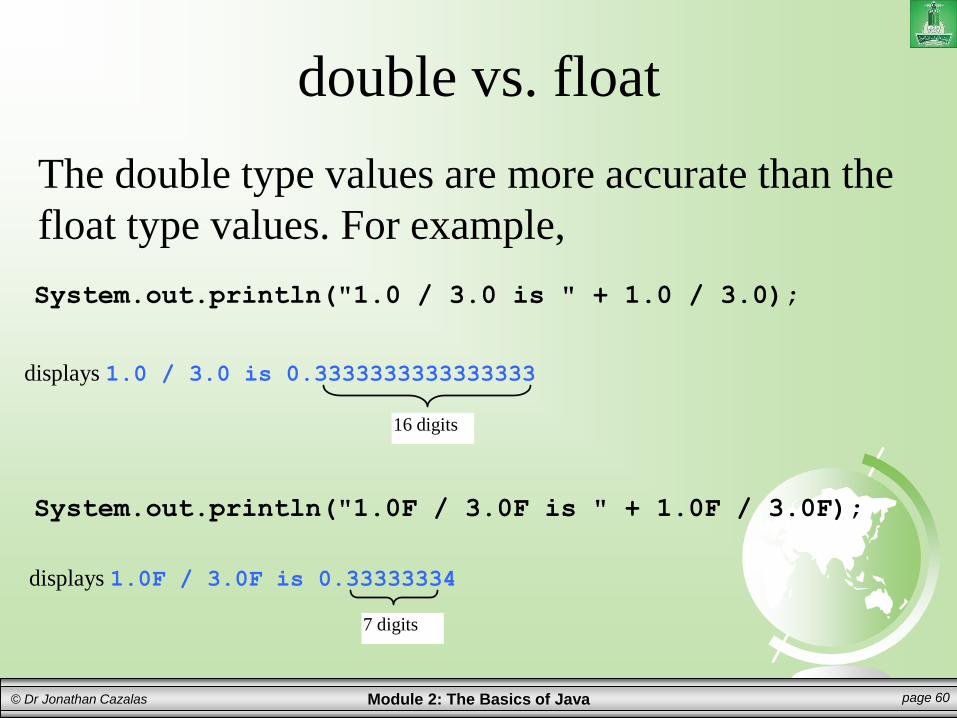
double vs. float
The double type values are more accurate than the
float type values. For example,
System.out.println("1.0 / 3.0 is " + 1.0 / 3.0);
displays 1.0 / 3.0 is 0.3333333333333333
16 digits
displays 1.0F / 3.0F is 0.33333334
7 digits
System.out.println("1.0F / 3.0F is " + 1.0F / 3.0F);

Module 2: The Basics of Java page 61© Dr Jonathan Cazalas
Reading Numbers from the Keyboard
Scanner input = new Scanner(System.in);
int value = input.nextInt();
double grade = input.nextDouble();
Method Description
nextByte() reads an integer of the byte type.
nextShort() reads an integer of the short type.
nextInt() reads an integer of the int type.
nextLong() reads an integer of the long type.
nextFloat() reads a number of the float type.
nextDouble() reads a number of the double type.

Module 2: The Basics of Java page 62© Dr Jonathan Cazalas
Numeric Operators
Name Meaning Example Result
+ Addition 34 + 1 35
- Subtraction 34.0 – 0.1 33.9
* Multiplication 300 * 30 9000
/ Division 1.0 / 2.0 0.5
% Remainder 20 % 3 2

Module 2: The Basics of Java page 63© Dr Jonathan Cazalas
Integer Division
“Normal” division: 7 / 2 = 3.5
In Computer Science, when we say division,
majority of the time, we mean integer division.
– When both operands of a division are integers, we
will use integer division.
What is integer division?
– Easiest to explain with examples:
5 / 2 = 2 12 / 5 = 2
7 / 2 = 3 15 / 4 = 3
15 / 2 = 7 33 / 8 = 4

Module 2: The Basics of Java page 64© Dr Jonathan Cazalas
Remainder Operator
The % operator is known as the remainder
operator, or also as the modulo operator
– This operator will give the remainder after division
– Examples:
7 % 3 = 1 3 % 7 = 3
12 % 4 = 0 26 % 8 = 2
20 % 13 = 7
Module 2: The Basics of Java page 65© Dr Jonathan Cazalas
Remainder Operator
Remainder is very useful in programming.
For example, an even number % 2 is always 0
An odd number % 2 is always 1
So you can use this property to determine
whether a number is even or odd.
You can also mod by other values to achieve
valuable results.

Module 2: The Basics of Java page 66© Dr Jonathan Cazalas
Remainder Operator
Saturday is the 7th day in a week
A week has 7 days
After 10 days
The 3rd day in a week is Tuesday (7 + 10) % 7 is 3
Example:
– If today is Saturday, it will be Saturday again in 7
days. Suppose you and your friends will meet in 10
days. What day is it in 10 days?
– Let us assume Sunday is the 1st day of the week.
– We can find that in 10 days, the day will be Tuesday
by using the following equation:
Module 2: The Basics of Java page 67© Dr Jonathan Cazalas
Program 5: Convert Time
Write a program to get an amount of time
from the user in seconds. Then your program
should convert this time into minutes and the
remaining seconds.
Remember:
– Step 1: Problem-solving Phase
– Step 2: Implementation Phase

Module 2: The Basics of Java page 68© Dr Jonathan Cazalas
Program 5: Convert Time
Step 1: Problem-solving Phase
– If you are given seconds, how do you then
calculate the minutes and remaining seconds?
Example:
– Given 624 seconds, how do we calculate the minutes?
– We divide by 60!
• We see how many complete 60s are in 624.
• Answer: 10 of them. 10x60 = 600.
– So in 624 seconds, there are a full 10 minutes.
– After we remove those 10 minutes, how many seconds are
remaining?
• 624 – (10x60) = 24 seconds remaining
• We can use mod! 624%60 = 24 seconds remaining.
Module 2: The Basics of Java page 69© Dr Jonathan Cazalas
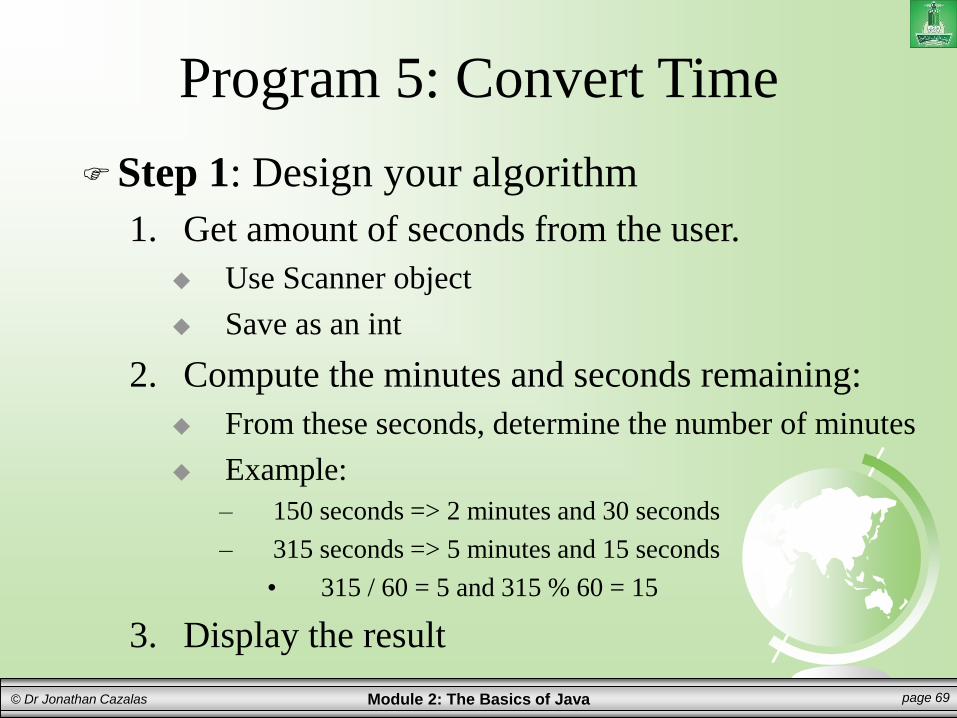
Program 5: Convert Time
Step 1: Design your algorithm
1. Get amount of seconds from the user.
Use Scanner object
Save as an int
2. Compute the minutes and seconds remaining:
From these seconds, determine the number of minutes
Example:
– 150 seconds => 2 minutes and 30 seconds
– 315 seconds => 5 minutes and 15 seconds
• 315 / 60 = 5 and 315 % 60 = 15
3. Display the result

Module 2: The Basics of Java page 70© Dr Jonathan Cazalas
Program 5: Convert Time
Step 2: Implementation

Module 2: The Basics of Java page 71© Dr Jonathan Cazalas
Program 5: Convert Time
See sample program: TimeCalculation.java
Module 2: The Basics of Java page 72© Dr Jonathan Cazalas
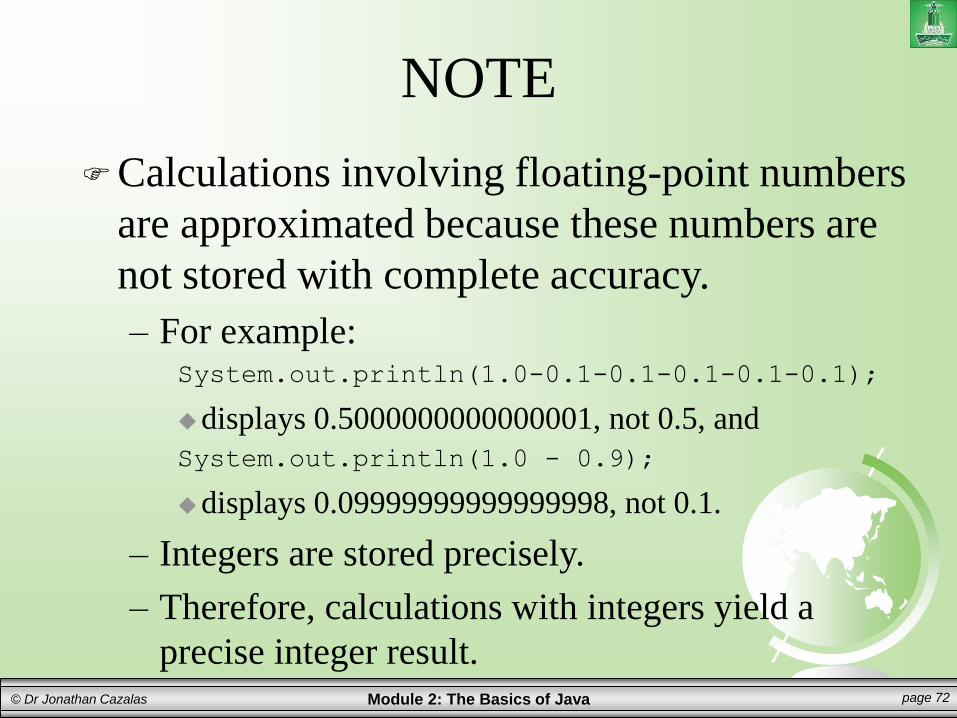
NOTE
Calculations involving floating-point numbers
are approximated because these numbers are
not stored with complete accuracy.
– For example:System.out.println(1.0-0.1-0.1-0.1-0.1-0.1);
displays 0.5000000000000001, not 0.5, and
System.out.println(1.0 - 0.9);
displays 0.09999999999999998, not 0.1.
– Integers are stored precisely.
– Therefore, calculations with integers yield a
precise integer result.

Module 2: The Basics of Java page 73© Dr Jonathan Cazalas
Exponent Operations
System.out.println(Math.pow(2, 3));
// Displays 8.0
System.out.println(Math.pow(2, 5));
// Displays 32.0
System.out.println(Math.pow(4, 0.5));
// Displays 2.0
System.out.println(Math.pow(2.5, 2));
// Displays 6.25
System.out.println(Math.pow(2.5, -2));
// Displays 0.16

Module 2: The Basics of Java page 74© Dr Jonathan Cazalas
Scientific Notation
Floating-point literals can also be specified in
scientific notation
Example:
– 1.23456e+2, same as 1.23456e2, is equivalent to
123.456
– and 1.23456e-2 is equivalent to 0.0123456
– E (or e) represents an exponent and it can be either
in lowercase or uppercase.

Module 2: The Basics of Java page 75© Dr Jonathan Cazalas
Arithmetic Expressions
Java expressions are written the same way as
normal arithmetic expressions.
Example:
is translated into
(3+4*x)/5 – 10*(y-5)*(a+b+c)/x + 9*(4/x + (9+x)/y)
)94
(9))(5(10
5
43
y
x
xx
cbayx

Module 2: The Basics of Java page 76© Dr Jonathan Cazalas
How to Evaluate an Expression
Summary: you can safely apply the arithmetic
rule for evaluating a Java expression
– Operators inside parenthesis are evaluated first
Parenthesis can be nested
Expression in inner parenthesis is evaluated first
– Use normal operator precedence
Multiplication, division, and remainder are done first
– if an expression has several multiplication, division, and
remainder operators, you evaluate them from left to right
Addition and subtraction are done last
– and again, if an expression has several addition and
subtraction operators, you evaluate them from left to right

Module 2: The Basics of Java page 77© Dr Jonathan Cazalas
How to Evaluate an Expression
Example of how an expression is evaluated:
3 + 4 * 4 + 5 * (4 + 3) - 1
3 + 4 * 4 + 5 * 7 – 1
3 + 16 + 5 * 7 – 1
3 + 16 + 35 – 1
19 + 35 – 1
54 - 1
53
(1) inside parentheses first
(2) multiplication
(3) multiplication
(4) addition
(6) subtraction
(5) addition
Module 2: The Basics of Java page 78© Dr Jonathan Cazalas
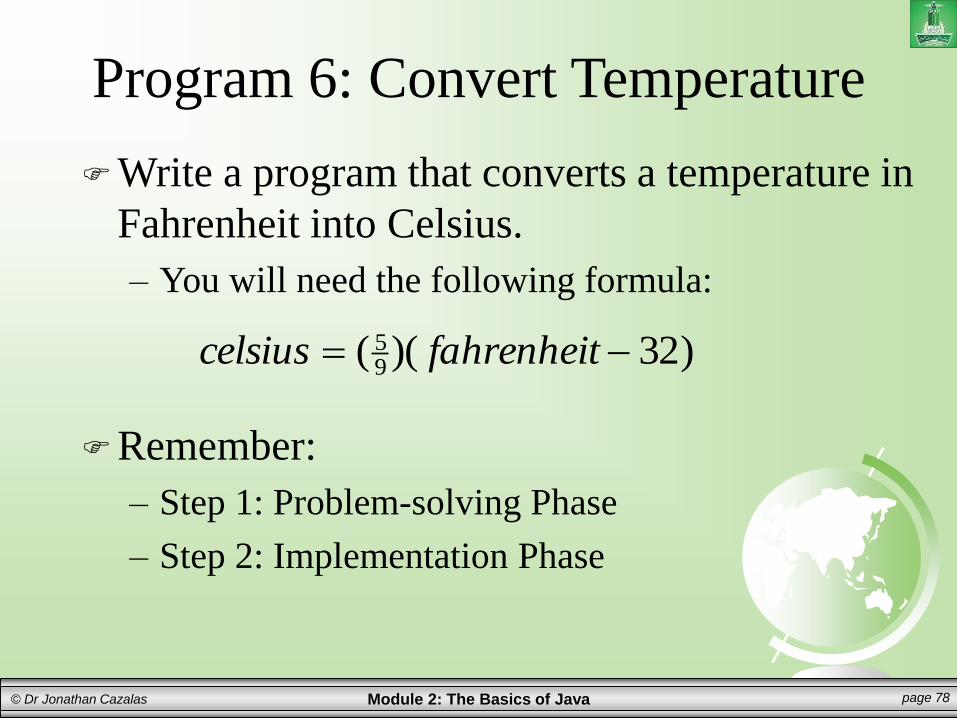
Program 6: Convert Temperature
Write a program that converts a temperature in
Fahrenheit into Celsius.
– You will need the following formula:
Remember:
– Step 1: Problem-solving Phase
– Step 2: Implementation Phase
)32)((95 fahrenheitcelsius
Module 2: The Basics of Java page 79© Dr Jonathan Cazalas
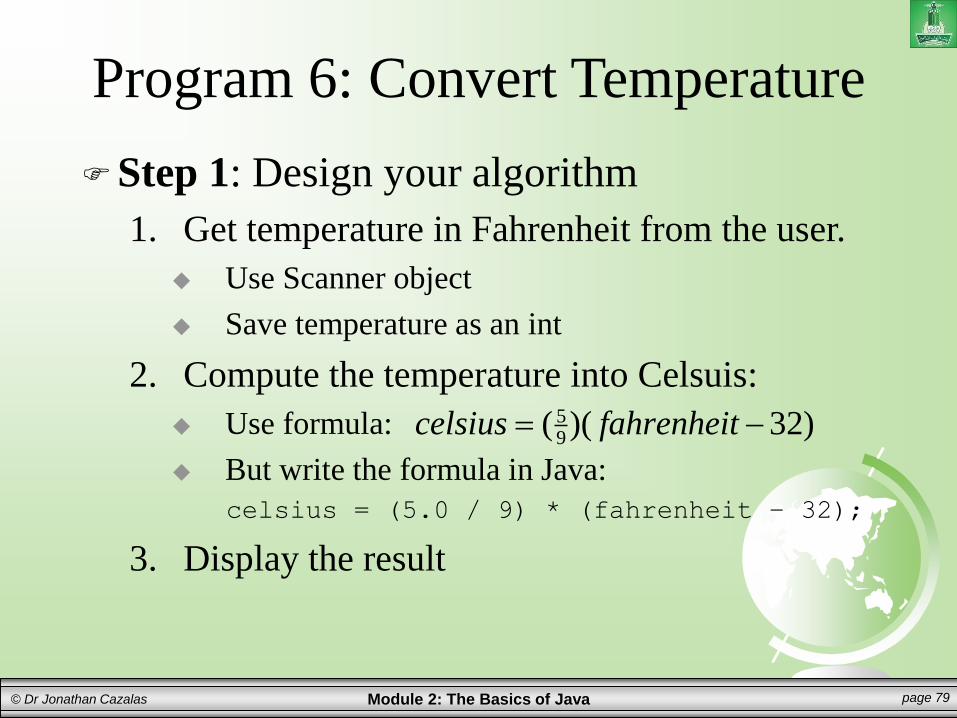
Program 6: Convert Temperature
Step 1: Design your algorithm
1. Get temperature in Fahrenheit from the user.
Use Scanner object
Save temperature as an int
2. Compute the temperature into Celsuis:
Use formula:
But write the formula in Java:
celsius = (5.0 / 9) * (fahrenheit – 32);
3. Display the result
)32)((95 fahrenheitcelsius

Module 2: The Basics of Java page 80© Dr Jonathan Cazalas
Program 6: Convert Temperature
Step 2: Implementation

Module 2: The Basics of Java page 81© Dr Jonathan Cazalas
Program 6: Convert Temperature
Discussion: be careful when dividing integers
– Notice the formula has 5 divided by 9
– What happens if we write this formula as:celsius = (5 / 9) * (fahrenheit – 32);
– (5 / 9) evaluates to zero!
Integer division!
– So we use (5.0 / 9) instead, which gives a number
See sample program: TempConvert.java
)32)((95 fahrenheitcelsius

Module 2: The Basics of Java page 82© Dr Jonathan Cazalas
Program 7: Show Current Time
Write a program that displays current time in
GMT in the format hour:minute:second such
as 1:45:19.
Remember:
– Step 1: Problem-solving Phase
– Step 2: Implementation Phase
Module 2: The Basics of Java page 83© Dr Jonathan Cazalas
Program 7: Show Current Time
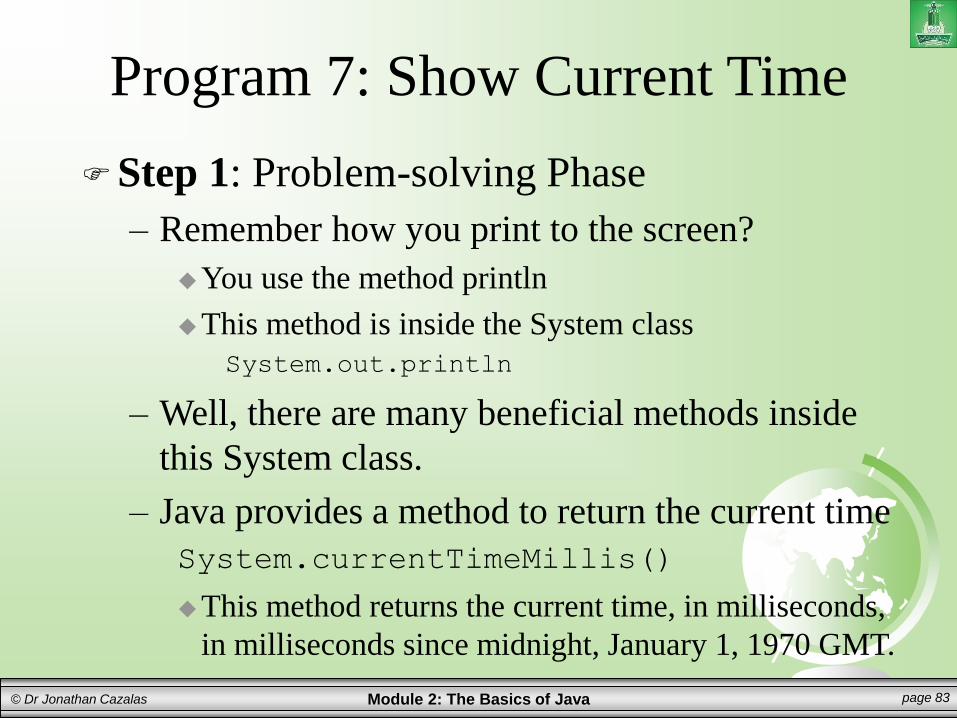
Step 1: Problem-solving Phase
– Remember how you print to the screen?
You use the method println
This method is inside the System class
System.out.println
– Well, there are many beneficial methods inside
this System class.
– Java provides a method to return the current time
System.currentTimeMillis()
This method returns the current time, in milliseconds,
in milliseconds since midnight, January 1, 1970 GMT.

Module 2: The Basics of Java page 84© Dr Jonathan Cazalas
Program 7: Show Current Time
Step 1: Problem-solving Phase
System.currentTimeMillis()
This method returns the current time, in milliseconds,
in milliseconds since midnight, January 1, 1970 GMT.
Why this specific date?
This was known as the UNIX epoch
– The point in time when UNIX started
• Important? Not really. Just a neat fact!
Elapsed
time
Unix Epoch
01-01-1970
00:00:00 GMT
Current Time
Time
System.currentTimeMills()

Module 2: The Basics of Java page 85© Dr Jonathan Cazalas
Program 7: Show Current Time
Step 1: Problem-solving Phase
System.currentTimeMillis()
So this method returns the number of milliseconds
since 1970.
That’s a LOT of milliseconds
It’s 2015…so 45 years since 1970
45 𝑦𝑒𝑎𝑟𝑠 ×365 𝑑𝑎𝑦𝑠
1 𝑦𝑒𝑎𝑟×
24 ℎ𝑜𝑢𝑟𝑠
1 𝑑𝑎𝑦×
3600 𝑠𝑒𝑐𝑜𝑛𝑑𝑠
1 ℎ𝑜𝑢𝑟×
1000𝑚𝑠
1 𝑠𝑒𝑐𝑜𝑛𝑑
Now take a calculator…
– That comes to 1,419,210,000,000 milliseconds
– The point: this methods returns a HUGE number
So how can we calculate the time from this number???

Module 2: The Basics of Java page 86© Dr Jonathan Cazalas
Program 7: Show Current Time
Step 1: Problem-solving Phase
1. Get the total milliseconds since midnight, January
1, 1970 by invoking: System.currentTimeMillis();
– Example: 1203183068328 milliseconds
2. Obtain the total number of seconds by dividing
totalMilliseconds by 1000 totalSeconds = totalMilliseconds / 1000;
– Example: 1203183068328 ms / 1000 = 1203183068 seconds
3. Compute the current seconds from totalSeconds currentSeconds = totalSeconds % 60;
– Example: 1203183068 % 60 = 8, which is the current second

Module 2: The Basics of Java page 87© Dr Jonathan Cazalas
Program 7: Show Current Time
Step 1: Problem-solving Phase
4. Obtain the total minutes, totalMinutes, by
dividing totalSeconds by 60 totalMinutes = totalSeconds / 60;
– Example: 1203183068 seconds / 60 = 20053051 minutes
5. Compute the current minute from totalMinutes
mod 60 currentMinute = totalMinutes % 60;
– Example: 20053051 minutes % 60 = 31, the current minute
Module 2: The Basics of Java page 88© Dr Jonathan Cazalas
Program 7: Show Current Time
Step 1: Problem-solving Phase
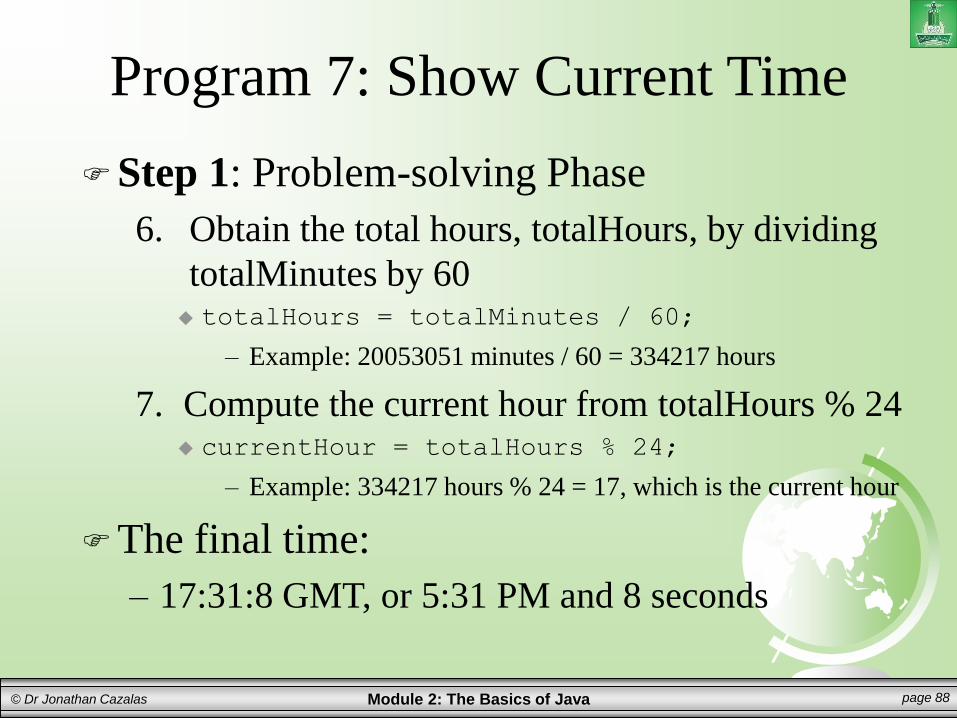
6. Obtain the total hours, totalHours, by dividing
totalMinutes by 60 totalHours = totalMinutes / 60;
– Example: 20053051 minutes / 60 = 334217 hours
7. Compute the current hour from totalHours % 24 currentHour = totalHours % 24;
– Example: 334217 hours % 24 = 17, which is the current hour
The final time:
– 17:31:8 GMT, or 5:31 PM and 8 seconds

Module 2: The Basics of Java page 89© Dr Jonathan Cazalas
Program 7: Show Current Time
Step 1: Problem-solving Phase
– All these numbers are HUGE
– The int data type is not large enough
– All variables should be declared as the long data
type for this program
Module 2: The Basics of Java page 90© Dr Jonathan Cazalas
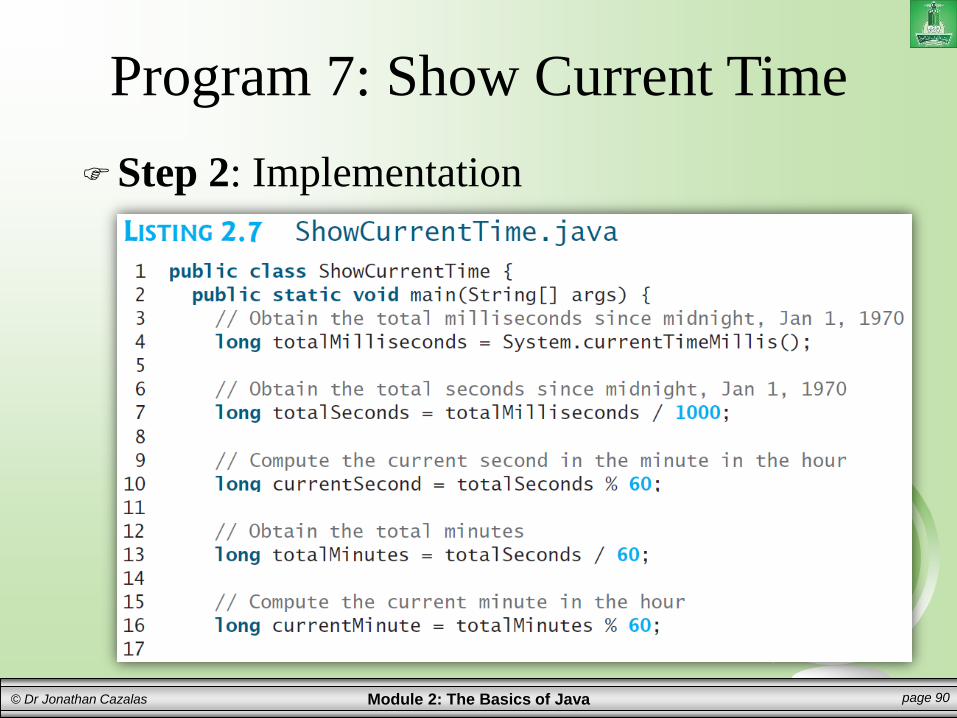
Program 7: Show Current Time
Step 2: Implementation

Module 2: The Basics of Java page 91© Dr Jonathan Cazalas
Program 7: Show Current Time
Step 2: Implementation
Module 2: The Basics of Java page 92© Dr Jonathan Cazalas
Augmented Assignment Operators
Very often, we use the current value of a
variable, we modify it, and then save it back to
the same variable.
– Example:
count = count + 1;
– Java allows you to combine this addition and
assignment into one operator, which is called the
augmented assignment operator.
– Example:
count += 1;

Module 2: The Basics of Java page 93© Dr Jonathan Cazalas
Augmented Assignment Operators
Module 2: The Basics of Java page 94© Dr Jonathan Cazalas
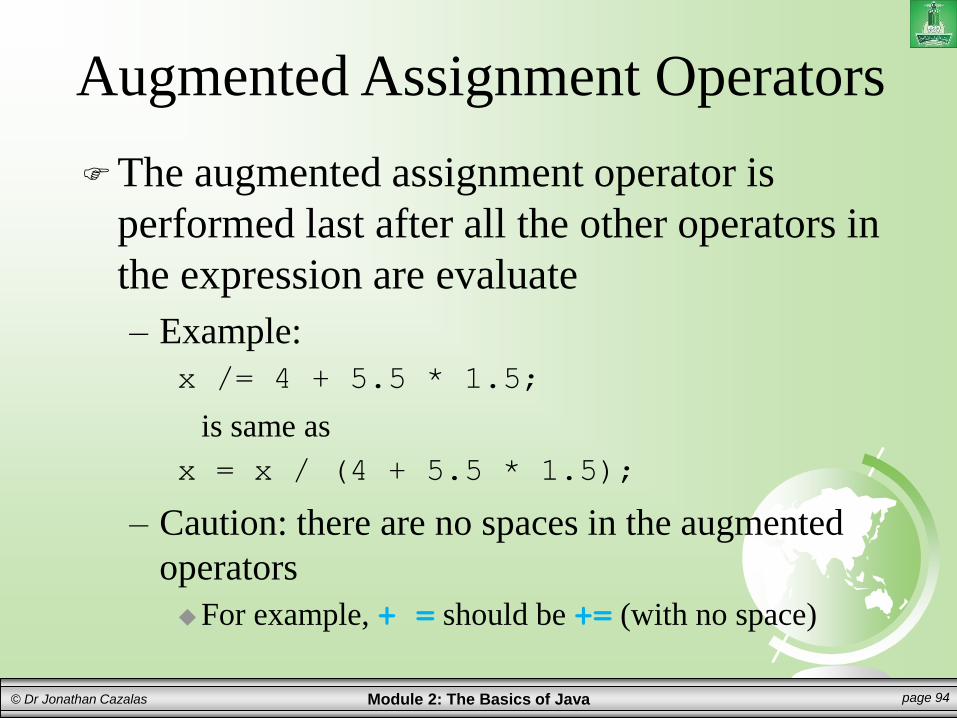
Augmented Assignment Operators
The augmented assignment operator is
performed last after all the other operators in
the expression are evaluate
– Example:
x /= 4 + 5.5 * 1.5;
is same as
x = x / (4 + 5.5 * 1.5);
– Caution: there are no spaces in the augmented
operators
For example, + = should be += (with no space)
Module 2: The Basics of Java page 95© Dr Jonathan Cazalas
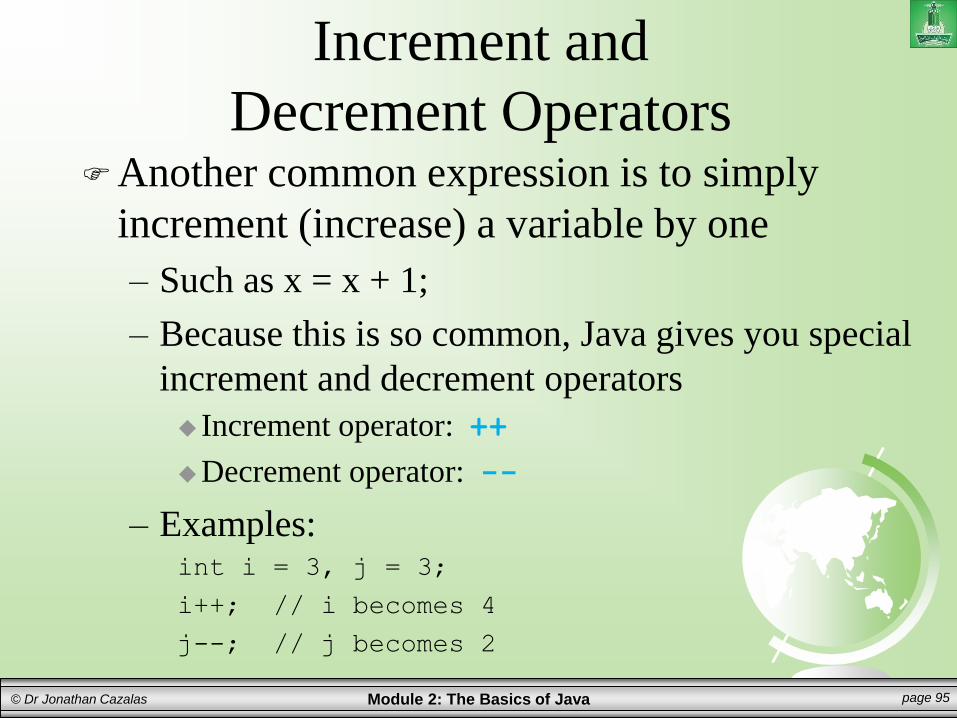
Increment and
Decrement OperatorsAnother common expression is to simply
increment (increase) a variable by one
– Such as x = x + 1;
– Because this is so common, Java gives you special
increment and decrement operators
Increment operator: ++
Decrement operator: --
– Examples:int i = 3, j = 3;
i++; // i becomes 4
j--; // j becomes 2

Module 2: The Basics of Java page 96© Dr Jonathan Cazalas
Increment and
Decrement OperatorsMore details:
i++ is pronounced as i plus plus
i-- is pronounced as i minus minus
– These two operators are known as postincrement
and postdecrement
– Why?
Because the operators (++ and --) are placed after the
variable
– The operators can also be placed before the
variable

Module 2: The Basics of Java page 97© Dr Jonathan Cazalas
Increment and
Decrement OperatorsMore details:
– The operators can also be placed before the
variable
int i = 3, j = 3;
++i; // i becomes 4
--j; // j becomes 2
– Again, ++i increments i, and --j decrements j
– In this small example, result is the same
Meaning i++ and ++i both increase i from 3 to 4.
And both --j and j– decrease j from 3 to 2.
Module 2: The Basics of Java page 98© Dr Jonathan Cazalas
Increment and
Decrement Operators
More details:
– If the statement is ONLY doing increment or
decrement, the effect of j++ and ++j is the same.
– However, the effect changes when these operators
are used in other types of statements.
Specifically:
– ++i: the increment is done before evaluating an expression
– i++: the increment is done after evaluated an expression
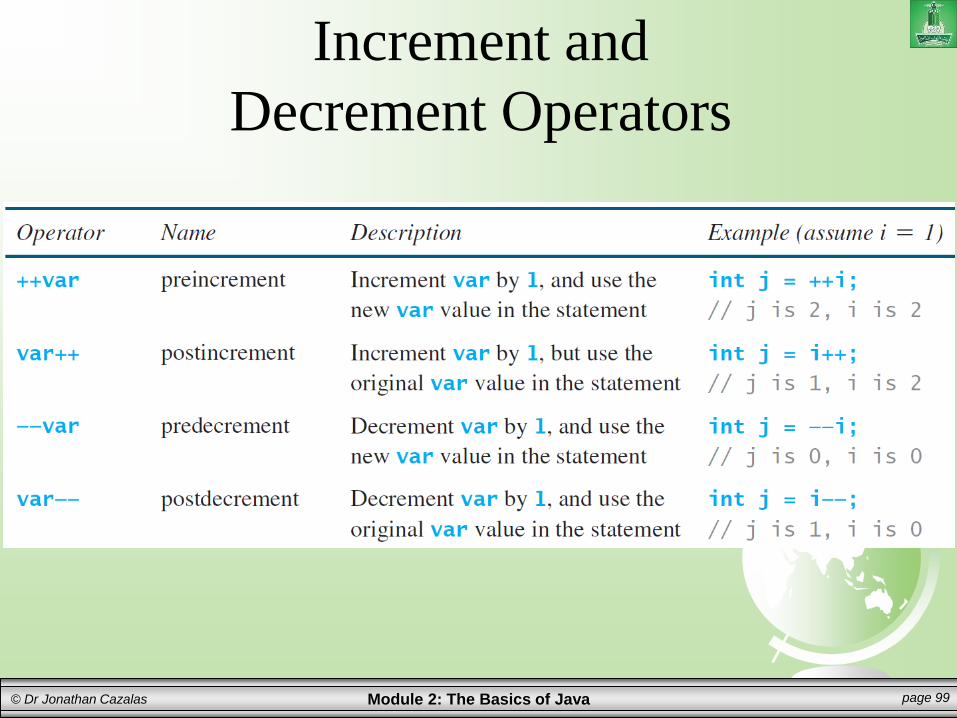
– Study the following table and examine the
results…
Module 2: The Basics of Java page 99© Dr Jonathan Cazalas
Increment and
Decrement Operators

Module 2: The Basics of Java page 100© Dr Jonathan Cazalas
Increment and
Decrement Operators
Consider the following code:
– Details:
Here, we first get the value of i (which is 10) and
calculate newNum.
Then, we increment i.
– i is not incremented until AFTER the expression is evaluated.

Module 2: The Basics of Java page 101© Dr Jonathan Cazalas
Increment and
Decrement Operators
Consider the following code:
– Details:
Here, we first increment i
Then, after i is incremented, we calculate newNum

Module 2: The Basics of Java page 102© Dr Jonathan Cazalas
Increment and
Decrement Operators
Another example:
– Consider the following code:
double x = 1.0;
double y = 5.0;
double z = x-- + (++y);
– What is the value of x, y, and z after are three lines
are executed?
x becomes 0.0
y becomes 6.0
z becomes 7.0

Module 2: The Basics of Java page 103© Dr Jonathan Cazalas
Increment and
Decrement Operators
More details:
– Using increment and decrement operators makes
expressions short
but it also makes them complex and difficult to read
– Avoid using these operators in expressions that
modify multiple variables, or the same variable for
multiple times such as this:
int k = ++i + i;
Is this legal?
– Yes. But it is confusing!
– Message: don’t use increment/decrement like this.
Module 2: The Basics of Java page 104© Dr Jonathan Cazalas
Numeric Type Conversions
Can you perform binary operations with
operands of different types?
– Meaning, can we add an integer literal with a
double literal?
– Answer: YES.
If you add an integer with a floating-point number, Java
automatically coverts the int to a floating point value.
– Example:
3 * 4.5 is the same as
3.0 * 4.5
Module 2: The Basics of Java page 105© Dr Jonathan Cazalas
Numeric Type Conversions
Details:
– You can always assign a value to a numeric
variable just so long as the value is within the
limits/range of the data type.
– Example:
You can save an int into a double, because the double is
much wider (larger) than the int
int x = 4;
double y;
y = x;
This is allowed, because x can easily “fit” into y.
Module 2: The Basics of Java page 106© Dr Jonathan Cazalas
Numeric Type Conversions
Details:
– However, you cannot assign a value to a variable
of a data type with a smaller range of values.
Unless you use type casting
– Casting is an operation that coverts a value of one
data type into a value of another data type
Casting a type with a small range to a type with a larger
range is known as “widening a type”
Casting a type with a large range to a type from a
smaller range is known as “narrowing a type”

Module 2: The Basics of Java page 107© Dr Jonathan Cazalas
Numeric Type Conversions
Casting:
– Java will automatically widen a type, but you must
request a narrowing explicitly
– Syntax:
specify the target type in parentheses, followed by the
variable’s name or the value to be cast
– Example:
System.out.println((int)1.7);
1 gets printed.
Why? Because 1.7 was converted into an int.
Module 2: The Basics of Java page 108© Dr Jonathan Cazalas
Numeric Type Conversions
Casting:
– Example:
System.out.println((double)1/2);
0.5 gets printed.
Why? Because 1 is cast into 1.0. Then 1.0 is divided by
2.
– Example:
System.out.println(1 / 2);
Be careful!
Here, 0 (zero) gets printed. Why? 1 and 2 are both inters
and the result should be an integer.

Module 2: The Basics of Java page 109© Dr Jonathan Cazalas
Type Casting
Implicit casting
double d = 3; // (type widening)
Explicit casting
int i = (int)3.0; // (type narrowing)
int i = (int)3.9; // (Fraction part is truncated)
What is wrong? int x = 5 / 2.0;
byte, short, int, long, float, double
range increases
See sample program: JavaBasics.java
Module 2: The Basics of Java page 110© Dr Jonathan Cazalas
Conversion Rules
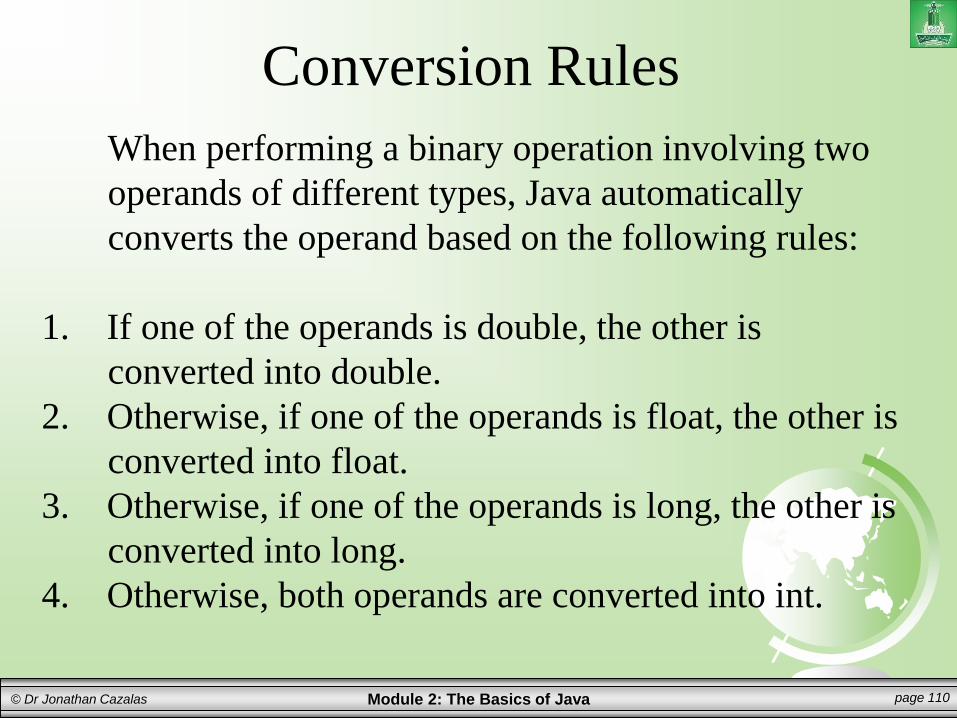
When performing a binary operation involving two
operands of different types, Java automatically
converts the operand based on the following rules:
1. If one of the operands is double, the other is
converted into double.
2. Otherwise, if one of the operands is float, the other is
converted into float.
3. Otherwise, if one of the operands is long, the other is
converted into long.
4. Otherwise, both operands are converted into int.
Module 2: The Basics of Java page 111© Dr Jonathan Cazalas
Program 8: Sales Tax
Write a program that reads a purchase amount
from the user, calculates the sales tax, and
then displays the result.
– But we want to print the tax with only two
decimal places
Remember:
– Step 1: Problem-solving Phase
– Step 2: Implementation Phase

Module 2: The Basics of Java page 112© Dr Jonathan Cazalas
Program 8: Sales Tax
Step 1: Design your algorithm
1. Get purchase amount from user.
Use Scanner object
Save purchaseAmount as a double
2. Compute the tax:
Use a simple tax rate (6%)
Use the formula:
– tax = purchaseAmount * 0.06
3. Display the result
Print the result, but show only two decimal places
Module 2: The Basics of Java page 113© Dr Jonathan Cazalas
Program 8: Sales Tax
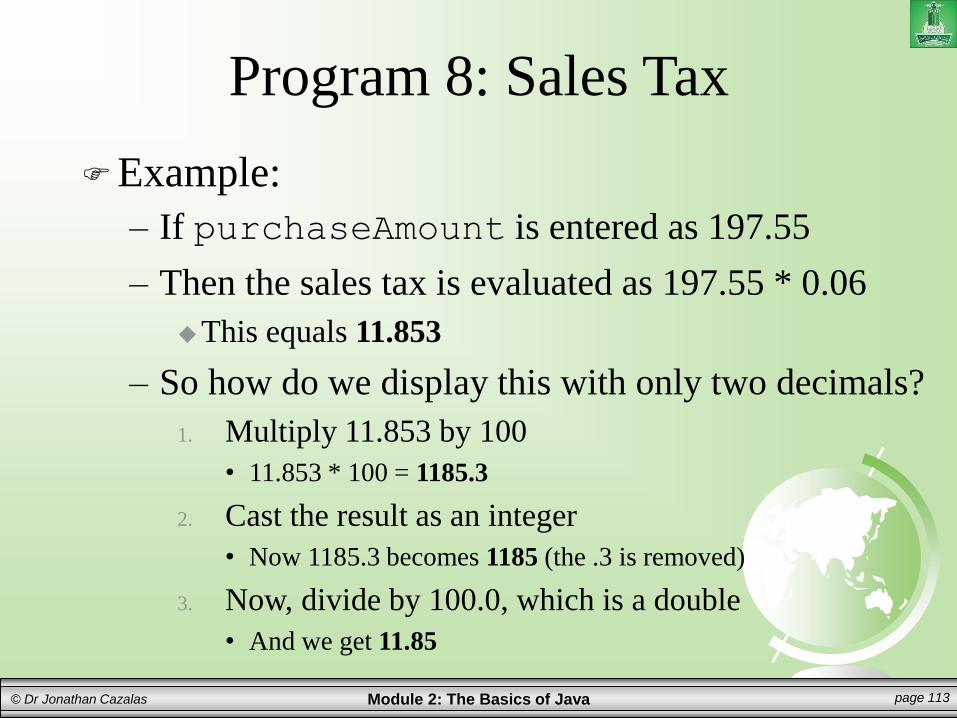
Example:
– If purchaseAmount is entered as 197.55
– Then the sales tax is evaluated as 197.55 * 0.06
This equals 11.853
– So how do we display this with only two decimals?
1. Multiply 11.853 by 100
• 11.853 * 100 = 1185.3
2. Cast the result as an integer
• Now 1185.3 becomes 1185 (the .3 is removed)
3. Now, divide by 100.0, which is a double
• And we get 11.85

Module 2: The Basics of Java page 114© Dr Jonathan Cazalas
Program 8: Sales Tax
Step 2: Implementation
See sample program: SalesTax.java

Module 2: The Basics of Java page 115© Dr Jonathan Cazalas
Casting in an Augmented Expression
In Java, an augmented expression of the form
x1 op= x2 is implemented as
– x1 = (T)(x1 op x2)
where T is the type for x1.
Exampleint sum = 0;
sum += 4.5; // sum becomes 4 after this statement
– This is equivalent to:
sum = (int)(sum + 4.5);
Here, OP means operation.

Module 2: The Basics of Java page 116© Dr Jonathan Cazalas
Software Development Process
Module 2: The Basics of Java page 117© Dr Jonathan Cazalas
Requirement Specification
Requirement
Specification
System
Analysis
System
Design
Testing
Implementation
Maintenance
Deployment
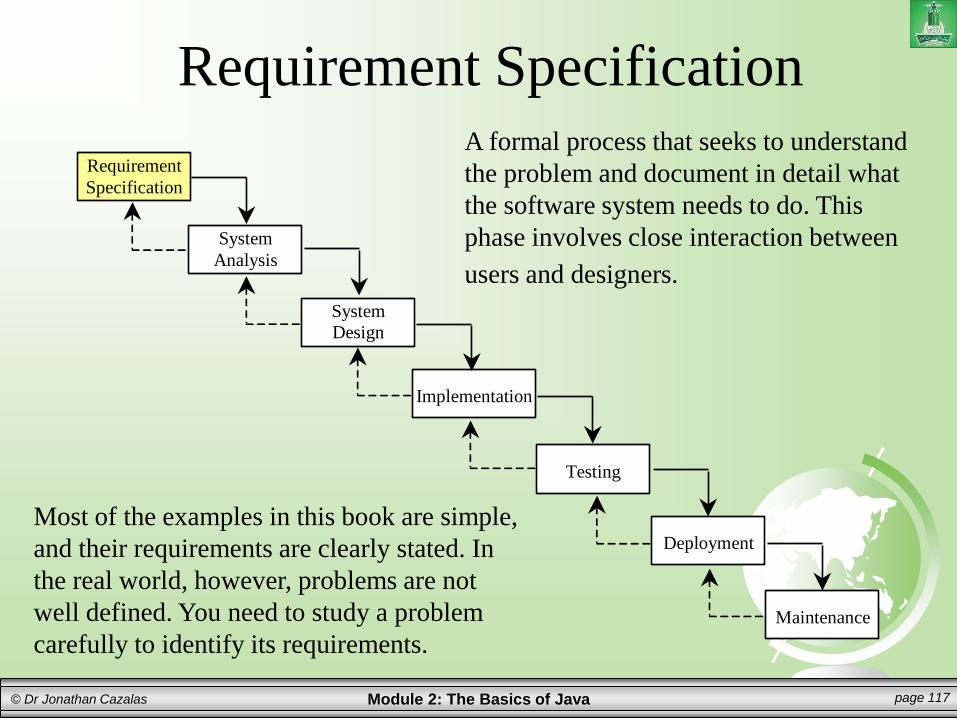
A formal process that seeks to understand
the problem and document in detail what
the software system needs to do. This
phase involves close interaction between
users and designers.
Most of the examples in this book are simple,
and their requirements are clearly stated. In
the real world, however, problems are not
well defined. You need to study a problem
carefully to identify its requirements.

Module 2: The Basics of Java page 118© Dr Jonathan Cazalas
System Analysis
Requirement
Specification
System
Analysis
System
Design
Testing
Implementation
Maintenance
Deployment
Seeks to analyze the business
process in terms of data flow, and
to identify the system’s input and
output.
Part of the analysis entails modeling
the system’s behavior. The model is
intended to capture the essential
elements of the system and to define
services to the system.

Module 2: The Basics of Java page 119© Dr Jonathan Cazalas
System Design
Requirement
Specification
System
Analysis
System
Design
Testing
Implementation
Maintenance
Deployment
The process of designing the
system’s components.
This phase involves the use of many levels
of abstraction to decompose the problem into
manageable components, identify classes and
interfaces, and establish relationships among
the classes and interfaces.

Module 2: The Basics of Java page 120© Dr Jonathan Cazalas
IPO
Requirement
Specification
System
Analysis
System
Design
Input, Process, Output
Testing
Implementation
Maintenance
Deployment
The essence of system analysis and design is input,
process, and output. This is called IPO.

Module 2: The Basics of Java page 121© Dr Jonathan Cazalas
Implementation
Requirement
Specification
System
Analysis
System
Design
Testing
Implementation
Maintenance
Deployment
The process of translating the
system design into programs.
Separate programs are written for
each component and put to work
together.
This phase requires the use of a
programming language like Java.
The implementation involves
coding, testing, and debugging.

Module 2: The Basics of Java page 122© Dr Jonathan Cazalas
Testing
Requirement
Specification
System
Analysis
System
Design
Testing
Implementation
Maintenance
Deployment
Ensures that the code meets the
requirements specification and
weeds out bugs.
An independent team of software
engineers not involved in the design
and implementation of the project
usually conducts such testing.

Module 2: The Basics of Java page 123© Dr Jonathan Cazalas
Deployment
Requirement
Specification
System
Analysis
System
Design
Testing
Implementation
Maintenance
Deployment
Deployment makes the project
available for use.
For a Java program, this means
installing it on a desktop or on the
Web.

Module 2: The Basics of Java page 124© Dr Jonathan Cazalas
Maintenance
Requirement
Specification
System
Analysis
System
Design
Testing
Implementation
Maintenance
Deployment
Maintenance is concerned with
changing and improving the
product.
A software product must continue to
perform and improve in a changing
environment. This requires periodic
upgrades of the product to fix newly
discovered bugs and incorporate changes.

Module 2: The Basics of Java page 125© Dr Jonathan Cazalas
Program 9: Money Units
Write a program that asks the user for an
amount of money in dollars and cents. Then
your program should output a report listing the
number of dollars, quarters, dimes, nickels,
and pennies (and in that order) in your
program.
Remember:
– Step 1: Problem-solving Phase
– Step 2: Implementation Phase
Module 2: The Basics of Java page 126© Dr Jonathan Cazalas
Program 9: Money Units
Step 1: Problem-solving Phase
– A reminder about U.S. monetary units:
1 dollar = 100 cents (or pennies)
1 quarter = 25 cents
1 dime = 10 cents
1 nickel = 5 cents
– So if you need to give someone 42 cents in
change, you should give:
One quarter, one dime, one nickel, and two pennies

Module 2: The Basics of Java page 127© Dr Jonathan Cazalas
Program 9: Money Units
Step 1: Problem-solving Phase
– First step: UNDERSTAND the problem!
– So let us look at an example run:
– Is it clear what the problem is asking of us?
Make sure you understand the question before starting

Module 2: The Basics of Java page 128© Dr Jonathan Cazalas
Program 9: Money Units
Step 1: Problem-solving Phase
1. Get the total amount of money by asking the user
to enter a double value money = input.nextDouble();
– Example: $11.56
2. Convert this amount into cents (multiply by 100) totalCents = (int)money*100;
– Example: 11.56 * 100 = 1156

Module 2: The Basics of Java page 129© Dr Jonathan Cazalas
Program 9: Money Units
Step 1: Problem-solving Phase
3. Get the total number of dollars by now dividing
by 100. And get remaining cents by using
totalCents % 100. totalDollars = totalCents / 100;
– Example: 1156 / 100 = 11
remainingCents = totalCents % 100;
– Example: 1156 % 100 = 56

Module 2: The Basics of Java page 130© Dr Jonathan Cazalas
Program 9: Money Units
Step 1: Problem-solving Phase
4. Get the total # of quarters by dividing
remainingCents by 25. And then recalculate
remainingCents. totalQuarters = remainingCents / 25;
– Example: 56 / 25 = 2
remainingCents = remainingCents % 25;
– Example: 56 % 25 = 6

Module 2: The Basics of Java page 131© Dr Jonathan Cazalas
Program 9: Money Units
Step 1: Problem-solving Phase
5. Get the total # of dimes by dividing
remainingCents by 10. And then recalculate
remainingCents. totalDimes = remainingCents / 10;
– Example: 6 / 10 = 0
remainingCents = remainingCents % 10;
– Example: 6 % 10 = 6
So nothing changed at this step
– remainingCents is still 6.

Module 2: The Basics of Java page 132© Dr Jonathan Cazalas
Program 9: Money Units
Step 1: Problem-solving Phase
6. Get the total # of nickels by dividing
remainingCents by 5. And then recalculate
remainingCents. totalDimes = remainingCents / 5;
– Example: 6 / 5 = 1
remainingCents = remainingCents % 5;
– Example: 6 % 5 = 1
Module 2: The Basics of Java page 133© Dr Jonathan Cazalas
Program 9: Money Units
Step 1: Problem-solving Phase
7. The value stored in remainingCents is the
number of pennies left over
8. Display the result!

Module 2: The Basics of Java page 134© Dr Jonathan Cazalas
Program 9: Money Units
Step 2: Implementation

Module 2: The Basics of Java page 135© Dr Jonathan Cazalas
Program 9: Money Units
Step 2: Implementation

Module 2: The Basics of Java page 136© Dr Jonathan Cazalas
Program 9: Money Units
Run the program:
See sample program: PrintMoney.java

Module 2: The Basics of Java page 137© Dr Jonathan Cazalas
Common Errors and Pitfalls
Common Error # 1: Undeclared/Uninitialized
Variables and Unused Variables
– a variable must be declared and a value assigned
to it before you use it.
– Common errors include not declaring or not
initializing a variable
– Example:
double interestRate = 0.05;
double interest = interestrate * 45;
– Java is case sensitive. In the 2nd line, interestrate is not
defined, because the R is not capitalized

Module 2: The Basics of Java page 138© Dr Jonathan Cazalas
Common Errors and Pitfalls
Common Error #2: Integer Overflow
– Remember: numbers are stored with a limited
number of digits
– If you try to save a value that is too large for a
variable, an overflow error will occur
– Example: int value = 2147483647; // allowed
– but this number is the biggest possible int, therefore…
value++; // will result in an error
Module 2: The Basics of Java page 139© Dr Jonathan Cazalas
Common Errors and Pitfalls
Common Error #3: Round-off Errors
– a round-off error, also called a rounding error, is
the difference between the exact mathematical
value of a number and the approximated value that
was calculated.
– Example:
1/3 is approximately 0.333 if you use three decimals
and it is 0.3333333 if you use seven decimal places
The number of digits you can store is limited
So having round-off errors is inevitable (a guarantee!)

Module 2: The Basics of Java page 140© Dr Jonathan Cazalas
Common Errors and Pitfalls
Common Error #3: Round-off Errors
– Calculations with floating-point numbers are also
approximated
Because they are not stored with complete accuracy
– Example: System.out.println(1.0 - 0.1 - 0.1 - 0.1 - 0.1 - 0.1);
– The output should be 0.5, but the output is really
0.5000000000000001 System.out.println(1.0 - 0.9);
– The output should be 0.1, but the output is really
0.09999999999999998
– Message: use integers for exact/precise results!
Module 2: The Basics of Java page 141© Dr Jonathan Cazalas
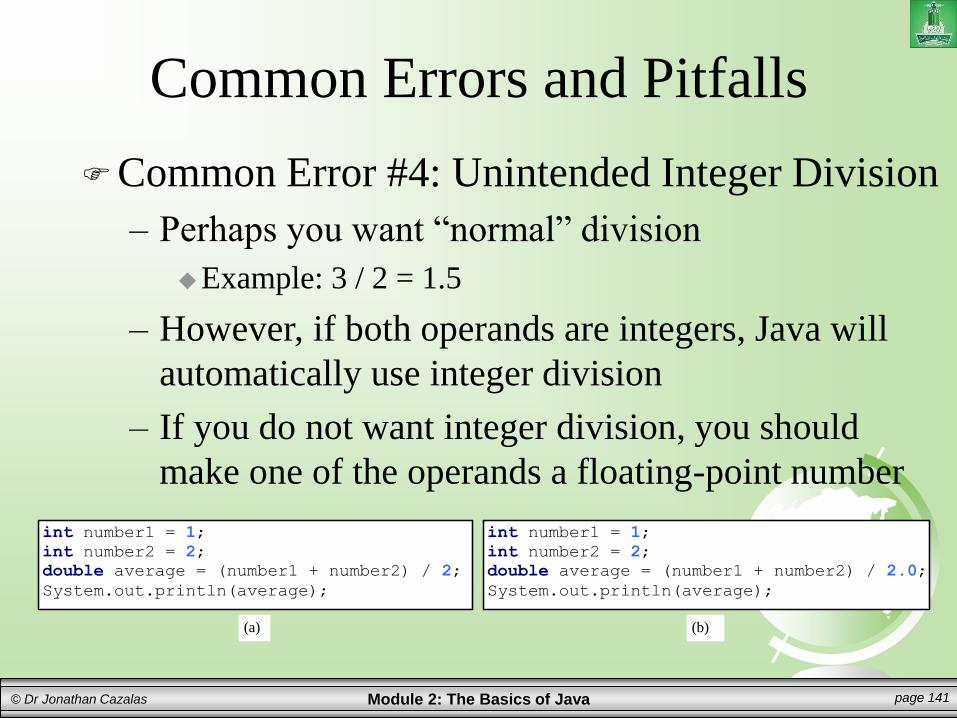
Common Errors and Pitfalls
Common Error #4: Unintended Integer Division
– Perhaps you want “normal” division
Example: 3 / 2 = 1.5
– However, if both operands are integers, Java will
automatically use integer division
– If you do not want integer division, you should
make one of the operands a floating-point number
int number1 = 1; int number2 = 2;
double average = (number1 + number2) / 2;
System.out.println(average);
(a)
int number1 = 1;
int number2 = 2;
double average = (number1 + number2) / 2.0;
System.out.println(average);
(b)

Module 2: The Basics of Java page 142© Dr Jonathan Cazalas
Common Errors and Pitfalls
Common Pitfall #1: Repeated Input Objects
– New programmers often make many Scanner
objects each time they want input
This is a mistake!
– See the code below:

Module 2: The Basics of Java page 143© Dr Jonathan Cazalas
Common Errors and Pitfalls
Common Pitfall #1: Repeated Input Objects
– The code is not wrong, but it is inefficient (slow)
– It creates two input objects, which is a waste
– The correct code is below:

Module 2:
Elementary Programming
The Basics of Java

![Number Theory Elementary Number Theory - Magma · Number Theory Elementary Number Theory 11Axx except 11A41 and 11A51, 11Cxx [1]David H. Bailey and Jonathan M. Borwein, Experimental](https://img.dokumen.tips/doc/110x75/5aee03b97f8b9a9031907892/number-theory-elementary-number-theory-magma-theory-elementary-number-theory-11axx.jpg)