Embed Size (px)
Citation preview

TwEECer Install Guide
** The items highlighted in blue are direct links to the referenced items, you may click on them to perform the listed action.
This tutorial is also available on our channel HERE
The first step will be to download the needed software from the TwEECer website. You will need to download the following items:
• Borland Database Engine (BDE)• CE132 (TwEECer software) Name has been changed from RT132, so substitute CE132 anywhere
you may see RT132 referenced in images.
Make sure to note where these files are saved, normally this would be your Download folder or Desktop, but depends on your Web Browsers settings. Some versions of Windows have security settings that will not allow for unsigned/unknown software to be downloaded. The driver install will give the end user the most fits, as there is an important step required before it will allow the driver to be installed. Please visit our YouTube channel (link is above) for videos specific to Windows 7, 8.x and 10.
Borland Database Engine (BDE)
The BDE needs to be installed first, as the CE132 install needs this to access the information used for parameter editing.
Locate the BDEInst.EXE file obtained from the TwEECer website.
Right click on BDEInst and Select Run As Administrator
Setup will ask if you want to install the BDE, click Yes.
Install Guide.odt - 1 - 5/11/2018

The BDE Install will begin, click Next to continue.
You will be asked to select a Destination Directory, click Next to accept the default folder
Install Guide.odt - 2 - 5/11/2018

At this point the BDE is ready to continue with the first part of the install, click Install.
The BDE will confirm the install Directory, click OK to continue
You will be asked to create the Directory, click Yes to create it and continue
Install Guide.odt - 3 - 5/11/2018

An error regarding failure to create a registry key may display when installing on Vista and Windows 7, this can be ignored as itwill not affect the operation of the software. Click OK to continue
*** The BDE is written circa 1997 when Hard disk drives (HDD) had just a fraction of thestorage of todays HDD. The BDE will report that there is not enough space on most drives
manufactured after 2000. You can ignore this and any other error reported during theinstall of BDE.
The BDE Setup is complete, click Finish to exit the install
Install Guide.odt - 4 - 5/11/2018

CalEdit & CalCon Install
This install begins the same was the BDE, Right click on the CE132 file and select Open, or double clickon the install EXE to begin installation.
Once again, Right click on CE132 and Select Open or just double click on the file
Setup will begin, click Next to continue
Install Guide.odt - 5 - 5/11/2018
You will be prompted for the destination folder, click Next to select the default location and continue
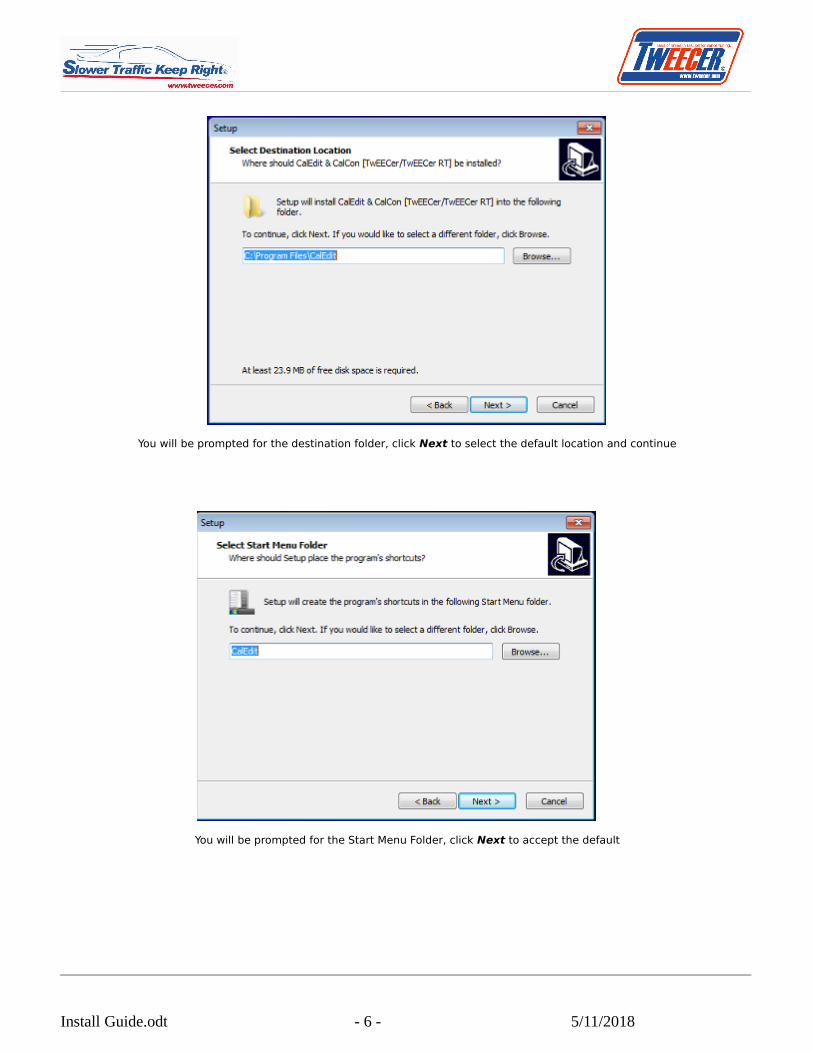
You will be prompted for the Start Menu Folder, click Next to accept the default
Install Guide.odt - 6 - 5/11/2018

Setup is ready to Install the software, click Install to continue
Setup will install the software and complete. Click Finish to exit Setup and follow the steps on the next page BEFORE attempting to open CalEdit, as it will report an error that the DLL (FTD2XX.DLL) cannot be found. This file is part of the driver install process and must be completed before using the software.
Install Guide.odt - 7 - 5/11/2018

Driver Installation
At this point you should have the BDE and the latest CalEdit/CalCon installed to your PC and are ready to install the driver needed to communicate with the TwEECer.
The Driver MUST be installed before using CalEdit. This requires that you connect the TwEECer module to your PC, the EEC from the vehicle is NOT needed here. Just connect the TwEECer to the USB cable and then the USB cable to your PC.
64bit versions of Windows 7 and later will require that the end user manually install the driver for the TwEECer. Please see page 12 for details regaring this process.
Please locate and plug in the USB cable that shipped with the TwEECer and plug the cable into an available USB port on your PC. Next, connect the TwEECer to the cable.
Windows MIGHT notify you that it has “Found New Hardware” and will begin trying to install a driver
You may see a message that the driver software was not installed or the screen below
Click on the Locate and Install driver software (recommended) option
Install Guide.odt - 8 - 5/11/2018

Windows will not be able to locate a driver. Select “Browse my compuer for driver software (advanced)” or you may seethe screen on the following page. Either will take you to the necessary Next step.
You may be asked to insert a disc, Click “I don't have the disc. Show me other options”
Install Guide.odt - 9 - 5/11/2018

click Browse to locate the driver on your computer, which is located in the folder where the TwEECer software is installed.
Use this next dialog to navigate to C:\Program Files\CalEdit\Driver\ and click OK. If installing on a 64bit version of Windows,your Program Files folder may be C:\Program Files (x86)\CalEdit\Driver\
Install Guide.odt - 10 - 5/11/2018

Depending on UAC (User Access Control) and other security settings, you may see this message. If so, then Click “Install thisdriver software anyway” to continue
Windows will begin installing the driver
Windows should display this next after successfully installing the driver. Click Close to complete the install process
The Windows Notification area may display this message upon ending the install process
Install Guide.odt - 11 - 5/11/2018

Manual Driver Installation
The TwEECer owner needs to determine which version of Windows is in use as there are additional steps for Windows 8 and 10 users.
Windows 8.x and 10.x users should go to the Apps screen and locate and Right Click on the This PC icon. The context menu bar will pop up along the bottom of the screen. Select the Properties option.
Install Guide.odt - 12 - 5/11/2018

BDE Install Notes
In some instances, the BDE has problems with Vista & Windows 7 security and you may need to adjust a few parameters using the BDE Administration utility which installs with the BDE. This can be accessed from the control panel. If you are running a 64bit version of Windows, look for the View 32bitControl Panel Icon on in the list of icons in the Main Control Panel window.
Optionally, you can use the Start Search opton on the Start button, just type in BDE and it will show you the icon as a choice in the results list
Install Guide.odt - 13 - 5/11/2018

The primary issue is that the root of your boot drive, usually by default C:\, is not accessible to the BDE for writing and you need to change the NETDIR variable in the configuration. Create a TEMP folder on the root of C:\ and change the NETDIR variable to that folder.
You may also see an error message “An error occurred while attempting to initialize the Borland Database Engine (error $210D)”. If you get this error, change the SHAREDMEMORYLOCATION value to 5BDE.
*** The BDE is written circa 1997 when Hard disk drives (HDD) had just a fraction of the storage of todays HDD. The BDE will report that there is not enough space on most drives manufactured after 2000. You can ignore this and any other error reported during the install of BDE.
Install Guide.odt - 14 - 5/11/2018


![A B D - gdlp01.c-wss.comgdlp01.c-wss.com/gds/6/0300002996/02/LBP2900_SETUP... · GG]Found New Hardware Windows needs to install driver software for your Canon LBP2900 Locate and install](https://img.dokumen.tips/doc/110x75/5b9dee8a09d3f29a298d799c/a-b-d-gdlp01c-wsscomgdlp01c-wsscomgds6030000299602lbp2900setup.jpg)