Embed Size (px)
Citation preview

kÉï=~ë=çÑW=
léÉê~íçêDë=j~åì~ä
MVKOMNT
páêçå~=`çååÉÅí=ptpçÑíï~êÉ=sÉêëáçå=QKRKñ
båÖäáëÜ
=
Operator's Manual\rSoftware version 4.2x

Table of contents Sirona Dental Systems GmbHOperator's Manual Sirona Connect SW
Table of contents
1 Introduction............................................................................................................... 6
1.1 Dear Customer, ............................................................................................. 61.1.1 Contact information .......................................................................... 6
1.2 Copyright and trademark............................................................................... 7
2 General data............................................................................................................. 8
2.1 Certification ................................................................................................... 82.2 General safety information ............................................................................ 82.3 Accessories................................................................................................... 8
2.3.1 Accessories for implant measurement ............................................. 92.4 Structure of the manual ................................................................................. 10
2.4.1 Identification of the danger levels..................................................... 102.4.2 Formats and symbols used .............................................................. 102.4.3 CEREC AC / AF / AI conventions .................................................... 112.4.4 APOLLO DI conventions .................................................................. 11
2.4.4.1 Multi-Touch........................................................................ 112.4.5 Manual formats (assistance) ............................................................ 122.4.6 Data format ...................................................................................... 12
2.5 User interface................................................................................................ 132.5.1 Phase bar......................................................................................... 13
2.5.1.1 ADMINISTRATION............................................................ 142.5.1.2 ACQUISITION ................................................................... 142.5.1.3 MODEL.............................................................................. 142.5.1.4 CONNECT......................................................................... 142.5.1.5 Current program version ................................................... 152.5.1.6 Open chat.......................................................................... 15
2.5.2 Object bar......................................................................................... 152.5.3 Step menu........................................................................................ 152.5.4 System menu ................................................................................... 172.5.5 Start view ......................................................................................... 172.5.6 Workflow path .................................................................................. 17
3 Getting started.......................................................................................................... 18
3.1 Installing the software ................................................................................... 183.2 Uninstalling the software ............................................................................... 183.3 Restore factory default settings..................................................................... 183.4 Copy protection ............................................................................................. 193.5 Downloading software................................................................................... 193.6 Starting the software ..................................................................................... 20
63 61 963 D35342 D3534.208.02.11.02 09.2017

Sirona Dental Systems GmbH Table of contentsOperator's Manual Sirona Connect SW
båÖäáëÜ
3.7 License update ............................................................................................. 203.7.1 Installation of the License Manager (Individual) .............................. 203.7.2 License update without Internet access .......................................... 21
4 Configuration ........................................................................................................... 22
4.1 Parameters................................................................................................... 224.2 Devices......................................................................................................... 22
4.2.1 CEREC Bluecam............................................................................. 234.2.1.1 Resetting settings ............................................................. 234.2.1.2 Calibration ........................................................................ 23
4.2.2 CEREC Omnicam ........................................................................... 234.2.2.1 Resetting settings ............................................................. 244.2.2.2 Calibration ........................................................................ 244.2.2.3 Color calibration................................................................ 274.2.2.4 Camera heating settings................................................... 304.2.2.5 Updating the firmware ...................................................... 30
4.2.3 APOLLO DI ..................................................................................... 304.3 Settings ........................................................................................................ 31
4.3.1 ADA/FDI odontogram ...................................................................... 314.3.2 Warning messages.......................................................................... 314.3.3 Language ........................................................................................ 31
4.4 App Center (applications)............................................................................. 31
5 System menu........................................................................................................... 32
5.1 Saving the impression .................................................................................. 325.2 Saving the impression under a different name............................................. 335.3 Importing an impression ............................................................................... 335.4 Exporting an impression............................................................................... 335.5 Exporting scan data...................................................................................... 345.6 Open a case in the CEREC software ........................................................... 345.7 License manager.......................................................................................... 345.8 Configuration ................................................................................................ 345.9 Window mode............................................................................................... 355.10 Open help information .................................................................................. 355.11 Exit program ................................................................................................. 35
6 Start view................................................................................................................. 36
6.1 Create a new patient .................................................................................... 366.2 Patient database .......................................................................................... 37
6.2.1 Buttons ............................................................................................ 376.2.2 Searching for individual patients ..................................................... 37
63 61 963 D3534D3534.208.02.11.02 09.2017 3

Table of contents Sirona Dental Systems GmbHOperator's Manual Sirona Connect SW
6.2.3 Edit a patient .................................................................................... 386.2.4 Deleting patients .............................................................................. 386.2.5 Deleting the impression.................................................................... 386.2.6 Opening an impression .................................................................... 386.2.7 Adding a new impression ................................................................. 386.2.8 2D-acquisitions with CEREC Omnicam ........................................... 39
7 Page palette ............................................................................................................. 40
7.1 View options.................................................................................................. 407.2 Tools ............................................................................................................. 41
7.2.1 Buccal registration............................................................................ 417.2.2 Buccal bite tools ............................................................................... 427.2.3 Cut out model areas......................................................................... 42
7.2.3.1 Remove model area (for Omnicam and Bluecam users) .. 427.2.3.2 Invert model area (for Omnicam and Bluecam users)....... 427.2.3.3 Removing the model area (APOLLO DI users) ................. 43
7.2.4 Resetting the model (MODEL phase) .............................................. 437.2.5 Trimming .......................................................................................... 43
7.2.5.1 Hide model area (for Omnicam and Bluecam users) ........ 437.2.5.2 Invert image area (for Omnicam and Bluecam users)....... 437.2.5.3 Hide image areas (for APOLLO DI users)......................... 44
7.2.6 Entering the preparation margin....................................................... 447.3 Display objects .............................................................................................. 457.4 Activating analysis......................................................................................... 46
8 ADMINISTRATION phase........................................................................................ 48
9 ACQUISITION phase ............................................................................................... 51
9.1 Image catalogs with CEREC Bluecam.......................................................... 519.1.1 Working with the image catalog ....................................................... 529.1.2 Adding image catalogs..................................................................... 549.1.3 Options............................................................................................. 559.1.4 Recycle bin....................................................................................... 55
9.2 Image catalogs with CEREC Omnicam ........................................................ 569.2.1 Adding image catalogs..................................................................... 57
9.3 Image catalogs with APOLLO DI .................................................................. 579.4 Camera view ................................................................................................. 589.5 3D preview (with CEREC Bluecam and CEREC Omnicam)......................... 589.6 3D Preview (with APOLLO DI) ...................................................................... 599.7 Take a scan................................................................................................... 59
9.7.1 CEREC Bluecam.............................................................................. 599.7.1.1 Switch CEREC camera on/off ........................................... 59
63 61 963 D35344 D3534.208.02.11.02 09.2017

Sirona Dental Systems GmbH Table of contentsOperator's Manual Sirona Connect SW
båÖäáëÜ
9.7.1.2 Camera support................................................................ 599.7.1.3 Preparing the exposure .................................................... 609.7.1.4 Taking acquisitions with the CEREC Bluecam................. 619.7.1.5 Supplementary optical impressions.................................. 639.7.1.6 Angled optical impressions............................................... 639.7.1.7 Optical impressions for quadrant restoration.................... 639.7.1.8 Acquiring end teeth........................................................... 639.7.1.9 Acquiring an impression ................................................... 64
9.7.2 CEREC Omnicam ........................................................................... 649.7.2.1 Camera warm-up time ...................................................... 649.7.2.2 Mode................................................................................. 649.7.2.3 Directing the camera ........................................................ 659.7.2.4 Taking acquisitions with the CEREC Omnicam................ 729.7.2.5 Cut out model areas ......................................................... 739.7.2.6 Additional acquisitions ...................................................... 73
9.7.3 APOLLO DI ..................................................................................... 739.7.4 Finishing the phase ......................................................................... 74
10 MODEL phase......................................................................................................... 75
10.1 Editing the model.......................................................................................... 7510.2 Buccal registration........................................................................................ 7510.3 Manual correlation for image fields .............................................................. 7810.4 Select Scanbody .......................................................................................... 7810.5 Trimming the preparation ............................................................................. 7810.6 Entering the preparation margin................................................................... 80
10.6.1 Entering the preparation margin - CEREC Omnican/Bluecam users 8010.6.2 Entering the preparation margin - APOLLO DI users...................... 81
10.7 Preparation analysis..................................................................................... 8210.8 Finishing the phase ...................................................................................... 82
11 CONNECT phase.................................................................................................... 83
11.1 Registration and functions of the Sirona Connect portal .............................. 8311.2 Log out of the Sirona Connect software at the portal ................................... 8411.3 Check restoration information ...................................................................... 8411.4 Enter order data ........................................................................................... 8411.5 Add additional information............................................................................ 8411.6 Shopping cart ............................................................................................... 8511.7 Order list....................................................................................................... 85
Index........................................................................................................................ 86
63 61 963 D3534D3534.208.02.11.02 09.2017 5
1 Introduction Sirona Dental Systems GmbH1.1 Dear Customer, Operator's Manual Sirona Connect SW
1 Introduction
1.1 Dear Customer,Thank you for purchasing Sirona Connect SW software from Sirona.
You can use Sirona Connect SW software in combination with a Sirona acquisition unit to create digital impressions and send them to your partner laboratory via the Sirona Connect portal. Any type of restoration can be manufactured from your impressions there. Your laboratory can then decide whether to produce the restorations directly from your digital impression or, if necessary, produce a physical model in-house with central production facilities to complete the work. Models are always required when you order a veneer crown or a veneer bridge from your laboratory (e.g. made of zirconia or metal etc.). It is not possible to design and mill restorations with this software.
Improper use and handling can create hazards and cause damage. Therefore, please read and follow this document carefully. You should always keep it within reach.
Also pay attention to the safety instructions to prevent personal injury and material damage.Your Sirona Connect team
1.1.1 Contact informationCustomer service center For technical questions, use the contact form on the internet at the
following address: http://srvcontact.sirona.com
Manufacturer's address
Sirona Dental Systems GmbHFabrikstrasse 3164625 BensheimGermany
Tel.: +49 (0) 6251/16-0Fax: +49 (0) 6251/16-2591e-Mail: [email protected]
63 61 963 D35346 D3534.208.02.11.02 09.2017

Sirona Dental Systems GmbH 1 IntroductionOperator's Manual Sirona Connect SW 1.2 Copyright and trademark
båÖäáëÜ
1.2 Copyright and trademarkCopyright © Sirona Dental Systems GmbH. All rights reserved.
The information contained in this manual may be changed without notice.
The software and all related documentation are protected by copyright. You must therefore handle it in the same way as any other protected material.
Anyone who copies this software to any medium for any purpose other than his own personal use without the written permission of Sirona Dental Systems will be liable to prosecution.
Trademarks Microsoft®, Windows 7®, and Windows 10® are registered trademarks.
WindowsTM is a trademark of Microsoft Corporation.
All other trademarks are the property of their respective holders.Notes on 3rd party code libraries must be stored in license.pdf in the installation directory.
63 61 963 D3534D3534.208.02.11.02 09.2017 7
2 General data Sirona Dental Systems GmbH2.1 Certification Operator's Manual Sirona Connect SW
2 General dataPlease read this document completely and follow the instructions exactly. You should always keep it within reach.
Original language of the present document: German
2.1 CertificationCE mark
This product bears the CE mark in accordance with the provisions of the Council Directive 93/42/EEC of June 14, 1993 concerning medical devices (MDD).
2.2 General safety informationOnly use original software
Only use original software or software which has been released by Sirona. To produce restorations and equipment, manipulated or non-released software components must not be used.
Software and software components must not be installed using incorrect data.
Please check that each installed component has been granted approval in its country. Contact your dealer for more information.
Models to be checked by trained personnel
Each model which is created with this software must be checked for suitability by a trained person (e.g. dental technician or dentist).
For the USA only
CAUTION: Federal law (USA) restricts sale of this device to or on the order of a physician, dentist, or licensed practitioner.
2.3 AccessoriesIn order to ensure product safety, this device may be operated only with original Sirona accessories or third-party accessories expressly approved by Sirona. The user is responsible for any damage resulting from the use of non-approved accessories.
Available accessories
Hygiene protection for APOLLO DI, REF 64 41 344
63 61 963 D35348 D3534.208.02.11.02 09.2017

Sirona Dental Systems GmbH 2 General dataOperator's Manual Sirona Connect SW 2.3 Accessories
båÖäáëÜ
2.3.1 Accessories for implant measurement
Both Scanbody types can be used for APOLLO DI as they have to be coated with APOLLO DI-SpeedSpray.
63 61 963 D3534D3534.208.02.11.02 09.2017 9
2 General data Sirona Dental Systems GmbH2.4 Structure of the manual Operator's Manual Sirona Connect SW
2.4 Structure of the manual
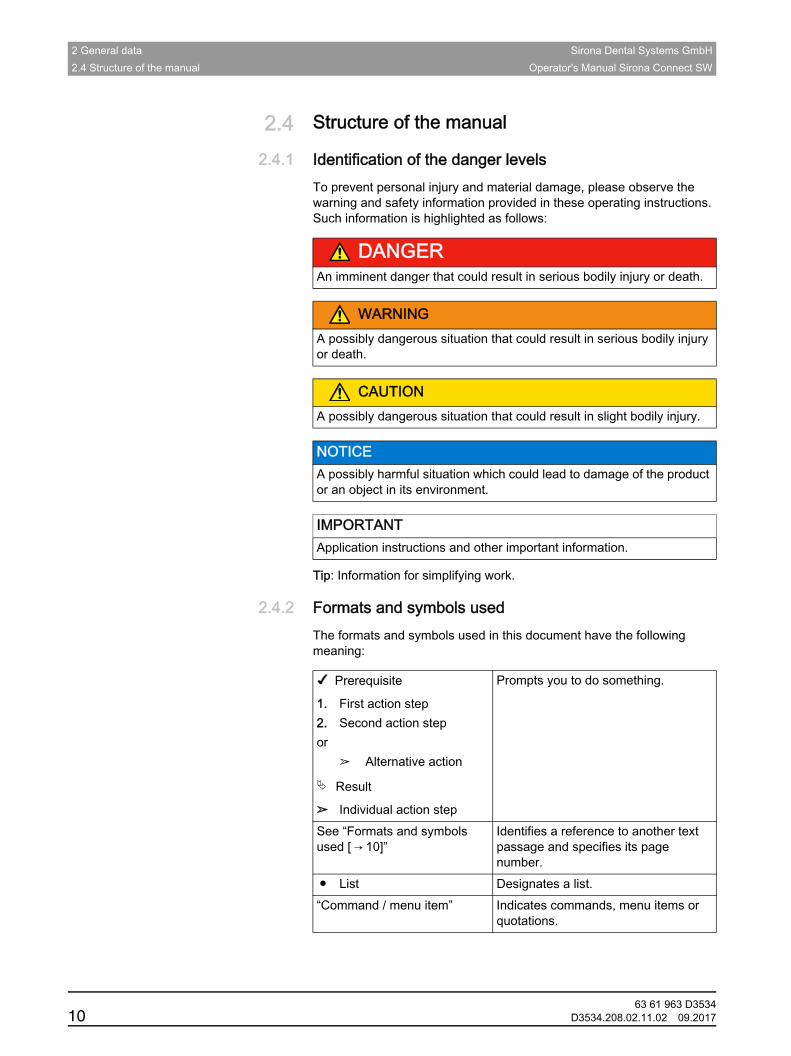
2.4.1 Identification of the danger levelsTo prevent personal injury and material damage, please observe the warning and safety information provided in these operating instructions. Such information is highlighted as follows:
Tip: Information for simplifying work.
2.4.2 Formats and symbols usedThe formats and symbols used in this document have the following meaning:
DANGERAn imminent danger that could result in serious bodily injury or death.
WARNINGA possibly dangerous situation that could result in serious bodily injury or death.
CAUTIONA possibly dangerous situation that could result in slight bodily injury.
NOTICE A possibly harmful situation which could lead to damage of the product or an object in its environment.
IMPORTANTApplication instructions and other important information.
Prerequisite
1. First action step2. Second action stepor
➢ Alternative action
Result
➢ Individual action step
Prompts you to do something.
See “Formats and symbols used [ → 10]”
Identifies a reference to another text passage and specifies its page number.
● List Designates a list.“Command / menu item” Indicates commands, menu items or
quotations.
63 61 963 D353410 D3534.208.02.11.02 09.2017

Sirona Dental Systems GmbH 2 General dataOperator's Manual Sirona Connect SW 2.4 Structure of the manual
båÖäáëÜ
2.4.3 CEREC AC / AF / AI conventions
2.4.4 APOLLO DI conventions
2.4.4.1 Multi-Touch
Multi-Touch Technology
The screen is equipped with multi-touch technology. You can navigate and enter content using your finger. Icons open if you tap them with your finger.
Navigating in the software
Example MeaningClick Pressing once and releasing the left mouse button
or the left trackball button on the acquisition unit (or foot switch).
Double-click Pressing twice quickly in succession and releasing the left mouse button or the left trackball button on the acquisition unit (or foot switch).
Moving the mouse in one direction
On the acquisition unit: Moving the trackball in the corresponding direction.
Seizing a point Pressing the left mouse button (left trackball button on the acquisition unit) and keeping it pressed.
For acquisitions with the CEREC Bluecam: Actuate foot switch
The same function as: Pressing the left trackball button on the acquisition unit or the left mouse button.
"Ctrl+N" On the keyboard: Press the Ctrl and N keys simultaneously.
Drag & drop .
Press and hold an element (e.g. a pictograph) and drop / release it onto a potential destination.
Example MeaningTap Single tap on the screen using your finger.
To execute functions in the software you must tap once on the corresponding button.
Double-click Two taps on the screen in rapid succession using your finger.
Tip: To open programs in Windows you must tap the corresponding button twice (double-click).
Call up shortcut menus
Tap the corresponding point and hold the finger on the screen for a longer period. A shortcut menu opens at this point.
Drag & drop .
Tap an element (e.g. pictograph), drag and drop onto new potential destination.
63 61 963 D3534D3534.208.02.11.02 09.2017 11

2 General data Sirona Dental Systems GmbH2.4 Structure of the manual Operator's Manual Sirona Connect SW
Edit a 3D model with multi-touch
You can edit the 3D model using multi-touch.
2.4.5 Manual formats (assistance)You can access the manual via the Help button or by pressing "F1".Fragment pdf SironaThe PDF-format user manual can be found on the supplied software DVD or on the Internet (http://www.sirona.com/manuals).
This format is page-oriented and is well suited for printing out the desired pages.
2.4.6 Data formatYou can assign one or more cases to any patient in the software. Depending on the processing status, a case comprises multiple optical impressions, the virtual models reconstructed from them and the preparation margin which has been drawn in.
In this manual, patient data is generally referred to as "cases".
The software uses its own file format (*.con) to export a case. This format contains all of the case data including patient information. A different file format is used (*.dxd) to send data via the Sirona Connect portal or if data is opened in the CEREC SW.
Under certain circumstances, older software versions cannot open data exports from a more recent version.
Item FunctionA ➢ Complete a rotary movement using 2 fingers.
The object is rotated in the plane.
B ➢ Drag with 1 finger. The model is rotated out of its current plane.
C ➢ Pull 2 fingers in together. The object is minimized.
D ➢ Pull the fingers apart. The object is maximized.
E ➢ Drag with 2 fingers. The model is dragged.
63 61 963 D353412 D3534.208.02.11.02 09.2017

Sirona Dental Systems GmbH 2 General dataOperator's Manual Sirona Connect SW 2.5 User interface
båÖäáëÜ
2.5 User interface
Overview of the user interface
2.5.1 Phase barThe workflow is illustrated in the software in four phases.
Phase bar
● ADMINISTRATION
● ACQUISITION
● MODEL
● CONNECT
A System menu E Main windowB Phase bar F Page palette C Information dialog G Step menu D Open chat H Object bar
63 61 963 D3534D3534.208.02.11.02 09.2017 13

2 General data Sirona Dental Systems GmbH2.5 User interface Operator's Manual Sirona Connect SW
2.5.1.1 ADMINISTRATIONIn this phase, you can perform the following:
● Manage patients
● Create cases and determine their type,
● Define the tooth numbers and materials.
2.5.1.2 ACQUISITION
In this phase, you can perform the following:● Create acquisitions
- lower jaw, - upper jaw, - buccal bite registration
● View a 3D preview of the acquisitions
2.5.1.3 MODELIn this phase, you can perform the following:
● The buccal registration of the bite situation
● Adjust the virtual models
● Draw and edit preparation margins
2.5.1.4 CONNECTIn this phase, you can log in to the Sirona Connect portal (see "Log out of the Sirona Connect software at the portal [ → 84]“). You must register as a dentist on the Sirona Connect homepage for this.
You can open this phase by clicking in the phase bar on the "CONNECT" phase or on the double arrow in the step menu.
63 61 963 D353414 D3534.208.02.11.02 09.2017
Sirona Dental Systems GmbH 2 General dataOperator's Manual Sirona Connect SW 2.5 User interface
båÖäáëÜ
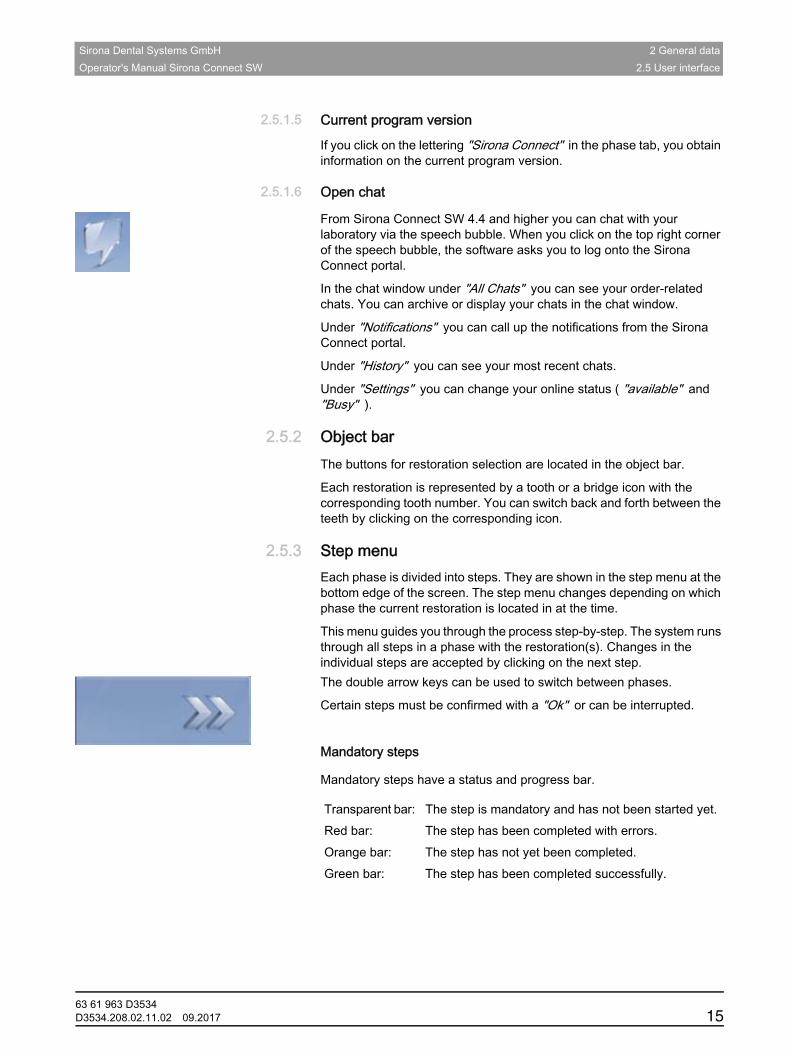
2.5.1.5 Current program version
If you click on the lettering "Sirona Connect" in the phase tab, you obtain information on the current program version.
2.5.1.6 Open chat
From Sirona Connect SW 4.4 and higher you can chat with your laboratory via the speech bubble. When you click on the top right corner of the speech bubble, the software asks you to log onto the Sirona Connect portal.
In the chat window under "All Chats" you can see your order-related chats. You can archive or display your chats in the chat window.
Under "Notifications" you can call up the notifications from the Sirona Connect portal.
Under "History" you can see your most recent chats.
Under "Settings" you can change your online status ( "available" and "Busy" ).
2.5.2 Object barThe buttons for restoration selection are located in the object bar.
Each restoration is represented by a tooth or a bridge icon with the corresponding tooth number. You can switch back and forth between the teeth by clicking on the corresponding icon.
2.5.3 Step menuEach phase is divided into steps. They are shown in the step menu at the bottom edge of the screen. The step menu changes depending on which phase the current restoration is located in at the time.
This menu guides you through the process step-by-step. The system runs through all steps in a phase with the restoration(s). Changes in the individual steps are accepted by clicking on the next step. The double arrow keys can be used to switch between phases.
Certain steps must be confirmed with a "Ok" or can be interrupted.
Mandatory steps
Mandatory steps have a status and progress bar.
Transparent bar: The step is mandatory and has not been started yet.Red bar: The step has been completed with errors.Orange bar: The step has not yet been completed.Green bar: The step has been completed successfully.
63 61 963 D3534D3534.208.02.11.02 09.2017 15

2 General data Sirona Dental Systems GmbH2.5 User interface Operator's Manual Sirona Connect SW
Optional steps
Optional steps do not have colored bars. They can be shown/hidden using the button on the left of the step menu.
Optional steps are only shown with a symbol in the non-selected state. Hover over the step menu with your cursor in order to learn about the function. As soon as you have activated the step, the name of the function will be displayed.
63 61 963 D353416 D3534.208.02.11.02 09.2017

Sirona Dental Systems GmbH 2 General dataOperator's Manual Sirona Connect SW 2.5 User interface
båÖäáëÜ
2.5.4 System menu
Fragment: inLab graphics SWFragment introductionIn the system menu, you can:Fragment list 1● Switch to the start view to start a new case
● Save case
● Save the case under a different name
● Import case
● Exporting a caseFragment list 2● Call up App Center/start plug-insFragment only CEREC Connect SW 4● Open a case in CEREC SWFragment list 3 Connect● Open license manager
● Configure hardware and software
● Change window mode
● Open help information
● Exit CEREC Connect SW
2.5.5 Start viewIn the start window, you can perform the following:
● Create a new patient,
● Search patient database,
● Open patient database,
● Open the Sirona Connect portal.
2.5.6 Workflow pathThe workflow path in the software is not strictly linear. You can switch to any active phase using the phase bar or switch back and forth between individual steps using the step menu. For example, if you notice during the process that there is a crown rather than an onlay, you can return to the administration and simply change the restoration type.
63 61 963 D3534D3534.208.02.11.02 09.2017 17

3 Getting started Sirona Dental Systems GmbH3.1 Installing the software Operator's Manual Sirona Connect SW
3 Getting started
3.1 Installing the software✔ The PC is powered up and all programs are terminated.✔ You have downloaded the installation file from the Internet and saved
it to the device.1. Navigate to the location of the installation file.2. Double-click the "setup. exe" file. 3. Select the language of the installation and click the button marked
"OK" . The installation wizard opens.
4. Click "Next" . The license agreement is shown.
5. Confirm the license agreement with the "Yes" button. The program continues the installation routine.
6. Select "Full Installation".
7. After installation, you can display the "ReadMe" file by ticking or unticking the appropriate check box.
8. Click on the "Finish" button.
3.2 Uninstalling the software✔ The program is closed.1. Click on "Start / All Programs / Sirona Dental Systems / Sirona
Connect / Tools / Deinstallation" to uninstall the software. During the uninstall procedure, you will be asked whether you
want to delete the patient data or the entries in the registration database (e.g. the calibration data).
2. Depending on your decision, click either the "Yes" or "No" button. The software is uninstalled.
3.3 Restore factory default settings✔ The program is closed.1. Uninstall the software (see "Uninstalling the software [ → 18]"). 2. Install the software (see "Installing the software [ → 18]").
The original factory default settings are restored.
NOTICE Installing DirectX
If DirectX is not yet installed on your computer, it will be installed now. Accept the license agreement and decide whether the computer is to be restarted now or later.
63 61 963 D353418 D3534.208.02.11.02 09.2017

Sirona Dental Systems GmbH 3 Getting startedOperator's Manual Sirona Connect SW 3.4 Copy protection
båÖäáëÜ
3.4 Copy protectionThe software can be started only when the USB license stick is plugged in. The USB license stick is included in the scope of supply of the acquisition unit. The license stick is installed in the device with the APOLLO DI product. If you require additional licenses, please contact your dealer.
Always keep the USB license stick near the acquisition unit/PC.
All authorizations (interface and software licenses) can be installed as electronic licenses on the USB license stick. You must enter a 25-digit license key for this purpose.You will receive the license key along with the acquisition unit. Alternatively, you can order it separately from your dealer.
Following an update, you may require a new license that is not available on your USB license stick. For more information, refer to the “License manager [ → 34]” section.
3.5 Downloading softwareService packsCEREC Connect SW To keep your software versions lower than version 4.4 updated, regularly check whether new service packs are available.
Visit the Sirona Connect website at www.sirona-connect.com and navigate to the software download area.Description (not for CEREC Ortho SW)You will also find a description of the improvements and enhancements made in the service pack.
Automatic software updates
Once the Sirona Connect software is opened and the Sirona acquisition unit is connected to the Internet, the Sirona Connect software from version 4.4 automatically searches for updates.
If a new version is found you will be asked whether you want to download this now or later.
If you decide not to download the software now the, the Sirona Connect software will prompt you again when you next start.
Once you have downloaded the Sirona Connect software you will be asked whether you want to install the software now.
IMPORTANTSoftware license for Sirona Connect is pre-installed.
No separate license needs to be installed for the Sirona Connect software. This is pre-installed on every USB license stick.
63 61 963 D3534D3534.208.02.11.02 09.2017 19

3 Getting started Sirona Dental Systems GmbH3.6 Starting the software Operator's Manual Sirona Connect SW
3.6 Starting the software✔ The CEREC Connect SW software is installed. You will find the start
icon on the desktop.✔ The USB license stick is connected with a valid, current license.1. Double-click the CEREC Connect SW start icon.or
➢ Click on "Start / All Programs / Sirona Dental Systems / Sirona Connect / CEREC Connect SW 4".
The software is started.
3.7 License updateFor more information on the license manager, refer to the section on “License manager [ → 34]”.
3.7.1 Installation of the License Manager (Individual)
✔ The PC is powered up and all programs are terminated.1. Insert the DVD in the DVD drive.
The setup program starts automatically.
2. If this is not the case, run the "Setup.exe" file in the root directory of the DVD. The installation wizard opens.
3. Click on the "OK" button.4. In the next dialog, click the "Next" button.
The license agreement is shown.
5. Read through the license agreement carefully.6. If you accept the license agreement, then activate the "I accept the
terms in the license agreement" option button and click the "Next" button.
7. In the next dialog, click the "Custom" button.8. Uncheck all options apart from the license manager.9. In the next dialog, click the "Next" button.10. In the next dialog, click the "Install" button.
The program continues the installation routine. This may take several minutes.
11. Click the "Finish" button once installation is complete. The license manager is installed.
IMPORTANTNot required for APOLLO DI
Installation of the license manager is not required for APOLLO DI The license manager is also installed with the software installation.
63 61 963 D353420 D3534.208.02.11.02 09.2017
Sirona Dental Systems GmbH 3 Getting startedOperator's Manual Sirona Connect SW 3.7 License update
båÖäáëÜ
3.7.2 License update without Internet accessIf the Sirona acquisition unit does not have Internet access itself, you can run the license manager on another PC with Internet access.
You need to remove the license stick from the Sirona acquisition unit and plug it into the PC with Internet access. The license stick is behind the lower cover at the rear side of the Sirona acquisition unit.
Install the license manager on the PC with Internet access and run the license update.
63 61 963 D3534D3534.208.02.11.02 09.2017 21

4 Configuration Sirona Dental Systems GmbH4.1 Parameters Operator's Manual Sirona Connect SW
4 ConfigurationThe "Configuration" menu contains the following submenus:
● "Parameters" ● "Devices" ● "Settings" ● "Apps"
4.1 ParametersGeneral information
The "Parameters" menu is arranged according to adjustment options.
The parameters in the configuration are used the standard value when calculating tools.
Preparation Analysis
Under "Preparation Analysis" parameters you can define the ideal distance of the preparation to the antagonist.
In the "Preparation Analysis" step you can see whether the spatial conditions are adequate for the desired material.
4.2 DevicesAll connected devices can be displayed and configured under the menu item "Devices" .A green check mark on a device indicates its availability.
A red warning triangle with an exclamation mark shows that the device cannot be reached.
Updating
With the "Refresh Devices" button you can
● refresh the status or
● Check the current availability of a device.
63 61 963 D353422 D3534.208.02.11.02 09.2017

Sirona Dental Systems GmbH 4 ConfigurationOperator's Manual Sirona Connect SW 4.2 Devices
båÖäáëÜ
4.2.1 CEREC BluecamUnder the menu item "Devices" , CEREC Bluecam can be set up.
Accepting settings
➢ Click on the "Ok" button.
Discarding settings
➢ Click on the "Cancel" button.
4.2.1.1 Resetting settings
➢ Click on the "Reset Camera Settings" button. The settings are reset to factory settings.
4.2.1.2 Calibration
1. Click on the "Calibrate" button.2. Then simply proceed as prompted by the software.
4.2.2 CEREC Omnicam
Audio feedback
Using the "Sound:" selection box, you can switch the audio feedback for acquisitions on or off. You can control the volume using the slide bar. You are able to choose from three different sounds.
Setting DescriptionShake tolerance ● Set motion sensitivity for automatic
activation.
● The more stringent the setting, the longer you have to hold the camera still before the next acquisition will be taken.
Auto-delete rejected images
● Images that could not be reconstructed/overlaid with the current acquisitions are automatically moved to the Recycle Bin.
63 61 963 D3534D3534.208.02.11.02 09.2017 23
4 Configuration Sirona Dental Systems GmbH4.2 Devices Operator's Manual Sirona Connect SW
Acquisition Hints
"Acquisition Hints" provides visual feedback to the user.
The red arrows show that an insufficient amount of information is available between individual areas. You can improve the precision of the model by scanning the camera in the direction of the arrows. To do so, connect both ends of the arrow with one scanning motion.
Wait briefly after the scanning motion is complete until the calculation has been made and repeat if necessary if the arrows are displayed in red. During the calculation, the arrows will change color to orange.
Accepting settings
➢ Click on the "Ok" button.
Discarding settings
➢ Click on the "Cancel" button.
4.2.2.1 Resetting settings
➢ Click on the "Reset Camera Settings" button. The settings are reset to factory settings.
4.2.2.2 Calibration
The measurement procedure used by the system requires the use of a calibrated CEREC Omnicam. The CEREC Omnicam is factory-calibrated. Then calibrate the CEREC Omnicam after every reinstallation and after every transport. The calibration set supplied with the CEREC Omnicam is available for the calibration process.
In order to achieve optimum results, the CEREC Omnicam must be allowed to warm up for 15-20 minutes before calibration.Recalibrate the CEREC Omnicam in the following cases:
● following transport (shaking stress) or during first commissioning,
● after storage in unheated or un-air-conditioned rooms (temperature differences exceeding 30°C)
● with temperature differences of over 15°C between the last calibration and operation
● In general, carrying out a calibration is the correct process in the event of errors in the acquisition process (such as poor image quality or the lack of a 3D preview). In many cases, the errors can be corrected in doing so.
63 61 963 D353424 D3534.208.02.11.02 09.2017

Sirona Dental Systems GmbH 4 ConfigurationOperator's Manual Sirona Connect SW 4.2 Devices
båÖäáëÜ
Starting calibration
1. In the software, navigate to the system menu and click on the "Configuration" button.
2. Click on the "Devices" button.3. Click on the "Omnicam" button.4. Click on the "Calibrate" button.
The camera view is displayed in one window.
5. Enter the 8-digit Sirona ID. You can find this ID on the sticker on the calibration set.
Calibrate the camera
1. Remove the protective cap from the calibration set.2. Mount the calibration set on the tip of the camera until it locks into
place.3. Secure the CEREC Omnicam in the calibration set using one hand.
Ensure that the external calibration set screw is fully screwed in a clockwise motion until it gently locks into place.
4. Click on the "OK" button. The measuring process starts.
The software prompts you to proceed to the next latching.
5. Turn the screw counter-clockwise until you reach the next latching point.
6. Click on the "OK" button. In doing so, ensure that the CEREC Omnicam does not move. The software confirms the calibration process.
The software prompts you to proceed to the next latching.
7. Execute steps 5 and 6 a total of 11 times. The software provides status updates on the calibration and
informs you once the procedure is complete.
You will be prompted to measure the position of the exit window.
63 61 963 D3534D3534.208.02.11.02 09.2017 25
4 Configuration Sirona Dental Systems GmbH4.2 Devices Operator's Manual Sirona Connect SW
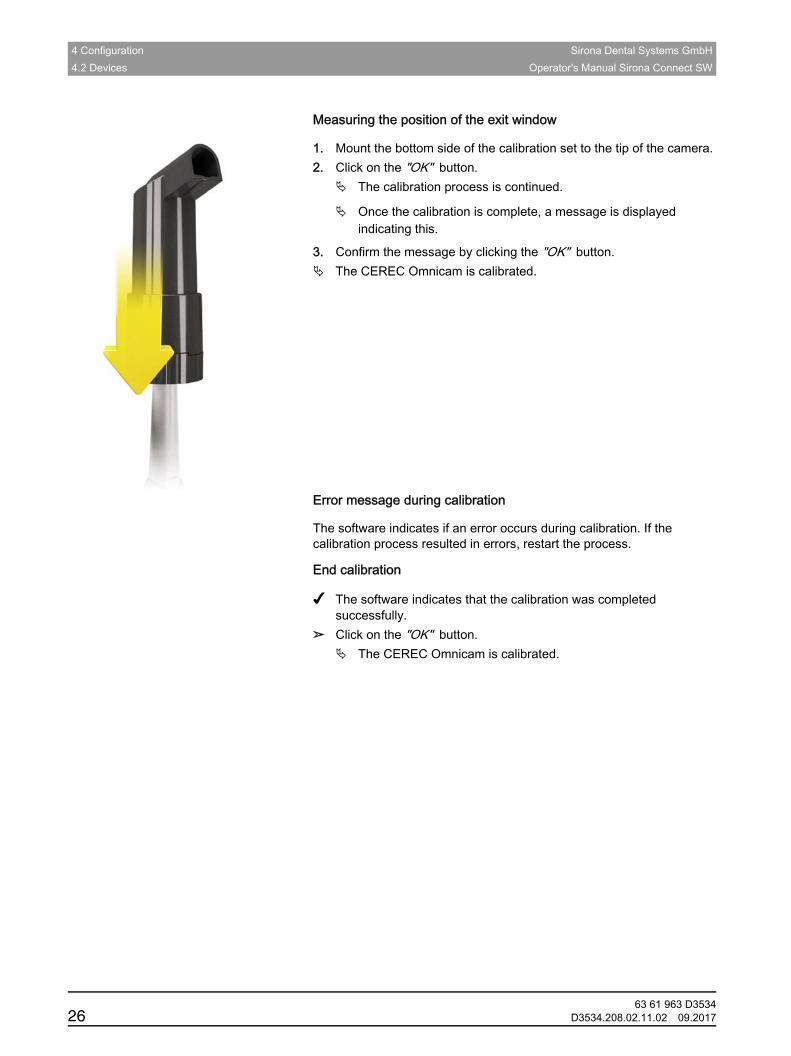
Measuring the position of the exit window
1. Mount the bottom side of the calibration set to the tip of the camera.2. Click on the "OK" button.
The calibration process is continued.
Once the calibration is complete, a message is displayed indicating this.
3. Confirm the message by clicking the "OK" button. The CEREC Omnicam is calibrated.
Error message during calibration
The software indicates if an error occurs during calibration. If the calibration process resulted in errors, restart the process.
End calibration
✔ The software indicates that the calibration was completed successfully.
➢ Click on the "OK" button. The CEREC Omnicam is calibrated.
63 61 963 D353426 D3534.208.02.11.02 09.2017

Sirona Dental Systems GmbH 4 ConfigurationOperator's Manual Sirona Connect SW 4.2 Devices
båÖäáëÜ
4.2.2.3 Color calibration
General information
A color-calibrated Omnicam must be used for the color analysis.The color analysis can only be carried out with a CEREC Omnicam from a particular serial number. In order to test the CEREC Omnicam, use the Omnicam test tool on my.cerec.com -> CEREC SW 4.5 - > Shade Detection. You can find the serial number of the Omnicam on the upper side on the optics tube (see arrow E in the figure below).
This is only relevant for first generation cameras. For new systems, the serial number of the Omnicam does not need to be determined.
1. Press the mirror sleeve (B) against the camera body.2. Press detent (A).
3. Pull off the mirror sleeve.
In order to achieve optimum results, the CEREC Omnicam must be allowed to warm up for 20 minutes before calibration. The CEREC Omnicam must be color calibrated every two weeks in order to carry out a reliable color analysis. You will achieve the best results if the CEREC Omnicam is color calibrated immediately before scanning a new case.
Carry out a color calibration also after changing a mirror sleeve.
Heavily scratched mirror sleeves may not be used for a color analysis.
NOTICE Risk of damaging the camera window (D) or the coated sapphire glass (C).
➢ Push the mirror sleeve straight toward the front; do not tilt it.
63 61 963 D3534D3534.208.02.11.02 09.2017 27
4 Configuration Sirona Dental Systems GmbH4.2 Devices Operator's Manual Sirona Connect SW
Storing a color-calibration set
The color-calibration set must be stored in its packaging in a dry place which is protected from light. It must be used with a disinfected Omnicam as the color-calibration set must itself not be disinfected. If dust accumulates on the inside of the color-calibration set, it must be carefully removed using compressed air.
Switch on the color analysis
1. In the software, navigate to the system menu and click on the "Configuration" button.
2. Click on the "Devices" button.3. Click on the "Omnicam" button.4. Select the "Shade Detection" option.
- You can choose between various color systems ("Shade Guide Selection" ).- You can decide whether you would like to be notified in 14 days when the color calibration is needed again.- If color recognition is not possible with your camera, a corresponding notice will appear. A color calibration is also not available in this case.
5. Confirm the changes below with "Ok" .6. Click the "Color Calibration" button and carry out the color
calibration.
Color-calibrating the camera
1. Make sure that the CEREC Omnicam is clean, disinfected and dry.2. Remove the color-calibration set from the packaging.3. Use the CEREC Omnicam to scan the QR code on the underside of
your color-calibration set. In order to do this, you must hold the CEREC Omnicam still in front of the QR code so that it is completely visible in the picture. If the QR code appears to be shiny, hold the camera at more of an oblique angle in order to avoid any glaring light and to make it easier to scan the codes. If the QR code is recognized, the next "Please mount color calibration set" step appears.This step of the QR code scan is skipped during the subsequent color calibration and the serial number of the color-calibration set is thus displayed. If this does not match the serial number printed on your color-calibration set, click on the "Rescan QR Code" button and scan the new QR code.
4. Mount the color-calibration set on the tip of the camera until it locks into place.
5. Click on the "Ok" button. The measuring process starts. Do not move the CEREC
Omnicam or the color-calibration set during this time.
The software provides status updates on the calibration and informs you once the procedure is complete.
63 61 963 D353428 D3534.208.02.11.02 09.2017

Sirona Dental Systems GmbH 4 ConfigurationOperator's Manual Sirona Connect SW 4.2 Devices
båÖäáëÜ
Ending the color calibration
✔ The software indicates that the color calibration was completed successfully.
1. Click on the "Ok" button. The CEREC Omnicam is now color calibrated.
2. Remove the color-calibration set from the camera and place it back in the packaging.
Error message during color calibration
The software indicates if an error occurs during color calibration. If the color calibration contained an error, ensure the following:
● The color-calibration set is free of dust
● The color-calibration set was mounted correctly
● The CEREC Omnicam exit window is clean
➢ Then restart the color calibration.
Do not continue using a damaged color-calibration set; instead, contact your distributor to purchase a new one.
Replacing the color calibration set
Please note that the color calibration set
● can only be used with CEREC SW software ≥ 4.5 or Sirona Connect SW ≥ 4.5 or CEREC Premium SW ≥ 4.5.
● can only be kept for use for a maximum of 2 years. You can find the expiry date at the bottom of the color calibration set container. Previous storage may mean that the period for use has been reduced to less than 2 years.
● can only be used for one year after the container has been opened. Write the date that the container was opened on the container after "Opened on ___________" using a waterproof pen and do not use after one year.
The color calibration set may no longer be used once either of the two periods has expired.
The software notifies you that the color calibration set needs to be replaced with a new set before the color calibration expires.
Once the color calibration set has expired the software notifies you that a color analysis can only be carried out based on old calibration data.
Please contact your dealer for replacements for the color calibration set.
63 61 963 D3534D3534.208.02.11.02 09.2017 29
4 Configuration Sirona Dental Systems GmbH4.2 Devices Operator's Manual Sirona Connect SW
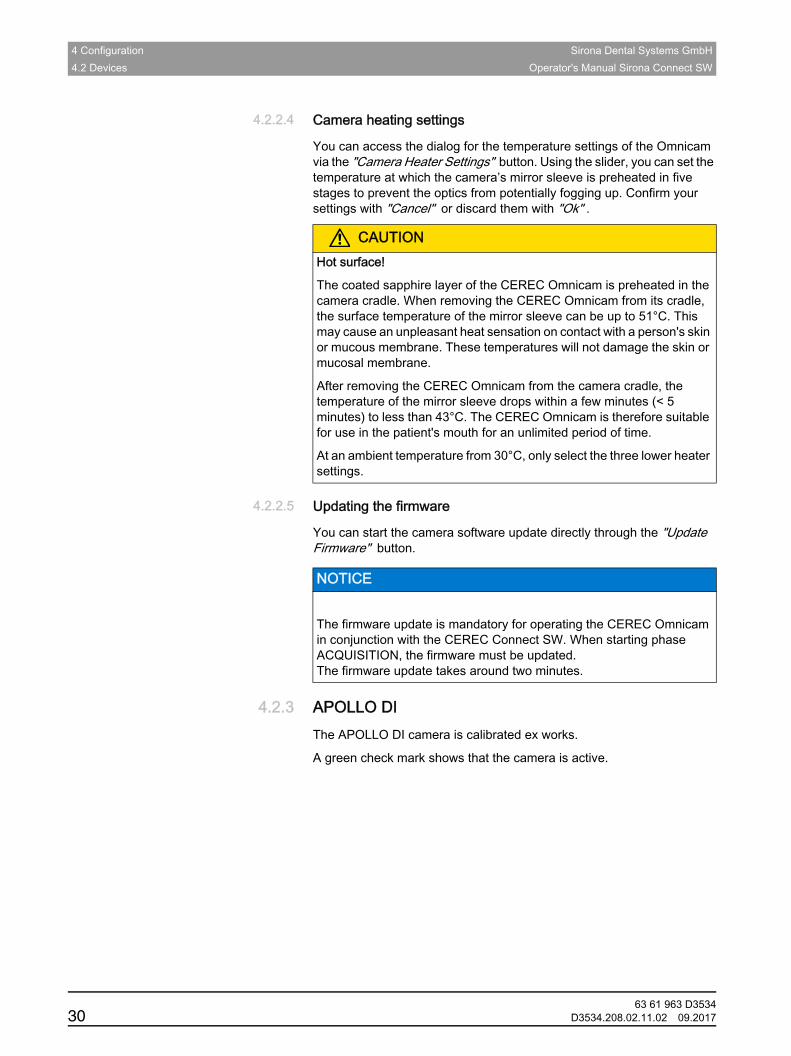
4.2.2.4 Camera heating settings
You can access the dialog for the temperature settings of the Omnicam via the "Camera Heater Settings" button. Using the slider, you can set the temperature at which the camera’s mirror sleeve is preheated in five stages to prevent the optics from potentially fogging up. Confirm your settings with "Cancel" or discard them with "Ok" .
4.2.2.5 Updating the firmware
You can start the camera software update directly through the "Update Firmware" button.
4.2.3 APOLLO DIThe APOLLO DI camera is calibrated ex works.
A green check mark shows that the camera is active.
CAUTIONHot surface!
The coated sapphire layer of the CEREC Omnicam is preheated in the camera cradle. When removing the CEREC Omnicam from its cradle, the surface temperature of the mirror sleeve can be up to 51°C. This may cause an unpleasant heat sensation on contact with a person's skin or mucous membrane. These temperatures will not damage the skin or mucosal membrane.
After removing the CEREC Omnicam from the camera cradle, the temperature of the mirror sleeve drops within a few minutes (< 5 minutes) to less than 43°C. The CEREC Omnicam is therefore suitable for use in the patient's mouth for an unlimited period of time.
At an ambient temperature from 30°C, only select the three lower heater settings.
NOTICE
The firmware update is mandatory for operating the CEREC Omnicam in conjunction with the CEREC Connect SW. When starting phase ACQUISITION, the firmware must be updated. The firmware update takes around two minutes.
63 61 963 D353430 D3534.208.02.11.02 09.2017

Sirona Dental Systems GmbH 4 ConfigurationOperator's Manual Sirona Connect SW 4.3 Settings
båÖäáëÜ
4.3 SettingsThe menu item "Settings" has the following subitems:● Select odontogram (USA or international)
● Resetting notes
● Patient database
● Selecting a language
4.3.1 ADA/FDI odontogramYou can set the odontogram using "ADA/FDI Notation" :● International ("FDI Notation" )● USA ("ADA Notation" )
4.3.2 Warning messages
Warnings may appear in pop-up windows when using the software. Many of these messages can be deactivated by clicking on the "Don't show this message again" check box. If this check box is already selected or if a new user uses the software, all warnings can be reset here. All warning messages are displayed once again by clicking the "Reset" button.
4.3.3 LanguageHere, you can set the language of the software.
4.4 App Center (applications)Via the Sirona App (Application) Center, you have access to various apps (applications) for our CAD CAM products. Furthermore, you have access to a website that shows you the apps available. The website also contains additional information on where you can download the apps.
Setting DescriptionYES Displays all the deactivated warnings in the workflow
again.NO Warnings which were previously hidden, remain hidden.
63 61 963 D3534D3534.208.02.11.02 09.2017 31

5 System menu Sirona Dental Systems GmbH5.1 Saving the impression Operator's Manual Sirona Connect SW
5 System menu
Fragment: inLab graphics SWFragment introductionIn the system menu, you can:Fragment list 1● Switch to the start view to start a new case
● Save case
● Save the case under a different name
● Import case
● Exporting a caseFragment list 2● Call up App Center/start plug-insFragment only CEREC Connect SW 4● Open a case in CEREC SWFragment list 3 Connect● Open license manager
● Configure hardware and software
● Change window mode
● Open help information
● Exit CEREC Connect SW
Opening system menu
1. Move the mouse cursor to the top of the window.or
➢ Click the Start view button.
The system menu is displayed.
Closing system menu
1. Click the Start view button.or
➢ Click into the main window with the left mouse button.
The system menu is closed.
5.1 Saving the impressionIn this window, you can save the current optical impression.
➢ Select "Save Case" in the system menu. The impression is saved.
63 61 963 D353432 D3534.208.02.11.02 09.2017

Sirona Dental Systems GmbH 5 System menuOperator's Manual Sirona Connect SW 5.2 Saving the impression under a different name
båÖäáëÜ
5.2 Saving the impression under a different nameThis dialog allows you to save the current optical impression under a new name or assign it to a different patient.
1. Select "Save Case As..." in the system menu. The "Save as…" dialog box opens.
2. Enter a name for the optical impression.3. Select the appropriate patient.4. Click on the "OK" button.
5.3 Importing an impression✔ An existing optical impression is located on your acquisition unit (or
data storage medium).1. Click the "Import Case..." button in the system menu.
A standard Windows dialog box opens.
2. Select the folder where the optical impression is located. 3. Select the relevant file.
4. Click the "Open" button.5. Assign a name to the optical impression.6. Click on the "OK" button. The optical impression is imported and opened.
5.4 Exporting an impressionYou can save an optical impression in a compressed format in any location.
✔ You have opened an optical impression.1. Select "Export Case..." .
A standard Windows file dialog box opens.
2. Select the target folder to which you want to export the optical impression.
3. Assign a name to the optical impression.4. Click on the "Save" button. The optical impression is exported.
If you want to transfer the optical impression from your acquisition unit to another PC (e.g. in order to upload it to the Internet portal), you can use a USB stick for this purpose.
NOTICE File types
If the selected file is an optical impression with CEREC Connect SW or CEREC Connect SW this this is opened. If not, it will not open, and an error message will be displayed.
63 61 963 D3534D3534.208.02.11.02 09.2017 33

5 System menu Sirona Dental Systems GmbH5.5 Exporting scan data Operator's Manual Sirona Connect SW
5.5 Exporting scan dataYou can export scan data as STL in order to process
● in the inLab SW or
● in another compatible
system.
5.6 Open a case in the CEREC softwareIf the CEREC SW and Sirona Connect are operated in parallel, a CEREC button appears in the Sirona Connect system menu If you press this button, the current case will open in the CEREC software - e.g. in order to create the temporary solution.
5.7 License managerThe license manager is used for the installation of new software licenses on the USB license stick. To do this, start the license manager via the system menu and follow the instructions on the screen. Keep the license certificate with 25-digit license key ready, which you either obtained with the unit or ordered separately from your dealer.
Tip: You can also start the license manager via "StartAll Programs / Sirona Dental SystemsSirona ConnectToolsLicense Manager".
To activate the license you must have an Internet connection and the USB license stick must be connected.
Licenses and code libraries
For information on licenses and code libraries from other providers, see licenses.pdf. The file is in the installation directory under "C:/Programs/Sirona Dental Systems/CADCAM".
5.8 ConfigurationThe configuration is described in the section “Configuration”.
IMPORTANTSirona will not be held liable for the further processing of *.stl data in other/external software.
IMPORTANTSoftware license for Sirona Connect is pre-installed.
No separate license needs to be installed for the Sirona Connect software. This is pre-installed on every USB license stick.
63 61 963 D353434 D3534.208.02.11.02 09.2017

Sirona Dental Systems GmbH 5 System menuOperator's Manual Sirona Connect SW 5.9 Window mode
båÖäáëÜ
5.9 Window modeThe "Window Mode" function can be used to exit full-screen mode or enter it again. You can also activate/deactivate the window mode via F11.
5.10 Open help informationYou can access the manual via the Help button or by pressing "F1".
5.11 Exit program
The "Exit" function can be used to close the software.
63 61 963 D3534D3534.208.02.11.02 09.2017 35
6 Start view Sirona Dental Systems GmbH6.1 Create a new patient Operator's Manual Sirona Connect SW
6 Start viewIn the start window, you can perform the following:
● Create a new patient,
● Search patient database,
● Open patient database,
● Open the Sirona Connect portal.
Switching to the start view
You can switch to the start view at any time.
1. Open the system menu.2. Click on the "Start Screen" button.
6.1 Create a new patientIn the data structure, a patient is uniquely identified by one of the following two entries:
● Surname, first name and date of birthor
● Patient IDTip: We recommend that our customers work solely with one reference number. Please observe the data protection regulations applicable to you.
Add patients
1. Click on the "Add New Patient" button. An empty patient card is opened.
2. Enter a surname, first name, and date of birth. A real-time search function is active during the input which should prevent duplicate entries.
or➢ Enter the patient ID.
Once you have entered enough information, the bar in the "Edit Patient" step turns from red to green.
3. Click on the "Add New Case" button. The program switches over to the "ADMINISTRATION" phase.
63 61 963 D353436 D3534.208.02.11.02 09.2017
Sirona Dental Systems GmbH 6 Start viewOperator's Manual Sirona Connect SW 6.2 Patient database
båÖäáëÜ
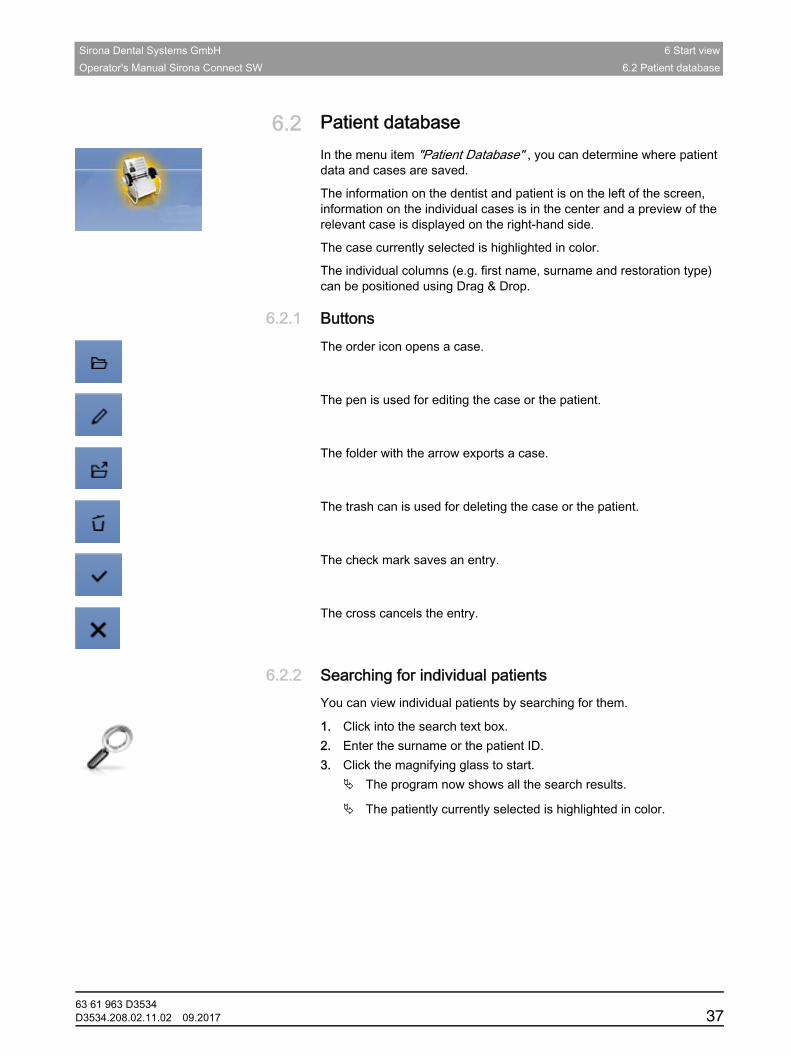
6.2 Patient databaseIn the menu item "Patient Database" , you can determine where patient data and cases are saved.
The information on the dentist and patient is on the left of the screen, information on the individual cases is in the center and a preview of the relevant case is displayed on the right-hand side.
The case currently selected is highlighted in color.
The individual columns (e.g. first name, surname and restoration type) can be positioned using Drag & Drop.
6.2.1 ButtonsThe order icon opens a case.
The pen is used for editing the case or the patient.
The folder with the arrow exports a case.
The trash can is used for deleting the case or the patient.
The check mark saves an entry.
The cross cancels the entry.
6.2.2 Searching for individual patientsYou can view individual patients by searching for them.
1. Click into the search text box.2. Enter the surname or the patient ID.3. Click the magnifying glass to start.
The program now shows all the search results.
The patiently currently selected is highlighted in color.
63 61 963 D3534D3534.208.02.11.02 09.2017 37

6 Start view Sirona Dental Systems GmbH6.2 Patient database Operator's Manual Sirona Connect SW
6.2.3 Edit a patient✔ You have found the patient with the search function.1. Click on the pen to edit the patient.2. Click on the "Edit Patient" step in the step menu.
The patient card/case view is opened for editing.
3. Carry out the changes.4. Confirm your changes by clicking the check mark.
The changes are saved in the memory.
5. If you do not want to accept the changes, click Cancel.
6.2.4 Deleting patients
✔ You have found the patient with the search function.1. Click on the patient.2. Click on the trash can icon.
3. Confirm the deletion by clicking the check mark. The patient is deleted.
6.2.5 Deleting the impression
✔ You have found the associated patient with the search function.1. Click on the patient.2. Select the impression.
The different cases for each patient are presented together.
3. Click on the trash can icon to delete the impression.4. Confirm the deletion by clicking "Ok" .
The impression is deleted.
6.2.6 Opening an impression
✔ You have found the associated patient with the search function.1. Click on the patient.2. Select the impression.3. Click the folder icon in the step menu or double-click the impression.
The impression is opened.
6.2.7 Adding a new impression✔ You have found the associated patient with the search function.1. Click on the patient.2. Click on the "Add New Case" button.
The program switches over to the "ADMINISTRATION" phase.
63 61 963 D353438 D3534.208.02.11.02 09.2017

Sirona Dental Systems GmbH 6 Start viewOperator's Manual Sirona Connect SW 6.2 Patient database
båÖäáëÜ
6.2.8 2D-acquisitions with CEREC OmnicamAs a CEREC Omnicam user you can add 2D photos and videos to the case here. Confirmation with this button takes you to the acquisition phase.
63 61 963 D3534D3534.208.02.11.02 09.2017 39

7 Page palette Sirona Dental Systems GmbH7.1 View options Operator's Manual Sirona Connect SW
7 Page paletteVarious functions and options are offered to you in the page palette, depending on the restoration phase currently active.You can open several page palettes at the same time. Initially all page palettes opened on the right side of the main window in a fixed state. In this state all opened page palettes share the height available there.
Should this display be inadequate for you, you can remove any page palette of your choosing from the fixed state of the magnet bar. To do this, drag the palette to the desired position within the main window.
7.1 View optionsDifferent views are available to you in the "View Options" page palette. The global views are based on the model axis of the upper and lower jaw.
Depending on the current step, the following views are available to you:
Global views
● "Top" ● "Bottom" ● "Right" ● "Left" ● "Front" ● "Back side"
Changing the view
1. Click on the "View Options" button.2. Click on one of the proposed views.
The virtual model rotates to the corresponding view.
Enlarge or reduce 3D previewFragment ConnectIn the "View Options" page palette on global views you will find the zoom options.Fragment: 3D previewUsing the slide you can enlarge or reduce the 3D preview.
In the attendant text field, the current degree of enlargement is displayed in percent. Here you can also manually enter a value from 0 to 100 percent and confirm with the Enter button.
Tip: If the mouse pointer is inside the 3D preview, then you can also change the view with the center mouse button pressed down while simultaneously moving the mouse up and down. Fragment: CEREC/inLab adjustmentZoom adjustment via the mouse’s scroll wheel is also supported.
63 61 963 D353440 D3534.208.02.11.02 09.2017

Sirona Dental Systems GmbH 7 Page paletteOperator's Manual Sirona Connect SW 7.2 Tools
båÖäáëÜ
7.2 ToolsYou will find all tools as a sub-menu under "Tools" . The available tools are displayed for each step.
To change a tool, click on the button of another tool in the left column of the page palette.
To close a tool, click on the button of the active tool once more in the left column.
"Undo" and "Reset"
With the "Undo" button in the tools you can undo all changes made on the selected restorations since the tool was started.
With the "Reset" button in the tools you can undo all changes made on all restorations since the tool was started.
7.2.1 Buccal registrationIn version Sirona Connect SW 4.4 and higher the buccal registration of CEREC Omnicam and APOLLO DI scans is automatic.
If the upper and lower jaw do not find the occlusion automatically or if you have taken images with a CEREC Bluecam, you will need to allocate both jaws manually.
Move buccal image
Activate the "Drag Buccal" tool for this, which allows you to move the buccal image.
1. Click on the "Drag Buccal" button.2. Click on the buccal image and displace it to the same region on the
upper or lower jaw. The image is accepted.
Tip: If an image is not accepted, align the jaw buccally. This enables better overlaying.If registration is still not possible, check whether the buccal sections in the jaws and in the buccal image are sufficient.
3. If the image was accepted, move the image to the corresponding region of the opposite jaw.
Turn Buccal Impression
With the "Turn Buccal Impression" function, you can rotate the buccal image.
1. Click on the "Buccal" button.2. Click on the "Turn Buccal Impression" button.
The buccal image is then rotated.
63 61 963 D3534D3534.208.02.11.02 09.2017 41
7 Page palette Sirona Dental Systems GmbH7.2 Tools Operator's Manual Sirona Connect SW
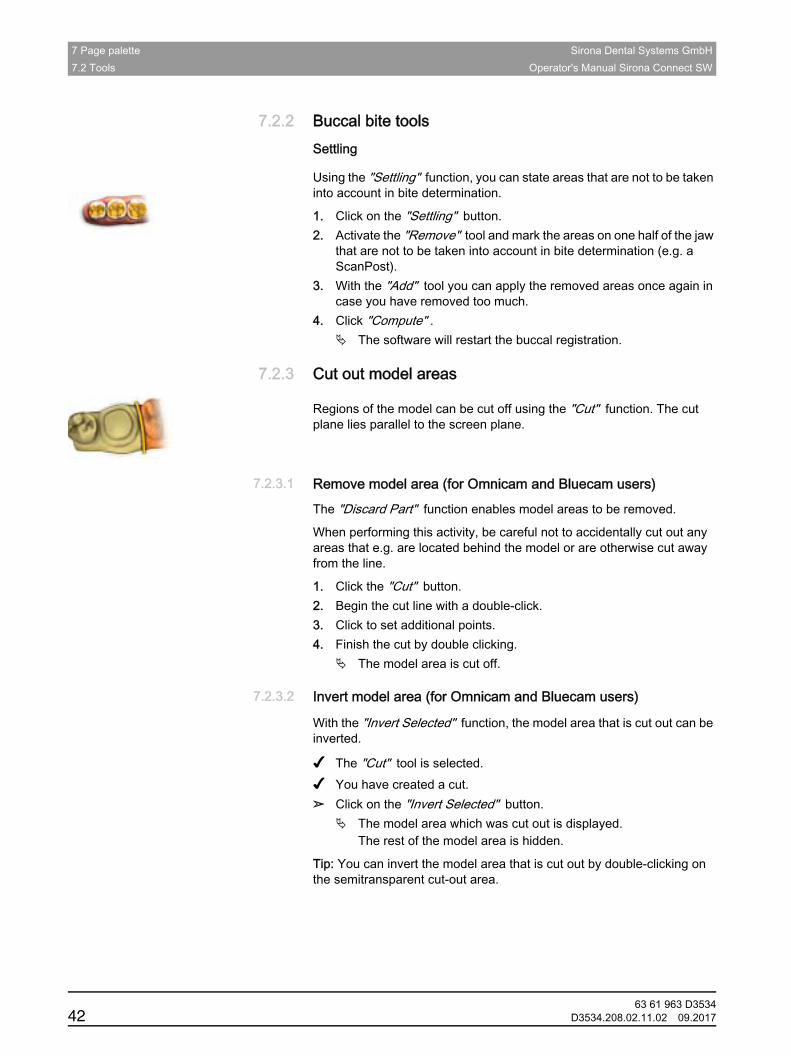
7.2.2 Buccal bite toolsSettling
Using the "Settling" function, you can state areas that are not to be taken into account in bite determination.
1. Click on the "Settling" button.2. Activate the "Remove" tool and mark the areas on one half of the jaw
that are not to be taken into account in bite determination (e.g. a ScanPost).
3. With the "Add" tool you can apply the removed areas once again in case you have removed too much.
4. Click "Compute" . The software will restart the buccal registration.
7.2.3 Cut out model areas
Regions of the model can be cut off using the "Cut" function. The cut plane lies parallel to the screen plane.
7.2.3.1 Remove model area (for Omnicam and Bluecam users)
The "Discard Part" function enables model areas to be removed.
When performing this activity, be careful not to accidentally cut out any areas that e.g. are located behind the model or are otherwise cut away from the line.
1. Click the "Cut" button.2. Begin the cut line with a double-click.3. Click to set additional points.4. Finish the cut by double clicking.
The model area is cut off.
7.2.3.2 Invert model area (for Omnicam and Bluecam users)
With the "Invert Selected" function, the model area that is cut out can be inverted.
✔ The "Cut" tool is selected.✔ You have created a cut.➢ Click on the "Invert Selected" button.
The model area which was cut out is displayed.The rest of the model area is hidden.
Tip: You can invert the model area that is cut out by double-clicking on the semitransparent cut-out area.
63 61 963 D353442 D3534.208.02.11.02 09.2017

Sirona Dental Systems GmbH 7 Page paletteOperator's Manual Sirona Connect SW 7.2 Tools
båÖäáëÜ
7.2.3.3 Removing the model area (APOLLO DI users)
1. Activate the "Cut" tool in the tool window or in the magnifying glass.2. Keep your finger pressed on the touchscreen and place the starting
point at the desired position using the magnifying glass.3. Tap on the screen to set further points thereby marking out the area
to be separated.4. Click on the trash can icon on the side of the line that you wish to
discard.
7.2.4 Resetting the model (MODEL phase)With the "Reset Model" function, all changes will be reset.
1. Click the "Tools" button.2. Click on the "Reset Model" button.3. Confirm with "Apply" .
7.2.5 TrimmingWith the "Trim" function, you can isolate the preparation. You can thus e.g. draw in the preparation margin more easily. Trimmed image regions can be optionally displayed and hidden later on.
7.2.5.1 Hide model area (for Omnicam and Bluecam users)
The "Discard Part" function enables you to hide image regions.
1. Click on the "Manual Trim" button.2. Start by double-clicking in the vicinity of the model or on the model.3. Click to set additional points. Draw the line close to the preparation
around which you want to trim.4. Finish the line by double clicking.
The smaller region of the model is hidden.
7.2.5.2 Invert image area (for Omnicam and Bluecam users)
With the "Invert Selected" function, an image region which was hidden can be reversed.
✔ An image region has been hidden using the "Trim" tool.➢ Click on the "Invert Selected" button.
The hidden image region will be shown.The image region shown will be hidden.
Tip: You can invert the hidden image area by double-clicking on the semitransparent hidden region.
63 61 963 D3534D3534.208.02.11.02 09.2017 43

7 Page palette Sirona Dental Systems GmbH7.2 Tools Operator's Manual Sirona Connect SW
7.2.5.3 Hide image areas (for APOLLO DI users)
1. Align the model.2. Activate the "Trim" tool in the tool window or in the magnifying glass.3. Keep your finger pressed on the touchscreen and place the starting
point at the desired position using the magnifying glass. 4. Tap on the screen to set further points thereby marking out the area
to be separated.5. Click on the trash can icon on the side of the line that you wish to
discard.
Tip: If the "Trim" tool is activated then you can no longer move the model. Deactivate the tool in order to reposition the model once again.
7.2.6 Entering the preparation margin
Automatic edge detection
With "Margin" / "Auto" , you can work with automatic edge detection.
1. Click on the "Margin" button.2. Click on the "Auto" button.
Automatic edge detection is switched on.
Manual drawing
With "Manual" you can draw in the preparation margin manually. With this technique, you must place the individual points close together in order to clearly define the contour of the preparation margin even in difficult situations.
✔ The "Margin" tool is open.➢ Click on the "Manual" button.
The manual technique is switched on.
Tip: As an Omnicam and Bluecam user you start the drawing by double-clicking and end it by double-clicking. The tooth number appears if the preparation margin is drawn. If amendments are required you can make corrections by clicking on the line in manual mode. To end the correction, click on the blue line again.Tip: As an APOLLO DI user proceed as follows:
1. Align the model so that you can clearly see the preparation margin.2. Activate the "Auto" or "Manual" tool in the tool window or in the
magnifying glass.3. Keep your finger pressed on the touchscreen and place the starting
point at the desired position using the magnifying glass. 4. Tap on the screen to set further points on the preparation margin. The
tooth number appears following successful drawing.5. If amendments are required you can make corrections by clicking on
the line in manual mode. To end the correction, click on the blue line again.
Tip: You can also use a mouse or a touchpen for drawing.
63 61 963 D353444 D3534.208.02.11.02 09.2017

Sirona Dental Systems GmbH 7 Page paletteOperator's Manual Sirona Connect SW 7.3 Display objects
båÖäáëÜ
7.3 Display objectsOpening view options
Click on the "View Options" button. Here you will find all currently available options for setting visibilities in the 3D preview. The options available depend on the current step.
Showing and hiding the upper jaw
With the "Upper Jaw" button, you can display and hide the upper jaw.
➢ Click on the "Upper Jaw" button. The upper jaw is displayed or hidden.
Showing and hiding the lower jaw
With the "Lower Jaw" button, you can display and hide the lower jaw.
➢ Click on the "Lower Jaw" button. The lower jaw is displayed or hidden.
Display upper/lower jaw transparently
You can adjust the transparency of the upper/lower jaw continuously.
1. Click the slider of the "Upper/lower jaw" and press and hold the mouse button.
2. Now drag the slider to the right or left to increase or reduce the transparency. The transparency of the jaw concerned is changed.
Side and bottom surfaces
Using the "Model Box" button, the virtual model can be displayed without the sides and bottom.
➢ Click on the "Model Box" button. The virtual model is displayed without side and bottom surfaces.
Displaying and hiding the trimmed region
With the "Trimmed Model" button, you can display and hide the trimmed region.
✔ You have trimmed a region in the MODEL phase.➢ Click on "Trimmed Model"
The trimmed region of the virtual model is displayed or hidden.
Additional image catalogs acquired
Additional image catalogs acquired such as BioCopy can also be displayed and hidden here.
63 61 963 D3534D3534.208.02.11.02 09.2017 45
7 Page palette Sirona Dental Systems GmbH7.4 Activating analysis Operator's Manual Sirona Connect SW
7.4 Activating analysisActivating Analyzing Tools
➢ Click the "Analyzing Tools" button to activate the analysis tools.
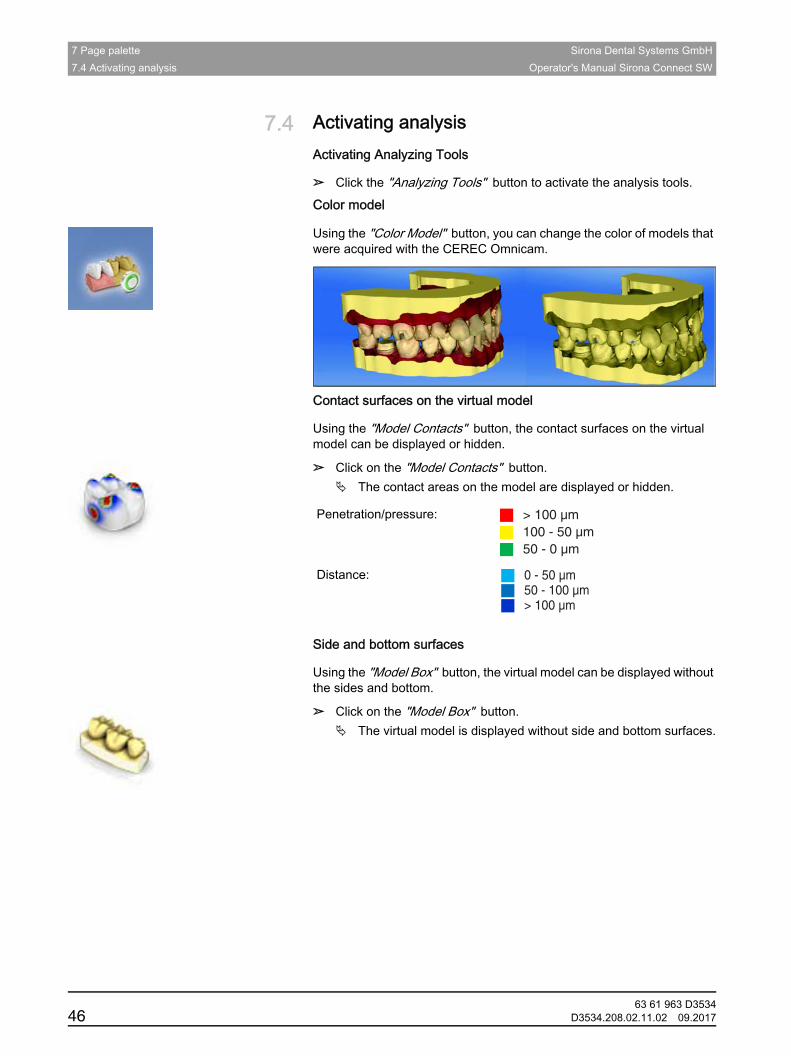
Color model
Using the "Color Model" button, you can change the color of models that were acquired with the CEREC Omnicam.
Contact surfaces on the virtual model
Using the "Model Contacts" button, the contact surfaces on the virtual model can be displayed or hidden.
➢ Click on the "Model Contacts" button. The contact areas on the model are displayed or hidden.
Contact surfaces colors overview
Side and bottom surfaces
Using the "Model Box" button, the virtual model can be displayed without the sides and bottom.
➢ Click on the "Model Box" button. The virtual model is displayed without side and bottom surfaces.
Penetration/pressure:
Distance:
> 100 µm100 - 50 µm50 - 0 µm
0 - 50 µm50 - 100 µm> 100 µm
63 61 963 D353446 D3534.208.02.11.02 09.2017

Sirona Dental Systems GmbH 7 Page paletteOperator's Manual Sirona Connect SW 7.4 Activating analysis
båÖäáëÜ
Distance to the antagonist
If the preparation margin has been drawn in then the distance to the antagonist can be displayed in the step "Preparation Analysis" . The parameters can be set under "Configuration" / "Parameters" / "Preparation Analysis" .Tip: Set the distance to the desired value, e.g. 1500µm and 0µm tolerance. Distances that are less than 1500µm are then displayed in the software.
Under Tolerance you can add a tolerance range to the ideal distance. This is displayed in blue. The blue marking is displayed between ideal value minus tolerance value and ideal value plus tolerance value.
Example: You set the distance (ideal value) to 1500µm and a tolerance value of 500µm.
● Distances less than 1000µm are displayed in red by the software.
● Distances between 1000µm and 2000µm are displayed in blue.
● Distances greater than 2000µm are displayed in green.
Undercuts
If the preparation margin has been drawn in then the undercuts can be displayed in the step "Preparation Analysis" . The thickness of the undercut can be read from the scale.
63 61 963 D3534D3534.208.02.11.02 09.2017 47

8 ADMINISTRATION phase Sirona Dental Systems GmbHOperator's Manual Sirona Connect SW
8 ADMINISTRATION phaseSelecting a restoration type
Tip: Restorations can be selected both in the upper and lower jaw.
➢ Select the restoration type in the page palette: "Single Restoration" or "Bridge Restoration" .
Single tooth restoration
✔ You have selected the restoration type "Single Restoration" .1. Select the restoration type.
The types of restoration available match the selected tooth number.
2. Select a fully anatomic or veneered restoration.3. Click on the tooth for which the restoration must be set up.
The selected tooth is marked.
4. In the step menu, click on the step "Select Material" in order to select the material class.For the "Abutment" restoration type, select the manufacturer and implant type suitable for the implant. Select TiBase, ScanPost or an intraoral scanbody from another provider.
5. Click on "Ok" to confirm the settings.Tip: If you click on "Cancel" , the restoration will not be created and the program will return to the odontogram.
6. If necessary, create further restorations.
Bridge restoration
✔ You have selected the restoration type "Bridge Restoration" .1. Determine the restoration type and the design mode for the abutment
teeth.2. Select the positions of the abutment teeth of the bridge.
The selected teeth are marked.
3. Determine the restoration type and the design mode for the intermediate teeth. The selected teeth are marked.
4. In the step menu, click the "Select Material" step to select the material.
5. Click on "Ok" to confirm the settings.Tip: If you click "Cancel" then the restoration will not be created and the program will return to the odontogram.
6. If necessary, create further restorations.
63 61 963 D353448 D3534.208.02.11.02 09.2017

Sirona Dental Systems GmbH 8 ADMINISTRATION phaseOperator's Manual Sirona Connect SW
båÖäáëÜ
Select material
You can select the desired material in this step.
1. Click the desired material class.2. Select "See Additional Notes" if you wish to order a certain material
and define it in the text field in the Sirona Connect portal.
Color selection
➢ Click the "Select Final Shade" or "Select Stump Shade" to proceed to the step of choosing colors. Stating the color is optional.
Tip: It is also possible to state the color later in the additional information in the portal.
You can select the stump/restoration color in this step.
1. First select the color code.2. Then select the appropriate color using the color code.3. Click "Ok" to confirm the selection.
Selecting the scanbody type (only for abutments)
You can select the desired scanbody type in this step. In addition to TiBase and ScanPost, you can also select Other to use an intraoral scanbody from another provider.
➢ Click on the desired scanbody type.
Selecting material for the veneering structure
You can select the desired material for the veneering structure in this step.
➢ Click on the desired material.
Selecting material for the framework
You can select the desired material for the framework in this step.
➢ Click on the desired material.
CAUTIONThe user is responsible for the correct use of scanbodies, which are offered by other providers. Sirona can neither guarantee the clinical safety and biocompatibility nor the scan quality for all available scanbodies. Ask your provider whether such use with CEREC Omnicam, CEREC Bluecam or APOLLO DI is permitted in your country.
63 61 963 D3534D3534.208.02.11.02 09.2017 49
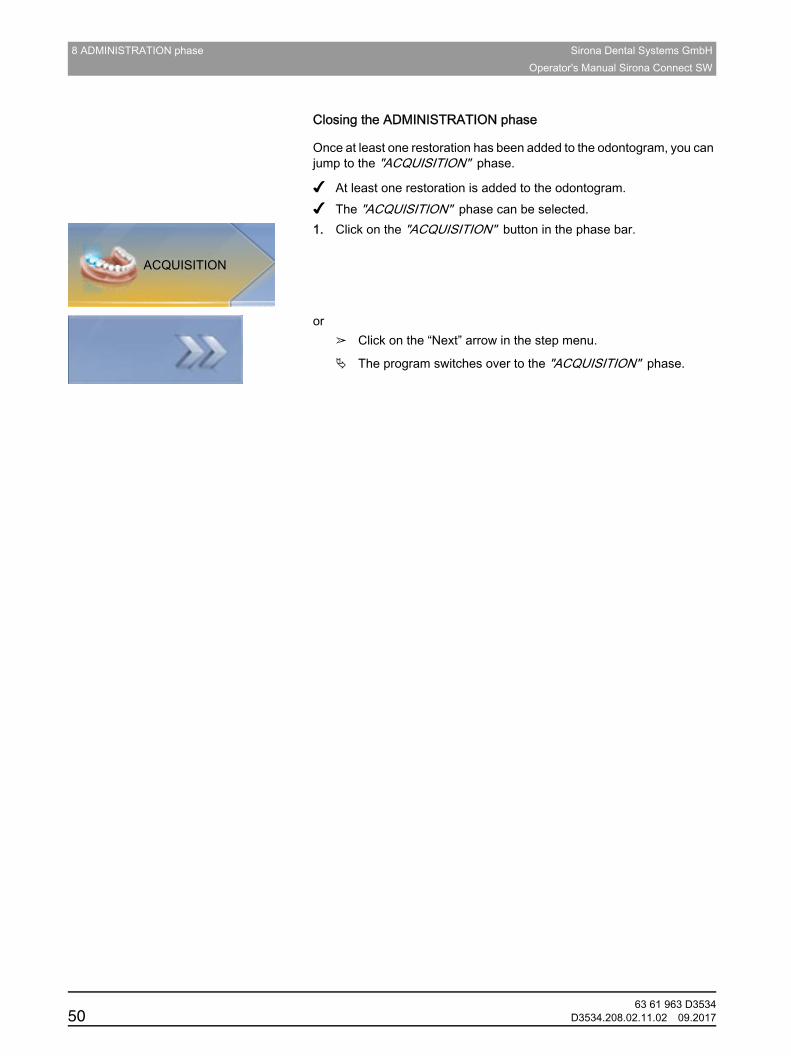
8 ADMINISTRATION phase Sirona Dental Systems GmbHOperator's Manual Sirona Connect SW
Closing the ADMINISTRATION phase
Once at least one restoration has been added to the odontogram, you can jump to the "ACQUISITION" phase.
✔ At least one restoration is added to the odontogram.✔ The "ACQUISITION" phase can be selected.1. Click on the "ACQUISITION" button in the phase bar.
or➢ Click on the “Next” arrow in the step menu.
The program switches over to the "ACQUISITION" phase.
63 61 963 D353450 D3534.208.02.11.02 09.2017
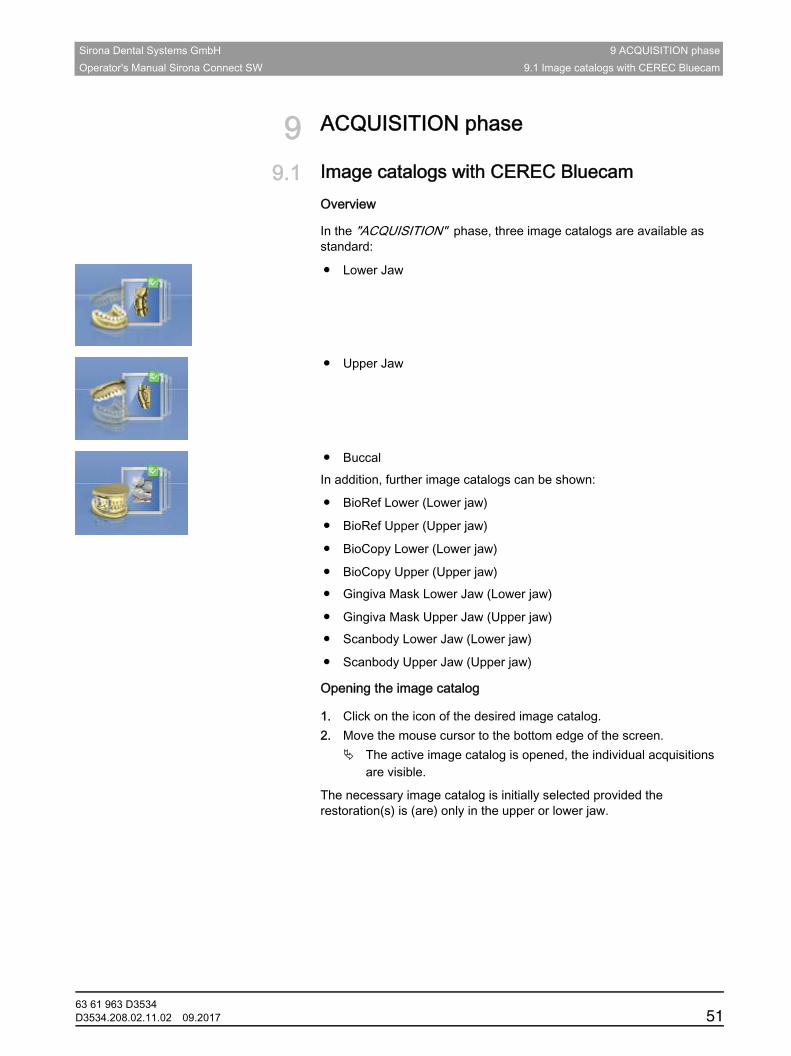
Sirona Dental Systems GmbH 9 ACQUISITION phaseOperator's Manual Sirona Connect SW 9.1 Image catalogs with CEREC Bluecam
båÖäáëÜ
9 ACQUISITION phase
9.1 Image catalogs with CEREC BluecamOverviewFragment: ACQUISITIONIn the "ACQUISITION" phase, three image catalogs are available as standard:
● Lower Jaw
● Upper Jaw
● BuccalIn addition, further image catalogs can be shown:
● BioRef Lower (Lower jaw)
● BioRef Upper (Upper jaw)
● BioCopy Lower (Lower jaw)
● BioCopy Upper (Upper jaw)LE● Gingiva Mask Lower Jaw (Lower jaw)
● Gingiva Mask Upper Jaw (Upper jaw)Fragment Connect SW● Scanbody Lower Jaw (Lower jaw)
● Scanbody Upper Jaw (Upper jaw)
Opening the image catalog
1. Click on the icon of the desired image catalog.2. Move the mouse cursor to the bottom edge of the screen.
The active image catalog is opened, the individual acquisitions are visible.
The necessary image catalog is initially selected provided the restoration(s) is (are) only in the upper or lower jaw.
63 61 963 D3534D3534.208.02.11.02 09.2017 51

9 ACQUISITION phase Sirona Dental Systems GmbH9.1 Image catalogs with CEREC Bluecam Operator's Manual Sirona Connect SW
9.1.1 Working with the image catalog
In the image catalog all acquisitions are shown respective to their regions.
The first acquisition of an image catalog is called the reference acquisition and is marked with a dot (flag in the upper right-hand corner of the single image). Take the acquisition from the occlusal direction as this acquisition determines the orientation of the virtual model.
The acquisitions are marked as follows:
If you position the mouse over an acquisition, it will be displayed in the camera view and highlighted in the 3D preview.
Scrolling through the image catalog
For each acquisition, a colored dot will be shown at the top of the image catalog.
If the acquisitions can no longer be displayed in full in the image catalog, a scroll bar appears. You can use it to scroll through all acquisitions.
1. Click on the scroll bar and press and hold the mouse button.2. Slide the scroll bar to the right or left.
Selecting images
➢ Click on the acquisition with the left mouse button.Several images can be selected. The images are now selected.
Symbol MeaningGreen flag with check mark Reconstructed / overlapped imagesGreen flag with dot Reference optical impressionBlue flag Reconstruction / overlapping attempt
still in progress.Red flag with exclamation mark Reconstruction / overlapping failed.No flag Hidden images
Color MeaningGreen Reconstructed / overlapped imagesBlue Reconstruction / overlapping attempt still in progressRed Reconstruction / overlapping failedWhite Hidden images
63 61 963 D353452 D3534.208.02.11.02 09.2017

Sirona Dental Systems GmbH 9 ACQUISITION phaseOperator's Manual Sirona Connect SW 9.1 Image catalogs with CEREC Bluecam
båÖäáëÜ
Moving acquisitions
You can move acquisitions to other image catalogs using drag & drop.
1. Click on marked acquisitions and keep the mouse button pressed.2. Drag your selection to the icon of the desired image catalog.
The program will ask whether you want to move or copy the acquisition.
3. Select "YES" to copy the acquisition or "NO" to move it. "Cancel" can be used to cancel the operation. The acquisition will be ready for use in the corresponding image
catalog.
Tip: You can copy or move all of the acquisitions contained in an image catalog. Simply click on the image catalog with the left mouse button and drag it to any other previously created folder.
Hiding images
➢ Click an acquisition with the right mouse button. The exposure is displayed in gray.
The acquisition is no longer used for the 3D preview or creation of the virtual model.
You can make the acquisitions visible again by following the same process.
If the "Ignored" filter is active, the acquisition remains visible in the image catalog.If the "Ignored" filter is deactivated, the acquisition is not displayed in the image catalog (see Filter command [ → 54]).
Command Select
The "Select" command enables you to:
● select all images
● void the selection
● invert the selection
1. Click the "Select" button in the image catalog.2. Click the appropriate button.
63 61 963 D3534D3534.208.02.11.02 09.2017 53
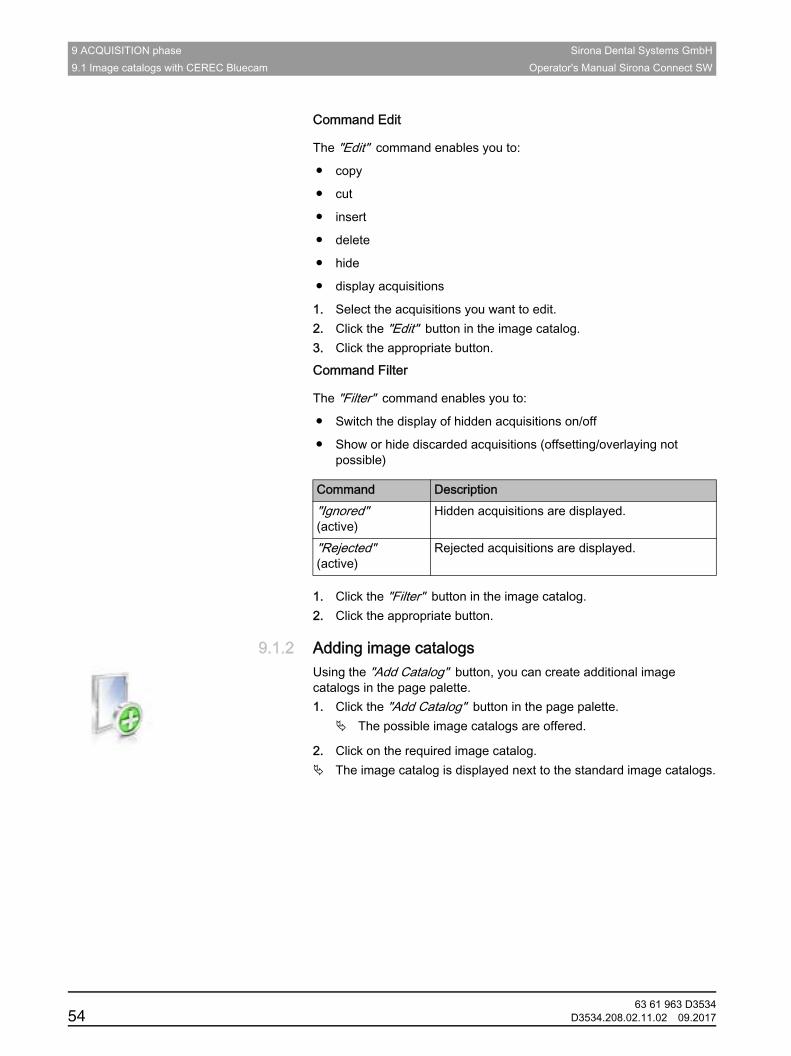
9 ACQUISITION phase Sirona Dental Systems GmbH9.1 Image catalogs with CEREC Bluecam Operator's Manual Sirona Connect SW
Command Edit
The "Edit" command enables you to:
● copy
● cut
● insert
● delete
● hide
● display acquisitions
1. Select the acquisitions you want to edit.2. Click the "Edit" button in the image catalog.3. Click the appropriate button.
Command Filter
The "Filter" command enables you to:
● Switch the display of hidden acquisitions on/off
● Show or hide discarded acquisitions (offsetting/overlaying not possible)
1. Click the "Filter" button in the image catalog.2. Click the appropriate button.
9.1.2 Adding image catalogsUsing the "Add Catalog" button, you can create additional image catalogs in the page palette.1. Click the "Add Catalog" button in the page palette.
The possible image catalogs are offered.
2. Click on the required image catalog. The image catalog is displayed next to the standard image catalogs.
Command Description"Ignored" (active)
Hidden acquisitions are displayed.
"Rejected" (active)
Rejected acquisitions are displayed.
63 61 963 D353454 D3534.208.02.11.02 09.2017

Sirona Dental Systems GmbH 9 ACQUISITION phaseOperator's Manual Sirona Connect SW 9.1 Image catalogs with CEREC Bluecam
båÖäáëÜ
9.1.3 OptionsIn the page palette, the "Options" button enables you to:
● Buffer the acquisition sequence (quadrant)
● Merge the first and second acquisition sequences (quadrants)
● Activate first acquisition sequence
● Change to the "Impression Scan" mode
1. Click the "Options" button in the page palette.2. Click the appropriate button.
9.1.4 Recycle bin
Removing acquisitions
1. Select the acquisitions you wish to remove.2. Click on the "Edit" button.3. Click on the "Delete" button.or
➢ Grab the image with your mouse and move it using drag & drop to the recycle bin.
The acquisition is sent to the recycle bin.
Tip: You can move the last acquisition to the recycle bin by right-clicking on the image catalog icon.
Command Description"Add Quadrant" ● Buffer the first acquisition sequence
(quadrant).
● Subsequently, another acquisition sequence can be taken.
"Merge Quadrants" ● The current acquisition sequence is merged with the buffered sequence.
"Change Quadrants"
● Activate the first acquisition sequence in order to add other images.The second sequence is saved temporarily automatically.
63 61 963 D3534D3534.208.02.11.02 09.2017 55

9 ACQUISITION phase Sirona Dental Systems GmbH9.2 Image catalogs with CEREC Omnicam Operator's Manual Sirona Connect SW
Opening the recycle bin
In the recycle bin you will see the acquisitions removed from the currently active image catalog.
1. Click on the icon of the image catalog, for which you wish to open the recycle bin.
2. Click on the icon of the recycle bin. The recycle bin for the active image catalog is displayed.
Reusing acquisitions from the recycle bin
➢ Grab the image with your mouse and move it using drag & drop to the desired folder.
Tip: If you display/hide acquisition in the recycle bin then these are automatically moved back into the image catalog.
9.2 Image catalogs with CEREC OmnicamFragment: ACQUISITIONIn the "ACQUISITION" phase, three image catalogs are available as standard:
● Lower Jaw
● Upper Jaw
● BuccalIn addition, further image catalogs can be shown:
● BioRef Lower (Lower jaw)
● BioRef Upper (Upper jaw)
● BioCopy Lower (Lower jaw)
● BioCopy Upper (Upper jaw)
● Gingiva Mask Lower Jaw (Lower jaw)
● Gingiva Mask Upper Jaw (Upper jaw)
● Scanbody Lower Jaw (Lower jaw)
● Scanbody Upper Jaw (Upper jaw)
For each of these image catalogs, only one acquisition is saved in the corresponding image catalog.
Opening the image catalog
1. Click on the icon of the desired image catalog.2. Move the mouse cursor to the bottom edge of the screen.
The active image catalog is opened, the individual acquisitions are visible.
The necessary image catalog is initially selected provided the restoration(s) is (are) only in the upper or lower jaw.
63 61 963 D353456 D3534.208.02.11.02 09.2017
Sirona Dental Systems GmbH 9 ACQUISITION phaseOperator's Manual Sirona Connect SW 9.3 Image catalogs with APOLLO DI
båÖäáëÜ
Deleting acquisitions
If an acquisition is not suitable, you can delete it. You can then execute a new acquisition for the corresponding image catalog.
➢ Grab the image with your mouse and move it using drag & drop to the recycle bin.
The image is deleted.
9.2.1 Adding image catalogsUsing the "Add Catalog" button, you can create additional image catalogs in the page palette.1. Click the "Add Catalog" button in the page palette.
The possible image catalogs are offered.
2. Click on the required image catalog. The image catalog is displayed next to the standard image catalogs.
9.3 Image catalogs with APOLLO DIIf there are multiple exposures for one jaw then they are automatically merged. There must be sufficient overlap for this.
Once an acquisition has been made then it is immediately optimized. The small light at the bottom of the screen is displayed in grey. Once the optimization process has completed the software attempts to register multiple acquisitions together. The light turns blue with this. The light turns green once the registration is successful. If the software is unable to register the light turns red.
You can move and delete individual acquisitions via drag & drop.
Tip:
● Were the individual exposures stored in the correct image catalog?
– Move the individual exposure.
● Is moving tissue or e.g. a scanned mirror disrupting the exposure?
– Trim the exposure.
If this is not successful the individual exposure must be deleted and retaken.
63 61 963 D3534D3534.208.02.11.02 09.2017 57

9 ACQUISITION phase Sirona Dental Systems GmbH9.4 Camera view Operator's Manual Sirona Connect SW
9.4 Camera viewChange window size
You can adjust the size of the camera view proportionally. For this move the arrow on the right margin to maximize or minimize the window.
1. Click the arrow at the right edge with the mouse and hold down the mouse button.
2. Drag the camera view to enlarge or reduce it.
9.5 3D preview (with CEREC Bluecam and CEREC Omnicam)In the default setting, the data are displayed from the occlusal direction in the 3D preview.
You can freely select the viewing direction of the virtual model in the 3D preview window by using the mouse.
Rotating a 3D preview
1. Click on the 3D preview with the left mouse button and hold it down.2. Move the mouse. The 3D preview is rotated.
Moving the 3D preview
1. Click on the 3D preview with the right mouse button and hold it down.2. Move the mouse. The 3D preview moves.
Zooming into/out of the 3D preview
1. Click on the 3D preview with the middle mouse button and hold it down.
2. Move the mouse up or down as desired. The 3D preview is enlarged or reduced.
63 61 963 D353458 D3534.208.02.11.02 09.2017

Sirona Dental Systems GmbH 9 ACQUISITION phaseOperator's Manual Sirona Connect SW 9.6 3D Preview (with APOLLO DI)
båÖäáëÜ
9.6 3D Preview (with APOLLO DI)Edit a 3D model with multi-touch
You can edit the 3D model using multi-touch.
9.7 Take a scan
9.7.1 CEREC Bluecam
9.7.1.1 Switch CEREC camera on/off
The CEREC camera is turned on automatically when you switch to the acquisition phase. If it is not used for some time, it will shut down.
➢ Click the camera icon to switch the CEREC camera on or off.
9.7.1.2 Camera support
Using the camera support gives you the following advantages:
● You obtain acquisitions free of motion blurring.
● You avoid damage to the prism.
● You avoid touching the prepared tooth.
Item FunctionA ➢ Complete a rotary movement using 2 fingers.
The object is rotated in the plane.
B ➢ Drag with 1 finger. The model is rotated out of its current plane.
C ➢ Pull 2 fingers in together. The object is minimized.
D ➢ Pull the fingers apart. The object is maximized.
E ➢ Drag with 2 fingers. The model is dragged.
CAUTIONUsing the camera support
Clean the camera support by wiping or spraying it with disinfectant prior to use. Designed for one-time use only.
63 61 963 D3534D3534.208.02.11.02 09.2017 59
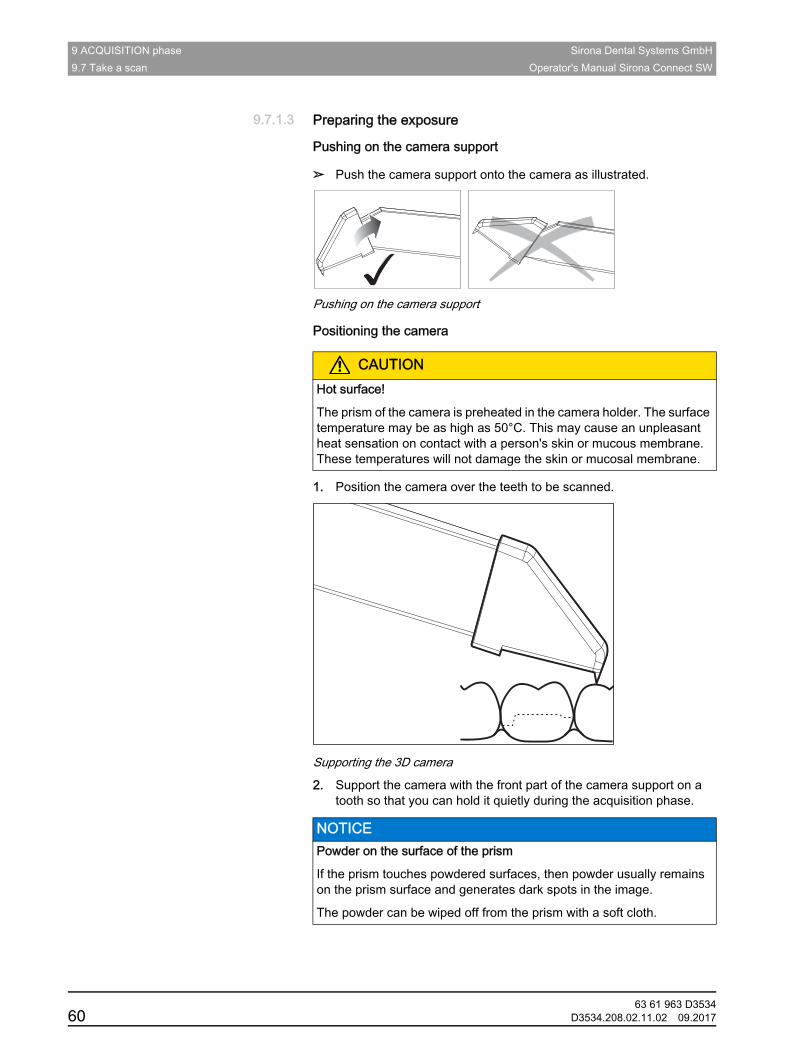
9 ACQUISITION phase Sirona Dental Systems GmbH9.7 Take a scan Operator's Manual Sirona Connect SW
9.7.1.3 Preparing the exposure
Pushing on the camera support
➢ Push the camera support onto the camera as illustrated.
Pushing on the camera support
Positioning the camera
1. Position the camera over the teeth to be scanned.
Supporting the 3D camera
2. Support the camera with the front part of the camera support on a tooth so that you can hold it quietly during the acquisition phase.
CAUTIONHot surface!
The prism of the camera is preheated in the camera holder. The surface temperature may be as high as 50°C. This may cause an unpleasant heat sensation on contact with a person's skin or mucous membrane. These temperatures will not damage the skin or mucosal membrane.
NOTICE Powder on the surface of the prism
If the prism touches powdered surfaces, then powder usually remains on the prism surface and generates dark spots in the image.
The powder can be wiped off from the prism with a soft cloth.
63 61 963 D353460 D3534.208.02.11.02 09.2017

Sirona Dental Systems GmbH 9 ACQUISITION phaseOperator's Manual Sirona Connect SW 9.7 Take a scan
båÖäáëÜ
9.7.1.4 Taking acquisitions with the CEREC Bluecam
With the CEREC camera you can switch between two acquisition modes:
● manual
● automatic
After being switched on, the CEREC camera is set to automatic acquisition control.
Changing from automatic to manual acquisition control
You can change from automatic to manual acquisition control.
✔ You are now using automatic acquisition control.1. Place the cursor on the camera icon.
2. Press the foot control upward and keep it pressed. A green cross appears in the live image. Manual acquisition
control is active.
You can exit manual acquisition control in the same way.
NOTICE Image brightness
The image brightness during the scan is controlled automatically, so that there is always optimum image brightness, largely independent of the distance between the CEREC camera and the tooth.
The surroundings of the tooth to be scanned should be as weakly illuminated as possible. Avoid any type of external light. Switch off the dental light.
63 61 963 D3534D3534.208.02.11.02 09.2017 61
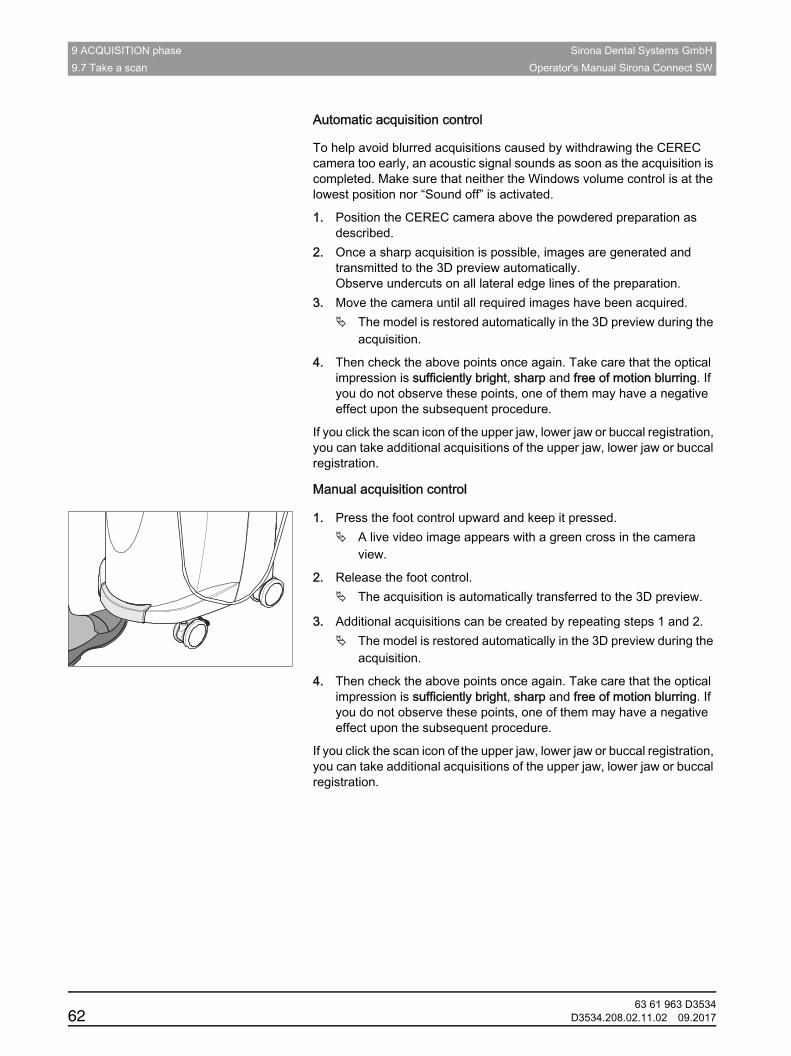
9 ACQUISITION phase Sirona Dental Systems GmbH9.7 Take a scan Operator's Manual Sirona Connect SW
Automatic acquisition control
To help avoid blurred acquisitions caused by withdrawing the CEREC camera too early, an acoustic signal sounds as soon as the acquisition is completed. Make sure that neither the Windows volume control is at the lowest position nor “Sound off” is activated.
1. Position the CEREC camera above the powdered preparation as described.
2. Once a sharp acquisition is possible, images are generated and transmitted to the 3D preview automatically.Observe undercuts on all lateral edge lines of the preparation.
3. Move the camera until all required images have been acquired. The model is restored automatically in the 3D preview during the
acquisition.
4. Then check the above points once again. Take care that the optical impression is sufficiently bright, sharp and free of motion blurring. If you do not observe these points, one of them may have a negative effect upon the subsequent procedure.
If you click the scan icon of the upper jaw, lower jaw or buccal registration, you can take additional acquisitions of the upper jaw, lower jaw or buccal registration.
Manual acquisition control
1. Press the foot control upward and keep it pressed. A live video image appears with a green cross in the camera
view.
2. Release the foot control. The acquisition is automatically transferred to the 3D preview.
3. Additional acquisitions can be created by repeating steps 1 and 2. The model is restored automatically in the 3D preview during the
acquisition.
4. Then check the above points once again. Take care that the optical impression is sufficiently bright, sharp and free of motion blurring. If you do not observe these points, one of them may have a negative effect upon the subsequent procedure.
If you click the scan icon of the upper jaw, lower jaw or buccal registration, you can take additional acquisitions of the upper jaw, lower jaw or buccal registration.
63 61 963 D353462 D3534.208.02.11.02 09.2017

Sirona Dental Systems GmbH 9 ACQUISITION phaseOperator's Manual Sirona Connect SW 9.7 Take a scan
båÖäáëÜ
9.7.1.5 Supplementary optical impressions
Acquiring the neighboring teeth as well
Overlap area 8mm
If the neighboring teeth are to be completely imaged as well, then the image catalog can be extended by acquisitions of these teeth. The overlap area of two neighboring optical impressions must be at least 8mm.
9.7.1.6 Angled optical impressions
Additional angled optical impressions
Additional angled acquisitions are possible. They can be used to acquire regions that are concealed in the occlusal acquisition direction, or to acquire steep walls in more favorable angles.
The maximum permissible tilt angle for capturing an additional optical impression of the same area is 20°.
9.7.1.7 Optical impressions for quadrant restoration
For quadrant restoration it is recommended to acquire the prepared teeth as well as an unprepared neighboring tooth in each case. It can be covered by capturing several supplementary optical impressions.
9.7.1.8 Acquiring end teeth
End teeth at the distal margin
When end teeth are restored, the end tooth should lie at the distal margin of the image field.
IMPORTANTProximal undercuts
Proximal undercuts may make it impossible to seat an inlay.
63 61 963 D3534D3534.208.02.11.02 09.2017 63

9 ACQUISITION phase Sirona Dental Systems GmbH9.7 Take a scan Operator's Manual Sirona Connect SW
9.7.1.9 Acquiring an impression
Preparing an impression
✔ In certain circumstances, the casting must be cut free somewhat, so that the definition of the image of the CEREC camera is sufficient.
➢ Unless this involves scannable silicone, apply a matte finishing to the areas to be acquired to prevent reflections. For this purpose, use CEREC Optispray.
Acquiring an impression
1. Click on the icon of the desired image catalog.2. Open the image catalog.3. Click on the "Advanced" button.4. Click on the "Impression Scan" button.5. Start the acquisition procedure.
In the 3D preview, the model is displayed on both sides. The model preview is displayed in yellow, whereas the preview of the casting itself is shown in green.
Provided that the "Impression Scan" mode is active, the acquisitions will be inverted when the virtual model is created. The "Impression Scan" mode is available for all image catalogs.
The different catalogs do not need to be acquired in the same mode.
9.7.2 CEREC Omnicam
9.7.2.1 Camera warm-up time
When switching on the system, the camera needs to warm up for 15 - 20 minutes. If the coated sapphire glass of the Omnicam is not sufficiently warm, it may steam up during the acquisition. As such, it is not possible to carry out the exposure.
Following use, always position the Omnicam on the heater plate.You can set the end temperature to which the camera heater warms the Omnicam mirror sleeve.
1. In the software, navigate to the system menu and click on the "Configuration" button.
2. Click on the "Devices" button.3. Click on the "Omnicam" button.4. Click on the "Camera Heater Settings" button.5. Use the slider to adjust the temperature.
9.7.2.2 Mode
Taking photos
1. Select the "Photo" tab.2. Click on the button or use the foot switch to trigger the camera.
63 61 963 D353464 D3534.208.02.11.02 09.2017

Sirona Dental Systems GmbH 9 ACQUISITION phaseOperator's Manual Sirona Connect SW 9.7 Take a scan
båÖäáëÜ
Recording videos
1. Select the "Video" tab.2. Click on the button to start video recording or use the foot switch.3. Repeat click on the button or actuate the foot switch once more to
stop the recording.
Viewing photos and images
1. Select the button with the "View" folder symbol.2. Click on the left or right arrows to see all exposures taken. Videos can
be started by clicking on the play button.Tip: In the acquisition modes activate the right button with the folder symbol in order to switch directly from the acquisition mode to the media view.
9.7.2.3 Directing the cameraFragment User manuals
The CEREC Omnicam acquires images which are used during the ongoing measurement in spatial relation to each other (image registration).
During the acquisition and then during the ongoing registration process, a distinctive sound can be heard. If the registration cannot be implemented, the acquisition flow is suspended. You are informed of this by means of a sound. This is different to the sound emitted during successful acquisition. You can adjust the volume under configuration and select another type of sound (melody).
CAUTIONAfter each use
Prepare the camera once again after each patient.
➢ Follow the instructions in the CEREC Omnicam user instructions, in the “Care, cleaning, disinfection and sterilization” section, in order to avoid cross-contamination between patients.
IMPORTANTRegistration error
Should a registration error occur, you must return to another acquired point.To start with, practice this procedure on the model and then on intraoral areas.
➢ Move the CEREC Omnicam to a position where a successful acquisition was taken. A point that has already been acquired in the occlusal area is best. You will be able to hear the sound for registered acquisitions.
➢ Continue the acquisition.
63 61 963 D3534D3534.208.02.11.02 09.2017 65

9 ACQUISITION phase Sirona Dental Systems GmbH9.7 Take a scan Operator's Manual Sirona Connect SW
Divide the acquisition into four consecutive sequences:
1. Occlusal
2. Buccal
3. Lingual
4. Proximal
9.7.2.3.1 Occlusal scan
Important: Ensure that the distance between the coated sapphire glass of the CEREC Omnicam and the scanned surface is observed. The distance must be between 0-15 mm (ideally: 5 mm). The camera does not rest on the teeth or the gums. If the distance is too great, no data will be obtained.
1. Move the CEREC Omnicam to the starting position. For this purpose, the CEREC Omnicam is in the occlusal view of the tooth, which is next to the prepared tooth in the distal direction.
2. Scan in the mesial direction. To do so, slowly move the CEREC Omnicam in the occlusal direction from the distal-positioned tooth over the prepared tooth to the mesial-positioned tooth.
With full jaw acquisitions, the scan sequence is different for the transition to anteriors. Scanning begins with the lingual and labial areas, before moving on to the incisors.
63 61 963 D353466 D3534.208.02.11.02 09.2017

Sirona Dental Systems GmbH 9 ACQUISITION phaseOperator's Manual Sirona Connect SW 9.7 Take a scan
båÖäáëÜ
9.7.2.3.2 Buccal scan
✔ The CEREC Omnicam is on the adjacent tooth, in the mesial direction to the preparation.
1. Rotate the CEREC Omnicam between 45° to maximum 90° toward the buccal.
2. Guide the CEREC Omnicam over the entire buccal distance in the distal direction over the prepared tooth. With full jaw acquisitions, limit the buccal scan to no more than a quadrant.
Ensure that the CEREC Omnicam is held like a flute during buccal scans. Do not tilt it vertically to the direction of motion.
Tip: Practice guiding the camera between 45° and 90°.
9.7.2.3.3 Lingual scan
✔ The CEREC Omnicam is on the tooth that is positioned next to the preparation in the distal direction.
1. Rotate the CEREC Omnicam from 90° in the buccal direction to around 45° to maximum 90° in the lingual direction on the other side.
2. Guide the CEREC Omnicam over the entire lingual distance in the mesial direction over the prepared tooth.
63 61 963 D3534D3534.208.02.11.02 09.2017 67

9 ACQUISITION phase Sirona Dental Systems GmbH9.7 Take a scan Operator's Manual Sirona Connect SW
9.7.2.3.4 Approximal surface scan
Scan the approximal surfaces of the prepared tooth.
➢ Move the CEREC Omnicam in the occlusal direction to the prepared tooth. Acquire the approximal surfaces in the distal and mesial direction by using a wave motion in the occlusal, buccal, and lingual direction over the prepared tooth.To do so, tilt the surface by 15° in the distal and mesial direction to gain a better view of the approximal contacts.
Notes:
● Remove the soft tissue.
● Cut away the moveable gingivae, so that only 2-5mm gingivae remains around the tooth.
● When performing this activity, be careful not to accidentally cut out any areas that e.g. are located behind the model or are otherwise cut away from the line.
● This cut must be completed during the ACQUISITION phase using the cutter.
9.7.2.3.5 Buccal registration
A buccal registration can be used to establish contact with the antagonist.
✔ The jaw with the preparation is scanned.1. Scan the occlusal, buccal and lingual view of the antagonist (see the
section “Occlusal scan [ → 66]”, “Buccal scan [ → 67]” and “Lingual scan [ → 67]”).
2. Perform a buccal scan of the bite block prior to completing the registration. This buccal scan should be carried out close-up to the preparation. To acquire sufficient geometry, capture the teeth of the upper and lower jaw as well as 5 mm of the respective gingival areas.
Tip: Remove the ScanPost before buccal image registration.
9.7.2.3.6 Scan procedure for the color analysis
Do not guide the Omnicam exclusively at the same distance to the tooth when carrying out the color analysis.
Vary the distance to the tooth for the scan of the buccal surface of the tooth for which you wish to carry out a color analysis of the buccal surface.
Ensure that you avoid reflections (highlights) on the buccal surface by tilting the Omnicam slightly during the scanning process.
63 61 963 D353468 D3534.208.02.11.02 09.2017
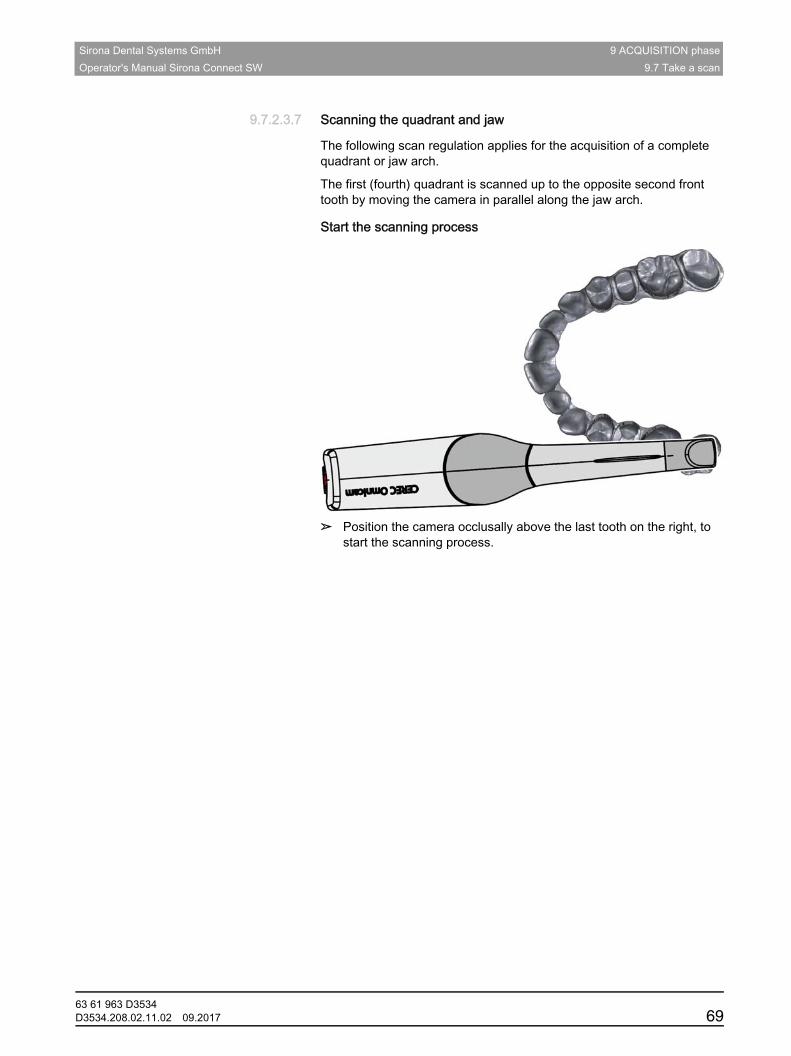
Sirona Dental Systems GmbH 9 ACQUISITION phaseOperator's Manual Sirona Connect SW 9.7 Take a scan
båÖäáëÜ
9.7.2.3.7 Scanning the quadrant and jaw
The following scan regulation applies for the acquisition of a complete quadrant or jaw arch.
The first (fourth) quadrant is scanned up to the opposite second front tooth by moving the camera in parallel along the jaw arch.
Start the scanning process
➢ Position the camera occlusally above the last tooth on the right, to start the scanning process.
63 61 963 D3534D3534.208.02.11.02 09.2017 69

9 ACQUISITION phase Sirona Dental Systems GmbH9.7 Take a scan Operator's Manual Sirona Connect SW
Completing the scanning process
1. Start as indicated above, on the occlusal surface of the right terminal tooth, and scan it occlusally. Tilt the camera by 45° in a palatinal direction (oral) and guide it from the distal to the mesial.
2. Tilt the camera another 45° in a palatinal direction (oral) and move it in a distal direction.
3. Tilt the camera by 90° on to the occlusal surface and move it in a mesial direction.
4. Tilt the camera in a 45° buccal direction and move it back towards the distal.
5. Then tilt the camera a further 45° in a buccal direction to a total of 90° and move it in a mesial direction again.
63 61 963 D353470 D3534.208.02.11.02 09.2017
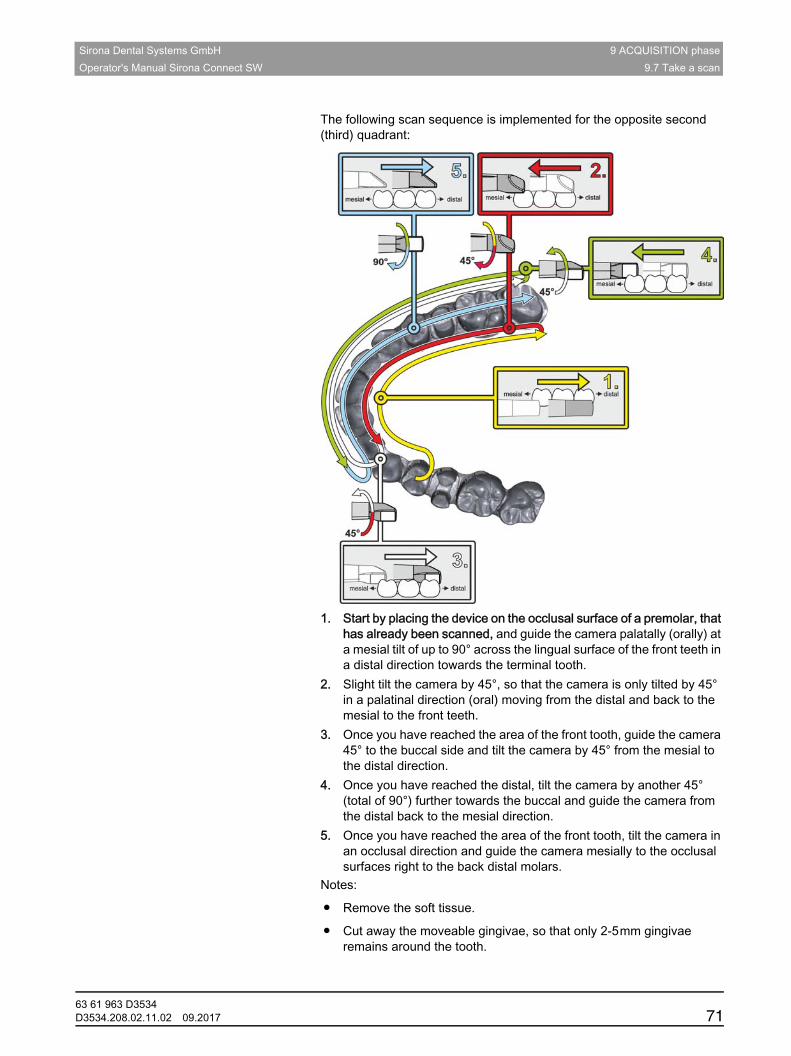
Sirona Dental Systems GmbH 9 ACQUISITION phaseOperator's Manual Sirona Connect SW 9.7 Take a scan
båÖäáëÜ
The following scan sequence is implemented for the opposite second (third) quadrant:
1. Start by placing the device on the occlusal surface of a premolar, that has already been scanned, and guide the camera palatally (orally) at a mesial tilt of up to 90° across the lingual surface of the front teeth in a distal direction towards the terminal tooth.
2. Slight tilt the camera by 45°, so that the camera is only tilted by 45° in a palatinal direction (oral) moving from the distal and back to the mesial to the front teeth.
3. Once you have reached the area of the front tooth, guide the camera 45° to the buccal side and tilt the camera by 45° from the mesial to the distal direction.
4. Once you have reached the distal, tilt the camera by another 45° (total of 90°) further towards the buccal and guide the camera from the distal back to the mesial direction.
5. Once you have reached the area of the front tooth, tilt the camera in an occlusal direction and guide the camera mesially to the occlusal surfaces right to the back distal molars.
Notes:
● Remove the soft tissue.
● Cut away the moveable gingivae, so that only 2-5mm gingivae remains around the tooth.
63 61 963 D3534D3534.208.02.11.02 09.2017 71
9 ACQUISITION phase Sirona Dental Systems GmbH9.7 Take a scan Operator's Manual Sirona Connect SW
● When performing this activity, be careful not to accidentally cut out any areas that e.g. are located behind the model or are otherwise cut away from the line.
● This cut must be completed during the ACQUISITION phase using the cutter.
9.7.2.3.8 Completing measurements
✔ The exposures are complete.1. Click on the "Next" button.
The virtual model is calculated and displayed in color.
Gray sections highlight data material that is missing from the calculated model.
2. If missing data emerges in the preparation area, carry out further scans.
9.7.2.4 Taking acquisitions with the CEREC Omnicam
CAUTIONHot surface!
The coated sapphire layer of the CEREC Omnicam is preheated in the camera cradle. When removing the CEREC Omnicam from its cradle, the surface temperature of the mirror sleeve can be up to 51°C. This may cause an unpleasant heat sensation on contact with a person's skin or mucous membrane. These temperatures will not damage the skin or mucosal membrane.
After removing the CEREC Omnicam from the camera cradle, the temperature of the mirror sleeve drops within a few minutes (< 5 minutes) to less than 43°C. The CEREC Omnicam is therefore suitable for use in the patient's mouth for an unlimited period of time.
At an ambient temperature from 30°C, only select the three lower heater settings.
NOTICE Image brightness
The image brightness during the acquisition is controlled automatically, so that there is always optimum image brightness, largely independent of the distance between the CEREC Omnicam and the tooth.
The surroundings of the tooth to be scanned should be as weakly illuminated as possible. Avoid any type of external light. Switch off the operating light.
IMPORTANTDo not use cotton rolls in the scan area
Do not use any cotton rolls in the vicinity of the scan area.Should any pieces of cotton roll contaminate this area, the acquisitions will be inaccurate.
63 61 963 D353472 D3534.208.02.11.02 09.2017
Sirona Dental Systems GmbH 9 ACQUISITION phaseOperator's Manual Sirona Connect SW 9.7 Take a scan
båÖäáëÜ
Proceeding with scanning procedure
1. Activate the foot control or click on the Omnicam icon with the cursor. The scanning procedure begins.
2. Proceed with the scanning procedure as described above.
9.7.2.5 Cut out model areas
With the "Cut" function, you can should be able to cut out model areas. These can be areas in which parts of cotton rolls or cheeks were unintentionally acquired.
When performing this activity, be careful not to accidentally cut out any areas that e.g. are located behind the model or are otherwise cut away from the line.
You can execute another scan of the area which you have cut out using the crop function. To do so, close the tool window, by clicking on the top right corner. You can refill the area with another acquisition.
"Undo" and "Reset"
With the "Undo" button in the tools you can undo all changes made on the selected restorations since the tool was started.
With the "Reset" button in the tools you can undo all changes made on all restorations since the tool was started.
9.7.2.6 Additional acquisitions
You can switch back from the MODEL phase to the ACQUISITION phase and add additional exposures.
✔ You are now in the MODEL phase.1. Click on the ACQUISITION phase.
The ACQUISITION phase opens. The image catalogs are locked.
2. Click the "Unlock" button in the page palette. The image catalogs are unlocked.
You can take additional exposures.
9.7.3 APOLLO DIPlease read the operating instructions for APOLLO DI.
Principle of data acquisition
For data acquisition, the 3D model is developed externally based on 3D data that has already been acquired. You cannot therefore scan a molar and then switch to an incisor if the 3D data between these two teeth is not scanned.
Rapid camera movements can cause the system to lose its position.
Therefore, do not interrupt the exposure area and guide the camera with smooth movements.
63 61 963 D3534D3534.208.02.11.02 09.2017 73

9 ACQUISITION phase Sirona Dental Systems GmbH9.7 Take a scan Operator's Manual Sirona Connect SW
Preparing the exposure
✔ The teeth are blown dry and the APOLLO DI-SpeedSpray has been applied as described in the operating instructions.
1. Change to phase "Acquisition" .2. Press the black LED button to exit sleep mode and to activate the
LEDs. The camera is ready for scanning.
A live image appears which can be used to look around the patient's mouth.
3. Take the camera from its holder.4. Position the camera over the relevant part for which an exposure is
to be taken.Important: Do not start to take the exposure yet. If you start the exposure before the camera has been positioned, the scanned areas cannot be aligned. This results in a scanning error and the procedure cannot be continued.
9.7.4 Finishing the phase✔ All required scans are present (jaw, if necessary the opposing jaw
and buccal bite exposure).✔ The "MODEL" phase can be selected.1. Click on the "MODEL" phase.or
➢ Click on the double arrow.
The program switches over to the "MODEL" phase.
B
A
63 61 963 D353474 D3534.208.02.11.02 09.2017

Sirona Dental Systems GmbH 10 MODEL phaseOperator's Manual Sirona Connect SW 10.1 Editing the model
båÖäáëÜ
10 MODEL phaseIn the "MODEL" phase, the virtual models are reconstructed based on the acquired image catalogs.
If you would like to edit the model, change to the "Edit Model" step.The "Edit Model" , "Bite Registration" and "Set Model Axis" steps relate to the entire model (upper and lower jaw).
All other steps in the "MODEL" phase refer to the restoration currently selected. These steps must be carried out as relevant for all restorations.
10.1 Editing the modelThis step is optional. You must click on this step in order to access it.In the "Edit Model" step, you can work with the following tool:
● "Cut" Use of the individual tools is described in the section “Page palette [ → 40]”.
10.2 Buccal registrationThe software joins the models together automatically und shows this with a green check mark at the buccal window. If this is not possible, the software will attempt to correlate the jaws in the following process. If this is not possible, you can also correlate the models together manually.
Manual correlation
In this step, the virtual models of the upper and lower jaw should be aligned with one another with the help of the buccal image in its correct position.In the "Buccal Bite Registration" step, you can work with the following tools in the page palette:
● Drag Buccal
● Turn Buccal Impression
Rotating the lower and upper jaw
➢ Click in the blue area with the left mouse button and hold the button down. The lower jaw and upper jaw can be rotated about the vertical
axis simultaneously.
➢ Click on the lower jaw or upper jaw with the left mouse button and hold the button down. The arches can be rotated freely, individually.
63 61 963 D3534D3534.208.02.11.02 09.2017 75

10 MODEL phase Sirona Dental Systems GmbH10.2 Buccal registration Operator's Manual Sirona Connect SW
Drag Buccal
1. Rotate both models so that you can see the overlap area of the buccal acquisition and of the upper jaw and lower jaw.
2. Now drag the buccal acquisition to the corresponding area of the upper jaw with the mouse and let go of the mouse button (drag & drop).
The buccal acquisition automatically registers itself on the upper jaw. If the registration was successful, this will be indicated by a "leopard pattern". If the registration was not successful, the buccal acquisition returns to its original position. In this case, you must repeat the drag&drop procedure in order to find a better correlation surface.
3. Now click on the buccal acquisition once again and drag it onto the appropriate area of the lower jaw (drag & drop).
If the registration was successful, this will be indicated by a "leopard pattern". If the registration was not successful, the buccal acquisition returns to its original position. In this case, you must repeat the drag&drop procedure in order to find a better correlation surface.
It is irrelevant whether you drag the buccal acquisition onto the lower jaw or onto the upper jaw first.
63 61 963 D353476 D3534.208.02.11.02 09.2017

Sirona Dental Systems GmbH 10 MODEL phaseOperator's Manual Sirona Connect SW 10.2 Buccal registration
båÖäáëÜ
Turn Buccal Impression
In some cases, the buccal acquisition may be displayed upside down in relation to the lower jaw and the upper jaw. Proceed as follows in such cases:
1. Click on the upper area of the buccal image and drag it onto the lower model.
or➢ Move the mouse via "Tools" onto the "Bite Registration" button
and activate the "Turn Buccal Impression" command.
The buccal acquisition will automatically flip, and you can then register it on the jaw using the drag & drop technique.
This works in the same way vice versa, i.e. if you click on the lower area of the buccal image and then drag it onto the upper model.
The buccal image is then displayed right side up. Registration is possible without rotation.
The buccal image is then displayed upside down. When you begin the registration, the software detects this and automatically flips the image right side up.
Moving to the next step
✔ The step is completed.➢ Click on the next step to continue.
63 61 963 D3534D3534.208.02.11.02 09.2017 77
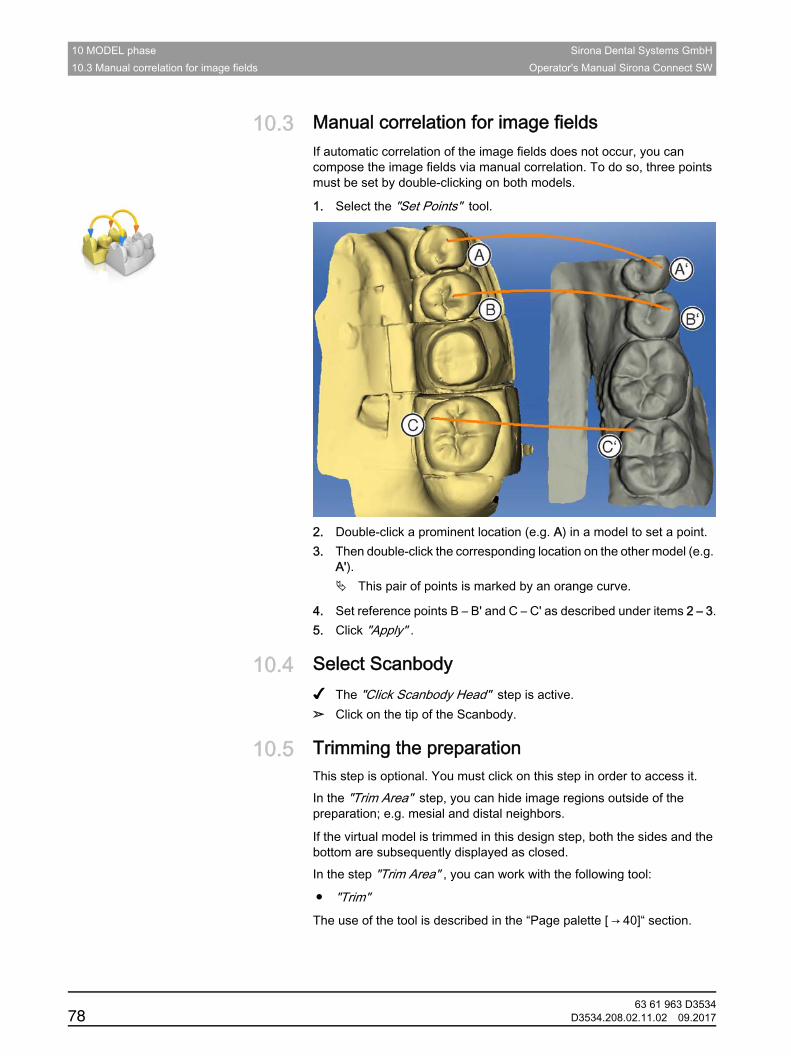
10 MODEL phase Sirona Dental Systems GmbH10.3 Manual correlation for image fields Operator's Manual Sirona Connect SW
10.3 Manual correlation for image fieldsIf automatic correlation of the image fields does not occur, you can compose the image fields via manual correlation. To do so, three points must be set by double-clicking on both models.
1. Select the "Set Points" tool.
2. Double-click a prominent location (e.g. A) in a model to set a point.3. Then double-click the corresponding location on the other model (e.g.
A'). This pair of points is marked by an orange curve.
4. Set reference points B – B' and C – C' as described under items 2 – 3.5. Click "Apply" .
10.4 Select Scanbody✔ The "Click Scanbody Head" step is active.➢ Click on the tip of the Scanbody.
10.5 Trimming the preparationThis step is optional. You must click on this step in order to access it.In the "Trim Area" step, you can hide image regions outside of the preparation; e.g. mesial and distal neighbors.
If the virtual model is trimmed in this design step, both the sides and the bottom are subsequently displayed as closed.In the step "Trim Area" , you can work with the following tool:
● "Trim" The use of the tool is described in the “Page palette [ → 40]“ section.
63 61 963 D353478 D3534.208.02.11.02 09.2017

Sirona Dental Systems GmbH 10 MODEL phaseOperator's Manual Sirona Connect SW 10.5 Trimming the preparation
båÖäáëÜ
Trimming image regions – CEREC Omnicam/Bluecam users
You can trim several image regions.
1. Rotate the model to a perspective in which you can see all areas that you want to trim. The model cannot be rotated while you are drawing the line.
2. Double click in any location to set the starting point of the trim line.3. Click to set further points of the line, e.g. in the interdental space.4. Double click in any position to end the line. Ensure that the closing
end of the line does not cut any areas of the model that you want to keep. The smaller image region to the side of the line is hidden.
Tip: If the wrong image region is hidden, you can switch to the other image region by double-clicking the hidden region.
Fragment APOLLO DI (not in Japan)
Trimming image regions - APOLLO DI users
1. Align the model in such a way that the preparation is clearly visible.2. Click/tap on trim tool in the magnifying glass to activate it.3. Now move your finger across the screen to mark the start point.4. Now click/tap on the individual points to define the trim line.5. In the "Undo" function, you can undo individual points and use the
"Reset" function to delete the entire trim line.6. We recommend trimming individual adjacent teeth or going round the
complete preparation once.7. To start trimming, click/tap on the trash can in the region you wish to
trim.
63 61 963 D3534D3534.208.02.11.02 09.2017 79

10 MODEL phase Sirona Dental Systems GmbH10.6 Entering the preparation margin Operator's Manual Sirona Connect SW
10.6 Entering the preparation margin
10.6.1 Entering the preparation margin - CEREC Omnican/Bluecam usersIn the step "Draw Margin" , you can work with the following tool:
● Margin
The use of the tool is described in the Page palette [ → 40] section.
General information
The preparation margin must always form a closed line.
You can edit the finished preparation margin after entering the last line.
Once the preparation margin is complete and has a tooth number, only the "Manual" tool will be available. This can be used for editing.
To enter the preparation margin, a technique can be selected in the page palette:Fragment: CEREC/inLab table
IMPORTANT
You can enlarge or reduce the 3D view during the input or editing of the preparation margin (see “3D Preview”) in order to ensure the correct positioning of the preparation margin. Be sure to hold down the left mouse button for a long time. A short click adds a point to the preparation margin.
Technique Layout Usage"Auto" Height image With clear
preparation margins, for initially drawing in the margin.
"Manual" Height image For unclear preparation margins, for subsequent correction of the initial limit.
"Manual with intensity image" Intensity image
63 61 963 D353480 D3534.208.02.11.02 09.2017

Sirona Dental Systems GmbH 10 MODEL phaseOperator's Manual Sirona Connect SW 10.6 Entering the preparation margin
båÖäáëÜ
Entering the preparation margin in the case of clear preparation edges
Tip: You can rotate the model during input in order to obtain a better view of the preparation limit. Click and hold the left mouse button and move the model with the mouse.Fragment: CEREC/inLab1. Start the entry by double-clicking anywhere on the preparation
margin.2. Move the cursor along the preparation margin.
Tip: To support the automatic edge detection, click anywhere near the margin on the raised side. There is an automatic correction when the next point is set.
3. Continue this procedure until you are back at the starting point. 4. Conclude the entry by double-clicking the starting point.
Entering the preparation margin in the case of blurred preparation edges
If you change to "Manual" in the page palette while entering the preparation margin, you can draw in the limit yourself.Be careful to set the points exactly on the edge and place them close together.
If you wish to see the intensity image in blurred situations, change to the page palette in "Manual with intensity image" .Tip: The space bar can be used to switch back and forth between drawing modes.
Enter the preparation margin for the next restoration
➢ Continue with the preparation margin for the next restoration by clicking on the desired restoration in the object bar.
10.6.2 Entering the preparation margin - APOLLO DI usersUse of the tool is described under “Entering the preparation margin [ → 44]“.
To draw the preparation margin for APOLLO DI, we recommend trimming the model in advance.
As you are entering the preparation margin, you can undo individually set points using the "Undo" function.
IMPORTANTIntensity image only with inEos Blue
The intensity image can only be used for exposures with inEos Blue.
63 61 963 D3534D3534.208.02.11.02 09.2017 81

10 MODEL phase Sirona Dental Systems GmbH10.7 Preparation analysis Operator's Manual Sirona Connect SW
10.7 Preparation analysisThis step can optionally be selected after defining the insertion axis.
Here the following analyses are possible:
● Undercuts
● Distance to antagonists
10.8 Finishing the phase✔ The next phase is can be selected.1. Click on the next phase.or
➢ Click on the double arrow.
The program switches over to the next phase.
63 61 963 D353482 D3534.208.02.11.02 09.2017
Sirona Dental Systems GmbH 11 CONNECT phaseOperator's Manual Sirona Connect SW 11.1 Registration and functions of the Sirona Connect portal
båÖäáëÜ
11 CONNECT phaseIn this phase, you can log in to the Sirona Connect portal (see "Log out of the Sirona Connect software at the portal [ → 84]“). You must register as a dentist on the Sirona Connect homepage for this.
You can open this phase by clicking in the phase bar on the "CONNECT" phase or on the double arrow in the step menu.
Model data in the Sirona Connect Portal
The user contact data is saved within Sirona Connect and is used by Sirona to make contact if necessary. The users should send patient data via Sirona Connect in anonymized form only wherever possible. Sirona Connect deletes this data at regular intervals.
11.1 Registration and functions of the Sirona Connect portal1. Go to the Sirona Connect homepage and click on "Dentist
Registration" . The application software now guides you through the log-in
process.
2. Enter all required information there. On completing registration successfully, you will receive an e-
mail stating from Sirona Connect with an activation link.
3. Click on the link in the e-mail to activate your account.
Under "My account" you have the option of amending your user data and saving additional information such as your Skype ™ ID.
Under "My favorite Laboratories" you can add up to 5 laboratories with which you are able to work via Sirona Connect. For this click on "Search labs" and enter at least your zip code and an area for the search. Via the "add" and "remove" buttons you can adapt your favorite laboratories.
Under the "External portals" link you have the option of linking the Sirona Connect portal with other portals. If you do connect with other portals, the data-protection regulations apply for the other portal that is connected. Depending on the external portal you may need its access data to log on.
You can also change your password in this area and display your Sirona Connect order list.
Under the "User Administration" link you can create new users, e.g. if there are multiple users working in a practice, and manage their access rights.
63 61 963 D3534D3534.208.02.11.02 09.2017 83
11 CONNECT phase Sirona Dental Systems GmbH11.2 Log out of the Sirona Connect software at the portal Operator's Manual Sirona Connect SW
11.2 Log out of the Sirona Connect software at the portal1. Enter user name and password.2. Activate the relevant option if you want to save the user name and
password.3. In the step menu, click on "Ok" .
The data are uploaded in parallel to the information being entered in the portal.
11.3 Check restoration informationYou can check the restoration information in the first step.
To the left of the overview the restoration information is shown for each restoration that was created in the "ADMINISTRATION" phase.
If the data are not correct you have to change them in the "ADMINISTRATION" phase. You can leave the portal with "Exit Portal" .If the data is correct you can click on "Enter Order Data" to move to the next step.
11.4 Enter order dataIn this step you can select the lab to which the case is to be sent and enter the desired delivery date.
Via "Edit your favourite laboratories" you can add labs to or delete labs from the list.
Under "Return Date" you can select the delivery date by clicking on the desired day in the calendar. Under "Time" you can also state a delivery time.
Then click on "Add Additional Information" to go on to the next step. Your preferred laboratory has saved individual order information, which must be entered for the return date.
11.5 Add additional informationIn this step you must add the patient's gender and insurance type (Germany only).
Under "Additional Instructions" , either a wide text field is provided or individual fields for further information are shown, which were created by their laboratory.
Using the "Additional Files" function you can send additional files (photos).
Then click on the "Add To Cart" button to move to the shopping cart.
IMPORTANTMaximum 5 labs
You can save a maximum of 5 labs in the list of your favorite labs.
63 61 963 D353484 D3534.208.02.11.02 09.2017
Sirona Dental Systems GmbH 11 CONNECT phaseOperator's Manual Sirona Connect SW 11.6 Shopping cart
båÖäáëÜ
11.6 Shopping cartIn the shopping cart you can check the order details, modify them or delete the order from the shopping cart.
As soon as the file has been fully uploaded and all the information is correct, you can send the order to your lab via "Submit cart" . To do so under "Verification" you must enter your password and confirm it with "Ok" . The order list is then inserted automatically.
11.7 Order listAll sent orders are displayed in the order list. The most recently sent order is always at the top.
You can filter the orders by the various statuses via the filter below the list.
In order to view the order details you must click the relevant order in the list so that it is highlighted in orange. Then you can view the details by clicking on "View Order" in the step menu.Via the step menu you can call up individual items of information on the highlighted order.
63 61 963 D3534D3534.208.02.11.02 09.2017 85

Sirona Dental Systems GmbH IndexOperator's Manual Sirona Connect SW
IndexAAngled optical impressions, 63
BBuccal registration
Moving acquisitions, 41
Rotating exposures, 41
CCamera
Warm-up time, 64
CE mark, 8
Close
MODEL, 75
Code library, 34
Contact surfaces
Virtual model, 46
Customer service center, 6
Cut
Inverting the model area, 42
Removing the model area, 42
DDeclaration of conformity, 8
Display objects
Transparency, 45
Trimmed model, 45
Displaying side surfaces, 45, 46
Displaying the bottom, 45, 46
Double arrow keys, 15
EEntering the preparation margin, 81
Automatic, 44
Manual, 44
IImage regions
Hide, 79, 79
impression
Exporting, 33
Importing, 33
Save an, 32
Save as, 33
LLicenses, 34
MManual
HTML format, 12, 35
PDF format, 12
Manufacturer's address, 6
Model
Trimming the preparation, 78
Multi-Touch, 11
Edit a 3D model, 12, 59
Enlarge a 3D model, 12, 59
Navigation, 11
Reduce a 3D model, 12, 59
Rotate a 3D model, 12, 59
Ooptical impression
End teeth, 63
Quadrant restoration, 63
PProduct safety, 8
RRotate
Buccal image, 77
Lower and upper jaw, 75
63 61 963 D3534D3534.208.02.11.02 09.2017 86

Index Sirona Dental Systems GmbHOperator's Manual Sirona Connect SW
SSafety instructions, 10
Screen, 11
Software
Uninstallation, 18
Step menu, 15
Supplementary optical impressions, 63
TTool
Buccal registration, 41
Entering the preparation margin, 44
Resetting the model, 43
Trimming, 43
Trimming
Discard a part, 43
Invert the selection, 43
VViews
Global, 40
63 61 963 D353487 D3534.208.02.11.02 09.2017

tÉ=êÉëÉêîÉ=íÜÉ=êáÖÜí=íç=ã~âÉ=~åó=~äíÉê~íáçåë=ïÜáÅÜ=ã~ó=ÄÉ=êÉèìáêÉÇ=ÇìÉ=íç=íÉÅÜåáÅ~ä=áãéêçîÉãÉåíëK
«=páêçå~=aÉåí~ä==póëíÉãë=dãÄe péê~ÅÜÉW ÉåÖäáëÅÜ mêáåíÉÇ=áå=dÉêã~åóaPRPQKOMUKMOKNNKMO MVKOMNT ûKJkêKW= NOQ=NUM
páêçå~=aÉåí~ä=póëíÉãë=dãÄe `çåí~Åí=áå=íÜÉ=rp^W
c~Äêáâëíê~≈É=PNSQSOR=_ÉåëÜÉáãdÉêã~åó
páêçå~=aÉåí~äI=fåÅKQUPR=páêçå~=aêáîÉ`Ü~êäçííÉI=k`=OUOTPrp^
lêÇÉê=kç SP=SN=VSP=aPRPQ
ïïïKëáêçå~KÅçã


![pçÑíï~êÉ=sÉêëáçå=QKRKñ léÉê~íçêDë=j~åì~ä...See "Formats and symbols used[→7]" Identifies a reference to another text passage and specifies its page number](https://img.dokumen.tips/doc/110x75/5e78b337ce1a3d13346ac6f7/psqkrk-ldj-see-formats.jpg)
![SafeGuard LAN Crypt 3.50 CLIENT FR - sophos.com filexc Application pour Windows® 2000 Windows® XP xp~ÑÉdì~êÇ∆=i^k=`êóéíz [Le chiffrement de fichiers intelligent] sÉêëáçå==PKRM](https://img.dokumen.tips/doc/110x75/5c7c78c109d3f26d2a8b4725/safeguard-lan-crypt-350-client-fr-application-pour-windows-2000-windows-xp.jpg)

