Embed Size (px)
Citation preview

ASA PIOM PAGE 1 OF 129 Date of Issue: December 2016 PIOMDec2016 (2) CASA Approved Version.docx Version: 2nd Version
Parachute Instructors & Operations Manual
(PIOM)
STATUS: MANDATORY

ASA PIOM PAGE 2 OF 129 Date of Issue: December 2016 PIOMDec2016 (2) CASA Approved Version.docx Version: 2nd Version
MANUAL INFORMATION The Parachute Instructors and Operations Manual is an instrument to be made available for all examiners, instructors, parachutists, students and staff for the preparation, training, examination and conduct throughout all aspects of parachute training, duties, responsibilities and activities with the Australian Skydiving Association.
About this publication This manual is produced by The Australian Skydiving Association (ASA) for providing information for ASA Training organisation and its members. If you want more information or copies of this manual please contact your local dropzone or the ASA Office.
Disclaimer WARNING: Parachuting is dangerous. Where the applicant is a consumer as defined by any relevant law such as the Trade Practices Act 1974 or similar State Laws, then certain rights will be implied into a contract for the supply of goods or services for the benefit of the applicant. These terms and rights and any liability of the Association flowing from them cannot be excluded, restricted or modified by the contract. In all other cases except where inconsistent with the above any person parachuting, learning to parachute, training to parachute, flying in any aircraft being used for or in connect ion with parachuting or participating in any activity carried out by the Association does so entirely at their own risk. It is a condition of admission to membership of this Association, that this Association, its office-bearers, committee-persons, members and servants or agents are absolved from all liability howsoever arising from injury or damage howsoever caused (and whether fatal or otherwise) arising out of membership of this Association or participation in parachuting, learning to parachute, training to parachute, flying in any aircraft being used for or in connection with parachuting or in any way caused by or arising out of any activity carried out by this Association whether or not such injury or damage is in any way whatsoever due to negligent act, breach of duty, default and/or omission on the part of this Association, its office-bearers, committee-persons, members and servants or agents. Any person parachuting, learning to parachute, training to parachute, flying in any aircraft being used for or in connect ion with parachuting or participating in any activity carried out by the Association are only allowed to do so on the distinct understanding that they do so entirely at their own risk.
Copyright The Australian Skydiving Association © 1996 - 2016
Version 1st Version Dec 1996 || 2rd Version Dec 2016
This manual is to be used in conjunction with the following ASA Manuals:
Parachute Operational Regulations (POR)
ASA Display Manual
ASA Cloud Manual
Parachute Operations Manual for Jump Pilots
ASA Directives
ASA Approved Manuals and References
This manual was edited by Jamie Hughes-Gage (Cutaway Adventures)
Contact the ASA
Australian Skydiving Association 87 Mountain View Road, Montmorency VIC 3094 Australia
Ph: +61 (03) 9432 2419 Website: www.skydivingassoc.com.au – Email: [email protected]

ASA PIOM PAGE 3 OF 129 Date of Issue: December 2016 PIOMDec2016 (2) CASA Approved Version.docx Version: 2nd Version
TABLE OF CONTENTS
SECTION 1 General ................................................................................................................................ 6
1.1 Applicability ......................................................................................................................... 6
1.2 Applicable Documents ......................................................................................................... 6
1.3 Scope .................................................................................................................................... 6
1.4 Class of Operations .............................................................................................................. 6
1.5 Parachuting Standards and Safety ........................................................................................ 6
SECTION 2 Student Training Operations ............................................................................................. 8
2.1 General ................................................................................................................................. 8
2.2 Types of Student Training .................................................................................................... 8
2.3 Student Parachute Equipment ............................................................................................... 8
SECTION 3 Static Line Training Program ........................................................................................... 9
3.1 General ................................................................................................................................. 9
3.2 Ground Training ................................................................................................................... 9
3.3 Training Descent Table ........................................................................................................ 9
Annexes: (A) S/L Ground Training Syllabus ............................................................................ 10
(B) Written and Practical Review — First Jump (sample) ...................................... 11
(C) S/L Training Descent Table .............................................................................. 21
(D) Briefing Notes for Dummy Ripcord Pull (DRP) and Freefall Training ............. 22
(E) Written and Practical Review — ‘A’ Licence (sample) .................................... 41
SECTION 4 Accelerated Freefall Training Program ......................................................................... 51
4.1 General ............................................................................................................................... 51
4.2 Ground Training ................................................................................................................. 51
4.3 Training Descent Table ...................................................................................................... 51
4.4 Duties of AFF Instructors and Jumpmasters ....................................................................... 52
Annexes: (A) Ground Training Syllabus ................................................................................. 53
(B) Written and Practical Review — First Jump (sample) ...................................... 54
(C) AFF Training Descent Table ............................................................................. 65
(D) Briefing Notes for AFF Stages 1 — 9 ............................................................... 68
(E) Duties of AFF Instructors and Jumpmasters ...................................................... 81
(F) Written and Practical Review — ‘A’ Licence (sample)
(Refer to Section 3 Annex E) ............................................................................ 41
SECTION 5 Tandem Training Program .............................................................................................. 83
5.1 General ............................................................................................................................... 83
5.2 Ground Training ................................................................................................................. 83
5.3 Exit Height ......................................................................................................................... 83

ASA PIOM PAGE 4 OF 129 Date of Issue: December 2016 PIOMDec2016 (2) CASA Approved Version.docx Version: 2nd Version
TABLE OF CONTENTS
SECTION 6 Orientation Flight Emergency Training ......................................................................... 84
6.1 General ............................................................................................................................... 84
6.2 Ground Training ................................................................................................................. 84
SECTION 7 Additional Training .......................................................................................................... 85
7.1 Relative Work .................................................................................................................... 85
7.2 Water Descents ................................................................................................................... 85
7.3 Night Descents ................................................................................................................... 85
7.4 Conversion Courses ............................................................................................................ 85
7.5 Spotting .............................................................................................................................. 85
7.6 Canopy Relative Work ....................................................................................................... 85
7.7 Wing Suit Descents ............................................................................................................ 86
7.8 Freefly Descents ................................................................................................................. 86
Annexes: (A) Lesson Guides for Section 7 ............................................................................. 87
(B) ASA Relative Work Training Descent Table .................................................... 98
(C) Wingsuit Training Table – Part A ................................................................... 101
(D) Wingsuit Training Table – Part B ........................................................ 104
(E) Freefly Recommended Basic Training (FFRBT) ................................ 106
SECTION 8 Parachute Packing Training .......................................................................................... 113
8.1 General ............................................................................................................................ 113
8.2 Basic Packing ................................................................................................................... 113
8.3 Packing of Specific Canopies and Equipment .................................................................. 113
Annexes: (A) Lesson Guides for Section 8 ............................................................................... 114
SECTION 9 Additional Operational Procedures .............................................................................. 115
9.1 Qualified Parachutists ....................................................................................................... 115
9.2 Visiting Parachutists ......................................................................................................... 115
9.3 Briefings ........................................................................................................................... 115
9.4 Preparation of Aircraft for Parachuting ............................................................................ 115
9.5 Operation of Aircraft ........................................................................................................ 116
9.6 Parachute Packing and Maintenance ................................................................................ 116
9.7 Target Assistant Training Syllabus ................................................................................... 116
9.8 Target Control Officer Training ....................................................................................... 117
Annexes: (A) Target Assist Certification ........................................................................................ 118
(B) TA Examination / Review (sample) ........................................................................... 119
(C) TCO Examination (sample)........................................................................................ 120

ASA PIOM PAGE 5 OF 129 Date of Issue: December 2016 PIOMDec2016 (2) CASA Approved Version.docx Version: 2nd Version
TABLE OF CONTENTS
SECTION 10 Local Drop Zone Rules .................................................................................................. 121
10.1 Duty Instructor Checklist .................................................................................................. 121
10.2 Map of Drop Zone ............................................................................................................ 122
SECTION 11 Instructor Courses .......................................................................................................... 123
11.1 General ............................................................................................................................. 123
11.2 Methods of Instruction ..................................................................................................... 124
11.3 Instructor ‘D’ Course Syllabus ......................................................................................... 125
11.4 Instructor ‘B’ Course Syllabus ......................................................................................... 126
11.5 Endorsements ................................................................................................................... 127
SECTION 12 Conduct of Examinations ............................................................................................... 128

ASA PIOM PAGE 6 OF 129 Date of Issue: December 2016 PIOMDec2016 (2) CASA Approved Version.docx Version: 2nd Version
SECTION 1: General
1.1 Applicability
The Australian Skydiving Association Parachute Instructors and Operations Manual is the approved
authority for parachute training operations to be conducted by ......................................(member or
member organisation) {hereafter referred to as ‘The Club’}.
The Parachute Instructors and Operations Manual contains the relevant information necessary for the
conduct of training operations which is not explicit in the applicable documents listed in paragraph 1.2 of
this manual.
1.2 Applicable Documents
1.2.1 The following documents are applicable to the conduct of parachute operations within the ASA.
The primary documents are the Civil Aviation Regulations (CAR) and Civil Aviation Safety
Regulations (CASR). Subservient documents sequentially are as follows:
(a) ASA Parachute Operational Regulations (OP REGS);
(b) ASA Directives;
(c) ASA Parachute Instructors and Operations Manual (PIOM); and
(d) ASA Approved Manuals and References.
1.2.2 The conduct of all facets of parachute operations is to be in accordance with the relevant sections
of the above documents and this manual. The requirements and provisions of the documents are to
be adhered to by all parties at all times. Breaches of the requirements of these documents shall be
subject to disciplinary actions by the Chief Instructor (CI) or Drop Zone Safety Officer (DZSO),
as appropriate, under the provisions of the ASA OP REGS.
1.2.3 This manual will be available to each instructor engaged in instructional duties under the
supervision of The Club.
1.3 Scope
1.3.1 The purpose of this manual is to:
(a) Set operational requirements to ensure safe and consistent parachute training; and
(b) Set the standard of knowledge and skills required by students participating in parachute
training.
1.3.2 It is not the purpose of this manual to state in detail how the training is to be conducted; however,
all instructors are expected to exercise due care and skill consistent with the professional standards
of the ASA.
1.3.3 This manual contains sample tests and training material as a guide to the standard required by the
ASA. Individual organisation must submit their own documents to be approved by the ASA. If a
change to an approved document has been made, it must be resubmitted for re-approval.
1.4 Class of Operations
1.4.1 Operations embrace parachute training and display parachuting in the widest possible sphere as
well as catering for those members who are primarily interested in parachuting for their own
pleasure. Operations may be summarised as follows:
(a) Student parachutists undergoing training to qualify for the Parachute Certificate Class
‘A’;
(b) Advanced training to qualified parachutists;
(c) Parachuting for approved competition or display purposes;
(d) Parachuting for pleasure; and
(e) Parachuting undertaken for the issue, renewal or validation of parachutist certificates.

ASA PIOM PAGE 7 OF 129 Date of Issue: December 2016 PIOMDec2016 (2) CASA Approved Version.docx Version: 2nd Version
1.5 Parachuting Standards and Safety
1.5.1 The Chief Instructor shall be responsible for all parachute operations conducted by The Club as
prescribed in the ASA OP REGS
1.5.2 Authority is vested in the Chief Instructor to summarily prohibit or suspend any parachutist from
parachute descents and operations under his areas of responsibility within the Club, if the
parachutist’s conduct or actions are likely in the CI’s opinion to endanger the safety of parachuting
operations or prejudice the “Club’s” and/or ASA’s reputation or safety standards. The matter must
be reported to the ASO immediately and follow the correct process and procedures for discipline.
1.5.3 This authority is further delegated to parachute instructors of The Club, provided that:
(a) the CI be consulted before any action is taken, (unless safety decrees otherwise);
(b) the most senior instructor present is consulted in the CI’s absence; and
(c) the full circumstances are presented to the CI at the earliest opportunity.
1.5.4 The CI, or in his absence, the instructor delegated to supervise operations, shall act as Drop Zone
Safety Officer (DZSO).
1.5.5 Authority is vested in the Drop Zone Safety Officer to summarily prohibit or suspend a parachutist
from parachute descents and operations under his areas of responsibility, if the parachutist’s
conduct or actions are likely, in the DZSO’s opinion, to endanger the safety of parachuting
operations or prejudice: ”The Club’s” and/or the ASA’s reputation and safety standards.
1.5.6 Any suspension action taken by the DZSO against a parachutist shall be reported to the CI in
accordance with ASA OP REGS.

ASA PIOM PAGE 8 OF 129 Date of Issue: December 2016 PIOMDec2016 (2) CASA Approved Version.docx Version: 2nd Version
2 — 1
SECTION 2: Student Training Operations
2.1 General
2.1.1 Student training operations are to be conducted in accordance with the provisions of the ASA OP
REGS Section 5, and this manual.
2.1.2 The training of student parachutists shall be carried out by an instructor who holds the appropriate
rating for that training and is authorised by the CI to conduct the training. All instructors are to be
fully conversant with the applicable documents and this Parachute Instructors and Operations
Manual.
2.1.3 A student parachutist shall not make a descent unless authorised to do so by an instructor under
the direct supervision of a DZSO. An instructor shall not authorise a descent unless they are
satisfied that:
(a) the descent is within the scope of the applicable Training Descent Table; and
(b) the descent is appropriate for the level of training of the student.
2.1.4 By authorising a student descent an instructor accepts responsibility for directly supervising that
descent.
2.1.5 The student will be issued an ASA Student Parachutist Licence before undergoing any practical
training. At the time of membership application the student will be made aware of the potential
dangers of parachuting and will not be allowed to continue training until the application form has
been fully completed.
2.2 Types of Student Training
2.2.1 The types of student training operations conducted by the The Club and the details of each are
contained in the following sections of this manual:
(a) Section 3 — Static Line (S/L) Training;
(b) Section 4 — Accelerated Freefall (AFF) Training;
(c) Section 5 — Tandem Training;
(d) Section 6 — Orientation Flight Emergency Training; and
(e) Section 7 — Additional Training.
2.3 Student Parachute Equipment
2.3.1 Only parachute equipment which meets the following specifications shall be used for student
training, this does not include Tandem equipment:
(a) a piggyback harness/container system fitted with a “single operation system” main canopy
release/reserve canopy activation;
(b) an automatic activation device (AAD) on the main/reserve parachute deployment system
for all students undergoing AFF or S/L FF training.
(c) a round/square reserve parachute;
(d) a lanyard release system fitted to the harness/container for reserve activation;
(e) a ram-air main parachute which, in the assessment of the CI, has docile handling
characteristics and a low rate of descent for the weight of the student;
(f) a main parachute deployment system which has a spring-loaded pilot chute and a static
line, ripcord or direct bag;
(g) an altimeter for all students undergoing AFF or above Stage 5 S/L FF training; and
(h) a rigid helmet with a hard shell;
2.3.2 Other than tandem students, all students will use equipment activated by either static line or
ripcord.

ASA PIOM PAGE 9 OF 129 Date of Issue: December 2016 PIOMDec2016 (2) CASA Approved Version.docx Version: 2nd Version
SECTION 3: Static Line (S/L) Training Program
3.1 General
3.1.1 The S/L Training Program consists of ground training and 9 Stages. The contents of the ground
training are designed to give the student the appropriate knowledge and skills to complete his/her
S/L Training Table safely and competently. The Ground Training Program is at Annex A to this
Section.
3.1.2 Lesson plans for the particular subjects in this program are to be supplied by the instructor
conducting the course and/or training and approved by the Chief Instructor. Lesson Plans specific
to the Static Line Training Program can be found in Attachment #1.
3.2 Ground Training
3.2.1 The content of the ground training may be summarised as follows:
(a) Introduction: General knowledge on how the sport is administered, regulations, safety,
drop zone location and rules and an outline of the course content;
(b) Equipment: The equipment to be used, its operation and characteristics is given so
students fully understand how it works and feel confident with the equipment, including
field recovery and packing;
(c) Aircraft Drills/Procedures: The conduct of the jump from the time of manifesting to exit,
with emphasis on the procedures required from emplaning to parachute activation,
including the safety aspects associated with aircraft operations;
(d) Stability: The theory of stability and how it can be achieved, including practical training
on the stable arch position and the count;
(e) Canopy Control: How to check that the canopy is properly deployed, and how to control
the canopy to achieve a safe landing back at the target, including the method of target
assistance to be used;
(f) Emergencies/Hazards: Learn to recognise and distinguish between a good canopy and a
malfunction and know the actions to take for the types of parachute emergencies (including
drag recovery);
(g) Landings: Practical instruction in the correct execution of parachute landings, including
landing hazards, both under a main or reserve parachute;
(h) Practical Drills: All aspects of exits, stability, twists, emergencies, hazards, canopy
control are practiced utilising a suspended harness type training aid; and
(i) Examination/Review: Students are required to complete both a practical and a written
examination/review prior to the first jump. It will test the student’s theoretical knowledge
and practical ability in those areas covered in the training program. The
examination/review is at Annex B to this Section.
3.3 Training Descent Table
3.3.1 Student progression is to be in accordance with the Training Descent Table at Annex C. Students
shall receive the training applicable to the next stage having completed the previous stage to the
instructor’s satisfaction. Lesson guides are at Annex D. Instruction for advanced freefall (Stages 7
to 9) will normally consist of detailed pre-jump briefings and rehearsals followed by a detailed
debrief on the student’s performance.
3.3.2 On completion of Stage 9 of the Table the student is to satisfactorily complete the ‘A’ Licence
written and practical test at Annex E to this Section.

ASA PIOM PAGE 10 OF 129 Date of Issue: December 2016 PIOMDec2016 (2) CASA Approved Version.docx Version: 2nd Version
ANNEX A TO SECTION 3
S/L Ground Training Syllabus
Note: The following is a guide to the course program as outlined in Section 3.
Lesson Subject
1 Introduction
2 General Knowledge
Organisational Background
Regulations/Safety
DZ Layout/Local Rules
Course Preview
3 Student Parachute Equipment
4 Aircraft Procedures — Theory (Emplaning, spotting and exits, including aircraft emergencies)
5 Stability
Revision — All lessons
BREAK
Revision — Equipment and aircraft procedures, spotting and exits/stability
6 Canopy Control 1 — Theory (Parachute development to landing including TA procedures and DZ
familiarisation)
7 Parachute Landings 1 — Theory and Practical
8 Parachute Emergency Procedures 1 — Theory
9 Emergency Procedures 2 — Practical (Suspended Harness)
Overnight Break at the DZ
10 DZ Familiarisation/Post-jump Procedures
11 Landings — Practical
12 Canopy Control 2 — Practical
13 Aircraft Drill/Exits/Emergencies — Practical/Rehearsal
14 Course Examination/Review — Written and Practical
15 First Jump, Debrief and Certificate Presentation

ASA PIOM PAGE 11 OF 129 Date of Issue: December 2016 PIOMDec2016 (2) CASA Approved Version.docx Version: 2nd Version
ANNEX B TO SECTION 3
First Jump Examination / Review
Practical
1 Each student will individually demonstrate to the course instructor’s satisfaction prior to the first
jump:
(a) Aircraft procedures and exits;
(b) Emergency procedures for:
(1) High speed canopy malfunctions;
(2) Low speed canopy malfunctions; and
(3) Static line hang-up.
(c) Procedure for landing hazards:
(1) Water;
(2) Power lines;
(3) Trees; and
(4) Buildings.
(d) Parachute landings.
Written
1 The theory examination set by the Chief Instructor at Appendix 1 to this Annex is to be
successfully passed by the student prior to the first jump.
Appendix 1
1 Written examination/review (static line)
2 Answer sheet

ASA PIOM PAGE 12 OF 129 Date of Issue: December 2016 PIOMDec2016 (2) CASA Approved Version.docx Version: 2nd Version
3 — B — 2
STATIC LINE COURSE – PRE JUMP REVIEW (SAMPLE)
Static Line Review
Now that you have accepted our Invitation to Adventure, in order to
confirm that you have assimilated the instruction given on this
course, you are required to satisfactorily complete the following
review.
What you are about to do
could change your life,
your outlook,
your career,
your future.
AUSTRALIAN SKYDIVING ASSOCIATION
welcomes you to the
challenging and
exciting sport of
Skydiving!

ASA PIOM PAGE 13 OF 129 Date of Issue: December 2016 PIOMDec2016 (2) CASA Approved Version.docx Version: 2nd Version
3 — B — 3
Static Line Course Pre-Jump Review
SELECT THE CORRECT ANSWER AND INDICATE BY CIRCLING THE APPROPRIATE LETTER ON
THE ANSWER SHEET.
PLEASE DO NOT WRITE ON THIS PAPER
1 As a student parachutist, whose permission must you seek before making a jump?
(a) DZSO (b) Pilot (c) An experienced
parachutist
(d) Manifester
2 You are not permitted to consume any alcohol how many hours before making a jump?
(a) 6 hours (b) 8 hours (c) 12 hours (d) 24 hours
3 What height would you expect your first ram-air descent to be conducted from?
(a) 6,000 feet (b) 4,000 feet (c) 3,000 feet (d) 2,000 feet
4 Why is a logbook necessary?
(a) To allow jump payments to be calculated.
(b) Because it is required by the pilot.
(c) To show your friends your jump progress.
(d) To maintain a record of descents and experience for the purpose of providing an accurate record
for certificate appliations..
5 Where on your harness are the cut-away and reserve deployment handles located (SOS system)?
(a) Mounted on legstrap.
(b) Across the back pack.
(c) Right hand side of harness.
(d) Left hand side of harness.
6 Where are the steering toggles for a main and reserve located?
(a) On the rear of the rear risers above your head.
(b) On the front of the rear risers above your head.
(c) On the front of the front risers above your head.
(d) On the left hand side of your harness.
7 What colour are the toggles, brakes or steering loops for the main and reserve canopies?
(a) Black (b) Red (c) Blue (d) Yellow
8 If you are being dragged along the ground by your ram-air parachute after landing, what must
you do?
(a) Yell for help.
(b) Wait until you stop.
(c) Wait for assistance.
(d) Pull in one toggle, stand up and run toward the canopy.
9 What should your body position be as soon as you leave the aircraft?
(a) Looking at the ground.
(b) Stable spread, head back.
(c) Tucked up looking at aircraft.
(d) Does not matter.

ASA PIOM PAGE 14 OF 129 Date of Issue: December 2016 PIOMDec2016 (2) CASA Approved Version.docx Version: 2nd Version
3 — B — 4
10 Why is a good stable body position essential?
(a) So we can enjoy the jump.
(b) Reduce risk of canopy collisions.
(c) Minimise oscillations.
(d) Give the parachute the best chance to open correctly.
11 Why do you need to count when the canopy is deploying?
(a) To remain stable.
(b) To tighten all body muscles.
(c) To indicate that you are conscious.
(d) To maintain time awareness.
12 One of the reasons brakes are locked on during opening is to?
(a) Assist pilot chute deployment.
(b) Ensures the canopy opens on the target heading.
(c) Minimise forward surge and to aid opening.
(d) Helps assess your position over the DZ.
13 Deflated end cells can be inflated by?
(a) Pumping steering toggles twice to the crutch.
(b) Pulling down the front risers.
(c) Rapid turns, watch for cells to inflate.
(d) Allowing the canopy to run with the wind.
14 When stalling your canopy, it?
(a) Flies forward.
(b) Dives forward and loses height.
(c) Rotates at high speed.
(d) Loses forward speed and lift, then falls behind you.
15 To recover from a stall you should?
(a) Hold the toggles on deep brakes.
(b) Let the toggles up about 6 inches.
(c) Let the toggles up fully and wait for airspeed to build.
(d) No recovery action required.
16 Turbulence will often be encountered?
(a) In nil winds.
(b) During canopy turns.
(c) When the canopy is at 3/4 brakes.
(d) On the downwind side close to trees, buildings, behind another canopy, etc.
17 When encountering strong air turbulence it is best to?
(a) Fly on full drive to escape the rough area.
(b) Fly the canopy on deep brakes.
(c) Fly the canopy on half brakes.
(d) Tighten your legstraps.

ASA PIOM PAGE 15 OF 129 Date of Issue: December 2016 PIOMDec2016 (2) CASA Approved Version.docx Version: 2nd Version
3 — B — 5
18 When turning your canopy fast your?
(a) Canopy will not respond.
(b) Rate of descent will increase dramatically during the turn.
(c) Canopy will stall and fall backward.
(d) The pilot chute will move to the front.
19 When close to the ground (eg. below 500 feet) sharp turns are?
(a) Recommended for accuracy only.
(b) Not permitted for students at all.
(c) Used to avoid landing hazards.
(d) Acceptable if you need to adjust landing point.
20 At what height should you be set up for your final landing approach?
(a) 50 feet (b) 100 feet (c) 200 feet (d) 500 feet
21 To minimise your groundspeed when landing face your canopy which way?
(a) Toward the cross.
(b) On the aircraft heading.
(c) Toward the TA.
(d) Into wind.
22 After you feel the opening shock you should?
(a) Look up, carry out canopy checks, locate DZ, and follow arrows, do brake check.
(b) Look around to check the view.
(c) Locate DZ and arrow, then carry out canopy checks.
(d) Release brakes, locate DZ and arrow.
23 Where will you exit the aircraft in relation to the target?
(a) Downwind of the target.
(b) Over the target.
(c) Upwind of the target.
(d) Abreast of the target cross.
24 How would you find the wind direction as you descend if you are unable to see the target.
(a) Always on aircraft heading.
(b) Wind action on trees.
(c) Do not need to know until on the ground.
(d) Wind sock, smoke, etc.
25 The correct response to the TA’s signal (arrow) is?
(a) Turn to face the same direction.
(b) Only used for a reference.
(c) Turn to keep arrow in sight.
(d) Keep the arrow behind you.
26 Why is it important to locate the arrow as soon as possible after opening?
(a) To increase you time in the air.
(b) To avoid any hazard and be safely directed to the DZ.
(c) To reduce the time in the air.

ASA PIOM PAGE 16 OF 129 Date of Issue: December 2016 PIOMDec2016 (2) CASA Approved Version.docx Version: 2nd Version
(d) To keep clear of aircraft and next jumper.
27 If, on your jumps you are under TA, and you are unable to see the TA, how would you land?
(a) Attempt to flare when you feel the time is right.
(b) Let go of the toggles and set up for the PLF.
(c) Stall the canopy as close to the ground as possible.
(d) Keep on 1/2 brakes and set up for the PLF, facing into wind.
28 If you are about to land in water you should?
(a) Let the toggles up to gain air speed.
(b) Face into wind and hold position.
(c) Steer to the nearest bank, at 100 feet undo chest strap, feet together, when feet touch the water
release leg snaps.
(d) Rethink your training to find out what you have overlooked.
29 After landing in a tree you are suspended above the ground, what are you going to do?
(a) Climb down as quickly as possible.
(b) Hold a good landing position and grasp a large branch and wait and Yell for help.
(c) Panic
(d) Attempt to climb up to the canopy.
30 At height you are heading for power lines — what will you do?
(a) Spread feet and arms wide.
(b) Attempt to avoid them at height and if unsuccessful make your body thin to pass through them on
1/4 brakes
(c) Feet up to fend off.
(d) Feet crossed, arms in front to protect face.
31 You are above 500 feet and heading for a hazardous area — do you?
(a) Hold into wind.
(b) Steer away while you have height.
(c) Stall the canopy.
(d) Turn and face the hazard
32 On the final approach you notice a hazard on the ground directly in front — you should?
(a) Immediately turn hard right or left to avoid the hazard.
(b) Turn 180 degrees and land downwind.
(c) Turn only as little as necessary to avoid the hazard.
(d) Remain as you are.
33 If you have line twists on opening you should first?
(a) Check canopy for any malfunction and then kick out twists.
(b) Kick legs vigorously to assist untwisting.
(c) Cut away and deploy your reserve.
(d) Decide the canopy has been incorrectly packed.
34 While completing your canopy checks, you see holes and tears in the canopy what will you do?
(a) Deploy the reserve.
(b) Release both brakes and see how it flies.
(c) Don’t worry.

ASA PIOM PAGE 17 OF 129 Date of Issue: December 2016 PIOMDec2016 (2) CASA Approved Version.docx Version: 2nd Version
(d) Attempt to locate the DZ.
35 If you cannot determine the cause of a continuous fast rotation you should?
(a) Conduct emergency procedures
(b) Counteract the turn using the front risers.
(c) Try to fly the canopy and land it.
(d) Fly the canopy using the rear risers.
36 If you find yourself under a round reserve how do you land?
(a) Attempt to flare.
(b) Remain on full drive, face into wind, carry out PLF.
(c) Head toward the TA.
(d) Apply half brakes and carry out PLF.
37 You have a broken steering line — you would?
(a) Deploy the reserve.
(b) Release other steering line then steer and flare with rear risers.
(c) Pull both toggles full arms length.
(d) Do not attempt to steer.
38 If you are unable to release one steering toggle (locked on), you should?
(a) Do not attempt to steer.
(b) Lower the other toggle to steer.
(c) Conduct emergency procedures
(d) There is no need to worry.
39 If you are in any doubt that your canopy has opened and flying properly what must you do?
(a) Deploy the reserve.
(b) Turn right and left to check the canopy.
(c) Maintain heading until landing.
(d) Slowly turn, keeping sight of DZ.
40 After pulling the reserve/cutaway handle (SOS), the procedure is not complete until you have?
(a) Clear one cable
(b) Check Altimeter
(c) Restowed cables.
(d) Cleared all cables
41 AfterAircraft take-off but below 500 feet, the engine fails, what will you do?
(a) Adopt forced landing position.
(b) Exit aircraft.
(c) Tighten your legstraps.
(d) Move to rear of aircraft.
42 As the aircraft is climbing to height a static line dislodges, spilling a canopy inside the aircraft —
you should?
(a) Move away and tell someone quickly.
(b) Ask for help to repack the canopy.
(c) Smother it and tell the instructor quickly.
(d) Replace the static line in the pack.

ASA PIOM PAGE 18 OF 129 Date of Issue: December 2016 PIOMDec2016 (2) CASA Approved Version.docx Version: 2nd Version
3 — B — 8
43 If your canopy should come open and is escaping from the plane, you should?
(a) Disconnect the static line.
(b) Do nothing.
(c) Hang on with both hands.
(d) Follow canopy out quickly.
44 Having counted to three thousand you feel no opening shock, what do you do next?
(a) Wait 10 seconds, then carry out reserve deployment drill.
(b) Call check, and wait.
(c) Call four thousand, check, look, reach, pull, check, check.
(d) Maintain your arch position.
45 If you are dangling beneath the aircraft (static line hang-up) what would you do?
(a) Pull the reserve.
(b) Wait to be pulled back inside.
(c) Put your hands on your head and wait to be cut free.
(d) Nothing until you are cut free.
46 If there are 2 student canopies in the air at the same time, what procedure should be followed?
(a) High person to follow arrow, low person to spiral down to lose height, land as soon as possible.
(b) Low person to follow arrow, high person steers toward cross and circles until other person lands.
(c) Both face downwind.
(d) Both face upwind.
47 We always land into the wind because?
(a) It reduces our airspeed.
(b) It reduces our groundspeed.
(c) It increases our airspeed.
(d) It increases our groundspeed.
48 Why is it dangerous to attempt to flare the canopy without the guidance of the TA?
(a) You may flare too early.
(b) You may flare too late.
(c) Without guidance it is safer to land on half brakes into wind in a PLF position.
(d) All of the above.
49 Are you fully confident that you can carry out a parachute descent safely with the training that
you have received?
(a) Yes.
(b) No.
50 Are you fully confident that you can recognise a malfunctioned parachute and carry out the
appropriate actions to deal with it?
(a) Yes.
(b) No.
51 Do you believe you can land your canopy unassisted for an off-DZ landing if required?
(a) Yes.
(b) No.

ASA PIOM PAGE 19 OF 129 Date of Issue: December 2016 PIOMDec2016 (2) CASA Approved Version.docx Version: 2nd Version
3 — B — 9
STATIC LINE COURSE – ANSWER SHEET (SAMPLE)
ANSWER SHEET
BEFORE CORRECTION: If you have circled your choice and wish to change your mind strike out and
INITIAL, then circle your new choice.
Name: ..................................................... Instructor: ............................................ Score: ......
Course Type: ......................................... Instructor: ............................................ Date: / /
CIRCLE THE CORRECT ANSWER
1 A B C D 28 A B C D
2 A B C D 29 A B C D
3 A B C D 30 A B C D
4 A B C D 31 A B C D
5 A B C D 32 A B C D
6 A B C D 33 A B C D
7 A B C D 34 A B C D
8 A B C D 35 A B C D
9 A B C D 36 A B C D
10 A B C D 37 A B C D
11 A B C D 38 A B C D
12 A B C D 39 A B C D
13 A B C D 40 A B C D
14 A B C D 41 A B C D
15 A B C D 42 A B C D
16 A B C D 43 A B C D
17 A B C D 44 A B C D
18 A B C D 45 A B C D
19 A B C D 46 A B C D
20 A B C D 47 A B C D
21 A B C D 48 A B C D
22 A B C D 49 A B C D
23 A B C D 50 A B C D
24 A B C D 51 A B C D
25 A B C D 52 A B C D
26 A B C D 53 A B C D
27 A B C D 54 A B C D
I answered the following questions incorrectly and after discussion with my instructor I now fully
understand the correct answer.
Q:
A:
I am confident that I can make a parachute descent safely and take the correct action should I have a
malfunction.
Signed (Student): .............................................. Instructor: ..........................................................

ASA PIOM PAGE 20 OF 129 Date of Issue: December 2016 PIOMDec2016 (2) CASA Approved Version.docx Version: 2nd Version
3 — B — 10
STATIC LINE COURSE – ANSWER SHEET (SAMPLE)
ANSWER SHEET
COURSE INSTRUCTOR TO READ AND SIGN
The student as named on the front of this Answer Sheet has been observed throughout his/her course of
training whilst under my supervision as having the ability to demonstrate the following procedures to my
satisfaction:
Aircraft exit procedure
Stability
Canopy control
Emergency procedures for the following:
1. High speed malfunction
2. Low speed malfunction
3. Static line hang up4. Aircraft Emergencies
5. Freefall emergencies (for AFF students)
Line twists
Landing hazards:
1. Water
2. Power lines
3. Trees
4. Buildings
Landings (PLF)
Harness drills
Flaring the canopy
Signed: ..................................................................................... Date: / /
Print Instructor name: ............................................................. Location: ........................................
Licence number: .....................................
THE FOLLOWING STATEMENT WILL BE HAND WRITTEN BY THE STUDENT AND SIGNED AFTER
TRAINING AND BEFORE THE FIRST JUMP.
“T AM CONFIDENT WITH THE TRAINING I HAVE RECEIVED. THAT I CAN CARRY OUT MY FIRST AND
FOLLOWING DESCENTS SAFELY.”
SIGNED……………………………… DATE:……………………………………….

ASA PIOM PAGE 21 OF 129 Date of Issue: December 2016 PIOMDec2016 (2) CASA Approved Version.docx Version: 2nd Version
3 — C — 1
ANNEX C TO SECTION 3
Static Line Training Descent Table
The student’s rate of progression through training will conform to this table. Each stage must be completed to the
satisfaction of the DZSO before the student is permitted to advance to the next stage.
Stage 1 Two stable static line descents from
Three stable static line descents with dummy ripcord pull from
3,000 feet
3,000 feet
Stage 2 A stable 3 second freefall descent from 3,000 feet
Stage 3 A stable 7 second freefall descent on heading from 3,400 feet
Stage 4 A stable 10 second freefall descent on heading from 3,800 feet
Stage 5 A stable 12 second freefall descent on heading learning instruments from 4,000 feet
Stage 6 A stable 15 second freefall descent using delta position from
A stable 15 second freefall descent using frog position from
4,500 feet
4,500 feet
Stage 7 A consolidation jump as directed by the DZSO from
A stable 20 second freefall descent with either a left or right 360 degree
turn from
A stable 20 second freefall descent with figure 8 from
A stable 20 second freefall descent with backloop from
5,500 feet
5,500 feet
5,500 feet
5,500 feet
Stage 8 A stable 25 second freefall descent with figure eight and backloop from
A stable 25 second freefall descent performing a fast and slow fall from
6,000 feet
6,000 feet
Stage 9 A stable 30 second freefall descent using maxtrack from
A stable 30 second freefall descent using maxtrack with ‘S’ turn from
A controlled freefall descent with an instructor evaluating air-skills, in
particular arm and leg awareness, body position and hover control with
special attention to time and height awareness from
7,000 feet
7,000 feet
10,000 feet
Note: A minimum of twenty descents (20) as per the Static Line Training Table above is required before
a Certificate “A” Licence can be issued.
Note: The exit heights shown in this table are minimum heights for each stage.
Note: At the discretion of the DZSO an instructor may not need to be present in the aircraft after the
successful completion of Stage 6 of this table (refer to OR 5.13).
Note: Until the successful completion of Stage 7 of this table, the main canopy must be open by a
minimum height of 2,200 feet AGL (refer to OR 4.2.2).

ASA PIOM PAGE 22 OF 129 Date of Issue: December 2016 PIOMDec2016 (2) CASA Approved Version.docx Version: 2nd Version
3 — D — 1
ANNEX D TO SECTION 3
Briefing Notes for Dummy Ripcord Pull (DRP) and Freefall Training
1 The following briefing notes and lesson guides are to be used in briefing the student before the student
progresses to the next stage of the Static Line Training Descent Table at Annex C of this Section.
2 A static line descent with DRP must have been made within the 48 hours prior to making the first freefall
descent.
3 Three consecutive successful DRPs shall be required before the student makes the first freefall descent.
4. An AAD is to be fitted to the harness/container to activate the main or reserve parachute during all
student freefall descents.

ASA PIOM PAGE 23 OF 129 Date of Issue: December 2016 PIOMDec2016 (2) CASA Approved Version.docx Version: 2nd Version
3 — D — 2
LESSON 1
BRIEFING FOR FIRST DUMMY RIPCORD PULL
AREA: Outside
AIDS: Main parachute container including dummy handle, suspended harness
AIM: To drill student in the procedure for dummy ripcord pulls
CONTENTS REMARKS
EXIT HEIGHT 3,000 feet
1. The count as for basic static line descent.
2. Actions:
(a) Arch; Position of head and elbows.
(b) Look for dummy ripcord handle;
(c) Reach and grasp dummy ripcord handle;
(d) Pull, one thousand, two thousand, three thousand
check pilot chute on four thousand.
3. Handle to be placed in jumpsuit or its pocket before grasping
toggles but after canopy inspection.
Handle to be thrown away in an
emergency.
4. Emphasis to be placed on dissimilarity to proper pull (canopy
already deploying, therefore student must not try and beat
deployment).
QUESTIONS FROM:
QUESTIONS TO:

ASA PIOM PAGE 24 OF 129 Date of Issue: December 2016 PIOMDec2016 (2) CASA Approved Version.docx Version: 2nd Version
3 — D — 3
LESSON 2
BRIEFING FOR FIRST 3-SECOND DELAY
AREA: Outside
AIDS: Main complete, suspended harness
AIM: To drill student in the procedure for his/her first 3-second delay
CONTENTS REMARKS
EXIT HEIGHT 3,000 feet
1. Actions: Exit and count.
(a) On the command GO adopt the hard arch position;
(b) Look for ripcord handle; Look at handle with minimum head
movement.
(c) Reach and grasp ripcord handle; Bring in both arms symmetrically.
(d) Pull ripcord handle and commence development
count: one to three thousand, check pilot chute on four
thousand, then continue count to six thousand and
check canopy.
2. Handle to be placed in jumpsuit or its pocket before grasping
toggles but after canopy inspection.
Handle to be thrown away in an
emergency.
3. Pull will be stiffer than a dummy pull. See attached notes.
4. Remedial action for hard pull, both hands once, then if still
unable to pull, immediately deploy reserve.
Drill with equipment.
Note: This must include at least three
actual ripcord pulls on the ground
5. Floating ripcord make one attempt if unable to find ripcord
then immediately deploy reserve.
6. Introduce student to freefall equipment.
NOTE: All freefall descents to be made within 45 degrees of heading. Stress that the count after pulling
must be maintained throughout a jumping career.
QUESTIONS FROM:
QUESTIONS TO:

ASA PIOM PAGE 25 OF 129 Date of Issue: December 2016 PIOMDec2016 (2) CASA Approved Version.docx Version: 2nd Version
3 — D — 4
LESSON 2 NOTES
POINTS TO WATCH FOR:
1. To achieve a stable exit your legs and feet should be extended before you let go the strut.
2. YOU MUST COUNT! Counting is the only way you will know how long you have fallen, and by
counting you will not lose time in starting your emergency procedures should they be needed. Counting
after pulling is a habit well worth retaining as an experienced jumper.
COMMON PROBLEMS:
1. KICKING LEGS — This is generally an unconscious attempt to maintain stability. If you recognise that
you are kicking, use this to trigger yourself into a hard arch.
2. FAILING TO ARCH ON LEAVING THE AIRCRAFT — Exiting the aircraft with the hand almost on
the ripcord (usually first freefallers) almost always results in rolling off. You must arch on leaving the
aircraft to ensure stability is first gained and then maintained. Stability Hint: In the vital first two — three
seconds, strain you neck back against the pack by keeping your eyes on the aircraft. This will help you
arch more fully.
3. SHORT DELAY — The stability during the first few seconds depends mainly on the exit from the
aircraft, while those later in the delay rely heavily on the arch. Any tendency to roll off as the delay
progresses should be countered by extra arching effort rather than an early grab for the ripcord.
4. TURNS — If the body is twisted or the position of the arms and legs uneven this can cause turns (usually
slow). Straining to the limit of body movement during the delay will tend to produce a more symmetrical
arch removing this problem.
5. FAILURE TO BRING BOTH ARMS IN — When going for the ripcord be sure to bring both arms in out
of the airstream and do not drop the right shoulder or instability will result. If at any stage you are out of
control don’t try to get stable, pull immediately.
6. HARD PULL — It takes less than 22 lbs to open your parachute by moving the ripcord pins about 1”, so
if you movements are forceful it is unlikely that you will ever be worried by a hard pull. If this does
occur, then bring both hands in and pull the ripcord then go back to the arch. If you fumble the ripcord
and drop it or the ripcord has accidentally come out of its pocket, then make only ONE quick try to get
hold of it. If unsuccessful go for the reserve immediately.
7. BUFFETING — This unequal displacement of the air as it passes may cause the body to rock slightly,
first head up then head down (like a see-saw). Slightly moving the position of the arms forward or
backward will generally alleviate this problem and or Arching

ASA PIOM PAGE 26 OF 129 Date of Issue: December 2016 PIOMDec2016 (2) CASA Approved Version.docx Version: 2nd Version
3 — D — 5
LESSON 3
BRIEFING FOR FIRST 7-SECOND DELAY
AREA: Outside
AIDS: Complete main assembly, suspended harness, large box
AIM: To drill student in the procedure for his/her first 7-second delay
CONTENTS REMARKS
EXIT HEIGHT 3,400 feet
1. New count:
(a) ‘One thousand’; Basic stable position.
(b) ‘Two thousand’; Continue to retain position.
(c) ‘Three thousand’;
(d) ‘Four thousand’; Position same as for DRP pull.
(e) ‘Look’ at ripcord handle;
(f) ‘Reach’ and grasp ripcord handle; Practice all on ground and in
stabilised harness.
(g) Pull ripcord handle and commence development
count: one to three thousand, check pilot chute on four
thousand, then continue count to six thousand and
check canopy.
2. Immediately Arch and operate main handle on encountering
instability.
Reinforce Arch and Pull
3. Remedial action for hard pull — both hands at once, then if
still not pulled, go straight for reserve.
4. Retention of handle in jumpsuit or its pocket after completing
all canopy checks.
Handle to be thrown away in
emergencies.
NOTE: Student is now approaching terminal velocity.
QUESTIONS FROM:
QUESTIONS TO:

ASA PIOM PAGE 27 OF 129 Date of Issue: December 2016 PIOMDec2016 (2) CASA Approved Version.docx Version: 2nd Version
3 — D — 6
LESSON 4
BRIEFING FOR FIRST 10-SECOND DELAY
AREA: Outside
AIDS: Complete main assembly, suspended harness
AIM: To drill student in the procedure for his/her first 10-second delay
CONTENTS REMARKS
EXIT HEIGHT 3,800 feet
1. New count:
(a) Look at handle ‘Eight thousand’; To be practiced on ground and in
stabilised harness.
(b) Reach and grasp on ‘Nine thousand’;
(c) Pull on ‘Ten thousand’;
(d) ‘One thousand, two thousand, etc’ —
deployment/reserve activation, count.
2. Student to be aware of acceleration toward terminal velocity,
eg. any movement of limbs will have faster effect on stable
position.
3. Maintenance of heading — gentle rotation of body at waist if
necessary, like turns
4. Remedial action for instability — same as for 7-seconds.
NOTE:
QUESTIONS FROM:
QUESTIONS TO:

ASA PIOM PAGE 28 OF 129 Date of Issue: December 2016 PIOMDec2016 (2) CASA Approved Version.docx Version: 2nd Version
3 — D — 7
LESSON 5
USE OF ALTIMETER
AREA: Outside
AIDS: Complete assembly plus altimeter
AIM: To instruct the student in the use of the altimeter
CONTENTS REMARKS
EXIT HEIGHT 4,000 feet
1. Limitations:
(a) Being mechanical subject to failure;
(b) Lag;
(c) Fragile instrument — to be treated with care.
2. Setting of altimeter at zero for DZ.
3. Use of verbal count in addition to altimeter.
4. Beware of instability through breaking position while looking
at altimeter.
5. Student should be starting to be aware of what 2,000 feet
looks like in case of instrument failure.
6. Danger of sensitive altimeters.
QUESTIONS FROM:
QUESTIONS TO:

ASA PIOM PAGE 29 OF 129 Date of Issue: December 2016 PIOMDec2016 (2) CASA Approved Version.docx Version: 2nd Version
3 — D — 8
LESSON 5 NOTES
USE OF ALTIMETER
Before attempting to use instruments, students should have completed at least one stable 10-second delay to the
satisfaction of the DZSO.
INTRODUCTION:
1. Counting in thousands to time the freefall is satisfactory up to delays of about 10 seconds. After this the
errors caused by faster falling speeds and incorrect counting rate prove too great, and an altimeter is used.
2. An altimeter makes use of the reduced air pressure at higher altitudes to indicate height above the ground.
The instrument is easily read in freefall.
PROCEDURE:
1. 1st jump exit height 3,700 feet for a 10-second delay.
2. After stabilising, look briefly at the instrument by lowering the head while still holding an arched
position. Look at the instrument two or three times throughout the descent but counting as normal. Pull on
the count of ‘ten thousand’.
3. 2nd jump exit height 3,900 feet for 12-second delay.
4. The second jump is the same as the first except it is a longer delay. Read the altimeter and pull the
ripcord at 2,500 feet. Student may cease counting in freefall at this stage if completely confident.
POINTS TO WATCH FOR:
1. The altimeter MUST be set to read ZERO on the drop zone before you board the aircraft.
If the drop zone is located at a higher altitude than the airfield then compensate by setting the altimeter
below ZERO before emplaning. Jumper usually cross checks against another jumper’s altimeter with their
own while the aircraft is climbing to jump height. Do NOT alter the altimeter while in the aircraft.
2. When looking at the instrument in freefall just lower the head enough to see it. Lowering the head too
much could cause you to fall in a head down position.
3. Like a lot of other mechanical devices, altimeters can become faulty.As you do more jumps you become
more aware of your surrounds. All parachutists develop a method of checking their own height against
their altimeter. This is called ‘EYE-BALLING’. This is using your sight to judge height above the
ground. A good method of learning this is to look at the ground as you pull your ripcord and you will
soon know what buildings, trees, roads, etc. look like at correct opening height.
4. If ever in any doubt at all about your height release your main canopy IMMEDIATELY.

ASA PIOM PAGE 30 OF 129 Date of Issue: December 2016 PIOMDec2016 (2) CASA Approved Version.docx Version: 2nd Version
3 — D — 9
LESSON 6
THE DELTA
AREA: Outside/Lecture Room
AIDS: Suspended harness, slides, large box
AIM: To teach the student the Delta position
CONTENTS REMARKS
EXIT HEIGHT 4,500 feet
1. Using a box or suspended harness teach the following.
2. Stabilise in the first 4-5 seconds and pick a reference point on
the ground for a heading.
3. Sweep your arms slowly back from the arch position.
4. As you move your arms back you will tilt forward and go into
a dive. The angle of the dive will depend on the angle of your
arms, about 45 degrees maximum. Your rate of descent will
increase to about 150 mph.
5. Keep your head well back and your legs straight while
maintain an arch
6. Maintain your heading. Turns can be made by dipping a
shoulder in the desired direction to turn.
7. From the head back position glance down at the altimeter at
frequent intervals.
8. After approximately 7 seconds in the Delta adopt the basic
stable spread position and pull the ripcord at 2,500 feet.
9. Advise the student that the Delta is a good position to recover
from instability.
QUESTIONS FROM:
QUESTIONS TO:

ASA PIOM PAGE 31 OF 129 Date of Issue: December 2016 PIOMDec2016 (2) CASA Approved Version.docx Version: 2nd Version
3 — D — 10
LESSON 6 NOTES
THE DELTA
INTRODUCTION:
1. Before attempting this manoeuvre students should have completed all previous stages of the minimum
training program to the satisfaction of the DZSO.
2. This manoeuvre will be attempted from an altitude of 4,500 feet during a 15-second delay, pulling the
ripcord at not lower than 2,500 feet.
3. The Delta position is used to enable an experienced skydiver to move across the sky, eg. during a relative
jump, etc.
4. Golden Rules:
a) Never sacrifice altitude for stability
b) If in doubt, whip it out
c) Try Once, Try Twice, And Try Something Else.
PROBLEMS:
1. If at any stage you lose control while attempting this manoeuvre then briefly arch hard and pull the
ripcord.
NB: When deploying you main or reserve parachute while being unstable or in any controlled
or uncontrolled manoeuvre the opening of the parachute may not be clean. (possible line
twists, malfunctions may occur)
2. Avoid opening your parachute in the Delta position as there will be a greater opening shock and
damage could be caused to your canopy. Also as you are in the feet high position there is a
possibility that your legs may tangle in the rigging lines.
3. Deltas must not be completed up or down the direction of the jump run.

ASA PIOM PAGE 32 OF 129 Date of Issue: December 2016 PIOMDec2016 (2) CASA Approved Version.docx Version: 2nd Version
3 — D — 11
LESSON 7
THE FROG/BOX POSITION
AREA: Outside/Lecture Room
AIDS: Suspended harness, slides, large box
AIM: To teach the student the Frog/Box position
CONTENTS REMARKS
EXIT HEIGHT 4,500 feet
1. Using a suspended harness or box demonstrate and explain
the following:
2. This manoeuvre is made from an altitude of 4,500 feet during
a 15-second delay pulling the ripcord at not lower than 2,500
feet.
3. The Frog/Box position is used by all experienced parachutists
as the basic freefall position. It becomes, with experience, a
very relaxed position and one from which other manoeuvres
such as turns are more easily made.
Note: Students to practice on box or
in harness a number of times.
4. Leave the aircraft in the hard arch position. After 4-5 seconds,
slowly bring your arms in so a 90 angle is formed behind each
elbow. Bend your legs up so that a 45 degree angle is formed.
You still maintain your arch. Maintain your heading by
reference to a large feature on the horizon.
Explain leg turns, etc, but students not
to attempt at this stage.
5. After 5-7 seconds in the Frog/Box, check your altimeter. Pull
the ripcord at 2,500 feet.
6. Any tendency to turn due to lack of symmetry will be
exaggerated in this position. If a turn persists for more than
three revolutions pull the ripcord immediately. Do not attempt
too tight a position on this first attempt. Do not forget your
legs! Ground practice should be done lying face down, not
standing up. Slight rocking or buffeting may set in if your
position is too stiff. Maintain your arch but relax your limbs a
little.
If a slow turn no problem, only pull if
a slow turn starts to increase rotation
speed and you become disorientated
and you are getting out of control.
NOTE: Line twist may occur if
parachute is deployed while turning
QUESTIONS FROM:
QUESTIONS TO:

ASA PIOM PAGE 33 OF 129 Date of Issue: December 2016 PIOMDec2016 (2) CASA Approved Version.docx Version: 2nd Version
3 — D — 12
LESSON 8
BASIC TURNS
AREA: Outside/Lecture Room
AIDS: Suspended harness, slides, large box
AIM: To teach the student simple body turns
CONTENTS REMARKS
EXIT HEIGHT 5,500 feet
1. Selection of heading.
2. Execution of turn by turning the head, and by dipping the
shoulder in the direction of the turn.
To practice on ground and in
stabilised harness, or box.
3. Stopping on new heading (correct in opposite direction just
before new heading is reached).
Emphasis in this lesson to be placed
on simplicity. No push or leg turns at
this stage.
4. Remedial action for loss of stability as already taught. Delta pull.
QUESTIONS FROM:
QUESTIONS TO:

ASA PIOM PAGE 34 OF 129 Date of Issue: December 2016 PIOMDec2016 (2) CASA Approved Version.docx Version: 2nd Version
3 — D — 13
LESSON 8 NOTES
TURNS
Turns may only be attempted after satisfactorily completing Stage 7 of the Static Line Training table program
and obtaining the permission of an instructor. Turns are made from an altitude of 5,500 feet during a 20-second
freefall delay and the parachute must be open at an altitude not lower than 2,200 feet.
Turns are made by deflecting the airflow past the jumper’s body and may be made by using the hands, arms, legs
or body, separately or in any combination. The effect of a particular body movement in making a turn depends
on airspeed and hence turns are slower when falling at sub-terminal speeds than they are after reaching terminal
velocity. Turns do not commence immediately with body movement and the student should be prepared to hold
the position until it takes effect. The same applies when stopping turns, thus the student should counteract the
turn just prior to reaching the desired heading. Usually, a more exaggerated position is required for counteracting
because turns tend to speed up as the jumper rotates.
When first learning turns, study and practice the following procedures:
1. Leave the aircraft from the poised exit position;
2. Assume the basic stable spread position;
3. As speed builds up settle into the relaxed arch or frog/box position;
4. Select a ground reference point on the horizon or at least out and away from the drop zone.
5. Apply a small turning movement by moving one hand down and out (about 3” — 6”) and dipping the
shoulder slightly.
6. WAIT until the turn commences, once the turn begins, look ahead in the direction of the turn and watch
for the ground reference point to re-appear.
7. At about 45 degrees before the heading start counteracting the turn by making a turning movement in the
opposite direction.
8. As the turn slows to a stop on the reference heading, settle back into your original relaxed arch or
frog/box position.
9. CHECK YOUR ALTIMETER.
10. Practice the turn and turn stop positions on the ground before the jump. Have the position checked by an
instructor.
PROBLEMS TO AVOID:
1. A caution to be observed is the cancelling affect of the legs. For example: if the right arm is dropped and
the left leg is raised one action will cancel the other and no turn will result.
2. At first attempts, you may find turns start all right but due to the fact that they speed up your attempt to
stop the turn is ineffective and the turn continues or even accelerates, this uncontrolled turn is called a
“SPIN”. If a spin is allowed to continue it may disorientate the jumper, therefore if a spin remains
uncontrolled for more than 3 seconds pull the ripcord. Line twist may occur.

ASA PIOM PAGE 35 OF 129 Date of Issue: December 2016 PIOMDec2016 (2) CASA Approved Version.docx Version: 2nd Version
3 — D — 14
LESSON 9
BACKLOOP
AREA: Outside/Lecture Room
AIDS: Suspended harness, slides, large box
AIM: To teach the student the backloop
CONTENTS REMARKS
EXIT HEIGHT 5,500 feet
1. Before attempting this manoeuvre students must have
completed all previous stages of the minimum training
program to the satisfaction of the DZSO. Exit height for this
jump is 5,500 feet, the delay is 20 seconds and opening height
is 2,200 feet.
2. In the backloop one makes use of the air flow with arms and
legs to perform a manoeuvre similar to a backward
somersault. The backloop, like the previous turns, teaches
control of the air flow, which subsequently improves ability
and confidence in freefall. Turns and backloops will be
combined later to perform a figure-eight and backloop, the
series of manoeuvres used in competition ‘style sets’.
3. The backloop is to be executed at terminal velocity after
about 10 seconds of the delay and is started from the Frog or
fullspread position. Bring both arms straight out forward and
push them down to a point level but out from the sides of your
body. At the same time bring your knees quickly up toward
your chest and throw your head straight back. These three
actions are combined into one vigorous movement. When
head down snap back into the full spread position and you
will stable out completing the loop.
CHECK YOUR ALTIMETER
See attached notes.
NOTE: Practice this procedure on the ground until you think you have it right and then have the
movements checked by an instructor before jumping.
QUESTIONS FROM:
QUESTIONS TO:

ASA PIOM PAGE 36 OF 129 Date of Issue: December 2016 PIOMDec2016 (2) CASA Approved Version.docx Version: 2nd Version
3 — D — 15
LESSON 9 NOTES
BACKLOOP
PROBLEMS:
1. Rolling off to the side at the top of the loop. This is caused by starting the loop when not completely
stable, or having the arms too close to the body, losing lateral stability.
2. Completing only half the loop. As all the looping force is produced in the first half of the loop, sufficient
momentum must be gained to carry it through by positive movements of the arms, legs and head.
3. Making a succession of loops. Here the jumper has not arched out after the top of the loop in time to
stable out.
ASA PIOM PAGE 37 OF 129 Date of Issue: December 2016 PIOMDec2016 (2) CASA Approved Version.docx Version: 2nd Version
3 — D — 16
LESSON 10
FAST AND SLOW FALL
AREA: Outside/Lecture Room
AIDS: Suspended harness, slides, large box
AIM: To teach the student fast and slow falls
CONTENTS REMARKS
The manoeuvres are performed from an altitude of 6,000 feet during
a delay of 25 seconds, pulling the ripcord not lower than 2,200 feet.
1. The fast and slow fall positions enable you to adjust your rate
of descent. On this jump you are required to assume both the
fast fall and the slow fall positions by presenting the minimum
and maximum possible body area to the air. The positions are
used extensively in later relative work jumps when you will
need to be able to control your vertical speed in relation to
others.
2. Exit the aircraft, assume a medium frog position and find a
suitable reference point on the ground for a heading.
3. After about 8-10 seconds assume the slow fall position by
adopting a reverse arch (commonly called DE-ARCHING).
This is achieved by curving the body forward at the waist and
imagining that you are lying on top of a big ball with your
body following its shape. Turning your head sideways will
assist in maintaining your view on fellow skydivers in the sky;
hold this position for about 5 seconds.
See attached notes
4. Now assume the fast fall position by simultaneously bringing
your arms in so that the hands are close to your shoulders and
tucking your legs up. This position could be described as a
very tight frog.
5. Hold this position for about 5 seconds to enable your speed to
increase. Small adjustments will be required almost
continuously to maintain your heading and stability.
6. Once again adopt the slow fall position and check your
altimeter. Hold this position until it is time to pull the ripcord
at 2,200 feet.
QUESTIONS FROM:
QUESTIONS TO:
ASA PIOM PAGE 38 OF 129 Date of Issue: December 2016 PIOMDec2016 (2) CASA Approved Version.docx Version: 2nd Version
3 — D — 17
LESSON 10 NOTES
FAST AND SLOW FALL
POINTS TO WATCH FOR:
1. In both the fast and slow fall positions stability is harder to maintain and continuous adjustments may
need to be made. If at any time you lose stability, delta or arch hard and if sufficient height remains make
another attempt.
ASA PIOM PAGE 39 OF 129 Date of Issue: December 2016 PIOMDec2016 (2) CASA Approved Version.docx Version: 2nd Version
3 — D — 18
LESSON 11
TRACKING
AREA: Outside/Lecture Room
AIDS: Suspended harness, slides, large box
AIM: To teach the student how to track
CONTENTS REMARKS
EXIT HEIGHT 7,000 feet
1. Explanation of basic positions. Similarity to aerofoil section. Practice on the ground and in
stabilised harness, or box.
2. Movement into tracking position in freefall via Delta position.
3. Awareness of increase of speed. Student should not be
worried by this.
4. Maintenance of heading.
5. Warning of altimeter lag.
6. Flare out before pull.
7. Exit and opening points detailed before practical exercise.
8. Before attempting this manoeuvre students must have
satisfactorily completed Stage 8 of the minimum training
program and have the permission of the DZSO. The exit
height for this jump is 7,000 feet. the delay is 30 seconds and
deployment height is 2,200 feet.
9. The maxtrack is a modified Delta, generating a high forward
speed, and is the ultimate means a parachutist has at his/her
disposal to cover distance horizontally whilst in freefall. The
rate of descent is only slightly higher than in the frog position
because the higher forward speed (up to 80mph) produces an
airflow over the body similar to that of the airflow over the
wing of an aircraft, generating some degree of lift. Its three
main uses are: to cover distance over the ground if you realise
after exiting that you are off the wind line; to give horizontal
separation between relative workers after break-off; to close
large horizontal distances between a relative worker and the
base.
QUESTIONS FROM:
QUESTIONS TO:

ASA PIOM PAGE 40 OF 129 Date of Issue: December 2016 PIOMDec2016 (2) CASA Approved Version.docx Version: 2nd Version
3 — D — 19
LESSON 11 NOTES
MAXTRACK
THE JUMP:
To make the jump easier to see, exit off the wind line and Maxtrack across toward the opening point. Be sure an
instructor observes the jump from the aircraft or the ground.
PROCEDURE:
Leave the aircraft from the poised exit position. After approximately 5 seconds assume the Delta position then
bend the arms at the elbows to bring the hands just below the body, about 6” — 8” out, cup the hands and spread
the fingers to gain as much lifting surface as possible. Round the shoulders, to form a hollow or concave at the
chest, arms may be dropped a little to help produce this hollow, but not too much. Force the head back against
the top of the backpack. Bend a little at the waist putting a hump in your back. Stretch and point your toes, feet
6” — 8” apart. About every 5 seconds check your altitude; at 3,000 feet flare out into a full spread (hands high
position) to decelerate. Pull the ripcord at 2,200 feet.
Put real effort into the Maxtrack. Once in the position, really strain your muscles to hold it. You should be trying
to push the main off your back with your head, trying to push your fingers through your gloves, your toes
through your boots and make your legs stiff as boards. Get a hump in your back and the amount of reverse arch
you apply is the key to the secret of mastering the Maxtrack.
COMMON PROBLEMS:
1. To maintain a heading occasional minor shoulder corrections may be necessary throughout the track.
Dipping the right shoulder will turn you right.
2. If you find yourself going head down correct this by easing your hands out from your thighs.
WARNINGS:
1. Try not to dump in a Maxtrack or the higher opening shock may damage your canopy.
2. Altimeters may lag slightly behind actual height because of air pressure changes in this position.
3. Don’t become engrossed in tracking to a point — make regular checks of height — stop max track and
slow down at 2,000 feet above main deployment height.
4. Tracking on aircraft heading should be avoided
MAIN POINTS:
1. Feet 6” apart.
2. Bend at waist.
3. Toes pointed.
4. Bend elbows.
5. Head back.
6. Hands 6” from thighs, cupped and spread.
7. Round shoulders.

ASA PIOM PAGE 41 OF 129 Date of Issue: December 2016 PIOMDec2016 (2) CASA Approved Version.docx Version: 2nd Version
3 — E — 1
ANNEX E TO SECTION 3
‘A’ Licence Examination
1 This examination is to be successfully completed after a student has completed the Training Descent
Table and before making application for an ‘A’ Licence.
2. The examination is in two parts:
(a) Written
The written paper is at Appendix 1 to this Annex and includes questions on ASA Op Regs and general
knowledge. Any student scoring less than 85% on the written paper must remain on student status until
he/she can pass a supplementary examination.
(b) Practical
The student is to demonstrate the ability to:
(1) Pack a minimum of 20 main parachutes and be able to identify and rectify line tangles,
turns and twists.
(2) Student must be able to pack a main parachute within 45 minutes after a series of tangles
has been applied to that parachute.
(3) Proficiency in spotting.
(4) Have his/her logbook endorsed by the Chief Instructor as being proficient in being able to
pack a main parachute for his/her own use.
Appendix 1
‘A’ Certificate Written Examination (Sample)

ASA PIOM PAGE 42 OF 129 Date of Issue: December 2016 PIOMDec2016 (2) CASA Approved Version.docx Version: 2nd Version
3 — E — 2 APPENDIX 1 – ‘A’ CERTIFICATE WRITTEN EXAMINATION (SAMPLE)
‘A’ Licence Theory Examination
Now that you have accepted our Invitation to Adventure, and have
decided to stay with the sport, in order to test your knowledge of
parachuting regulations and theory that affects your safety, and as
one of the steps to gaining your ‘A’ Certificate, you are required to
satisfactorily complete the following review.
By continuing with this sport
you will change your life,
your outlook,
your career,
your future.
AUSTRALIAN SKYDIVING ASSOCIATION
continues to welcome you
to the challenging and
exciting sport of
Skydiving!

ASA PIOM PAGE 43 OF 129 Date of Issue: December 2016 PIOMDec2016 (2) CASA Approved Version.docx Version: 2nd Version
3 — E — 3
AUSTRALIAN SKYDIVING ASSOCIATION ‘A’ Licence Theory Examination
PLEASE DO NOT WRITE ON THIS EXAMINATION PAPER
Select the correct answer from those given. Indicate your choice by circling the appropriate letter on the
answer sheet.
Pass mark: 85% Time Limit: 1 hour
1 Approved flotation equipment must be worn by a parachutist with an ‘A’ licence or higher when
a descent is made within ............ of an open body of water broader than 100 metres and deeper
than 1 metre?
(a) 100 metres (b) 300 metres (c) 1000 metres (d) 1,500 metres
2 An altimeter must be worn on delays exceeding .......... seconds?
(a) 10 seconds (b) 15 seconds (c) 20 seconds (d) 30 seconds
3 On descents above FL 140 oxygen equipment must be used above?
(a) 10,000 feet (b) 12,000 feet (c) 13,000 feet (d) FL 140
4 The minimum height at which RW participants must separate is .......... above planned opening
height.
(a) 500 feet (b) 750 feet (c) 1000 feet (d) 1,500 feet
5 A Wind Drift Indicator must be used?
(a) On the first sortie of the day.
(b) If you think the spot may have altered.
(c) If directed by the DZSO to do so.
(d) All of the above.
6 A Target Assistant must be at the target?
(a) When students are being despatched.
(b) When any descent is made.
(c) If the wind is gusting.
(d) In order to verify your accuracy.
7 A DZSO-approved hard-shelled helmet is required until gaining your?
(a) ‘B’ licence.
(b) ‘C’ licence.
(c) ‘D’ licence.
(d) B-rel qualified.
8 An ‘A’ licence holder may take part in two-person relative descents if under the direct
supervision of?
(a) A coach.
(b) An Australian Star Crest holder.
(c) A ‘D’ licence holder.
(d) The DZSO.
9 Repair of parachutes may only be made by?
(a) Any licenced parachutist.
(b) A rigger.
(c) A parachute dealer.
(d) An instructor.

ASA PIOM PAGE 44 OF 129 Date of Issue: December 2016 PIOMDec2016 (2) CASA Approved Version.docx Version: 2nd Version
10 When using panels, which of the following indicates orbit aircraft?
(a) (b) (c) (d)
11 A logbook will contain amongst other details?
(a) The type of parachute descent.
(b) The type and registration of the aircraft used.
(c) The height above ground level from which the descent began.
(d) All of the above.
12 As an ‘A’ licence holder, the minimum height from which a descent may be made is?
(a) 1,800 feet (b) 2,000 feet (c) 2,200 feet (d) 2,500 feet
13 A parachutist will need to be assessed by an Instructor ‘B’ if he/she has not made a parachute
descent in the preceding..........?
(a) 3 months (b) 6 months (c) 9 months (d) 12 months
14 Reserve parachutes must be inspected and repacked every six months by?
(a) A rigger or Packer ‘A’.
(b) A Licenced Display Organiser.
(c) A DZSO.
(d) The manufacturer.
15 Who may organise a parachute display?
(a) A Chief Instructor.
(b) A Licenced Display Organiser.
(c) A DZSO.
(d) An instructor.
16 A parachute descent other than a display descent shall not be made onto a DZ that is closer than
.......... to a populous area where the parachutist wears steerable main and reserve parachutes?
(a) 150 metres (b) 300 metres (c) 600 metres (d) 1,500 metres
17 A parachutist shall not make a descent within .......... of consuming any alcoholic beverage?
(a) 6 hours (b) 8 hours (c) 12 hours (d) 24 hours
18 A parachute descent shall not commence when the wind at eye-level exceeds?
(a) 16 knots (b) 20 knots (c) 25 knots (d) 15 knots
19 If your weight (including rig) is 160 pounds and the size of your main canopy is 200 square feet,
your wing loading is?
(a) 0.8 (b) 40 (c) 1.25 (d) -40
20 All articles carried by a parachutist during a descent must be?
(a) Very light.
(b) Of bright colour.
(c) Secured to the person.
(d) Bio-degradable.

ASA PIOM PAGE 45 OF 129 Date of Issue: December 2016 PIOMDec2016 (2) CASA Approved Version.docx Version: 2nd Version
21 Descents may be conducted into a flying training area of a licenced aerodrome with approval
from?
(a) Approval not required if flying not in progress.
(b) A Licenced Display Organiser.
(c) The aerodrome operator.
(d) A Chief Instructor.
22 Footwear, clothing and equipment used in a descent is to be approved by?
(a) ASA — in Operational Regulations.
(b) The ASO or Chief Instructor.
(c) DZSO.
(d) Jumpmaster.
23 As a ‘B’ licence holder with a ‘D’ Display licence what is the minimum distance needed from
landing hazards?
(a) 125 metres (b) 150 metres (c) 175 metres (d) 200 metres
24 As an ‘A’ licence holder still on your B-rel training you are only permitted to engage in relative
work with?
(a) Any number of parachutists.
(b) No restriction if approved by any instructor.
(c) An instructor or an approved tutor until the completion of stage 6 of the B-rel table and then with
up to four other parachutists approved by the DZSO.
(d) A minimum of five other parachutists of your choice.
25 The wind speed should be below limits for at least .......... before commencing or resuming
operations?
(a) 10 minutes (b) 30 minutes (c) 45 minutes (d) 60 minutes
26 All descents shall be made in conditions such that?
(a) The pilot has identified the target.
(b) There is no more than four eighths cloud cover over the DZ.
(c) The general area is identified.
(d) The target is clearly visible and the parachutist does not enter cloud.
27 Who can act as a DZSO on a DZ during student operations?
(a) A jumper with a ‘B’ licence or above.
(b) An Instructor ‘B’ or above delegated to do so.
(c) Any Instructor ‘B’ or ‘A’.
(d) Any highly experienced jumper.
28 The training requirements for Packer ‘A’ or ‘B’ can be found in?
(a) Poynter’s Manual.
(b) CAOs.
(c) ASA Parachute Instructors and Operations Manual.
(d) ASA Operational Regulations.

ASA PIOM PAGE 46 OF 129 Date of Issue: December 2016 PIOMDec2016 (2) CASA Approved Version.docx Version: 2nd Version
3 — E — 6
29 Which of the following are required for the ASA ‘A’ licence?
(a)
1. Have completed the Training Descent Table as laid down in the ASA Operational Regulations.
2. Have the approval of the Chief Instructor to pack your own parachute.
3. Have landed within 25 metres of the target on ten freefalls of over 10 seconds.
4. Have passed a written examination set and conducted under the supervision of a Chief Instructor.
(b)
1. Have completed the Training Descent Table as laid down in the ASA Operational Regulations.
2. Be at least 16 years of age.
3. Have the approval to pack any main parachute.
4. Deemed to be safe to work with two other persons in RW.
(c)
1. Have completed the Training Descent Table as laid down in the ASA Operational Regulations.
2. Be at least 17 years of age.
3. Have completed at least six descents in the previous three months.
4. Have passed both a written and a practical examination with a minimum of 75%.
(d)
1. Have completed the Training Descent Table as laid down in the ASA Operational Regulations.
2. Be at least 18 years of age.
3. Have passed the Packer ‘B’ practical examination.
4. Have the approval of a Chief Instructor as to a knowledge of safety.
30 During student training the minimum qualification for the TA is?
(a) ‘A’ licence.
(b) Hold a Target Assistant Authority issued by a Chief Instructor.
(c) ‘D’ licence.
(d) Approved by the DZSO.
31 Wind speed is determined by measurement with an instrument?
(a) At eye-level then add 25%.
(b) At eye-level then subtract 25%.
(c) At 30 feet then add 25%.
(d) At eye-level.
32 When are jumps no longer considered training descents?
(a) After obtaining your ‘A’ licence certificate.
(b) After completing the Training Descent Table.
(c) After 25 descents.
(d) After obtaining your ‘B’ licence certificate.
33 As an ‘A’ licence holder you are able to jump any container/system?
(a) Yes, but only those you are totally familiar with.
(b) No, you must stay on the same system.
(c) Yes, if the owner approves.
(d) No, you must have a ‘B’ licence certificate.

ASA PIOM PAGE 47 OF 129 Date of Issue: December 2016 PIOMDec2016 (2) CASA Approved Version.docx Version: 2nd Version
3 — E — 7
34 As a visiting jumper, it is your responsibility to have your gear checked by?
(a) Any ‘A’ licence parachutist.
(b) The DZSO.
(c) A rigger or Packer ‘A’.
(d) Any instructor.
35 Should all jumpers on a load be aware of all planned opening heights?
(a) Only if they are doing canopy relative work.
(b) No, only their own.
(c) Yes, you must be aware of all opening heights.
(d) No, only the pilot should be concerned.
36 You intend to make a descent where the DZ is 500 feet above the take-off area. Before take-off,
your altimeter should be?
(a) Set at 0.
(b) Set at 500 feet.
(c) Set 500 feet below 0.
(d) Set at 1000 feet.
37 When you visit another DZ, your equipment should be checked?
(a) When you arrive on the DZ.
(b) Prior to boarding the aircraft.
(c) Just before you exit the aircraft.
(d) It doesn’t have to be checked if you hold a current ‘A’ licence certificate.
38 An equipment check is normally carried out?
(a) A jumper with an ‘A’ licence needn’t worry.
(b) To satisfy the pilot.
(c) Prior to boarding the aircraft and prior to exit.
(d) For the load organiser only.
39 Who is able to sign your logbook to authenticate your jumps?
(a) Any parachutist.
(b) The pilot or ‘B’ licence holders and above.
(c) Only the DZSO.
(d) Any observer.
40 After completing your ‘A’ licence training what is your first B-rel descent?
(a) Slow and fast fall with the instructor.
(b) Basic pinning techniques with the instructor.
(c) Fly a stable base and observe the instructor.
(d) Chase the instructor and fly level to break-off height.
41 A trainee must complete skill level .......... of the RW Training Descent Table before participating
in any other relative work descent?
(a) Stage 3 (b) Stage 5 (c) Stage 6 (d) Stage 4

ASA PIOM PAGE 48 OF 129 Date of Issue: December 2016 PIOMDec2016 (2) CASA Approved Version.docx Version: 2nd Version
3 — E — 8
42 Who is able to sign your logbook while doing training descents?
(a) An ‘A’ licence holder.
(b) A ‘B’ licence holder.
(c) The instructor supervising the jump.
(d) An observer in the aircraft.
43 Completion of the B-rel Training Descent Table requires a minimum freefall time of?
(a) 8 minutes (b) 10 minutes (c) 12 minutes (d) 15 minutes
44 When must qualifying descents be nominated to the DZSO?
(a) At the start of the day.
(b) Before emplaning.
(c) After the dirt dive.
(d) Whilst climbing to height.
45 For an ‘A’ licence holder, the minimum distance from the target to any landing hazard shall be?
(a) 300 metres (b) 150 metres (c) 125 metres (d) 100 metres
46 You have become an ‘A’ licence holder. What jumps are you now permitted to participate in?
(a) A 2-way with an approved B-rel tutor up to skill level 6.
(b) A 2-way with another ‘A’ licence holder.
(c) Up to a 3-way with ‘C’ and ‘D’ licence holders.
(d) Any jump you decide on so long as it is safe.
47 Who has the authority to enforce the Operational Regulations and carry out any disciplinary
action on a DZ?
(a) The manifester.
(b) An ‘F’ licence holder.
(c) The DZSO.
(d) Any instructor.
48 You have just completed your ‘A’ licence. Whose advice should you seek regarding the purchase
of your parachuting equipment?
(a) Any jumper from a recognised DZ.
(b) A ‘C’ licence holder or above.
(c) Any parachutist who holds an ASA licence.
(d) An instructor or rigger that you know and who is familiar with your needs.
49 Students who have not completed their ‘A’ licence are only permitted to?
(a) Jump at the one DZ at which they are conducting their training.
(b) Jump at any DZ.
(c) Jump where their friends invite them.
(d) Between two or three DZs as they see fit.
50 Which combination of equipment is recommended during your early RW skydiving career and
training descents?
(a) Tinted goggles, helmet, chest-mounted altimeter and approved footwear.
(b) Clear goggles, helmet, chest-mounted altimeter and approved footwear.
(c) Wrist-mounted altimeter, clear goggles, helmet and approved footwear.
(d) Clear goggles, chest-mounted altimeter, no helmet and at least sandals.

ASA PIOM PAGE 49 OF 129 Date of Issue: December 2016 PIOMDec2016 (2) CASA Approved Version.docx Version: 2nd Version
3 — E — 9
‘A’ LICENECE THOERY EXAMINATION – ANSWER SHEET (SAMPLE)
‘A’ Licence Theory Examination Answers to the following questions need to be clearly written on the back of your answer sheet. These
questions must be answered to the satisfaction of the examining instructor in order to pass this
examination.
51 You are a visiting jumper away from your normal DZ or location. What requirements, as specified in
the Operational Regulations, must be in place before you can legally jump there?
For example, person in charge, qualifications required, DZSO, CI, training organisation, delegating of
authority, checks required, reporting required.
Answer for both an ‘A’ licence holder and for a ‘B’ licence holder and above.
52 Why are tinted goggles not recommended for participating in RW?
53 Before you travel to or visit other DZs would you consider asking you own instructional staff for some
advice? What questions would you ask, what information would you seek from them, and why?
54 CRW requirements:
(a) When would you be allowed to attempt CRW?
(b) Who is to do the training?
(c) Where would you find these training requirements and sources?
(d) What requirements should you fulfil before commencing CRW?
55 Camera work requirements:
(a) When would you be allowed to attempt camera?
(b) Who is to do the training?
(c) Where would you find these training requirements and sources?
(d) What requirements should you fulfil before commencing camera?
56 You are an ‘A’ licence holder. You jump regularly with a group of friends. You notice one of your
friends finishing a can of beer prior to your planned RW jump. Describe in detail what action you
would take and why.
57 You are an ‘A’ licence holder. You become aware that your friend’s altimeter has read wrongly on
several previous descents. Describe in detail what action you would take and why?
58 You are an ‘A’ licence holder having a social drink in the bar with your fellow jumpers. You overhear a
student on backloop advising and briefing another junior student on their next jump. What action would
you take and why?
59 How would you promote student retention within the sport at your level? What input would you offer to
encourage and maintain your fellow jumpers within the club?
60 You know that one of your friends has not had his/her out-of-date reserve repacked this week. He/she is
promising you to have it done by next weekend. What action would you take and why.

ASA PIOM PAGE 50 OF 129 Date of Issue: December 2016 PIOMDec2016 (2) CASA Approved Version.docx Version: 2nd Version
3 — E — 10
‘A’ LICENECE THOERY EXAMINATION – ANSWER SHEET (SAMPLE)
ANSWER SHEET
BEFORE CORRECTION: If you have circled your choice and wish to change your mind strike out and
INITIAL, then circle your new choice.
Name: ..................................................... Instructor: ............................................ Score: ......
Date: / /
CIRCLE THE CORRECT ANSWER
1 A B C D 28 A B C D
2 A B C D 29 A B C D
3 A B C D 30 A B C D
4 A B C D 31 A B C D
5 A B C D 32 A B C D
6 A B C D 33 A B C D
7 A B C D 34 A B C D
8 A B C D 35 A B C D
9 A B C D 36 A B C D
10 A B C D 37 A B C D
11 A B C D 38 A B C D
12 A B C D 39 A B C D
13 A B C D 40 A B C D
14 A B C D 41 A B C D
15 A B C D 42 A B C D
16 A B C D 43 A B C D
17 A B C D 44 A B C D
18 A B C D 45 A B C D
19 A B C D 46 A B C D
20 A B C D 47 A B C D
21 A B C D 48 A B C D
22 A B C D 49 A B C D
23 A B C D 50 A B C D
24 A B C D 51 A B C D
25 A B C D 52 A B C D
26 A B C D 53 A B C D
27 A B C D 54 A B C D
I answered the following questions incorrectly and after discussion with my instructor I now fully
understand the correct answer.
Q:
A:

ASA PIOM PAGE 51 OF 129 Date of Issue: December 2016 PIOMDec2016 (2) CASA Approved Version.docx Version: 2nd Version
4 — 1
SECTION 4: Accelerated Freefall (AFF) Training Program
4.1 General
4.1.1 The AFF Training Program consists of ground training and 9 stages. Each stage comprises a pre-
jump briefing, one jump and post-jump debrief. The contents of the ground training are designed
to give the student the appropriate knowledge and skills to complete the jump safely and
competently. The Ground Training Program is at Annex A to this Section.
4.1.2 Lesson plans for the particular subjects in this program are to be supplied by the instructor
conducting the course and/or training and approved by the Chief Instructor. Lesson Plans specific
to the AFF Training Program can be found in Attachment #2.
4.2 Ground Training
4.2.1 The content of the ground training may be summarised as follows:
(a) Introduction: General knowledge on how the sport is administered, regulations, safety,
drop zone location and rules and an outline of the course content;
(b) Equipment: The equipment to be used, its operation and characteristics is given so
students fully understand how it works and feel confident with the equipment. Includes
field recovery and packing;
(c) Aircraft Drills/Procedures: The conduct of the jump from the time of manifesting to exit,
with emphasis on the procedures required from emplane to exit, including the safety
aspects associated with aircraft operations, including aircraft emergencies;
(d) Stability/Freefall Control: An understanding of the theory of stability and how it can be
achieved, including practical training on the stable arch position, the count and freefall
emergencies;
(e) Canopy Control: How to check that the canopy is properly deployed, and how to control
the canopy to achieve a safe landing back at the target, including the method of target
assistance to be used;
(f) Emergencies/Hazards: Learn to recognise and distinguish between a good canopy and a
malfunction and know the actions to take for the types of parachute emergencies (including
drag recovery);
(g) Landings: Practical instruction in the correct execution of parachute landings, including
landing hazards, and off drop zone landing both under a main or reserve parachute;
(h) Practice Drills: All aspects of exits, stability, twists, emergencies, hazards, canopy control
are practiced utilising a suspended harness type training aid;
(i) Freefall Procedures: Students will be required to demonstrate the freefall procedures and
skills of each stages of this table; and
(j) Examination/Review: Students are required to complete both a practical and a written
examination/review prior to the first jump. It will test the student’s theoretical knowledge
and practical ability in those areas covered in the training program. The
examination/review is at Annex B to this Section.
4.3 Training Descent Table
4.3.1 Student progression is to be in accordance with the Training Descent Table at Annex C. In outline
it consists of the following stages:
(a) Stage 1 — Orientation;
(b) Stage 2 — Forward Movement;
(c) Stage 3 — Hover Control;
(d) Stage 4 — Consolidation Dive;
(e) Stage 5 — Turns and Docking;
(f) Stage 6 — Consolidation Dive;
(g) Stage 7 — Backloops and Tracking;
(h) Stage 8 — Fast and Slow Fall; and
(i) Stage 9 — Clear and Pull.
4.3.2 The Chief Instructor may, at his discretion, allow a student to make a solo descent between Stages
6, 7 and 8 for the purpose of consolidating and polishing manoeuvres prior to advancing to the
next stage.
ASA PIOM PAGE 52 OF 129 Date of Issue: December 2016 PIOMDec2016 (2) CASA Approved Version.docx Version: 2nd Version
4.3.3 Instruction for each stage of the Training Descent Table will comprise:
(a) A pre-jump briefing which includes:
- an explanation of the aims of the jump;
- an explanation of the sequence of the jump;
- skill development periods and rehearsals; and
- a discussion on the exit point, canopy control and landing procedure.
(b) The jump which includes:
- a demonstration of skill by the student;
- communication between the student and jumpmasters;
- correction of the student by the jumpmasters;
- remembering for recall the events of the jump; and
- assessment of the student by the jumpmasters.
(c) A post-jump debrief which includes:
- recall of the jump by the student and jumpmasters;
- viewing and assessment of the jump on video (if available);
- explanations and demonstrations by the student and jumpmasters; and
- assessment of the student by the jumpmasters.
4.3.4 Lesson guides applicable to the Training Descent Table are at Annex D to this Section.
4.3.5 The minimum exit altitudes shall be:
(a) Stages 1 to 8 - 9,000 feet AGL
(b) Stage 9 - 3,000 feet AGL
(c) Solo Jumps - 5,000 feet AGL
4.3.6 On completion of Stage 9 the student is to satisfactorily complete the ‘A’ Licence written and
practical test at Annex E to Section 3.
4.4 Duties of AFF Instructors and Jumpmasters
4.4.1 The duties of instructors and jumpmasters involved in AFF training are detailed in Annex E to this
Section.

ASA PIOM PAGE 53 OF 129 Date of Issue: December 2016 PIOMDec2016 (2) CASA Approved Version.docx Version: 2nd Version
4 — A — 1
ANNEX A TO SECTION 4
Accelerated Freefall Training Syllabus
Note: The following is a guide to the course program as outlined in Section 3.
‘
Lesson Subject
1 Introduction
Documentation
2 General Knowledge
Organisational Background
Regulations/Safety
DZ Layout/Local Rules
Course Preview
3 Student Parachute Equipment
4 Aircraft Procedures — Theory (Emplaning, spotting and exits, including aircraft emergencies)
5 Stability
Revision — All lessons
BREAK
Revision — Equipment and aircraft procedures, spotting and exits/stability
6 Canopy Control 1 — Theory (Parachute development to landing including TA procedures and DZ
familiarisation)
7 Parachute Landings 1 — Theory and Practical
8 Parachute Emergency Procedures 1 — Theory
9 Emergency Procedures 2 — Practical (Suspended Harness)
10 Freefall Procedures Briefing
Overnight Break at the DZ
11 DZ Familiarisation/Freefall Procedures Briefing
12 Landings — Practical
13 Canopy Control 2 — Practical
14 Aircraft Drill/Exits/Emergencies — Practical/Rehearsal
15 Course Examination/Review — Written and Practical
16 First Jump, Debrief and Certificate Presentation

ASA PIOM PAGE 54 OF 129 Date of Issue: December 2016 PIOMDec2016 (2) CASA Approved Version.docx Version: 2nd Version
4 — B — 1
ANNEX B TO SECTION 4
First Jump Examination / Review
Practical
1 Each student will individually demonstrate to the course instructor’s satisfaction prior to the first jump:
(a) Aircraft procedures and exits
(b) Emergency procedures for:
(1) Freefall;
(2) High speed canopy malfunctions;
(3) Low speed canopy malfunctions;
(c) Procedure for landing hazards:
(1) Water;
(2) Power lines;
(3) Trees;
(4) Buildings.
(d) Parachute landings.
Written
1 The theory examination set by the Chief Instructor at Appendix 1 to this Annex is to be successfully
passed by the student prior to the first jump.
Appendix 1
1 AFF Written examination/review (Sample)
2 Answer sheet (Sample)
ASA PIOM PAGE 55 OF 129 Date of Issue: December 2016 PIOMDec2016 (2) CASA Approved Version.docx Version: 2nd Version
4 — B — 2
APPENDIX – AFF WRITTEN EXAMINATION/REVIEW (SAMPLE)
Accelerated Freefall Review
Now that you have accepted our Invitation to Adventure, in order to
confirm that you have assimilated the instruction given on this
course, you are required to satisfactorily complete the following
review.
What you are about to do
could change your life,
your outlook,
your career,
your future.
AUSTRALIAN SKYDIVING ASSOCIATION
welcomes you to the
challenging and
exciting sport of
Skydiving!

ASA PIOM PAGE 56 OF 129 Date of Issue: December 2016 PIOMDec2016 (2) CASA Approved Version.docx Version: 2nd Version
4 — B — 3
AFF Course Pre-Jump Review
SELECT THE CORRECT ANSWER AND INDICATE BY CIRCLING THE APPROPRIATE LETTER ON
THE ANSWER SHEET.
PLEASE DO NOT WRITE ON THIS PAPER
1 As a student parachutist, whose permission must you seek before making a jump?
(a) DZSO (b) Pilot (c) An experienced
parachutist
(d) Manifester
2 You are not permitted to consume any alcohol how many hours before making a jump?
(a) 6 hours (b) 8 hours (c) 12 hours (d) 24 hours
3 What height would you expect your first ram-air descent to be conducted from?
(a) 6,000 feet (b) 4,000 feet (c) 3,000 feet (d) 2,000 feet
4 Why is a logbook necessary?
(a) To allow jump payments to be calculated.
(b) Because it is required by the pilot.
(c) To show your friends your jump progress.
(d) Required by CASA and ASA for licence issues.
5 Where on your harness are the cut-away and reserve deployment handles located (SOS system)?
(a) Mounted on legstrap.
(b) Across the back pack.
(c) Right hand side of harness.
(d) Left hand side of harness.
6 Where are the steering toggles for a main and reserve located?
(a) On the rear of the rear risers above your head.
(b) On the front of the rear risers above your head.
(c) On the front of the front risers above your head.
(d) On the left hand side of your harness.
7 What colour are the main and reserve toggles, brakes or steering loops?
(a) Black (b) Red (c) Blue (d) Yellow
8 If you are being dragged along the ground by your ram-air parachute after landing, what must
you do?
(a) Yell for help.
(b) Wait until you stop.
(c) Wait for assistance.
(d) Pull in one toggle, stand up and run toward the canopy.
9 What should your body position be as soon as you leave the aircraft?
(a) Looking at the ground.
(b) Stable spread, head back.
(c) Tucked up looking at aircraft.
(d) Does not matter.
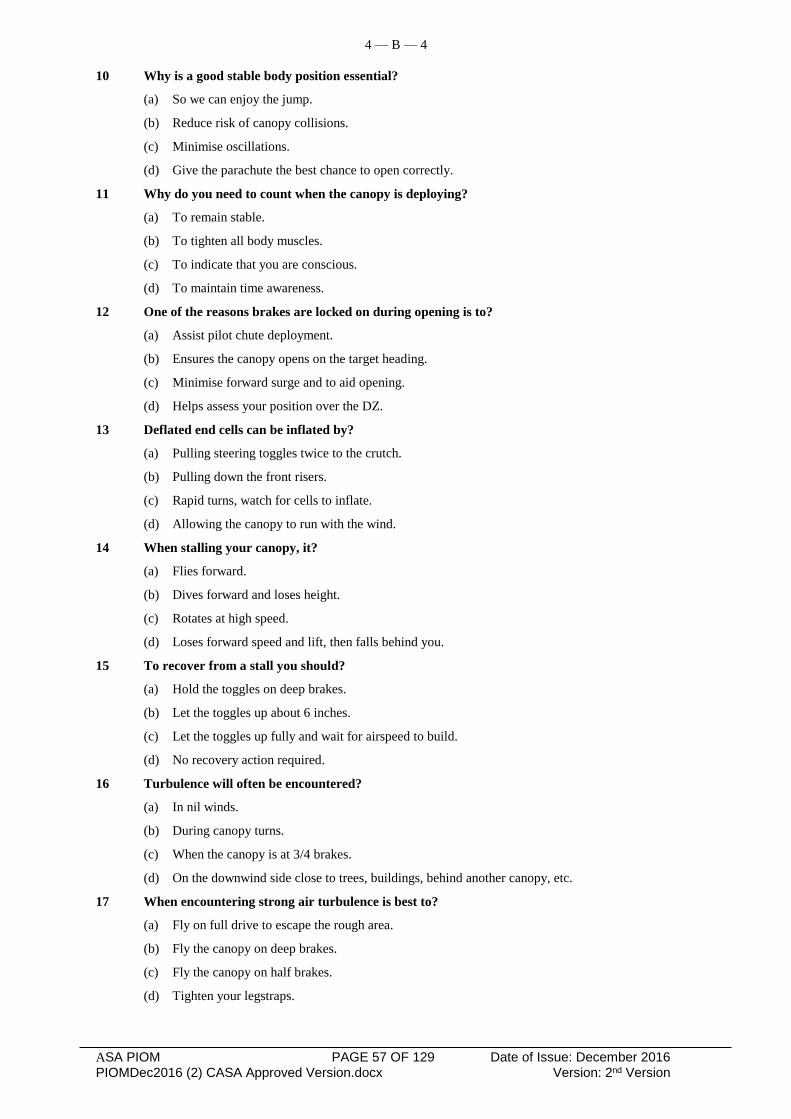
ASA PIOM PAGE 57 OF 129 Date of Issue: December 2016 PIOMDec2016 (2) CASA Approved Version.docx Version: 2nd Version
4 — B — 4
10 Why is a good stable body position essential?
(a) So we can enjoy the jump.
(b) Reduce risk of canopy collisions.
(c) Minimise oscillations.
(d) Give the parachute the best chance to open correctly.
11 Why do you need to count when the canopy is deploying?
(a) To remain stable.
(b) To tighten all body muscles.
(c) To indicate that you are conscious.
(d) To maintain time awareness.
12 One of the reasons brakes are locked on during opening is to?
(a) Assist pilot chute deployment.
(b) Ensures the canopy opens on the target heading.
(c) Minimise forward surge and to aid opening.
(d) Helps assess your position over the DZ.
13 Deflated end cells can be inflated by?
(a) Pulling steering toggles twice to the crutch.
(b) Pulling down the front risers.
(c) Rapid turns, watch for cells to inflate.
(d) Allowing the canopy to run with the wind.
14 When stalling your canopy, it?
(a) Flies forward.
(b) Dives forward and loses height.
(c) Rotates at high speed.
(d) Loses forward speed and lift, then falls behind you.
15 To recover from a stall you should?
(a) Hold the toggles on deep brakes.
(b) Let the toggles up about 6 inches.
(c) Let the toggles up fully and wait for airspeed to build.
(d) No recovery action required.
16 Turbulence will often be encountered?
(a) In nil winds.
(b) During canopy turns.
(c) When the canopy is at 3/4 brakes.
(d) On the downwind side close to trees, buildings, behind another canopy, etc.
17 When encountering strong air turbulence is best to?
(a) Fly on full drive to escape the rough area.
(b) Fly the canopy on deep brakes.
(c) Fly the canopy on half brakes.
(d) Tighten your legstraps.

ASA PIOM PAGE 58 OF 129 Date of Issue: December 2016 PIOMDec2016 (2) CASA Approved Version.docx Version: 2nd Version
4 — B — 5
18 When turning your canopy fast your?
(a) Canopy will not respond.
(b) Rate of descent will increase dramatically during the turn.
(c) Canopy will stall and fall backward.
(d) The pilot chute will move to the front.
19 When close to the ground (eg. below 500 feet) sharp turns are?
(a) Recommended for accuracy only.
(b) Not permitted for students at all.
(c) Used to avoid landing hazards.
(d) Acceptable if you need to adjust landing point.
20 At what height should you be set up for your final landing approach?
(a) 50 feet (b) 100 feet (c) 200 feet (d) 500 feet
21 To minimise your groundspeed when landing face your canopy which way?
(a) Toward the cross.
(b) On the aircraft heading.
(c) Toward the TA.
(d) Into wind.
22 After you feel the opening shock you should?
(a) Look up, carry out canopy checks, locate DZ, and follow arrows, do brake check.
(b) Look around to check the view.
(c) Locate DZ and arrow, then carry out canopy checks.
(d) Release brakes, locate DZ and arrow.
23 Where will you exit the aircraft in relation to the target?
(a) Downwind of the target.
(b) Over the target.
(c) Upwind of the target.
(d) Abreast of the target cross.
24 How would you find the wind direction as you descend if you are unable to see the target.
(a) Always on aircraft heading.
(b) Wind action on trees.
(c) Do not need to know until on the ground.
(d) Wind sock, smoke, etc.
25 The correct response to the TA’s signal (arrow) is?
(a) Turn to face the same direction.
(b) Only used for a reference.
(c) Turn to keep arrow in sight.
(d) Keep the arrow behind you.
26 Why is it important to locate the arrow as soon as possible after opening?
(a) To increase you time in the air.
(b) To avoid any hazard and be safely directed to the DZ.
(c) To reduce the time in the air.

ASA PIOM PAGE 59 OF 129 Date of Issue: December 2016 PIOMDec2016 (2) CASA Approved Version.docx Version: 2nd Version
(d) To keep clear of aircraft and next jumper.
27 If, on a jump with a TA, you are unable to see the TA, how would you land?
(a) Attempt to flare when you feel the time is right.
(b) Let go of the toggles and set up for the PLF.
(c) Stall the canopy as close to the ground as possible.
(d) Keep on 1/2 brakes and set up for the PLF, facing into wind.
28 If you are about the land in water you should?
(a) Let the toggles up to gain air speed.
(b) Face into wind and hold position.
(c) Steer to the nearest bank, at 100 feet undo chest strap, feet together, when feet touch the water
release leg snaps.
(d) Rethink your training to find out what you have overlooked.
29 After landing in a tree you are suspended above the ground, what are you going to do?
(a) Climb down as quickly as possible.
(b) Hold a good landing position and grasp a large branch and wait. Yell for help
(c) Panic
(d) Attempt to climb up to the canopy.
30 At height you are heading for power lines — what will you do?
(a) Spread feet and arms wide.
(b) Attempt to avoid them at height and if unsuccessful make your body thin to pass through them on
1/4 brakes
(c) Feet up to fend off.
(d) Feet crossed, arms in front to protect face.
31 You are above 500 feet and heading for a hazardous area — do you?
(a) Hold into wind.
(b) Steer away while you have height.
(c) Stall the canopy.
(d) Turn towards the hazard.
32 On the final approach you notice a hazard on the ground directly in front — you should?
(a) Immediately turn hard right or left to avoid the hazard.
(b) Turn 180 degrees and land downwind.
(c) Turn only as little as necessary to avoid the hazard.
(d) Remain as you are.
33 If you have line twists on opening you should first?
(a) Check canopy for any malfunction and then kick out twists.
(b) Kick legs vigorously to assist untwisting.
(c) Cut away and deploy your reserve.
(d) Decide the canopy has been incorrectly packed.
34 During your canopy checks, you see holes and tears in the canopy what will you do?
(a) Deploy the reserve.
(b) Release both brakes and see how it flies.
(c) Don’t worry.
(d) Attempt to locate the DZ.
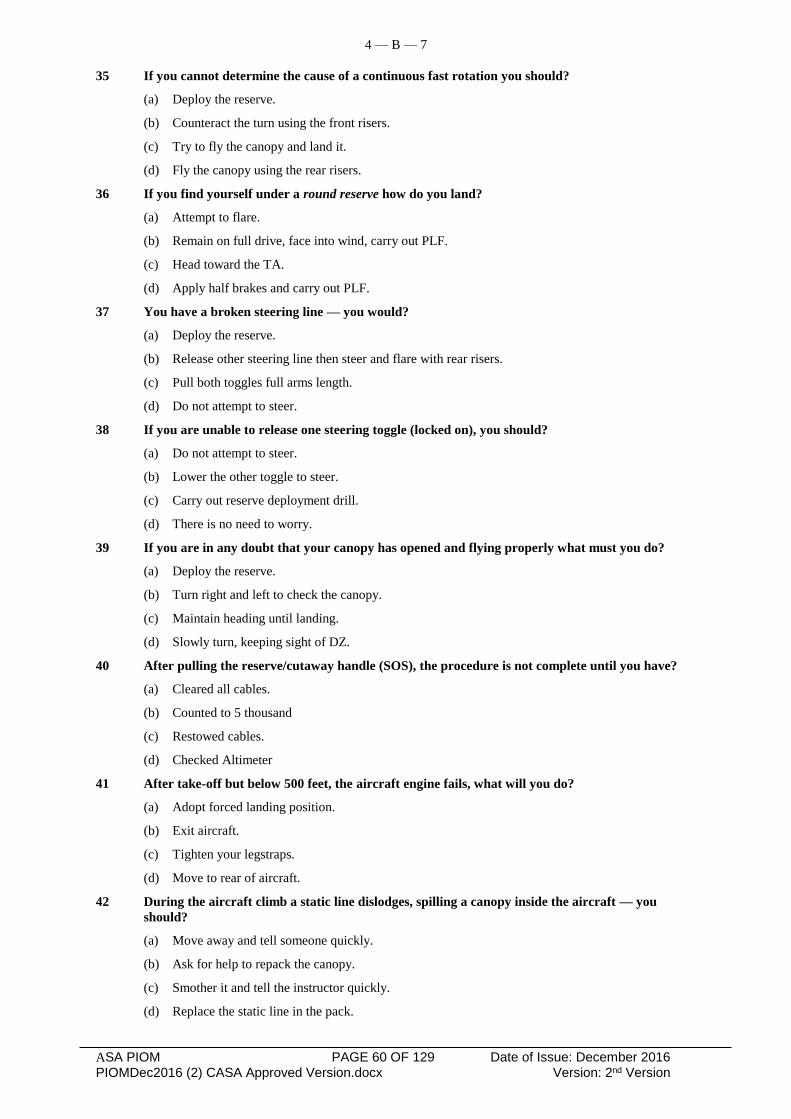
ASA PIOM PAGE 60 OF 129 Date of Issue: December 2016 PIOMDec2016 (2) CASA Approved Version.docx Version: 2nd Version
4 — B — 7
35 If you cannot determine the cause of a continuous fast rotation you should?
(a) Deploy the reserve.
(b) Counteract the turn using the front risers.
(c) Try to fly the canopy and land it.
(d) Fly the canopy using the rear risers.
36 If you find yourself under a round reserve how do you land?
(a) Attempt to flare.
(b) Remain on full drive, face into wind, carry out PLF.
(c) Head toward the TA.
(d) Apply half brakes and carry out PLF.
37 You have a broken steering line — you would?
(a) Deploy the reserve.
(b) Release other steering line then steer and flare with rear risers.
(c) Pull both toggles full arms length.
(d) Do not attempt to steer.
38 If you are unable to release one steering toggle (locked on), you should?
(a) Do not attempt to steer.
(b) Lower the other toggle to steer.
(c) Carry out reserve deployment drill.
(d) There is no need to worry.
39 If you are in any doubt that your canopy has opened and flying properly what must you do?
(a) Deploy the reserve.
(b) Turn right and left to check the canopy.
(c) Maintain heading until landing.
(d) Slowly turn, keeping sight of DZ.
40 After pulling the reserve/cutaway handle (SOS), the procedure is not complete until you have?
(a) Cleared all cables.
(b) Counted to 5 thousand
(c) Restowed cables.
(d) Checked Altimeter
41 After take-off but below 500 feet, the aircraft engine fails, what will you do?
(a) Adopt forced landing position.
(b) Exit aircraft.
(c) Tighten your legstraps.
(d) Move to rear of aircraft.
42 During the aircraft climb a static line dislodges, spilling a canopy inside the aircraft — you
should?
(a) Move away and tell someone quickly.
(b) Ask for help to repack the canopy.
(c) Smother it and tell the instructor quickly.
(d) Replace the static line in the pack.

ASA PIOM PAGE 61 OF 129 Date of Issue: December 2016 PIOMDec2016 (2) CASA Approved Version.docx Version: 2nd Version
4 — B — 8
43 If your canopy should come open and escape from the plane, you should?
(a) Disconnect the static line.
(b) Do nothing.
(c) Hang on with both hands.
(d) Follow canopy out quickly.
44 Having counted to three thousand you feel no opening shock, what do you do next?
(a) Wait 10 seconds, then carry out reserve deployment drill.
(b) Call check, and wait.
(c) Call four thousand, check, look, reach, pull, check, check.
(d) Maintain your arch position.
45 If you feel the jumpmasters shake you in freefall what would you do?
(a) Have a look to see what they want.
(b) Pull immediately.
(c) Arch harder.
(d) Arch and pull.
46 If you see a fist signal in freefall what will you do?
(a) Pull.
(b) Arch and carry out a normal ripcord pull.
(c) Check the altimeter.
(d) Do an awareness check.
47 What is the drill for a hard pull?
(a) Pull until it comes out.
(b) First pull with one hand, then the second pull should be with two hands, then deploy reserve.
(c) Check the altimeter to see whether you can continue to pull the ripcord or deploy the reserve.
(d) Do an awareness check.
48 What is the drill for a floating ripcord?
(a) Try to locate it for only 1-2 seconds then deploy the reserve.
(b) Arch and carry out a reserve deployment sequence.
(c) Keep checking the altimeter until you find it.
(d) Do an awareness check.
49 Why are the hotel checks important?
(a) To ensure that both jumpmasters are ready.
(b) To check that my parachute is fitted correctly.
(c) To ensure that I will land in the right spot.
(d) To indicate that I am in the correct exit position.
50 What would you do if you lost one jumpmaster?
(a) Arch and pull.
(b) Carry on.
(c) Arch and carry on.
(d) Look to that side so that you can see when he comes back.
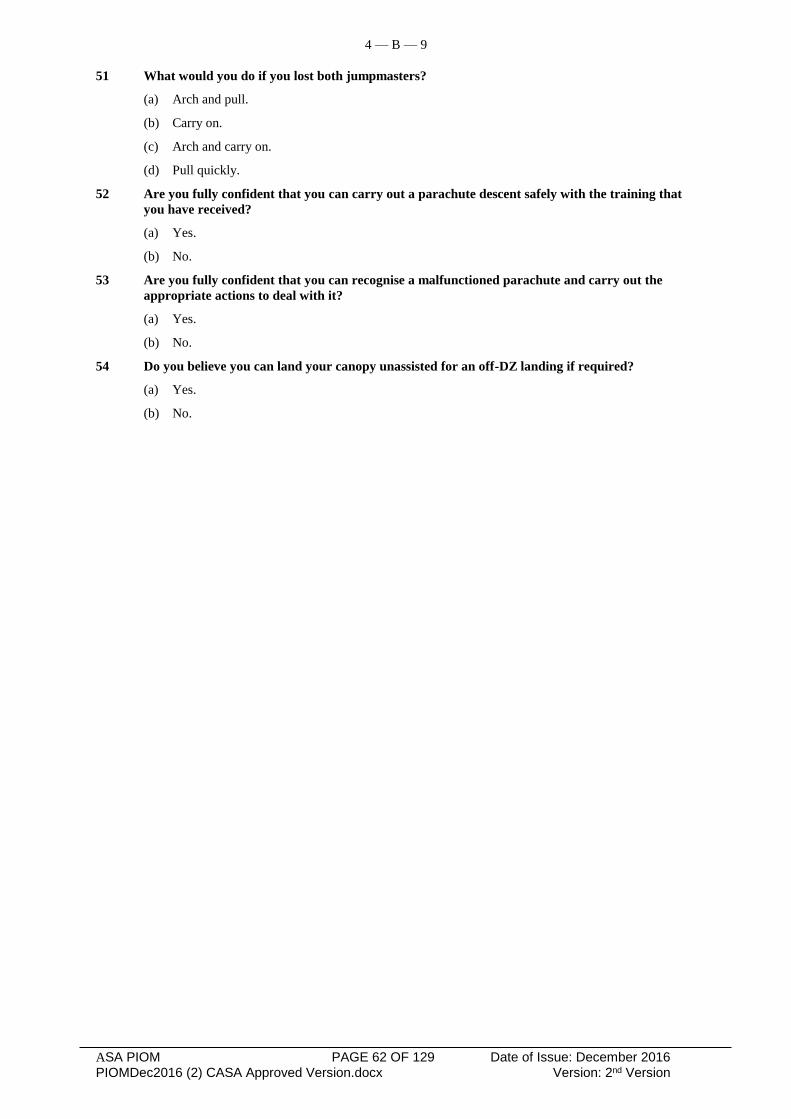
ASA PIOM PAGE 62 OF 129 Date of Issue: December 2016 PIOMDec2016 (2) CASA Approved Version.docx Version: 2nd Version
4 — B — 9
51 What would you do if you lost both jumpmasters?
(a) Arch and pull.
(b) Carry on.
(c) Arch and carry on.
(d) Pull quickly.
52 Are you fully confident that you can carry out a parachute descent safely with the training that
you have received?
(a) Yes.
(b) No.
53 Are you fully confident that you can recognise a malfunctioned parachute and carry out the
appropriate actions to deal with it?
(a) Yes.
(b) No.
54 Do you believe you can land your canopy unassisted for an off-DZ landing if required?
(a) Yes.
(b) No.

ASA PIOM PAGE 63 OF 129 Date of Issue: December 2016 PIOMDec2016 (2) CASA Approved Version.docx Version: 2nd Version
4 — B — 10
APPENDIX – ANSWER SHEET (SAMPLE)
ANSWER SHEET BEFORE CORRECTION: If you have circled your choice and wish to change your mind strike out and
INITIAL, then circle your new choice.
Name: ..................................................... Instructor: ............................................ Score: ......
Course Type: ......................................... Instructor: ............................................ Date: / /
CIRCLE THE CORRECT ANSWER
1 A B C D 28 A B C D
2 A B C D 29 A B C D
3 A B C D 30 A B C D
4 A B C D 31 A B C D
5 A B C D 32 A B C D
6 A B C D 33 A B C D
7 A B C D 34 A B C D
8 A B C D 35 A B C D
9 A B C D 36 A B C D
10 A B C D 37 A B C D
11 A B C D 38 A B C D
12 A B C D 39 A B C D
13 A B C D 40 A B C D
14 A B C D 41 A B C D
15 A B C D 42 A B C D
16 A B C D 43 A B C D
17 A B C D 44 A B C D
18 A B C D 45 A B C D
19 A B C D 46 A B C D
20 A B C D 47 A B C D
21 A B C D 48 A B C D
22 A B C D 49 A B C D
23 A B C D 50 A B C D
24 A B C D 51 A B C D
25 A B C D 52 A B C D
26 A B C D 53 A B C D
27 A B C D 54 A B C D
I answered the following questions incorrectly and after discussion with my instructor I now fully
understand the correct answer.
Q:
A:
I am confident that I can make a parachute descent safely and take the correct action should I have a
malfunction.
Signed (Student): .............................................. Instructor: ..........................................................

ASA PIOM PAGE 64 OF 129 Date of Issue: December 2016 PIOMDec2016 (2) CASA Approved Version.docx Version: 2nd Version
4 — B — 11
APPENDIX – ANSWER SHEET (SAMPLE)
ANSWER SHEET
COURSE INSTRUCTOR TO READ AND SIGN
The student as named on the front of this Answer Sheet has been observed throughout his/her course of
training whilst under my supervision as having the ability to demonstrate the following procedures to my
satisfaction:
Aircraft exit procedure
Stability
Canopy control
Emergency procedures for the following:
1. High speed malfunction
2. Low speed malfunction
3. Static line hang up
4. Aircraft Emergencies
5. Freefall emergencies (for AFF students)
Line twists
Landing hazards:
1. Water
2. Power lines
3. Trees
4. Buildings
Landings (PLF)
Harness drills
Flaring the canopy
Signed: ..................................................................................... Date: / /
Print Instructor name: ............................................................. Location: ........................................
Licence number: .....................................
THE FOLLOWING STATEMENT WILL BE HAND WRITTEN BY THE STUDENT AND SIGNED AFTER
TRAINING AND BEFORE THE FIRST JUMP.
“T AM CONFIDENT WITH THE TRAINING I HAVE RECEIVED. THAT I CAN CARRY OUT MY FIRST AND
FOLLOWING DESCENTS SAFELY.”
SIGNED……………………………… DATE:……………………………………….

ASA PIOM PAGE 65 OF 129 Date of Issue: December 2016 PIOMDec2016 (2) CASA Approved Version.docx Version: 2nd Version
4 — C — 1
ANNEX C TO SECTION 4
AFF Training Descent Jumps
The student’s rate of progression through training will conform to this table. Each stage must be completed to the
satisfaction of the DZSO before the student is permitted to advance to the next stage.
NOTE: An AAD fitted to the main parachute and set to fire 1000 feet below the planned opening height will be
used on all AFF stages.
NOTE: Approved Students Parachute Systems / Rigs configurations for the AFF Program are as follows:
Single Operation System (SOS)
Two-Shot Activation System (TAS)
Dual-Shot Activation System (DOS)
STAGE ONE: Two Jumpmasters
AIMS:
(a) Overcoming the sensory overload period;
(b) Height awareness;
(c) General awareness (jumpmasters, cameramen, ground reference); and
(d) Pull Main Handle at 4,000 feet.
THE JUMP:
(a) Student exits in a hard arch position counting in thousands from one to six, during this time he/she moves
into the frog/box position;
(b) Awareness check, student observes ground, altimeter, and commences one extended PRP and one normal
PRP;
(c) Jumpmasters may let go of the student’s arms during this section of the jump after considering the
student’s general stability;
(d) Awareness check, student signals JM2 and JM1 at 5,500 feet (tongue poke);
(e) Student looks for cameraman, again checks altimeter and at 4,500 feet looks, reaches, grasps and pulls
the main handle to be open at 4,000 feet, arches and counts to six thousand checking over his/her right
shoulder on four thousand then does the following:
(1) Checks canopy;
(2) Brakes off (slider down and end cells inflated);
(3) Locates target;
(4) Locates opening point; and
(5) Located other canopies.
STAGE TWO, ARMS FREE, FORWARD GLIDE: Two Jumpmasters
AIMS:
(a) Heading awareness (ground reference)
(b) Arm and leg awareness, and
(c) Pull Main Handle at 3,500 feet.
THE JUMP:
(a) Student exits as for stage one;
(b) Awareness check 1000 feet below exit height;
(c) Student does one extended PRP, ie. the student demonstrates the ability to fly in the pull position for an
extended period’ JM1 shakes when satisfied;
(d) JM2 signals student to initiate forward movement using the forward glide position (jumpmasters should
have released arms by this time). Student returns to normal flying position on shake from JM1. JM2
initiates leg trim exercise;
(e) Student observes any turn that may be initiated by the jumpmasters; and
(f) Awareness check and signal 5,000 feet. JM’s regrip the arms by 4,000 feet. Student commences pull and
pulls main handle at 3,500 feet AGL.
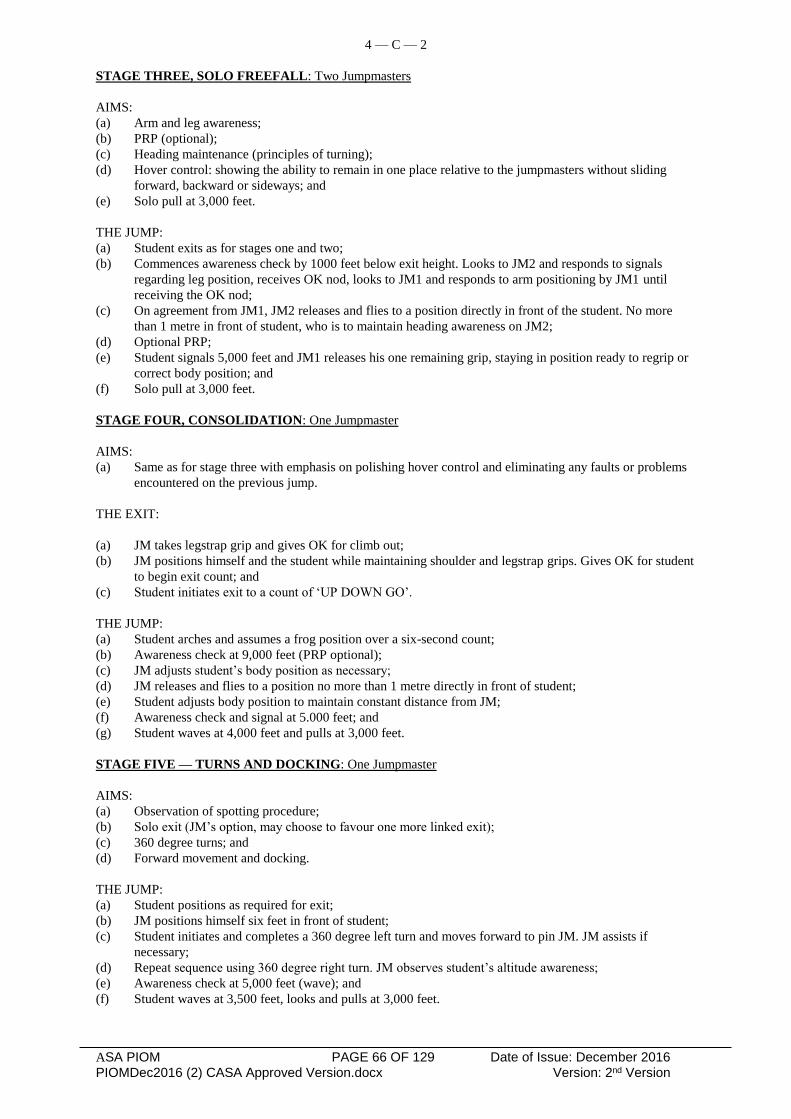
ASA PIOM PAGE 66 OF 129 Date of Issue: December 2016 PIOMDec2016 (2) CASA Approved Version.docx Version: 2nd Version
4 — C — 2
STAGE THREE, SOLO FREEFALL: Two Jumpmasters
AIMS:
(a) Arm and leg awareness;
(b) PRP (optional);
(c) Heading maintenance (principles of turning);
(d) Hover control: showing the ability to remain in one place relative to the jumpmasters without sliding
forward, backward or sideways; and
(e) Solo pull at 3,000 feet.
THE JUMP:
(a) Student exits as for stages one and two;
(b) Commences awareness check by 1000 feet below exit height. Looks to JM2 and responds to signals
regarding leg position, receives OK nod, looks to JM1 and responds to arm positioning by JM1 until
receiving the OK nod;
(c) On agreement from JM1, JM2 releases and flies to a position directly in front of the student. No more
than 1 metre in front of student, who is to maintain heading awareness on JM2;
(d) Optional PRP;
(e) Student signals 5,000 feet and JM1 releases his one remaining grip, staying in position ready to regrip or
correct body position; and
(f) Solo pull at 3,000 feet.
STAGE FOUR, CONSOLIDATION: One Jumpmaster
AIMS:
(a) Same as for stage three with emphasis on polishing hover control and eliminating any faults or problems
encountered on the previous jump.
THE EXIT:
(a) JM takes legstrap grip and gives OK for climb out;
(b) JM positions himself and the student while maintaining shoulder and legstrap grips. Gives OK for student
to begin exit count; and
(c) Student initiates exit to a count of ‘UP DOWN GO’.
THE JUMP:
(a) Student arches and assumes a frog position over a six-second count;
(b) Awareness check at 9,000 feet (PRP optional);
(c) JM adjusts student’s body position as necessary;
(d) JM releases and flies to a position no more than 1 metre directly in front of student;
(e) Student adjusts body position to maintain constant distance from JM;
(f) Awareness check and signal at 5.000 feet; and
(g) Student waves at 4,000 feet and pulls at 3,000 feet.
STAGE FIVE — TURNS AND DOCKING: One Jumpmaster
AIMS:
(a) Observation of spotting procedure;
(b) Solo exit (JM’s option, may choose to favour one more linked exit);
(c) 360 degree turns; and
(d) Forward movement and docking.
THE JUMP:
(a) Student positions as required for exit;
(b) JM positions himself six feet in front of student;
(c) Student initiates and completes a 360 degree left turn and moves forward to pin JM. JM assists if
necessary;
(d) Repeat sequence using 360 degree right turn. JM observes student’s altitude awareness;
(e) Awareness check at 5,000 feet (wave); and
(f) Student waves at 3,500 feet, looks and pulls at 3,000 feet.

ASA PIOM PAGE 67 OF 129 Date of Issue: December 2016 PIOMDec2016 (2) CASA Approved Version.docx Version: 2nd Version
STAGE SIX — CONSOLIDATION: One Jumpmaster
AIMS:
(a) Spotting (directions to JM);
(b) 360 turns;
(c) Forward movement and docking; and
(d) 180 degree turn, wave and pull.
THE JUMP:
(a) Student climbs out unassisted for solo exit;
(b) JM dives to a position 10 feet from student;
(c) Student completes 360 degree left turn then moves forward to pin JM;
(d) Repeat sequence using 360 degree right turn; and
(e) At 3,500 feet, student turns 180 degrees, waves, looks and pulls at 3,000 feet.
STAGE SEVEN — BACKLOOPS: One Jumpmaster
AIMS:
(a) Spotting (direct to pilot);
(b) Sub-terminal control;
(c) Backloops, and
(d) Tracking.
THE JUMP:
(a) Student climbs out first and positions for dive exit;
(b) Dive exit and stables out-turns to face JM;
(c) JM demonstrates backloop;
(d) Student performs backloop, recovers stability and performs a second backloop if time;
(e) At 5,000 feet student locates DZ, turns and tracks for it; and
(f) Student flares at 3,500 feet, waves, looks and pulls at 3,000 feet.
STAGE EIGHT: One Jumpmaster
AIMS:
(a) Spotting (unassisted);
(b) Fast and slow fall;
(c) Figure-eight and backloop; and
(d) ‘S’ track.
THE JUMP:
(a) Student makes poised exit;
(b) JM dives to a position ten feet below and in front of the student;
(c) Student tucks to come down to JM and flares out when level;
(d) Student perform figure-eight (backloop optional);
(e) At 5,000 feet student turns 180 degrees and tracks away with ‘S’ turn; and
(f) 3,500 feet student flares, waves, looks and pulls at 3,000 feet.
STAGE NINE — CLEAR AND PULL
AIM:
(a) Orientation for exits at lower heights.
THE JUMP:
(a) Student spots unassisted;
(b) Poised exit 3,000 feet AGL; and
(c) Three-second delay, and pull by 2,500 feet.
ADDITIONAL PRIVILEGES
The Chief Instructor may, at his discretion, allow a student to undertake a solo jump between stages 6, 7 and 8
for the purpose of consolidation and polishing of manoeuvres, prior to advancing to the next stage.

ASA PIOM PAGE 68 OF 129 Date of Issue: December 2016 PIOMDec2016 (2) CASA Approved Version.docx Version: 2nd Version
4 — D — 1
ANNEX D TO SECTION 4
Briefing Notes for AFF Stages 1 to 9
1. The briefings contained in this Annex are to be given to the student before he/she attempts the
applicable stage of the Training Descent Table (Annex C).
2. A description and explanation of the basic skills which the student must be taught as he/she progresses
through the Training Descent Table is also contained in this Annex.

ASA PIOM PAGE 69 OF 129 Date of Issue: December 2016 PIOMDec2016 (2) CASA Approved Version.docx Version: 2nd Version
4 — D — 2
ACCELERATED FREEFALL
STAGE ONE
PREPARATION: Jumpsuit, altimeter, video, helmet, whiteboard, DRP handle, single point harness, table.
AIMS:
At aircraft: An understanding of climbout and exit.
Classroom: An understanding of objectives and sequence.
Table: Practical application.
REVISION: Arch on table, introduce FF signals.
AT AIRCRAFT: Helmet on;
Seating and procedures;
Backward shaping — arch to seating;
Introduce TURN and SHAKE;
CLASSROOM:
Introduction: Put the student at ease;
General introduction;
State classroom objectives.
Revision: What does the student already know?
THE JUMP:
OBJECTIVES SEQUENCE
Overcoming Sensory Overload. 10,000 feet: Exit — arch — count six seconds, tongue
pokes.
9,000 feet: Awareness check 1 x extended PRP and 1 x
normal PRP.
Height Awareness. 5,500 feet: Awareness check (tongue pokes).
General Awareness. Look for cameraman or point on ground. 4,500 feet:
Look, reach.
Ripcord Pull 4,000 feet. 4,000 feet: Pull main handle and count.
VIDEO
CONFIRMATION
TABLE/HARNESS: Demonstrate exit to awareness check;
Student practices same;
Demonstrate PRPs (first on ground then table);
Student practices same;
Demonstrate 5,500 feet down to count;
Student practices same;
Put the jump together, one section at a time backward.

ASA PIOM PAGE 70 OF 129 Date of Issue: December 2016 PIOMDec2016 (2) CASA Approved Version.docx Version: 2nd Version
4 — D — 3
ACCELERATED FREEFALL
STAGE TWO
PREPARATION: Jumpsuit, altimeter, DRP handle, table, white board, video, single point harness.
AIMS:
Classroom: An understanding of the objectives and sequence by which they are achieved.
Table: Flawless rehearsal.
REVISION: Previous training;
Previous jump;
Any associated problems.
CLASSROOM:
Introduction: General introduction;
State classroom objectives;
Revision: Applicable to this lesson.
THE JUMP:
OBJECTIVES SEQUENCE
Leg and Arm Awareness. 10,000 feet: Exit — arch — count six seconds, tongue
pokes.
9,000 feet: Awareness check, 1 x extended PRP (until
shake), forward glide (signal) JM2, leg trim JM2
(signal).
Forward Movement. 5,000 feet: Awareness check (tongue pokes), observe
possible turn.
Heading Awareness. 4,000 feet: Look, reach.
Ripcord Pull at 3,500 feet. 3,500 feet: Pull main handle and count.
VIDEO
CONFIRMATION
TABLE/HARNESS: Demonstrate exit to awareness check;
Demonstrate 9,000 feet awareness check;
Extended PRP;
Student practices same;
Demonstrate forward glide;
Student practices same;
Demonstrate 5,000 feet awareness check;
Demonstrate observing turn;
Demonstrate 3,500 feet pull and count;
Student practices same;
Put the jump together one section at a time backward..

ASA PIOM PAGE 71 OF 129 Date of Issue: December 2016 PIOMDec2016 (2) CASA Approved Version.docx Version: 2nd Version
4 — D — 4
ACCELERATED FREEFALL
STAGE THREE
PREPARATION: Jumpsuit, table, DRP handle, whiteboard video, single point harness.
AIMS: For classroom and table — same as for stages one and two.
REVISION: Previous training;
Previous jump;
Any associated problems;
Introduce the principles of turning.
CLASSROOM: Introduce the jump, put the student at ease and reiterate the classroom objectives.
Revision: Applicable to this lesson.
THE JUMP:
OBJECTIVES SEQUENCE
Hover Control. 10,000 feet: Exit — arch.
9,000 feet: Awareness Check.
JM2 ‘How’s my legs?’
JM1 ‘How’s my arms?’
(Signals).
Heading Maintenance. JM2 may fly 1 metre front, initiates PRP. Student
repeats.
5,000 feet. Wave.
Solo Pull 3,000 feet. JM1 may let go remaining grip.
3,000 feet: Complete pull and count.
Student should respond to further signalling.
VIDEO
CONFIRMATION
TABLE/HARNESS: As required.

ASA PIOM PAGE 72 OF 129 Date of Issue: December 2016 PIOMDec2016 (2) CASA Approved Version.docx Version: 2nd Version
4 — D — 5
ACCELERATED FREEFALL
STAGE FOUR
PREPARATION: Jumpsuit, table, DRP handle, whiteboard, video, single point harness.
AIMS: For classroom and table — same as for stage three.
REVISION: Previous training;
Previous jump;
Any associated problems;
Introduce the principles of the wave-off.
CLASSROOM: Introduce the jump, put the student at ease and reiterate the classroom objectives.
Revision: Applicable to this lesson.
THE JUMP:
OBJECTIVES SEQUENCE
Polish Hover Control. 10,000 feet: Exit — arch (single JM).
9,000 feet; Awareness Check (PRP).
JM corrects arms/legs if necessary.
Rectify faults or problems from
previous jump.
JM release and fly to front.
5,000 feet: Awareness check (wave).
4,000 feet: Wave-off.
Solo pull 3,000 feet. 3,000 feet: Pull and count.
Confirm point at altimeter signal.
Reinforce student should respond to further signalling.
VIDEO
CONFIRMATION
TABLE/HARNESS: As required.

ASA PIOM PAGE 73 OF 129 Date of Issue: December 2016 PIOMDec2016 (2) CASA Approved Version.docx Version: 2nd Version
4 — D — 6
ACCELERATED FREEFALL
STAGE FIVE
PREPARATION: Jumpsuit, table, DRP handle, whiteboard, video, single point harness.
AIMS: For classroom and table — same as for stages one and two.
REVISION: Previous training;
Previous jump;
Any associated problems;
Introduce the principles of forward movement and docking.
CLASSROOM: Introduce the jump, put the student at ease and reiterate the classroom objectives.
Revision: Applicable to this lesson.
THE JUMP:
OBJECTIVES SEQUENCE
Observe Spotting Procedure. 10,000 feet: Exit — arch (solo at JM’s discretion).
JM 2 metres in front.
Polish Hover Control. 9,000 feet: 360 degree left turn and pin JM (JM
assists if necessary).
360 degree turns. 360 degree right turn and pin JM.
5,000 feet: Awareness check (wave).
Forward movement and docking. 3,500 feet: Wave-off and look.
3,000 feet: Pull and count.
Student to demonstrate altitude awareness between manoeuvres.
VIDEO
CONFIRMATION
TABLE/HARNESS: As required

ASA PIOM PAGE 74 OF 129 Date of Issue: December 2016 PIOMDec2016 (2) CASA Approved Version.docx Version: 2nd Version
4 — D — 7
ACCELERATED FREEFALL
STAGE SIX
PREPARATION: Jumpsuit, table, DRP handle, whiteboard, video, single point harness.
AIMS: For classroom and table — same as for stages one and two.
REVISION: Previous training;
Previous jump;
Any associated problems;
The principles of forward movement and docking.
CLASSROOM: Introduce the jump, put the student as ease and reiterate the classroom objectives.
Revision: Applicable to this lesson.
THE JUMP:
OBJECTIVES SEQUENCE
Spotting (to JM). 10,000 feet: Solo exit.
360 degree turns. JM 2 metres in front.
Forward movement and docking. 9,000 feet: 360 degree left turn and pin JM.
180 degree turn, wave, look and pull. 360 degree right turn and pin JM.
3,500 feet: 180 degree turn, wave and look.
3,000 feet: Pull and count.
Student to demonstrate altitude awareness between manoeuvres.
VIDEO
CONFIRMATION
TABLE/HARNESS: As required

ASA PIOM PAGE 75 OF 129 Date of Issue: December 2016 PIOMDec2016 (2) CASA Approved Version.docx Version: 2nd Version
4 — D — 8
ACCELERATED FREEFALL
STAGE SEVEN
PREPARATION: Jumpsuit, table, DRP handle, whiteboard, video, single point harness.
AIMS: For classroom and table — same as for stages one and two.
REVISION: Previous training;
Previous jump;
Any associated problems;
Introduce the principles of dive exit, backloops and tracking.
CLASSROOM: Introduce the jump, put the student at ease and reiterate the classroom objectives.
Revision: Applicable to this lesson.
THE JUMP:
OBJECTIVES SEQUENCE
Spotting (direct to pilot). 10,000 feet: Dive exit.
Sub-terminal Control. 9,000 feet: Turn to face JM.
Backloops. JM demonstrates backloop.
Student performs backloop.
Recover stability.
Perform 2nd backloop if time permits.
Tracking. 5,000 feet: Locate DZ, turn and track toward it.
3,500 feet: Flare out, wave and look.
3,000 feet: Pull and count.
Student to demonstrate altitude awareness throughout.
VIDEO
CONFIRMATION
TABLE/HARNESS: As required

ASA PIOM PAGE 76 OF 129 Date of Issue: December 2016 PIOMDec2016 (2) CASA Approved Version.docx Version: 2nd Version
4 — D — 9
ACCELERATED FREEFALL
STAGE EIGHT
PREPARATION: Jumpsuit, table, DRP handle, whiteboard, video, single point harness.
AIMS: For classroom and table — same as for stages one and two.
REVISION: Previous training;
Previous jump;
Any associated problems;
Introduce the principles of fast and slow fall.
CLASSROOM: Introduce the jump, put the student at ease and reiterate the classroom objectives.
Revision: Applicable to this lesson.
THE JUMP:
OBJECTIVES SEQUENCE
Spotting (unassisted). 10,000 feet: Poised exit.
JM 3 metres below and in front.
Height gain and loss. 9,000 feet: Student tucks, comes level and flares out.
Figure-eight and backloop. Figure-eight and backloop (optional).
‘S’ track. 5,000 feet: 180 degree turn, track with ‘S’ turn.
3,000 feet: Flare, wave, look.
2,500 feet: Pull and count.
VIDEO
CONFIRMATION
TABLE/HARNESS: As required

ASA PIOM PAGE 77 OF 129 Date of Issue: December 2016 PIOMDec2016 (2) CASA Approved Version.docx Version: 2nd Version
4 — D — 10
SKILLS FOR AFF STAGES ONE TO NINE
1. Aircraft Procedure
During the climb to height, JM2 should constantly monitor the student so that he/she doesn’t fiddle with
his/her equipment. Also ensure mental and verbal rehearsal are completed by student with instructor.
Two thousand feet below exit height JM2 instructs the student to put on his/her goggles and helmet and
checks the fit. Before turning onto jump run, JM2 instructs the student to get up from the sitting position.
When the student is up, JM1 should remain between the student and the door; JM2 should maintain a
legstrap grip on the student. While JM1 is climbing out, JM2 instructs the student to begin the climb out
(or set-up). JM2 should control the movement of the student during the climb out or set-up procedure.
Note: The climb out or set up procedure will vary depending on aircraft type and jumpmaster preference.
It should, however, be such as to place both jumpmasters in an advantageous position for controlling the
exit, whilst not inhibiting the student’s initiation of the exit.
2. Exit Procedure
The exit procedure will also vary depending on aircraft type, but will have certain features. These are that
the student initiates the exit with verbal and physical cues for the jumpmasters; all jumpers leave the
aircraft in a controlled position with respect to the relative air. The normal procedure is for the student to
complete a HOTEL check, then initiate exit with an UP, DOWN, ARCH.
3. The Arch
The arch is a body position in which the hands are level with the ears, the feet are approximately 18
inches apart and the spine, shoulders, elbows, wrists, fingers, hips, knees and ankles are at full anatomical
extension. This position is used for students when beginning freefall because it is a stable body position
and the body at full extension is a fixed position for that body, leaving only the hand and feet positions as
variables. Hence it is relatively easy to describe and achieve.
4. Awareness Checks
Awareness checks are used to enable the jumpmasters to monitor and communicate with the student.
While the jumpmaster has the student’s attention in an awareness check it is a good time for the
jumpmaster to correct body position or other faults. Awareness checks are also checkpoints for the
student to develop his/her recall and ground/height awareness.
(a) Basic Awareness Check. Approaching the height for a basic awareness check, the student
observes the ground, remembering any distinguishing features for later recall and so that he/she
grows in awareness of what the ground looks like at a given altitude; he/she reads the altimeter.
He/she makes eye contact with JM2 and makes the pre-arranged signal (a tongue poke). When
JM2 is satisfied he signals the student back. The student then make eye contact with, and signals,
JM1 who signals back when satisfied.
(b) Leg/Arm Awareness Check. Student observes the ground and reads altimeter. Student makes eye
contact with JM2 and asks ‘How are my legs?’ JM2 responds with signals as required, then ‘OK’.
Student makes eye contact with JM1 and asks ‘How are my arms?’ JM1 responds by positioning
the student’s arms as required, then ‘OK’.
5. Main Parachute Handle – PRPs or Practice Pull
Single Operation System (SOS)
Practice Pull Actual Pull Deployment Process

ASA PIOM PAGE 78 OF 129 Date of Issue: December 2016 PIOMDec2016 (2) CASA Approved Version.docx Version: 2nd Version
Two-Shot Activation System (TAS) and Dual-Shot Activation System (DOS)
Practice Pull Actual Pull Deployment Process
Practice Pull Actual Pull Deployment Process
5a. PRPs – On Ripcord Configuration (SOS)
All movements are to be made slowly and smoothly. The student flexes his/her neck just enough to see
the ripcord handle. Moving both arms simultaneously, the right forearm is swept around on the horizontal
plane toward the head, then under the right side of the chest and the right palm is placed flat over the
ripcord handle; the left arm is similarly swept around so that the left hand comes to a position about an
inch forward of the head, level with the face, palm toward the ground. Simultaneously both arms are
swept back to the arch on the reverse path and the neck is extended back to the arch position.
Emphasis should be placed on the student maintaining the arch in his/her back and legs, on simultaneous
slow and smooth movements and on the symmetry of arm position.
In explaining the extended PRP, jumpmasters should point out that goggles or altimeter can be adjusted
in a similar way. The emphasis should be on reducing the student’s desire to rush, or his/her fear of going
unstable in any position other than an arch. PRPs are another demonstration of the student’s ability to
control his/her freefall.
5b. Practice Pulls (BOC / LOC configuration) – TAS/DOS
All movements are to be made slowly and smoothly. The student looks on the horizon keeping the
boxman neutral position. The student will reach with the appropriate hand and located the
handle/ball/pud of the Pilot Chute. Once found will ensure they have a grip. The opposite arm will move
to create symmetry (as demonstrated in above diagrams)
6.0 Actual Main Pull (Main Parachute Activation)
Above Diagrams give visual reference.
6a. Actual Ripcord Pull (SOS)
The actual ripcord pull only differs from PRPs in the emphasis on maintaining a good grip on the ripcord
handle and reminding the student that there will be some resistance. This should be overcome with a firm
pull in a single motion.
6.b Actual Pull with BOC/LOC configuration (TAS/DOS)
The actual pull will include throwing and releasing the pilot chute into the clear air adjacent to the
student.

ASA PIOM PAGE 79 OF 129 Date of Issue: December 2016 PIOMDec2016 (2) CASA Approved Version.docx Version: 2nd Version
7. Leg Trim
The purpose of the leg trim exercises is to make the student think about the sensation of his/her legs. On a
signal (fingers straightened or bent) from JM2, the student straightens his/her legs or bends them as
required.
8. Forward Glide
The forward glide is a body position in which the spine and legs remain in extension and the elbows are
slowly and smoothly swept around toward the hips. The arms are in the forward glide position when the
elbows are tucked in the side of the body. Emphasis in teaching the forward glide should be given to a
slow smooth transition, and to advising the student of the sensation of a slight head down altitude.
9. Turning
The student should be taught to first look in the direction of the turn. Then, rotate the top of the body, on
the axis of the spine, at the waist, such that the hand in the direction of the turn ‘presses down on the air’.
Then, return the body to its arch or relaxed arch. As the new heading approaches, the student should keep
his/her eyes on that heading reference and rotate and press down in the direction opposite to the turn.
Stopping the turn should be judged so that the body returns to neutral and the turn stops just as the
desired heading is reached.
10. Wave-off
The purpose of the wave-off is to alert other jumpers that you are about to deploy your parachute. Both
arms are swept around toward the head and crossed to the wrists a few inches forward of the head. Then
uncross, cross and uncross arms.
11. Flaring the canopy
Flaring is the term given to slowing forward motion. For slow forward speeds in freefall, flaring can be
accomplished by sweeping the hands and arms a few inches forward. For higher speeds, like at the end of
a track, there should be an accompanying flexion at the knees so that the body ‘sits up’. For maximum
deceleration there should be an accompanying negative arch.
12 Docking
Reaching is the thing most likely to foil students learning to dock on the instructors. Emphasise the
importance of flying before, during, and after the dock, and point out the effect of reaching forward,
down or up. If it will be necessary to have the arms forward whilst in a particular dock, instruct the
student on the compensation required in the rest of the body. Also, stress the importance of not sitting up
whilst docked.
13 Dive Exit
Explain the sensations of a dive exit particularly one which goes very head down. Explain the body
position of arms forward, legs fully flexed in relation to the relative air flow and transitioning at the
bottom of the dive.
14 Backloops
The backloop procedure may be described as follows: sweep the arms forward, push the arms down on
the air at the same time flexing the hips and knees, to bring the knees forward to the chest, and throwing
the head back. When the student sees the ground coming around he/she should resume his/her normal
flying position.
Emphasis should be on a single movement. Explain the momentum effect of tucking up the body once the
loop has been initiated and the importance of the head.
15 Tracking
The body position is with the arms about six inches from the sides, palms down, no flexion or extension
at the hips, knees and ankles at full extension, slight flexion in the thoracic spine and protraction of the
shoulders (shoulders rounded), head back. From this position press the palms down on the air. If the
student finds he/she has been passed by the instructor, he/she should concentrate on knee extension,
pressing down with the palms and perhaps putting just a little flexion at the hips (if he/she overdoes the
latter he/she will pitch steeply head down, so then he/she should ease off).
Explain to the student the importance of a good flare at the end of a track prior to parachute deployment
to avoid damaging the canopy and/or body.
Turning in a track is accomplished by looking, and pressing down on the shoulder, in the direction of the
desired turn. Explain that just a head movement may be enough to initiate a turn when tracking.
ASA PIOM PAGE 80 OF 129 Date of Issue: December 2016 PIOMDec2016 (2) CASA Approved Version.docx Version: 2nd Version
16 Mushing
Mushing is a term for making a steep vertical descent which is not a dive, ie. belly or chest first. The
body position required is of maximum extension in spine and hips, maximum flexion in knees and with
the arms swept back, as for a forward glide, but also pressed up as far as possible. Vertical speed is
controlled by the distance between the hands and the sides of the body and the amount of extension in the
spine and retraction in the shoulders.
17 Negative arch
The negative arch body position is simply to press both forearms down on the air, flex the legs a little at
the hips and look down. Students should be advised to remain aware of where they are headed and to
counter any forward or backward sliding by adjusting their arm and lower leg positions.

ASA PIOM PAGE 81 OF 129 Date of Issue: December 2016 PIOMDec2016 (2) CASA Approved Version.docx Version: 2nd Version
4 — E — 1
ANNEX E TO SECTION 4
AFF Instructor and Jumpmaster Duties and Responsibilities
1 Definitions
(a) AFF Jumpmaster:
(1) May conduct all briefings, freefall supervision and debriefing for AFF jumps.
(b) AFF Instructor:
(1) May do all of the above as well as conduct Basic Parachute Training leading up to the AFF
Stage One brief;
(2) Must hold an AFF Instructor B Rating.
2 Major Responsibilities
(a) AFF Jumpmaster:
(1) Review all previous training or jumps;
(2) Introduce and brief the required stage;
(3) Supervise the student prior to emplaning, in the aircraft and in freefall;
(4) Conduct post-jump debrief; and
(5) Ensure student learning and safety.
(b) AFF Instructor:
(1) Provide Basic Parachute Training;
(2) Supervise the student’s progression through the course;
(3) Supervise jumpmaster activities in the air and on the ground; and
(4) Maintain course records.
3 Jumpmaster Duties
(a) JM1 Stages 4 to 8:
(1) The jumpmaster should revise all previous training prior to each jump. The amount of
revision necessary will depend largely on the time span since the last jump;
(2) When planning an AFF jump, the jumpmaster should review the previous dive, reinforcing
the good points and discussing any problems;
(3) Introduce the aims, outline the dive and discuss what has to be achieved on this jump;
(4) Conduct preliminary dirt dives using suspended harness (horizontal) or table;
(5) Gear up the student and practice the dive in full gear using the aircraft until satisfactory;
(6) Discuss the spot, wind directions and landing directions;
(7) Check the student’s equipment prior to boarding the aircraft;
(8) Supervise the student whilst on climb to height;
(9) Supervise spotting;
(10) Assist the exit as necessary and as required in freefall;
(11) Conduct debrief and fill out all necessary paperwork.
(b) JM2 Stages 1 to 3 (reserve side):
(1) Give the OK to the student to commence the climb out;
(2) Physically control the student during climb out;
(3) Give the student the OK when ready for exit;
(4) Assist in holding the formation stable as necessary;
(5) Monitor left arm during PRPs and watch the student’s leg position;
(6) Ensure deployment of student’s pilot chute;
(7) Pull reserve in emergency situation by 2,500 feet;
(8) Open by 1,800 feet AGL; and
(9) Assist in debrief.
(c) JM1 Stages 1 to 3 (main side):
(1) Fulfil the guidelines as for jumpmaster Stages 4 to 8;
(2) Maintain legstrap grips until main ripcord has been pulled (Stage 3 as necessary);
(3) Communicate with JM2 and signal for release on Stage 3;
(4) Monitor arm positioning;
(5) Ensure main ripcord pull;
(6) Open by 1,800 feet and provide orientation and indication of landing direction; and
(7) Conduct debrief and complete all necessary paperwork.

ASA PIOM PAGE 82 OF 129 Date of Issue: December 2016 PIOMDec2016 (2) CASA Approved Version.docx Version: 2nd Version
4 Freefall Signals
CLOSED FIST Immediate pull
AWARENESS CHECKS Tongue signals (Stage 1 and 2)
AWARENESS CHECKS Wave-off (Stage 3 onwards)
FORWARD MOVEMENT Point forward
CHECK ALTIMETER JM points to it
BEND LEGS Bent fingers
STRAIGHTEN LEGS Straighten fingers
SHAKE Arch harder
THUMB DOWN Arch harder
Note: When giving signals make them clear and precise. Signals must be given at the appropriate time to
avoid confusion.
Debriefing
The debrief should be as comprehensive as possible. The student should be given the chance to relate
his/her concept first so that the jumpmaster can check the level of awareness.
Points to critique include:
(a) Aircraft demeanour;
(b) Spotting;
(c) Exit;
(d) Sensory overload period;
(e) Height signals;
(f) Manoeuvres:
(1) Body position;
(2) Speed;
(3) Co-ordination.
(g) Freefall demeanour (tense, relaxed, confident);
(h) General awareness (recollection of heading changes, abnormalities in the dive);
(i) Canopy control; and
(j) Landing.

ASA PIOM PAGE 83 OF 129 Date of Issue: December 2016 PIOMDec2016 (2) CASA Approved Version.docx Version: 2nd Version
5 — 1
SECTION 5: Tandem Training Program
5.1 General
5.5.1 The Tandem Training Program consists of Ground Training and one jump as a passenger with a
Tandem Master.
5.2 Ground Training
5.2.1 Ground Training consists of a detailed briefing by the Tandem Master to the passenger prior to
each descent. Passengers shall be thoroughly briefed and rehearsed (where applicable) on the
following:
(a) Equipment:
(1) Explanation; and
(2) Fitting of harness.
(b) Aircraft procedures:
(1) Method of approaching aircraft;
(2) Seating positions;
(3) Operation of single point restraints or attachment system;
(4) Procedure for attaching passenger to the Tandem Master; and
(5) Climb out and exit procedure.
(c) Canopy control:
(1) Canopy flight characteristics; and
(2) Operation of dual controls.
(d) Landing:
(1) Into wind;
(2) Feet up;
(3) Listen to instructions from Tandem Master; and
(4) Possibility of falling over;
(e) Emergencies:
(1) Aircraft engine failure above/below 1,500 feet;
(2) Parachute open in aircraft;
(3) Canopy malfunction:
Explain procedure; and
Stress need to remain calm, hold harness, keep legs back.
5.3 Exit Height
5.3.1 The minimum exit height is to be not lower than 5,000 feet AGL.

ASA PIOM PAGE 84 OF 129 Date of Issue: December 2016 PIOMDec2016 (2) CASA Approved Version.docx Version: 2nd Version
6 — 1
SECTION 6: Orientation Flight Emergency Training
6.1 General
6.1.1 An orientation flight is made available to those persons wishing to view a parachute descent from
an aircraft. This option shall be made available to any person prior to them partaking of their first
jump.
6.1.2 All persons engaged in an orientation flight will be issued with an ASA student licence before
making that flight. At the time of membership application the person now a student will be made
aware of the potential dangers of parachuting operations and will not be permitted to make an
orientation flight until that application form has been fully completed.
6.1.3 Orientation Flight Emergency Training consists of ground training to enable a flight in an aircraft
by a student to observe other parachutists jump from the aircraft.
6.1.4 There are two methods by which a student may make an orientation flight, both being under the
guidance of an instructor directly supervising the student in the aircraft:
(a) Student wearing a round parachute; and
(b) Student securely retained in the aircraft.
6.2 Ground Training
6.2.1 For a student wearing a parachute, the ground training consists of a detailed briefing by the
instructor to the student prior to the flight. The student shall be thoroughly briefed and rehearsed
on the following:
(a) Equipment:
(1) Explanation; and
(2) Fitting of harness.
(b) Aircraft procedures:
(1) Method of approaching aircraft;
(2) Seating positions;
(3) Operation of single point restraints or attachment system;
(4) Jumpmaster commands in the event of an emergency;
(5) Emergency exit procedure; and
(6) Leaving the aircraft after landing.
(c) Canopy activation;
(d) Canopy control:
(1) Canopy flight characteristics; and
(2) Operation of controls.
(e) Landing into wind.
6.2.2 For a student securely restrained in the aircraft throughout the flight the ground training consists of
a detailed briefing by the instructor to the student prior to the flight. The student shall be
thoroughly briefed and rehearsed on the following:
(a) Aircraft procedures:
(1) Method of approaching aircraft;
(2) Seating positions;
(3) Operation of single point restraints or attachment system;
(4) Jumpmaster commands in the event of an emergency; and
(5) Leaving the aircraft after landing

ASA PIOM PAGE 85 OF 129 Date of Issue: December 2016 PIOMDec2016 (2) CASA Approved Version.docx Version: 2nd Version
7 — 1
SECTION 7: Additional Training
7.1 Relative Work
7.1.1 All relative work training will be conducted in accordance with CAR 152 specifications, ASA OP
REGS and the ASA Relative Work Training Descent Table.
7.1.2 Basic content of briefs to relative work students for initial RW training is at Annex A to this
Section. All such descents are to be performed with competent Relative Workers certified by the
Chief Instructor to perform such training, or with an ASA instructor (any grade).
7.2 Water Descents
7.2.1 Deliberate water descents shall be made only with the approval of the Chief Instructor and under
the direct supervision of a Grade B Parachute Instructor.
7.2.2 Parachutists shall have received training in accordance with the lesson at Annex A of this Section
prior to executing a deliberate water descent. Such descents shall be made in accordance with the
ASA CAR 152 specification and ASA OP REGS.
7.3 Night Descents
7.3.1 All parachutes shall have received training in accordance with the lesson at Annex A of this
Section prior to participation in night descents. Such descents shall be made in accordance with
the ASA CAR 152 specification and ASA OP REGS.
7.4 Conversion Courses
For the conversion courses listed below a minimum of five descents shall be made by the parachutist
before being permitted to engage in any other form of training or relative work. These five descents may
include a combination of the requisite training for more than one of the conversions listed below.
7.4.1 High-Performance or Ram-air Canopies
Prior to executing their first descent using a high-performance or Ram-air main canopy,
parachutists who have not been trained on high-performance or Ram-air canopies shall have
completed a course of instruction as outlined at Annex A of this Section and shall have received
the approval of the Chief Instructor or DZSO for such a descent. Such parachutists shall not
engage in relative work while using high-performance or Ram-air canopies until authorised to do
so by the DZSO and so endorsed in the parachutist’s logbook.
7.4.2 Ripcord to Hand-Deploy
Before being permitted to make a first jump using a hand-deploy system the parachutist will attend
a full briefing and be able to demonstrate his/her knowledge of the system and procedures
necessary to make a safe descent using the equipment. The training is to be carried out by an
instructor and endorsed in the parachutist’s logbook by the DZSO.
7.4.3 SOS to Two-Action System
Before being permitted to make a first jump using a two-action system the parachutist will attend a
full briefing and be able to demonstrate his/her knowledge of the system and procedures necessary
to make a safe descent using the equipment. The training is to be carried out by an instructor and
endorsed in the parachutist’s logbook by the DZSO.
7.5 Spotting
7.5.1 Spotting parachutists shall receive instructions in aircraft spotting techniques in accordance with
the lesson plans outlined at Annex A of this Section.
7.6 Canopy Relative Work
7.6.1 Parachutists shall not engage in canopy relative work (CRW) until they have received instruction
as outlined at Annex A of this Section or be otherwise certified competent by the Chief Instructor
or DZSO.

ASA PIOM PAGE 86 OF 129 Date of Issue: December 2016 PIOMDec2016 (2) CASA Approved Version.docx Version: 2nd Version
7 — 7
SECTION 7: Additional Training (Continued)
7.7 Wing Suit Descents
For additional Safety and Information regarding Free Flying Descents refer all information approved ASA
manuals and reference material.
7.7.1 Parachutist shall not engage in Wingsuit Descents until they have meet all the prerequisites as
outlined in the ASA OP REGS.
7.7.2 Parachutists shall not engage in Wing Suit Descents until they have received instruction as
outlined in Annex C (Part A) and D (Part B) of this Section or be otherwise certified competent by
the Wingsuit Tutor and DZSO.
7.7.3 The Wing Suit Training Table (WSTT) is made up of two parts – Part A and Part B:
(a) Part A
- Comprises of theory and practical assessment with WS Tutor.
- The practical component comprises of a minimum of 3 training descents
- After the successful completion of all stages in Part A, the novice is allowed to make
WS descents with up to 3 other parachutists approved by the DZSO.
(b) Part B
- Comprises of theory of practical assessment with a WS Tutor
- The practical component comprises of a minimum of 4 training descents
- After the successful completion of all stages in Part B, the novice can then apply for a
WS Crest.
7.7.2 Wing Suit training descent(s) must be under the direct supervision of a Wingsuit Tutor and DZSO.
7.8 Freefly Descents
For additional Safety and Information regarding Free Flying Descents refer all information approved ASA
manuals and material.
7.8.1 Parachutists shall not engage in Freefly Descents until they have meet all prerequisites as outlined
in the ASA OP REGS
7.8.2 Parachutist shall not engage in freeflying until they have completed a course of instruction in
accordance with the PIOM
7.8.3 Freefly Training must be under the supervisor of a FF Endorsed Tutor as approved by the CI and
the DZSO
7.8.4 All Freefly Training descents must break off 1,500ft above parachute opening height.
Annexes:
A Lesson guides for Sections 7.1 to 7.6.
B ASA Relative Work Training Descent Table.
C Wing Suit Training Table Part A
D Wing Suit Training Table Part B
E Freefly Recommended Basic Training

ASA PIOM PAGE 87 OF 129 Date of Issue: December 2016 PIOMDec2016 (2) CASA Approved Version.docx Version: 2nd Version
7 — A — 1
ANNEX A TO SECTION 7
One – Relative Work
AREA: Lecture room, drop zone.
AIDS: Slides, blackboard, Rel Training Table, Annex B to Section 7.
AIM: To teach the rel student the basics of freefall relative work through the ASA Rel Training Descent
Table Stages 1 to 10.
CONTENTS REMARKS
1 Introduce student to basic rel techniques, the nature of flying
relative, etc.
Student should read basic text such as
‘Art of Freefall Relative Work’.
2. Brief in detail on requirements of RW Training Descent
Table for relative descent.
3 SAFETY:
Emphasise responsibilities for height awareness, break-off,
wave before opening, closing speeds in freefall, break-off
height.
Emphasis height awareness.
CONFIRMATION:
1. Individual responsibilities;
2. Height awareness;
3. Approach speeds;
4. Initiation of break-off.
QUESTIONS FROM:
QUESTIONS TO:

ASA PIOM PAGE 88 OF 129 Date of Issue: December 2016 PIOMDec2016 (2) CASA Approved Version.docx Version: 2nd Version
7 — A — 2
ANNEX A TO SECTION 7
Two – Water Descents
AREA: Lecture room.
AIDS: Equipment, suspended harness, blackboard.
AIM: To instruct jumpers in the requirements and problems associated with water descents.
CONTENTS REMARKS
1. Discuss legal requirements, ie. boats, flotation devices, etc.,
and suitability of candidates swimming ability (proficient).
2. Equipment
Clothing - wet suit/swim suit, light footwear.
Flotation - types, approved, use of.
Parachute and/or harness - Release system, eg. is a 2 shot or
capewell etc. RSL disconnect prior to landing. Use and
practice of release snaps and chest strap. Effects of equipment
in water ie. fresh water, salt water.
3. Landing in Water -
- Release chest strap (bellyband if fitted)
- Loosen leg straps (not too far, need to reach toggles).
- Inflate flotation equipment.
- Face into wind
4. Canopy release and clearing techniques.
- Drill not completed in time - jettison main canopy.
- Towed by main canopy - jettison main canopy.
- Towed by reserve - roll onto back, control with legs.
- Canopy developed in water - pull in periphery or steering
line to spill.
Various problems according to wind
and water speed.
5. Hazards
- Separation from Harness too high above the water
- Power lines.
- Surf, currents, undertow.
- Submerged obstacles.
- Canopy face down.
- Towed by canopy face down.
- Weight of waterlogged equipment.
- Entanglement with suspension lines or canopy.
- Water traffic. Pick up boat’s propeller.
Stress difficulties in judging height
above a large body of water,
particularly when smooth.
6. Practice in suspended harness. Log book endorsement.
QUESTIONS FROM:
QUESTIONS TO:
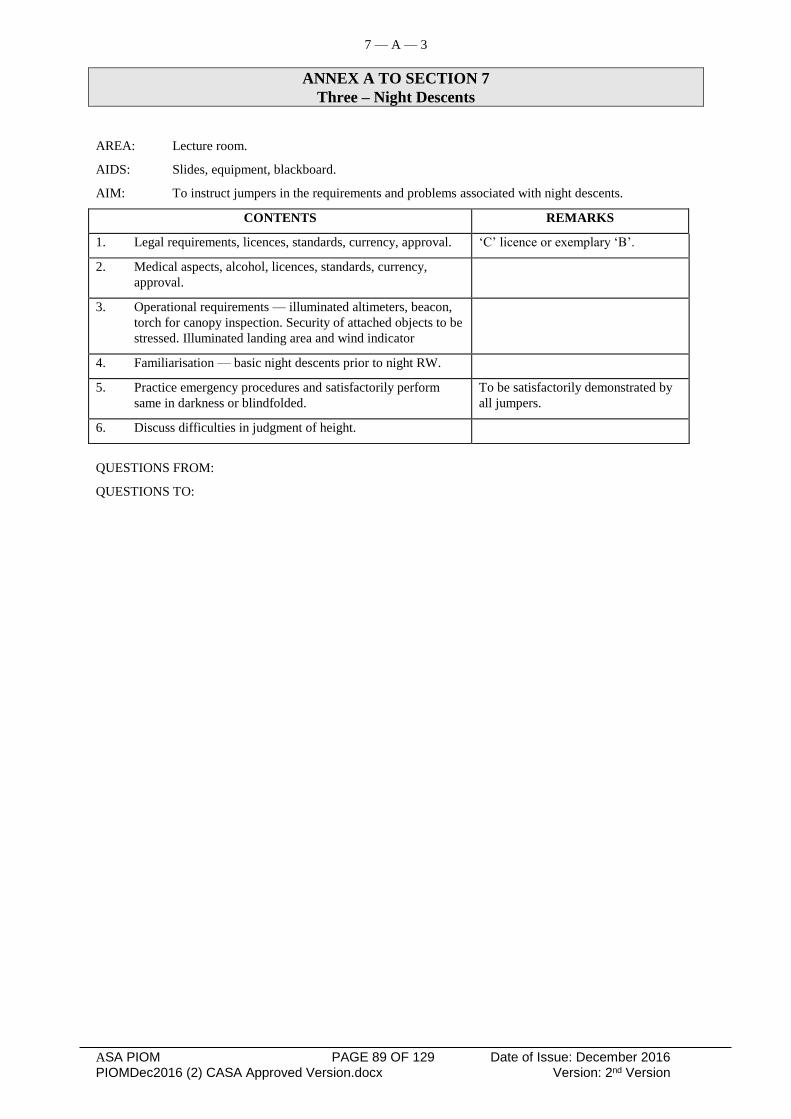
ASA PIOM PAGE 89 OF 129 Date of Issue: December 2016 PIOMDec2016 (2) CASA Approved Version.docx Version: 2nd Version
7 — A — 3
ANNEX A TO SECTION 7
Three – Night Descents
AREA: Lecture room.
AIDS: Slides, equipment, blackboard.
AIM: To instruct jumpers in the requirements and problems associated with night descents.
CONTENTS REMARKS
1. Legal requirements, licences, standards, currency, approval. ‘C’ licence or exemplary ‘B’.
2. Medical aspects, alcohol, licences, standards, currency,
approval.
3. Operational requirements — illuminated altimeters, beacon,
torch for canopy inspection. Security of attached objects to be
stressed. Illuminated landing area and wind indicator
4. Familiarisation — basic night descents prior to night RW.
5. Practice emergency procedures and satisfactorily perform
same in darkness or blindfolded.
To be satisfactorily demonstrated by
all jumpers.
6. Discuss difficulties in judgment of height.
QUESTIONS FROM:
QUESTIONS TO:
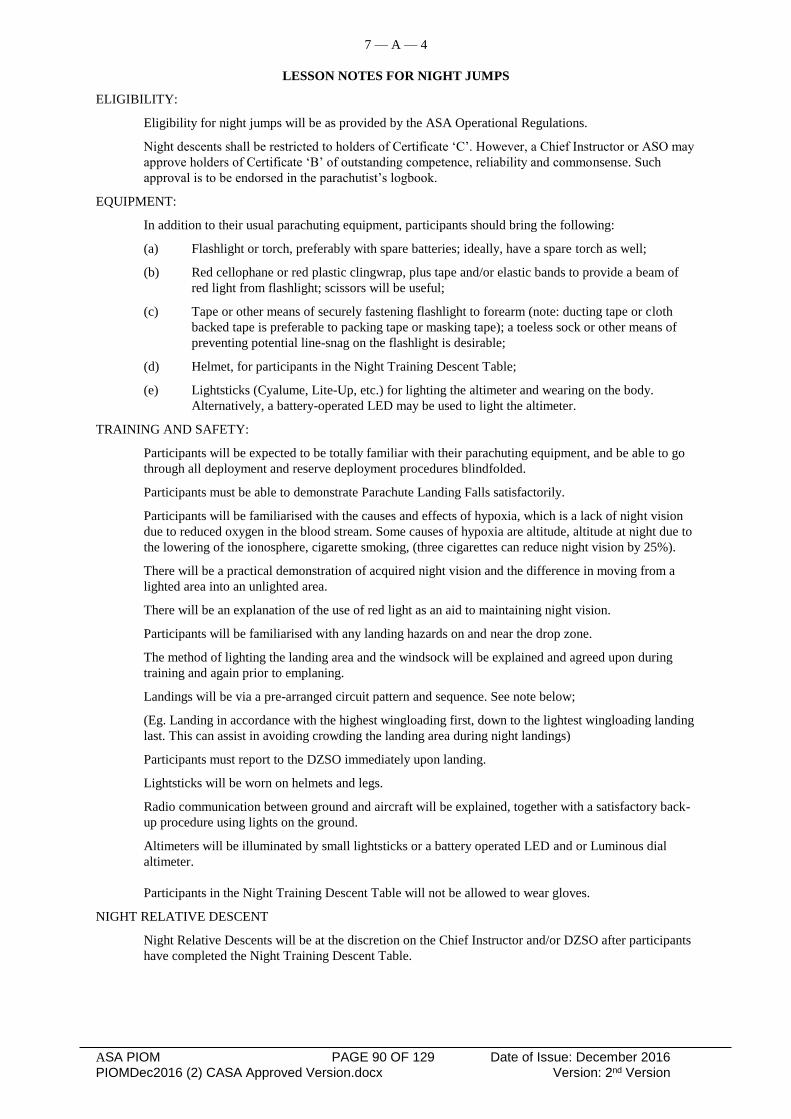
ASA PIOM PAGE 90 OF 129 Date of Issue: December 2016 PIOMDec2016 (2) CASA Approved Version.docx Version: 2nd Version
7 — A — 4
LESSON NOTES FOR NIGHT JUMPS
ELIGIBILITY:
Eligibility for night jumps will be as provided by the ASA Operational Regulations.
Night descents shall be restricted to holders of Certificate ‘C’. However, a Chief Instructor or ASO may
approve holders of Certificate ‘B’ of outstanding competence, reliability and commonsense. Such
approval is to be endorsed in the parachutist’s logbook.
EQUIPMENT:
In addition to their usual parachuting equipment, participants should bring the following:
(a) Flashlight or torch, preferably with spare batteries; ideally, have a spare torch as well;
(b) Red cellophane or red plastic clingwrap, plus tape and/or elastic bands to provide a beam of
red light from flashlight; scissors will be useful;
(c) Tape or other means of securely fastening flashlight to forearm (note: ducting tape or cloth
backed tape is preferable to packing tape or masking tape); a toeless sock or other means of
preventing potential line-snag on the flashlight is desirable;
(d) Helmet, for participants in the Night Training Descent Table;
(e) Lightsticks (Cyalume, Lite-Up, etc.) for lighting the altimeter and wearing on the body.
Alternatively, a battery-operated LED may be used to light the altimeter.
TRAINING AND SAFETY:
Participants will be expected to be totally familiar with their parachuting equipment, and be able to go
through all deployment and reserve deployment procedures blindfolded.
Participants must be able to demonstrate Parachute Landing Falls satisfactorily.
Participants will be familiarised with the causes and effects of hypoxia, which is a lack of night vision
due to reduced oxygen in the blood stream. Some causes of hypoxia are altitude, altitude at night due to
the lowering of the ionosphere, cigarette smoking, (three cigarettes can reduce night vision by 25%).
There will be a practical demonstration of acquired night vision and the difference in moving from a
lighted area into an unlighted area.
There will be an explanation of the use of red light as an aid to maintaining night vision.
Participants will be familiarised with any landing hazards on and near the drop zone.
The method of lighting the landing area and the windsock will be explained and agreed upon during
training and again prior to emplaning.
Landings will be via a pre-arranged circuit pattern and sequence. See note below;
(Eg. Landing in accordance with the highest wingloading first, down to the lightest wingloading landing
last. This can assist in avoiding crowding the landing area during night landings)
Participants must report to the DZSO immediately upon landing.
Lightsticks will be worn on helmets and legs.
Radio communication between ground and aircraft will be explained, together with a satisfactory back-
up procedure using lights on the ground.
Altimeters will be illuminated by small lightsticks or a battery operated LED and or Luminous dial
altimeter.
Participants in the Night Training Descent Table will not be allowed to wear gloves.
NIGHT RELATIVE DESCENT
Night Relative Descents will be at the discretion on the Chief Instructor and/or DZSO after participants
have completed the Night Training Descent Table.
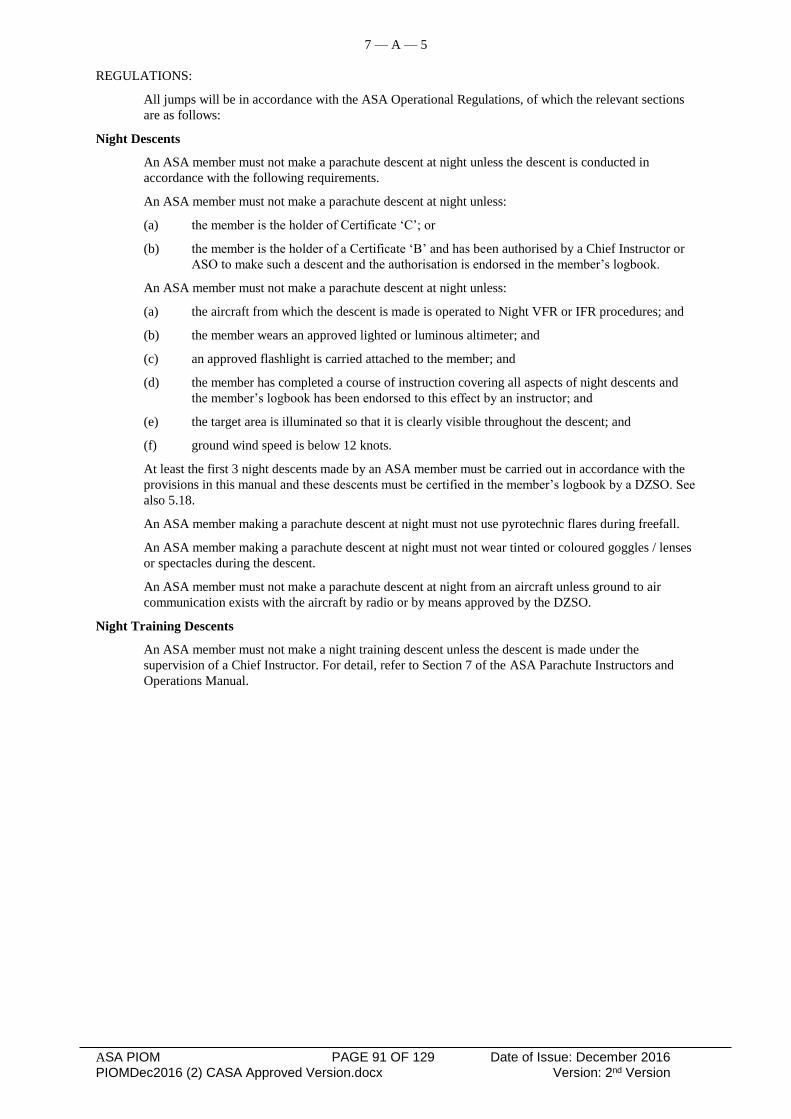
ASA PIOM PAGE 91 OF 129 Date of Issue: December 2016 PIOMDec2016 (2) CASA Approved Version.docx Version: 2nd Version
7 — A — 5
REGULATIONS:
All jumps will be in accordance with the ASA Operational Regulations, of which the relevant sections
are as follows:
Night Descents
An ASA member must not make a parachute descent at night unless the descent is conducted in
accordance with the following requirements.
An ASA member must not make a parachute descent at night unless:
(a) the member is the holder of Certificate ‘C’; or
(b) the member is the holder of a Certificate ‘B’ and has been authorised by a Chief Instructor or
ASO to make such a descent and the authorisation is endorsed in the member’s logbook.
An ASA member must not make a parachute descent at night unless:
(a) the aircraft from which the descent is made is operated to Night VFR or IFR procedures; and
(b) the member wears an approved lighted or luminous altimeter; and
(c) an approved flashlight is carried attached to the member; and
(d) the member has completed a course of instruction covering all aspects of night descents and
the member’s logbook has been endorsed to this effect by an instructor; and
(e) the target area is illuminated so that it is clearly visible throughout the descent; and
(f) ground wind speed is below 12 knots.
At least the first 3 night descents made by an ASA member must be carried out in accordance with the
provisions in this manual and these descents must be certified in the member’s logbook by a DZSO. See
also 5.18.
An ASA member making a parachute descent at night must not use pyrotechnic flares during freefall.
An ASA member making a parachute descent at night must not wear tinted or coloured goggles / lenses
or spectacles during the descent.
An ASA member must not make a parachute descent at night from an aircraft unless ground to air
communication exists with the aircraft by radio or by means approved by the DZSO.
Night Training Descents
An ASA member must not make a night training descent unless the descent is made under the
supervision of a Chief Instructor. For detail, refer to Section 7 of the ASA Parachute Instructors and
Operations Manual.

ASA PIOM PAGE 92 OF 129 Date of Issue: December 2016 PIOMDec2016 (2) CASA Approved Version.docx Version: 2nd Version
7 — A — 6
ANNEX A TO SECTION 7
Four – High Performance or Ram Air Canopy Conversions
AREA: Lecture Room.
AIDS: Slides, Equipment, Blackboard, owner manuals (three types).
AIM: To teach the parachutist the principles, emergencies and handling of high performance canopies.
CONTENTS REMARKS
1. Show parachutists high performance canopy. Recommended exercises:
Dump height 4,000 feet AGL.
2. Emphasis absolute necessity of having intimate knowledge of
type of canopy and release to be used.
1. Check canopy, release brakes.
2. Right turn (depression).
3. Lay out a set of exercises to be carried out on early descents. 3. Left turn (fly off).
4. Describe the types of canopies and their flying characteristics. 4. Stall (double declutch).
5. Stress the need to practice reserve procedures regularly, and
always just prior to the jump.
5. Right turn, two rotations.
6. Downwind target approach.
6. Ensure parachutist has read manual for system and canopy
prior to jump.
7. Landing open space; half-
brakes into wind.
7. Practice parachutist on various canopy release systems. 8. Violent stall recovery.
8. Brief parachutists on high performance malfunctions
(collapsed cells, slider hangup etc.).
9. Smooth recovery.
10. All modes of braking.
QUESTIONS FROM:
QUESTIONS TO:

ASA PIOM PAGE 93 OF 129 Date of Issue: December 2016 PIOMDec2016 (2) CASA Approved Version.docx Version: 2nd Version
7 — A — 7
ANNEX A TO SECTION 7
Five - Spotting
AREA: Lecture Room/DZ.
AIDS: Blackboard, air photograph, wind drift indicator, aircraft itself.
AIM: To teach the student the basic principles of spotting.
CONTENTS REMARKS
1. Use of wind drift indicator. Dimensions 20’ long — 10”
wide weight 3 oz. To be timed should be about 1 min 45
seconds.
2. WDI Drop from 2,000ft
2. Explanation and calculation of:
(a) Opening point;
(b) Throw forward;
(c) Freefall drift; and
(d) Exit point.
Use blackboard and air photograph.
3. Action in Aircraft:
(a) Briefing of pilot;
(b) Commands and signals;
(c) Awareness of aircraft drift; and
(d) Bad spotting.
Practice in aircraft on ground before
first live practice.
See attached notes.
QUESTIONS FROM:
QUESTIONS TO:

ASA PIOM PAGE 94 OF 129 Date of Issue: December 2016 PIOMDec2016 (2) CASA Approved Version.docx Version: 2nd Version
7 — A — 8
SPOTTING NOTES
This lesson should be given as soon as possible after the first freefall.
1. Determining the spot:
(a) Wind drift indicator;
(b) Selecting drifter run direction;
(c) Where to throw drifter;
(d) How to throw drifter;
(e) Timing drifter;
(f) Allowance for time difference; and
(g) Calculation of spot.
2. Getting the aircraft directly over the spot:
(a) Avoid parallax error;
(b) Head right out and use horizon;
(c) Do not use aircraft as a reference;
(d) Aircraft turns to be flat and 5 degrees;
(e) Signals to pilot 5 degrees, 10 degrees, and straight ahead;
(f) Power off;
(g) Brakes on command; and
(h) Do not hesitate to go around.
3. Other points:
(a) Dog-legs — effect on drifter, canopy and spot;
(b) Use of smoke on ground;
(c) Throw forward and freefall drift;
(d) Coasting past spot — especially on RW exits; and
(e) Changed winds during the day.

ASA PIOM PAGE 95 OF 129 Date of Issue: December 2016 PIOMDec2016 (2) CASA Approved Version.docx Version: 2nd Version
7 — A — 9
ANNEX A TO SECTION 7
Six – Canopy Relative Work (CRW)
AREA: Lecture Room/DZ.
AIDS: Blackboard, diagrams.
AIM: To teach the aspiring canopy relative worker the basics of CRW for safe early descents.
CONTENTS REMARKS
1. Revise handling characteristics of Ram-air canopies. Many articles on CRW have been
written and should be read prior to
first CRW descent.
2. Discuss effects of relative weights, canopy types, jumpsuits
etc. on flight and docking techniques.
3. Discuss various types of docking from below, behind, side,
and above. Nominate method to be used for first descent.
4. Discuss stacks and planning methods.
5. COMMANDS TO BE USED: left, right, centre, brakes, and
clear their meanings and actions required.
6. SAFETY: types of clothing (Boots/shoes without snag points
or hooks, use of gloves), helmet, knives to be carried and
readily available, break-off heights, and dropping and
cutaway procedures.
7. Emphasise smooth flying and safe closing speeds.
QUESTIONS FROM:
QUESTIONS TO:

ASA PIOM PAGE 96 OF 129 Date of Issue: December 2016 PIOMDec2016 (2) CASA Approved Version.docx Version: 2nd Version
7 — A — 10
LESSON NOTES FOR CRW
ELIGIBILITY:
Minimum of an A Licence. Currency is important and experience on canopy type.
EQUIPMENT
With CRW it is important to use the correct equipment such as:
Compatible canopies Protective Clothing
- Effect of suspended load on speed - Gloves and socks to prevent line burn
- Helmet should not restrict hearing
Equipment Suitability - Warm tracksuit or tight jumpsuit
- Cross connectors or stirrups
- Front riser handles Special Equipment
- Optimum length bridle (too long is unsuitable)- Use of retractable pilot chute -
Reliable altimeter
- RSL’s not recommended - Hook knife
- Single point bridle recommended - Tertiary reserve parachute
- Soft toggles
- SOS not recommended
TRAINING AND SAFETY
Participants should have a good knowledge of their canopy such as:
Aerodynamics of the canopy Flight characteristics of canopy stacks
- Angle of attack - Effect on rate of descent
- Effect of suspended weight on speed - Cantilever effect
- Gravity - Turning the stack
- Glide ratio
- Lift/drag Turbulence and its effect on ram air canopies
- Relative wind - Canopies
- The effects of braking - Dangers of turbulence and CRW
- Wing loading
Inform the following persons that you are to be involved in CRW:
- DZSO
- Pilot
- Other Jumpers
- Manifest
COMMUNICATIONS
Clear and concise verbal instructions
Break Any others by agreement between jumpers
Come up Come down Clear ears during descent by swallowing
Let it fly
Hold on Drop me
Right Left
Slowly

ASA PIOM PAGE 97 OF 129 Date of Issue: December 2016 PIOMDec2016 (2) CASA Approved Version.docx Version: 2nd Version
7 — A — 11
PROCEDURES
Spotting Docking
- Avoid cloud (turbulence) - Centre cell or centre “A” lines
- Determine winds at altitude - Communication is essential
forecasts - Pilot grips with both hands and feet
cloud movement
actual reports Biplane
- Maintain wind-line (upper winds likely to - Use of stirrups or cross connectors
differ from lower winds) - Pin observes to ensure canopy clearance
- Pin applies brakes to ascend
Exit
- Awareness of other canopies Break-off and Landing
- Follow the plan - Adhere to plan, but break-off if necessary
- Steering with rear risers - Maintain communication
- Check pilot chute before break-off
Setting Up - No changes below 2000’
- Ascending (apply brakes) - Break to left and right from larger stacks
- Descending (use front risers, avoid spirals) - Reduced flare potential when landing a stack
- Work to the wind line
Approaching
- Do not fly in front of the stack
- From below / From above
- Horizontal approach
- Keep it smooth
- Keep the stack in sight
EMERGENCY PROCEDURES
Prevention is better than cure With Support (one canopy inflated)
- Planning - Above safe cutaway height low man cuts away
- Altitude awareness - Below safe cutaway height inflight transfer by
- Communication low man
- Walking pace approaches
- No work below 2000’ Without Support
- Above safe cutaway height
Canopy Collision top man cuts away
- Collision drill (spread arms and legs) bottom man checks below then cuts away
Entanglement - Below safe cutaway height
- Determine altitude deploy reserve
- Establish communication
- Protect handles

ASA PIOM PAGE 98 OF 129 Date of Issue: December 2016 PIOMDec2016 (2) CASA Approved Version.docx Version: 2nd Version
7 — B — 1
ANNEX B TO SECTION 7
Relative Work Training Table
SKILL LEVEL 1
OBJECTIVES:
1. To check students competence and skill level in:
(a) Spotting;
(b) Height awareness;
(c) General freefall; and
(d) Tracking.
2. Instruction prior to dive should include:
(a) Economics of ensuring the plane is at the right spot at the right height;
(b) The importance of base; and
(c) The theory of:
(1) Commencing approach;
(2) Coasting;
(3) Flaring and docking; and
(4) The use of arms and legs to control fast and slow fall and glide angles.
COMMON PROBLEMS:
1. Loss of height awareness.
2. Tension.
3. Rushing.
4. Not using legs for forward movement.
5. Reaching.
THE DIVE:
1. Student exits base.
2. Tutor dives to a point 10 feet below and in front of student.
3. Student tucks to come down to same level as tutor maintaining heading.
4. Tutor demonstrates Pin.
5. Student observes:
(a) Body position of tutor;
(b) Angle of approach;
(c) Speed of approach; and
(d) Flare point.
6. Tutor backslides.
7. Student pins.
SKILL LEVEL 2
OBJECTIVES:
1. Consolidation of pinning.
2. Tension awareness between grips.
3. Pivot turn on the spot.
THE DIVE:
1. Tutor exits base.
2. Student dives to straight pin.
3. Tutor backslides 10 — 15 feet.
4. Tutor flies forward to offset grip and observes tension.
5. Student and tutor swing to opposite offset.
6. Student makes 360 degree flat pivot turn maintaining visual contact with tutor as much as possible
and returns to straight pin position.
7. Repeat sequence if time allows.
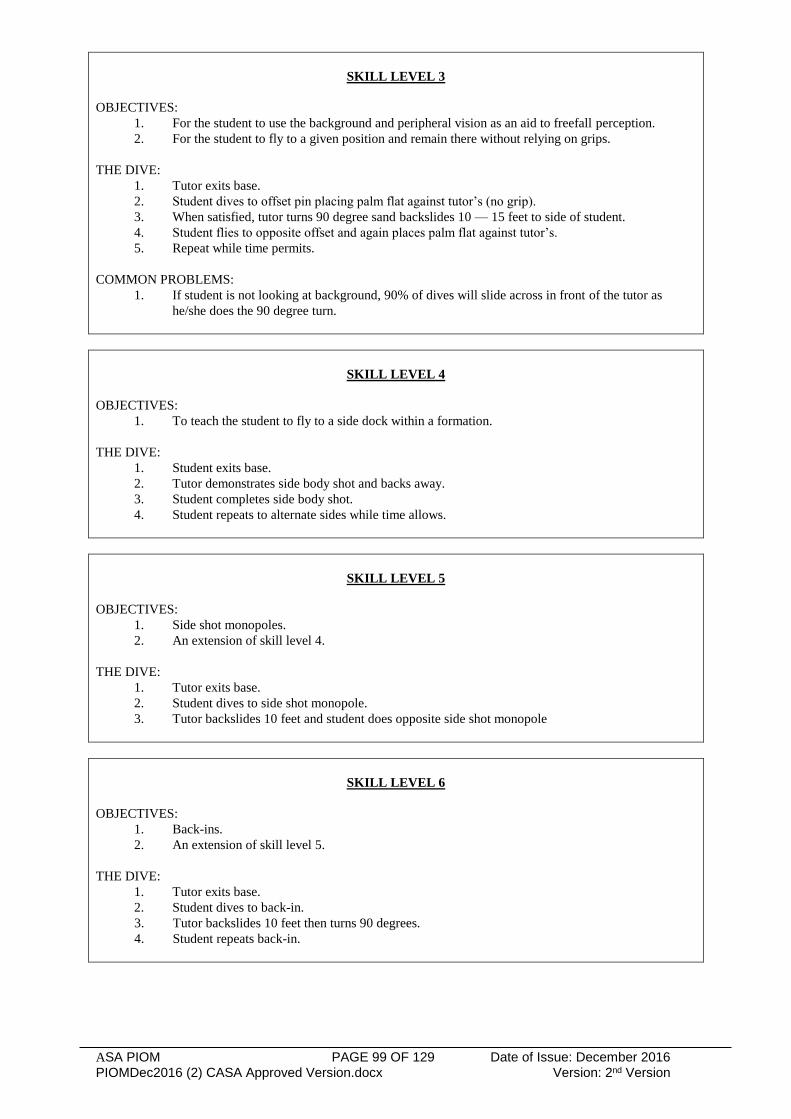
ASA PIOM PAGE 99 OF 129 Date of Issue: December 2016 PIOMDec2016 (2) CASA Approved Version.docx Version: 2nd Version
SKILL LEVEL 3
OBJECTIVES:
1. For the student to use the background and peripheral vision as an aid to freefall perception.
2. For the student to fly to a given position and remain there without relying on grips.
THE DIVE:
1. Tutor exits base.
2. Student dives to offset pin placing palm flat against tutor’s (no grip).
3. When satisfied, tutor turns 90 degree sand backslides 10 — 15 feet to side of student.
4. Student flies to opposite offset and again places palm flat against tutor’s.
5. Repeat while time permits.
COMMON PROBLEMS:
1. If student is not looking at background, 90% of dives will slide across in front of the tutor as
he/she does the 90 degree turn.
SKILL LEVEL 4
OBJECTIVES:
1. To teach the student to fly to a side dock within a formation.
THE DIVE:
1. Student exits base.
2. Tutor demonstrates side body shot and backs away.
3. Student completes side body shot.
4. Student repeats to alternate sides while time allows.
SKILL LEVEL 5
OBJECTIVES:
1. Side shot monopoles.
2. An extension of skill level 4.
THE DIVE:
1. Tutor exits base.
2. Student dives to side shot monopole.
3. Tutor backslides 10 feet and student does opposite side shot monopole
SKILL LEVEL 6
OBJECTIVES:
1. Back-ins.
2. An extension of skill level 5.
THE DIVE:
1. Tutor exits base.
2. Student dives to back-in.
3. Tutor backslides 10 feet then turns 90 degrees.
4. Student repeats back-in.

ASA PIOM PAGE 100 OF 129 Date of Issue: December 2016 PIOMDec2016 (2) CASA Approved Version.docx Version: 2nd Version
SKILL LEVEL 7
OBJECTIVES:
1. For the student to learn to fly from one point to another within a formation.
THE DIVE:
1. Linked exit, student on wheel/step.
2. Tutor releases one grip and flies back to line, then returns to pin, while student stays on heading.
3. Transition to compressed accordion.
4. Student flies around to caterpillar, then back to straight pin, with tutor remaining on heading
throughout.
SKILL LEVEL 8
OBJECTIVES:
1. To teach the student to fly to different points of a formation while maintaining relative height.
THE DIVE:
1. Tutor exits base.
2. Student flies to straight pin.
3. Tutor stays on heading while student flies around to dock on side of tutor, then on the back, then
on the opposite side.
SKILL LEVEL 9
OBJECTIVES:
1. To introduce student to sequential manoeuvring.
2. Outside turns are used to teach the student to remain on his/her own column of air while turning
away from the formation.
3. To demonstrate the flow of the dive to the student.
THE DIVE:
1. Tutor exits base.
2. Student dives to side shot monopole.
3. Student flies around to offset pin on opposite side.
4. Student backs in on same arm to form stairstep.
5. Student side-flakes tutor.
6. Student backs in on tutor to form caterpillar.
7. Repeat sequence.
SKILL LEVEL 10 (Three Dives)
OBJECTIVES:
1. To teach the student how to organise a dive.
2. To familiarise the student with flying relative with more than one other person.
3. To be used as a stepping off point to larger formations.
THE DIVES:
1. These dives should be done with 2 to 4 other persons.
2. The student designs each dive and organises it.
3. One of the participants must be an approved RW tutor.
4. At least one of these dives must be a successful 3 point random 4 way.
7 — C —

ASA PIOM PAGE 101 OF 129 Date of Issue: December 2016 PIOMDec2016 (2) CASA Approved Version.docx Version: 2nd Version
ANNEX C TO SECTION 7
WS TRAINING TABLE (WSTT) – Part A
WINGSUIT FIRST FLIGHT COURSE
ASA OP REGS Requirements:
All parachutist wanting to complete a wing suit descent must meet all ASA OP REGS and ASA
PIOM before commencing a flight.
Prerequisites:
Basic Training consists of a minimum of three jumps and ground course which is to be completed by
an ASA approved WS tutor:
Course Content
Tutor to explain/ demonstrate the following in the ground course:
Introduction into equipment, and a suitable choice of WS
Explanation, demonstration of gear up and checks
Explanation of jump run, exit point, exit order and flight path
Explanation of consequences of jumping up or opening wings on exit
A, B, C freefall emergency procedures
Canopy emergency procedures
Under canopy emergency procedures
General control and flight characteristics of a WS.
New signals
Signals
Closed Fist *Commence deployment procedures
Circle made by thumb and first finger *Check Altimeter
Two pointed fingers *Straighten legs
Completion of WSTT - Part A
After the successful completion of three jumps, the novice is allowed to make RW descents with up
to 3 others approved by the DZSO.
A jump plan must be presented to the DZSO if there is no WS tutor or WS crest holder present on the
jump.
To undertake WSTT Part B, the Novice must have made an additional 10 WS descents

ASA PIOM PAGE 102 OF 129 Date of Issue: December 2016 PIOMDec2016 (2) CASA Approved Version.docx Version: 2nd Version
WS TRAINING TABLE (WSTT) – Part A
WINGSUIT TRAINING DESCENT – STAGE ONE
Tutor and Participant
AIMS:
Maintain stability through exit and demonstrate control
Fly the planned flight path (left or right hand circuit)
Maintain constant height awareness
Show 2 x controlled PRP's
2 x heel clicks on deployment at correct pre‐planned altitude
Show controlled deployment procedures
SEQUENCE
Poised Exit
Fly up jump run for 10-15 sec
Make a 90 degree left (or right) hand turn
Perform 2 x PRP's (in control)
Make another 90 degree turn (same direction as preformed earlier)
Relax, look left or right for tutor for any signals
Perform 2x heel clicks at 5,000ft
Pull by 4,500ft
WINGSUIT TRAINING DESCENT - STAGE TWO (Consolidation Jump)
Tutor and Participant
AIMS
Maintain stability through exit and demonstrate control
Fly the planned flight path (left or right hand circuit)
Maintain constant height awareness
Show 2 x controlled PRP's
2 x heel clicks on deployment at correct pre‐planned altitude
Show controlled deployment procedures
Resolve any issue occurred during Jump 1
SEQUENCE
Poised Exit
Fly up jump run for 10-15 sec
Make a 90 degree left (or right) hand turn
Perform 2 x PRP's (in control)
Make another 90 degree turn (same direction as preformed earlier)
Relax, look left or right for tutor for anybody signals
Perform 2x heel clicks at 5,000ft
Pull by 4,500ft

ASA PIOM PAGE 103 OF 129 Date of Issue: December 2016 PIOMDec2016 (2) CASA Approved Version.docx Version: 2nd Version
WS TRAINING TABLE (WSTT) – Part A (Continued)
WINGSUIT TRAINING DESCENT STAGE THREE (Maximum 3-way)
Tutor and Participant
Extra person must be approved by WS Tutor and DZSO
Prerequisites:
Explain and demonstrate why it is not acceptable to approach a flock:
* Head-on or side-on (closing speeds)
* From below (i.e. not to drive up from underneath)
Explain while when flying in a flock must you never make a turn greater than 90 degrees
Explain break off procedures
Outline the Wing suit burble (its size and position) and how it differs from a normal skydive
AIMS
Demonstrate a stable exit
Demonstrate how to approach a formation
* (Showing different flight characteristics of your WS)
Maintain height awareness
Fly the planned flight path left (or right)
Show general control and safety in the sky
Show 1 x heel click on break off
Show a controlled break off (keeping the flight flat)
Show 2 x heel clicks of deployment
Show controlled deployment procedures
SEQUENCE:
Maintain stability through exit and demonstrate control
Fly the planned flight path (left or right hand circuit)
Maintain constant height awareness
Tutor to fly forward and/ or off to one side
Novice to demonstrate a controlled approach
Repeat as time allows
Perform 1x heel click at 5000 to signal break off
Novice to demonstrate break off procedures
Perform 2x heel clicks for deployment
Pull by 4,000ft
After the successful completion of three jumps, the novice is allowed to make RW descents with up
to 3 others approved by the DZSO.
A jump plan must be presented to the DZSO if there is no WS tutor or WS crest holder present on the
jump.
To undertake WSTT Part B, the Novice must have made an additional 10 WS descents

ASA PIOM PAGE 104 OF 129 Date of Issue: December 2016 PIOMDec2016 (2) CASA Approved Version.docx Version: 2nd Version
7 — D —
ANNEX D TO SECTION 7
Wing Suit Training Table (WSTT) – Part B
WING SUIT – RELATIVE WORK COURSE
The aim of Part B of the WSTT is to endorse the novice to fly in RW with a maximum of 10 WS
parachutist.
By obtaining this endorsement the novice must show control and safety in the air and complete each
stage of this training table to the satisfaction of the Wing suit coach and CI.
Part B training descents must be done under direct supervision of ASA approved Wingsuit Tutor
To undertake this section of the WSTT the Novice must have made an additional 10 WS descents
after completing part A of the WSTT
Course Content
Discuss all areas of WS formation Relative work
Discuss break off and not turning greater than 90 degrees
Discuss why WS pilots will never turn greater than 90 degrees off the planned flight line
Discuss keeping the same level on break off (not creating lift)
Discuss Approach and holding/ changing slots while in a formation
* Not looking up at the formation
* Looking from your fore head
* How to correct after sinking out
* What to do if you're in front/above of the formation
Discuss canopy control and avoidance techniques
***REMEMBER ***
Closing speeds in a WS are incredibly FAST, never rush an approach and always stay in control
and stay alive!!!!
Completion of WSTT - Part B
After the successful completion of four jumps, the parachutist is allowed to make RW descents with
up to 10 others approved by the DZSO.
A jump plan must be presented to the DZSO if there is no WS tutor or WS crest holder present on the
jump.
To apply for a WS Crest – the parachutist must have made completed the following:
- Completed WSTT Part A plus at least 10 WS descents
- Completed WSTT Part B plus at least 10 WS descents
- Be deemed competent by WS Tutor or DZSO before commencing WS Crest attempts
An ASA WS Star Crest MUST be held by all parachutist conducting a parachute decent involving
greater than 10 skydivers regardless of the discipline.

ASA PIOM PAGE 105 OF 129 Date of Issue: December 2016 PIOMDec2016 (2) CASA Approved Version.docx Version: 2nd Version
WS TRAINING TABLE (WSTT) – Part B
WINGSUIT TRAINING DESCENT - STAGE 1
Tutor and Participant
AIMS
Novice to perform a minimum of Three controlled docks of which:
*One must be a point after exit
*One must be a point after flying over the WS coach
*One must be a point after flying behind the WS coach
Novice must show stability and safety throughout the whole jump.
Maintain height awareness throughout the whole jump
Novice must break off and pull at pre-determined heights.
WINGSUIT TRAINING DESCENT
STAGE 2 || STAGE 3 || STAGE 4
(Maximum of 6 ways)
Tutor and Participant
Extra people must be approved by WS Tutor and DZSO and hold current WS Endorsement
AIMS
-Novice to show control and stability in:
*Exit
*Approach
*Holding and or changing slot
*on break off and deployment
Novice to Plan the jump and discuss issues relating to RW
Maintain height awareness throughout the whole jump
Novice to perform a different exit on each jump:
*exit from inside the plan
*exit from outside the plane.

ASA PIOM PAGE 106 OF 129 Date of Issue: December 2016 PIOMDec2016 (2) CASA Approved Version.docx Version: 2nd Version
ANNEX E TO SECTION 7
Freefly Training Table (FFTT)
Aims and Objectives of FFTT:
Initially FFTT enables you to participate better and more safely in two-way freefly jumps.
You can then progress to larger groups according to the level and experience of the other flyers.
Skydivers are not allowed to participate in an inexperienced group freefly jump without an FF
Endorsement.
Consequently, this should be looked on as a guide to jumpers and DZSOs so that a standard of
competence is established for participation in a particular skydive or so that the skydive may be
modified to suit the abilities of the skydivers taking part.
The danger is that two or more inexperienced jumpers will attempt more than they should. This is not
to say that jumpers who are competent at recovery and Head-up flying should not plan a Head-up
dive or that nobody should ever try anything new. But it does mean that they should not include
Head-down (for example) until they have demonstrated some competence or plan to fly with an
experienced jumper or tutor and that new things should be introduced in small doses and at the top of
the skydive.
In freefly having lots of jumps is not the criteria of competence, rather it is that the jumper has
practised and learnt the skills that are to be included in the jump.
To satisfy the evaluation criteria of FF Endorsement you should be able to demonstrate the following:
Evaluation Criteria
Knowledge of specific 'Freefly Safety Rules'
Understanding the dangers of “corking”.
Resuming the “recovery position” with ease.
Head-up Position
Backflying Position
- Maintain heading
- Understanding of corking and recovery
position
- Visual control according to reference
Head-up Position
- Maintain equilibrium with ease.
- Rotation through every axis.
- Controlling levels and proximity.
Head-down Position
- Being vertical (No time limit).
- Working in full safety.
- Visual control according to reference.
- Respecting axis.
- Proper reaction to loss of position.
Break Off & Tracking
- Altitude awareness and initiate break off.
- Go into a progressive efficient track.
- Respect heading and barrel roll visual
check.
Completion of FFTT:
Once Head-up Stages 1-5 passed to satisfaction of Tutor a note must be made in Logbook and
Trainee allowed to jump in groups larger than three in Head Up position.
Following the successful competition of Head Up RW TT are completed and signed off, trainees may
participant in Head Down RW training table descents subject to DZSO approvals and FF Tutor
briefing.

ASA PIOM PAGE 107 OF 129 Date of Issue: December 2016 PIOMDec2016 (2) CASA Approved Version.docx Version: 2nd Version
FREEFLY TRAINING TABLE (FFTT)
FREEFLY TRAINING TABLE - HEAD UP – STAGE 1
BACKFLYING (Recovery Position)
Tutor and Participant
DIVE PLAN
- Linked exit. Break and face-off with tutor
- Backflying Skills
Neutral Back flying Position (this is used as recovery position in Freefly descents)
Complete Slow Fall (Up)
Complete Fast Fall (Down)
- Trainee initiates break-off at agreed height and demonstrates a safe and smooth transition
to a track while checking airspace for a clear flight path.
Following successful completion of Stage 1, trainees may move onto stage 2
Note: No trainee is be permitted to jump head-down with an unqualified Freeflyer acting (either
head-up or head-down) as their reference.
Neither flyer has the knowledge or experience to deal with the risk of a highspeed collision.
FREEFLY TRAINING TABLE - HEAD UP – STAGE 2
BACKFLYING (Recovery Position)
Tutor and Participant
DIVE PLAN
- Linked exit. Break and face-off with tutor.
- Backflying Skills
Neutral Back flying Position (this is used as recovery position in Freefly descents)
Complete Figure 8 (360o Right Turn & 360o Left Turn)
- Trainee initiates break-off at agreed height and demonstrates a safe and smooth transition
to a track while checking airspace for a clear flight path.
Following successful completion of Stage 2, trainees may move onto stage 3
Note: No trainee is be permitted to jump head-down with an unqualified Freeflyer acting (either
head-up or head-down) as their reference.
Neither flyer has the knowledge or experience to deal with the risk of a highspeed collision.

ASA PIOM PAGE 108 OF 129 Date of Issue: December 2016 PIOMDec2016 (2) CASA Approved Version.docx Version: 2nd Version
FREEFLY TRAINING TABLE (FFTT)
FREEFLY TRAINING TABLE - HEAD UP – STAGE 3
SITFLYING (Neutral / Forward & Backward)
Tutor and Participant
DIVE PLAN
- Linked exit. Break and face-off with tutor.
- Neutral Sit flying position
- Tutor backs-off, trainee moves forward to face-off with tutor
- Trainee back-off, Tutor Flies forward to face off with trainee
- Trainee initiates break-off at agreed height and demonstrates a safe and smooth transition
to a track while checking airspace for a clear flight path.
Following successful completion of Stage 3, trainees may move onto Stage 4
Note: No trainee is be permitted to jump head-down with an unqualified Freeflyer acting (either
head-up or head-down) as their reference.
Neither flyer has the knowledge or experience to deal with the risk of a highspeed collision.
FREEFLY TRAINING TABLE - HEAD UP – STAGE 4
SITFLYING (Neutral / Turns)
Tutor and Participant
DIVE PLAN
- Linked exit.
- Break and face-off with tutor and fly in neutral position within 5 metres
- In-place – Complete Figure of 8
360o Left Turn
360o Right Turn
- Trainee initiates break-off at agreed height and demonstrates a safe and smooth transition
to a track while checking airspace for a clear flight path.
Following successful completion of Stage 4, trainees may move onto stage 4
Note: No trainee is be permitted to jump head-down with an unqualified Freeflyer acting (either
head-up or head-down) as their reference.
Neither flyer has the knowledge or experience to deal with the risk of a highspeed collision.
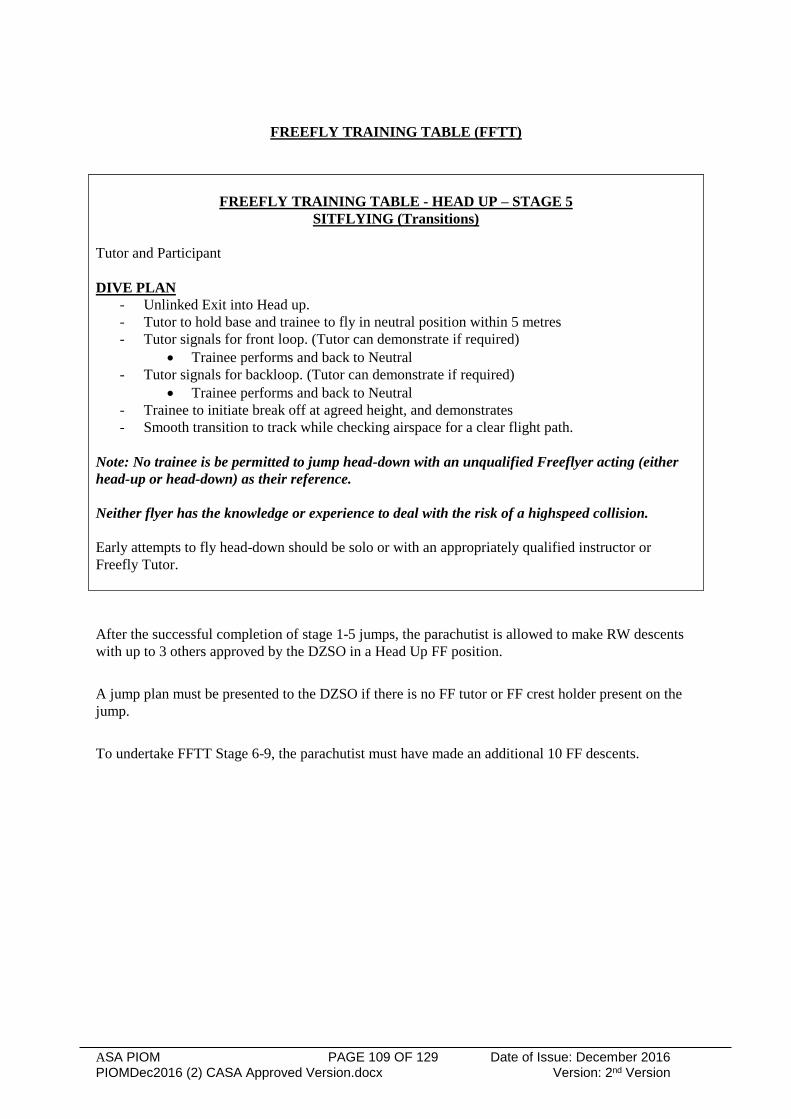
ASA PIOM PAGE 109 OF 129 Date of Issue: December 2016 PIOMDec2016 (2) CASA Approved Version.docx Version: 2nd Version
FREEFLY TRAINING TABLE (FFTT)
FREEFLY TRAINING TABLE - HEAD UP – STAGE 5
SITFLYING (Transitions)
Tutor and Participant
DIVE PLAN
- Unlinked Exit into Head up.
- Tutor to hold base and trainee to fly in neutral position within 5 metres
- Tutor signals for front loop. (Tutor can demonstrate if required)
Trainee performs and back to Neutral
- Tutor signals for backloop. (Tutor can demonstrate if required)
Trainee performs and back to Neutral
- Trainee to initiate break off at agreed height, and demonstrates
- Smooth transition to track while checking airspace for a clear flight path.
Note: No trainee is be permitted to jump head-down with an unqualified Freeflyer acting (either
head-up or head-down) as their reference.
Neither flyer has the knowledge or experience to deal with the risk of a highspeed collision.
Early attempts to fly head-down should be solo or with an appropriately qualified instructor or
Freefly Tutor.
After the successful completion of stage 1-5 jumps, the parachutist is allowed to make RW descents
with up to 3 others approved by the DZSO in a Head Up FF position.
A jump plan must be presented to the DZSO if there is no FF tutor or FF crest holder present on the
jump.
To undertake FFTT Stage 6-9, the parachutist must have made an additional 10 FF descents.

ASA PIOM PAGE 110 OF 129 Date of Issue: December 2016 PIOMDec2016 (2) CASA Approved Version.docx Version: 2nd Version
FREEFLY TRAINING TABLE (FFTT)
FREEFLY TRAINING TABLE – HEAD DOWN – STAGE 6
(Neutral Position)
Tutor and Participant
DIVE PLAN
- Linked exit.
- Break and face-off with tutor.
- Neutral Position
Understanding holding a heading (facing Tutor preferred)
- Trainee to initiate break off at agreed height, turns 180 and demonstrates
smooth transition to track while checking airspace for a clear flight path.
Following successful completion of Stage 6, trainees may move onto stage 7
Note: No trainee is be permitted to jump head-down with an unqualified Freeflyer acting (either
head-up or head-down) as their reference.
Neither flyer has the knowledge or experience to deal with the risk of a highspeed collision.
FREEFLY TRAINING TABLE – HEAD DOWN – STAGE 7
(Neutral Position / Forward & Backward)
Tutor and Participant
DIVE PLAN
- Unlinked Exit to Head Down.
- Tutor to hold base and trainee to approach and face off within 5 metres.
- Hand to hand dock.
- Tutor to hold base and trainee fly backwards and Tutor Follows
- Hand to hand dock.
- Trainee to initiate break off at agreed height, turns 180 and demonstrates
smooth transition to track.
Following successful completion of Stage 7, trainees may move onto stage 8
Note: No trainee is be permitted to jump head-down with an unqualified Freeflyer acting (either
head-up or head-down) as their reference.
Neither flyer has the knowledge or experience to deal with the risk of a highspeed collision.

ASA PIOM PAGE 111 OF 129 Date of Issue: December 2016 PIOMDec2016 (2) CASA Approved Version.docx Version: 2nd Version
FREEFLY TRAINING TABLE (FFTT)
FREEFLY TRAINING TABLE - HEAD DOWN – STAGE 8
(Neutral / Turns)
Tutor and Participant
DIVE PLAN
- Linked exit. Break and face-off with coach.
- Break and face-off with coach and fly in neutral position within 5 metres
- In-place – Complete Figure of 8
360o Left Turn
360o Right Turn
Trainee initiates break-off at agreed height to a track while checking airspace for a clear
flight path.
Following successful completion of Stage 8, trainees may move onto Stage 9
Note: No trainee is be permitted to jump head-down with an unqualified Freeflyer acting (either
head-up or head-down) as their reference.
Neither flyer has the knowledge or experience to deal with the risk of a highspeed collision.
FREEFLY TRAINING TABLE – HEAD DOWN – STAGE 9
SITFLYING (Neutral / Transitions)
Tutor and Participant
DIVE PLAN
- Linked exit.
- Break and face-off with coach and fly in neutral position within 5 metres
- Tutor signals for front loop. (Tutor can demonstrate if required)
Trainee performs and back to Neutral
- Tutor signals for backloop. (Tutor can demonstrate if required)
Trainee performs and back to Neutral
- Trainee initiates break-off at agreed height and demonstrates a safe and smooth transition
to a track while checking airspace for a clear flight path.
Note: No trainee is be permitted to jump head-down with an unqualified Freeflyer acting (either
head-up or head-down) as their reference.
Neither flyer has the knowledge or experience to deal with the risk of a highspeed collision.

ASA PIOM PAGE 112 OF 129 Date of Issue: December 2016 PIOMDec2016 (2) CASA Approved Version.docx Version: 2nd Version
FREEFLY TRAINING TABLE (FFTT)
COMPLETION OF FFTT STAGES 6-9
Additional Information and requirements
After the successful completion of stage 6-9, the parachutist is allowed to make RW descents with up
to 3 others approved by the DZSO in a Head Down FF position.
A jump plan must be presented to the DZSO if there is no FF tutor or FF crest holder present on the
jump.
To undertake FF Crest, the parachutist must have made an additional 10 FF descents.
Following the successful competition of BOTH Head Up and Head Down FFTT are completed and
signed off, trainees may participant in all Freefly Descents without a FF Tutor subject to DZSO
approvals and in accordance with ASA OP REGS.
After the successful completion of the FFTT, the parachutist is allowed to make RW descents with up
to 10 others approved by the DZSO.
To apply for a FF Crest – the parachutist must have made completed the following:
- Completed FFTT Stages 1-5 plus at least 10 FF descents
- Completed FFTT Stages 6-9 plus at least 10 FF descents
- Be deemed competent by FF Tutor or DZSO before commencing FF Crest attempts
An ASA FF Star Crest MUST be held by all parachutist conducting a parachute descent involving
greater than 10 skydivers regardless of the discipline.

ASA PIOM PAGE 113 OF 129 Date of Issue: December 2016 PIOMDec2016 (2) CASA Approved Version.docx Version: 2nd Version
8 — 1
SECTION 8: Parachute Packing Training
8.1 Parachute packing and packing instruction will be conducted in accordance with the ASA OP REGS.
8.2 Student parachutists shall receive instruction in accordance with the lesson guide at Annex A to this
Section. This shall give them the theoretical knowledge and experience necessary to be certified by the
Chief Instructor as competent to pack main canopies of any specified type for their own use.
8.3 Lesson guide for packing various types of canopies are generalised, details of packing procedures are
obtained from the manufacturers and applicable documents to the canopy type and harness system in use.
8.4 Student parachutists wishing to obtain their ‘A’ Licence will also need to complete the following:
(a) Pack a minimum of 20 main parachutes and be able to identify and rectify line tangles, turns and
twists;
(b) Student must be able to untangle and pack a main parachute within 45 minutes
(c) Have his/her logbook endorsed by the Chief Instructor as being proficient in being able to pack a
main parachute for his/her own use.

ASA PIOM PAGE 114 OF 129 Date of Issue: December 2016 PIOMDec2016 (2) CASA Approved Version.docx Version: 2nd Version
8 — A — 1
ANNEX A TO SECTION 8
Parachute Packing Familiarisation
AREA: DZ/packing area.
AIDS: Parachutes, packing manuals, and packing mats.
AIM: To familiarise the student with the procedures and principles of packing a main parachute.
CONTENTS REMARKS
1. Layout canopy. Mention enemies of the parachute.
2. Line check. Instructor Check No 1.
3. Fold canopy. Slider up, brakes installed.
Instructor Check No 2.
4. Deployment bag and line stowage. Instructor Check No 3.
5. Container closure. Instructors Check No. 4
6. Container and harness inspection. Book work completed.
Instructor Completes
Final Inspection confirming ready for
live drop
NOTE:
1. All containers, S/L or freefall, are to be inspected by an instructor.
2. AADs are only to be fitted and set by an instructor.
3. All parachutes packed by a student must be countersigned by an instructor on all 4 checks
QUESTIONS FROM:
QUESTIONS TO:

ASA PIOM PAGE 115 OF 129 Date of Issue: December 2016 PIOMDec2016 (2) CASA Approved Version.docx Version: 2nd Version
9 — 1
SECTION 9: Additional Operational Procedures
9.1 Qualified Parachutists
Qualified parachutists making use of the club facilities shall conduct their parachute descents in
accordance with the requirements of the ASA CAR 152 specification, the ASA Operational Regulations
and Section 2 of this Manual and shall be subject to the authority of the DZSO.
9.2 Visiting Parachutists
9.2.1 It will be the responsibility of the DZSO to ensure that visiting parachutists have the qualifications
and necessary recent experience to undertake any planned descents.
9.2.2 Prior to making any descents a visiting parachutist not known personally to the DZSO shall be
required to present the following for inspection: ASA sporting licence and his personal parachute
equipment.
9.2.3 In addition, if the visiting parachutist is a student parachutist he shall produce a letter of authority
signed by his Chief Instructor.
9.3 Briefings
It will be the responsibility of the student or instructor whose task it is to spot the aircraft and give the
command to exit to ensure that every parachutist and the pilot on that particular sortie has been
thoroughly briefed. The following points will be included in the brief:
Parachutists:
(a) Exit height;
(b) Mode of exit;
(c) Task(s) to be performed in freefall;
(d) If a relative descent is planned — break-off height;
(e) Opening height;
(f) Estimated opening point; and
(g) Emergency procedures in the aircraft.
Pilot:
(a) Exit height(s);
(b) Number of jump runs;
(c) Approximate line of jump run(s);
(d) Estimated exit point;
(e) Mode of exit;
(f) Emergency procedures in the aircraft; and
(g) Climb and descent traffic pattern.
9.4 Preparation of Aircraft for Parachuting
Prior to commencement of operations each day the DZSO will ensure that the aircraft to be used are of a
suitable type and are prepared as follows:
(a) Door removed;
(b) The necessary seats are removed;
(c) Dual control column is removed if that position is to be occupied by a parachutist;
(d) Seat belts or single point restraints are fitted;
(e) All loose objects are removed;
(f) Any projections likely to snag equipment are removed or taped over;
(g) For Display Descents only - A supply of wind drift indicators are stowed aboard
(h) A sharp knife is to be carried and stowed in a position readily accessible to the pilot or
parachutist(s)
9.5 Operation of Aircraft
9.5.1 It will be the responsibility of the DZSO and the pilots in command to ensure that the aircraft
engaged in the operations are operated in accordance with the requirements of ASA Operational
Regulations.
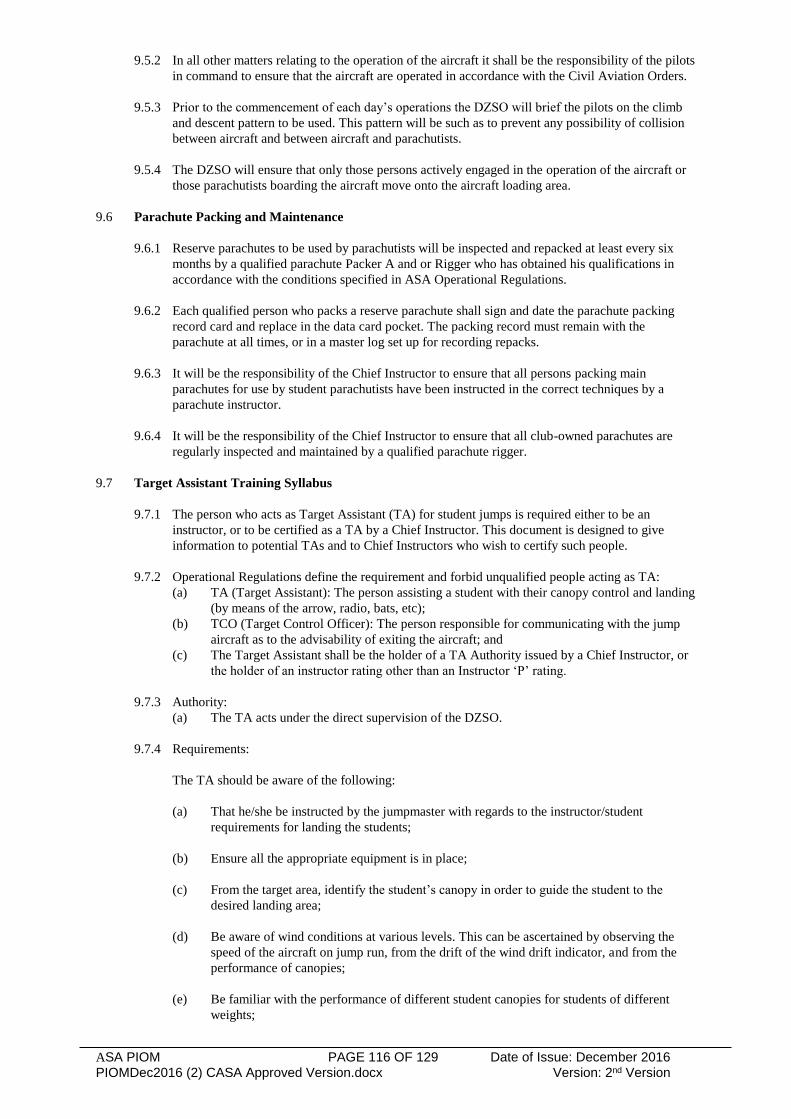
ASA PIOM PAGE 116 OF 129 Date of Issue: December 2016 PIOMDec2016 (2) CASA Approved Version.docx Version: 2nd Version
9.5.2 In all other matters relating to the operation of the aircraft it shall be the responsibility of the pilots
in command to ensure that the aircraft are operated in accordance with the Civil Aviation Orders.
9.5.3 Prior to the commencement of each day’s operations the DZSO will brief the pilots on the climb
and descent pattern to be used. This pattern will be such as to prevent any possibility of collision
between aircraft and between aircraft and parachutists.
9.5.4 The DZSO will ensure that only those persons actively engaged in the operation of the aircraft or
those parachutists boarding the aircraft move onto the aircraft loading area.
9.6 Parachute Packing and Maintenance
9.6.1 Reserve parachutes to be used by parachutists will be inspected and repacked at least every six
months by a qualified parachute Packer A and or Rigger who has obtained his qualifications in
accordance with the conditions specified in ASA Operational Regulations.
9.6.2 Each qualified person who packs a reserve parachute shall sign and date the parachute packing
record card and replace in the data card pocket. The packing record must remain with the
parachute at all times, or in a master log set up for recording repacks.
9.6.3 It will be the responsibility of the Chief Instructor to ensure that all persons packing main
parachutes for use by student parachutists have been instructed in the correct techniques by a
parachute instructor.
9.6.4 It will be the responsibility of the Chief Instructor to ensure that all club-owned parachutes are
regularly inspected and maintained by a qualified parachute rigger.
9.7 Target Assistant Training Syllabus
9.7.1 The person who acts as Target Assistant (TA) for student jumps is required either to be an
instructor, or to be certified as a TA by a Chief Instructor. This document is designed to give
information to potential TAs and to Chief Instructors who wish to certify such people.
9.7.2 Operational Regulations define the requirement and forbid unqualified people acting as TA:
(a) TA (Target Assistant): The person assisting a student with their canopy control and landing
(by means of the arrow, radio, bats, etc);
(b) TCO (Target Control Officer): The person responsible for communicating with the jump
aircraft as to the advisability of exiting the aircraft; and
(c) The Target Assistant shall be the holder of a TA Authority issued by a Chief Instructor, or
the holder of an instructor rating other than an Instructor ‘P’ rating.
9.7.3 Authority:
(a) The TA acts under the direct supervision of the DZSO.
9.7.4 Requirements:
The TA should be aware of the following:
(a) That he/she be instructed by the jumpmaster with regards to the instructor/student
requirements for landing the students;
(b) Ensure all the appropriate equipment is in place;
(c) From the target area, identify the student’s canopy in order to guide the student to the
desired landing area;
(d) Be aware of wind conditions at various levels. This can be ascertained by observing the
speed of the aircraft on jump run, from the drift of the wind drift indicator, and from the
performance of canopies;
(e) Be familiar with the performance of different student canopies for students of different
weights;

ASA PIOM PAGE 117 OF 129 Date of Issue: December 2016 PIOMDec2016 (2) CASA Approved Version.docx Version: 2nd Version
(f) Develop a flight plan depending on the weather conditions which would avoid turning the
student away from the TA below 1000 feet and which will also guide the student away
from hazardous areas and to a safe landing site downwind of the target but facing upwind.
The flight plan should be consistent with the student’s briefing by their instructor.
Note: Unless very practiced, a TA should not try to land a student too close to the target
since a small misjudgment will then allow the student to fly over the TA. Shouted
commands at this point are often ineffectual since the student’s ears are usually blocked
due to the pressure change;
(g) Allow for varying reaction times to the TA’s directions;
(h) If radios are being used, be prepared to quickly fall back to an alternative form of
communication should the student fail to respond to a direction;
(i) Assist the student to flare the canopy at the appropriate time, making allowance for canopy
type, wind conditions, student’s weight, sharpness of student’s reaction time, etc. To this
end it is usually better to give the flare signal slightly earlier than the ideal to allow for
slow reactions.
It is important during finals that the TA maintain a height reference to the student. Keeping
the student’s feet AND the horizon in the TA’s frame of vision will allow better judgment
of the flare timing.
Note: Many students are reported to take their eyes off the TA during finals to look at the
ground and consequently flare late. Small movements with the bats will tend to keep the
student focused on the TA’s action;
(j) Assist and advise the student after landing on care of their equipment;
(k) Report student’s canopy control and landing performance to DZSO or appropriate
instructor; and
(l) Have a knowledge of weather condition and regulations as they affect the TA’s job.
9.7.5 Certification — The candidate must:
(a) Pass a written exam covering the above areas (sample examination attached). The Chief
Instructor may alter or augment this examination to suit his/her needs;
(b) Be certified as competent by the Chief Instructor. When satisfied of the candidate’s
performance in both the written examination and practical tests, the Chief Instructor should
endorse both the candidate’s examination and his/her logbook; and
9.7.6 Target Assistant Examination:
The following examination may be administered either as a written examination or as an oral
examination. If examined orally, the candidate’s answers should be summarised and recorded by
the examiner.
This examination includes some questions to which the answer in invariable, and some which may
vary according to the Chief Instructor’s requirements. The Chief Instructor may modify or
augment this examination to suit the needs of the particular training organisation.
9.8 Target Control Officer (TCO)
9.8.1 A person acting as a TCO will require to complete a TCO examination ANNEX C set out by the
National Examiner.
Annexes:
A Target Assist Certification
B TA Examination / Review (Sample)
C TCO Examination (Sample)

ASA PIOM PAGE 118 OF 129 Date of Issue: December 2016 PIOMDec2016 (2) CASA Approved Version.docx Version: 2nd Version
ANNEX A TO SECTION 9
Target Assist Certification
TARGET ASSISTANT
I have examined the theoretical and practical
Target Assistance skills of
............................................
and authorise him/her to act as
TARGET ASSISTANT
for student parachute descents
Chief Instructor Date

ASA PIOM PAGE 119 OF 129 Date of Issue: December 2016 PIOMDec2016 (2) CASA Approved Version.docx Version: 2nd Version
ANNEX B TO SECTION 9
TA Examination / Review (Sample)
CANDIDATE: DATE:
1. What is the maximum wind limit for a student parachutist?
2. The TA’s duties include advising students on their landing performance. TRUE / FALSE
3. Name several causes of turbulence which may affect a student parachutist close to the ground.
4. What is the best technique for a student to use for flying in turbulent conditions?
5. The TA is immediately responsible to and will receive operational instructions from which of the
following:
The student’s jumpmaster YES / NO
The DZSO YES / NO
The Chief Instructor YES / NO
6. The TA should be particularly cautious of approaching thunderstorms. Why?
7. Under otherwise identical conditions, a heavier parachutist under canopy will have: GREATER/LESS
forward speed, GREATER/LESS downward speed
8. Draw a provisional plan for a student flight starting at 2,000 feet. Show planned turning heights.
9. Under otherwise identical conditions, a higher, deeper flare will be necessary in: STRONG/LIGHT winds
10. What action should the TA take if a student on final approach overflies the TA (ie. has his/her back to the
target)?
11. Early jump students are often too excited after landing to take good care of their equipment. The TA can
often help. What might the TA be looking out for in particular?
12. To whom should the TA report the student’s canopy control and landing performance?
13. What procedures are to be followed should a student injure themselves on landing?

ASA PIOM PAGE 120 OF 129 Date of Issue: December 2016 PIOMDec2016 (2) CASA Approved Version.docx Version: 2nd Version
This page has been intentionally left blank.

ASA PIOM PAGE 121 OF 129 Date of Issue: December 2016 PIOMDec2016 (2) CASA Approved Version.docx Version: 2nd Version
ANNEX C TO SECTION 9
TCO Examination (Sample)
CANDIDATE: DATE:
General
1. If there are any wind limits for the following descents, what are they based on:
a) Night Descents?
b) Display Descents?
c) Cloud Descents?
2. To whom do you report any incidents to?
3. Do you need to attend pre jump briefing prior to acting as a TCO for Night, Cloud and/or Display
jumps? YES NO
4. Before using radio as communication what information and/or equipment do you need to have or
check?
Display Jumps
1. During a display jump whom do you report directly to?
2. What are your responsibilities?
3. If appointing a marshal what characteristics, qualities and traits are you looking for?
4. Do you need to communicate – “clear to drop” with the jumpmaster before parachutists exit the
aircraft? YES NO
5. What resources can you use to assess and monitor weather?
Cloud Jumps
1. What are your responsibilities?
2. During descents where do you have to be to assess the airspace?
3. How do you communicate with PIC when there may be no visual reference?
Night Jumps
1. What are your responsibilities?
2. What can be used as ground to air communication during night jumps?
10 — 1

ASA PIOM PAGE 122 OF 129 Date of Issue: December 2016 PIOMDec2016 (2) CASA Approved Version.docx Version: 2nd Version
SECTION 10: Local Dropzone Rules
10.1 Duty Instructor/DZSO Checklist
10.1.1 The Duty Instructor/DZSO is to ensure the following actions have been completed prior to
commencing operations for the day:
(a) Conduct a staff meeting assigning areas of responsibility to various members rostered for
that day. They shall include, but may not be limited to, the following:
(1) Manifestors;
(2) Course Instructor(s);
(3) Jumpmasters;
(4) Target Assistant(s);
(5) Packers;
(6) Pilot(s);
(7) Cameramen;
(8) Other staff.
(b) Ensure all the following equipment is available and serviceable:
(1) Parachutes;
(2) Helmets;
(3) Jumpsuits;
(4) Target panels and batons;
(5) Radio (Frequency: local area 122.4, ATC 123.6)
(6) Wind meter and wind socks;
(7) Packing mats and records;
(8) Aircraft;
(9) All appropriate ASA records.
(c) Ensure that all the staff/instructors are properly servicing students and parachutists
throughout the day at their appropriate levels.
(d) Ensure that the aircraft loads are being run or conducted in an economical and efficient
manner.
(e) Delegate or conduct additional training for those members who may require it, ie, spotting,
conversion, revision, etc.
Note: Particularly during bad weather the Duty Instructor/DZSO is required to make good
use of the members’ attendance at the drop zone by conducting any form of training which
will maintain morale.
(f) Liaise with the Chief Instructor throughout the day.
(g) Position the target and arrow on the DZ in the appropriate location with regard to the
prevailing winds.
10.1.2 The following actions are to be completed by the Duty Instructor/DZSO at the end of each day or
weekend operation:
(a) Retrieve batons and secure all stores;
(b) Ensure all areas are left clean and tidy;
(c) All aircraft secured and loadsheets handed in to manifest;
(d) All monies are collected and manifests are correct;
(e) All incidents are reported on the correct form and reported to the CI as soon as possible.

ASA PIOM PAGE 123 OF 129 Date of Issue: December 2016 PIOMDec2016 (2) CASA Approved Version.docx Version: 2nd Version
10 — 2
10.2 Map of Drop Zone (Sample)
Image: Google Maps
Image: Google Maps

ASA PIOM PAGE 124 OF 129 Date of Issue: December 2016 PIOMDec2016 (2) CASA Approved Version.docx Version: 2nd Version
11 — 1
SECTION 11: Instructor Courses
11.1 General
This Section contains the basic course outline and information for the various instructor ratings. When
preparing the course material for the various courses, the course instructor should ensure that all the
correct and relevant information be obtained from the approved ASA manuals and publications. The
course instructor shall notify the National Examiner of his intentions to conduct a course and he should
submit the candidate’s application to the ASA.
11.1.1 Standard: The course instructor shall be highly qualified in the rating or endorsement in the course
which he is conducting and should ensure he/she gives full commitment to the course at all times.
Remember, the candidate will model himself/herself on the performance and standard of the
course instructor.
Other instructors/lecturers should be encouraged to provide input or give lessons during the course
in areas of their particular expertise.
The venue(s) should be selected to give the candidate optimum opportunity to concentrate on the
content of the course.
11.1.2 Pre-requisites: It is important that the candidate is properly prepared prior to the course by means
of obtaining access to pre-course study material and exposure to the duties and responsibilities of
the rating the candidate wishes to apply for.
It is extremely important that the candidate work hand in hand with a highly experienced instructor
to develop those qualities required of a good instructor for some time prior to the examination.
11.1.3 Attributes: It is paramount that when selecting an instructor candidate the Chief Instructor should
ensure that he has the potential to become a good instructor. The candidate should have the
following attributes:
Is he/she willing to commit significant amounts of time to his/her instructional duties?
Is he/she willing to continue to learn as well as teach?
Can his/her family and other commitments allow many days of instructional duties?
Is he/she emotionally, mentally and physically suited to take on the responsibilities of the
instructor rating?
Does he/she enjoy the atmosphere associated with active young people and can he/she accept
different points of view and the problems associated with groups of people who hold different
views?
Is he/she a doer without being continually prompted?
Is he/she able to improvise or be creative whenever necessary?
Does he/she wish to instruct, or is he/she just looking for status?
Is he/she personally confident within himself/herself and does he/she have the motivation to
encourage and train all students?
Is he/she able to make and stand by tough decisions?
Does he/she instill confidence in others?
Is he/she considerate of others’ needs, special requirements and emotions?
Does he/she remain in good spirits when confronted with difficult tasks?
Is he/she able to manage more than one task at a time and does he/she show the ability to
complete the job or task at hand at all times?
Does he/she have the personal cleanliness and hygiene expected of an instructor in a
professional environment dealing with the public?
Is he/she a team player, and not a loner?

ASA PIOM PAGE 125 OF 129 Date of Issue: December 2016 PIOMDec2016 (2) CASA Approved Version.docx Version: 2nd Version
11 — 2
11.2 Methods of Instruction
These are the basic tools required by a coach or an instructor. Without these, the coach or instructor
cannot pass knowledge and information on quickly, professionally and without confusion. The following
lessons are applicable to all instructors holder ratings or endorsements and should be taught prior to any
other specific rating or endorsement on the course.
11.2.1 Methods of Instruction Syllabus:
Lesson 1 — Instructional Technique:
Instructor/student relationship;
Student rights;
Lesson presentation.
Lesson 2 — Training Aids:
Visual;
Oral;
Projection;
Drop zone training aids.
Lesson 3 — Teaching Guidelines:
Purpose;
Methods;
Ground rules;
Liability.
Lesson 4 — Practical Teaching Conducted by
the Candidate:
Planning and preparation;
Classroom;
Locations;
Topics;
Assessment and group
discussion.
Lesson 5 — Principles of Instruction:
The principles of good
instruction;
Planning and preparation;
Motivation;
Confirmation.
Lesson 6 — The Learning Process:
How we learn;
Individual differences;
Motivators;
Anti-motivators;
Reward, punishment and
reprimand;
Repetition and over-learning.
Lesson 7 — Mental Rehearsal:
Motivation;
Goal-setting;
Mental rehearsal — use, value
and definition.
Lesson 8 — Lesson Preparation:
Preparation;
Lesson plans;
Teaching venues/areas.
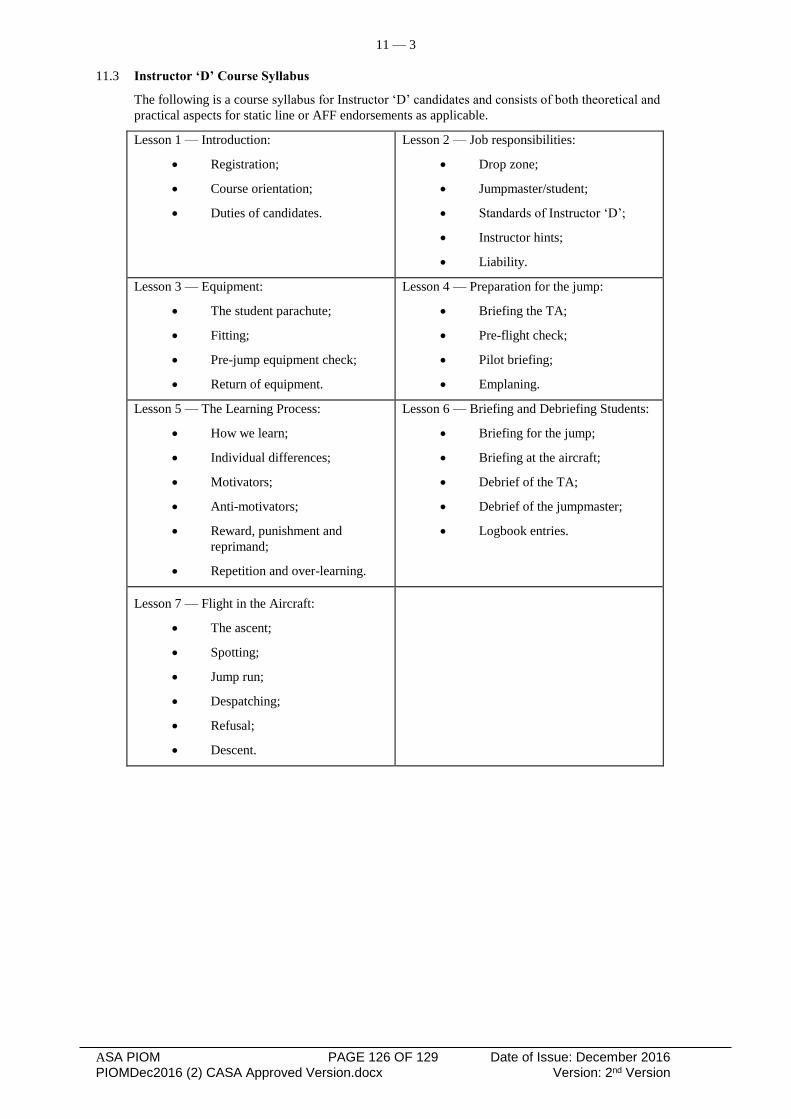
ASA PIOM PAGE 126 OF 129 Date of Issue: December 2016 PIOMDec2016 (2) CASA Approved Version.docx Version: 2nd Version
11 — 3
11.3 Instructor ‘D’ Course Syllabus
The following is a course syllabus for Instructor ‘D’ candidates and consists of both theoretical and
practical aspects for static line or AFF endorsements as applicable.
Lesson 1 — Introduction:
Registration;
Course orientation;
Duties of candidates.
Lesson 2 — Job responsibilities:
Drop zone;
Jumpmaster/student;
Standards of Instructor ‘D’;
Instructor hints;
Liability.
Lesson 3 — Equipment:
The student parachute;
Fitting;
Pre-jump equipment check;
Return of equipment.
Lesson 4 — Preparation for the jump:
Briefing the TA;
Pre-flight check;
Pilot briefing;
Emplaning.
Lesson 5 — The Learning Process:
How we learn;
Individual differences;
Motivators;
Anti-motivators;
Reward, punishment and
reprimand;
Repetition and over-learning.
Lesson 6 — Briefing and Debriefing Students:
Briefing for the jump;
Briefing at the aircraft;
Debrief of the TA;
Debrief of the jumpmaster;
Logbook entries.
Lesson 7 — Flight in the Aircraft:
The ascent;
Spotting;
Jump run;
Despatching;
Refusal;
Descent.

ASA PIOM PAGE 127 OF 129 Date of Issue: December 2016 PIOMDec2016 (2) CASA Approved Version.docx Version: 2nd Version
11 — 4
11.4 Instructor ‘B’ Course Syllabus
The following is a course syllabus for Instructor ‘B’ candidates and consists of both theoretical and
practical aspects for static line or AFF endorsements as applicable.
Lesson 1 — Introduction:
Registration;
Course orientation;
Duties of candidates.
Lesson 2 — Job responsibilities:
Drop zone;
Instructor/student;
Liability;
Standards of Instructor ‘B’.
Lesson 3 — Safety Procedures:
Accident prevention;
Safety around the aircraft;
Safety in freefall;
Safety under canopy.
Lesson 4 — Records to be Kept:
Master log;
Parachutist’s log;
Incident and accident reports;
Parachute maintenance log.
Lesson 5 — Equipment:
Equipment responsibilities;
Parachute design and types of
canopies;
Hardware and materials;
Deployment systems;
Types of harnesses and
containers;
Canopy releases;
Reserve canopies.
Lesson 6 — Parachuting Operational
Regulations:
Instructor responsibilities;
Knowledge of Op. Regs;
Other governing bodies;
CASA;
Liabilities;
Litigation;
Media liaison.
Lesson 7 — Drop Zone Management:
Administration;
The drop zone;
Records to be used and kept;
Safety;
Hierarchy of command;
Public relations.
Lesson 8 — Use of Student Training Tables:
History;
Practical use;
Effectiveness;
Safety;
Progression;
Group discussion.

ASA PIOM PAGE 128 OF 129 Date of Issue: December 2016 PIOMDec2016 (2) CASA Approved Version.docx Version: 2nd Version
11 — 5
11.5 Endorsements
11.5.1 Static line (specific):
(a) Static line management;
(b) Packing/instruction;
(c) Equipment;
(d) Jumpmaster responsibilities;
(e) Aircraft emergencies;
(f) Exits;
(g) Training jumps;
(h) Options for difficult students;
(i) Currency.
11.5.2 AFF (specific):
(a) Packing/instruction;
(b) Equipment;
(c) Jumpmaster responsibilities, JM1 and JM2;
(d) Aircraft emergencies;
(e) Freefall emergencies;
(f) Exits;
(g) Use of video;
(h) Training jumps;
(i) Spotting for AFF students;
(j) Options for difficult students;
(k) Currency.
11.5.3 Tandem (specific):
(a) Tandem Master’s responsibilities;
(b) Equipment;
(c) Briefing students;
(d) Practical training in aircraft, emergencies and landings;
(e) Packing;
(f) Students with disabilities or special requirements;
(g) Training jumps;
(h) Medical requirements;
(i) Currency.

ASA PIOM PAGE 129 OF 129 Date of Issue: December 2016 PIOMDec2016 (2) CASA Approved Version.docx Version: 2nd Version
12 — 1
SECTION 12: Conduct of Examinations
12.1 General
The National Examiner is responsible for the conduct of all examinations for all ratings and
endorsements. He/she will provide the necessary examination papers and organise the necessary panel of
examiners for the candidate.
12.2 For instructor ratings, a panel of three shall be required, two of whom shall be instructors holding the
equivalent rating or higher than the rating for which the candidate is being examined; the third shall be
the National Examiner.
12.3 For candidates applying for endorsements, the examination may be conducted by the National Examiner
or the highly qualified ASA instructor appointed by him/her.
12.4 Examinations will consist of three parts and a pass of 70% in written, oral and practical tests will be
required.
12.5 The examination panel may at their discretion postpone or terminate the examination if any candidate
whose attitude or confidence is deemed to be unsatisfactory.
12.6 The National Examiner shall be responsible for the collection of the examination papers from the ASA
Head Office and shall be responsible for their security, marking and return.
12.7 Upon completion of the examinations the National Examiner shall record the results and recommend or
not recommend the candidate for the rating or endorsement applied for.
12.8 The ASA shall hold the examination papers of all candidates for a period of time not less than the period
of issue of the rating.