Embed Size (px)
Citation preview

To enjoy fully all the features and functions of your product, please read this owner’s manual carefully and completely.
OWNER’S MANUAL
Ultra Slim Blu-ray/DVD Writer
BU20N
EN
GLIS
H
www.lg.com

Safety Instructions
11
CAUTION: The laser used in the writer can damage your eyes. Do not attempt to open the cover. To reduce the risk of electric shock, do not remove the cover (or back). There are no user-serviceable parts inside. Refer servicing to qualified service personnel. Use of controls or performance of procedures other than those specified herein may result in hazardous radiation exposure.
WARNING: To reduce the risk of fire or electric shock, do not expose this appliance to rain or moisture.
FCC COMPLIANCE STATEMENTNote : This equipment has been tested and found to comply with the limitsfor a Class B digital device, pursuant to Part 15 of the FCC Rules.These limits are designed to provide reasonable protection against harmful interference in a residential installation. This equipment generates, uses, and can radiate radio frequency energy and, if not installed and used in accordance with the instructions, may cause harmful interference to radio communications. However, there is no guarantee that interference will not occur in a particular installation. If this equipment does cause harmful interference to radio or television reception, which can be determined by turning the equipment off and on, the user is encouraged to try to correct the interference by one or more of the following measures:
- Reorient or relocate the receiving antenna.- Increase the separation between the equipment and receiver.- Connect the equipment into an outlet on a circuit different from that towhich the receiver is connected.- Consult the dealer or an Authorized Service Center for help.
• FCC WARNING Changes or modifications not expressly approved by the party responsible for compliance could void the user’s authority to operate the equipment.
• This product is for use only with UL listed personal computers that have installation instructions detailing user-installation of card cage accessory.

2
Contents
CAUTION: CLASS 3B VISIBLE AND INVISIBLE LASER RADIATION WHEN OPEN AND INTERLOCKS DEFEATED.AVOID EXPOSURE TO THE BEAM.
CLASS 1 LASER PRODUCT
Safety Instructions 1Introduction 3Using the Drive 4Drive Connectors 7Troubleshooting 8Specifications 10
Information in this document is subject to change without notice. ©2015HLDS,Inc.Allrightsreserved.
Trademarks used in this text: HLDS is a trademark of HLDS, Inc.; LG and the LG logo are trademarks of LG Electronics., Inc. Microsoft and Windows are registered trademarks of Microsoft Corporation.

3
Introduction
Drive Description
This drive reads and writes to CD, DVD, and BD media.
Features of the Drive
• 9.5 mm height internal Ultra Slim BD/DVD Writer Drive.• CD-R/RW, DVD-R/-R DL/ -RW/ +R/ +R DL/ +RW, DVD-RAM, BD-RE/R read and
write compatible.• CD Family, DVD-ROM and BD-ROM read compatible.• Active OPC (Running OPC)1 “Optimum Power Controller” provides for more
reliable writes.• Easy-to-use drawer loading mechanism.• Enhanced-IDE (ATAPI) model: SATA Interface.• Supports BDXL media (BD multi-layer) read and write• Supports M-Disc DVD and BD read and write• Improved Buffer Under- Run Error handling through the Preventive function.
1. Continuously monitors the signal level during recording and adjusts the laser power to compensate when the disc is dirty, insuring a flat signal.

4
Using the Drive
Front Panel This following is the general figure of the design of the drive. The drive’s appearance and specifications may change without prior notice.
2 4 1 3
1.EmergencyEjectHole If the disc tray does not open when you press the eject button, power off the computer, insert a pin or unfolded paper clip in the hole and push firmly.
2. Indicator Light The light blinks when there is drive activity.
3. Disc Tray The disc tray opens automatically when you press the eject button. When you place a disc in the tray, ensure that the label on the disc is facing outwards. If you are not loading or unloading a disc, the tray should remain closed.
4. Eject Button Press this button to open/close the disc tray. This button works only when power is supplied to the drive.

5
Drive Operation
Inserting a Disc
• Press the eject button. The disc tray will be ejected.• Place the disc in the center of the tray with the label side facing up.• Push disc onto hub until secure.• Push the disc tray by hand and close completely.
Removing a Disc
• Press the eject button. The disc tray will be ejected.• Remove the disc.• Push the disc tray till it closes completely. NOTE: During some drive activities, the drive will not allow the tray to open even when the eject button is pressed.
Usage Guidelines
• Do not press down on the disc tray when it is opening or closing.• Do not place objects on the disc tray.• Never use a damaged, broken, scratched, or deformed disc.• Keep the disc tray closed when the drive is not in use.
NOTE: High-speed drives spin the disc at a high rotational speed. If a disc has printing on only half of the disc, or if there is a slight imbalance in the disc, the imbalance is greatly magnified by the high speed, causing the drive to vibrate or produce a fan-like noise. These effects are inherent in the high-speed technology and do not indicate a problem with the drive.

6
Emergency Eject
The procedure described below can be used to remove a disc from the drive if the eject button is disabled by software or a power failure occurs.1. Turn the computer off.2. Insert a small diameter rod or a stiff wire (a straightened paper clip about
1.2 mm [0.047 in] in diameter) into the emergency eject hole and push firmly.
3. The disc tray is ejected by about 10 mm (0.39 in). Pull the disc tray out.
NOTE: Do not insert more than 50 mm (1.9 in) in depth.Inserting more than 50 mm (1.9 in) may damage the drive.
Cleaning Media
If dust or fingerprints get on the disc, wipe it with a soft cloth from the center to the edge.
CAUTION: Do not use benzene, paint thinner, record cleaner, solvent or static repellent. This can damage the disc.
Cleaning the Drive
Cleaning the inside of the drive is not recommended.
7
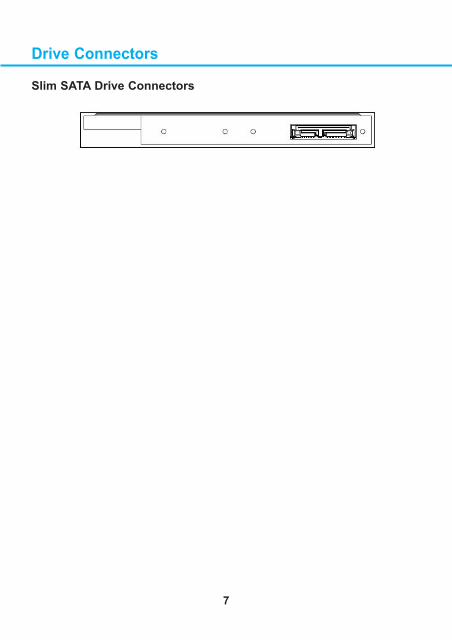
Drive Connectors
Slim SATA Drive Connectors

8
Troubleshooting
Please refer to the Introduction section to determine if the drive in your system is a slim device.
Symptoms and SolutionsSolutions
1-1. Turn off the system, remove the drive, and re-insert back to the system.
2-1. If the disc is dirty (fingerprints, etc.), clean it with a non-abrasive cloth from the disc center hole to the outside.2-2. If the disc is scratched and warped, do not insert it into the drive.2-3. If the disc is inserted upside-down, re-insert it in the proper direction.2-4. Check to see that the necessary software applications are installed correctly.3-1. This drive only supports discs with the formats indicated in the Specifications section. It cannot read the data on discs with other formats. Check the disc’s format.4-1. The CD player application may need to be set to “Digital.” In Windows Media Player, for example, from the menu bar, click on “Tools,” then “Options,” and then click on the “Device” tab. Select the drive and click on the “Properties” button. Set the playback mode to “Digital.”5-1. Ensure disc is clean and free of scratches.5-2. Media from different manufacturers or purchased at different times will record at different speeds. The drive will adjust the available recording speeds to achieve the highest write quality.6-1. Check to see that the system is powered up.6-2. For drives with LED indicator and it does not light up, refer to section 1 above.6-3. Use Emergency Eject Instructions to open the tray. Please refer to the Using the Drive section. 6-4. If the system is capable of booting into an operating system, attempt to issue an eject command from within the operating system.
Symptoms1. Drive is not recognized by system.
2. Cannot read or play disc.
3. Certain types of disc do not play.
4. When playing an audio CD, drive shows disc activity but there is no sound.
5. Drive will not write or read at maximum speed.
6. Cannot eject disc.

9
Solutions7-1. Is the disc loaded in the drive with the read/write surface facing the right direction? The label should be up. If a disc does not have a label, the disc code on the inner side of the disc should be properly oriented for reading when looking from the top of the disc.7-2. CD-R, DVD+R, DVD-R, and BD-R discs cannot be re-written.7-3. Please check the type of disc that is being used. Please refer to Specifications section to ensure that the disc type is supported by this drive.7-4. Is there enough free space on the writable disc?7-5. Did a screen saver or other application operate while writing to the disc? If so, try again with the application turned off.
Symptoms7. Cannot write to disc (for drives with write capability).

10
Specifications
System Interface
Applicable disc formats
PerformanceCD
DVD
Host Interface
BD
DVD
CD
Disc diameter
Read CD-R/RW/ROMDigital Audio Extraction (DAE) Write CD-RWrite CD-RWRead (Single Layer / Dual or Double Layer)Read DVD-RAM Write DVD+/-RWrite DVD+R/-R Double LayerWrite DVD+R SL (M-DISC)Write DVD-RAMWrite DVD+RWWrite DVD-RW
T13 ATA/ATAPI-8MMC-6, INF-8090i v8BD-ROM (SL/DL), BD-R (SL/DL), BD-R (TL/QL), BD-RE (SL/DL), BD-RE TLDVD-ROM, DVD-R, DVD-R DL, DVD-RW, DVD-RAM (Ver. 2.2), DVD+R, DVD+R DL, DVD+RWCD-ROM Mode-1 data disc, CD-ROM Mode-2 data disc , CD-ROM XA, CD-I, Photo-CD Multi-Session, Video CD, CD-Audio Disc, Mixed mode CD-ROM disc (audio), CD-Extra, CD-Text, CD-R (“Orange Book Part 2”: read & write), CD-RW (“Orange Book Part 3”: read & write)120 mm, 80mm
24 x max. 24 x max.
24 x max. 16 x max.8 x max.
5 x max.8 x max. 6 x max.
4 x max.
5 x max. (Ver. 2.2)8 x max. 6 x max.
Key: insert “Max X” speed for each media below. For CD 1X=150 KB/s; DVD 1X=1350 KB/s; BD 1x = 4.5 MB/s

11
Specifications
BD
Burst transfer rateAverage access time (1/3 stroke)
Data Buffer capacityReliabilityPower supplyTemperature Relative Humidity
Read BD-ROMRead BD-R SL/DL/TL/QL/SL LTHRead BD-RE SL/DLRead BD-RE TLWrite BD-R SL/DLWrite BD-R SL(M-DISC)Write BD-R TL/QLWrite BD-R SL LTHWrite BD-RE SL/DL/TLSATA Gen.1
MTBFVoltageOperating °C ( °F)Non-operating °C ( °F)Operating (No condensation)Non-operating (No condensation, Power Off, without disc)
6 x max. 6 x max.
6 x max.4 x max.6 x max.4 x max.4 x max.6 x max.2 x max.1.5 G bps (150 MB/s)
60,000 power on hours (POH)+5 V +/-5 % ripple less than 100 mVp-p5 °C to 50 °C-40 °C to 60 °C15 % to 85 %
5 % to 90 %
BD-ROM 250 ms typ.DVD-ROM 200 ms typ.CD-ROM 200 ms typ.4 MB

©2015 Made by LG Electronics.