Embed Size (px)
Citation preview

Osteopathic Considerations in HEENT Conditions
John Hohner, D.O., F.A.A.O. OMM Department, CCOMOMM Department, CCOM
October 26, 2010

Obj i d ibObjectives: to describe• The arterial supply and venous/lymphatic
drainage for the head and neck.Th t l f th h d d k• The autonomic supply for the head and neck.
• The role that cranial dysfunction plays in sinusitis ear problems and equilibriumsinusitis, ear problems and equilibrium.
• OMT treatment for eustachian tube / otitis media.d a
• Normal TMJ mechanics and the role of somatic dysfunction in TMJ syndrome.

C Cli i l C di iCommon Clinical Conditions
• URI• Sinusitis• Otitis Media• Eustachian Tube
Dysfunction

C ld (URI)Common cold (URI)• Viral- rhinitis, sneezing, nasal congestion,
pharyngitis, sinus congestion, low grade ffever.
• Goal- stimulate immune system, d l h l decongest lymphatics, normalize autonomics
l ff f • Visceral afferents from respiratory tract facilitate upper thoracics-sympathetics.

C ld (URI)Common cold (URI)
• Treatment– To improve drainagep d a ag
• Fluids, decongestants• OMT
– To help immune system• OMT

C ld (URI)Common cold (URI)• OMT to
– Improve circulation to head and neck tissues– Improve breathing- muscle relaxation– Drain sinuses
D ’t f t th f ! t t l h t – Don’t forget the fascia!- important in lymphatic drainage!!
– Thoracic inlet releaseThoracic inlet release– Augment respiratory diaphragm and rib cage motion

739.2 ART - THORACIC - SEGMENTAL ARTICULATION USING SPINOUS PROCESS - PATIENT SEATED Dysfunction: Motion restriction of the axial spine, ribs and thoracic cage.Objective: To improve spinal and thoracic cage motion It can be used in the lumbars alsoObjective: To improve spinal and thoracic cage motion. It can be used in the lumbars also.Discussion: This technique is especially useful for older patients with significant osteoarthritis of the spine, or stiffness due to chronic obstructive pulmonary disease.Patient Position: Seated.Physician Position: Standing behind the patient.
Procedure:1.Drape your left arm over the posterior aspect of the patient’s shoulders as if you were motion testing the thoracic spine.
2 Pl th th i f i ht h d th l ft id f th i t th l l2.Place the thenar eminence of your right hand on the left side of the spinous process at the level of T5.
3.Introduce lateral translation to the right (left sidebending) by a combined force through your left arm and right hand/thumb. Localize forces to T5. Is it free or restricted?
4 Now move your thumb to T6 and repeat the process Is it free or restricted?4.Now move your thumb to T6 and repeat the process. Is it free or restricted?
5.Repeat this process down the spine one segment at a time. Move to the other side of the patient switch hands and repeat the process.
6.Rotation may be combined with the sidebending motion. Flexion or extension may be added to further engage the restrictive barrierfurther engage the restrictive barrier.
7.Once you have developed a sense of segmentally localizing your forces, the motion can be performed more quickly, articulating each vertebra through a range of motion. Restricted segments require repetitive movements.
8.Reassess spinal and thoracic cage mobility.p g y

739.2 MFR - THORACIC - BILATERAL THORACIC INLET - DIRECTDysfunction: Bilateral thoracic inlet fascial restriction.Objective: Improve the motion of the fascia and soft tissues of the thoracic inlet to improve lymphatic drainage from the head and neck.Discussion: The thoracic inlet has complex motion patterns. It can be treated with a two-hand technique for each hemi-thorax individually, or both simultaneously with both hands placed anteriorly.technique for each hemi thorax individually, or both simultaneously with both hands placed anteriorly. During inhalation the posterior inlet moves caudad, the anterior inlet cephalad as the A-P diameter increases. If this motion is not bilaterally symmetric, dysfunction exists. Motion testing for restriction also is appropriate. This is done in a clockwise/counterclockwise, side-to-side, and front to back motion.Patient Position: Supine.Physician Position: Seated at the patient’s headPhysician Position: Seated at the patient s head.
Procedure:1. Place your hands on the patient’s thoracic inlet with your thumbs contacting the posterior portion of the transverse process of T2 and the head of the 2nd rib. 2. Your index fingers should contact the sternoclavicular joint and your middle fingers should contact the 2nd rib.3. Your ring fingers and pinkies should lie between the clavicle and 1st rib.4. The palm of your hand rests on the apex of the thoracic inlet.5. Move the tissues into the direction of the restrictive barrier in all planes of motion. This may be a very small amount of motion. Wait for an inherent relaxation/release of the tissues. If the tissues are slow to respond, have the patient take three large breaths and follow the release through the exhalations.
6 R ti6. Reassess motion.
Note: Alternate contact to perform technique.

Chapman’s Reflex Points
•• EENT points are EENT points are lateral tolateral to and and above the 2above the 2ndnd RibRib•• AcuteAcute
L t d i d p f i f p i tiL t d i d p f i f p i ti–– Located in deep fascia of periostiumLocated in deep fascia of periostium–– Tender, nonTender, non--radiating, sharpradiating, sharp–– Smooth, circumscribed, firmSmooth, circumscribed, firm
•• ChronicChronic–– NonNon--tender, rubberytender, rubbery

Sinusitis• Facial pain/fullness• Nasal congestion/rhinitis• Fever/malaise/erythema • Fever/malaise/erythema
overlying maxilla/frontals• Purulent drainage-
yellow/green- constantyellow/green constant• Headache/occasional cough• Must be present and/or not
improved for minimum of 7-p d10 days
• Tenderness to palpation over CN V1 and CN V2
• Tissue texture changes- OA, sub occipital, upper thoracics
• Chapman’s points-anteriorMCL R b 2 l l 1 t– MCL Rib 2, clavicle crosses 1st
rib

Sinusitis• Treatment-
– Fluids, decongestants, gmucolytics, antibiotics (if indicated)OMT– OMT
• trigeminal stim• ethmoid articulation• sphenopalatine decongestion
(parasympathetic)• suboccipital area (vagus)p g• lymphatic drainage• thoracics (sympathetic)• thoracic inlet• thoracic inlet• respiratory diaphragm

739.0 MFR - HEAD - OCCIPITO-ATLANTAL - DIRECTDysfunction: Sub-occipital tension and restricted movement of the occiput (C0) on atlas (C1).
Objective: Improve sub-occipital tension and occipital/atlantal motion.Discussion: This direct myofascial technique (called “killer fingers”) should not cause discomfort to the patient or physician. Having theDiscussion: This direct myofascial technique (called killer fingers ) should not cause discomfort to the patient or physician. Having theweight of the patient’s head resting over your fingertips will cause a slight amount of traction through the cervical spine.
Patient Position: Supine.
Physician Position: Seated at the head of the patient.
Procedure:1.Gently flex your patient’s head and place your fingertips under the patient’s occiput in the region of the inferior nuchal line.
2.Slowly let the patient’s head extend and rest on your fingertips.
3.The fingers act as a fulcrum between the patient's head and the cervical spine, which provides a mild traction force.
4.As the tissues relax, apply a slight anterior/superior stretch to the sub-occipital muscles. “Fine tuning” of applied force may facilitate a direct myofascial release.
5.The technique is discontinued when the tissues soften, and the atlas has unrestricted motion.
6 Reassess for sub-occipital tension6.Reassess for sub occipital tension.

739.0 CRANIAL - HEAD - FRONTAL LIFTDysfunction: Impaired motion of the frontal bones.
Obj ti Thi t h i i d t t ti t th f t l bObjective: This technique is used to restore motion to the frontal bones.
Discussion: It is often used in patients with sinus conditions or headaches. It allows for restoration of the cranial motion of the frontal bones and often, the face. It can also influence the tension on the reciprocal tension membrane (RTM). Lifting the frontal bones during internal rotation is important because internal rotation is the phase when the membranes have the least amount of tension or resistance. This technique requires the physician to gently disengage the frontal bones prior to liftingthe frontal bones prior to lifting.
Patient Position: Supine with arms at their sides and legs outstretched or knees bent with feet placed flat on table.
Physician Position: Seated at the head of the table.
Procedure: 1.As the frontal bone begins internal rotation (extension), the physician applies a gentle pressure on the frontal bones through the fingers.2.Using the thumbs as a fulcrum off the crown of the head, the physician gently applies traction or lifts the frontal bones in an anterior/superior direction until a perceived apex of motion is appreciated. The frontal bones will then begin to externally rotate and the bone is released.3.Motion is then reassessed.

739.0 ART- HEAD - SINUS TECHNIQUE - NASAL BONE ARTICULATIONDysfunction: Sinusitis.Objective: Improve drainage of the respiratory sinuses.Discussion: The nasal bones articulate with the frontal bones, which in turn articulate with the sphenoid , pand ethmoid bones. Given this relationship, articulation of the nasal bones indirectly affects the ethmoid and sphenoid sinuses. By introducing motion to the nasal bones, the ethmoid and sphenoid bones also move. Improving the motion of the sphenoid and ethmoid bones helps with decongestion of the sphenoid and ethmoid sinuses.
Patient Position: Lying supine.Patient Position: Lying supine.Physician Position: Seated at the head of the table.Procedure:1.The physician places his/her hands over the patient’s eyes with the thumbs contacting the bridge of the nose. The physician’s thumbs are crossed such that the right thumb contacts the left side of the patient’s nose and vice versa. **The picture shows one thumb at a time before being crossed.2 With the thumbs in this position gently apply alternating pressure medially to the side of the nose in a2.With the thumbs in this position, gently apply alternating pressure medially to the side of the nose in a translatory manner to articulate the nasal bones.3.This motion is repeated 3-4 times.

739.0 ST - HEAD - SINUS PERCUSSION OF THE FRONTAL AND MAXILLARY SINUSESDysfunction: Congestion of the paranasal sinuses.
Obj ti I d i f th iObjective: Improve drainage of the sinuses.
Discussion: Percussion of the superficial sinuses allows for decongestion of those areas via concussive waves. These waves help to loosen and liquefy the thick mucus, thus allowing the mucus to drain from the sinuses.
Patient Position: Lying supinePatient Position: Lying supine.
Physician Position: Seated or standing at the head of the table.
Procedure:1.The physician gently percusses the frontal bone, bilaterally, using his/her fingertips.2.With the non-dominant hand covering the patient’s ipsilateral eye, to avoid accidentally percussing it, the physician gently percusses the maxillary bone on that side. Repeat on the opposite side.3.Percuss over each sinus for 20-30 seconds.

739.0 ST - HEAD - SUBMANDIBULAR PERCUSSION
Dysfunction: Congestion of the superficial soft tissues of the face.
Objective: Enhance lymphatic drainage.
Discussion: The lymphatic vessels of the face and nasal sinuses terminate in the parotid nodes, submandibular nodes, superior deep cervical nodes, and submental nodes. Application of manual forces to lymphatic channels has great potential for odes pp ca o o a ua o ces o y p a c c a e s as g ea po e a oimproving function. This technique is intended to promote the flow of lymph from the face and sinuses; thus, decreasing symptoms, improving cellular respiration, and improving circulation and all its associated benefits.
Patient Position: Supine.
Physician Position: Seated at the head of the table.
Procedure:1.Place the tips of the fingers of your hands over the skin of the submental region just medial to the body of the mandible.
2.Ask the patient to close their mouth and bring their teeth together without clenching the teeth. (This will prevent the teeth from chattering during the technique, and potentially damaging the teeth.)
3.Apply a rapid oscillating percussive force in an upward (superior) direction through the submandibular region with your fingertips. g g y g p
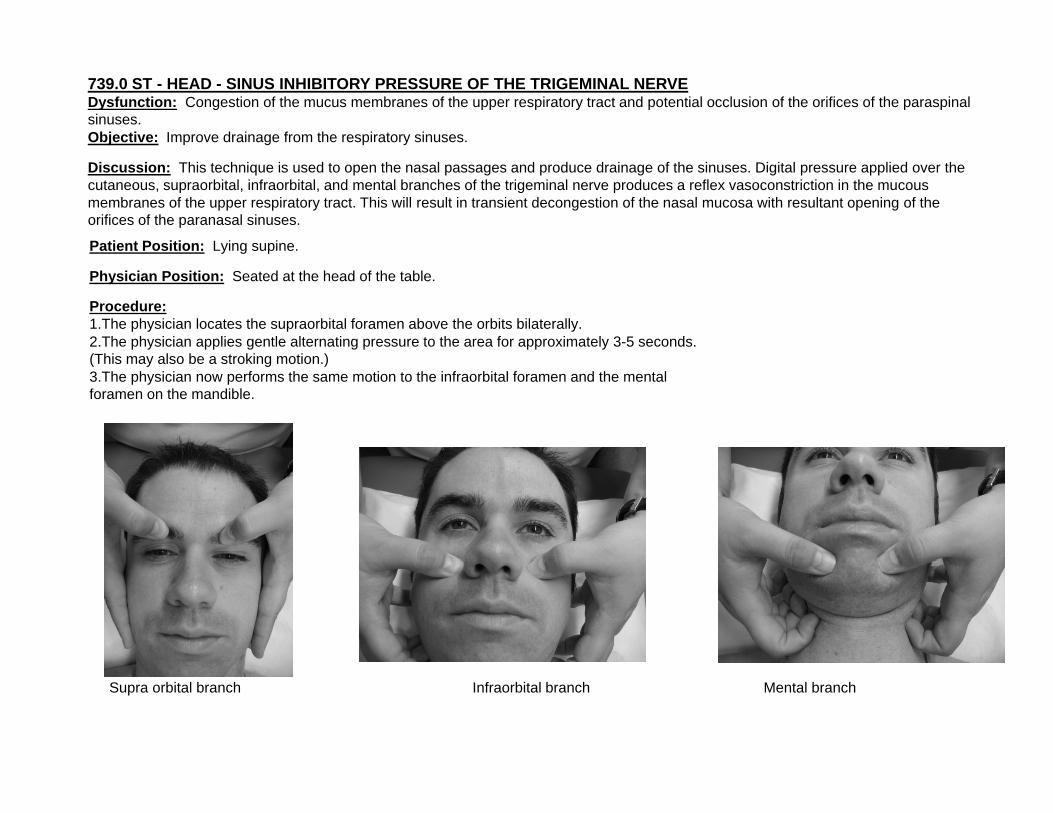
739.0 ST - HEAD - SINUS INHIBITORY PRESSURE OF THE TRIGEMINAL NERVEDysfunction: Congestion of the mucus membranes of the upper respiratory tract and potential occlusion of the orifices of the paraspinal sinuses. Objective: Improve drainage from the respiratory sinuses.
Discussion: This technique is used to open the nasal passages and produce drainage of the sinuses. Digital pressure applied over the cutaneous, supraorbital, infraorbital, and mental branches of the trigeminal nerve produces a reflex vasoconstriction in the mucous membranes of the upper respiratory tract. This will result in transient decongestion of the nasal mucosa with resultant opening of the orifices of the paranasal sinuses.
Patient Position: Lying supine.y g p
Physician Position: Seated at the head of the table.
Procedure:1.The physician locates the supraorbital foramen above the orbits bilaterally.2.The physician applies gentle alternating pressure to the area for approximately 3-5 seconds. (Thi l b t ki ti )(This may also be a stroking motion.)3.The physician now performs the same motion to the infraorbital foramen and the mental foramen on the mandible.
Supra orbital branch Infraorbital branch Mental branch
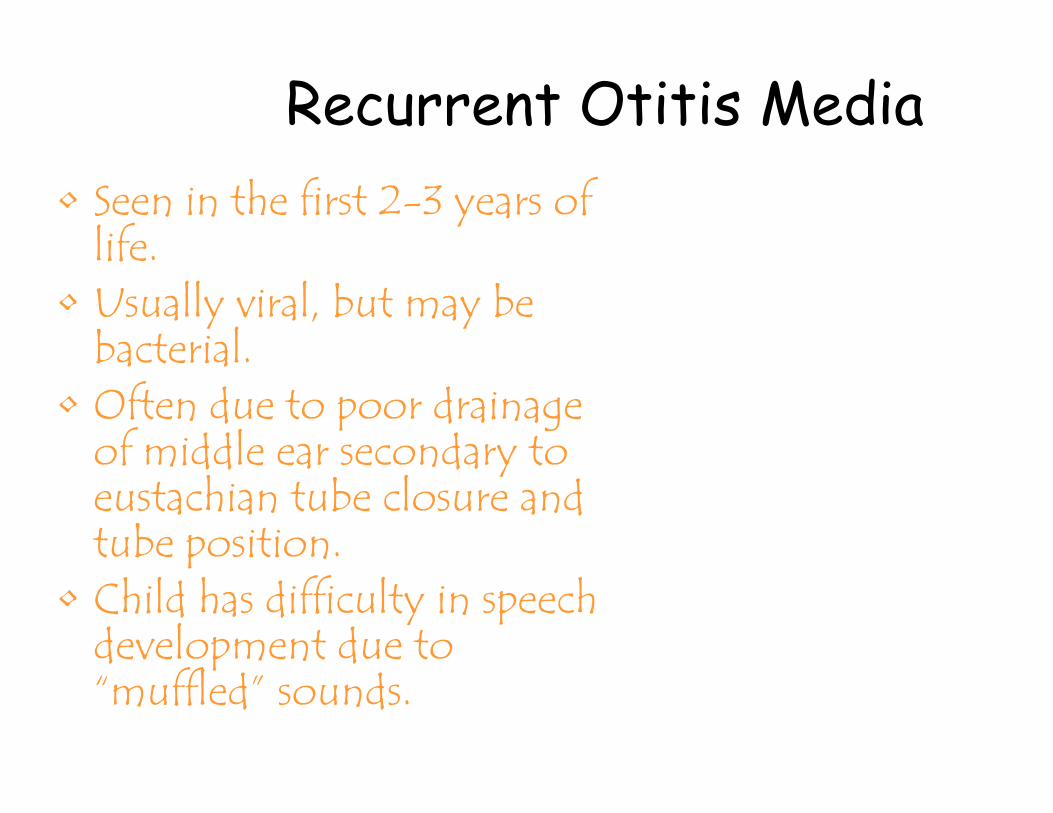
Recurrent Otitis Media• Seen in the first 2-3 years of
lifelife.• Usually viral, but may be
bacterialbacterial.• Often due to poor drainage
of middle ear secondary to of middle ear secondary to eustachian tube closure and tube position.p
• Child has difficulty in speech development due to d p d“muffled” sounds.

R O i i M diRecurrent Otitis Media
• Treatment-a multi-center study by Mills et al reveals that OMT is effective in decreasing the incidence of recurrent AOM• Cranial
• Check temporals, frontals, sphenoidp p• Pterygopalatine fossa drainage techniques
• Mandibular decongestion• Gilbreath technique.

739.0 ST - HEAD - ENT TECHNIQUE - PTERYGOID FOSSA DECONGESTION Dysfunction: Eustachian tube dysfunction or Otitis media - chronic, acute, or serous.
Objective: To improve function of the sphenopalatine ganglion.
Di i Thi t h i i d t i di tl d t th t id f d i thDiscussion: This technique is used to indirectly decongest the pterygoid fossa and improve the autonomic nerve function of sphenopalatine ganglion, thereby allowing normal function of the Eustachian tube and sinus cavity mucosa.
Patient Position: Supine.
Physician Position: Seated at the head of the table.Physician Position: Seated at the head of the table.
Procedure:1.The physician locates the angle of the mandible and gently places the pad of his/her middle finger caudad to the angle.2.The physician now reaches medially and cephalad with the middle finger to contact the edematous tissue located along the inner portion of the mandibular ramus.g p3.With this hand placement, the physician gently pumps the area in a cephalad/caudad manner for 1 minute. 4.The opposite side is then treated. This technique may be taught to the patient for self- treatment twice daily.

739.0 ART - HEAD - GALBREATH TECHNIQUEDysfunction: Otitis Media - chronic, acute, or serous
Objective: To drain the middle ear and improve aeration.
Discussion: The middle ear can be drained by intermittently opening the eustachian tube. This can be achieved by mobilization of the mandible, which affects the soft tissue structures that lie in close relation to the eustachian tube.
Patient Position: Lying supine, head elevated on pillows to at least 300 and turned with the affected ear up.
Physician Position: Seated at the side of the table at the level of the patient’s head, opposite the dysfunctional side, facing the patient.
Procedure:1.The physician’s cephalad hand is placed on the patient’s forehead. 2 The ph sician’s ca dad hand is placed on the patient’s mandible s ch that the inde and middle2.The physician’s caudad hand is placed on the patient’s mandible such that the index and middle fingers contact the condyle of the mandible and the remainder of the hand gently cradles the ramus of the mandible.3.Using a gentle pressure with the two fingers of the caudad hand, the condyle is pushed downward and inward while the mandible is gently drawn toward the physician and then released.4.This motion is repeated every 3-5 seconds over 30-60 seconds.
Thi h i b d 10 20 i if d d5.This technique can be repeated up to 10-20 minutes if needed.

739.2 LYMPH - THORACIC - LYMPHATIC PUMP TECHNIQUE OF MILLERDysfunction: Lymphatic stasis.
Objective: Improve lymphatic flow and fluid exchange.
Disc ssion The thoracic l mphatic p mp techniq e tili es the elastic recoil of the thoracic cage to create an abr ptDiscussion: The thoracic lymphatic pump technique utilizes the elastic recoil of the thoracic cage to create an abrupt inhalation. This inhalation creates a negative intrathoracic pressure which mobilizes lymph and intrabronchial phlegm.
Patient Position: Supine.
Physician Position: Standing at the head of the table.
Procedure:
Place your hands on the patient’s thoracic wall with the thenar eminence of each hand just distal to the respective clavicle, with the fingers spreading out over the chest wall. In the female patient it is important not to apply heavy pressure to the breast tissue.1.Have the patient inhale and exhale with their head turned to one side and their mouth open.2.As the patient breathes apply a compressive force through your arms, following exhalation and resisting inhalation.3.With each breath, resist inhalation and follow exhalation. Maintain your pressure at the end position of the previous exhalation and resist inhalation on the next cycle. One-third of the way through the 4th or 5th inhalation, briskly remove your hands, thereby releasing the pressure from the chest.4.As the patient quickly inhales, this creates a vacuum or negative intrathoracic pressure within the thoracic cavity. You should hear a suction or vacuum release.

739.2 LYMPH - THORACIC - THORACIC LYMPHATIC PUMP - OSCILLATORY TECHNIQUEDysfunction: Lymphatic stasis.
Objective: Improve lymphatic flow and fluid exchange.
Discussion: The thoracic lymphatic pump technique utilizes the oscillatory motion to loosen secretions in th b hi l d b hi Thi h l t bili i t b hi l hl d ll f i dthe bronchioles and bronchi. This helps to mobilize intrabronchial phlegm and allows for improved oxygenation.
Patient Position: Supine.
Physician Position: Standing at the head of the table.
Procedure:1. Place your hands on the patient’s thoracic wall with the thenar eminence of each hand just distal to the respective clavicle, with the fingers spreading out over the chest wall. In the female patient it is important not to apply heavy pressure to the breast tissue.2. Have the patient inhale and exhale with their head turned to one side and their mouth open.3. As the patient breathes apply an oscillatory pressure to the chest cage during the entire respiratory cycle.3. As the patient breathes apply an oscillatory pressure to the chest cage during the entire respiratory cycle.4. There is no appreciable danger of spreading pneumonia using this technique.

739.6 LYMPH - LE - PEDAL FASCIAL LYMPHATIC PUMPDysfunction: Lymphatic stasis.Objective: Improve lymphatic flow.Discussion: The use of a general body oscillatory "pump" may be employed to mobilize tissue and lymphatic fluids. Rhythmic motion of the musculoskeletal structures and rhythmic stretching stress to the fascial structures may be employed for this purpose. Applied forces may be directed to induce a pattern of rhythmic longitudinal wave motion. These waves of motion stretch and move the many soft tissue and fascial structures, stimulating tissue fluid removal and revitalizing cellular/tissue metabolism. The lymphatics are pumped. As the wave of motion moves through the abdominal and thoracic cavities, the visceral organs are balloted against adjoining structures and a significant degree of "milking" action of the organ tissue structures takes place.There are a number of techniques that may be applied directing external forces to affect these rhythmic motions and stresses within the patient's somatic and visceral structures. The thoracic lymphatic pump technique may be modified to accomplish this effect by including p y p p p q y p y gforces directed to create these longitudinal waves of motion. The pedal fascial techniques may also be employed as described below.Patient Position: Supine.
Physician Position: Stand at the foot of the table with the patient supine.
Procedure:Procedure:1.The physician grasps the patient's feet with the palms contacting the metatarsophalangeal area of the soles. The feet are dorsiflexed putting stress on the calcaneal tendons and stretching the posterior leg muscles and fascia.2.Holding the feet in the described manner, the physician introduces a force which tends to maintain dorsiflexion of the ankles and introduces a force along the longitudinal axis of the body. The force is held momentarily and then relaxed. The force will send a wave of motion cephalad which is followed by a rebound wave moving caudally. As the rebound wave reaches the feet, the re-application of dorsiflexion force is i t d d d t d h th i ll t t t th ti E h ti t t h th t i b d ll f i l t t dintroduced and repeated rhythmically to perpetuate the wave motion. Each motion stretches the posterior body wall fascial structures and sends the next wave of motion through the whole body. Care is required to assure application of a harmonious force, timing each new force with the force of the rebounding wave already established.3.The frequency of the applied force is variable to accommodate the patient and the physician, but isapproximately 80-120 per minute. The duration of treatment is approximately 1 to 3 minutes.4.The above technique may be modified or combined with the application of force through the plantar-flexed feet. The desired tissue wave pattern and stretching of the anterior body wall fascial structures is established and perpetuated by a pulling, plantar-flexion force through the physician's hands grasped over the distal dorsum of the feet. The mechanics of development of the wave motion and its affect are essentially the same as described above. This modificationis often used in combination with the above-described technique.