Embed Size (px)
Citation preview

Oracle® Common Application CalendarUser GuideRelease 12.1Part No. E13407-04
August 2010
Oracle Common Application Calendar User Guide, Release 12.1
Part No. E13407-04
Copyright © 2000, 2010, Oracle and/or its affiliates. All rights reserved.
Primary Author: William Colburn
Oracle is a registered trademark of Oracle Corporation and/or its affiliates. Other names may be trademarks of their respective owners.
This software and related documentation are provided under a license agreement containing restrictions on use and disclosure and are protected by intellectual property laws. Except as expressly permitted in your license agreement or allowed by law, you may not use, copy, reproduce, translate, broadcast, modify, license, transmit, distribute, exhibit, perform, publish or display any part, in any form, or by any means. Reverse engineering, disassembly, or decompilation of this software, unless required by law for interoperability, is prohibited.
The information contained herein is subject to change without notice and is not warranted to be error-free. If you find any errors, please report them to us in writing.
If this software or related documentation is delivered to the U.S. Government or anyone licensing it on behalf of the U.S. Government, the following notice is applicable:
U.S. GOVERNMENT RIGHTSPrograms, software, databases, and related documentation and technical data delivered to U.S. Government customers are "commercial computer software" or "commercial technical data" pursuant to the applicable Federal Acquisition Regulation and agency-specific supplemental regulations. As such, the use, duplication, disclosure, modification, and adaptation shall be subject to the restrictions and license terms set forth in the applicable Government contract, and, to the extent applicable by the terms of the Government contract, the additional rights set forth in FAR 52.227-19, Commercial Computer Software License (December 2007). Oracle USA, Inc., 500 Oracle Parkway, Redwood City, CA 94065.
This software is developed for general use in a variety of information management applications. It is not developed or intended for use in any inherently dangerous applications, including applications which may create a risk of personal injury. If you use this software in dangerous applications, then you shall be responsible to take all appropriate fail-safe, backup, redundancy and other measures to ensure the safe use of this software. Oracle Corporation and its affiliates disclaim any liability for any damages caused by use of thissoftware in dangerous applications.
This software and documentation may provide access to or information on content, products and services from third parties. Oracle Corporation and its affiliates are not responsible for and expressly disclaim all warranties of any kind with respect to third party content, products and services. Oracle Corporation and its affiliates will not be responsible for any loss, costs, or damages incurred due to your access to or use of third party content, products or services.

iii
Contents
Send Us Your Comments
Preface
1 Introduction to Oracle Common Application CalendarOverview of Oracle Common Application Calendar............................................................... 1-1Appointments and Resource Time Bookings........................................................................... 1-2Task Management..................................................................................................................... 1-3Escalation Management............................................................................................................ 1-3Resource Schedules and Availability....................................................................................... 1-4Notes for Business Objects....................................................................................................... 1-4Calendar Views......................................................................................................................... 1-5Assignment Manager................................................................................................................ 1-5Synchronization to External Calendars.................................................................................... 1-5
2 Introduction to Oracle Task ManagerOverview of Oracle Task Manager........................................................................................... 2-1Terms and Definitions.............................................................................................................. 2-4Overview of the Oracle Applications Framework Based Task Manager................................ 2-5Forms-based Task Manager User Interface.............................................................................. 2-7Oracle Task Manager Integrations............................................................................................2-9
3 Managing Appointments in Oracle Applications FrameworkOverview of the Oracle Applications Framework Based Calendar......................................... 3-1Creating Appointments............................................................................................................. 3-2Viewing Appointments............................................................................................................. 3-5

iv
Updating Appointments........................................................................................................... 3-6Responding to Appointment INVITES.................................................................................... 3-6Viewing Your Personal Calendar Views.................................................................................. 3-7Viewing Personal Calendar Daily View...................................................................................3-8Viewing Accessibility Daily View............................................................................................3-8Viewing Personal Calendar Weekly View............................................................................... 3-9Viewing Personal Calendar Monthly View............................................................................. 3-9Checking Resource Availability............................................................................................. 3-10Delegating Your Calendar....................................................................................................... 3-11Customizing Calendar View Preferences............................................................................... 3-11Customizing Calendar Default Preferences........................................................................... 3-12
4 Managing Tasks in Oracle Applications FrameworkUsing the Personalized Task Search and Result Page..............................................................4-1Using the Task Summary Contextual Region.......................................................................... 4-4Creating Tasks........................................................................................................................... 4-4Using the Task Header or General Region............................................................................... 4-5Using the Details Region.......................................................................................................... 4-6Using the Owner and Assignee Region.................................................................................... 4-7Using the Contacts Region........................................................................................................ 4-7Using the Schedule or Dates Region........................................................................................ 4-7Viewing the Related Items Region........................................................................................... 4-8Using the Repeating Region..................................................................................................... 4-8
5 Working with Forms-based TasksCreating, Updating, and Finding Tasks....................................................................................5-1Creating Tasks from Templates................................................................................................ 5-2Creating Tasks Individually..................................................................................................... 5-3Assigning and Scheduling Resources.......................................................................................5-4Setting Dependencies for Tasks............................................................................................... 5-5
Dependency Types...............................................................................................................5-6Dependency Validations...................................................................................................... 5-6
Setting References for a Task.................................................................................................... 5-7Specifying Additional Dates for a Task................................................................................... 5-7Documenting Multiple Contact Information........................................................................... 5-8Scheduling Recurring Tasks..................................................................................................... 5-8Setting Task Flags..................................................................................................................... 5-8Tracking a Task Record............................................................................................................. 5-8Launching the Task Workflow................................................................................................. 5-9Linking Tasks to Source Documentation................................................................................. 5-9
v
Tracking Planned, Scheduled, and Actual Dates..................................................................... 5-9
6 Using HTML TasksAccessing the Oracle Task Manager Interface..........................................................................6-2Viewing the Task Summary......................................................................................................6-2Personalizing Your Saved Searches.......................................................................................... 6-3Viewing Task Details................................................................................................................ 6-4View Parent/Child Tasks With Task Security.......................................................................... 6-5Creating a Task.......................................................................................................................... 6-5Basic Task Information............................................................................................................. 6-6Task Dates................................................................................................................................. 6-7Task Assignments..................................................................................................................... 6-8Customer Information............................................................................................................... 6-8Task References Information.................................................................................................... 6-8Assigning a Resource to a Task...............................................................................................6-10Specifying the Task Effort...................................................................................................... 6-11Creating a Repeating Task or Appointment........................................................................... 6-11Mass Creating Tasks............................................................................................................... 6-12Adding an Attachment............................................................................................................ 6-13Viewing Your Task Bin........................................................................................................... 6-13Editing Your Task Bin............................................................................................................. 6-13Reassigning Tasks................................................................................................................... 6-14Defining Your Task Preferences............................................................................................. 6-15Setting User Preferences......................................................................................................... 6-16Viewing Notifications in Your Worklist................................................................................ 6-16Defining Task Contacts........................................................................................................... 6-16
7 Data Security for TasksOverview of Data Security for Tasks........................................................................................ 7-1HTML Task Security Rules....................................................................................................... 7-2Task Security in the Oracle Applications Framework and Forms based Tasks...................... 7-4
8 Oracle Escalation ManagementOverview of Oracle Escalation Management........................................................................... 8-1Oracle Escalation Management Integrations............................................................................ 8-3Terms and Definitions.............................................................................................................. 8-4Accessing the Oracle Escalation Manager Interface................................................................. 8-6What is Escalation Manager?.................................................................................................... 8-7Workflow Notifications for Escalations................................................................................... 8-7Escalation Using Territories...................................................................................................... 8-8

vi
Escalation Owners and Owner Types.......................................................................................8-8Creating Escalations.................................................................................................................. 8-9Managing Different Types of Escalations.............................................................................. 8-10Managing a Service Request Escalation................................................................................. 8-10Managing a Task Escalation....................................................................................................8-12
9 Introduction to Oracle NotesOverview of Oracle Notes......................................................................................................... 9-1Oracle Notes Key Features........................................................................................................ 9-2Oracle Notes Integrations......................................................................................................... 9-3
10 Using NotesUsing the Add Note Region in OA......................................................................................... 10-1Creating a Contextual Note in OA.......................................................................................... 10-2Viewing and Updating the Notes History Region in OA...................................................... 10-2Viewing and Updating the Note Details Page in OA............................................................ 10-3Creating Notes in Forms..........................................................................................................10-4Finding Notes in Forms........................................................................................................... 10-5Accessing the Oracle Notes Interface .....................................................................................10-5Creating a Note in HTML....................................................................................................... 10-6Using the Relate To Function.................................................................................................. 10-6Using the HTML Notes Summary Window........................................................................... 10-6Viewing Note Details in HTML............................................................................................. 10-7Using the Quick Find Search in HTML.................................................................................. 10-8Searching for a Note in HTML................................................................................................10-8Data Security for HTML Notes............................................................................................. 10-10HTML Notes Security Rules................................................................................................. 10-11
11 Oracle HTML Calendar Overview of Oracle HTML Calendar..................................................................................... 11-1
Calendar Rules................................................................................................................... 11-2Types of Calendars............................................................................................................ 11-3Calendar Views.................................................................................................................. 11-4Who Uses Calendar?.......................................................................................................... 11-5
Oracle Calendar Key Features................................................................................................. 11-6Calendar Integration with Notes and Tasks........................................................................... 11-7Oracle HTML Calendar Integrations...................................................................................... 11-8Calendar Terms and Definitions............................................................................................ 11-8Accessing the Oracle HTML Calendar Interface.................................................................... 11-9

vii
12 Using the HTML CalendarViewing Your Personal Calendar............................................................................................12-2Viewing Your Tasks and Your Calendar Simultaneously..................................................... 12-2Viewing the Availability of a Resource.................................................................................. 12-3Adding a New Resource to Your Availability View.............................................................. 12-4Viewing a Public Calendar..................................................................................................... 12-4Using the Advanced Search in Calendar................................................................................ 12-5Viewing and Updating Appointment Details........................................................................ 12-5Creating an Appointment....................................................................................................... 12-6Defining Attendees for an Appointment............................................................................... 12-8Responding to an Invitation................................................................................................... 12-9Creating a Repeating Appointment........................................................................................ 12-9Attachments............................................................................................................................. 12-9
Adding an Attachment...................................................................................................... 12-9Relating Appointments to Source Objects........................................................................... 12-10Working with Bins................................................................................................................ 12-10Changing Your Personal Preferences....................................................................................12-11Defining Privileges for Your Calendar................................................................................. 12-12Requesting a New Group or Public Calendar...................................................................... 12-12Subscribing to a Group Calendar......................................................................................... 12-13Switching to Another Calendar............................................................................................ 12-13Adding and Removing Task Categories............................................................................... 12-14Defining Your Time Zone..................................................................................................... 12-14New Group Calendar Requests............................................................................................ 12-15New Group Calendar Subscription Requests...................................................................... 12-15Viewing Group Calendar Subscription Information........................................................... 12-16Updating Group Calendar Subscription Information......................................................... 12-16Add or Remove Group Calendar Administrators................................................................ 12-17Updating Group Calendar Subscription Information......................................................... 12-18
13 Oracle Forms-based Calendar Overview of the Oracle Forms-based Calendar......................................................................13-1
Calendar Setup window.................................................................................................... 13-1Calendar Datebook............................................................................................................ 13-3
Oracle Forms-based Calendar Integrations............................................................................ 13-3Accessing the Oracle Forms-based Calendar Interface.......................................................... 13-3Creating Tasks and ToDos in a Calendar............................................................................... 13-4Viewing the Datebook............................................................................................................ 13-4Creating a ToDo List............................................................................................................... 13-5
viii
14 Calendar SynchronizationOverview of Calendar Synchronization................................................................................. 14-1
Oracle Sales Synchronization............................................................................................. 14-1Downloading and Installing the Pocket PC Synchronization Client.................................... 14-2Downloading and Installing the Desktop Outlook Synchronization Client........................ 14-3Synchronization Preferences...................................................................................................14-4Synchronizing Pocket PC........................................................................................................ 14-5Synchronizing Desktop Outlook............................................................................................ 14-6Contacts in Outlook or Pocket PC...........................................................................................14-6Appointments in Outlook or Pocket PC................................................................................. 14-8Tasks in Outlook or Pocket PC............................................................................................. 14-10E-Mail Interactions with Desktop Outlook.......................................................................... 14-10
15 Resource Schedules in OAOverview of Schedules in OA................................................................................................ 15-1Sample Case Description........................................................................................................ 15-1Creating Schedules Business Flow......................................................................................... 15-2Creating Flex Time Schedules Business Flow........................................................................ 15-3Schedule Patterns.................................................................................................................... 15-3Creating a Duration Based Schedule Pattern......................................................................... 15-5Creating a Calendar Based Schedule Pattern......................................................................... 15-6Creating a Day Based Schedule Pattern..................................................................................15-6Creating Shifts for Day Based Schedule Patterns.................................................................. 15-7Previewing Schedules or Schedule Patterns.......................................................................... 15-8Defining a Schedule................................................................................................................ 15-8
16 Oracle Assignment ManagerOverview of Oracle Assignment Manager............................................................................. 16-1Assignment Manager Terms and Definitions........................................................................ 16-2Oracle Assignment Manager Integrations.............................................................................. 16-3Ownership and Resources...................................................................................................... 16-4Viewing resources in the Gantt Chart or Table Layout......................................................... 16-7
The Gantt Chart................................................................................................................. 16-8Gantt Chart Resource Attributes................................................................................. 16-8Gantt Chart Calendar Data.......................................................................................... 16-8Determining the Available Time for a Resource..........................................................16-9Determining duration and planned date over duration when both are defined in task................................................................................................................................... 16-10
Table Layout.................................................................................................................... 16-12

ix
Table Layout Resource Attributes............................................................................. 16-12Table Layout Calendar Data...................................................................................... 16-12Features..................................................................................................................... 16-12
Assigning a Process............................................................................................................... 16-13Assignment Manager Dependencies................................................................................16-13Assignment Manager Selection Criteria...........................................................................16-14
Service Lines and Business Processes........................................................................ 16-15Territories.................................................................................................................. 16-16Resource Availability................................................................................................ 16-16
Selecting Assignment Criteria.............................................................................................. 16-17Accessing the Oracle Assignment Manager Interface..........................................................16-18Viewing and Assigning Resources in the Gantt Chart........................................................ 16-19Viewing Resource Web Availability in the Gantt Chart......................................................16-19Viewing Support Site Name Information............................................................................ 16-21Viewing a Resource's Product Skills Rating........................................................................ 16-21
17 Business Rule MonitorWhat is a Business Rule?......................................................................................................... 17-1What is the Business Rule Monitor?....................................................................................... 17-2Workflow and Workflow Attributes ..................................................................................... 17-2Resource Types........................................................................................................................ 17-6General Tips for Defining Rules............................................................................................ 17-7
Glossary
Index

xi
Send Us Your Comments
Oracle Common Application Calendar User Guide, Release 12.1Part No. E13407-04
Oracle welcomes customers' comments and suggestions on the quality and usefulness of this document. Your feedback is important, and helps us to best meet your needs as a user of our products. For example:
• Are the implementation steps correct and complete? • Did you understand the context of the procedures? • Did you find any errors in the information? • Does the structure of the information help you with your tasks? • Do you need different information or graphics? If so, where, and in what format? • Are the examples correct? Do you need more examples?
If you find any errors or have any other suggestions for improvement, then please tell us your name, the name of the company who has licensed our products, the title and part number of the documentation andthe chapter, section, and page number (if available).
Note: Before sending us your comments, you might like to check that you have the latest version of the document and if any concerns are already addressed. To do this, access the new Oracle E-Business Suite Release Online Documentation CD available on My Oracle Support and www.oracle.com. It contains the most current Documentation Library plus all documents revised or released recently.
Send your comments to us using the electronic mail address: [email protected]
Please give your name, address, electronic mail address, and telephone number (optional).
If you need assistance with Oracle software, then please contact your support representative or Oracle Support Services.
If you require training or instruction in using Oracle software, then please contact your Oracle local officeand inquire about our Oracle University offerings. A list of Oracle offices is available on our Web site at www.oracle.com.


xiii
Preface
Intended AudienceWelcome to Release 12.1 of the Oracle Common Application Calendar User Guide.
This document is intended for the end users of Oracle Applications.
This guide assumes that you have a working knowledge of the following:
• The principles and customary practices of your business area
• The Oracle Common Application Calendar application
• Oracle Application Framework Applications
• Oracle Forms Applications
• Oracle Self-Service Web Applications
• The Oracle Applications graphical user interface
To learn more about the Oracle Applications graphical user interface, read the Oracle E-Business Suite User's Guide.
See Related Information Sources on page xv for more Oracle E-Business Suite product information.
Deaf/Hard of Hearing Access to Oracle Support ServicesTo reach Oracle Support Services, use a telecommunications relay service (TRS) to call Oracle Support at 1.800.223.1711. An Oracle Support Services engineer will handle technical issues and provide customer support according to the Oracle service request process. Information about TRS is available at http://www.fcc.gov/cgb/consumerfacts/trs.html, and a list of phone numbers is available at http://www.fcc.gov/cgb/dro/trsphonebk.html.

xiv
Documentation AccessibilityOur goal is to make Oracle products, services, and supporting documentation accessibleto all users, including users that are disabled. To that end, our documentation includes features that make information available to users of assistive technology. This documentation is available in HTML format, and contains markup to facilitate access bythe disabled community. Accessibility standards will continue to evolve over time, and Oracle is actively engaged with other market-leading technology vendors to address technical obstacles so that our documentation can be accessible to all of our customers. For more information, visit the Oracle Accessibility Program Web site at http://www.oracle.com/accessibility/.
Accessibility of Code Examples in DocumentationScreen readers may not always correctly read the code examples in this document. The conventions for writing code require that closing braces should appear on an otherwise empty line; however, some screen readers may not always read a line of text that consists solely of a bracket or brace.
Accessibility of Links to External Web Sites in DocumentationThis documentation may contain links to Web sites of other companies or organizationsthat Oracle does not own or control. Oracle neither evaluates nor makes any representations regarding the accessibility of these Web sites.
Structure1 Introduction to Oracle Common Application Calendar2 Introduction to Oracle Task Manager3 Managing Appointments in Oracle Applications Framework4 Managing Tasks in Oracle Applications Framework5 Working with Forms-based Tasks6 Using HTML Tasks7 Data Security for Tasks8 Oracle Escalation Management9 Introduction to Oracle Notes10 Using Notes11 Oracle HTML Calendar 12 Using the HTML Calendar13 Oracle Forms-based Calendar 14 Calendar Synchronization15 Resource Schedules in OA16 Oracle Assignment Manager17 Business Rule MonitorGlossary

xv
Related Information Sources
Integration RepositoryThe Oracle Integration Repository is a compilation of information about the service endpoints exposed by the Oracle E-Business Suite of applications. It provides a complete catalog of Oracle E-Business Suite's business service interfaces. The tool lets users easily discover and deploy the appropriate business service interface for integration with any system, application, or business partner.
The Oracle Integration Repository is shipped as part of the E-Business Suite. As your instance is patched, the repository is automatically updated with content appropriate for the precise revisions of interfaces in your environment.
Online DocumentationAll Oracle E-Business Suite documentation is available online (HTML or PDF).
• PDF - See the Oracle E-Business Suite Documentation Library for current PDF documentation for your product with each release. The Oracle E-Business Suite Documentation Library is also available on My Oracle Support and is updated frequently
• Online Help - Online help patches (HTML) are available on My Oracle Support.
• Release Notes - For information about changes in this release, including new features, known issues, and other details, see the release notes for the relevant product, available on My Oracle Support.
• Oracle Electronic Technical Reference Manual - The Oracle Electronic Technical Reference Manual (eTRM) contains database diagrams and a detailed description ofdatabase tables, forms, reports, and programs for each Oracle E-Business Suite product. This information helps you convert data from your existing applications and integrate Oracle E-Business Suite data with non-Oracle applications, and write custom reports for Oracle E-Business Suite products. The Oracle eTRM is available on My Oracle Support.
Guides Related to All Products
Oracle E-Business Suite User's GuideThis guide explains how to navigate, enter data, query, and run reports using the user interface (UI) of Oracle E-Business Suite. This guide also includes information on settinguser profiles, as well as running and reviewing concurrent programs.
You can access this guide online by choosing "Getting Started with Oracle Applications"

xvi
from any Oracle E-Business Suite product help file.
Guides Related to This Product
Oracle Common Application Calendar Implementation Guide This guide describes how to define tasks and note types, set up task statuses and status transition rules, define task priorities, set up data security, and map notes and references to source objects such as a sales lead to Task Manager. In addition, it describes how to create users and run concurrent programs to retrieve new and updated tasks.
Oracle Sales for Handhelds User GuideOracle Sales for Handhelds enables traveling sales professionals to access enterprise information from their pocket PC, Blackberry, palm-based devices, and Nokia using an HTML browser. You can use Outlook for your appointments, view emails received in outlook from contacts as Oracle Sales interaction history, and receive Short Message Service alerts for service contract expiry, escalated service requests, and invoice overdue. You can manage customers, contacts, and customer visits using your handheld.
Installation and System Administration
Maintaining Oracle E-Business Suite Documentation Set This documentation set provides maintenance and patching information for the Oracle E-Business Suite DBA. Oracle E-Business Suite Maintenance Procedures provides a description of the strategies, related tasks, and troubleshooting activities that will help ensure the continued smooth running of an Oracle E-Business Suite system. Oracle E-Business Suite Maintenance Utilities describes the Oracle E-Business Suite utilities that are supplied with Oracle E-Business Suite and used to maintain the application file system and database. It also provides a detailed description of the numerous options available to meet specific operational requirements. Oracle E-Business Suite Patching Procedures explains how to patch an Oracle E-Business Suite system, covering the key concepts and strategies. Also included are recommendations for optimizing typical patching operations and reducing downtime.
Oracle Alert User's GuideThis guide explains how to define periodic and event alerts to monitor the status of your Oracle E-Business Suite data.
Oracle E-Business Suite ConceptsThis book is intended for all those planning to deploy Oracle E-Business Suite Release 12, or contemplating significant changes to a configuration. After describing the Oracle
xvii
E-Business Suite architecture and technology stack, it focuses on strategic topics, giving a broad outline of the actions needed to achieve a particular goal, plus the installation and configuration choices that may be available.
Oracle E-Business Suite CRM System Administrator's GuideThis manual describes how to implement the CRM Technology Foundation (JTT) and use its System Administrator Console.
Oracle E-Business Suite Developer's GuideThis guide contains the coding standards followed by the Oracle E-Business Suite development staff. It describes the Oracle Application Object Library components needed to implement the Oracle E-Business Suite user interface described in the Oracle E-Business Suite User Interface Standards for Forms-Based Products. It also provides information to help you build your custom Oracle Forms Developer forms so that they integrate with Oracle E-Business Suite. In addition, this guide has information for customizations in features such as concurrent programs, flexfields, messages, and logging.
Oracle E-Business Suite Installation Guide: Using Rapid InstallThis book is intended for use by anyone who is responsible for installing or upgrading Oracle E-Business Suite. It provides instructions for running Rapid Install either to carryout a fresh installation of Oracle E-Business Suite Release 12, or as part of an upgrade from Release 11i to Release 12. The book also describes the steps needed to install the technology stack components only, for the special situations where this is applicable.
Oracle E-Business Suite System Administrator's Guide Documentation SetThis documentation set provides planning and reference information for the Oracle E-Business Suite System Administrator. Oracle E-Business Suite System Administrator's Guide - Configuration contains information on system configuration steps, including defining concurrent programs and managers, enabling Oracle Applications Manager features, and setting up printers and online help. Oracle E-Business Suite System Administrator's Guide - Maintenance provides information for frequent tasks such as monitoring your system with Oracle Applications Manager, administering Oracle E-Business Suite Secure Enterprise Search, managing concurrent managers and reports, using diagnostic utilities including logging, managing profile options, and using alerts. Oracle E-Business Suite System Administrator's Guide - Security describes User Management, data security, function security, auditing, and security configurations.
Oracle E-Business Suite User Interface Standards for Forms-Based ProductsThis guide contains the user interface (UI) standards followed by the Oracle E-Business Suite development staff. It describes the UI for the Oracle E-Business Suite products andtells you how to apply this UI to the design of an application built by using Oracle Forms.
xviii
Other Implementation Documentation
Oracle Applications Multiple Organizations Implementation GuideThis guide describes how to set up multiple organizations and the relationships among them in a single installation of an Oracle E-Business Suite product such that transactionsflow smoothly through and among organizations that can be ledgers, business groups, legal entities, operating units, or inventory organizations. You can use this guide to assign operating units to a security profile and assign this profile to responsibilities suchthat a user can access data for multiple operation units from a single responsibility. In addition, this guide describes how to set up reporting to generate reports at different levels and for different contexts. Reporting levels can be ledger or operating unit while reporting context is a named entity in the selected reporting level.
Oracle Approvals Management Implementation GuideThis guide describes transaction attributes, conditions, actions, and approver groups that you can use to define approval rules for your business. These rules govern the process for approving transactions in an integrated Oracle application. You can define approvals by job, supervisor hierarchy, positions, or by lists of individuals created either at the time you set up the approval rule or generated dynamically when the rule is invoked. You can learn how to link different approval methods together and how to run approval processes in parallel to shorten transaction approval process time.
Oracle Diagnostics Framework User's GuideThis guide contains information on implementing, administering, and developing diagnostics tests for Oracle E-Business Suite using the Oracle Diagnostics Framework.
Oracle E-Business Suite Flexfields GuideThis guide provides flexfields planning, setup and reference information for the Oracle E-Business Suite implementation team, as well as for users responsible for the ongoing maintenance of Oracle E-Business Suite product data. This guide also provides information on creating custom reports on flexfields data.
Oracle E-Business Suite Integrated SOA Gateway Implementation GuideThis guide explains the details of how integration repository administrators can manageand administer the entire service enablement process based on the service-oriented architecture (SOA) for both native packaged public integration interfaces and compositeservices - BPEL type. It also describes how to invoke Web services from Oracle E-Business Suite by working with Oracle Workflow Business Event System, manage Web service security, and monitor SOAP messages.

xix
Oracle E-Business Suite Integrated SOA Gateway User's GuideThis guide describes how users can browse and view the integration interface definitions and services that reside in Oracle Integration Repository.
Oracle e-Commerce Gateway Implementation ManualThis guide describes implementation details, highlighting additional setup steps neededfor trading partners, code conversion, and Oracle E-Business Suite. It also provides architecture guidelines for transaction interface files, troubleshooting information, and adescription of how to customize EDI transactions.
Oracle e-Commerce Gateway User's GuideThis guide describes the functionality of Oracle e-Commerce Gateway and the necessary setup steps in order for Oracle E-Business Suite to conduct business with trading partners through Electronic Data Interchange (EDI). It also describes how to runextract programs for outbound transactions, import programs for inbound transactions, and the relevant reports.
Oracle iSetup User's GuideThis guide describes how to use Oracle iSetup to migrate data between different instances of the Oracle E-Business Suite and generate reports. It also includes configuration information, instance mapping, and seeded templates used for data migration.
Oracle Product Lifecycle Management Implementation GuideThis guide describes how you can define hierarchies of items using structure types, catalogs, and catalog categories, and define change categories and configure them for revised items or request lines. Oracle Product Lifecycle Management provides several predefined catalogs such as the Product Catalog, Asset Catalog, and the Service Catalogand predefined change categories such as change orders and ideas. Use this guide to learn how to define additional catalogs for browsing and reporting purposes and new change categories specific to your business needs. You can then learn how to set up users and responsibilities that provide or restrict access to these catalogs, catalog items, and change management objects.
Oracle Product Lifecycle Management User GuideThis guide describes how to create and manage catalogs, create and maintain product attributes and attribute values, and manage item statuses and lifecycle phases. You can learn how to create change categories, create task templates for change orders, and create change management reports. In addition, you can use this guide to create roles, map roles to privileges, and maintain these roles.

xx
Oracle Web Applications Desktop Integrator Implementation and Administration GuideOracle Web Applications Desktop Integrator brings Oracle E-Business Suite functionality to a spreadsheet, where familiar data entry and modeling techniques can be used to complete Oracle E-Business Suite tasks. You can create formatted spreadsheets on your desktop that allow you to download, view, edit, and create OracleE-Business Suite data, which you can then upload. This guide describes how to implement Oracle Web Applications Desktop Integrator and how to define mappings, layouts, style sheets, and other setup options.
Oracle Workflow Administrator's GuideThis guide explains how to complete the setup steps necessary for any Oracle E-Business Suite product that includes workflow-enabled processes. It also describes how to manage workflow processes and business events using Oracle Applications Manager, how to monitor the progress of runtime workflow processes, and how to administer notifications sent to workflow users.
Oracle Workflow Developer's GuideThis guide explains how to define new workflow business processes and customize existing workflow processes embedded in Oracle E-Business Suite. It also describes howto define and customize business events and event subscriptions.
Oracle Workflow User's GuideThis guide describes how Oracle E-Business Suite users can view and respond to workflow notifications and monitor the progress of their workflow processes.
Oracle XML Gateway User's GuideThis guide describes Oracle XML Gateway functionality and each component of the Oracle XML Gateway architecture, including Message Designer, Oracle XML Gateway Setup, Execution Engine, Message Queues, and Oracle Transport Agent. It also explainshow to use Collaboration History that records all business transactions and messages exchanged with trading partners.
The integrations with Oracle Workflow Business Event System, and the Business-to-Business transactions are also addressed in this guide.
Oracle XML Publisher Administration and Developer's GuideOracle XML Publisher is a template-based reporting solution that merges XML data with templates in RTF or PDF format to produce outputs to meet a variety of business needs. Outputs include: PDF, HTML, Excel, RTF, and eText (for EDI and EFT transactions). Oracle XML Publisher can be used to generate reports based on existing Oracle E-Business Suite report data, or you can use Oracle XML Publisher's data extraction engine to build your own queries. Oracle XML Publisher also provides a

xxi
robust set of APIs to manage delivery of your reports via e-mail, fax, secure FTP, printer, WebDav, and more. This guide describes how to set up and administer Oracle XML Publisher as well as how to use the Application Programming Interface to build custom solutions. This guide is available through the Oracle E-Business Suite online help.
Oracle XML Publisher Report Designer's GuideOracle XML Publisher is a template-based reporting solution that merges XML data with templates in RTF or PDF format to produce a variety of outputs to meet a variety of business needs. Using Microsoft Word or Adobe Acrobat as the design tool, you can create pixel-perfect reports from the Oracle E-Business Suite. Use this guide to design your report layouts. This guide is available through the Oracle E-Business Suite online help.
Training and Support
TrainingOracle offers a complete set of training courses to help you master your product and reach full productivity quickly. These courses are organized into functional learning paths, so you take only those courses appropriate to your job or area of responsibility.
You have a choice of educational environments. You can attend courses offered by Oracle University at any of our many Education Centers, you can arrange for our trainers to teach at your facility, or you can use Oracle Learning Network (OLN), OracleUniversity's online education utility. In addition, Oracle training professionals can tailorstandard courses or develop custom courses to meet your needs. For example, you may want to use your organization structure, terminology, and data as examples in a customized training session delivered at your own facility.
SupportFrom on-site support to central support, our team of experienced professionals providesthe help and information you need to keep your product working for you. This team includes your Technical Representative, Account Manager, and Oracle's large staff of consultants and support specialists with expertise in your business area, managing an Oracle server, and your hardware and software environment.
Do Not Use Database Tools to Modify Oracle E-Business Suite DataOracle STRONGLY RECOMMENDS that you never use SQL*Plus, Oracle Data Browser, database triggers, or any other tool to modify Oracle E-Business Suite data unless otherwise instructed.
Oracle provides powerful tools you can use to create, store, change, retrieve, and maintain information in an Oracle database. But if you use Oracle tools such as
xxii
SQL*Plus to modify Oracle E-Business Suite data, you risk destroying the integrity of your data and you lose the ability to audit changes to your data.
Because Oracle E-Business Suite tables are interrelated, any change you make using an Oracle E-Business Suite form can update many tables at once. But when you modify Oracle E-Business Suite data using anything other than Oracle E-Business Suite, you may change a row in one table without making corresponding changes in related tables.If your tables get out of synchronization with each other, you risk retrieving erroneous information and you risk unpredictable results throughout Oracle E-Business Suite.
When you use Oracle E-Business Suite to modify your data, Oracle E-Business Suite automatically checks that your changes are valid. Oracle E-Business Suite also keeps track of who changes information. If you enter information into database tables using database tools, you may store invalid information. You also lose the ability to track whohas changed your information because SQL*Plus and other database tools do not keep arecord of changes.

Introduction to Oracle Common Application Calendar 1-1
1Introduction to Oracle Common Application
Calendar
This chapter covers the following topics:
• Overview of Oracle Common Application Calendar
• Appointments and Resource Time Bookings
• Task Management
• Escalation Management
• Resource Schedules and Availability
• Notes for Business Objects
• Calendar Views
• Assignment Manager
• Synchronization to External Calendars
Overview of Oracle Common Application CalendarOracle Common Application Calendar (CAC) eases management of daily activities, appointments, and scheduling of resources. Using the calendar features, you can create appointments, tasks, notes, and other calendar events, as well as invite attendees to appointments, and view scheduled activities through flexible daily, weekly, and monthly calendar views.
The Oracle Common Application Calendar provides a central place to store and view all resources' time reservations, schedules, and availability. Resource schedules, including working hours and holidays, can be defined to define a resource's work capacity.
Finally, Oracle Common Application Calendar also provides various options to synchronize the calendar data to external calendars such as Microsoft Outlook or handheld devices.
1-2 Oracle Common Application Calendar User Guide
Common Application Calendar consists of the following modules:
• Appointment Management
• Resource Time Bookings
• Task Management
• Escalation Management
• Resource Schedules
• Resource Availability
• Notes for Business Objects
• Calendar Views
• Assignment Manager
• Synchronization with Other Calendars
Appointments and Resource Time BookingsTime reservations block a time period for an object and designate the object as unavailable during the time block. Time reservations can be created against any object such as person, resource, customer contact, location, and warehouse dock doors (Inventory locators). . Time reservations can be created using one of the following entities.
• Appointment
Appointments are typically used to create meetings and invite others
ExampleA sales agent using Oracle Sales creates an appointment to meet a customer contact.
• Task
Tasks are created by various business objects such as service requests and opportunities. The Tasks component is utilized in various ways. Tasks can be created with no time details, with only a due date (called a To Do), or with a start date and time and a end date and time (Time Reservation). We only consider tasks that fall in the time reservation category as time blocks.
ExampleThe Oracle Field Service dispatcher or scheduler creates tasks to identify various duties (tasks) performed by a field service technician. For example, to attend a service request call there can be an Arrival task, Fix the Issue task, Debrief task, and Departure task. Each of these tasks can fall in any of the categories. Only tasks that

Introduction to Oracle Common Application Calendar 1-3
fall in the Time Reservation category are considered as time blocks
• Booking
Time reservations created outside Oracle Common Application Calendar can be represented as Bookings.
ExampleVacations originally get created in Oracle HRMS. In order for this vacation to be visible for deriving common availability, vacations are pushed in as Bookings into the calendar
Task ManagementTask Manager can be run as a standalone module or can be embedded in another application module. Features include:
• Fully integrated with Calendar Views, Notes, Booking, and other CAC modules
• Product standardization and entry speed-up by using task templates
• Strong yet flexible security based on AOL Data security model
• Support for Oracle Workflow notifications and business events subscription
• Task synchronization with Microsoft Outlook and Pocket Outlook
Many application modules are leveraging the Task Manager to provide task management capabilities and fulfill diverse business requirements, for example:
• For service requests and field service, a task is an assigned piece of work that has to be finished within a certain period of time. Task Manager is used as to plan, schedule, and track service activities
• Salespeople usually see a task as an action item related to the customer, sales opportunity, or lead. Task Manager is used to keep track of personal action items, or to delegate tasks to subordinates or members of a sales team.
• In Oracle Marketing, a task is a projected piece of work that is planned to be done during the marketing campaign. Task Manager is used as a campaign project management tool.
Escalation ManagementAn escalation is a process used to highlight or flag certain issues within an organization,so that the appropriate personnel can respond to these situations and monitor the resolutions. Escalations occur in support centers for a variety of reasons. An escalation management system allows an organization to identify, track, monitor, and manage

1-4 Oracle Common Application Calendar User Guide
situations that require increased awareness and swift action. Most businesses want to track issues such as: which customer complained, when the complaint was logged into the system, who was assigned to fix the problem, was the problem fixed or did it need to be manually assigned to someone else, and is the problem finally resolved.
An escalation is managed by creating an escalation document, assigning an escalation owner, defining the actions needed to resolve the escalation, and communicating the progress. Once a situation is de-escalated, the escalation closure note is captured and a final communication is sent to the contacts involved.
Resource Schedules and AvailabilityOne of the core attributes of a resource is its availability. If any of the E-Business Suite modules does anything that affects a resource's availability, then the rest of the E-Business Suite should be aware of it. Oracle Common Application Calendar provides a central place to define a resource's schedule.
Schedules in OA Framework are available only through Oracle HRMS. You can define shifts, schedule patterns, and define schedules for resources.
The Forms-based schedules provide a mechanism to define resource work shifts with the consideration of resource availability and associating them with a scheduling calendar, not a personal calendar used for managing daily activities. After these work shifts are defined, attached to a scheduling calendar, and associated with resources during implementation, the selection of qualified resources for a task in Assignment Manager can be based on the defined resource shifts and availability.
Schedules and availability times are interpreted in the time zone that is tied to the individual resource or group resource. For all other types of resources, the schedules and availability times are interpreted in the server time zone.
Notes for Business ObjectsNotes are the electronic equivalent of paper sticky notes. Use notes to jot down questions, ideas, reminders, and anything you would write on note paper. Notes are also useful for storing bits of information you may need later, such as directions or text you want to reuse in other items or documents. A note is a record of descriptive information that has been generated by users that can have a source and can be referenced. Notes can be used from different applications in the E-Business Suite to access the comment log that relates to a specific transaction.
ExampleA note is created with a source of Customer (Party), saying "This customer is a referenceand Gold Customer. All dealings should be handled carefully and if possible by senior officials." A sales agent working on an opportunity for this customer can reference this note to the opportunity he is working on.
Introduction to Oracle Common Application Calendar 1-5
Calendar ViewsCalendar Views provide a consolidated view of time reservations, schedules, and availability. Calendars can be viewed by day, week, or month, and users can define what they want to see in their calendars.
Assignment ManagerAssignment Manager is used to assign qualified and available resources to a business document (such as leads, service requests, or tasks) based on selection criteria includingcustomer preferred resources, territories, and resource availability.
An assignment is any task or responsibility that is given to someone. If it is given to you, this might be based on your capability or availability within a specific time frame. For example, a support manager promises upper management to fix common computerproblems including desktop and laptop computers in the company. Therefore, as a desktop support technician, you are asked to fix the desktop computer problems by the end of this week due to your expertise in the hardware support group. This is an assignment given to you by your manager. You can either accept or reject it depending on your availability. Also, you will probably be asked to repair laptop problems due to resource constraints on laptop technicians.
The Assignment Manager API has the ability to route service requests and tasks based on time-related attributes. Thus the API can check for resource availability using calendars, shifts, and exceptions when performing these assignments to service request groups and individual owners, and to task owners.
The Assignment Manager module is embedded within Oracle Common Application Calendar or other CRM products. It is not used as a standalone module and is only accessible through other CRM applications, such as Customer Support and Field Service, and Calendar modules, such as Task and Escalation Managers.
For example, you can access Assignment Manager through a standalone task in the Forms-based Task Manager or through a task associated with a service request in Oracle Teleservice and Oracle Field Service applications.
Synchronization to External CalendarsSynchronization is a critical functionality for calendaring and directory applications. Oracle Common Application Calendar uses the calendaring industry's standard synchronization protocol, SyncML. Users can install the CAC SyncML Client and use it to synchronize data in their Microsoft Outlook or Pocket Outlook with the CAC server. This solution currently works only with Oracle Sales and Oracle Sales for Handhelds.


Introduction to Oracle Task Manager 2-1
2Introduction to Oracle Task Manager
This chapter covers the following topics:
• Overview of Oracle Task Manager
• Terms and Definitions
• Overview of the Oracle Applications Framework Based Task Manager
• Forms-based Task Manager User Interface
• Oracle Task Manager Integrations
Overview of Oracle Task ManagerTask Manager provides methods for quantifying, responding to, and managing units of work generated by Oracle E-Business Suite applications. The unit of work is defined in Task Manager in the form of a task. A given task may be defined and bound by units of time, may be assigned to one or more qualified resources or resource groups or teams (see Assignment Manager for further information when assigning resources to tasks in Forms), and can be tracked and statused by the application that the work was generatedfrom.
Task Manager can be accessed through integration applications or as a standalone module. For example, Oracle Telesales uses Task Manager to assign tasks pertaining to individual consumers, organizations, and organizational contacts. You can also use standalone Task Manager to create personal tasks or todos. Using the Tasks features, you can create a single or a repeating task with specified repeating frequency, assign resources to a task, mass creating tasks, mass reassigned tasks to new owners or assignees, view tasks using personalized saved searches.
What is a Task?A task is defined as the lowest unit of work. It can be assigned to one or more resources.Tasks are managed by the Task Manager and are often scheduled events with defined dates of completion. For example, a support manager of a company can create a task for
2-2 Oracle Common Application Calendar User Guide
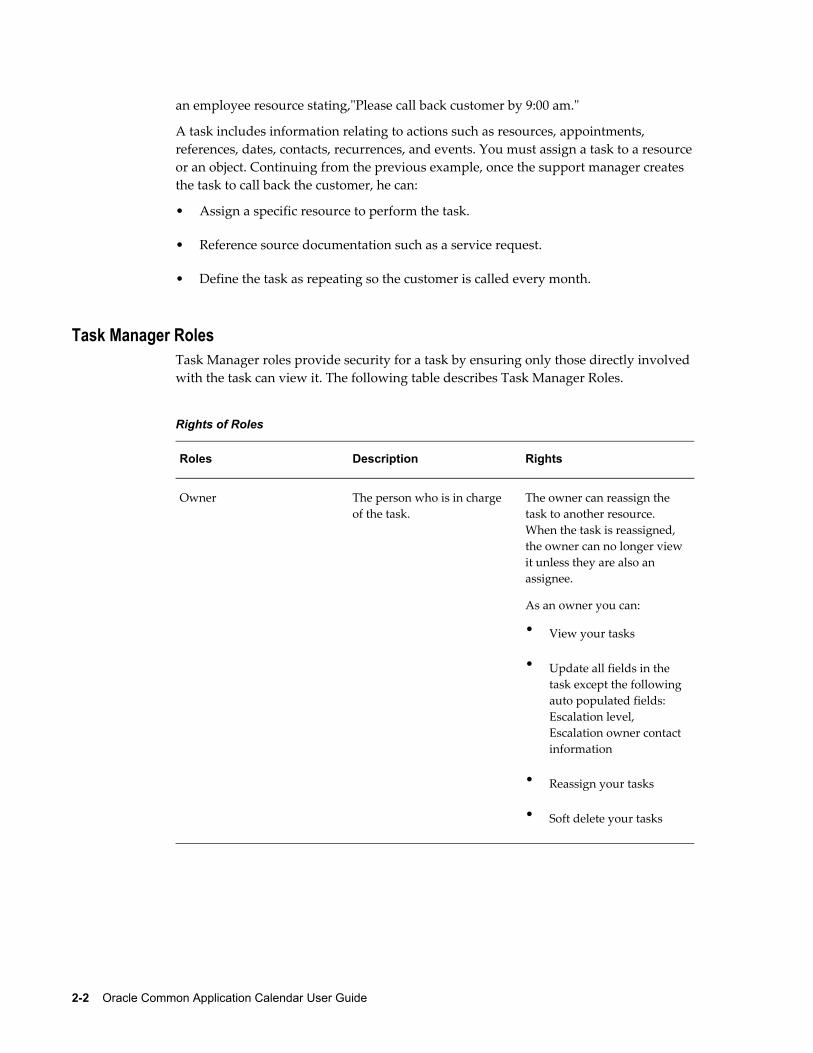
an employee resource stating,"Please call back customer by 9:00 am."
A task includes information relating to actions such as resources, appointments, references, dates, contacts, recurrences, and events. You must assign a task to a resourceor an object. Continuing from the previous example, once the support manager creates the task to call back the customer, he can:
• Assign a specific resource to perform the task.
• Reference source documentation such as a service request.
• Define the task as repeating so the customer is called every month.
Task Manager Roles Task Manager roles provide security for a task by ensuring only those directly involved with the task can view it. The following table describes Task Manager Roles.
Rights of Roles
Roles Description Rights
Owner The person who is in charge of the task.
The owner can reassign the task to another resource. When the task is reassigned, the owner can no longer view it unless they are also an assignee.
As an owner you can:
• View your tasks
• Update all fields in the task except the following auto populated fields: Escalation level, Escalation owner contact information
• Reassign your tasks
• Soft delete your tasks

Introduction to Oracle Task Manager 2-3
Roles Description Rights
Assignee The person who is actually working on the task.
The assignee can reassign the task to other resource types.
As an assignee you can:
• View your tasks
• Update all fields in the task except the following auto populated fields: Escalation level, Escalation owner contact information
• Soft delete your tasks
Task Manager NotificationsThe following table describes how task notifications are handled in Task Manager.
Task Notification
Event Notify
Task Creation Owner and all assignees
Task Deletion Owner and all assignees
Reassign Owner Old and new owner
Reassign Assignee Owner, the old and new assignee
Status Update of Owner Owner and all assignees
Priority Update Owner and all assignees
Type Update Owner and all assignees
Add Assignee Owner and new assignee
2-4 Oracle Common Application Calendar User Guide
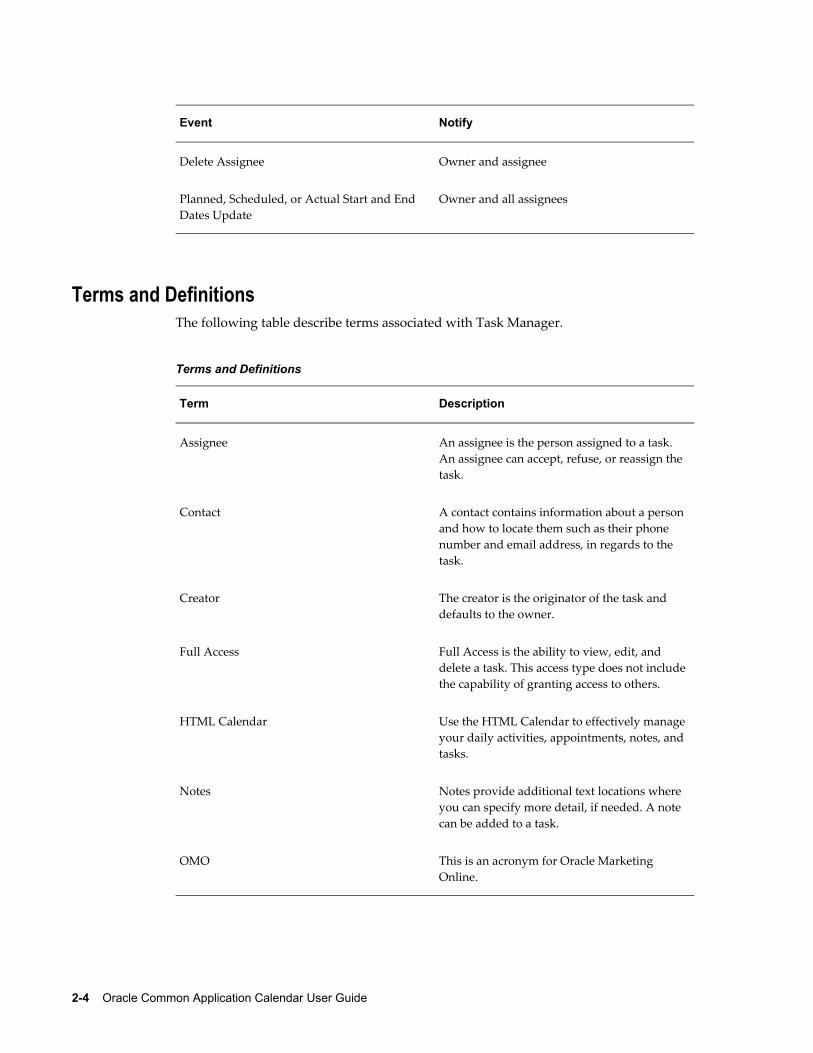
Event Notify
Delete Assignee Owner and assignee
Planned, Scheduled, or Actual Start and End Dates Update
Owner and all assignees
Terms and DefinitionsThe following table describe terms associated with Task Manager.
Terms and Definitions
Term Description
Assignee An assignee is the person assigned to a task. An assignee can accept, refuse, or reassign the task.
Contact A contact contains information about a personand how to locate them such as their phone number and email address, in regards to the task.
Creator The creator is the originator of the task and defaults to the owner.
Full Access Full Access is the ability to view, edit, and delete a task. This access type does not includethe capability of granting access to others.
HTML Calendar Use the HTML Calendar to effectively manageyour daily activities, appointments, notes, andtasks.
Notes Notes provide additional text locations where you can specify more detail, if needed. A note can be added to a task.
OMO This is an acronym for Oracle Marketing Online.

Introduction to Oracle Task Manager 2-5
Term Description
Owner An owner is the person responsible for the task. They are not necessary the person who performs the task.
Party A party is an entity that can enter into a business relationship.
Read-only Read-only access is the ability to view a task without making modifications to it. You may not edit or delete any information.
Reference A reference occurs when one task relates to another document. For example, a task can be related to a service request.
Repeating Task A repeating task automatically reoccurs in a specified time increment such as daily, weekly, monthly, or yearly.
Resource A resource is the basic element of the Resource Manager and is defined as people, places and things.
Source Object The source object defines the origin of the task, for example, Sales, Service, or Task Manager.
Tasks A task is the lowest unit of work. Tasks are assignments that detail the actions required of resources or other objects.
Task Type A task type defines the nature of the task such as a callback or a meeting, which helps organize your tasks.
Overview of the Oracle Applications Framework Based Task ManagerTask Manager for Common Application Calendar adopts the Oracle Applications Framework, the standard HTML development and deployment platform for Oracle HTML Applications. It provides Tasks functionality for integrated applications such as Oracle Service Online, Oracle Customers Online, and Oracle Sales.
Task Manager for Common Application Calendar provides the following task features
2-6 Oracle Common Application Calendar User Guide
if integrated applications use these features:
• Manage work assignment for service related tasks that have specific time requirements
• Manage sales related tasks that do not have specific time requirements such as standalone tasks or personal to dos
• Create a contextual task for a service request, lead or opportunity
• Create a standalone task such as a personal to do for a sales agent from Sales
• View all tasks created for a source document, such as a service request, lead, or an opportunity, from the task summary contextual page
• View standalone tasks for a given source from the personalized task search and result page
• Create personalized saved searches for standalone tasks
• Provide customer contacts information for a contextual task
• Provide repeating function for appointments
• Provide "related to" or references information for appointments
Task Manager in Oracle Applications Framework is not fully compatible with the HTML Task Manager's user interface. For example, some HTML Tasks features of creating tasks by using task templates, mass creating tasks and reassignment, as well as viewing task hierarchy, are not available in the Oracle Applications Framework based Tasks.
Accessing Task Manager Developed for Common Application CalendarTask Manager developed for Common Application Calendar can only be accessed through integrated applications, such as Oracle Service Online, Oracle Sales, or the Calendar module. Users of the integrated applications can access the tasks if they have appropriate access privileges.
Although Task Manager provides a standalone task page allowing you to perform a personalized task search, there is no standalone Oracle Applications Framework based Tasks user interface currently available for you to create personal tasks, such as to dos. The standalone tasks such as personal to dos for sales agents are created only through Oracle Sales and Oracle Customers Online.
Documenting Task Features Based on Individual Task Region or PageAll task features developed for Common Application Calendar can be integrated with

Introduction to Oracle Task Manager 2-7
Oracle Applications. However, depending on each individual application's needs, you might not see every task feature in your screens unless the integrated application has implemented them.
For example, when creating a task, you can see the customer contacts region only if the task is created for a sales related task. It will not be visible if the task is created for a sales agent as a personal to do. For Service Applications, when creating a service relatedtask in Service Online, you might find the Dates region in the task screen specifically used to manage time sensitive work assignments for service engineers. This region allows entry of multiple dates (planned, scheduled, and actual) for tracking purposes. This dates region might not be used in Sales Applications.
Therefore, all task features provided in the Oracle Applications Framework based Tasksare documented based on each embeddable region or page as follows:
• Personalized Task Search and Result Page
• Task Summary Contextual Region
• Task Header or General Region
• Details Region
• Owner and Assignee Region
• Contacts Region
• Schedule or Dates Region
• Related Items Region
• Repeating Region
Forms-based Task Manager User InterfaceThe following tabs are available in Task Manager, once you've created a task and clicked the More button:
• Task Resources
Use the Resources tab to assign personnel information to a task. This window defines resource requirements, assignments, and scheduling information. For example, a resource can be an employee, a group, or a party.
• Task Dependencies
Use the Dependencies tab to determine the order among task templates and use the offset feature to separate the sequence between task templates with time-sensitive restrictions. This functionality of dependencies and offset field is enforced only

2-8 Oracle Common Application Calendar User Guide
during the tasks automated creation of a task using task templates.
• Task References
Use the References tab to link tasks to different documents or pertinent backgroundinformation.
• Tasks Dates
Use the Dates tab to identify more dates in addition to the planned, scheduled, and actual dates types. Use this tab to track task progress by entering date information after each task milestone. Examples include task creation, resource reservation, or task completion.
• Task Contacts
Use the Contacts tab to create and manage multiple customer contacts assigned to a task. Contact information is obtained from customer information. In order to enter this information, you must identify a customer in the main task window.
• Task Recurrences
Use the Recurrences tab to schedule tasks to automatically repeat. Examples of intervals include daily, weekly, monthly, or yearly occurrences. To schedule a recurring task, you must either specify a start date and the number of times you want the task to repeat or the end date.
• Other Task Information
Use the Others tab to identify additional task information. You can customize tasks by setting task flags. The Currency and Cost fields identify the currency of a task and if there is a cost associated with it. These fields are used by the Oracle Marketing applications. The following table describes flags in the Others tab.
Task Flag Descriptions
Flag Description
Billable The Billable flag signifies a task as a service that requires billing.
Holiday The Holiday flag indicates whether or not the task can be performed on a holiday.
Multibook The Multibook flag indicates whether or notthe task can book resources that are already assigned to other tasks.
Introduction to Oracle Task Manager 2-9
Flag Description
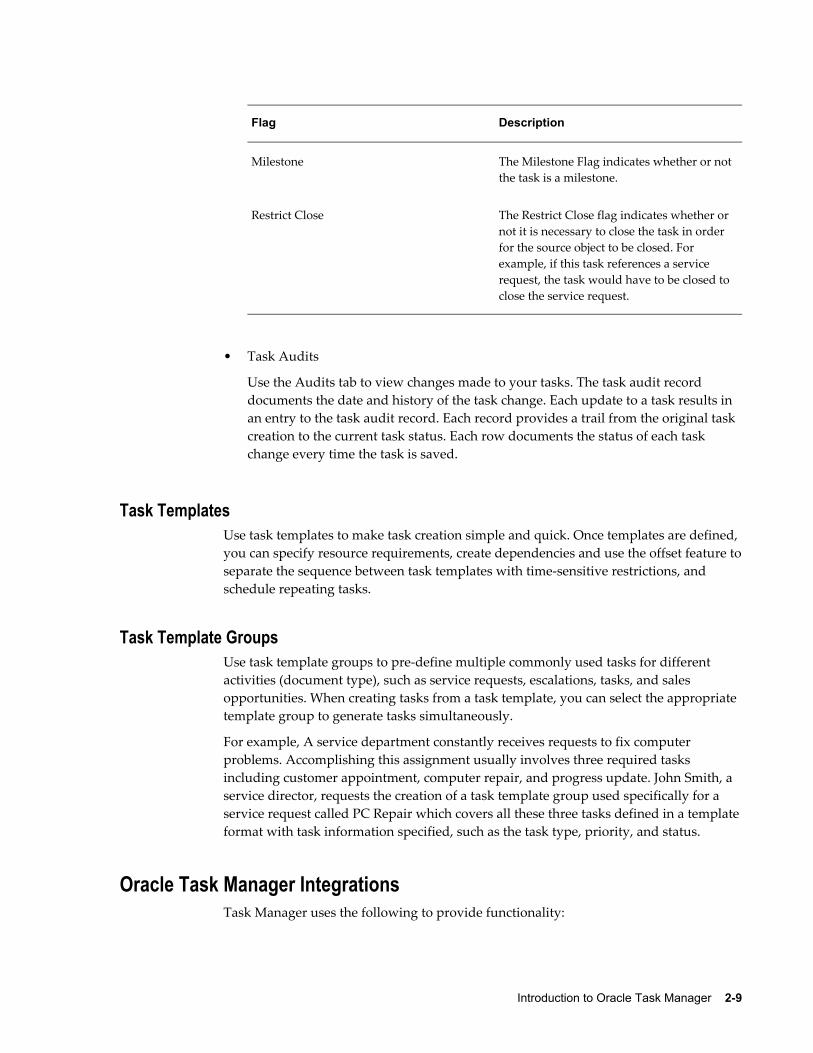
Milestone The Milestone Flag indicates whether or notthe task is a milestone.
Restrict Close The Restrict Close flag indicates whether or not it is necessary to close the task in order for the source object to be closed. For example, if this task references a service request, the task would have to be closed to close the service request.
• Task Audits
Use the Audits tab to view changes made to your tasks. The task audit record documents the date and history of the task change. Each update to a task results in an entry to the task audit record. Each record provides a trail from the original task creation to the current task status. Each row documents the status of each task change every time the task is saved.
Task TemplatesUse task templates to make task creation simple and quick. Once templates are defined, you can specify resource requirements, create dependencies and use the offset feature toseparate the sequence between task templates with time-sensitive restrictions, and schedule repeating tasks.
Task Template GroupsUse task template groups to pre-define multiple commonly used tasks for different activities (document type), such as service requests, escalations, tasks, and sales opportunities. When creating tasks from a task template, you can select the appropriate template group to generate tasks simultaneously.
For example, A service department constantly receives requests to fix computer problems. Accomplishing this assignment usually involves three required tasks including customer appointment, computer repair, and progress update. John Smith, a service director, requests the creation of a task template group used specifically for a service request called PC Repair which covers all these three tasks defined in a templateformat with task information specified, such as the task type, priority, and status.
Oracle Task Manager IntegrationsTask Manager uses the following to provide functionality:

2-10 Oracle Common Application Calendar User Guide
• Oracle Trading Community Architecture (TCA) to locate the customer contact information when creating a task in relation to a customer.
• Resource Manager to locate resources (task owner and assignee) for a task.
• Assignment Manager to assist in locating a qualified resource (task owner and assignee) for a task. Assignment Manager can use the Territory Assisted assignmentoption to locate the right resource assigned to a specific territory.
• The Notes Module to create a note for a task.
• Oracle Workflow to send a workflow notification to an owner, assignee, group, or team, about a new or updated task.
• Escalation Manager to escalate a task. Escalation Manager also uses Oracle Workflow to send workflow notifications to appropriate resources when escalating a task, defect, or service request.
Task Manager is widely used by the following modules across Oracle E-Business Suite:
• Escalation Manager uses Task Manager to create tasks associated with an escalationdocument.
• Universal Work Queue (UWQ) uses the Task Manager to display tasks.
• The HTML, OA, and Forms-based Calendars use Task Manager to display tasks and appointments on different calendar views, such as daily, weekly, and monthly views.
• Assignment Manager uses the Forms-based Task Manager to determine task duration.
• Service applications use Task Manager to create tasks associated with service requests.
• Sales applications use Task Manager to create tasks associated with opportunities and leads.
• Marketing uses Task Manager to create tasks associated with marketing campaigns.
• Contract applications use Task Manager to create tasks associated with contracts.

Managing Appointments in Oracle Applications Framework 3-1
3Managing Appointments in Oracle
Applications Framework
This chapter covers the following topics:
• Overview of the Oracle Applications Framework Based Calendar
• Creating Appointments
• Viewing Appointments
• Updating Appointments
• Responding to Appointment INVITES
• Viewing Your Personal Calendar Views
• Viewing Personal Calendar Daily View
• Viewing Accessibility Daily View
• Viewing Personal Calendar Weekly View
• Viewing Personal Calendar Monthly View
• Checking Resource Availability
• Delegating Your Calendar
• Customizing Calendar View Preferences
• Customizing Calendar Default Preferences
Overview of the Oracle Applications Framework Based CalendarThe Common Application Calendar module provides essential functionality for managing daily activities generated by various Oracle E-Business Suite applications. It allows you to create and update appointments, respond to appointment invitations, check resource availability, and view scheduled activities through personal calendar daily, weekly, and monthly views.

3-2 Oracle Common Application Calendar User Guide
Similar to Notes and Tasks, the Calendar module adopts the Oracle Applications Framework to provide essential Calendar functionality for integrated applications, suchas Oracle Sales and licensed Oracle Financials/Oracle Property Manager. It provides the following features:
• Create, update, and view a single appointment
• Create, update, and view a repeating appointment
• Add notes and attachments to an appointment and invitation
• Update notes and attachments based on Notes data security rules
• Accept a previously rejected invitation or reject a previously accepted invitation
• View scheduled activities in calendar daily, weekly, and monthly views
• Search for resource availability in an availability view
• View all details of the scheduled activities in an accessible daily view
• Customize your personal calendar preferences
Calendar in Oracle Applications Framework is not fully compatible with the HTML Calendar user interface. For example, some HTML Calendar features of using group and public calendars, as well as granting calendar privileges to other users, are not available in the Oracle Applications Framework based Calendar.
Creating AppointmentsUse the Create Appointment window to create a single or repeating appointment. After creating an appointment, you can access the calendar daily view by default.
To create an appointment, enter appointment header information and use necessary tabs as illustrated in the following diagram:
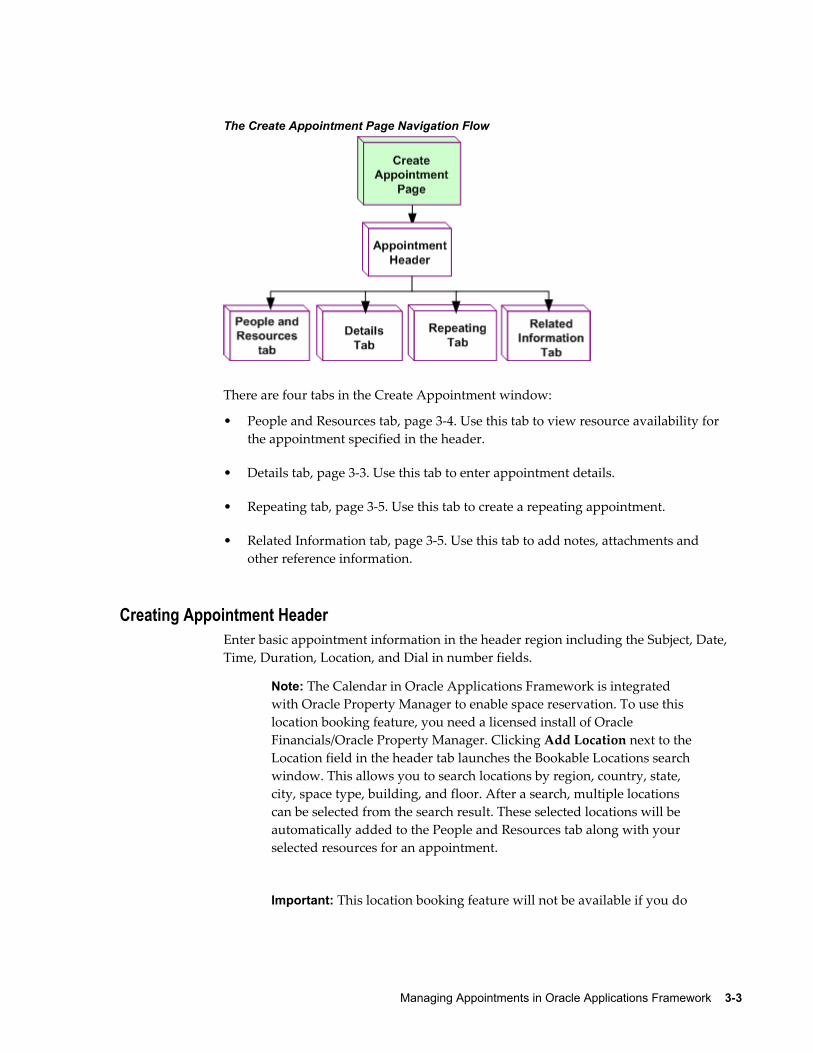
Managing Appointments in Oracle Applications Framework 3-3
The Create Appointment Page Navigation Flow
There are four tabs in the Create Appointment window:
• People and Resources tab, page 3-4. Use this tab to view resource availability for the appointment specified in the header.
• Details tab, page 3-3. Use this tab to enter appointment details.
• Repeating tab, page 3-5. Use this tab to create a repeating appointment.
• Related Information tab, page 3-5. Use this tab to add notes, attachments and other reference information.
Creating Appointment HeaderEnter basic appointment information in the header region including the Subject, Date, Time, Duration, Location, and Dial in number fields.
Note: The Calendar in Oracle Applications Framework is integrated with Oracle Property Manager to enable space reservation. To use this location booking feature, you need a licensed install of Oracle Financials/Oracle Property Manager. Clicking Add Location next to theLocation field in the header tab launches the Bookable Locations search window. This allows you to search locations by region, country, state, city, space type, building, and floor. After a search, multiple locations can be selected from the search result. These selected locations will be automatically added to the People and Resources tab along with your selected resources for an appointment.
Important: This location booking feature will not be available if you do
3-4 Oracle Common Application Calendar User Guide
not have a licensed install of Oracle Financials/Oracle Property Manager and Add Location will not be visible.
An appointment start and end date and time are stored in server timezone unless the appointment is an all day appointment. When appointments are displayed in calendar daily view, the date and time are displayed in user timezone.
For example, in the header, enter an appointment called "Team Meeting" as the subject for coming Monday at 10:00 a.m. for one hour at Room 432. You can specify the date, time, location, and duration, one hour, for the meeting. Dial in number can also be entered if anyone needs to call in from different locations.
Inviting People and ResourcesUse the People and Resources tab to search for resources and check their availability based on the date entered in the appointment header as well as the start and end time specified in this tab. If you use Oracle Sales, then you can also search for contacts contained in Trading Community Architecture. You can only find contacts for customers you have security access to.
After finding desired resources, you can view the availability of each individual resource as well as the combination of all the selected resources' availability together in the availability view table. For customer contacts, a note displays in the calendar stating"no availability information."
Use the Show or Hide hyperlink to list a resource's or a contact's e-mail, phone, and office information or a location's suite, floor, and building information. This allows you to contact the resource directly for availability check if needed before inviting the resource to the appointment specified in the header. The e-mail link enables the e-mail compose window which allows you to send e-mails through an integrated webmail, such as Oracle Collaboration Suite.
In addition, you can update the resources by adding more or removing some of them tofinalize the resource list for the appointment.
Send Invitation: Select Send Invitation in order to automatically e-mail an invitation to the appointment. The check box does not appear if you do not have an e-mail address for a customer contact.
Notification of Update: To notify people of an update made to the appointment, select the Notify box for each person to be notified.
Entering Appointment DetailsUse the Details tab to enter description and other appointment details including the Type, Category, Priority, Access, and Reminder fields if you want to change the default values.
For example, select "Meeting" in the Type field for the "Team Meeting". Since this
Managing Appointments in Oracle Applications Framework 3-5
meeting is a regular meeting, not a private appointment, use "Medium" for the Priority field and "Normal" for the Access field. Select "10 minutes before" in the Reminder field so that you will receive a workflow notification in your Personal Home Page Worklist 10 minutes prior to the meeting. Keep "Busy" in the "Shown As" field so that the availability for the appointment owner specifically for this appointment time will be busy. If the owner is also invited to other appointments for the same time, the value "Busy" identified here will indicate that the owner is not available for the selected time.
Appointment Default Values
Instead of entering appointment fields each time when creating an appointment, you can set default values for the Duration, Location, Type, Priority, Access, Shown As, Reminder, and Category fields in the Calendar Default Preferences page.
See: Customizing Calendar Default Preferences, page 3-12.
Creating Repeating AppointmentsUse the Repeating tab to create repeating appointments with different frequencies including daily, weekly, monthly, and yearly.
See: Using the Repeating Region, page 4-8.
Adding Notes and Other Related InformationUse the Related Information tab to add notes, attachments, and other reference information to the appointment specified in the header.
Adding Notes and Attachments
Use the Add Note region to add new notes to the appointment specified in the header. Once notes are added to the appointment, you can view the notes in the Note History region.
See: Using the Add Note Region, page 10-1.
Use the Attachments region to add attachments with the appropriate format, Text, File, or URL, to your appointment. See: Using Attachments, Oracle Applications User's Guide.
Adding Reference Information
Use the Related Items region to add appointment reference information. However, currently this region shows no data by default and you cannot add any data unless a corresponding ID and source are passed from a customer page.
Viewing AppointmentsAfter clicking an appointment from calendar daily view, you can view the appointment details including invitation statuses regardless if invitees have been accepted or rejected, as well as attached notes and attachments in read-only format.
Bookings are time reservations created outside of Oracle Common Application

3-6 Oracle Common Application Calendar User Guide
Calendar. If you select a booking, the details for the booking appear.
Any appointment updates must be performed in the Update Appointment window. You can delete the appointment after viewing it.
To view or update notes attached to the appointment, see Viewing and Updating the Notes History Region, page 10-2.
Updating AppointmentsUse the Update Appointment window to modify an appointment including resources or attendees, appointment details, repeating appointments, and relevant notes and attachments. For changing the dates of a repeating appointment series, you need to use the Repeating region. See Using the Repeating Region, page 4-8.
Note updates are based on the HTML Notes data security rules. If you have appropriateaccess privileges, then you can add new notes and attachments, update note text for an existing note, update note attributes for the Type and Visibility fields, and update attachments.
Note: After an update to a repeating appointment, you can further specify how you want the changes to be implemented. It can be appliedonly to the current appointment, or to the entire repeating series.
For adding new notes, see Using the Add Note Region, page 10-1 in the Managing Notes in Oracle Applications Framework chapter.
For updating note attributes, see Viewing and Updating the Notes History Region, page10-2.
For updating note text, see Viewing and Updating the Note Details Page, page 10-3. See Using Attachments, Oracle Applications User's Guide for Attachment details.
Responding to Appointment INVITESWhen you receive an invitation to an appointment, it displays in your calendar daily view. Click one of the invitation links to access the Respond to INVITE page where you can respond to the invitation.
Oracle Common Application Calendar allows you to respond to an INVITE in the following ways:
• Accept or reject a single invitation.
• Accept all or reject all of the repeating appointment invitations.
• Accept a previously rejected invitation if the Show Declined Appointments check box in the View Preferences page is selected.
Managing Appointments in Oracle Applications Framework 3-7
• Reject a previously accepted invitation if the Decline button is visible.
• Add new notes and attachments.
• Update an existing note if you have appropriate security access.
Before responding to the invitation by either selecting the Accept or Decline button, youcan change the default values for the Category and "Show Time As" fields in the Details region if needed. For example, select "Free" in the "Show Time As" field if you reject the invitation or "Busy" if you accept it so that your availability for the accepted appointment time becomes busy which will block future appointment reservations. However, if you accept the appointment and also want to keep the time slot open for other important events, you can select "Free" instead so that it will not block you from being invited to other activities.
After you respond to the INVITE, the invitation status displayed in the People and Resources tab changed from "Invited" to "Accepted" or "Rejected". In addition, relevant workflow notifications will be sent to the appointment owner after an invitee accepts or rejects an invitation.
If it is a repeating appointment, you can either reject all or accept all of them, instead of responding to each invitation individually.
Viewing Your Personal Calendar ViewsCalendar allows you to view scheduled activities in daily, weekly, and monthly views. The same data is shown in all three views.
You can select another person's calendar from the Switch Calendars list. The list includes calendars you have viewed recently. Click More to search for another person's calendar. You only see appointment text if you have access to that person's calendar. Click the information icon to display the privileges you have for the current calendar.
The consuming application determines what activities are shown in your calendar. For example, Oracle Field Service includes Tasks, but Oracle Sales does not. Links take you to details for a displayed activity.
Daily View
Depending on your calendar preferences, you can view the scheduled activities in the daily view page displayed in the following ways:
• Use Personal Calendar Daily View, page 3-8 to view scheduled activities in a regular daily view
• Use Accessibility Daily View, page 3-8 to view scheduled activities in a daily viewwith detailed information
Note: To access the Accessibility Daily View window, you must
3-8 Oracle Common Application Calendar User Guide
choose either "Screen Reader" or "Yes" from the Accessibility Features list of values in the General Display Preferences page. If it is set to "No", then you can access the regular Personal Calendar Daily View page.
Weekly View
Your weekly view is based on Work Week Settings set by you in Preferences. These determine the days of the week to be shown and which day begins the week. Click the date to view the selected day in daily view. See Viewing Personal Calendar Weekly View, page 3-9.
Monthly View
The Monthly View page allows you to view scheduled activities in a monthly view format. See Viewing Personal Calendar Monthly View, page 3-9 for details.
Viewing Personal Calendar Daily ViewUse calendar daily view to view scheduled appointments for today, or a specific day. Additionally, you can choose to display declined appointments, or open invitations in this daily view if they are selected in the View Preferences page.
Any scheduled activities are displayed in the corresponding time slots in calendar daily view based on the scheduled start time and duration. Click the scheduled appointment's subject link to view the appointment details. If an appointment will be repeated, you should see a repeating icon displayed in front of the subject link.
Additionally, you may also find attendees, location, and related items for your appointments in the order you selected for the First Detail, Second Detail, and Third Detail fields respectively in the Calendar View Preferences page, page 3-11.
From the calendar daily view, you can also create a new appointment and check resource availability.
Viewing Accessibility Daily ViewUse the Accessibility Daily View window to view all the details of scheduled activities displayed in tabular summary format for a given date including the activity time, duration, subject, location, attendees, reminder, and repeating information detailing how often an appointment will be repeated or not be repeated.
All the activities displayed in the window are based on the given start date. If an activity does not have start date, then this activity will not be displayed in this view.
By changing the date in the View field, you can view other activities for the selected date. To view all the activities for the current date, click the Today button. Additionally,you can create an appointment from this page with the selected date.
Managing Appointments in Oracle Applications Framework 3-9
Note: You will not be able to access the Accessibility Daily View window unless you choose either "Screen Reader" or "Yes" from the Accessibility Features list of values in the General Preferences page or set the profile option "Self Service Accessibility Features" to "Screen Reader" or "Yes". Otherwise, you will access the regular personal calendar daily view.
Viewing Personal Calendar Weekly ViewUse the weekly view to view scheduled appointments for a chosen week. How your calendar displays depends upon your preferences. What activities are displayed depends upon the settings made by the consuming application, such as Oracle Field Service.
Notes• Date: Double-click the date to view the day in the daily view.
• Time: Each day shows times from 8 a.m. to 6 p.m. If an activity is scheduled outsideof these times, then the calendar changes to add the new time. For example, if you schedule an appointment at 7 p.m., the schedule for the week changes to display 8 a.m. to 7 p.m.
Multiple appointments for the same time are merged.
• Create Icon: Click the icon at the appropriate day and time to create a new appointment.
• Link: If an activity is a link, click it to see details of the activity.
Viewing Personal Calendar Monthly ViewUse the Monthly View page to view scheduled appointments for a particular month.
Note: Whether you can see appointments, declined appointments, or open invitations in your calendar monthly view depends on the preference settings in the Calendar View Preferences page or relevant parameter passed.
In the calendar monthly view, you will not only see the current month days, but also view the last few days of the previous month and the first few days of the next month displayed in white color. In order to easily distinguish weekdays from weekends, Calendar also marks the weekends in different colors in the monthly view. The weekends are determined based on the setup of the week start and end days in the preferences page.
3-10 Oracle Common Application Calendar User Guide
You can view scheduled activities in your calendar monthly view in the following two ways:
• Normal View. By default, the Monthly View page will be displayed in a normal view which means that there will be only three scheduled activities displayed for each day. If there are more than three activities for a day, then click the More... link to access the Daily View page.
• Full View. The Monthly View page presented in full view displays all scheduled activities for a day, not just limited to three items.
Additionally, you may also find attendees, location, and related items for your appointments in the order you selected for the First Detail, Second Detail, and Third Detail fields respectively in the Calendar View Preferences page, page 3-11. By clicking the appointment subject link, you can drill down to see the read-only appointment details page.
Please note that depending on how the Monthly View page is integrated with your applications, you might see Printable Page on the page which allows you to print your monthly schedule in paper.
Checking Resource AvailabilityUse the Check Availability window to search for the availability of resources that need to be included in an appointment, as well as to invite the selected people to the appointment based on availability.
Searching and Viewing Resource and Location Availability
To view the availability of resources for specific time, first specify appropriate date, start and end time, then search desired resources, and then add them to the availability view. Each selected individual resource's availability as well as the combination of all the selected resources are both displayed in the availability view table.
Additionally, you can book a location at the same time while checking resource availability by clicking Add Location. However, this feature is available only if you have a licensed install of Oracle Financials/Oracle Property Manager. Otherwise, Add Location is disabled. After finding a desired location, you can see the selected location is added to the availability view table along with the selected resources.
Use the Show or Hide hyperlink to list a resource's e-mail, phone, and office information or a location's suite, floor, and building information. This allows you to contact the resource directly for availability check if needed before inviting the resource to an appointment. The e-mail link can enable web mail compose window which allowsyou to send web mails through Oracle Collaboration Suite.
Creating an Appointment and Sending Invites
You can create a new appointment after checking resource availability. The time listed in the Create Appointment drop-down menu is synchronized with the availability view

Managing Appointments in Oracle Applications Framework 3-11
start time. By changing the create appointment time and clicking the Go button allows you to create a new appointment with the updated appointment time. All attendees listed in the availability view are invited to the appointment. Attendees can respond to the INVITE shown in their personal calendar daily view.
Updating Attendees
You can update attendees by adding more resources or removing them from the availability view before creating an appointment. Since this window is also used in the Create Appointment and Update Appointment pages, you can update attendees later for an existing appointment.
In summary, you can perform the following tasks in the Check Availability window:
• Search resources based on name, date, and time
• Search location based on region, country, state, city, space type, building, and floor only if have a licensed install of Oracle Financials/Oracle Property Manager
• Check the availability for the selected resources
• Invite the resources for a new appointment as attendees
• Remove attendees from the appointment
• Add more resources to the existing appointment
• Create a new appointment based on the selected time
Delegating Your CalendarAny calendar user can search for other users and delegate them privileges to view or modify the calendar and schedule appointments.
From Preferences, select Calendar: Manage Access Privilege.
Notes• Add Delegate: Select the user to whom you want to give access to your calendar.
• Start and End Dates: The start date is defaulted to the current date, and the end date is left blank. The end date revokes the privileges for the user as of the specifieddate.
• Privileges: For each delegate, specify the privileges you are granting for each object.Possible values are View Only Access and Full Access. No value means none.
Customizing Calendar View PreferencesUse the calendar view preferences page to change the calendar time display interval

3-12 Oracle Common Application Calendar User Guide
and specify how you want your scheduled activities and work weeks to be displayed in your calendar views.
General Region
You can set calendar time display interval in the Display Increment field for your calendar daily view. For example, display time interval in calendar daily view by every 30 minute or one hour increments.
Item Settings Region
Identify which scheduled activities you want them to be displayed in your calendar views. Additionally, to be able to distinguish appointments between declined appointments and open invitations, Calendar allows you to set display color and prefix for the selected activities that you want them to be displayed in your calendar views. The prefix can have up to 20 characters.
For example, if green is chosen for appointments and with prefix "Appt", then all appointments will be displayed in green and have prefix "Appt" in front of each appointment name in your calendar daily view. This way you can easily differentiate appointments from declined appointments if they are in red with prefix "RejAppt".
Item Details Region
Use this region to specify detailed preferences for a selected item in the order you want to display in the calendar daily view.
For example, if "Appointment" is selected in the Item Settings region, you can identify the detailed values for appointments using the First Detail, Second Detail, and Third Detail fields. If "Attendees", "Location", and "Related Items" are selected for the first, second, and third detail fields respectively, then when viewing scheduled appointmentsfrom your personal calendar views, you should see all attendee's names, such as John Walsh and Lisa Jones, listed first right after an appointment's subject link, then followedby location, such as HQ-1-1000, and then followed by the related item, such as Lead. If the Third Detail field is left blank, then you will not be able to see the related item (Lead) displayed after the location information for the appointment.
Work Week Settings
Use this region to customize which days to be displayed in your monthly and weekly views including the beginning of each week, your working days, and whether your nonworking days would be shown in your calendar with a different color. For example, start your work week on Sunday, show only Monday, Wednesday and Friday as working days, and leave non working days, Sunday, Tuesday, Thursday, and Saturday shown in a different color.
Customizing Calendar Default PreferencesUse the Calendar Default Preferences page to set personalized default values for appointment fields as well as to add and delete categories that are used to classify appointments or tasks.
Managing Appointments in Oracle Applications Framework 3-13
Setting Default Preferences
Use the Defaults page to set personalized default values for the following appointment fields:
• Type. This field classifies the purposes of your appointment creation, such as Follow Up, or Meeting. You can change the default "General" to other type if needed.
• Duration. This field determines how long the appointment would be, such as one hour, or 30 minutes.
• Priority. This field defines the urgency or an importance rating for an appointment, such as low, high, medium, and critical.
• Access. This field determines the accessibility of an appointment. It is reserved for the switch calendar functionality.
• Reminder. This field allows you to specify when you want to be reminded for an appointment. The default value is "Do not Remind Me".
• Show As. This field sets the default availability status for an appointment.
• Location. This field allows you to enter free-form text, such as "My office", indicating where an appointment should be held.
You can update these default values when creating an appointment.
Updating Categories
In the Categories region, you can add new categories by clicking the Add 5 Rows button, remove categories, and reset default category by clicking the Set As Default button. Please note that you can reset the default category from "Unfiled" to other category, but you cannot delete it since the delete icon for "Unfiled" is not visible.


Managing Tasks in Oracle Applications Framework 4-1
4Managing Tasks in Oracle Applications
Framework
This chapter covers the following topics:
• Using the Personalized Task Search and Result Page
• Using the Task Summary Contextual Region
• Creating Tasks
• Using the Task Header or General Region
• Using the Details Region
• Using the Owner and Assignee Region
• Using the Contacts Region
• Using the Schedule or Dates Region
• Viewing the Related Items Region
• Using the Repeating Region
Using the Personalized Task Search and Result PageUse the Personalized Task Search and Result page to perform a simple or an advanced search for standalone tasks, such as personal to dos, and to view the search results in the Results region with tabular summary format. In addition, you can customize the search result display options, save searches, and modify personalized search views.
You can perform the following tasks in this page:
• Perform a simple task search
• Perform an advanced task search
• Create a personalized save search or task view by specifying appropriate search

4-2 Oracle Common Application Calendar User Guide
criteria and display options
• Perform a saved search using a previously created personalized task view
• Modify previously saved personalized task views or change a default task view
• View all tasks that match the search criteria listed in the Results region
• Modify a selected task from the Results region if you have appropriate privileges
Currently, this page is integrated with Oracle Sales for sales agents to create standalone tasks, such as personal to dos. Please note that the creation of new personal tasks shouldbe done in this summary page, as it is an updatable table.
See Using the Task Summary Contextual Region, page 4-4 for content sensitive tasks.
Viewing Search ResultsIn the Results region, you can view tasks that are retrieved from your default search displayed in the tabular summary format. This table includes the task Subject, Due Date, Type, and Status fields. If you have appropriate access privileges, you can update task attributes using the drop-down lists, update task details, and delete a task. Otherwise, these attribute fields will be displayed in read-only format, and the Update More Details and Delete icons are disabled.
Click the Personalize button to access the Personalize Views page where you can modify existing views and change the default view.
Creating Personalized Task ViewsIn addition to simple search and advanced search, Task Manager developed for Common Application Calendar also allows you to use the Create Task View window to create personalized task views that contain your frequently used search criteria, columndisplay options, and sort criteria.
To personalize your task views, enter the following search criteria:
• General Properties
Use the General Properties region to specify a personalized task view's name, description, and number of rows displayed in the search results region. Select the Set View as Default check box if you want this task view to be set as the default value when clicking the Views button in the Personalized Task Search and Result page.
• Column Properties
Use the Column Properties region to update the appropriate column attributes as desired by clicking the Advanced Settings button. You can rename column names that will be displayed in your search results region. Select the Show Total check box
Managing Tasks in Oracle Applications Framework 4-3
if you want the renamed column to be displayed in the Results region.
• Column Display Options and Order
Use the Columns Shown and Column Order region to select the desired columns with the display order for the search results table.
• Sort Settings
To define the sort settings, select column names using the drop-down lists for the First Sort, Second Sort and Third Sort fields, and then select appropriate sort orders,such as ascending, descending, or no sort order, respectively. For example, first sortby type with an ascending order, then second sort by priority with an ascending order, and third sort by owner with no sort order.
• Search Query to Filter Data in Table
After specifying columns displayed and sort criteria, you can define queries in the Search Query to Filter Data in Table region for task owner, due date, type, subject, status, and priority.
For example, use the drop-down list to select a desired connecting value for a task field, such as task owner "contains" a selected owner name, "John", or due date is "greater than" a selected date, "07/23/03". Use the [Control] key to select multiple values for task status and priority fields. For example, status "equals to" selected statuses "Open", and "In Planning". Priority "does not equal to" selected priorities, "Low", and "Optional".
Optionally, use the drop-down list next to the Add button to add another search criterion.
In addition, you can execute the query in either of the following conditions:
• Show table data when all conditions are met.
• Show table data when any conditions are met.
After saving your query, you can find the newly created query added to the Personalize Views table where you can modify existing task views or reset a defaultview.
Use the "Apply and View Results" button to save your query and display the searchresults in the Results region simultaneously.
Modifying Personalized ViewsAfter saving your personalized task views, you can use the Personalize Views page to view all task views, change the default view, and redefine your saved searches if necessary.
Before updating your task view, you can select the view name link to execute the query

4-4 Oracle Common Application Calendar User Guide
and retrieve the search results in the Results region displayed along with the Simple Search region.
Using the Task Summary Contextual RegionUse the Task Summary contextual region to display tasks created for source objects and related objects, such as service requests, sales, leads, or opportunities, in the tabular summary format containing task subject, due date, type, and status. If you have appropriate access privileges, you can update these fields using the drop-down lists. Otherwise, these fields will be displayed in read-only format.
With appropriate privileges, you can also view a selected task, update the task details, and delete the task if the View More Details, Update More Details, and Delete icons are enabled.
While adding a new task using the "Add Another Row" button, you can only delete the new task once it is added to the table. You cannot view or update any existing tasks because the View More Details and Update More Details icons are disabled.
Creating TasksUse the Create Task window to create a task.
Depending on business needs of each integrated application, different task regions are implemented in the Create Task window. As a result, you might not see every task feature in your screens unless the integrated application has implemented them.
For example, when creating a sales related task, you can see the customer contacts region. This contacts region will not be visible if the task is created for a sales agent as a personal to do. For Service Applications, when creating a service related task in Service Online, you might find the Dates region in the task screen specifically used to manage time sensitive work assignments for service engineers. This region allows entry of multiple dates (planned, scheduled, and actual) for tracking purposes. This dates regionmight not be used in Sales Applications.
Related TopicsUsing the Task Header or General Region, page 4-5
Using the Details Region, page 4-6
Using the Owner and Assignee Region, page 4-7
Using the Contacts Region, page 4-7
Using the Schedule or Dates Region, page 4-7
Viewing the Related Items Region, page 4-8
Using the Repeating Region, page 4-8

Managing Tasks in Oracle Applications Framework 4-5
Using the Add Note Region in OA, page 10-1
For information about the Attachments region, please see Using Attachments, Oracle Applications User's Guide.
Using the Task Header or General RegionUse the task header or general region to enter basic task information including subject, type, and status. Besides these basic task fields, tasks created for different source objectsrequire additional fields to address different task needs.
• Sales Related Tasks
A sales related contextual task has an additional Due Date field in the region. Whena sales agent creates a personal to do, it requires only Due Date for the task, not specific time requirements.
• Service Related Tasks in Service Online
However, for a service related task created in Service Online, whether the task is completed on time or behind the schedule is critical for the service request. Therefore, instead of having the Due Date field in this region, service related tasks use the Dates region with more fields to manage time sensitive work assignments. The Visibility and Priority fields that are listed in the Details region for sales related tasks are displayed in the General region for service related tasks.
Detailed information for each field in this region is addressed as follows:
• Task subject is the task title or summary information of your task.
• Task type classifies the purposes of your task creation, such as a Follow-up task, or an Appointment task.
Additionally, only the mapped task types to a source are listed in the list of values (LOV). If none of the task types is mapped to your object, then all types will be displayed in the LOV.
• Task status specifies the progress of your task, such as Open, Working, or Completed.
In addition, status transition rules will be used if a rule is assigned to the logged-in user's responsibility. As a result, the user will only see the statuses specified in the rule from the LOV.
• Additional fields for service related tasks created:
• Visibility: This field determines the accessibility of a task. It has the following values from the drop-down list:
• Private: Only the creator has the privilege to read and update a task.

4-6 Oracle Common Application Calendar User Guide
• Internal Only (Default): The owner and assignees can read and update a task if they have appropriate privileges.
• Publish to All: A task becomes publishable over the Internet. Anyone can view it.
• Priority: This field defines the urgency or an importance rating for a task, such as low, high, and critical.
In addition, like task type, only the mapped task priorities to a source are listed in the list of values (LOV). If none of the task priorities is mapped to your object, then all priorities will be displayed in the LOV.
Note: Source is read-only text to display the source object and ID.
• Additional fields for sales related tasks:
• Due Date: This field specifies the end date needed for task completion.
The Visibility, Priority, and Source fields are in the Details region for sales related tasks.
Using the Details RegionUse the Details region to specify additional task information.
For a sales related task, you can see the following fields in this region:
• Visibility: It determines the accessibility of a task. You can see Private, Internal Only(default), and Publish to All from the drop-down list. The value Publish to All is notavailable for a standalone task, such as a personal to do created for a sales agent.
• Priority: It defines the urgency or an importance rating for a task, such as low, high,and critical.
• Description: It details a task with free-form text.
You can also see source and customer information displayed as read-only text if it is a contextual task. For example, the source information, Lead: iAS Lead, and customer, Business World, can be displayed for a contextual task created for a sales lead name iASfor a customer Business World.
For a contextual task created for a service request, in addition to the task description, you can see the Task Closure Required check box that restricts the closure sequence of a task and the related service request. Select this check box to specify that this contextual task must be closed first before closing the service request.

Managing Tasks in Oracle Applications Framework 4-7
Using the Owner and Assignee RegionUse the Owner and Assignee region to identify the owner and assignees for a task.
A Task Assignee
To add assignees to the task, click the Add Another Row button to enter assignee information.
For the Type field, all the resource types with the usage of RESOURCES are displayed in the drop-down list if the assignee mappings do not exist. Otherwise, only the mapped assignee and owner types will be displayed in the list. All other unmapped types will not be in the list.
Other Fields in the Region
After identifying task owner and assignees, the following fields are populated:
• For a service related task in Service Online, you can see the owner and assignee status fields which are unique to the service related task for managing work assignments. These fields are not available for sales-related tasks.
• For a sales related task, the selected resource's phone number, job title, and e-mail information are populated automatically in this region. Clicking the e-mail link to launch the e-mail compose window. There is no assignee or owner status field for a sales related task.
You can delete assignees in this region, but you must have one owner for your task.
Using the Contacts RegionUse the Contacts region to manage customer contacts for a task. This region is only available for a sales related contextual task that has customer information identified. It is not used for a standalone task, such as a personal to do, created through Oracle Sales for a sales agent without a specific customer.
The Search fields on the contact list of values page when you click the "Add Contact(s)" button are rendered based on the Trading Community Architecture (TCA) Data QualityManagement match rule. For more information, see Data Quality Management documentation provided by TCA to define match rules.
Click the Add Contacts button to access the TCA search page to select a contact. Once a contact is selected, the primary job title, e-mail, phone, and address are displayed automatically. If there are multiple contacts for a task customer, you can select one of them to be the primary contact by clicking the Set as Primary button.
Using the Schedule or Dates RegionTask Manager uses the Schedule region including the Dates region for service related

4-8 Oracle Common Application Calendar User Guide
tasks to record time sensitive information including planned effort, planned effort unit of measure, as well as planned and scheduled start and end dates.
Task Dates
Task start and end dates are essential fields for service related tasks. To effectively manage service related task assignments, you must enter either one of the following fields:
• Planned: Enter the planned start and end dates for a task. For example, a repair taskis specifically planned from February 12 to February 14, 2004.
• Scheduled: Enter the scheduled start and end dates if the task has been scheduled.
Viewing the Related Items RegionUse the Related Items region to display references information including reference type,name, description, and date added in the read-only format for a task or an appointment.
Currently, this region is only integrated with the Appointments screens, and it is not used in Tasks.
Using the Repeating RegionUse the Repeating region to create and update recurrences for an appointment. You can create these recurrences with different frequencies including daily, weekly, monthly, and yearly.
Note: The Repeating region is currently integrated only with the CreateAppointment and Update Appointment pages. It is not used in Tasks.
To define repeating appointments, you must identify the following elements:
• Repeating frequency type. It can be daily, weekly, monthly, and yearly.
• Repeating pattern. It includes how frequent the appointment is to be repeated, such as repeat each day, or every two weeks, as well as on any particular days the appointment is to be repeated, such as repeat every Tuesday, or every 15th of each month.
• Repeating range. It includes the start date and end date of the repeating cycle. The start date is the same date as is used for an appointment. The end date can be determined by either an actual date or the number of occurrences the appointment is to be repeated.
To create repeating appointments in the Create Appointment window, first specify the repeating frequency in the Frequency Type field using the drop-down list. You can select daily, weekly, monthly, or yearly for your repeating appointments.
Managing Tasks in Oracle Applications Framework 4-9
Daily Repeating
In the daily repeating region, you must define how frequently the appointment will be repeated in the Repeat Every number of Days field. For example, repeat every two days.
The daily repeating start date is the same date as the date for an appointment, and its end date is determined by either of the following fields:
• Repeat Until: Use the date picker icon to enter a specific end date, such as Oct-10-2006.
• End After Occurrences: Use this field to enter the number of times the appointment should be repeated. For example, enter 10 in the field if you want the appointment to be repeated 10 times including the appointment you just created.
You must enter either the end date in the Repeat Until field or the number of occurrences in the End After Occurrence(s) field to set the end date for the repeating appointments. For example, repeat every two days for an appointment starting on July 22, 2003 with 4 occurrences. As a result, the repeating appointments are scheduled on July 22, 2003, July 24, 2003, July 26, 2003, and July 28, 2003.
Weekly Repeating
For the weekly repeating, in addition to specifying how frequently the appointment willbe repeated in the Repeat Every number of Weeks field, you also need to identify on what weekdays the appointment is to be repeated using check boxes. By default, the weekday check box of the appointment start day is automatically checked. For example,if your appointment starts Wednesday on March 3rd, 2006, then the Wednesday check box will be automatically checked by default when weekly repeating is selected. You can also select more weekdays if needed, such as repeat every Wednesday, Thursday, and Friday each week.
Like daily repeating, the start date of the weekly repeating is the same date as the date for an appointment. The end date of the weekly repeating is determined by either the end date specified in the Repeat Until field or by the number of occurrences in the End After Occurrences field.
Monthly Repeating
Enter the repeating pattern by specifying how frequently the appointment is to be repeated in the Repeat Every number of Months field, as well as specifying to repeat on what particular days or dates in a month for the repeating.
• Repeat On Date
To repeat on the exact date as defined by start date. For example, if start date is 01-22-2006, the repeating will be performed on the 22nd of each month.
• Repeat On Day
Instead of specifying the exact dates, you can select a particular week and days in a month that you want the repeating to occur. Like weekly repeating, the weekday

4-10 Oracle Common Application Calendar User Guide
check box of the appointment start day is automatically checked by default. You can also select more weekdays if needed, such as repeat Wednesday plus the first Friday of each month.
The start date of monthly repeating is the same date as the date entered for an appointment. You must specify an end date by either entering a date in the Repeat Untilfield or the number of occurrences in the End After Occurrences field.
Yearly Repeating
Like all other repeating appointments, you must define how frequenlyt the appointment will be repeated in the Repeat Every number of Years field. For example, repeat every two years.
In addition, specify the repeating pattern by selecting either one of the following radio buttons:
• Repeat On Date
Select the exact date within one year for the appointment to be repeated, such as repeat every two years on March 20.
• Repeat On Day
Instead of specifying the exact date, you can select a specific weekday, such as the third Friday, for a particular month, such as in July.
The start date is the same date as used for an appointment. You must specify an end date by either entering a date in the Repeat Until field or the number of occurrences in the End After Occurrences field.
Updating Repeating AppointmentsWhen you update a repeating appointment, you have three options:
• This Occurrence: Updates only the appointment you edited.
• This Series from <selected date> Forward: Updates the edited appointment and every appointment in the future.
• All Occurrences: Updates every repetition of the edited appointment, including those in the past.
Working with Forms-based Tasks 5-1
5Working with Forms-based Tasks
This chapter covers the following topics:
• Creating, Updating, and Finding Tasks
• Creating Tasks from Templates
• Creating Tasks Individually
• Assigning and Scheduling Resources
• Setting Dependencies for Tasks
• Setting References for a Task
• Specifying Additional Dates for a Task
• Documenting Multiple Contact Information
• Scheduling Recurring Tasks
• Setting Task Flags
• Tracking a Task Record
• Launching the Task Workflow
• Linking Tasks to Source Documentation
• Tracking Planned, Scheduled, and Actual Dates
Creating, Updating, and Finding TasksUse the Task window to create and update a task, or use the Find Tasks window to search for tasks created with or without templates.
Searching For TasksEnter search criteria in the Find Tasks window to search for desired tasks. These criteriainclude basic task elements, information about owner, assignee, customer, and task dates. Additionally, you can also search for open tasks, escalated tasks, or any tasks

5-2 Oracle Common Application Calendar User Guide
created from a task template group if appropriate criteria are selected.
For example, if the Show Open Tasks check box is selected, then Task Manager filters out any task status with the status Canceled, Rejected, Closed, or Completed and only shows task with Open task status. If this box is not checked, then all tasks with any statuses will appear in your search results. If the Show Escalated Tasks check box is selected, then Task Manager will search for all escalated tasks of all escalation levels.
Updating TasksTask Manager allows you to use the standalone Forms-based Tasks to update standalone tasks, and contextual tasks created from other source objects, such as servicerequests. Contextual tasks can only be updated if the From Task check box is selected for the source object in Task Setup: Object Types. Updates made in the standalone Tasksforms may break some of the business rules that are enforced in the source business object. Therefore, you should use the parent business object's specific Task screens, suchas service request screen, to update contextual tasks.
When updating customer information for an existing task, it is important to note that any updates to the customer will remove the existing contacts for the task. After an update, the customer name and number are changed, and the contacts and contact points for the former customer are also removed from that task. Therefore, you must select new contacts from the newly added customer for that task.
Additionally, when you manually update or add any owners, assignees or customers with a resource of category party in the Forms-based or HTML Tasks, the associated party references including the party type of relationship, party and organization information will also be created and visible under Task References. However, if it adds any duplicate references in Tasks, then an error message will appear stating that the reference already exists, unless the calling module is set up to ignore the creation of duplicated references.
Creating TasksAfter clicking the New button in the Find Tasks window, you are directed to the Tasks window to create tasks in the following ways:
• Create tasks from a task template, page 5-2
• Create tasks individually, page 5-3
Creating Tasks from TemplatesTasks can be created simultaneously from a task template if an appropriate task template has been created during the implementation.
For example, a service department constantly receives requests to fix computer problems. To accomplish this assignment usually involves three required tasks
Working with Forms-based Tasks 5-3
including customer appointment, computer repair, and progress update. A service director could request the creation of a task template group used specifically for a service request called PC Repair which covers all these three tasks defined in a templateformat with task information specified, such as task type, priority, and status.
To create tasks from a template, you must select the Create Task from Template button. Enter the following information in the Create Tasks from Template Group window:
• Template Group: Select a template group from the LOV, such as PC Repair since this template group consists of three task templates that are used specifically for service requests regarding computer problems.
• Source Document: This field displays automatically after the template group is identified. For example, the PC Repair template group is tied to the source document Service Request during the setup.
• Source Value: Enter the document number that these tasks are to be created for. For example, if you create tasks associated with a service request, then you need to select the request number as the source value. If creating tasks from a template for astandalone task, you can select any number as the source value. The selected number will not have impact on the task creation.
• Owner Type: Enter the type of owner that will be assigned to all these three tasks, such as Employee Resource.
• Owner: Select the specific owner based on the previous value. For example, if you select Employee Resource you must select a person.
Clicking the Create Tasks button will create multiple tasks from the selected template simultaneously.
Creating Tasks IndividuallyYou can create a single task in the Tasks window by entering appropriate task information including subject, type, status, priority, description, and other task information.
The values of task owner type, , owner, task type, status, and priority fields can be defaulted from the relevant profile options. If selecting the values from the type and priority fields, you will see only the task types and task priorities mapped to your source object from the list of values. If none of the types or priorities is mapped to your source, then all task types and priorities will be displayed in the list of values.
Additionally, enter dates and customer information for your task. Click the More button to specify task details using the following tabs:
• Use the Resources tab to define resource requirements. See: Assigning and Scheduling Resources, page 5-4.
5-4 Oracle Common Application Calendar User Guide
• Use the Dependencies tab to enter task dependencies. See: Setting Dependencies forTasks, page 5-5.
• Use the References tab to enter task references. See: Linking Tasks to Source, page 5-9.
• Specify Additional Dates for a Task, page 5-7 using the Date tab.
• Use the Contacts tab to enter the customer contact information. See: Documenting Multiple Contact Information, page 5-8.
• Use the Recurrences tab to enter the recurrence rules. See: Scheduling Recurring Tasks, page 5-8.
• Use the Audit tab to view the task history information. See: Tracking a Task Record,page 5-8.
RestrictionsClicking Launch Workflow in the Tasks windowautomatically reserves the specified resource and notifies the task owner of task creation.
Time Zone: If the time zone is not selected for a task and profile options enable time zones, then all times are displayed in the server time zone along with a hint explaining the time zone. If the time zone is selected for a task, and profile options enable time zones, then times appear in the selected time zone along with a hint explaining the time zone. If profile options do not enable time zones, then times display in the server time zone with no hints.
Assigning and Scheduling ResourcesUse the Resources tab to define a specific resource for a task. The task owner assigns and schedules the required resources after selecting the best available options. Perform the following steps to assign and schedule resources.
Steps:1. With your task information displayed in the window, click More.
The Task Details window opens.
2. In the Requirements region of the Resources tab, select the resource type from the list of values (LOV).
3. Enter a numerical value in the Unit field.
The unit value determines the number of resources needed to complete the task.

Working with Forms-based Tasks 5-5
4. Select the Enabled check box to activate varied resources according to the task.
Use this option to select live resources when updating.
5. In the Assignment region, select the resource type and name from the LOV.
6. If you want to schedule a resource, select the Schedule check box.
Enter scheduled distance and duration values and select a unit of measure.
7. For tracking purposes, update the Actual fields after task completion.
8. Save your task.
Setting Dependencies for TasksDependencies determine the order among tasks. When an action requires the creation ofseveral tasks, setting a dependency for each task sets the relationship between the tasks and their start or end dates. For example, it ensures the completion of a designated task before the start of another task.
Note: The functionality of dependencies and offset field is enforced only during the tasks automated creation using task templates.
For example, a support manager wants an employee to call back to a customer and another employee to follow up with a salesperson. Dependencies can be created to ensure the salesperson is contacted before the customer is called back. Dependent tasks are tasks that are completed in a specific order.
Use the offset feature to organize tasks with time-sensitive restrictions. Enter a numeric value in the Offset field plus an appropriate unit of measure, such as one hour or 30 minutes, to separate the initial task template from a subsequent task template. This way,tasks are time dependent. For example, you can have a one day (offset) time frame between when the salesperson is contacted and the customer is called back. This allows the salesperson to have one day preparation before the customer is called back.
Please note that the difference between dependencies and parent-child tasks is that a parent task and its child tasks do not have a specific order for completion. They are not, therefore, dependent on each other. The dependent tasks have to follow a specific sequence. If desired, specific time restrictions (offsets) can be specified between each dependent task.
The Offset value determines the time that separates the action of initial tasks from subsequent tasks. Use this feature to organize tasks with time-sensitive restrictions.
Responsibility: CRM Administrator
5-6 Oracle Common Application Calendar User Guide
Dependency TypesDependency types define the relationship between dependent tasks and their start or end dates. There are four dependency types:
• Finish to Start: The successor task cannot start until the predecessor task finishes.
ExampleFor example, a document needed for a customer is completed before an agent calls on the customer.
• Start to Finish: The successor task cannot finish until the predecessor task starts.
ExampleFor example, the on-site training person cannot leave until the implementation consultant arrives and is ready to start.
• Start to Start: The successor task cannot start until the predecessor task starts.
ExampleFor example, two service representatives need to call on the same customer at the same time to perform two different tasks that are related and require cooperation.
• Finish to Finish: The successor task cannot finish until the predecessor task finishes.
ExampleFor example, the implementation consultant starts weeks before user training begins, but the consultant assists with training and isn't finished until the training isalso completed.
Dependency ValidationsThere is a validation flag for each dependency, which is defaulted to no. If it is set to Yes, then validations are done when dependencies are created, updated, or deleted. Thefollowing are some of the validations that are performed:
• The schedule for a scheduled task is validated against the dependency type.
• For the Finish to Start dependency type, the task B start date is not less than the taskA end date.
• For the Start to Finish dependency type, the task B end date is not less than the task A start date.
• For the Start to Start dependency type, the task B start date is not less than the task A start date.
• For the Finish to Finish dependency type, the task B end date is not less than the
Working with Forms-based Tasks 5-7
task A end date.
• A task depends only once upon another task.
• The predecessor task cannot depend on the successor, creating a cycling dependency.
• Tasks cannot make a cyclic chain, with the first task linked with the last one in a cyclic manner.
Setting References for a TaskAfter creating a task, you can use the References tab to update or add more references or business objects to a task. See Task References Information, page 6-8 for more information. Perform the following steps to add a reference to a task.
1. As the CRM Administrator, navigate to Task and Escalation Manager > Tasks > Tasks.
2. Locate your task and click More.
3. In the References tab of the Task Details window, select from the LOV in the Document Type field.
4. Enter the identification number of the reference document in the Number field. The application name populates the Details field with a description of the reference type.
5. Optionally, enter the resource type information and click OK.
6. Save your task.
Specifying Additional Dates for a TaskUse the Date tab to provide values for additional date types related to a task. These datetypes are in addition to the already present date types, Planned, Scheduled, and Actual that are on the main task window. The user can define additional date types using the Define Task Date Type window.
1. With your task information displayed in the window, click More.
2. Select the Date tab and enter a date type. You can define a new date type using Define Task Date Type.
The Application Reference field is read only and displays information based on the application that is related to the date type, as set up in Define Task Date Type.
5-8 Oracle Common Application Calendar User Guide
3. Enter a value for the selected date type.
4. Enter information in the flexfield region if any flexfields are defined for the task dates.
5. Save your work.
Documenting Multiple Contact InformationUse the Contacts tab to associate contact information to a task.
Note: You must save the task to make contact information available in the list of values (LOV).
Select the Primary check box if the person is the primary contact for the task.
Entering multiple contacts and selecting one as the primary contact records the correct communication channel for the selected task.
Scheduling Recurring TasksYou can schedule a task to automatically repeat on a daily, weekly, monthly, or yearly basis using the Recurrences tab of the Task Details window.
Setting Task FlagsUse the Others tab to set task flags to further customize a task.
The task owner receives the task flagged as a Milestone.
Tracking a Task RecordUse the Audit tab to view the history of a task. The task record provides a trail from the original task status through the current status. Perform the following steps to access the task audit record information.
Steps:1. With your task information displayed in the window, click More.
The Task Details window opens.
2. In the Audit tab, view the task history.
Each row documents the status of the task. The first row contains the most recent task record.
Working with Forms-based Tasks 5-9
3. Scroll to the right to view both the old and new values.
4. Click OK when you are done viewing the audit record.
Launching the Task WorkflowUse the launch workflow button to notify an assignee of the creation of a task.
Workflow triggers an e-mail or worklist notification when a task is created or updated.
Linking Tasks to Source DocumentationYou can link a task to a source document to reference pertinent background information. Define source documentation as the original request document that resultsin the creation of a task. Perform the following steps to link a task to a source document.
Responsibility: CRM Administrator
Steps:1. Navigate to Task and Escalation Manager > Tasks > Tasks
2. Locate your task.
The Task Main window opens.
3. Select the source document from the LOV.
4. Enter the identification number of the source document in the Source Value field.
5. Save your task.
The source document is now associated with the corresponding task.
6. Double-click the Source Value field to view the source document.
Tracking Planned, Scheduled, and Actual DatesTrack task progress by entering date information after three task milestones:
• Task Creation
• Resource Reservation
• Task Completion
Use this procedure to track planned, scheduled, and actual task dates.

5-10 Oracle Common Application Calendar User Guide
Steps:1. In the Find Tasks window, find or create a task.
The Tasks window opens.
2. Enter information into the Planned fields in the Dates region.
3. After reserving resources for the task, enter information into the Scheduled fields.
4. Upon task completion, enter final information into the Actual fields.
5. Save your task.
RestrictionsUpdating the Actual Start and End Dates in the Resource tab populates the corresponding Actual date fields in the Task window.
Using HTML Tasks 6-1
6Using HTML Tasks
This chapter covers the following topics:
• Accessing the Oracle Task Manager Interface
• Viewing the Task Summary
• Personalizing Your Saved Searches
• Viewing Task Details
• View Parent/Child Tasks With Task Security
• Creating a Task
• Basic Task Information
• Task Dates
• Task Assignments
• Customer Information
• Task References Information
• Assigning a Resource to a Task
• Specifying the Task Effort
• Creating a Repeating Task or Appointment
• Mass Creating Tasks
• Adding an Attachment
• Viewing Your Task Bin
• Editing Your Task Bin
• Reassigning Tasks
• Defining Your Task Preferences
• Setting User Preferences
• Viewing Notifications in Your Worklist
6-2 Oracle Common Application Calendar User Guide
• Defining Task Contacts
Accessing the Oracle Task Manager InterfaceThere are several ways to access Task Manager. It can be run as a standalone module where you access tasks directly to create personal tasks or it can be called from other modules to provide integrated solutions. You can also access Task Manager through theHTML Calendar module from a link on the main navigation bar. The following modules use the Task Manager to create and manage tasks:
• Oracle Marketing Online (HTML)
• Oracle Service (Forms and HTML)
Viewing the Task SummaryUse the Task Summary to:
• View a list of your tasks
• Create a new task by clicking the Create button
• Create a quick task by clicking the "Create Quick Task" button if it is visible
• Update task fields
• Update task details by clicking the task number hyperlink
• Remove tasks
• Select to display another saved search in addition to seeded query "My Open Tasks"
• View parent/child tasks in a tree hierarchy by clicking an enabled Hierarchy icon in the Hierarchy column
• Click the CSV icon to save your list of tasks in Microsoft Excel.
Seeded Query "My Open Tasks"
HTML Task Manager provides a seeded query "My Open Tasks" which allows you to search for only the tasks where the user is the owner or assignee. If a task is owned by or assigned to a group or team that you belong to, then that task will not be retrieved from the "My Open Tasks" seeded query.
Be aware that you cannot delete the seeded query "My Open Tasks".
• Use the First, Previous, Next, and Last links to view all of your

Using HTML Tasks 6-3
existing tasks.
• It is mandatory to display either the task name or the task number fields. If you remove both of these columns, the task name appears automatically.
• You must be the owner or assignee of a task to have full access to it.If you are not the owner or assignee, the task will appear in read-only format. See HTML Task Security Access Details, page 7-2 for a description of access privileges.
Personalizing Your Saved SearchesIn addition to the seeded query "My Open Tasks", Task Manager allows you to use the Task Search window to create a personalized saved search. You can personalize your search results in four ways:
• Create search criteria and save it as a personalized search.
• Select only the columns you want to display in the Task Summary window.
• Sort records in ascending or descending order.
• Specify how many rows of task records you want to display in the Task Summary window.
When searching tasks from the seeded "My Open Tasks" saved search, only the tasks forwhich the user is the owner or assignee will be displayed in the Task Summary window. If a task is owned by or assigned to a group or team that you belong to, then that task will not be retrieved from the "My Open Tasks" seeded query.
To be able to list that task, you must perform a search separately by creating another saved query which will show all tasks for which the user is the owner or assignee, as well as all tasks that the group or team for which the user is a member of is listed as the task owner or assignee.
Deletion of Saved Search Records
You can delete your saved search records except the seeded search "My Open Tasks". After each deletion, you are directed to the Task Search screen with a confirmation message.
Note: Before entering information for a new saved search, you must click Clear in the Task Search window. Otherwise, the information that appears in each field reflects the default Saved Search that appears in the drop-down list. For example, in the Assignments region, the default

6-4 Oracle Common Application Calendar User Guide
setting is to search tasks with any role since the option button "Task with Any Role" is selected. This allows you to search for tasks for whichyou are neither the owner nor the assignee, but with view access.
Select the Task with Role option button to search for tasks assigned to another owner or assignee.
Select the Use as Summary Page Default check box to have the search execute upon opening the Task Summary window.
Select the Use as Default Query for Combo View check box to have the search execute upon opening the Combination window in Calendar.
Viewing Task DetailsAny applicable values entered in the Create Task window are carried over to the Task Details window. In addition to updating or deleting an existing task in the Task Details window, you can also view task hierarchy if a task has a parent or child task associated.
In the heading of the Task Details window, you can see the source name, source document number, task subject, and task number for the task. Click the Source document number link to view the source of an existing task or click the subject link to view the details of that record.
If a task has a parent or child task associated, you can also find the Hierarchy icon displayed next to the source document field. Otherwise, this icon becomes invisible. Click the Hierarchy icon to access the Task Hierarchy window for the current task with all its associated parent or child tasks displayed in a tree hierarchical structure starting from the root. In addition, if you have appropriate access privileges to access the parent task, you should also see an icon enabled for the parent task number that allows you to drill down to the actual parent task. Otherwise, this parent task icon becomes invisible if you don't have the security access granted to you.
Updating Customer Information
You can update the task information by modifying appropriate fields including customer contacts. However, any updates to the customer for an existing task will remove the existing contacts for the task. After an update, the customer name and number are changed, and the contacts and contact points for the former customer are also removed from that task. Therefore, you must select new contacts from the newly added customer for that task.
Note: If a product integrated with Task Manager passes customer data into the system, the information automatically populates the customer area of the Task Details window based on the source.

Using HTML Tasks 6-5
View Parent/Child Tasks With Task SecurityIn the Task Hierarchy window, you can view the hierarchical tree structure of a given task. However, the access of each task in the tree hierarchy is aligned with the security access you have in Tasks.
• If a task appears in a tree node with "Task Number: Subject" hyperlink, such as "1234 : Installation", then you have the access privilege for that task. Click the hyperlink to access the Task Details window.
• If a tree node appears with a No Access label, then you don't have the privilege to access that task.
Creating a TaskYou can create tasks through the following two ways based on your business needs:
• Create a Regular Task: Click the Create button in the Task Summary window to access the Create Task window
• Create a Quick Task: Click the "Create Quick Task" button in the Task Summary window to access the Create Quick Task window to quickly create a light version ofa task if the button is visible
Creating a Quick TaskInstead of creating a regular task, you can choose to quickly create a simple task, a light version of a task, by clicking the "Create Quick Task" button if it is shown in the Tasks Summary window. You proceed to the Create Quick Task window to enter the following information:
• Combination of Basic Task and Date Information
• Task Assignments
• Task References Information
To create a simple task, you need to enter a combination of basic task elements (type, name, description, and category) and date information (date, start and end time), and optionally enter resource assignments and task references information.
Features of Quick Tasks
Since a quick task is a light version of a regular task, there are some restrictions in quick task:
• You can only enter one date with appropriate start and end time, but without
6-6 Oracle Common Application Calendar User Guide
specifying start or end date. Date and time are in default time zone.
Note: Default time zone is set by profile option and in your calendar preferences.
• A quick task must be a public task.
• A quick task cannot be a child task as you cannot specify a parent task.
After creating a quick task, you can still update the task in the Task Details window.
Create a Regular TaskUse the Create Task window to create a new task by entering the following information:
• Basic Task Information, page 6-6
• Task Dates , page 6-7
• Task Assignments, page 6-8
• Customer Information, page 6-8
• Task References Information, page 6-8
• Additional Task Information can be entered if flexfields are defined for Task Details.
Basic Task InformationEnter basic task information including task type, subject, description, priority, status, categories, and parent task. You can use drop-down menus to select desired task information.
For task types and priorities, only the mapped task types and task priorities are listed inthe relevant list of value options. If none of the task types or priorities is mapped to your object, then all types and priorities will be displayed in the list of values.
Select the Private check box if this task is considered a private task. Click the Notify check box if you want to notify assignees of the newly created task.
If you are creating a child task for another task, then search a parent task by task subjector task number if necessary. However, child and parent tasks must have the same source, such as Service Request. For example, the child task cannot have the source as Lead and the parent task cannot have the source as Service Request.
Using HTML Tasks 6-7
Task DatesEnter appropriate dates for your task including time zone, task start and end dates and time for planned, scheduled, and actual dates, as well as duration.
You must select the "Use For Calendar" button for one of the planned, scheduled, or actual task dates. HTML Calendar uses this button to determine which date would be used for your task when displaying it in your personal calendar views. Additionally, when a task is displayed in a personal calendar, these task start and end dates are essential to the resources availability calculation which is used to determine whether the resources assigned to the task are considered as Free, Busy or Tentative available.
Time Zone: If the time zone is not selected for a task and the profile option Enable Timezone Conversions is set to yes, then all times are displayed in the server time zone along with a hint explaining the time zone. If the time zone is selected for a task, and the profile option Enable Timezone Conversions is set to yes, then times appear in the selected time zone along with a hint explaining the time zone. If Enable Timezone Conversions is set to no, then times display in the server time zone with no hints.
Task End Date Based on Start Date and Duration
After you enter start date and duration values for a task, the task's end date and time will be automatically calculated based on the start date and time plus the duration value chosen.
If a task has start date and time but without end date, then the following profile options will be checked first to determine the task end date:
• Task Manager: Default Duration. If this profile is set, the end date will be automatically calculated based on the start date and time plus the duration.
• Task Manager: Copy Start Date to End Date. If this profile is set, then the end date will be directly copied from the start date.
Condition 1: Only One Profile Option Is Set
If only one profile is set, then the end date is defaulted based on the profile.
Condition 2: Both Profile Options Are Set
If both profiles are set, then the "Task Manager: Default Duration" overrides the profile "Task Manager: Copy Start Date to End Date" which means the end date is the start dateand time plus the duration.
During the task updates, you can update the end date, but the duration field will be displayed only if the calculated duration matches one of the values in the drop-down menu. Otherwise, the duration field will be set to Null.
Note: The default task date is set to "Scheduled", but you can manually override it by selecting another option button and then specify task

6-8 Oracle Common Application Calendar User Guide
start and end dates in the corresponding fields.
Task AssignmentsIn the Assign To region, you can search for appropriate resources of any type by first name, last name, or user name as an owner or assignee for this task.
In general, the task creator is automatically defaulted to be an owner of the task. The task creator has the ability to:
• View and update all fields within the task
• Reassign an owner to the task if necessary
• Assign resources (assignees) to the task
After creating a task, you can use the Assignments window to update or add more resources to a task. See: Assigning a Resource to a Task, page 6-10.
Customer InformationIn the Customer region, you can specify customer type to be organization, person, or relationship for your task. Select a customer name based on the selected customer type. Use the phone number LOV to select an appropriate number for the customer.
You must enter customer information here so that customer's contacts, not employee contacts, can then be specified later in the Contacts window. See: Defining Task Contacts, page 6-16.
You can update customer information later for an existing task. However, any updates to the customer for an existing task will remove the existing contacts for the task. After an update, the customer name and number are changed, and the contacts and contact points for the former customer are also removed from that task. Therefore, you must select new contacts from the newly added customer for that task.
Task References InformationIn the References region, depending on the source object, Task Manager automatically displays all the reference information that will be created for the organization, person, and relationship as read-only text.
In addition, since desired references (or Relate To) can be mapped to a source during implementation, only the mapped references are listed in the list of value options. If none of the references is mapped to your object, then all references will be displayed in the list of values.
If there are more than one mapped objects, a list of reference information will be
Using HTML Tasks 6-9
displayed for further selection.
For example, the following reference information should be displayed for a task if it is created for:
• An organization party. The reference information includes reference type "Party" and reference name that is an organization's name.
• A person party. The reference information includes reference type "Party" and reference name that is a person's name.
• A relationship party. The reference information includes reference type "Party" and reference name that is the relationship, the person, and organization of the relationship.
• An opportunity. The reference information includes reference type "Sales Opportunity", the customer of the opportunity, and the primary contact of the opportunity in the reference section.
• A lead. The reference information includes reference type "Sales Lead", the customer of the lead, and the primary contact of the lead in the reference section.
This reference information allows you to easily identify business objects with similar features or attributes for future references. For example, if a task relates to a specific business campaign, you can relate it to that campaign so the information appears to anyone who views the task.
After creating a task, you can use the References window to update or add more references or business objects to a task. In addition, you can also drill down to the actualreferences by clicking the object number links if you have appropriate access privileges.
TASK REFERENCE FOR A RESOURCE CATEGORY "PARTY"
When a new task is created with resources (owner, assignee, customer, and customer contact information) of category "party" in the Forms-based or HTML Tasks, additional party references are also created and visible in the Tasks:
• If the party type is Source, then one reference for that source object will be created.
• If the customer type is Person or Organization, then one reference for that person ororganization will be created.
• If the customer type is Relationship, then three associated party references will be created:
• The relationship itself (such as Jeff Walsh at Vision Corporation)
• The party who is the subject of the relationship (Jeff Walsh)
• The organization which is the object of the relationship (Vision Corporation)
6-10 Oracle Common Application Calendar User Guide
• If the resource type is Person, then one reference for that person will be created for every task assignment.
• If the resource type is Relationship, then three references (relationship, person, and organization) will be created for every task assignment.
• If the resource type is Person, then two references (person, and relationship between the customer and organization) will be created for every customer contact.
However, if the reference creation adds any duplicate references in Tasks, then an error message will appear stating that the reference already exists. If calling modules call the JTF_TASK_REFERENCES_PUB. Create_References ( ) or JTF_TASK_REFERENCES_PUB.Update_References ( ) API that leads to the creation of duplicate references, then the system will ignore the duplicated references.
Users can manually delete existing references that are shared by one or more attributes without problems. For example, if you delete a customer contact name "John" for VisionCorporation, then system will automatically delete the contact "John" as well as the relationship information "John at Vision Corporation", but it will leave the organization "Vision Corporation" unchanged in the system.
Assigning a Resource to a TaskWhen searching for resources of any types, you can search by first name, last name, or user name. In addition, any inactive resources will not be displayed in the resource list of values. In addition, when you manually update or add any resources (owners or assignees) with a resource category of party in the Forms-based or HTML Tasks, additional party references are also created and visible in the Tasks. If the resource type is Person (such as Jeff Walsh), then one reference of that person for every task assignment will be created. If the resource type is Relationship, then three associated party references will be created for every task assignment:
• The relationship itself (such as Jeff Walsh at Vision Corporation)
• The party who is the subject of the relationship (Jeff Walsh)
• The organization which is the object of the relationship (Vision Corporation)
However, if it adds any duplicate references in Tasks, then an error message will appearstating that the reference already exists.
When an assignment is updated with a different resource, existing task references for the old assignment are removed and new references are created.
Note: You can change the owner of a task but you cannot delete the owner altogether.
Click the Remove check box to delete a selected resource. If you manually delete a

Using HTML Tasks 6-11
resource name in the Name field without changing the resource type, the selected resource, regardless of an owner or assignee, is still valid. This is because the resource id is stored as a hidden parameter if you leave the resource type unchanged. Make sure to change the resource type drop-down list if you try to delete a resource name in the Assignments window.
Specifying the Task EffortUse the Efforts window to specify either the planned, duration, or actual effort. Each effort is defined as follows:
• Planned: This is the effort required to complete a task. For example, a task requires 10 hours work and is assigned to Mary and John. Each needs to contribute five hours to complete the assignment. The planned effort to complete this task is 10 hours.
• Duration: This is the actual time it takes for the completion of the task. For example,if Mary starts her work from 10:00 to 14:00, and John continues from 14:00 to 19:00, then the duration of this task is nine hours (10:00-19:00.) If John starts at 10:00, instead of 14:00, and finishes at 15:00, then the duration is five hours (10:00-15:00.)
• Actual: This is the actual effort for a task. For example, the actual effort for Mary to complete her work is four hours (10:00-14:00) and for John is five hours (10:00-15:00.)
Creating a Repeating Task or AppointmentUse the Repeating window to create a series of tasks for a regularly scheduled task or appointment. The start date must be specified before you can create a repeating task or appointment.
After creating a repeating task or appointment, you can further update the repeating rule by changing the frequency of a repeating series.
In addition, similar to the delete a repeating appointment feature, after updating a repeating appointment or inviting new attendees for the selected repeating appointment, you need to make selections in the Update Appointments window about how the changes are to be implemented (only this appointment, all appointments, or all future appointments). Invitees of a repeating appointment or task can either reject all or accept all of them, instead of responding to each invitation individually.
• Click the source number link to view the source or the name link to view the details of the record.
• After a repeating task is created, any additional modification

6-12 Oracle Common Application Calendar User Guide
impacts only the current occurrence of the task.
Perform the following steps to create a repeating task or appointment.
Steps:1. In the Repeating window, the Start Date field is populated with the date the task or
appointment was originally created. You cannot edit this date.
2. Click the Date Picker to access the select a date window and select an End Date for the repeating task or enter a number in the count text field to define the number of times you want the task to repeat. You must use the date picker to select a date. Manually entering dates causes an error to occur.
3. Select the option button for the frequency of the repeating task or appointment. Options include none, daily, weekly, monthly, and yearly.
1. Select None and the task does not repeat.
2. Select Daily and enter the number of days you want the task to repeat.
3. Select Weekly and enter the number of weeks and select the check box for each day you want it to occur.
4. Select Monthly and enter the number of months and select the check box for each day you want it to occur.
5. Select Yearly and enter the number of years and the day or the particular day ofthe month you want the task to occur.
4. Click Update to save your repeating task or appointment. A confirmation window opens confirming the repeating task was created. You can update the repeating ruleby changing the frequency of a repeating series if you want. Click the Update again to confirm the changes.
5. Click Restore to reset the original values in the window.
Mass Creating TasksUse the Mass Create window to create a separate task for each selected resources. Whenyou use the Mass Create feature, a new task is created for each resource in a group or team and that resource is automatically assigned as the owner of the task. Also, once thetask is created, the creator of the mass created task may not perform any updates to the new task.

Using HTML Tasks 6-13
Note: Click the source number link to view the source or the name link to view the details of the record.
In the Mass Create window, select the resource type (group or team) from the drop-down list and choose a corresponding value from the LOV. Tip text provides information about the distinction between the group and team concepts for marketing applications.
Select the Keep Record check box to copy the task to a group or team member even if one already exist for the owner.
Select the Copy Notes check box to create a copy of any note attached to the task.
A task for each member of the group or team is assigned and each individual becomes the owner of their task.
Adding an AttachmentUse the Attachment feature to link unstructured data such as images, word-processing documents, spreadsheets, or text to their application data. For example, you can link images to items or video to operation instructions. Task Manager supports the ability toadd one or more attachments to a task. The attachment can be in the form of a text message, a file, or a URL.
See Using Attachments, Oracle Applications User's Guide for Adding an Attachment.
Viewing Your Task BinIf you are using Task Manager integrated with another application within Oracle E-Business Suite, use the task bin as a quick look at your daily tasks, including the task name and end date. If no end date is specified during task creation, "No Date" appears in the date field. The task bin only shows tasks for which the logged in user is the owneror assignee and does not display appointments.
Note: When you switch to another calendar that you are subscribed to, your calendar and task bins still reflect your personal appointments and tasks.
Editing Your Task BinIn the task bin, tasks are sorted in the order of the calendar end date and priority. The task bin can be customized to select tasks based on different task statuses and priorities,as well as the update status. Perform the following steps to modify which tasks you want to appear in your task bin.

6-14 Oracle Common Application Calendar User Guide
Steps:1. Navigate to the Parameters window by clicking Edit in your Task bin.
2. In the Parameters window, use the Show Task Ending drop-down list to select which tasks you want to appear in the task bin. Options include tasks ending:
• Today
• Through tomorrow
• 2 days from now
• 3 days from now
• 4 days from now
• 5 days from now
• 6 days from now
• 7 days from now
3. In the Priority multi-select box, select which task priorities you want to appear in the task bin. You can select as many priorities as you want by holding down the [Ctrl] key and selecting each priority with your mouse.
4. In the Status multi-select box, select which task statuses you want to appear in the task bin. You can select as many statuses as you want by holding down the [Ctrl] key and selecting each priority with your mouse.
5. Select whether or not you want to show updated tasks in your task bin.
6. Click Update once you've selected all your parameters.
Your Homepage appears showing additional tasks which correspond to the task attributes you selected in the Parameters window.
Reassigning TasksTasks can be mass reassigned to new owners or assignees by using the Task Reassignment window. These new resources can be of any types that are defined in Resource Manager. For example, you can reassign a task from an employee resource to a supplier contact, party, partner, other, to be hired, resource group or team when the original resource was end dated (became inactive) or due to other business reasons. For example, due to the change of a person's role, as a result, the person is not suitable for the assigned task.

Using HTML Tasks 6-15
Please note that the Reassign button used to launch the Task Reassignment window is located in the Resource Details window, instead of in the Tasks screen. This is because the nature of task reassignment is to change resources for assigned tasks. Therefore, to reassign a task, users need to have the Resource Self Service Administrator responsibility to be able to access the HTML Resource Manager administrator page. In addition, the profile option Task Manager: Mass Task Reassign Access also needs to be set to Yes so that the Reassign button is shown in the resource window.
Alternatively, users with the CRM Application Foundation User responsibility can also access the reassign screen, but need to set the value of the profile option JTFRS: Employee Resource Update Access to Any at the user level. This way, users can reassign tasks even if the profile option Task Manager: Mass Task Reassign Access is setto No.
After you log in to Resource Manager with the appropriate responsibility, the first thingis to locate the resource that you want to change in the resource screen. This means the original resource must only be an employee resource or a group resource in this release.After locating the resource, then you can launch the Task Reassignment window by clicking Reassign.
During task reassignment process, make sure to identify both of the following items before you commit the change.
• The tasks for which you want the resource to be reassigned from the task list
• Resource type (such as employee resource) and a new resource name for the selected tasks
After you reassign tasks, workflow notifications should be sent to the old assignee, new assignee, and the task owner if the reassignment is for the task's assignee. If it is an owner reassignment, the notifications should be sent to the old owner and new owner.
Be aware that task reassignment will not change the task status. In other words, the status will still be the same as it was before reassignment.
Note: Only open tasks can be reassigned. Tasks shown on the Task Reassignment window should not have a status of closed, canceled, rejected, or completed.
Defining Your Task PreferencesTask Manager shares some preference options with the HTML Calendar. Use the following links to view information regarding Task Preferences.
• Changing Your Personal Preferences, page 12-11
• Adding and Removing Task Categories, page 12-14

6-16 Oracle Common Application Calendar User Guide
Setting User PreferencesYou can receive either e-mail notifications or workflow notifications, but not both. If you want to receive notifications in your worklist, you must set your Personal Home Page Preferences.
Select Do Not Send Me Mail in the Send me Electronic Mail drop-down list and click Apply.
Viewing Notifications in Your WorklistWhen a task is created, you can be notified by a workflow notification if it is set up properly. For detailed information about responding to workflow notifications, see Oracle Workflow User's Guide.
Responsibility: Workflow User Web Applications
Steps:1. Select Worklist hyperlink from the Workflow User Web Applications column.
2. The Worklist window opens with workflow notifications displayed.
3. Click on the notification in the Subject column that you want to view.
4. View your selected notification in the Notification Details window.
5. Respond to the notification by selecting an appropriate button in the bottom of the page.
Defining Task ContactsUse the Task Contacts window to manage employee and customer contact information. To be able to enter customer contact information, you must have customer information specified when creating a task.
When searching for a customer's contact, you can search either by contact's first name orlast name. After a search, you can see the matched contact names displayed with specified text either by last or first name. Any inactive resources will not be displayed inthe resource list of values.
In addition, when you manually update or add any resources (employee or customer contacts) with a resource of category party in the Forms-based or HTML Tasks, additional party references are also created and visible in the Tasks. If the resource type is Person (such as Jeff Walsh), then two associated party references will be created for every contact:
Using HTML Tasks 6-17
• The relationship between the customer and the contact (such as Jeff Walsh at VisionCorporation)
• The person itself (Jeff Walsh)
However, if it adds any duplicate references in Tasks, then an error message will appearstating that the reference already exists.
When you update a contact with a different contact name, existing task references for the old contact are removed and new references are created.
Task Manager allows you to manually delete existing references that are shared by one or more attributes without problems. For example, if you delete a customer contact name "Jeff Walsh" for Vision Corporation, then system will automatically delete the contact "Jeff Walsh" as well as the relationship information "Jeff at Vision Corporation", but it will leave the organization "Vision Corporation" unchanged in the system.
Select the Primary option button if the resource is the primary contact.


Data Security for Tasks 7-1
7Data Security for Tasks
This chapter covers the following topics:
• Overview of Data Security for Tasks
• HTML Task Security Rules
• Task Security in the Oracle Applications Framework and Forms based Tasks
Overview of Data Security for TasksWhen a task is created, who can view, update or delete the task is based on the security rules in Task Manager. Task Manager leveraging the Application Object Library (AOL) data security model provides you with four aspects of security protection (user, network, function, and data levels) for the data entered in the system. With the finest security controlled in the data level, a specific data record can be further customized and authorized to different users for the security access and modifications. This AOL security was initially used in HTML Tasks only.
To allow product specific security added to the existing AOL task security, and to extend the task data security offerings specifically for task related resource assignments to the Forms-based Tasks and to the Oracle Application Self-Service Framework based Tasks, Task Manager enhances the AOL data security based on Virtual Private Database(VPD) policy, a feature implemented in database to allow security dynamically created at runtime to all queries issued against a database table or view. This new security model with VPD feature provides more flexibility in task security for resource assignments by allowing any applications to set product specific security rules around the existing task security.
For example, not every resource can create, view, or update a service related task of certain types. Only the resources that have privileges to access certain types of service request can be assigned to the service related tasks of the same types as assignees. Therefore, with this enhanced security model, Oracle Service Online can pass its own security functions to Tasks in Forms or in Oracle Applications Framework to allow qualified resources to be retrieved from the resource list of values when assigning them to a task within the service request of certain types.
7-2 Oracle Common Application Calendar User Guide
Note: This security model with VPD feature only applies to task security for resource assignments in the Forms-based and Oracle Applications Framework based Task Manager. It is not implemented in task security rules currently used in HTML Tasks.
For detailed information on AOL security framework, refer to Oracle E-Business Suite System Administrator's Guide - Security.
HTML Task Security RulesIn addition to the task rules based on the AOL Data Security model, HTML Task Manager provides additional security rules for users to access the tasks of either standalone or context sensitive tasks. In addition, based on the group hierarchy defined in Resource Manager, group managers can have full access or read only access privilegeto their directs' HTML tasks only if necessary privileges are granted to the group managers. Furthermore, Task Manager also allows different users to see various resource selections appearing in the resource list of values (LOV) while creating a task.
Scope of the HTML Task Security RulesTask security rules are applied to Task Summary, Details, and Contextual Tasks screens. It will not secure task data accessed through non-Task modules, such as the Quick Find screen and Calendar View. These non-Task screens will continue to show the tasks for which the user is the owner or assignee.
In regard to the resource list of values security, it is applied to the major task screens. However, it will not be applied to the Customer/Contact LOV (organization, person, relationships) and References if not based on resources (such as customer/contact, and lead).
HTML Task Security Access DetailsIn general, HTML Task Manager provides the following security access rules:
• For Calendar Grants Functionality
HTML Task Manager supports the calendar grants functionality used in the past when a user grants calendar access privilege (full access or read only) to another user. When this calendar grant is executed, the access for tasks is also given at the same time. The same functionality applies while revoking the grants.
• For Standalone Tasks
A user has full access (view, update, and delete) to tasks if she or he:
• Is the owner or assignee of the task
Data Security for Tasks 7-3
• Is granted "full access" by another resource (excluding private tasks) using the calendar grants functionality
• Is granted "full access" by the administrator because of security grants
• Belongs to the group that is either assigned to the task or is the owner of the task
• Belongs to the team that is either assigned to the task or is the owner of the task
A user will have read only access (view only) to tasks (excluding private tasks) if she or he:
• Is granted "read only" access by another resource using the calendar grants functionality
• Is granted "read only" by the administrator because of security grants
Note: For a private task, only the owner and assignees can havefull access to that private task. In addition, for security purposes, even if full access is granted to another resource, thatprivate task is excluded from the authorization. None of the grantees can see that private task.
• For Context Sensitive Tasks
Context sensitive tasks are tasks that are attached to certain business objects, such as tasks created for an object instance (lead or opportunity).
Since task security can be further customized to meet other Oracle Applications needs while integrating with Tasks, who can access the context sensitive tasks can be based on the security defined by the individual application. For example, Oracle Marketing Online might implicitly grant users with full access permissions to accesscertain marketing objects if they are on a team for that object.
• For the Resource List of Values
For the resource list of values (LOV) security access, users may see different resource options populated in the list of values (LOV) when trying to assign resources (owner or assignees) to a task. This is because the resource LOV can be furthered customized and granted to a different user, user groups, or members of resource group based on individual or business needs.
Note: The resource list of values can be resources of any category (employee, party, partner, supplier contact, group, team, other, andto be hired).

7-4 Oracle Common Application Calendar User Guide
This rule is currently applied to the following task screens:
• Create or Update Task
• Task Assignments
• Task Summary
• Mass Task Reassignment
• Task Search
• Mass Create
• Reference (Relate To) based on resources
• For the Manager-Directs Security Access
Based on the resource group hierarchy defined in Resource Manager, each managercan have full access or read only access privilege to his or her directs' tasks in the Task Summary screen (excluding private tasks) if necessary privileges are granted to group managers. This way, for example, sales managers can view their directs' tasks to track possible sales related activities performed for a particular week.
Note: Only the group manager with active manager's role, such as the role for that group, can have the access privileges to his or her direct's tasks.
The manager-directs security access only covers the resource reporting hierarchy of one level below. It does not include any multiple levels beneath.
In addition, if a resource group has more than one group managers identified in thereporting hierarchy, then all of the group managers will have the access privileges to the group member's tasks. Managers cannot view any private tasks created by their subordinates even if they have full access privilege.
This functionality is not available out of the box. To implement this manager-directssecurity, see Customizing Tasks Security chapter, Oracle Common Application Calendar Implementation Guide.
Task Security in the Oracle Applications Framework and Forms based Tasks
Based on the existing task security rules used in HTML Tasks, users if they have appropriate privileges can view or update a task created in Oracle Applications Framework.
In addition, since Task Manager allows product specific security rules added to the
Data Security for Tasks 7-5
existing AOL task security used for the resource list of values assignment in Forms and in Oracle Applications Framework, if service related security rules are used in a service request assignment, users may only see the resources that are qualified for the service rules from the resource list of values (LOV) when assigning them to a service related task.
Task Security Rules Access DetailsTask Manager in Oracle Applications Framework provides the following security rules:
• For the Contextual Tasks
When updating a contextual task developed based on Oracle Applications Framework, whether you have Full Access or Read Only Access is determined by values set in a profile option.
• For Standalone Tasks
For standalone tasks, such as personal to dos created for a sales agent through Oracle Sales, the system will check the user security access based on data security. The user can have Full Access or Read Only access privilege.
• For the Resource List of Values Security
Users with different privileges may see different resource options populated in the list of values (LOV) when trying to assign resources (assignees) to a task in Forms and in Oracle Applications Framework. These privileges can be customized by yoursystem administrators and then granted to a user, user groups, or members of a resource group.
If product specific security rules are used in selecting resources for a service request, users might see only the resources who have privileges to access certain types of service requests populated from the assignee LOV.
In the Forms-based Tasks, security is based on object metadata definition. If productspecific security rules are used, users can see secured task views based on the product security rules. Since tasks can be queried only in read-only format, product specific rules will not be modified in the standalone Tasks forms. To update these contextual tasks, for example tasks created for service requests, you should use the parent application to query the source document, such as the service request, first and then update the contextual tasks. Additionally, these product specific privilegesare defined and maintained by the relevant products. For how to use this feature, see product specific documentation for details.
Note: The resource list of value security access discussed here is restricted to the assignee list of values with resource types of employee, group, and team.
7-6 Oracle Common Application Calendar User Guide
• For the Manager-Direct Security Access
Similar to the manager-direct security rule in HTML Tasks, Task Manager in OracleApplications Framework allows group managers to access their directs' tasks with appropriate privileges.
The only security rule currently available in Tasks Forms is the resource list of values security.
Oracle Escalation Management 8-1
8Oracle Escalation Management
This chapter covers the following topics:
• Overview of Oracle Escalation Management
• Oracle Escalation Management Integrations
• Terms and Definitions
• Accessing the Oracle Escalation Manager Interface
• What is Escalation Manager?
• Workflow Notifications for Escalations
• Escalation Using Territories
• Escalation Owners and Owner Types
• Creating Escalations
• Managing Different Types of Escalations
• Managing a Service Request Escalation
• Managing a Task Escalation
Overview of Oracle Escalation ManagementA company, using Escalation Management, can re-prioritize, reassign, and monitor a situation to a satisfactory completion. There are two types of escalations: reactive and proactive. Each are discussed in the subsequent sections. Escalation Manager is the "reactive" end of Escalation Management. The Business Rule Monitor (BRM) is the "proactive" escalation process. The following can be escalated in either modules:
• A task
• A service request

8-2 Oracle Common Application Calendar User Guide
What is an Escalation?An escalation is a process used to highlight or flag certain issues within an organization,so that the appropriate personnel can respond to these situations and monitor the resolutions. Escalations occur in support centers for a variety of reasons. An escalation management system allows an organization to identify, track, monitor, and manage situations that require increased awareness and swift action.
In a reactive escalation, a customer calls and reports a problem and you must react to it and resolve the issue. In a proactive escalation, you notice a potential issue and you resolve it before the customer contacts you. In other words, did you catch a potential problem before a customer complained? The following sections describe each type of escalation in greater detail.
What is a Reactive Escalation?In a reactive escalation, a business must take the necessary action to resolve a situation. Most businesses want to track issues such as: which customer complained, when the complaint was logged into the system, who was assigned to fix the problem, was the problem fixed or did it need to be manually assigned to someone else, and is the problem finally resolved.
ExampleBusiness World, a customer of Vision Corporation, complains that a hardware problem reported one week ago is still not completely repaired. Vision Corporation assigns different resources, that are more experienced, to handle this hardware problem immediately. Manually assigning escalation resources is possible through the EscalationManager.
What is a Proactive Escalation?A company that values great customer service may implement systems that monitor situations alerting them before a crisis occurs. What criteria do they use for monitoring these situations? Usually, this is based on established business rules of the company. However, proactive escalation can also be set up as a follow-up action.
ExampleVision Corporation wants to enforce the rule that any open task must be closed within five business days. If it has been four days since the task is opened, then the owner of this task must send an e-mail to the assignee as a reminder and also check if any assistance is needed. The Business Rule Monitor (BRM) is used to raise awareness. It provides a centralized place to define and monitor business rules on a regular basis.
Vision Corporation has also set up a business rule that seven days after closing a servicerequest, it will send an e-mail to verify that the customer is satisfied and thanks them for doing business with them.

Oracle Escalation Management 8-3
Note: In summary, a proactive escalation is usually initiated by the Business Rule Monitor (BRM) system based on business rules. Therefore, it is considered an automated escalation. A reactive escalation is primarily initiated by a person in response to customer's needs. Therefore, it is considered a manual escalation.
Escalation FeaturesThe following are some features of Escalation Management:
• Escalation situation tracking information
• Service Request and task linking capability
• Ownership assignment
• Resolution plan definition with associated tasks and notes
• Automatic notification of escalation progress to identified contacts
• De-escalation and closure
Basic information is captured in an escalation document which includes the requester, the required resolution date, and additional contacts that are involved.
An escalation is managed by creating an escalation document, assigning an escalation owner, defining the actions needed to resolve the escalation, and communicating the progress. Once a situation is de-escalated, the escalation closure note is captured and a final communication is sent to the contacts involved.
Oracle Escalation Management IntegrationsEscalation Manager• Trading Community Architecture (TCA) information, such as business contacts, is
pulled into escalated documents.
• Service Request is where service requests are created and they can manually be escalated through Escalation Manager.
• Oracle Workflow is used to send out workflow notifications to relevant resources when an escalation document is created or updated.
• Territory Manager is used to automatically retrieve qualified escalation resources identified in the territories when using Assignment Manager with territory assisted assignment option.
8-4 Oracle Common Application Calendar User Guide
• Task Manager (Forms-based) is used to attach additional tasks to an escalation document. Tasks created in Forms can also be manually escalated through Escalation Manager.
• Assignment Manager is used to automatically assign a qualified resource identifiedin the territories as the owner of an escalation document.
• Notes (Forms-based) is used to attach additional notes information to an escalation document.
Business Rule Monitor• Service Request is where service requests are created and they can automatically be
escalated through BRM.
• Oracle Workflow is used by the seeded workflow processes to send out workflow notifications to relevant document owners.
• Territory Manager is used to retrieve qualified escalation resources identified in theterritories if the identity of a person who receives notifications defined in the Workflow Attributes window cannot be determined.
• Task Manager is used by the seeded workflow processes to create an automated escalation task. This is generally through the seeded Automated Escalation Template Group for Task Manager (Service Request or Defect Management) defined in the Forms-based Task Manager. Tasks created in Forms can also be automatically escalated when a business rule is violated.
Terms and DefinitionsThe following table describes Escalation Management terms and definitions.
Escalation Management Terms and Definitions
Term Description
BRM module The Business Rule Monitor (BRM) provides a User Interface (UI) and functionality that an organization can use to proactively manage escalations. It consists of two components:
• Business Rule Monitor
• Business Rule Workbench
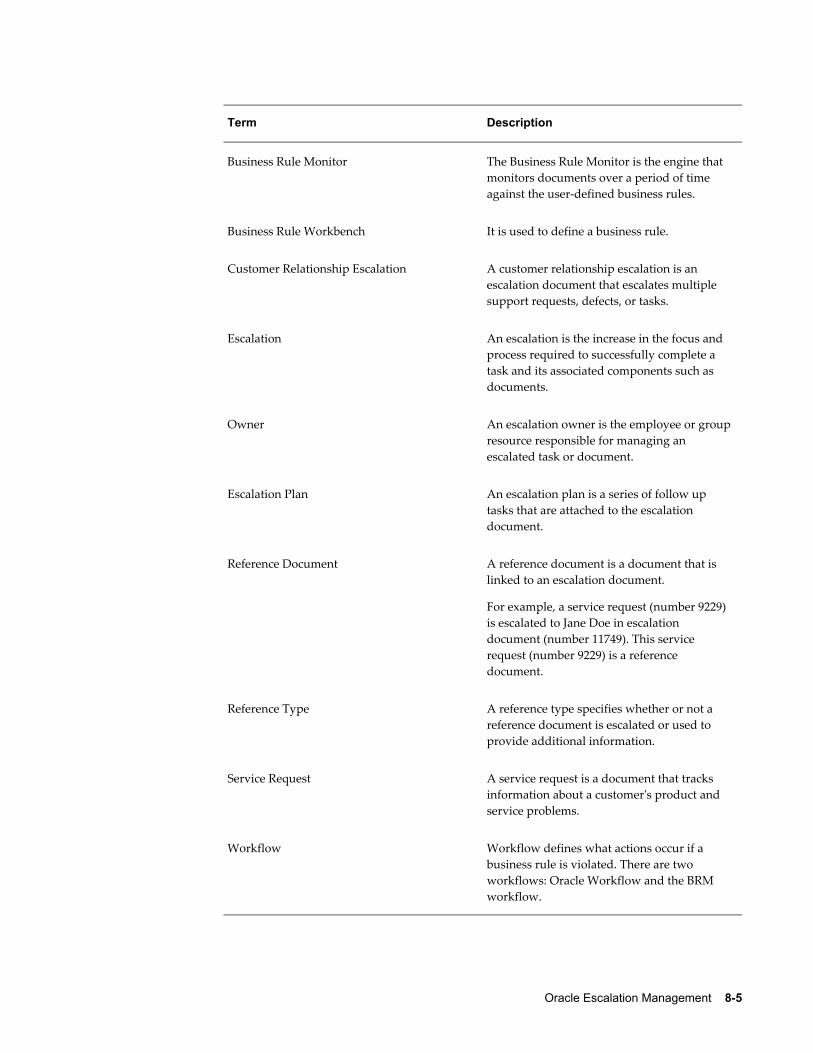
Oracle Escalation Management 8-5
Term Description
Business Rule Monitor The Business Rule Monitor is the engine that monitors documents over a period of time against the user-defined business rules.
Business Rule Workbench It is used to define a business rule.
Customer Relationship Escalation A customer relationship escalation is an escalation document that escalates multiple support requests, defects, or tasks.
Escalation An escalation is the increase in the focus and process required to successfully complete a task and its associated components such as documents.
Owner An escalation owner is the employee or group resource responsible for managing an escalated task or document.
Escalation Plan An escalation plan is a series of follow up tasks that are attached to the escalation document.
Reference Document A reference document is a document that is linked to an escalation document.
For example, a service request (number 9229) is escalated to Jane Doe in escalation document (number 11749). This service request (number 9229) is a reference document.
Reference Type A reference type specifies whether or not a reference document is escalated or used to provide additional information.
Service Request A service request is a document that tracks information about a customer's product and service problems.
Workflow Workflow defines what actions occur if a business rule is violated. There are two workflows: Oracle Workflow and the BRM workflow.

8-6 Oracle Common Application Calendar User Guide
Term Description
Workflow Attributes Workflow attributes set the variable parameters. They control the behavior of the workflow.
Workflow Monitor Workflow Monitor is a Java-based tool used for administering and viewing workflow process.
Accessing the Oracle Escalation Manager InterfaceThere are several ways to access Escalation Manager. Typically, you would access Escalation Manager through a task or service request that you want to escalate. In general, service requests, tasks, and defects can be escalated.
• Log in using the CRM Administrator responsibility, for setting up tasks. Use the Forms-based Task module to escalate a task.
• You can access Escalation Manager through a task, defect, or service request that you want to escalate.
Administrative PathTo access the administrative tasks indicated through the Forms-based CRM Administrator responsibility, select Task and Escalation Manager > Setup.
Escalation administrative tasks are defined in the Form from Define Escalation Reason to Define Reference Type.
General Usage PathSearch for a task (or defect or service request) then use the following navigation path to invoke Escalation Manager:
• From a standalone task in the Forms-based Task Manager: Tools > Manage Escalation
• From a service request: Tools > Request Escalation
• From a service request: Tools > Task Escalation
• From the CRM Administrator responsibility: Task and Escalation Manager > Manage Escalations
Oracle Escalation Management 8-7
What is Escalation Manager?You can manually escalate a business problem to the appropriate level where it can be solved in Escalation Manager. It has a user interface (UI) where you can manage situations that require awareness and possible actions. An escalation is managed either by creating an escalation document, or by assigning an escalation owner, or by defining the actions needed to resolve the escalation.
ExampleLorraine Abbott, a support agent for Vision Corporation, receives a call from Cindy Miller, a primary contact for Business World, complaining that their hardware problems are not completely fixed. Lorraine finds the service request, creates an escalation document, and also reassigns herself as the owner for this document. In addition, Lorraine can also utilize the following features in this escalation document:
• Escalation level: Specify the degree of urgency for this escalation.
• All relevant documents: Link the relevant documents to this escalation, such as link the service request in this document.
• Relevant contacts: Identify the employee and customer contact information, such as Lorraine Abbott and Cindy Miller.
• Notes: A note can be created about Lorraine's contact number if the assignee needs to contact her while she is on vacation.
• Tasks: A task can be created, such as a update meeting with her manager.
Workflow Notifications for EscalationsNotifications are an integral part of the Escalation functionality. Oracle Workflow is used to process and deliver the notifications regarding the escalation activity.
Notifications are sent for the following reasons:
• Escalation creation
• Escalation status changes
• Escalation owner assignment changes
• Escalation level changes
• Escalation target date changes
Notifications are sent to people (employees or customers) who are identified on the Contacts tab, and for whom the Notify check box is selected.
8-8 Oracle Common Application Calendar User Guide
Typical recipients include:
• Owner of the object (service request, task, or defect) that is being escalated
• Human Resource (HR) manager of the owner of the escalation document
• Owner of the escalation document
Escalation Using TerritoriesA territory with an escalation owner assigned to it provides the resources responsible for managing escalations. Use territory escalation owners to define the escalation path with appropriate resources which the escalation owner identified for the territory in the event of exceptions. In case of automatic assignment by using an territory escalation owners, the Assignment Manager is used in conjunction with Oracle Territory Manager.The escalation can be automatically assigned to an owner if the escalated document (such as a service request, task, or defect) has a territory defined with an escalation owner.
You can create alternate escalation territories to automatically reassign a service call when certain conditions are not met.
1. A service team assigned to a repair does not take action within five business days, so now that repair can be assigned automatically to another group.
2. A service engineer cannot successfully resolve a request within a certain time frame,which is set up in the Business Rule Monitor (BRM), so now the service request will be automatically escalated to another resource.
A territory can be a catch all for all escalations.
Escalation Owners and Owner TypesEach escalation must be assigned an owner and this owner must be a specified owner type.
Owners
An escalation owner is a person who manages an escalated task, or document. Once a task or document is escalated, the responsibility for either one is transferred from the original owner to the escalation owner. For example, a support service center can assigna defect to an employee resource, John Smith. If John Smith fails to correct the defect thesupport service center can escalate the defect and assign another employee resource, Rhonda Abbott, as its escalation owner. When this occurs, the original owner, John Smith, is no longer responsible for the defect.
Owner Types
An escalation owner can be an employee resource or a group resource. When an
Oracle Escalation Management 8-9
escalation is owned by a group, any member of that group can manage the escalation.
Creating EscalationsAn escalation is initiated by a person using a service channel (telephone, web, or e-mail). An escalation can also be initiated by the system based on pre-defined rules that are established to monitor business situations.
To initiate an escalation, you must:
• Accept a request for an escalation
• Review the situation
• Create an escalation document
• Notify the involved parties (this is performed automatically)
An escalation request can be initiated on behalf of a customer, an employee, or other involved party. Perform the following steps to create an Escalation document.
Steps:1. If the Escalation Manager is launched directly from a service request or task, then
the customer information should be populated automatically. Otherwise, manually enter it. If you open the Escalation Manager as a standalone application, from the CRM Administrator responsibility, select Task and Escalation Manager > Manage Escalations.
Note: You must have the appropriate information entered into the Reference Documents and Contacts tab before you can assign an owner.
2. Enter the customer's name and number.
3. Select the Reference Documents tab.
1. Enter all relevant information if it has not already been automatically populatedin the Type field.
2. Enter all relevant information if it has not already been automatically populatedin the Document and Details fields.
4. Select the Contacts tab.
1. Enter all contacts (customer or employee).

8-10 Oracle Common Application Calendar User Guide
2. Specify if the contact is a requester or the escalation is for notification purposes.
In addition to the owner of the escalation document, recipients can include the Human Resource manager of the owner of the escalation document, the owner of the escalated object, and the selected employee and customer contacts.
5. (Optional) Select the Audit tab to view all the changes once you are finished.
6. Click Assign, in the Escalation Owner Information region, to assign ownership.
You can assign either automatically or manually.
• Automatic Assignment
An owner can be automatically assigned by using the Assignment Manager if the escalated source document is assigned to an escalation resource defined in aterritory.
• Manual Assignment
If the document does not contain a territory, or if you want to override the recommended escalation resource by the territory, then either select an owner from the List of Values or use the Assignment Manager to assist in owner selection.
Managing Different Types of EscalationsThe following sections describe the process of managing different types of escalations:
• Managing a Service Request Escalation, page 8-10
• Managing a Task Escalation, page 8-12
Managing a Service Request EscalationA service request is a document that tracks information regarding a customer's product and service problems. Perform the following steps to manage a service request escalation.
Steps:1. Navigate to the View Service Request window.
2. Query the existing service request.
3. Verify that the service request has never been escalated. In the Request Information area of the header, verify that "Never Escalated" appears in the Escalation Level
Oracle Escalation Management 8-11
field.
You may have to scroll down in the Request Information header region to see the Escalation Level field.
4. From the Tools menu, choose Request Escalation.
The customer and account information fields are automatically populated, along with the reference document information (service request).
5. Select or enter the following information:
• A status
• A reason
• Target date
• The escalation level
6. Assign the escalation to yourself or another existing resource using one of the two methods listed:
1. Manual Assignment
Select a resource from the LOV.
2. Automatic Assignment
1. Click Assign to choose an escalation owner from the Assignment Manager.
2. Select the Assisted Assignment option and select Territories.
3. Click Search.
Note: Only click Search in the Selection Criteria region. Leave the other fields in the default settings.
The escalation resources from the territory of the escalated document become visible. If there are no territories with escalation resources set up, then the resources from the Catch All territory are in view.
7. Select the resource name and click OK.
8. Enter an escalation summary.
9. Enter the name of the customer or employee contact (requester), and select the Requester check box.
8-12 Oracle Common Application Calendar User Guide
There can be more than one contact, but only one requester.
1. (Optional) Enter any additional contact points.
2. (Optional) Add more reference documents to the escalation in the Reference Documents tab.
10. Save the escalation, and make a note of the escalation number.
1. (Optional) Click Notes to create a note about the escalation.
2. (Optional) Click Tasks to create a follow up task for the escalation.
11. Close the Escalation window to return to the Service Request window.
Re-query the service request to view the updated escalation level.
Managing a Task EscalationPerform the following steps to manage a standalone task escalation.
Steps:1. Navigate to the Task window.
2. Find the task to be escalated.
3. From the Tools menu, choose Manage Escalation.
4. Verify that the task has never been escalated.
If the task has already been escalated, then the escalation document will automatically appear in the escalation window.
5. Enter the following information:
• A status
• A reason
• Target date
• The escalation level
6. Assign the escalation to yourself or another existing resource using one of the two methods listed:
1. Manual Assignment
Oracle Escalation Management 8-13
Select a resource from the LOV.
2. Automatic Assignment
1. Click Assign to choose an escalation owner from the Assignment Manager.
2. Select the Assisted Assignment option and select Territories.
3. Click Search.
Note: Only click Search in the Selection Criteria region. Leave the other fields as defaulted.
The escalation resources from the territory of the escalated document become visible. If there are no territories set up, then the resources from the Catch All territory display.
7. Select the resource name and click OK.
8. Enter an escalation summary in the Escalation Summary field.
9. Enter the name of the customer or employee contact (requester), and select the Requester check box.
There can be more than one contact, but only one requester.
10. (Optional) Enter any additional contact points.
11. Save the escalation and query the escalated task to view the updated escalation level.


Introduction to Oracle Notes 9-1
9Introduction to Oracle Notes
This chapter covers the following topics:
• Overview of Oracle Notes
• Oracle Notes Key Features
• Oracle Notes Integrations
Overview of Oracle NotesThe Notes module provides a quick and easy way to enter in any information for an Oracle Applications business object. It is useful for attaching information such as directions, special instructions, or reminders. One or more people with access to the business object may enter in a note; therefore, it is collaborative in nature. It is historical and archivable, and may be further linked to Oracle Attachments. The Notes module can be accessed through Oracle Applications Framework, Forms, and HTML versions. The Notes module in Oracle Applications Framework is not fully compatible with HTML Notes user interface.
ExampleA customer support agent enters a note for a service request. The note states that the customer is in a business meeting from 10:00 a.m. to 12:00 p.m. and is unavailable to assist the technician with the problem. The support agent also attaches a copy of the log file provided by the customer.
You may add an attachment to a note, such as a spreadsheet, picture, presentation, or a hyperlink to a web site.
Note Text Storage MethodsFor the Forms-based and HTML Notes, you can create a note with the following two separate formats:
• Text Note: A note stored in a text format is known as a text note or regular note.
9-2 Oracle Common Application Calendar User Guide
• CLOB Note: A note stored in a binary format is known as a CLOB Note, large note, or detail note. The CLOB allows you to view a full note with a limit of 4GB in size.
For the Oracle Applications Framework based Notes, you can enter unlimited free form text and all note text can be stored or retrieved from the following locations depending on the note function:
• Create Notes and Update Notes: In general, all note text can be entered or updated only in one field and is stored in a CLOB Note.
If your note text is less than or equal to 2000 characters, then the note is stored in both the Text Note and CLOB Note. If it exceeds 2000 characters, then the first 2000 characters are still stored in the Text Notes field, but the complete note text is also stored in the CLOB Note.
• View Notes: The first 40 characters are retrieved from the Text Note. All detailed note text is retrieved from CLOB Note.
What is a Note Type?Note types help categorize notes. Users can define additional note types and associate those types to specific source objects, which makes the note types visible only to that source. Only note types that are mapped to a source object appear in the note window. Note types that are not mapped to any source object are considered general note types and are shown for all source objects.
Oracle Notes Key FeaturesThe Notes module in Oracle Applications Framework provides a new look and feel with the following features:
• View all notes and their attachments created for a source document.
• Create a contextual note with unlimited text for a source document, such as a task or a service request.
• Update existing note attributes, such as note type and visibility.
• Update existing note text if you have appropriate access privileges.
• Add attachments to a note when updating the note.
• Delete an existing note if you have appropriate access privileges.
Note: Notes created for Common Application Calendar can only be accessed through the integrated applications, such as Oracle Service

Introduction to Oracle Notes 9-3
Online, Oracle Sales Online, or contextual task screens developed for Common Application Calendar, and are not available in standalone format. Users who can access the integrated applications can access the contextual notes for which they have permissions.
The following are key features of the Notes module in Forms and HTML:
• The Notes module can hold free form text up to 2000 characters for a regular note, and can be extended to hold text up to 32KB for a large note.
• There are three statuses of notes: private, public, or publish.
• Note types are available to help you categorize notes.
• You can attach additional text, a file, or a URL to a note.
• Notes are created in the context of a source object.
• Notes can be related to other business objects.
Note: The Notes module is a standalone module in HTML only. However, it is commonly accessed from many applications under various responsibilities. For example, Customer Support, Task Manager, Escalation Manager, and Installed Base all use the Notes module.
Oracle Notes IntegrationsThe Notes module is widely used by the following modules across Oracle E-Business Suite:
• Collections use the Notes module to add additional information for late payments or overdue accounts.
• Sales and Telesales applications use the Notes module to enter additional information for an opportunity, a lead, or a task.
• Service applications use the Notes module to enter more information for a service request, defect, or task such as a special customer request or deadline that must be met.
• E-Commerce applications use the Notes module to enter additional information for online service requests, tasks, and campaigns.
• Marketing applications use the Notes module to enter additional information about

9-4 Oracle Common Application Calendar User Guide
marketing activities, such as campaigns, events, budgets, or claims.
• Task Manager uses the Notes module to enter more task related information.
• Escalation Manager uses the Notes module to enter additional information for an escalation document.

Using Notes 10-1
10Using Notes
This chapter covers the following topics:
• Using the Add Note Region in OA
• Creating a Contextual Note in OA
• Viewing and Updating the Notes History Region in OA
• Viewing and Updating the Note Details Page in OA
• Creating Notes in Forms
• Finding Notes in Forms
• Accessing the Oracle Notes Interface
• Creating a Note in HTML
• Using the Relate To Function
• Using the HTML Notes Summary Window
• Viewing Note Details in HTML
• Using the Quick Find Search in HTML
• Searching for a Note in HTML
• Data Security for HTML Notes
• HTML Notes Security Rules
Using the Add Note Region in OAUse the Add Note region to create notes for a source object such as a task, service request, or appointment.
For Oracle Applications Framework based Tasks, a service agent can add notes to a contextual task either during task creation or update. An agent can create notes to record descriptive information including questions, reminders, directions, or any text that might be reused or referenced later by the attached contextual task.

10-2 Oracle Common Application Calendar User Guide
Creating Notes
To create a note, enter the following information in the Add Note region:
• Notes Attributes:
• Note Type: Note type is used to categorize your note. Note types can be mapped to a source object, such as a Task or Service Request. After mapping note types to a source, users will see only the mapped note types displayed in the list of values. Note types that are not mapped to any source object are considered general note types and are also shown for all source objects.
• Visibility: Visibility is used to determine the accessibility of a note within OracleApplications. There are three values in the drop-down list:
• Private: Only the creator has the privilege to read and update the note.
• Public (Default): It is visible only to the Oracle E-Business Suite users, not toexternal users such as guest users, parties, partners, and supplier contacts.
• Publish: It is publishable and visible to everyone if the integrated application decides to publish the note.
• Actual Note Text: Enter descriptive information in the text box. The length of the note text is unlimited.
Be aware that you cannot create attachments while creating your note in the Add Note region, but you can add attachments later while updating your note in the Note Details window.
Creating a Contextual Note in OAYou must have responsibilities to access an integration application such as Oracle Sales Online and create a source document first in order to create a contextual note.
Steps:1. Navigate to the Add Note region from the source document.
2. Select appropriate note type and visibility fields from the drop-down menus.
3. Enter descriptive information for your note.
Viewing and Updating the Notes History Region in OAUse the Notes History region to view the contextual notes that you have access to, and to update note attributes where you have appropriate access privileges.

Using Notes 10-3
Through the Notes History region, you can also access the entire note text by clicking the appropriate icon.
Accessing the Notes History Region
Like the Add Note region, you can access the Notes History region through the integrated applications, such as the Oracle Applications Framework based Task Manager and Oracle Service Online.
To locate the Notes History region, click the Notes History (+) icon to unhide the Notes History region.
Viewing All Contextual Notes
You will see all public notes listed for a specified source object in tabular format with the following fields:
• Details: Each note in the Notes History table can be viewed in Hide or Show mode. Click the Show link to see the expanded row region with the following fields:
• Note Text field: This displays the first 2000 characters of the selected note text.
• Full Note icon: Click this icon to access the Note Details region and view the full note text. See: Viewing and Updating Note Details Page, page 10-3.
• Note: Displays the first 40 characters of the selected note in the note summary row followed by three dots (...) if the note has more than 40 characters. The first 2000 characters are shown in the Note Text field.
• Date Added: Displays the date the note was attached to a source object.
• User: Displays the creator of the note.
• Note Type: Displays the note type information for the selected note.
• Visibility: Displays the note accessibility information.
Initially all notes are sorted in descending order based on the Date Added. You can alsore-sort the notes by User, Note Type, and Visibility.
Updating Note Attributes
In addition to viewing the actual note, you can also update the note type and visibility fields using the drop-down lists if you have appropriate access privileges. Otherwise, these fields are displayed in read-only format.
Viewing and Updating the Note Details Page in OAUse the Note Details window to display existing notes and attachments in read-only or updatable mode depending on your security access.
With appropriate privileges, you can perform the following tasks after clicking the Full

10-4 Oracle Common Application Calendar User Guide
Note icon in the Notes History region:
Viewing Note Text and Attachments
You can view the note details including date added, user, note type, visibility, and entire note text in addition to existing attachments listed in the Attachments region.
Updating Note Text
You can update the note text by adding unlimited text.
Deleting Notes
You can delete notes if the Delete button is visible.
Updating Note Attributes and Attachments
You can update note attributes by changing the note type and visibility from the drop-down lists, as well as update attachments by adding, modifying, and deleting attachments to an existing note.
Please note that attachments that are attached to a note can only be accessed from the note, not from a task that the note is currently attached to. If attachments are added to a task, these attachments can only be accessed from the task.
In the Attachments region, you can create an attachment with the format of text, file, or URL. You can also update, delete, or search for existing attachments.
Creating Notes in FormsA note is a record of descriptive information attached to an object. It is created by an agent, customer care or service representative, or end user, to help retain information such as directions, special instructions, or reminders. Notes created in a specific application within Oracle E-Business Suite are not visible from another application. For example, Notes created in the Task Manager are not visible in Service Request.
Note: View the note through the Notes tab and any additional note text through the Summary tab. Clicking Latest First in the Summary tab organizes the note history so that the most recent note appears first.
Creating Notes. You can enter up to 2000 characters of text in the Notes field. If your note exceeds 2000 characters, click the More button to enter an additional 32kb of text inthe Note Details window.
Once your note is created, you cannot update the note. However, you can update the note details. Note that integrated applications might customize notes features, see product specific documentation for details.
Viewing Notes. After creating notes, you can view notes by either Source or Related To.By default, the Source radio button is selected to show all notes associated with the source from where the note is called. If the Related To button is selected, then the Notes window will query all notes associated with the source to which the current source is

Using Notes 10-5
related to.
Related To: Define the information you enter in the Related To and Value fields according to the relationship between the note and business transaction. Use the Related To field to identify the source type and the Value field to specify the source name or number.
Finding Notes in FormsFind a note by performing a search for the source number, owner, date, or note type.
Perform the following steps to find an existing note.
Steps:1. On the application toolbar, click Find.
The Find Notes window opens.
2. Select the source and number from the list of values (LOV) for each field and click Search.
The note information appears in the main note window.
3. Enter the owner (entered by), date, or note type and click Search.
Note: The owner for notes created in HTML or OA is the Created By user.
The application populates the Notes tab in the Notes window with the possible matches.
4. Click to select your note and scroll right for additional information.
5. Further refine your note search by entering Related To information in the Find Notes window. Selecting a match option also helps you refine your search.
Accessing the Oracle Notes Interface Since the HTML Notes module is integrated with the HTML Calendar and Task Manager, you can only access HTML Notes through the Calendar tab. Perform the following steps to log in to the Notes module.
You must be an active resource in the Resource Manager tables to access the Notes module.
Click Notes on the main navigation bar.
The Notes Summary window opens with a list of your current notes.

10-6 Oracle Common Application Calendar User Guide
Creating a Note in HTMLA note is a record of descriptive information attached to an object. It is created by an agent, customer care or service representative, or end user, to help retain information such as directions, special instructions, or reminders. Notes created in a specific moduleare not visible from another module. For example, notes created in the Task Manager are not visible in Service Request.
When accessing Notes from other applications, such as Tasks or Calendar, the source name and source number are passed to Notes and displayed in the Create Note windowfor your reference.
Please note that HTML Notes module uses the following note statuses:
• Private: Only the creator can read and write to it.
• Public: A public note is visible only to the Oracle E-Business Suite users, not to external users such as guest users, parties, partners, and supplier contacts.
• Publish: A publish note is publishable and visible to everyone if the integrated application decides to publish the note.
You can add attachment from the Note Details window.
Note: The attachment types Short Text and Long Text used in the forms-based version of Notes are not available in HTML.
Using the Relate To FunctionYou can associate one or more business objects to a Note. For example, a note can be created for a Task (the source) but also relate to an employee. A note can be related to two different tasks, but the same note cannot be related to the same task twice.
The Relate To drop-down list of values is driven by a source object. If the default value of Relate To is deleted, then you will not be able to see the notes when trying to search by Relate To. These notes can be retrieved when filtered under Source. For example, if a note is created for a task, then Task Manager becomes the default value in the Relate To field. If the default Task Manager is removed, then you can only view the note if Source is selected from the drop-down list in the Notes Summary window. You won't see the note if Relate To is selected as the search criteria.
Using the HTML Notes Summary WindowThe Notes Summary window is the main entry window for HTML Notes. If you are using the standalone HTML Notes module, then all the notes that you create for yourself appear in the Notes Summary window. These standalone notes are considered
Using Notes 10-7
your personal notes and can only be created through the standalone HTML Notes module.
If notes are created from other applications for a source object, such as a sales lead, task,or a service request, then all notes for that source ID (such as, Task Manager 10935) and task name (such as, Monthly Conference Call) appear in this window. Notes created in this way are referred to as contextual notes.
Both contextual and standalone notes can be related to other business objects allowing you to view the note from various windows. Contextual and standalone notes can be marked as private, which means the note can only be viewed by the user that created it.
Use the Notes Summary window to:
• View a list of all your notes
• Create a new note
• Search for a note
• Display note details
When a note is associated with an appointment or task, the note is only visible in the context of that source and does not appear in your Notes Summary or All Notes window. However, you can search for a note associated with a specific source.
Note: If your Notes module is integrated with another application within Oracle E-Business Suite (Context Sensitive window), there is a filter on the Notes Summary window where you can search by either the source of the note, or the relate to information.
Steps:1. Click the note name hyperlink to view the note's details.
2. Click the icon in the Text column to view additional text added to the note.
3. Click the paperclip icon in the Attachments column to add or update an attachment.
Viewing Note Details in HTMLBased on the HTML Notes security rules, you can perform the following tasks in the Note Details window:
• Update note's secondary information including note type, status, relate to and attachment: You can modify this secondary information for an existing note only if you have an appropriate privilege. Be aware that you cannot update the actual note information.

10-8 Oracle Common Application Calendar User Guide
• View a large note: You can view the large note that is attached to an existing note by clicking the More button.
• Create attachments: Click the Attachment button to add or update attachments to an existing note.
• Update relate to information: You can create, update, and delete relate to information by clicking the Relate To button to access the Relate To window.
• Delete a note: You can delete an existing note by clicking the Delete button if you have "JTF_NOTE_DELETE" function granted to you. After deleting a note, you are directed to the Notes Summary window.
Note: The Source provides information on who created the note and thename provides the name of the note. If the note was created from a source other than the Notes standalone module, you can click the source or name to drill down on the details of the record.
Using the Quick Find Search in HTMLUse the Quick Find search to find your appointments, tasks, notes, employees, and groups.
Based on the HTML Notes security rules, Oracle E-Business Suite users can find public notes and published notes from the Quick Find search. External users such as guest users, parties, partners, and supplier contacts can search for published notes only. Private notes can only be retrieved by the creators.
Searching for a Note in HTMLUse the Notes Search window to search all user created notes based on multiple search and sorting criteria.
Search Criteria
You can perform a search based on the search criteria you entered. These criteria include key word, source, relate to, note type, created by, and date range information. You can select multiple note types using the [Ctrl] key to include or exclude notes of certain types.
After entering search criteria, you can perform a search without further specifying the sorting criteria if you want the search results based on the default settings. This means that notes are sorted by date with an ascending order (starting with the earliest date) and are displayed 15 rows in one page. The search results are shown in the Notes Summary window.
Sorting Criteria for Search Results

Using Notes 10-9
Before performing a search, you can also manage your sorting results by entering sorting criteria (date, note type, status, and source). You can decide to sort by an ascending or a descending order for the selected sorting criteria.
After entering the appropriate criteria into the fields and clicking Search, the results are displayed in the Notes Summary window.
For example, you can first sort by note type with an ascending order, then by date with an ascending order, and finally by status with a descending order. In addition, you can also enter the number of rows visible in one page after performing a search.
Please note that you can also use the Quick Find search by selecting Notes from the Quick Find drop-down list and entering search criteria. After entering key words, you can click the notes that you want to view from the search results to see the notes details.
Perform the following steps to find existing notes.
Steps:1. Navigate to the Notes Search window by clicking Search in the Notes Summary.
2. In the Notes Search window, enter a keyword for the search.
The keyword search is to enter a partial or full word to search the text entered in theregular notes only, not the large notes.
3. Select a source to search on. You must choose a source in order to select the corresponding record name or select All (Sources). The Created by field defaults to the logged in user's ID.
4. Select relate to information for the note. You must select a relate to in order to selectthe corresponding record name. Depending on what you enter, the Created by field populates automatically.
5. Select multiple note types if necessary.
6. Enter a date range. Select any of the following option buttons to specify the date:
• None or Today drop-down list
• Last 30 days (default): Enter the last number of days that you want to search.
• From To: Use the date picker icon to enter desired date range for your search.
7. Select your sorting preferences by entering sorting criteria (date, note type, status, and source).
8. Select how many rows you want to display and click Search.

10-10 Oracle Common Application Calendar User Guide
Data Security for HTML NotesWhen a note is created or attached to a business object, it may contain confidential data that is only meant to be viewed by specific users. Oracle HTML Notes module provides a flexible system of access privileges that restricts the ability to view note data to the appropriate users. This system is based on the Application Object Library (AOL) data security model.
There are four different aspects of security access in the AOL security model:
• User security is about determining the user identify and preventing access from unauthorized users.
• Network security is about ensuring that communications over the network are secure.
• Function security is about controlling what people can do on the system. It focuses on which applications and modules you have access to.
• Data security, like function security, is also about controlling what people can do on the system. However, it focuses on what rows or columns of data you can look at as well as what operations can be carried out on those rows or columns. In Notes,data security is used to give different accesses to users. For example, Sales Managers can be granted access to create and delete Confidential and Non-Confidential notes whereas Sales Representatives can be granted access to onlyNon-Confidential notes.
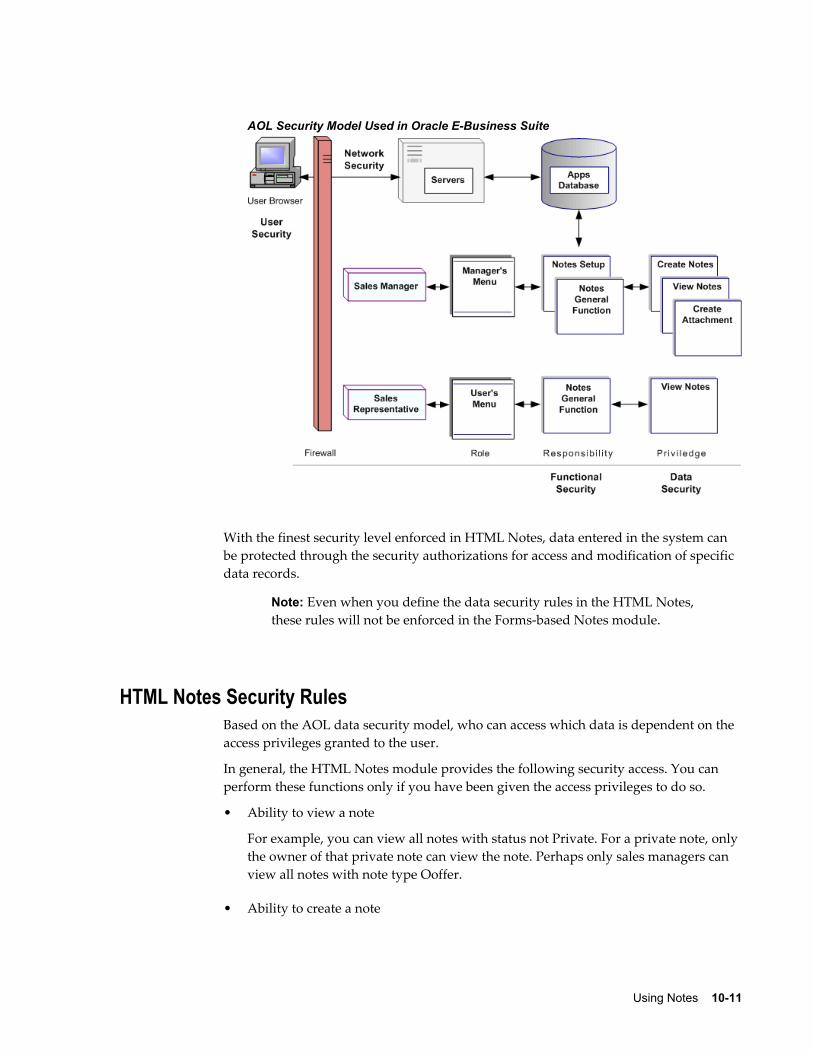
Using Notes 10-11
AOL Security Model Used in Oracle E-Business Suite
With the finest security level enforced in HTML Notes, data entered in the system can be protected through the security authorizations for access and modification of specific data records.
Note: Even when you define the data security rules in the HTML Notes,these rules will not be enforced in the Forms-based Notes module.
HTML Notes Security RulesBased on the AOL data security model, who can access which data is dependent on the access privileges granted to the user.
In general, the HTML Notes module provides the following security access. You can perform these functions only if you have been given the access privileges to do so.
• Ability to view a note
For example, you can view all notes with status not Private. For a private note, only the owner of that private note can view the note. Perhaps only sales managers can view all notes with note type Ooffer.
• Ability to create a note
10-12 Oracle Common Application Calendar User Guide
This functionality includes not only creating a regular note, and a large note (detailed note), but also creating an attachment for a note.
• Ability to update a regular note
• Ability to update a large note
• Ability to update a note's secondary information
• Ability to delete a note
• Ability to restrict Note Type list of values
When creating a new note, you might be able to see only part of the note types fromthe list of values if your system administrator restricts you to certain note types. Forexample, call center agents can see Interaction note type, not Knowledge Base note type, for interaction or activity related notes if they are restricted to access certain note types.
Please note that even if you create notes of a restricted note type, you might not be able to view it after they are saved unless you are granted with appropriate access privileges as mentioned earlier. For example, a sales representative creates a note with note type Ooffer, but only a sales manager can view this type of note if a specific privilege has been granted to sales managers only.
Note: By default, you can create, view, and update a large note and a note's secondary information including note type, status, relate to, and attachment information. However, system administrators can update the Notes security rules and grant you various security privileges. As a result, whether you can view or update a note is dependent on your security access privileges.

Oracle HTML Calendar 11-1
11Oracle HTML Calendar
This chapter covers the following topics:
• Overview of Oracle HTML Calendar
• Oracle Calendar Key Features
• Calendar Integration with Notes and Tasks
• Oracle HTML Calendar Integrations
• Calendar Terms and Definitions
• Accessing the Oracle HTML Calendar Interface
Overview of Oracle HTML CalendarHTML Calendar manages daily activities, appointments, and schedules of applications resources as well as calendar events generated by various Oracle E-Business Suite applications, such as marketing events and sales meetings. Using the calendar features, a user may create appointments, tasks, notes, and other calendar events (such as schedules and bookings), invite attendees for the appointment, and view scheduled activities through various daily, weekly, combination, and monthly calendar views.
Additionally, HTML Calendar provides an effective mechanism to manage group activities by using group or public calendars. With an approval from the Calendar Administrator for a new group or public calendar request, the requestor of the new group calendar becomes the group calendar owner or Group Calendar Administrator ofthat group calendar and is responsible for any future approvals of subscription requestsfor that group calendar . All group calendar activities will also be displayed in your personal calendar views with your desired color in order to distinguish them from yourpersonal activities. Furthermore, you can also synchronize appointments that appear in HTML Calendar with your offline devices, such as Palm or Outlook, connected to your personal computer.
Note: Calendar for Oracle Common Application Calendar adopts

11-2 Oracle Common Application Calendar User Guide
Oracle Applications Framework, the standard HTML development anddeployment platform for Oracle HTML Applications. It provides essential calendar functionality for integrated applications such as Oracle Sales Online. Calendar in Oracle Applications Framework is not fully compatible with the HTML Calendar user interface. For basic use feature, see Chapter 10, Managing Appointments in Oracle Applications Framework. For detailed implementation and use featuresof the integrated applications, consult product specific documentation.
Calendar RulesHTML Calendar provides the following security rules to access appointments, and appointment attachments:
Security Access to Appointments• Every employee resource can use HTML Calendar.
• The owner can have full access (view, update, and delete) privilege to the appointments and the invitees can have view only access to the appointment.
• Only the owner of a calendar can grant another user an access privilege (full access or read only access) to access his or her personal calendar. However, for the private appointments, only the owner can see them even if the full access privilege is granted to another user.
Security Access to Appointment Attachments• Owners of appointments can have full access privilege to attached notes as well as
the attachments created by the owners.
• Invitees can have full access to the attached notes as well as the attachments createdby the appointment owner. In addition, invitees can also create additional notes andattachments for the appointment.
• When a searched note has a source of appointment and you are not the owner or the attendee of the appointment, you will see a message "You do not have permission to access this page" displayed when trying to access the note.
Since the HTML Notes module leverages the Application Object Library (AOL) data security model to provide new security rules, it may change the behavior of accessing Notes from appointment drill down screens depending on the security rules set up in Notes.
See:HTML Notes Security Rules, page 10-11, Data Security for HTML Notes chapter about the notes security access.

Oracle HTML Calendar 11-3
Types of CalendarsThe following are the different types of calendars available for viewing in Calendar.
Personal CalendarsEvery employee has a personal calendar that they use to create or view appointments, invite resources to appointments, attach notes and tasks, and relate appointments to business objects. There are several ways to view your calendar including: daily, weekly,monthly, yearly, or in combination with your assigned tasks. Other features of the personal calendar include checking a resource's availability, personalizing your calendar view, and updating and soft deleting existing appointments.
Public CalendarsPublic calendars are generally used for publishing details like holidays. They can be used by any users in the monthly view format. For example, a user in the United States can view the Australian public calendar for which all the holidays are defined before scheduling a marketing campaign targeting Australia customers.
In addition, public calendars can be used to publish any information that is not targetedto a specific group of people.
Public calendars can only be created through requesting a new group calendar, requested as a public calendar in the Request New Group window. After being approved by the Calendar Administrator, the requestor becomes the owner of the public calendar and is responsible for future appointment creation and updates for that public calendar.
To create appointments for a public calendar, the public calendar owner needs to use the switch calendar functionality. All appointments created for a public calendar must be classified as "public" appointments. They cannot be "private".
Group CalendarsA group calendar is created specifically for tasks and appointments related to a resourcegroup. Unlike the public calendar, which can only be viewed on the separate public calendar view, a group calendar is viewed within the user's personal calendar.
A group calendar is not accessible unless you subscribe and receive approval. You can request a new group calendar by submitting a request to the Calendar Administrator. Once the new group calendar is approved, you become the owner of that group calendar or the Group Calendar Administrator and are responsible for future subscription approvals and rejections.
It is important to note that all group calendar appointments are public to the group calendar subscribers, therefore, group calendar appointments cannot be private appointments.
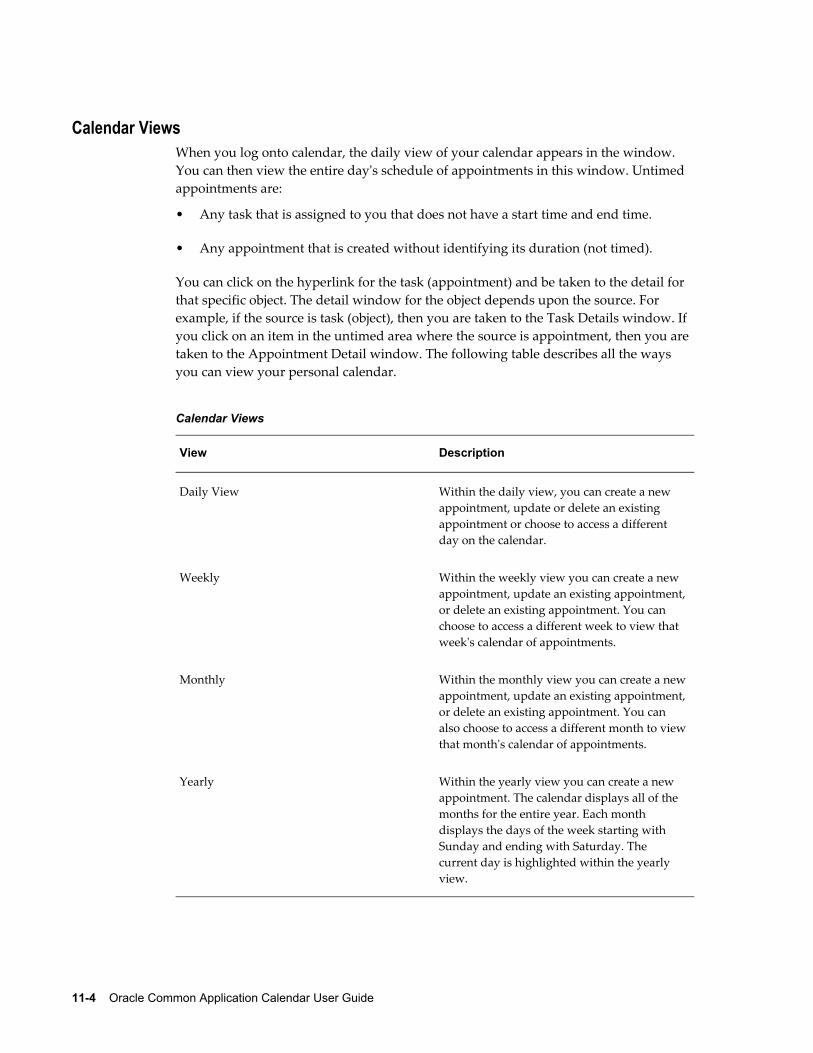
11-4 Oracle Common Application Calendar User Guide
Calendar ViewsWhen you log onto calendar, the daily view of your calendar appears in the window. You can then view the entire day's schedule of appointments in this window. Untimed appointments are:
• Any task that is assigned to you that does not have a start time and end time.
• Any appointment that is created without identifying its duration (not timed).
You can click on the hyperlink for the task (appointment) and be taken to the detail for that specific object. The detail window for the object depends upon the source. For example, if the source is task (object), then you are taken to the Task Details window. If you click on an item in the untimed area where the source is appointment, then you are taken to the Appointment Detail window. The following table describes all the ways you can view your personal calendar.
Calendar Views
View Description
Daily View Within the daily view, you can create a new appointment, update or delete an existing appointment or choose to access a different day on the calendar.
Weekly Within the weekly view you can create a new appointment, update an existing appointment,or delete an existing appointment. You can choose to access a different week to view that week's calendar of appointments.
Monthly Within the monthly view you can create a newappointment, update an existing appointment,or delete an existing appointment. You can also choose to access a different month to viewthat month's calendar of appointments.
Yearly Within the yearly view you can create a new appointment. The calendar displays all of the months for the entire year. Each month displays the days of the week starting with Sunday and ending with Saturday. The current day is highlighted within the yearly view.

Oracle HTML Calendar 11-5
View Description
Combination In the combination view, you can maintain daily activities while avoiding scheduling conflicts by viewing the days events alongsidea list of current tasks. The combination view fields may vary depending on the columns you choose to display in the Task Summary window.
Availability Within the availability view you can check theavailability of multiple resources at the same time. You can also create an appointment by clicking on the time link, and invite all resources who are visibly available. Resource availability is based on appointments which appear on the resource's personal calendar.
Who Uses Calendar?Roles are assigned to resources to determine privileges. For example, you may have the ability to modify another resource's calendar if you are granted full access by the owner.The following table defines each Calendar role.
Calendar Roles
Role Description
Calendar Administrator The Calendar Administrator is responsible for creating group or public calendars based on user requests. Creation of calendars are accomplished by responding to a workflow request. Once the calendar is approved, the creator becomes the Administrator for that group calendar (Group Calendar Administrator). Requests for that group calendar are then processed by that user.
Group Calendar Administrator The Group Calendar Administrator has all thesame privileges as a regular calendar user except that they are responsible for approving and rejecting subscription requests for the group calendars they own.

11-6 Oracle Common Application Calendar User Guide
Role Description
Attendee An attendee is a resource who has accepted anappointment invitation.
Invitee An invitee is a resource who receives an invitation to an appointment but has not responded.
Owner A calendar owner is defined as the resource who owns the personal, group, or public calendar.
Subscriber A subscriber is an individual who requests access to a group calendar. A subscriber of a group calendar can have read-only or full access.
User A calendar user is an employee resource who uses calendar.
Oracle Calendar Key FeaturesThe following are key features of Calendar:
• Managing Appointments
You can create appointments for yourself or for other resources who grant you full access privileges to their calendar. For example, Elizabeth Smith, a marketing manager at Vision Corporation, decides to target small size companies through the Vision web site. She wants to discuss campaign details with her team, so she uses the HTML Calendar to create an appointment, and subsequently, invites her team to the appointment. Her team members receive the invitation in their calendar.
In addition to creating appointments for upcoming events, you can also create an appointment for a business event that has already occurred in order to have a tracking record. For example, you attended a meeting last week to follow-up on a business event, even though this event was not originally scheduled in your calendar. You create the appointment one week after the event to record the meeting.
• Personalization and Preferences
You can specify personal preferences for viewing your daily calendar. You can change your password, grant access privileges so others can view your calendar, request a group or public calendar, or switch to another calendar. You can also

Oracle HTML Calendar 11-7
personalize the appearance of your calendar. For example, you can define what constitutes a week (Monday to Friday or, perhaps including weekends) as well as, what hours to start and end the day within the daily and weekly views. When Calendar is integrated with other Oracle products, Calendar preferences are embedded within that applications profile or preferences.
Calendar Integration with Notes and TasksA note provides a record of descriptive information that is generated and referenced by the user. Use Notes to add additional information to an appointment. The key functionality of the Notes module includes:
• Viewing all existing notes
• Creating a note
• Attaching a document, text, or a URL to a note
• Searching for a note
Task Manager provides the capability for tasks to be created, assigned, prioritized, and managed. It provides an effective mechanism for organizations to use to respond to customers' needs in a timely manner. The key functionality of the Task Manager module includes:
• Viewing Task Information
• Searching for a Task
• Creating a Task
• Assigning individual resources to a task
• Maintaining Task Contacts
Appointments and tasks are both considered tasks. Appointments that are created in the Create Appointment window automatically show up on the user's calendar with a source of appointment.
Note: If you have integrated both Calendar and Resource Manager withanother Oracle product, you see both the Calendar tab and the People tab. These two modules share the CRM Application Foundation User responsibility.
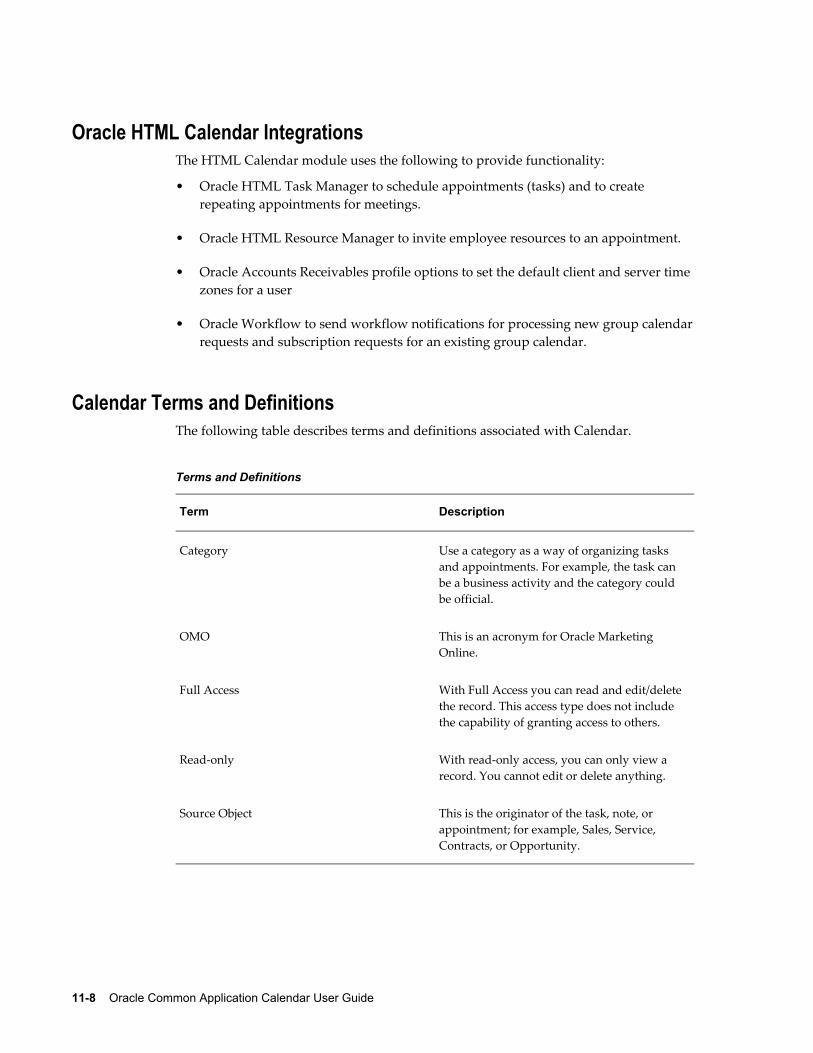
11-8 Oracle Common Application Calendar User Guide
Oracle HTML Calendar IntegrationsThe HTML Calendar module uses the following to provide functionality:
• Oracle HTML Task Manager to schedule appointments (tasks) and to create repeating appointments for meetings.
• Oracle HTML Resource Manager to invite employee resources to an appointment.
• Oracle Accounts Receivables profile options to set the default client and server time zones for a user
• Oracle Workflow to send workflow notifications for processing new group calendarrequests and subscription requests for an existing group calendar.
Calendar Terms and DefinitionsThe following table describes terms and definitions associated with Calendar.
Terms and Definitions
Term Description
Category Use a category as a way of organizing tasks and appointments. For example, the task can be a business activity and the category could be official.
OMO This is an acronym for Oracle Marketing Online.
Full Access With Full Access you can read and edit/delete the record. This access type does not include the capability of granting access to others.
Read-only With read-only access, you can only view a record. You cannot edit or delete anything.
Source Object This is the originator of the task, note, or appointment; for example, Sales, Service, Contracts, or Opportunity.

Oracle HTML Calendar 11-9
Term Description
Calendar Use Calendar to create, manage, and organize your appointments, tasks, and contacts.
Party A party is an entity that can enter into a business relationship. Resources of type "Party" can be imported as resources from Oracle Accounts Receivables. An example of aparty is a customer.
Tasks A task is the lowest unit of work. For example,a task consists of sending an e-mail, calling back a customer, or attending a meeting.
Accessing the Oracle HTML Calendar InterfaceEach module integrated with Calendar has an individual login. Perform the following steps to log in to Calendar.
• Click the Calendar tab to access the daily view of your calendar.
• If you have integrated both Calendar and Resource Manager with another Oracle module, you see both the Calendar tab and the People tab. These two modules share the CRM Application Foundation User responsibility
Prerequisite: You must be an employee resource to use calendar.
Responsibility: CRM Application Foundation User
Navigate to the JSP login page.


Using the HTML Calendar 12-1
12Using the HTML Calendar
This chapter covers the following topics:
• Viewing Your Personal Calendar
• Viewing Your Tasks and Your Calendar Simultaneously
• Viewing the Availability of a Resource
• Adding a New Resource to Your Availability View
• Viewing a Public Calendar
• Using the Advanced Search in Calendar
• Viewing and Updating Appointment Details
• Creating an Appointment
• Defining Attendees for an Appointment
• Responding to an Invitation
• Creating a Repeating Appointment
• Attachments
• Relating Appointments to Source Objects
• Working with Bins
• Changing Your Personal Preferences
• Defining Privileges for Your Calendar
• Requesting a New Group or Public Calendar
• Subscribing to a Group Calendar
• Switching to Another Calendar
• Adding and Removing Task Categories
• Defining Your Time Zone
• New Group Calendar Requests

12-2 Oracle Common Application Calendar User Guide
• New Group Calendar Subscription Requests
• Viewing Group Calendar Subscription Information
• Updating Group Calendar Subscription Information
• Add or Remove Group Calendar Administrators
• Updating Group Calendar Subscription Information
Viewing Your Personal CalendarOnce logged in to the HTML Calendar, you are taken to the calendar daily view with any scheduled appointments, tasks, or other calendar items, such as marketing objects. Select an appropriate link from the side navigation menu to have calendar displayed in weekly, monthly, yearly, or combination view. Clicking any arrow on any calendar view page allows you to view the previous or next day, week, month, or year.
When viewing tasks in calendar views including daily, weekly, monthly, combination, and public calendar views, if "Display Task Customer and Source" is set to "Yes" in personal preferences page and if a task has a source and it is not "Task Manager" or "Appointment", you can also find customer names and source names displayed in the hyperlink format along with the tasks. Click the hyperlink to see the source object if it isset up correctly in the JTF Object meta-data table.
Untimed Appointments
You might see untimed appointments shown in the untimed area on top of the daily, weekly and combination daily views. The untimed appointments, tasks or events appear because of the following reasons:
• Any task that is assigned to you and has zeroes for the start time and end time.
• Any appointment that is created without identifying its duration (not timed).
Note: If you have integrated both Calendar and Resource Manager with another Oracle product, you see both the Calendar tab and thePeople tab. These two modules share the CRM Application Foundation User responsibility.
Viewing Your Tasks and Your Calendar SimultaneouslyUse the combination view to create, update, or delete an existing appointment or task. Since the combination view provides an overview of a specific day's events (daily view),along with a quick list of the current tasks, you can view the following information:
• Scheduled appointments in the daily view (on the left-hand side of the window)
• List of the tasks (on the right-hand side of the window) in the Tasks region: The

Using the HTML Calendar 12-3
tasks shown here are the tasks you own or that are assigned to you. The order of thelist of tasks is based on the planned start date starting with the oldest. You can modify the number of rows displayed for the list of tasks by selecting the Profile icon and Display References link.
In addition, if "Display Task Customer and Source" is set to "Yes" in personal preferences page and if a task has a source and it is not "Task Manager" or "Appointment", you can also find customer names and source names displayed in ahyperlink format along with the tasks in the combination view.
It is important to note that the Create or Quick Create button displayed in the Tasksregion is used to create tasks, not appointments.
Note: You will not be able to view another resource's personal or group calendar in the combination view.
Navigate to the Combination window by clicking Combination in any calendar view.
Viewing the Availability of a ResourceUse the Availability window to check the availability of a resource that you want to invite to an appointment. Resource availability is based on appointments assigned directly to the resources which display on the resource's calendar. This is not the same as the availability used in the Forms Calendar. Availability in Forms specifically indicates a resource's work shift availability.
Searching for Resources
To search for resource availability, first perform a search to locate the resource. In the search result window, you can see the resource name along with phone number, email, and job title information which allows you to contact the resource directly for further availability verification before adding the resource to the Availability view.
Viewing Resource Availability
After adding a resource in the Availability view, you will not only be able to view the resource availability, but also to see the selected resource's phone number displayed next to the resource name in a hyperlink format which opens the e-mail compose window. As a result, you can contact the selected resource directly either by phone or e-mail for availability check before scheduling an appointment. The unavailable time displays in red, and the available time displays in blue. The combination of all the selected resources' availability is shown in the Combined row.
In addition, you can send web mails through Oracle Collaboration Suite from the Availability window if it is set up.
Private appointments are considered as unavailable and their detailed information will not be seen by the user even if granted with full access privilege. Private appointments are exclusive to the user who has created them.

12-4 Oracle Common Application Calendar User Guide
Features of the Resource Availability Window
You can perform the following tasks in the Availability window:
• View additional resource availability: By clicking Add Resource, you can add additional usernames to the availability view and then view their availability information.
• Create Appointments: You can create appointments by the following ways:
• Click Create Appointment, you can directly create a new appointment. All your selected resources in this window for availability information are automatically added to the Attendees window if you create an appointment from this view.
• After selecting different resources in the Availability window, you click the timeline hyperlink (such as 1:00 p.m.) shown in the Combined row to access theCreate Appointment window. Notice that the Start Time field is displayed automatically (1:00 p.m.) and the resources that you selected in the Availability window are also automatically invited to the appointment.
• View resource availability for current date and a specific date: By clicking Today, you can view all the selected resource availability for the current date. By clicking appropriate arrows surrounding the day, you can move forward or backward to compare the list of your selected resources' availability for the next or previous day.
Adding a New Resource to Your Availability ViewUse the Availability window to add a resource's schedule to your availability view.
Note: Resources added to your availability view are only present while the user is logged in. Once you log out of your calendar, any resources added to the availability view are deleted and you must add them to the window again once you log back in.
Viewing a Public CalendarA calendar user can view all existing public calendars. Public calendars appear in monthly view only. If the description information of a public calendar is very long, thenyou will see the information displayed in a wrapped text format.
Navigate to the Public Calendar window by clicking Public Calendar in any calendar view.
You can enter the name of the public calendar or search for a public calendar.

Using the HTML Calendar 12-5
Using the Advanced Search in CalendarIn addition to the Quick Find search, HTML Calendar also allows you to use advanced search functionality to search for appointments based on the following search criteria:
• Name
• Appointments between two dates
• Type
• Priority
• Description
• Show All Invitations
To access the advanced search window, you must first select "Appointment" from the Quick Find drop-down list. Click the Advanced Search hyperlink to access the Appointment Advanced Search window.
Enter at least one search criterion and perform a search to see the appointments that match the search criteria populated in the Appointments window. When clicking the appointment link listed in the search results, you can either view the appointment details or respond to the appointment invitation if searching by "Show All Invitations".
For example, you can search for all your appointment invitations specifically for next week. After entering appropriate date range and selecting the "Show All Invitations" check box, you will see all appointments that you are invited to next week listed in the Appointments window. You can respond to each appointment invitation by clicking theappointment name hyperlink or the name with prefix "INVITE" to access the Appointment Invitation window where you can accept or decline the invitation. Once you accept the invitation by clicking the Accept button for the appointment with prefix "INVITE", when performing a search next time, the same appointment will still be retrieved, but listed without the prefix "INVITE". You can then decline the invitation if necessary.
Viewing and Updating Appointment DetailsUse the Appointment Details window to view details for any of your existing appointments. You can access the appointments menu in the side navigation bar once you create an appointment.
Note: Click the source number link to view the source or the name link to view the details of the record.

12-6 Oracle Common Application Calendar User Guide
Creating an AppointmentUse the Create Appointment window to create an appointment for yourself or another resource.
Be aware that if an appointment is created for a group or public calendar, then the "Private" check box is removed from the appointment creation page. Therefore, all group calendar appointments are public to all group calendar subscribers.
If an appointment is created without specifying starting time, then the appointment willbe displayed in the untimed area in the calendar views.
HTML Calendar defaults appointment Type to "General" in the Create Appointment window. You can change the default type from the Type drop-down list. The available types shown in the list are only the types that are mapped to the source object "Appointments". However, if no task types are mapped to the object "Appointments", then all of the types will be displayed in the drop-down list.
In the Reference region, you can relate the appointment to a business object, such as an opportunity. Appointments do not follow the Tasks data security rules for the "Relate To" (or Reference) list of values.
Note: You cannot create a private appointment in association with a public or a group calendar.
Steps:1. Enter a name for the appointment.
2. The start date reflects the current date and is automatically populated. You can change the date if necessary.
3. Click the Go button to select the time zone where the appointment is scheduled. This overrides the client time zone set in your calendar profile.
4. Using the drop-down lists, define the following information for the appointment:
• Start Time: If you accessed this window by clicking the + icon in the daily or weekly view, the default is the time you selected. If this field is left blank, then your appointment will be displayed in the untimed area in the calendar views.
• Duration: If you accessed this window by clicking the + icon in the daily or weekly view, the default is one hour.
• (Task) Type: You can update the default type "General" to other type if needed.
• (Task) Category

Using the HTML Calendar 12-7
• Priority (Status)
5. Select when you want to be reminded of an appointment:
• Do Not Remind Me
• 15 Minutes Before
• 30 Minutes Before
• 1 Hour Before
• 2 Hours Before
• 1 Day Before
• 2 Days Before
• 3 Days Before
• 1 Week Before.
The default value is "Do Not Remind Me". If you choose to receive a reminder, you will receive a workflow notification in your Personal Home Page Worklist. However, You will not receive an e-mail notification since you cannot receive both e-mail and a notification in your Personal Home Page.
6. Select the Private check box if this is a private appointment. If the appointment is created for a group or public calendar, then you will not be able to see the Private check box in the creation page.
7. Enter a description for the appointment.
8. Select the related business object.
1. Use the Reference Type drop-down list to select an object to reference a person, organization, or opportunity.
2. Enter the related object name.
9. Click Create to save the current appointment and return to the Appointment Details window where you can update or delete the appointment. Click Create and Create Another to save the appointment and proceed to the Create Appointment window again to create another appointment.
12-8 Oracle Common Application Calendar User Guide
Defining Attendees for an AppointmentUse the Attendees window to send an appointment invitation to another resource. When searching for resources, you can search either by resource name, such as Jeff Walsh, or by user name, such as jwalsh. After a search, both resource name and user name of the selected resource are displayed for your selection.
• Click the source link to view the source or the name link to view the details of the record.
• It is recommended that you do not invite attendees to public calendar appointments.
Note: Do not modify the assignee status of the invitee in the Forms-based version of Task Manager. Not all Task Manager assignee statuses are available in the HTML Calendar.
Perform the following steps to invite an employee resource to an appointment.
Prerequisites❒ An appointment must already exist.
❒ In order for a resource to receive an e-mail notification for an appointment invitation, the invitee must set the Issue Notification in the Calendar Personal Preferences window to Yes. This window is accessed through the Profile link.
Steps:1. In the Appointment Details window, click Attendees in the side navigation bar.
2. Enter either the resource name or user name of the employee you want to invite to the appointment or perform a search using the lookup tool.
3. Click Add. The resource name is moved to the multi-select text box.
4. Select the resource and click Availability to view the individual's availability for the scheduled appointment time in a graphical format.
5. Click Send Invite to add the resource to the invitees list with invitation status such as "Invited", "Accepted", or "Rejected".
6. To create a note for the appointment, click the Notes link on the side navigation bar and click Create Note.

Using the HTML Calendar 12-9
Responding to an InvitationWhen you receive an invitation to an appointment, it displays on your calendar with the word INVITE. You can respond to an invitation either through HTML Calendar or through Workflow notification.
When you respond to the invitation by either accepting or rejecting it, HTML Calendar sends a workflow notification to the appointment owner. The notification is similar to the invitation and contains key information of the appointment, such as start date and time, duration, priority, type, description, and repeating rule details if for a repeating appointment.
Once you accept the invitation, the status changes from "Invitee" to "Attendee" and you can attach notes to it. For a repeating appointment or task, you can either reject all or accept all of them, instead of responding to each invitation individually.
Note: If you reject an invitation, then it will be deleted and you are not able to retrieve it.
Creating a Repeating AppointmentUse the Repeating window to create a series of appointments for a regularly scheduled appointment. See Creating a Repeating Task or Appointment, page 6-11 for instructions.
AttachmentsYou can view or update existing attachments created for an appointment, a task, or a note through the HTML Calendar, Tasks, Notes or other integrated applications.
Use the Attachments window to view existing attachments for a selected appointment, task, or note. You can find attachment summary information including creation date, description, file size, data type, created by, and the actual attachment link.
By clicking the source or name hyperlink, you can view the details of the selected source document. To view the actual attachment, click the attachment link to directly access the attachment details.
See Using Attachments, Oracle Applications User's Guide for detail information on creating, updating, and deleting attachments.
Adding an AttachmentYou can create and add an attachment to an appointment, a note, or a task. You can linkunstructured data such as images, word-processing documents, spreadsheets, URLs, or text to application data.

12-10 Oracle Common Application Calendar User Guide
Note: Click the source link to view the source or the name link to view the details of the record. Use the First, Previous, Next, and Last links to view all existing attachments in the system.
Relating Appointments to Source ObjectsUse the References window to relate an appointment to a business object. For example, if an appointment relates to a specific business campaign, you can relate it to that campaign so the information appears to anyone who views the appointment.
Note: Appointments do not follow the Tasks data security rules for the "Relate To" (or "Reference") list of values.
Working with BinsBins provide a quick look at the current days appointments and tasks. The calendar bin shows the current calendar month, the task bin shows a modified task summary, and the appointment bin shows the current day's appointments, which appear in the daily view of your calendar. Only tasks and appointments (including task and group calendar items) to which the user has access, are shown in the task and appointment bins. The following topics provide additional information on bins:
• Viewing the Task Bin, page 6-13
• Editing Your Task Bin, page 6-13
If you are running Calendar integrated with another Oracle module, use calendar bins as a quick look at your daily calendar and appointments.
• The calendar bin shows you the monthly view of your calendar while the appointment bin shows you all the items that appear on the daily view of your calendar including tasks and appointments.
• The appointment bin has two columns. The time column shows the start time of theappointment and the name shows the appointment name. If a start time is not specified when the appointment is created, "All Day" appears in the time column. When you create an appointment, it appears in your appointment bin for the specified day.
Note: When you switch to another calendar that you are subscribed or have access to, your calendar and task bins still reflect your personal appointments and tasks.
Using the HTML Calendar 12-11
Changing Your Personal PreferencesUse Calendar preferences to control the way that you view your calendar. You can set personal calendar preferences in the following regions:
General Setup Header
This header region includes setting default values for the following fields:
• Issue Notification. Select whether or not you want workflow notifications sent to invitees when an invitation is sent, as well as workflow notifications sent to an owner when invitees respond to an invitation. The e-mail notifications can also be sent only if e-mail server is set up correctly. The default is set to Yes. If No is selected which overwrites sending an e-mail to an invitee or an owner.
• Display Items. Select whether or not you want to show calendar items, such as marketing objects, in your personal calendar views.
• Clock (12/24 Hour). Select if you want your clock to display in intervals of 12 or 24 hours.
• Display Task Customer and Source. Select whether or not you want to display task customer and source of a task in calendar views. The default is No.
Color/Prefix Setup for Items Region
To differentiate tasks and calendar items from appointments in your calendar views, HTML Calendar allows you to choose a different color and prefix for each of them so that you can easily identify them in your calendar.
For example, if green is chosen for tasks and with prefix "Task", then all tasks will be displayed in green and have prefix "Task" in front of each task name in your calendar views. This way you can easily differentiate tasks from appointments if they are in red with prefix "Apt".
This functionality is similar to the Group Calendar Subscription page to have different color or prefix selected for your subscribed group calendar events. There will be no default text for prefix. Each prefix can have up to 20 characters.
To be able to view calendar events in your personal calendars, in addition to having "Display Items" set to "Yes" and identifying desired color and prefix text, you must belong to resource groups to which the event is published.
Weekly Setup Region
Use this region to set up the following display intervals for a week:
• Select in what order you want a week in your calendar to begin and end. For example, Sunday through Saturday or Monday through Friday.
• Select the way you want your appointment time increments to display. For

12-12 Oracle Common Application Calendar User Guide
example, 15 minute or 30 minute increments.
• Select the start and end time for each day of the week that you want in your calendar. For example, from 08:00 a.m. and ends at 05:00 p.m.
Defining Privileges for Your CalendarUse Calendar privileges to grant another user "view only" or "full access" to your personal calendar. When searching for users, you can search either by resource name, such as Jeff Walsh, or by user name, such as "jwalsh". After a search, both resource name and user name of the selected resource are displayed for your selection.
When a user gives calendar access privilege to another resource, the access for tasks is also given simultaneously. The same functionality applies while revoking the grants. Since Task Manager leverages the AOL data security model, task security can be furthercustomized around granting access to tasks. Granting calendar access to another user will still result in granting task access to the user. However, the access to the tasks can be restricted if additional data security has been implemented for tasks.
Note: If you have a private appointment, only you are able to view it. Even if you grant privileges to a user to view your calendar, the appointment remains private.
Requesting a New Group or Public CalendarWhen you request a new group or public calendar, the request is sent to the Calendar System Administrator for approval. Once approved, a workflow process is started and the calendar is created automatically.
If requesting a group calendar, you receive a notification and become the owner of the group calendar, which entitles you to administer future subscription requests to that calendar. Any subsequent subscription requests are then sent directly to your worklist for your approval.
If requesting a public calendar, you must select the Public check box to identify this group calendar is used as a public calendar. After being approved by the Calendar Administrator, you will become the owner of the public calendar who will be responsible for future appointment creation and updates for that public calendar.
To create appointments for a public calendar, the public calendar owner needs to use the switch calendar functionality. All appointments created for a public calendar must be classified as "public" appointments. They cannot be "private". As a result, any calendar users can view public calendars without subscription request.
Note: You cannot create a private appointment in association with a

Using the HTML Calendar 12-13
public calendar.
Perform the following steps to request creation of a new group calendar.
Steps:1. Click Group Calendar in the side navigation bar.
2. Click Request New Group.
3. Enter a name for the group.
4. Optionally enter a description for the group. If the description is a very long text, then it can be displayed in a wrapped text format.
5. Select the Public check box if you are requesting a public calendar.
6. Click Send Request. A workflow notification is sent to the Group Calendar Administrator who determines whether or not the request is approved.
Subscribing to a Group CalendarA calendar user can subscribe to a group calendar (which is not public) from Profile > Group Calendar > Subscribe to Group. If your subscription request is approved by the group calendar owner, the group calendar appears in the Calendar Group Subscription window the next time you accesses it. The group calendar then appears in your personal calendar. Only the Group Calendar Administrator, or a calendar user granted full access to the calendar, can modify it.
Switching to Another CalendarUse the Switch to Another Calendar window to view a group calendar that you own or to view another user's personal calendar if you have been granted access privileges.
For example, Paul Henry can select the Key Accounts group calendar after he receives approval from Timothy Cleary, the owner of the Key Accounts group calendar. If Paul is an assistant for Elizabeth Smith, a sales director, and has view-only access privilege toElizabeth's personal calendar, then Paul can also see Elizabeth's name shown in the User or Group Name field's drop-down list. He can switch to Elizabeth's personal calendar and view her schedule if needed, but cannot make updates, or add new appointments.
Timothy, the owner of the Key Account group calendar, can select the Key Account group calendar if he wants to create or update activities. Paul is not able to select the Key Account group calendar because Paul is not the owner of that group calendar.

12-14 Oracle Common Application Calendar User Guide
It is important to note that when you switch a calendar, you can still see your tasks and notes by navigating to the Tasks or Notes subtab. Within this context if you come back to the Views subtab, you are still in the switch calendar mode. To switch back to your personal calendar, you need to go to switch calendar and switch back.
Access to appointments is based on whether you are the owner of the appointment or an attendee. For example, when you search a note whose source is an appointment, youcan drill down to the appointment only if you are the owner or the attendee of that appointment. Otherwise, you cannot drill down to the appointment.
Access to calendars and the ability to view the associated contents kick in only when you switch calendar and not in any other context.
Adding and Removing Task CategoriesUse Calendar to create personalized task categories to classify your appointments or tasks.
Note: The default category "Unfiled" exists for all users and cannot be deleted.
Perform the following steps to create a new task category.
Steps:1. Navigate to the Calendar Personal Preferences window by clicking the Profile link.
2. Click Categories in the side navigation bar.
3. Enter a name for the category into a blank field under the category column.
4. Save your changes.
Defining Your Time ZoneUse the time zone window to determine what time zone your appointments take place in when you are creating an appointment.
Perform the following steps to change your time zone information for Calendar and all integrated Oracle Products.
Steps:1. Navigate to the Calendar Personal Preferences window by clicking the Profile link.
2. Click Time Zone in the side navigation bar.
Using the HTML Calendar 12-15
3. Perform a search to select the time zone you want to specify as your default.
4. Enter at least two characters in the search field and execute the search.
5. Select the option button of the time zone you want to define.
6. Save your changes.
New Group Calendar RequestsThe Calendar Administrator can approve or reject a new group calendar request. Whether the request is granted or rejected, the requestor receives a notification. If the request is approved, the requestor automatically becomes the Group Calendar Administrator, and is then responsible for approving future subscription requests for that group calendar.
You must configure your Personal Home Page (PHP) and create a worklist to receive notifications and be a Calendar Administrator to approve new group calendar requests.
Steps:1. Navigate to your homepage worklist in Forms.
2. Click on any request link.
3. In the lower portion of the window, select No in the response drop-down list to deny the request, or Yes to accept it.
4. Click an appropriate button to approve or deny the request.
New Group Calendar Subscription RequestsWhen you receive an approval for a new group calendar, you become the owner and the Group Calendar Administrator, and are responsible for responding to all future subscription requests.
You must configure your Personal Home Page (PHP) and create a worklist to receive notifications and be a Group Calendar Administrator with the CRM Application Foundation User responsibility or the JTF HTML Calendar User responsibility.
Steps:1. Navigate to your homepage worklist in Forms.
2. Click any request link.
3. In the lower portion of the window, select read-only access from the Response

12-16 Oracle Common Application Calendar User Guide
drop-down list and click Approve to grant the request or Reject to deny it.
4. Click an appropriate button to approve or reject the request.
Viewing Group Calendar Subscription InformationTo view group calendar subscription information, the Calendar Administrator can see an additional drop-down menu in the Calendar Group Subscription window with the following choices:
• Show Subscribed (Default)
• Show All
The "Show Subscribed" lists the group calendars that the Calendar Administrator is currently subscribed to. The Calendar Group Subscription window appears with GroupCalendar Name, Description, Color, and Prefix information. If "Show All" is selected, then all group calendars' names and descriptions will be shown in the Calendar Group Subscription window.
You must be the Calendar Administrator to view group calendar subscription information.
Steps:1. Use the CRM Application Foundation User or JTF HTML Calendar User
responsibility to navigate to the Calendar Personal Preferences window by clicking the Profile icon > clicking Group Calendar in the side navigation bar.
2. In the Calendar Group Subscription window, review the group calendar information that the Calendar Administrator has subscribed to.
3. (Optionally) select Show All from the drop-down list to review all group calendars.
Updating Group Calendar Subscription InformationAfter the Calendar Administrator approves a new group calendar request or the Group Calendar Administrator approves a subscription request, any users can update their group calendar subscriptions shown in the Calendar Group Subscription window.
However, the level of calendar updates is based on user types. An average user can perform basic subscription updates. A user who is a Calendar Administrator or a GroupCalendar Administrator can also update the list of Group Calendar Administrators (owners) shown for the selected group calendar.
After opening the subscribed group calendar, you can modify the subscription information by changing the color and prefix event title information for the selected
Using the HTML Calendar 12-17
group calendar. The Color and Prefix Event Title fields are used to differentiate which activities displayed in your personal calendar belong to the subscribed group calendar. Click Unsubscribe to revoke the selected group calendar subscription.
There is also a table listing all the Group Calendar Administrators for the selected group calendar.
Add or Remove Group Calendar AdministratorsBesides the basic group calendar updates, a user who is a Calendar Administrator or a Group Calendar Administrator can see the Remove check box shown in the table next to the Name field. A user with the administrator role can add more Group Calendar Administrators from the Name LOV if necessary. Any changes made to the administrators will be confirmed by a message indicating the update was successful.
Note: Each group calendar must have at least one Group Calendar Administrator.
Before removing existing administrators, you must make sure that each group calendar has at least one Group Calendar Administrator remaining in the table. Otherwise, an error message indicates that you must select a new Group Calendar Administrator before you remove all of the existing ones. If a duplicate name (administrator) is selected, then an error message indicates that the resource you selected is already a Group Calendar Administrator.
After you update the administrators, if a group calendar has more than one Group Calendar Administrator, then a subscriber's request through workflow notifications willbe sent to all of the Group Calendar Administrators. The access privilege of the subscriber to the group calendar is based on the level granted by the first approver. When one administrator approves the request, notifications sent to the rest of administrators will be removed automatically from their worklists.
For example, one of the administrators approves the request and grants the subscriber an access level, such as Read. The system will first check whether the subscriber has been added or removed from the list. If the subscriber is added to the list, then it will change the notification status to "Closed" for all notifications sent to the rest of administrators.
Tips: Although you can have more than one Group Calendar Administrator for a groupcalendar for backup purposes, it is suggested that you grant only one additional user the Administrator access.
While responding to group calendar subscription requests, the Group Calendar Administrator can grant Full Access to a user who needs to create or update the group calendar's appointments, or grant Administrator access to a user who acts as the Group Calendar Administrator. The administrator should grant Read Only access to all other subscribers.

12-18 Oracle Common Application Calendar User Guide
Updating Group Calendar Subscription InformationTo update administrators for a given group calendar, you must have the administrator role meaning either be a Calendar Administrator or a Group Calendar Administrator.
Steps:1. Use the CRM Application Foundation User or JTF HTML Calendar User
responsibility to navigate to the Calendar Personal Preferences window by clicking the Profile icon >Group Calendar in the side navigation bar.
2. In the Calendar Group Subscription window, view a list of your subscribed group calendars.
3. Click one of the group calendar names to update group calendar subscription information such as color and prefix event title.
4. To unsubscribe the selected group calendar, click Unsubscribe to revoke the subscription.
5. To update the administrators if you are a Calendar Administrator or a Group Calendar Administrator:
1. Select the Remove check box next to the administrator whom you want to remove.
2. Use the Name LOV to search by either a user name or a resource name and find the administrator you want to add to the calendar.
Oracle Forms-based Calendar 13-1
13Oracle Forms-based Calendar
This chapter covers the following topics:
• Overview of the Oracle Forms-based Calendar
• Oracle Forms-based Calendar Integrations
• Accessing the Oracle Forms-based Calendar Interface
• Creating Tasks and ToDos in a Calendar
• Viewing the Datebook
• Creating a ToDo List
Overview of the Oracle Forms-based CalendarThe Forms-based Calendar module provides a mechanism of allowing people to define resource work shifts with the consideration of resource availability and associating them with a scheduling calendar, not a personal calendar used for managing daily activities. After these work shifts are defined, attached to a scheduling calendar, and associated with resources during implementation, the selection of qualified resources for a task in Assignment Manager can be based on the resource shifts and availability defined in the Forms-based Calendar.
Additionally, you can use the Calendar Datebook features in the Oracle Telesales application to view scheduled activities and create personal ToDos.
Calendar Setup windowUse the Calendar Setup window to create time periods in a Calendar Datebook for yourself or another resource. Calendar setup uses shifts and patterns to define time availability and accommodate the most complex situation for a resource. You can defineboth your working hours and your unavailable hours such as holidays and vacations.

13-2 Oracle Common Application Calendar User Guide
What is Available Time?Available time is defined using shifts and patterns. It is the time a resource is available for scheduled work.
What is a Shift?A shift defines when a person is available to work. For example, a shift can be created that defines the default working week Monday to Friday 8:30 to 17:00. Shift pattern times are interpreted in the time zone that is tied to an individual resource or group resource. For all other types of resources, the schedules and availability times are interpreted in the server time zone.
Note: The Forms-based version of Calendar includes the ability to support a 24 hour shift, which makes it possible for graveyard shifts to be covered with one shift instead of two. In previous versions, two separate shifts had to be created to cover a shift which spanned between two separate days, such as, 10:00pm-2:00am.
What is a Shift Pattern?A set of shifts that are set as a pattern.
Example• Shift A, Field Support, starts at 8:00 and lasts 9 hours.
• Shift B, Stand By, starts at 20:00 and lasts 12 hours.
• On days 1 through 4, the resource can be assigned shift A, and then days 6 and 7 shift B, and day 5 can be free.
What Is Non-available TIme?Non-available time is a defined block of time when a resource is not available to accept a task.
Non-available time includes:
• Personal appointment
• Public holidays
• Meetings
• Vacations
• Illness
Oracle Forms-based Calendar 13-3
Calendar DatebookUse the Calendar Datebook to view time availability for yourself, a resource, or a group of resources. In the datebook, a resource's schedule can be viewed in a daily, weekly, or monthly format.
In your Datebook you can view:
• Working hours
• Assigned tasks
• Personal appointments
• Official holidays and vacation days
In addition, you can:
• Create a ToDo list for the day, week, or month
• Access the Tasks application to edit a task
Oracle Forms-based Calendar IntegrationsThe Forms-based Calendar uses the following Oracle modules to provide functionality:
• Task Manager (Forms) to create a personal ToDo List (tasks) and different calendar views.
• Resource Manager to locate a specific resource for different calendar views.
The Forms-based Calendar is widely used by various modules across Oracle E-BusinessSuite:
• TeleService and Field Service uses Calendar to access the Calendar Datebook to view a specific resource's availability and assign task information.
• Assignment Manager uses Calendar to display resource work shift information through the Gantt chart. Service applications can then use Assignment Manager to locate appropriate resources for a service request or a task.
Accessing the Oracle Forms-based Calendar InterfaceYou must be an employee type resource to use calendar, and use the TeleSales Agent responsibility.
Navigate to the Oracle E-Business Center. and click the Datebook icon from the application icon menu to access the Calendar Datebook.

13-4 Oracle Common Application Calendar User Guide
Creating Tasks and ToDos in a CalendarUse the Calendar Datebook functionality in the Oracle Telesales application to view scheduled activities and create ToDos in Calendar.
Perform the following steps to gain access to your personal calendar and create and edittasks and ToDos.
Steps:1. Using the TeleSales Agent responsibility, click the Calendar Datebook icon from the
eBusiness Center.
2. Select any group in the Role and Group field of the Choose Role and Group window and click OK if necessary.
3. (Optional) Select All Tasks option button and click New to create a task.
See: Creating , Updating, and Finding Tasks, page 5-1.
4. (Optional) Select ToDo and click Private Tasks option button and click New to create or edit a ToDo.
The Create/Edit Todo form opens. Fill in the appropriate information and click OK.
See: Creating a ToDo List, page 13-5.
5. Save your changes and close the Calendar.
Viewing the DatebookUse the Datebook window to view a work shift, task, or time off for yourself or another resource, or a group of resources. The Calendar Datebook is specific to the Telesales application. Perform the following steps to view the datebook.
Steps:1. Navigate to the eBusiness Center.
2. From the Calendar Name field, select the calendar name you want to view. For example, a personal or work calendar.
3. From the drop-down list next to the Resource Employee field, select the resource or group of resources available for the chosen calendar.
4. Select either the Day, Week, or Month tab depending on the time period you want to view.

Oracle Forms-based Calendar 13-5
Creating a ToDo ListYou can create a personal ToDo list for yourself. Please note that you will only see the task statuses defined in the status transition rule that is associated with your logging-in responsibility populated in the Status list of values. In the eBusiness Center select the Private Tasks option button and enter your ToDo.

Calendar Synchronization 14-1
14Calendar Synchronization
This chapter covers the following topics:
• Overview of Calendar Synchronization
• Downloading and Installing the Pocket PC Synchronization Client
• Downloading and Installing the Desktop Outlook Synchronization Client
• Synchronization Preferences
• Synchronizing Pocket PC
• Synchronizing Desktop Outlook
• Contacts in Outlook or Pocket PC
• Appointments in Outlook or Pocket PC
• Tasks in Outlook or Pocket PC
• E-Mail Interactions with Desktop Outlook
Overview of Calendar SynchronizationCalendar Synchronization provides the ability to synchronize contacts, tasks, and appointments between the Oracle enterprise database and either Pocket PC or desktop Microsoft Outlook. Calendar Synchronization is used by Oracle Sales for Handhelds. For complete implementation instructions and user information for Oracle Sales for Handhelds, see the Oracle Sales for Handhelds Implementation Guide and the Oracle Sales For Handhelds User Guide.
Oracle Sales SynchronizationUsers can use Oracle Sales synchronization to synchronize information between laptop, desktop, or Pocket PC devices and the eBusiness Suite. Oracle Sales Synchronization can be used to synchronize:
• Appointments
14-2 Oracle Common Application Calendar User Guide
• Tasks
• Contacts
• E-mail interactions (Desktop only)
Synchronization functionality is provided specifically for:
• Pocket PC devices running Windows Mobile 2003 or Windows Mobile 5.0
• Palm devices running Windows Mobile 5.0
• Laptops or desktops with Windows 2000 or Windows XP operating systems running Outlook 2000, Outlook 2002 (XP), Outlook 2003
Downloading and Installing the Pocket PC Synchronization ClientTo use the synchronization with Oracle Sales you need to install the client on your Pocket PC.
Prerequisites❒ You need the Wireless Sales User responsibility
Steps:1. Open Internet Explorer on your handheld device.
2. Go to the URL for Applications login for your environment.
3. Enter your username and password. You are taken directly to Oracle Sales.
4. Select Pocket Outlook Client Download from the menu.
5. Click the link for Step 1 in the browser page.
6. In the Download window, deselect Open File After Download. Download the file.
7. In the browser page, select the link in Step 2.
8. In the Download window, leave Open File After Download selected. Download the file.
The client loads and installs automatically in your Pocket PC.

Calendar Synchronization 14-3
RestrictionsWhen the server version of the synchronization software is upgraded to a new version, (for example, from version 1.0 to 2.0) all users need to download the new version in order to remain compatible with the server and be able to perform synchronizations. Changes in build number do not cause incompatibility.
Downloading and Installing the Desktop Outlook Synchronization ClientDownload the client to be able to synchronize appointments, tasks, and contacts between Microsoft Outlook on your desktop and Oracle Sales.
To initialize custom category:If you have your own custom category added to the Master Category List, then proceed with the installation steps. If you do not have your own custom category added to the Master Category List, then you need to create one and remove it using the following steps.
1. In Outlook select Edit > Categories from the menu .
2. Click Master Category List.
3. Add a new Category called Outlook Category.
4. Click Add.
5. Click OK.
6. Click Master Category List.
7. Select Outlook Category from the list.
8. Click Delete.
9. Click OK.
10. Click OK.
Installation Steps:1. Login to Oracle Applications and select your Sales User responsibility.
2. On the Dashboard, go to Preferences > Outlook Synchronization > Client Download.
3. Follow the instructions on the page.
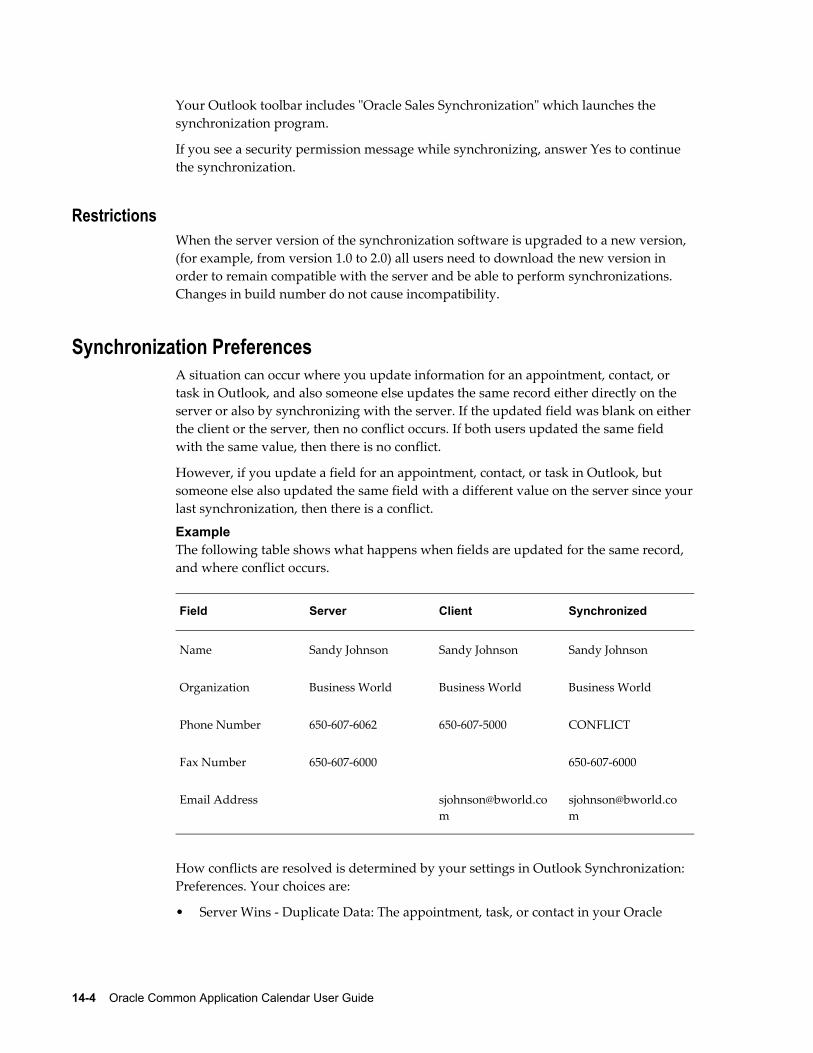
14-4 Oracle Common Application Calendar User Guide
Your Outlook toolbar includes "Oracle Sales Synchronization" which launches the synchronization program.
If you see a security permission message while synchronizing, answer Yes to continue the synchronization.
RestrictionsWhen the server version of the synchronization software is upgraded to a new version, (for example, from version 1.0 to 2.0) all users need to download the new version in order to remain compatible with the server and be able to perform synchronizations. Changes in build number do not cause incompatibility.
Synchronization PreferencesA situation can occur where you update information for an appointment, contact, or task in Outlook, and also someone else updates the same record either directly on the server or also by synchronizing with the server. If the updated field was blank on either the client or the server, then no conflict occurs. If both users updated the same field with the same value, then there is no conflict.
However, if you update a field for an appointment, contact, or task in Outlook, but someone else also updated the same field with a different value on the server since yourlast synchronization, then there is a conflict.
ExampleThe following table shows what happens when fields are updated for the same record, and where conflict occurs.
Field Server Client Synchronized
Name Sandy Johnson Sandy Johnson Sandy Johnson
Organization Business World Business World Business World
Phone Number 650-607-6062 650-607-5000 CONFLICT
Fax Number 650-607-6000 650-607-6000
Email Address [email protected]
How conflicts are resolved is determined by your settings in Outlook Synchronization: Preferences. Your choices are:
• Server Wins - Duplicate Data: The appointment, task, or contact in your Oracle
Calendar Synchronization 14-5
category used for synchronization is replaced by the object on the server. Your updated object is moved to an Oracle Conflicts category on the client. You can then compare the two as a reminder of what you changed when you updated the object, make the same edits to the object in the Oracle category, and synchronize again. Your client and the server now reflect both changes to the appointment, task, or contact. Your log notes the fact.
This is the default setting.
• Server Wins - Replace Client Data: Your information is automatically replaced with the information from the server. Your log notes the fact.
• Client Wins - Replace Server Data: The information on the server is automatically replaced with your client data. Your log notes the fact.
Synchronizing Pocket PCSynchronize whenever you want to update information between your Pocket PC and the enterprise database. Review the business flows for examples of what happens with different types of information during synchronization.
Steps:1. Start menu > Programs > Oracle Sales Synchronization.
2. Your user name is defaulted. Enter your password.
3. Perform the synchronization.
4. Review the log if you see any warning messages to find out what information did not synchronize and why.
5. If your synchronization preferences are set to Server Wins - Duplicate Data on Client, then go to the Oracle Conflicts category. If one of your objects had a conflict, then your client version was moved to the Oracle Conflicts category and the live version was updated from the server. You need to again update the object and synchronize again for your changes to take place on the server.
RestrictionsIf information on the enterprise server was updated since your last synchronization, then the conflict resolution depends upon your synchronization preference settings.
Use Advanced > Full Synchronization only if something is not working right on your Pocket PC. If your synchronization fails or you stop it before completing, then you needto run a full synchronization. Full Synchronization replaces all enterprise data on your Pocket PC with data from the enterprise database.
14-6 Oracle Common Application Calendar User Guide
Synchronizing Desktop OutlookSynchronize whenever you want to update information between your Desktop Outlookand the enterprise database. Review the business flows for examples of what happens with different types of information during synchronization.
Steps:1. Outlook Toolbar > Oracle Sales Synchronization
2. Your user name is defaulted. Enter your password.
3. Perform the synchronization.
4. Review the log if you see any warning messages to find out what information did not synchronize and why.
5. If your synchronization preferences are set to Server Wins - Duplicate Data, then view the Oracle Conflicts category in Outlook. If one of your objects had a conflict, then your client copy was moved to the Oracle Conflicts category and the live version was updated from the server. You need to again update the object and synchronize again for your changes to take place on the server.
RestrictionsIf information on the enterprise server was updated since your last synchronization, then the conflict resolution depends upon your synchronization preference settings.
Use Options > Advanced > Full Synchronization only if something is not working right. If your synchronization fails or you stop it before completing, then you need to run a full synchronization. Full Synchronization replaces all enterprise data in Outlook with data from the enterprise database.
Contacts in Outlook or Pocket PC
Scenario:1. As a Sales User, sales representative Jerry Weinberg logs into Oracle Sales to
prepare his list of contacts for his trip next week.
2. Jerry navigates to Preferences > Outlook Synchronization > Contacts and reviews his current list of contacts to synchronize. He removes the contacts he doesn't need for the trip. Then he searches and adds the contacts he will be visiting as well as those he may speak to by phone during the week. Only address information that is selected as the Identifying address will synchronize.
Calendar Synchronization 14-7
3. While Jerry is meeting with Tom Watkins at Business World, Tom mentions that histitle has changed to VP. Jerry updates his Pocket PC with the new job title.
4. Jerry synchronizes and checks his log. There is an error for his change to Tom Watkins contact information because today someone else changed the fax number for the same contact. His change is replaced with the one on the server. (His preference is set to Server Wins - Replace Client Data.) Jerry changes the title and synchronizes again.
5. Tom introduces Jerry to a new contact at Business World, Jack Black. Jack gives himhis business card and Jerry adds the contact information into his Pocket PC and assigns him the synchronization category (for example, Oracle Contacts).
Note: This is the only category that should be assigned to the contact. If additional categories are assigned, then the contact will not synchronize.
6. Jerry synchronizes. During synchronization, new contacts are sent to Oracle Trading Community Architecture and checked for duplicates using Data Quality Management. Jerry checks his log. Jack Black's organization already exists and DQM found no potential duplicates for Jack Black, therefore there is no error in the log and Jack Black is added as a contact in the enterprise.
7. That evening Jerry opens contact information for Jane Bond in his Pocket PC and in the Notes he selects the link to view contact detail information in Oracle Sales. His browser window opens, and after logging in, he views the associated opportunities and notes on line while making his call.
8. Jerry determines he doesn't need to call Jane again for six months. He deletes the contact from his Pocket PC. He synchronizes and the contact is removed from his list of contacts to synchronize.
RestrictionsIf you change the customer name in your client, then the change will not be applied to the enterprise application data. The next time the record is synchronized, the customer name in the enterprise data will overwrite the value in Outlook.
The resolution of conflicts depends upon your setting in Outlook Synchronization: Preferences.
Related TopicsOracle Trading Community Architecture User Guide
14-8 Oracle Common Application Calendar User Guide
Appointments in Outlook or Pocket PCWhen you create, update, or delete appointment in Outlook or Pocket PC and then synchronize, your changes are reflected in your Oracle Calendar. Also, Oracle Calendar appointments or invitations appear in your Outlook or Pocket PC.
Notes• Category: Oracle appointments created in Outlook or Pocket PC must be assigned
the synchronization category (Oracle Appointments) to make appointment details available in the Oracle Sales Calendar.
• Invitation: The word indicates an invitation to an appointment created by someone else. To accept the appointment, remove the word Invite and synchronize.
• Personal Appointments: Non-Oracle appointments created in Outlook or Pocket PC appear in the Oracle Calendar as read-only appointments with the notation "This is a Non-Oracle Appointment" followed by the appointment name.
• Recurring Personal Appointments: Recurring non-Oracle appointments created in Outlook or Pocket PC create recurring appointments for a maximum of five years inthe Oracle Calendar after synchronization.
• Time Zone: Appointments and repeating appointments created in Outlook or Pocket PC synchronize time zone information with the server. The time zone is converted to saved in the server time zone. When synchronized, the appointment inOutlook and Pocket PC is converted to the individual user's time zones.
Scenario:1. Customer Tom Watkins from Business World calls to request a demonstration. He
talks to sales agent Jerry Weinberg. Using Oracle Sales, Jerry creates an appointment for Thursday at 2:00, adds attendees, and associates the related opportunity. He also assigns the synchronization category (for example, Oracle Appointments).
Note: This is the only category that should be assigned to the appointment for the appointment details to display in the Oracle Sales Calendar. If a different category is used, then the appointmentdisplays as a Time Booking in the Oracle Sales Calendar after synchronization.
2. Jerry then synchronizes his Pocket PC. In the calendar, he sees the appointment he created in Oracle Sales and another appointment with the word Invite in the subject line. The appointment was set up by product specialist John Smith for Thursday at 1:00. In the appointment notes, he sees that the appointment is for discussing the

Calendar Synchronization 14-9
upcoming demo. He sees the list of attendees as well as information about the opportunity and Business World.
3. In his Pocket PC, Jerry removes the word Invite from the subject line to accept John'sappointment.
4. Jerry then realizes that he has a dentist appointment Thursday at 2:00. In his Pocket PC, he creates a personal appointment from 2:00 to 4:00 on Thursday. He then updates his original demonstration appointment with Tom Watkins to occur on Friday at 10:00.
5. Jerry then synchronizes his Pocket PC. After synchronization, Jerry's Oracle Sales calendar shows that he accepted John's appointment, moved the original demonstration appointment, and has a "Non-Oracle Appointment Dentist."
6. Friday morning, Jerry synchronizes his Pocket PC to make sure his calendar is up todate with the latest information in Oracle Sales. He wants additional information concerning the 10:00 meeting. In the appointment notes, he sees several links to Oracle Sales.
7. Jerry taps each link on his Pocket PC causing it to open the web browser. After logging into Oracle Sales, Jerry accesses real-time detailed information about Tom Watkins, Business World, and the opportunity.
8. The meeting goes well, and Jerry wants to close out the appointment. In his Pocket PC, he taps the Appointment Wrap-Up link in the notes section of the appointment.This opens Oracle Sales in the web browser to a page that allows Jerry to add notes, set up a follow-up task, set up a follow-up appointment, and update the opportunity.
9. Jerry then synchronizes his Pocket PC. The follow-up appointment and task now appear on his Pocket PC.
RestrictionsRepeating appointments with more than 1 year between appointments do not synchronize from the server.
Appointments can repeat up to 99 weeks on the client.
Outlook does not support more than one repeating appointment in a month.
The resolution of conflicts depends upon your setting in Outlook Synchronization: Preferences.

14-10 Oracle Common Application Calendar User Guide
Tasks in Outlook or Pocket PC
Scenario:1. Jerry Weinberg's manager assigns a task to both Jerry and to John Smith to write a
report about their visit to Business World. The task is created using Oracle Sales and is associated to the contact at Business World and assigned to John and Jerry.
2. Jerry and John both synchronize their Pocket PCs in the morning and see their task. Both update the status of the task and add to the description using their remote devices. John synchronizes at 1:00. When Jerry synchronizes at 2:00 his task on his device is updated with John's information and his own updates are placed in the Oracle Conflicts category. He updates the task with his information and synchronizes again.
3. During a meeting with Tom at Business World, Jerry agrees to have technical specialist Harvey Mathers call Tom. He enters this as a task in his Pocket PC, assigns the synchronization category (for example, Oracle Tasks), and synchronizes.
Note: This is the only category that should be assigned to the task. If additional categories are assigned, then the task will not synchronize.
4. Back in the office, Jerry goes to the task summary in Oracle Sales using his laptop and associates the task to Tom at Business World and assigns the task to Harvey Mathers. (Associations and assignments cannot be done on the wireless device.)
5. On the road, Jerry changes the category for a task on his Pocket PC so it is no longerthe default category for synchronized tasks (for example, "Oracle Tasks"). He synchronizes, and the task is deleted from Oracle Sales.
RestrictionsRecurring tasks are not supported for synchronizing and will generate an error.
The resolution of conflicts depends upon your setting in Outlook Synchronization: Preferences.
E-Mail Interactions with Desktop OutlookSales representatives working in a collaborative environment need to be aware of various sales activities. Many interactions with contacts occur using e-mail. You can include e-mails in your synchronization of Desktop Outlook which results in the e-mailsbeing recorded in interaction history and becoming available for viewing in Oracle
Calendar Synchronization 14-11
Sales.
• E-mails sent to contacts using Desktop Outlook become available to Oracle Sales users in interaction history, including the contents of the e-mails.
• E-mails received from contacts via Desktop Outlook also become viewable interactions in Oracle Sales.
• When synchronizing, new contacts are created in the enterprise data and any e-mails with the new contacts become interactions for the new contacts.
• If there are duplicate contacts and e-mail addresses in the database, then the interactions are associated with all duplicate contacts.
• E-mails for an existing contact with an unrecognized e-mail address are not placed in interaction history. An error message appears in the synchronization log.
To record an e-mail communication with a contact as an interaction• Click the Flag for Interaction icon. It changes to a Flagged for Interaction icon,
which when clicked, deselects the e-mail so that it will not be synchronized as an interaction.
• While reading an e-mail in Desktop Outlook, click the Flag for Interaction icon in the Add-Ins tab. The icon changes to a Flagged for Interaction icon, which when clicked, deselects the e-mail so that it will not be synchronized as an interaction.
• In the Desktop Outlook e-mail list, such as your Inbox, highlight one or more e-mails and click the Flag for Interaction icon in the Add-Ins tab.
• If you move an e-mail from one IMAP folder to another, then the first e-mail is marked for deletion and the e-mail in the new folder is a copy. The copy does not include the flag for interaction. The first e-mail will synchronize until it is purged. The e-mail copy must be flagged before it will synchronize as an interaction.
Note: If you are using Microsoft Outlook 2007 version then the Flag for Interaction can be found under the Add-Ins menu item.s
To enable e-mail interactions• There is an option in your Outlook preferences for Oracle Sales Synchronization
that enables e-mail interactions being recorded in Interaction History.
• If you are using OL2000, then the interaction flag does not update automatically unless you make the following change to the parameter that controls the cache usedby Outlook.
1. Quit Outlook.
14-12 Oracle Common Application Calendar User Guide
2. Start the Registry Editor (regedt32.exe).
3. Go to the following key in the registry:
HKEY_LOCAL_MACHINE\software\microsoft\office\9.0\outlook
4. In the Edit menu, click Add Value and add the following:
Value Name: DontCacheInspectors
Data Type: REG_DWORD
Value: 0x1
5. Click OK and quit the Registry Editor.
6. Start Outlook.

Resource Schedules in OA 15-1
15Resource Schedules in OA
This chapter covers the following topics:
• Overview of Schedules in OA
• Sample Case Description
• Creating Schedules Business Flow
• Creating Flex Time Schedules Business Flow
• Schedule Patterns
• Creating a Duration Based Schedule Pattern
• Creating a Calendar Based Schedule Pattern
• Creating a Day Based Schedule Pattern
• Creating Shifts for Day Based Schedule Patterns
• Previewing Schedules or Schedule Patterns
• Defining a Schedule
Overview of Schedules in OAOA schedules is only available at this time if you are using Oracle HRMS.
One of the core attributes of a resource is its availability. If any of the eBusiness Suite modules does anything that affects a resource's availability, then the rest of the eBusiness Suite should be aware of it. The schedule repository provides a central place to define a resource's schedule.
Sample Case DescriptionThe following case study is presented in order to help visualize setting up and using theschedule repository.
Bugs Inc. is a small pest control company. Within the company there are two
15-2 Oracle Common Application Calendar User Guide
departments:
• The call center department, that takes customer calls and creates appointments. Thecall center is staffed around the clock Monday through Friday, utilizing three shifts.
• The service department. These are the people who visit the customers and take care of their pests. The service department's regular work hours are Monday to Friday, 9:00 to 17:00. The company has a deal with the local authorities to respond to serious cases like poisonous snakes, alligators, and bears. This is a 24x7x365 deal forwhich the service department operates an emergency pager schedule.
The company is closed on:
• New Year's Day Wednesday, January 1
• Memorial Day Monday, May 26
• Independence Day Friday, July 4
• Labor Day Monday, September 1
• Thanksgiving, Thursday & Friday, November 27 & 28
• Christmas, Thursday, December 25
Questions to be answered:
• A customer calls in on January 2nd at 05:00 with a termite problem:
• Who will be around to take the call?
• What is the soonest that the call center can create an appointment?
• The fire department calls in an emergency on January 1st. Who in the service department will be on pager duty?
Creating Schedules Business Flow1. Create shifts and schedule patterns, page 15-3. You can create patterns based on
duration, page 15-5, a calendar week, page 15-6, or number of days, page 15-6.
2. Preview the schedule pattern, page 15-8 and make changes as needed.
3. Define schedules, page 15-8 and assign exceptions and resources to the schedules.
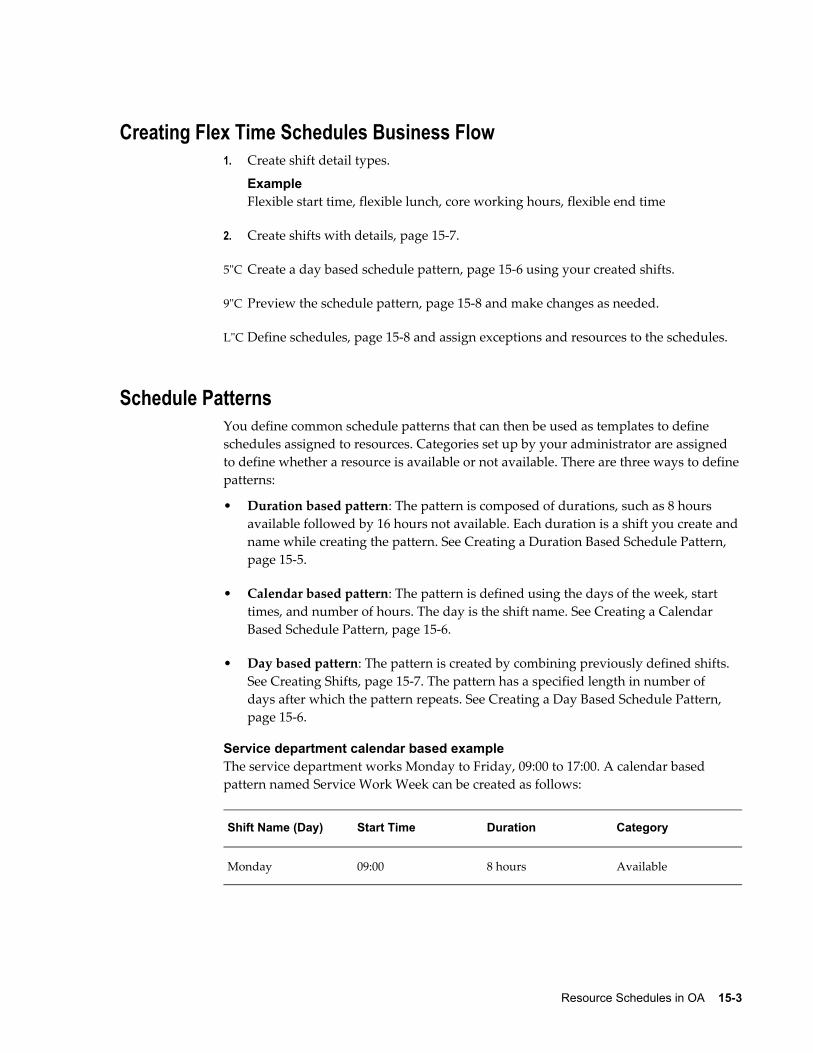
Resource Schedules in OA 15-3
Creating Flex Time Schedules Business Flow1. Create shift detail types.
ExampleFlexible start time, flexible lunch, core working hours, flexible end time
2. Create shifts with details, page 15-7.
3. Create a day based schedule pattern, page 15-6 using your created shifts.
4. Preview the schedule pattern, page 15-8 and make changes as needed.
5. Define schedules, page 15-8 and assign exceptions and resources to the schedules.
Schedule PatternsYou define common schedule patterns that can then be used as templates to define schedules assigned to resources. Categories set up by your administrator are assigned to define whether a resource is available or not available. There are three ways to definepatterns:
• Duration based pattern: The pattern is composed of durations, such as 8 hours available followed by 16 hours not available. Each duration is a shift you create and name while creating the pattern. See Creating a Duration Based Schedule Pattern, page 15-5.
• Calendar based pattern: The pattern is defined using the days of the week, start times, and number of hours. The day is the shift name. See Creating a Calendar Based Schedule Pattern, page 15-6.
• Day based pattern: The pattern is created by combining previously defined shifts. See Creating Shifts, page 15-7. The pattern has a specified length in number of days after which the pattern repeats. See Creating a Day Based Schedule Pattern, page 15-6.
Service department calendar based exampleThe service department works Monday to Friday, 09:00 to 17:00. A calendar based pattern named Service Work Week can be created as follows:
Shift Name (Day) Start Time Duration Category
Monday 09:00 8 hours Available

15-4 Oracle Common Application Calendar User Guide
Shift Name (Day) Start Time Duration Category
Tuesday 09:00 8 hours Available
Wednesday 09:00 8 hours Available
Thursday 09:00 8 hours Available
Friday 09:00 8 hours Available
Emergency pager duration based exampleThe company has a deal with the local authorities to respond to serious cases like poisonous snakes, alligators, and bears. This is a 24x7x365 deal for which the service department operates an emergency pager schedule.
The service department has 4 emergency response teams that are on call once every fourweeks. Since it is 24 hours a day service there is no need to define a workday. Instead we create a pattern with the shift name Emergency Week with a duration of 7 days and a category of Available. And a second pattern called Emergency Unavailable with a duration of 7 days and the category Unavailable.
A pattern can include other patterns within its sequence. We now create a duration-based pattern called Emergency Monthly. It consists of the following:
Sequence Shift Name Duration Category
1 Emergency Week 7 days Available
2 Emergency Unavailable
7 days Unavailable
3 Emergency Unavailable
7 days Unavailable
4 Emergency Unavailable
7 days Unavailable
When a schedule based on this pattern is later assigned to resources, different resources are scheduled to start the pattern at different points in the pattern: week 1, week 2, and so on.
Call center day based exampleThe call center is staffed around the clock Monday through Friday. To achieve this they operate 3 shifts. These shifts are defined using Create Shift.
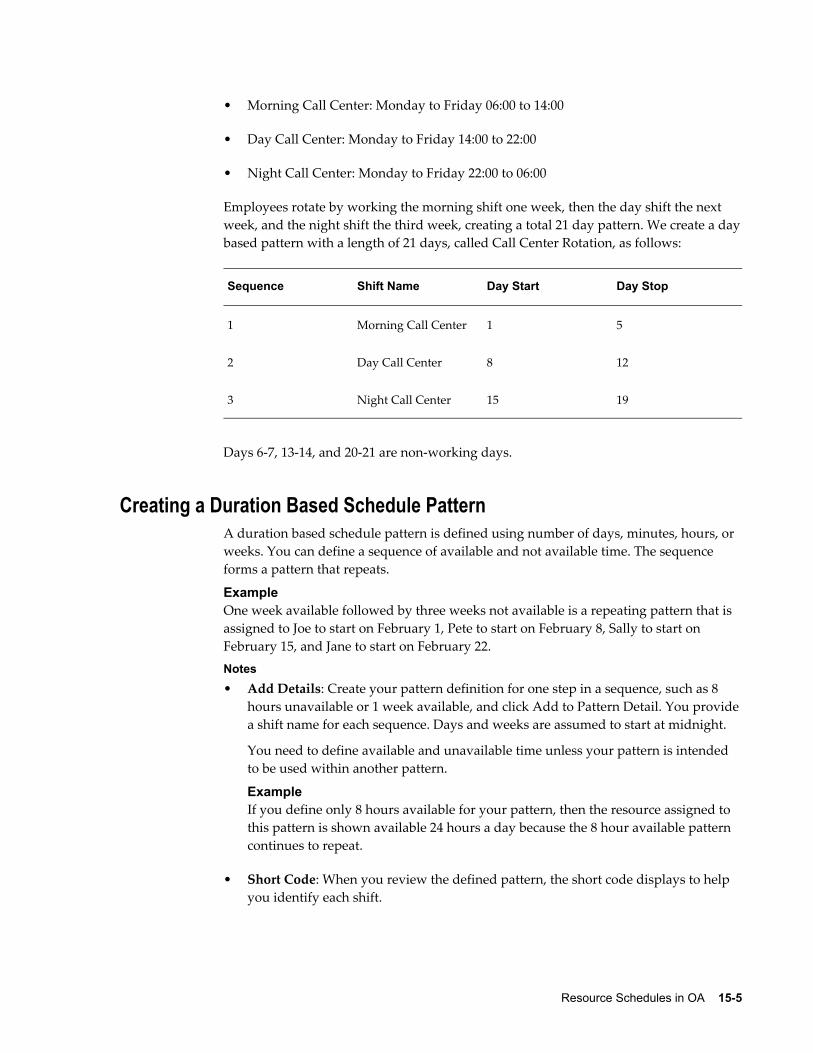
Resource Schedules in OA 15-5
• Morning Call Center: Monday to Friday 06:00 to 14:00
• Day Call Center: Monday to Friday 14:00 to 22:00
• Night Call Center: Monday to Friday 22:00 to 06:00
Employees rotate by working the morning shift one week, then the day shift the next week, and the night shift the third week, creating a total 21 day pattern. We create a daybased pattern with a length of 21 days, called Call Center Rotation, as follows:
Sequence Shift Name Day Start Day Stop
1 Morning Call Center 1 5
2 Day Call Center 8 12
3 Night Call Center 15 19
Days 6-7, 13-14, and 20-21 are non-working days.
Creating a Duration Based Schedule PatternA duration based schedule pattern is defined using number of days, minutes, hours, or weeks. You can define a sequence of available and not available time. The sequence forms a pattern that repeats.
ExampleOne week available followed by three weeks not available is a repeating pattern that is assigned to Joe to start on February 1, Pete to start on February 8, Sally to start on February 15, and Jane to start on February 22.
Notes• Add Details: Create your pattern definition for one step in a sequence, such as 8
hours unavailable or 1 week available, and click Add to Pattern Detail. You providea shift name for each sequence. Days and weeks are assumed to start at midnight.
You need to define available and unavailable time unless your pattern is intended to be used within another pattern.
ExampleIf you define only 8 hours available for your pattern, then the resource assigned to this pattern is shown available 24 hours a day because the 8 hour available pattern continues to repeat.
• Short Code: When you review the defined pattern, the short code displays to help you identify each shift.

15-6 Oracle Common Application Calendar User Guide
• Pattern Details: You can change the sequence in your pattern or remove any of the sequences already created. You can also search for other existing duration based patterns and include them in your sequences.
Creating a Calendar Based Schedule PatternA calendar based pattern is defined using the days of the week, start times, and numberof hours. The day of the week is the shift name.
ExampleA regular work week pattern consists of a sequence, Monday through Friday, each day starting at 9:00 am with a duration of 8 hours. You only need to define the available hours. The system will allocate the remaining hours in the day, and the remaining days in the week, as unavailable.
Notes• Short Code: When you review the defined pattern, the short code displays to help
you identify each shift.
• Pattern Details: You can change the sequence in your pattern or remove any of the sequences already created. You can also search for other existing calendar based patterns and include them in your sequences.
Creating a Day Based Schedule PatternA day based schedule pattern defines a repeating pattern built around a specified number of days. You define shifts separately using Create Shift, page 15-7, and assemble them in sequence.
ExampleFor example, employees rotate on a 21 day rotation starting with a morning shift for oneweek, then the day shift for one week, then the night shift for one week.
Notes• Add Details: Search for a shift and specify what day the shift starts and stops. Days
and hours in the pattern that are not included in a shift are assumed to be unavailable time. You can also search for an existing day based pattern to include it in the sequence.
ExampleIn the 21 day example, you would specify:
1. Morning Shift days 1 through 5
2. Day Shift days 8 through 12
3. Night Shift days 15 through 19
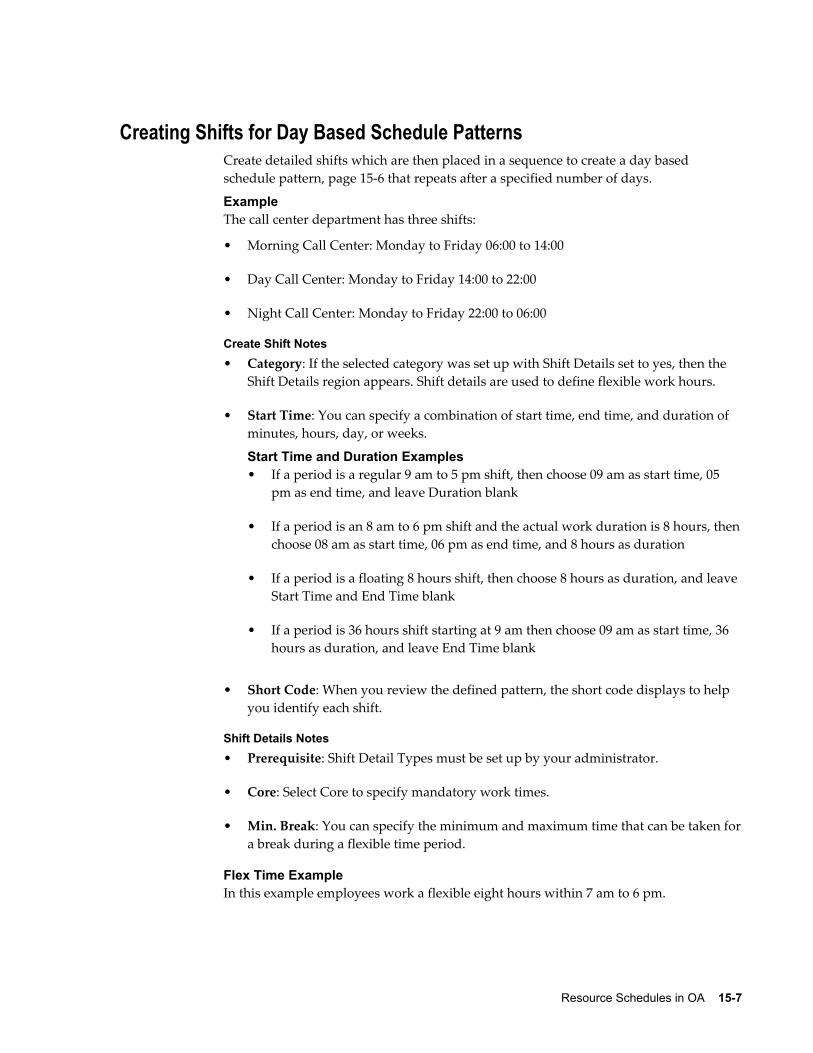
Resource Schedules in OA 15-7
Creating Shifts for Day Based Schedule PatternsCreate detailed shifts which are then placed in a sequence to create a day based schedule pattern, page 15-6 that repeats after a specified number of days.
ExampleThe call center department has three shifts:
• Morning Call Center: Monday to Friday 06:00 to 14:00
• Day Call Center: Monday to Friday 14:00 to 22:00
• Night Call Center: Monday to Friday 22:00 to 06:00
Create Shift Notes• Category: If the selected category was set up with Shift Details set to yes, then the
Shift Details region appears. Shift details are used to define flexible work hours.
• Start Time: You can specify a combination of start time, end time, and duration of minutes, hours, day, or weeks.
Start Time and Duration Examples• If a period is a regular 9 am to 5 pm shift, then choose 09 am as start time, 05
pm as end time, and leave Duration blank
• If a period is an 8 am to 6 pm shift and the actual work duration is 8 hours, thenchoose 08 am as start time, 06 pm as end time, and 8 hours as duration
• If a period is a floating 8 hours shift, then choose 8 hours as duration, and leave Start Time and End Time blank
• If a period is 36 hours shift starting at 9 am then choose 09 am as start time, 36 hours as duration, and leave End Time blank
• Short Code: When you review the defined pattern, the short code displays to help you identify each shift.
Shift Details Notes• Prerequisite: Shift Detail Types must be set up by your administrator.
• Core: Select Core to specify mandatory work times.
• Min. Break: You can specify the minimum and maximum time that can be taken fora break during a flexible time period.
Flex Time ExampleIn this example employees work a flexible eight hours within 7 am to 6 pm.

15-8 Oracle Common Application Calendar User Guide
Flex Time Shift Details for 7 to 6 Shift
Start End Core Min Break Max Break Type
7 am 9 am No Flexible Start
9 am 11 am Yes Core Work
11 am 1:30 pm No 30 60 Flexible Lunch
1:30 pm 3:30 pm Yes Core Work
3:30 pm 6 pm Flexible End
Previewing Schedules or Schedule PatternsWhen you create or modify a schedule pattern or a schedule you can review it in three possible formats:
• Weekly format: This format displays seven days at a time in columns, with rows for times of the day. You specify the time increment. Color coding of each cell shows available and not available times.
• List format: This format lists each shift, giving start and end dates and times, category (such as available) and duration. There is no color coding.
• Continuous format: This format displays a column for each day of the week and a row for each week. Color coding displays a day as available if any hours during that day are designated as available in the pattern. The date (day of the month) is shown in each cell.
Notes• Time increment: Specify the time increment for each row in the weekly format.
• Preview For: You can specify a date range for your preview, or select Relative Date and provide the start date and the number of minutes, hours, days, or weeks to display.
Defining a ScheduleA schedule details the availability and unavailability of assigned resources for a specified period of time. You create a schedule using the following steps:

Resource Schedules in OA 15-9
1. Choose a schedule pattern , page 15-3and assign effective dates.
2. Add exceptions to the schedule.
An exception is an override of the existing schedule pattern. A holiday is an exception changing a normal work day to a not available day. An exception can alsochange a normal non-work day, such as Saturday, to an available day.
Company holidays can be set up as global exceptions that can be incorporated into any schedule. Exceptions that apply only to a particular schedule can be created during the schedule creation process.
3. Preview the schedule, page 15-8.
4. Add resources
Define Schedule Notes• Pattern: The pattern selected determines the schedule details for the resources
assigned to the schedule.
• Effective Dates: When you save the schedule, the application generates and saves the schedule details based on a repeat of the selected pattern throughout the time period designated by your effective dates.
Create Exceptions Notes• Name: You can create an exception that applies just to this schedule.
ExampleYou have a rush order and you need a modified normal work week schedule. You add Saturday to the schedule as an exception that shows Available.
• Whole Day: If you select Whole Day, then the exception applies to 24 hours for the selected dates. If you deselect Whole Day, then you enter start and end dates and times.
• Exception Type: Global exception types are defined by your administrator, such as company holidays. You can find values for Calendar Event or Calendar Event Type only if you are using the Oracle HR holiday model.
• Existing Exception Name: You can select existing global exceptions that are valid for the date range of your schedule. Global exceptions such as company holidays donot apply to your schedule unless you add each one to the exception table.
Add Resources Notes• Resource Type: Examples of resource types are employee or conference room.
• Name: Choose from the list of active resources with the same type as the type you selected.

15-10 Oracle Common Application Calendar User Guide
• Effective Dates: When you add the resource to the table, the effective dates default to the schedule's effective dates.
• Start Details Icon: By default the resource starts at the beginning of the pattern on the resource's effective start date. Click this icon to view a hierarchy of the pattern and select the point in the pattern where the resource begins.
ExampleAn employee is starting the emergency pager pattern, which starts with one week on call followed by 3 weeks unavailable. You can select to start the employee at week 3.
• Publish Schedule: Select to indicate that this is the primary schedule published throughout the eBusiness Suite. A resource can be assigned to multiple schedules for the same period of time. For example, a work shift schedule and a pager schedule for an employee. The published schedule is the primary schedule to use todetermine availability of a resource.

Oracle Assignment Manager 16-1
16Oracle Assignment Manager
This chapter covers the following topics:
• Overview of Oracle Assignment Manager
• Assignment Manager Terms and Definitions
• Oracle Assignment Manager Integrations
• Ownership and Resources
• Viewing resources in the Gantt Chart or Table Layout
• Assigning a Process
• Selecting Assignment Criteria
• Accessing the Oracle Assignment Manager Interface
• Viewing and Assigning Resources in the Gantt Chart
• Viewing Resource Web Availability in the Gantt Chart
• Viewing Support Site Name Information
• Viewing a Resource's Product Skills Rating
Overview of Oracle Assignment ManagerAssignment Manager is a tool that is integrated with other applications for selecting or designating qualified resources for a document or a task. It supports all resource categories defined in the Resource Manager module and cannot be used as a stand alone application. You can use Assignment Manager to assign resources or ownership to a task or a document.
Note: Documents can be leads, opportunities, service requests, defects, or escalations. Once a document is created, it can require multiple tasksto fulfill the requirements.

16-2 Oracle Common Application Calendar User Guide
What is an Assignment?An assignment is a task or responsibility that can be delegated to an individual based on skill or availability.
ExampleA support manager is required to fix all company hardware problems. The support manger assigns all of the desktop computer problems to a desktop technician and requires that the repairs be completed by the end of the week. In this case, the support manager is the owner of the assignment and if the desktop technician accepts the assignment, then that person becomes the assignee. The assignment criteria is based on the desktop technician's level of expertise and availability.
Designate ResourcesWhen logging a service request, you can use Assignment Manager to determine the following types of available resources:
• Resources that are responsible for the company's geographical location
• Resources that are available for a specific time frame
• Resources with the lowest labor rate
• Resources preferred by the company
Assign OwnershipAssignment Manager can also assign ownership to a task or a document by performing the following:
• Assign responsibility for documents and tasks
• Assess the availability of qualified resources needed to be an owner for a task or document
The assignment process uses criteria based on preferred resources, availability, and territories. An optional module, Oracle Scheduler, provides additional features to optimize scheduling resources.
Assignment Manager Terms and DefinitionsThe following table describes the Assignment Manager terms and definitions.
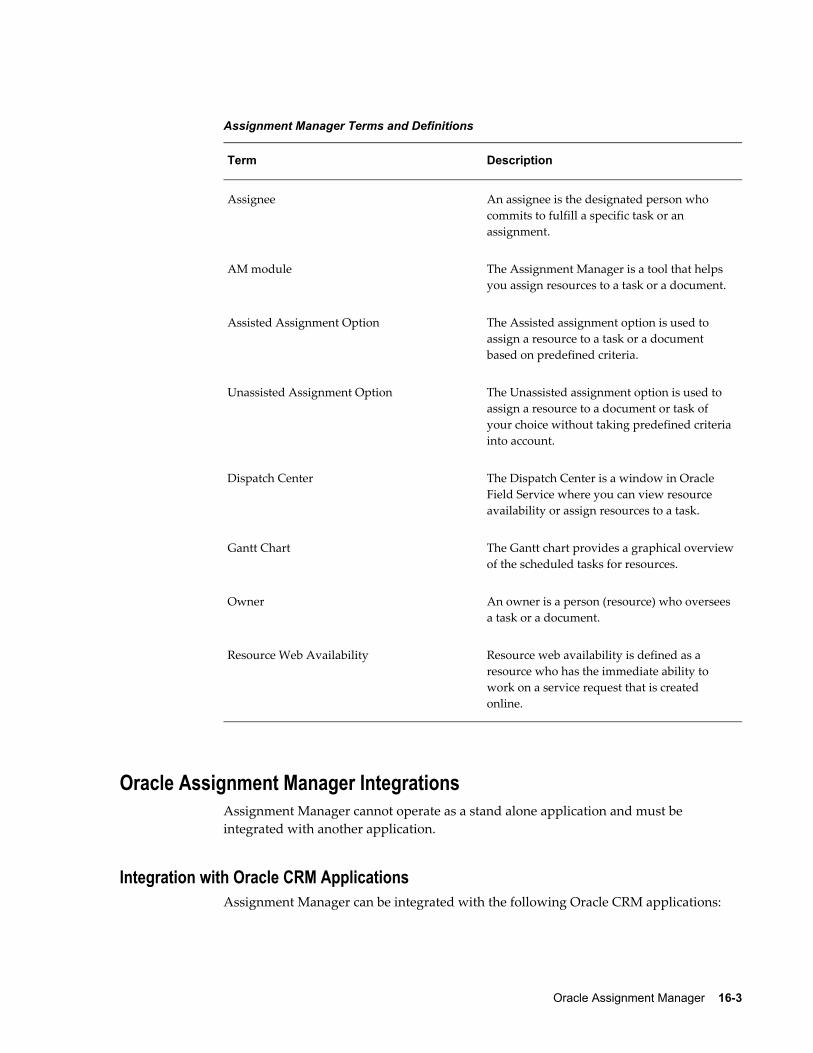
Oracle Assignment Manager 16-3
Assignment Manager Terms and Definitions
Term Description
Assignee An assignee is the designated person who commits to fulfill a specific task or an assignment.
AM module The Assignment Manager is a tool that helps you assign resources to a task or a document.
Assisted Assignment Option The Assisted assignment option is used to assign a resource to a task or a document based on predefined criteria.
Unassisted Assignment Option The Unassisted assignment option is used to assign a resource to a document or task of your choice without taking predefined criteriainto account.
Dispatch Center The Dispatch Center is a window in Oracle Field Service where you can view resource availability or assign resources to a task.
Gantt Chart The Gantt chart provides a graphical overviewof the scheduled tasks for resources.
Owner An owner is a person (resource) who oversees a task or a document.
Resource Web Availability Resource web availability is defined as a resource who has the immediate ability to work on a service request that is created online.
Oracle Assignment Manager IntegrationsAssignment Manager cannot operate as a stand alone application and must be integrated with another application.
Integration with Oracle CRM ApplicationsAssignment Manager can be integrated with the following Oracle CRM applications:

16-4 Oracle Common Application Calendar User Guide
• Contracts provides preferred engineers.
• Installed Base determines preferred engineers.
• TeleSales uses Assignment Manager to assign appropriate resources to a lead.
• Teleservice (formerly known as Customer Support) uses Assignment Manager to help assign an owner to a service request.
• Field Service uses Assignment Manager in the Dispatch Center (previously the Control Tower) to assign an owner to a field service request.
• Depot Repair uses Assignment Manager for Repair Tasks.
• Territory Manager provides qualified resources identified in a territory.
• Escalation Manager uses Assignment Manager to assign an owner to an escalation document.
• Forms-based Calendar offers resource work shift information.
• Task Manager (Forms-based) determines task duration. Tasks also uses Assignment Manager to help assign resources (an owner and an assignee) to a task.
Oracle Quality, Sales, and iSupport applications can either manually select resources or use backend processes to call Assignment Manager for resource selection.
Ownership and ResourcesAssignment Manager can assign ownership and resources to a specific task or document based on selection criteria including customer preferred resources, territories,and resource availability. The following section discusses the concept of ownership and resource assignment options.
Assigning OwnershipYou must assign an owner when you create a document or task to ensure that some type of action is taken.
• A document owner can be a service manager, expediter, marketing person, service support, or a salesperson.
• A task owner can be a planner, dispatcher, or service representative. An owner is defined as a resource within Assignment Manager.
In order for a task or service request to be fulfilled, that task or service request must have a person (owner) responsible for subsequent actions. The actions are performed
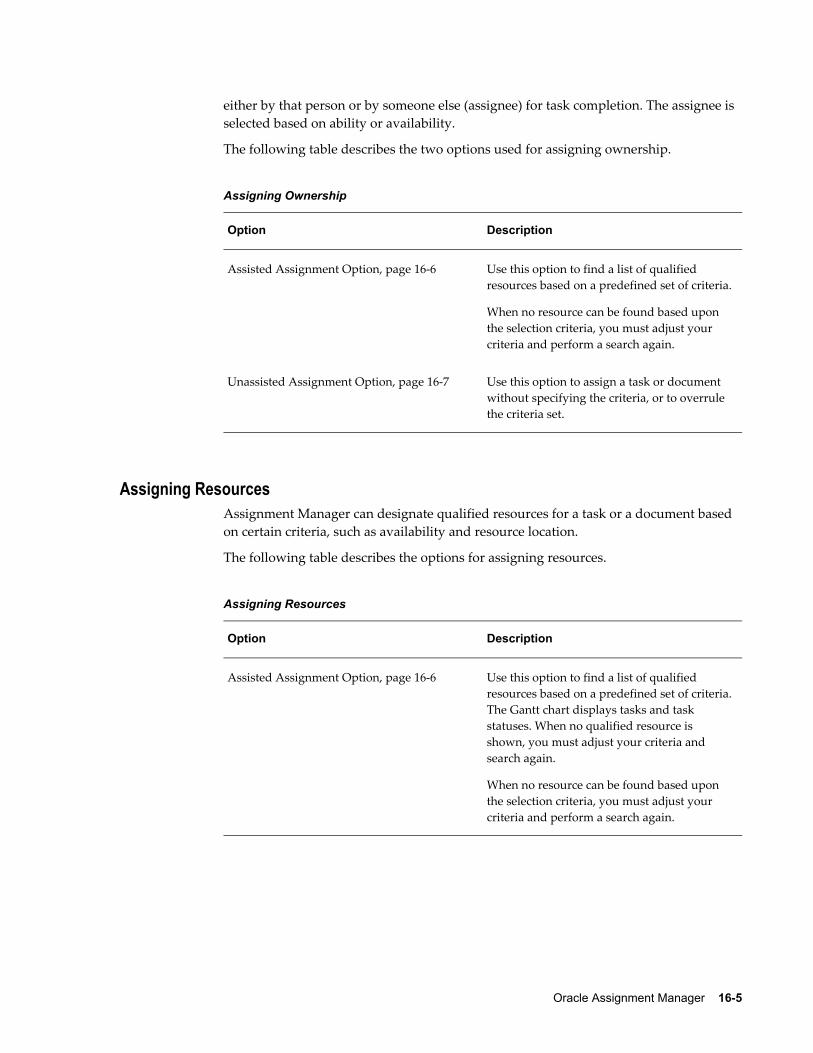
Oracle Assignment Manager 16-5
either by that person or by someone else (assignee) for task completion. The assignee is selected based on ability or availability.
The following table describes the two options used for assigning ownership.
Assigning Ownership
Option Description
Assisted Assignment Option, page 16-6 Use this option to find a list of qualified resources based on a predefined set of criteria.
When no resource can be found based upon the selection criteria, you must adjust your criteria and perform a search again.
Unassisted Assignment Option, page 16-7 Use this option to assign a task or document without specifying the criteria, or to overrule the criteria set.
Assigning ResourcesAssignment Manager can designate qualified resources for a task or a document based on certain criteria, such as availability and resource location.
The following table describes the options for assigning resources.
Assigning Resources
Option Description
Assisted Assignment Option, page 16-6 Use this option to find a list of qualified resources based on a predefined set of criteria.The Gantt chart displays tasks and task statuses. When no qualified resource is shown, you must adjust your criteria and search again.
When no resource can be found based upon the selection criteria, you must adjust your criteria and perform a search again.

16-6 Oracle Common Application Calendar User Guide
Option Description
Unassisted Assignment Option, page 16-7 Use this option to assign a document or task without considering search criteria.
For example, to assign a group to a task, eitherspecify the exact group name or partial name, if known, or search for all group resources and then select them based on resource availability for the task.
Assisted Assignment OptionThe Assisted Assignment Option finds a list of active resources in Assignment Managerbased on a predefined set of criteria instead of selecting resources based on the user's choices. When Assignment Manager is invoked, the Assisted option is the default assigning mode.
Note: In the Unassisted and Assisted assignment options, Assignment Manager does not return any end dated resources. All resources populated in the Gantt chart are active resources.
For task assignments, save your task first before launching Assignment Manager. Otherwise, the task start and end date information will not populate automatically in the document details region.
Use this option if you want Assignment Manager to assist you in selecting qualified resources to be the owner of a document or to fulfill a task based on certain criteria. Thisselection criteria can help you assign qualified resources to a task or a document.
Example A company that is having computer problems requests help from its support vendor. A representative for the support vendor who must send resources to the company can usethe Assisted option in Assignment Manager to help select qualified resources based on the following criteria:
• Preferred Resources retrieves a customer's preferred resources (engineers) defined in Oracle Contracts or Installed Base.
• Matching Attributes, such as Customer Name that are used for territory selection. When Assisted option is used for the first time, all enabled matching attributes across operating units are automatically selected. After the search is performed, all resources in the winning territories with the matching attribute "Customer Name" are displayed in the Resource region.
• Resource Availability searches for all available resources based on a task or a
Oracle Assignment Manager 16-7
document duration.
After performing a search, the customer support representative can view shift schedulesand assigned tasks in the Gantt chart.
Unassisted Assignment OptionThe Unassisted Assignment option assigns a document without taking search criteria into account. If you want to assign a group resource to a task, then either specify the group name (if you know it) or search for all group resources, and then make your choice based on resource availability for the task.
Note: When using the Unassisted and Assisted assignment options, Assignment Manager does not return any end dated resources. All resources populated in the Gantt chart are active resources.
ExampleAfter receiving a hardware repair request from a customer, a service company's supportrepresentative logs a service request and then creates a task for that request. As part of this process, the support representative enters the customer's request location and also enters the current date as the planned start date and adds five business days to establishthe end date. Before assigning the appropriate resource to the service request, the support representative uses Assignment Manager to view that person's availability. Using the Unassisted Assignment option, the support representative enters the following information to limit resource selection:
Resource Partial Name enables the support representative to enter a partial name for the resource.
Resource Type limits resource selection to a specific resource type. For example, selecting group resource in the Resource Type field retrieves all of the group resources information.
When the Unassisted Assignment option is selected, predefined selection criteria is not available. After searching for resources, the support representative can view shift schedules and assigned tasks in the Gantt chart.
Viewing resources in the Gantt Chart or Table LayoutAssignment Manager displays the details of qualified and preferred resources in two formats, the Gantt chart and a table layout. The Gantt chart provides a comprehensive view of resources including identifying information, schedules, and attributes in graphical format. The table layout provides a simplified version of this information that is better suited for accessibility requirements. When Assignment Manager displays resource information, you can view that information in the Gantt chart by clicking Viewin Gantt, or in the table layout by clicking View in Table. Assignment Manager uses the Gantt chart as the default method for displaying resource details.
16-8 Oracle Common Application Calendar User Guide
Time ZonesIf time zone conversion is disabled, then date time fields display with the time stored in the database.
If time zone conversion is enabled, then all times in the Gantt chart are converted to anddisplayed in the viewer's (Agent) time zone if available, and if not available, in the server (Corporate) time zone. The Table view provides the ability to select the time zoneto view. The selection list includes the agent and corporate time zones, time zone for a task, and any time zones passed from calling applications. The default time zone is that passed by the application, or if none, then the agent time zone is the default.
The Gantt ChartThe Gantt chart provides a quick graphical overview of the scheduled tasks based on a specific period of time. The right side of the chart displays the calendar schedule and booking related details of the resource and the left side displays its attributes
Gantt Chart Resource AttributesThe Gantt chart displays the following resource attributes:
• Resource Name
• Resource Type
• Web Availability - Yes/No
• Skill Rating
• Support Site
• Primary Resource - Yes/No
• Source of Resource
Gantt Chart Calendar DataThe Gantt chart uses different colors to display calendar data for a resource. The following table describes the resource calendar displayed in the Gantt chart:

Oracle Assignment Manager 16-9
Calendar Data in Gantt Chart
Calendar Data Color Description
Shift schedules Yellow background Displays available shifts within a specific date range. Shifts are determined in the Forms-based calendar.
First available time slot Green bar Displays the first available time slot for a work assignment.
Assigned tasks Optional (blue default) Displays work assigned within a shift. The work is color-coded based on setup data. The setup data denotes the color to be used for any specific task based on task attributes.
Escalated tasks Red bar Displays escalated tasks within a shift.
Note: The Thin Client Framework (TCF) server must be set up correctlyand running in order for the Gantt chart to work properly.
You can drag the scroll bar to move across the Gantt if the shift or current time line is not synchronized properly.
Determining the Available Time for a ResourceThe default for the First Available slot for a resource depends on the following:
• The time the shift starts
• The current time
Assignment Manager takes into consideration what the current time is and when the resource's shift actually starts. The end time for the first available slot equals start time plus the duration. If no duration is specified, the default assumed is one hour.
Auto assignment has three typical cases:
• Service request assignment based on time of day

16-10 Oracle Common Application Calendar User Guide
• Service request assignment based on day of the week
• Service request assignment based on holidays
Example 1If the resource's shift runs from 9:00 a.m. to 6:00 p.m., and if the current time is 11:47 a.m., then if no start or end date-time is specified for the search, the Assignment Manager defaults to 11:47 a.m. as the first available slot for a resource.
Example 2If the resource's shift runs from 9:00 a.m to 6:00 p.m., and if the current time is 8:47 a.m, then if no start or end date-time is specified for the search, the Assignment Manager defaults to 9:00 a.m as the first available slot for a resource.
Determining duration and planned date over duration when both are defined in taskWhile assigning available time for a selected resource, Assignment Manager also checksthe planned start and end dates for the required task time frame to locate the work shifts if identified, as well as checks the planned effort and duration effort to determine the required work hours (or days) for a task assignment.
The following table describes the effort information that can be entered while defining atask.
Effort Information
Dates for a Task Description
Planned The effort required to complete a task. For example, a task requires 10 hours work and is assigned to Mary and John. Each needs to contribute five hours to complete this assignment. The planned effort to complete this task is 10 hours.
Duration The actual time for task completion. For example:
If Mary works from 10:00 a.m. to 2:00 p.m., and John continues from 2:00 p.m. to 7:00 p.m., then the duration of this task is nine hours (10:00 a.m. - 7:00p.m.)
If John starts at 10:00 a.m., instead of 2:00 p.m.,and finishes at 3:00 p.m., then the duration is five hours (10:00 a.m. - 3:00 p.m.)

Oracle Assignment Manager 16-11
Dates for a Task Description
Actual The actual effort for a task. For example, the actual effort for Mary to complete her work is four hours (10:00 a.m. - 2:00 p.m.) and for Johnis five hours (10:00 a.m. - 3:00 p.m.)
The following table describes the date information which can be entered while defining a task.
Date Information
Dates for a Task Description
Planned The planning start and end dates are required for a task. For example, a hardware repair taskis specifically required to occur from February12 to February 14, 2002.
Scheduled The scheduled start and end dates are shown here after the resources are assigned through Assignment Manager, such as February 12 at 8:00 a.m. to February 12 at 11:30 a.m., 2002.
Actual The actual start and end dates for the task.
The planned effort and duration effort do not always require the same work hours or days. For example, if a task is assigned to one resource, from start to finish, then the planned and duration efforts should be the same. However, if it is assigned to more than one resources, then the planned effort (10 hours work to complete the task) and duration effort (the actual time for a task completion, such as five hours work) might not be the same.
Assignment Manager uses the following rules to determine the effort required for a taskassignment:
• If the planned effort is provided while creating a task, but there is no duration effort, then display the planned effort in Assignment Manager.
• If both planned effort and duration efforts are provided while creating a task, then display the planned effort in Assignment Manager.
• If the planned effort is not provided, but duration is provided while creating a task, then display the duration effort in Assignment Manager.
16-12 Oracle Common Application Calendar User Guide
In summary, planned effort always takes precedence and the Actual Effort is of no significance while using Assignment Manager for a task assignment.
Table LayoutThe table layout provides a simple tabular view of resource details that can be accessed entirely using the keyboard. It does not display details about the resource shifts and the current bookings of the resource, which can only be viewed from the Gantt layout.
Table Layout Resource AttributesThe table layout displays the following resource attributes:
• Resource Name
• Resource Type
• Source of Resources
• Web Availability - Yes/No
• Skill Name
• Support Site
• Primary Resource - Yes/No
Table Layout Calendar DataThe table layout displays the first available slot for a given work assignment in two columns, Start Time and End Time. The information displayed in each column is formatted in date time format. For example:
• Start Time = 01-JAN-2003 10:00:00
• End Time = 01-JAN-2003 13:00:00.
The first available slot is derived from the shifts assigned to the resource and the existing workload.
FeaturesThe table layout contains the following features:
• Users can navigate to the table layout page by selecting the View in Table tab.
• Users can navigate from one resource record to another by using the Up and Down Arrow keys on the keyboard.

Oracle Assignment Manager 16-13
• Navigating to a record in the tabular format selects the Resource and populates its details in the fields below the tab page. The selected resource may be returned to the calling document using the OK button.
• Clicking Resource Details launches the Resource Manager form in query mode and displays the details for the currently selected resource.
• If the resource is GROUP, the group detail form appears.
• If the resource is TEAM, the team detail form appears.
• For all other resources, the RESOURCE DETAIL form appears.
• Clicking Resource Details while the view is focused in the View in Gantt tab, launches the resource manager UI for the currently selected resource.
• Clicking OK returns a resource to the calling document.
Assigning a ProcessThe process for selecting a qualified resource is based upon selection criteria and customer selections. To make these criteria effective, some requirements need to be met.
Assignment Manager DependenciesThe following table describes Assignment Manager's required dependencies.
Dependencies
Dependency Description
Preferred Resource Information A preferred resource is a single person or a resource group that is defined in Oracle Contracts or is recommended from the Installed Base in Oracle Service.
Territory Definition Territories are defined in Territory Manager. A territory has resources or resource groups assigned to it.
For more information, see the module Oracle Territory Manager.

16-14 Oracle Common Application Calendar User Guide
Dependency Description
Task Duration Information Task duration is essential for checking the availability of the resource and for designatinga resource as unavailable in the resources calendar after a task has been assigned.
Resource's Availability Information Availability of the resource is provided by the Forms-based Calendar component in which availability is defined.
Assignment Manager Selection CriteriaThe following table describes Assignment Manager's selection criteria.
Assigning Resource Availability
Criteria Description
Preferred Resources, page 16-14 The first criterion the Assignment Manager considers in the assignment process.
Territories, page 16-16 Territories are used to retrieve all the qualifiedresources for the assignment from the winningterritories.
Resource Availability, page 16-16 The availability of the resource is considered after a preferred or qualified resource, based upon territories, is selected.
Preferred ResourcesPreferred resources must first be set up in Oracle Service Installed Base and Oracle Contracts. A customer's preferred resources can be employees, groups, or team resources set up in Oracle Contracts or recommended from the Installed Base in Oracle Service. Once the preferred engineers are identified in either application, you can retrieve recommended resources based on specific customer preferences.
Assisted ModeIn Assisted Mode, you have to select either Preferred Resources (Contracts or Install Base) or Matching Attributes or both to search qualified resources. These are primary search criteria. Resource Availability and Filter Excluded Resources are secondary filter
Oracle Assignment Manager 16-15
criteria.
Service Lines and Business ProcessesWhen Assignment Manager displays preferred resources, it either lists them as a group with their associated service line, or it lists them according to the individual business processes with which they are associated. For example, a company has three preferred engineers, John, Mary, and Jacob, that are associated with a service line called Printer Support. When fetching resources for this company's printer problem, Assignment Manager returns John, Mary, and Jacob as the preferred engineers.
When servicing this company's printer problem, however an Assignment Manager user such as a customer service representative may also wish to list its preferred resources according to individual business processes such as Customer Support (Teleservice), Field Service, and Depot Repair. For example, John may be the company's preferred Teleservice engineer, Mary its preferred Field Service engineer, and Jacob its preferred Depot Repair engineer. If the company wishes to speak to an engineer on the telephone regarding its printer problem, then John is the preferred engineer. If it wishes to have anengineer dispatched to repair the printer on site, then Mary is the preferred engineer, and if it wishes to have the printer sent away for repairs, then Jacob is the preferred engineer.
The returned resources for service lines and business processes are the same, but they are categorized differently.
Examples:1. A company lists two preferred engineers in the service contract with its support
vendor. A service representative can use the Assisted assignment option, by selecting the Contracts check box in Assignment Manager, to display both engineers in the Resource region.
2. A company specifies an Installed Base preferred engineer. The support vendor's service representative sees the specified engineer's name in the Resource region if the Installed Base check box is checked.
For a service request assignment, when Contracts, Installed Base, and Territories check boxes are all selected in the Assignment Manager window, the Assignment Manager engine checks Contracts preferred resources first. If a Contracts preferred resource is found, Assignment Manager displays this resource in the Gantt chart and stop the process. If no resource is found, then Installed Base preferred resources will then be checked. If a preferred resource is found, then return the resource and stop the process. If not, then Assignment Manager checks Territories for qualified resources.
Default resource selection order is:
1. Contracts
2. Installed Base

16-16 Oracle Common Application Calendar User Guide
3. Territories
TerritoriesTerritories defined in Territory Manager are used to provide resources for a task or document. This assistance is done through the matching attributes and qualified resources identified in a territory. Matching attributes aid (filter) in a territory win over competitions between territories. The qualified resources in the winning territories can then be assigned to a task or document.
When setting up resources in a territory, if resources are end dated in Resource Manager, these end dated resources are not displayed in Assignment Manager when using Assisted and Unassisted assignment options.
ExampleTwo engineers are the qualified resources in the West Coast Territory. When a support manager tries to assign an open service request to the proper resources located in the West Coast, the support manager uses territories to assist Assignment Manager in the selection. If the West Coast Territory happens to be the winning territory, then the two engineers are listed in the Resource region in the Assignment Manager window. The support manager can assign either one to the service request based on their availability and customer needs.
Resource AvailabilityAssignment Manager uses the Forms-based Calender to check the availability of a resource. When a task is assigned to a resource, that resource becomes unavailable for the period of time designated by the task.
After a preferred or qualified resource is identified, the next important criteria to consider is the availability of that qualified resource. Resource availability information is provided by the Forms-based Calendar module in which the shift schedule is defined.Resource availability for a specific time frame is determined by task planned start and end date. After a task or document has been assigned to a resource, this designated resource becomes unavailable and then will be reflected in the Assignment Manager window.
Note: The resource availability discussed here has a specific time frame required by a task or document (task planned start and end date). However, the resource Web availability always indicates current time.
The Resource Availability check box in the Assignment Manager window operates as follows:
• When the box is cleared, the application displays all the winning resources from Installed Base, Contracts, and Territory Management without checking for resource availability through calendars, shifts, and exceptions.

Oracle Assignment Manager 16-17
• When the box is selected, the application displays only resources with active shifts:
• The current day / date / time is within a shift pattern tied to the resource.
• The current day / date / time is not defined as an exception tied to the resource.
Example
A support representative receives a call regarding a task that can be completed in up to four hours and that must be completed in the following week. The support representative can select territory as the criteria and can also check resource availability in the Assignment Manager window for the following week's time frame. If there are two technicians capable of completing the work but only one is available in the requiredtime frame, then the available technician is selected.
The support representative can update the available technician's start and end date if necessary and can specify the four hour work completion time.
Selecting Assignment CriteriaThe following table lists the assignment criteria that can be selected in the Assignment Manager Assisted window:
Assignment Criteria
Preferred Resources
Territories Resource Availability
Selection Results in:
Yes No No A search for the preferred resource, availability is not taken into account.
No Yes No A search for a qualified resource in the selected territories, availabilityis not taken into account.
No No No A search for an available preferred resource or territories is not taken into account.

16-18 Oracle Common Application Calendar User Guide
Preferred Resources
Territories Resource Availability
Selection Results in:
Yes Yes No A search for the preferred resource, availability is not taken into account. When no preferred resource is available, a search for a qualified resource in the selected territoriesis done, availability isnot taken into account.
No No Yes The search looks for all resources in the system taking availability into account.
No Yes Yes A search for a qualified resource in the territories selectedand availability is taken into account.
Yes Yes Yes A search for the preferred resource or territory, availability is taken into account. If no preferred resource is available, a search for a qualified resource in the selected territoriesis done, availability istaken into account.
Accessing the Oracle Assignment Manager InterfaceThe Assignment Manager module is embedded within Oracle Common Application Calendar or other CRM products. It is not used as a standalone module and is only accessible through other CRM applications, such as Customer Support and Field Service, and Foundation modules, such as Task and Escalation Managers.

Oracle Assignment Manager 16-19
For example, you can access Assignment Manager through a standalone task in the Forms-based Task Manager or through a task associated with a service request in Teleservice and Field Service applications.
If accessing from Task Manager, first click More to bring up the Task Details window. Then click the Assignment Manager icon in the Resources tab.
Note: Save your task first before launching the Assignment Manager. Otherwise, the task's start and end date information will not automatically populate in the Document Details region.
Viewing and Assigning Resources in the Gantt ChartThe Gantt chart is a graphical tool embedded in Assignment Manager that provides scheduled tasks based on a specific period of time.
Steps:1. Select either Assisted, or Unassisted in the Selection Criteria, enter any required
search text section, and click Search.
The Gantt chart populates with a list of resources in the Resource Name field.
2. Select the resource using one of the following options:
1. Double-click the resource to view the resource name, resource type, start and end time information. You can manually change the start and end time, and the date, before clicking OK to save the assignment.
2. Right-click the resource to view resource details. This opens a Resource Manager form in query mode that displays the following:
• Group Details page if the selected resource is a group
• Team Details page if the selected resource is a team
• Resource Details page for all other resources.
3. When you are finished, either close the form or exit the application.
Viewing Resource Web Availability in the Gantt ChartThe Resource Web Availability feature is used for web-generated service requests, including those created in the iSupport application. It automatically assigns resources, such as support agents who are currently web available, to work on requests immediately with customers. As a result, an agent can easily determine resources that

16-20 Oracle Common Application Calendar User Guide
are currently web available and ready to accept a service request immediately. If a resource is not web available, then a symbol does not appear before the resource name.
Resource web availability is another resource selection criteria added to Assignment Manager to help an agent to select the appropriate resources for service request assignments. After assigning resources through Assignment Manager, the selected resources must still check their work assignment information through the Universal Work Queue (UWQ).
Note: The resource web availability works with the Territory Assisted Assignment option only. The available time indicates the current time, not that for a specific time frame.
Login: Log in to Oracle Forms.
Responsibilities used in Oracle Service and Support applications
Prerequisites❒ Territory Manager must be installed and set up correctly.
❒ Resources who are web available or unavailable should be identified by selecting Tools > Web Availability from the application menu in the Create Service Requests window or the Search Service Requests window.
Steps:1. Perform the following to access Assignment Manger:
1. Access the Forms-based service request window and query the Web generated service request.
2. Manually reassign the resources by first removing the original owner and then click Assign Request.
2. In the Selection Criteria section, choose the Territory Assisted assignment option and click Search.
The Gantt chart populates with a list of resources and their schedule.
3. Double-click the resource who you are going to assign to a task created within a service request, or to a service request.
The selected resource name, resource type, start and end time information populates automatically.
4. You can manually change the start and end time, and the date, before clicking OK to save the assignment.

Oracle Assignment Manager 16-21
5. When you are finished, either close the form or exit the application.
RestrictionsThe resource web availability feature is used in the Oracle Support applications for a service request assignment with Territory Assisted assignment option only.
The manual assignment process through the Forms-based service request window to launch the Assignment Manager is used only when a resource reassignment is required.
Viewing Support Site Name InformationWhen a resource is selected in Assignment Manager, the support site name that the selected resource belongs to appears automatically in the Support Site Name field at thebottom of the window. This information is useful to determine how close a resource is geographically to the client.
Support site information is defined in the Service Tab of the Forms-based Resource Manager and in the Employees Detail window in HTML Resource Manager.
Viewing a Resource's Product Skills RatingWhen assigning a resource to a service request, it is useful to know if the resource is a specialist in a particular area. In addition to viewing a resource's availability or geographical location, a manager can also determine the most appropriate resource for a given task.
An employee or manager can use the HTML-based Resource Manager module to view the skill set and the level of expertise that he possesses. This functionality is primarily used by Teleservice for a service request assignment with the Territory Assisted Assignment option only.
Employees can rate their skill levels against specific products which are defined in Oracle Inventory. When a service request is created, Assignment Manager searches for the qualified territories against a product name specified in that service request. Resources who are assigned to qualified territories (so-called winning territories) display in the Gantt chart with product skill rating information. The best resource can then be selected for the service request assignment.

Business Rule Monitor 17-1
17Business Rule Monitor
This chapter covers the following topics:
• What is a Business Rule?
• What is the Business Rule Monitor?
• Workflow and Workflow Attributes
• Resource Types
• General Tips for Defining Rules
What is a Business Rule?A business rule is a user-defined condition. When the condition is not met, the rule triggers a workflow process. The process is enforced by the business rule owner.
A business rule can be as simple as "A service request cannot be left open for more than two days." This rule can be defined according to an organization's needs or an agreement between its customers.
ExampleVision Corporation, a service organization, is eager to provide efficient customer service, so the Service Department Director for Vision Corporation defines a business rule based on the company's goal. This rule is that if a task with a high priority is open for four hours, then the task owner should be notified to proactively manage potential issues. Effective immediately, the director is the owner of this business rule as he is responsible for any future updates and necessary confirmation.
Additional examples include:
• A service request is assigned within half an hour. Otherwise, the owner of this request receives a warning notification.
• A task with a high priority is closed within two days. Otherwise, a manager investigates why it cannot be done within that time frame.

17-2 Oracle Common Application Calendar User Guide
What is the Business Rule Monitor?The Business Rule Monitor (BRM) provides a User Interface (UI) and functionality that an organization uses to proactively manage escalations. It consists of two components:
• Business Rule Workbench: used to define a business rule.
• Business Rule Monitor: the engine that monitors documents over time against the user-defined business rules.
The BRM module integrates with Oracle Workflow to provide possible action taken if the condition defined in the rules is not met.
Note: The functionality of BRM is not limited to only detect potential problems. It can also be used as a reminder of positive reinforcement, such as to remind employees of a company's annual events or an employee's birthday.
Workflow and Workflow Attributes When defining your rules, you must also specify the workflow information for actions that can occur when the rule is violated. There are four seeded workflow processes:
• Notification Only
An Oracle Workflow notification is sent. The person who receives this notification selects from the Value field in the Workflow Attributes window. Click the "..." button to display this attributes window.
• Create a Task Only
An automated escalation task is created. This is generated through the seeded Automated Escalation Template Group for Task Manager (Service Request). The owner and assignee of this task select from the Value field in the Workflow Attributes window.
• Notification and Create Task
In addition to the sent workflow notifications, an automated escalation task is also created. The owner and assignee of this task are specified in the Value field.
• Escalated Object
An escalated document is created. The owner of this escalated document can be specified in the Value field. The selection in the Value field can be a document owner, the document owner's Human Resource manager, an escalation territory primary contact, or the business rule owner. If this value is not specified, it defaults

Business Rule Monitor 17-3
to the business owner.
Note: If the unassigned option is selected in the Automated Escalation Notification Task Assignee Role field in the Workflow Attributes window, then the task that is created has no assignee, but it has an owner specified and there is no unassigned option in the List of Values for the task owner role field.
Workflow AttributesIn addition to the Workflows which provide standard escalation activities, each of the seeded Workflow processes has its own Workflow attributes, which can be accessed in the Business Rule Workbench window. The value chosen for each attribute is saved as part of the Business Rule and allows you to control the behavior of the escalation activity for that rule.
Workflow attributes in the Business Rule Monitor seeded workflows are specific to the workflow process. The following table lists each seeded workflow process, the attributes it has, the meaning of that attribute, and possible values. Attributes are the same regardless of whether or not the Workflow is for a task, or a service request.
Workflow Attributes Defined
Workflow Name Attribute Meaning Possible Values
Send Notification Automated EscalationNotification Role
Send the notification to the person who fulfills the role indicated by the valueselected.
• Business Owner
• Document Owner
• Document Owner's HR Manager
• Escalation Territory Primary Contact
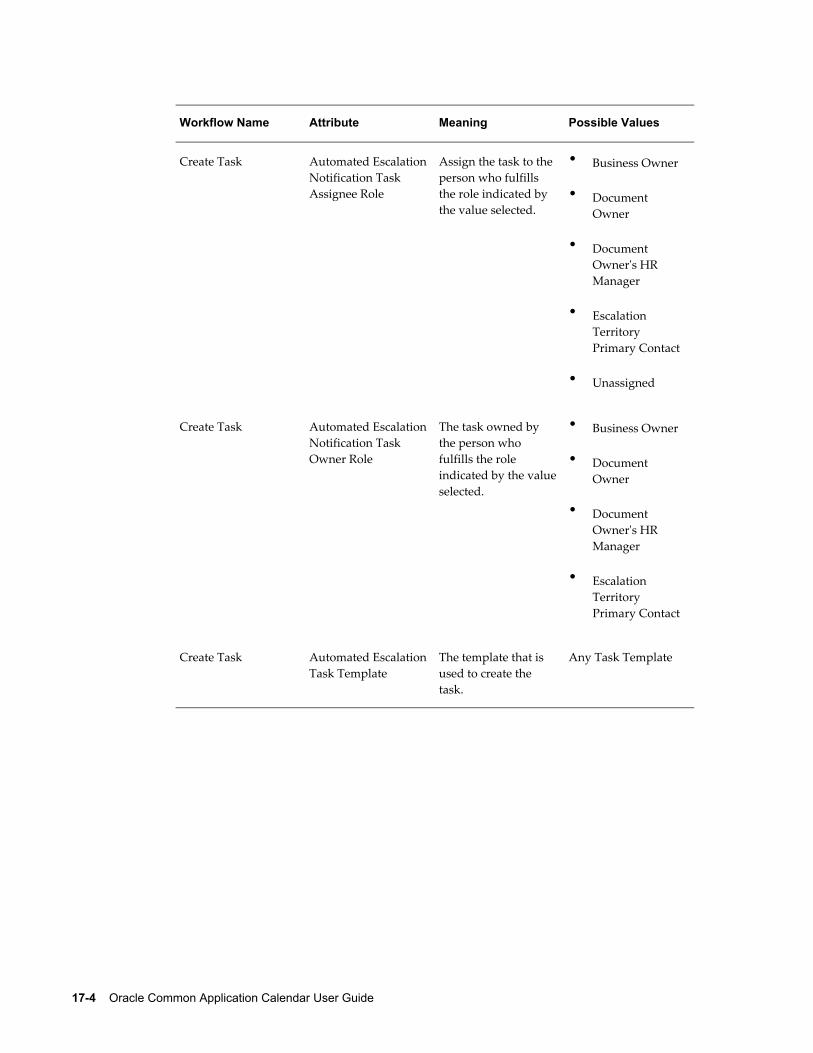
17-4 Oracle Common Application Calendar User Guide
Workflow Name Attribute Meaning Possible Values
Create Task Automated EscalationNotification Task Assignee Role
Assign the task to the person who fulfills the role indicated by the value selected.
• Business Owner
• Document Owner
• Document Owner's HR Manager
• Escalation Territory Primary Contact
• Unassigned
Create Task Automated EscalationNotification Task Owner Role
The task owned by the person who fulfills the role indicated by the valueselected.
• Business Owner
• Document Owner
• Document Owner's HR Manager
• Escalation Territory Primary Contact
Create Task Automated EscalationTask Template
The template that is used to create the task.
Any Task Template

Business Rule Monitor 17-5
Workflow Name Attribute Meaning Possible Values
Send Notification andCreate Task
Automated EscalationNotification Role
Send the notification to the person who fulfills the role indicated by the valueselected.
• Business Owner
• Document Owner
• Document Owner's HR Manager
• Escalation Territory Primary Contact
Send Notification andCreate Task
Automated EscalationNotification Task Assignee Role
Assign the task to the person who fulfills the role indicated by the value selected.
• Business Owner
• Document Owner
• Document Owner's HR Manager
• Escalation Territory Primary Contact
• Unassigned
Send Notification andCreate Task
Automated EscalationNotification Task Owner Role
The task owned by the person who fulfills the role indicated by the valueselected.
• Business Owner
• Document Owner
• Document Owner's HR Manager
• Escalation Territory Primary Contact

17-6 Oracle Common Application Calendar User Guide
Workflow Name Attribute Meaning Possible Values
Send Notification andCreate Task
Automated EscalationTask Template
The template that is used to create the task.
Any Task Template
Escalate Object Automated EscalationDocument Owner Role
The escalation document owned by the person who fulfills the role indicated by the valueselected.
• Business Owner
• Document Owner
• Document Owner's HR Manager
• Escalation Territory Primary Contact
Resource TypesA document owner can be of any resource type as well as an employee resource. Some examples of other types of document owners are: parties or partners and supplier contacts. Since the automated escalation can happen to the document owner of any resource type, the person who will receive the notifications is determined as follows:
Document OwnerThe Document Owner is selected as the value in the workflow attributes.
• If the document owner type is an employee resource, then the document owner willreceive notifications.
• If the document owner resource is of any other type, then the primary contact with the employee resource type in the escalation territory is used. If there is no resource that satisfies this criteria, then the primary contact with the employee resource type in the catch-all territory is used. Again, if there is no resource that satisfies this criteria, then the Business Rule Owner is used because the business rule owner is guaranteed to be an employee resource.
Document Owner's HR ManagerThe Document Owner's HR Manager is selected as the value.
Business Rule Monitor 17-7
• If the document owner is an employee resource, then the notification is sent to the HR manager of that resource. If there is no resource that satisfies this criteria, then the primary contact with the employee resource type in the escalation territory is used. Otherwise, the primary contact with the employee resource type in the catch-all territory is used, and then the Business Rule Owner is selected.
• If the document owner resource is a group resource, then the notification is sent to the first employee resource within the resource group who has a manager. If there is no resource that satisfies this criteria, then the primary contact with the employeeresource in the escalation territory is used. Otherwise, the notification is sent to the primary contact with the employee resource in the catch-all territory, and then the Business Rule Owner.
• If the document owner resource is of any other type other than employee or group resources, then the same rule is used: the primary contact with the employee resource type in the escalation territory, then the primary contact with the employee resource type in the catch-all territory, and then the Business Rule Owner.
Escalation Territory Primary ContactThe Escalation Territory Primary Contact is selected as the value.
• The notification is sent to the primary contact with employee resource in the escalation territory.
• If there is no resource that satisfies this criteria, then the notification is sent to the primary contact with employee resource in the catch-all territory. Otherwise, the Business Rule Owner receives the notification.
General Tips for Defining RulesThe following suggestions are helpful when defining rules in the BRM:
• The condition should not reflect an absolute state. Otherwise, the monitor will keep detecting the same objects and acting upon them; you may have repeated notifications sent.
• Use reasonable check intervals. The check interval also determines the notification interval. So, if you check a rule every two minutes, notifications are sent every two minutes.
• Take loop time into consideration. If the main scan cycle is set to run every ten minutes, then there is no point in setting the check frequency to two minutes.
• Even in a simple rule, SQL syntax applies. You can use SQL functions, but you
17-8 Oracle Common Application Calendar User Guide
also have to use quotes around your character values. Also use IS NULL and IS NOT NULL instead of =NULL and <>NULL.
• Verify that the view does what you intended for it to do. The simplest way to do this is to cut and paste the view definition from the Complex tab into a SQL+ session.
• Check the performance of the view. Do a Select from your view. If it takes a long time to return the values, then ask a SQL expert for assistance.
Glossary-1
Glossary
approval
An optional feature in User Management, whereby approvers can reject or approve newuser accounts. In the User tab, the System Administrator Console provides windows so you can view, create, modify, delete, enable, and disable approvals, including those for specific organizations.
approval flow
The approval flow is a predefined flow of steps required to approve user registration or service enrollment requests in User Management.
assignee
An assignee is the designated person who is assigned to fulfill a specific task or assignment. If an assigned task cannot be completed by the assignee, then the owner of this task can reassign a new resource (assignee) to this task.
The assignee, can also be the owner of the task.
Assignment Manager
The Assignment Manager is a tool that helps you assign resources to a task or a document.
assisted assignment option
The assisted assignment option is used to assign a resource to a task or a document based on predefined criteria in the Assignment Manager.
attachment
An attachment is any document associated with one or more application modules. You can view attachments as you review and maintain a module. For example: operating instructions, purchase order, notes, item drawings, presentations, or an employee photocan be an attachment.
audit
An audit displays a history of changes that have been made to information in Oracle

Glossary-2
e-Business Suite.
automatic assignment
Automatic assignment refers to the matching of territories to resources resulting in a "Winning Territory" in Territory Management.
bins
Bins are small reports, which display high-level summary information in a tabular format on your homepage.
business rule
A business rule is a user-defined condition. When a rule is violated, a relevant workflow process can be triggered.
Business Rule Monitor (BRM)
The Business Rule Monitor is the engine that monitors documents over time against user-defined business rules.
business rule owner
A business rule owner is an employee resource who enforces the business rules.
business rule workbench
The Business Rule workbench is used to define a business rule in BRM.
business user
A business user is a typical Business to Business (B2B) user, associated with an organization. Generally, the Primary user(s) of the same organization approves these users.
Calendar (HTML)
The HTML Calendar is a tool to effectively manage your daily activities, appointments, and tasks.
Calendar (Forms)
The Forms-based Calendar is a scheduling tool used to define and view available and non-available time for a resource or group of resources.
calendar datebook
The calendar datebook displays time availability for yourself, a resource, or a group of resources in the Forms-based Calendar.
Glossary-3
concurrent manager
The concurrent manager is a process manager that coordinates the processes generated by users' requests to run various data-intensive programs. An Oracle applications product group can have several concurrent managers.
contact
A contact contains information about a person and how to locate them such as their phone number and e-mail address.
control tower
The Control Tower is a window in Field Service where you can view resource availability or assign resources to a task.
customer
Customers are typically primary users, Business to Business (B2B) users, business to Customer (B2C), and (individual) users.
customer relationship escalation
A customer relationship escalation is an escalation document that escalates multiple support requests, defects, or tasks.
customization
Customizations are enhancements to an Oracle Applications system made to fit the needs of a specific user community.
defect
A defect is a document that tracks product problems and resolutions in Escalation Management. A defect can be escalated without an associated service request. It is escalated through Oracle Quality.
dependency
A dependency is where one task must complete before another. This functionality is only available in the Forms-based Task Manager.
dynamic group
A dynamic group is a group which is created based on your criteria by using SQL statements in the Resource Manager.
effective dates
Effective dates are the dates used by Oracle E-Business Suite to specify when somethingis going to begin.

Glossary-4
employee
An employee is a resource type that represents a person who is hired to work for a company. Employee resources can be imported as resources from the Oracle Human Resources Management System (HRMS).
enrollment
Enrollment is a set of add-on services that you can receive during or after registration inUser Management. One enrollment corresponds to zero or one responsibility, zero or one template, zero or one approval and zero or more roles. Enrollments are application specific and can be tied to user types.
escalation
An escalation is a modification of a process, a status, or both, to reflect an increased level of importance and a more immediate degree of response.
escalation management
Escalation Management is the process of managing proactive and reactive escalations. Proactive escalations are managed using the Business Rule Monitor and reactive escalations are managed using Escalation Manager.
Escalation Manager
Escalation Manager is a tool used to reprioritize, reassign, and monitor a situation, such as a service request or task, to a satisfactory completion.
escalation owner
An escalation owner is a person who oversees the escalation task, or document in Escalation Management. Once a task or document is escalated, the responsibility of the original owner of the escalated task is transferred to the escalation owner. For example, a defect is escalated to Rhonda Abbott and Rhonda becomes the escalation owner of thisdefect. John Smith, the original owner of the escalated defect, is no longer responsible for the defect.
escalation plan
An escalation plan is a series of follow up tasks that are attached to the escalation document.
exception
An exception is defined the time that a resource is not available in the Forms-based Calendar. Examples of exceptions include holidays, vacations, sick days, or weekends.
explicit enrollment
Explicit enrollments are enrollments that you manually register for during the

Glossary-5
registration process from the "Register Here" link in User Management.
forms
Forms are a logical collection of fields, regions, and graphical components that appears on a single screen. Oracle applications forms resemble paper forms used to run a business. You enter data by typing information into the form.
forms server
A Forms server is a type of application server that hosts the Forms server engine. It mediates between the desktop client and the database, providing input screens for the Forms-based products on the desktop client and creating or changing database records based on user actions.
framework
A framework is a collection of collaborating classes. The interaction framework dictates the architecture. It defines the overall structure, its partitioning into classes and objects, the key responsibilities, how the classes and objects collaborate, and the thread of control.
full access
Full access provides you with the ability to read and edit, and delete a record. This access type does not include the capability of granting access to others.
functions (privileges)
A function is an action that can be performed on an object or object instance. It can be granted to a user or user group that means gives them permission to perform that function. Therefore, a function can also be referred as a permission or privilege from a user's point of view.
Gantt Chart
The Gantt chart provides a graphical overview of the scheduled tasks for resources.
grant (authorization)
A grant is an authorization for the grantee (users, or user groups) to perform the specified object role on the specified object instance or object instance set.
group calendar
A group calendar is a calendar used only by its subscribers in the HTML Calendar. For example, a group calendar called Key Account can be used by any subscriber after the subscription is approved.
GUI
An interface used with personal computers and workstations that allows the user to

Glossary-6
access fields and regions of the screen with a pointing device, typically a mouse. The acronym is pronounced "goo-ee."
HTML (hypertext markup language)
HTML is a simple language used to format documents, predominantly for viewing witha web browser. Portions of text or images, called hypertext, can be associated with otherdocuments.
HTTP (Hypertext transfer protocol)
The TCP/IP-based network protocol used to transmit requests and documents between an HTTP server and a web browser.
HTTP listener
An HTTP listener is a program on an HTTP server that accepts and processes incoming HTTP requests from web browsers.
implicit enrollment
These are enrollments for which a user is automatically registered for during the registration process using the "Register Here" link In User Management. The user is not asked to register for these enrollments. Instead, they are automatically attached to the user upon registration.
individual user
An individual user is an individual with no relationship to an organization in User Management. Generally, no approval is required for this type of user.
intelligent assignment option
The intelligent assignment option is no longer used.
JAR (java archive) file
JAR files are a collection of Java classes compressed into files for faster download to a desktop client.
java class
Java classes are components of a Java program that define objects and operations performed on objects. A Java class also identifies an operating system file that contains a program or part of a program written in Java.
JInitiator
Oracle JInitiator enables end users to run Oracle Developer Server applications directly within Netscape Navigator or Microsoft Internet Explorer on the Windows 95, 98, or 2000 and Windows NT4.0 platforms. Implemented as a plug-in (Netscape Navigator) orActiveX component (Microsoft Internet Explorer), Oracle JInitiator allows you to specify
Glossary-7
the use of Oracle's Java Virtual Machine (JVM) on web clients instead of having to use the browser's default JVM.
JSP
Java server pages are an extension to the Java servlet technology that was developed by Sun as an alternative to Microsoft's ASPs (Active Server Pages). JSPs have dynamic scripting capability that works in tandem with HTML code, separating the page logic from the static elements — the actual design and display of the page.
list of values (LOV)
A list of value is a predefined list of choices that the user has to chose from.
menus (roles)
A menu is a grouping of functions. It is required to group functions into related sets of menus necessary to perform a particular job role on an object instance. A good example is an "Administrator" menu, which might include many functions required for a user with an administrator role to perform his job. Therefore, menus can also be referred as roles.
merchant administrator (system administrator)
The Merchant or System Administrator is the main administrator of a company who approves requests for primary, business, and individual users in the User Management process. This System Administrator, who has the JTREG_APPROVAL permission, sees all the pending requests to be approved and is able to approve them.
merchants
Merchants refer to implementors of the Oracle E-Business Suite. This term is used to clear up any confusion with the term "customers", which refers to customers of a business using Oracle products as opposed to those implementing the product.
Notes
Notes is a tool that provides additional text locations where you can specify more detail, if needed. A note can be added to a task.
note source
A note source is the originating module of the note. For example, if the notes are entered from a service request application, then the source of the note is Service Request.
note status
Note status determines note accessibility. For example, you can define a private note with status of Personal so that only you can see the note. There are three statuses available for notes that you can set:

Glossary-8
• Private: Only the creator can view it.
• Public: The creator and others can read or write to it.
• Publish: Publishable over the Internet. Everyone can view it. This status is currentlynot used.
note text
A large type note, such as a customer's letter or directions.
note type
Note types provide a further categorization to the notes based on a user's individual needs. Also, a note type can be tied to a source type and such note types are visible onlyto that mapped source. Therefore, you must choose between the entire note types that have been defined for your source and those which do not have any source type attached to them.
Objects
An object is a type of thing on which security can be managed. For example, Tasks and Notes can be examples of an object.
In a technical definition, each object must be registered in the FND_OBJECTS tables. Every object definition will contain related database object (table or view) and primary key information for the object.
Object Instances
An object instance is a subset of an object. This generally corresponds to a row (or related set of rows) in the database. For example, if Notes is considered an object, then the Note with number 1541 is an object instance.
In a technical explanation, object instances are derived from the primary key values. The primary key values should be set for the registered object in the FND_GRANTS table.
Object Instance Sets
An object instance set is a group of multiple object instances. For example, all notes witha number smaller than 5 could be considered as an object instance set.
In a technical definition, object instance set definition is stored in the FND_OBJECT_INSTANCE_SET table. The definition contains a SQL where clause, the predicate, that combined with the object definition will return all the object instances that are part of the object instance set.
OMO
OMO is an acronym for Oracle Marketing Online.
Glossary-9
OSO
OSO is an acronym for Oracle Sales Online.
other/TBH
Other/TBH is the only resource that is created and not imported in the Forms-based version of Resource Manager. Use this resource to create a salesperson that is going to be hired (TBH) but is not yet an employee.
owner
An owner is a resource person who oversees a task or a document. Use the Task Manager: Default Task Owner profile option to set the default to a specific owner. For example, tasks can be owned by a specific employee such as Ms. Marsha Able. This wayshe can oversee the work completed per task.
partner
A partner is one of two or more persons who contribute capital to establish or maintain a commercial venture and who usually share in the risks and profits.
party
A party is a person, group, or organization and is owned by TCA. Party relates to an employee, customer, or organization that can be related to a task.
permissions
A permission is the HTML equivalent to a responsibility.
platform
Within a resource category, there could be numerous platforms in skills management. Aresource can be rated individually for each of those platforms. Platforms can be rated with the following: foundation, intermediate, skilled, advanced, expert, or N/A.
PL/SQL
PL/SQL is a procedural extension of SQL that provides programming constructs such asblocks, conditionals, and functions.
port
In TCP/IP and UDP networks, a port is an endpoint to a logical connection. The port number identifies what type of port it is. For example, port 80 is used for HTTP traffic.
primary user
A primary user is a designated person of an external organization, like a business partner, who is responsible for some administrative functions on behalf of the external organization in User Management. In the case of registration the primary user is

Glossary-10
responsible for managing the registration and maintenance of users, accounts, and enrollments. Primary users of different parties may have access to different responsibilities and they may be granted different access rights.
privileges
Privileges define how a user can operate a system resource on a network or a file server.Privileges also define a right to execute a particular type of SQL statement or to access another user's object. For example, the right to create a table or session.
problem code
Within a category in skills management, there could be numerous problem codes. A resource can be rated individually for each of those problem codes. Problem codes can be rated with the following: foundation, intermediate, skilled, advanced, expert, or N/A.
product
Within a category in skills management, it is possible to have numerous products. A resource can be rated individually for each of those products. A product can be sub-divided into components. Products can be rated with the following: foundation, intermediate, skilled, advanced, expert, or N/A.
profile option
A profile option is a set of changeable attributes that affect the way Oracle applications appear and how they function.You set profile options whenever you want the application to react in different ways for different users, depending on specific user attributes. They can be set at the user, application, site, or responsibility level.
proxy server
A server that sits between a client application, such as a Web browser, and a real server.It intercepts all requests to the real server to see if it can fulfill the requests itself. If not, it forwards the request to the real server.
public calendar
A public calendar can be used by everyone. Examples of public calendars can be corporate holiday calendar and local holiday calendars for branch offices.
read-only
Read-only access provides you with read-only capability. You cannot edit or delete any information.
recurrence
Recurrence is where a task is repeatedly assigned to a user in a pre-specified time increment such as daily, weekly, monthly, or yearly.

Glossary-11
reference document
A reference document is a document that is linked to an escalation document. For example, a service request (number 9229) is escalated to John Smith in an escalation document (number 11749), then this service request (number 9229) is a reference document.
reference
Reference is where one task relates to another document. For example, a task can be related to a service request.
reference type
A reference type specifies whether or not a reference document is escalated or used to provide additional information in Escalation Management.
registration
Registration is the process by which any user gains some access to the application's functionality.
registration self-service administration UI
The registration self-service administration UI is used by System Administrators, and attimes primary users, to maintain external organization or internal group, users, parties, and accounts in User Management.
registration self-service user UI
The registration self-service user UI is used by the primary, individual, or business users to register themselves in User Management.
registration templates
Applications require varying pieces of information to register different types of users in User Management. Registration templates refer to JSP files that are used to capture the registration information that is special to a particular user type or enrollment.
repeating task
A repeating task is repeated in specified time increment such as daily, weekly, monthly,or yearly.
request owner
The request owner is the current approver based on the approver list and current state of workflow defined for a given approval in User Management. The request owner is only able to approve the requests which they currently own. This user should have "JTAPPROVER" permission. The request owner is tied to the JTUM_APPROVAL_OWNER profile option.
Glossary-12
resource
A resource is the basic element of the Resource Manager and is defined as people, places and things.
resource category
There are five types of resources defined in Resource Manager: party, employee, partner, supplier contact, other/to be hired (TBH).
resource component
Within a product in skills management, there are numerous components. A resource can be rated individually for each of those components. Components can be rated with the following: foundation, intermediate, skilled, advanced, expert, or N/A.
Resource Manager
The Resource Manager is a tool used to define, access, and maintain all resources in Oracle E-Business Suite.
resource skill category
A resource skill category is the highest level that a resource can be rated in relation to skills management. If a resource is rated at the category level, and not rated at any one of the product, platform, or product code levels, it does not imply the resource is also rated at those levels. Categories can be rated with the following: foundation, intermediate, skilled, advanced, expert, or N/A.
responsibilities
Responsibilities are groupings of application menus that determine the user interface accessible to a particular user.
role
Roles are groupings of permissions, which are page level and function level granular privileges used to maintain application security.
role attribute
A role attribute is associated with a role. It defines the responsibility for each role in a group or team in the Resource Manager. For example, a Telesales Agent role represents the Member role attribute in a group, and a Sales Manager role represents the Manager role attribute in a group.
role type
A role type is a collection of roles associated with a particular module in Oracle E-Business Suite.
Glossary-13
salesperson
A salesperson is a generic term used for any person involved in the sale or support of products and services.
self-service registration
Rather than asking an Administrator to register users manually, users can register themselves through a self-service UI in User Management. Self-service registration includes the UI and the background processes used to complete the registration process.This involves assigning users the correct data and UI access privileges.
service request
A service request is a document that tracks information about a customer's product and service problems.
servlet
A servlet is a Java program executed on an HTTP server, rather than downloaded to a desktop client.
shift
Shifts define a resource's availability to work in the Forms-based Calendar.
shift pattern
Shift pattern is a set of shifts, such as First Shift Monday through Friday 08:00 a.m - 05:00 p.m. in the Forms-based Calendar.
skills management
Skills management provides the ability to add a new skill rating to a resource in the Resource Manager. The resource can update and maintain their skill rating, attach a numeric value to each skill level, and change the actual name of each skill level.
source
A source is the originator of the note. For example, if the notes are entered from a service request application, then the source of the note is Service Request. Sources are pre-defined.
source object
The source object is the originator of the task, note, or appointment; for example, Sales, Service, or Contract.
Spreadtable
A spreadtable is the user interface component that contains row, columns, and column headers set in a grid that can be embedded into an Oracle form.
Glossary-14
SQL (structured query language)
SQL is an internationally standard language used to access data in a relational database.The acronym is pronounced "sequel."
SQL*Plus
SQL*Plus is an Oracle tool used to submit SQL statements to an Oracle database server for execution. It has its own command language.
SQL script
A SQL script is a file containing SQL statements that you run with a tool such as SQL*Plus to query or update Oracle data.
supplier contact
A supplier contact is the contact information for a person or agency that sells raw material or goods in the Resource Manager. Supplier resources can be imported as resources from the purchasing (PO) application.
system administrator
The System Administrator is the person who manages administrative tasks in Oracle Applications, such as registering new users and defining system printers, using the System Administrator responsibility.
task
A task is a discrete unit of work that is assigned to one or more individuals. Tasks are managed by the Task Manager. Tasks are often scheduled events and have defined expirations.
task assignee
An assignee is the person that is assigned to a task, which can include the owner. An assignee can accept, refuse, or reassign the task.
task category
A task category as a way of organizing tasks. For example, the task can be a phone call and the category could be call back customer.
task creator
The creator is the originator of the task and defaults to the owner. However, the owner can be modified.
task template
A task template is a skeleton or surrogate task.
Glossary-15
task group template
A task group template is a grouping of different task templates defined during setup.
Task Manager
Task Manager is a tool used to manage tasks throughout other applications. Task Manager provides a mechanism for tasks to be created, assigned, managed, sorted, and prioritized to provide timely response to customer issues.
task owner
An owner is the person (resource) that creates and is responsible for the task.
task type
A task type defines the nature of the task such as a callback or a meeting.
TCP/IP (transmission control protocol / internet protocol)
A widely-used industry-standard networking protocol used for communication among computers.
team
A team is a collection of cross-functional resources. It is organized for the purpose of accomplishing a project in the Resource Manager. Team members are chosen for their availability, qualifications, and location. This functionality can be defined in the Forms version of Resource Manager only.
template handler
Template handlers refers to how the data flow built by other applications occur among registration and how they are associated with enrollments and user types in User Management.
Thin Client Framework (TCF)
The Thin Client Framework server is a middle tier process that enables certain Java components of the Oracle Applications user interface to communicate with the middle tier and database tier.
tier
A set of machines that perform similar tasks. Client/server is a two-tier architecture, with machines on the client tier connecting to machines on the server tier. Internet Computing Architecture consists of three tiers. Machines on the desktop client tier communicate with machines on the application tier, which in turn, communicate with each other and with machines on the database tier.

Glossary-16
to do list
A to do list is a personal listing of things to do.
unassisted assignment option
The unassisted assignment option is used to manually assign a resource to a document or task of your choice without taking predefined criteria into account in the AssignmentManager.
universal primary user approver
Create a universal primary user approver if you want to have multiple primary users inUser Management.
user
A user is a single person with an account on the system (represented by a row entry in FND_USER). Users can be referred as Grantee if they are the subjects of a data security grant. These users must be exposed in the WUSER table.
Users can be grouped into groups.
user group
A user group is any grouping of FND_USERS who are exposed through the WROLES view. User groups can be referred as Grantee if they are the subjects of a data security grant. These user groups must be exposed in the WROLES table.
user ID
The User ID is a combination of a username and its password.
User Management
User Management is a tool used to registering a user and thereafter maintaining the user in the system by granting or revoking privileges, accounts, customer profile information, and party relationships based on a set of business requirements set-forth by the organization where the process is deployed.
username
A name that grants access to a secure environment or program, such as an Oracle database or Oracle applications. A username is customarily associated with a collection of privileges and data available to a particular user (responsibilities in Oracle Applications). Every username is associated with a password.
user profile
User profiles, which are associated with responsibilities, are a set of user interfaces that give users access to their personal data and preferences.

Glossary-17
user type
A user type is a category of users that caters to the specific needs of an application's business requirements in User Management. User types allow flexible and extensible ways for defining, categorizing and implementing behavior of users. A user type is associated to only one template, one responsibility, zero or one approval and zero or more roles.
web availability
Web availability is defined as a resource who has the immediate ability to attend to a service request that is assigned online in the Resource Manager.
window to promise assignment option
The Window to Promise assignment option is no longer used.
work
Work is broadly defined as a collection of items presented to an agent through the Oracle E-Business application to be processed. Work items can be either a media item ora task.
workflow
Oracle Workflow automates and continuously improves business processes, routing information of any type according to business rules you can change. Oracle Workflow manages business processes according to rules that you define. The rules, which we calla workflow process definition, include the activities that occur in the process and the relationship between those activities. An activity in a process definition can be an automated function defined by:
• a PL/SQL stored procedure or an external function
• a notification to a user or role that they may request a response
• a business event
• a subflow that itself is made up of many activities.
workflow attributes
Workflow attributes control the behavior of the workflow.
workflow monitor
The workflow monitor is a Java based tool used for administering and viewing workflow process.


Index-1
Index
Aappointments
attendees, 12-8create, 12-6creating, 3-2invite, 12-9invites, 3-4relate to, 12-10repeating, 3-5, 4-8, 12-9synchronization, 14-8time zone, 12-14updating, 3-6view, 12-5viewing, 3-5
assigneedefinition, 2-4
assignmentsaccessing, 16-18criteria, 16-17definitions, 16-2integration, 16-3overview, 16-1process, 16-13resources, 16-4support site, 16-21view, 16-7, 16-19
attachments, 6-13, 12-9
Bbillable, 2-8bins, 12-10
business rule, 17-1, 17-2business rules, 17-7
Ccalendar
accessibility view, 3-8accessing, 11-9, 13-3appointments, 12-5daily view, 3-8definitions, 11-8delegating, 3-11features, 11-6group, 12-12, 12-15
administrators, 12-17subscription, 12-15, 12-16, 12-16, 12-18
integration, 11-7, 11-8, 13-3monthly, 3-9OA, 3-1overview, 11-1, 13-1preferences, 3-11, 3-12, 12-11privileges, 12-12public, 12-12
view, 12-4resource, 12-3, 12-4search, 12-5subscribing, 12-13switching, 12-13synchronization, 14-1time zone, 12-14view, 12-2, 12-2views, 3-7weekly, 3-9

Index-2
contactdefinition, 2-4
contactssynchronization, 14-6
Ddatebook, 13-4Desktop Outlook, 14-3
e-mail interactions, 14-10synchronization, 14-6
Eesalations
accessing, 8-6escalations
create, 8-9definitions, 8-4integration, 8-3overview, 8-1, 8-7owners, 8-8service request, 8-10task, 8-12territories, 8-8types, 8-10workflow, 8-7
FForms
tasks, 2-7
Hholiday, 2-8
Iinteractions
e-mail, 14-10invites, 3-4
responding, 3-6
Mmilestone, 2-9multibook, 2-8
N
notesaccessing, 10-5add, 10-1contextual, 10-2create, 10-4, 10-6data security, 10-10details, 10-3, 10-7features, 9-2history, 10-2integration, 9-3overview, 9-1relate to, 10-6search, 10-5, 10-8, 10-8security rules, 10-11summary, 10-6
OOA Frame
calendar, 3-1tasks, 2-5
Oracle Sales synchronization, 14-1
Pparty
definition, 2-5Pocket PC, 14-2
synchronization, 14-5preferences
calendar, 3-11, 3-12, 12-11synchronization, 14-4task, 6-15user, 6-16
Rrelated items
tasks, 4-8repeating task
definition, 2-5resource
availability, 3-10, 12-3, 12-4definition, 2-5
resourcesassignments, 16-4skills, 16-21types, 17-6
Index-3
view, 16-7, 16-19, 16-19restrict close, 2-9
Sschedules
create, 15-2define, 15-8flex time, 15-3patterns, 15-3
calendar based, 15-6day based, 15-6duration based, 15-5
resource, 15-1shifts, 15-7view, 15-8
securitynotes, 10-10, 10-11
service requestsescalations, 8-10
source objectdefinition, 2-5
synchronizationappointments, 14-8client, 14-2, 14-3contacts, 14-6Desktop Outlook, 14-6overview, 14-1Pocket PC, 14-5preferences, 14-4tasks, 14-10
synchronizionOracle Sales, 14-1
Ttask bin
edit, 6-13tasks
access, 2-4assignee, 4-7assignments, 6-8attachments, 6-13basic, 6-6bin view, 6-13categories, 12-14contacts, 4-7, 5-8, 6-16create, 4-4, 5-3, 6-5, 13-4
creator, 2-4customer information, 6-8data security, 7-1dates, 4-7, 5-9, 6-7definition, 2-1, 2-5definitions, 2-4dependencies, 5-5details, 4-6, 6-4effort, 6-11escalation, 8-12flags, 5-8Forms, 2-7header, 4-5hierarchy, 6-5history, 5-8introduction, 2-1mass create, 6-12notifications, 2-3OA, 2-5owner, 2-5, 4-7preferences, 6-15reassign, 6-14recurring, 5-8reference, 2-5references, 6-8related items, 4-8repeating, 2-5, 6-11resources, 5-4, 6-10roles, 2-2search, 4-1, 5-1, 6-3security, 7-4security rules, 7-2source document, 5-9source object, 2-5summary, 4-4, 6-2synchronization, 14-10template groups, 2-9templates, 2-9, 5-2type, 2-5view, 12-2workflow, 5-9, 6-16
territoriesescalation, 8-8
time zone, 12-14todo, 13-5

Index-4
Wworkflow, 17-2
escalations, 8-7tasks, 5-9, 6-16