Embed Size (px)
Citation preview

The tools of innovation.
112 Inverness Circle East Suite F Englewood, CO 80112
1– 87STEELMAX, FAX 303 – 690 – 9172
www.steelmax.com [email protected]
OPERATOR’S MANUAL
RRaaiill RRuunnnneerr
WELDING CARRIAGE

Contents
1. GENERAL INFORMATION ............................................................................................... 3
1.1. Application ................................................................................................................. 3
1.2. Technical data............................................................................................................ 3
1.3. Design ....................................................................................................................... 5
1.4. Equipment included ................................................................................................... 6
2. SAFETY PRECAUTIONS .................................................................................................. 7
3. STARTUP AND OPERATION ........................................................................................... 9
3.1. Assembling the track .................................................................................................. 9
3.2. Assembling the holder ...............................................................................................11
3.3. Positioning ................................................................................................................12
3.4. Connecting to welding circuits ...................................................................................13
3.5. Operating ..................................................................................................................14
3.6. Changing the unit of measure ...................................................................................16
3.7. Troubleshooting ........................................................................................................17
4. MAINTENANCE ...............................................................................................................18
5. ACCESSORIES ...............................................................................................................19
5.1. 16–22 mm torch clamp ..............................................................................................19
5.2. 16–22 mm torch clip ..................................................................................................19
5.3. 22–35 mm torch clamp ..............................................................................................19
5.4. Short rod ...................................................................................................................20
5.5. Long rod....................................................................................................................20
5.6. Short rod torch holder with clamp ..............................................................................20
5.7. Short rod torch holder with clip ..................................................................................21
5.8. Short rod low torch holder with clip ............................................................................21
5.9. Long rod torch holder with clamp ..............................................................................21
5.10. Long rod torch holder with clip .................................................................................22
5.11. Semi-flexible track ...................................................................................................22
5.12. Rigid track ...............................................................................................................23
5.13. Dual magnetic unit ..................................................................................................24
5.14. Track supports ........................................................................................................25
5.15. Gear rack adjustment tool .......................................................................................26
5.16. Transport attachment ..............................................................................................26
5.17. 76 mm cross slide ...................................................................................................27
5.18. Vacuum track fixing system .....................................................................................28
6. WIRING DIAGRAM ..........................................................................................................29
7. EXPLODED DRAWINGS AND PARTS LIST ....................................................................30
8. DECLARATION OF CONFORMITY .................................................................................35
9. QUALITY CERTIFICATE..................................................................................................36
10. WARRANTY CARD ........................................................................................................37

Rail Runner
Rail Runner Operator’s Manual
3
1. GENERAL INFORMATION
1.1. Application
The Rail Runner welding carriage is a track carriage designed to produce butt and fillet
welds with or without oscillation using MIG/MAG torches with the handle diameter of
16–22 mm (0.63–0.87’’). The carriage can work in the following welding positions:
PA/1F/1G, PB/2F, PC/2G, PD/4F, PE/4G, PF/3G, and PG/3F/3G. It moves on a track
fixed using dual magnetic units to ferromagnetic surfaces that are flat or curved with a
radius of at least 5 m (16 ft).
Accessories allow, for instance, using a torch with the handle diameter larger than
22 mm (0.87’’) and guiding the carriage on a semi-flexible or rigid track. Using a vacuum
track fixing system allows the track to be fixed to surfaces that are non-ferromagnetic.
1.2. Technical data
Voltage 1~ 115–230 V, 50–60 Hz
Power 100 W
Welding position
(according to EN ISO 6947 and AWS/ASME)
horizontal
PA / 1F / 1G
PB / 2F
PC / 2G
PD / 4F
PE / 4G
vertical
PF / 3G
PG / 3F (contact dealer)
PG / 3G
Minimum curvature radius of a semi-flexible track 5 m (16 ft)
Torch type MIG/MAG
Torch diameter 16–22 mm (0.63–0.87’’)
Minimum workpiece thickness 5 mm (0.20’’)
Horizontal pulling force 350 N (77 lbs)
Vertical pulling force 150 N (33 lbs)
Cross slide adjustment range 0–35 mm (0–1.38’’, up-down, left-right)
Horizontal speed 0–120 cm/min (0–47.2 in/min)
Vertical speed 0–110 cm/min (0–43.3 in/min)
Oscillation type linear
Oscillation path trapezoid, triangle, straight line
Oscillator arm stroke 0–100 mm (0–3.9’’)
Oscillation width 0–50 mm (0–1.9’’)
Oscillation speed 0–1500 mm/min (0–59 in/min)
Oscillation delay at center and on ends 0–5 s
Maximum oscillator pulling force 100 N (22 lbs)
Maximum permitted ambient temperature 50°C (122°F)
Maximum permitted ambient humidity 85%
Weight 20 kg (44 lbs)

Rail Runner
Rail Runner Operator’s Manual
4
362 m
m (
14.3
’’)
644 m
m (
25.4
’’)
441 mm (17.4’’)

Rail Runner
Rail Runner Operator’s Manual
5
1.3. Design
The Rail Runner welding carriage consists of a chassis, a drive system, a controller,
an oscillator, a cross slide, two clamping blocks, a long rod, a cable anchor, and a
torch holder. A cam mechanism enables the carriage to be installed on a track, onto
which dual magnetic units may be attached to allow the track to be fixed to the surface.
The drive system incorporates a gear-motor that drives a gear wheel cooperating
with the gear rack of the track. The oscillator consisting of a gear-motor and an arm with
a gear rack performs linear oscillation, and the cross slide allows precise control
of the torch holder position in both the horizontal and vertical axis. Additionally,
connecting the arc ignition cable will enable the carriage to ignite an arc when
selecting a travel direction.
Fig. 1. View of the Rail Runner
Pressing lever
Control panel
Oscillator arm
Cable anchor
Cross slide
Torch holder with clamp
Power switch
Arc ignition socket
Drive clutch knob
Display
Carrying handle
Clamping block
Long rod

Rail Runner
Rail Runner Operator’s Manual
6
Fig. 2. View of the control panel
1.4. Equipment included
The Rail Runner is supplied including the following elements.
Carriage 1 unit
Metal box 1 unit
Cross slide 1 unit
Two clamping blocks with a set of screws 1 unit
Long rod 1 unit
Short rod torch holder with clip 1 unit
Cable anchor 1 unit
3 m (10 ft) power cord 1 unit
6.5 m (21 ft) arc ignition cable 1 unit
3 mm hex wrench 1 unit
4 mm hex wrench 1 unit
Operator’s Manual 1 unit
Oscillation width knob oscillation speed knob
Arc ignition switch
(TEST / O / I)
Travel direction switch
(Forward / O / Backward) Oscillation offset knob (arm stroke)
Travel
speed
knob
Left oscillation position delay knob Right oscillation position delay knob
Center oscillation position delay knob

Rail Runner
Rail Runner Operator’s Manual
7
2. SAFETY PRECAUTIONS
1. Before beginning, read this Operator’s Manual and complete proper occupational
safety and health training.
2. Use the carriage only in applications specified in this Operator’s Manual.
3. The carriage must be complete and all parts must be genuine and fully operational.
4. The specifications of the power source must conform to those specified on the
rating plate.
5. Connect the carriage into a properly grounded power source.
6. Never carry the carriage by the cords or arc ignition cable and never pull them as
this may damage them and result in electric shock.
7. Untrained bystanders must not be present near the carriage.
8. Before beginning, make sure that the correct is the condition of the carriage, power
source, cords, arc ignition cable, plugs, control panel, guiding rollers, and gear wheel.
9. Keep the carriage dry. Exposure to rain, snow, or frost is prohibited.
10. Keep the work area well lit, clean, and free of obstacles.
11. Never use near flammable liquids or gases, or in explosive environments.
12. Transport and position the carriage using the carrying handles.
13. Install the carriage only on the supplied track.
14. Make sure that the gear wheel and guiding rollers are clean and not damaged.
15. Plug the cords and arc ignition cable into sockets only when the power switch is
set to the position ‘O’.
16. Keep the sockets clean. Do not use compressed air for cleaning.
17. Install only MIG/MAG torches with the handle diameter corresponding to the
torch holder in use.
18. Suspend cables to reduce the load of the carriage.
19. Do not bend the semi-flexible track to a radius less than 5 m (16 ft).
20. Use the rigid track only on flat surfaces.
21. When operating at heights, protect the carriage and the track from dropping. To do
this, fasten the track to a fixed structure by using chains attached to the leftmost
and rightmost dual magnetic units. Protect the carriage by attaching a chain to a
carrying handle. The chains must not be loose.
22. Do not stay below the carriage or the track placed at heights.

Rail Runner
Rail Runner Operator’s Manual
8
23. Always use eye protection (helmet, shield, and screen), hearing protection, gloves,
and protective clothing during operation. Do not wear loose clothing.
24. Before every use, inspect the carriage to ensure it is not damaged. Check whether
any part is cracked or improperly fitted. Make sure to maintain proper conditions
that may affect the operation of the carriage.
25. Never try to manually stop the motion of the carriage. To stop, set the travel
direction switch to the position ‘O’.
26. Maintain only when the carriage is unplugged from the power source.
27. Repair only in a service center appointed by the seller.
28. If the carriage falls from any height, is wet, or has any other damage that could
affect the technical state of the carriage, stop the operation and immediately
send the carriage to the service center for inspection and repair.
29. Never leave the carriage unattended during operation.
30. Remove from the worksite and store in a secure and dry location when not in use.

Rail Runner
Rail Runner Operator’s Manual
9
3. STARTUP AND OPERATION
3.1. Assembling the track
Position on the workpiece a rail with dual magnetic units. Attach additional rails using
the 4 mm hex wrench (1, Fig. 3), and then switch the levers of the magnetic units to
the position ‘I’, which will clamp the track to the surface.
When working in PC/2G welding position, place the track in such a way to direct
the teeth of the gear rack downward.
Fig. 3. Interconnecting the rails and clamping the magnetic units to the surface
Before attaching additional rails to a semi-flexible rail placed on a curvature,
loosen the screws of the connecting plates (1, Fig. 4) and of the gear racks (2) using
the 4 mm hex wrench. Next, attach the rails, clamp them using levers, and then
tighten the connecting plates. Place the gear rack adjustment tool into the hole (3),
rotate the tool to the left (4) to remove the gap (5) between the gear racks, and then
tighten the leftmost screw and the rightmost screw of each gear rack (2).
1
2

Rail Runner
Rail Runner Operator’s Manual
10
Fig. 4. Removing the gap between the gear racks of a semi-flexible track
1 2
5
3
4

Rail Runner
Rail Runner Operator’s Manual
11
3.2. Assembling the holder
Join the clamping blocks to the cross slide as shown in Fig. 5 with four M5x20 screws
using the 4 mm hex wrench. The parts shown can be assembled in many ways to
form different configurations. However, notice that the oscillator moves in and out
during initialization, therefore never position the torch holder and the cross slide too
close to the carriage side or to obstacles, to avoid oscillator collision and to allow the
control system of the carriage to initialize properly.
Fig. 5. Sample method of assembling the torch holder

Rail Runner
Rail Runner Operator’s Manual
12
3.3. Positioning
Set the power switch, arc ignition switch, and travel direction switch to the position ‘O’.
Next, with the pressing lever in the position OFF (1, Fig. 6) loosen the drive clutch knob
fully (2), and then set the carriage on the track (3) in such a way to position the back
rollers in the groove (4).
Fig. 6. Positioning the carriage on the track
1
2
3
4
7
6
5

Rail Runner
Rail Runner Operator’s Manual
13
Set the pressing lever to the position ON (5) to press the front rollers to the track.
Slide the carriage to the required position (6), and fully tighten the drive clutch knob (7)
to engage the gear wheel of the carriage with the gear rack of the track. Then, loosen
the knob by 1/4 rotation.
When operating at heights, protect the carriage and the track from dropping. To do
this, fasten the track to a fixed structure by using chains attached to the leftmost and
rightmost dual magnetic units. Protect the carriage by attaching a chain to a carrying
handle. The chains must not be loose (chains are not included).
Plug the power cord into the power source, and then insert the torch into the torch
holder and secure with the knob. Next, insert the torch cable into the cable anchor,
secure with knobs, and then fix the anchor in the required position using levers.
3.4. Connecting to welding circuits
The carriage can control two torches using the arc ignition cable plugged into the arc
ignition socket. To do this, connect any blue-jacketed wire to any terminal of the welding
circuit, and then connect the second blue-jacketed wire to the second terminal of the
same circuit, according to the diagram shown in Fig. 7. To control the second torch,
connect the green-jacketed wires to the terminals of the second welding circuit.
Fig. 7. Connecting the arc ignition cable to welding circuits
To make sure that the arc ignition cable is connected correctly, turn on the power
of the carriage, and set the arc ignition switch to the position TEST, which should
enable the arc for a while.
blu
e
blu
e
Welding circuit 1
gre
en
gre
en
Welding circuit 2

Rail Runner
Rail Runner Operator’s Manual
14
3.5. Operating
After setting the power switch to the position ‘I’ the carriage will turn on and the
initialization of the control system will start. If the message appears on the
display, set the travel direction switch to the position ‘O’. Then, use the knobs located
on the control panel to set the required process parameters (Tab. 1). Right rotation
increases the value of the parameter, and left rotation decreases the value.
Parameter Value Description
0–5 s [step: 0.1]
Delay in left position of the oscillation.
0–5 s [step: 0.1]
Delay in center position of the oscillation.
0–5 s [step: 0.1]
Delay in right position of the oscillation.
0–5 cm 0–2 in [step: 0.1 cm/0.02 in]
Oscillation width. Set to weld without oscillation.
0–100% [step: 1%]
Relative oscillation speed.
–100% to 100% [step 1%]
Oscillation offset. If exceeds the value of the parameter , the parameter will be recalculated automatically.
0 5–140 cm/min 2–55 in/min
Carriage speed. Setting to during operation will stop the main motor, and the oscillator will enter into the test mode to allow for proper selection of the width and speed of the oscillation ( , ).
Welding path (trapezoid)
(straight line)
Trapezoid is default. To weld according to the triangular pattern, set all delay times ( , , ) to . To weld along a straight line, set to .
Unit
Unit set by the jumper cap (Fig. 9).
Tab. 1. Configuration parameters

Rail Runner
Rail Runner Operator’s Manual
15
If the carriage is to control the torch, set the arc ignition switch to the position ‘I’.
Use the travel direction switch to select a direction of motion, which will start the
movement of the carriage according to the parameters shown on the display. It is
possible to adjust the parameters at any time by rotating the knobs.
The produced welds form a shape similar to that shown in Fig. 8.
Fig. 8. Graphic description of the oscillation parameters from Tab. 1
To stop the motion, set the travel direction switch to the position ‘O’, which will
also save the values shown on the display.
After the work is finished, turn off the power using the power switch and unplug
the carriage from the power source.
If the arc ignition switch is set to the position ‘I’, the torch will start
welding immediately after selecting a travel direction.
Starting point of the weld
Final point of the weld
1 /

Rail Runner
Rail Runner Operator’s Manual
16
3.6. Changing the unit of measure
To change the unit of measure from centimeters to inches, or vice versa, unplug the
power cord from the power source and follow the steps shown in Fig. 9.
Fig. 9. Changing the unit of measure
With the jumper cap connecting the top and center pin, the measurement system
will be metric after the carriage is restarted. With the jumper cap connecting the
center and bottom pin, the system will be imperial.
The 2.5 mm hex wrench needed to unscrew the control panel is not included in
standard equipment.
Set the jumper cap in the position
corresponding to the required unit.
Use the 2.5 hex wrench to loosen
the fixing screws to access the
back side of the control panel.
inch cm

Rail Runner
Rail Runner Operator’s Manual
17
3.7. Troubleshooting
Problem Cause Solution
Travel direction switch not in the position ‘O’ when powering.
Set the travel direction switch to the position ‘O’.
Malfunction of the travel direction switch wire set or the controller.
Contact service center for inspection and repair.
Power not supplied to the main motor. Contact service center for inspection and repair.
Oscillator movement blocked or power not supplied to the oscillator motor.
Remove obstacles blocking the movement of the oscillator. If this message still appears, contact service center for inspection and repair.
Malfunction of the oscillator motor encoder or the controller.
Contact service center for inspection and repair.
Malfunction of the main motor encoder or the controller.
Contact service center for inspection and repair.
Malfunction of the encoder board. Contact service center for inspection and repair.

Rail Runner
Rail Runner Operator’s Manual
18
4. MAINTENANCE
Daily:
1. Clean the gear wheel of the carriage chassis and the gear rack of each rail.
2. Clean the guiding rollers and make sure that they rotate freely.
3. Clean the torch nozzle. Replace if damaged.
Monthly:
1. Check whether the knobs and the switches operate as intended. Replace if
loose or damaged.
2. Inspect cables, cords, and hoses. Replace if damaged.
3. Tighten screws if loose.

Rail Runner
Rail Runner Operator’s Manual
19
5. ACCESSORIES
5.1. 16–22 mm torch clamp
Allows using a torch with the handle diameter of 16–22 mm (0.63–0.87’’).
5.2. 16–22 mm torch clip
Allows using a torch with the handle diameter of 16–22 mm (0.63–0.87’’). Tighten the
torch in the clip using the 4 mm hex wrench.
5.3. 22–35 mm torch clamp
Allows using a torch with the handle diameter of 22–35 mm (0.87–1.38’’).
Part number:
ZRZ-0466-19-00-00-0
Part number:
ZRZ-0466-04-01-00-0
Part number:
ZCS-0476-06-01-00-0

Rail Runner
Rail Runner Operator’s Manual
20
5.4. Short rod
Provides a 120 mm (4.72’’) reach.
5.5. Long rod
Provides a 240 mm (9.45’’) reach.
5.6. Short rod torch holder with clamp
Allows using a torch with the handle diameter of 16–22 mm (0.63–0.87’’).
Part number:
UCW-0476-20-00-00-0
Part number:
WLK-0476-20-01-00-0
Part number:
WLK-0466-04-10-00-0
Rail Runner
Rail Runner Operator’s Manual
21
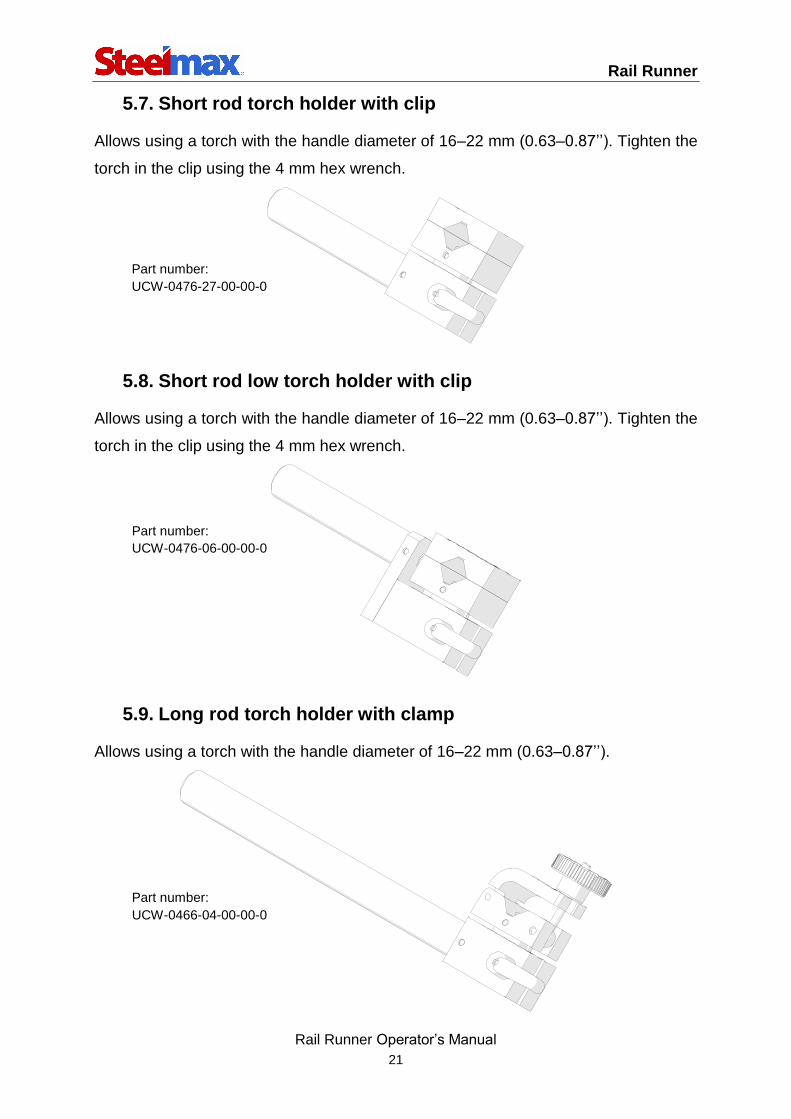
5.7. Short rod torch holder with clip
Allows using a torch with the handle diameter of 16–22 mm (0.63–0.87’’). Tighten the
torch in the clip using the 4 mm hex wrench.
5.8. Short rod low torch holder with clip
Allows using a torch with the handle diameter of 16–22 mm (0.63–0.87’’). Tighten the
torch in the clip using the 4 mm hex wrench.
5.9. Long rod torch holder with clamp
Allows using a torch with the handle diameter of 16–22 mm (0.63–0.87’’).
Part number:
UCW-0466-04-00-00-0
Part number:
UCW-0476-27-00-00-0
Part number:
UCW-0476-06-00-00-0

Rail Runner
Rail Runner Operator’s Manual
22
5.10. Long rod torch holder with clip
Allows using a torch with the handle diameter of 16–22 mm (0.63–0.87’’). Tighten the
torch in the clip using the 4 mm hex wrench.
5.11. Semi-flexible track
Allows guiding the carriage along a curvature. The length of a single rail is 2 m (6.5 ft).
Part number:
PRW-0482-15-05-00-0
Part number:
UCW-0466-22-00-00-0

Rail Runner
Rail Runner Operator’s Manual
23
5.12. Rigid track
Allows guiding the carriage along a straight line. To assemble the rigid rail, attach
stiffeners to a semi-flexible rail with M6x16 screws and M6 nuts using the 5 mm hex
wrench and 10 mm flat wrench. Place the washers between the nuts and the stiffeners
in the order shown in the figure below.
Part number:
WSP-0523-13-01-00-0
(stiffeners, screws, washers, nuts)
6.1 mm spring washer
6.4 mm round washer

Rail Runner
Rail Runner Operator’s Manual
24
5.13. Dual magnetic unit
Allows clamping a semi-flexible track (using a bracket) or rigid track to ferromagnetic
surfaces. The holding force on a 5 mm (0.2’’) thick surface is 1200 N (260 lbs) up to a
temperature of 100°C (212°F). At 180°C (356°F) the force decreases to 720 N (160 lbs).
To attach the dual magnetic unit to a semi-flexible rail, join the unit to the bracket
with two M6x16 socket head cap screws using the 5 mm hex wrench. Then, attach
the bracket to the rail with two M6x16 hex head cap screws using the 10 mm flat
wrench (left figure).
To attach the dual magnetic unit to a rigid rail, join the unit to the stiffeners with
two M6x16 hex head cap screws using the 10 mm flat wrench. Place the washers
under the screws in the order shown in the right figure.
Part number:
ZSP-0475-44-00-00-0
Part number (bracket):
DYS-0482-15-01-01-0
6.1 mm
spring washer
6.4 mm
round washer

Rail Runner
Rail Runner Operator’s Manual
25
5.14. Track supports
Allow supporting a semi-flexible or rigid track and can be used instead of some dual
magnetic units.
Attach the support for semi-flexible track with two M6x16 socket head cap screws
using the 5 mm hex wrench (left figure).
Attach the support for rigid track to the stiffeners with two M6x16 hex head cap
screws using the 10 mm flat wrench. Place the washers under the screws in the
order shown in the right figure.
Part number (for rigid track):
WSP-0523-13-02-00-0
Part number (for semi-flexible track):
WSP-0523-12-01-00-0
6.4 mm
round washer
6.1 mm
spring washer

Rail Runner
Rail Runner Operator’s Manual
26
5.15. Gear rack adjustment tool
Allows removing the clearance between the gear racks of two semi-flexible rails placed
on a curvature.
5.16. Transport attachment
Allows transporting the wire feeder.
Part number:
PEP-0482-18-00-00-0
Part number:
PKT-0341-13-00-00-0

Rail Runner
Rail Runner Operator’s Manual
27
5.17. 76 mm cross slide
Extends either up-down or left-right adjustment range from 0–35 mm (0–1.38’’) to
0–76 mm (0–3’’).
Install in place of the standard cross slide after unscrewing four screws using the
4 mm hex wrench.
Part number:
ZSP-0466-46-00-00-1

Rail Runner
Rail Runner Operator’s Manual
28
5.18. Vacuum track fixing system
Dedicated to fixing the track to non-ferromagnetic surfaces.
Part number (vacuum pump with safety reservoir):
AGR-0541-24-10-00-0 (115 V US)
AGR-0541-24-20-00-0 (230 V US)
Information about the other elements of the system
are included in a separate manual.

Rail Runner
Rail Runner Operator’s Manual
29
6. WIRING DIAGRAM

Rail Runner
Rail Runner Operator’s Manual
30
7. EXPLODED DRAWINGS AND PARTS LIST
1
2
8
16
25
19
1314
13
10
9
1511
3
12
4
14
5
20
6
21
2322
17
26
7
18
24
1
2
8
16
25
19
1314
13
10
9
1511
3
12
4
14
5
20
6
21
2322
17
26
7
18
24
ITEM PART NUMBER DESCRIPTION Q-TY
1 PRW-0482-11-00-00-0 TORCH GUIDE ASSY 1
2 UCW-0482-17-00-00-0 CABLE ANCHOR ASSY WITH ARM 1
3 PWD-0466-18-00-00-0 POWER CORD 230V (CEE) 1
3 PWD-0466-16-00-00-0 POWER CORD 120V (USA) 1
4 KBL-0466-17-00-00-0 START-STOP ARC IGNITION CABLE 6.5 M (20 FT) 1
5 SKR-0482-20-00-00-0 METAL BOX 1
6 KLC-000006 3 MM HEX WRENCH 1
7 KLC-000007 4 MM HEX WRENCH 1
8 UCW-0466-22-00-00-0 LONG ROD TORCH HOLDER WITH CLIP ASSY 1
9 WLK-0482-04-10-00-0 LONG ROD WITHOUT SLEEVE ASSY 1
10 KST-0482-11-01-00-0 CLAMPING BLOCK I 1
11 KST-0482-11-02-00-0 CLAMPING BLOCK II 1
12 RKJ-000043 HANDLEVER M6-25 1
13 RKJ-000036 HANDLEVER M6-32 2
14 SRB-000086 HEX SOCKET HEAD CAP SCREW M5x20 4
15 ZSP-0466-03-00-00-1 CROSS SLIDE ASSY 1
16 WLK-0466-04-10-00-0 LONG ROD ASSY 1
17 ZCS-0476-06-01-00-0 TORCH CLIP ASSY 1
18 RKJ-000036 HANDLEVER M6-32 1
19 UCW-0476-07-00-00-0 CABLE ANCHOR ASSY 1
20 RAM-0482-17-01-00-0 CABLE ANCHOR ARM 1
21 RKJ-000006 HANDLEVER M6-16 1
22 TRM-0219-06-16-00-0 CLAMP PLATE I 1
23 NKR-000121 KNURLED NUT M6 2
24 RKJ-000036 HANDLEVER M6-32 1
25 TLJ-0419-04-02-03-0 INSULATION SLEEVE 1
26 KST-0476-07-01-00-0 ANCHOR CLAMPING BLOCK 1

Rail Runner
Rail Runner Operator’s Manual
31
4339
45
6
13
66
20
5
22
57
111
492
19
24
63
23
100
104
81
78
76
67
95
36
38
33
60
46
26
25
97
90
34
3
75 110
105
117
88
89
91
107
116113
103
96
10293
103
99
70
106
68
101
59
88
94
100
56
69
98
38
12
49
10
31
47
55
6561
9
7
17
4829
28
3227
51
45
15
38
30
40
50
52
44
79
1
21
54
87
35
62
86
41
83
85
42
82
84
120
118
64
109
114
22
72
73
74
77
8
58
120
18
80
108
71
119
18
216
11
115

Rail Runner
Rail Runner Operator’s Manual
32
ITEM PART NUMBER DESCRIPTION Q-TY
1 SRB-0341-02-10-00-0 MOUNTING SCREW 4
2 PKT-0466-03-01-03-0 KNOB 1
3 PLY-0482-01-00-00-0 CARRIAGE PLATE 1
4 ZSP-0482-02-00-00-0 MOTOR ASSY 1
5 ZSP-0482-03-00-00-0 OSCILLATOR 1
6 KRP-0482-04-00-00-2 BODY ASSY 1
7 ZSP-0482-05-00-00-0 DRIVE POWER SUPPLY 120-230V 1
8 PLY-0482-06-00-00-0 LEFT SIDE PLATE 1
9 PLY-0482-07-00-00-0 RIGHT SIDE PLATE 1
10 PRS-0482-08-00-00-0 MASKING RING 1
11 RKJ-0482-09-00-00-1 LEFT HANDLE 1
12 RKJ-0482-10-00-00-1 RIGHT HANDLE 1
13 PRW-0482-12-00-00-0 CHASSIS ASSY 1
14* WZK-0482-13-00-00-0 POWER SUPPLY-CONTROL PANEL WIRE SET 1
15 ZLP-0482-16-00-00-0 PLUG 1
16 NKR-000017 HEX NUT M6 1
17 WKR-000185 CROSS RECESSED PAN HEAD SCREW M4x12 4
18 WKR-000136 HEX SOCKET COUNTERSUNK HEAD SCREW M5x16 18
19 WKR-000142 HEX SOCKET COUNTERSUNK HEAD SCREW M6x16 4
20 MTR-0482-03-02-00-0 GEAR MOTOR ASSY 1
21 WKR-000091 HEX SOCKET BUTTON HEAD SCREW M4x8 3
22 WKR-000098 HEX SOCKET BUTTON HEAD SCREW M5x16 7
23 SRB-000103 HEX SOCKET HEAD CAP SCREW M6x12 4
24 WKR-000143 HEX SOCKET COUNTERSUNK HEAD SCREW M6x20 6
25 KOL-0341-02-01-09-0 DRIVE GEAR z14 1
26 WPS-0341-02-01-10-0 KEY 1
27 PDK-0233-01-21-00-0 DISTANCE WASHER 12.1x19x3 1
28 KOL-0456-01-05-00-0 IDLE GEAR WHEEL ASSY z25 1
29 KRP-0482-02-01-00-1 MOTOR BODY 1
30 KOL-0482-02-02-00-0 GEAR z22 1
31 WLK-0482-02-03-00-0 DRIVE GEAR SHAFT 1
32 KOL-0482-02-04-00-0 GEAR z36 1
33 OSL-0482-02-05-00-0 GEAR COVER 1
34 SRB-0482-02-07-00-0 FEED SCREW 1
35 WSP-0482-02-08-00-0 SCREW BRACKET 1
36 MTR-0482-02-09-00-0 DRIVE GEAR MOTOR WITH WIRE SET 1
37* WZK-0482-02-10-00-0 DRIVE MOTOR ENCODER WIRE SET 1
38 PRS-000003 EXTERNAL RETAINING RING 12z 3
39 PDK-000108 ROUND WASHER 4.3 1
40 PDK-000036 ROUND WASHER 5.5 1
41 PDK-000164 SPACER WASHER 12x18x1 2
42 PLY-000060 STOPPER PLATE 9 1
43 WKR-000092 HEX SOCKET BUTTON HEAD SCREW M4x10 1
44 WKR-000292 HEX SOCKET BUTTON HEAD SCREW M4x6 4
45 WPS-000082 KEY 4x4x8 2
46 PRS-000022 INTERNAL RETAINING RING 32w 1
47 WKR-000012 HEX SOCKET SET SCREW WITH DOG POINT M4x6 1
48 LOZ-000062 BALL BEARING 12x32x10 1
49 LOZ-000038 BALL BEARING 12x28x8 1
50 SRB-000078 HEX SOCKET HEAD CAP SCREW M5x12 1
51 SRB-000083 HEX SOCKET HEAD CAP SCREW M5x16 2

Rail Runner
Rail Runner Operator’s Manual
33
ITEM PART NUMBER DESCRIPTION Q-TY
52 SRB-000098 HEX SOCKET HEAD CAP SCREW M5x8 1
53 KRP-0482-03-01-00-1 OSCILLATOR BODY 1
54 KOL-0482-03-02-02-0 GEAR z26 1
55 LST-0482-03-03-00-0 GUIDING BAR 1
56 WLK-0482-03-04-00-0 BEARING SHAFT 1
57 WLK-0482-03-05-00-0 OSCILLATOR SHAFT ASSY 1
58 WZK-0482-03-06-00-0 INDUCTION SENSOR WIRE SET 1
59 PRS-000041 EXTERNAL RETAINING RING 8z 1
60 PDK-000017 ROUND WASHER 5.3 4
61 PDK-000021 ROUND WASHER 6.4 4
62 TLJ-000109 SLEEVE 2
63 LOZ-000053 BALL BEARING 8x22x7 1
64 SRB-000082 HEX SOCKET HEAD CAP SCREW M5x14 4
65 SRB-000105 HEX SOCKET HEAD CAP SCREW M6x14 4
66 WLK-0482-03-05-01-0 OSCILLATOR SHAFT 1
67 LST-0482-03-05-02-0 GEAR RACK 1
68 PDK-000045 SPRING WASHER 5.1 2
69 KLK-000047 DOWEL PIN 5n6x16 1
70 SRB-000083 HEX SOCKET HEAD CAP SCREW M5x16 2
71 WZK-0482-04-02-01-0 ARC IGNITION SWITCH WIRE SET 1
72 WZK-0482-04-02-02-0 TRAVEL DIRECTION SWITCH WIRE SET 1
73 MDL-0482-04-02-03-0 ENCODER MODULE 1
74 MDL-0482-04-02-04-0 MAIN MODULE 1
75 MSK-0482-04-02-10-1 PANEL MASKING COVER WITH OSCILLATION ASSY 1
76 PDK-000058 EXTERNAL TOOTH LOCK WASHER 3 4
77 PKT-000028 POTENTIOMETER KNOB 23 2
78 TLJ-000051 HEX SLEEVE 4
79 WKR-000058 HEX SOCKET SET SCREW WITH FLAT POINT M6x8 1
80 PKT-000015 POTENTIOMETER KNOB K85/6D 5
81 WKR-000181 CROSS RECESSED PAN HEAD SCREW M3x6 4
82 MDL-0476-02-02-22-2 DISPLAY 1
83 MDL-0482-04-03-02-1 DISPLAY MODULE 1
84 MSK-0482-04-03-10-1 DISPLAY MASKING COVER ASSY 1
85 NKR-000146 HEX NUT M3 2
86 TLJ-000111 DISTANCE SLEEVE M3x10 2
87 WKR-000339 SELF-TAPPING SCREW M3x6 2
88 RLK-0341-01-02-00-0 PRESSURE ROLLER ASSY 4
89 WLK-0341-01-04-00-0 ECCENTRIC SHAFT 2
90 TLJ-0341-01-05-00-0 DISTANCE SLEEVE I 2
91 PDK-0341-01-07-00-0 SLIDE WASHER 2
92 PLY-0482-12-01-00-1 CHASSIS PLATE 1
93 LST-0482-12-02-00-0 RESISTIVE BAR ASSY 1
94 LST-0482-12-03-00-0 PRESSURE BAR ASSY 1
95 ZCS-0482-12-04-00-0 CAM CLAMP ASSY 1
96 ZDR-0482-12-05-00-0 BUMPER 2
97 PDK-000017 ROUND WASHER 5.3 1
98 WKR-000137 HEX SOCKET COUNTERSUNK HEAD SCREW M5x20 2
99 PDK-000022 ROUND WASHER 8.4 2
100 SPR-000012 DISC SPRING 8.2x16x0.6 7
101 TLJ-000048 SLIDE SLEEVE 8x10x12 2
102 SRB-000075 HEX SOCKET HEAD CAP SCREW M5x10 1

Rail Runner
Rail Runner Operator’s Manual
34
ITEM PART NUMBER DESCRIPTION Q-TY
103 SRB-000083 HEX SOCKET HEAD CAP SCREW M5x16 8
104 SRB-000361 FULL THREAD HEX HEAD SCREW M8x16 2
105 SRB-000202 FULL THREAD HEX HEAD SCREW M8x22 2
106 SRB-000351 FULL THREAD HEX HEAD SCREW M8x35 2
107 WZK-0466-02-09-00-0 POWER WIRE SET ASSY 1
108 WZK-0476-02-04-00-0 ARC IGNITION SOCKET WIRE SET 1
109 KRP-0482-04-01-00-1 BODY 1
110 PNL-0482-04-02-00-1 CONTROL PANEL WITH OSCILLATION ASSY 1
111 WYS-0482-04-03-00-1 DISPLAY ASSY 1
112* WZK-0482-04-04-00-0 POWER SWITCH WIRE SET 1
113 PWD-0482-04-05-00-0 CONTROL PANEL GROUNDING WIRE ASSY 1
114 NKR-000013 HEX NUT M4 2
115 DLW-000007 CABLE GLAND WITH STRAIN RELIEF PG11 1
116 PDK-000060 EXTERNAL TOOTH LOCK WASHER 4.3 2
117 PNK-000026 LEVER SWITCH 641 H3 1
118 WKR-000152 CROSS RECESSED COUNTERSUNK HEAD SCREW M4x16 1
119 WKR-000385 HEX SOCKET BUTTON HEAD SCREW M3x8 4
120 WKR-000092 HEX SOCKET BUTTON HEAD SCREW M4x10 8
* not shown in the drawing

Rail Runner
Rail Runner Operator’s Manual
35
8. DECLARATION OF CONFORMITY
EC Declaration of Conformity
We
PROMOTECH sp. z o.o.
ul. Elewatorska 23/1
15-620 Białystok
Poland
declare with full responsibility that:
Rail Runner Welding Carriage
is manufactured in accordance with the following standards:
EN 50144-1
EN 60974-10
and satisfies safety regulations of the guidelines: 2004/108/EC, 2006/95/EC, 2006/42/EC.
Białystok, 22 February 2013 ___________________________
Marek Siergiej
CEO

Rail Runner
Rail Runner Operator’s Manual
36
9. QUALITY CERTIFICATE
Machine control card
Rail Runner Welding Carriage
Serial number.....................................................................
Electric test
Type of test Result Name of tester
Test with sinusoidal voltage (voltage 1000 V, frequency 50 Hz)
...................................
Date
Resistance of the protective circuit ............ Ω ................................... Signature
Quality control .................................................
Adjustments, inspections
Quality control .................................................

Rail Runner
Rail Runner Operator’s Manual
37
10. WARRANTY CARD
WARRANTY CARD No...........
.......................................................................... in the name of Manufacturer warrants
the Rail Runner Welding Carriage to be free of defects in material and workmanship
under normal use for a period of 12 months from the date of sale.
This warranty does not cover guiding rollers as well as damage or wear that arise
from misuse, accident, tempering or any other causes not related to defects in
workmanship or material.
Date of production .........................................................................................................
Serial number ................................................................................................................
Date of sale ...................................................................................................................
Signature of seller ..........................................................................................................
2.08 / 19 January 2016
WE RESERVE THE RIGHT TO MAKE CHANGES IN THIS MANUAL WITHOUT NOTICE