Embed Size (px)
Citation preview

Operating Instructions for Radio
The Ultimate Driving Machine

These Operating Instructions are intended to familiarise you with details of your BMW car radio. The notes that they contain on its correct operation will enable you to use all functions rapidly and effectively.For supplementary information, please consult the Owner's Handbook for Vehicle and the other items of on-board literature.
We wish you many a safe and enjoyable journey,
BMW AG
Introduc-

© 2004 Bayerische Motoren WerkeAktiengesellschaft Munich, GermanyNot to be reproduced, wholly or in part, without written permission from BMW AG, Munich.Order No. 01 41 0 158 734English VIII/04Printed in GermanyPrinted on environmentally friendly paper,bleached without chlorine, suitable for recycling.
2n
NotesSymbolsYour individual vehicle
Notes on these Operating InstructionsTo help you start enjoying your car radio without delay, the first chapter contains a summary of its displays and controls.
>The chapter "Settings" contains all general information on radio and Compact disc (CD) functions
>The chapter "Reception" contains information specifically on listening to the radio
>The chapter "Players" contains infor-mation specifically on playing CDs.
You will find it easiest to locate certain topics via the index at the end of this booklet.
If you later sell your BMW, please remember to pass on these Operating Instructions – they are legally part of the car's equipment.
Symbols usedindicates instructions or precau-tions that must be followed pre-
cisely in order to avoid the possibility of personal injury and serious damage to the vehicle or car radio.<
Indicates information that will as-sist you in gaining the optimum
benefit from your car radio and enable you to care more effectively for your car radio.<
< Marks the end of a specific item of information.
* Identifies optional extras or specific national-market items of equipment, as well as equipment and functions not yet available at the time of printing.
If you have any queries, BMW Service will be glad to advise you.
Status at time of printingThe advanced technical features and high quality of BMW equipment and ac-cessories are assured by continuous development work. Because of this, the equipment in your car may very occa-sionally differ from the equipment de-scribed in these Operating Instructions.

Over
view
3n
Overview
Settings
Reception
Players
Index
Sett
ings
Rece
ptio
nPl
ayer
sK
eyw
ords
The car radio at a glance 4Care notes 6
Overview

4nThe car radio at a glance

5n
Over
view
Sett
ings
Rece
ptio
nPl
ayer
sK
eyw
ords
The car radio at a glance
Controls and displays1 On/off, volume adjustment for audio
sources and telephone hands-free unit* 8
2 Compact disc slot 26
3 Compact disc eject 26
4 MW and LW (AM) and VHF (FM) wavebands/memory ranges 14, 20
5 Sampling>Stations 17>CD tracks 27, 33
6 Audio source, changeover to>Radio 26>CD changer* 23>CD 23
7 Station/track search>Station selection 15, 16>Music track search
CD 27CD changer 32
8 Manual tuning 15
9 Display for functions key (display for RDS, Traffic Program, random play of music tracks)
10 Functions key for controlling the functions RDS, Traffic Program, random play of music tracks
11 Station keys for>Radio 20>CD changer 32
12 Display (for waveband/memory range, name of RDS stations, pro-gramme, frequency, CD and CD changer functions, tone settings and time)
13 Adjusting values>Volume of Traffic Program 8>Speed-dependent
volume control 9>Tone 11>Programme type on/off 18
14 Music symbol>Volume of Traffic Program 8>Speed-dependent
volume control 9>Tone setting 11>Programme type display 18
15 Clock symbol>Display/hide time 12

6nCare notes
Cleaning the setClean the radio only with a slightly moistened cloth.
Do not use any chemicals or do-mestic cleaning agents. Keep all
liquids away from the set and protect it against moisture. There is otherwise a risk of its surfaces or electrical compo-nents being attacked or damaged.<
Handling CDsFor useful information on this subject, see the booklet Looking after your car.

7n
Over
view
Sett
ings
Rece
ptio
nPl
ayer
sK
eyw
ords
Overview
Settings
Reception
Players
Index
Switching on and off 8Varying volume 8Tone control 11Displaying time 12Key Memory 12
Settings

8nSwitching on and off Varying volume
Press the knob.
The set selects the audio source last used (radio, CD changer or CD).
Listening to the radio with the ignition switched offWith the ignition switched off (ignition key turned to position 0 or removed), the radio functions remain available for approximately 20 minutes.
When the ignition is switched off, the set is likewise switched off.
To switch the set on again
Press the knob.
The set cannot be operated via the multifunctional steering
wheel* when the ignition is switched off.To protect the battery, you should al-ways switch off the radio when leaving the car.<
Adjusting volume
Turn the knob.
As soon as you start to make a telephone call or receive an in-
coming call, the radio reception volume is automatically muted.<
Adjusting the volume of traffic reportsThe function TP MIN allows you to set a minimum volume for traffic reports. When the TP function is active, see page 22, you can select a volume stage between —9 and +9. Stage 0 corre-sponds to the basic setting as supplied by the manufacturer.
As the individual stages are fixed vol-umes, you will hear all traffic reports irrespective of how high or low the current volume setting for the radio, CD changer or CD is.
The volume of traffic reports can only be adjusted in the radio
mode.<
1. Call up the current setting
Keep the key pressed in.
The display changes to the control line for SPEED VOL, e.g.:
2.
Press as often as necessary until the display changes to the control line for TP MIN, e.g.:
3. Adjust as required
Press once or hold pressed in until the desired volume is obtained.
The volume stage selected appears in the display
4. Quit the control line

9n
Over
view
Sett
ings
Rece
ptio
nPl
ayer
sK
eyw
ords
Varying volume
The selected minimum volume is retained for all traffic reports.
If you have selected a volume setting for the radio, CD changer or CD that is louder than the TP MIN volume, the vol-ume will remain unchanged when a traf-fic report is broadcast.<
The volume of a traffic report can be adjusted individually with the volume control knob. You can, for instance, turn it down if the basic volume setting for the radio, CD changer or CD is very loud, or increase it if for example you have opened a window and the level of noise inside the car is very high.
Turn the knob during traffic reports until the desired volume is obtained.
Adjusting speed-dependent volume controlYour radio set has speed-dependent volume control (Speed Volume) to com-pensate for the higher level of noise inside the car at higher road speeds. This feature raises the volume in line with your car's speed.
You can adjust the rate of increase in volume in 6 stages. The higher the volume stage selected, the more pro-nounced the increase in volume.
1. Call up the current setting
Keep the key pressed in.
The display changes to the control line for SPEED VOL, e.g.:
2. Select volume stage
Press once or hold pressed in.
The volume stage selected appears in the display
3. Quit the control line

10nVarying volume
Default settingsThe default (centre) volume settings for traffic programmes and speed-depen-dent volume control can be restored.
Both functions and the activated programme type (PTY) cannot
be reset individually. When "RESET?" is confirmed, all settings are reset or de-activated.<
1. Call up the current setting
Keep the key pressed in.
The display changes to the control line for SPEED VOL
2.
Press as often as necessary until the display shows "RESET?"
3. Restore the default settings
The default (centre) volume setting for traffic programmes is reset to stage 0 and the speed-dependent volume control reset to stage 3. If the programme type was switched on, it is de-activated.

11n
Over
view
Sett
ings
Rece
ptio
nPl
ayer
sK
eyw
ords
Tone control
Tone and soundYou can select from the following tone options:
>Bass:Amplifies or attenuates low notes
>Treble:Amplifies or attenuates high notes
>Volume distribution between front and rear (fader):Volume higher/lower at the front or rear
>Volume distribution between right and left (balance):Volume higher/lower on the right or left
>Central settings (tone linear):To restore the tone settings to the central settings.
The tone settings for bass and treble are specific to the audio
source, i.e. they can be adjusted indi-vidually for radio, CD changer and CD. When the audio source is changed, the tone settings last used for the new audio source are established.The tone settings for the volume distri-bution between front and rear as well as right and left apply to all audio sources.<
Altering tone settings
1. Call up the tone setting
The display switches to the control line for BASS, e.g.:
2. Select a different tone setting (treble, fader or balance) if desired
Press as often as necessary until the desired control line is obtained
3. Alter the desired tone setting
Press once or hold pressed in until the desired setting is obtained.
Resetting the tone settingsTONE LIN resets all tone settings for the current audio source to the central settings.
Bass and treble are reset for the current audio source only; front/
rear and right/left volume distribution is reset for all audio sources.<
1. Call up the control line for the central settings
Press as often as necessary until "TONE LIN" appears
2.
All settings are reset.

12nDisplaying time Key Memory
Instead of the current settings, you can call up the time in the display.
With the time displayed, the cur-rent settings are no longer visible.
As soon as you press a key to alter a setting, the display briefly flashes up the setting in question.<
The time is shown in the display, e.g.:
Adjusting time, see Owner's Handbook for Vehicle.<
Displaying the time with the ignition switched off
The time disappears from the dis-play as soon as you remove the
ignition key.<
To show the time with the ignition key removed, press:
The time appears in the display for 8 seconds.
Memorising the settingsEach person using the car must have an ignition key of their own.
For further notes on Key Memory, see Owner's Handbook for Vehicle.<
Key Memory means that BMW Service can program each key to memorise the following settings for its user:
>The audio source last selected (radio, CD changer or CD)
>The station last listened to>The tone settings last selected.
Key Memory automatically restores the settings last memorised for the key in question when it is turned to ignition key position 1 or beyond.

13n
Over
view
Sett
ings
Rece
ptio
nPl
ayer
sK
eyw
ords
Overview
Settings
Reception
Players
Index
Selecting waveband 14Selecting stations by
frequency 15Selecting stations by name 16Sampling and selecting
(Scan) 17Programme type (PTY) 18Memorising and calling up
stations 20Traffic Program (TP) 22Regional programmes 23Switching to CD changer or
CD 23
Reception
14n
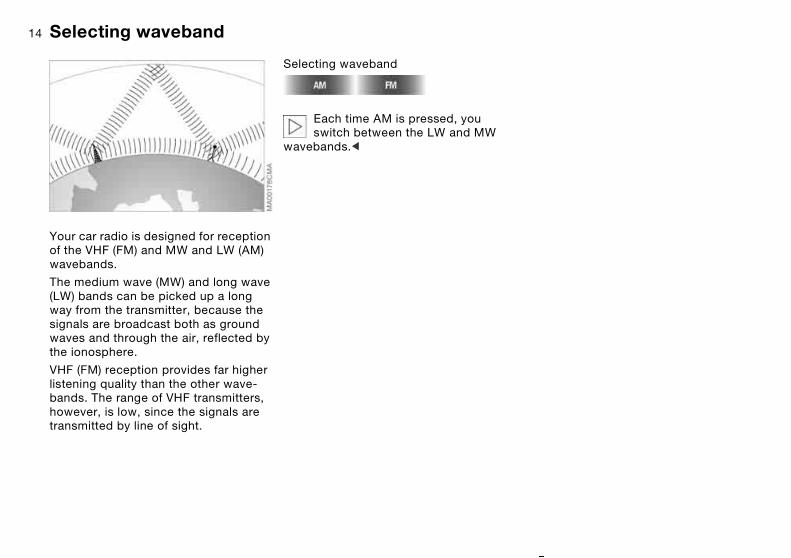
Your car radio is designed for reception of the VHF (FM) and MW and LW (AM) wavebands.
The medium wave (MW) and long wave (LW) bands can be picked up a long way from the transmitter, because the signals are broadcast both as ground waves and through the air, reflected by the ionosphere.
VHF (FM) reception provides far higher listening quality than the other wave-bands. The range of VHF transmitters, however, is low, since the signals are transmitted by line of sight.
Selecting waveband
Each time AM is pressed, you switch between the LW and MW
wavebands.<
Selecting waveband

15n
Over
view
Sett
ings
Rece
ptio
nPl
ayer
sK
eyw
ords
Selecting stations by frequency
Manual station selection
1. Select "Manual"
"MAN" ("Manual") appears in the dis-play alongside the frequency display or station name
2. Adjust the frequency
Press once or hold pressed in.
Each time the key is operated, the frequency is changed by a predeter-mined amount.
Search for station (search)Start the search
Press once or hold pressed in.
The search begins at the last selected frequency.
The search stops as soon as a station is found.
16nSelecting stations by name
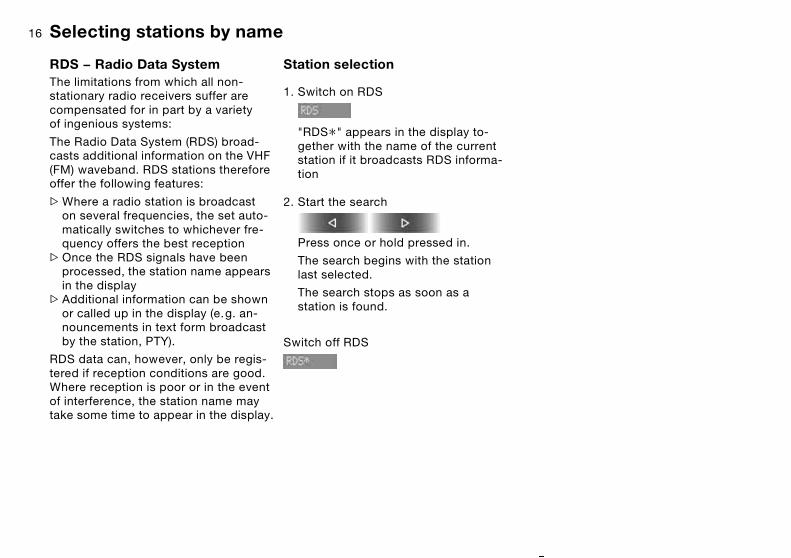
RDS — Radio Data SystemThe limitations from which all non-stationary radio receivers suffer are compensated for in part by a variety of ingenious systems:
The Radio Data System (RDS) broad-casts additional information on the VHF (FM) waveband. RDS stations therefore offer the following features:
>Where a radio station is broadcast on several frequencies, the set auto-matically switches to whichever fre-quency offers the best reception
>Once the RDS signals have been processed, the station name appears in the display
>Additional information can be shown or called up in the display (e.g. an-nouncements in text form broadcast by the station, PTY).
RDS data can, however, only be regis-tered if reception conditions are good. Where reception is poor or in the event of interference, the station name may take some time to appear in the display.
Station selection
1. Switch on RDS
"RDS " appears in the display to-gether with the name of the current station if it broadcasts RDS informa-tion
2. Start the search
Press once or hold pressed in.
The search begins with the station last selected.
The search stops as soon as a station is found.
Switch off RDS
*

17n
Over
view
Sett
ings
Rece
ptio
nPl
ayer
sK
eyw
ords
Sampling and selecting (Scan)
You can play a brief sample of all receivable stations.
1. Start sampling
The display shows e.g.:
2. Station selection
The scan function is halted and the selected station is retained.
18nProgramme type (PTY)
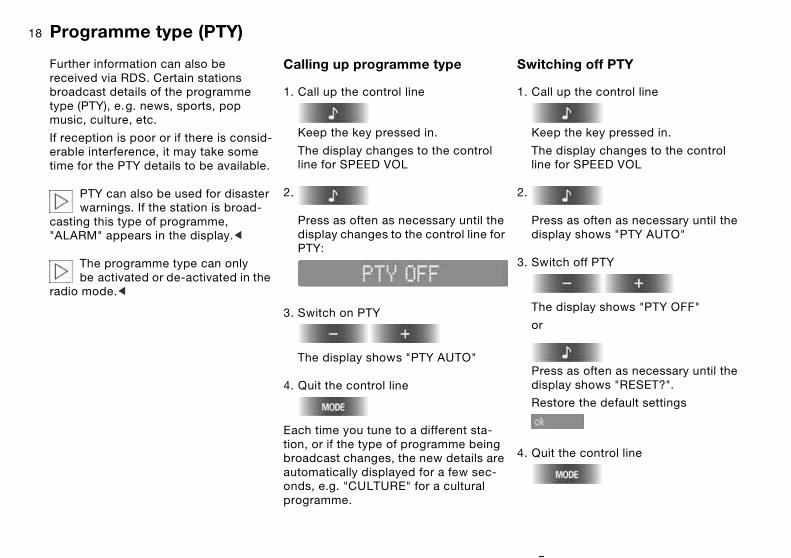
Further information can also be received via RDS. Certain stations broadcast details of the programme type (PTY), e.g. news, sports, pop music, culture, etc.
If reception is poor or if there is consid-erable interference, it may take some time for the PTY details to be available.
PTY can also be used for disaster warnings. If the station is broad-
casting this type of programme, "ALARM" appears in the display.<
The programme type can only be activated or de-activated in the
radio mode.<
Calling up programme type
1. Call up the control line
Keep the key pressed in.
The display changes to the control line for SPEED VOL
2.
Press as often as necessary until the display changes to the control line for PTY:
3. Switch on PTY
The display shows "PTY AUTO"
4. Quit the control line
Each time you tune to a different sta-tion, or if the type of programme being broadcast changes, the new details are automatically displayed for a few sec-onds, e.g. "CULTURE" for a cultural programme.
Switching off PTY
1. Call up the control line
Keep the key pressed in.
The display changes to the control line for SPEED VOL
2.
Press as often as necessary until the display shows "PTY AUTO"
3. Switch off PTY
The display shows "PTY OFF"
or
Press as often as necessary until the display shows "RESET?".
Restore the default settings
4. Quit the control line

19n
Over
view
Sett
ings
Rece
ptio
nPl
ayer
sK
eyw
ords
Programme type (PTY)
When you use RESET to switch off the function, as well as PTY being
switched off, the SPEED VOL and TP MIN functions are in addition reset to their default settings, see page 10.<

20nMemorising and calling up stations
Memory locationsYour radio can memorise 42 stations:
>You can memorise 12 stations of your choice on the VHF (FM) waveband and 6 stations of your choice on each of the MW and LW (AM) wavebands; see "Memorising stations"
>The radio in addition automatically memorises the 6 stations with the strongest reception signal on each of the VHF (FM), MW and LW (AM) wavebands, see page 21.
The memory locations of the indi-vidual wavebands are on the fol-
lowing memory levels: FM1, FM2, MW and LW, and on FMA, MWA and LWA.<
The fact that there are various memory levels means that more than one station is stored on each station key.
Selecting waveband
Each time you press the key, you can change between the MW/LW and FM memory levels.
The selected memory level is indicated on the left side of the display.
Memorising stations
1. Selecting waveband
Each time you press the key, you change within the MW/LW and FM memory levels
2. Selecting station, see page 15 and 16
3. Storing stations
Keep the desired key (1…6) pressed in until the station is heard again after a brief interruption. The station is now memorised.
The memory level and the number of the key selected are shown at the left of the display, e.g.:
Calling up a station
1. Selecting waveband
Each time you press the key, you change within the MW/LW and FM memory levels
2. Select a memorised station
Press the desired key (1…6).

21n
Over
view
Sett
ings
Rece
ptio
nPl
ayer
sK
eyw
ords
Memorising and calling up stations
Automatic memorisingThe automatic memorising feature (AUTOSTORE) is useful if, for example, you would like to find whichever station currently offers the strongest reception signal when you are on a long journey.
On each of the FMA, MWA and LWA memory levels, the 6 stations with the strongest reception signals can be memorised automatically.
Select memory level FMA
Keep the key pressed in.
Display line:
or
1. Select memory level MWA or LWA
Press as often as necessary until the desired memory range is displayed
2.
Keep the key pressed in.
The radio automatically switches to the FMA, MWA or LWA memory level. The 6 stations currently offering the strong-est reception signals are automatically stored and the station that is stored un-der station key 1 is broadcast.
If it is not possible to memorise a station due to poor reception con-
ditions, the display briefly shows "NO STATION" and the station last selected is called up again.<
If you do not wish to use AUTO-STORE, you can store 6 further
stations of your own choice on each of the FMA, MWA and LWA memory lev-els, see page 20.<

22nTraffic Program (TP)
TP functionWhen the TP function (Traffic Program) is active, a station broadcasting traffic reports is selected in the following sequence:
> If a station broadcasting traffic infor-mation is received, you will hear its traffic reports
> If the station to which you are tuned does not carry traffic reports but comes from a group of stations which does provide them, you will hear that group's traffic reports
> If the station to which you are tuned neither broadcasts traffic reports nor belongs to a group of stations with traffic report facilities, the next traffic report station will be found if a station search is activated.
Displays and signalsIf a station broadcasts traffic reports, "TP" appears after the name of the station or its frequency.
The following notes refer to the TP dis-play in the right-hand display:
TPThe Traffic Program is switched on.
TPThe Traffic Program is not switched on.
TP flashesThe station being received is not a Traf-fic Program station.
*
*
Switching traffic reports on/offTo switch traffic reports on, press
The CD changer or CD is interrupted for the duration of traffic reports.
Adjusting volume of traffic reports, see page 8.
To switch traffic reports off, press

23n
Over
view
Sett
ings
Rece
ptio
nPl
ayer
sK
eyw
ords
Regional programmes Switching to CD changer or CD
On VHF (FM), certain stations broadcast regional programmes either all day or at certain times of day. You can receive these programmes via the regional function.
Switching the regional programme on/off
Keep the key pressed in.
"REG ON" or "REG OFF" briefly ap-pears in the display.
If you have switched on this function and the transmitter switches to a re-gional programme, the radio will auto-matically retain the regional programme you have selected.
Press as often as necessary until the control line changes to the desired audio source (CD changer or CD). If the magazine contains CDs or if there is a CD in the slot, the audio source changes to
>CD changer operation, see page 31>CD replay, see page 26

24n

25n
Over
view
Sett
ings
Rece
ptio
nPl
ayer
sK
eyw
ords
Overview
Settings
Reception
Players
Index
CD:Starting and stopping a CD 26Operating displays 26Searching for a track 27Random play 28
CD changer:CD changer 29Starting and stopping a CD 31Operating displays 31Searching for a track 32Random play 33
Players

26n
Starting The CD player can also play CDs with compressed audio data, such as MP3 and WMA.
Depending on the number of tracks, some time may elapse before the CD player starts.
For MP3 items to be reproduced correctly, the MP3 data should
have been generated using the Fraun-hofer codec. High-quality reproduction is achieved with a transfer rate of 192 kBit/s; the rate should be at least 128 kBit/s.<
1. Switch on the set, see page 8
2. Push the CD into the CD slot with the label side uppermost.
The display shows:
If there is already a CD in the CD slot ("CD" visible on right of display):
Start to play the CD
Press as often as necessary until "CD" appears on the left in the display.
If replay was previously interrupted, it will begin again at the same point after a few seconds.
Stopping
The CD is ejected a short way out of the CD slot and the audio source switches to CD changer or radio
or
Switch off the set, see page 8
or
Change to the radio or the CD changer
Press as often as necessary until the control line changes to the desired audio source (radio or CD changer).
The audio source switches directly to
>Radio, see page 13>Or, if there is a CD in the magazine,
to the CD changer, see page 31
NO DISCThe CD slot is empty.
CD-ERRORThe CD has been inserted upside-down or is damaged.
Starting and stopping a CD Operating displays

27n
Over
view
Sett
ings
Rece
ptio
nPl
ayer
sK
eyw
ords
Searching for a track
Track searchSelect the direction
Press the key as often as necessary un-til the desired track is obtained.
The CD starts to play from the selected track.
If the CD in the drive contains com-pressed audio files, e.g. MP3:
As well as "TR" it displays the folder, followed by the track, e.g. Folder 5, Track 3.
The display shows e.g.:
To change the folder:
1.
2. Select the direction
Press a button as often as necessary until the desired folder is obtained.
All folders on the CD are counted, even if they do not contain any
compressed audio files.<
Fast forward/reverse
1. Select the direction
Keep the key pressed in. The tracks can be heard, but the quality is dis-torted
2. To interrupt fast forward/reverse, release the key.
The CD starts to play from the se-lected point.
Sampling and selecting (Scan)All tracks on the CD are automatically sampled briefly in succession.
1. Start sampling
The display shows e.g.:
2. Select track
The scan function is interrupted and the CD plays from the point reached.
28nRandom play
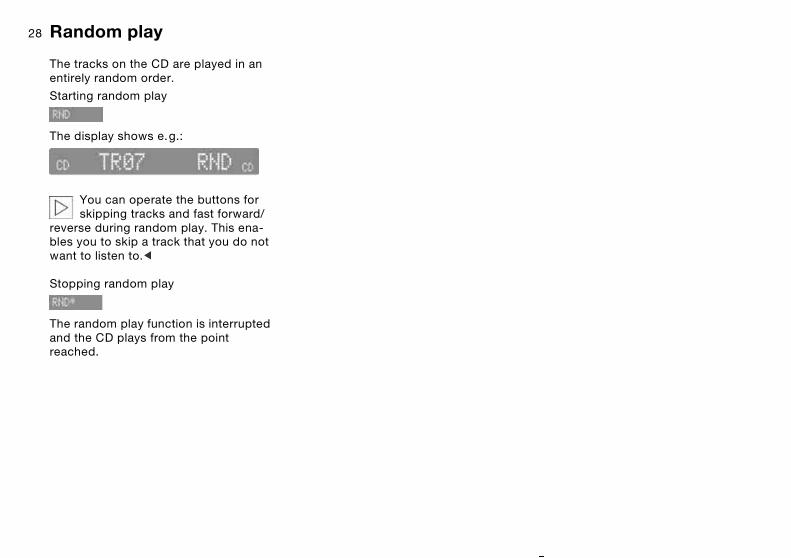
The tracks on the CD are played in an entirely random order.
Starting random play
The display shows e.g.:
You can operate the buttons for skipping tracks and fast forward/
reverse during random play. This ena-bles you to skip a track that you do not want to listen to.<
Stopping random play
The random play function is interrupted and the CD plays from the point reached.

29n
Over
view
Sett
ings
Rece
ptio
nPl
ayer
sK
eyw
ords
CD changer*
Installed positionThe BMW CD changer for 6 CDs is installed at the rear left in the luggage compartment.
Removing the CD magazineTo load or empty it, the CD magazine has to be removed from the CD changer.
1. Slide the flap to the right
2. Press the button
The magazine will slide out and can then be removed.
Filling/emptying the CD magazineWhen adding CDs to or removing them from the CD magazine, hold
them only at the edge and do not touch the reflective sensing area.<
The CD compartments in the changer have the same numbers as the CD selector buttons on the radio.
To load:Insert the CD into a compartment with the label side uppermost.
To empty:Pull out the appropriate holder as illus-trated, and take out the CD.
You are recommended not to play CD singles with an adapter. The
CDs or the adapter could jam in the CD changer.Suitable magazines for CD singles can be obtained from shops.<
Inserting the CD magazine
1. Slide the flap to the right
2. With the arrow pointing towards the CD changer, push the CD magazine fully in
3. Close the flap again.

30nCD changer*
Operating temperaturesOnly use the CD changer at tem-peratures between –15 6 and
+60 6, otherwise it may malfunction.Even when switched off, the unit should not be exposed to temperatures be-yond –25 6 or +856.<
Atmospheric humidityA high level of humidity inside the CD changer may cause the laser beam fo-cusing lens to fog over and prevent the CD from being played.
Precautions when using laser equipmentThe BMW CD changer is officially des-ignated a class 1 laser product.
Do not remove the cover from the housing. Never run the device if its
cover is damaged. Otherwise the invisi-ble laser beam could cause serious eye injuries.Repairs or maintenance work must only be carried out by qualified service experts.<

31n
Over
view
Sett
ings
Rece
ptio
nPl
ayer
sK
eyw
ords
Starting and stopping a CD Operating displays
Starting
Press as often as necessary until "CDC" appears on the left in the display.
As well as "CDC", the CD in the CD magazine is indicated, e.g. CD 2:
If replay was previously interrupted, it will begin again at the same point after a few seconds.
If the CDs in the magazine have been changed, the CD in the low-
est compartment occupied starts to play first, e.g. CD 1, track 1.<
StoppingSwitch off the set, see page 8
or
Switch to radio or CD
Press as often as necessary until the control line changes to the desired audio source (CD or radio).
If there is a CD in the slot, the audio source switches to
>CD replay, see page 26>Or otherwise directly to radio, see
page 13
NO DISCThe CD compartment is empty or the CD has been inserted upside-down.
NO DISCSThe magazine is empty.
NO MAGAZINENo magazine has been inserted.
CD CHECKThe contents of the CD are being read in.
HIGH TEMPOperating temperature is too high.When the temperature drops to normal, replay will continue automatically.

32nSearching for a track
Selecting a CD
Press the key for the desired CD number (1…6) at the left or right.
The corresponding CD number is shown in the display. Replay starts with the first track on the CD. At the end of the final track, the next CD is selected and played.
Track searchSelect the direction
Press the key as often as necessary un-til the desired track is obtained.
The CD starts to play from the selected track.
Fast forward/reverse
1. Select the direction
Keep the key pressed in. The tracks can be heard, but the quality is dis-torted
2. To interrupt fast forward/reverse, release the key.
The CD starts to play from the selected point.

33n
Over
view
Sett
ings
Rece
ptio
nPl
ayer
sK
eyw
ords
Searching for a track Random play
Sampling and selecting (Scan)All tracks on the CD are automatically sampled briefly in succession.
1. Start sampling
The display shows e.g.:
2. Select track
The scan function is interrupted and the CD plays from the point reached.
The tracks on the CDs are played in an entirely random order.
Starting random play
The display shows e.g.:
You can operate the buttons for skipping tracks and fast forward/
reverse during random play. This ena-bles you to skip a track that you do not want to listen to.<
Stopping random play
The random play function is interrupted and the CD plays from the point reached.

34n

35n
Over
view
Sett
ings
Rece
ptio
nPl
ayer
sK
eyw
ords
Overview
Settings
Reception
Players
Index
From A to Z 36
Keywords

From A to Z
A Adjusting the volume of
traffic reports 8 ALARM 18 AM waveband 14 AUTOSTORE 21
B Balance BAL 11 Bass 11 Buttons 4
C Care
notes 6 of CDs 6
CD eject 26 fast forward 27 music track search 27 random play 28 reverse 27 sampling 27 starting 26 stopping 26 track search 27
CD changer 29 fast forward 32 humidity 30 installed position 29 music track search 32 operating temperatures 30 random play 33 reverse 32 sampling 33 selecting a CD 32 starting 31 stopping 31 temperature range 30 track search 32
CD eject button 5 CD slot 5 Central settings 11 Cleaning agents 6 Cleaning the set 6 Clock adjustment, see
Owner’s Handbookfor Vehicle
Compressed audio files 26 Controls 4 Copyright 2
D Display 5 Displays 4
E Eject button 5
F Fader FAD 11 FM waveband 14
H Handling
CDs 6
I Imprint 2 Installed position
CD changer 29
K Key Memory 12 Keys 4
L Linear 11 Listening to the radio
with the ignition switched off 8
LW waveband 14
M Manual station selection
MAN 15 Memory levels 20, 21 Memory locations 20 Minimum volume
TP MIN 8 MP3 26 Music track
random play 28, 33 sampling 27, 33 search 27, 32
MW waveband 14
N Notes on these Operating
Instructions 2
O On/off 5 Operating displays
CD CHECK 31 CD-ERROR 26 HIGH TEMP 31 NO DISC 26, 31 NO DISCS 31 NO MAGAZINE 31
Operating temperatures 30 Overview 4

From A to Z 37n
Over
view
Sett
ings
Rece
ptio
nPl
ayer
sK
eyw
ords
P Programme type PTY 18 PTY AUTO/PTY OFF 18
R Radio Data System RDS 16 Radio set layout 4 Random play RND
CD 28 CD changer 33
RDS Radio Data System 16 Reception quality 16 REG ON/REG OFF 23 Regional programmes
REG 23 RESET? 10 RND random play
CD 28 CD changer 33
S Safety
CD changer 30 Sampling SC
music track 27, 33 stations 17
Scan SC CD 27 CD changer 33 radio 17
Search music track 27, 32 station 15, 16
Search key 5 Set cleaning 6 SPEED VOL 9 Speed-dependent
volume control 9 Station keys 20, 21 Stations
calling up 20 memorising 20, 21 sampling 17 search 15 selecting by frequency 15 selecting by name 16
Switching the set on and off 8
Symbols 2
T Telephone
muting 8 Time displaying 12 Tone
central settings 11 controls 11
TONE LIN 11 TP function 22 TP MIN minimum
volume 8 Track search
CD 27 CD changer 32
Tracks sampling 27, 33
Traffic Program (TP) 22 Traffic reports 22
adjusting volume 8 displays and signals 22 switching on/off 22 TP function 22
Treble TREB 11
V VHF waveband 14 Volume
speed-dependent, adjusting 9 traffic reports 8 varying 8
Volume distribution front/rear 11 right/left 11
W Waveband selection 14 WMA 26

Display Meaning
1…6 Station numbers 1 to 6 on the FM1, FM2, MW, LW, FMA, MWA and LWA memory levels
BAL Balance — for adjusting the distribution of volume on the right/left side
BASS Adjustment of bass
CD Compact disc — appears when a CD is being played
CDC Compact Disc Changer — a CD is being played from the CD changer
FAD Fader — for adjusting the distribution of volume between the front/rear
FM Frequency modulation — on the VHF waveband
FM1/FM2/FMA Memory levels 1, 2 and AUTOSTORE on the VHF (FM) waveband
LW/LWA Long-wave waveband; the LW/AUTOSTORE memory levels on the LW waveband
MAN Manual station selection
MW/MWA Medium-wave waveband; the MW/AUTOSTORE memory levels on the MW waveband
PTY Programme type (e.g. news, sports, pop music, etc.) on the VHF (FM) waveband
RDS Radio Data System on the VHF (FM) waveband
REG Regional programme on the VHF (FM) waveband
RND Random play — the music tracks on a CD (including in the CD changer) are played in random order
SC Scan — for sampling a station or track
SPEED VOL Speed Volume — for adjustment of speed-dependent volume control
TONE LIN Tone linear — resets the tone settings to the central settings
TP Traffic Program (a radio station broadcasting traffic reports)
TP MIN TP minimum volume — volume adjustment for traffic reports
TR Track — appears when a CD is playing
TREB Adjustment of treble
Abbreviations

The Ultimate Driving Machine
01
41 0
15
8 7
34
enE
46 B
us.
CD
More about BMW
www.bmw.com