Embed Size (px)
Citation preview

APNIC SDN Workshop Lab
1
©APNIC Created: 2 March 2018 Updated: 2 March 2018
OpenFlow Configuration Lab
Objective: As part of this hands-on module, you will be installing the Mininet network emulator on your PC. You will then configure a standalone OpenFlow network using Mininet. Next, you will install the OpenDaylight controller on your PC. Finally, you will configure the Mininet network to use an OpenDaylight controller, add flow entries and observe the exchange of OpenFlow messages between the controller and the virtual switches. Prerequisites: Knowledge of virtualisation, UNIX and OpenFlow. The following will be base topology used for parts 1-4 of this lab. Note that the IP addresses are examples only. When working on your lab, use your actual IP addresses as indicated by your instructors. For the purpose of this guide, we use the IP address of 192.168.1.x to refer to the Mininet machine.
Figure 1 – OpenFlow Lab topology for parts 1-4

Friday, March 02, 2018
2
The following topology will be used for parts 5-7 of this lab. For the purpose of this guide, we use the IP address of 192.168.1.x to refer to the Mininet machine and the IP address of 192.168.1.y to refer to the OpenDaylight machine.
Figure 2 – OpenFlow Lab topology for parts 5-7
Lab Notes To emulate an OpenFlow network, we will use two virtual machines:
• OpenDaylight VM: for running the OpenDaylight controller • Mininet VM: for running the Mininet VM emulator
As a minimum, we recommend the following hardware specifications:
• Intel i5 or i7 processor • 6GB of RAM • 25GB of free hard disk space
Basic steps:
1. Install Oracle VirtualBox 2. Install WireShark 3. Install Mininet VM on VirtualBox 4. Test a simple, standalone Mininet network 5. Create Ubuntu VM on VirtualBox 6. Install and configure Opendaylight on the Ubuntu VM 7. Test a simple Mininet network using the OpenDaylight OpenFlow controller
APNIC SDN Workshop Lab
3
©APNIC Created: 2 March 2018 Updated: 2 March 2018
Lab Exercise
Part 1. Installation of Oracle VirtualBox
VirtualBox is supported on: • Windows • OS X • Linux
Installation steps: 1. Download the appropriate install package for your operating system from:
https://www.virtualbox.org/wiki/Downloads
2. Use the supplied installer to install using default parameters.
Part 2. Installation of Wireshark Wireshark is supported on:
• Windows • OS X • Linux
Installation steps: 1. Download the appropriate install package for your operating system from:
https://www.wireshark.org/download.html
2. Use the supplied installer to install using default parameters.
Part 3. Install Mininet VM on VirtualBox Installation and configuration steps: 1. Download Mininet VM
The Mininet VM images are available at: https://github.com/mininet/mininet/wiki/Mininet-VM-Images
In order to save time, your instructor will provide you instructions to download a mininet OVA virtual appliance locally to create an Ubuntu virtual machine on VirtualBox. Simply double-click the file mininet.ova and import it into VirtualBox. Ensure that you select the option to re-initialise all MAC addresses.

Friday, March 02, 2018
4
2. Configure the network settings of the VM. Within VirtualBox, go into the Settings for the VM and ensure that the first network adapter is attached to ‘Bridged Adapter’, as depicted below:
3. Start the Mininet virtual machine from VirtualBox
4. Log in using the following credentials:
Username: mininet Password: mininet
5. Check the IP address configuration of the Mininet server:
mininet@mininet-vm:~$ ip addr show There should be a total of 2 interfaces: lo and eth0. Verify that the eth0 interface has been assigned an address from the same address range as your LAN interface.
6. You may now SSH to the Mininet virtual machine:
APNIC SDN Workshop Lab
5
©APNIC Created: 2 March 2018 Updated: 2 March 2018
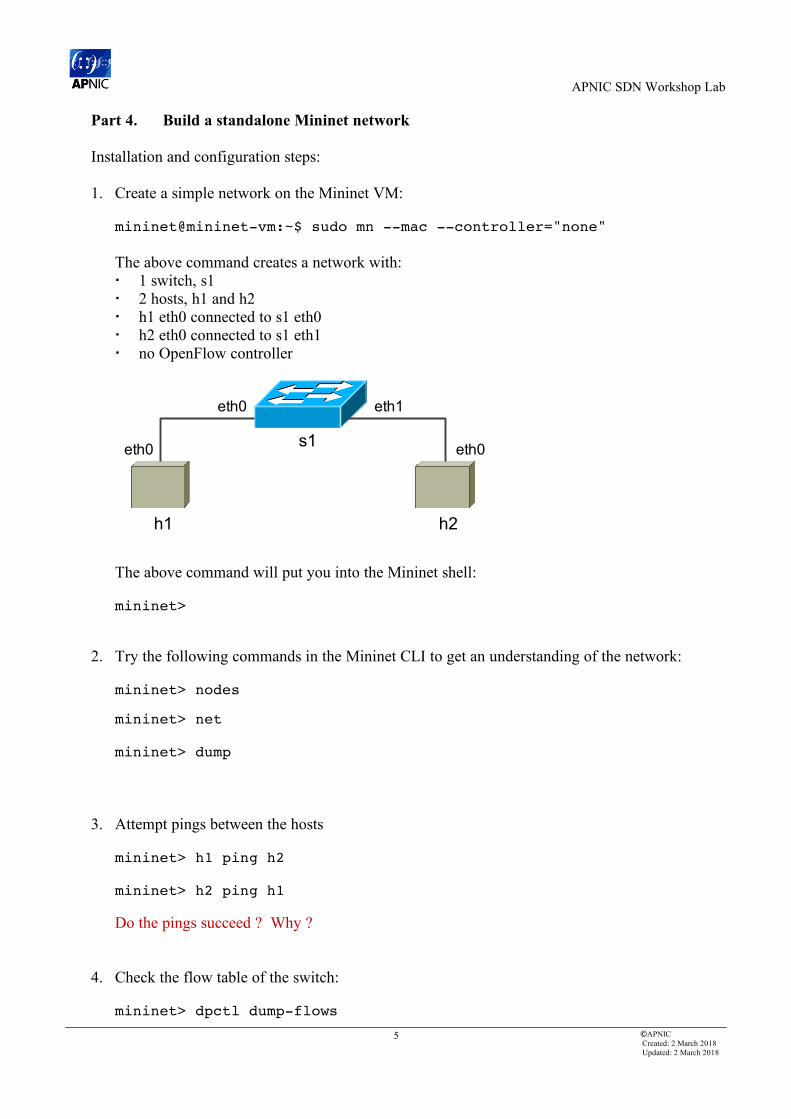
Part 4. Build a standalone Mininet network Installation and configuration steps: 1. Create a simple network on the Mininet VM:
mininet@mininet-vm:~$ sudo mn --mac --controller="none" The above command creates a network with: 1 switch, s1 2 hosts, h1 and h2 h1 eth0 connected to s1 eth0 h2 eth0 connected to s1 eth1 no OpenFlow controller
The above command will put you into the Mininet shell: mininet>
2. Try the following commands in the Mininet CLI to get an understanding of the network:
mininet> nodes mininet> net mininet> dump
3. Attempt pings between the hosts mininet> h1 ping h2 mininet> h2 ping h1 Do the pings succeed ? Why ?
4. Check the flow table of the switch: mininet> dpctl dump-flows
h2h1
s1eth0
eth0 eth1
eth0

Friday, March 02, 2018
6
Can you explain the reason for what you see ?
5. Exit from the Mininet CLI: mininet> exit
6. Create another simple network on the Mininet VM but this time use the default controller. mininet@mininet-vm:~$ sudo mn --mac The above command creates a network with: 1 switch, s1 2 hosts, h1 and h2 h1 eth0 connected to s1 eth0 h2 eth0 connected to s1 eth1 the default OpenFlow controller for Mininet
The above command will put you into the Mininet shell: mininet>
7. Try the following commands in the Mininet CLI to get an understanding of the network:
mininet> nodes mininet> net mininet> dump
8. Check the flow table of the switch: mininet> dpctl dump-flows
h2h1
s1eth0
eth0 eth1
eth0
Controller, c0

APNIC SDN Workshop Lab
7
©APNIC Created: 2 March 2018 Updated: 2 March 2018
Can you explain the reason for what you see ?
9. Attempt pings between the hosts mininet> h1 ping h2 mininet> h2 ping h1 Do the pings succeed ? Why do you think that is the case ?
10. Check the flow table of the switch again: mininet> dpctl dump-flows What do you see now ? Analyse the entries in the table.
11. Wait for the flows to timeout. That is, wait until the output of the following command is again empty. mininet> dpctl dump-flows
12. We will now enable snooping to see the message flow between the switch and controller. mininet> dpctl snoop &
13. Wait for the flows to timeout. That is, wait until the output of the following command is again empty. mininet> dpctl dump-flows
14. Check the flow table again. mininet> dpctl dump-flows What do you see now ?
15. Pings between the hosts again mininet> h1 ping h2 mininet> h2 ping h1
16. Check the flow table npw. mininet> dpctl dump-flows

Friday, March 02, 2018
8
What do you see now ?
17. Exit from the Mininet CLI: mininet> exit
Part 5. Create Ubuntu VM on VirtualBox In order to save time, your instructor will provide you instructions to download a ubuntu.ova virtual appliance to create an Ubuntu virtual machine on VirtualBox. This virtual machine has been:
installed with Ubuntu 16.04.2-server. configured with a network interface with a Bridged adapter configured to acquire addresses via DHCP for the network interface installed with SSH server
Simply double-click the file ubuntu.ova and import it into VirtualBox. Ensure that you select the option to re-initialise all MAC addresses.
Installation and configuration steps: 1. Verify the network settings of the VM. Within VirtualBox, go into the Settings for the VM and
ensure that the first network adapter is attached to ‘Bridged Adapter’, as depicted below:
Adapter 1:
2. Start the Ubuntu virtual machine from VirtualBox

APNIC SDN Workshop Lab
9
©APNIC Created: 2 March 2018 Updated: 2 March 2018
3. Log in using the following credentials:
Username: apnic Password: apnic
4. Verify the version of Ubuntu:
apnic@ubuntu:~$ lsb_release -a
5. Check the IP address configuration of the Ubuntu server:
apnic@ubuntu:~$ ip addr show
There should be a total of 2 interfaces: lo and enp0s3.
Verify that the enp0s3 interface has been assigned an address from the same address range as your LAN interface.
6. You may now SSH to the Ubuntu virtual machine:
7. Update repositories:
apnic@ubuntu:~$ sudo apt-get update
8. Install Java runtime environment:
apnic@ubuntu:~$ ip addr show1: lo: <LOOPBACK,UP,LOWER_UP> mtu 65536 qdisc noqueue state UNKNOWN group default
link/loopback 00:00:00:00:00:00 brd 00:00:00:00:00:00inet 127.0.0.1/8 scope host lo
valid_lft forever preferred_lft foreverinet6 ::1/128 scope host
valid_lft forever preferred_lft forever2: enp0s3: <BROADCAST,MULTICAST,UP,LOWER_UP> mtu 1500 qdisc pfifo_faststate UP group default qlen 1000
link/ether 08:00:27:10:d9:e9 brd ff:ff:ff:ff:ff:ffinet 61.45.252.20/24 brd 61.45.252.255 scope global enp0s3
valid_lft forever preferred_lft foreverinet6 fe80::a00:27ff:fe43:9b6e/64 scope link
valid_lft forever preferred_lft foreverapnic@ubuntu :~$

Friday, March 02, 2018
10
apnic@ubuntu:~$ sudo apt-get install default-jre-headless Set the JAVA_HOME environment variable
apnic@ubuntu:~$ vi ~/.bashrc Add the following line:
JAVA_HOME=/usr/lib/jvm/default-java Run the file:
apnic@ubuntu:~$ source ~/.bashrc
Part 6. Install and configure OpenDaylight on the Ubuntu VM
1. Download and install OpenDaylight:
Downlight OpenDaylight Boron-SR4 (it may be easier to do a web search for ‘OpenDaylight download’ and then copy the download link from there):
apnic@ubuntu:~$ wget https://nexus.opendaylight.org/content/groups/public/org/opendaylight/integration/distribution-karaf/0.5.4-Boron-SR4/distribution-karaf-0.5.4-Boron-SR4.tar.gz
Extract the tar file: apnic@ubuntu:~$ tar xvf distribution-karaf-0.5.4-Boron-SR4.tar.gz
A new directory distribution-karaf-0.5.4-Boron-SR4 will be created in the current directory. Note that Opendaylight uses Apache Karaf technology (http://karaf.apache.org/) which allows the entire distribution to be contained in a single folder.
2. Run OpenDaylight:
apnic@ubuntu:~$ cd distribution-karaf-0.5.4-Boron-SR4 apnic@ubuntu:~$ ./bin/karaf
The above command will take you to the OpenDaylight shell:
APNIC SDN Workshop Lab
11
©APNIC Created: 2 March 2018 Updated: 2 March 2018
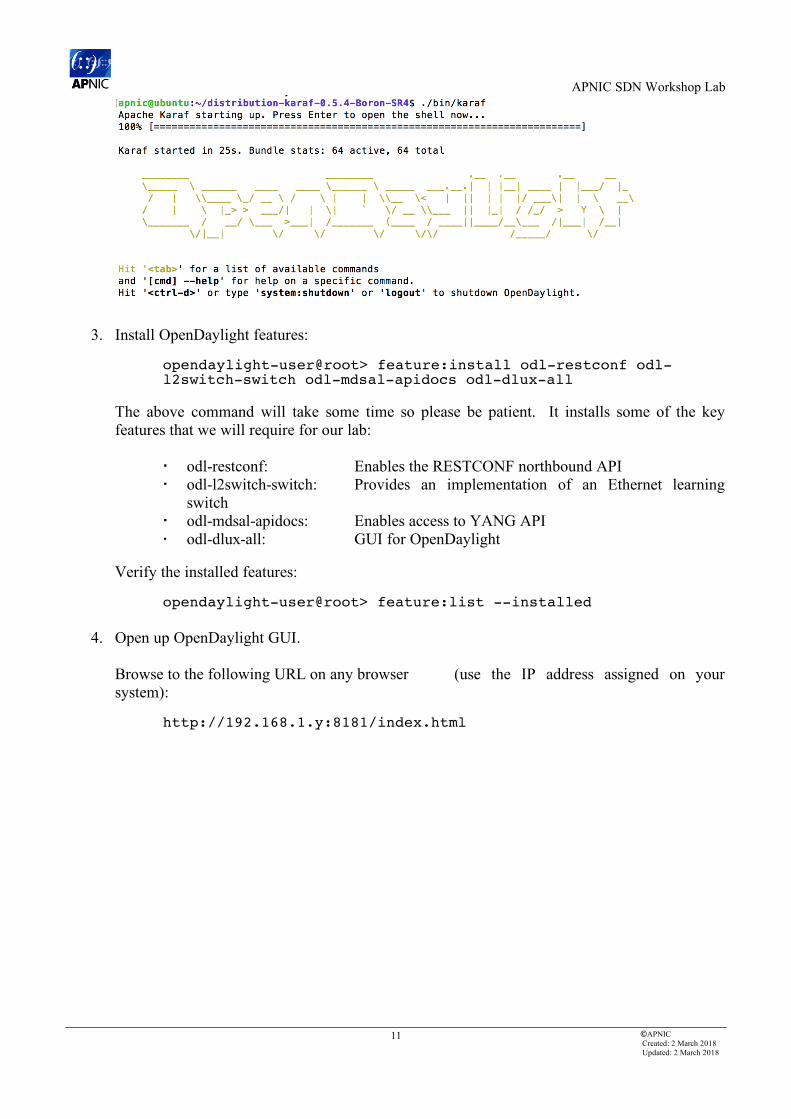
3. Install OpenDaylight features:
opendaylight-user@root> feature:install odl-restconf odl-l2switch-switch odl-mdsal-apidocs odl-dlux-all
The above command will take some time so please be patient. It installs some of the key features that we will require for our lab:
odl-restconf: Enables the RESTCONF northbound API odl-l2switch-switch: Provides an implementation of an Ethernet learning
switch odl-mdsal-apidocs: Enables access to YANG API odl-dlux-all: GUI for OpenDaylight
Verify the installed features: opendaylight-user@root> feature:list --installed
4. Open up OpenDaylight GUI.
Browse to the following URL on any browser (use the IP address assigned on your system):
http://192.168.1.y:8181/index.html
Friday, March 02, 2018
12
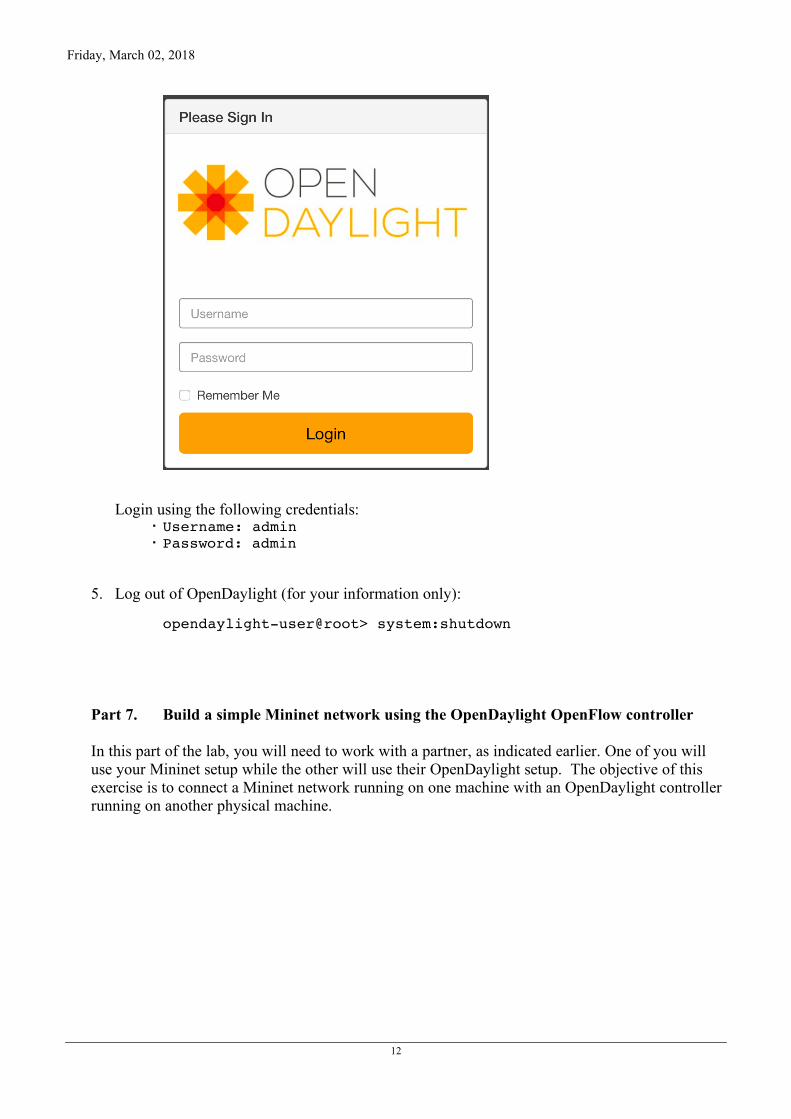
Login using the following credentials: Username: admin Password: admin
5. Log out of OpenDaylight (for your information only):
opendaylight-user@root> system:shutdown
Part 7. Build a simple Mininet network using the OpenDaylight OpenFlow controller In this part of the lab, you will need to work with a partner, as indicated earlier. One of you will use your Mininet setup while the other will use their OpenDaylight setup. The objective of this exercise is to connect a Mininet network running on one machine with an OpenDaylight controller running on another physical machine.

APNIC SDN Workshop Lab
13
©APNIC Created: 2 March 2018 Updated: 2 March 2018
Installation and configuration steps: 1. Start Wireshark and select interface corresponding to your LAN or Wifi interface to capture
2. Create a display filter within Wireshark for openflow_v4
3. Create a simple network on the Mininet VM: mininet@mininet-vm:~$ sudo mn --mac
--controller=remote,ip=192.168.1.y,port=6633 --switch ovs,protocols=OpenFlow13
The above command creates a network with: 1 switch, s1 2 hosts, h1 and h2 h1 eth0 connected to s1 eth0 h2 eth0 connected to s1 eth1 Remote OpenFlow controller @192.168.1.y
VM
61.45.252.0/24
VM
Mininet
61.45.252.y 61.45.252.xVirtualBox VirtualBox
Attendee1 Attendee2

Friday, March 02, 2018
14
The above command will put you into the mininet CLI: mininet>
4. Check the flow table of the switch: mininet> dpctl dump-flows --protocols=OpenFlow13 Can you explain what you see ?
5. Open up OpenDaylight GUI. Browse to the following URL on any browser (use the IP address assigned on your system):
http://192.168.1.y:8181/index.html
View the topology.
6. At this point, stop the Wireshark capture and analyse the OpenFlow messages that have been sniffed. In particular, attempt to relate the FLOW_MOD messages with the contents of the flow table that you displayed earlier.
7. Re-start the Wireshark capture.
8. Attempt pinging between h1 and h2
mininet> h1 ping h2 Do the pings succeed ? Why do you think that is the case ?
h2h1
s1eth0
eth0 eth1
eth0
OpenDaylightcontroller, c0
Attendee2
Attendee1

APNIC SDN Workshop Lab
15
©APNIC Created: 2 March 2018 Updated: 2 March 2018
9. Check the flow table of the switch again:
mininet> dpctl dump-flows What do you see now ? Analyse the entries in the table.
10. Open up OpenDaylight GUI again: http://192.168.1.y:8181/index.html
Reload the topology. Has anything changed ?
11. At this point, stop the Wireshark capture and analyse the OpenFlow messages that have been sniffed. In particular, pay attention to the Packet-In and Flow_Mod messages.
12. Exit from the Mininet CLI: mininet> exit
13. If time permits, repeat the above steps for the following topologies:
sudo mn --mac --topo=tree,3 --controller=remote,ip=192.168.1.y,port=6633 --switch ovs,protocols=OpenFlow13
sudo mn --mac --topo=linear,4 --controller=remote,ip=192.168.1.y,port=6633 --switch ovs,protocols=OpenFlow13