Embed Size (px)
Citation preview

OpenDaylight
Gett ing Started GuideLithium (June 29, 2015)
OpenDaylight Getting StartedGuide
June 29, 2015 Lithium
ii
OpenDaylight Getting Started GuideOpenDaylight Community
Lithium (2015-06-29)Copyright © 2015 Linux Foundation All rights reserved.
This guide describes how to get started with OpenDaylight.
This program and the accompanying materials are made available under the terms of the Eclipse Public License v1.0 whichaccompanies this distribution, and is available at http://www.eclipse.org/legal/epl-v10.html

OpenDaylight Getting StartedGuide
June 29, 2015 Lithium
iii
Table of ContentsOpenDaylight Overview .................................................................................................. 51. OpenDaylight Release Notes ....................................................................................... 1
Target Environment ................................................................................................ 1Known Issues and Limitations ................................................................................. 2Project-specific Release Notes .................................................................................. 2
2. Getting and Installing OpenDaylight Lithium ............................................................... 4Downloading and installing OpenDaylight Lithium .................................................. 4Installing the components ....................................................................................... 5Installing support for REST APIs ............................................................................... 7Installing the DLUX web interface ........................................................................... 7Installing MD-SAL clustering .................................................................................... 7
3. OpFlex agent-ovs Install Guide .................................................................................... 8Required Packages .................................................................................................. 8Host Networking Configuration .............................................................................. 8OVS Bridge Configuration ....................................................................................... 9Agent Configuration ............................................................................................. 10
4. OVSDB OpenStack Installation Guide ......................................................................... 13Overview ............................................................................................................... 13Pre Requisites for Installing OVSDB OpenStack ...................................................... 13Preparing for Installation ....................................................................................... 13Installing OVSDB OpenStack .................................................................................. 13Verifying your Installation ..................................................................................... 14Uninstalling OVSDB OpenStack .............................................................................. 14
5. TSDR H2 Default Datastore Installation Guide ............................................................ 15Overview ............................................................................................................... 15Pre Requisites for Installing TSDR with default H2 datastore ................................... 15Preparing for Installation ....................................................................................... 15Installing TSDR with default H2 datastore ............................................................. 15Verifying your Installation ..................................................................................... 15Post Installation Configuration .............................................................................. 16Upgrading From a Previous Release ....................................................................... 16Uninstalling TSDR with default H2 datastore ......................................................... 16
6. TSDR HBase Data Store Installation Guide ................................................................. 17Overview ............................................................................................................... 17Prerequisites for Installing TSDR HBase Data Store ................................................. 18Preparing for Installation ....................................................................................... 18Installing TSDR HBase Data Store .......................................................................... 18Verifying your Installation ..................................................................................... 19Post Installation Configuration .............................................................................. 19Upgrading From a Previous Release ....................................................................... 19Uninstalling HBase Data Store ............................................................................... 19
7. VTN Installation Guide .............................................................................................. 21Overview ............................................................................................................... 21Preparing for Installation ....................................................................................... 22Installing VTN ........................................................................................................ 22Verifying your Installation ..................................................................................... 23Uninstalling VTN ................................................................................................... 24

OpenDaylight Getting StartedGuide
June 29, 2015 Lithium
iv
List of Tables2.1. Lithium Components ................................................................................................ 52.2. Experimental Lithium Components ........................................................................... 7

OpenDaylight Getting StartedGuide
June 29, 2015 Lithium
5
OpenDaylight OverviewThe OpenDaylight project is a collaborative open source project that aims to accelerateadoption of Software-Defined Networking (SDN) and Network Functions Virtualization(NFV) with a transparent approach that fosters new innovation.
OpenDaylight mainly consists of software designed to be run on top of a Java VirtualMachine (JVM) and can be run on any operating system and hardware as there is a JavaRuntime Environment (JRE) available for it.
For a more detailed information about OpenDaylight, see the and OpenDaylight User Guie,OpenDaylight Developer Guide.

OpenDaylight Getting StartedGuide
June 29, 2015 Lithium
1
1. OpenDaylight Release Notes
Table of ContentsTarget Environment ........................................................................................................ 1Known Issues and Limitations ......................................................................................... 2Project-specific Release Notes .......................................................................................... 2
Target Environment
For ExecutionThe OpenDaylight Karaf container, OSGi bundles, and Java class files are portable andshould run on any Java 7- or Java 8-compliant JVM to run. Certain projects and certainfeatures of some projects may have additional requirements. Those are noted in theproject-specific release notes.
Projects and features which have known additional requirements are: * TCP-MD5 requires64-bit Linux * TSDR has extended requirements for external databases * Persistencehas extended requirements for external databases * SFC requires addition features forcertain configurations * SXP depends on TCP-MD5 on thus requires 64-bit Linux * SNBIhas requirements for Linux and Docker * OpFlex requires Linux * DLUX requires a modernweb browser to view the UI * AAA when using federation has additional requirements forexternal tools * VTN has components which require Linux
Note
If you are using the Oracle JDK, version 1.7.0_45 or later is required.
For DevelopmentOpenDaylight is written primarily in Java project and primarily uses Maven as a build toolConsequently the two main requirements to develop projects within OpenDaylight are:
• A Java 7- or Java 8-compliant JDK
• Maven 3.1.1 or later
Applications and tools built on top of OpenDaylight using it’s REST APIs should have nospecial requirements beyond whatever is needed to run the application or tool and makethe REST calls.
In some places, OpenDaylight makes use of the Xtend language. While Maven willdownload the appropriate tools to build this, additional plugins may be required for IDEsupport.
The projects with additional requirements for execution typically have similar or moreextensive additional requirements for development. See the project-specific release notesfor details.
OpenDaylight Getting StartedGuide
June 29, 2015 Lithium
2
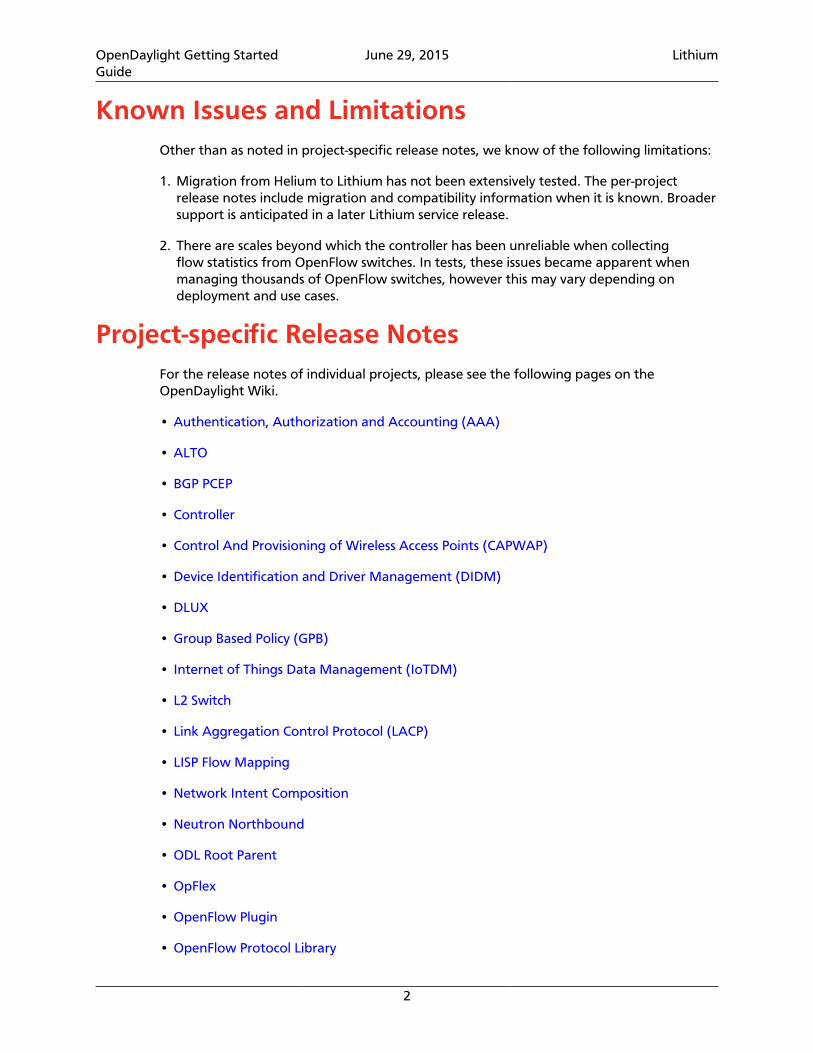
Known Issues and LimitationsOther than as noted in project-specific release notes, we know of the following limitations:
1. Migration from Helium to Lithium has not been extensively tested. The per-projectrelease notes include migration and compatibility information when it is known. Broadersupport is anticipated in a later Lithium service release.
2. There are scales beyond which the controller has been unreliable when collectingflow statistics from OpenFlow switches. In tests, these issues became apparent whenmanaging thousands of OpenFlow switches, however this may vary depending ondeployment and use cases.
Project-specific Release NotesFor the release notes of individual projects, please see the following pages on theOpenDaylight Wiki.
• Authentication, Authorization and Accounting (AAA)
• ALTO
• BGP PCEP
• Controller
• Control And Provisioning of Wireless Access Points (CAPWAP)
• Device Identification and Driver Management (DIDM)
• DLUX
• Group Based Policy (GPB)
• Internet of Things Data Management (IoTDM)
• L2 Switch
• Link Aggregation Control Protocol (LACP)
• LISP Flow Mapping
• Network Intent Composition
• Neutron Northbound
• ODL Root Parent
• OpFlex
• OpenFlow Plugin
• OpenFlow Protocol Library

OpenDaylight Getting StartedGuide
June 29, 2015 Lithium
3
• OVSDB Integration
• Packet Cable/PCMM
• Persistence
• Reservation
• SDN Interface Application
• Secure Network Bootstrapping Infrastructure (SNBI)
• SNMP4SDN
• SNMP Plugin
• Secure tag eXchange Protocol (SXP)
• Service Function Chaining (SFC)
• TCP-MD5
• Time Series Data Repository (TSDR)
• Table Type Patterns (TTP)
• Topology Processing Framework
• Unified Secure Channel (USC)
• VPN Service
• Virtual Tenant Network (VTN)
• YANG Tools
Projects without Release Notes
The following projects participated in Lithium, but intentionally do not have release notes.
• Documentation Project produced this and the other downloadable documentation
• Integration Group hosted the OpenDaylight-wide tests and main release distribution
• Controller Core Functionality Tutorials provided a single test suite (dsbenchmark) thatwas used as part of integration testing
• Release Engineering - autorelease was used to build the Lithium release artifacts andincluding the main release download.
OpenDaylight Getting StartedGuide
June 29, 2015 Lithium
4
2. Getting and Installing OpenDaylight Lithium
Table of ContentsDownloading and installing OpenDaylight Lithium .......................................................... 4Installing the components ............................................................................................... 5Installing support for REST APIs ...................................................................................... 7Installing the DLUX web interface ................................................................................... 7Installing MD-SAL clustering ............................................................................................ 7
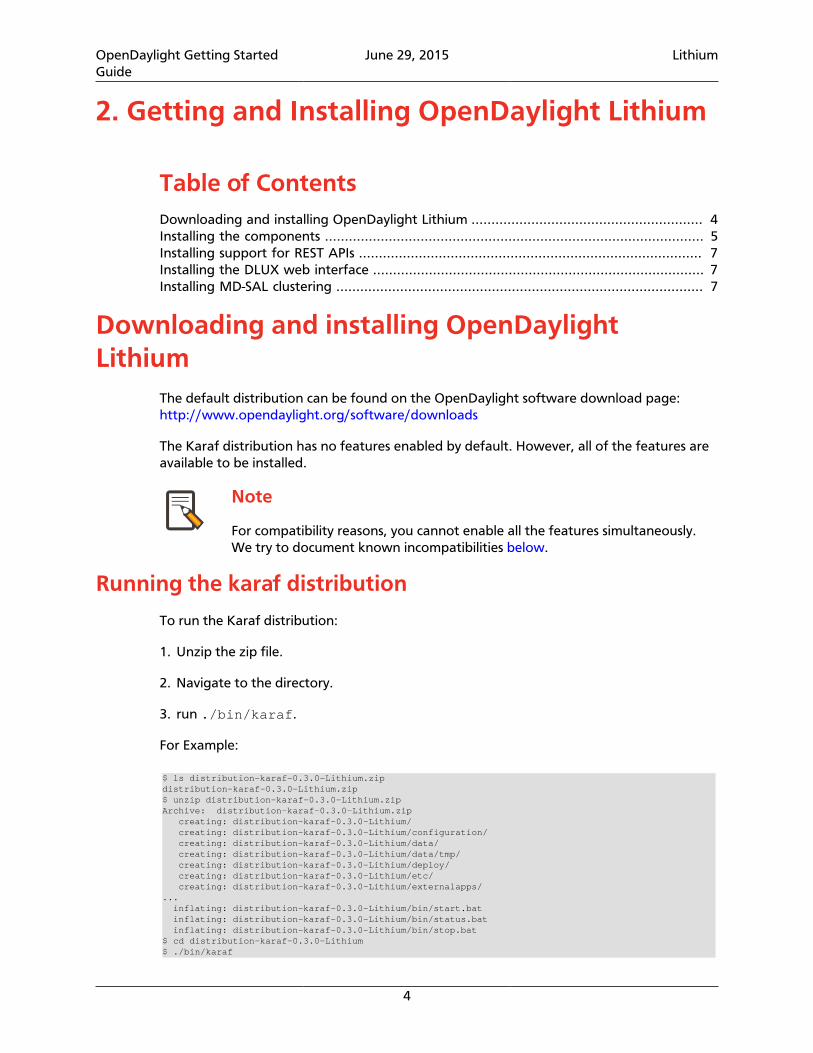
Downloading and installing OpenDaylightLithium
The default distribution can be found on the OpenDaylight software download page:http://www.opendaylight.org/software/downloads
The Karaf distribution has no features enabled by default. However, all of the features areavailable to be installed.
Note
For compatibility reasons, you cannot enable all the features simultaneously.We try to document known incompatibilities below.
Running the karaf distribution
To run the Karaf distribution:
1. Unzip the zip file.
2. Navigate to the directory.
3. run ./bin/karaf.
For Example:
$ ls distribution-karaf-0.3.0-Lithium.zipdistribution-karaf-0.3.0-Lithium.zip$ unzip distribution-karaf-0.3.0-Lithium.zipArchive: distribution-karaf-0.3.0-Lithium.zip creating: distribution-karaf-0.3.0-Lithium/ creating: distribution-karaf-0.3.0-Lithium/configuration/ creating: distribution-karaf-0.3.0-Lithium/data/ creating: distribution-karaf-0.3.0-Lithium/data/tmp/ creating: distribution-karaf-0.3.0-Lithium/deploy/ creating: distribution-karaf-0.3.0-Lithium/etc/ creating: distribution-karaf-0.3.0-Lithium/externalapps/... inflating: distribution-karaf-0.3.0-Lithium/bin/start.bat inflating: distribution-karaf-0.3.0-Lithium/bin/status.bat inflating: distribution-karaf-0.3.0-Lithium/bin/stop.bat$ cd distribution-karaf-0.3.0-Lithium$ ./bin/karaf

OpenDaylight Getting StartedGuide
June 29, 2015 Lithium
5
________ ________ .__ .__ .__ __ \_____ \ ______ ____ ____ \______ \ _____ ___.__.| | |__| ____ | |___/ |_ / | \\____ \_/ __ \ / \ | | \\__ \< | || | | |/ ___\| | \ __\ / | \ |_> > ___/| | \| ` \/ __ \\___ || |_| / /_/ > Y \ | \_______ / __/ \___ >___| /_______ (____ / ____||____/__\___ /|___| /__| \/|__| \/ \/ \/ \/\/ /_____/ \/
• Press tab for a list of available commands
• Typing [cmd] --help will show help for a specific command.
• Press ctrl-d or type system:shutdown or logout to shutdown OpenDaylight.
Installing the componentsThe section describes a list of components in OpenDaylight Lithium and the relevant Karaffeature to install in order to enable that component.
To install a feature use the following command:
feature:install
For Example:
feature:install <feature-name>
Multiple features can be installed using the following command:
feature:install <feature1-name> <feature2-name> ... <featureN-name>
Table 2.1. Lithium Components
Component Name Component Description Karaf feature name Compatibility
ALTO Enable support for Application-Layer Traffic Optimization odl-alto-all self+all
BGP Enables support for BGP odl-bgpcep-bgp-all all
CAPWAP Enables control of supported wireless APs odl-capwap-ac-rest all
DIDM Device Identification and Driver Management odl-didm-identification-api, odl-didm-identification, andodl-didm-drivers-api
all
Group Based Policy Enable Endpoint Registry and Policy Repository REST APIsand associated functionality for Group Based Policy
odl-groupbasedpolicy-ofoverlay
self+all
Internet of ThingsData Management
Enables support for the oneM2M specification odl-iotdm-onem2m all
L2 Switch Provides L2 (Ethernet) forwarding across connectedOppenFlow switches and support for host tracking
odl-l2switch-switch-ui
self+all
LACP Enable support for the Link Aggregation Control Protocol odl-lacp-ui self+all
LISP Flow Mapping Enable LISP control plane services including the mappingsystem services REST API and LISP protocol SB plugin
odl-lispflowmapping-all
all
MD-SAL Clustering Provides support for operating a cluster of OpenDaylightinstances
odl-mdsal-clustering special
NETCONF over SSH Provides support to manage NETCONF-enabled devicesover SSH
odl-netconf-connector-ssh
all
Network IntentComposition
Enable support for high-level network control via intents odl-nic-core self+all

OpenDaylight Getting StartedGuide
June 29, 2015 Lithium
6
Component Name Component Description Karaf feature name Compatibility
OVS Management Enables OVS management using OVSDB plugin and itsassociated OVSDB northbound APIs
odl-ovsdb-all all
OVSDB OpenStackNeutron
OpenStack Network Virtualization using OpenDaylight’sOVSDB support
odl-ovsdb-openstack
self+all
OpFlex Enables support for the OpFlex protocol special (see user/developer guide)
all
OpenFlow FlowProgramming
Enables discovery and control of OpenFlow switches andthe topology between them
odl-openflowplugin-flow-services-ui
all
OpenFlow TableType Patterns
Allows OpenFlow Table Type Patterns to be manuallyassociated with network elements
odl-ttp-all all
PCEP Enables support for PCEP odl-bgpcep-pcep-all all
Packetcable PCMM Enables flow-based dynamic QoS management of CMTSusing in the DOCSIS infrastructure
odl-packetcable-all self+all
Packetcable PolicyServer
Enables support for the PacketCable policy server odl-packetcable-policy-server-all
self+all
RESTCONF APISupport
Enables REST API access to the MD-SAL including the datastore
odl-restconf all
SDN Interface Provides support for interaction and sharing of statebetween (non-clustered) OpenDaylight instances
odl-sdninterfaceapp-all
all
SFC over L2 Supports implementing SFC using Layer 2 forwarding odl-sfcofl2 self+all
SFC over LISP Supports implementing SFC using LISP odl-sfclisp all
SFC over REST Supports implementing SFC using REST CRUD operationson network elements
odl-sfc-sb-rest all
SFC over VXLAN Supports implementing SFC using VXLAN tunnels odl-sfc-ovs self+all
SNMP Plugin Enables monitoring and control of network elements viaSNMP
odl-snmp-plugin all
SNMP4SDN Enables OpenFlow-like control of network elements viaSNMP
odl-snmp4sdn-all all
SSSD FederatedAuthentication
Enable support for federated authentication using SSSD odl-aaa-sssd-plugin all
Secure NetworkingBootstrap
Defines a SNBI domain and associated white lists ofdevices to be accommodated to the domain
odl-snbi-all self+all
Secure tageXchange Protocol(SXP)
Enables distribution of shared tags to network devices odl-sxp-controller all
Service FlowChaining (SFC)
Enables support for applying chains of network services tocertain traffic
odl-sfc-all all
Time Series DataRepository (TSDR)
Enables historical tracking of OpenFlow statistics odl-tsdr-all self+all
TopologyProcessingFramework
Enables merged and filtered views of network topologies odl-topoprocessing-framework
all
Unified SecureChannel (USC)
Enables support for secure, remote connections tonetwork devices
odl-usc-channel-ui all
VPN Service Enables support for OpenStack VPNaaS odl-vpnservice-core all
VTN Manager Enables Virtual Tenant Network support odl-vtn-manager-rest
self+all
VTN ManagerNeutron
Enables OpenStack Neutron support of VTN Manager odl-vtn-manager-neutron
self+all
In the table a compatibility value of all means that it can be run with other features. Avalue of self+all indicates that the feature can be installed with other features with a valueof all, but may interact badly other features with a value of self+all.

OpenDaylight Getting StartedGuide
June 29, 2015 Lithium
7
Table 2.2. Experimental Lithium Components
Component Name Component Description Karaf feature name Compatibility
Persistence Enables saving of data to external databases odl-persistence-api self+all
Reservation Enables bandwidth calendaring using the TL1 protocol odl-reservation-models
all
Listing available features
To find the complete list of Karaf features, run the following command:
feature:list
To list the installed Karaf features, run the following command:
feature:list -i
Installing support for REST APIsMost components that offer REST APIs will automatically load the RESTCONF API Supportcomponent, but if for whatever reason they seem to be missing, you can activate thissupport by installing the odl-restconf feature.
Installing the DLUX web interfaceThe OpenDaylight web interface; DLUX, draws information from topology andhost databases to display information about the topology of the network, flowstatistics, host locations. You can either use DLUX as a stand-alone plug-in or integratewith OpenDaylight. To install DLUX as a standalone application, refer to https://wiki.opendaylight.org/view/OpenDaylight_DLUX:Setup_and_Run To integrate withOpenDaylight you must enable DLUX Karaf feature. You can enable AD-SAL, MD-SAL andvarious other bundles within Karaf depending on the features you would like to accessusing DLUX. Each feature can be enabled or disabled separately.
Ensure that you have created a topology and enabled MD-SAL feature in the Karafdistribution before you use DLUX for network management. For more information aboutenabling the Karaf features for DLUX, refer to https://wiki.opendaylight.org/view/OpenDaylight_DLUX:DLUX_Karaf_Feature
Installing MD-SAL clusteringThe MD-SAL clustering feature has "special" compatibility criteria. You must installclustering, before other features are installed. To install clustering, run the followingcommand on the Karaf CLI console:
feature:install odl-mdsal-clustering

OpenDaylight Getting StartedGuide
June 29, 2015 Lithium
8
3. OpFlex agent-ovs Install Guide
Table of ContentsRequired Packages .......................................................................................................... 8Host Networking Configuration ...................................................................................... 8OVS Bridge Configuration ............................................................................................... 9Agent Configuration ..................................................................................................... 10
Required PackagesYou’ll need to install the following packages and their dependencies:
• libuv
• openvswitch-gbp
• openvswitch-gbp-lib
• openvswitch-gbp-kmod
• libopflex
• libmodelgbp
• agent-ovs
Packages are available for Red Hat Enterprise Linux 7 and Ubuntu 14.04 LTS. Some of theexamples below are specific to RHEL7 but you can run the equivalent commands for upstartinstead of systemd.
Note that many of these steps may be performed automatically if you’re deploying thisalong with a larger orchestration system.
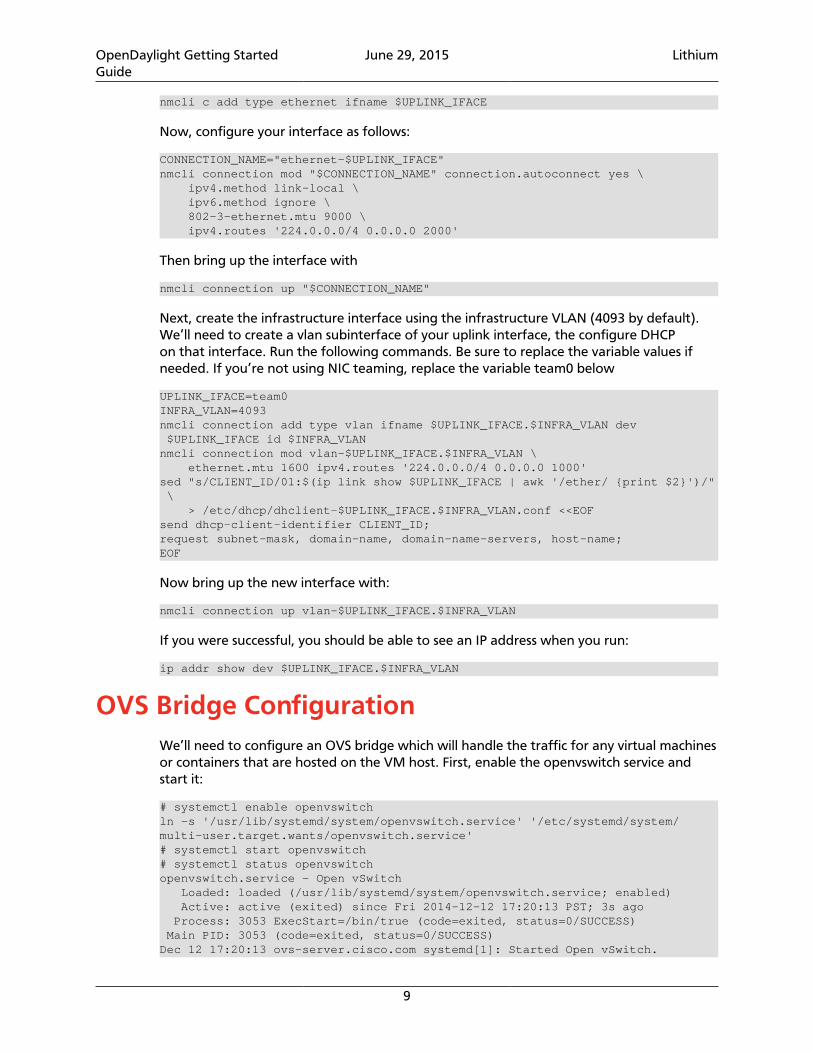
Host Networking ConfigurationYou’ll need to set up your VM host uplink interface. You should ensure that the MTU ofthe underlying network is sufficient to handle tunneled traffic. We will use an example ofsetting up eth0 as your uplink interface with a vlan of 4093 used for the networking controlinfrastructure and tunnel data plane.
We just need to set the MTU and disable IPv4 and IPv6 autoconfiguration. The MTU needsto be large enough to allow both the VXLAN header and VLAN tags to pass throughwithout fragmenting for best performance. We’ll use 1600 bytes which should be sufficientassuming you are using a default 1500 byte MTU on your virtual machine traffic. If youalready have any NetworkManager connections configured for your uplink interface findthe connection name and proceed to the next step. Otherwise, create a connection with(be sure to update the variable UPLINK_IFACE as needed):
UPLINK_IFACE=eth0
OpenDaylight Getting StartedGuide
June 29, 2015 Lithium
9
nmcli c add type ethernet ifname $UPLINK_IFACE
Now, configure your interface as follows:
CONNECTION_NAME="ethernet-$UPLINK_IFACE"nmcli connection mod "$CONNECTION_NAME" connection.autoconnect yes \ ipv4.method link-local \ ipv6.method ignore \ 802-3-ethernet.mtu 9000 \ ipv4.routes '224.0.0.0/4 0.0.0.0 2000'
Then bring up the interface with
nmcli connection up "$CONNECTION_NAME"
Next, create the infrastructure interface using the infrastructure VLAN (4093 by default).We’ll need to create a vlan subinterface of your uplink interface, the configure DHCPon that interface. Run the following commands. Be sure to replace the variable values ifneeded. If you’re not using NIC teaming, replace the variable team0 below
UPLINK_IFACE=team0INFRA_VLAN=4093nmcli connection add type vlan ifname $UPLINK_IFACE.$INFRA_VLAN dev $UPLINK_IFACE id $INFRA_VLANnmcli connection mod vlan-$UPLINK_IFACE.$INFRA_VLAN \ ethernet.mtu 1600 ipv4.routes '224.0.0.0/4 0.0.0.0 1000'sed "s/CLIENT_ID/01:$(ip link show $UPLINK_IFACE | awk '/ether/ {print $2}')/" \ > /etc/dhcp/dhclient-$UPLINK_IFACE.$INFRA_VLAN.conf <<EOFsend dhcp-client-identifier CLIENT_ID;request subnet-mask, domain-name, domain-name-servers, host-name;EOF
Now bring up the new interface with:
nmcli connection up vlan-$UPLINK_IFACE.$INFRA_VLAN
If you were successful, you should be able to see an IP address when you run:
ip addr show dev $UPLINK_IFACE.$INFRA_VLAN
OVS Bridge ConfigurationWe’ll need to configure an OVS bridge which will handle the traffic for any virtual machinesor containers that are hosted on the VM host. First, enable the openvswitch service andstart it:
# systemctl enable openvswitchln -s '/usr/lib/systemd/system/openvswitch.service' '/etc/systemd/system/multi-user.target.wants/openvswitch.service'# systemctl start openvswitch# systemctl status openvswitchopenvswitch.service - Open vSwitch Loaded: loaded (/usr/lib/systemd/system/openvswitch.service; enabled) Active: active (exited) since Fri 2014-12-12 17:20:13 PST; 3s ago Process: 3053 ExecStart=/bin/true (code=exited, status=0/SUCCESS) Main PID: 3053 (code=exited, status=0/SUCCESS)Dec 12 17:20:13 ovs-server.cisco.com systemd[1]: Started Open vSwitch.

OpenDaylight Getting StartedGuide
June 29, 2015 Lithium
10
Next, we can create an OVS bridge (you may wish to use a different bridge name):
# ovs-vsctl add-br br0# ovs-vsctl show34aa83d7-b918-4e49-bcec-1b521acd1962 Bridge "br0" Port "br0" Interface "br0" type: internal ovs_version: "2.3.90"
Next, we configure a tunnel interface on our new bridge as follows:
# ovs-vsctl add-port br0 br0_vxlan0 -- \ set Interface br0_vxlan0 type=vxlan \ options:remote_ip=flow options:key=flow options:dst_port=8472# ovs-vsctl show34aa83d7-b918-4e49-bcec-1b521acd1962 Bridge "br0" Port "br0_vxlan0" Interface "br0_vxlan0" type: vxlan options: {dst_port="8472", key=flow, remote_ip=flow} Port "br0" Interface "br0" type: internal ovs_version: "2.3.90"
Open vSwitch is now configured and ready.
Agent ConfigurationBefore enabling the agent, we’ll need to edit its configuration file, which is located at "/etc/opflex-agent-ovs/opflex-agent-ovs.conf".
First, we’ll configure the Opflex protocol parameters. If you’re using an ACI fabric, you’llneed the OpFlex domain from the ACI configuration, which is the name of the VMMdomain you mapped to the interface for this hypervisor. Set the "domain" field to thisvalue. Next, set the "name" field to a hostname or other unique identifier for the VM host.Finally, set the "peers" list to contain the fixed static anycast peer address of 10.0.0.30 andport 8009. Here is an example of a completed section (bold text shows areas you’ll need tomodify):
"opflex": { // The globally unique policy domain for this agent. "domain": "[CHANGE ME]",
// The unique name in the policy domain for this agent. "name": "[CHANGE ME]",
// a list of peers to connect to, by hostname and port. One // peer, or an anycast pseudo-peer, is sufficient to bootstrap // the connection without needing an exhaustive list of all // peers. "peers": [ {"hostname": "10.0.0.30", "port": 8009} ],

OpenDaylight Getting StartedGuide
June 29, 2015 Lithium
11
"ssl": { // SSL mode. Possible values: // disabled: communicate without encryption // encrypted: encrypt but do not verify peers // secure: encrypt and verify peer certificates "mode": "encrypted",
// The path to a directory containing trusted certificate // authority public certificates, or a file containing a // specific CA certificate. "ca-store": "/etc/ssl/certs/" }},
Next, configure the appropriate policy renderer for the ACI fabric. You’ll want to use astitched-mode renderer. You’ll need to configure the bridge name and the uplink interfacename. The remote anycast IP address will need to be obtained from the ACI configurationconsole, but unless the configuration is unusual, it will be 10.0.0.32.
// Renderers enforce policy obtained via OpFlex."renderers": { // Stitched-mode renderer for interoperating with a // hardware fabric such as ACI "stitched-mode": { "ovs-bridge-name": "br0",
// Set encapsulation type. Must set either vxlan or vlan. "encap": { // Encapsulate traffic with VXLAN. "vxlan" : { // The name of the tunnel interface in OVS "encap-iface": "br0_vxlan0",
// The name of the interface whose IP should be used // as the source IP in encapsulated traffic. "uplink-iface": "eth0.4093",
// The vlan tag, if any, used on the uplink interface. // Set to zero or omit if the uplink is untagged. "uplink-vlan": 4093,
// The IP address used for the destination IP in // the encapsulated traffic. This should be an // anycast IP address understood by the upstream // stitched-mode fabric. "remote-ip": "10.0.0.32" } }, // Configure forwarding policy "forwarding": { // Configure the virtual distributed router "virtual-router": { // Enable virtual distributed router. Set to true // to enable or false to disable. Default true. "enabled": true,
// Override MAC address for virtual router. // Default is "00:22:bd:f8:19:ff" "mac": "00:22:bd:f8:19:ff",

OpenDaylight Getting StartedGuide
June 29, 2015 Lithium
12
// Configure IPv6-related settings for the virtual // router "ipv6" : { // Send router advertisement messages in // response to router solicitation requests as // well as unsolicited advertisements. "router-advertisement": true } },
// Configure virtual distributed DHCP server "virtual-dhcp": { // Enable virtual distributed DHCP server. Set to // true to enable or false to disable. Default // true. "enabled": true,
// Override MAC address for virtual dhcp server. // Default is "00:22:bd:f8:19:ff" "mac": "00:22:bd:f8:19:ff" } },
// Location to store cached IDs for managing flow state "flowid-cache-dir": "DEFAULT_FLOWID_CACHE_DIR" }}
Finally, enable the agent service:
# systemctl enable agent-ovsln -s '/usr/lib/systemd/system/agent-ovs.service' '/etc/systemd/system/multi-user.target.wants/agent-ovs.service'# systemctl start agent-ovs# systemctl status agent-ovsagent-ovs.service - Opflex OVS Agent Loaded: loaded (/usr/lib/systemd/system/agent-ovs.service; enabled) Active: active (running) since Mon 2014-12-15 10:03:42 PST; 5min ago Main PID: 6062 (agent_ovs) CGroup: /system.slice/agent-ovs.service ##6062 /usr/bin/agent_ovs
The agent is now running and ready to enforce policy. You can add endpoints to the localVM hosts using the OpFlex Group-based policy plugin from OpenStack, or manually.

OpenDaylight Getting StartedGuide
June 29, 2015 Lithium
13
4. OVSDB OpenStack Installation Guide
Table of ContentsOverview ....................................................................................................................... 13Pre Requisites for Installing OVSDB OpenStack .............................................................. 13Preparing for Installation ............................................................................................... 13Installing OVSDB OpenStack .......................................................................................... 13Verifying your Installation ............................................................................................. 14Uninstalling OVSDB OpenStack ...................................................................................... 14
OverviewThis guide is geared towards installing OpenDaylight to use the OVSDB project to provideNeutron support for OpenStack.
Open vSwitch (OVS) is generally accepted as the unofficial standard for Virtual Switching inthe Open hypervisor based solutions. For information on OVS, see Open vSwitch.
With OpenStack within the SDN context, controllers and applications interact using twochannels: OpenFlow and OVSDB. OpenFlow addresses the forwarding-side of the OVSfunctionality. OVSDB, on the other hand, addresses the management-plane. A simpleand concise overview of Open Virtual Switch Database (OVSDB) is available at: http://networkstatic.net/getting-started-ovsdb/
Pre Requisites for Installing OVSDB OpenStack• JRE 1.7+
• A distribution of OpenDaylight
Preparing for Installation1. Download a copy of the latest OpenDaylight release in a Pre-Build archive of your
choosing. Download OpenDaylight
Installing OVSDB OpenStack1. Extract the OpenDaylight distribution somewhere.
2. Navigate to the /bin/ directory
3. Execute the karaf binary file, that should bring up the OpenDaylight console
4. Install the required features with these commands: feature:install odl-ovsdb-openstack
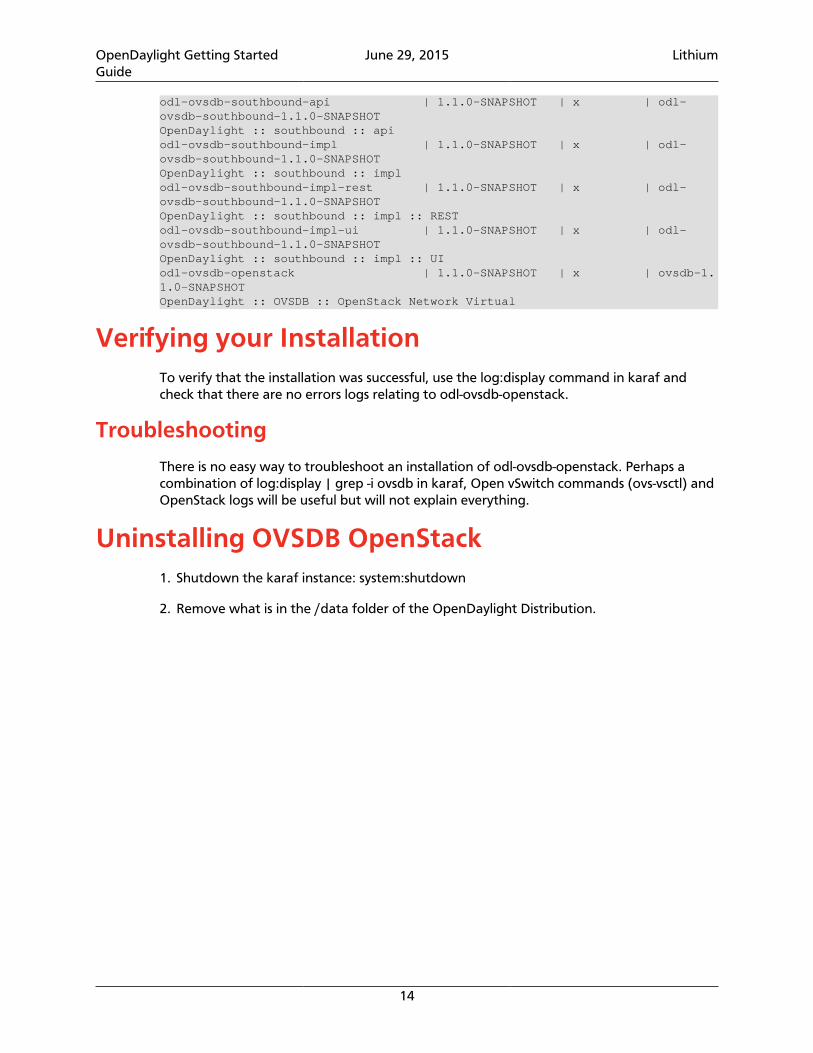
Sample output from the Karaf consoleopendaylight-user@root>feature:list -i | grep ovsdb
OpenDaylight Getting StartedGuide
June 29, 2015 Lithium
14
odl-ovsdb-southbound-api | 1.1.0-SNAPSHOT | x | odl-ovsdb-southbound-1.1.0-SNAPSHOTOpenDaylight :: southbound :: apiodl-ovsdb-southbound-impl | 1.1.0-SNAPSHOT | x | odl-ovsdb-southbound-1.1.0-SNAPSHOTOpenDaylight :: southbound :: implodl-ovsdb-southbound-impl-rest | 1.1.0-SNAPSHOT | x | odl-ovsdb-southbound-1.1.0-SNAPSHOTOpenDaylight :: southbound :: impl :: RESTodl-ovsdb-southbound-impl-ui | 1.1.0-SNAPSHOT | x | odl-ovsdb-southbound-1.1.0-SNAPSHOTOpenDaylight :: southbound :: impl :: UIodl-ovsdb-openstack | 1.1.0-SNAPSHOT | x | ovsdb-1.1.0-SNAPSHOTOpenDaylight :: OVSDB :: OpenStack Network Virtual
Verifying your InstallationTo verify that the installation was successful, use the log:display command in karaf andcheck that there are no errors logs relating to odl-ovsdb-openstack.
Troubleshooting
There is no easy way to troubleshoot an installation of odl-ovsdb-openstack. Perhaps acombination of log:display | grep -i ovsdb in karaf, Open vSwitch commands (ovs-vsctl) andOpenStack logs will be useful but will not explain everything.
Uninstalling OVSDB OpenStack1. Shutdown the karaf instance: system:shutdown
2. Remove what is in the /data folder of the OpenDaylight Distribution.

OpenDaylight Getting StartedGuide
June 29, 2015 Lithium
15
5. TSDR H2 Default Datastore Installation Guide
Table of ContentsOverview ....................................................................................................................... 15Pre Requisites for Installing TSDR with default H2 datastore .......................................... 15Preparing for Installation ............................................................................................... 15Installing TSDR with default H2 datastore ..................................................................... 15Verifying your Installation ............................................................................................. 15Post Installation Configuration ...................................................................................... 16Upgrading From a Previous Release ............................................................................... 16Uninstalling TSDR with default H2 datastore ................................................................. 16
This document is for the user to install the artifacts that are needed for using Time SeriesData Repository (TSDR) functionality in the ODL Controller by enabling the default JPA (H2)Datastore. TSDR is new functionality added in OpenDaylight in Lithium Release.
OverviewIn Lithium Release the time deries data records of OpenFlow statistics are collectedperiodically and stored in a persistent store. For non-production usage, the bundled defaultJPA based datastore (H2) is utilized based on odl-tsdr-all feature installation. The TSDRrecords get persisted in H2 store in <install folder>/tsdr/ folder by default.
Pre Requisites for Installing TSDR with default H2datastore
There are no additional pre-requisites for TSDR based on default datastore
Preparing for InstallationNo additional steps required for preparation of installing TSDR feature
Installing TSDR with default H2 datastoreOnce OpenDaylight distribution is up, from karaf console install the TSDR feature withdefault datastore (JPA based datastore H2 store used) can be installed by
feature:install odl-tsdr-all
This will install all dependency features (and can take sometime) before returning controlto the console.
Verifying your InstallationIf the feature install was successful you should be able to see the following tsdr commandsadded
OpenDaylight Getting StartedGuide
June 29, 2015 Lithium
16
tsdr:list tsdr:purgeAll
Troubleshooting
Check the ../data/log/karaf.log for any exception related to TSDR or JPA related features
Post Installation ConfigurationThe feature installation takes care of automated configuration of the datasource byinstalling a file in <install folder>/etc named org.ops4j.datasource-metric.cfg. This containsthe default location of <install folder>/tsdr where the H2 datastore files are stored. If youwant to change the default location of the datastore files to some other location updatethe last portion of the url property in the org.ops4j.datasource-metric.cfg and then restartthe karaf container
Upgrading From a Previous ReleaseLithium being the first release supporting TSDR functionality, only fresh installation ispossible.However if you want to move to production usage by enabling the store HBase forTSDR usage, you can do it by uninstalling the TSDR with default H2 datastore, restartingthe Karaf container and then enabling the TSDR with HBase store as documented in tsdr-hbase-install.doc
Uninstalling TSDR with default H2 datastoreTo uninstall the TSDR functionality with the default store, you need to do the followingfrom karaf console * feature:uninstall odl-tsdr-all * feature:uninstall odl-tsdr-core *feature:uninstall odl-tsdr-H2-persistence
Its recommended to restart the Karaf container after uninstallation of the TSDRfunctionality with the default store

OpenDaylight Getting StartedGuide
June 29, 2015 Lithium
17
6. TSDR HBase Data Store Installation Guide
Table of ContentsOverview ....................................................................................................................... 17Prerequisites for Installing TSDR HBase Data Store ......................................................... 18Preparing for Installation ............................................................................................... 18Installing TSDR HBase Data Store .................................................................................. 18Verifying your Installation ............................................................................................. 19Post Installation Configuration ...................................................................................... 19Upgrading From a Previous Release ............................................................................... 19Uninstalling HBase Data Store ....................................................................................... 19
This document is for the user to install the artifacts that are needed for using HBase DataStore in Time Series Data Repository, which is a new feature available in OpenDaylightLithium release.
OverviewThe Time Series Data Repository (TSDR) project in OpenDaylight (ODL) creates aframework for collecting, storing, querying, and maintaining time series data in theOpenDaylight SDN controller. It contains the following services and components:
• Data Collection Service
• Data Storage Service
• TSDR Persistence Layer with data stores as plugins
• TSDR Data Stores
• Data Query Service
• Data Aggregation Service
• Data Purging Service
Data Collection Service handles the collection of time series data into TSDR and hands itover to Data Storage Service. Data Storage Service stores the data into TSDR through TSDRPersistence Layer. TSDR Persistence Layer provides generic Service APIs allowing variousdata stores to be plugged in. Data Aggregation Service aggregates time series fine-grainedraw data into course-grained roll-up data to control the size of the data. Data PurgingService periodically purges both fine-grained raw data and course-granined aggregateddata according to user-defined schedules.
In Lithium, we implemented Data Collection Service, Data Storage Service, TSDR PersistenceLayer, TSDR HBase Data Store, and TSDR H2 Data Store. Among these services andcomponents, time series data is communicated using a common TSDR data model, whichis designed and implemented for the abstraction of the time series data commonalities.

OpenDaylight Getting StartedGuide
June 29, 2015 Lithium
18
With these functions, TSDR will be able to collect the data from the data sources and storethem into one of the TSDR data stores: either HBase Data Store or H2 Data Store. We alsoprovided a simple query command from Karaf console for the user to retrieve TSDR datafrom the data stores.
A future release will contain Data Aggregation service, Data Purging Service, and a full-fledged Data Query Service with Norghbound APIs.
Prerequisites for Installing TSDR HBase Data StoreThe hardware requirements are the same as those for standard ODL controller installation.
The software requirements for TSDR HBase Data Store are as follows:
• The supported operating system for TSDR HBase Data Store is Linux. We do not supportTSDR HBase Data Store on Windows.
• Besides the software that ODL requires, we also require HBase database running on topof Hadoop single node.
Preparing for InstallationDownload HBase (version number to be finalized) from the following website.
http://archive.apache.org/dist/hbase/hbase-0.94.15/
Installing TSDR HBase Data StoreInstalling TSDR HBase Data Store contains two steps:
• Installing HBase server, and
• Installing TSDR HBase Data Store features from ODL Karaf console.
This installation guide will only cover the first step. For installing TSDR HBase Data Storefeatures, please refer to TSDR HBase Data Store User Guide.
In Lithium, we only support HBase single node running together on the same machine asODL controller. Therefore, follow the steps to download and install HBase server onto thesame box as where ODL controller is running:
• Create a folder in Linux operating system for the HBase server.
For example, create an hbase directory under /usr/lib:
mkdir /usr/lib/hbase
• Unzip the downloaded HBase server tar file.
Run the following command to unzip the installation package:
tar xvf <hbase-installer-name> /usr/lib/hbase

OpenDaylight Getting StartedGuide
June 29, 2015 Lithium
19
• Make proper changes in hbase-site.xml
a. Under <hbase-install-directory>/conf/, there is a hbase-site.xml. Although it is notrecommended, an experience user with HBase canmodify the data directory for hbaseserver to store the data.
b. Modify the value of the property with name "hbase.rootdir" in the file to reflect thedesired file directory for storing hbase data.
The following is an example of the file:
<configuration> <property> <name>hbase.rootdir</name> <value>file:///usr/lib/hbase/data</value> </property> <property> <name>hbase.zookeeper.property.dataDir</name> <value>/usr/lib/hbase/zookeeper</value> </property></configuration>
Verifying your InstallationAfter the HBase server is properly installed, start hbase server and hbase shell.
a. start hbase server
cd <hbase-installation-directory>./start-hbase.sh
b. start hbase shell
cd <hbase-insatllation-directory>./hbase shell
Post Installation ConfigurationPlease refer to HBase Data Store User Guide.
Upgrading From a Previous ReleaseLithium is the first release of TSDR. Upgrading is not applicable for TSDR Lithium release.
Uninstalling HBase Data StoreTo uninstall TSDR HBase Data Store,
a. stop hbase server
cd <hbase-installation-directory>./stop-hbase.sh
b. remove the file directory that contains the HBase server installation.

OpenDaylight Getting StartedGuide
June 29, 2015 Lithium
20
rm -r <hbase-installation-directory>

OpenDaylight Getting StartedGuide
June 29, 2015 Lithium
21
7. VTN Installation Guide
Table of ContentsOverview ....................................................................................................................... 21Preparing for Installation ............................................................................................... 22Installing VTN ................................................................................................................ 22Verifying your Installation ............................................................................................. 23Uninstalling VTN ........................................................................................................... 24
OverviewOpenDaylight Virtual Tenant Network (VTN) is an application that provides multi-tenantvirtual network on an SDN controller.
Conventionally, huge investment in the network systems and operating expenses areneeded because the network is configured as a silo for each department and system.Therefore various network appliances must be installed for each tenant and those boxescannot be shared with others. It is a heavy work to design, implement and operate theentire complex network.
The uniqueness of VTN is a logical abstraction plane. This enables the complete separationof logical plane from physical plane. Users can design and deploy any desired networkwithout knowing the physical network topology or bandwidth restrictions.
VTN allows the users to define the network with a look and feel of conventional L2/L3network. Once the network is designed on VTN, it will automatically be mapped intounderlying physical network, and then configured on the individual switch leverage SDNcontrol protocol. The definition of logical plane makes it possible not only to hide thecomplexity of the underlying network but also to better manage network resources.It achieves reducing reconfiguration time of network services and minimizing networkconfiguration errors. OpenDaylight Virtual Tenant Network (VTN) is an application thatprovides multi-tenant virtual network on an SDN controller. It provides API for creating acommon virtual network irrespective of the physical network.
It is implemented as two major components
• VTN Manager
• VTN Coordinator
VTN Manager
An OpenDaylight Controller Plugin that interacts with other modules to implementthe components of the VTN model. It also provides a REST interface to configure VTNcomponents in ODL controller. VTN Manager is implemented as one plugin to theOpenDaylight controller. This provides a REST interface to create/update/delete VTN
OpenDaylight Getting StartedGuide
June 29, 2015 Lithium
22
components. The user command in VTN Coordinator is translated as REST API to VTNManager by the ODC Driver component. In addition to the above mentioned role, it alsoprovides an implementation to the OpenStack L2 Network Functions API.
VTN Coordinator
The VTN Coordinator is an external application that provides a REST interface for auser to use the VTN Virtualization. It interacts with VTN Manager plugin to implementthe user configuration. It is also capable of multiple controller orchestration. It realizesVirtual Tenant Network (VTN) provisioning in OpenDaylight Controllers (ODC). Inthe OpenDaylight architecture VTN Coordinator is part of the network application,orchestration and services layer. VTN Coordinator has been implemented as an externalapplication to the OpenDaylight controller. This component is responsible for the VTNvirtualization. VTN Coordinator will use the REST interface exposed by the VTN Manger torealize the virtual network using the OpenDaylight controller. It uses OpenDaylight APIs(REST) to construct the virtual network in ODCs. It provides REST APIs for northbound VTNapplications and supports virtual networks spanning across multiple ODCs by coordinatingacross ODCs.
Preparing for Installation
VTN Manager
Running the Karaf distribution
Follow the instructions in Getting and Installing OpenDaylight.
VTN Coordinator
• Arrange a physical/virtual server with any one of the supported 64-bit OS environment.
• RHEL 6 / 7
• CentOS 6 / 7
• Install these packages
yum install perl-Digest-SHA uuid libxslt libcurl unixODBC json-c
rpm -ivh http://yum.postgresql.org/9.3/redhat/rhel-6-x86_64/pgdg-redhat93-9.3-1.noarch.rpm
yum install postgresql93-libs postgresql93 postgresql93-server postgresql93-contrib postgresql93-odbc
Installing VTN
VTN Manager
Install Feature
OpenDaylight Getting StartedGuide
June 29, 2015 Lithium
23
feature:install odl-vtn-manager-rest odl-vtn-manager-neutron
Note
The above command will install all features of VTN Manager. You can installonly REST or Neutron also.
VTN Coordinator
• Enter into the externalapps directory in the top directory of Lithium
cd distribution-karaf-0.2.1-Lithium-SR1/externalapps
• Run the below command to extract VTN Coordinator from the tar.bz2 file in theexternalapps directory.
tar –C/ -jxvf distribution.vtn-coordinator-6.0.0.1-Lithium-SR1-bin.tar.bz2
This will install VTN Coordinator to /usr/local/vtn directory. The name of the tar.bz2 filename varies depending on the version. Please give the same tar.bz2 file name which isthere in your directory.
• Configuring database for VTN Coordinator
/usr/local/vtn/sbin/db_setup
• To start the Coordinator
/usr/local/vtn/bin/vtn_start
Using VTN REST API:
Get the version of VTN REST API using the below command, and make sure the setup isworking.
curl --user admin:adminpass -H 'content-type: application/json' -X GET http://<VTN_COORDINATOR_IP_ADDRESS>:8083/vtn-webapi/api_version.json
The response should be like this, but version might differ:
{"api_version":{"version":"V1.2"}}
Verifying your Installation
VTN Manager
• In the karaf prompt, type the below command to ensure that vtn packages are installed.
feature:list i | grep vtn
• Run any VTN Manager REST API
curl --user "admin":"admin" -H "Accept: application/json" -H \"Content-type: application/json" -X GET \http://localhost:8282/controller/nb/v2/vtn/default/vtns

OpenDaylight Getting StartedGuide
June 29, 2015 Lithium
24
VTN Coordinator
• ps –ef | grep unc will list all the vtn apps
• Run any REST API for VTN Coordinator version
Uninstalling VTN
VTN ManagerFeature:uninstall odl-vtnmanager-all
VTN Coordinator/usr/local/vtn/bin/vtn_stop
Remove the usr/local/vtn folder