Embed Size (px)
Citation preview

Welcome to the Summit Health Online
Appointment System. The following tutorial
will walk you through the simple process of
scheduling your appointment! scheduling your appointment!

Click:
“I am a new User”
Create a Username
“I am a new User”

2) Choose a username 1) Enter your
Create a Username
2) Choose a username
and password that will
be easy to remember
1) Enter your
name and
email address
3) Click “Register”

You will receive two
emails: one with your
username and the other
with your password
Username Confirmation Emails
1) Select a security
Schedule your Appointment
1) Select a security
question from the
drop down menu
2) Click on:
UPDATE SECURITY
QUESTION
INFORMATION

1) Check that your
company name is
the “Client Name”
2) Select the state
Schedule your Appointment
3) Select the city
4) Select the site
5) Select the clinic
(if multiple sites
available)
6) Select who you are
making the
appointment for
7) Click “CLICK TO SCHEDULE
APPOINTMENT”

Schedule your Appointment
To schedule an appointment,
click on “CLICK HERE TO
SCHEDULE THIS TIME SLOT”

Schedule your Appointment
1) Select “Fasting” or “Non Fasting”
if applicable to your event
2) If you have Microsoft Outlook, you
can add it to your notifications3) Click “CONFIRM APPOINTMENT”

Appointment Confirmation
You will see a green message
confirming your appointment
followed by a confirmation email

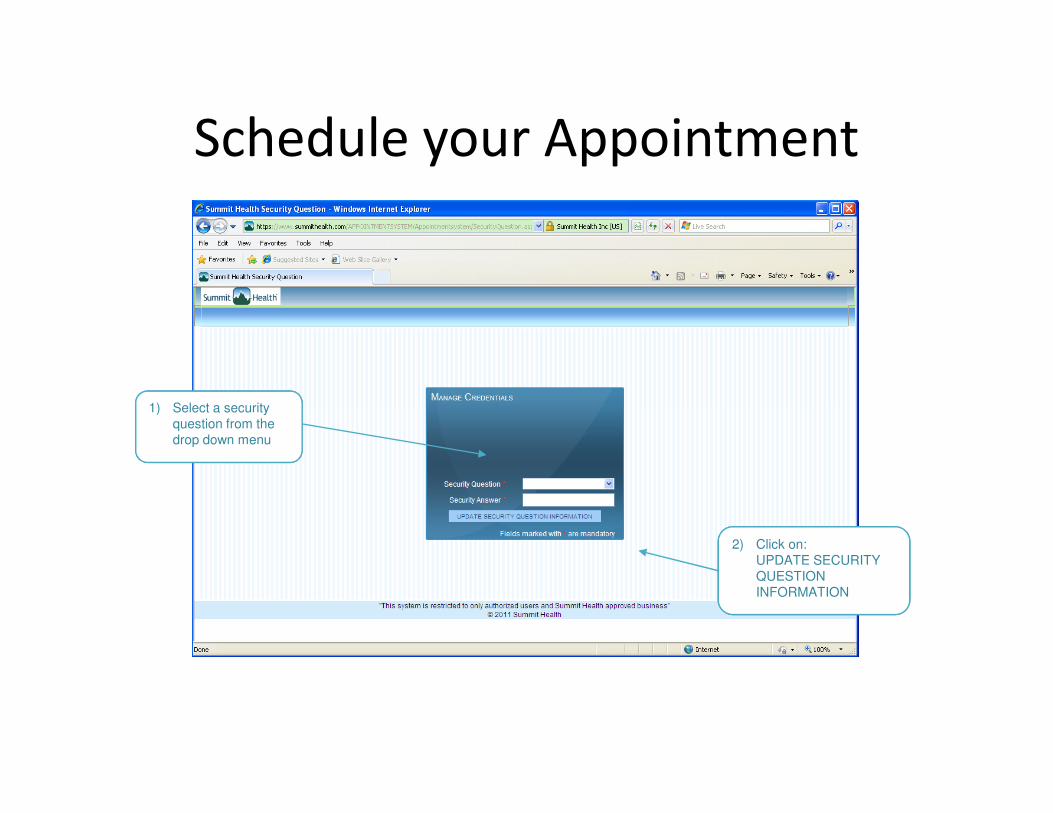
Change your Appointment
Click “I am a returning User”
and enter your current
username and passwordusername and password

Cancel your AppointmentGo to “Appointment” and
“Manage Appointment”

Cancel your Appointment
Click “Cancel”Click “Cancel”

Confirm Cancelled of Appointment
Click “OK”

Cancellation Confirmation
You will see a green message
confirming the cancellation of
your appointment followed by a
confirmation email
Change your Appointment
Click “I am a returning User”
and enter your current
username and passwordusername and password

Reschedule your Appointment
When you schedule a new
appointment your old appointment
will automatically be cancelled

Reschedule your Appointment
1) Check that your
company name is
the “Client Name”
2) Select the state
3) Select the city
4) Select the site
5) Select the clinic
(if multiple sites
available)
6) Select who you are
making the
appointment for
7) Click “CLICK TO SCHEDULE APPOINTMENT” to schedule a new appointment and your old appointment will automatically be cancelled

Reschedule your Appointment
Click on “CLICK HERE TO
SCHEDULE THIS TIME
SLOT” to schedule at the new
appointment time you want

Reschedule your Appointment
1) Select “Fasting” or “Non Fasting”
if applicable to your event
2) If you have Microsoft Outlook, you
can add it to your notifications3) Click “CONFIRM APPOINTMENT”
to reschedule your appointment
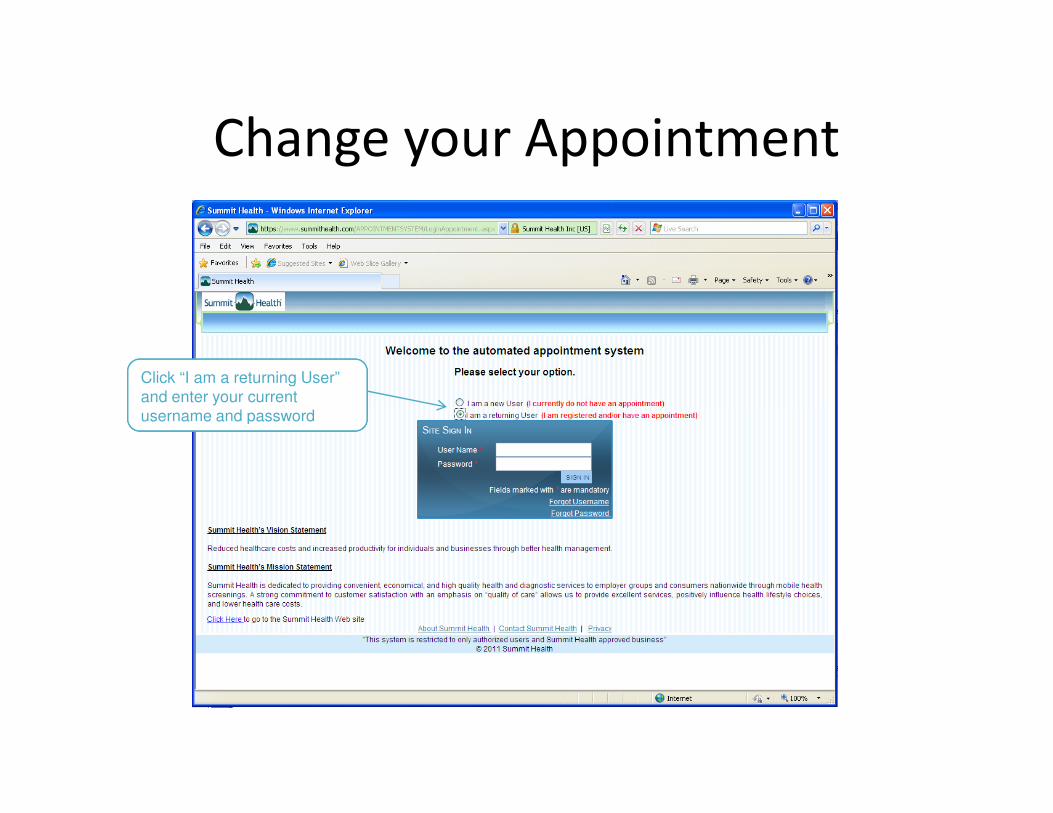
Rescheduled Appointment Confirmation
You will see a green message
confirming the new time, date
and location of your appointment
followed by a confirmation email


![[email protected] online activation instructions [email protected] online activation instructions](https://img.dokumen.tips/doc/110x75/613d4690736caf36b75b678c/emailprotected-online-activation-instructions-emailprotected-online.jpg)