Embed Size (px)
Citation preview

On Your Tabletop #4:
Fall of Damnos This copy of “On Your Tabletop: Fall of Damnos” is Version 1.1. We say THANK YOU to our servitors who helped playtest and review this supplement:
Darwin
Eugene K. Francis P.
James I. Phil H.
DISCLAIMER: This is a notforprofit supplement for Warhammer 40,000 by Games Workshop plc. None of the authors, distributors, contributors, editors, or commentators have participated in this project for money; they have done so purely for the love of the game. This ruleset demands that its users own and refer to the Warhammer 40,000 rulebook and relevant codices in the use of these rules. All content within these pages is usercreated and is derived, without permission, from Warhammer 40,000 intellectual property owned by Games Workshop Ltd. This ruleset is completely unofficial and is in no way endorsed by Games Workshop Ltd. Adepta Sororitas, Astartes, Battlefleet Gothic, Black Angels, Black Library, the Black Library logo, BL Publishing, Blood Angels, Bloodquest, Blood Bowl, the Blood Bowl logo, the Blood Bowl Spike Device, Cadian, Catachan, the Chaos device, Cityfight, the Chaos logo, Citadel, the Citadel device, City of the Damned, Codex, Daemonhunters, Dark Angels, Dark Eldar, Dark Future, the DoubleHeaded/Imperial Eagle device, ‘Eavy Metal, Eldar, Eldar symbol devices, Epic, Eye of Terror, Fanatic, the Fanatic logo, the Fanatic II logo, Fire Warrior, Forge World, Games Workshop, Games Workshop logo, Genestealer, Golden Daemon, Gorkamorka, Great Unclean One, the Hammer of Sigmar logo, the Horned Rat logo, Inferno, Inquisitor, the Inquisitor logo, the Inquisitor device, Inquisitor: Conspiracies, Keeper of Secrets, Khemri, Khorne, Kroot, Lord of Change, Marauder, Mordheim, the Mordheim logo, Necromunda, Necromunda stencil logo, Necromunda plate logo, Necron, Nurgle, Ork, Ork skull devices, Sisters of Battle, Skaven, the Skaven symbol and devices, Slaanesh, Space Hulk, Space Marine, Space Marine chapters, Space Marine chapter logos, Talisman, Tau, the Tau caste designations, Tomb Kings, Trio of Warriors, the Twin Tailed Comet logo, Tyranid, Tzeentch, Ultramarines, Warhammer, Warhammer Historical, Warhammer Online, the Warhammer device, the Warhammer World logo, Warmaster, White Dwarf, the White Dwarf logo, and all associated marks, names, races, race insignia, characters, vehicles, locations, units, illustrations, and images from the Blood Bowl game, the Warhammer world, the Talisman world, and the Warhammer 40,000 Universe are either ®, TM and/or Copyright Games Workshop Ltd 20002010, variably registered in the UK and other countries around the world. Used without permission. No challenge to the status Games Workshop’s intellectual property is intended, and All Rights Reserved to the respective owners.
This is NOT a Games Workshop Product, but is meant to be a promotion of the hobby we love.
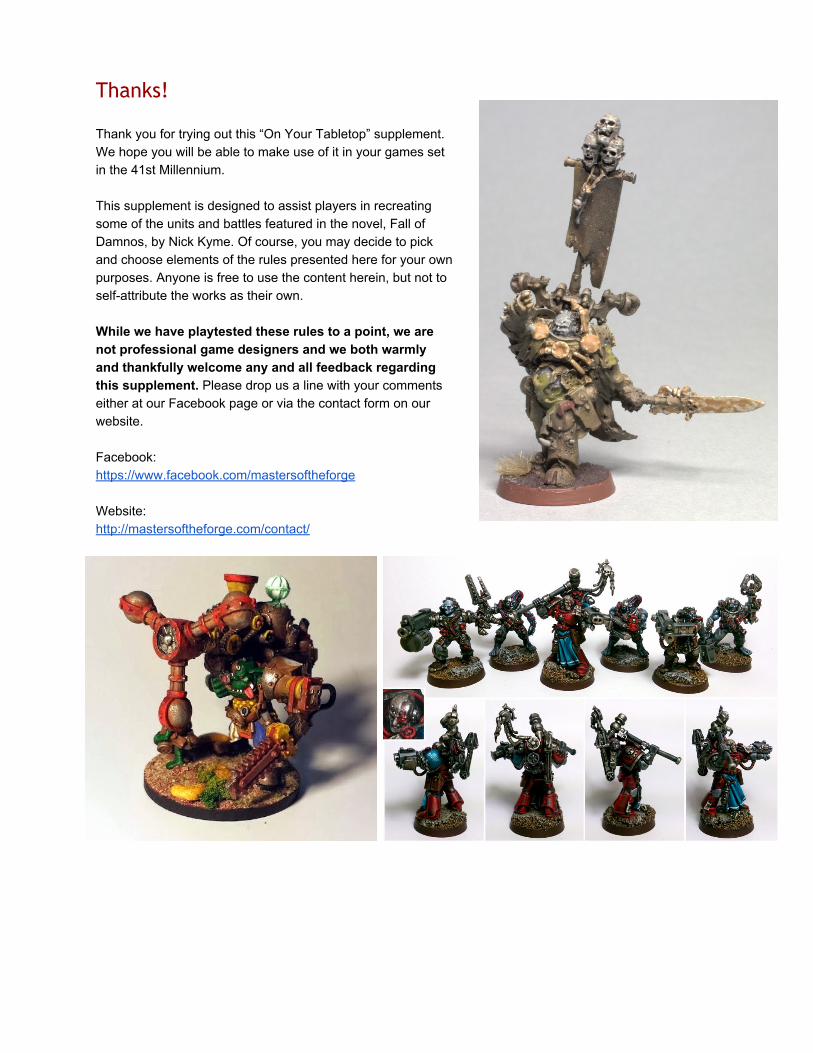
Thanks! Thank you for trying out this “On Your Tabletop” supplement. We hope you will be able to make use of it in your games set in the 41st Millennium. This supplement is designed to assist players in recreating some of the units and battles featured in the novel, Fall of Damnos, by Nick Kyme. Of course, you may decide to pick and choose elements of the rules presented here for your own purposes. Anyone is free to use the content herein, but not to selfattribute the works as their own. While we have playtested these rules to a point, we are not professional game designers and we both warmly and thankfully welcome any and all feedback regarding this supplement. Please drop us a line with your comments either at our Facebook page or via the contact form on our website. Facebook: https://www.facebook.com/mastersoftheforge Website: http://mastersoftheforge.com/contact/

New Rules As this novel features some very iconic characters indeed and needs very few special rules in order to bring it to life on the tabletop. Codex: Space Marines and Codex: Necrons are all the books you need to play most of the forces depicted in Fall of Damnos. However, below you will find a few interesting things to use during these missions.
Terrain Feature: Fog Bank The Fog Bank is a transparent, 6” long and 2” tall piece of flat terrain. Models which are partially obscured by three or more Fog Banks can only be hit by ranged attacks with Snap Shots. Models which are partially obscured by just two Fog Banks instead have the shrouded special rule. Models partially obscured by only one Fog Bank instead have the stealth special rule. Models which are partially obscured by a Fog Bank do not need to be obscured 25% to receive the bonus. Fog Banks are deployed in groups of 4 as a single terrain selection during terrain setup. All four pieces must be placed within 4” of each other at the beginning of the game. At the end of each game turn, the players roll off. The player who wins will scatter all of the Fog Banks. Roll a scatter die and a single regular die in the midst of the Fog Banks and scatter each one that number of inches. If a HIT is rolled, then the player may change the orientation of the Fog Banks before they scatter (use the builtin arrow on the HIT symbol to determine which direction they scatter). Fog Banks may overlap other pieces of terrain or each other. If a Fog Bank scatters to a point where it cannot be placed evenly on the table or a terrain piece, then reduce the amount scattered) until it can be placed evenly on the table or a terrain piece. If a Fog Bank scatters off the table, it is removed from play. Look to future On Your Tabletop supplements for rules on weapons which generate Fog Banks of differing varieties. “Mysterious” Fog Banks You may also choose to use mysterious terrain for your fog banks, or simply choose to use alternatives for the narrative terrain setup you’ve got planned. For any Fog Bank which causes a negative effect when passing through it or the Fog Bank passing over it, the effect is imposed for each token passing over it. This is to represent a thicker fog being more dangerous than one which has spread out. 12 Whew! Normal Fog Bank! 3 Smoke 4 Incapacitating Gas 5 Poisoned Gas 6 Corrosive Gas

Smoke: Where there’s smoke, there’s fire. Do not scatter Smoke terrain. Instead, place a 30mm base in its midst to represent the source of the fire. This base is Dangerous Terrain. Otherwise, treat this as a normal Fog Bank. Incapacitating Gas: This is a gas which is often used by planetary police forces for crowd control. If a nonvehicle model passes through Incapacitating Gas or is passed over by a scattered bank of Incapacitating Gas, the model’s movement is reduced by 3” for the duration of the turn, including the shooting and assault phases. Models with a 3+ or better armor save are immune to this effect. Otherwise, treat this as a normal Fog Bank. Poisoned Gas: This terrain feature represents a billowing mass of gas which can render casualties in a unit of infantry. If a model passes through Poisoned Gas or is passed over by a scattered bank of Poisoned Gas, it must make a Dangerous Terrain check. Abilities which grant a model protection from Dangerous Terrain (such as move through cover) do not work against Poisoned Gas. Models with a 3+ or better armor save are immune to this effect, as are models with the Mark of Nurgle or otherwise have Nurgle in their unit name. Otherwise, treat this as a normal Fog Bank. Corrosive Gas: Corrosive Gas is a deadly mélange of substances designed to affect a myriad of materials. Any model passing through or passed over by a bank of Corrosive Gas must make a dangerous terrain check. Abilities which grant a model protection from Dangerous Terrain (such as move through cover and a dozer blade) do not work against Corrosive Gas. Otherwise, treat this as a normal Fog Bank. Modeling Fog Banks: An acrylic fog bank terrain piece is in development in partnership with Burn In Designs (easily found with Google). However, these are easily represented with a good, fluffy, multiply bathroom tissue or paper towel cut into 6” long billowycloud shapes. It’s just important to remember anything beyond the Fog Bank which is partially obscured by it receives the bonus regardless of whether it is obscured 25%, unless it’s a flyer.
New Units/Characters
Flayed Lord / Sahtah the Enfleshed
Pts WS BS S T W I A Ld Sv Flayed Lord 100 5 4 4 5 3 2 4 10 3+ Sahtah the Enfleshed 130 5 4 4 5 3 4 5 10 3+ As quickly as they came, the sensations bled away again and left numbness and sorrow in their wake. The sun did not warm him, the wind was as dead as the bloodless arteries of his mechanised body. No rifle identified him as a noble plains hunter, instead a pair of gruesome talons betrayed him for what he was a monster.

A Flayed Lord is a Necron Overlord who has succumbed to the Flayer Curse. They rarely command entire dynasties, but are sometimes found under the command of a savvy Overlord. Such is the disdain for those afflicted with the curse, however, they are pariahs among their own kind. Unit Type:
Infantry (Character) Unit Composition:
1 Flayed Lord (Sahtah the Enfleshed counts as a Flayed Lord) Wargear:
Slicing claws Robes of flesh
Special Rules:
EverLiving Independent Character Deep Strike Infiltrate Reanimation Protocols Flayer Pariah Flayed Court Feel No Pain (Sahtah the Enfleshed only)
Options:
May take any of the following for the usual cost for a Necron Lord: Phylactery Resurrection Orb Phase Shifter
Slicing Claws: The claws of a Flayed Lord are especially adept at flaying the flesh from a living being and have the following profile: Range S AP Type Special Rules Slicing Claws User 5 Melee Rending, Shred The Flayed Lord’s number of attacks for having multiple slicing claws has already been included in their profile. Robes of Flesh: A Flayed Lord is wears the robes of its victims proudly and even becomes morose when their robes become rotten and unsightly, fueling an urge to collect new robes. These robes grant the Flayed Lord the fear special rule. If the Flayed Lord or the unit he has joined destroys a unit of infantry, he dons new robes made from the flesh of one of those victims, granting a 2 to further rolls against the Flayed Lord’s fear checks.

Flayer Pariah: A unit may not join or be joined by this unit unless it is a Flayed One, also has this special rule, or is otherwise described in its story block as having the Flayer Curse. Furthermore, a Flayed Lord does not count as a Necron Lord for the purposes of selecting a Royal Court or other considerations from Codex: Necrons. Flayed Court: An army list which includes a Flayed Lord may select up to two units of Flayed Ones as a Troops choices.
Death World Conscripts - 45pts
WS BS S T W I A Ld Sv Death World Conscript 4 3 3 3 1 3 1 7 6+ Death World Conscript Sergeant 4 3 3 3 2 3 2 8 6+ Iulus didn’t know who this person was but he understood the sentiment. Men were more than just material that could wield a gun, throw a grenade or drive a tank. They were flesh and blood, with hearts and minds. And it hadn’t been an honoured warrior, a sternfaced veteran consigned to the lectorum or even a Chaplain that had taught the sergeant this. It had merely been a man, a miner at that. The Ultramarine felt humbled and wished that it could end differently for Falka Kolpeck.
Some human warriors aren’t pressed into the service to the Imperium. The very nature of their difficult lives hones them into fighting machines and they are more than ready to step forward and do battle for their homes and their families. They may be seen as a ragtag group of undisciplined wretches in the eyes of most Imperial commanders, but they can surprise even Astartes on the field of battle. These warriors are not only tough, but loyal. They are a tightknit group, almost a family in and of themselves. Death World Conscripts are a Troops Choice for an Astra Militarum army. If you wish to recreate the Damnos military actions, then you may take any number Death World Conscripts as a formation for your Ultramarines detachments and count them as scoring units. Unit Type:
Infantry Infantry (Character) Sergeant only
Unit Composition:
1 Death World Conscript Sergeant and 4 Death World Conscripts Wargear:
Lasgun Frag grenades Closecombat weapon
Special Rules:
6+ Feel No Pain

Grim Reality Undisciplined
Options (for any unlisted prices, please refer to Codex: Astra Militarum):
You may add up to 45 more conscripts at 6 points per model The entire unit may take
Bush Training 10pts Urban Training 10pts MechanicumApproved Combat Toxins 1pt per model
Any model may take the following: Makeshift power weapon 1pt per model Improvised Flakk armor 2pts per model Explosive Bolas 1pt per model
Any model may replace their lasgun with the following Shotgun 1pt per model Laspistol Free Improvised Combat Shield 1pt per model
The Conscript Sergeant may take the following: Makeshift Power Armor 10pts
For up to 1 model in 10, any model may take the following: Meltabombs 5pts
For up to 1 model in 10, any model may replace their lasgun the following: Sniper Rifle Meltagun Flamer Bolter 1pt Storm Bolter 2pts If that model is the Conscript Sergeant, they may take one of the following instead:
Plasma Pistol Grav Pistol Plasma Gun Grav Gun Heavy Flamer 10pts Heavy Bolter 15pts
For up to 1 model in 10, any model may replace their closecombat weapon with the following: Power Weapon Power Fist If that model is the Conscript Sergeant, they may take one of the following instead:
Thunderhammer For up to one model in 10, two Death World Conscripts which have not received a special
weapon upgrade may be upgraded to a heavy weapons team. Heavy Weapons Teams count as two models for determining how many upgrades may be taken for the squad. The Heavy Weapons Team may, if you wish, still take other upgrades such as Makeshift Power Weapons or even a Power Fist.
Grim Reality The Death World Conscript has seen more in their lives than most normal humans. They are no strangers to violence or strange happenings. Their resolve is such that they stand strong in the face of

danger, knowing that to flee from danger is usually as fatal as facing it head on. Death World Conscripts must reroll all failed morale checks. Undisciplined The Death World Conscripts may not receive Orders. Makeshift Power Weapon Death World Conscripts often bring the tools of their trade with them into battle whether they be plasma cutters, vibrohammers, or power icepicks. Range S AP Type Special Rules Makeshift Power Weapon User 4 Melee Makeshift Makeshift: A Makeshift weapon strikes at 1 Weapon Skill. Makeshift Power Armor Power Armor isn’t just a tool of the Astartes or the Sororitas. Some power armor is used for industrial purposes. The Death World Conscripts have a knack for using what they have lying around to give them an edge in combat and industrial power suits are almost an obvious choice. Makeshift Power Armor grants the wearer slow and purposeful, though it does not confer that ability to the unit. While the model wearing the armor may not run, the unit may do so around it. It also grants the wearer +2 strength and a 3+ armor save. Explosive Bolas A Scything Bolas is a oneuse Krak Grenade with the Shred and Armor Bane special rules. It is suggested that you bring tokens to mark which models have used their Explosive Bolas during the game. Bush Training The unit has the Move Through Cover and Stealth special rules in woods, rivers, and any other similar natural terrain feature. Urban Training The unit has the Move Through Cover and Stealth special rules in ruins, over barricades, and any other similar manmade terrain feature, including the burning wreckage of destroyed vehicles. MechanicumApproved Combat Toxins These drugs give the unit the Furious Charge special rule and improve their Feel No Pain to 5+ on their turn when they successfully assault an enemy unit.
Battles

Special Note: These missions were developed with 6th Edition in mind. In the future, the Masters of the Forge will make every attempt to include the Tactical Objectives (or even make up our own) whenever appropriate.
Scenario #1: Sieze Ground Ambush Like gruesome marionettes jerking to horrific unlife, the necron ‘flayed ones’ sprang from their ambuscade. They’d been buried just beneath the surface of the earth, poised to attack the Ultramarines as they charged. A minefield of sorts, but one littered with an animate and deadly enemy rather than mere explosives.
Throughout the battle on Damnos, the Ultramarines are beset upon by packs of Flayed Ones which have hidden themselves beneath the ground. Of course, the wily Tigurius cannot be fooled by their treacherous ways. The Armies: This scenario assumes there is a clear Attacker and a clear Defender. While this Scenario is built from engagements with the Ultramarines as an attacker and Necrons (with Flayed Ones) as the defender, there is no reason for players to feel they must use those armies.
The Battlefield: This scenario is played on a standard 6’x4’ board. Players are encouraged to use the random terrain placement described in the old 6th Edition Warhammer 40,000 rulebook and also to try to use some kind of narrative focus when choosing their pieces. Woods, ruins, and water features are encouraged for regular play. To simulate the conditions on Damnos, the use of ruins and ice features are most encouraged along with the use of the Fog Bank terrain described in this supplement. Deployment: Randomly determine a Deployment Type as prescribed in the Warhammer 40,000 rulebook. The Defender deploys first in the normal way with one exception being the deployment of Ambushers. The Defender may select up to three units with which to place in Reserve as an Ambush (described under Special Mission Rules). Independent Characters attached to an Ambushing unit does not count towards the maximum of three Ambushing units. The Defender will secretly write down on his army list the area terrain within which their Ambushing units are hidden. It may be helpful to add a numbered token next to each piece of area terrain to make this easier. Only one Ambushing unit may be assigned per piece of terrain and the terrain pieces may be anywhere on the board, including their opponent’s deployment zone. The Ambushers are not revealed quite yet. For games of more than 2000 points, it is suggested that you add an additional unit to the Ambush for every 500 additional points you play.

The Attacker deploys in the normal way.
First Turn: The Attacker automatically goes first and the Defender may not attempt to seize the initiative.
Game Length: This mission uses Variable Game Length.
Victory Conditions and Objectives: Players earn Victory Points by holding area terrain as objectives. A scoring unit holds a piece of terrain by having all of the models of that unit in the terrain. A denial unit may contest a piece of terrain by having all of the models of that unit in the terrain. Each piece of area terrain held is worth 3 Victory points. First Blood and Slay the Warlord are worth 1 point each while Linebreaker is worth an additional 3 points for this scenario. Special Mission Rules: Night Fighting, Mysterious Objectives, Reserves, Ambush, Flush Out Ambush: Units hidden in terrain may reveal themselves at any time during the Defending player’s turn. All models must be placed in their corresponding terrain if possible. If the Attacker has any models on the terrain, then the Defender may place their own models in base contact with the Attacker’s models. In this case, they count as being engaged in an ongoing combat during successive Assault Phases. Otherwise, the Defender may elect not to shoot with newlyrevealed units. Units which are revealed in this manner may assault the turn they are revealed as long as they did not shoot that turn. Flush Out: The Attackers’ warlord possesses either a special piece of wargear, biomorph, or other special power which allows them to detect enemy units hidden in terrain. After the Warlord’s unit has moved, measure from the Warlord (or the hull of the Warlord’s transport). Any terrain features within 6” must reveal their hidden models. If the Attacker has models in the terrain, the Defender may place their models in base contact with those models as described in “Ambush” above, but, of course, the Defender may not choose to assault with their revealed units during the Attacker’s turn.
Scenario #2: Advance and Execute ‘Take and hold the ground.’ Those had been his orders during the mission briefing. Thirty Ultramarines to keep a simple esplanade from the enemy. It had seemed like overkill; now, Iulus Fennion wasn’t so sure.
In a great many conflicts, it’s up to the trooper to do two things and do it well. One of those things is to destroy the enemy and the other is to take ground from the enemy. A great deal of this kind of warfare is seen throughout portions of Fall of Damnos. This mission seeks to duplicate these objectives.
The Armies: While this scenario is designed for the use of any army, if you wish to recreate the battles in Part II of Fall of Damnos, then you may select any Necron forces you desire for one side of the conflict. For the Imperium, select Ultramarines Infantry or Dreadnoughts accompanied by Imperial Guard to represent the Damnosian defense forces and/or any number of units of Death World Conscripts.
The Battlefield: As with Scenario 1, this scenario is played on a standard 6’x4’ board. Players are encouraged to use the old 6th Edition random terrain placement described in the Warhammer 40,000 rulebook and also to try to use some kind of narrative focus when choosing their pieces. To simulate the conditions on Damnos, the use of ruins and ice features are most encouraged along with the use of the Fog Bank terrain described in this supplement.
First Turn: Roll for first turn as normal. Deployment: The deployment type used for this scenario is Hammer & Anvil to represent the need to advance and hold territory.
Game Length: This mission uses Variable Game Length.
Victory Conditions and Objectives: Players score points in two ways. First, the table is divided into 2’ squares as described for terrain placement (see the map below). For each table square you dominate, you score 3 Victory Points. You dominate a table square by having more units in the square than your opponent. Scoring Units count double. For example, if you have a Tactical Squad (a Scoring Unit) and a Dreadnought in a table square while your opponent has three units of Scarabs in the same square, you will tie in that square and no one will score it. If the enemy had a squad of Warriors (a Scoring Unit) instead of one of those squads of Scarabs, they would score 3 Victory Points for holding that square. Additionally, during this mission, players score 1 Victory Point for each enemy unit slain. If you are recreating the battles in the novel, Fall of Damnos, then if the forces of the Imperium score Slay the Warlord, they receive 4 additional Victory Points for the feat instead of just 1. Similarly, if the Necrons are able to hold their ground, they receive additional points; if the forces of the Imperium fail to score Linebreaker, the Necron forces receive 3 additional Victory Points. Secondary mission objectives

are in play as normal.
Special Mission Rules: Night Fighting, Reserves
Scenario #3: Sabotage Jynn breathed deeply, trying to master her terror, and achieved a small amount of calm. It was just enough to remove the explosive payload from the pack, arm it, and attach the whole thing to the pylon. She wanted to detonate it immediately, but the resulting firestorm would kill her if she didn’t get clear. Instead, she pulled out her pistol and made for the next artillery piece.
This scenario attempts to simulate an attacking force whose job it is to sabotage enemy targets while the defending force attempts to thwart their attackers. The Armies: This scenario assumes there is a clear Attacker and a clear Defender. While this Scenario is built from engagements with the Ultramarines accompanied by Conscripts as the attackers and Necrons as the

defender, there is no reason for players to feel they must use those armies. Note that it might be more fun to know ahead of time whether a player is the attacker or the defender before building lists for this scenario.
The Battlefield: This scenario is played on a standard 6’x4’ board. Players are encouraged to use the random terrain placement described in the old Warhammer 40,000 rulebook and also to try to use some kind of narrative focus when choosing their pieces. To simulate the conditions on Damnos, the use of ruins and ice features are most encouraged along with the use of the Fog Bank terrain described in this supplement.
First Turn: Roll for first turn as normal. Deployment: The defender may deploy a full 24” from their long table edge while the attacker may deploy 12” from their long table edge.

Game Length: This mission uses Variable Game Length.
Victory Conditions and Objectives: There are six objective markers used in this game. Three are placed by the attacker and three are placed by the defender. All Objective Markers must be placed within the defender’s deployment zone. If an Attacker’s scoring unit is holding an objective at the end of their turn, remove it from play. For each Objective removed from play at the end of the game, the Attacker scores 3 Victory Points. For each Objective remaining in play at the end of the game, the Defender scores 3 Victory Points. For the purpose of this mission, Elites choices are scoring units. Secondary mission objectives are in play as normal. Alternative Victory Conditions and Objectives: More Interesting Objectives: It might be more interesting to select different Battlefield Debris or even include one Archaeotech Artifact as the Objectives in this mission. Of course, if these Objectives would pose too great a benefit to the Defending Player, work out a points value for these benefits before the start of the game. Timed explosives: Instead of destroying the Objectives right away, if you are holding the Objective at the end of your turn, place a Sabotaged Token on it. For each turn the Defender is holding an Objective, remove a Sabotaged Token from it. There is no limit on the number of Sabotaged Tokens an Objective may have on it. Just before the game ends, each sabotaged token explodes, destroying the Objective with it. In addition, deal Str 8 AP 2 Barrage blast hits out from the center of the marker to a distance of 2d6” for each sabotaged Objective. This method is preferred if you are trying to recreate the Damnos story. Special Mission Rules: Night Fighting, Mysterious Objectives, Reserves