Embed Size (px)
Citation preview

Viewer User Manual
Smarter Surveillance for a Safer World

On-Net Surveillance Systems, Inc.
One Blue Hill Plaza, 7th Floor, PO Box 1555 Pearl River, NY 10965
Phone: (845) 732-7900 | Fax: (845) 732-7999 Web: www.onssi.com
000102913-1007-3.7.1.17
Legal Notice This product manual is intended for general information purposes only, and due care has been taken in its preparation. Any risk arising from the use of this information rests with the recipient, and nothing herein should be construed as constituting any kind of warranty. © 2002-2016 On-Net Surveillance Systems, Inc. All rights reserved. OnSSI and the ‘Eye’ logo are registered trademarks of On-Net Surveillance Systems, Inc. Ocularis, Ocularis Client, Ocularis Client Lite, Ocularis Video Synopsis, NetEVS, NetDVMS, NetDVR, ProSight, NetGuard, NetGuard-EVS, NetSwitcher, NetMatrix, NetCentral, NetTransact, NetPDA and NetCell are trademarks of On-Net Surveillance Systems, Inc. All other trademarks are property of their respective owners. On-Net Surveillance Systems, Inc. reserves the right to change product specifications without prior notice.
Ocularis Viewer User Manual Contents
On-Net Surveillance Systems, Inc. i
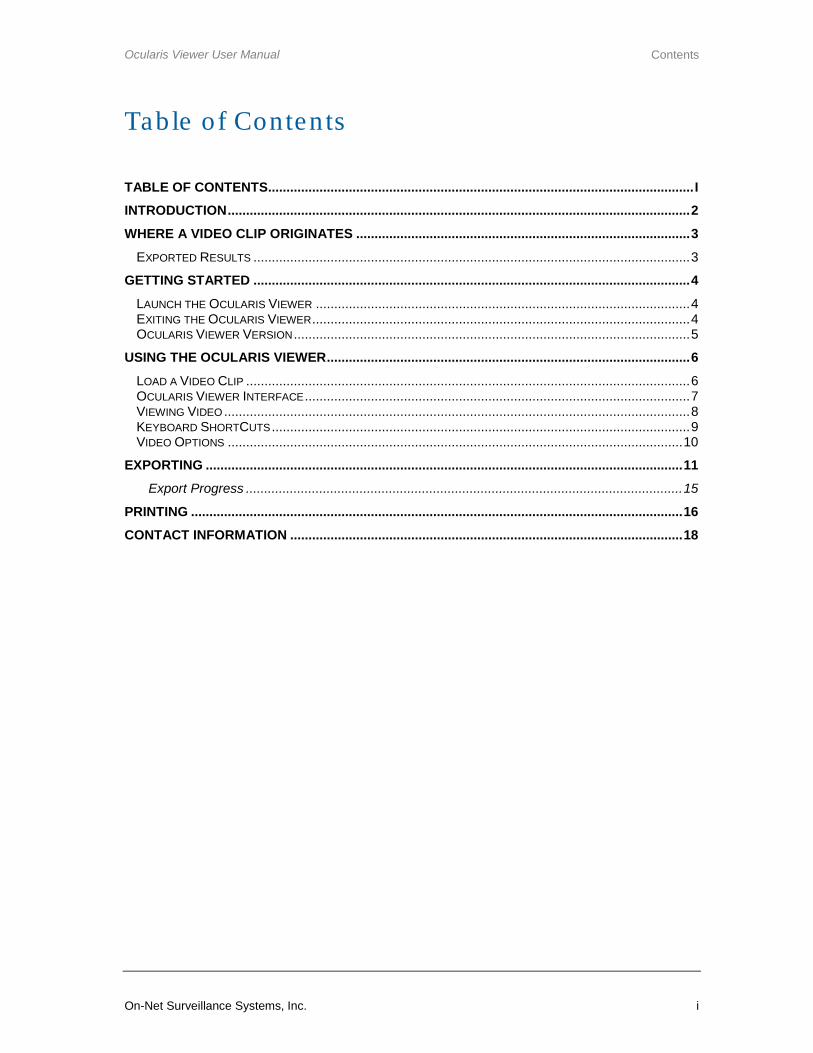
Table of Conten ts TABLE OF CONTENTS .................................................................................................................... I INTRODUCTION .............................................................................................................................. 2 WHERE A VIDEO CLIP ORIGINATES ........................................................................................... 3
EXPORTED RESULTS ....................................................................................................................... 3 GETTING STARTED ....................................................................................................................... 4
LAUNCH THE OCULARIS VIEWER ...................................................................................................... 4 EXITING THE OCULARIS VIEWER ....................................................................................................... 4 OCULARIS VIEWER VERSION ............................................................................................................ 5
USING THE OCULARIS VIEWER ................................................................................................... 6 LOAD A VIDEO CLIP ......................................................................................................................... 6 OCULARIS VIEWER INTERFACE ......................................................................................................... 7 VIEWING VIDEO ............................................................................................................................... 8 KEYBOARD SHORTCUTS .................................................................................................................. 9 VIDEO OPTIONS ............................................................................................................................ 10
EXPORTING .................................................................................................................................. 11 Export Progress ....................................................................................................................... 15
PRINTING ...................................................................................................................................... 16 CONTACT INFORMATION ........................................................................................................... 18

Introduction Ocularis Viewer User Manual
2 On-Net Surveillance Systems, Inc.
In troduction The Ocularis™ Viewer is a stand alone application that allows users to view video clips exported from
Ocularis™ Client. The exported video is in Ocularis database format. Users need not have the full featured
Ocularis Client in order to view the encrypted video.
The Ocularis Viewer allows users to:
View and playback video clips exported from Ocularis Client.
Export additional clips from the original clip.
Export still images from the original clip.
Print reports based on images in the original clip
Why use Ocularis Database Format instead of Windows standard .avi format?
There are situations where it is more beneficial to export video from Ocularis Client to Ocularis
Database Format rather than to .avi format:
• .avi format supports only 1 camera stream per file. Ocularis Database Format supports multiple
streams in the same file.
• Ocularis Database Format video supports file encryption for security
• Ocularis Database Format video supports password protection for security
• By using the Ocularis Viewer with Ocularis Database Format video, users have a fully functioning
video application that goes beyond simply playing back video. You can print from the video clip or
export additional clips to .avi format.

Ocularis Viewer User Manual Where a Video Clip Originates
On-Net Surveillance Systems, Inc. 3
Where a Video Clip Orig ina tes The Ocularis Viewer is used to view video evidence that is exported from Ocularis Client using Ocularis ES, Ocularis CS or Ocularis IS. The video is in proprietary format and contains an “.oml” file extension.
The Ocularis Viewer is used in lieu of having the Ocularis Client installed on the PC. It is available two ways:
1. When the Ocularis Client software is installed, the Ocularis Viewer application is also installed on the same workstation.
2. When a Database Format video clip is exported from Ocularis Client, the Ocularis Viewer may also be included as part of the export.
From the Ocularis Client Export Options screen, a user selects ‘Database Format’:
The Export to Database Format Dialog Box
The ‘Export Ocularis Viewer to same directory’ checkbox should be checked to include the Ocularis
Viewer application as part of the export.
Exported Results Once the export process is finished, the following will be found in the destination folder:
• a ‘[filename].oml’ file
• a folder named ‘Data’
• a folder named ‘Ocularis Viewer’ (if the option to ‘Export Ocularis Viewer to same directory’
checkbox was selected)
Getting Started Ocularis Viewer User Manual
4 On-Net Surveillance Systems, Inc.
Getting Sta rted Launch the Ocularis Viewer There are multiple ways to launch the Ocularis Viewer.
From a workstation with the Ocularis Viewer application installed (such as an Ocularis Client workstation):
• The Start menu: Start All Programs OnSSI Ocularis Viewer
• The desktop icon:
From the exported video directory:
When database format video is exported, if the ‘Export Ocularis Viewer to same directory’ checkbox is checked, a sub-folder in the destination folder for the video will be created.
• From the Ocularis Viewer folder, double-click the Ocularis Viewer.exe file.
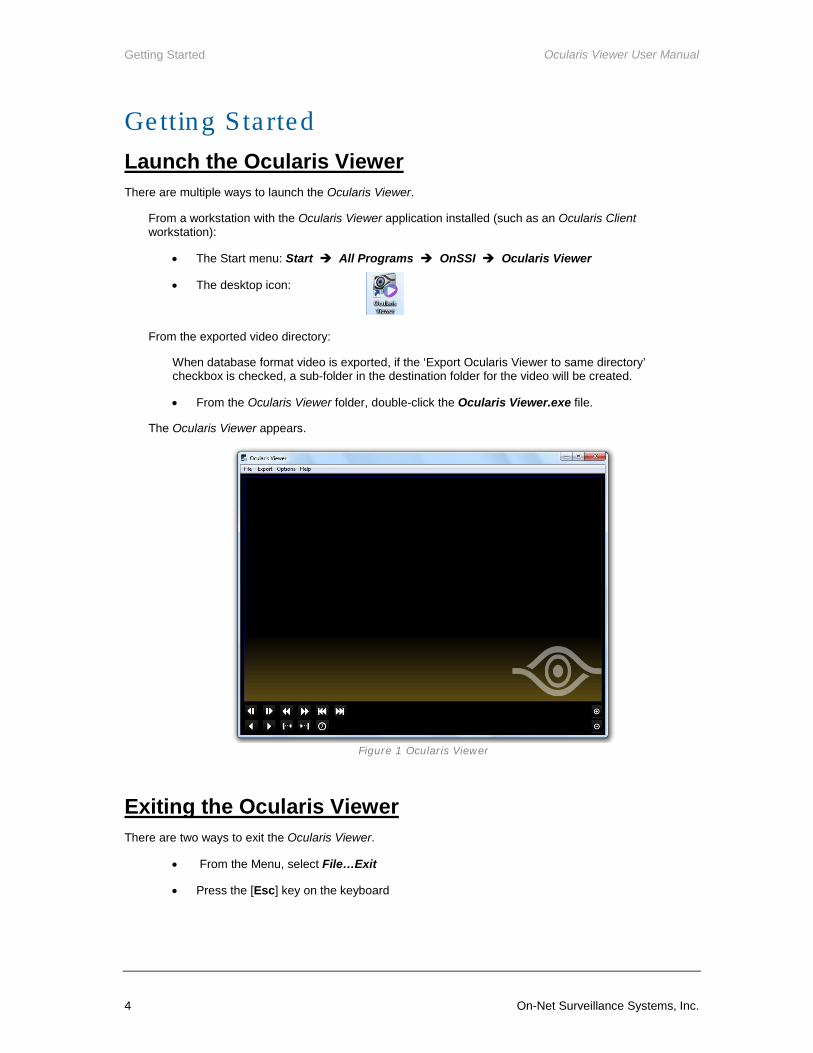
The Ocularis Viewer appears.
Figure 1 Ocularis Viewer
Exiting the Ocularis Viewer There are two ways to exit the Ocularis Viewer.
• From the Menu, select File…Exit
• Press the [Esc] key on the keyboard
Ocularis Viewer User Manual Getting Started
On-Net Surveillance Systems, Inc. 5
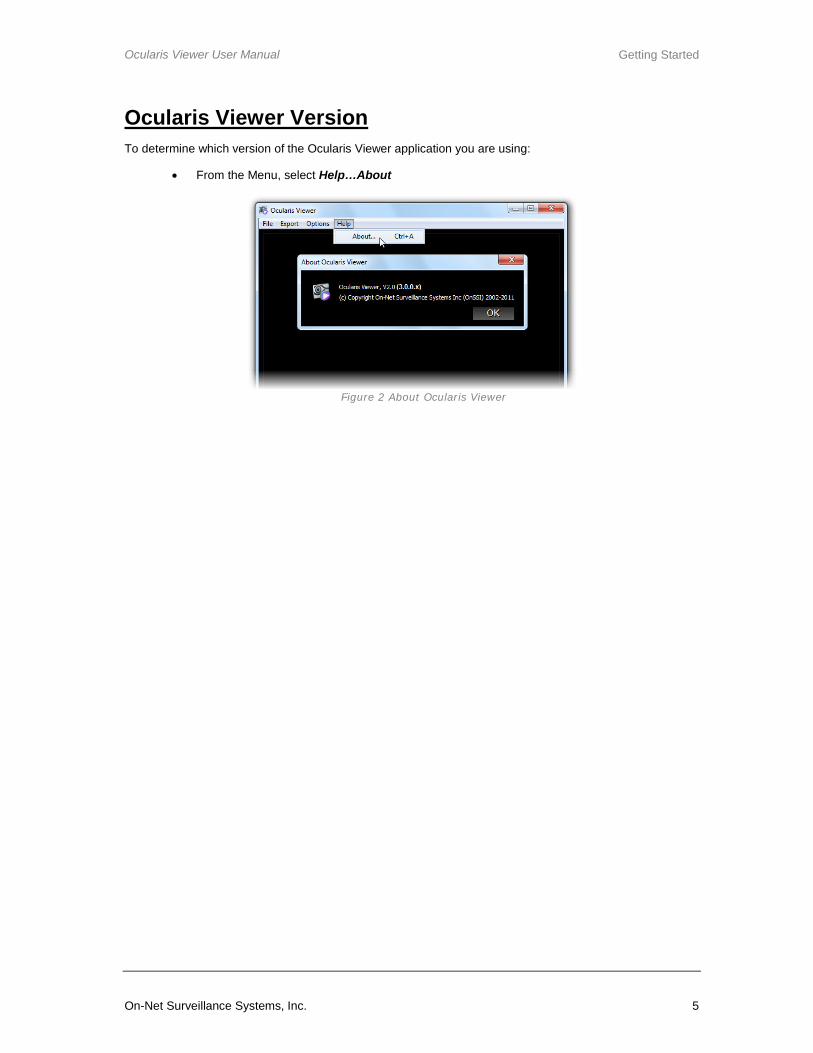
Ocularis Viewer Version To determine which version of the Ocularis Viewer application you are using:
• From the Menu, select Help…About
Figure 2 About Ocularis Viewer

Using the Ocularis Viewer Ocularis Viewer User Manual
6 On-Net Surveillance Systems, Inc.
Us ing the Ocula ris Viewer Load a Video Clip
To load a video clip:
1. Select the ‘File’ menu and click ‘Open’.
2. Locate the exported ‘.oml’ file, select it and click ‘Open’.
3. If a password is required for the video, you will be prompted to enter it. Enter the password and click OK.
The video clip is loaded and displays the first frame of the clip.
Figure 3 Ocularis Viewer with a 1 pane display
Only one clip may be open at a given time.
Ocularis Viewer User Manual Using the Ocularis Viewer
On-Net Surveillance Systems, Inc. 7
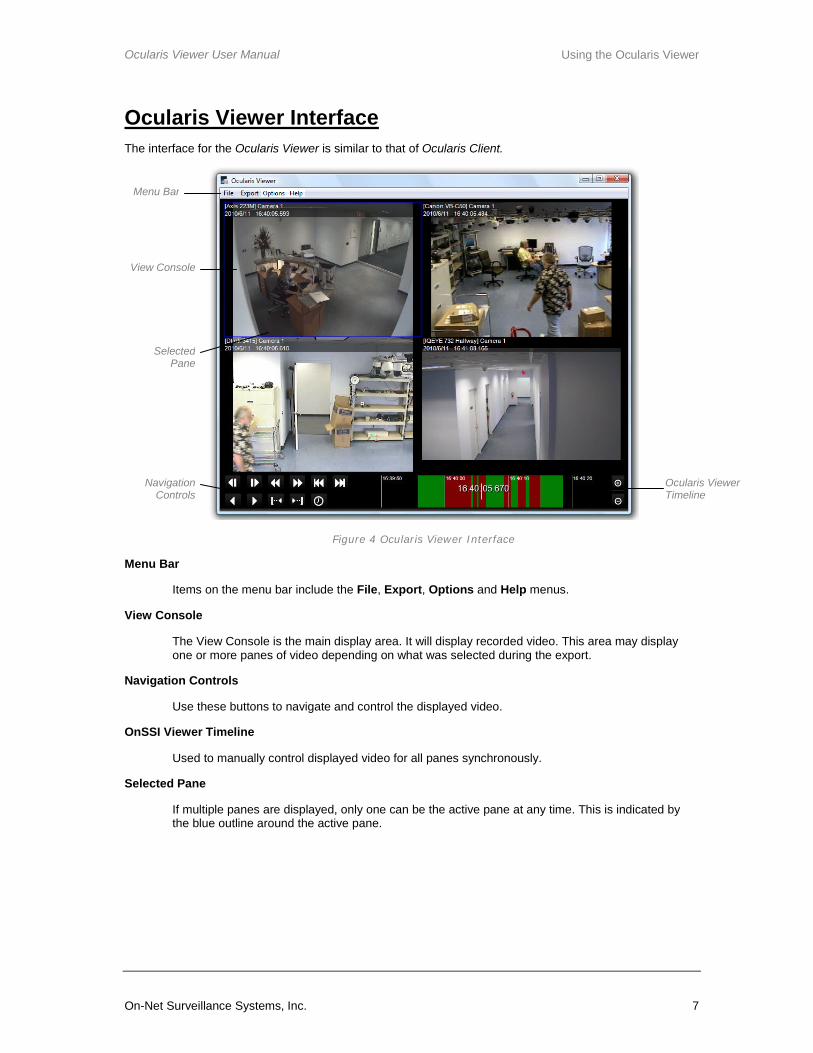
Ocularis Viewer Interface The interface for the Ocularis Viewer is similar to that of Ocularis Client.
Figure 4 Ocularis Viewer Interface
Menu Bar
Items on the menu bar include the File, Export, Options and Help menus.
View Console
The View Console is the main display area. It will display recorded video. This area may display one or more panes of video depending on what was selected during the export.
Navigation Controls
Use these buttons to navigate and control the displayed video.
OnSSI Viewer Timeline
Used to manually control displayed video for all panes synchronously.
Selected Pane
If multiple panes are displayed, only one can be the active pane at any time. This is indicated by the blue outline around the active pane.
Menu Bar
View Console
Navigation Controls
Ocularis Viewer Timeline
Selected Pane

Using the Ocularis Viewer Ocularis Viewer User Manual
8 On-Net Surveillance Systems, Inc.
Viewing Video Once the video clip is loaded (see ‘Load a Video Clip’ on page 6), you may navigate the video the following
ways:
1. Manually drag the Ocularis Timeline to the left and right. The color coding on the timeline follows the same conventions as Ocularis Client and is defined as follows:
Figure 5 Ocularis Viewer Timeline
• Black: no video was recorded
• Green: video was recorded, but no motion was detected
• Red: video was recorded, containing motion events
• Purple: indicates the future, starting from the current time
Use the time scale icons on the Ocularis Timeline to increase or decrease the units of the timeline.
2. Navigation Buttons
Use the navigation buttons to the left of the timeline to control video playback.
Skip one frame backwards
Skip one frame forwards
Go to the previous sequence in the database
Go to the next sequence in the database
Go to the beginning of the database
Go to the end of the database
Play in Reverse
Play forwards
Go to a specific time in the database
Even though only one pane of the video displayed can be the active pane at any time, all video will play (or rewind, etc.) synchronously for all visible panes, provided that recorded video exists.

Ocularis Viewer User Manual Using the Ocularis Viewer
On-Net Surveillance Systems, Inc. 9
Keyboard ShortCuts Shortcut Shortcut for: Description
Ctrl + O File…Open Loads a video file
Esc File…Exit Closes the Ocularis Viewer
Ctrl + <number> File…Recent Files…<filename> Opens recently viewed files
Ctrl + V Export…AVI File Exports a clip to .AVI format
Ctrl + F Export…Individual Frames Export a jpg or series of jpgs
Ctrl + P Export…Print Print an incident report
Ctrl + E Export…Progress View progress of an export
Ctrl + A Help…About Displays the version of Ocularis Viewer
Left arrow
Previous Frame
Right arrow
Next Frame
Alt + Left arrow
Previous Sequence
Alt + Right arrow
Next Sequence
Ctrl + Alt + Left arrow
Go to beginning of database
Ctrl + Alt + Right arrow
Go to end of database
Ctrl + Left arrow
Play video in reverse
Ctrl + Right arrow
Play video forward
Ctrl + G
Go to Time
[
Set start of export clip
]
Set end of export clip
+ Zoom the Timeline scale in
- Zoom the Timeline scale out

Using the Ocularis Viewer Ocularis Viewer User Manual
10 On-Net Surveillance Systems, Inc.
Video Options There are two settings which allow you to control the quality of the video. These are located in the ‘Options’ menu. These options help you control the playback speed of high resolution cameras.
Scale to viewport size
This option will scale an image down to the current size of that image’s view pane. For example, if the image resolution of a video is 1920 x 1080 and the view pane size for that image is 800 x 600, the displayed image will be scaled from 1920 pixels wide to 800 pixels wide. Note: Image resolutions are only scaled downward; they are not scaled up.
Video Quality
This option allows you to set the quality of the video to Low, Medium or High.

Ocularis Viewer User Manual Exporting
On-Net Surveillance Systems, Inc. 11
Exporting While viewing video clips with Ocularis Viewer, you may find the need to export additional clips from the existing file. Exporting includes: export video to .avi format or export still images to .jpg format.
To Export Video to .AVI Format
You can export video from the Ocularis Viewer to .avi format. Similar to exporting in the Ocularis Client, you must first set your start and end times for the video clip.
1. Load the source video using File…Open.
2. If the View Console contains multiple panes, select the pane with the video you wish to export.
3. Navigate to the desired start of the video clip.
4. Click the ‘Set Start of Export’ button.
5. Play the video / navigate to the end of the clip you wish to export.
6. Click the ‘Set End of Export’ button.
7. From the menu, select Export…AVI File.
Figure 6 Export to AVI
8. In the Export to AVI File pop-up window, enter the entire path to the folder to store the video clip. Use the browse button to select via mouse.
9. Enter the Filename to assign to the clip. The filename entered will be appended with the .avi suffix.
10. Enter optional Preamble information for the clip. A Preamble is title text that appears in the clip prior to the actual video.
11. Enter a description in the Comment field regarding the incident. This optional text will appear in the video’s preamble.
12. If you would like to change default settings of the .avi video export, click the Setup button.

Using the Ocularis Viewer Exporting
12 On-Net Surveillance Systems, Inc.
Figure 7 AVI Export Setup
a. Here you can modify the settings as follows:
Field Description
Video Codec Select alternate codecs from the drop-down list
Encoding Quality Choose: Low, Medium, or High. The higher the quality. the larger the size of the resulting file.
Include:
Time Stamp Check this box to the time stamp displayed on the video while it is playing.
Camera Name Check this box to display the camera name on the video.
Always Prepend Preamble Check this box to include the preamble text to the video clip.
b. Click OK to save settings in the AVI Export Setup pop-up.
13. When ready, click Export.
The clip will be stored in the location you specified using the following filename convention:
YYYY-MM-DDTStart_time_of_clip.avi
You may now view the video using any viewer which supports .avi.

Ocularis Viewer User Manual Exporting
On-Net Surveillance Systems, Inc. 13
To Export Video to Still Images (.jpg format)
You can export video from the Ocularis Viewer to a single or a series of still images. The image is saved in .jpg format.
1. Load the source video using File…Open.
2. If the View Console contains multiple panes, select the pane with the video you wish to export.
3. Navigate to the frame of the image you wish to export.
a. If you wish to export multiple images:
• Navigate to the starting frame
• Click the ‘Set Start of Export’ button
• Navigate to the ending frame
• Click the ‘Set End of Export’ button
4. From the menu, select Export…Individual Frames.
Figure 8 Export Still Frames
5. In the Export Still Frames pop-up, specify the folder in which to store the image(s). Use the browse button to select via mouse.
6. Select either Single Frame if exporting only one jpg. Select Full Timespan if you wish to export multiple .jpg images. (The Full Timespan option will only be available if a video clip was selected).
7. If you would like to change default settings of the .jpg image, click the Setup button.

Using the Ocularis Viewer Exporting
14 On-Net Surveillance Systems, Inc.
Figure 9 Image Export Setup
a. Here you can modify the settings as follows:
Field Description
Image Quality Choose: Low, Medium, or Original. The higher the quality. the larger the size of the resulting file.
Include:
Time Stamp Check this box to the time stamp displayed on the image.
Camera Name Check this box to display the camera name on the image.
b. Click OK to save settings in the Image Export Setup pop-up.
8. When ready, click Export.
The image(s) will be stored in the location you specified using the following filename convention:
YYYY-MM-DDTime_of_image_capture.jpg
You may now view the image(s) using any viewer which supports .jpg.

Ocularis Viewer User Manual Exporting
On-Net Surveillance Systems, Inc. 15
Export Progress
After you’ve issued an export command, you can check the status of the export’s progress.
• From the Menu, select Export…Progress
An Export Progress screen appears.
Figure 10 Export Progress
The progress bar(s) on this screen identify how far along the export is.
When the export is complete, you will see a status message pop up in the system tray on the desktop.
• Click the Folder button to open the folder which contains the exported file using Windows Explorer.
• Click the Open button to open the exported file in the application associated with the file type.

Using the Ocularis Viewer Printing
16 On-Net Surveillance Systems, Inc.
Prin ting Still Image Reports are printed reports which include a still image as well as the associated time, date,
camera information, operator and workstation identifiers and operator comments.
To Print a Still Image Report
1. Load the source video using File…Open.
2. If the View Console contains multiple panes, select the pane with the video you wish to export.
3. Navigate to the desired image to use in the report.
4. From the menu, select Export…Print.
Figure 11 Print Report
5. Enter desired text for the report header in the Header field.
6. Enter any descriptive comments for the report in the Comment field. The text entered will automatically word wrap on the printed report.
7. Enter desired text for the report footer in the Footer field.
8. Click the Preview button if you would like to see a preview of the printed report.

Ocularis Viewer User Manual Printing
On-Net Surveillance Systems, Inc. 17
Figure 12 Preview of Print Report
9. Close the window to exit the print preview.
10. Click OK to send the report to the printer.

Using the Ocularis Viewer Printing
18 On-Net Surveillance Systems, Inc.
Contact Information
On-Net Surveillance Systems (OnSSI) One Blue Plaza
7th Floor
P.O. Box 1555
Pearl River, NY 10965
Website: www.onssi.com
General: [email protected] 845.732.7900
Fax: 845.732.7999
Sales Support: [email protected] 845.732.7900 x 1
PreSales Support [email protected] 845.732.7900 x 2
Technical Support: [email protected] 845.732.7900 x 3
Training: [email protected] 845.732.7900 x 4
Marketing: [email protected] 845.732.7900 x 5