Embed Size (px)
Citation preview

Growing new plants from scratch can become a business venture or a rewarding pastime depending upon your desires, your interests, and your focus. I am not saying that you will become rich off of such a business venture. There is a lot of competition in the business, and there are rules, laws, regulations, and expenses that can become major impediments. Nevertheless, some people have actually turned a successful pastime into a paying business and, if you are committed, you might become one of them. For the rest of us, however, propagating plants can be a relaxing hobby; something to help us wind down after a long day, or maybe help us save a few bucks on a home landscape upgrade. Propagating plants at home is simple to do and takes only a minimum of inputs. For these reasons, and also I guess because of the sheer joy in watching something come to life and grow under one’s care, many people choose to express their creative side by growing new plants at home.
If you want to show off your green thumb, or develop one, how do you get started? First off, you need a little space. It doesn’t need to be a large area, just a few square feet if you like, but it will need to be big enough for a work table, a few shelves for storage of equipment and supplies, and enough space to provide good air circulation and sunlight for newly potted plants. The space can be as small as a few square feet or as large as you like. There will also need to be an easy access to water. A faucet and a garden hose work very well for many people. You will want to install a hook or a hose rack on a post or a wall somewhere so that you can coil up your hose and get it out of the way. A hose just laying helter-skelter across your work area could become a trip hazard if it is not properly stored. The hose should be long enough to reach the far side of your growing area so that you can easily water plants as needed. Even if you decide to install an overhead sprinkler system, which many people do, you will still want a water bib handy in case the irrigation system breaks down. Water from a hose is also helpful during your potting sessions and for mixing liquid fertilizer solutions.
Your growing area should be placed in an area exposed to sunlight all day long. Sunlight is critical for plant growth because it provides the energy that drives the growth and development functions of all plants. For that reason, you want your
In This Issue:
Setting Up a Plant Propagation Work Area at Home 1
The Secrets of Growing Adenium at Home 3
Benefits of Biochar in Southern Arizona Gardens 5
The Ginkgo Tree 7
October 2019 Garden & Landscape Newsletter
U of A Cooperative Extension, Pinal County 820 E. Cottonwood Lane, Bldg. C., Casa Grande, AZ 85122 (520) 836-5221 http://extension.arizona.edu/pinal
Setting Up a Plant Propagation Work Area at Home
Setting Up a Propagation Work area ... Continued on Page 2
One of BJ Seemuth’s propagation area

2
growing area to be where your plants can get full benefit from the sun. Okay, this is important. Please listen up. While you want day-long exposure to sunlight, you will not want your tender cuttings and seedlings to bake in full sunlight. I know that sounds confusing. Let me try to explain. Sunlight is absolutely necessary for good plant growth, as previously explained, but direct sun can burn the tender tissues. Never let your tender new plants to sit in full, unfiltered sun. Newly propagated plants, including leaves, stems, and roots, can be baked and cooked under our hot summer sun, and can easily freeze back if exposed to the air on a cold night. Challenges such as these can be minimized by rigging a shade cloth across the top of your growing area. The mesh count of the fabric determines how much sunlight can pass through to the plants. A count that blocks about forty to sixty percent of available sunlight would be just about right. More tender plants, such as orchids, may need a seventy-five percent fabric. You will need to decide how you will organize your newly potted plants. Some people opt to set up a wire mesh growth table whose surface, for good ergonomic work, will sit about waist high. Others may simply place the containers on a weed mesh-and-pallet combination. Both systems work well. Whichever system is selected, the surface must be sufficiently porous to allow excess water to drain away from the plants It is not a good idea to simply place them on the ground. Direct contact with the soil slows water drainage and allows exposure to unwanted pests, such as weeds and insects. If you plan on growing twenty or more plants at a time, you will seriously want to consider an overhead sprinkler system that drops water down onto your container plants. This will save a lot of time and effort on your part because water applications must be delivered on a set schedule and in an amount that will sustain the plants. Before installing a system, you might want to consult with an experienced someone for advice in assembling a good irrigation system. If you have just a few plants, a watering can or the end of a hose with a baffle attached work well. In your work area you will want to have the right tools for the job handy so that you do not have to go looking for them when you need them. Many choose to install a storage cabinet and give each item a place in the cabinet. Then, because each tool is ready at hand, it is easy to find them for the next job. A box or a bin will certainly suffice, but many people like a cabinet better. What kind of tools will be necessary? Every person has their own favorite tools but a basic list might include a hand spade to fill pots with soil, a watering wand that attaches to the end of the hose, a sharp knife to make precision cuts, hand clippers of the scissors type to help in cutting propagating pieces, and perhaps a pair of sewing scissors for close in work. Other tools could include a small shovel, a lopping pruner for big cutting jobs, a garbage can to catch clippings and other debris as you work, and a yard rake to clean up after a work session. Some people swear by a full-sized broom or maybe just a hand wisk for the same cleaning purposes, depending upon the work site needs. I have often seen a watering can or two in work areas to make irrigation easy, and to distribute liquid fertilizers without a lot of hassle. Also plastic bins of varying sizes are also useful at times. Do not forget to have a push pull hoe that you can slide underneath your growing tables to keep the weeds down. They often harbor diseases or invite insects. Expendable supplies will also be necessary. Many keep potting soil in a large can with a tight-fitting lid to keep our unwanted critters, like roaches and scorpions. You will need to keep some liquid fertilizer mixes handy, including starter mixes and slow-acting tablets to provide extra nutrition during the early start up and maturing stages. Of course you will also want to keep a supply of one, two, three, and five gallon plant containers of various sizes close by the work area so that they are accessible as needed. Some even stock a few ten and thirty gallon containers for extra big jobs. With a little space and know how, anyone can begin to start their own trees, shrubs, and bedding plants for their own use, as gifts to friends, and perhaps even to sell for a little extra income.
Setting Up a Propagation Work Area … Continued from page 1

3
“What in the world is an Adenium,” some may be asking? The various Adenium species are succulent plants that can be grown in our climate, either indoors or outside. They produce flowers that are truly spectacular for container grown plants. They also have an interesting shape and many find growing them a pleasant pastime. If you like houseplants, you may already have one or more in your collection. If not, you could be in for a treat. Whichever group you fall into, let’s review the basics of growing this intriguing plant. Adenium are desert plants native to the dry areas of Africa. As such, they can handle our heat and dry air quite well. They are, however, highly sensitive to cold weather and it is the norm to move the plants about to accommodate their needs. While some growers choose to keep them inside all year round, most will move them outside when it is warm and inside when there is danger of frost, freeze, or cold. Because they must be moved about for their own protection, they must be mobile, which means that they must be grown in containers. For this reason, they are generally considered to be a container plant. The Adenium are also succulents, meaning that they can store water in their stems and branches. This ability to store water gives them the capacity to live in dry areas. Watering however, is essential and must be done correctly. Yes, where they come from, they can live on rainfall alone, but not here. We will talk more about watering and schedules later on. Adenium is the genus name of this plant. Its second scientific name, the species name, varies by the individual plant type. There are eight different species of Adenium and each has its own set of characteristics. The species most often grown for indoor and outdoor display is A. obesum but many collectors have more than one species on display. The plant structure is of itself intriguing. Not only does it have showy, pink to red-colored flowers, it also has a thickened stem or trunk which is of botanical as well as visual interest. Called a caudex, it is a storage organ where water and other essential materials are held until needed. The stems, the caudex, and the flowers all combine to make this as an interesting plant. To successfully grow an Adenium here in the desert, it will be essential to give it proper care. As previously mentioned, water, along with light intensity, fertilization, temperature, pests, and potting mixtures are all critical elements that are key to success. If you are a new hand at growing Adenium plants, please know that you will need to pay particular attention to their specific needs. Light intensity may be the most important. While Adenium needs sunlight to grow and develop, how that light is provided can be somewhat of a challenge. In the soil and in its native environment, it can spread its roots out quite a ways in search of water. Under these conditions, it can take, and prefers, full sun. Growing them in containers where they are often moved about frequently and then from indoors to outdoors and back again, the amount of sunlight that they get is going to vary through the year. Because of this, we have to be careful about the intensity of light that they receive each time they are moved. You probably already know the biological fact that plants have the capacity to adjust to the amount of light they receive. A saguaro cactus, for example, will have a thicker layer of cells on the sunny side of the plant and a thinner layer on the shady side. If the plant gets transplanted with what used to be the south side facing north, catastrophic sunburn can occur on the new sunny side. Other plants may adjust to differing light intensities using their own mechanisms. For this reason, it is important to remember that as you move an Adenium from inside to the outdoors, the plant should not be placed into the direct sun immediately after it comes outside. It must be gradually moved from a shady
- Growing Adenium. . . Continued on Page 4
The Secrets of Growing Adenium at Home
Adenium Obesum-Wikimedia

4
spot to a more sunny location a little bit at a time to give it time to adjust and to prevent sunburn. In fact, most successful Adenium growers never place it in full sun here in the desert. They tend to place it in filtered sunlight, such as might be found under a tree or shade awning outdoors. It is still even a little more complex than that. After the growing season, while the plant is outdoors, it will eventually lose its leaves and go dormant. That is the proper time to bring it in and place it in a south or west facing window for the winter. In the spring, and before it begins to leaf out, it should be returned to the outdoors. Any leaves that emerge and grow indoors will likely sunburn and fall off when it is returned to outdoors light. Avoid damage to the leaves, and possibly tender stems, by gradually moving the plant from shade to filtered shade when you put it outside. Likewise, proper watering is just as important. Because the plant can store water over time, it is a good idea for the health of the roots, and subsequently the plant, to water regularly but infrequently. Okay, I know that sounds like a conflicting statement but here is the tip. Water enough to provide for the needs of the plant but let the soil around the roots completely dry out before adding any more water. Growing in containers, it is critical that you test the soil frequently with a finger to determine when it is time to water. The actual frequency of irrigation will depend upon the size of the container, how hot it is, how windy it is, and how much light it is receiving. Practice will help you decide what is right for your conditions. Adenium plants like a well drained soil mix because they do not like to have their roots wet all the time. A medium soil with sufficient sand to allow good drainage should work well. A liquid house plant fertilizer works very well with Adeniums. Growing in a container, they should receive a diluted, perhaps half strength solution, once a month between April and October to adequately support plant growth and development. Some growers fertilize once a week with a quarter strength solution. A more frequent application of fertilizer tends to even out the availability of the nutrients so that the plant benefits from a consistent supply. There are usually no plant diseases that plaque the Adenium group here in Arizona but mealy bugs, spider mites, and aphids can all become a problem. Since these are generally warm season pests, the plant can be washed with a strong stream of water outside to knock them off the plant. Several treatments might be necessary. Here are some other tips that might help out down the road. First, these plants are naturally slow growing so do not expect to see a big plant overnight. They are not a Jack-in-the-Bean-Stock kind of thing. Second, flowering will begin usually early in the spring, perhaps in the late winter before leaves appear. Some hybrids will flower year round. At the smallest, the flower size may be one and one-half inches across. Other varieties have flowers that can reach up to four inches across. Since the plant is related to the oleander, the flower structure will be about the same size and shape. Just like some people are passionately devoted to growing orchids, there are many who really enjoy Adenium plants. As a result, they find satisfaction not only in the success of growing a challenging plant, but also in the beauty that they provide.
Growing Adenium . . . continued from pg.3
Trade names used in this publication are for identification only and do not imply endorsement of products named or criticism of similar products not mentioned.
5
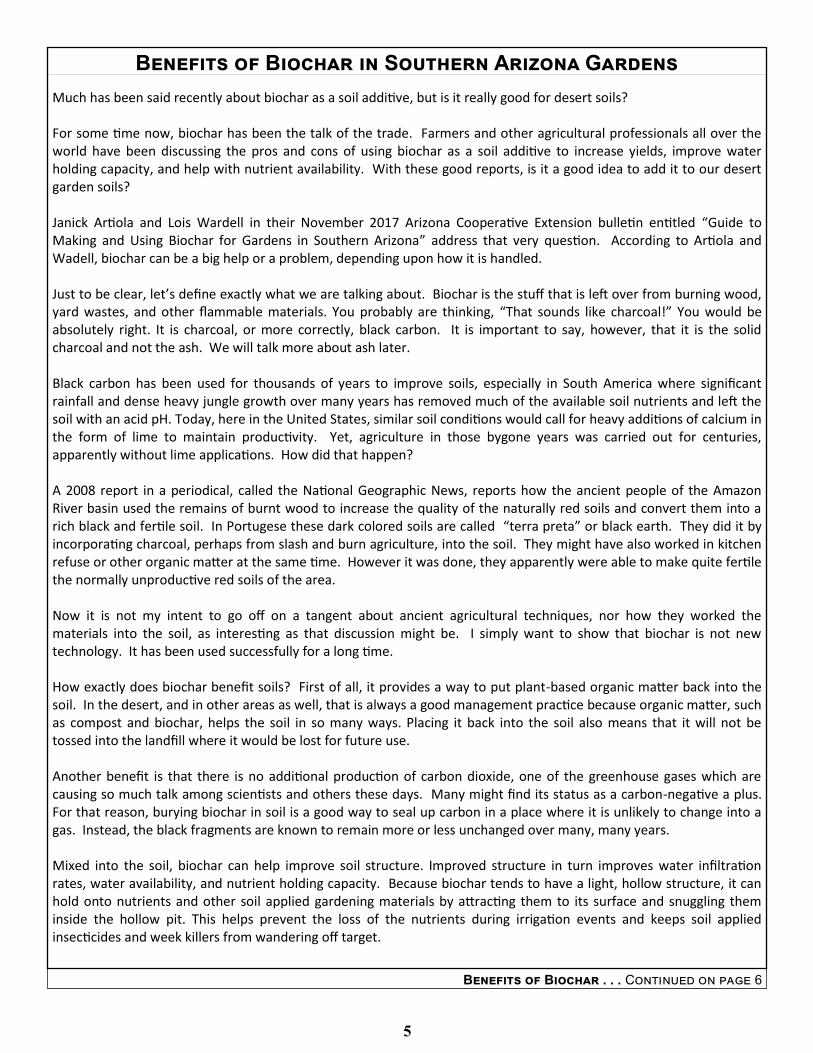
Much has been said recently about biochar as a soil additive, but is it really good for desert soils? For some time now, biochar has been the talk of the trade. Farmers and other agricultural professionals all over the world have been discussing the pros and cons of using biochar as a soil additive to increase yields, improve water holding capacity, and help with nutrient availability. With these good reports, is it a good idea to add it to our desert garden soils? Janick Artiola and Lois Wardell in their November 2017 Arizona Cooperative Extension bulletin entitled “Guide to Making and Using Biochar for Gardens in Southern Arizona” address that very question. According to Artiola and Wadell, biochar can be a big help or a problem, depending upon how it is handled. Just to be clear, let’s define exactly what we are talking about. Biochar is the stuff that is left over from burning wood, yard wastes, and other flammable materials. You probably are thinking, “That sounds like charcoal!” You would be absolutely right. It is charcoal, or more correctly, black carbon. It is important to say, however, that it is the solid charcoal and not the ash. We will talk more about ash later. Black carbon has been used for thousands of years to improve soils, especially in South America where significant rainfall and dense heavy jungle growth over many years has removed much of the available soil nutrients and left the soil with an acid pH. Today, here in the United States, similar soil conditions would call for heavy additions of calcium in the form of lime to maintain productivity. Yet, agriculture in those bygone years was carried out for centuries, apparently without lime applications. How did that happen? A 2008 report in a periodical, called the National Geographic News, reports how the ancient people of the Amazon River basin used the remains of burnt wood to increase the quality of the naturally red soils and convert them into a rich black and fertile soil. In Portugese these dark colored soils are called “terra preta” or black earth. They did it by incorporating charcoal, perhaps from slash and burn agriculture, into the soil. They might have also worked in kitchen refuse or other organic matter at the same time. However it was done, they apparently were able to make quite fertile the normally unproductive red soils of the area. Now it is not my intent to go off on a tangent about ancient agricultural techniques, nor how they worked the materials into the soil, as interesting as that discussion might be. I simply want to show that biochar is not new technology. It has been used successfully for a long time. How exactly does biochar benefit soils? First of all, it provides a way to put plant-based organic matter back into the soil. In the desert, and in other areas as well, that is always a good management practice because organic matter, such as compost and biochar, helps the soil in so many ways. Placing it back into the soil also means that it will not be tossed into the landfill where it would be lost for future use. Another benefit is that there is no additional production of carbon dioxide, one of the greenhouse gases which are causing so much talk among scientists and others these days. Many might find its status as a carbon-negative a plus. For that reason, burying biochar in soil is a good way to seal up carbon in a place where it is unlikely to change into a gas. Instead, the black fragments are known to remain more or less unchanged over many, many years. Mixed into the soil, biochar can help improve soil structure. Improved structure in turn improves water infiltration rates, water availability, and nutrient holding capacity. Because biochar tends to have a light, hollow structure, it can hold onto nutrients and other soil applied gardening materials by attracting them to its surface and snuggling them inside the hollow pit. This helps prevent the loss of the nutrients during irrigation events and keeps soil applied insecticides and week killers from wandering off target.
Benefits of Biochar . . . Continued on page 6
Benefits of Biochar in Southern Arizona Gardens
6
There is a serious drawback, however. Fresh made biochar carries a lot of salt. Because most desert soils already carry a healthy supply, we have to be careful not to push soil levels into the toxic range when we add biochar. If we feel that an application of biochar would help the soil, we really should remove the salts first. Salts can be removed, well, at least decreased, by soaking the biochar several times in water. Now, we are not talking about just sprinkling it with a hose. That will not do much good. To remove up to sixty percent of the salts found in biochar, it will need to be placed in a tub or bin and soaked in water overnight. Doing this two or three times should remove a majority of the salts. What about fireplace ash? It is never a good idea to add wood ashes to desert soils. Ash flakes are high in total salts and do not have that key structure of biochar previously mentioned. Ashes are often recommended for gardens in acid soils, but here, with our alkaline soils, they just add to the problem. I do not have space here to describe how to make biochar at home, but it is a fairly simple process. Using a fire pit is probably the most simple and ready to hand, but it is also the least efficient. There are special stoves that are designed for the purpose and these might be the best bet, either one that is purchased from a dealer, or one that you build at home. It is best if the pieces of wood used to make biochar are small and of a uniform size. For that purpose, many choose to run their mesquite, palo verde, ironwood, or other wood sources through a wood chipper first. A small, electric wood chipper can be purchased from tool dealers for about $200. A word of warning is due at this point. Never select toxic plants, like oleander, for making biochar. Stay with the safe woods, such as those mentioned above. Smoke from toxic plants can be detrimental to pets, other plants, and humans. Never burn oleander wood for any reason. Now that you have made your biochar, and leached the salts out of it, it is time to mix it into your soil. When working with biochar, always use a dust mask to keep the small particles that billow up into the air when it is disturbed from being sucked into your lungs as you breathe. For this reason, it is best to never use biochar as a surface mulch. Always bury the biochar into the earth. If left on the surface of the soil, wind could pick it up and make it a hazard to those nearby. Rates and depths of incorporation will be dependent upon the type of soil in your garden, and other factors. I think it is a good idea to mix the biochar fragments with regular compost before digging it into the soil. By doing that, the several benefits of both biochar and compost can be combined in the garden. You may have other questions about the use of biochar. You can obtain a copy of the above referenced Extension bulletin written by Artiola and Wadell by going to the Arizona Cooperative Extension website and searching under “Publications” for bulletin number az1752. Scroll down and you will see a link to the publication, “Guide to Making and Using Biochar for Gardens in Southern Arizona.” The bulletin contains extensive information about biochar and its production at home. If we are careful, and manage salts appropriately, biochar may be a good way to improve the soil health of our garden soils.
Benefits of Biochar - continued from page 5
Issued in furtherance of Cooperative Extension work, acts of May 8 and June 30, 1914, in cooperation with the U.S. Department of Agriculture, Jeffrey C. Silvertooth, Associate Dean & Director, Economic Development & Extension, College of Agriculture and Life Sciences, The University of Arizona. The University of Arizona is an equal opportunity, affirmative action institution. The University does not discriminate on the basis of race, color, religion, sex, national origin, age, disability, veteran status, or sexual orientation in its programs and activities.
cals.arizona.edu
7
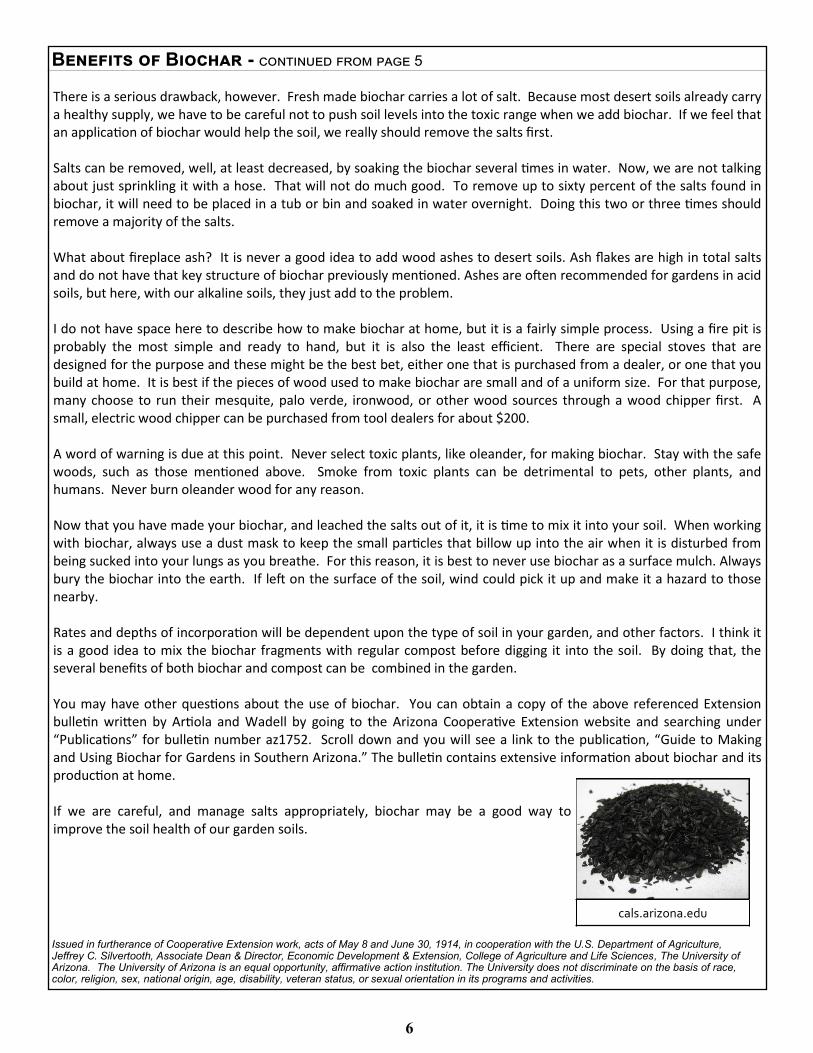
While it does require regular irrigation, the fall colors of the ginkgo tree make it an eye-catching addition to a home yard landscape. Sometimes known as the maidenhair tree, the gingko is the only surviving member of its family. It is an ancient tree with evidence of a worldwide distribution tracing its roots back to times when dinosaurs were alive. Now, only one species of this family remains and that species is found in the wild only in a couple of places in China. Still, it is favored today because of its hearty nature, its broad leaves, and particularly for the brilliantly gold color of the leaves in the fall. Back when the dinosaurs were the thing, there were multiple species of the family. Eleven have been identified so far, but now only Ginkgo biloba is the only one left alive. As might be expected, a survivor like this can tolerate a lot of adversity in the form of heat, salt, and other constraints. For this purpose, it is valued as a landscape tree from cold climates to the warm deserts and is often planted for its different type of growth, tolerance to local conditions, and, of course, its fall color. The leaves during most of the year are light-green in color and have a leathery feel. When the weather turns cold, the color changes to a vibrant gold and some sources indicate that when sunlight back lights the leaves that they seem to glow, such as might be expected if the light were internal to the leaf. This color change can be dramatic, especially when viewed from a distance. The leaves tend to persist or hang on to the stems for a while, but, when the leaves do fall, the ground underneath can appear as if carpeted with gold. Before you go out and purchase a tree, however, there are a few things you need to know. First of all, the plant is dioecious, meaning that the male reproductive structures are on a different tree than the female parts. That is, there is a male tree and a female tree. You most likely will want a male tree, even though its pollen can cause problems with those who are allergic. This is important because the fruit produced by the female tree is highly odoriferous, meaning, it smells really bad. The smell I am told, is so bad that one does not even want to be around it. For this reason, only male trees are recommended for planting in a landscape. In the trade, only male trees are generally sold. In the description above, you will notice that I said, “male reproductive structures.” I did that on purpose, because the ginkgo is not a flowering tree. Please let me repeat that. It doesn’t produce flowers. It is more like a pine tree than a plum tree. Still, it is not all that closely related to the pine tree either. It is a classification all of its own. Like a pine tree, it can be slow growing, but like a broadleaf tree, it has large leaves that are up to four inch wide and provide good shade. The leaves are fan-shaped and the veins in the leaves spread out from the central point of attachment like spokes in a wheel. The leaf may have indentations along the top edge which helps in tree identification. When viewed up close, the shape and veining of the leaf resemble the leaflets of the maidenhair fern. This may account for its common name, the maidenhair tree. Since the tree, in a good location, can grow up to fifty feet tall, it can be considered a big tree. Here in the desert, they tend to be about thirty feet tall. Even at that size, they will need lots of room, so when considering a ginkgo, it is important to place it in a location where it can grow to full size without having to keep pruning it each year to keep it within bounds. Along a street or in a large yard would be about right. The tree tends to be taller than it is wide which helps to fit it into a smaller space. I have seen a few ginkgo trees growing around the valley, usually in rather poor shape. The reasons for this, I believe, can be traced to the conditions of the soil and how they are watered. The ginkgo requires a loose and well drained soil for good health. Unfortunately, in many cases here in the desert, our soils are compacted and tight. These latter conditions tend to slow the movement of water and air into the soil which can have negative effects on plants, including the ginkgo. In addition, the tree needs lots of room to spread out its roots. Planting sites sitting on top of a caliche or a rocky layer inside the top three feet of soil could constrict the root zone and keep them from sinking deep enough into the soil to give
The Ginkgo Tree
Ginkgo Tree. . Continued on Page 8
cals.arizona.edu

8
them the support they need. Each of these problems need to be addressed and solved before the tree is placed into the ground. Before the tree is even purchased, it would be a good idea to decide on a possible planting site, dig the hole, and then test the soil for its ability to drain after an irrigation by filling the hole with water and then timing the rate of percolation into the soil. If the hole drains water more than two inches per hour, it should be okay to plant. If not, it would be best to pick another site that does provide good drainage. If a hard, white to gray layer of caliche, or a layer of hard to penetrate compacted soil is found, it will be best to either choose a better site. If that is not possible, it will be important to dig down through the layers and loosen the compacted soil, or remove the caliche layer, if possible. Never plant a ginkgo tree into a spot where these problems are not resolved. That is just asking for trouble later on. Cooperative Extension has a bulletin for proper preparation of planting holes. Correct irrigation is also important for the health of the tree. Because it uses a lot of water early on, it will be important to irrigate the tree on a regular basis. Ginkgo trees should be irrigated at least weekly with a supply of water that will wet the soil down to the bottom of the planting hole, and out to at least the drip line of the tree. This will ensure that all of the roots get watered. After the tree reaches about twenty feet tall, and is approaching maturity, irrigation frequencies can be decreased to an occasional irrigation. However, at all times it is important to remember that each time the tree is watered, it should be watered long enough to sink the water down to at least three feet for best results. The ginkgo grows slowly during the first years of its life. That is normal. Nevertheless, the tree will grow even more slowly, or will suffer significant sunburn damage, if it is not irrigated correctly. For these reasons, it is important to plant it right and water it correctly to ensure good tree health. The ginkgo tree, after new growth appears after planting, should be fertilized with a nitrogen-based fertilizer three to five times a year. The rate and timing should be about the same as for a citrus tree. The gingko tree is not all that common in our area, but they can be found here and there. With regular amounts of water, they certainly add color to fall landscapes. If you have questions about this newsletter, have any plant related problems, or wish to have a publication sent to you, please call (520) 836-5221 x204 or (520) 374-6263 and leave a message. If you have a plant problem and are able to email a picture, please send a picture with any information you can provide about the plant, and your contact information to our diagnostic team at [email protected] and a Master Gardener will contact you.
This newsletter is available to view on our website at: http://extension.arizona.edu/pinal
Richard D. Gibson
Extension Agent, Agriculture
RDG/te/sh/aw
59 mailed copies
262 emailed
Ginkgo Tree . . . continued from page 7

9
How to connect with Rick Gibson online…
Blog: Booming Deserts
ricksgardenspot.blogspot.com
Facebook: https://www.facebook.com/PinalCountyGardenandLandscapeProgram
Twitter: https://twitter.com/RickGibson4
Successful Desert Gardening Series
This will be a practical, in-depth view of the principles required to grow healthy outdoor plants in the desert southwest. Get answers to your gardening questions. The cost of the class is $10 per person, paid by cash, check or money order. (Sorry, cannot accept credit cards). Space is limited, so please RSVP to save a seat by contacting either BJ Seemuth at (520) 431-6167 [email protected] or Theresa Ellsworth at (520) 836-5221 x202 [email protected]
06/26/19 Integrated Pest Management by Naomi Pier
09/25/19 Fall Vegetable Gardens by Rick Gibson
10/23/19 Planting Trees & Shrubs Correctly by Rick Gibson
11/27/19 Low Water Use Landscape by Rick Gibson
12/18/19 Pruning Fruit Trees by Rick Gibson