Embed Size (px)
Citation preview

0Table of Contents
Version 2.3.0 Bridge User Guide User Guide - Product Design
Oceanwide Bridge
User Guide - Product Design
Version 2.3.0
iTable of Contents
Table of Contents
TABLE OF CONTENTS.........................................................................................I
INTRODUCTION...................................................................................................1
PRODUCTS..........................................................................................................2Creating a New Product.....................................................................................................2Viewing and Modifying a Product.......................................................................................4Deactivating a Product.......................................................................................................5
PREMIUM TYPES.................................................................................................7Creating a New Premium Type..........................................................................................7Viewing and Modifying a Premium Type............................................................................9Deactivating a Premium Type..........................................................................................10
LOOKUP TABLES..............................................................................................11Preparing the Lookup File................................................................................................11Uploading Lookup Tables................................................................................................12Viewing and Modifying Lookup Tables and Versions.......................................................16Deactivating a Lookup Table............................................................................................17Deleting a Lookup Table Version.....................................................................................18
OPTION LISTS....................................................................................................19Creating a New Option List..............................................................................................19Viewing and Modifying an Option List..............................................................................23Deactivating an Option List..............................................................................................25
WORKFLOW CONFIGURATIONS.....................................................................26
Managing Fields.......................................................................................................27Creating a New Field........................................................................................................27Setting Default Values for Rich Text Fields......................................................................37Viewing and Modifying a Field..........................................................................................38Copying a Field................................................................................................................40Deactivating a Field..........................................................................................................41
Version 2.3.0 Bridge User Guide User Guide - Product Design

iiTable of Contents
Managing Panels......................................................................................................43Creating a New Panel......................................................................................................43Viewing and Modifying a Panel........................................................................................57Deactivating a Panel........................................................................................................58
Managing Screens...................................................................................................60Creating a New Screen....................................................................................................60Viewing and Modifying a Screen......................................................................................65Deactivating a Screen......................................................................................................66
Integration Configurations......................................................................................67Creating a New Integration Configuration........................................................................67Viewing and Modifying a Configuration............................................................................73Deactivating a Configuration............................................................................................74
Managing Workflows...............................................................................................75Creating a New Workflow.................................................................................................75Viewing and Modifying a Workflow...................................................................................83Publishing a Workflow......................................................................................................84Deactivating a Workflow...................................................................................................85Workflow Report...............................................................................................................87
ADDITIONAL RESOURCES...............................................................................88
Managing Clauses....................................................................................................89Creating a New Clause....................................................................................................89Viewing and Modifying a Clause......................................................................................91Deactivating a Clause......................................................................................................92
Managing Triggers...................................................................................................94Creating a New Trigger....................................................................................................94Viewing and Modifying a Trigger......................................................................................99Deactivating a Trigger....................................................................................................101
Managing Email Templates...................................................................................103Creating a New Email Template.....................................................................................103Viewing and Modifying an Email Template....................................................................105Deactivating an Email Template.....................................................................................106
Managing Document Templates...........................................................................108Uploading a New Document Template...........................................................................108Viewing and Modifying a Document Template...............................................................110Deactivating a Document Template...............................................................................111
Version 2.3.0 Bridge User Guide User Guide - Product Design

iiiTable of Contents
EXPORT / IMPORT...........................................................................................113Export............................................................................................................................. 113Import............................................................................................................................. 115Download Word Ribbon.................................................................................................118
MASTER COVERS...........................................................................................120
REFERENCE....................................................................................................121Workflow and System Placeholders...............................................................................121Tables............................................................................................................................ 121Triggers.......................................................................................................................... 122
Appendix B - Advanced Trigger Design..............................................................124Mixing And and Or.........................................................................................................124
INDEX................................................................................................................126
Version 2.3.0 Bridge User Guide User Guide - Product Design

1Index
Introduction
Welcome to the Bridge insurance access portal. The system provides a full workflow, from the administration of products and coverage, to the submission and management of individual policies.
Access to all features, options, and data are controlled by the settings in your user account. This guide is for users with product management rights, covering the creation and management of products, workflows, and resources to be used throughout the system.
This guide assumes the user is familiar with the general functions of the system. For instructions on logging in and using common features throughout the system, see the User Guide - Introduction document.
Guide
Click a link to jump to the appropriate section.
Products Creating products in the system, used to group and categorize submissions.
Premium Types Creating premium types in the system, used to group related premium calculations.
Option Lists Creating lists of options for use throughout the system.
Workflow Configurations Creating fields, panels, screens, and workflows for entering submissions.
Additional Resources Creating other resources used in the setup of master covers.
Export / Import Downloading the Word Ribbon for use in creating document templates.
Version 2.3.0 Bridge User Guide User Guide - Product Design

2Index
Version 2.3.0 Bridge User Guide User Guide - Product Design

3Index
Products
A Product is used to set options for all master covers assigned to that product. It is also used to group master covers for reporting purposes.
Creating a New Product
1. In the main menu, select Product Design, then select Products. A list of all available products is displayed.
Tip: By default, only Active products are displayed. Clear the filter in the Status column to view all products.
2. Click Create. The Product Management page opens.
3. Fill in the necessary information.
Version 2.3.0 Bridge User Guide User Guide - Product Design

4Index
Name Enter the name of the product. This is the internal name, used to select this product when creating or editing a master cover.
Code This is an internal reference name generated by the system when the product is saved.
Description Enter a description of the product.
Primary Premium Select a Premium Type to be used as the primary premium for use in reports. For information on creating premium types, click here.
Product Group Select a Product Group. The available options are defined by an internal list, and can be used for reporting purposes.
Line of Business Select a Line of Business from the list of industry presets.
4. Click Add to save the product but remain on the page, click Add & Close to save the product and return to the product list, or click Close to return to the product list without saving the product.
Version 2.3.0 Bridge User Guide User Guide - Product Design
5Index
Viewing and Modifying a Product
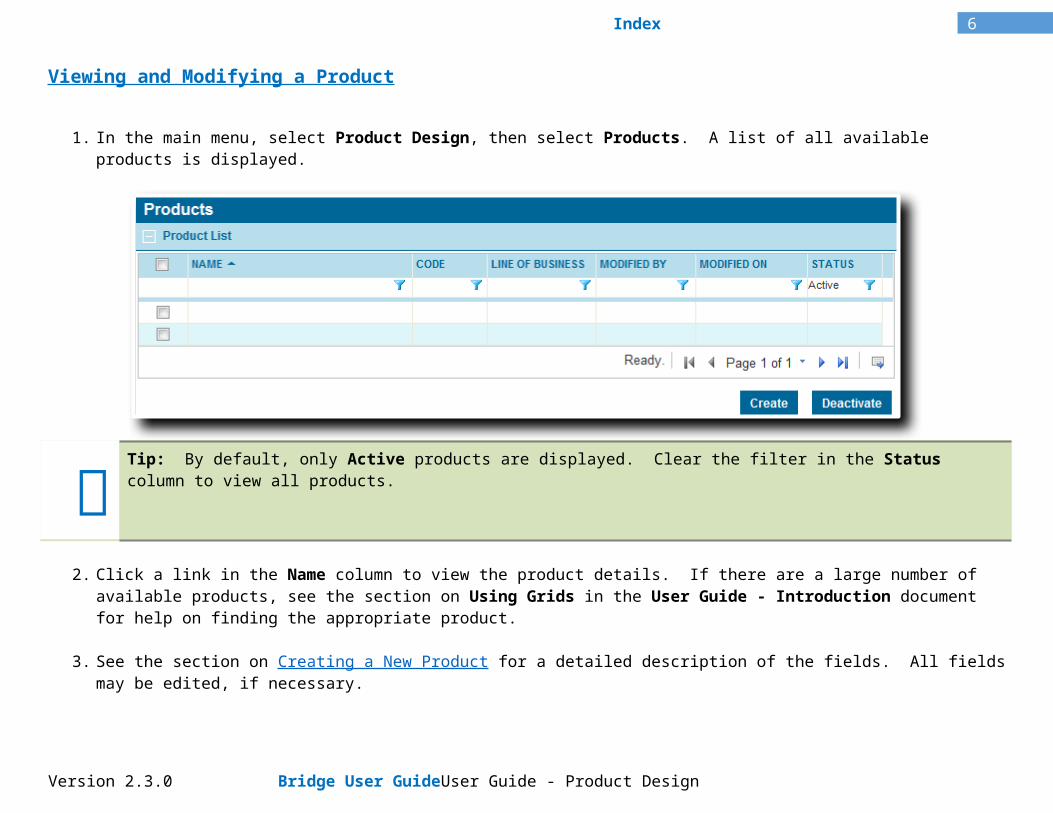
1. In the main menu, select Product Design, then select Products. A list of all available products is displayed.
Tip: By default, only Active products are displayed. Clear the filter in the Status column to view all products.
2. Click a link in the Name column to view the product details. If there are a large number of available products, see the section on Using Grids in the User Guide - Introduction document for help on finding the appropriate product.
3. See the section on Creating a New Product for a detailed description of the fields. All fields may be edited, if necessary.
Version 2.3.0 Bridge User Guide User Guide - Product Design
6Index
Active Marks the product as active and available for use. If unchecked, the product remains linked to any existing master covers, but cannot be used for new master covers.
Created By Identifies the date and time the product was created, and the user who created it.
Last Modified By Identifies the last date and time the product was changed, and the user who made the changes.
4. Click Save to save any changes and remain on the page, click Save & Close to save and return to the product list, or click Close to return to the product list without saving any changes.
Deactivating a Product
Once created, a product cannot be deleted. It can be deactivated, which leaves it linked to any existing master covers, but prevents it from being used for new master covers.
1. In the main menu, select Product Design, then select Products. A list of all available products is displayed.
Version 2.3.0 Bridge User Guide User Guide - Product Design

7Index
Tip: By default, only Active products are displayed. Clear the filter in the Status column to view all products.
2. Locate the product or products to be deactivated. If there are a large number of available products, see the section on Using Grids in the User Guide - Introduction document for help on finding the appropriate products.
3. Check the boxes for all products to be deactivated.
4. Click Deactivate, then confirm the deactivation when prompted to do so. All selected products are deactivated. If the product list is still defaulted to only show active products, they disappear from the list.
Tip: Individual products can also be deactivated or reactivated directly through the product record. See the section on Viewing and Modifying a Product for details.
Version 2.3.0 Bridge User Guide User Guide - Product Design

8Index
Premium Types
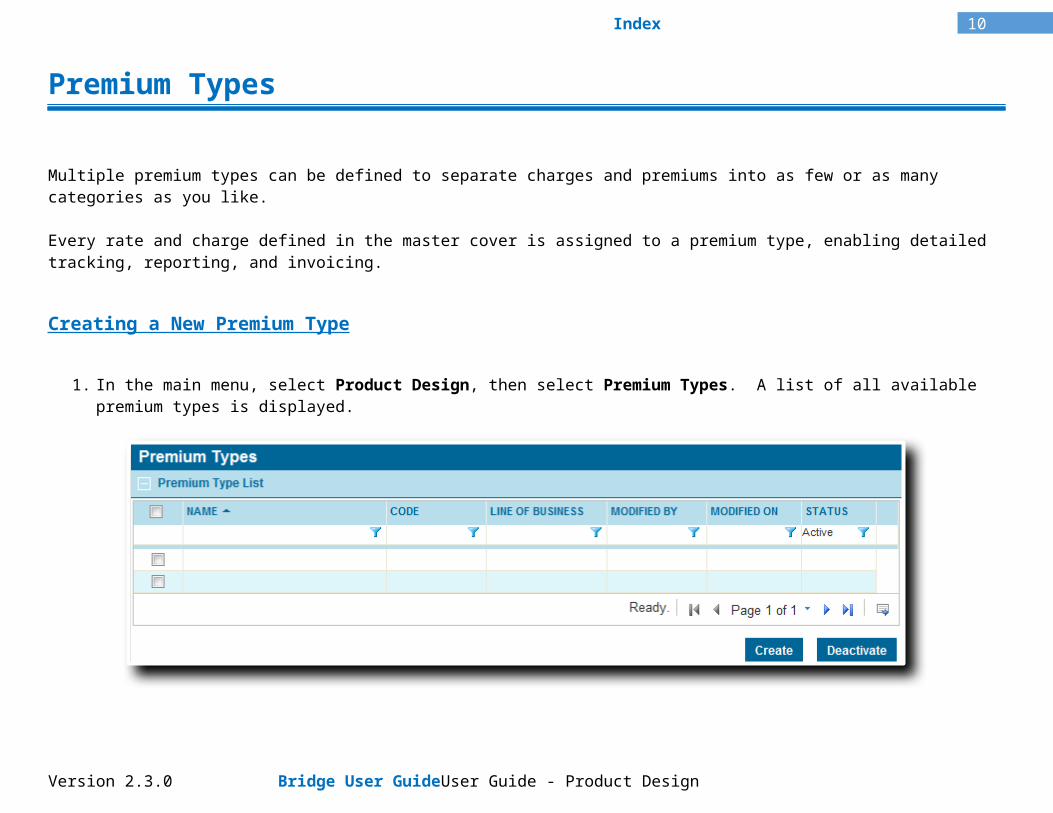
Multiple premium types can be defined to separate charges and premiums into as few or as many categories as you like.
Every rate and charge defined in the master cover is assigned to a premium type, enabling detailed tracking, reporting, and invoicing.
Creating a New Premium Type
1. In the main menu, select Product Design, then select Premium Types. A list of all available premium types is displayed.
Tip: By default, only Active premium types are displayed. Clear the filter in the Status column to view all premium types.
2. Click Create. The Premium Type Management page opens.
3. Fill in the necessary information.
Version 2.3.0 Bridge User Guide User Guide - Product Design

9Index
Name Enter the name of the premium type. This name is what appears in the submission form and billing screens, as well as being used to select this premium type during setup.
Code This is an internal reference name generated by the system when the premium type is saved.
Description Enter a description of this premium type.
Line of Business Select a Line of Business from the list of industry presets, or select All to make the premium type available to all lines.
Product Select an available product, or select All to make the premium type available to all products.
4. Click Add to save the premium type but remain on the page, click Add & Close to save the premium type and return to the premium type list, or click Close to return to the premium type list without saving the premium type.
Version 2.3.0 Bridge User Guide User Guide - Product Design
10Index
Viewing and Modifying a Premium Type
1. In the main menu, select Product Design, then select Premium Types. A list of all available premium types is displayed.
Tip: By default, only Active premium types are displayed. Clear the filter in the Status column to view all premium types.
2. Click a link in the Name column to view the premium type details. If there are a large number of available premium types, see the section on Using Grids in the User Guide - Introduction document for help on finding the appropriate premium type.
3. See the section on Creating a New Premium Type for a detailed description of the fields. All fields may be edited, if necessary.
Active Marks the premium type as active and available for use. If unchecked, the premium type remains linked to any master covers, but cannot be used for new master covers.
Created By Identifies the date and time the premium type was created, and the user who created it.
Last Modified By Identifies the last date and time the premium type was changed, and the user who made the changes.
Version 2.3.0 Bridge User Guide User Guide - Product Design

11Index
4. Click Save to save any changes and remain on the page, click Save & Close to save and return to the premium type list, or click Close to return to the premium type list without saving any changes.
Deactivating a Premium Type
Once created, a premium type cannot be deleted. It can be deactivated, which leaves it linked to any existing products, but prevents it from being used for new products.
1. In the main menu, select Product Design, then select Premium Types. A list of all available premium types is displayed.
Tip: By default, only Active premium types are displayed. Clear the filter in the Status column to view all premium types.
2. Locate the premium type or types to be deactivated. If there are a large number of available premium types, see the section on Using Grids in the User Guide - Introduction document for help on finding the appropriate premium types.
3. Check the boxes for all premium types to be deactivated.
4. Click Deactivate, then confirm the deactivation when prompted to do so. All selected premium types are deactivated. If the premium type list is still defaulted to only show active premium types, they disappear from the list.
Version 2.3.0 Bridge User Guide User Guide - Product Design

12Index
Tip: Individual premium types can also be deactivated or reactivated directly through the premium type record. See the section on Viewing and Modifying a Premium Type for details.
Version 2.3.0 Bridge User Guide User Guide - Product Design

13Index
Lookup Tables
Lookup tables are custom Excel files containing a list of values and all of the conditions required for each value. Once a table has been uploaded to the system, the $Lookup() function can be used in a calculated field to gather the conditions from the submission form and find the appropriate value from the table.
For details about the $Lookup() function, please see the Bridge 2.2.1 - User Guide - Calculated Fields document.
Preparing the Lookup File
1. Create a new Excel file or modify an existing file that has all of the table information.
The first row must be the header, with column names for the value and each condition. Note that the word "column" must not be used in the header name. The system supports up to 10 conditions, for a total of 11 columns (last column is K).
The first column must be the value, and cannot contain opening or closing brackets ( ) or the dollar sign $.
The remaining columns contain the conditions in the order they are used in the $Lookup() function. The maximum length for any value or condition is 80 characters, and cannot contain opening or closing brackets ( ), the dollar sign $, single or double quotes ' ", returns \r, new lines \n, or commas ,.
Version 2.3.0 Bridge User Guide User Guide - Product Design

14Index
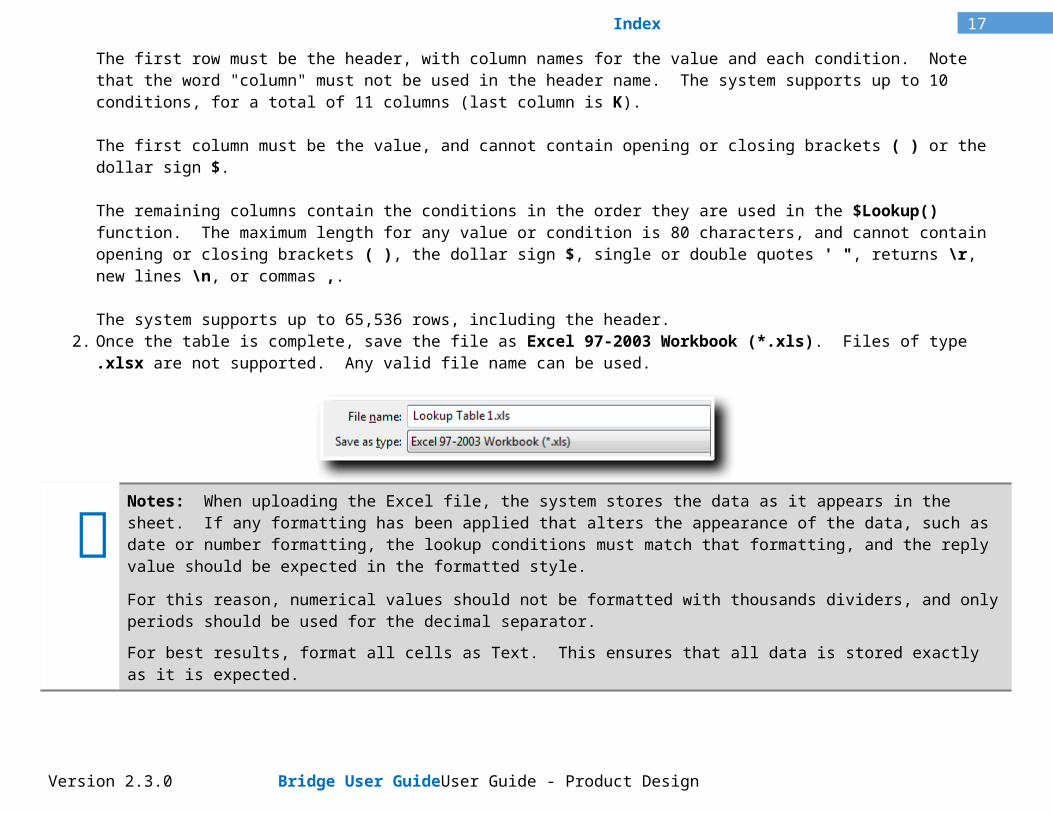
The system supports up to 65,536 rows, including the header.2. Once the table is complete, save the file as Excel 97-2003 Workbook (*.xls). Files of type .xlsx are not supported. Any valid
file name can be used.
Notes: When uploading the Excel file, the system stores the data as it appears in the sheet. If any formatting has been applied that alters the appearance of the data, such as date or number formatting, the lookup conditions must match that formatting, and the reply value should be expected in the formatted style.
For this reason, numerical values should not be formatted with thousands dividers, and only periods should be used for the decimal separator.
For best results, format all cells as Text. This ensures that all data is stored exactly as it is expected.
Uploading Lookup Tables
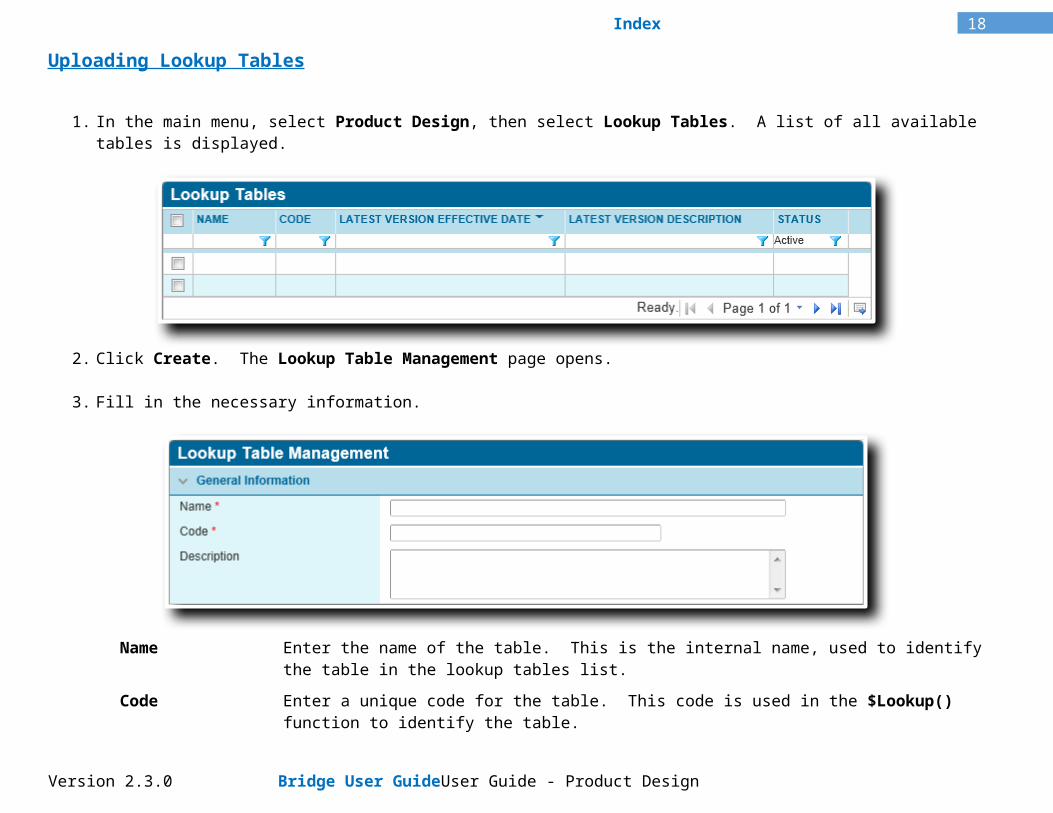
1. In the main menu, select Product Design, then select Lookup Tables. A list of all available tables is displayed.
2. Click Create. The Lookup Table Management page opens.
3. Fill in the necessary information.
Version 2.3.0 Bridge User Guide User Guide - Product Design

15Index
Name Enter the name of the table. This is the internal name, used to identify the table in the lookup tables list.
Code Enter a unique code for the table. This code is used in the $Lookup() function to identify the table.
Description Enter a description of the table.
4. Click Add to save the lookup table but remain on the page, click Add & Close to save the lookup table and return to the table list, or click Close to return to the table list without saving the lookup table.
Once the lookup table is saved, the Versions and Status panels become available.
Each lookup table can have multiple versions, effective within a specific period. When a lookup is performed, the Effective Date of the transaction determines which table version is used. If more than one table is in effect for the date, the most recently created version is used.
Version 2.3.0 Bridge User Guide User Guide - Product Design

16Index
Active Marks the table as active and available for use. If unchecked, any lookups on this table will return no results.
Created By Identifies the date and time the lookup table was created, and the user who created it.
Last Modified By Identifies the last date and time the lookup table was changed, and the user who made the changes.
5. Click Add Version. The Lookup Table Version window opens.
6. Fill in the necessary information.
Description Enter a description for this version of the table.
Effective Date Enter the date that this table version comes into effect, or select the date from the calendar lookup.
Valid Until Date Enter the date of the last day this table version is in effect, or select the date from the calendar lookup. If no date is provided, the table is valid indefinitely.
Version 2.3.0 Bridge User Guide User Guide - Product Design
17Index
Select File Click the Browse button to open a standard file browser window. Locate and select the appropriate file, and the file name and path appear in the field. This field and the Browse button are not shown when viewing a saved table version.
7. Click Save & New to save the table version and clear the form to add a new version, click Save & Close to save the table version and close the window, or click Close to close the window without saving the table version.
Once the table version is saved, the Status panel becomes available at the bottom of the window.
Created By Identifies the date and time the table version was created, and the user who created it.
Last Modified By Identifies the last date and time the table version was changed, and the user who made the changes.
8. To add additional table versions, repeat steps 5 to 7.
Tip: The table version should contain the same number of conditions as used in the $Lookup() function. If the function includes more conditions than exist in the table, the function does not return any value. If the table includes more conditions than are used in the function, the function returns the first value that matches the conditions. If it is necessary to change the number of conditions used in a lookup, while maintaining compatibility with previous versions, there are some options.
If conditions are being added, the older table versions can be modified to include the new condition columns with values that are always included, and then be added in place of the original tables. If conditions are being removed, the new version can include the extra condition columns.
The $If() function can be used to adjust the $Lookup() conditions to find the correct table version, or even a different lookup table entirely.
9. Click Save to save the lookup table but remain on the page, click Save & Close to save the lookup table and return to the table list, or click Close to return to the table list without saving the lookup table.
Version 2.3.0 Bridge User Guide User Guide - Product Design
18Index
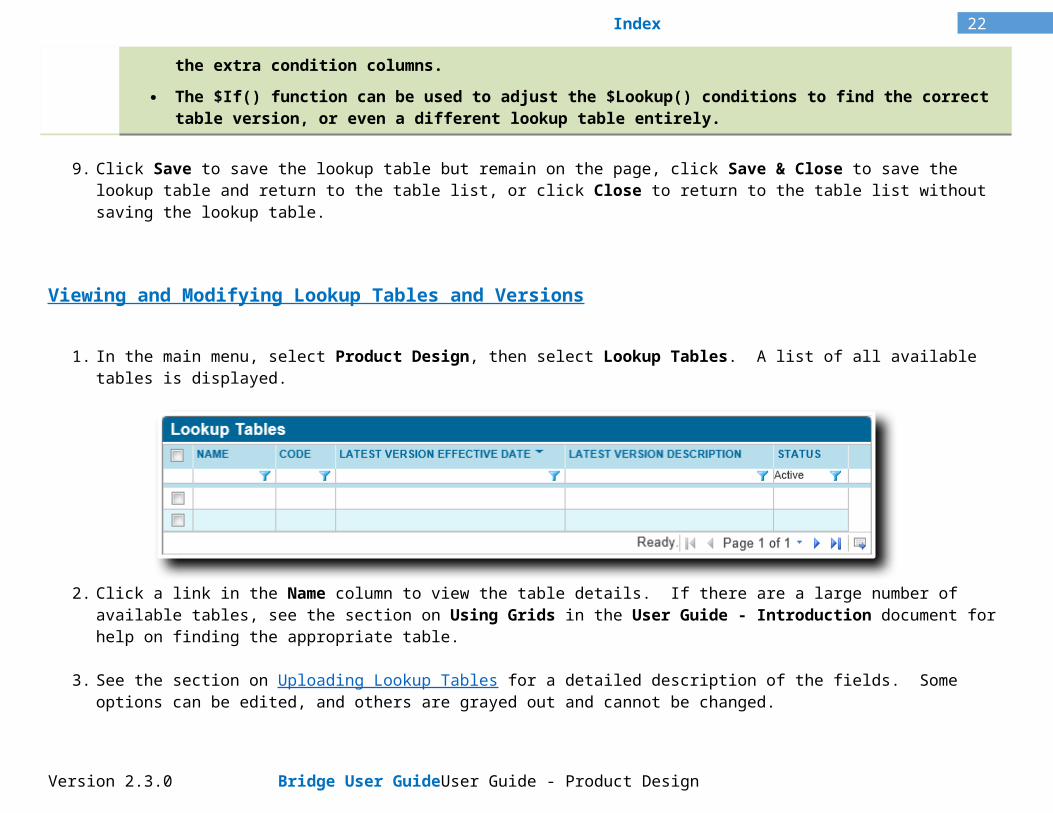
Viewing and Modifying Lookup Tables and Versions
1. In the main menu, select Product Design, then select Lookup Tables. A list of all available tables is displayed.
2. Click a link in the Name column to view the table details. If there are a large number of available tables, see the section on Using Grids in the User Guide - Introduction document for help on finding the appropriate table.
3. See the section on Uploading Lookup Tables for a detailed description of the fields. Some options can be edited, and others are grayed out and cannot be changed.
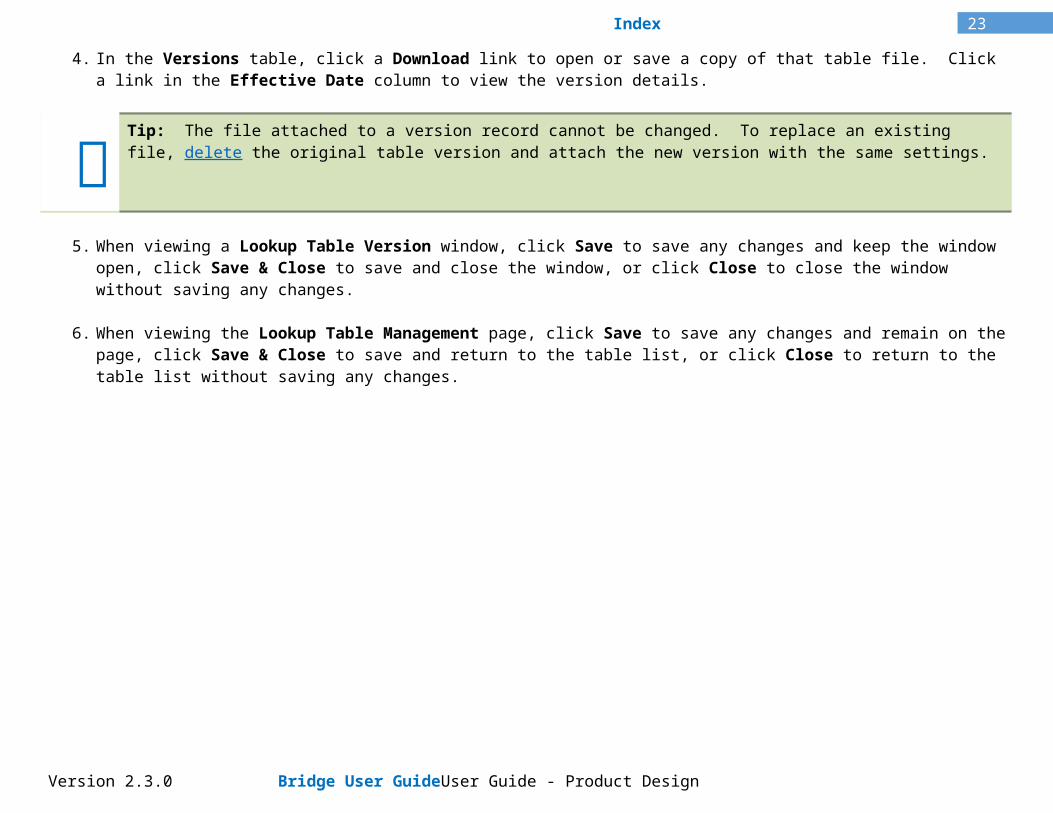
4. In the Versions table, click a Download link to open or save a copy of that table file. Click a link in the Effective Date column to view the version details.
Tip: The file attached to a version record cannot be changed. To replace an existing file, delete the original table version and attach the new version with the same settings.
5. When viewing a Lookup Table Version window, click Save to save any changes and keep the window open, click Save & Close to save and close the window, or click Close to close the window without saving any changes.
6. When viewing the Lookup Table Management page, click Save to save any changes and remain on the page, click Save & Close to save and return to the table list, or click Close to return to the table list without saving any changes.
Version 2.3.0 Bridge User Guide User Guide - Product Design

19Index
Deactivating a Lookup Table
Once created, a lookup table cannot be deleted. It can be deactivated, which prevents it from being used for new lookups. Individual table versions can be deleted.
1. In the main menu, select Product Design, then select Lookup Tables. A list of all available tables is displayed.
2. Locate the table or tables to be deactivated. If there are a large number of available tables, see the section on Using Grids in the User Guide - Introduction document for help on finding the appropriate tables.
3. Check the boxes for all tables to be deactivated.
4. Click Deactivate, then confirm the deactivation when prompted to do so. All selected tables are deactivated. If the list is still defaulted to only show active tables, they disappear from the list.
Tip: Individual lookup tables can also be deactivated or reactivated directly through the table record. See the section on Viewing and Modifying Lookup Tables and Versions for details.
Version 2.3.0 Bridge User Guide User Guide - Product Design

20Index
Deleting a Lookup Table Version
While a lookup table cannot be deleted, individual table versions can be.
1. In the main menu, select Product Design, then select Lookup Tables. A list of all available tables is displayed.
2. Click a link in the Name column to view the table details. If there are a large number of available tables, see the section on Using Grids in the User Guide - Introduction document for help on finding the appropriate table.
3. In the Versions list, click a link in the Effective Date column to view the version details.
4. Click Delete, then confirm the deletion when prompted to do so. The version is deleted and the window is closed.
Version 2.3.0 Bridge User Guide User Guide - Product Design

21Index
Option Lists
Certain types of field on the submission form provide multiple options. An option list is created and can then be selected during the creation of the field. Other option lists are used to define available choices within the system, and can be attached to master covers.
Creating a New Option List
1. In the main menu, select Product Design, then select Option Lists. A table of all available option lists is displayed.
Tip: By default, only Active lists are displayed. Clear the filter in the Status column to view all lists.
2. Click Create. The Option List Management page opens.
3. Fill in the necessary information.
Version 2.3.0 Bridge User Guide User Guide - Product Design
22Index
Name Enter the name of the list. This is the internal name, used to select this list when assigning it to a field. This name does not appear on the form itself.
Description Enter a description of the list.
Line of Business Select a Line of Business from the list of industry presets, or select All to make the list available to all lines.
System Library This option is currently inactive.
Correlated Correlated fields cause the selection of any option in the parent field to define the available options in the child field.Check the Correlated checkbox if this field is used as the parent or child.This option is only available for certain types of list. Select the appropriate options in the Data Source Properties panel (below) before defining a correlation.
Parent Field If this field is to be a child field in a correlated pairing, select the parent field from this list.
Version 2.3.0 Bridge User Guide User Guide - Product Design
23Index
Type Select the source of the list information. Static All items in the list need to be added in the Option List Items grid below. Existing
ResourceThe list is selected from an internal data table, and can be customized in the Option List Items section below.
Resource Type Select the specific type of data to be included in the list. Custom Available when Static is selected as the Type. This option should be selected for general-use
lists. Lists of this type can be correlated. Attachment Type Available when Static is selected as the Type. When attached to a master cover, this list defines
the choices available for attachment types under that master cover. Note Type Available when Static is selected as the Type. When attached to a master cover, this list defines
the choices available for note types under that master cover. Limit Type Available when Static is selected as the Type. When attached to a master cover, this list defines
the choices available for limit types under that master cover. Deductible Type Available when Static is selected as the Type. When attached to a master cover, this list defines
the choices available for deductible types under that master cover. Lost Quote
ReasonAvailable when Static is selected as the Type. When attached to a master cover, this list defines the choices available when marking a quote as Lost.
Reinstatement Reason
Available when Static is selected as the Type. When attached to a master cover, this list defines the choices available when reinstating a cancelled policy.
Country Available when Existing Resource is selected as the Type. This populates the list with all countries registered in the system. The final list can be customized in the Option List Items section.
State Available when Existing Resource is selected as the Type. This populates the list with all states and provinces registered in the system. The final list can be customized in the Option List Items section. Lists of this type can be correlated.
Version 2.3.0 Bridge User Guide User Guide - Product Design

24Index
Currency Available when Existing Resource is selected as the Type. This populates the list with all currencies registered in the system. The final list can be customized in the Option List Items section. Lists of this type can be correlated.
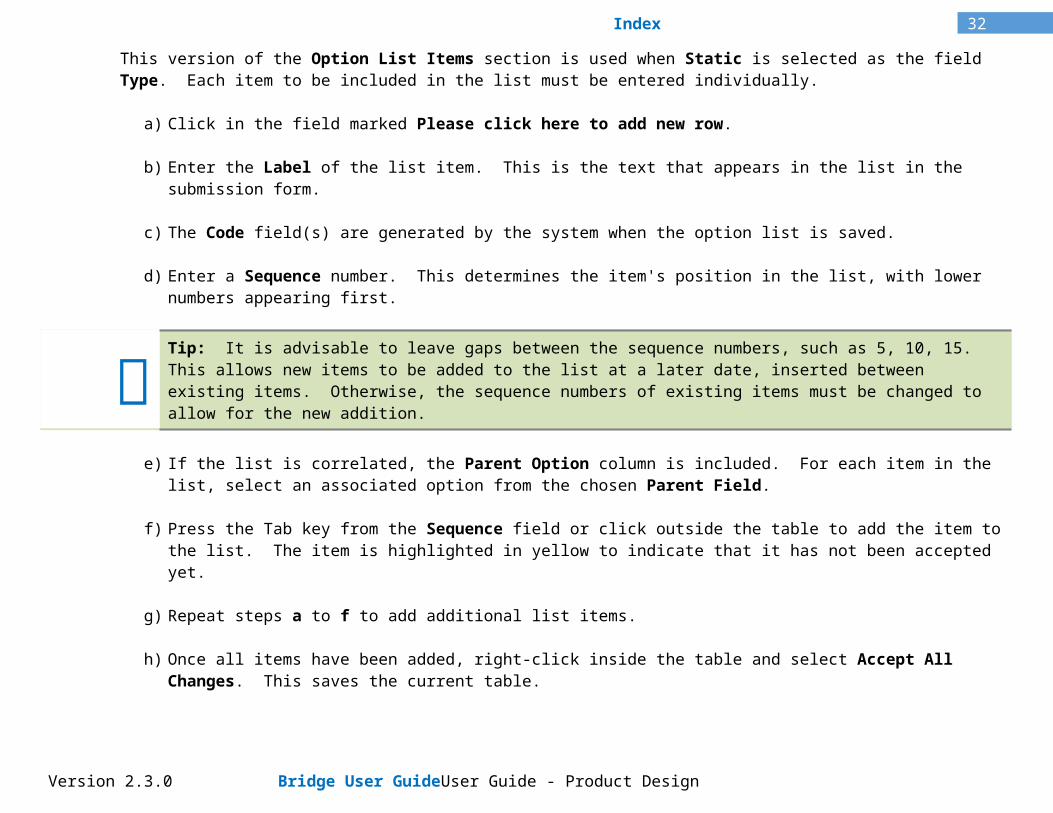
This version of the Option List Items section is used when Static is selected as the field Type. Each item to be included in the list must be entered individually.
a) Click in the field marked Please click here to add new row.
b) Enter the Label of the list item. This is the text that appears in the list in the submission form.
c) The Code field(s) are generated by the system when the option list is saved.
d) Enter a Sequence number. This determines the item's position in the list, with lower numbers appearing first.
Tip: It is advisable to leave gaps between the sequence numbers, such as 5, 10, 15. This allows new items to be added to the list at a later date, inserted between existing items. Otherwise, the sequence numbers of existing items must be changed to allow for the new addition.
e) If the list is correlated, the Parent Option column is included. For each item in the list, select an associated option from the chosen Parent Field.
f) Press the Tab key from the Sequence field or click outside the table to add the item to the list. The item is highlighted in yellow to indicate that it has not been accepted yet.
g) Repeat steps a to f to add additional list items.
Version 2.3.0 Bridge User Guide User Guide - Product Design

25Index
h) Once all items have been added, right-click inside the table and select Accept All Changes. This saves the current table.
This version of the Option List Items section is used when Existing Resource is selected as the field Type.
Depending on the chosen Resource Type, one or more items may be available in the list. Select which items are Included or Excluded.
4. Click Add to save the option list but remain on the page, click Add & Close to save the option list and return to the option list table, or click Close to return to the option list table without saving the option list.
Viewing and Modifying an Option List
1. In the main menu, select Product Design, then select Option Lists. A table of all available option lists is displayed.
Version 2.3.0 Bridge User Guide User Guide - Product Design

26Index
Tip: By default, only Active lists are displayed. Clear the filter in the Status column to view all lists.
2. Click a link in the Name column to view the list details. If there are a large number of available lists, see the section on Using Grids in the User Guide - Introduction document for help on finding the appropriate list.
3. See the section on Creating a New Option List for a detailed description of the fields. Some options can be edited, and others are grayed out and cannot be changed.
To remove list items, right-click on the item in the table, and select Delete. The item is marked in red, and is removed when the list is saved.
Active Marks the option list as active and available for use. If unchecked, the list remains linked to any
Version 2.3.0 Bridge User Guide User Guide - Product Design

27Index
existing forms, but cannot be attached to new fields.
Created By Identifies the date and time the option list was created, and the user who created it.
Last Modified By Identifies the last date and time the option list was changed, and the user who made the changes.
4. Click Save to save any changes and remain on the page, click Save & Close to save and return to the option list table, or click Close to return to the option list table without saving any changes.
Version 2.3.0 Bridge User Guide User Guide - Product Design

28Index
Deactivating an Option List
Once created, an option list cannot be deleted. It can be deactivated, which leaves it linked to any existing forms, but prevents it from being used for new fields.
1. In the main menu, select Product Design, then select Option Lists. A table of all available option lists is displayed.
Tip: By default, only Active lists are displayed. Clear the filter in the Status column to view all lists.
2. Locate the list or lists to be deactivated. If there are a large number of available lists, see the section on Using Grids in the User Guide - Introduction document for help on finding the appropriate lists.
3. Check the boxes for all lists to be deactivated.
4. Click Deactivate, then confirm the deactivation when prompted to do so. All selected lists are deactivated. If the table is still defaulted to only show active lists, they disappear from the table.
Version 2.3.0 Bridge User Guide User Guide - Product Design

29Index
Tip: Individual option lists can also be deactivated or reactivated directly through the list record. See the section on Viewing and Modifying an Option List for details.
Version 2.3.0 Bridge User Guide User Guide - Product Design

30Index
Workflow Configurations
The Bridge system allows the submission process to be completely built and customized to the exact needs of the licensee. Different products can have similar workflows, with just a few minor differences, or follow entirely unique paths, all within the same system.
A workflow is built in stages. Fields are created and grouped into panels, panels are assembled into screens, and screens are assigned to workflows. Workflows are divided into steps, with one or more screens per step.
When a new workflow is created, or when changes are made to an existing workflow, it must then be Published to make the workflow or changes available for use. This allows extensive changes to be made to a workflow without interrupting live users, then applying all changes in one action.
Managing Fields Creating individual fields to be included in the workflow.
Managing Panels Defining panels to group one or more related fields.
Managing Screens Defining screens to assemble various panels in a workflow.
Managing Integration Configurations
Configuring integration options for the sharing of data between systems.
Managing Workflows Assembling screens into steps, forming the final workflow.
Version 2.3.0 Bridge User Guide User Guide - Product Design

31Index
Managing Fields
Individual fields are one of the most basic components of the workflow, each one capturing an element of the submission information.
Creating a New Field
1. In the main menu, select Product Design, then select Workflow Configurations, then Fields. A list of all available fields is displayed.
Some columns have been hidden.
Tip: By default, only Active fields are displayed. Clear the filter in the Status column to view all fields.
2. Click Create. The Field Management page opens.
3. Fill in the necessary information.
Version 2.3.0 Bridge User Guide User Guide - Product Design
32Index
Name Enter the name of the field. This is the internal name, used to select this field when connecting it to other elements of the form. This name does not appear on the form itself.
Code This is an internal reference name which is generated by the system when the field is saved.
External Code This field is used for integration between Bridge and external systems. For integration with the Genoa system, this code should match the Client Code field in the related custom field (EDF) in Genoa.The code should not include spaces. Any spaces are removed when the field is saved.In addition, special characters other than underscore ( _ ) should be avoided.
Control Type Select the type of field.
Version 2.3.0 Bridge User Guide User Guide - Product Design

33Index
Checkbox A single checkbox, that can be checked or unchecked.
Checkbox Group A group of two or more checkboxes, arranged horizontally, where each one can be checked or unchecked.
Combo Box An advanced dropdown list, displaying multiple columns of data from a pre-defined data source. This list is searchable by entering characters, and the selected option can populate multiple fields on the screen, as defined in the data source.
Date Picker A field where the date can be entered manually, or selected from a calendar lookup.
Drop Down A simple drop down list, displaying selections from an Option List.
Include Exclude List
Creates two fields with controls to move items between the Include and Exclude sides.
Version 2.3.0 Bridge User Guide User Guide - Product Design

34Index
Label This option displays the text entered in the Default field, and cannot be changed by the user. This can be used to insert additional information into the form. Text must be entered in the Default field, and wraps around according to the selected Size.
Multi Select A list of checkboxes, arranged vertically, allowing one or more items to be checked.
Radio Buttons A group of two or more options, where only one can be selected.
Note: The vertical or horizontal orientation can be selected with the Layout option further down in the panel.
Rich Text A large text-entry field with formatting tools to display and produce rich text content. Formatting in these fields is maintained when the data is pulled into generated documents.
Version 2.3.0 Bridge User Guide User Guide - Product Design

35Index
Text Area A multi-line box used for blocks of simple text.
Textbox A single-line field for simple text.
Textbox (Decimal) Used for numerical values that may include decimals. If a Rounding Precision (see below) is not specified, the field defaults to two decimal points.
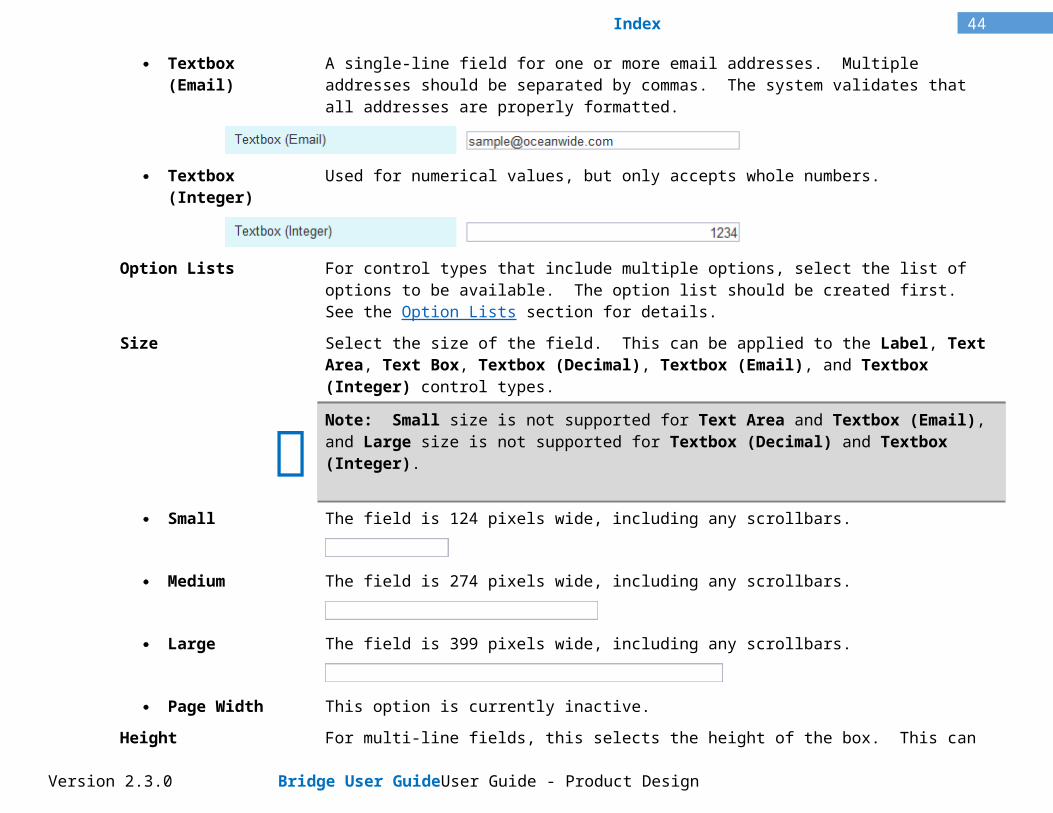
Textbox (Email) A single-line field for one or more email addresses. Multiple addresses should be separated by commas. The system validates that all addresses are properly formatted.
Textbox (Integer) Used for numerical values, but only accepts whole numbers.
Option Lists For control types that include multiple options, select the list of options to be available. The option list should be created first. See the Option Lists section for details.
Size Select the size of the field. This can be applied to the Label, Text Area, Text Box, Textbox (Decimal), Textbox (Email), and Textbox (Integer) control types.
Version 2.3.0 Bridge User Guide User Guide - Product Design

36Index
Note: Small size is not supported for Text Area and Textbox (Email), and Large size is not supported for Textbox (Decimal) and Textbox (Integer).
Small The field is 124 pixels wide, including any scrollbars.
Medium The field is 274 pixels wide, including any scrollbars.
Large The field is 399 pixels wide, including any scrollbars.
Page Width This option is currently inactive.
Height For multi-line fields, this selects the height of the box. This can be applied to the Include Exclude List, Rich Text, and Text Area control types, and the exact height varies for each.
Short For Include Exclude List fields, the height is 135 pixels, including the scrollbars and labels.For Rich Text fields, the height is 288 pixels, including the header and tool box.For Text Area fields (displayed below), the height is 56 pixels.
Medium For Include Exclude List fields, the height is 255 pixels, including the scrollbars and labels.For Rich Text fields, the height is 538 pixels, including the header and tool box.For Text Area fields (displayed below), the height is 147 pixels.
Version 2.3.0 Bridge User Guide User Guide - Product Design

37Index
Tall For Include Exclude List fields, the height is 495 pixels, including the scrollbars and labels.For Rich Text fields, the height is 838 pixels, including the header and tool box.For Text Area fields (displayed below), the height is 277 pixels.
Layout Available when the Radio Buttons option is selected for the Control Type. This selects if the options are displayed in a Horizontal or Vertical arrangement. The horizontal arrangement conserves space in the form, while the vertical arrangement allows for longer descriptions.
Fixed Height whenRead-Only
Available when the Rich Text option is selected for the Control Type. This controls how the field is displayed when in read-only mode (either as a default setting or due to a field override rule).When checked, the field always displays at the height selected above. A scrollbar becomes available if the content exceeds the size of the field.When unchecked, the field height shrinks or expands to match the content of the field.
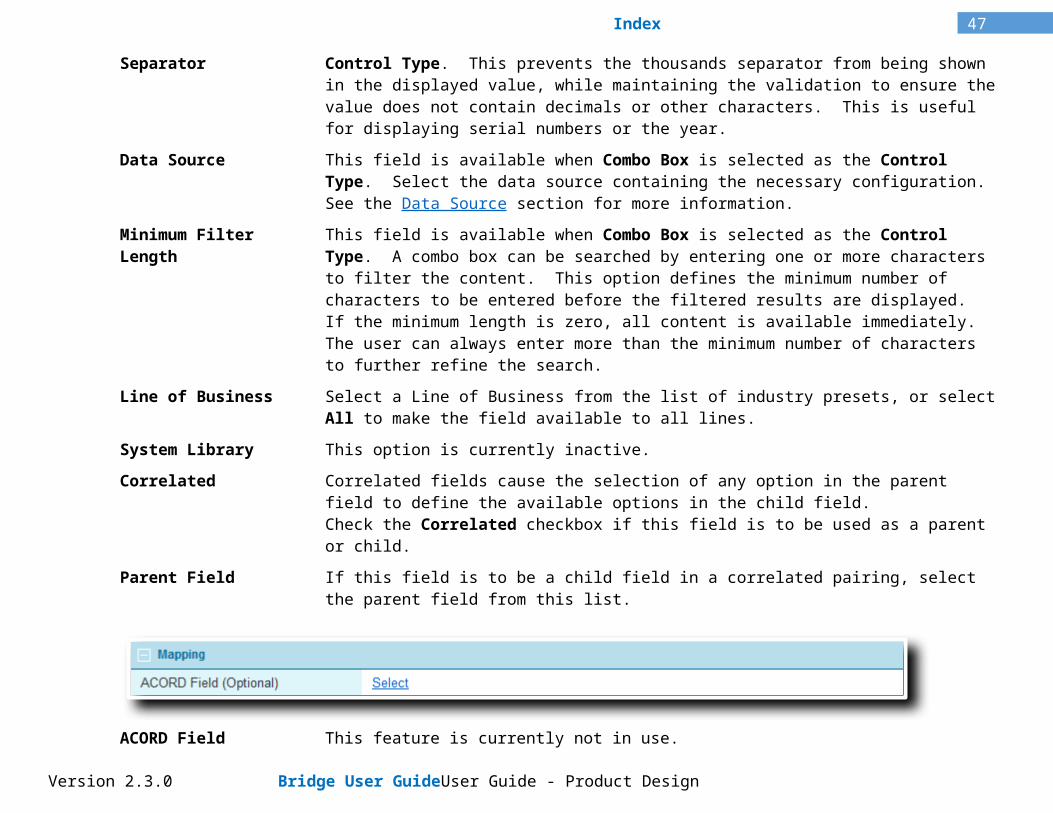
Hide Thousands Separator
Available when the Textbox (Integer) option is selected for the Control Type. This prevents the thousands separator from being shown in the displayed value, while maintaining the validation to ensure the value does not contain decimals or other characters. This is useful for displaying serial numbers or the year.
Version 2.3.0 Bridge User Guide User Guide - Product Design

38Index
Data Source This field is available when Combo Box is selected as the Control Type. Select the data source containing the necessary configuration. See the Data Source section for more information.
Minimum Filter Length This field is available when Combo Box is selected as the Control Type. A combo box can be searched by entering one or more characters to filter the content. This option defines the minimum number of characters to be entered before the filtered results are displayed. If the minimum length is zero, all content is available immediately.The user can always enter more than the minimum number of characters to further refine the search.
Line of Business Select a Line of Business from the list of industry presets, or select All to make the field available to all lines.
System Library This option is currently inactive.
Correlated Correlated fields cause the selection of any option in the parent field to define the available options in the child field.Check the Correlated checkbox if this field is to be used as a parent or child.
Parent Field If this field is to be a child field in a correlated pairing, select the parent field from this list.
ACORD Field This feature is currently not in use.
Version 2.3.0 Bridge User Guide User Guide - Product Design

39Index
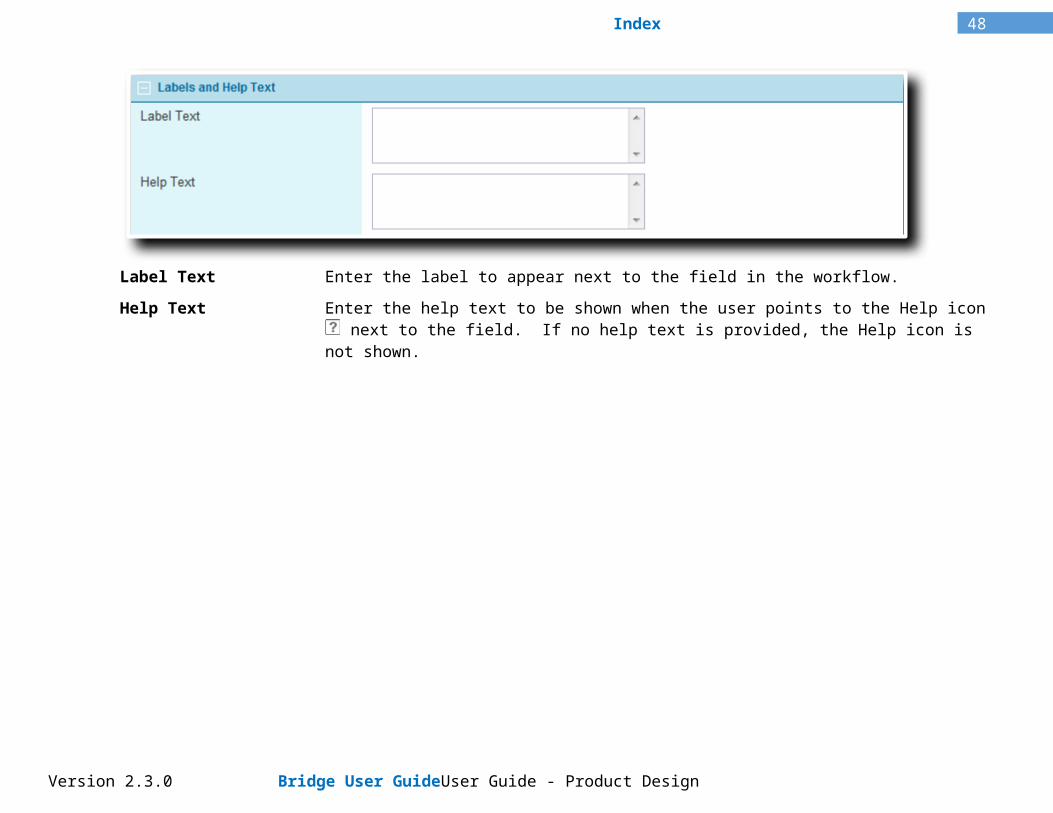
Label Text Enter the label to appear next to the field in the workflow.
Help Text Enter the help text to be shown when the user points to the Help icon next to the field. If no help text is provided, the Help icon is not shown.
Required If checked, the user must complete the field before they can save the screen. Rules can be defined to override this behavior based on user type or certain circumstances.
Read-Only If checked, the field displays its current or default value, and cannot be changed. Rules can be defined to override this behavior based on user type or certain circumstances.
Hidden If checked, the field is not displayed on the submission form. Rules can be defined to override this behavior based on user type or certain circumstances.
Rate Driver If checked, the field can be selected when setting up rates calculations. This option is only available for numeric fields.
Available for Triggers If checked, the field can be selected when setting up a trigger.
Version 2.3.0 Bridge User Guide User Guide - Product Design

40Index
Available for Reports If checked, this field is available for use in reports (such as Cognos).
Calculated If checked, the value of the field is calculated from other fields instead of taking user input directly.
Calculated Field Formula If Calculated has been checked, the formula should be entered in this field. Please see the section on Building Formulas in the Calculated Fields Guide for detailed instructions on preparing formulas.
Default If the field should contain a default value, enter it here.
When viewing settings for a Rich Text Field type, the Default box appears at the bottom of the panel instead and has additional functionality. Please see the Setting Default Values for Rich Text Fields section below.
Maximum Length This value defines the maximum number of characters that can be entered in the field. When a user is entering information, the cursor stops at the set number of characters. If pasting information into the field, only the set number of characters are pasted. This option only functions for TextBox and Textbox (Email) control types.
Rounding Precision This value defines the number of decimal spaces permitted in the field. If a user attempts to enter a value with too many decimal spaces, an error message asks that they correct the value.
Scale This option is currently inactive.
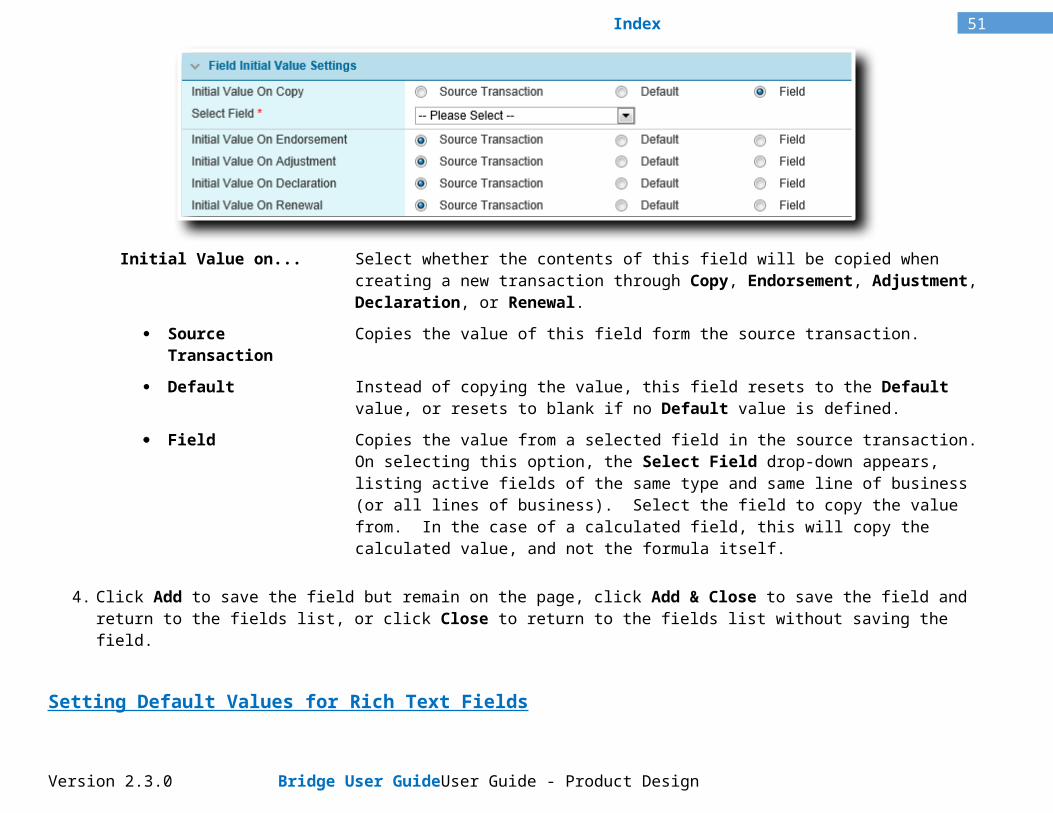
Initial Value on... Select whether the contents of this field will be copied when creating a new transaction through Copy, Endorsement, Adjustment, Declaration, or Renewal.
Source Transaction Copies the value of this field form the source transaction.
Version 2.3.0 Bridge User Guide User Guide - Product Design

41Index
Default Instead of copying the value, this field resets to the Default value, or resets to blank if no Default value is defined.
Field Copies the value from a selected field in the source transaction. On selecting this option, the Select Field drop-down appears, listing active fields of the same type and same line of business (or all lines of business). Select the field to copy the value from. In the case of a calculated field, this will copy the calculated value, and not the formula itself.
4. Click Add to save the field but remain on the page, click Add & Close to save the field and return to the fields list, or click Close to return to the fields list without saving the field.
Setting Default Values for Rich Text Fields
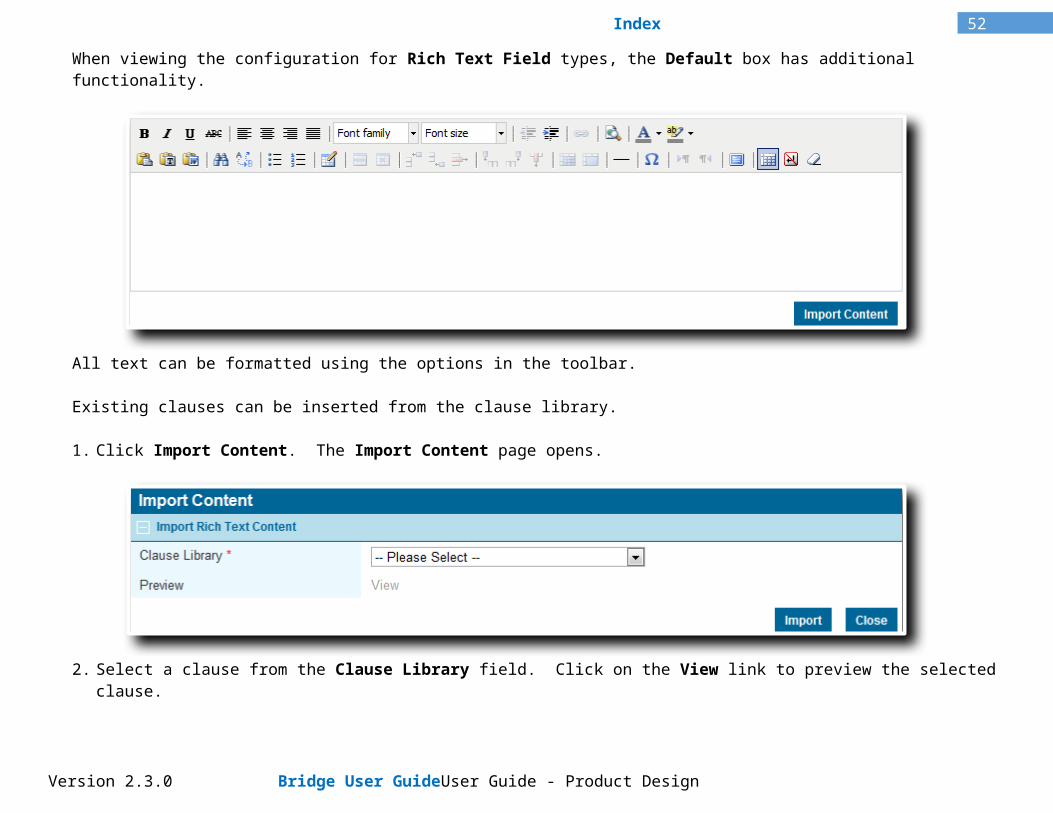
When viewing the configuration for Rich Text Field types, the Default box has additional functionality.
All text can be formatted using the options in the toolbar.
Existing clauses can be inserted from the clause library.
1. Click Import Content. The Import Content page opens.
Version 2.3.0 Bridge User Guide User Guide - Product Design

42Index
2. Select a clause from the Clause Library field. Click on the View link to preview the selected clause.
3. Click Import to return to the Field Management page and insert the clause at the end of the current default text, or click Close to return to the Field Management page without adding the clause.
4. Click Save once the default text is complete.
Viewing and Modifying a Field
1. In the main menu, select Product Design, then select Workflow Configurations, then Fields. A list of all available fields is displayed.
Some columns have been hidden.
Version 2.3.0 Bridge User Guide User Guide - Product Design

43Index
Tip: By default, only Active fields are displayed. Clear the filter in the Status column to view all fields.
2. Click a link in the Name column to view the field details. If there are a large number of available fields, see the section on Using Grids in the User Guide - Introduction document for help on finding the appropriate field.
3. See the section on Creating a New Field for a detailed description of the fields. All fields may be edited, if necessary, except for the System Reference name. The Status panel is included once the field has been saved.
Active Marks the field as active and available for use. If unchecked, the field remains linked to any existing forms, but cannot be used for new forms.
Created By Identifies the date and time the field was created, and the user who created it.
Last Modified By Identifies the last date and time the field was changed, and the user who made the changes.
4. Click Save to save any changes and remain on the page, click Save & Close to save and return to the fields list, or click Close to return to the fields list without saving any changes.
Version 2.3.0 Bridge User Guide User Guide - Product Design
44Index
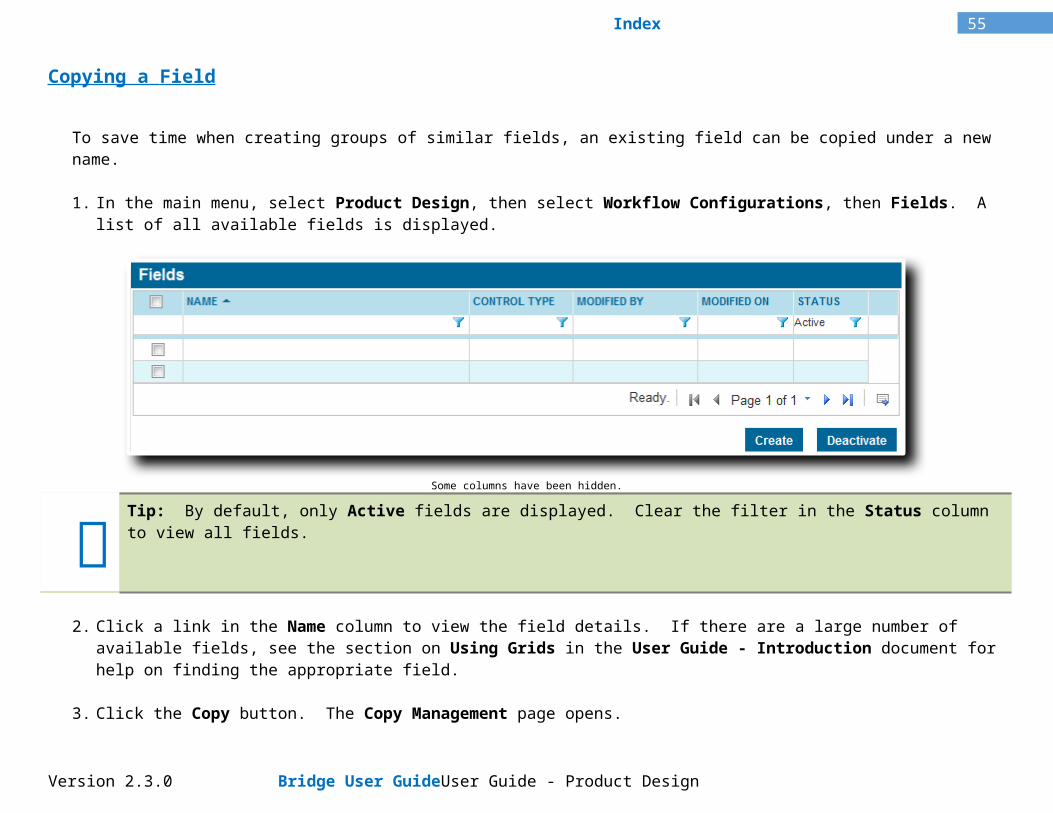
Copying a Field
To save time when creating groups of similar fields, an existing field can be copied under a new name.
1. In the main menu, select Product Design, then select Workflow Configurations, then Fields. A list of all available fields is displayed.
Some columns have been hidden.
Tip: By default, only Active fields are displayed. Clear the filter in the Status column to view all fields.
2. Click a link in the Name column to view the field details. If there are a large number of available fields, see the section on Using Grids in the User Guide - Introduction document for help on finding the appropriate field.
3. Click the Copy button. The Copy Management page opens.
Version 2.3.0 Bridge User Guide User Guide - Product Design

45Index
4. Enter the Name of the new field.5. Click Next to save the field and proceed to the Field management page for the new field, or click Cancel to return to the original
field without saving the copy.
6. The new field is available in the fields list, and can be edited as needed.
Notes: The Correlated and Parent Field settings cannot be copied due to the unique connections between the field and the parent. When copying a correlated field, a new correlation must be created manually.
An Inactive field can be copied, with the copy being Active by default.
Deactivating a Field
Once created, a field cannot be deleted. It can be deactivated, which leaves it linked to any existing forms, but prevents it from being used for new forms.
1. In the main menu, select Product Design, then select Workflow Configurations, then Fields. A list of all available fields is displayed.
Version 2.3.0 Bridge User Guide User Guide - Product Design

46Index
Some columns have been hidden.
Tip: By default, only Active fields are displayed. Clear the filter in the Status column to view all fields.
2. Locate the field or fields to be deactivated. If there are a large number of available fields, see the section on Using Grids in the User Guide - Introduction document for help on finding the appropriate fields.
3. Check the boxes for all fields to be deactivated.
4. Click Deactivate, then confirm the deactivation when prompted to do so. All selected fields are deactivated. If the fields list is still defaulted to only show active fields, they disappear from the list.
Tip: Individual fields can also be deactivated or reactivated directly through the field record. See the section on Viewing and Modifying a Field for details.
Version 2.3.0 Bridge User Guide User Guide - Product Design
47Index
Managing Panels
Panels are used to collect multiple fields, usually related, into a group for use in the workflow.
Panels are also used to define specific behaviors depending on a variety of factors such as the status of the submission or policy, the type of business, or the security settings of the user viewing the submission or policy. Individual behavior settings can also be applied to each of the fields attached to the panel, overriding the default settings of the fields when the conditions are met.
Panels can be manually collapsed and expanded using the and icons or by clicking in an empty area of the panel header, and they can be set to appear in collapsed form by default.
Creating a New Panel
1. In the main menu, select Product Design, then select Workflow Configurations, then Panels. A list of all available panels is displayed.
Some columns have been hidden.
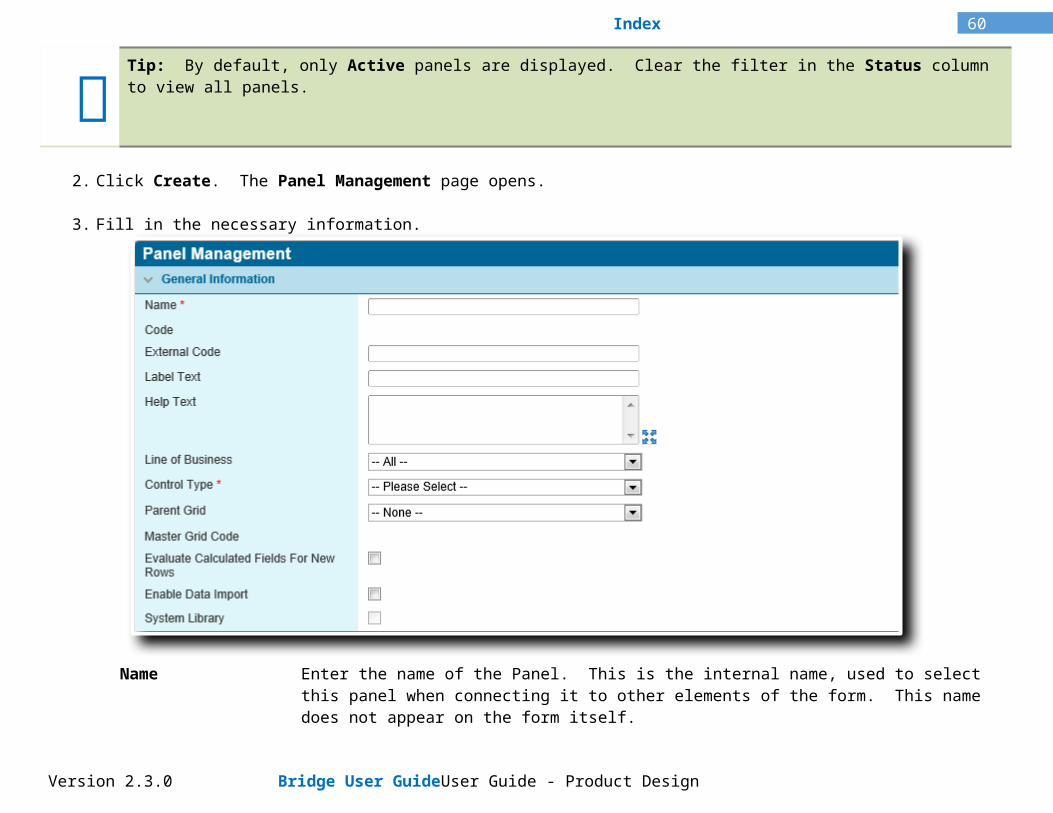
Tip: By default, only Active panels are displayed. Clear the filter in the Status column to view all panels.
2. Click Create. The Panel Management page opens.
Version 2.3.0 Bridge User Guide User Guide - Product Design
48Index
3. Fill in the necessary information.
Name Enter the name of the Panel. This is the internal name, used to select this panel when connecting it to other elements of the form. This name does not appear on the form itself.
Code This is an internal reference name which is generated by the system when the panel is saved.
External Code This field is used for integration between Bridge and external systems.The code should not include spaces. Any spaces are removed when the field is saved.In addition, special characters other than underscore ( _ ) should be avoided. For View Grids, the code is inherited from the master grid and cannot be changed.
Label Text Enter the label to be shown at the top of the panel. When the panel is collapsed, this label is the only part that shows, so the label should be descriptive enough for users to locate the fields they need.
Version 2.3.0 Bridge User Guide User Guide - Product Design

49Index
Help Text Enter the help text to be shown when the user clicks on the Help icon in the panel header.
Tip: If the Label Text and Help Text fields are both blank, the panel header will be hidden. This can be used to arrange panels so that they appear to be a single panel, while each panel maintains distinct display and override rules.Hiding the header removes the control to collapse or expand the panel. For this reason, any settings or overrides to collapse the panel will not be applied if the header is hidden.
Line of Business Select a Line of Business from the list of industry presets, or select All to make the panel available to all lines. For View Grids, the line of business is inherited from the master grid and cannot be changed.
Control Type Select the format of the panel. For View Grids, the control type is inherited from the master grid and cannot be changed.
Grid The fields are aligned in a standard grid, with all common grid functions. An Add button opens a details page, allowing the user to add multiple rows of data. Clicking an entry in the grid opens the details page for that entry.
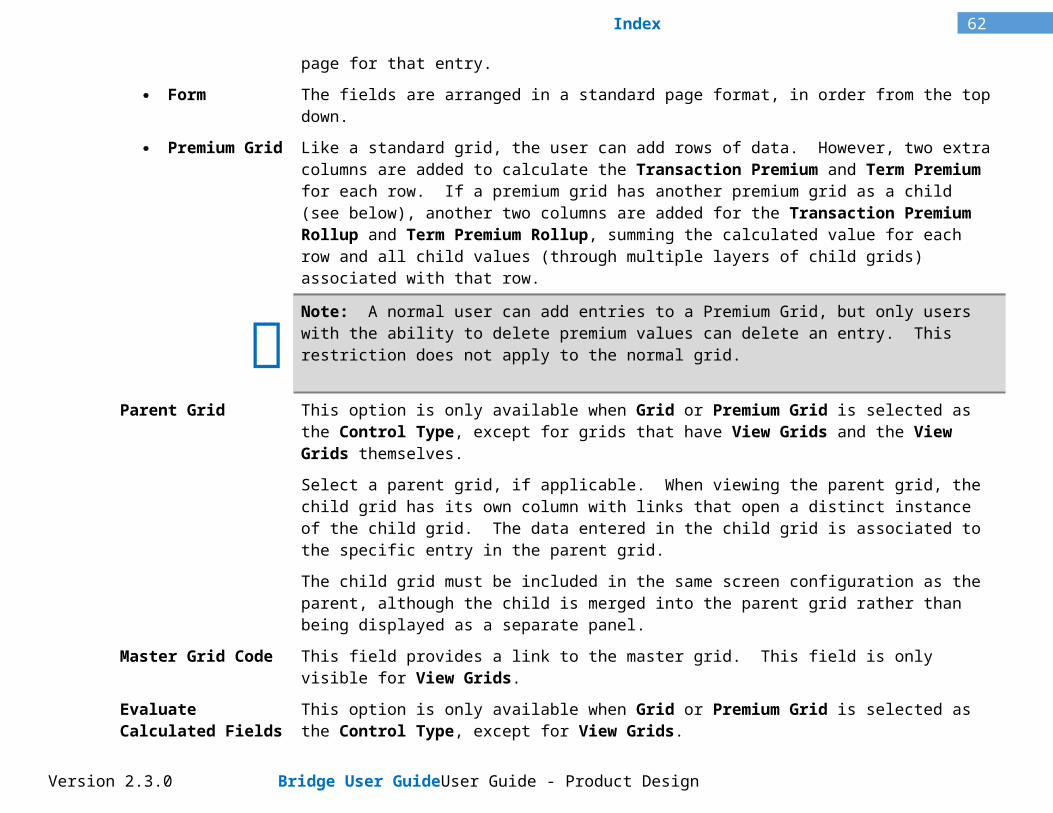
Form The fields are arranged in a standard page format, in order from the top down.
Premium Grid Like a standard grid, the user can add rows of data. However, two extra columns are added to calculate the Transaction Premium and Term Premium for each row. If a premium grid has another premium grid as a child (see below), another two columns are added for the Transaction Premium Rollup and Term Premium Rollup, summing the calculated value for each row and all child values (through multiple layers of child grids) associated with that row.
Note: A normal user can add entries to a Premium Grid, but only users with the ability to delete premium values can delete an entry. This restriction does not apply to the normal grid.
Parent Grid This option is only available when Grid or Premium Grid is selected as the Control Type, except for grids that have View Grids and the View Grids themselves.
Select a parent grid, if applicable. When viewing the parent grid, the child grid has its own column with links that open a distinct instance of the child grid. The data entered in the child grid is associated to the specific entry in the parent grid.
The child grid must be included in the same screen configuration as the parent, although the child is merged into the parent grid rather than being displayed as a separate panel.
Master Grid Code This field provides a link to the master grid. This field is only visible for View Grids.
Version 2.3.0 Bridge User Guide User Guide - Product Design

50Index
Evaluate Calculated Fields For New Rows
This option is only available when Grid or Premium Grid is selected as the Control Type, except for View Grids.
When checked, each time a new row is added to the grid, all calculated fields in the workflow are evaluated on opening the detail window, and again on saving the new row.
When unchecked, calculated fields are only evaluated on saving the new row.
Enable Data Import This option is only available when Grid or Premium Grid is selected as the Control Type. With this option checked, users with the necessary right can import a spreadsheet to quickly populate the grid with a significant amount of data, or update existing data.
System Library This option is currently inactive.
The Policy Settings panel is available when Grid or Premium Grid are selected as the Control Type, except for View Grids. This controls whether or not data in the grid is copied in to the new transaction when creating an endorsement or renewal.
Copy Row on Endorsement
Select a trigger to control copying when creating an endorsement.
Copy Row on Adjustment Select a trigger to control copying when creating an adjustment.
Copy Row on Declaration Select a trigger to control copying when creating a declaration.
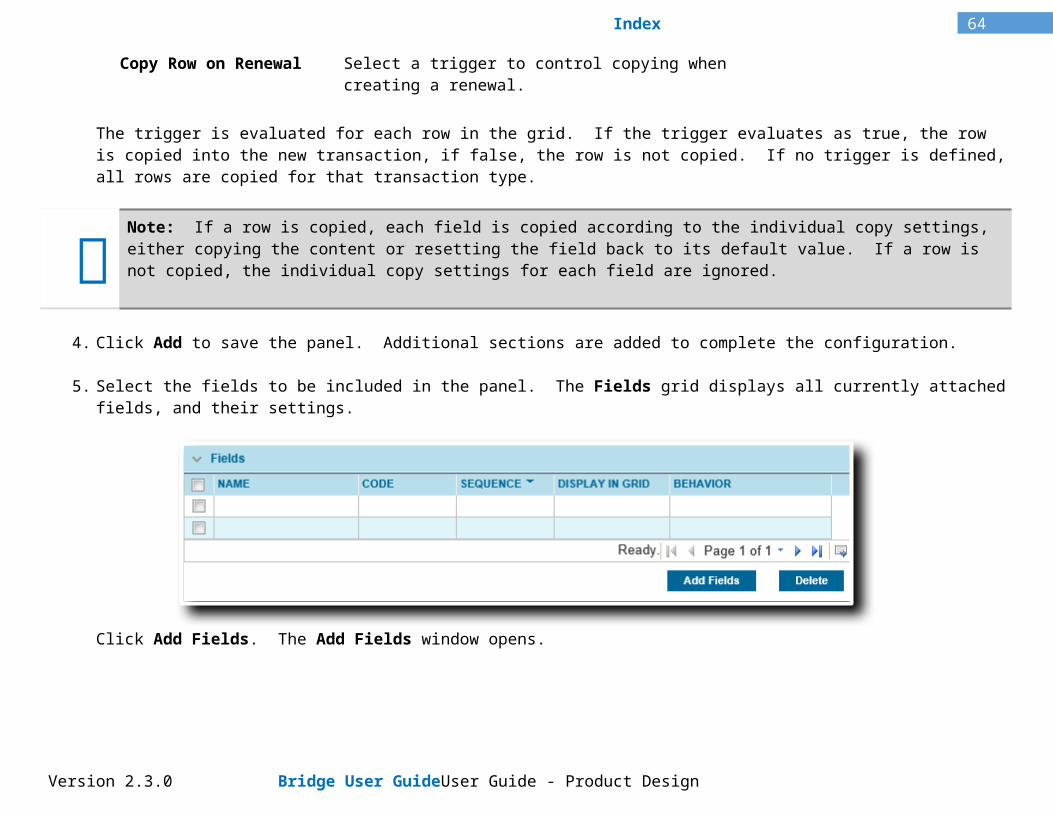
Copy Row on Renewal Select a trigger to control copying when creating a renewal.
The trigger is evaluated for each row in the grid. If the trigger evaluates as true, the row is copied into the new transaction, if false, the row is not copied. If no trigger is defined, all rows are copied for that transaction type.
Version 2.3.0 Bridge User Guide User Guide - Product Design
51Index
Note: If a row is copied, each field is copied according to the individual copy settings, either copying the content or resetting the field back to its default value. If a row is not copied, the individual copy settings for each field are ignored.
4. Click Add to save the panel. Additional sections are added to complete the configuration.
5. Select the fields to be included in the panel. The Fields grid displays all currently attached fields, and their settings.
Click Add Fields. The Add Fields window opens.
a) The Available Fields panel lists all fields that are available for use in the panel. The columns can be sorted and filtered to locate the necessary fields, then click Add for each one in the order they should appear in the panel. Each field is grayed out as it is selected.
b) Click Bulk Add to add all selected fields to the Included Fields list.
Version 2.3.0 Bridge User Guide User Guide - Product Design
52Index
As each field is added, default sequence numbers are assigned in increments of ten and the configuration is saved. The sequence numbers can be changed manually later in the process.
c) When all fields have been added, click Close to close the window.
d) The Fields panel lists all fields currently included in the panel. To update details such as the sequence number and whether or not the field will be displayed in grids (for Grid and Premium Grid panels), click a link in the Name column. The Edit Field window opens.
Name Displays the name of the selected field.
Sequence The assigned sequence number can be changed.
Tip: It is advisable to leave gaps between the sequence numbers, such as 5, 10, 15. This allows new fields to be added to the list at a later date, inserted between existing fields. Otherwise, the sequence numbers of existing fields must be changed to allow for the new addition.
Display in Grid This checkbox is only available for Grid and Premium Grid panels. When unchecked, the field will only be shown in the details screen when adding rows. When checked, this field will be included in the grid, as well as the details screen.
Version 2.3.0 Bridge User Guide User Guide - Product Design

53Index
e) Click Save & Close to save and close the window, or click Close to close the window without saving any changes.
f) On the Panel Management page, fields can be removed from the panel by checking the boxes for all fields to be removed, then click Delete.
6. By default, each panel is open, visible, and editable at all stages and statuses of the transaction. The Panel Behavior Override is used to create rules that change the behavior based on a variety of options. The table lists all currently defined rules.
Click Add Panel Behavior. The Panel Behavior Override page opens.
a) Complete the necessary details to define the rule.
Select how the panel should behave under the defined circumstances.
Collapsed The panel starts out collapsed when the form is displayed. The user can still expand the panel to display the fields.
Version 2.3.0 Bridge User Guide User Guide - Product Design

54Index
Hidden The panel is not shown in the form, although it is still present for use in triggers, calculated fields, and generating documents.
Read-Only The panel can be viewed, but cannot be edited.
The Trigger option is used to assign a trigger to the rule. The rule is only applied if the trigger evaluates as true.
Notes: Use caution when creating override rules for panels that contain fields used in triggers. It can create circumstances where users trigger changes in a form that they cannot undo.
When a user makes changes in a form that trigger an override rule, it does not occur immediately. The rule is applied when any action is taken that saves the form.
If a panel is hidden by a triggered override rule, all fields in that panel retain their current value.
Select the type of transaction where the rule applies.
New Business The original version of a submission or policy.
Endorsement A modification to a bound policy.
Adjustment An adjustment to a bound policy.
Declaration A periodical modification to a bound policy.
Renewal A renewal for an expired policy.
Cancellation A cancelled policy.
Reinstatement A policy that was reinstated after being cancelled.
Version 2.3.0 Bridge User Guide User Guide - Product Design
55Index
Select the status of submission or policy where the rule applies.
Incomplete A submission that has not yet had a quote calculated.
Quoted A submission that has been quoted and is ready to be bound.
Referred A submission that does not meet the requirements of the master cover and has been submitted to the insurance representatives for review.
Bound A policy that has been bound.
Declined A quote request or referral that has been declined.
Indication Provided A preliminary quote has been issued, which cannot be bound. A full quote must still be requested, possibly requiring additional information.
Underwriting Required A submission that does not meet the requirements of the master cover and must either be corrected or submitted to the insurance representatives for review.
Payment Pending A submission that is awaiting payment before being bound.
Lost A quote that has been marked as lost business.
Version 2.3.0 Bridge User Guide User Guide - Product Design

56Index
Select the types of user where the rule applies. The user viewing the form must have one or more of the selected security roles in order for the rule to be applied.
Note: At least one option must be selected in each category. For a rule to apply to all options in a category, all options must be selected.
b) Click Add & New to save the rule and clear the form to add additional rules, click Add & Close to save the rule and return to the panel details, or click Close to return to the panel details without saving the rule.
7. When each field was created, default behavior was defined. The Field Behavior Override is used to create rules that change the behavior based on a variety of options. The table lists all currently defined rules.
Click Add Field Behavior. The Field Behavior Override page opens.
Version 2.3.0 Bridge User Guide User Guide - Product Design

57Index
a) Complete the necessary details to define the rule.
Select the fields where the rule applies. All required fields should be added to the panel before defining the rules. If any fields are added to the panel that should be included in an existing rule, the rule must be edited to select the new fields.
Select how the field should behave under the defined circumstances. For each option select Yes to apply the behavior, No to not apply it, or Not Applicable to indicate that this behavior should not be changed by this rule.
Required The field must be completed before the user can save the screen.
Hidden The field is not shown in the form.
Read-Only The field can be viewed, but cannot be edited.
The Trigger option is used to assign a trigger to the rule. The rule is only applied if the trigger evaluates as true.
Notes: Use caution when creating override rules for fields that are used in triggers. It can create circumstances where users trigger changes in a form that they cannot undo.
When a user makes changes in a form that trigger an override rule, it does not occur immediately. The rule is applied when any action is taken that saves the form.
If a field is hidden by a triggered override rule, it retains its current value.
Version 2.3.0 Bridge User Guide User Guide - Product Design

58Index
When hiding a field included in a grid, the field is hidden when viewing the details page for an entry, but the column remains visible when viewing the grid itself.
Select the type of transaction where the rule applies.
New Business The original version of a submission or policy.
Endorsement A modification to a bound policy.
Adjustment An adjustment to a bound policy.
Declaration A periodical modification to a bound policy.
Renewal A renewal for an expired policy.
Cancellation A cancelled policy.
Reinstatement A policy that was reinstated after being cancelled.
Select the status of submission or policy where the rule applies.
Version 2.3.0 Bridge User Guide User Guide - Product Design

59Index
Incomplete A submission that has not yet had a quote calculated.
Quoted A submission that has been quoted and is ready to be bound.
Referred A submission that does not meet the requirements of the master cover and has been submitted to the insurance representatives for review.
Bound A policy that has been bound.
Declined A quote request or referral that has been declined.
Indication Provided A preliminary quote has been issued, which cannot be bound. A full quote must still be requested, possibly requiring additional information.
Underwriting Required A submission that does not meet the requirements of the master cover and must either be corrected or submitted to the insurance representatives for review.
Payment Pending A submission that is awaiting payment before being bound.
Lost A quote that has been marked as lost business.
Select the types of user where the rule applies. The user viewing the form must have one or more of the selected security roles in order for the rule to be applied.
Note: At least one option must be selected in each category. For a rule to apply to all options in a category, all options must be selected.
Version 2.3.0 Bridge User Guide User Guide - Product Design
60Index
b) Click Add & New to save the rule and clear the form to add additional rules, click Add & Close to save the rule and return to the panel details, or click Close to return to the panel details without saving the rule.
8. A standard grid is a stand-alone entity with unique fields, and can only be used once in any workflow. View Grids can be defined to share the data stored in the master grid. Each View Grid can contain all fields from the master grid, or a subset of those fields. All rules for displaying fields and data, including overrides, are inherited from the master. Any changes to data within a View Grid will update the master grid.
Notes: Grids configured as parent or child cannot be used as a master or view grid. The View Grids panel will not be shown.
Only one grid from a single master/view configuration can be used on any one screen. Grids from separate configurations can be used on the same screen.
View Grids can be used in a workflow even if the master grid is not included.
Click a link in the Name column to save the current page and open an existing View Grid. Click Create to save the current page and open the Panel Management page to create a new view grid.
View grids are configured much like the master grid, although with reduced options. Some settings are inherited from the master grid, and all fields and overrides are included by default.
Any fields and overrides that should not apply to this view can be deleted by checking the boxes and clicking the Delete button. Any deleted fields can be added again, but only fields included in the master grid will be available.
Version 2.3.0 Bridge User Guide User Guide - Product Design

61Index
Active Marks the panel as active and available for use. If unchecked, the panel remains linked to any existing forms, but cannot be used for new forms.
Created By Identifies the date and time the panel was created, and the user who created it.
Last Modified By Identifies the last date and time the panel was changed, and the user who made the changes.
9. Click Add to save the panel but remain on the page, click Add & Close to save the panel and return to the panels list, or click Close to return to the panels list without saving the panel.
Viewing and Modifying a Panel
1. In the main menu, select Product Design, then select Workflow Configurations, then Panels. A list of all available panels is displayed.
Version 2.3.0 Bridge User Guide User Guide - Product Design
62IndexSome columns have been hidden.
Tip: By default, only Active panels are displayed. Clear the filter in the Status column to view all panels.
2. Click a link in the Name column to view the panel details. If there are a large number of available panels, see the section on Using Grids in the User Guide - Introduction document for help on finding the appropriate panel.
3. See the section on Creating a New Panel for a detailed description of the fields. All fields may be edited, if necessary, except for the System Reference name and Control Type.
To remove a field or behavior override rule, check the box next to the field or rule, then click the Delete button below the grid.
4. Click Save to save any changes and remain on the page, click Save & Close to save and return to the panels list, or click Close to return to the panels list without saving any changes.
Deactivating a Panel
Once created, a panel cannot be deleted. It can be deactivated, which leaves it linked to any existing forms, but prevents it from being used for new forms.
1. In the main menu, select Reference, then select Workflow Configurations, then Panels. A list of all available panels is displayed.
Version 2.3.0 Bridge User Guide User Guide - Product Design

63Index
Some columns have been hidden.
Tip: By default, only Active panels are displayed. Clear the filter in the Status column to view all panels.
2. Locate the panel or panels to be deactivated. If there are a large number of available panels, see the section on Using Grids in the User Guide - Introduction document for help on finding the appropriate panels.
3. Check the boxes for all panels to be deactivated.
4. Click Deactivate, then confirm the deactivation when prompted to do so. All selected panels are deactivated. If the panels list is still defaulted to only show active panels, they disappear from the list.
Tip: Individual panels can also be deactivated or reactivated directly through the panel record. See the section on Viewing and Modifying a Panel for details.
Version 2.3.0 Bridge User Guide User Guide - Product Design
64Index
Managing Screens
Screens are used to group panels together. Each screen is one page in the final workflow, with navigation tools to move between screens.
Creating a New Screen
1. In the main menu, select Product Design, then select Workflow Configurations, then Screens. A list of all available screens is displayed.
Some columns have been hidden.
Tip: By default, only Active screens are displayed. Clear the filter in the Status column to view all screens.
2. Click Create. The Screen Management page opens.
3. Fill in the necessary information.
Version 2.3.0 Bridge User Guide User Guide - Product Design

65Index
Name Enter the name of the screen. This is the internal name, used to select this screen when connecting it to other elements of the form. This name does not appear on the form itself.
Code This is an internal reference name which is generated by the system when the screen is saved.
Label Enter the label to be shown at the top of the screen.
Help Text Help text is currently not available for screens. Any necessary help text can be added to individual panels and fields.
Emphasize Actions As the user navigates through the workflow, there may be screens where certain actions are common and expected, such as binding the submission on the last page, requesting a special quote on a summary page, or printing a specific document related to the content of the screen.
This option allows specific buttons to be displayed at the bottom of the screen along with the navigation buttons. Each button matches an option in the Actions widget, performs exactly the same function, and follows the same rules for availability based on the transaction type, status, and the rights of the user. Even when activated for a particular screen, the button only appears if the matching option is available in the Actions widget.
Check the box for each button to be enabled for the current screen.
Version 2.3.0 Bridge User Guide User Guide - Product Design

66Index
Tip: The amount of space in the navigation bar depends on the screen resolution and the size of the browser window. The workflow configuration should be tested to ensure that there is enough space for the buttons. The following information may help:
The Request Quote and Request Special Quote actions are never available at the same time.
The Bind and Request Bind buttons are never available at the same time.
The Previous button is not displayed on the first screen of the submission, and the Next button is not displayed on the last screen of the submission.
Line of Business Select a Line of Business from the list of industry presets, or select All to make the screen available to all lines.
System Library This option is currently inactive.
4. Click Add to save the screen but remain on the page, click Add & Close to save the screen and return to the screens list, or click Close to return to the screens list without saving the screen.
5. On saving the screen, the following panels are added to the page.
The Panels list displays all panels within the screen. Click Create to add panels. The Panel window opens.
Version 2.3.0 Bridge User Guide User Guide - Product Design

67Index
Panel Select the Name of the panel to be added. The list displays the names of the panels, and not the labels that appear on the submission form.
Sequence Enter a Sequence number. This determines the panel's position in the screen, with lower numbers appearing first.
Tip: It is advisable to leave gaps between the sequence numbers, such as 5, 10, 15. This allows new panels to be added to the screen at a later date, inserted between existing panels. Otherwise, the sequence numbers of existing panels must be changed to allow for the new addition.
Responsive Disclosure Driver Field
This option controls whether the panel is visible or hidden based on a checkbox or radio buttons. Unlike using a panel override rule, which can change the visibility of the panel when a quote is calculated, this option changes the visibility immediately on changing the driver field.If a checkbox control is selected, the panel will be displayed when the box is checked. If a radio button group is selected, the panel will be displayed on selection of specific options defined in the field below.
Version 2.3.0 Bridge User Guide User Guide - Product Design

68Index
Note: If any behavior overrides are defined to hide the driver field or the panel containing the driver field, the same behavior overrides must be applied to all target panels.
Responsive Disclosure Driver Options
This list is only displayed when a radio button group is selected in the Responsive Disclosure Driver Field list. This causes the panel to be shown when certain options are selected. Select all suitable options.
Click Save & New to save the panel and clear the form to add another panel, click Save & Close to save the panel and return to the screen page, or click Close to return to the screen page without saving the panel.
Active Marks the screen as active and available for use. If unchecked, the screen remains linked to any existing workflows, but cannot be used for new workflows.
Created By Identifies the date and time the screen was created, and the user who created it.
Last Modified By Identifies the last date and time the screen was changed, and the user who made the changes.
Version 2.3.0 Bridge User Guide User Guide - Product Design

69Index
Viewing and Modifying a Screen
1. In the main menu, select Product Design, then select Workflow Configurations, then Screens. A list of all available screens is displayed.
Some columns have been hidden.
Tip: By default, only Active screens are displayed. Clear the filter in the Status column to view all screens.
2. Click a link in the Name column to view the screen details. If there are a large number of available screens, see the section on Using Grids in the User Guide - Introduction document for help on finding the appropriate screen.
3. See the section on Creating a New Screen for a detailed description of the fields. All fields may be edited, if necessary, except for the Code.
To edit or delete a panel, click a link in the Name column. All fields can be edited except for the selected panel itself. Make any necessary changes and click Save & New to save the panel and clear the form to add another panel, click Save & Close to save the panel and return to the screen page, click Close to return to the screen page without saving the panel, or click Delete to remove the panel from the screen.
4. Click Save to save any changes and remain on the page, click Save & Close to save and return to the screens list, or click Close to return to the screens list without saving any changes.
Version 2.3.0 Bridge User Guide User Guide - Product Design

70Index
Deactivating a Screen
Once created, a screen cannot be deleted. It can be deactivated, which leaves it linked to any existing forms, but prevents it from being used for new forms.
1. In the main menu, select Product Design, then select Workflow Configurations, then Screens. A list of all available screens is displayed.
Some columns have been hidden.
Tip: By default, only Active screens are displayed. Clear the filter in the Status column to view all screens.
2. Locate the screen or screens to be deactivated. If there are a large number of available screens, see the section on Using Grids in the User Guide - Introduction document for help on finding the appropriate screens.
3. Check the boxes for all screens to be deactivated.
4. Click Deactivate, then confirm the deactivation when prompted to do so. All selected screens are deactivated. If the screens list is still defaulted to only show active screens, they disappear from the list.
Version 2.3.0 Bridge User Guide User Guide - Product Design
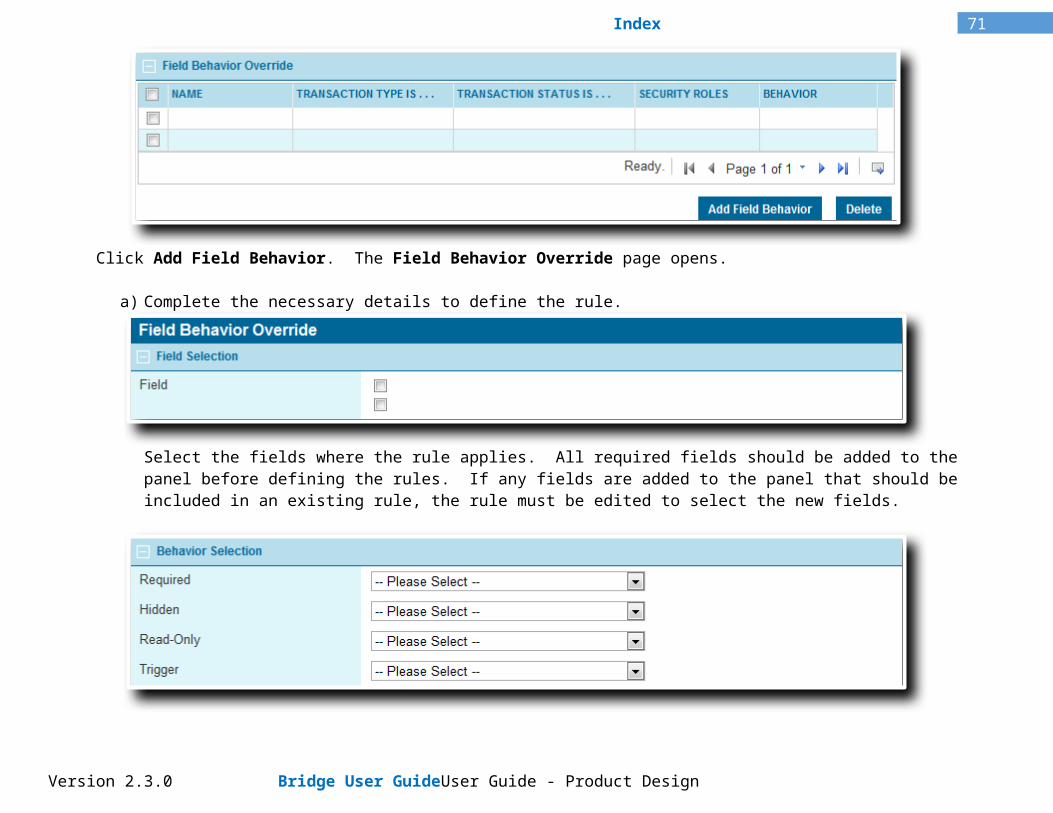
71Index
Tip: Individual screens can also be deactivated or reactivated directly through the screen record. See the section on Viewing and Modifying a Screen for details.
Version 2.3.0 Bridge User Guide User Guide - Product Design

72Index
Integration Configurations
The Bridge system can be integrated with a variety of external systems, transferring data through pre-configured channels. Integration can be set to occur automatically at specific points in the workflow, or can be triggered manually using buttons added to the Actions widget.
The Integration Configurations section is used to create and maintain these links between systems, but initial configuration must be done by Oceanwide. Contact your Oceanwide Representative to request that a specific integration be setup, and receive certain configuration details required for this page.
Creating a New Integration Configuration
1. In the main menu, select Product Design, then select Workflow Configurations, then Integration Configurations. A list of all available configurations is displayed.
Tip: By default, only Active configurations are displayed. Clear the filter in the Status column to view all configurations.
2. Click Create. The Integration Configuration Management page opens.
3. Fill in the necessary information.
Version 2.3.0 Bridge User Guide User Guide - Product Design

73Index
Name Enter the name of the configuration. This is the internal name, used to select this screen in the configurations list. This name does not appear on the form itself.
Code This is an internal reference name which is generated by the system when the configuration is saved.
Description Enter a description for this configuration.
Integration Type Select the type of integration. This is provided by your Oceanwide Representative.
Endpoint Code Enter the Endpoint Code for the external system. This is provided by your Oceanwide Representative.
Action Select the type of action to initiate the integration configuration. This may be a direct action by the user, or an indirect action resulting from other activities. The configuration conditions are evaluated to determine if the integration is performed, and how it will be handled.
Bind The configuration will activate when the user attempts to bind a transaction.
Calculate Quote The configuration will activate when the system performs a quote calculation. This can be activated by the user, triggered by navigating through a workflow, or automated processes such
Version 2.3.0 Bridge User Guide User Guide - Product Design

74Index
as the optional quote calculation after automatic renewal.
Mark as Lost The configuration will activate when a quote is marked as lost, either by manual action on the part of the user, or the timed expiry of the quote.
Save The configuration will activate with the following save events.
o Clicking Save & Refresh or Next in the policy workflow, except when the screen is complete and no changes have been made within the screen.
o Activating the Calculate Quote process, either manually or automatically.
o Clicking Select Quote in the Quote Summary window for a multi-quote workflow.
o Changing the Effective Date or Valid Until date in the Policy Information window, and clicking Save & Close. Except for Cancellation and Reinstatement transactions, where clicking Save & Close will save the settings even if no changes were made.
o If any changes are made to the Assured, including creating or selecting an assured, changing the assured, or editing the assured information and saving.
Note that field validations, such as invalid data or missing required fields, will prevent the save and the integration.
Custom Links the configuration to a custom item in the Actions or Common Screens widgets, configured below.
The Integration Specifications panel becomes available when an Action is selected.
Perform Select how the integration should be performed in relation to the selected Action. Not available when Custom is selected as the Action.
Version 2.3.0 Bridge User Guide User Guide - Product Design
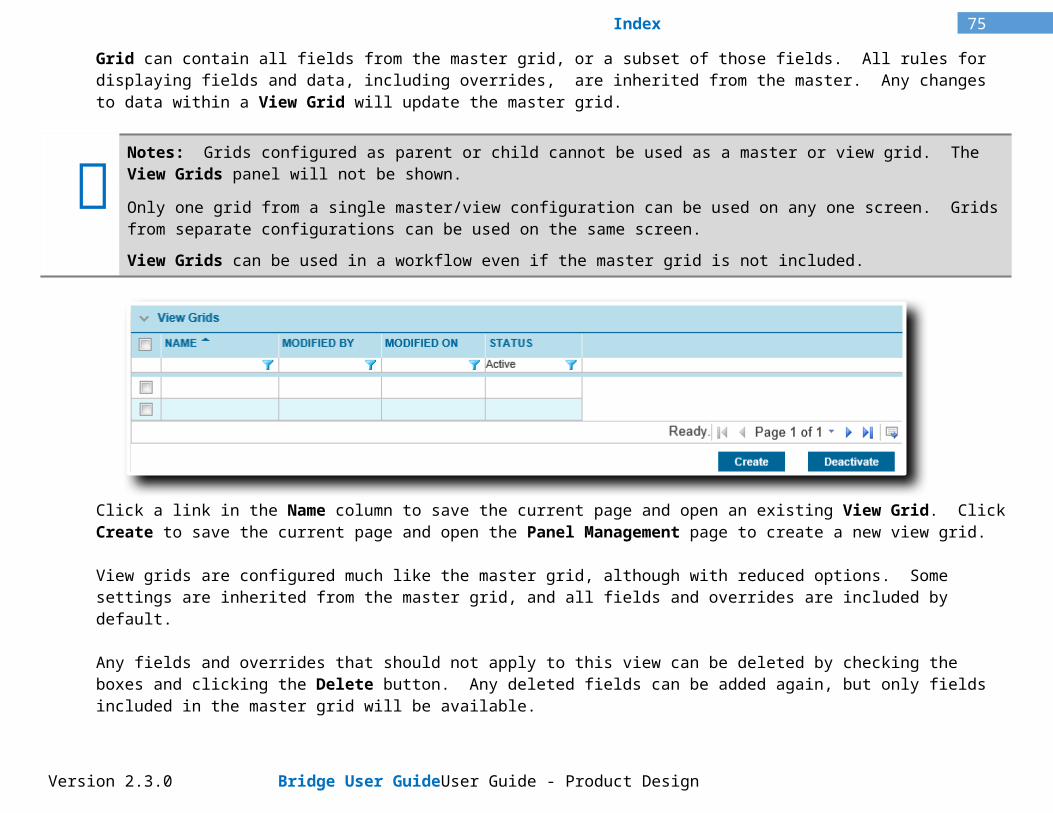
75Index
Pre-Action The integration will be performed before the selected Action.If the integration fails, the action will not occur. This does not apply to Save actions, which will occur regardless of the integration results.Any validations that can prevent the action, such as bind validations, are performed after the integration. This means the action may not occur, even if the integration is successful.
Post-Action The integration will be performed after the selected Action. The integration will occur even if the event itself fails due to validations. Use the Availability / Triggering Conditions detailed below if the integration requires specific conditions.
External Service This option is currently unavailable.
Label Text For configurations that are initiated by the user, enter the label for the button. Available when Custom is selected as the Action.
Integration Level Select where the processing is to be done. Available when Custom is selected as the Action.
Backend Creates a button in the Actions widget that calls an integration service on the Bridge server.
Frontend Creates a button in the Common Screens widget that opens a new window with the URL of an external web page.
Communication Select how the systems should communicate. Available when either Calculate Quote or Bind are selected as the Action, or when Custom is selected as the Action and Backend is selected as the Integration Level. This information is provided by your Oceanwide Representative.
Synchronous The Bridge system and integration system communicate both ways, allowing immediate updates of the submission as well as warning messages if there are any problems.
Note: Replies and updates from synchronous integrations can only be accepted when the submission is a New Business or Renewal transaction in Incomplete status, or any transaction type in Bound status. In any other transaction type or status, any reply will be ignored.
Asynchronous The Bridge system sends the information to the integration system, and then continues with normal processing. While the integration may affect the submission in the background, it will not return any warning messages.
Link URL Provide the link (URL) of the external system. Available when Frontend is selected as the Integration Level.
Version 2.3.0 Bridge User Guide User Guide - Product Design

76Index
Integration configurations are enabled for a workflow in the Workflow Management page. Within the workflow, the Availability / Triggering Conditions panel defines when the integration can be activated by the event or user. The integration can only be activated if the transaction and user match at least one selected option in each group. At least one option must be selected in each group or the integration can never be activated.
Version 2.3.0 Bridge User Guide User Guide - Product Design
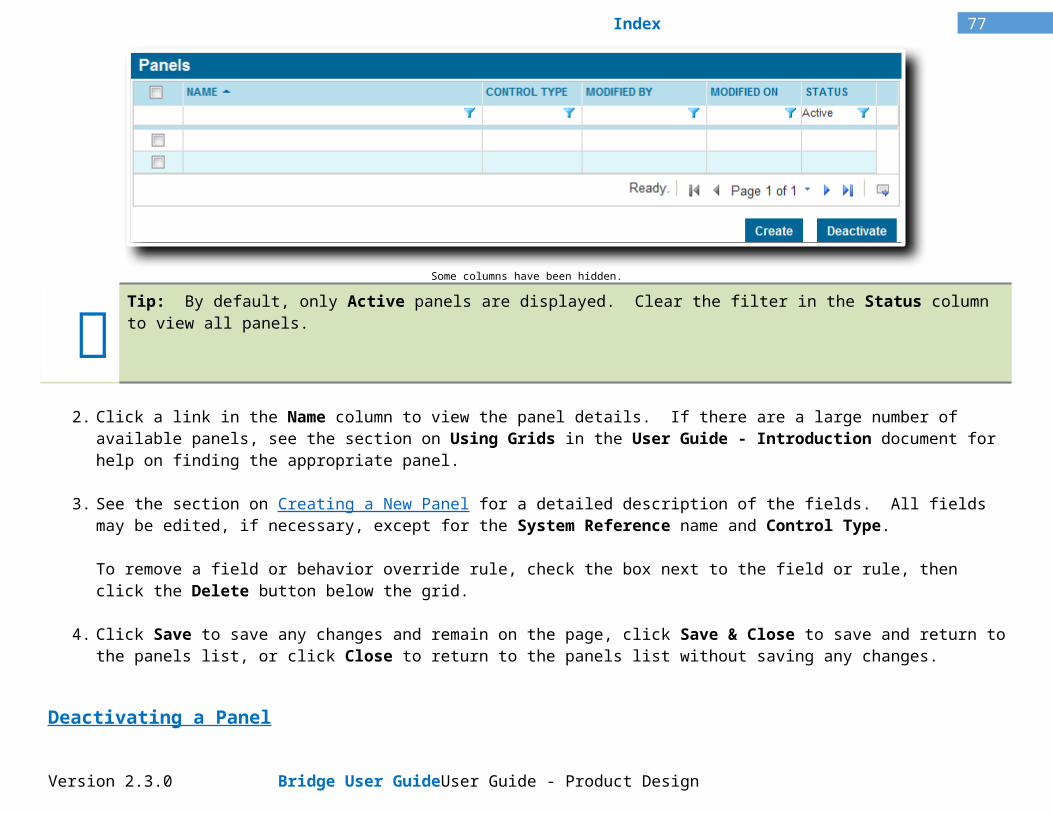
77Index
Policy Transaction Types Select the transaction types where the integration can be activated.
Policy Transaction Statuses Select the transaction statuses where the integration can be activated.
Security Roles Select the user security roles that are required to enable the integration.
Screens Select the screens where the integration can be activated. This only applies for Custom Actions.
Trigger An optional trigger can be selected as a final requirement to enable the integration. The trigger must evaluate as true for the integration to occur, as well as meeting the other requirements in this panel.
4. Click Add to save the configuration but remain on the page, click Add & Close to save the configuration and return to the configurations list, or click Close to return to the configurations list without saving the configuration.
Once the configuration is saved, the Status panel becomes available at the bottom of the page.
Active Marks the configuration as active and available for use. If unchecked, the integration is no longer available and cannot be activated.
Created By Identifies the date and time the configuration was created, and the user who created it.
Last Modified By Identifies the last date and time the configuration was changed, and the user who made the changes.
Version 2.3.0 Bridge User Guide User Guide - Product Design
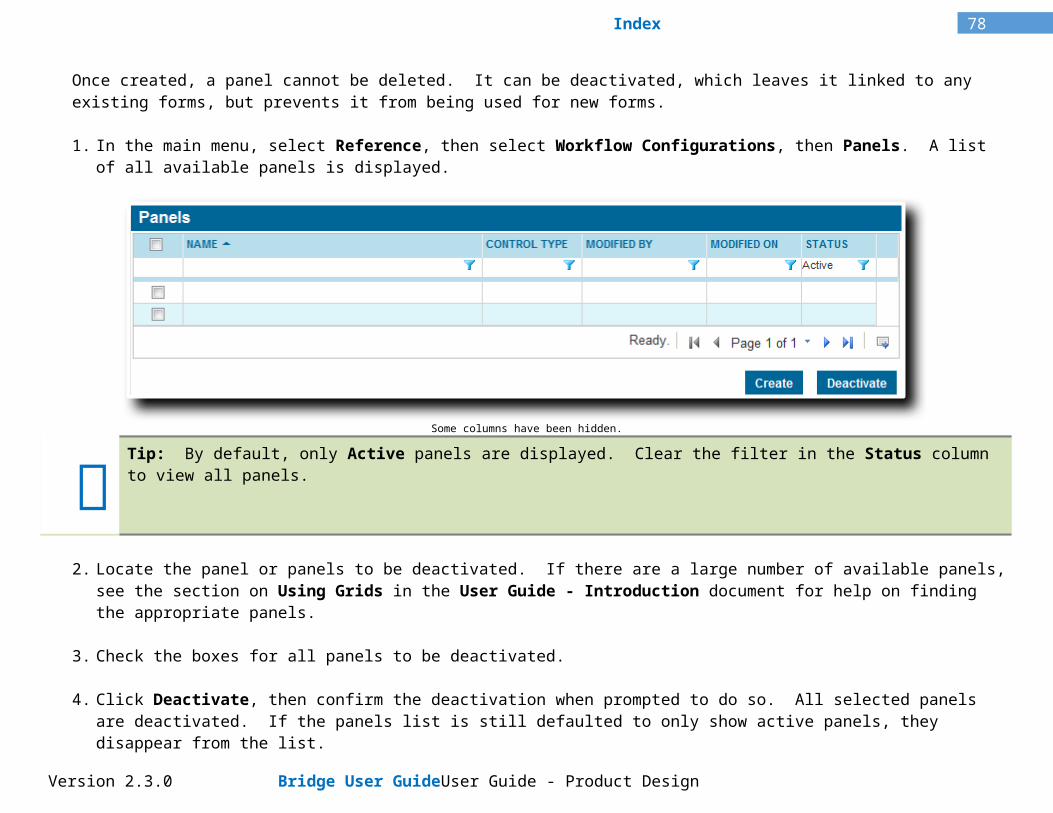
78Index
Viewing and Modifying a Configuration
1. In the main menu, select Product Design, then select Workflow Configurations, then Integration Configurations. A list of all available configurations is displayed.
Tip: By default, only Active configurations are displayed. Clear the filter in the Status column to view all configurations .
2. Click a link in the Name column to view the configuration details. If there are a large number of available configurations, see the section on Using Grids in the User Guide - Introduction document for help on finding the appropriate configuration.
3. See the section on Creating a New Integration Configuration for a detailed description of the fields. All fields may be edited, if necessary.
4. Click Save to save any changes and remain on the page, click Save & Close to save and return to the configurations list, or click Close to return to the configurations list without saving any changes.
Version 2.3.0 Bridge User Guide User Guide - Product Design

79Index
Deactivating a Configuration
Once created, a configuration cannot be deleted. It can be deactivated, which prevents it from being used.
1. In the main menu, select Product Design, then select Workflow Configurations, then Integration Configurations. A list of all available configurations is displayed.
Tip: By default, only Active configurations are displayed. Clear the filter in the Status column to view all configurations .
2. Locate the configuration or configurations to be deactivated. If there are a large number of available configurations , see the section on Using Grids in the User Guide - Introduction document for help on finding the appropriate configurations.
3. Check the boxes for all configurations to be deactivated.
4. Click Deactivate, then confirm the deactivation when prompted to do so. All selected configurations are deactivated. If the configurations list is still defaulted to only show active configurations , they disappear from the list.
Version 2.3.0 Bridge User Guide User Guide - Product Design

80Index
Tip: Individual configurations can also be deactivated or reactivated directly through the configuration record. See the section on Creating a New Integration Configuration for details.
Version 2.3.0 Bridge User Guide User Guide - Product Design

81Index
Managing Workflows
The workflow assembles all components of a single submission process, and is assigned to one or more master covers. This is the final step in the workflow design process, although additional configuration can be done at the master cover level. See the Master Cover Setup guide for instructions on attaching and configuring a workflow.Each workflow contains Steps, with each step containing as many screens as necessary. The navigation options within the workflow allows user to navigate through steps and screens.
Creating a New Workflow
1. In the main menu, select Product Design, then select Workflow Configurations, then Workflows. A list of all available workflows is displayed.
Tip: By default, only Active workflows are displayed. Clear the filter in the Status column to view all workflows.
2. Click Create. The Workflow Management page opens.
3. Fill in the necessary information.
Version 2.3.0 Bridge User Guide User Guide - Product Design

82Index
Name Enter the name of the workflow. This is the internal name, and does not appear on the workflow itself.
Code This is an internal reference name which is generated by the system when the workflow is saved.
Line of Business Select a Line of Business from the list of industry presets.
Style Select the format of the workflow.
Single Screen With a single screen workflow, all panels are included in one screen.
Multi-Screen With a multi-screen workflow, panels are divided among multiple screens, and the screens are divided among multiple steps. The workflow includes navigation controls to move through the steps and screens.
Screen When Single Screen has been selected as the Style, select the screen that represents the entire workflow. (if Multi-Screen is selected, the Steps panel is only available after the workflow is saved. see below)
4. Click Add to save the workflow but remain on the page (if Multi-Screen configuration is required), click Add & Close to save the workflow and return to the workflows list, or click Close to return to the workflows list without saving the workflow.
5. Once the workflow has been saved, the Status panel is added at the bottom of the page.
Version 2.3.0 Bridge User Guide User Guide - Product Design
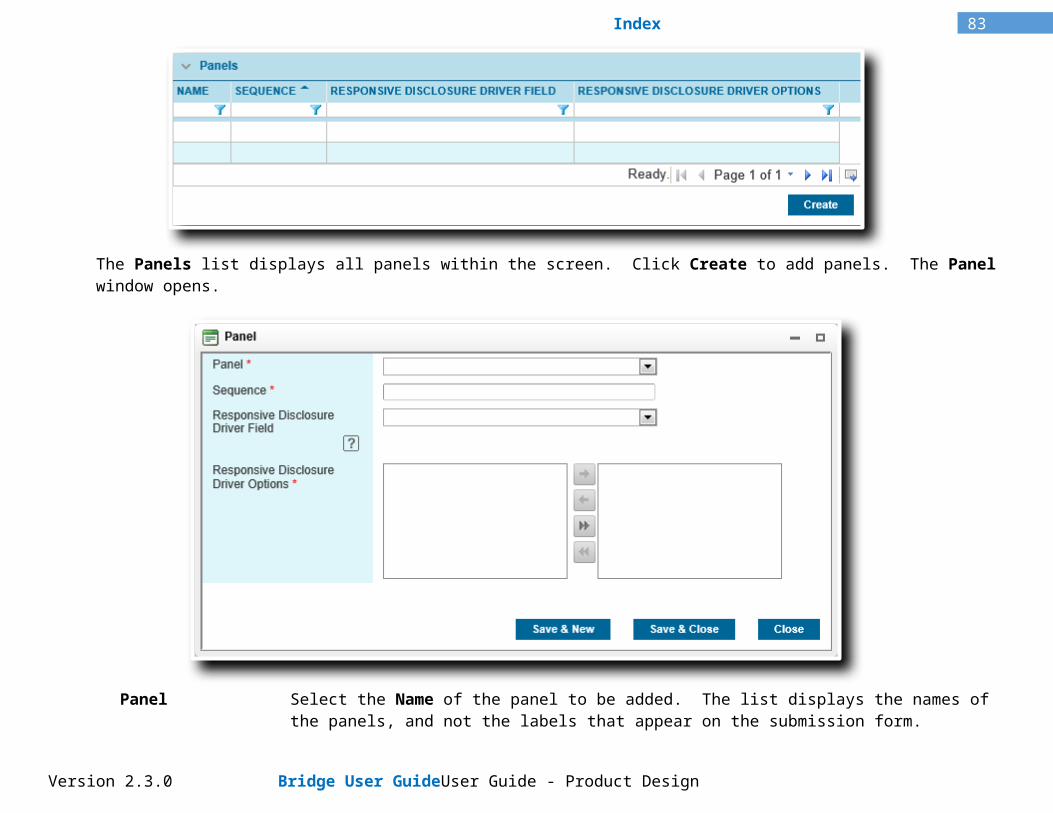
83Index
Active Marks the workflow as active and available for use. If unchecked, the workflow remains linked to any existing resources, but cannot be used for new resources.
Created By Identifies the date and time the workflow was created, and the user who created it.
Last Modified By Identifies the last date and time the workflow was changed, and the user who made the changes.
6. If Multi-Screen has been selected, the Steps and Screen Behavior Override panels are also added to define the steps of the workflow and visibility of the screens.
The Steps grid lists all steps currently configured for the workflow. Click a link in the Label column to view an existing step.
a) Click Create to add a step. The Steps window opens.
b) Fill in the General Information panel.
Version 2.3.0 Bridge User Guide User Guide - Product Design
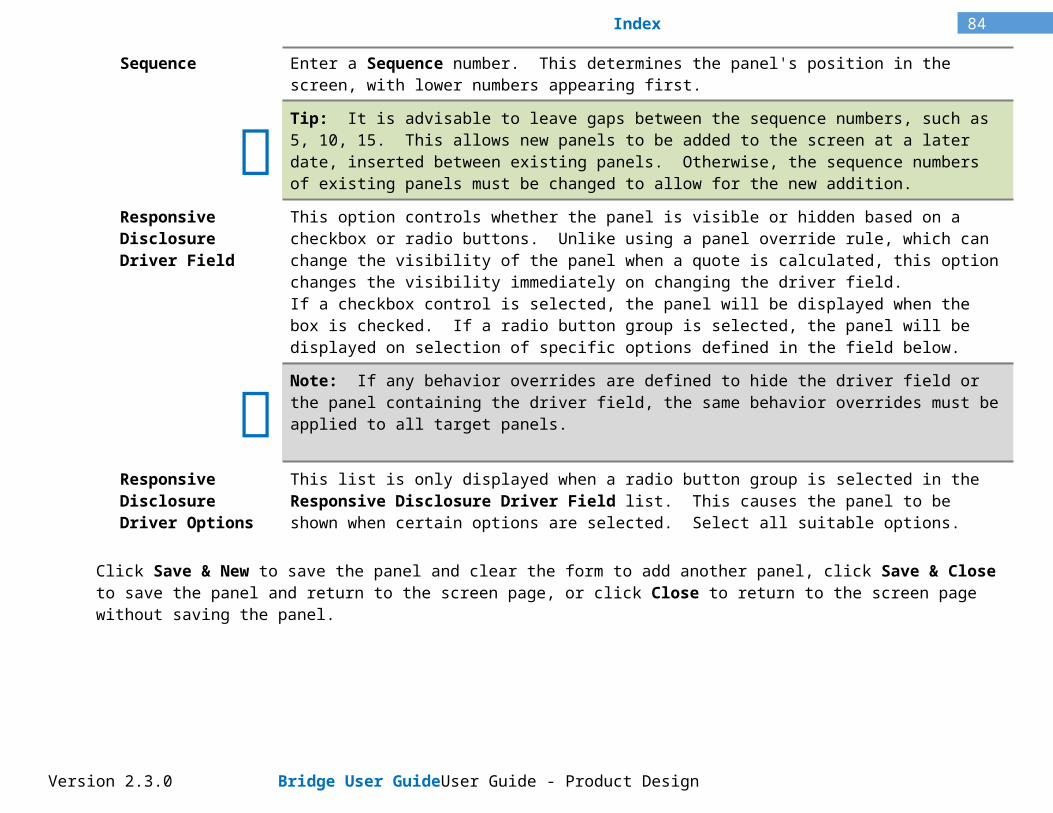
84Index
Label Enter the label to be displayed for the step. This is shown in the progress bar at the top of the workflow page.
Sequence Enter a sequence number to determine the step's position in the workflow.
c) Click in the field marked Please click here to add new row.
d) Select the Name of the screen to be added.
e) Enter a Sequence number. If no sequence number is provided, it is considered a zero.
f) Press the Tab key from the Sequence field or click outside the table to add the screen to the list. The screen is highlighted in yellow to indicate that it has not been accepted yet.
g) Repeat steps c to f to add additional screens.
h) When all screens have been added, right-click inside the table and select Accept All Changes. This saves the current table.
Version 2.3.0 Bridge User Guide User Guide - Product Design

85Index
i) Click Save & New to save the current step and create a new step, click Save & Close to save the current step and return to the Workflow Management page, or click Close to return to the Workflow Management page without saving the current step.
Note: Screens can only be used once in a single workflow.
7. By default, each screen is visible at all stages and statuses of the transaction. The Screen Behavior Override is used to create rules that change the behavior based on a variety of options. The table lists all currently defined rules.
Click Add Screen Behavior. The Screen Behavior Override window opens.
a) Complete the necessary details to define the rule.
Version 2.3.0 Bridge User Guide User Guide - Product Design
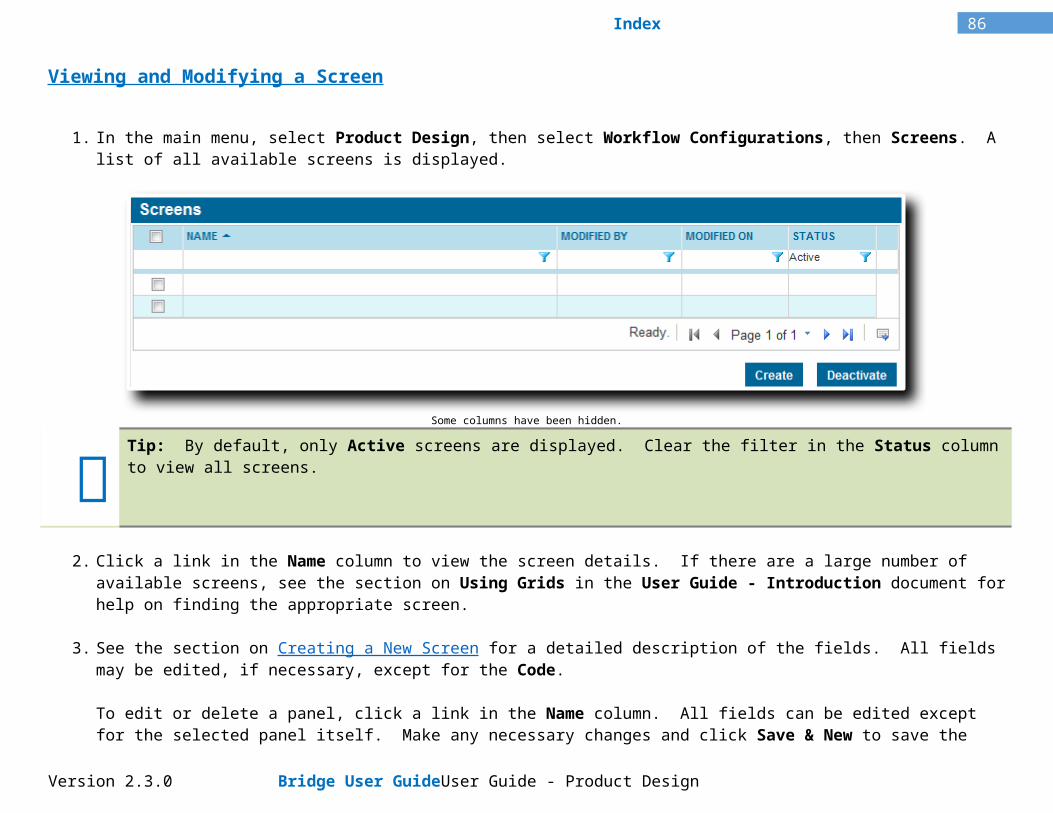
86Index
Hidden This option is checked by default and cannot be modified.
Screen Select the screens to be affected by this rule.
Trigger This option is used to assign a trigger to the rule. The rule is only applied if the trigger evaluates as true.
Notes: Use caution when creating override rules for screens that contain fields used in triggers. It can create circumstances where users trigger changes in a form that they cannot undo.
When a user makes changes in a form that trigger an override rule, it does not occur immediately. The rule is applied when any action is taken that saves the form.
If a screen is hidden by a triggered override rule, all fields in that screen retain their current value.
The first screen in the workflow cannot be hidden.
Version 2.3.0 Bridge User Guide User Guide - Product Design
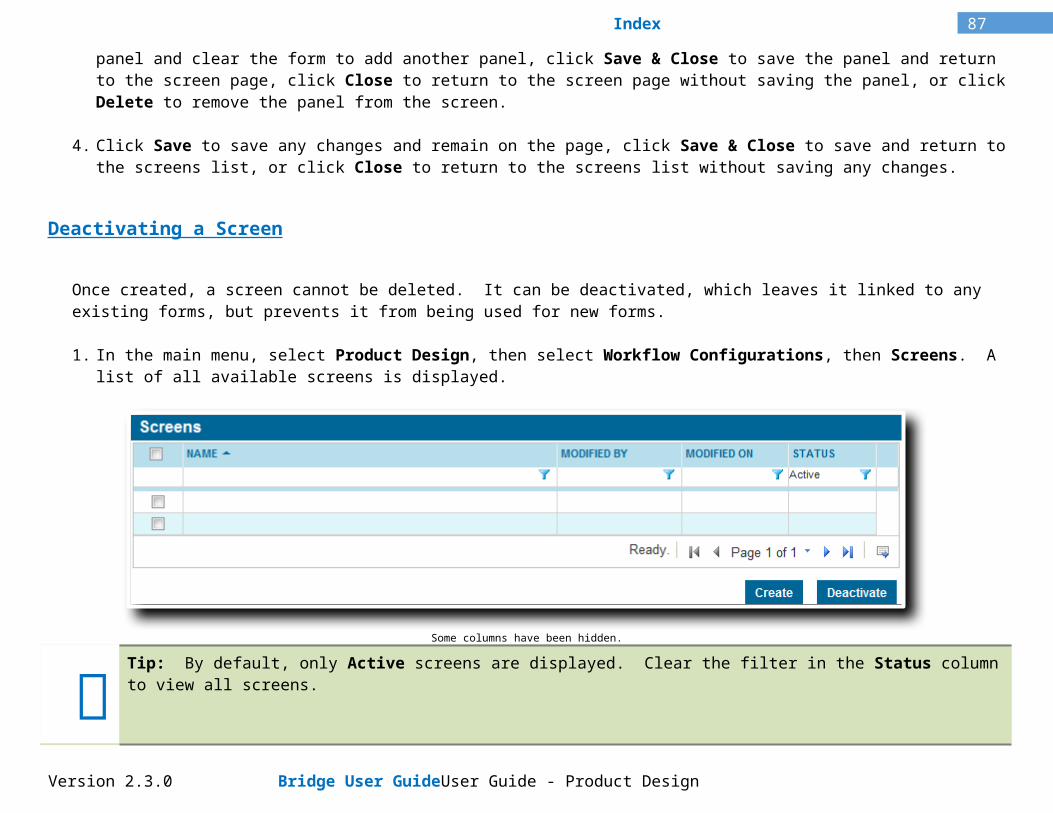
87Index
Select the types of transaction where the rule applies.
New Business The original version of a submission or policy.
Endorsement A modification to a bound policy.
Adjustment An adjustment to a bound policy.
Declaration A periodical modification to a bound policy.
Renewal A renewal for an expired policy.
Cancellation A cancelled policy.
Reinstatement A policy that was reinstated after being cancelled.
Select the status of submission or policy where the rule applies.
Incomplete A submission that has not yet had a quote calculated.
Quoted A submission that has been quoted and is ready to be bound.
Referred A submission that does not meet the requirements of the master cover and has been submitted to the insurance representatives for review.
Bound A policy that has been bound.
Declined A quote request or referral that has been declined.
Underwriting Required A submission that does not meet the requirements of the master cover and must either be corrected or submitted to the insurance representatives for review.
Lost A quote that has been marked as lost business.
Version 2.3.0 Bridge User Guide User Guide - Product Design
88Index
Select the types of user where the rule applies. The user viewing the form must have one or more of the selected security roles in order for the rule to be applied.
Note: At least one option must be selected in each category. For a rule to apply to all options in a category, all options must be selected.
b) Click Save & New to save the rule and clear the form to add additional rules, click Save & Close to save the rule and return to the workflow details, or click Close to return to the workflow details without saving the rule.
8. The Integration Configurations panel allows integrations with external services or systems to be activated from within this workflow. The exact circumstances under which the integration activates, or becomes available for user activation, is controlled by the settings in the integration configuration itself.
Select all available integrations to be applied to this workflow, and move them to the right-side window.
Version 2.3.0 Bridge User Guide User Guide - Product Design

89Index
9. Click Save to save any changes and remain on the page, click Save & Close to save and return to the workflows list, or click Close to return to the workflows list without saving any changes.
Click Workflow Report to generate a list of all fields, panels, and screens used in the current workflow. Click here for more information.
Viewing and Modifying a Workflow
1. In the main menu, select Product Design, then select Workflow Configurations, then Workflows. A list of all available workflows is displayed.
Tip: By default, only Active workflows are displayed. Clear the filter in the Status column to view all workflows.
2. Click a link in the Name column to view the workflow details. If there are a large number of available workflows, see the section on Using Grids in the User Guide - Introduction document for help on finding the appropriate workflow.
3. See the section on Creating a New Workflow for a detailed description of the fields. All fields may be edited, if necessary, except for the Code and the Style.
Version 2.3.0 Bridge User Guide User Guide - Product Design

90Index
To edit or delete a step, click the link in the Label column to view the step.
Make any necessary changes.
To edit screens, double-click in the field to be edited, make the changes, and click outside the field. The screen is highlighted in gray to indicate that the changes have not been accepted.
To delete a screen, right click the screen in the grid and select Delete. The panel is highlighted in red to indicate that the changes have not been accepted.
Once all changes have been made, right-click inside the table and select Accept All Changes. This saves the current table.
Click Save & Close to save the current step and return to the Workflow Management page, click Close to return to the Workflow Management page without saving the current step, or click Delete to delete the current step from the workflow.
If a screen is removed from the workflow, any override rules associated with that screen are deleted automatically.
4. To edit a screen override rule, click a link in the Screen column to view the specific rule for that screen (more than one rule may exist per screen). The Screen Behavior Override window opens with the details of the rule.
All settings may be edited, except for the Hidden checkbox and the Screen selection.
Click Save & Close to save the current rule and return to the Workflow Management page, click Close to return to the Workflow Management page without saving the rule, or click Delete to delete the rule.
5. When back on the Workflow Management page, click Save to save any changes and remain on the page, click Save & Close to save and return to the workflows list, or click Close to return to the workflows list without saving any changes.
Publishing a Workflow
While a workflow is being created or edited, changes are not available to users immediately. To ensure that changes are implemented all at once, the workflow must be published. This replaces the existing workflow with the updated one.
1. In the main menu, select Product Design, then select Workflow Configurations, then Workflows. A list of all available workflows is displayed.
Version 2.3.0 Bridge User Guide User Guide - Product Design

91Index
Tip: By default, only Active workflows are displayed. Clear the filter in the Status column to view all workflows.
2. Click a link in the Name column to view the workflow details. If there are a large number of available workflows, see the section on Using Grids in the User Guide - Introduction document for help on finding the appropriate workflow.
3. Click the Publish button. The workflow is saved and published. A confirmation message is shown.
Deactivating a Workflow
Once created, a workflow cannot be deleted. It can be deactivated, which leaves it linked to any existing resources, but prevents it from being used for new resources.
1. In the main menu, select Product Design, then select Workflow Configurations, then Workflows. A list of all available workflows is displayed.
Version 2.3.0 Bridge User Guide User Guide - Product Design

92Index
Tip: By default, only Active workflows are displayed. Clear the filter in the Status column to view all workflows.
2. Locate the workflow or workflows to be deactivated. If there are a large number of available workflows, see the section on Using Grids in the User Guide - Introduction document for help on finding the appropriate workflows.
3. Check the boxes for all workflows to be deactivated.
4. Click Deactivate, then confirm the deactivation when prompted to do so. All selected workflows are deactivated. If the workflows list is still defaulted to only show active workflows, they disappear from the list.
Tip: Individual workflows can also be deactivated or reactivated directly through the workflow record. See the section on Viewing and Modifying a Workflow for details.
Version 2.3.0 Bridge User Guide User Guide - Product Design
93Index
Workflow Report
Advanced workflows can be a complex hierarchy of fields, panels, and screens. The Workflow Report option produces an Excel sheet listing all fields, panels or grids, and screens.
Note: The report uses the most recently published workflow details. To include recent changes in the report, be sure to publish the workflow before running the report.
1. In the Workflow Management page for the appropriate workflow, click Workflow Report.
2. The report is produced in Excel format. A standard Save / Open dialogue box appears. Select if you want to Open the file, Save the file to your computer, or Cancel the download.
3. The report lists the names and labels of all screens, panels, fields, and option lists in the workflow. It also provides some additional details such as the panel type, field control type, whether each field is designated as a rate driver or available for use in triggers, plus the full formula for calculated fields.
Version 2.3.0 Bridge User Guide User Guide - Product Design
94Index
Additional Resources
The workflow and all of its components are one resource used in the creation and operation of the master covers and submission process.
Other resources can also be created. Some are optional, but others are required when preparing a master cover. These resources are detailed below.
Managing Clauses Defining legal clauses to be used in the submission form and documentation.
Managing Triggers Creating the conditions used by the system to make detailed logical decisions.
Managing Email Templates Creating templates to be used for both automated and manual email communications.
Managing Document Templates Importing templates to be used in the generation of system documents.
Version 2.3.0 Bridge User Guide User Guide - Product Design

95Index
Managing Clauses
Clauses are segments of legal text or other information that can be assembled into a full policy document.
Individual clauses are defined in the system, and then attached to various features or pulled into generated documents.
Creating a New Clause
1. In the main menu, select Product Design, then select Clauses. A list of all available clauses is displayed.
Tip: By default, only Active clauses are displayed. Clear the filter in the Status column to view all clauses.
2. Click Create. The Clause Management page opens.
3. Fill in the necessary information.
Version 2.3.0 Bridge User Guide User Guide - Product Design
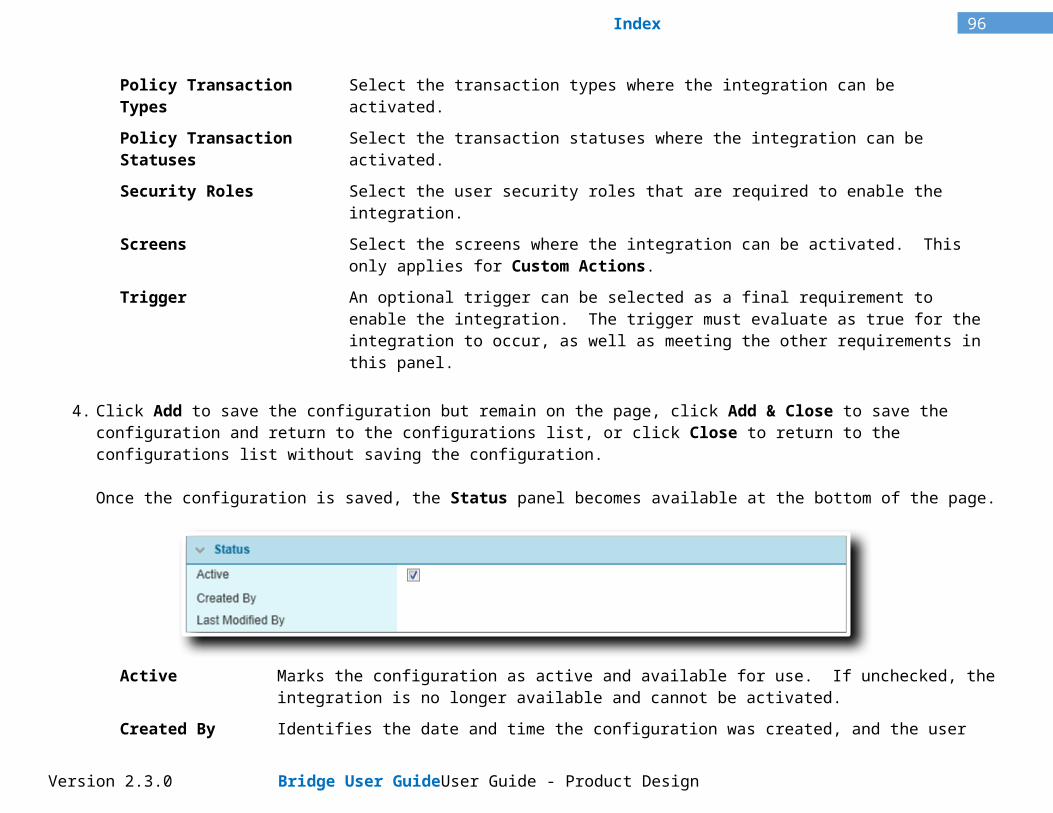
96Index
Name Enter the name of the clause. This is the internal name, used to select this clause in the master cover. This name does not appear on the form itself.
Code This is an internal reference name which is generated by the system when the clause is saved.Line of Business Select a Line of Business from the list of industry presets, or select All to make the clause available
to all lines.Product Select an available product, or select All to make the clause available to all products.
4. In the text area, enter the full text to be included in this clause. The integrated toolbar includes a full set of formatting tools to create and maintain the appearance of the text.
5. Click Add to save the clause but remain on the page, click Add & Close to save the clause and return to the clause list, or click Close to return to the clause list without saving the clause.
Version 2.3.0 Bridge User Guide User Guide - Product Design

97Index
Viewing and Modifying a Clause
1. In the main menu, select Product Design, then select Clauses. A list of all available clauses is displayed.
Tip: By default, only Active clauses are displayed. Clear the filter in the Status column to view all clauses.
2. Click a link in the Name column to view the clause details. If there are a large number of available clauses, see the section on Using Grids in the User Guide - Introduction document for help on finding the appropriate clause.
3. See the section on Creating a New Clause for a detailed description of the fields. All fields may be edited, if necessary.
Version 2.3.0 Bridge User Guide User Guide - Product Design

98Index
Active Marks the clause as active and available for use. If unchecked, the clause remains linked to any master covers, but cannot be used for new master covers.
Created By Identifies the date and time the clause was created, and the user who created it.
Last Modified By Identifies the last date and time the clause was changed, and the user who made the changes.
4. Click Save to save any changes and remain on the page, click Save & Close to save and return to the clause list, or click Close to return to the clause list without saving any changes.
Deactivating a Clause
Once created, a clause cannot be deleted. It can be deactivated, which leaves it linked to any existing products, but prevents it from being used for new products.
1. In the main menu, select Product Design, then select Clauses. A list of all available clauses is displayed.
Version 2.3.0 Bridge User Guide User Guide - Product Design

99Index
Tip: By default, only Active clauses are displayed. Clear the filter in the Status column to view all clauses.
2. Locate the clause or clauses to be deactivated. If there are a large number of available clauses, see the section on Using Grids in the User Guide - Introduction document for help on finding the appropriate clauses.
3. Check the boxes for all clauses to be deactivated.
4. Click Deactivate, then confirm the deactivation when prompted to do so. All selected clauses are deactivated. If the clause list is still defaulted to only show active clauses, they disappear from the list.
Tip: Individual clauses can also be deactivated or reactivated directly through the clause record. See the section on Viewing and Modifying a Clause for details.
Version 2.3.0 Bridge User Guide User Guide - Product Design
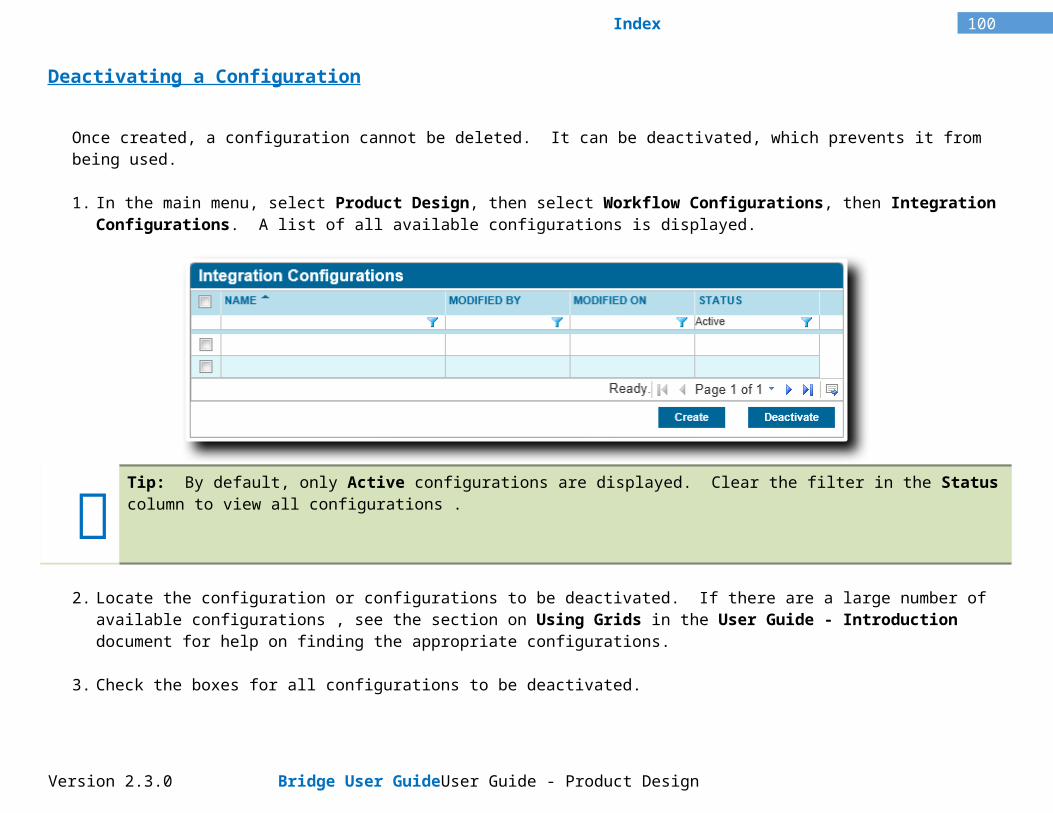
100Index
Managing Triggers
Triggers are logical conditions that can be set to evaluate system and submission information against a set of criteria.
Whether a trigger evaluates as true or false can determine if certain options are available on the submission form, if a calculation is processed a certain way, if specific data is included in an email or generated document, or a variety of other options.
Triggers can be nested together, creating detailed logical structures to suit any need.
Creating a New Trigger
1. In the main menu, select Product Design, then select Triggers. A list of all available triggers is displayed.
Tip: By default, only Active triggers are displayed. Clear the filter in the Status column to view all triggers.
2. Click Create. The Trigger Management page opens.
3. Fill in the necessary information.
Version 2.3.0 Bridge User Guide User Guide - Product Design

101Index
Trigger Name Enter the name of the trigger. This is the internal name, used to select this trigger when setting up related features. This name does not appear on the form itself.
Code This is an internal reference name which is generated by the system when the trigger is saved.
Scope Select how this trigger is available for workflows.
Workflow Restricts this trigger to one specific workflow, selected in the next field. If selected, only fields and triggers belonging to the same workflow are available for setting conditions.
Universal Makes the trigger available throughout the system. Only fields and triggers assigned to all lines of business are available for setting conditions.
Workflow If Workflow was selected as the Scope, select the appropriate workflow from this list.
4. One trigger can have multiple conditions. Each condition compares one field or one trigger to a set value. Depending on the chosen Conjunction (see below), the trigger is true if all conditions are true (Conjunction = And) or if any condition is true (Conjunction = Or).
a) Click in the field marked Please click here to add new row.
Version 2.3.0 Bridge User Guide User Guide - Product Design

102Index
b) Select the field, trigger, or other option to be checked for this condition.
Fields In order for a field to be available in this list, the field must be set as a Trigger field, and the availability must match the Scope settings selected above. See the section on Managing Fields for more information.
Triggers All triggers within the same Scope can be selected. Since only one type of Conjunction can be used within a single trigger, having triggers within triggers allows for detailed and/or logic structures.
Other Options These are additional choices that allow the trigger to check other information within the system.
Current Screen This option obtains the Code of the current screen in the workflow. This can be compared to known screen codes, identified on the Screen Management page.
c) The Function field is optional, and provides advanced features related to tables, dates, and compliance checks. The result of the function is used to check the condition.
Min Used for fields within a table, this uses the lowest value in the table.
Max Used for fields within a table, this uses the highest value in the table.
Sum Used for fields within a table, this adds together all instances of the chosen field within a table.
All Used for fields within a table, this checks each record against the selected criteria. All records must evaluate as true for the condition to be true.
Any Used for fields within a table, this checks each record against the selected criteria. If one or more records evaluate as true, the condition is true.
Count Used for fields within a table, this counts the number of records in the table. The contents of the records have no effect.
Days From Current This function compares the selected date field against the current system date, and returns the number of days difference.
Months From Current This function compares the selected date field against the current system date, and returns the number of months difference.
Years From Current This function compares the selected date field against the current system date, and
Version 2.3.0 Bridge User Guide User Guide - Product Design

103Index
returns the number of years difference.
Scan - [List Name] This is a special feature that checks the selected field for compliance with one of a series of sanction or watch lists. This feature provides a number from 0 to 100, with 100 meaning an exact match against a restricted person, place, or company. That resulting number is compared to the Value to determine if the condition is met. A separate condition must be created for each different list to be scanned.
d) The Operator determines how the field or function result is compared to the condition value.
Equals The field or function result must match the condition value exactly.
Not Equals The field or function result must be different from the condition value.
Greater Than For numeric or date fields, the field or function result must be greater than the condition value.
Greater Than or Equals For numeric or date fields, the field or function result must be greater than or equal to the condition value.
Less Than For numeric or date fields, the field or function result must be less than the condition value.
Less Than or Equals For numeric or date fields, the field or function result must be less than or equal to the condition value.
Contains For text fields, the full text of the condition value must be included anywhere in the field.
Does Not Contain For text fields, the full text of the condition value must not be included anywhere in the field.
e) Enter the condition value. The field or function result is checked against this value according to the selected operator. The type of value to use depends on the type of field being evaluated:
For text values, the text should be entered exactly as it should be evaluated. Do not enclose text in quotes or other markers unless those markers are to be included in the evaluation.
For numerical values, the number should be entered without any commas or markups, other than decimals and/or minus signs (-) for negative values.
Version 2.3.0 Bridge User Guide User Guide - Product Design

104Index
For triggers or single checkboxes, the value is Yes if the trigger evaluates as true or if the checkbox is checked. The value is No if the trigger evaluates as false or the checkbox is unchecked. The values are not case sensitive.
To evaluate any field that uses an option list (Radio Buttons, Multi-Selects, Include/Exclude Boxes, etc.) refer to the codes assigned to each item in the option list.
Tip: Direct evaluation of date fields is currently not supported. To evaluate a date, please use a calculated field to perform a date comparison that returns a numerical value. The calculated field can then be used in the trigger.
f) Select a Conjunction. If And is selected, every condition must be met for the trigger to evaluate as true. If Or is selected, at least one must be met for the trigger to evaluate as true.
Only one type of conjunction can be used in a single trigger, meaning each condition must be set to the same conjunction. However, a separate trigger with a different conjunction can be included in a condition, allowing complex logical structures.
g) Press the Tab key from the Conjunction field or click outside the table to add the condition to the list. The condition is highlighted in yellow to indicate that it has not been accepted yet
h) Repeat steps a to g to add additional conditions.
i) Once all conditions have been added, right-click inside the table and select Accept All Changes. This saves the current table.
5. Click Add to save the trigger but remain on the page, click Add & Close to save the trigger and return to the trigger list, or click Close to return to the trigger list without saving the trigger.
Version 2.3.0 Bridge User Guide User Guide - Product Design

105Index
Viewing and Modifying a Trigger
1. In the main menu, select Product Design, then select Triggers. A list of all available triggers is displayed.
Tip: By default, only Active triggers are displayed. Clear the filter in the Status column to view all triggers.
2. Click a link in the Name column to view the trigger details. If there are a large number of available triggers, see the section on Using Grids in the User Guide - Introduction document for help on finding the appropriate trigger.
3. See the section on Creating a New Trigger for a detailed description of the fields. All fields may be edited, if necessary, except for the Scope and Workflow.
The following panels were added when the trigger was saved.
Version 2.3.0 Bridge User Guide User Guide - Product Design

106Index
The Dependencies panel identifies how the trigger is linked to other resources in the system.
Triggers Used by this Trigger
Lists all triggers used in the conditions for this trigger. Clicking a link opens a new tab or new window with the Trigger Management page for the selected trigger.
Triggers Using this Trigger
Lists all triggers that refer to this trigger in their conditions. Clicking a link opens a new tab or new window with the Trigger Management page for the selected trigger.
Usage in System Identifies where the trigger is used for master covers or overrides. For master covers, the name of the master cover is provided, followed by the section where the trigger is used. For overrides, the type of override is provided, followed by the field and panel names where the trigger is used.
Active Marks the trigger as active and available for use. If unchecked, the trigger remains linked to any existing resources, but cannot be used for new resources.
Created By Identifies the date and time the trigger was created, and the user who created it.
Version 2.3.0 Bridge User Guide User Guide - Product Design

107Index
Last Modified By Identifies the last date and time the trigger was changed, and the user who made the changes.
4. Click Save to save any changes and remain on the page, click Save & Close to save and return to the trigger list, or click Close to return to the trigger list without saving any changes.
Deactivating a Trigger
Once created, a trigger cannot be deleted. It can be deactivated, which removes it from any existing resources, and prevents it from being used for new resources. The Dependencies panel can be used to identify where the trigger is used, and the impact of deactivating the trigger.
1. In the main menu, select Product Design, then select Triggers. A list of all available triggers is displayed.
Tip: By default, only Active triggers are displayed. Clear the filter in the Status column to view all triggers.
2. Locate the trigger or triggers to be deactivated. If there are a large number of available triggers, see the section on Using Grids in the User Guide - Introduction document for help on finding the appropriate triggers.
Version 2.3.0 Bridge User Guide User Guide - Product Design

108Index
3. Check the boxes for all triggers to be deactivated.
4. Click Deactivate, then confirm the deactivation when prompted to do so. All selected triggers are deactivated. If the trigger list is still defaulted to only show active triggers, they disappear from the list.
Tip: Individual triggers can also be deactivated or reactivated directly through the trigger record. See the section on Viewing and Modifying a Trigger for details.
Version 2.3.0 Bridge User Guide User Guide - Product Design

109Index
Managing Email Templates
The system includes features for sending emails. Automated emails can be sent at various stages of the submission process, and manual emails can be sent by users. All logged and tracked in the submission form.
First, an email template is created. The template can contain placeholders, which pull in data from the system and submission form when the email is sent. The template is then attached to the manual and automated email settings in the master cover.
Creating a New Email Template
1. In the main menu, select Product Design, then select Email Templates. A list of all available templates is displayed.
Tip: By default, only Active templates are displayed. Clear the filter in the Status column to view all templates.
2. Click Create. The Email Templates page opens.
3. Fill in the necessary information.
Version 2.3.0 Bridge User Guide User Guide - Product Design

110Index
Name Enter the name of the template. This is the internal name, used to select this template in the master cover. This name does not appear on the form itself.
Line of Business Select a Line of Business from the list of industry presets, or select All to make the template available to all lines.
Product Select an available product, or select All to make the template available to all products.
Email Subject Enter the subject line of the email.
Email Body Enter the main body of the email.
Both the subject line and body can contain placeholders to pull in extra information when the email is sent. For more information on creating dynamically generated content, please see Appendix A - E-mail Syntax.
4. Click Add to save the template but remain on the page, click Add & Close to save the template and return to the template list, or click Close to return to the template list without saving the template.
Version 2.3.0 Bridge User Guide User Guide - Product Design

111Index
Viewing and Modifying an Email Template
1. In the main menu, select Product Design, then select Email Templates. A list of all available templates is displayed.
Tip: By default, only Active templates are displayed. Clear the filter in the Status column to view all templates.
2. Click a link in the Name column to view the template details. If there are a large number of available templates, see the section on Using Grids in the User Guide - Introduction document for help on finding the appropriate template.
3. See the section on Creating a New Email Template for a detailed description of the fields. All fields may be edited, if necessary.
Active Marks the template as active and available for use. If unchecked, the template remains linked to any
Version 2.3.0 Bridge User Guide User Guide - Product Design

112Index
master covers, but cannot be used for new master covers.
Created By Identifies the date and time the template was created, and the user who created it.
Last Modified By Identifies the last date and time the template was changed, and the user who made the changes.
4. Click Save to save any changes and remain on the page, click Save & Close to save and return to the template list, or click Close to return to the template list without saving any changes.
Deactivating an Email Template
Once created, a template cannot be deleted. It can be deactivated, which leaves it linked to any existing products, but prevents it from being used for new products.
1. In the main menu, select Product Design, then select Email Templates. A list of all available templates is displayed.
Tip: By default, only Active templates are displayed. Clear the filter in the Status column to view all templates.
Version 2.3.0 Bridge User Guide User Guide - Product Design

113Index
2. Locate the template or templates to be deactivated. If there are a large number of available templates, see the section on Using Grids in the User Guide - Introduction document for help on finding the appropriate templates.
3. Check the boxes for all templates to be deactivated.
4. Click Deactivate, then confirm the deactivation when prompted to do so. All selected templates are deactivated. If the template list is still defaulted to only show active templates, they disappear from the list.
Tip: Individual templates can also be deactivated or reactivated directly through the template record. See the section on Viewing and Modifying an Email Template for details.
Version 2.3.0 Bridge User Guide User Guide - Product Design

114Index
Managing Document Templates
The Bridge system includes the ability to dynamically generate documentation, pulling in system information to produce custom documents for a wide variety of purposes.
Each document is first created as a template, using placeholders for system information. See the Document Configuration Reference Guide for detailed instructions on preparing templates. The templates are then uploaded into the system.
Uploading a New Document Template
1. In the main menu, select Product Design, then select Document Templates. A list of all available templates is displayed.
Tip: By default, only Active templates are displayed. Clear the filter in the Status column to view all templates.
2. Click Create. The Document Template Management page opens.
3. Fill in the necessary information.
Version 2.3.0 Bridge User Guide User Guide - Product Design

115Index
Name Enter the name of the template. This is the internal name, used to select this template in the master cover. This name does not appear on the form itself.
Line of Business Select a Line of Business from the list of industry presets, or select All to make the template available to all lines.
Product Select an available product, or select All to make the template available to all products.
Document to Upload Click the Browse button to open a standard file selection window. Select the file to be attached and click Open. The full path and filename is displayed in the field.
4. Click Add to save the template but remain on the page, click Add & Close to save the template and return to the template list, or click Close to return to the template list without saving the template.
Version 2.3.0 Bridge User Guide User Guide - Product Design
116Index
Viewing and Modifying a Document Template
1. In the main menu, select Product Design, then select Document Templates. A list of all available templates is displayed.
To quickly view the template file attached to any document template, click the View link in the View File column.
Tip: By default, only Active templates are displayed. Clear the filter in the Status column to view all templates.
2. Click a link in the Name column to view the template details. If there are a large number of available templates, see the section on Using Grids in the User Guide - Introduction document for help on finding the appropriate template.
3. See the section on Uploading a New Document Template for a detailed description of the fields. All fields may be edited, if necessary, and a new template may be uploaded to replace the existing one. This allows changes to be made to the template document and quickly uploaded without making extensive changes to the setup.
Version 2.3.0 Bridge User Guide User Guide - Product Design

117Index
Active Marks the template as active and available for use. If unchecked, the template remains linked to any master covers, but cannot be used for new master covers.
Created By Identifies the date and time the template was created, and the user who created it.
Last Modified By Identifies the last date and time the template was changed, and the user who made the changes.
4. Click Save to save any changes and remain on the page, click Save & Close to save and return to the template list, or click Close to return to the template list without saving any changes.
Deactivating a Document Template
Once created, a document template cannot be deleted. It can be deactivated, which leaves it linked to any existing products, but prevents it from being used for new products.
1. In the main menu, select Product Design, then select Document Templates. A list of all available templates is displayed.
Version 2.3.0 Bridge User Guide User Guide - Product Design

118Index
To quickly view the template file attached to any document template, click the View link in the View File column.
Tip: By default, only Active templates are displayed. Clear the filter in the Status column to view all templates.
2. Locate the template or templates to be deactivated. If there are a large number of available templates, see the section on Using Grids in the User Guide - Introduction document for help on finding the appropriate templates.
3. Check the boxes for all templates to be deactivated.
4. Click Deactivate, then confirm the deactivation when prompted to do so. All selected templates are deactivated. If the template list is still defaulted to only show active templates, they disappear from the list.
Tip: Individual templates can also be deactivated or reactivated directly through the template record. See the section on Viewing and Modifying a Document Template for details.
Version 2.3.0 Bridge User Guide User Guide - Product Design

119Index
Export / Import
This section includes features for sharing data with other programs and copying resources between different Bridge websites.
The export and import of an entire product is a particularly powerful feature.
When developing an entirely new product, the workflow, master cover, and all related resources can be assembled, tested, and approved in a UAT environment, and then copied in one large piece to the production environment.
If a product already exists in production, it can be copied to the UAT environment where changes can be made, possibly to implement valuable new features added to the Bridge system itself. The changes can be tested and approved, then the whole product is copied back to production, resulting in minimal downtime for the users.
The export feature can also be used to make a backup of a product before attempting risky changes that would be difficult to undo. The file can be imported back into the original system to restore the product to its original state (with some exceptions, detailed below).
Export
The Export feature allows entire products to be exported from one Bridge site, ready to be imported into another. This includes the workflow, the master cover, and all related resources.
Version 2.3.0 Bridge User Guide User Guide - Product Design
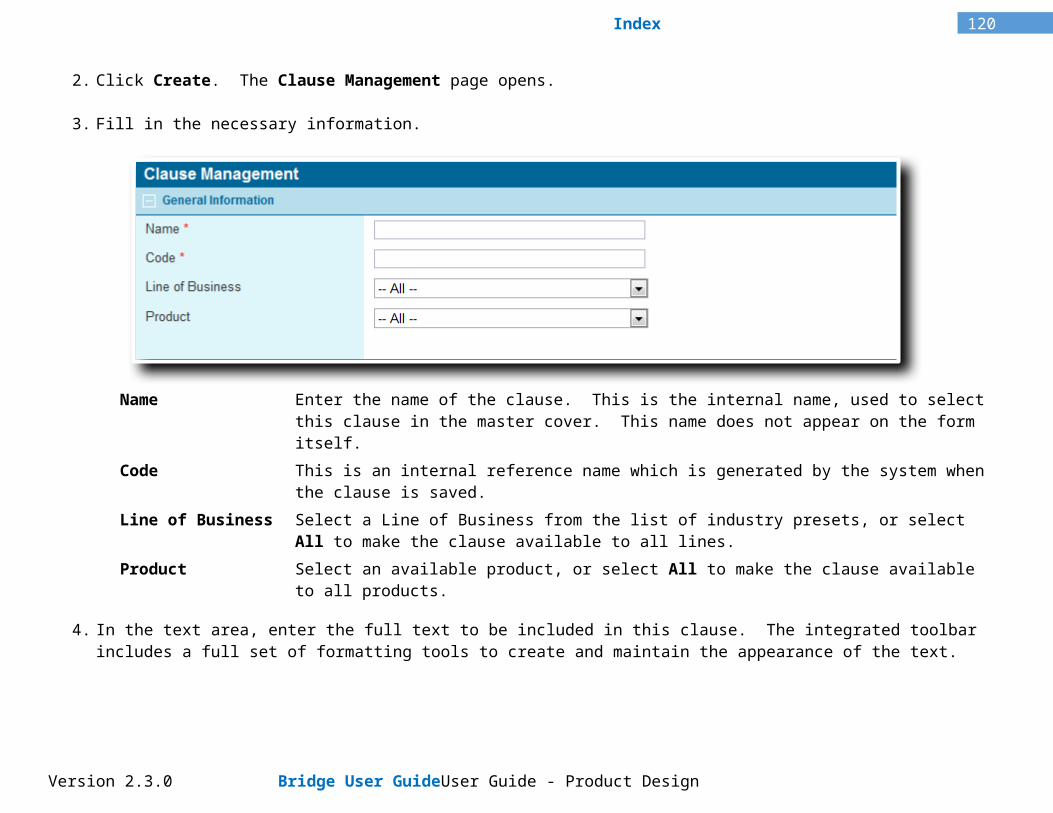
120Index
Master Cover Select the master cover to be exported. The master cover should be set to Draft mode before export.
Include Universal Triggers Check this box to include all universal triggers in the system. If unchecked, only the triggers used in the product and associated resources are included, both universal and workflow related.
Notes:
The export includes both Active and Inactive triggers in order to maintain necessary system links.
Any triggers referenced in document templates are not included. If these triggers are not used elsewhere in the product, they must be recreated in the target system.
Click Export to begin the process. This may take some time, depending on the size and complexity of the product. Once the data has been assembled, a standard browser Save/Open dialogue box appears to allow the file to be saved. The output XML file can be imported into another system. See the Import feature below.
Note: The file name includes the name of the master cover, the date and time of export, and a system-generated code number. Neither the file name nor the content of the file should be altered or the file will be rejected when trying to import.
The following items are included in the export. Only items associated with the selected master cover, or included in the workflow attached to the selected master cover are included, unless otherwise noted.
Fields Panels Screens Workflows Option Lists All option lists included in the workflow attached to the selected master cover, and any option lists
attached to the master cover itself.
Master Cover All pages and settings are included except for Product Description which must be manually copied to the new system. Also, the Insurers and Distributors settings are included, but the companies themselves are not. Each company must exist in the target system with the same Code as on the source system. If a company is not present at the time of import, or has the wrong Code, the settings for that company are discarded from the master cover and must be recreated manually.
Version 2.3.0 Bridge User Guide User Guide - Product Design
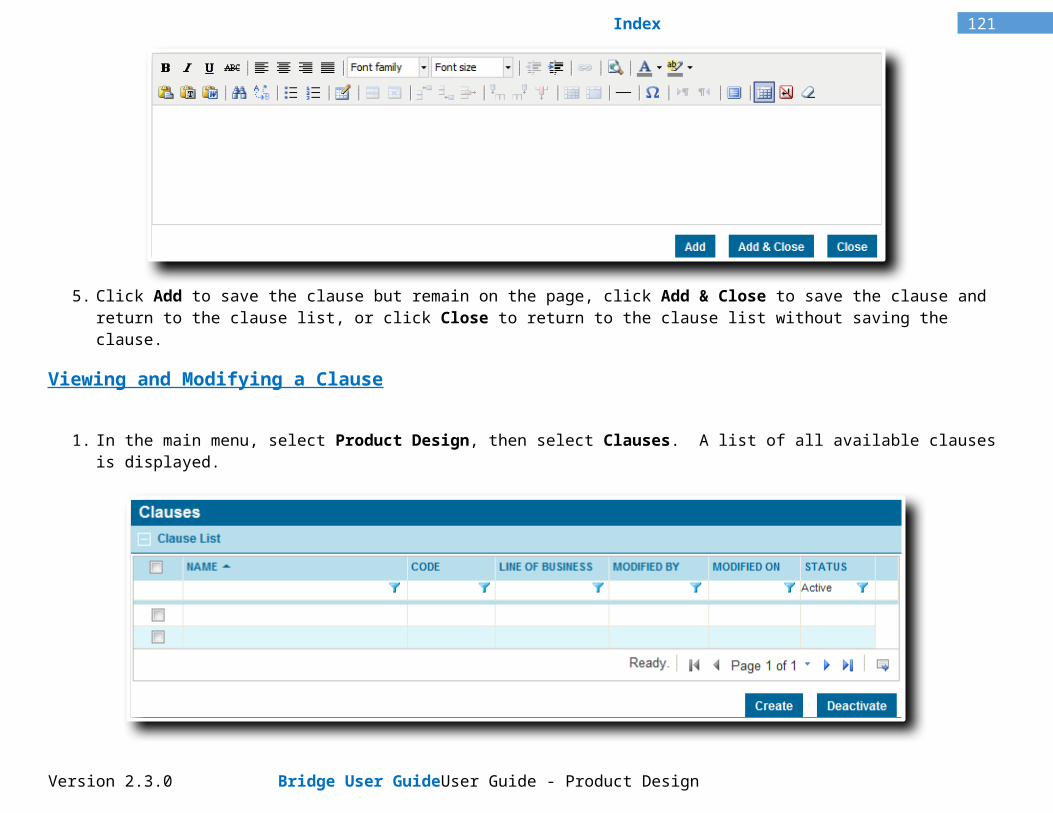
121Index
The Policy Numbering page is copied, but if the import overwrites an existing master cover, the Next Sequence Number in the existing master cover is not overwritten.
Clauses Products Premium Types All premium types available to the selected master cover, including those with the same line of
business or all lines of business.
Document Templates All active document configurations in the master cover are included, as well as the associated document templates. Inactive configurations are excluded.
E-mail Templates All active e-mail configurations in the master cover are included, as well as the associated e-mail templates. Inactive configurations are excluded.
Triggers All triggers associated with the product, including inactive triggers. Also includes universal triggers not directly associated to the product, if that option is checked.
Taxes
Import
Initiating an import is a simple enough action, but it is important to understand the process that occurs behind-the-scenes and the results of the import.
1. Preparation: Some steps should be taken to prepare the destination system, allowing for a smooth import.
If a master cover exists in the destination system with the same code as the source master cover, it should be exported and kept as a backup, allowing the original to be restored.
Any security roles referenced in the master cover, workflow, or resources must be recreated in the destination system. Only roles that are actually selected need to be available.
Some resources may be shared between multiple master covers on the destination system. Overwriting these resources could cause problems with the other master covers. Identify such dependencies and create alternate resources wherever possible.
Version 2.3.0 Bridge User Guide User Guide - Product Design

122Index
Any triggers to be included should be checked to ensure they do not contain the angle brackets "<" ">" or ampersand "&" characters.
All insurer and distributor companies linked to the master cover must be recreated in the destination system, with the same Codes used in the source system. If any companies already exist in the destination system and have the same codes as companies linked to the product, those companies will be linked to the product on import. Such companies must be manually removed from the product after import is complete, and replaced with the proper companies.
All elements in the workflow and other resources should have a Code. Any elements missing a Code will have one generated during import using the standard process, but generating the codes ahead of time could help identify elements in the destination system that might be overwritten by mistake.
2. Select the import file and settings.
Select File to Import Click the Browse button to open a standard file browser window. Locate and select the appropriate export file, and the file name and path appear in the field.
Overwrite Existing Items? During the import the system checks if each resource already exists, identified by Code. If a resource of the same type exists with the same Code, this setting determines how the import proceeds. If checked, the system overwrites the resource, ensuring that the full product remains intact. If unchecked, the existing resource is not changed and the imported resource is discarded, which protects existing data, but can cause gaps in the imported product.
Version 2.3.0 Bridge User Guide User Guide - Product Design
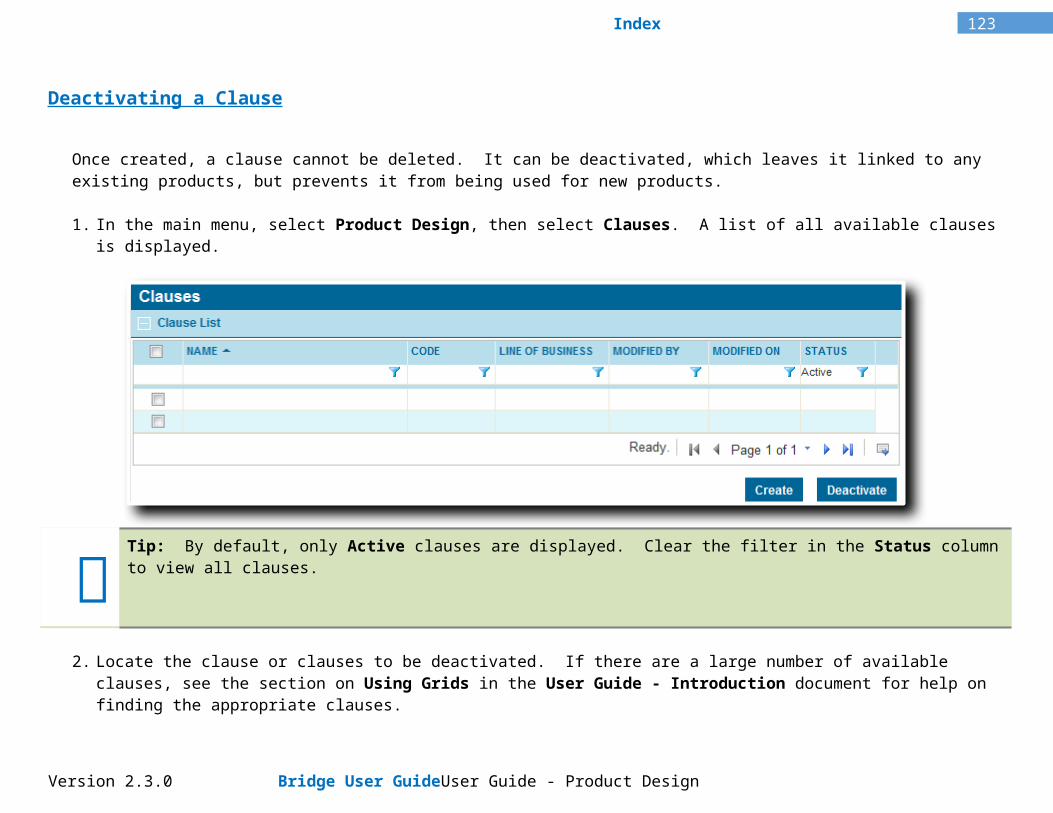
123Index
Note: The master cover itself is an exception to this setting. If a master cover exists with the same Code, it is overwritten, regardless of the overwrite setting.
3. Click Data Import to begin the process.
a) The system validates the import file to confirm that it has not been altered or corrupted. If the file fails validation, the import stops and an error message is displayed. A new export file must be generated for import.
b) The system checks that all required security roles are present in the destination system. If any roles are missing, the import stops and an error message is displayed. The missing roles must be created before attempting to import the file again.
c) The system checks all included triggers for invalid characters. If the angle brackets "<" ">" or ampersand "&" characters are found in any triggers, the import stops and an error message is displayed. The triggers must be corrected in the source system, then a new export file must be generated for import.
d) All workflow components (fields, panels, screens, workflow, options lists) are identified by two values, the Code visible in the management pages, as well as a GUID that serves as an internal ID value. If a component being exported has the same Code and GUID as a component in the destination system, they are considered the same item, and the destination component will be either attached to the product, or overwritten, depending on the import settings. If a component has the same Code as a component in the destination system, but the GUID does not match, the import stops and an error is displayed identifying the mismatched component. To resolve this error, the affected component in the destination system can be deactivated, or the component in the source system can be replaced by an identical component with a new Code, and the export process started again.
e) The workflow data is imported (fields, panels, screens, workflow, options lists).
f) Resources are imported (premium types, products, clauses, triggers, taxes).
g) Master cover settings are imported. If the settings refer to any universal triggers, and universal triggers were not included in the export, the import continues and the missing triggers are identified on completion.
h) Insurer and distributor companies are linked to the imported master cover. If any company is missing or the Code does not match, the settings for that company are omitted from the master cover. The import continues and the missing companies are identified on completion. The company settings must be configured manually after import has completed.
i) Document templates are imported and attached to the imported master cover.
Version 2.3.0 Bridge User Guide User Guide - Product Design

124Index
j) E-mail templates are imported and attached to the imported master cover. If any user accounts listed as recipients in the e-mail template do not exist in the destination system, the import continues and the missing companies are identified in the results field on completion. The setup of the recipient users can be corrected after import has completed.
4. Once the import has completed or stopped due to an error, the window under the Data Import button is populated with the relevant messages and errors from the import. Copy the text (click inside the field, press Ctrl + A to select all text, then Ctrl + C to copy) and save it for future reference. This text can be used for troubleshooting or as a checklist of items that must be corrected after the import.
5. After the import is complete and the results have been copied and saved, close any additional browser windows and log out of the system. This clears the session data accumulated in the Import/Export process.
6. Once all corrections have been made, the workflow must be published before submissions can be created.
Note: Concurrency issues may occur if other users are working in the system during import. It is recommended to perform the import during a maintenance window or other downtime.
Download Word Ribbon
In order to use the Word Ribbon to insert system placeholders in document templates, you must first save the current system layout to a file. The file is then imported into Word. See the Document Configuration Reference Guide for detailed instructions.
1. In the main menu, select Product Design, then select Export / Import.
2. Under the Download Word Ribbon panel, click Download.
Version 2.3.0 Bridge User Guide User Guide - Product Design

125Index
3. A standard File Download window opens. Click Save to save the file to your computer.
4. Select a location and enter a filename, then click Save.
5. To import the data into Word, see the Document Configuration Reference Guide.
Version 2.3.0 Bridge User Guide User Guide - Product Design

126Index
Master Covers
Managing Master Covers is an extensive and detailed process.
For detailed instructions, please see the Bridge User Guide - Master Covers document.
Version 2.3.0 Bridge User Guide User Guide - Product Design

127Index
Reference
Appendix A - E-mail Syntax
When an email is generated, system and submission information can be pulled into the subject and body of the email. This section details the syntax to be used when preparing the email template.
Workflow and System Placeholders
The main objective of sending dynamically generated emails is to provide information. To achieve this, the email template is created using placeholders. When the system prepares the email, it replaces the placeholders with the required information.
To pull in information from the custom fields in your workflow, the placeholder is the System Reference name of the field enclosed in double square brackets [[ ]].
For example, a field named “Business Region” may have a system reference name of “BusinessRegion”, so the contents of the field would be pulled in with the placeholder [[BusinessRegion]].
Notes:
The System Reference name does not change if the field name is changed, and may include numbering if duplicate fields exist. For these reasons, you should verify the System Reference name of each field when adding placeholders.
If a field is part of a grid, the placeholders must be included in a table format, described here.
In addition to the workflow information, you can also include system information related to the submission, or the date and time from the server. For a complete list of system variables that can be used in documents, e-mails, and calculated fields, see Appendix B in the Bridge User Guide - Calculated Fields.
Tables
Version 2.3.0 Bridge User Guide User Guide - Product Design
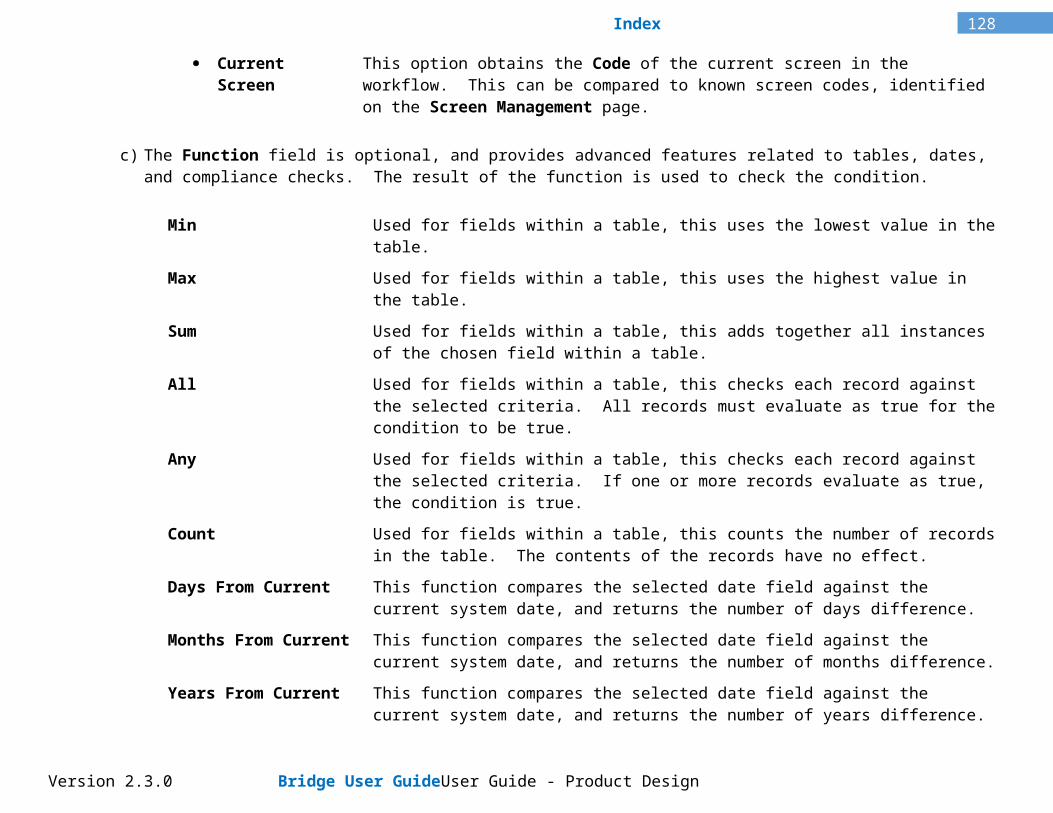
128Index
A table can be added to the email template to pull in all entries from a grid, displaying all chosen fields for the first entry, then the second entry, and so on.
The table must be contained within the [[TABLESTART]] and [[TABLEEND]] markers (they are case sensitive). It displays all text between the markers, replacing any placeholders with the appropriate values for that entry, then repeats the line for the next entry in the table.
When adding placeholders for fields within a grid, the System Reference for the grid must be identified along with the System Reference for the field as follows:
[[GridName_FieldName]]
For example, a grid with system reference RegionalPercentages has three fields. The system references for the first two fields are RegionName and Percentage. The third field is not included in the table. The table entry in the email template would appear as follows (markers and placeholders are marked in bold):
[[TABLESTART]]The percentage for region [[RegionalPercentages_RegionName]] is [[RegionalPercentages_Percentage]]%.[[TABLEEND]]
When the email is generated, the table appear as follows (data pulled from the grid is marked in bold):
The percentage for region North America is 40%.
The percentage for region South America is 48%.
The percentage for region Europe is 54%.
Since the third field in the table is not included in the table setup, it is ignored when the table is generated.
Triggers
Triggers can be used to define sections of the email that are only included if certain conditions are met.
The trigger markers [[OW_DOCUMENTTRIGGER_START]] and [[OW_DOCUMENTTRIGGER_END]] are used to mark the beginning and end of the conditional text. After the start marker, the trigger is identified with a standard placeholder containing the name of the trigger, such as [[My Trigger]].
Between the trigger placeholder and the end marker, place all of the text that depends on the trigger.
Version 2.3.0 Bridge User Guide User Guide - Product Design

129Index
For example, to add a section to the email that lists special instructions based on two triggers, the following lines could be added (markers and placeholders are marked in bold):
Special Conditions:
[[OW_DOCUMENTTRIGGER_START]][[Premium Client]]This is a premium client. Escalate all issues for immediate attention.[[OW_DOCUMENTTRIGGER_END]][[OW_DOCUMENTTRIGGER_START]][[High-Value Coverage]]This coverage falls under the High-Value regulations.[[OW_DOCUMENTTRIGGER_END]]
If the Premium Client trigger evaluates as true, but the High-Value Coverage trigger evaluates as false, the following is included in the email:
Special Conditions:
This is a premium client. Escalate all issues for immediate attention.
Tip: All spacing and line breaks included within the trigger markers are included or excluded based on the triggers. Care should be taken to place text properly in order to maintain the layout of the document.
Version 2.3.0 Bridge User Guide User Guide - Product Design

130Index
Appendix B - Advanced Trigger Design
While the basic setup of triggers can be very useful, they do not take advantage of the full capabilities of the trigger system.
Advanced setups can include triggers within triggers to blend And/Or logic (referred to as “Nested Triggers”), entire pages can be evaluated for any number of conditions, cascading and branching triggers can make complex decisions, all automatically.
Combining triggers and calculated fields opens a world of possibilities, where multiple fields can be run through formulas and functions, with the results being used in multi-stage trigger structures.
Mixing And and Or
While a single trigger can have multiple conditions, with all conditions using the same conjunction (And/Or), some situations require a combination of the two. By creating separate triggers for each group of conditions using the same conjunction, then joining the triggers together in a higher level trigger, a precise set of conditions can be identified.
For example, there are four checkboxes, valued at 1, 2, 4, and 8. A trigger is needed to determine if the combined value of the checked boxes is more than 10. There are multiple solutions for this problem, one of which is detailed below.
The logical formula appears as follows:(Box 8 and (Box 4 or (Box 2 and Box 1)))
Since each trigger needs to be referenced in the trigger above it, we begin with the lowest level, represented in Blue above.
The second level, represented in Green above, can now refer to the third-level trigger.
Version 2.3.0 Bridge User Guide User Guide - Product Design

131Index
The top level, represented in Red above, can now be created to complete the structure.
When the top trigger is used anywhere in the system, the system evaluates the conditions and triggers from the top-down until it has a conclusion.
Version 2.3.0 Bridge User Guide User Guide - Product Design

132Index
Index
AAdditional Resources 88Appendix A - E-mail Syntax 121Appendix B - Advanced Trigger Design 124CCopying a Field 40Creating a New Clause 89Creating a New Email Template 103Creating a New Field 27Creating a New Integration Configuration 67Creating a New Option List 19Creating a New Panel 43Creating a New Premium Type 7Creating a New Product 2Creating a New Screen 60Creating a New Trigger 94Creating a New Workflow 75DDeactivating a Clause 92Deactivating a Configuration 74Deactivating a Document Template 111Deactivating a Field 41Deactivating a Lookup Table 17Deactivating a Panel 58Deactivating a Premium Type 10Deactivating a Product 5Deactivating a Screen 66Deactivating a Trigger 101Deactivating a Workflow 85Deactivating an Email Template 106Deactivating an Option List 25Deleting a Lookup Table Version 18Download Word Ribbon 118
Version 2.3.0 Bridge User Guide User Guide - Product Design

133Index
EExport 113Export / Import 113GGuide 1IImport 115Integration Configurations 67Introduction 1LLookup Tables 11MManaging Clauses 89Managing Document Templates 108Managing Email Templates 103Managing Fields 27Managing Panels 43Managing Screens 60Managing Triggers 94Managing Workflows 75Master Covers 120Mixing And and Or 124OOption Lists 19PPremium Types 7Preparing the Lookup File 11Products 2Publishing a Workflow 84RReference 121SSetting Default Values for Rich Text Fields 37TTables 121Triggers 122UUploading a New Document Template 108
Version 2.3.0 Bridge User Guide User Guide - Product Design
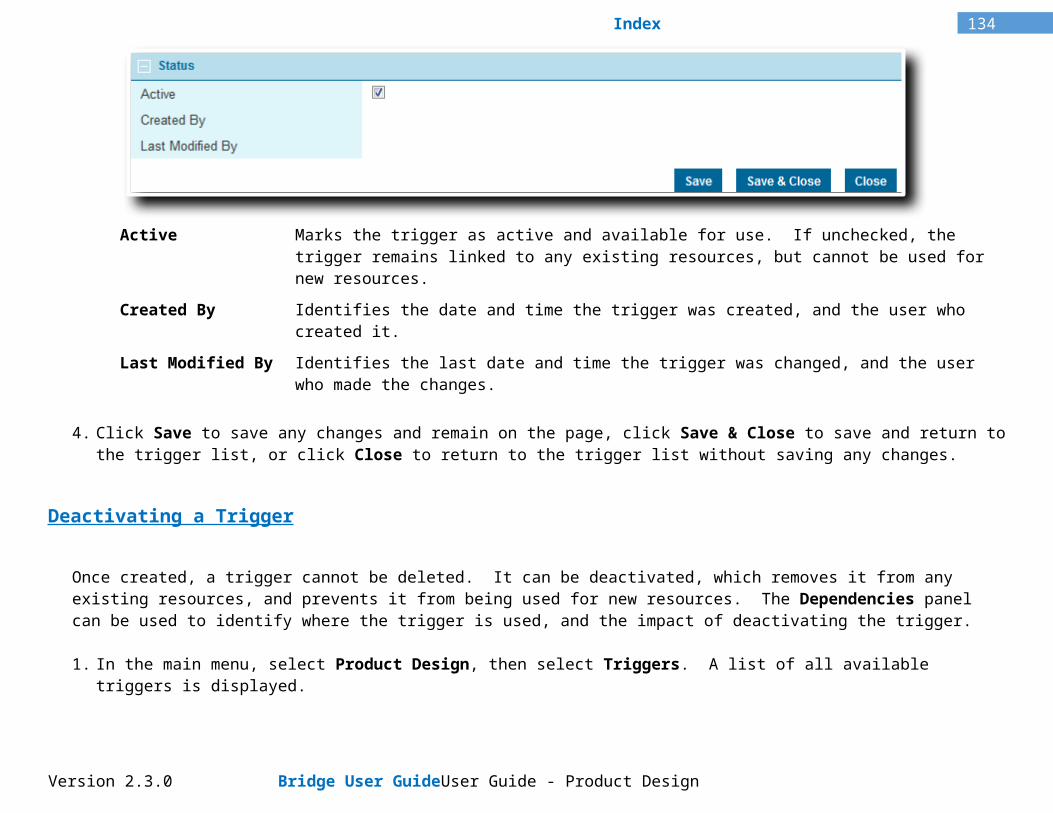
134Index
Uploading Lookup Tables 12VViewing and Modifying a Clause 91Viewing and Modifying a Configuration 73Viewing and Modifying a Document Template 110Viewing and Modifying a Field 38Viewing and Modifying a Panel 57Viewing and Modifying a Premium Type 9Viewing and Modifying a Product 4Viewing and Modifying a Screen 65Viewing and Modifying a Trigger 99Viewing and Modifying a Workflow 83Viewing and Modifying an Email Template 105Viewing and Modifying an Option List 23Viewing and Modifying Lookup Tables and Versions 16WWorkflow and System Placeholders 121Workflow Configurations 26Workflow Report 87
Version 2.3.0 Bridge User Guide User Guide - Product Design

Copyright Notice
Copyright © 1998 - 2014 Oceanwide Inc. All Rights Reserved.
All material in this document and on this website are protected by copyright and intellectual property laws and are the property of Oceanwide Inc. ®™
No part of this document may be reproduced, stored in a retrieval system, or transmitted by any means, electronic, mechanical, photocopying, recording or otherwise, without prior written permission from the owner Oceanwide Inc.®™ Printed and published in Montreal, Quebec CANADA.
Trademarks
All trademarks, registered trademarks and service marks in this document are exclusive to Oceanwide Inc. ®™.
Disclaimer
The publisher Oceanwide Inc. ®™ and authors specifically disclaim any responsibility for any liability, loss, or risk; whether corporate, personal or otherwise in whole or in part of which; is incurred as a consequence directly or indirectly of the application use; or reliance on or any of the contents of this document (documentation).