Embed Size (px)
Citation preview

HTML 1
TUTORIAL 1OBJECTIVES
Session 1.1• Explore the history of the
Internet, the Web, and HTML• Compare the different versions
of HTML• Study the syntax of HTML tags
and attributes• Defi ne a Web page head,
body, and title• Work with the HTML5
structural elements
Session 1.2• Mark page headings,
paragraphs, block quotes, and addresses
• Create unordered and ordered lists
• Apply an external style sheet to a Web page
• Run a JavaScript program• Mark text-level elements
including strong and emphasized text
• Insert inline images and line breaks
• Insert special characters from extended character sets
TUTORIAL 1Getting Started with HTML5Creating a Product Page for a Small Business
Case | The J-Prop ShopDave Vinet owns a small business called the J-Prop Shop that builds and sells circus props and equipment. Dave is looking to expand his business and his visibility by upgrading his Web site. Dave has already written the text for the Web site’s home page and has gener-ated some of the graphic images for it. He has come to you for help in designing a Web page and writing the code. Dave hopes to build on his Web page in the future as his business expands, so he would like you to write code that takes advantage of the latest Web stan-dards, including HTML5. Your job will be to create a sample home page that Dave can use as a foundation for his new Web site.
STARTING DATA FILES
tutorial.01 tutorial
jpslogo.pngjpsstyles.cssmodernizr-1.5.js
review
basiclogo.pngbasicstick.pngbasicstyles.cssstick.txtmodernizr-1.5.js
case1
mhlogo.jpgmhstyles.cssmhtxt.htmmodernizr-1.5.js
dessertstyles.cssdessertweb.jpgmodernizr-1.5.jstorte.jpgtortetxt.htm
case3
case2
macbeth.jpgmacbethtxt.htmmacstyles.cssmodernizr-1.5.js
logo.jpgsmith.jpgsmith.txt
case4
cengage.jpgdemo.gifdemo_characters.htmdemo_html.htmdemo2.gifmodernizr-1.5.js
demo
A_C7929_01.4c.indd 1A_C7929_01.4c.indd 1 2/8/11 8:24 AM2/8/11 8:24 AMA_C7844_Gloss_01-16.4c.indd 16 10/21/11 12:42 PM
Copyright 2012 Cengage Learning. All Rights Reserved. May not be copied, scanned, or duplicated, in whole or in part. Due to electronic rights, some third party content may be suppressed from the eBook and/or eChapter(s). Editorial review has deemed that any suppressed content does not materially affect the overall learning experience. Cengage Learning reserves the right to remove additional content at any time if subsequent rights restrictions require it.

HTML 2 HTML and CSS | Tutorial 1 Getting Started with HTML5
SESSION 1.1 VISUAL OVERVIEW
Structure of an HTML file
The head element provides information and instructions to the browser about the document.
The section element marks a major section of the Web page.
The doctype statement indicates the markup language of the document.
The article element contains content about a specific area of interest.
HTML structural elements define the basic structure of the contents of the Web page.
The contents of the title element appear in the browser title bar.
The body element contains the content of the page body.
HTML comments document the HTML code.
Resulting Web page
A_C7929_01.4c.indd 2A_C7929_01.4c.indd 2 2/8/11 8:24 AM2/8/11 8:24 AMA_C7844_Gloss_01-16.4c.indd 16 10/21/11 12:42 PM
Copyright 2012 Cengage Learning. All Rights Reserved. May not be copied, scanned, or duplicated, in whole or in part. Due to electronic rights, some third party content may be suppressed from the eBook and/or eChapter(s). Editorial review has deemed that any suppressed content does not materially affect the overall learning experience. Cengage Learning reserves the right to remove additional content at any time if subsequent rights restrictions require it.

HTML 3Tutorial 1 Getting Started with HTML5 | HTML and CSS
One-sided tags mark elements that contain no textual content
Two-sided tags mark elements that contain textual content or other elements
The header element contains an introduction to the page.
opening tag element content
closing tag
The footer element contains address and summary information.
The aside element contains extra content on the page.
Markup Tags
Document elements are marked using tags.
Resulting Web page
THE STRUCTURE OF AN HTML5 DOCUMENT
A_C7929_01.4c.indd 3A_C7929_01.4c.indd 3 2/8/11 8:24 AM2/8/11 8:24 AMA_C7844_Gloss_01-16.4c.indd 16 10/21/11 12:42 PM
Copyright 2012 Cengage Learning. All Rights Reserved. May not be copied, scanned, or duplicated, in whole or in part. Due to electronic rights, some third party content may be suppressed from the eBook and/or eChapter(s). Editorial review has deemed that any suppressed content does not materially affect the overall learning experience. Cengage Learning reserves the right to remove additional content at any time if subsequent rights restrictions require it.

HTML 4 HTML and CSS | Tutorial 1 Getting Started with HTML5
Exploring the History of the World Wide WebBefore you start creating a Web page for Dave, it will be helpful to fi rst look at the his-tory of the Web and the development of HTML. You’ll start by reviewing networks and learn how they led to the creation of the World Wide Web.
NetworksA network is a structure that allows devices known as nodes or hosts to be linked together to share information and services. Hosts can include devices such as comput-ers, printers, and scanners because they are all capable of sending and receiving data electronically over a network.
A host that provides information or a service is called a server. For example, a print server is a network host that provides printing services to the network; a fi le server is a host that provides storage space for saving and retrieving fi les. A computer or other device that receives a service is called a client. Networks can follow several different designs based on the relationship between the servers and the clients. One of the most commonly used designs is the client-server network in which several clients access information provided by one or more servers. You might be using such a network to access your data fi les for this tutorial.
Networks can also be classifi ed based on the range they cover. A network confi ned to a small geographic area, such as within a building or department, is referred to as a local area network or LAN. A network that covers a wider area, such as several buildings or cities, is called a wide area network or WAN. Wide area networks typically consist of two or more interconnected local area networks.
The largest WAN in existence is the Internet, which incorporates an almost uncount-able number of networks and hosts involving computers, mobile phones, PDAs, MP3 players, gaming systems, and television stations. Like many business owners, Dave uses the Internet to advertise his business to potential customers.
Locating Information on a NetworkOne of the biggest obstacles to effectively using the Internet is the network’s sheer scope and size. Most of the early Internet tools required users to master a bewildering array of terms, acronyms, and commands. Because network users had to be well versed in com-puters and network technology, Internet use was limited to universities and the govern-ment. To make the Internet accessible to the general public, it needed to be easier to use. The solution turned out to be the World Wide Web.
The foundations for the World Wide Web, or the Web for short, were laid in 1989 by Timothy Berners-Lee and other researchers at the CERN nuclear research facility near Geneva, Switzerland. They needed an information system that would make it easy for their researchers to locate and share data on the CERN network with minimal training and support. To meet this need, they developed a system of hypertext documents that enabled users to easily navigate from one topic to another. Hypertext is a method of organization in which data sources are interconnected through a series of links or hyper-links that users can activate to jump from one piece of information to another. Hypertext is ideally suited for the Internet because end users do not need to know where a particu-lar document, information source, or service is located—they need to know only how to activate the link. The fact that the Internet and the World Wide Web are synonymous in many users’ minds is a testament to the success of the hypertext approach.
A_C7929_01.4c.indd 4A_C7929_01.4c.indd 4 2/8/11 8:24 AM2/8/11 8:24 AMA_C7844_Gloss_01-16.4c.indd 16 10/21/11 12:42 PM
Copyright 2012 Cengage Learning. All Rights Reserved. May not be copied, scanned, or duplicated, in whole or in part. Due to electronic rights, some third party content may be suppressed from the eBook and/or eChapter(s). Editorial review has deemed that any suppressed content does not materially affect the overall learning experience. Cengage Learning reserves the right to remove additional content at any time if subsequent rights restrictions require it.

HTML 5Tutorial 1 Getting Started with HTML5 | HTML and CSS
Web Pages and Web ServersEach document on the World Wide Web is referred to as a Web page and is stored on a Web server. When you access a Web page, a Web browser retrieves the page from its Web server and renders it on your computer or other device.
The earliest browsers, known as text-based browsers, were limited to displaying only text. Today’s browsers are capable of handling text, images, audio, video, and interac-tive programs. In the early days of the Internet, Web browsing was limited to computers. Now browsers are installed on devices such as mobile phones, cars, handheld media devices, and gaming systems, to name only a few. How does a Web page work with so many combinations of browsers and devices? To understand, you need to look at how Web pages are created.
Introducing HTMLWeb pages are text fi les written in Hypertext Markup Language (HTML). We’ve already discussed hypertext, but what is a markup language? A markup language is a language that describes the content and structure of a document by identifying, or tagging, dif-ferent elements in the document. For example, this tutorial contains paragraphs, fi gure captions, page headings, and so forth; each of these items could be tagged as a distinct element using a markup language. Thus, HTML is a markup language that supports both hypertext and the tagging of distinct document elements.
The History of HTMLHTML evolved as the Web itself evolved. Thus, in order to fully appreciate the nuances of HTML, it’s a good idea to review the language’s history. The fi rst popular markup language was the Standard Generalized Markup Language (SGML). Introduced in the 1980s, SGML is device- and system-independent, meaning that it can be applied to almost any type of document stored in almost any format. While powerful, SGML is also quite complex; for this reason, SGML is limited to those organizations that can afford the cost and overhead of maintaining complex SGML environments. However, SGML can also be used to create other markup languages that are tailored to specifi c tasks and are simpler to use and maintain. HTML is one of the languages created with SGML.
In the early years after HTML was created, no single organization was responsible for the language. Web developers were free to defi ne and modify HTML in whatever ways they thought best. This led to incompatibilities between the various browsers and, as a result, Web page authors faced the challenge of writing HTML code that would satisfy different browsers and browser versions.
Ultimately, a group of Web designers and programmers called the World Wide Web Consortium, or the W3C, created a set of standards or specifi cations for all browser manufacturers to follow. The W3C has no enforcement power; but because using a uniform language is in everyone’s best interest, the W3C’s recommendations are usually followed, though not always immediately. For more information on the W3C and the services it offers, see its Web site at www.w3.org.
As HTML evolves, earlier features of the language are often deprecated, or phased out. While deprecated features might not be part of the current specifi cation for HTML, that doesn’t mean that you won’t encounter them in your work—indeed, if you are maintaining older Web sites, you will often need to be able to interpret code from earlier versions of HTML.
A_C7929_01.4c.indd 5A_C7929_01.4c.indd 5 2/8/11 8:24 AM2/8/11 8:24 AMA_C7844_Gloss_01-16.4c.indd 16 10/21/11 12:42 PM
Copyright 2012 Cengage Learning. All Rights Reserved. May not be copied, scanned, or duplicated, in whole or in part. Due to electronic rights, some third party content may be suppressed from the eBook and/or eChapter(s). Editorial review has deemed that any suppressed content does not materially affect the overall learning experience. Cengage Learning reserves the right to remove additional content at any time if subsequent rights restrictions require it.

HTML 6 HTML and CSS | Tutorial 1 Getting Started with HTML5
XHTML and the Development of HTML5Near the end of the 1990s, the W3C released the fi nal specifi cations for the 4th ver-sion of HTML, called HTML 4, and began charting a course for the next version. The path chosen by the W3C was to reformulate HTML in terms of XML. XML (Extensible Markup Language) is a compact offshoot of SGML and is used to defi ne new markup languages, known as XML vocabularies. A document based on an XML vocabulary is forced to obey specifi c rules for content and structure to avoid being rejected as invalid. By contrast, HTML allows for a wide variety in syntax between one HTML document and another. Another important aspect of XML is that several XML vocabularies can be combined within a single document, making it easier to extend XML into different areas of application.
The W3C developed an XML vocabulary that was a stricter version of HTML4, known as XHTML (Extensible Hypertext Markup Language). XHTML was designed to confront some of the problems associated with the various competing versions of HTML and to better integrate HTML with other markup languages. Because XHTML was an XML ver-sion of HTML, most of what Web designers used with HTML could be applied to XHTML with only a few modifi cations, and many tools and features associated with XML could be easily applied to XHTML.
By 2002, the W3C had released the specifi cations for XHTML 1.1. This version was intended to be only a minor upgrade on the way to XHTML 2.0, which would contain a set of XML vocabularies moving HTML into the future with robust support for mul-timedia, social networking, interactive Web forms, and other features needed by Web designers. One problem was that XHTML 2.0 would not be backward compatible with earlier versions of HTML and thus older Web sites could not be easily integrated with the proposed new standard.
Web designers rebelled at this development. In 2004, Ian Hickson, who was work-ing for Opera Software at the time, proposed a different path. Hickson’s proposal would have allowed for the creation of new Web applications while still maintaining backward compatibility with HTML 4. He argued that HTML was whatever the browser market determined it to be, and that trying to enforce a new specifi cation that did not accommo-date the needs and limitations of the market was a fruitless exercise.
Hickson’s proposal was rejected by the W3C and, in response, a new group of Web designers and browser manufacturers formed the Web Hypertext Application Technology Working Group (WHATWG) with the mission to develop a rival version to XHTML 2.0, called HTML5. For several years, it was unclear which specifi cation would represent the future of the Web; but by 2006, work on XHTML 2.0 had completely stalled. The W3C issued a new charter for an HTML Working Group to develop HTML5 as the next HTML specifi cation. Work on XHTML 2.0 was halted in 2009, leaving HTML5 as the de facto standard for the next generation of HTML.
A_C7929_01.4c.indd 6A_C7929_01.4c.indd 6 2/8/11 8:24 AM2/8/11 8:24 AMA_C7844_Gloss_01-16.4c.indd 16 10/21/11 12:42 PM
Copyright 2012 Cengage Learning. All Rights Reserved. May not be copied, scanned, or duplicated, in whole or in part. Due to electronic rights, some third party content may be suppressed from the eBook and/or eChapter(s). Editorial review has deemed that any suppressed content does not materially affect the overall learning experience. Cengage Learning reserves the right to remove additional content at any time if subsequent rights restrictions require it.

HTML 7Tutorial 1 Getting Started with HTML5 | HTML and CSS
Version Date DescriptionHTML1.0 1989 The first public version of HTML.
HTML 2.0 1995 Added interactive elements including Web forms.
HTML 3.0 1996 A proposed replacement for HTML 2.0 that was never widely adopted.
HTML 3.2 1997 Included additional support for Web tables and expanded the options for interactive form elements and a scripting language.
HTML 4.01 1999 Added support for style sheets to give Web designers greater control over page layout and appearance, and provided support for multi-media elements such as audio and video. Current browsers support almost all of HTML 4.01.
XHTML 1.0 2001 A reformulation of HTML 4.01 in the XML language in order to pro-vide enforceable standards for HTML content and to allow HTML to interact with other XML languages.
XHTML 1.1 2002 A minor update to XHTML 1.0 that allows for modularity and simpli-fies writing extensions to the language.
XHTML 2.0 discontinued The follow-up version to XHTML 1.1 designed to fix some of the prob-lems inherent in HTML 4.01 syntax. Work on this version was discon-tinued in 2009 due to lack of browser support.
HTML 5.0 In development An update to HTML 4.01 that provides support for a variety of new features including semantic page elements, column layout, form vali-dation, offline storage, and enhanced multimedia.
XHTML 5.0 In development A version of HTML 5.0 written under the XML language; unlike XHTML 2.0, XHTML 5.0 will be backward compatible with XHTML 1.1.
Figure 1-1 Versions of HTML
Figure 1-1 summarizes the various versions of HTML that have been developed over the past 20 years. You may be wondering how on Earth anything can be written with so many versions of HTML to consider. At the time of this writing, you can write your code following the standards of HTML 4.01 or XHTML 1.1 and be assured that it will be sup-ported by all major browsers. Many features of HTML5 are also being rapidly adopted by the market even as work continues on developing the language. HTML5 is the future, but the challenges for Web designers today lie in knowing which parts of HTML5 are supported by which browsers, and in developing strategies for supporting older browsers even as HTML5 is being implemented.
In this book you’ll use HTML5 code for those features that have already achieved sup-port among current browsers, but you’ll also learn the standards used for HTML 4.01 and XHTML 1.1 and practice writing code that will support both current and older browsers.
HTML and Style SheetsHTML marks the different parts of a document, but it does not indicate how document content should be displayed by browsers. This is a necessary facet of HTML because a Web page author has no control over what device will actually view his or her docu-ment. An end user might be using a large-screen television monitor, a mobile phone, or even a device that renders Web pages in Braille or in aural speech.
For this reason, the exact appearance of each page element is described in a sepa-rate document known as a style sheet. Each browser has its own internal style sheet that specifi es the appearance of different HTML elements. For example, content that is marked as containing the text of an address is rendered by most Web browsers in italic, while major headings usually appear in large bold-faced fonts.
A_C7929_01.4c.indd 7A_C7929_01.4c.indd 7 2/8/11 8:24 AM2/8/11 8:24 AMA_C7844_Gloss_01-16.4c.indd 16 10/21/11 12:42 PM
Copyright 2012 Cengage Learning. All Rights Reserved. May not be copied, scanned, or duplicated, in whole or in part. Due to electronic rights, some third party content may be suppressed from the eBook and/or eChapter(s). Editorial review has deemed that any suppressed content does not materially affect the overall learning experience. Cengage Learning reserves the right to remove additional content at any time if subsequent rights restrictions require it.

HTML 8 HTML and CSS | Tutorial 1 Getting Started with HTML5
A Web page author can also create a style sheet that takes precedence over the internal style sheets of browsers. In addition, an author can create multiple style sheets for different output devices: one for rendering a page on a computer screen, another for printed output, and another for rendering the page aurally. In each case, the markup of the document content is the same, but the presentation is determined by the style sheet.
Tools for Creating HTML DocumentsBecause HTML documents are simple text fi les, you can create them using nothing more than a basic text editor such as Windows Notepad. Other software programs that enable you to create documents in different formats, such as Microsoft Word or Adobe Acrobat, include tools to convert their documents into HTML for quick and easy pub-lishing on the Web.
If you intend to create a large Web site incorporating dozens of Web pages, you should invest in specialized Web publishing software to manage all of the code and extended features of your site. Programs such as Adobe Dreamweaver and Microsoft Expression Web are among the leaders in this fi eld.
Since this book is focused on the HTML language itself and not how to work with dif-ferent software programs, you’ll need nothing more than a text editor and a Web browser to complete the assignments that follow.
Entering Elements and AttributesNow that you’ve had a chance to review a brief history of the Web and the role of HTML in its development, you are ready to write your fi rst HTML document for the J-Prop Shop. You’ll start by studying the rules for entering HTML code.
Introducing HTML TagsAn HTML document is composed of elements that represent distinct items in the Web page, such as a paragraph, the page heading, or even the entire body of the page itself. Each element is marked within the HTML fi le by one or more tags. If an element con-tains text or another element, it is marked using a two-sided tag set in which an opening tag and a closing tag enclose the element content. The syntax of a two-sided tag set is
<element>content</element>
where element is the name of the element and content is the content of the element. For example, the following code marks a paragraph using a two-sided tag set:
<p>Welcome to the J-Prop Shop.</p>
In this example, the <p> tag marks the beginning of the paragraph, the text Welcome to the J-Prop Shop. is the content of the paragraph element, and the </p> tag marks the end of the paragraph. Elements can also contain other elements. For example, in the code
<p>Welcome to <em>Dave's Devil Sticks</em>.</p>
the paragraph tags enclose both the text of the paragraph and the tag set <em> ... </em>, which is used to mark content that should be treated by the browser as emphasized text. Note that the <em> tag set must be completely enclosed, or nested, within the <p> tags. It’s improper to have tags overlap as in the following code sample:
<p>Welcome to <em>Dave's Devil Sticks.</p></em>
In this example, the closing </em> tag is placed after the closing </p> tag, which is improper because one element must be completely contained within another.
A_C7929_01.4c.indd 8A_C7929_01.4c.indd 8 2/8/11 8:24 AM2/8/11 8:24 AMA_C7844_Gloss_01-16.4c.indd 16 10/21/11 12:42 PM
Copyright 2012 Cengage Learning. All Rights Reserved. May not be copied, scanned, or duplicated, in whole or in part. Due to electronic rights, some third party content may be suppressed from the eBook and/or eChapter(s). Editorial review has deemed that any suppressed content does not materially affect the overall learning experience. Cengage Learning reserves the right to remove additional content at any time if subsequent rights restrictions require it.

HTML 9Tutorial 1 Getting Started with HTML5 | HTML and CSS
An element that does not enclose content is an empty element and it is marked with a one-sided tag using the syntax
<element />
where element is the name of the element. For example, you can mark a line break using the br element, which has the following syntax:
<br />
Since empty elements don’t contain content, they’re often employed to send directives to browsers regarding how a page should be rendered. A browser encountering the br element would insert a line break, causing the text of the next element in the document to be placed on a new line.
Specifying an Element AttributeIn addition to content, elements also support attributes that specify the use, the behavior, and in some cases the appearance of an element. Attribute values don’t appear in the rendered Web page; rather, they provide information to the browser about the properties of the element.
To add an attribute to an element, you insert the attribute within the element’s open-ing tag. For a two-sided tag, the syntax is:
<element attribute1=”value1” attribute2=”value2” ...> content</element>
Attributes are added to one-sided tags in the same way:
<element attribute1=”value1” attribute2=”value2” ... />
In these examples, attribute1, attribute2, etc. are the names of attributes associ-ated with the element, and value1, value2, etc. are the values of those attributes. For instance, the following code adds the id attribute to a paragraph marked with the p element:
<p id=”opening”>Welcome to the J-Prop Shop.</p>
A browser interpreting this code would recognize that the text Welcome to the J-Prop Shop. should be treated as a paragraph and given the id value opening.
Attributes can be listed in any order, but they must be separated from one another by a blank space and enclosed within single or double quotation marks.
RE
FER
EN
CE
Adding an Attribute to an Element• To add an element attribute, use the format
<element attribute1=”value1” ƒƒƒƒƒƒƒƒƒattribute2=”value2” ...>content</element>
where attribute1, attribute2, etc. are the names of attributes associated with the element, and value1, value2, etc. are the values of those attributes.
White Space and HTMLSince an HTML fi le is a text fi le, it’s composed of text characters and white space. White space includes the blank spaces, tabs, and line breaks found within the fi le. As far as a browser is concerned, there is no difference between a blank space, a tab, or a line break. Browsers also ignore consecutive occurrences of white space, collapsing extra
A_C7929_01.4c.indd 9A_C7929_01.4c.indd 9 2/8/11 8:24 AM2/8/11 8:24 AMA_C7844_Gloss_01-16.4c.indd 16 10/21/11 12:42 PM
Copyright 2012 Cengage Learning. All Rights Reserved. May not be copied, scanned, or duplicated, in whole or in part. Due to electronic rights, some third party content may be suppressed from the eBook and/or eChapter(s). Editorial review has deemed that any suppressed content does not materially affect the overall learning experience. Cengage Learning reserves the right to remove additional content at any time if subsequent rights restrictions require it.

HTML 10 HTML and CSS | Tutorial 1 Getting Started with HTML5
white space characters into a single blank space. Thus, browsers treat the following para-graph elements in the same way:
<p>Welcome to the J-Prop Shop.</p>
<p> Welcome to the J-Prop Shop.</p>
<p>Welcometo the J-Prop Shop.</p>
<p>Welcome to the J-Prop Shop.</p>
Because HTML handles white space in this way, you can make your code easier for others to read by indenting lines and adding extra blank lines to separate one tag from another in the fi le.
INSI
GH
T
HTML5 and XHTML SyntaxThe rules that govern how code should be entered are called syntax. The way that HTML has been implemented by most browsers through the Web’s history has allowed for minor variations in syntax. One reason for the success of the Web is that HTML has made it easy for non-programmers to write and edit code without being ensnarled by syntax violations.
On the other hand, XHTML forces strict syntax on page authors. If an author’s code does not follow the rules, browsers do not render the page. One advantage of this approach is that it forces authors to write clear and more concise code; indeed, one of the driving forces behind the development of XHTML was the desire to clean up some of the messy and inconsistent code found on the Web.
For example, XHTML requires that all tag names be placed in lowercase letters and that all attribute values be enclosed within quotation marks. HTML allows either upper-case or lowercase tag names and does not require attribute values to be quoted. In addition, XHTML requires that every one-sided tag be entered with a closing slash: for instance, the br element must be entered as <br /> for XHTML compatibility. Most browsers, however, accept HTML code in which one-sided tags are entered without clos-ing slashes; thus, the br element could be entered either as <br> or as <br />.
HTML5 supports the informal standards accepted by most browsers and will continue to allow for minor variations in syntax. However, it is still good practice to write all code to be XHTML compliant whenever possible, since it will allow that code to be easily transferred to XHTML environments if necessary.
Exploring the Structure of an HTML DocumentThe structure of an HTML document consists of different elements nested within each other in a hierarchy of elements. The top element in that hierarchy is the html element, which contains all of the other elements within an HTML fi le. Directly below the html element in the hierarchy are the head and body elements. The head element contains general information about the document—for example, the document’s title, or a list of
A_C7929_01.4c.indd 10A_C7929_01.4c.indd 10 2/8/11 8:24 AM2/8/11 8:24 AMA_C7844_Gloss_01-16.4c.indd 16 10/21/11 12:42 PM
Copyright 2012 Cengage Learning. All Rights Reserved. May not be copied, scanned, or duplicated, in whole or in part. Due to electronic rights, some third party content may be suppressed from the eBook and/or eChapter(s). Editorial review has deemed that any suppressed content does not materially affect the overall learning experience. Cengage Learning reserves the right to remove additional content at any time if subsequent rights restrictions require it.

HTML 11Tutorial 1 Getting Started with HTML5 | HTML and CSS
keywords that would aid search engines in directing interested users to the page. The body element contains all of the content that appears in the rendered Web page. Thus, the general structure of an HTML fi le is
<html> <head> head content </head> <body> body content </body></html>
where head content and body content are the content you want to place within the document’s head and body. Note that the body element is always placed after the head element.
The Document Type DeclarationPrior to the opening <html> tag, many HTML fi les also include a Document Type Declaration, or doctype, to indicate the type of markup language used in the document. The doctype is used by validators, which are programs that examine document code to ensure that it meets all the syntax requirements of the specifi ed language. All XHTML fi les require a doctype because those documents must be validated against a set of standards.
Most current browsers also use the presence or absence of a doctype to decide which mode they should use to render a document in a process known as doctype switching. If a doctype is included, such browsers render the Web page in standards mode, in accor-dance with the most current specifi cations of the language. If no doctype is provided, these browsers render the document in quirks mode based on practices followed in the 1990s. The differences can be striking. Figure 1-2 shows an example of two documents rendered by Internet Explorer under standards mode and quirks mode. The only differ-ence in the code between these two documents is the presence or absence of a doctype, but the browser renders the two documents very differently.
Standards mode Quirks mode
Figure 1-2 A Web page rendered in standards mode and quirks mode
Different HTML versions have different doctypes. The doctype for HTML 4.01 is:
<!DOCTYPE HTML PUBLIC “-//W3C//DTD HTML 4.01/EN” ƒƒ“http://www.w3.org/TR/html4/strict.dtd”>
A_C7929_01.4c.indd 11A_C7929_01.4c.indd 11 2/8/11 8:24 AM2/8/11 8:24 AMA_C7844_Gloss_01-16.4c.indd 16 10/21/11 12:42 PM
Copyright 2012 Cengage Learning. All Rights Reserved. May not be copied, scanned, or duplicated, in whole or in part. Due to electronic rights, some third party content may be suppressed from the eBook and/or eChapter(s). Editorial review has deemed that any suppressed content does not materially affect the overall learning experience. Cengage Learning reserves the right to remove additional content at any time if subsequent rights restrictions require it.

HTML 12 HTML and CSS | Tutorial 1 Getting Started with HTML5
The doctype for XHTML is:
<!DOCTYPE html PUBLIC “-//W3C//DTD XHTML 1.0 Strict//EN” “http://www.w3.org/TR/xhtml1/DTD/xhtml1-strict.dtd”>
Finally, the doctype for HTML5 is much simpler than what was required for HTML 4.01 or XHTML:
<!DOCTYPE html>
HTML5 documents should always be opened in standards mode because they are based on the latest specifi cations for the HTML language.
You can learn more about standards mode and quirks mode by searching the Web for examples of the differences between the two modes.
Creating the Initial DocumentNow that you’ve seen the basic structure of an HTML document, you are ready to begin creating the sample Web page for Dave’s Web site.
Unless you are work-ing with a legacy page that absolutely needs to be compatible with old browsers from the 1990s, you should always include a doctype and put your browser in standards mode.
RE
FER
EN
CE
Creating the Basic Structure of an HTML DocumentEnter the HTML tags
doctype<html> <head> head content </head> <body> body content </body></html>
where doctype is the Document Type Declaration, and head content and body content are the content of the document’s head and body.
You can start creating Dave’s Web page using a basic editor such as Windows Notepad. Since Dave wants his document to be based on HTML5, you’ll use the HTML5 doctype in your fi le.
To create the basic structure of an HTML document:◗ 1. Start your text editor, opening a blank text document.
Trouble? If you don’t know how to start or use your text editor, ask your instruc-tor or technical support person for help. Note that some editors do not save files in text file format by default, so check your editor’s documentation to ensure that you are creating a basic text document.
A_C7929_01.4c.indd 12A_C7929_01.4c.indd 12 2/8/11 8:24 AM2/8/11 8:24 AMA_C7844_Gloss_01-16.4c.indd 16 10/21/11 12:42 PM
Copyright 2012 Cengage Learning. All Rights Reserved. May not be copied, scanned, or duplicated, in whole or in part. Due to electronic rights, some third party content may be suppressed from the eBook and/or eChapter(s). Editorial review has deemed that any suppressed content does not materially affect the overall learning experience. Cengage Learning reserves the right to remove additional content at any time if subsequent rights restrictions require it.

HTML 13Tutorial 1 Getting Started with HTML5 | HTML and CSS
Now that you’ve entered the basic structure of your HTML fi le, you can start entering the content of the head element.
Marking the Head ElementIn general, the head element is where you provide browsers with information about your document. This can include the page’s title, the location of any style sheets used with the document, the location of any programs that browsers should run when they load the page, and information for use by search engines to aid users in locating the Web site.
Defi ning the Page TitleThe fi rst element you’ll add to the head of Dave’s document is the title element, which has the syntax
<title>document title</title>
where document title is the text of the document title. The document title is not dis-played within the page, but is usually displayed in a browser’s title bar or on a browser
◗ 2. Type the following lines of code in your document. Press the Enter key after each line. Press the Enter key twice for a blank line between lines of code. See Figure 1-3.
<!DOCTYPE html><html>
<head> </head>
<body> </body>
</html>
Make sure you include the exclamation point (!) within the doctype; oth-erwise, browsers will not recognize the doctype.
opening html tag
doctype indicates the type of document
closing html tag
doctype for HTML5 documents
head section contains information about the document
body section contains content to be displayed by Web browsers
Figure 1-3 Basic structure of an HTML fi le
◗ 3. Save the file as jprop.htm in the tutorial.01\tutorial folder included with your Data Files.
Trouble? If you are using the Windows Notepad text editor to create your HTML file, make sure you don’t save the file with the extension .txt, which is the default file extension for Notepad. Instead, save the file with the file extension .htm or .html. Using the incorrect file extension might make the file unreadable to Web browsers, which require file extensions of .htm or .html.
To make it easier to link to your Web pages, follow the Internet convention of naming HTML files and folders using only lowercase letters with no spaces.
A_C7929_01.4c.indd 13A_C7929_01.4c.indd 13 2/8/11 8:24 AM2/8/11 8:24 AMA_C7844_Gloss_01-16.4c.indd 16 10/21/11 12:42 PM
Copyright 2012 Cengage Learning. All Rights Reserved. May not be copied, scanned, or duplicated, in whole or in part. Due to electronic rights, some third party content may be suppressed from the eBook and/or eChapter(s). Editorial review has deemed that any suppressed content does not materially affect the overall learning experience. Cengage Learning reserves the right to remove additional content at any time if subsequent rights restrictions require it.

HTML 14 HTML and CSS | Tutorial 1 Getting Started with HTML5
Adding CommentsAs you write your HTML fi le, you can add notes or comments about your code. These comments might include the name of the document’s author and the date the document was created. Such notes are not intended to be displayed by browsers, but are instead used to help explain your code to yourself and others. To add notes or comments, insert a comment tag using the syntax
<!-- comment -->
where comment is the text of the comment or note. For example, the following code inserts a comment describing the page you’ll create for Dave’s business:
<!-- Sample page for the J-Prop Shop -->
A comment can also be spread out over several lines as follows:
<!-- Sample page for the J-Prop Shop. Created by Dave Vinet -->
Because they are ignored by the browser, comments can be added anywhere within the html element.
To add a title to your Web page:◗ 1. Click at the end of the opening <head> tag, and then press the Enter key to insert
a new line in your text editor.
◗ 2. Press the Spacebar several times to indent the new line of code, and then type <title>The J-Prop Shop</title> as shown in Figure 1-4.
Indent your markup tags and insert extra blank spaces as shown in this book to make your code easier to read. These indentations and spaces do not affect how the page is rendered by browsers.
text will appear in browser title bar or on browser tab
Figure 1-4 Specifying the page title
RE
FER
EN
CE
Adding an HTML CommentTo insert an HTML comment anywhere within your document, enter
<!-- comment -->
where comment is the text of the HTML comment.
You’ll add a comment to the jprop.htm fi le, identifying the author and purpose of this document.
tab. The document title is also used by search engines like Google or Yahoo! when com-piling an index of search results.
A_C7929_01.4c.indd 14A_C7929_01.4c.indd 14 2/8/11 8:24 AM2/8/11 8:24 AMA_C7844_Gloss_01-16.4c.indd 16 10/21/11 12:42 PM
Copyright 2012 Cengage Learning. All Rights Reserved. May not be copied, scanned, or duplicated, in whole or in part. Due to electronic rights, some third party content may be suppressed from the eBook and/or eChapter(s). Editorial review has deemed that any suppressed content does not materially affect the overall learning experience. Cengage Learning reserves the right to remove additional content at any time if subsequent rights restrictions require it.

HTML 15Tutorial 1 Getting Started with HTML5 | HTML and CSS
Displaying an HTML FileAs you continue modifying the HTML code, you should occasionally view the page with your Web browser to verify that you have not introduced any errors. You might even want to view the results using different browsers to check for compatibility. In this book, Web pages are displayed using the Windows Internet Explorer 9 browser. Be aware that if you are using a different browser or a different operating system, you might see slight differences in the layout and appearance of the page.
To add a comment to the document head:◗ 1. Click at the end of the opening <head> tag, and then press the Enter key to insert
a new line in your text editor directly above the opening <title> tag.
◗ 2. Type the following lines of code as shown in Figure 1-5:
<!-- The J-Prop Shop Sample Page Author: your name Date: the date-->
where your name is your name and the date is the current date.
multi-line comment describing the document
Figure 1-5 Adding comments to the HTML fi le
To view Dave’s Web page:◗ 1. Save your changes to the jprop.htm file.
◗ 2. Start your Web browser. You do not need to be connected to the Internet to view local files stored on your computer.
Trouble? If you start your browser and are not connected to the Internet, you might get a warning message. Click the OK button to ignore the message and continue.
◗ 3. After your browser loads its home page, open the jprop.htm file from the tutorial.01\tutorial folder.
Trouble? If you’re not sure how to open a local file with your browser, check for an Open or Open File command under the browser’s File menu. If you are still having problems accessing the jprop.htm file, talk to your instructor or technical resource person.
A_C7929_01.4c.indd 15A_C7929_01.4c.indd 15 2/8/11 8:24 AM2/8/11 8:24 AMA_C7844_Gloss_01-16.4c.indd 16 10/21/11 12:42 PM
Copyright 2012 Cengage Learning. All Rights Reserved. May not be copied, scanned, or duplicated, in whole or in part. Due to electronic rights, some third party content may be suppressed from the eBook and/or eChapter(s). Editorial review has deemed that any suppressed content does not materially affect the overall learning experience. Cengage Learning reserves the right to remove additional content at any time if subsequent rights restrictions require it.

HTML 16 HTML and CSS | Tutorial 1 Getting Started with HTML5
Your browser displays the Web page shown in Figure 1-6. Note that in this case, the page title appears in the browser tab; in other cases, it will appear in the browser’s title bar. The page itself is empty because you have not yet added any content to the body element.
no content appears in the page body
document title appears in the browser tab
Figure 1-6 Viewing the initial HTML fi le in a Web browserIN
SIG
HT
Converting an HTML Document into XHTMLThere is considerable overlap between HTML and XHTML. You can quickly change an HTML document into an XHTML document just by altering the first three lines of code. To convert an HTML file into an XHTML file, replace the doctype and the opening <html> tag with the following:
<?xml version=”1.0” encoding=”UTF-8” standalone=”no” ?><!DOCTYPE html PUBLIC “-//W3C//DTD XHTML 1.0 Strict//EN” “http://www.w3.org/TR/xhtml1/DTD/xhtml1-strict.dtd”><html xmlns=”http://www.w3.org/1999/xhtml”>
Since XHTML is an XML vocabulary, the first line notifies browsers that the document is an XML file. The version number—1.0—tells the browser that the file is written in XML 1.0. The second line provides the doctype for an XHTML document written under a strict interpretation of XHTML syntax. The third line of the file contains the opening <html> tag. In XHTML, the <html> tag must include what is known as a namespace declaration indicating that any markup tags in the document should, by default, be considered part of the XHTML language. Because XML documents can contain a mixture of several different vocabularies, the namespace declaration is necessary to specify the default language of the document. With these three lines in place, browsers will recog-nize the file as an XHTML document.
A_C7929_01.4c.indd 16A_C7929_01.4c.indd 16 2/8/11 8:24 AM2/8/11 8:24 AMA_C7844_Gloss_01-16.4c.indd 16 10/21/11 12:42 PM
Copyright 2012 Cengage Learning. All Rights Reserved. May not be copied, scanned, or duplicated, in whole or in part. Due to electronic rights, some third party content may be suppressed from the eBook and/or eChapter(s). Editorial review has deemed that any suppressed content does not materially affect the overall learning experience. Cengage Learning reserves the right to remove additional content at any time if subsequent rights restrictions require it.

HTML 17Tutorial 1 Getting Started with HTML5 | HTML and CSS
Defi ning the Structure of the Page BodyNow that you’ve marked the document head and inserted a page title, you’ll turn to the contents of the body of the Web page. It’s always a good idea to plan your Web page before you start coding it. You can do this by drawing a sketch or by creating a sample document within a word processor. Your preparatory work can weed out textual errors or point to potential problems in your page layout. In this case, Dave has already drawn up a fl yer that he’s passed out at juggling and circus conventions. Figure 1-7 shows the handout, which provides information about Dave’s company and his products.
Figure 1-7 Dave’s fl yer
Dave’s fl yer contains several elements that are common to many Web pages, as shown in Figure 1-8. A header displays the company’s logo and a footer displays contact information for the J-Prop Shop. The main section, which describes Dave’s business, includes several subsections, also known as articles. A second section that appears as a sidebar displays quotes from some J-Prop customers.
A_C7929_01.4c.indd 17A_C7929_01.4c.indd 17 2/8/11 8:24 AM2/8/11 8:24 AMA_C7844_Gloss_01-16.4c.indd 16 10/21/11 12:42 PM
Copyright 2012 Cengage Learning. All Rights Reserved. May not be copied, scanned, or duplicated, in whole or in part. Due to electronic rights, some third party content may be suppressed from the eBook and/or eChapter(s). Editorial review has deemed that any suppressed content does not materially affect the overall learning experience. Cengage Learning reserves the right to remove additional content at any time if subsequent rights restrictions require it.

HTML 18 HTML and CSS | Tutorial 1 Getting Started with HTML5
Working with HTML5 Structural ElementsEach of these parts of Dave’s document can be marked using HTML5 structural elements, which are the elements that defi ne the major sections of a Web page. Figure 1-9 describes some of these elements.
header
article
article
article
section
aside footer
Figure 1-8 Structure of Dave’s Web page
Figure 1-9 HTML5 structural elements
Structural Element Descriptionarticle A subsection covering a single topic
aside Content containing tangential or side issues to the main topic of the page
footer Content placed at the bottom of the page
header Content placed at the top of the page
nav A navigation list of hypertext links
section A major topical area in the page
A_C7929_01.4c.indd 18A_C7929_01.4c.indd 18 2/8/11 8:24 AM2/8/11 8:24 AMA_C7844_Gloss_01-16.4c.indd 16 10/21/11 12:42 PM
Copyright 2012 Cengage Learning. All Rights Reserved. May not be copied, scanned, or duplicated, in whole or in part. Due to electronic rights, some third party content may be suppressed from the eBook and/or eChapter(s). Editorial review has deemed that any suppressed content does not materially affect the overall learning experience. Cengage Learning reserves the right to remove additional content at any time if subsequent rights restrictions require it.

HTML 19Tutorial 1 Getting Started with HTML5 | HTML and CSS
For example, to mark the header of your Web page, you would enter a header ele-ment within the page body, using the syntax
<header> header content</header>
where header content is the page content that you want displayed within the page header. One of the reasons we want to defi ne these structural elements is that we can write styles for them and defi ne the layout of the Web page content.
RE
FER
EN
CE
Marking Structural Elements in HTML5• To mark the page header, use the header element.• To mark the page footer, use the footer element.• To mark a main section of page content, use the section element.• To mark a sidebar, use the aside element.• To mark an article, use the article element.
Based on Dave’s sample document shown in Figure 1-8, you’ll add the header, section, aside, and footer structural elements to your HTML fi le.
To insert the HTML5 structural elements:◗ 1. Return to the jprop.htm file in your text editor.
◗ 2. Within the body element, insert the following tags as shown in Figure 1-10:
<header></header>
<section></section>
<aside></aside>
<footer></footer>
A_C7929_01.4c.indd 19A_C7929_01.4c.indd 19 2/8/11 8:24 AM2/8/11 8:24 AMA_C7844_Gloss_01-16.4c.indd 16 10/21/11 12:42 PM
Copyright 2012 Cengage Learning. All Rights Reserved. May not be copied, scanned, or duplicated, in whole or in part. Due to electronic rights, some third party content may be suppressed from the eBook and/or eChapter(s). Editorial review has deemed that any suppressed content does not materially affect the overall learning experience. Cengage Learning reserves the right to remove additional content at any time if subsequent rights restrictions require it.

HTML 20 HTML and CSS | Tutorial 1 Getting Started with HTML5
Structural elements can also be nested within one another. In the structure of Dave’s page from Figure 1-8, notice that the section element contains three article elements. Add this content to your HTML fi le by nesting three article elements within the section element.
marks a section within the page
marks the page footer
marks the page header
marks a sidebar within the page
Figure 1-10 Inserting structural elements
◗ 3. Save your changes to the file.
To add three article elements:◗ 1. Within the section element, insert the following code as shown in Figure 1-11:
<article></article>
<article></article>
<article></article>
article elements
Figure 1-11 Inserting nested elements
◗ 2. Save your changes to the file.
A_C7929_01.4c.indd 20A_C7929_01.4c.indd 20 2/8/11 8:24 AM2/8/11 8:24 AMA_C7844_Gloss_01-16.4c.indd 16 10/21/11 12:42 PM
Copyright 2012 Cengage Learning. All Rights Reserved. May not be copied, scanned, or duplicated, in whole or in part. Due to electronic rights, some third party content may be suppressed from the eBook and/or eChapter(s). Editorial review has deemed that any suppressed content does not materially affect the overall learning experience. Cengage Learning reserves the right to remove additional content at any time if subsequent rights restrictions require it.
HTML 21Tutorial 1 Getting Started with HTML5 | HTML and CSS
Marking a Section with the div ElementThe structural elements are part of the current specifi cations for HTML5, but they are not part of HTML 4.01 or XHTML. Pages written to those languages instead use the div element to identify different page divisions. The syntax of the div element is
<div id=”id”> content</div>
where id is a unique name assigned to the division and content is page content con-tained within the division. While not required, the id attribute is useful to distinguish one div element from another. This becomes particularly important if you apply different styles to different page divisions.
Figure 1-12 shows how the same page layout marked up using structural elements under HTML5 would be marked up in HTML 4.01 using the div element.
HTML5
<header>
<footer>
<nav> <section>
<article>
<aside>
HTML 4.01
<div id="header">
<div id="footer">
<div id="nav"> <div id="section">
<div id="article">
<divid="aside">
Figure 1-12 Structural elements in HTML5 and HTML 4.01
A_C7929_01.4c.indd 21A_C7929_01.4c.indd 21 2/8/11 8:24 AM2/8/11 8:24 AMA_C7844_Gloss_01-16.4c.indd 16 10/21/11 12:42 PM
Copyright 2012 Cengage Learning. All Rights Reserved. May not be copied, scanned, or duplicated, in whole or in part. Due to electronic rights, some third party content may be suppressed from the eBook and/or eChapter(s). Editorial review has deemed that any suppressed content does not materially affect the overall learning experience. Cengage Learning reserves the right to remove additional content at any time if subsequent rights restrictions require it.

HTML 22 HTML and CSS | Tutorial 1 Getting Started with HTML5
You can use either HTML5’s structural elements or HTML 4.01’s div elements to identify the major sections of your document. The HTML5 approach is preferred because it represents the future standard of the Web, and structural elements are more descriptive than the generic div element. One problem with the div element is that there are no rules for id names. One Web designer might identify the page heading with the id name header while another designer might use heading or top. This makes it harder for Web search engines to identify the main topics of interest in each Web page.
PRO
SKIL
LS
Written Communication: Writing Effective HTML CodePart of writing good HTML code is being aware of the requirements of various browsers and devices, as well as understanding the different versions of the language. Here are a few guidelines for writing good HTML code:• Become well versed in the history of HTML and the various versions of HTML and XHTML.
Unlike other languages, HTML’s history does impact how you write your code.• Know your market. Do you have to support older browsers, or have your clients standard-
ized on one particular browser or browser version? Will your Web pages be viewed on a single device such as a computer, or do you have to support a variety of devices?
• Test your code on several different browsers and browser versions. Don’t assume that if your page works in one browser it will work in other browsers, or even in earlier versions of the same browser. Also check on the speed of the connection. A large file that per-forms well with a high-speed connection might be unusable with a dial-up connection.
• Read the documentation on the different versions of HTML and XHTML at the W3C Web site and keep up to date with the latest developments in the language.In general, any HTML code that you write should be compatible with the current versions
of the following browsers: Internet Explorer (Windows), Firefox (Windows and Macintosh), Safari (Windows and Macintosh), Chrome (Windows and Macintosh), and Opera (Windows and Macintosh). In addition, you should also view your pages on a variety of devices includ-ing laptops, mobile phones, and tablets. To effectively communicate with customers and users, you need to make sure your Web site is always readable.
At this point, you’ve created the basic framework of Dave’s Web page. In the next ses-sion, you’ll insert the page content and learn how to apply a visual style to that content to create a nicely formatted Web page. If you want to take a break before starting the next session, you can close any open fi les or applications.
A_C7929_01.4c.indd 22A_C7929_01.4c.indd 22 2/8/11 8:24 AM2/8/11 8:24 AMA_C7844_Gloss_01-16.4c.indd 16 10/21/11 12:42 PM
Copyright 2012 Cengage Learning. All Rights Reserved. May not be copied, scanned, or duplicated, in whole or in part. Due to electronic rights, some third party content may be suppressed from the eBook and/or eChapter(s). Editorial review has deemed that any suppressed content does not materially affect the overall learning experience. Cengage Learning reserves the right to remove additional content at any time if subsequent rights restrictions require it.

HTML 23Tutorial 1 Getting Started with HTML5 | HTML and CSS
RE
VIE
W
Session 1.1 Quick Check
1. What is a markup language? 2. What is XHTML? How does XHTML differ from HTML? 3. What is the W3C? What is the WHATWG? 4. What is a doctype? What are two uses of the doctype? 5. What is incorrect about the syntax of the following code?
<p>Welcome to the <em>J-Prop Shop</p></em>
6. What is white space? How does HTML treat consecutive occurrences of white space?
7. What structural element would you use to mark a sidebar? 8. What structural element would you use to mark the page footer?
A_C7929_01.4c.indd 23A_C7929_01.4c.indd 23 2/8/11 8:24 AM2/8/11 8:24 AMA_C7844_Gloss_01-16.4c.indd 16 10/21/11 12:42 PM
Copyright 2012 Cengage Learning. All Rights Reserved. May not be copied, scanned, or duplicated, in whole or in part. Due to electronic rights, some third party content may be suppressed from the eBook and/or eChapter(s). Editorial review has deemed that any suppressed content does not materially affect the overall learning experience. Cengage Learning reserves the right to remove additional content at any time if subsequent rights restrictions require it.

HTML 24 HTML and CSS | Tutorial 1 Getting Started with HTML5
The h2 element marks a heading.
The p element marks a paragraph.
The ul element marks an unordered list.
The • entity represents the bullet character.
The address element marks an address or contact info.
The li element marks an item in the list.
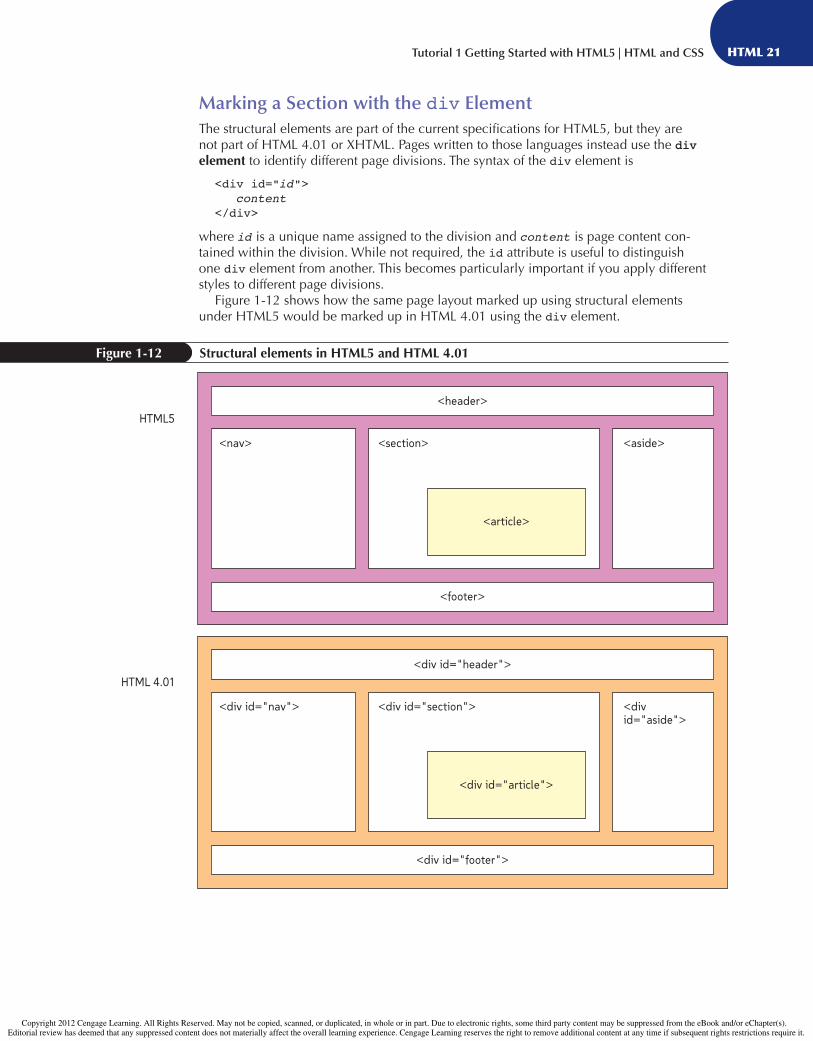
The strong element is a text-level element that marks strong or bold text.
Resulting Web pageHTML code
SESSION 1.2 VISUAL OVERVIEW
A_C7929_01.4c.indd 24A_C7929_01.4c.indd 24 2/8/11 8:24 AM2/8/11 8:24 AMA_C7844_Gloss_01-16.4c.indd 16 10/21/11 12:42 PM
Copyright 2012 Cengage Learning. All Rights Reserved. May not be copied, scanned, or duplicated, in whole or in part. Due to electronic rights, some third party content may be suppressed from the eBook and/or eChapter(s). Editorial review has deemed that any suppressed content does not materially affect the overall learning experience. Cengage Learning reserves the right to remove additional content at any time if subsequent rights restrictions require it.

HTML 25Tutorial 1 Getting Started with HTML5 | HTML and CSS
<link href="jpsstyles.css" rel="stylesheet" type="text/css" />
The hgroup element groups main headings and subheadings.
The img element is used to insert images into the Web page.
The blockquote element marks large blocks ofquoted material.
The cite element marksa citation.
The — entity represents the em-dash character.
A page rendered with the default browser style sheet
The same page rendered with a user-defined style sheet
The link element connects the Web page to the style sheet.
The href attribute indicates the name of the style sheet file.
The type attribute indicates the language of the style sheet.
HTML code
PAGE CONTENT ELEMENTS
A_C7929_01.4c.indd 25A_C7929_01.4c.indd 25 2/8/11 8:24 AM2/8/11 8:24 AMA_C7844_Gloss_01-16.4c.indd 16 10/21/11 12:42 PM
Copyright 2012 Cengage Learning. All Rights Reserved. May not be copied, scanned, or duplicated, in whole or in part. Due to electronic rights, some third party content may be suppressed from the eBook and/or eChapter(s). Editorial review has deemed that any suppressed content does not materially affect the overall learning experience. Cengage Learning reserves the right to remove additional content at any time if subsequent rights restrictions require it.

HTML 26 HTML and CSS | Tutorial 1 Getting Started with HTML5
Working with Grouping ElementsYou’re now ready to begin entering content into the body of Dave’s Web page. The fi rst elements you’ll add are grouping elements, which are elements that contain content that is viewed as a distinct block within the Web page. Paragraphs, which were presented in the last session, are one example of a grouping element, as are page divisions marked using the div element. Figure 1-13 lists some of the commonly used grouping elements.
Figure 1-13 Grouping elements
Grouping Element Descriptionaddress Contact information (usually rendered as italicized text)
blockquote An extended quotation (usually indented from the left and right margins)
dd A definition from a description list
div A generic grouping element
dl A description list
dt A definition term from a description list
figure A figure or illustration (HTML5 only)
figcaption The caption of a figure, which must be nested within the figure element (HTML5 only)
hn A heading, where n is a value from 1 to 6, with h1 as the most prominent heading and h6 the least prominent (usually displayed in bold text)
li A list item from an ordered or unordered list
ol An ordered list
p A paragraph
pre Preformatted text, retaining all white space and special characters (usually displayed in a fixed width font)
ul An unordered list
To explore how grouping elements are typically rendered by your Web browser, a demo page has been prepared for you.
To open the HTML Tags demo page:◗ 1. Use your browser to open the demo_html.htm file from the tutorial.01\demo
folder.
◗ 2. If your browser prompts you to allow code from the Web page to be run, click the Allow blocked content button.
Marking Content HeadingsThe fi rst grouping elements you’ll explore are heading elements, which contain the text of main headings on a Web page. They’re often used for introducing new topics or for dividing the page into topical sections. The syntax to mark a heading element is
<hn>content</hn>
where n is an integer from 1 to 6. Content marked with <h1> tags is considered a major heading, and is usually displayed in large bold text. Content marked with <h2> through <h6> tags is used for subheadings, and is usually displayed in progressively smaller bold text.
A_C7929_01.4c.indd 26A_C7929_01.4c.indd 26 2/8/11 8:24 AM2/8/11 8:24 AMA_C7844_Gloss_01-16.4c.indd 16 10/21/11 12:42 PM
Copyright 2012 Cengage Learning. All Rights Reserved. May not be copied, scanned, or duplicated, in whole or in part. Due to electronic rights, some third party content may be suppressed from the eBook and/or eChapter(s). Editorial review has deemed that any suppressed content does not materially affect the overall learning experience. Cengage Learning reserves the right to remove additional content at any time if subsequent rights restrictions require it.

HTML 27Tutorial 1 Getting Started with HTML5 | HTML and CSS
To see how these headings appear on your computer, use the demo page.
RE
FER
EN
CE
Marking Grouping Content• To mark a heading, enter
<hn>content</hn>where n is an integer from 1 to 6 and content is the text of the heading.
• To mark a paragraph, enter<p>content</p>
• To mark a block quote, enter<blockquote>content</blockquote>
To view heading elements:◗ 1. Click in the blue box in the lower-left corner of the demo page, type <h1>The
J-Prop Shop</h1> and then press the Enter key to go to a new line.
◗ 2. Type <h2>Quality Juggling and Circus Props</h2>.
◗ 3. Click the Preview Code button located below the blue code window. Your browser displays a preview of how this code would appear in your Web browser (see Figure 1-14).
click to preview the HTML code
h1 and h2 headings
h1 and h2 headings as rendered by the browser
Figure 1-14 Previewing h1 and h2 headings
Trouble? If you are using a browser other than Internet Explorer 9 running on Windows 7, your screen might look slightly different from that shown in Figure 1-14.
◗ 4. To see how an h3 heading would look, change the opening tag for the store description from <h2> to <h3> and change the closing tag from </h2> to </h3>. Click the Preview Code button again.
Your browser renders the code again, this time with the store information displayed in a smaller font. If you continued to change the heading element from h3 to each of the elements down to h6, you would see the second line in the Preview box get progressively smaller.
A_C7929_01.4c.indd 27A_C7929_01.4c.indd 27 2/8/11 8:24 AM2/8/11 8:24 AMA_C7844_Gloss_01-16.4c.indd 16 10/21/11 12:42 PM
Copyright 2012 Cengage Learning. All Rights Reserved. May not be copied, scanned, or duplicated, in whole or in part. Due to electronic rights, some third party content may be suppressed from the eBook and/or eChapter(s). Editorial review has deemed that any suppressed content does not materially affect the overall learning experience. Cengage Learning reserves the right to remove additional content at any time if subsequent rights restrictions require it.

HTML 28 HTML and CSS | Tutorial 1 Getting Started with HTML5
It’s important not to treat markup tags as simply a way of formatting the Web page. The h1 through h6 elements are used to identify headings, but the exact appearance of these headings depends on the browser and the device being used. While most browsers display an h1 heading in a larger font than an h2 heading, remember that the headings might not even be displayed at all. A screen reader, for example, doesn’t display text, but rather conveys the presence of an h1 heading with increased volume or with special emphasis preceded by an extended pause.
Now that you’ve seen how to mark page headings, you can add them to Dave’s Web page. The fi rst heading Dave wants to add is an h1 heading containing the company’s name. He also wants you to insert h2 headings in several places—as titles for the three articles on the page, as a title for the sidebar containing the customer comments, and as a subheading to the main heading on the page.
To add headings to Dave’s document:◗ 1. Return to the jprop.htm file in your text editor.
Trouble? If you are using the Macintosh TextEdit program, you must select the Ignore rich text commands check box when reopening the file.
◗ 2. Within the header element, insert the following tags:
<h1>The J-Prop Shop</h1><h2>Quality Juggling and Circus Props</h2>
◗ 3. Within the first article element, insert the following h2 heading:
<h2>Welcome</h2>
◗ 4. Within the second article element, insert
<h2>Specials This Month</h2>
◗ 5. Within the third and final article element, insert
<h2>Quality Tested</h2>
◗ 6. Finally, within the aside element, insert
<h2>Customer Comments</h2>
Figure 1-15 highlights the revised code in the file.
A_C7929_01.4c.indd 28A_C7929_01.4c.indd 28 2/8/11 8:24 AM2/8/11 8:24 AMA_C7844_Gloss_01-16.4c.indd 16 10/21/11 12:42 PM
Copyright 2012 Cengage Learning. All Rights Reserved. May not be copied, scanned, or duplicated, in whole or in part. Due to electronic rights, some third party content may be suppressed from the eBook and/or eChapter(s). Editorial review has deemed that any suppressed content does not materially affect the overall learning experience. Cengage Learning reserves the right to remove additional content at any time if subsequent rights restrictions require it.

HTML 29Tutorial 1 Getting Started with HTML5 | HTML and CSS
Figure 1-15 Inserting h1 and h2 headings
◗ 7. Save your changes to the file and then reload or refresh the jprop.htm file in your Web browser. Figure 1-16 shows the initial view of the page body content.
h1 heading
h2 headings
Figure 1-16 Viewing h1 and h2 headings in Dave’s document
Grouping HeadingsThe interpretation of a particular heading depends on how it’s used. For example, the h2 headings you just entered were used either to provide a title for articles or sections in the Web page or as a subtitle to the main title of the page. You can indicate that an h2 head-ing acts as a subtitle by grouping it with a main title heading using the hgroup element. The hgroup element uses the syntax
<hgroup> heading elements</hgroup>
A_C7929_01.4c.indd 29A_C7929_01.4c.indd 29 2/8/11 8:24 AM2/8/11 8:24 AMA_C7844_Gloss_01-16.4c.indd 16 10/21/11 12:42 PM
Copyright 2012 Cengage Learning. All Rights Reserved. May not be copied, scanned, or duplicated, in whole or in part. Due to electronic rights, some third party content may be suppressed from the eBook and/or eChapter(s). Editorial review has deemed that any suppressed content does not materially affect the overall learning experience. Cengage Learning reserves the right to remove additional content at any time if subsequent rights restrictions require it.

HTML 30 HTML and CSS | Tutorial 1 Getting Started with HTML5
where heading elements are elements marked with the <h1> through <h6> heading tags. The hgroup element was introduced in HTML5 and is not part of older HTML or XHTML specifi cations.
Group the fi rst two headings in Dave’s document to indicate that they should be inter-preted as a main title and a subtitle.
The hgroup element can contain only h1 through h6 elements or other hgroup elements.
To group the first two headings in the document:◗ 1. Return to the jprop.htm file in your text editor.
◗ 2. Indent the first two headings in the document and then enclose them within <hgroup> tags as shown in Figure 1-17.
h1 and h2 headings are grouped together
Figure 1-17 Grouping the h1 and h2 headings
◗ 3. Save your changes to the file.
Marking Paragraph ElementsAs you saw earlier, you can mark a paragraph element using the <p> tag, which has the syntax
<p>content</p>
where content is the content of the paragraph. In older HTML code, you might occa-sionally see paragraphs marked with only the opening <p> tags, omitting closing tags. In those situations, a <p> tag marks the start of each new paragraph. While this convention is still accepted by many browsers, it violates HTML’s syntax rules. In addition, if you want XHTML-compliant code, you must always include closing tags.
Many articles on the J-Prop Shop page are enclosed within paragraphs. You’ll add these paragraphs now.
To add four paragraphs to Dave’s Web page:◗ 1. Return to the jprop.htm file in your text editor.
◗ 2. Directly below the h2 heading Welcome, insert the following paragraph code, indented as shown in Figure 1-18:
<p>If you're looking for high-quality, hand-crafted juggling and circus products, the J-Prop Shop is the store for you. I've designed and built props for the past 35 years, and my products have been used by professional entertainers and hobbyists throughout the world. Our prices are reasonable and our quality is excellent.</p>
A_C7929_01.4c.indd 30A_C7929_01.4c.indd 30 2/8/11 8:24 AM2/8/11 8:24 AMA_C7844_Gloss_01-16.4c.indd 16 10/21/11 12:42 PM
Copyright 2012 Cengage Learning. All Rights Reserved. May not be copied, scanned, or duplicated, in whole or in part. Due to electronic rights, some third party content may be suppressed from the eBook and/or eChapter(s). Editorial review has deemed that any suppressed content does not materially affect the overall learning experience. Cengage Learning reserves the right to remove additional content at any time if subsequent rights restrictions require it.

HTML 31Tutorial 1 Getting Started with HTML5 | HTML and CSS
◗ 3. Directly below the h2 heading Specials This Month, insert the following:
<p>The following devil sticks are available at a special discount for the entire month of May:</p>
◗ 4. Directly below the h2 heading Quality Tested, insert the following:
<p>Every item I create is checked and tested before being shipped out to assure perfect quality. I take pride in every one of my juggling props and I want my customers to feel that same pride.</p>
◗ 5. Finally, below the h2 heading Customer Comments, insert the following:
<p>Here are a few select quotes from our happy family of customers and associates:</p>
Figure 1-18 highlights the newly added paragraphs in the document.
Figure 1-18 Adding paragraph elements
Trouble? Don’t worry if your lines do not wrap at the same locations shown in Figure 1-18. Where the line wraps in the HTML code does not affect how the page is rendered by the browser.
◗ 6. Save your changes to the file and then refresh the jprop.htm file in your Web browser. Figure 1-19 shows the new paragraphs added to the Web page.
A_C7929_01.4c.indd 31A_C7929_01.4c.indd 31 2/8/11 8:24 AM2/8/11 8:24 AMA_C7844_Gloss_01-16.4c.indd 16 10/21/11 12:42 PM
Copyright 2012 Cengage Learning. All Rights Reserved. May not be copied, scanned, or duplicated, in whole or in part. Due to electronic rights, some third party content may be suppressed from the eBook and/or eChapter(s). Editorial review has deemed that any suppressed content does not materially affect the overall learning experience. Cengage Learning reserves the right to remove additional content at any time if subsequent rights restrictions require it.

HTML 32 HTML and CSS | Tutorial 1 Getting Started with HTML5
Marking a Block QuoteNext, Dave wants you to enter a few select quotes from his satisfi ed customers. You mark extended quotes with the HTML blockquote element, which uses the syntax
<blockquote>content</blockquote>
where content is the text of the quote. Most browsers render block quotes by indenting them to make it easier for readers to separate quoted material from the author’s own words.
You’ll add the customer comments as block quotes.
paragraphs
Figure 1-19 Paragraphs in the Web page
To create the customer comment block quotes:◗ 1. Return to the jprop.htm file in your text editor.
◗ 2. Scroll down to the aside element, and after the paragraph within that element, insert the following block quote, as shown in Figure 1-20:
<blockquote> <p>”I'm more than happy to recommend Dave Vinet's products. I came upon his work 10 years ago and was immediately impressed by his craftsmanship. He provides well-balanced and attractive props which are the perfect complement to my performances.” </p> <p>”Dave Vinet makes the best juggling equipment on the planet. Period.” </p> <p>”David has been my main supplier for 20 years. I have never had a problem with his equipment and his service is impeccable.” </p></blockquote>
A_C7929_01.4c.indd 32A_C7929_01.4c.indd 32 2/8/11 8:24 AM2/8/11 8:24 AMA_C7844_Gloss_01-16.4c.indd 16 10/21/11 12:42 PM
Copyright 2012 Cengage Learning. All Rights Reserved. May not be copied, scanned, or duplicated, in whole or in part. Due to electronic rights, some third party content may be suppressed from the eBook and/or eChapter(s). Editorial review has deemed that any suppressed content does not materially affect the overall learning experience. Cengage Learning reserves the right to remove additional content at any time if subsequent rights restrictions require it.

HTML 33Tutorial 1 Getting Started with HTML5 | HTML and CSS
Note that the customer quote also included three paragraph elements nested within the blockquote element. The indentation applied by the browser to the block quote was also applied to any content within that element, so those paragraphs were indented even though browsers do not indent paragraphs by default.
Marking an AddressDave wants to display the company’s address at the bottom of the body of his page. Contact information such as addresses can be marked using the address element, which uses the syntax
<address>content</address>
where content is the contact information. Most browsers render addresses in italic. You’ll use the address element to display the address of the J-Prop Shop.
Figure 1-20 Adding a block quote
◗ 3. Save your changes to the file, and then reload jprop.htm in your Web browser. Figure 1-21 shows the revised page with the quoted material.
quoted paragraphs are indented in the page
Figure 1-21 Block quote in the Web page
A_C7929_01.4c.indd 33A_C7929_01.4c.indd 33 2/8/11 8:24 AM2/8/11 8:24 AMA_C7844_Gloss_01-16.4c.indd 16 10/21/11 12:42 PM
Copyright 2012 Cengage Learning. All Rights Reserved. May not be copied, scanned, or duplicated, in whole or in part. Due to electronic rights, some third party content may be suppressed from the eBook and/or eChapter(s). Editorial review has deemed that any suppressed content does not materially affect the overall learning experience. Cengage Learning reserves the right to remove additional content at any time if subsequent rights restrictions require it.

HTML 34 HTML and CSS | Tutorial 1 Getting Started with HTML5
The address text appears in italic at the bottom of the page. Note that even though you entered the company name, street address, city, state, and phone number on multiple lines, in the browser they all appear to run together on a single line. Remember that the browser ignores the occurrence of line breaks, tabs, and other white space in your text document. Shortly, you’ll learn how to make this text more readable by adding a charac-ter symbol to separate the different parts of the address. For now, you’ll leave the address text as it is.
Marking a ListDave wants to display a list of products on this sample page. This information is pre-sented on his fl yer as a bulleted list. He wants something similar on the Web site. HTML supports three kinds of lists: ordered, unordered, and description.
To add the J-Prop Shop address:◗ 1. Return to the jprop.htm file in your text editor.
◗ 2. Scroll down to the bottom of the file, and then within the footer element insert the following code, as shown in Figure 1-22:
<address>The J-Prop Shop 541 West Highland Drive Auburn, ME 04210 (207) 555 – 9001</address>
Figure 1-22 Adding an address
◗ 3. Save your changes to the file, and then refresh jprop.htm in your Web browser. Figure 1-23 shows the revised page with the address text.
address text is displayed in italic by default
Figure 1-23 Address as rendered in the Web page
A_C7929_01.4c.indd 34A_C7929_01.4c.indd 34 2/8/11 8:24 AM2/8/11 8:24 AMA_C7844_Gloss_01-16.4c.indd 16 10/21/11 12:42 PM
Copyright 2012 Cengage Learning. All Rights Reserved. May not be copied, scanned, or duplicated, in whole or in part. Due to electronic rights, some third party content may be suppressed from the eBook and/or eChapter(s). Editorial review has deemed that any suppressed content does not materially affect the overall learning experience. Cengage Learning reserves the right to remove additional content at any time if subsequent rights restrictions require it.

HTML 35Tutorial 1 Getting Started with HTML5 | HTML and CSS
Ordered ListsOrdered lists are used for items that follow some defi ned sequential order, such as lists ordered from smallest to greatest or from oldest to youngest. The beginning of an ordered list is marked by the <ol> (ordered list) tag. Each item within an ordered list is marked using the <li> (list item) tag. The structure of an ordered list is therefore
<ol> <li>item1</li> <li>item2</li>...</ol>
where item1, item2, and so forth are the items in the list. To explore creating an ordered list, you’ll return to the HTML demo page.
RE
FER
EN
CE
Marking Lists• To mark an ordered list, enter
<ol> <li>item1</li> <li>item2</li>...</ol>where item1, item2, and so forth are the items in the list.
• To mark an unordered list, enter<ul> <li>item1</li> <li>item2</li>...</ul>
• To mark a description list, enter<dl> <dt>term1</dt> <dd>description1</dd> <dt>term2</dt> <dd>description2a</dd> <dd>description2b</dd>...</dl>
where term1, term2, etc. are the terms in the list and description1, description2a, description2b, etc. are descriptions associated with the preceding terms.
To create an ordered list:◗ 1. Return to the demo_html.htm file in your Web browser.
◗ 2. Delete the HTML code in the left box and replace it with the following:
<ol> <li>First Item</li> <li>Second Item</li> <li>Third Item</li></ol>
A_C7929_01.4c.indd 35A_C7929_01.4c.indd 35 2/8/11 8:24 AM2/8/11 8:24 AMA_C7844_Gloss_01-16.4c.indd 16 10/21/11 12:42 PM
Copyright 2012 Cengage Learning. All Rights Reserved. May not be copied, scanned, or duplicated, in whole or in part. Due to electronic rights, some third party content may be suppressed from the eBook and/or eChapter(s). Editorial review has deemed that any suppressed content does not materially affect the overall learning experience. Cengage Learning reserves the right to remove additional content at any time if subsequent rights restrictions require it.

HTML 36 HTML and CSS | Tutorial 1 Getting Started with HTML5
By default, entries in an ordered list are numbered, with the numbers added automati-cally by the browser.
Unordered ListsTo mark a list in which the items are not expected to occur in any specifi c order, you create an unordered list. The structure of ordered and unordered lists is the same, except that the list items for an unordered list are nested within the ul element, as follows:
<ul> <li>item1</li> <li>item2</li>...</ul>
You’ll practice creating an unordered list with the demo page.
◗ 3. Click the Preview Code button. Figure 1-24 shows how the browser renders the ordered list contents.
code for an ordered list by default, browsers display ordered lists as numbered lists
Figure 1-24 Viewing an ordered list
To create an unordered list:◗ 1. Delete the HTML code in the left box and replace it with the following:
<ul> <li>Basic Stick</li> <li>Flower Stick</li> <li>Master Stick</li> <li>Glow Stick</li></ul>
◗ 2. Click the Preview Code button. Figure 1-25 shows how the browser renders the unordered list.
A_C7929_01.4c.indd 36A_C7929_01.4c.indd 36 2/8/11 8:24 AM2/8/11 8:24 AMA_C7844_Gloss_01-16.4c.indd 16 10/21/11 12:42 PM
Copyright 2012 Cengage Learning. All Rights Reserved. May not be copied, scanned, or duplicated, in whole or in part. Due to electronic rights, some third party content may be suppressed from the eBook and/or eChapter(s). Editorial review has deemed that any suppressed content does not materially affect the overall learning experience. Cengage Learning reserves the right to remove additional content at any time if subsequent rights restrictions require it.

HTML 37Tutorial 1 Getting Started with HTML5 | HTML and CSS
By default, most browsers display unordered lists using a bullet symbol. The exact bul-let symbol depends on the browser, but most browsers use a fi lled-in circle.
Nesting ListsYou can place one list inside of another to create several levels of list items. The top level of a nested list contains the major items, with each sublevel containing items of lesser importance. Most browsers differentiate the various levels by increasing the indentation and using a different list symbol at each level. You’ll use the demo page to see how this works with unordered lists.
code for an unordered list by default, browsers display unordered lists as bulleted lists
Figure 1-25 Viewing an unordered list
Trouble? In some browsers, the list appears with diamond shapes rather than circular bullets.
To create a nested list:◗ 1. Click after the word Stick in the <li>Basic Stick</li> line, and then press the
Enter key to insert a new blank line.
◗ 2. Indent the following code between the code <li>Basic Stick and the closing </li> tag:
<ul> <li>Red</li> <li>Blue</li> <li>Green</li></ul>
◗ 3. Click the Preview Code button. Figure 1-26 shows the resulting nested list in the browser.
A_C7929_01.4c.indd 37A_C7929_01.4c.indd 37 2/8/11 8:24 AM2/8/11 8:24 AMA_C7844_Gloss_01-16.4c.indd 16 10/21/11 12:42 PM
Copyright 2012 Cengage Learning. All Rights Reserved. May not be copied, scanned, or duplicated, in whole or in part. Due to electronic rights, some third party content may be suppressed from the eBook and/or eChapter(s). Editorial review has deemed that any suppressed content does not materially affect the overall learning experience. Cengage Learning reserves the right to remove additional content at any time if subsequent rights restrictions require it.

HTML 38 HTML and CSS | Tutorial 1 Getting Started with HTML5
The lower level of items is displayed using an open circle as the list bullet and addi-tional indentation on the page. Once again, the exact format applied to these lists is determined by each browser’s internal style sheet.
Description ListsA third type of list is the description list, which contains a list of terms, each followed by its description. The structure of a description list is
<dl> <dt>term1</dt> <dd>description1</dd> <dt>term2</dt> <dd>description2a</dd> <dd>description2b</dd>...</dl>
where term1, term2, etc. are the terms in the list and description1, description2a, description2b, etc. are the descriptions associated with the terms. Note that descrip-tion lists must follow a specifi ed order, with each dt (defi nition term) element followed by one or more dd (defi nition description) elements.
You’ll study how to work with description lists by returning to the demo page.
code for a nested list by default, browsers display nested lists with different symbols
Figure 1-26 Viewing a nested list
Trouble? Depending on your browser, the nested list of basic stick colors might appear with solid bullets rather than open circles.
To create a description list:◗ 1. Replace the code in the left box of the HTML demo page with
<dl> <dt>Basic Stick</dt> <dd>Easiest stick to learn</dd> <dt>Flower Stick</dt> <dd>A graceful stick with tassels</dd> <dt>Master Stick</dt> <dd>Our most popular stick</dd></dl>
A_C7929_01.4c.indd 38A_C7929_01.4c.indd 38 2/8/11 8:24 AM2/8/11 8:24 AMA_C7844_Gloss_01-16.4c.indd 16 10/21/11 12:42 PM
Copyright 2012 Cengage Learning. All Rights Reserved. May not be copied, scanned, or duplicated, in whole or in part. Due to electronic rights, some third party content may be suppressed from the eBook and/or eChapter(s). Editorial review has deemed that any suppressed content does not materially affect the overall learning experience. Cengage Learning reserves the right to remove additional content at any time if subsequent rights restrictions require it.

HTML 39Tutorial 1 Getting Started with HTML5 | HTML and CSS
The demo page shows each term followed by its description, which is placed in a new block below the term and indented on the page. If you had included multiple dd ele-ments for a single dt element, each description would have been contained within its own block and indented.
Now that you’ve experimented with the three types of HTML lists, you’ll add an unor-dered list of products to Dave’s Web page. By default, the product names will appear as a bulleted list.
◗ 2. Click the Preview Code button. Figure 1-27 shows the appearance of the descrip-tion list in the browser.
Description lists can also mark dialog, with each dt element naming a speaker, and each dd element containing the speaker’s words.
code for a description list by default, browsers indent the description associated with each term
Figure 1-27 Viewing a description list
To add an unordered list to Dave’s Web page:◗ 1. Return to the jprop.htm file in your text editor.
◗ 2. Within the Specials This Month article, directly below the p element, insert the fol-lowing code, as shown in Figure 1-28:
<ul> <li>Basic Stick ($19.95) The easiest stick to learn with, but “grippy” enough for the most demanding tricks. Comes in red, green, and blue. </li> <li>Flower Stick ($24.95) A graceful stick with colored tassels. Flower Sticks fl oat slowly, making them ideal for beginners. </li> <li>Master Stick ($39.95) Our most popular stick is shorter and heavier for fast play and more advanced tricks. Each Master Stick is available in custom colors. </li> <li>Glow Stick ($29.95) The Glow Stick shines brightly at night (without the danger of a fire stick). </li></ul>
A_C7929_01.4c.indd 39A_C7929_01.4c.indd 39 2/8/11 8:24 AM2/8/11 8:24 AMA_C7844_Gloss_01-16.4c.indd 16 10/21/11 12:42 PM
Copyright 2012 Cengage Learning. All Rights Reserved. May not be copied, scanned, or duplicated, in whole or in part. Due to electronic rights, some third party content may be suppressed from the eBook and/or eChapter(s). Editorial review has deemed that any suppressed content does not materially affect the overall learning experience. Cengage Learning reserves the right to remove additional content at any time if subsequent rights restrictions require it.

HTML 40 HTML and CSS | Tutorial 1 Getting Started with HTML5
Although you’ve added much of the text content to Dave’s sample page, the page as rendered by the browser still looks nothing like the fl yer shown in Figure 1-7. That’s because all of the page elements have been rendered using your browser’s internal style sheet. To change the page’s appearance, you need to substitute your own style sheet for the browser’s internal one.
unordered list element
list item
Figure 1-28 Adding an unordered list
◗ 3. Save your changes to the file, and then refresh the jprop.htm file in your Web browser. As shown in Figure 1-29, the list of products appears as a bulleted list in the middle of the page.
unordered list items are displayed with bullet markers
Figure 1-29 Unordered list as rendered in the Web page
A_C7929_01.4c.indd 40A_C7929_01.4c.indd 40 2/8/11 8:24 AM2/8/11 8:24 AMA_C7844_Gloss_01-16.4c.indd 16 10/21/11 12:42 PM
Copyright 2012 Cengage Learning. All Rights Reserved. May not be copied, scanned, or duplicated, in whole or in part. Due to electronic rights, some third party content may be suppressed from the eBook and/or eChapter(s). Editorial review has deemed that any suppressed content does not materially affect the overall learning experience. Cengage Learning reserves the right to remove additional content at any time if subsequent rights restrictions require it.

HTML 41Tutorial 1 Getting Started with HTML5 | HTML and CSS
Applying an External Style SheetStyle sheets are written in the Cascading Style Sheet (CSS) language. Like HTML fi les, CSS fi les are text fi les and can be created and edited using a simple text editor. A style sheet fi le has the fi le extension .css, which distinguishes it from an HTML fi le. Dave already has a style sheet for his Web page stored in the fi le jpsstyles.css.
Linking to an External Style SheetTo apply an external style sheet to a Web page, you create a link within the document head to the style sheet fi le using the link element
<link href=”file” rel=”stylesheet” type=”text/css” />
where file is the fi lename and location of the style sheet fi le. When a browser loads the page, it substitutes the style from the external style sheet fi le for its own internal style sheet.
See how the format and layout of Dave’s sample page change when the page is linked to the jpsstyles.css fi le.
To apply Dave’s external style sheet:◗ 1. Return to the jprop.htm file in your text editor.
◗ 2. Within the head element at the top of the file, insert the following link element, as shown in Figure 1-30:
<link href=”jpsstyles.css” rel=”stylesheet” type=”text/css” />
filename of style sheet style sheet language
link element
Figure 1-30 Linking to the jpsstyles.css style sheet
◗ 3. Save your changes to the file.
◗ 4. Reload the jprop.htm file in your Web browser. As shown in Figure 1-31, the for-mat and the layout change to reflect the styles in Dave’s style sheet.
A_C7929_01.4c.indd 41A_C7929_01.4c.indd 41 2/8/11 8:24 AM2/8/11 8:24 AMA_C7844_Gloss_01-16.4c.indd 16 10/21/11 12:42 PM
Copyright 2012 Cengage Learning. All Rights Reserved. May not be copied, scanned, or duplicated, in whole or in part. Due to electronic rights, some third party content may be suppressed from the eBook and/or eChapter(s). Editorial review has deemed that any suppressed content does not materially affect the overall learning experience. Cengage Learning reserves the right to remove additional content at any time if subsequent rights restrictions require it.

HTML 42 HTML and CSS | Tutorial 1 Getting Started with HTML5
Using the new style sheet, Dave’s Web page is much more readable. The page is displayed in a two-column layout with the main content of the section element dis-played in the left column. The content of the aside element is shown as a sidebar in the right column with a light purple background, rounded corners, and a drop shadow. The content of the footer element is styled with a smaller font, a top border line, and a light purple background.
Styles for HTML5 ElementsThe section, aside, and footer elements used in the code of the jprop.htm fi le are new HTML5 elements that were not part of earlier HTML specifi cations. For most brows-ers this is not a problem, and the Web page should be rendered with a format and layout close to what Dave requested. An important exception, though, is the Internet Explorer browser. Internet Explorer version 8 and earlier versions provide almost no support for HTML5 and do not recognize styles applied to HTML5 elements. For example, as Figure 1-32 shows, even with the new style sheet, Internet Explorer 8 displays Dave’s Web page with a few of the styles shown in Figure 1-31.
Figure 1-31 Web page rendered with the jpsstyles.css style sheet
Trouble? Many elements in HTML5 are still not completely supported in current browsers, so the appearance of your Web page might differ slightly from that shown in Figure 1-31. If you are running Internet Explorer 8 or earlier, you’ll see a significant difference. You’ll learn how to correct this problem shortly.
A_C7929_01.4c.indd 42A_C7929_01.4c.indd 42 2/8/11 8:24 AM2/8/11 8:24 AMA_C7844_Gloss_01-16.4c.indd 16 10/21/11 12:42 PM
Copyright 2012 Cengage Learning. All Rights Reserved. May not be copied, scanned, or duplicated, in whole or in part. Due to electronic rights, some third party content may be suppressed from the eBook and/or eChapter(s). Editorial review has deemed that any suppressed content does not materially affect the overall learning experience. Cengage Learning reserves the right to remove additional content at any time if subsequent rights restrictions require it.

HTML 43Tutorial 1 Getting Started with HTML5 | HTML and CSS
Dave needs this problem fi xed because he can’t assume that users will always be running the latest version of Internet Explorer. Workarounds for this problem involve running an external program known as a script. The most often used program language for the Web is JavaScript. Like HTML and CSS fi les, JavaScript fi les are text fi les that require no special soft-ware other than a Web browser to run. At this point, you don’t need to know how to write a JavaScript program to correct Internet Explorer’s problem with HTML5 elements; someone else has already done that. You just need to know how to access and run their program.
One of the most useful programs to enable HTML5 support in older browsers is Modernizr. Modernizr is a free, open-source, MIT-licensed JavaScript library of func-tions that provides support for many HTML5 elements and for the newest CSS styles. One of the many uses of Modernizr is to enable support for HTML5 in older browsers. Modernizr is distributed in a single JavaScript fi le that you can download from www.modernizr.com and add to your Web site. To link a Web page to a JavaScript fi le, you add the script element
<script src=”file”></script>
to the document head, where file is the name of the JavaScript fi le. The current version of Modernizr at the time of this writing is stored in the fi le modernizr-1.5.js. To link to this fi le, you add the following to the document head:
<script src=”modernizr-1.5.js”></script>
The modernizr-1.5.js fi le has already been added to your data folder. Link to this fi le now to apply it to Dave’s Web page.
Figure 1-32 Web page as it appears in Internet Explorer 8
A_C7929_01.4c.indd 43A_C7929_01.4c.indd 43 2/8/11 8:24 AM2/8/11 8:24 AMA_C7844_Gloss_01-16.4c.indd 16 10/21/11 12:42 PM
Copyright 2012 Cengage Learning. All Rights Reserved. May not be copied, scanned, or duplicated, in whole or in part. Due to electronic rights, some third party content may be suppressed from the eBook and/or eChapter(s). Editorial review has deemed that any suppressed content does not materially affect the overall learning experience. Cengage Learning reserves the right to remove additional content at any time if subsequent rights restrictions require it.

HTML 44 HTML and CSS | Tutorial 1 Getting Started with HTML5
To link to the Modernizr file:◗ 1. Return to the jprop.htm file in your text editor.
◗ 2. Scroll to the top of the file and add the following tag pair above the link ele-ment, as shown in Figure 1-33:
<script src=”modernizr-1.5.js”></script>
Modernizr script file
Figure 1-33 Linking to the Modernizr script
◗ 3. Save your changes to the file.
◗ 4. If you have access to Internet Explorer 8, use that browser to open the jprop.htm file. As shown in Figure 1-34, the browser renders the Web page employing the page layout and many of the formats shown earlier in Figure 1-29.
rounded corners and drop shadows are not supported in IE8
Figure 1-34 Web page as it appears in Internet Explorer 8 with Modernizr
A_C7929_01.4c.indd 44A_C7929_01.4c.indd 44 2/8/11 8:24 AM2/8/11 8:24 AMA_C7844_Gloss_01-16.4c.indd 16 10/21/11 12:42 PM
Copyright 2012 Cengage Learning. All Rights Reserved. May not be copied, scanned, or duplicated, in whole or in part. Due to electronic rights, some third party content may be suppressed from the eBook and/or eChapter(s). Editorial review has deemed that any suppressed content does not materially affect the overall learning experience. Cengage Learning reserves the right to remove additional content at any time if subsequent rights restrictions require it.

HTML 45Tutorial 1 Getting Started with HTML5 | HTML and CSS
The rendering done by Internet Explorer 8 does not completely match what was shown under Internet Explorer 9 or many of the other competing browsers such as Firefox, Safari, or Google Chrome. For example, Internet Explorer 8 doesn’t support styles for rounded corners and drop shadows. All of this underscores an important point: You may fi nd variations between one browser and another in how your page is rendered, espe-cially when using the newest HTML5 elements and CSS styles. This means you have to test your page under multiple browsers and devices, and make sure that any differences in format or layout do not impact your users’ ability to read and understand your page.
Marking Text-Level ElementsGrouping elements like paragraphs and headings start their content on a new line. Another type of element is a text-level element, which marks content within a group-ing element. A text-level element is like a phrase or a collection of characters within a paragraph or heading. Text-level elements do not start out on a new line, but instead fl ow alongside of, or inline with, the rest of the characters in the grouping element. Figure 1-35 lists some of the text-level elements in HTML.
Figure 1-35 Text-level elements
Text-Level Element Descriptiona A hypertext link
abbr An abbreviation
b Text offset from the surrounding content (usually displayed in boldface text)
cite A citation (usually displayed in italics)
code Program code (usually displayed in a fixed width font)
del Deleted text (usually displayed with a strikethrough line)
dfn A definition term (usually displayed in italics)
em Emphasized content (usually displayed in italics)
i Text representing an alternate voice or mood (usually displayed in italics)
ins Inserted text (usually displayed with an underline)
kbd Keyboard text (usually displayed in a fixed width font)
mark Highlighted or marked text (usually displayed with a highlight. HTML5 only)
q Quoted text (occasionally enclosed in “quotes”)
samp Sample computer code (usually displayed in a fixed width font)
small Text displayed in a smaller font than surrounding content
span A span of generic text
strong Strongly emphasized content (usually displayed in boldface text)
sub Subscripted text
sup Superscripted text
time A date and time value (HTML5 only)
var Programming variables (usually displayed in italic)
To practice using text-level elements in conjunction with grouping elements, you’ll return to the HTML demo page.Text-level elements should
always be nested within grouping elements such as paragraphs or headings.
A_C7929_01.4c.indd 45A_C7929_01.4c.indd 45 2/8/11 8:24 AM2/8/11 8:24 AMA_C7844_Gloss_01-16.4c.indd 16 10/21/11 12:42 PM
Copyright 2012 Cengage Learning. All Rights Reserved. May not be copied, scanned, or duplicated, in whole or in part. Due to electronic rights, some third party content may be suppressed from the eBook and/or eChapter(s). Editorial review has deemed that any suppressed content does not materially affect the overall learning experience. Cengage Learning reserves the right to remove additional content at any time if subsequent rights restrictions require it.
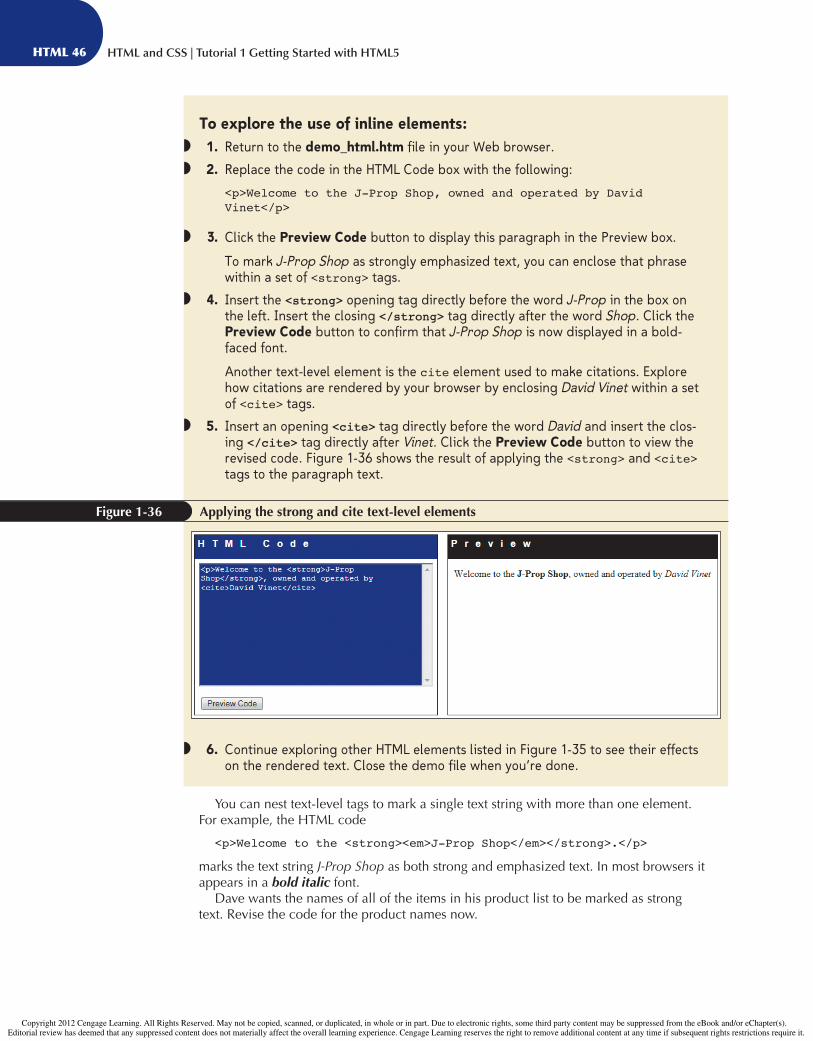
HTML 46 HTML and CSS | Tutorial 1 Getting Started with HTML5
You can nest text-level tags to mark a single text string with more than one element. For example, the HTML code
<p>Welcome to the <strong><em>J-Prop Shop</em></strong>.</p>
marks the text string J-Prop Shop as both strong and emphasized text. In most browsers it appears in a bold italic font.
Dave wants the names of all of the items in his product list to be marked as strong text. Revise the code for the product names now.
To explore the use of inline elements:◗ 1. Return to the demo_html.htm file in your Web browser.
◗ 2. Replace the code in the HTML Code box with the following:
<p>Welcome to the J-Prop Shop, owned and operated by DavidVinet</p>
◗ 3. Click the Preview Code button to display this paragraph in the Preview box.
To mark J-Prop Shop as strongly emphasized text, you can enclose that phrase within a set of <strong> tags.
◗ 4. Insert the <strong> opening tag directly before the word J-Prop in the box on the left. Insert the closing </strong> tag directly after the word Shop. Click the Preview Code button to confirm that J-Prop Shop is now displayed in a bold-faced font.
Another text-level element is the cite element used to make citations. Explore how citations are rendered by your browser by enclosing David Vinet within a set of <cite> tags.
◗ 5. Insert an opening <cite> tag directly before the word David and insert the clos-ing </cite> tag directly after Vinet. Click the Preview Code button to view the revised code. Figure 1-36 shows the result of applying the <strong> and <cite> tags to the paragraph text.
Figure 1-36 Applying the strong and cite text-level elements
◗ 6. Continue exploring other HTML elements listed in Figure 1-35 to see their effects on the rendered text. Close the demo file when you’re done.
A_C7929_01.4c.indd 46A_C7929_01.4c.indd 46 2/8/11 8:24 AM2/8/11 8:24 AMA_C7844_Gloss_01-16.4c.indd 16 10/21/11 12:42 PM
Copyright 2012 Cengage Learning. All Rights Reserved. May not be copied, scanned, or duplicated, in whole or in part. Due to electronic rights, some third party content may be suppressed from the eBook and/or eChapter(s). Editorial review has deemed that any suppressed content does not materially affect the overall learning experience. Cengage Learning reserves the right to remove additional content at any time if subsequent rights restrictions require it.

HTML 47Tutorial 1 Getting Started with HTML5 | HTML and CSS
To mark strong text:◗ 1. Return to the jprop.htm file in your text editor.
◗ 2. Scroll down to the unordered list and enclose the name and price of each product within a set of <strong> tags as shown in Figure 1-37.
Figure 1-37 Marking product names using the strong element
◗ 3. Save your changes to the file and then reload the jprop.htm file in your Web browser. Figure 1-38 shows the revised appearance of the bulleted list of products.
Figure 1-38 Product names rendered in a boldfaced font
A_C7929_01.4c.indd 47A_C7929_01.4c.indd 47 2/8/11 8:24 AM2/8/11 8:24 AMA_C7844_Gloss_01-16.4c.indd 16 10/21/11 12:42 PM
Copyright 2012 Cengage Learning. All Rights Reserved. May not be copied, scanned, or duplicated, in whole or in part. Due to electronic rights, some third party content may be suppressed from the eBook and/or eChapter(s). Editorial review has deemed that any suppressed content does not materially affect the overall learning experience. Cengage Learning reserves the right to remove additional content at any time if subsequent rights restrictions require it.

HTML 48 HTML and CSS | Tutorial 1 Getting Started with HTML5
Using the Generic Elements div and spanMost of the page elements you’ve examined have a specifi c meaning. However, some-times you want to add an element that represents a text block or a string of inline text without it having any other meaning. HTML supports two such generic elements: div and span. The div element is used to mark general grouping content and has the follow-ing syntax:
<div>content</div>
The span element, which is used to mark general text-level content, has the following syntax:
<span>content</span>
Browsers recognize both elements but do not assign any default format to content marked with these elements. This frees Web authors to develop styles for these elements without worrying about overriding any styles imposed by browsers. Note that the main use of the div element to mark sections of the page has been superseded in HTML5 by the sectional elements such as header and article; however, you will still encounter the div element in many current and older Web sites.
PRO
SKIL
LS
Written Communication: Logical and Physical Interpretation of ElementsAs you learn more HTML, you’ll notice some overlap in how browsers display certain ele-ments. To display italicized text, you could use the <dfn>, <em>, <i>, or <var> tags; or if you wanted to italicize an entire block of text, you could use the <address> tag. However, browsers differ in how they display elements, so you should not rely on the way any browser or group of browsers commonly displays an element.
In addition, it’s important to distinguish between the way a browser displays an ele-ment, and the purpose of the element in the document. Although it can be tempting to ignore this difference, your HTML code benefits when you respect that distinction because search engines often look within specific elements for information. For example, a search engine may look for the address element to find contact information for a particular Web site. It would be confusing to end users if you used the address element to simply italicize a block of text. Web programmers can also use elements to extract information from a page. For example, a JavaScript program could automatically generate a bibliography from all of the citations listed within a Web site by looking for occurrences of the cite element.
The best practice for communicating the purpose of your document is to use HTML to mark content but not to rely on HTML to format that content. Formatting should be done solely through style sheets, using either the internal style sheets built into browsers or through your own customized styles.
A_C7929_01.4c.indd 48A_C7929_01.4c.indd 48 2/8/11 8:24 AM2/8/11 8:24 AMA_C7844_Gloss_01-16.4c.indd 16 10/21/11 12:42 PM
Copyright 2012 Cengage Learning. All Rights Reserved. May not be copied, scanned, or duplicated, in whole or in part. Due to electronic rights, some third party content may be suppressed from the eBook and/or eChapter(s). Editorial review has deemed that any suppressed content does not materially affect the overall learning experience. Cengage Learning reserves the right to remove additional content at any time if subsequent rights restrictions require it.

HTML 49Tutorial 1 Getting Started with HTML5 | HTML and CSS
Marking a Line BreakAfter examining your work, Dave notices that the list of customer comments lacks the names of the customers who made them. He asks you to add this information to the Web page, marking the customer information as citations.
INSI
GH
T
Presentational AttributesEarly versions of HTML were used mostly by scientists and researchers who, for the most part, didn’t need flashy graphics, decorative text fonts, or even much color on a page. The earliest Web pages weren’t fancy and didn’t require much from the browsers that displayed them. This changed as the Web became more popular and attracted the atten-tion of commercial businesses, graphic designers, and artists.
One way that HTML changed to accommodate this new class of users was to intro-duce presentational elements and presentational attributes designed to describe how each element should be rendered by Web browsers. For example, to align text on a page, Web authors would use the align attribute
<element align=”alignment”>content</element>
where alignment is either left, right, center, or justify. Thus, to center an h1 head-ing on a page, you could apply the following align attribute to the <h1> tag:
<h1 align=”center”>The J-Prop Shop</h1>
Almost all presentational elements and attributes are now deprecated in favor of style sheets, but you may still see them used in older Web sites. Using a deprecated attribute like align would probably not cause a Web page to fail, but it’s still best to focus your HTML code on describing the content of a document and not its appearance.
To append customer names to the Customer Comments section:◗ 1. Return to the jprop.htm file in your text editor.
◗ 2. Locate the first customer comment and then add the following code at the end of the paragraph, directly before the closing </p> tag:
<cite>Thomas Gage, Circus England</cite>
◗ 3. At the end of the paragraph for the second customer comment, insert
<cite>Douglas Pederson, Street-Wise Shows</cite>
◗ 4. Finally, at the end of the paragraph for the third customer comment, insert
<cite>Linda Unger, Linda & Louis</cite>
Figure 1-39 shows the revised code in the file.
A_C7929_01.4c.indd 49A_C7929_01.4c.indd 49 2/8/11 8:24 AM2/8/11 8:24 AMA_C7844_Gloss_01-16.4c.indd 16 10/21/11 12:42 PM
Copyright 2012 Cengage Learning. All Rights Reserved. May not be copied, scanned, or duplicated, in whole or in part. Due to electronic rights, some third party content may be suppressed from the eBook and/or eChapter(s). Editorial review has deemed that any suppressed content does not materially affect the overall learning experience. Cengage Learning reserves the right to remove additional content at any time if subsequent rights restrictions require it.

HTML 50 HTML and CSS | Tutorial 1 Getting Started with HTML5
Figure 1-39 Providing citations for the customer quotes
◗ 5. Save your changes to the file and then refresh the jprop.htm file in your Web browser. Figure 1-40 shows the revised text of the Customer Comments sidebar.
citations, displayed by the browser in italic
Figure 1-40 Revised Customer Comments sidebar
A_C7929_01.4c.indd 50A_C7929_01.4c.indd 50 2/8/11 8:24 AM2/8/11 8:24 AMA_C7844_Gloss_01-16.4c.indd 16 10/21/11 12:42 PM
Copyright 2012 Cengage Learning. All Rights Reserved. May not be copied, scanned, or duplicated, in whole or in part. Due to electronic rights, some third party content may be suppressed from the eBook and/or eChapter(s). Editorial review has deemed that any suppressed content does not materially affect the overall learning experience. Cengage Learning reserves the right to remove additional content at any time if subsequent rights restrictions require it.

HTML 51Tutorial 1 Getting Started with HTML5 | HTML and CSS
Dave thinks the comments are diffi cult to read when the text of a comment runs into the citation. He suggests that you start each citation on a new line. To do this, you can insert a line break into the Web page using the following empty element tag:
<br />
Line breaks must be placed within grouping elements such as paragraphs or head-ings. Some browsers accept line breaks placed anywhere within the body of a Web page; however, this is not good coding technique. A browser displaying an XHTML document will reject code in which a text-level element such as br is placed outside of any group-ing element.
You’ll use the br element to mark a line break between each customer comment and its associated citation in Dave’s Web page.
To insert line breaks in the comments:◗ 1. Return to the jprop.htm file in your text editor.
◗ 2. Insert the tag <br /> between the comment and the citation for each of the three customer comments in the file. See Figure 1-41.
line break element
Figure 1-41 Inserting line breaks
◗ 3. Save your changes to the file and then refresh the jprop.htm file in your Web browser. Verify that each citation starts on a new line below the associated cus-tomer comment.
INSI
GH
T
Marking a Horizontal RuleAnother empty element is hr, the horizontal rule element, which marks a major topic change within a section. The syntax of the hr element is as follows:
<hr />
The exact appearance of the hr element is left to the browser. Most browsers display a gray-shaded horizontal line a few pixels in height. The hr element was originally used as a quick way of inserting horizontal lines within a Web page. Although that task now should be left to style sheets, you will still see the hr element in older Web pages.
A_C7929_01.4c.indd 51A_C7929_01.4c.indd 51 2/8/11 8:24 AM2/8/11 8:24 AMA_C7844_Gloss_01-16.4c.indd 16 10/21/11 12:42 PM
Copyright 2012 Cengage Learning. All Rights Reserved. May not be copied, scanned, or duplicated, in whole or in part. Due to electronic rights, some third party content may be suppressed from the eBook and/or eChapter(s). Editorial review has deemed that any suppressed content does not materially affect the overall learning experience. Cengage Learning reserves the right to remove additional content at any time if subsequent rights restrictions require it.

HTML 52 HTML and CSS | Tutorial 1 Getting Started with HTML5
Inserting an Inline ImageDave wants you to replace the name of the company at the top of his Web page with an image of the company logo. Because HTML fi les are simple text fi les, non-textual con-tent such as graphics must be stored in separate fi les, which are then loaded by browsers as they render pages. To add a graphic image to a Web page, you have to insert an inline image into your code.
The img ElementInline images are inserted into a Web page using the one-sided img element with the syntax
<img src=”file” alt=”text” />
where file is the name of the graphic image fi le and text is text displayed by brows-ers in place of the graphic image. In this tutorial, you’ll assume that the graphic image fi le is located in the same folder as the Web page, so you don’t have to specify the loca-tion of the fi le. In the next tutorial, you’ll learn how to reference fi les placed in other folders or locations on the Web.
Browsers retrieve the specifi ed image fi le and display the image alongside the rest of the Web page content. The size of the image is based on the dimensions of the image itself; however, you can specify a different size using the width and height attributes
width=”value” height=”value”
where the width and height values are expressed in pixels. If you specify only the width, browsers automatically set the height to maintain the proportions of the image; similarly, if you defi ne the height, browsers automatically set the width to maintain the image pro-portions. Thus, by setting the width and height values yourself, you can enlarge or reduce the size of the rendered image.
Inline images are considered text-level elements and thus must be placed within a grouping element such as a heading or a paragraph. An inline image is most com-monly stored in one of three formats: GIF (Graphics Interchange Format), JPEG (Joint Photographic Experts Group), or PNG (Portable Network Graphics). Dave has already created his graphic image in PNG format and stored it with his other fi les using the fi le-name jpslogo.png. You’ll replace the text of the h1 heading with this inline image.
Always include alternate text for inline images. The alt attribute is required in XHTML code and is highly recommended as a way of accommodating users running nonvisual Web browsers.
To insert the company logo at the top of the page:◗ 1. Return to the jprop.htm file in your text editor.
◗ 2. Go to the h1 heading element at the top of the body section, delete the text The J-Prop Shop from between the opening and closing <h1> tags, and then replace it with
<img src=”jpslogo.png” alt=”The J-Prop Shop” />
Figure 1-42 highlights the revised code in the jprop.htm file.
A_C7929_01.4c.indd 52A_C7929_01.4c.indd 52 2/8/11 8:24 AM2/8/11 8:24 AMA_C7844_Gloss_01-16.4c.indd 16 10/21/11 12:42 PM
Copyright 2012 Cengage Learning. All Rights Reserved. May not be copied, scanned, or duplicated, in whole or in part. Due to electronic rights, some third party content may be suppressed from the eBook and/or eChapter(s). Editorial review has deemed that any suppressed content does not materially affect the overall learning experience. Cengage Learning reserves the right to remove additional content at any time if subsequent rights restrictions require it.

HTML 53Tutorial 1 Getting Started with HTML5 | HTML and CSS
Figures and Figure CaptionsIn books and magazines, fi gures and fi gure captions are often placed within boxes that stand aside from the main content of an article. HTML5 introduced this type of object to Web page markup with the figure and figcaption elements
<figure> content <figcaption>caption</figcaption></figure>
where content is the content that will appear in the fi gure box and caption is the text of the fi gure caption. The figcaption element is optional; but if the figcaption element is used, it must be nested within a set of <figure> tags either directly after the opening <figure> tag or directly before the closing </figure> tag. For example, the
alternate text displayed in place of the image
image file
Figure 1-42 Adding an inline image
◗ 3. Save your changes to the file, and then refresh the Web page in your browser. Figure 1-43 shows the new heading with the logo centered across the page.
company logo
Figure 1-43 Viewing the company logo
A_C7929_01.4c.indd 53A_C7929_01.4c.indd 53 2/8/11 8:24 AM2/8/11 8:24 AMA_C7844_Gloss_01-16.4c.indd 16 10/21/11 12:42 PM
Copyright 2012 Cengage Learning. All Rights Reserved. May not be copied, scanned, or duplicated, in whole or in part. Due to electronic rights, some third party content may be suppressed from the eBook and/or eChapter(s). Editorial review has deemed that any suppressed content does not materially affect the overall learning experience. Cengage Learning reserves the right to remove additional content at any time if subsequent rights restrictions require it.

HTML 54 HTML and CSS | Tutorial 1 Getting Started with HTML5
following HTML5 code creates a fi gure box containing an inline image of one of the J-Prop Shop’s products and a caption:
<figure> <img src=”stick03.png” alt=”Master Stick” /> <figcaption>Master Stick ($39.95)</figcaption></figure>
The figure element doesn’t necessarily need to contain an inline image. It can be used to mark any content that stands aside from a main article but is referenced by it. For instance, it could be used to contain an excerpt of a poem, as the following code demonstrates:
<figure> <p>'Twas brillig, and the slithy toves<br /> Did gyre and gimble in the wabe;<br /> All mimsy were the borogoves,<br /> And the mome raths outgrabe. </p> <figcaption> <cite>Jabberwocky, Lewis Carroll, 1832-98</cite> </figcaption></figure>
As with other HTML elements, the exact appearance of a fi gure box is determined by a style sheet. At this time, Dave does not need to create a fi gure box for his company’s home page.
Working with Character Sets and Special CharactersDave likes the work you’ve done so far on the Web page. He has only one remaining concern: The company’s address in the page footer is diffi cult to read because the street address, city name, zip code, and phone number all run together on one line. Dave would like to have the different parts of the address separated by a solid circular marker ( • ). However, this marker is not represented by any keys on your keyboard. How, then, do you insert this symbol into the Web page?
Character SetsEvery character that your browser is capable of rendering belongs to a collection of char-acters and symbols called a character set. Character sets come in a wide variety of sizes. For English, no more than about 127 characters are needed to represent all of the upper- and lowercase letters, numbers, punctuation marks, spaces, and special typing symbols in the language. Other languages, such as Japanese or Chinese, require character sets containing thousands of symbols. Beyond the basic characters used by a language are special characters such as ©, ½, π, and ®. Thus, a complete character set that includes all possible printable characters is made up of hundreds of symbols.
The character set used for the alphabet of English characters is called ASCII (American Standard Code for Information Interchange). A more extended character set, called Latin-1 or the ISO 8859-1 character set, supports 255 characters and can be used by most languages that employ the Latin alphabet, including English, French, Spanish, and Italian. Unicode, the most extended character set, supports up to 65,536 symbols and can be used for any of the world’s languages. The most commonly used character set on the Web is UTF-8, which is a compressed version of Unicode and is probably the default character set assumed by your browser. You can learn more about character sets by visiting the W3C Web site and the Web site for the Internet Assigned Numbers Authority at www.iana.org.
A_C7929_01.4c.indd 54A_C7929_01.4c.indd 54 2/8/11 8:24 AM2/8/11 8:24 AMA_C7844_Gloss_01-16.4c.indd 16 10/21/11 12:42 PM
Copyright 2012 Cengage Learning. All Rights Reserved. May not be copied, scanned, or duplicated, in whole or in part. Due to electronic rights, some third party content may be suppressed from the eBook and/or eChapter(s). Editorial review has deemed that any suppressed content does not materially affect the overall learning experience. Cengage Learning reserves the right to remove additional content at any time if subsequent rights restrictions require it.

HTML 55Tutorial 1 Getting Started with HTML5 | HTML and CSS
Character EncodingCharacter encoding associates each symbol from a character set with a numeric value called the numeric character reference. For example, the copyright symbol © from the UTF-8 character set is encoded with the number 169. If you know the character encod-ing number, you can insert the corresponding character directly into your Web page using the entity
&#code;
where code is the encoding number. Thus, to display the © symbol in your Web page, you would enter
©
into your HTML fi le.
Character Entity ReferencesAnother way to insert a special symbol is to use a character entity reference, which is a short memorable name used in place of the encoding number. Character entity refer-ences are inserted using the syntax
&char;
where char is the character’s entity reference. The character entity reference for the copyright symbol is copy. So to display the © symbol in your Web page, you could insert
©
into your HTML code.
RE
FER
EN
CE
Inserting Symbols from a Character Set• To insert a symbol based on the encoding number, use the entity
&#code;where code is the encoding number.
• To insert a symbol based on a character entity reference, use the entity&char;where char is the name assigned to the character.
• To insert a nonbreaking space, use the following entity:
• To insert the < symbol, use the following entity:<
• To insert the > symbol, use the following entity:>
You can explore various encoding numbers and character entity references by open-ing the demo page supplied with your Data Files.
To view the demo page:◗ 1. Use your Web browser to open the demo_characters.htm file from the
tutorial.01\demo data folder.
◗ 2. Type £ in the input box and then click the Show button. The Web browser displays the £ symbol in the ivory-colored box below.
A_C7929_01.4c.indd 55A_C7929_01.4c.indd 55 2/8/11 8:24 AM2/8/11 8:24 AMA_C7844_Gloss_01-16.4c.indd 16 10/21/11 12:42 PM
Copyright 2012 Cengage Learning. All Rights Reserved. May not be copied, scanned, or duplicated, in whole or in part. Due to electronic rights, some third party content may be suppressed from the eBook and/or eChapter(s). Editorial review has deemed that any suppressed content does not materially affect the overall learning experience. Cengage Learning reserves the right to remove additional content at any time if subsequent rights restrictions require it.

HTML 56 HTML and CSS | Tutorial 1 Getting Started with HTML5
◗ 3. Replace the value in the input box with ® and then click the Show button. The browser now displays the ® symbol, the symbol for registered trademarks, which you specified using a character entity reference.
You can also view a collection of numeric character references and character entity references by selecting a table from the list box on the page.
◗ 4. Verify that General Symbols is displayed in the selection list box, and then click the Show Table button. As shown in Figure 1-44, the browser displays a list of 35 symbols with the character entity reference and the numeric character refer-ence displayed beneath each symbol.
character symbol
character entity reference
character entity reference
symbol numeric character reference
Figure 1-44 HTML characters demo page
◗ 5. Take some time to explore the variety of numeric character references and char-acter entity references supported by your browser. Close the demo page when you’re finished, but leave your browser open.
INSI
GH
T
Special CharactersOne use of character codes is to insert text about HTML itself. For example, if you want your Web page to describe the use of the <h1> tag, you cannot simply type
The <h1> tag is used to mark h1 headings.
because browsers would interpret the <h1> text as marking the beginning of an h1 heading! Instead, you have to use the < and > entity references to insert the < and > symbols. The text would then be:
The <h1> tag is used to mark h1 headings.
Another use of character codes is to add extra spaces to your Web page. Remember that browsers ignore extra blank spaces in an HTML file. To insert an additional space, use the entity reference (nbsp stands for nonbreaking space), which forces browsers to insert an extra space.
A_C7929_01.4c.indd 56A_C7929_01.4c.indd 56 2/8/11 8:24 AM2/8/11 8:24 AMA_C7844_Gloss_01-16.4c.indd 16 10/21/11 12:42 PM
Copyright 2012 Cengage Learning. All Rights Reserved. May not be copied, scanned, or duplicated, in whole or in part. Due to electronic rights, some third party content may be suppressed from the eBook and/or eChapter(s). Editorial review has deemed that any suppressed content does not materially affect the overall learning experience. Cengage Learning reserves the right to remove additional content at any time if subsequent rights restrictions require it.

HTML 57Tutorial 1 Getting Started with HTML5 | HTML and CSS
On Dave’s Web page, you decide to use the bullet symbol ( • ) to break up the address text into sections. The symbol has a character encoding number of 8226 and the character entity reference name bull. Dave suggests that you also add a long horizontal line known as an em-dash ( — ) to mark the customer names in the customer comments section. The character encoding number for an em-dash is 8212 and the entity reference is mdash.
To add bullets and an em-dash to Dave’s Web page:◗ 1. Return to the jprop.htm file in your text editor.
◗ 2. Locate the customer comment from Thomas Gage, and then directly before the opening <cite> tag insert the character code — followed by a space.
◗ 3. Repeat Step 2 for the two remaining customer comments.
◗ 4. Scroll down to the address element within the page footer. At the end of each line within the address (except the last line), insert a space followed by the • character entity. Figure 1-45 highlights the revised code in the Web page.
Always include a semi-colon so that browsers recognize the entry as a character code.
character encoding number
character entity reference
Figure 1-45 Adding symbols from a character set
◗ 5. Save your changes to the file.
◗ 6. Refresh the jprop.htm file in your Web browser. Figure 1-46 shows the final con-tent of Dave’s Web page.
A_C7929_01.4c.indd 57A_C7929_01.4c.indd 57 2/8/11 8:24 AM2/8/11 8:24 AMA_C7844_Gloss_01-16.4c.indd 16 10/21/11 12:42 PM
Copyright 2012 Cengage Learning. All Rights Reserved. May not be copied, scanned, or duplicated, in whole or in part. Due to electronic rights, some third party content may be suppressed from the eBook and/or eChapter(s). Editorial review has deemed that any suppressed content does not materially affect the overall learning experience. Cengage Learning reserves the right to remove additional content at any time if subsequent rights restrictions require it.

HTML 58 HTML and CSS | Tutorial 1 Getting Started with HTML5
Specifying the Character SetTo render a numeric character reference correctly, a browser must apply the correct char-acter set to a Web page. This information is typically sent by the Web server as it transfers an HTML page to a browser. However, to be doubly certain that browsers employ the correct character set, you can specify the character set within the head element of your HTML document. For HTML 4.01 and XHTML, you add the meta element
<meta http-equiv=”Content-Type” content=”text/html; charset=character_set” />
Figure 1-46 Completed Web page
A_C7929_01.4c.indd 58A_C7929_01.4c.indd 58 2/8/11 8:24 AM2/8/11 8:24 AMA_C7844_Gloss_01-16.4c.indd 16 10/21/11 12:42 PM
Copyright 2012 Cengage Learning. All Rights Reserved. May not be copied, scanned, or duplicated, in whole or in part. Due to electronic rights, some third party content may be suppressed from the eBook and/or eChapter(s). Editorial review has deemed that any suppressed content does not materially affect the overall learning experience. Cengage Learning reserves the right to remove additional content at any time if subsequent rights restrictions require it.

HTML 59Tutorial 1 Getting Started with HTML5 | HTML and CSS
to the document head, where character_set is the name of the character set you want the browser to employ when interpreting your HTML code. Under HTML5, the meta ele-ment is simply:
<meta charset=”character_set” />
HTML5 also supports the syntax of the HTML 4.01 and XHTML meta element. You should always specify the character encoding in your document, even if you are not using any special symbols. It relieves the browser from having to guess about the correct encoding; and in certain situations, not specifying the encoding can lead to a security hole in the transfer of a page from the Web server to the client.
You’ll add the meta element to Dave’s document to specify that his fi le has been encoded using the UTF-8 character set.
The meta element is also used to store information and keywords describing a document and its purpose.
To specify the character encoding for Dave’s document:◗ 1. Return to the jprop.htm file in your text editor.
◗ 2. Scroll to the top of the file. Directly below the comment in the head section, insert the following meta element as shown in Figure 1-47:
<meta charset=”UTF-8” />
character set
Figure 1-47 Specifying the character encoding
◗ 3. Close the jprop.htm file, saving your changes.
◗ 4. Refresh the jprop.htm file in your browser and verify that the browser renders the page with no errors.
A_C7929_01.4c.indd 59A_C7929_01.4c.indd 59 2/8/11 8:24 AM2/8/11 8:24 AMA_C7844_Gloss_01-16.4c.indd 16 10/21/11 12:42 PM
Copyright 2012 Cengage Learning. All Rights Reserved. May not be copied, scanned, or duplicated, in whole or in part. Due to electronic rights, some third party content may be suppressed from the eBook and/or eChapter(s). Editorial review has deemed that any suppressed content does not materially affect the overall learning experience. Cengage Learning reserves the right to remove additional content at any time if subsequent rights restrictions require it.

HTML 60 HTML and CSS | Tutorial 1 Getting Started with HTML5
PRO
SKIL
LS
Written Communication: Publishing Your Web PageOnce you’ve completed your Web page, your next step is to get it on the Web. You first need to find a Web server to host the page. In choosing a Web server, you’ll need to consider how much you want to pay, how much space you need, and how much traffic you expect at your Web site. If you’d prefer a free or low-cost option and don’t need much space, you might first look toward the company that provides your Internet access. Most Internet service providers (ISPs) offer space on their Web servers as part of their regular service or for a small fee. However, they usually limit the amount of space available to you, unless you pay an extra fee to host a larger site. There are also free Web hosts, which pro-vide space on servers for personal or noncommercial use. Once again, the amount of space you get is limited. Free Web hosting services make their money from selling advertising space on your site, so you should be prepared to act as a billboard in return for space on their servers. Finally, you can pay a monthly fee to an ISP to host your Web site to get more space and bandwidth.
Once you identify a Web host, you next need to consider the domain name that identi-fies your site. If you’re planning to create a commercial site to advertise a product or ser-vice, you’ll want the domain name to reflect your business. Free Web hosts usually include their names in your Web address. Thus, instead of having a Web address like
thejpropshop.comyou might have something like
freewebhosting.net/members/thejpropshop.htmlIf you’re running a site for personal use, this might not be a problem—but it would
look unprofessional on a commercial site. If you are planning a commercial site and simply want to advertise your product by publishing an online brochure, you can usually find an inexpensive host and pay a nominal yearly fee to reserve a Web address that reflects your company’s name.
RE
VIE
W
Session 1.2 Quick Check
1. Specify the code you would enter to mark the text The J-Prop Shop as an h1 heading and the text Product List as an h2 heading. Add code to group these two headings so browsers recognize them as a heading and subheading, respectively.
2. Specify the code you would enter to mark the text Hamlet by William Shakespeare as an h1 heading, with a line break after the word Hamlet.
3. Create an ordered list of the following items: Packers, Bears, Lions, Vikings. 4. Specify the code to access the CSS style sheet fi le uwstyles.css. Where should
you place this code within an HTML fi le? 5. Mark the graphic fi le portrait.gif as an inline image, setting the dimensions to
250 pixels wide by 300 pixels high. Specify the text David Vinet as alternate text to be displayed in place of the image for non-graphical browsers.
6. Specify the code to place the portrait.gif image from the previous question within a fi gure box with the caption David Vinet, owner of the J-Prop Shop.
7. The trademark symbol ( ™ ) has the character encoding number 8482. Provide the HTML code to enter this symbol into your Web page.
8. The Greek letter ß has the character entity name beta. How would you enter this symbol into your Web page?
A_C7929_01.4c.indd 60A_C7929_01.4c.indd 60 2/8/11 8:24 AM2/8/11 8:24 AMA_C7844_Gloss_01-16.4c.indd 16 10/21/11 12:42 PM
Copyright 2012 Cengage Learning. All Rights Reserved. May not be copied, scanned, or duplicated, in whole or in part. Due to electronic rights, some third party content may be suppressed from the eBook and/or eChapter(s). Editorial review has deemed that any suppressed content does not materially affect the overall learning experience. Cengage Learning reserves the right to remove additional content at any time if subsequent rights restrictions require it.

HTML 61Tutorial 1 Getting Started with HTML5 | HTML and CSS
PR
AC
TIC
E
Review Assignments
Data Files needed for the Review Assignments: basiclogo.png, basicstick.png, basicstyles.css, modernizr-1.5.js, stick.txt
Dave has found a host for his Web page and has published the document you helped him create on the Internet. Now he wants to start adding more pages to his Web site. He’s come to you for help in creating a page describing his basic stick. He’s already written the text for the Web page; he needs you to mark up that text with HTML code. Figure 1-48 shows a preview of the page you’ll create for Dave.
Practice the skills you learned in the tutorial using the same case scenario.
Figure 1-48 The Basic Stick product page
Complete the following:
1. Use your text editor to create a new fi le named basic.htm, and then save it in the tutorial.01\review folder included with your Data Files.
2. Add the doctype for an HTML5 document. 3. Create the root html element and nest the head and body elements within it.
A_C7929_01.4c.indd 61A_C7929_01.4c.indd 61 2/8/11 8:24 AM2/8/11 8:24 AMA_C7844_Gloss_01-16.4c.indd 16 10/21/11 12:42 PM
Copyright 2012 Cengage Learning. All Rights Reserved. May not be copied, scanned, or duplicated, in whole or in part. Due to electronic rights, some third party content may be suppressed from the eBook and/or eChapter(s). Editorial review has deemed that any suppressed content does not materially affect the overall learning experience. Cengage Learning reserves the right to remove additional content at any time if subsequent rights restrictions require it.

HTML 62 HTML and CSS | Tutorial 1 Getting Started with HTML5
4. Within the head element, insert the commentThe J-Prop Shop
Sample Page for the Basic Stick
Author: your name
Date: the date
where your name is your name and the date is the current date. 5. Add code to specify that the page uses the UTF-8 character set. 6. Set the page title as Basic Sticks. 7. Link the fi le to the modernizr-1.5.js script fi le to enable HTML5 support for older
browsers. 8. Link the fi le to the basicstyles.css style sheet fi le. 9. Within the body element, create structural elements for the page header, main sec-
tion, and footer. 10. Within the page header, insert an h1 heading containing the inline image fi le
basiclogo.png. Specify the following alternate text for the image: The J-Prop Shop. Below the h1 heading, insert an h2 heading containing the text Specials This Month. Group the h1 and h2 headings using the hgroup element.
11. Within the section element, insert an aside element. The aside element should contain an inline image pointing to the basicstick.png fi le and having the text string photo as the alternate text. Below the inline image within the aside element, insert a paragraph containing the text string Our Basic Stick.
12. Add two article elements to the section element. 13. Within the fi rst article, insert an h2 heading containing the text The Basic Stick. Add
a paragraph containing the following text:The Basic Stick is the perfect stick for beginners. The stick rotates slowly to provide extra time for performing stick tricks, but is fl ashy enough to impress your friends. Enjoy the following:
14. Add a block quote containing the following four paragraphs (you can copy this text from the stick.txt fi le):Patented Dura-Coat fi nish ensures sticks can withstand all weather conditions. More durable than other sticks, these props will keep looking like new for as long as you own them.Enhanced stick fl exibility provides more bounce, allowing for better tricks. A soft rubber core adds a whole new element to the sticking experience that you have to feel to believe!Full customization will give you the chance to own a pair of sticks unlike any others out there. I make exactly what you want, with your colors and your designs.A personal touch through both my customization options and hand-crafted designs.
15. Mark the fi rst few words of each of the four paragraphs as strong text, as shown in Figure 1-48.
16. Within the second article element, insert an h2 heading with the title Specifi cations. 17. Directly below the h2 heading, insert an unordered list. The list should contain two
items: Main Stick and Handle Sticks (one pair).
A_C7929_01.4c.indd 62A_C7929_01.4c.indd 62 2/8/11 8:24 AM2/8/11 8:24 AMA_C7844_Gloss_01-16.4c.indd 16 10/21/11 12:42 PM
Copyright 2012 Cengage Learning. All Rights Reserved. May not be copied, scanned, or duplicated, in whole or in part. Due to electronic rights, some third party content may be suppressed from the eBook and/or eChapter(s). Editorial review has deemed that any suppressed content does not materially affect the overall learning experience. Cengage Learning reserves the right to remove additional content at any time if subsequent rights restrictions require it.

HTML 63Tutorial 1 Getting Started with HTML5 | HTML and CSS
18. Within the Main Stick list item, insert a nested unordered list containing the follow-ing items:
• Weight: 7 oz.• Length: 24 inches• Tape: Dura-Coat fi nish with laser-style color choices
19. Within the Handle Sticks (one pair) list item, insert a nested unordered list contain-ing the following items:
• Weight: 2 oz.• Length: 18 inches• Tape: Soft ivory tape with rubber core
20. Locate the two occurrences of Dura-Coat in the document. Directly after the word Dura-Coat, insert the registered trademark symbol ®. The character entity name of the ® symbol is reg. Display the ® symbol as a superscript by placing the character within the sup element.
21. Within the page footer, insert the company’s address:The J-Prop Shop541 West Highland DriveAuburn, ME 04210(207) 555 - 9001
22. Separate the different sections of the address using a solid diamond (character code 9830).
23. Save your changes to the fi le, open it in your Web browser, and then compare your Web page to Figure 1-48 to verify that it was rendered correctly. Older browsers may display some slight differences in the design.
24. Submit your completed fi les to your instructor, in either printed or electronic form, as requested.
AP
PLY
Case Problem 1
Data Files needed for the Case Problem: mhlogo.jpg, mhstyles.css, mhtxt.htm, modernizr-1.5.js
Math High Professor Lauren Coe of the Mathematics Department of Coastal University in Anderson, South Carolina, is one of the founders of Math High, a Web site containing articles and course materials for high school and college math instructors. She has writ-ten a series of biographies of famous mathematicians for the Web site and would like you to transfer content she’s already written to an HTML5 fi le. You’ll create the fi rst one in this exercise. Figure 1-49 shows a preview of the page you’ll create, which profi les the mathematician Leonhard Euler.
Apply your knowledge of HTML5 to create a Web page for a mathematics Web site.
A_C7929_01.4c.indd 63A_C7929_01.4c.indd 63 2/8/11 8:24 AM2/8/11 8:24 AMA_C7844_Gloss_01-16.4c.indd 16 10/21/11 12:42 PM
Copyright 2012 Cengage Learning. All Rights Reserved. May not be copied, scanned, or duplicated, in whole or in part. Due to electronic rights, some third party content may be suppressed from the eBook and/or eChapter(s). Editorial review has deemed that any suppressed content does not materially affect the overall learning experience. Cengage Learning reserves the right to remove additional content at any time if subsequent rights restrictions require it.

HTML 64 HTML and CSS | Tutorial 1 Getting Started with HTML5
Complete the following:
1. In your text editor, open the mhtxt.htm fi le from the tutorial.01\case1 folder included with your Data Files. Save the fi le as mathhigh.htm in the same folder.
2. Enclose the contents of the fi le within a set of opening and closing <html> tags. Set the doctype of the fi le to indicate that this is an HTML5 document.
3. Add head and body elements to the fi le, enclosing the page contents within the body element.
4. Within the document head, insert the commentMath High: Leonhard EulerAuthor: your nameDate: the datewhere your name is your name and the date is the current date.
5. Set the character set of the document to UTF-8. 6. Add the page title Math High: Leonhard Euler to the document head. 7. Link to the modernizr-1.5.js script fi le. 8. Link to the mhstyles.css style sheet. 9. Within the page body, create a header element. Within this element, insert an inline
image using the mhlogo.jpg fi le as the source and Math High as the alternate text. 10. Mark the page text from the line Leonhard Euler (1707 - 1783) up to (but not includ-
ing) the line The Most Beautiful Theorem? as an article. 11. Mark the fi rst line in the article element, containing Leonhard Euler (1707 - 1783),
as an h1 heading. 12. Mark the next three blocks of text describing Euler’s life as paragraphs.
Figure 1-49 Math High Web page
A_C7929_01.4c.indd 64A_C7929_01.4c.indd 64 2/8/11 8:24 AM2/8/11 8:24 AMA_C7844_Gloss_01-16.4c.indd 16 10/21/11 12:42 PM
Copyright 2012 Cengage Learning. All Rights Reserved. May not be copied, scanned, or duplicated, in whole or in part. Due to electronic rights, some third party content may be suppressed from the eBook and/or eChapter(s). Editorial review has deemed that any suppressed content does not materially affect the overall learning experience. Cengage Learning reserves the right to remove additional content at any time if subsequent rights restrictions require it.

HTML 65Tutorial 1 Getting Started with HTML5 | HTML and CSS
13. Within the fi rst paragraph, mark the names Leonhard Euler and Jean Bernoulli using the strong element. Mark the phrase 800 different books and papers as emphasized text using the em element.
14. In the second paragraph, mark the phrase Introductio in analysin infi nitorum (1748) as a citation.
15. In the phrase Lettres a une princesse d’Allemagne, replace the one-letter word a with à (the character entity name is agrave). Mark the entire publication name as a citation.
16. In the third paragraph, mark the notation for e as a var element and replace pi with the character π (the character reference name is pi).
17. Enclose the next section of text from the line The Most Beautiful Theorem? up to (but not including) the line Math High: A Site for Educators and Researchers as an aside.
18. Mark the text The Most Beautiful Theorem? as an h1 heading. 19. Mark the next fi ve blocks of text as individual paragraphs. 20. In the fi rst equation, mark the letters e, i, and x using the var element (but do not
italicize the i in sin). Mark the term (ix) as a superscript. 21. In the second equation, replace pi with the character π. Mark the letters e and i using
the var element. Mark (πi) as a superscript. 22. In the last paragraph, mark the notations for e and i with the var element and
replace pi with π. 23. Mark the journal name The Mathematical Intelligencer as a citation. 24. Mark the fi nal line in the fi le as a footer. 25. Save your changes to the fi le, and then verify that the page appears correctly in your
Web browser. 26. Submit your completed fi les to your instructor, in either printed or electronic form,
as requested.
AP
PLY
Case Problem 2
Data Files needed for the Case Problem: macbeth.jpg, macbethtxt.htm, macstyles.css, modernizr-1.5.js
Mansfi eld Classical Theatre Steve Karls is the director of Mansfi eld Classical Theatre, a theatre company for young people located in Mansfi eld, Ohio. This summer the com-pany is planning to perform the Shakespeare play Macbeth. Steve wants to put the text of the play on the company’s Web site and has asked for your help in designing and completing the Web page. Steve wants a separate page for each scene from the play. A preview of the page you’ll create for Act I, Scene 1 is shown in Figure 1-50. Steve has already typed the text of the scene. He needs you to supply the HTML code.
Apply your knowledge of HTML to create a page showing text from a scene of a Shakespeare play.
A_C7929_01.4c.indd 65A_C7929_01.4c.indd 65 2/8/11 8:24 AM2/8/11 8:24 AMA_C7844_Gloss_01-16.4c.indd 16 10/21/11 12:42 PM
Copyright 2012 Cengage Learning. All Rights Reserved. May not be copied, scanned, or duplicated, in whole or in part. Due to electronic rights, some third party content may be suppressed from the eBook and/or eChapter(s). Editorial review has deemed that any suppressed content does not materially affect the overall learning experience. Cengage Learning reserves the right to remove additional content at any time if subsequent rights restrictions require it.

HTML 66 HTML and CSS | Tutorial 1 Getting Started with HTML5
Complete the following:
1. Open the macbethtxt.htm fi le from the tutorial.01\case2 folder included with your Data Files. Save the fi le as macbeth.htm in the same folder.
Figure 1-50 Macbeth Act I, Scene 1 Web page
A_C7929_01.4c.indd 66A_C7929_01.4c.indd 66 2/8/11 8:24 AM2/8/11 8:24 AMA_C7844_Gloss_01-16.4c.indd 16 10/21/11 12:42 PM
Copyright 2012 Cengage Learning. All Rights Reserved. May not be copied, scanned, or duplicated, in whole or in part. Due to electronic rights, some third party content may be suppressed from the eBook and/or eChapter(s). Editorial review has deemed that any suppressed content does not materially affect the overall learning experience. Cengage Learning reserves the right to remove additional content at any time if subsequent rights restrictions require it.

HTML 67Tutorial 1 Getting Started with HTML5 | HTML and CSS
2. Enclose the entire Macbeth text within the structure of an HTML document includ-ing the html, head, and body elements. Add a doctype to the document head to indicate that the page is written in HTML5.
3. Within the head section, insert a comment containing the following text:Macbeth: Act I, Scene 1Author: your nameDate: the date
4. Add the page title Macbeth: Act I, Scene 1. 5. Link the fi le to the modernizr-1.5.js script fi le and to the macstyles.css style sheet.
Set the character set to UTF-8. 6. Within the body element, insert a heading group consisting of an h1 heading and an
h2 heading. Within the h1 heading, insert an inline image containing the macbeth.jpg image fi le. Specify Macbeth as the alternate text. Within the h2 heading, enter the text Presented by: Mansfi eld Classical Theatre.
7. Enclose the text of the play within a section element. 8. Mark the text ACT I as an h2 heading. Mark SCENE 1 as an h3 heading. Group the
two headings within an hgroup element. 9. Mark the summary of the scene as a paragraph. Mark the word Summary using the
strong element. 10. In the text of the play, mark the descriptions of setting, scene, and exits as separate
paragraphs and italicize the text using the i element, as shown in Figure 1-50. 11. Mark the dialog as a description list, with each character’s name marked as a
description term and each speech marked as a description. When a speech includes two lines, add a line break at the end of the fi rst line to keep the speech on separate lines, as shown in the fi gure.
12. Directly below the paragraph containing the text Exeunt, insert the line Go to Scene 2. Mark this line as a div element with the id value direction. At the end of this line, insert a right arrow character using the 8658 character number. Add hori-zontal rules directly above and below this statement.
13. Mark the line Text provided by Online Shakespeare as a footer. Make sure the footer element is below the section element.
14. Save your changes to the fi le, and then confi rm the layout and content of the page in your Web browser.
15. Submit the completed fi les to your instructor, in either printed or electronic form, as requested.
CH
ALL
EN
GE
Case Problem 3
Data Files needed for the Case Problem: dessertstyles.css, dessertweb.jpg, modernizr-1.5.js, torte.jpg, tortetxt.htm
dessertWEB Amy Wu wants to take her enjoyment of cooking and her love of shar-ing recipes to the World Wide Web. She’s interested in creating a new Web site called dessertWEB where other cooks can submit and review dessert recipes. Each page within her site will contain a photo and description of a dessert, along with a list of ingredients, cooking directions, and a list of reviews. Each recipe will be rated on a fi ve-star scale. She already has information on one recipe: Apple Bavarian Torte. She’s asked for your help in creating a Web page from the data she’s collected. A preview of the completed page is shown in Figure 1-51.
Explore how to use HTML to create a recipe page.
A_C7929_01.4c.indd 67A_C7929_01.4c.indd 67 2/8/11 8:24 AM2/8/11 8:24 AMA_C7844_Gloss_01-16.4c.indd 16 10/21/11 12:42 PM
Copyright 2012 Cengage Learning. All Rights Reserved. May not be copied, scanned, or duplicated, in whole or in part. Due to electronic rights, some third party content may be suppressed from the eBook and/or eChapter(s). Editorial review has deemed that any suppressed content does not materially affect the overall learning experience. Cengage Learning reserves the right to remove additional content at any time if subsequent rights restrictions require it.

HTML 68 HTML and CSS | Tutorial 1 Getting Started with HTML5
Complete the following:
1. Open the tortetxt.htm fi le from the tutorial.01\case3 folder included with your Data Files. Save the fi le as torte.htm in the same folder.
2. Add the structure of an HTML5 document around the recipe text. Within the head element, insert a comment containing the following text:Apple Bavarian TorteAuthor: your nameDate: the date
3. Set the character set of the document to ISO-8859-1. 4. Link the document to the modernizr-1.5.js script fi le and the dessertstyles.css style
sheet fi le. 5. Specify Apple Bavarian Torte Recipe as the page title. 6. Within the body element, add a header element. Within the header element, insert
an h1 heading containing the inline image dessertweb.jpg with the alternate text dessertWEB.
Figure 1-51 dessertWeb menu page
A_C7929_01.4c.indd 68A_C7929_01.4c.indd 68 2/8/11 8:24 AM2/8/11 8:24 AMA_C7844_Gloss_01-16.4c.indd 16 10/21/11 12:42 PM
Copyright 2012 Cengage Learning. All Rights Reserved. May not be copied, scanned, or duplicated, in whole or in part. Due to electronic rights, some third party content may be suppressed from the eBook and/or eChapter(s). Editorial review has deemed that any suppressed content does not materially affect the overall learning experience. Cengage Learning reserves the right to remove additional content at any time if subsequent rights restrictions require it.

HTML 69Tutorial 1 Getting Started with HTML5 | HTML and CSS
7. Enclose the recipe description, ingredients list, and directions within a section ele-ment. Enclose the recipe reviews within an aside element.
8. Mark the text Apple Bavarian Torte as an h1 heading. 9. Replace the text (4 stars) in the h1 heading with a set of four star symbols (character
number 9733). 10. Directly below the h1 heading, insert the inline image torte.jpg. Specify the alternate
text Torte image. Set the width of the image to 250 pixels. 11. Mark the description of the dessert as a paragraph. 12. Mark INGREDIENTS and DIRECTIONS as h2 headings. 13. Mark the list of ingredients as an unordered list. Mark the list of directions as an
ordered list. 14. Within the ingredients, replace the occurrences of 1/2 with the character symbol ½
(reference number 189), the occurrences of 1/4 with the symbol ¼ (reference num-ber 188), and the occurrences of 1/3 with the symbol ¹∕³ (reference number 8531.)
15. Replace each occurrence of the word degrees in the directions with the degree sym-bol ( ° ) (character name deg).
16. Mark REVIEWS within the aside element as an h1 heading. 17. Change the text of each customer star rating to a set of star symbols using character
number 9733 placed within a paragraph. 18. Enclose the text of each customer review in a paragraph nested within a blockquote
element. Place the name of the reviewer and the date on a new line within that para-graph. Insert an em-dash (character name mdash) before the word Reviewed in each of the reviews. Enclose the date of each review within a time element and enclose by reviewer within a cite element where reviewer is the name of the reviewer.
19. Save your changes to the fi le, and then verify the layout and content of the page in your Web browser.
20. Submit the completed fi les to your instructor, in either printed or electronic form, as requested.
RE
SE
AR
CH
Case Problem 4
Data Files needed for the Case Problem: logo.jpg, smith.jpg, and smith.txt
Body Systems Body Systems is a leading manufacturer of home gyms. The company recently hired you to assist in developing its Web site. Your fi rst task is to create a Web page for the LSM400, a popular weight machine sold by the company. You’ve been given a text fi le describing the features of the LSM400. You’ve also received two image fi les: one of the company’s logo and one of the LSM400. You are free to supplement these fi les with any other resources available to you. You are responsible for the page’s content and appearance.
Complete the following:
1. Create a new HTML5 fi le named smith.htm and save it in the tutorial.01\case4 folder included with your Data Files.
2. Add the appropriate doctype for HTML5 to the beginning of the fi le. 3. Add a comment to the document head describing the document’s content and con-
taining your name and the date. 4. Add an appropriate page title to the document head. 5. Set the character set of the fi le to UTF-8.
Test your knowledge of HTML and use your creativity to design a Web page for an exercise equipment company.
A_C7929_01.4c.indd 69A_C7929_01.4c.indd 69 2/8/11 8:24 AM2/8/11 8:24 AMA_C7844_Gloss_01-16.4c.indd 16 10/21/11 12:42 PM
Copyright 2012 Cengage Learning. All Rights Reserved. May not be copied, scanned, or duplicated, in whole or in part. Due to electronic rights, some third party content may be suppressed from the eBook and/or eChapter(s). Editorial review has deemed that any suppressed content does not materially affect the overall learning experience. Cengage Learning reserves the right to remove additional content at any time if subsequent rights restrictions require it.
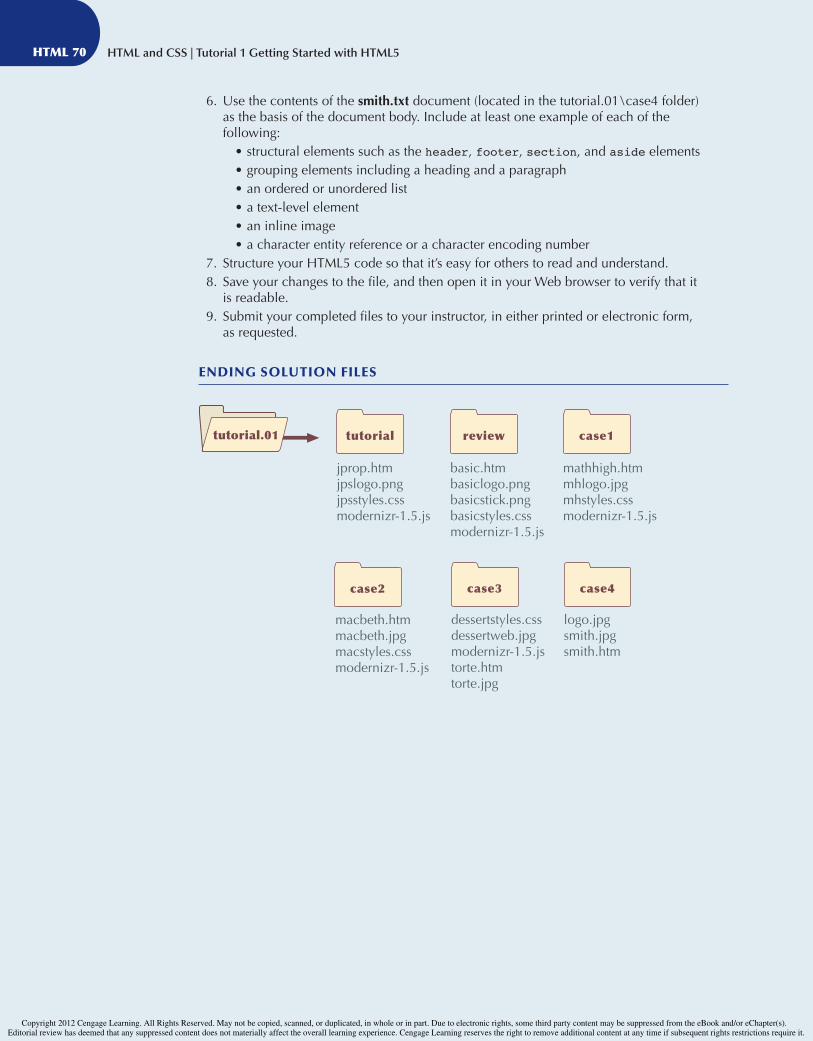
HTML 70 HTML and CSS | Tutorial 1 Getting Started with HTML5
6. Use the contents of the smith.txt document (located in the tutorial.01\case4 folder) as the basis of the document body. Include at least one example of each of the following:
• structural elements such as the header, footer, section, and aside elements• grouping elements including a heading and a paragraph• an ordered or unordered list• a text-level element• an inline image• a character entity reference or a character encoding number
7. Structure your HTML5 code so that it’s easy for others to read and understand. 8. Save your changes to the fi le, and then open it in your Web browser to verify that it
is readable. 9. Submit your completed fi les to your instructor, in either printed or electronic form,
as requested.
ENDING SOLUTION FILES
tutorial.01 tutorial
jprop.htmjpslogo.pngjpsstyles.cssmodernizr-1.5.js
review
basic.htmbasiclogo.pngbasicstick.pngbasicstyles.cssmodernizr-1.5.js
case1
mathhigh.htmmhlogo.jpgmhstyles.cssmodernizr-1.5.js
dessertstyles.cssdessertweb.jpgmodernizr-1.5.jstorte.htmtorte.jpg
case3case2
macbeth.htmmacbeth.jpgmacstyles.cssmodernizr-1.5.js
logo.jpgsmith.jpgsmith.htm
case4
A_C7929_01.4c.indd 70A_C7929_01.4c.indd 70 2/8/11 8:24 AM2/8/11 8:24 AMA_C7844_Gloss_01-16.4c.indd 16 10/21/11 12:42 PM
Copyright 2012 Cengage Learning. All Rights Reserved. May not be copied, scanned, or duplicated, in whole or in part. Due to electronic rights, some third party content may be suppressed from the eBook and/or eChapter(s). Editorial review has deemed that any suppressed content does not materially affect the overall learning experience. Cengage Learning reserves the right to remove additional content at any time if subsequent rights restrictions require it.