Embed Size (px)
Citation preview

NSX Container Plug-in forOpenShift - Installationand Administration GuideVMware NSX Container Plug-in 2.3, 2.3.1, 2.3.2VMware NSX-T Data Center 2.3VMware NSX-T Data Center 2.3.1

NSX Container Plug-in for OpenShift - Installation and Administration Guide
VMware, Inc. 2
You can find the most up-to-date technical documentation on the VMware website at:
https://docs.vmware.com/
If you have comments about this documentation, submit your feedback to
Copyright © 2017–2019 VMware, Inc. All rights reserved. Copyright and trademark information.
VMware, Inc.3401 Hillview Ave.Palo Alto, CA 94304www.vmware.com

Contents
NSX-T Container Plug-in for OpenShift - Installation and Administration Guide 4
1 Overview of NSX-T Container Plug-in 5
Compatibility Requirements 6
Installation Overview 6
Upgrading NCP 7
2 Setting Up NSX-T Resources 8
Configuring NSX-T Resources 8
Create and Configure a Tier-0 Logical Router 11
3 Installing NCP in an OpenShift Environment 12
Deploy OpenShift VMs 12
Prepare the Ansible Hosts File 12
Install NCP and OpenShift Using a Single Playbook 14
Install CNI Plug-in, OVS, and NCP Docker Image 15
Install OpenShift Container Platform 17
Run NCP and NSX Node Agent 17
Setup Notes 19
4 Installing NCP in a Bare-Metal Environment 23
Install NSX-T Data Center CNI Plug-in 23
Configure NSX-T Data Center Networking for OpenShift Nodes 23
Install NSX Node Agent 24
Configmap for ncp.ini in nsx-node-agent-ds.yml 25
Install NSX-T Container Plug-in 28
Configmap for ncp.ini in ncp-rc.yml 30
5 Load Balancing 36
Configuring Load Balancing 36
6 Administering NSX-T Container Plug-in 42
Manage IP Blocks from the NSX Manager GUI 42
View IP Block Subnets from the NSX Manager GUI 43
CIF-Attached Logical Ports 43
CLI Commands 44
Error Codes 55
VMware, Inc. 3

NSX-T Container Plug-in for OpenShift -Installation and Administration Guide
This guide describes how to install and administer NSX-T Container Plug-in (NCP) to provide integrationbetween NSX-T Data Center and OpenShift.
Intended AudienceThis guide is intended for system and network administrators. A familiarity with the installation andadministration of NSX-T Data Center and OpenShift is assumed.
VMware Technical Publications GlossaryVMware Technical Publications provides a glossary of terms that might be unfamiliar to you. Fordefinitions of terms as they are used in VMware technical documentation, go to http://www.vmware.com/support/pubs.
VMware, Inc. 4

Overview of NSX-T ContainerPlug-in 1NSX-T Container Plug-in (NCP) provides integration between NSX-T Data Center and containerorchestrators such as Kubernetes, as well as integration between NSX-T Data Center and container-based PaaS (platform as a service) software products such as OpenShift. This guide describes setting upNCP with OpenShift.
The main component of NCP runs in a container and communicates with NSX Manager and with theOpenShift control plane. NCP monitors changes to containers and other resources and managesnetworking resources such as logical ports, switches, routers, and security groups for the containers bycalling the NSX API.
The NSX CNI plug-in runs on each OpenShift node. It monitors container life cycle events, connects acontainer interface to the guest vSwitch, and programs the guest vSwitch to tag and forward containertraffic between the container interfaces and the VNIC.
NCP provides the following functionalities:
n Automatically creates an NSX-T logical topology for a OpenShift cluster, and creates a separatelogical network for each OpenShift namespace.
n Connects OpenShift pods to the logical network, and allocates IP and MAC addresses.
n Supports network address translation (NAT) and allocates a separate SNAT IP for each OpenShiftnamespace.
Note When configuring NAT, the total number of translated IPs cannot exceed 1000.
n Implements OpenShift network policies with NSX-T distributed firewall.
n Support for ingress and egress network policies.
n Support for IPBlock selector in network policies.
n Support for matchLabels and matchExpression when specifying label selectors for networkpolicies.
n Implements OpenShift route with NSX-T layer 7 load balancer.
n Support for HTTP route and HTTPS route with TLS edge termination.
n Support for routes with alternate backends and wildcard subdomains.
VMware, Inc. 5

n Creates tags on the NSX-T logical switch port for the namespace, pod name, and labels of a pod, andallows the administrator to define NSX-T Data Center security groups and policies based on the tags.
In this release, NCP supports a single OpenShift cluster.
This chapter includes the following topics:
n Compatibility Requirements
n Installation Overview
n Upgrading NCP
Compatibility RequirementsNSX-T Container Plug-in (NCP) has the following compatibility requirements.
Software Product Version
NSX-T Data Center 2.2, 2.3
Hypervisor for Container Host VMs n Supported vSphere versionn RHEL KVM 7.4, 7.5
Container Host Operating System RHEL 7.4, 7.5
Platform as a Service OpenShift 3.9, 3.10
Container Host Open vSwitch 2.9.1 (packaged with NSX-T 2.3 and 2.2)
Installation OverviewInstalling and configuring NCP involves the following steps. To perform the steps successfully, you mustbe familiar with NSX-T Data Center and OpenShift installation and administration.
1 Install NSX-T Data Center.
2 Create an overlay transport zone.
3 Create an overlay logical switch and connect the nodes to the switch.
4 Create a tier-0 logical router.
5 Create IP blocks for the pods.
6 Create IP pools for SNAT (source network address translation).
7 Deploy OpenShift VMs.
8 Prepare the Ansible hosts file.
9 (Option 1) Install NCP and OpenShift using a single playbook.
(Option 2) Install CNI plug-in, OVS (Open vSwitch), and NCP docker image. Then Install OpenShiftContainer Platform.
10 Run NCP and NSX node agent.
NSX Container Plug-in for OpenShift - Installation and Administration Guide
VMware, Inc. 6

Steps 2 to 6 are not needed if you install NCP using playbooks that are provided. See Install NCP andOpenShift Using a Single Playbook and Install CNI Plug-in, OVS, and NCP Docker Image.
Upgrading NCPTo upgrade NCP to 2.3.0, perform the following steps.
1 Upgrade the CNI RPM package, NSX Node Agent DaemonSet, and NCP ReplicationController.
2 (Optional) Upgrade NSX-T Data Center to 2.3.
NCP 2.3.0 supports NSX-T 2.2 but you can also upgrade to NSX-T Data Center 2.3.
NSX Container Plug-in for OpenShift - Installation and Administration Guide
VMware, Inc. 7

Setting Up NSX-T Resources 2NSX-T Data Center resources must be created to provide networking to OpenShift nodes. You canconfigure these resources manually using the NSX Manager GUI, or automate the process using anAnsible playbook.
This section describes creating the NSX-T resources manually. To automate the process, see Install CNIPlug-in, OVS, and NCP Docker Image.
This chapter includes the following topics:
n Configuring NSX-T Resources
n Create and Configure a Tier-0 Logical Router
Configuring NSX-T ResourcesNSX-T Data Center resources that you need to configure include an overlay transport zone, a tier-0logical router, a logical switch to connect the node VMs, IP blocks for Kubernetes nodes, and an IP poolfor SNAT.
You configure NSX-T Data Center resources using UUIDs or names in the configuration file ncp.ini.
Overlay Transport ZoneLog in to NSX Manager and navigate to Fabric > Transport Zones. Find the overlay transport zone thatis used for container networking or create a new one.
Specify an overlay transport zone for a cluster by setting the overlay_tz option in the [nsx_v3] sectionof ncp.ini. This step is optional. If you do not set overlay_tz, NCP will automatically retrieve theoverlay transport zone ID from the tier-0 router.
Tier-0 Logical RoutingLog in to NSX Manager and navigate to Networking > Routing > Routers. Find the router that is usedfor container networking or create a new one.
Specify a tier-0 logical router for a cluster by setting the tier0_router option in the [nsx_v3] section ofncp.ini.
Note The router must be created in active-standby mode.
VMware, Inc. 8

Logical SwitchThe vNICs used by the node for data traffic must be connected to an overlay logical switch. It is notmandatory for the node's management interface to be connected to NSX-T Data Center, although doingso will make setting up easier. You can create a logical switch by logging in to NSX Manager andnavigating to Networking > Switching > Switches. On the switch, create logical ports and attach thenode vNICs to them. The logical ports must have the following tags:
n tag: <cluster_name>, scope: ncp/cluster
n tag: <node_name>, scope: ncp/node_name
The <cluster_name> value must match the value of the cluster option in the [coe] section inncp.ini.
IP Blocks for Kubernetes PodsLog in to NSX Manager and navigate to Networking > IPAM to create one or more IP blocks. Specify theIP block in CIDR format.
Specify IP blocks for Kubernetes pods by setting the container_ip_blocks option in the [nsx_v3]section of ncp.ini.
You can also create IP blocks specifically for no-SNAT namespaces.
Specify no-SNAT IP blocks by setting the no_snat_ip_blocks option in the [nsx_v3] section ofncp.ini.
If you create no-SNAT IP blocks while NCP is running, you must restart NCP. Otherwise, NCP will keepusing the shared IP blocks until they are exhausted.
Note When you create an IP block, the prefix must not be larger than the value of the parametersubnet_prefix in NCP's configuration file ncp.ini.
IP Pool for SNATThe IP pool is used for allocating IP addresses which will be used for translating pod IPs via SNAT rules,and for exposing ingress controllers via SNAT/DNAT rules, just like Openstack floating IPs. These IPaddresses are also referred to as external IPs.
Multiple Kubernetes clusters use the same external IP pool. Each NCP instance uses a subset of thispool for the Kubernetes cluster that it manages. By default, the same subnet prefix for pod subnets will beused. To use a different subnet size, update the external_subnet_prefix option in the [nsx_v3]section in ncp.ini.
Log in to NSX Manager and navigate to Inventory > Groups > IP Pools to create a pool or find anexisting pool.
Specify IP pools for SNAT by setting the external_ip_pools option in the [nsx_v3] section ofncp.ini.
NSX Container Plug-in for OpenShift - Installation and Administration Guide
VMware, Inc. 9

You can also configure SNAT for a specific service by adding an annotation to the service. For example,
apiVersion: v1
kind: Service
metadata:
name: svc-example
annotations:
ncp/snat_pool: <external IP pool ID or name>
selector:
app: example
...
NCP will configure the SNAT rule for this service. The rule's source IP is the set of backend pods. Thedestination IP is the SNAT IP allocated from the specified external IP pool. Note the following:
n The IP pool specified by ncp/snat_pool should already exist in NSX-T Data Center before theservice is configured. Starting with NCP 2.3.1, the IP pool must have the tag{"ncp/owner": cluster:<cluster>}.
n In NSX-T Data Center, the priority of the SNAT rule for the service is higher than that for the project.
n If a pod is configured with multiple SNAT rules, only one will work.
You can specify which namespace can be allocated IPs from the SNAT IP pool by adding the followingtag to the IP pool.
n scope: ncp/owner, tag: ns:<namespace_UUID>
You can get the namespace UUID with one of the following command:
oc get ns -o yaml
Note the following:
n Each tag should specify one UUID. You can create multiple tags for the same pool.
n If you change the tags after some namespaces have been allocated IPs based on the old tags, thoseIPs will not be reclaimed until the SNAT configurations of the services change or NCP restarts..
n The namespace owner tag is optional. Without this tag, any namespace can have IPs allocated fromthe SNAT IP pool.
(Optional) Firewall Marker SectionsTo allow the administrator to create firewall rules and not have them interfere with NCP-created firewallsections based on network policies, log in to NSX Manager, navigate to Security > Distributed Firewall> General and create two firewall sections.
Specify marker firewall sections by setting the bottom_firewall_section_marker andtop_firewall_section_marker options in the [nsx_v3] section of ncp.ini.
NSX Container Plug-in for OpenShift - Installation and Administration Guide
VMware, Inc. 10

The bottom firewall section must be below the top firewall section. With these firewall sections created, allfirewall sections created by NCP for isolation will be created above the bottom firewall section, and allfirewall sections created by NCP for policy will be created below the top firewall section. If these markersections are not created, all isolation rules will be created at the bottom, and all policy sections will becreated at the top. Multiple marker firewall sections with the same value per cluster are not supported andwill cause an error.
Create and Configure a Tier-0 Logical RouterThe tier-0 logical router connects the Kubernetes nodes to external networks.
Procedure
1 From a browser, log in to NSX Manager at https://nsx-manager-ip-address.
2 Navigate to Networking > Routing > Routers and click Add > Tier-0 Router.
3 Enter a name and optionally a description.
4 Select an existing edge cluster from the drop-down menu to back this tier-0 logical router.
5 Select a high-availability mode.
Select active-standby.
6 Click Save.
The new logical router appears as a link.
7 Click the logical router link.
8 Click Routing > Route Redistribution.
9 Click Add to add a new redistribution criterion.
For sources, in a routed (non-NAT) topology, select NSX Static. In a NAT topology, select Tier-0NAT.
10 Click Save.
11 Click the newly created router.
12 Click Configuration > Router Ports
13 Click Add to add an uplink port.
14 Select a transport node.
15 Select the logical switch that was previously created.
16 Specify an IP address in your external network.
17 Click Save.
The new logical router appears as a link.
NSX Container Plug-in for OpenShift - Installation and Administration Guide
VMware, Inc. 11
Installing NCP in an OpenShiftEnvironment 3This chapter describes installing and configuring NSX-T Container Plug-in (NCP) and OpenShift.
This chapter includes the following topics:n Deploy OpenShift VMs
n Prepare the Ansible Hosts File
n Install NCP and OpenShift Using a Single Playbook
n Install CNI Plug-in, OVS, and NCP Docker Image
n Install OpenShift Container Platform
n Run NCP and NSX Node Agent
n Setup Notes
Deploy OpenShift VMsBefore installing NSX-T Container Plug-in, OpenShift must be installed. You must deploy at least onemaster.
For more information, see https://docs.openshift.com.
What to do next
Prepare the Ansible hosts file. See Prepare the Ansible Hosts File.
Prepare the Ansible Hosts FileThe Ansible hosts file defines the nodes in the OpenShift cluster.
Procedure
1 Clone the NCP GitHub repository at https://github.com/vmware/nsx-integration-for-openshift. Thehosts file is in the openshift-ansible-nsx directory. You must keep the hosts file in theopenshift-ansible-nsx directory. Some playbooks assume that this is the path for the hosts file.
VMware, Inc. 12

2 In the [masters] and [nodes] sections, specify the host names and IP addresses of the OpenShiftVMs. For example,
[masters]
admin.rhel.osmaster ansible_ssh_host=101.101.101.4
[single_master]
admin.rhel.osmaster ansible_ssh_host=101.101.101.4
[nodes]
admin.rhel.osmaster ansible_ssh_host=101.101.101.4 openshift_ip=101.101.101.4
openshift_schedulable=true openshift_hostname=admin.rhel.osmaster
admin.rhel.osnode ansible_ssh_host=101.101.101.5 openshift_ip=101.101.101.5
openshift_hostname=admin.rhel.osnode
[etcd]
[OSEv3:children]
masters
nodes
etcd
Note that openshift_ip identifies the cluster internal IP and needs to be set if the interface to beused is not the default one. The single_master variable is used by ncp-related roles from a masternode to perform certain tasks only once, e.g. NSX-T Data Center management plane resourceconfiguration.
3 Set up SSH access so that all the nodes can be accessed without password from the node where theAnsible role is run (typically it is the master node):
ssh-keygen
ssh-copy-id -i ~/.ssh/id_rsa.pub [email protected]
4 Update the [OSEv3:vars] section. Details about all the parameters can be found in the OpenShiftContainer Platform Documentation for the Advanced Installation (search for "advanced installation" in https://docs.openshift.com). For example,
# Set the default route fqdn
openshift_master_default_subdomain=apps.corp.local
os_sdn_network_plugin_name=cni
openshift_use_openshift_sdn=false
openshift_node_sdn_mtu=1500
# If ansible_ssh_user is not root, ansible_become must be set to true
ansible_become=true
openshift_master_default_subdomain
This is the default subdomain used in the OpenShift routes for External LB
os_sdn_network_plugin_name
Set to 'cni' for the NSX Integration
NSX Container Plug-in for OpenShift - Installation and Administration Guide
VMware, Inc. 13

openshift_use_openshift_sdn
Set to false to disable the built-in OpenShift SDN solution
openshift_hosted_manage_router
Set to false to disable creation of router during installation. The router has to be
manually started after NCP and nsx-node-agent are running.
openshift_hosted_manage_registry
Set to false to disable creation of registry during installation. The registry has to be
manually started after NCP and nsx-node-agent are running.
deployment_type
Set to openshift-enterprise
openshift_hosted_manage_registry
Set to false to disable auto creation of registry
openshift_hosted_manage_router
Set to false to disable auto creation of router
openshift_enable_service_catalog
Set to false to disable service_catalog
(For OpenShift 3.9 only) skip_sanity_checks
Set to true
(For OpenShift 3.9 only) openshift_web_console_install
Set to false
5 Check that you have connectivity to all hosts:
ansible OSEv3 -i /PATH/TO/HOSTS/hosts -m ping
The results should look like the following. If not, resolve the connectivity problem.
openshift-node1 | SUCCESS => {
"changed": false,
"ping": "pong"
}
openshift-master | SUCCESS => {
"changed": false,
"ping": "pong"
}
What to do next
Install CNI plug-in and OVS. See Install CNI Plug-in, OVS, and NCP Docker Image.
Install NCP and OpenShift Using a Single PlaybookYou can install NCP and OpenShift using a single playbook or perform the installation in separate steps.
NSX Container Plug-in for OpenShift - Installation and Administration Guide
VMware, Inc. 14

The single Ansible playbook install.yaml performs the following tasks:
n NCP preparation
n OpenShift installation
n NCP installation
Alternatively, you can install NCP and OpenShift using the instructions in the following two sections: Install CNI Plug-in, OVS, and NCP Docker Image and Install OpenShift Container Platform.
Before running the install.yaml playbook, set the required and optional parameters for the ncp_prepand ncp plabook roles. The parameters are described in Install CNI Plug-in, OVS, and NCP DockerImage.
The following command runs the playbook:
ansible-playbook -i /PATH/TO/HOSTS/hosts install.yaml
Install CNI Plug-in, OVS, and NCP Docker ImageThe container network interface (CNI) plug-in, Open vSwitch (OVS), and the NCP Docker image must beinstalled on the OpenShift nodes. The installation is performed by running an Ansible playbook.
Note This step is not necessary if you install NCP and OpenShift using a single playbook. See InstallNCP and OpenShift Using a Single Playbook.
The playbook contains instructions to configure NSX-T resources for the nodes. You can also configurethe NSX-T Data Center resources manually as described in Chapter 2 Setting Up NSX-T Resources. Theparameter perform_nsx_config indicates whether or not to configure the resources when the playbookis run.
Procedure
1 Update the parameter values in roles/ncp_prep/default/main.yaml androles/nsx_config/default/main.yaml, including the URLs where CNI plugin RPM, OVS and itscorresponding kernel module RPM can be downloaded. In addition, uplink_port is the name of theuplink port VNIC on the node VM. The remaining variables pertain to the NSX-T Data Centermanagement plane configuration.
Parameters that need to be specified:
n perform_nsx_config: whether to perform the resource configuration. Set it to false if theconfiguration will be done manually, and nsx_config script will not be run.
n nsx_manager_ip: IP of NSX Manager
n nsx_edge_cluster_name: name of the Edge Cluster to be used by the tier-0 router
n nsx_transport_zone_name: name of the overlay Transport Zone
NSX Container Plug-in for OpenShift - Installation and Administration Guide
VMware, Inc. 15

n os_node_name_list: comma-separated list of node names
For example, node1,node2,node3
n subnet_cidr: CIDR address for IP administrator will assign to br-int on the node
n vc_host: IP address of vCenter Server
n vc_user: user name of vCenter Server administrator
n vc_password: password of vCenter Server administrator
n vms: comma-separated list of VM names. The order must match os_node_name_list.
The following parameters have default values. You can modify them as needed.
n nsx_t0_router_name: name of tier-0 Logical Router for the cluster. Default: t0
n pod_ipblock_name: name of IP block for pods. Default: podIPBlock
n pod_ipblock_cidr: CIDR address for this IP block. Default: 172.20.0.0/16
n snat_ippool_name: name of the IP block for SNAT. Default is externalIP.
n snat_ippool_cidr: CIDR address for this IP block. Default: 172.30.0.0/16
n start_range: the start IP address of CIDR specified for this IP pool. Default: 172.30.0.1
n end_range: the end IP address of CIDR specified for this IP pool. Default: 172.30.255.254
n os_cluster_name: name of the OpenShift cluster. Default: occl-one
n nsx_node_ls_name: name of Llogical switch connected to the nodes. Default: node_ls
n nsx_node_lr_name: name of logical router for the switch node_ls. Default: node_lr
The nsx-config playbook supports creating only one IP pool and one IP block. If you want more,you must create them manually.
2 Change to the openshift-ansible-nsx directory and run the ncp_prep role.
ansible-playbook -i /PATH/TO/HOSTS/hosts ncp_prep.yaml
The playbook contains instructions to perform the following actions:
n Download the CNI plug-in installation file.
The filename is nsx-cni-1.0.0.0.0.xxxxxxx-1.x86_64.rpm, where xxxxxxx is the build number.
n Install the CNI plug-in installation file.
The plug-in is installed in /opt/cni/bin. The CNI configuration file 10.net.conf is copiedto /etc/cni/net.d. The rpm will also install the configuration file /etc/cni/net.d/99-loopback.conf for the loopback plug-in.
n Download and install the OVS installation files.
The files are openvswitch-2.9.1.xxxxxxx-1.x86_64.rpm and openvswitch-kmod-2.9.1.xxxxxxx-1.el7.x86_64.rpm, where xxxxxxx is the build number.
NSX Container Plug-in for OpenShift - Installation and Administration Guide
VMware, Inc. 16

n Create the br-int instance if it is not already created.
# ovs-vsctl add-br br-int
n Add the network interface (node-if) that is attached to the node logical switch to br-int .
n Make sure that the br-int and node-if link status is up.
# ip link set br-int up
# ip link set <node-if> up
n Update the network configuration file to ensure that the network interface is up after a reboot.
n Download the NCP tar file and load the Docker image from the tar file.
n Download the ncp-rbac yaml file and change the apiVersion to v1.
n Create a logical topology and related resources in NSX-T Data Center, and create tags on them sothat they can be recognized by NCP.
n Update ncp.ini with NSX-T Data Center resource information.
What to do next
Install OpenShift Container Platform. See Install OpenShift Container Platform.
Install OpenShift Container PlatformOpenShift Container Platform (OCP) is a platform as a service (PaaS) product that brings togetherDocker and Kubernetes.
Note This step is not necessary if you install NCP and OpenShift using a single playbook. See InstallNCP and OpenShift Using a Single Playbook.
For information about installing OCP, see https://docs.openshift.com.
What to do next
Run NCP and NSX node agent. See Run NCP and NSX Node Agent.
Run NCP and NSX Node AgentSet up and run NCP and NSX node agent.
Procedure
1 Edit roles/ncp/defaults/main.yaml and specify the OpenShift API server IP, NSX manager IP,and URL'sfor downloading NCP ReplicationController yaml and nsx-node-agent DaemonSet yaml.
2 From the openshift-ansible-nsx directory, run the ncp role:
ansible-playbook -i /PATH/TO/HOSTS/hosts ncp.yaml
NSX Container Plug-in for OpenShift - Installation and Administration Guide
VMware, Inc. 17

The ncp role performs the following steps:
n Check if nsx-system project exists, and create one if it does not.
oc new-project nsx-system
n Download the ncp-rbac yaml file and change the apiVersion to v1.
n Create the service account for the NCP pod, create a cluster role that specifies resources that NCPcan access and bind the cluster role with the NCP service account.
n Create the service account for the nsx-node-agent pod, create a cluster role that specifies theresources that the node agent can access and bind the cluster role with the node agent serviceaccount.
oc apply -f /tmp/ncp-rbac.yml
n Obtain the token associated with the above service accounts, and store it under /etc/nsx-ujo/<service_account>_token:
secret=`kubectl get serviceaccount ncp-svc-account -o yaml | grep -A1 secrets | tail -n1 | awk
{'print $3'}`
kubectl get secret $secret -o yaml | grep 'token:' | awk {'print $2'} | base64 -d > /etc/nsx-
ujo/ncp_token
secret=`kubectl get serviceaccount nsx-node-agent-svc-account -o yaml | grep -A1 secrets |
tail -n1 | awk {'print $3'}`
kubectl get secret $secret -o yaml | grep 'token:' | awk {'print $2'} | base64 -d > /etc/nsx-
ujo/node_agent_token
n Download the SecurityContextConstraint (SCC) yaml file ncp-os-scc.yml for NCP and create theSCC based on the yaml.
oc apply -f ncp-os-scc.yml
The SCC yaml file specifies SELinux type as spc_t to ensure that NCP/nsx-node-agent has accesspermissions under SELinux. That is,
seLinuxContext:
seLinuxOptions:
type: spc_t
In the SCC yaml file, under seLinuxContext's seLinuxOptions, the SELinux label-based accesscontrol level is set to s0:c0:c1023 to allow ncp/node-agent access to targets from different filecategories.
n Add the SCC to the user who creates the NCP and NSX node agent pods. For example, to add theSCC to the default user in the current project:
oc adm policy add-scc-to-user ncp-scc -z default
NSX Container Plug-in for OpenShift - Installation and Administration Guide
VMware, Inc. 18

n Add the SCC to the NCP and NSX node agent service accounts:
oc adm policy add-scc-to-user ncp-scc -z ncp-svc-account
oc adm policy add-scc-to-user ncp-scc -z nsx-node-agent-svc-account
n Download the yaml files for NCP ReplicationController (RC) and nsx-node-agent DaemonSet (DS)and update the ConfigMap.
n Download and load the NCP image (nsx-node-agent uses the same image).
n Configure the service account and set up the required SecurityContextConstraint for NCP andnsx_node_agent.
n Create the NCP ReplicationController and nsx-node-agent DaemonSet.
Note NCP opens persistent HTTP connections to the Kubernetes API server to watch for life cycleevents of Kubernetes resources. If an API server failure or a network failure causes NCP's TCPconnections to become stale, you must restart NCP so that it can re-establish connections to the APIserver. Otherwise, NCP will miss the new events.
Setup NotesBefore setting up OpenShift and NCP, take note of the following information.
n A pod must have no more than 11 labels and a namespace must have no more than 12 labels.
n Labels added for OpenShift internal usage, for example, a label with prefix openshift.io in its key, willbe disregarded by NCP and thus user won't see the corresponding tags created on the related NSXresources. Here is a list of label prefixes used by OpenShift, and you should avoid using a label keystarting with any of the following:
openshift.io
pod-template
n The nodes will need access to the pods, for example, for Kubelet health-checks. Make sure the hostmanagement interface is able to access the pod network.
n Linux capabilities NET_ADMIN and NET_RAW can be exploited by attackers to compromise the podnetwork. You should disable these two capabilities of untrusted containers. By default, with restrictedand anyuid SCC, NET_ADMIN is not granted. Be wary of any SCC that enables NET_ADMINexplicitly, or enables the pod to run in privileged mode. In addition, for untrusted containers, create aseparate SCC based on, for example, anyuid SCC, with NET_RAW capability removed. This can bedone by adding NET_RAW to `requiredDropCapabilities` list in the SCC definition.
n Allow root access in PODs/Containers (only for testing). Commands below will require root access inall PODs of the oc project you are currently logged in to.
oc new-project test-project
oc project test-project
oc adm policy add-scc-to-user anyuid -z default
NSX Container Plug-in for OpenShift - Installation and Administration Guide
VMware, Inc. 19

n Configure (add) the OpenShift Registry.
oc login -u system:admin -n default
oc adm registry --service-account=registry --config=/etc/origin/master/admin.kubeconfig
n Delete the OpenShift Registry
oc login -u system:admin -n default
oc delete svc/docker-registry dc/docker-registry
n There is a missing IPtables firewall rule to allow DNS requests from the Docker default bridgecontainers to the dnsmasq process on the Node. It needs to be opened manually.Edit /etc/sysconfig/iptables and add the following Rules at the bottom of the file beforeCOMMIT:
-A OS_FIREWALL_ALLOW -p tcp -m state --state NEW -m tcp --dport 53 -j ACCEPT
-A OS_FIREWALL_ALLOW -p udp -m state --state NEW -m udp --dport 53 -j ACCEPT
COMMIT
n Restart iptables, docker and origin-node (restarts kube-proxy and kubelet).
systemctl restart iptables
systemctl restart docker
systemctl restart origin-node
n The internal docker registry of OpenShift needs to be allowed to use non-TLS for OpenShift to work.Normally this should be added automatically by the OpenShift Ansible installer, but it seems that thisis currently not working. Edit /etc/sysconfig/docker and add:
INSECURE_REGISTRY='--insecure-registry 172.30.0.0/16'
n Restart Docker.
systemctl restart docker
n NCP's support for network policies is the same as the support provided by Kubernetes and dependson the Kubernetes version used by OpenShift.
n OpenShift 3.9 - The rule clauses in the network policy may contain at most one selector fromnamespaceSelector, podSelector and ipBlock.
n The Kubernetes API server does not perform validation of a network policy specification. It is possibleto create a network policy that is invalid. NCP will reject such a network policy. If you update thenetwork policy to make it valid, NCP will still not process the network policy. You must delete thenetwork policy and recreate one with a valid specification.
NSX Container Plug-in for OpenShift - Installation and Administration Guide
VMware, Inc. 20

n Certain versions of Kubernetes has a subPath-related issue (see https://github.com/kubernetes/kubernetes/issues/61076). If the OpenShift version does not contain afix for this issue, the creation of the NCP pod will fail with the error CreateContainerConfigError:failed to prepare subPath for volumeMount. You can work around this problem by removingthe use of subPath from the NCP yaml. Specifically, remove the line containing subPath: ncp.iniand replace the configuration for volumes with the following:
volumes:
- name: config-volume
# ConfigMap nsx-ncp-config is expected to supply ncp.ini
configMap:
name: nsx-ncp-config
items:
- key: ncp.ini
path: ncp.ini
A side effect of this change is that the entire /etc/nsx-ujo directory becomes read-only. As a result,connecting with NSX-T using certificate and private key will not work because NCP will not be able tocreate a temporary file under /etc/nsx-ujo to move both certificate and private key into a single file.
n If you are running or upgrading to OpenShift 3.10 cluster, note the following:
n You must specify configuration of Node groups specific to OpenShift 3.10 cluster. Node configmap configuration must be provided in inventory hosts file.
n All hosts defined in the [nodes] group in the inventory hosts file must be assigned to a nodegroup name.
n Upgrading OpenShift cluster from an Ansible playbook might cause network loss. Make sure toadd the patch (https://github.com/openshift/openshift-ansible/pull/8016/files#diff-2386e21861da3f95091dbb27d72ca366) on the openshift-ansiblerepository to remove the stop/uninstallation of Open vSwitch packages.
n Starting with OpenShift 3.10, kube-proxy was moved from the openshift-node service to aDaemonSet. It is no longer started by default. Perform the following steps to start kube-proxymanually (assuming that the openshift-ansible repo has been cloned):
n Go to the openshift-ansible directory, under [defaults] set the following:
library = roles/lib_utils/library/
n Create a create_proxy.yaml file in the playbooks directory with the following entries:
- import_playbook: byo/openshift_facts.yml
- hosts: masters
run_once: True
roles:
- kube_proxy_and_dns
NSX Container Plug-in for OpenShift - Installation and Administration Guide
VMware, Inc. 21

n Run the playbook:
ansible-playbook -i hosts playbooks/create_proxy.yaml
You will see error messages indicating the failure of some operations. These messages can beignored. You can verify the result by running the command oc get po --all-namespaces.
NSX Container Plug-in for OpenShift - Installation and Administration Guide
VMware, Inc. 22
Installing NCP in a Bare-MetalEnvironment 4The steps to install NSX-T Container Plug-in (NCP) in a bare-metal environment are similar to the stepsto install NCP in a non-bare-metal environment. The steps that are different are described in this section.
This chapter includes the following topics:n Install NSX-T Data Center CNI Plug-in
n Configure NSX-T Data Center Networking for OpenShift Nodes
n Install NSX Node Agent
n Configmap for ncp.ini in nsx-node-agent-ds.yml
n Install NSX-T Container Plug-in
n Configmap for ncp.ini in ncp-rc.yml
Install NSX-T Data Center CNI Plug-inNSX-T Data Center CNI plug-in must be installed on the OpenShift nodes.
Procedure
1 Download the installation file appropriate to your Linux distribution.
The filename is nsx-cni-1.0.0.0.0.xxxxxxx-1.x86_64.rpm, where xxxxxxx is the build number.
2 Install the rpm file downloaded in step 1.
The plug-in is installed in /opt/cni/bin. The CNI configuration file 10.net.conf is copiedto /etc/cni/net.d. The rpm will also install the configuration file /etc/cni/net.d/99-loopback.conf for the loopback plug-in.
Configure NSX-T Data Center Networking for OpenShiftNodesThis section describes how to configure NSX-T Data Center networking for OpenShift master andcompute nodes.
VMware, Inc. 23

Each node must be registered with the NSX Manager as OS type RHEL Container. The node'smanagement interface can be used to join the OpenShift cluster, and can be on the NSX-T Data Centerfabric or not. The other interfaces provide networking for the pods, and must be on theNSX-T Data Center fabric.
The corresponding transport node must have the following tags:
{'ncp/node_name': '<node_name>'}
{'ncp/cluster': '<cluster_name>'}
You can identify the transport node for an OpenShift node by navigating to Fabric > Nodes from theNSX Manager GUI.
If the OpenShift node name changes, you must update the tag ncp/node_name and restart NCP. You canuse the following command to get the node names:
oc get nodes
If you add a node to a cluster while NCP is running, you must add the tags to the transport node beforeyou run the oc cluster add command. Otherwise, the new node will not have network connectivity. Ifthe tags are incorrect or missing, you can take the following steps to resolve the issue:
n Apply the correct tags to the transport node.
n Restart NCP.
Install NSX Node AgentThe NSX node agent is a DaemonSet where each pod runs two containers. One container runs the NSXnode agent, whose main responsibility is to manage container network interfaces. It interacts with the CNIplugin and the Kubernetes API server. The other container runs NSX kube-proxy, whose onlyresponsibility is to implement Kubernetes service abstraction by translating cluster IPs into pod IPs. Itimplements the same functionality as the upstream kube-proxy.
Procedure
1 Download the NCP Docker image.
The filename is nsx-ncp-xxxxxxx.tar, where xxxxxxx is the build number.
2 Download the NSX node agent DaemonSet yaml template.
The filename is nsx-node-agent-ds.yml. You can edit this file or use it as an example for your owntemplate file.
3 Load the NCP Docker image to your image registry.
docker load -i <tar file>
4 Edit nsx-node-agent-ds.yml.
Change the image name to the one that was loaded.
NSX Container Plug-in for OpenShift - Installation and Administration Guide
VMware, Inc. 24

Make the following changes:
[coe]
node_type = 'BAREMETAL'
...
[nsx_node_agent]
ovs_bridge = 'nsx-managed'
Uncomment the following lines:
securityContext:
capabilities:
add:
- NET_ADMIN
- SYS_ADMIN
- SYS_PTRACE
- DAC_READ_SEARCH
# For BMC usecase
- DAC_OVERRIDE
volumeMounts:
…
# mount nestdb-sock for baremetal node
- name: nestdb-sock
mountPath: /var/run/vmware/nestdb/nestdb-server.sock
volumes:
…
# volume for baremetal node
- name: nestdb-sock
hostPath:
path: /var/run/vmware/nestdb/nestdb-server.sock
type: Socket
Note In the yaml file, you must specify that the ConfigMap generated for ncp.ini must be mountedas a ReadOnly volume. The downloaded yaml file already has this specification, which should not bechanged.
5 Create the NSX node agent DaemonSet with the following command.
oc apply -f nsx-node-agent-ds.yml
Configmap for ncp.ini in nsx-node-agent-ds.ymlThe sample yaml file nsx-node-agent-ds.yml contains a ConfigMap for the configuration file ncp.inifor the NSX node agent. This ConfigMap section contains parameters that you can specify to customizeyour node agent installation.
NSX Container Plug-in for OpenShift - Installation and Administration Guide
VMware, Inc. 25

The sample nsx-node-agent-ds.yml that you download has the following ncp.ini information:
# ConfigMap for ncp.ini
apiVersion: v1
kind: ConfigMap
metadata:
name: nsx-node-agent-config
labels:
version: v1
data:
ncp.ini: |
[DEFAULT]
# Set to True to enable logging to stderr
#use_stderr = True
# Set to True to send logs to the syslog daemon
#use_syslog = False
# Enabler debug-level logging for the root logger. If set to True, the
# root logger debug level will be DEBUG, otherwise it will be INFO.
#debug = True
# The log file path must be set to something like '/var/log/nsx-ujo/'. By
# default, logging to file is disabled.
#log_dir = None
# Name of log file to send logging output to. If log_dir is set but log_file is
# not, the binary name will be used, i.e., ncp.log, nsx_node_agent.log and
# nsx_kube_proxy.log.
#log_file = None
# max MB for each compressed file. Defaults to 100 MB
#log_rotation_file_max_mb = 100
# Total number of compressed backup files to store. Defaults to 5.
#log_rotation_backup_count = 5
[coe]
#
# Common options for Container Orchestrators
#
# Container orchestrator adaptor to plug in
# Options: kubernetes (default), openshift, pcf.
#adaptor = kubernetes
# Specify cluster for adaptor. It is a prefix of NSX resources name to
# distinguish multiple clusters who are using the same NSX.
# This is also used as the tag of IP blocks for cluster to allocate
# IP addresses. Different clusters should have different IP blocks.
#cluster = k8scluster
# Log level for the NCP operations. If set, overrides the level specified
# for the root logger. Possible values are NOTSET, DEBUG, INFO, WARNING,
# ERROR, CRITICAL
#loglevel=None
NSX Container Plug-in for OpenShift - Installation and Administration Guide
VMware, Inc. 26

# Log level for the NSX API client operations. If set, overrides the level
# specified for the root logger. Possible values are NOTSET, DEBUG, INFO,
# WARNING, ERROR, CRITICAL
nsxlib_loglevel=INFO
# Once enabled, all projects in this cluster will be mapped to a NAT
# topology in NSX backend
#enable_snat = True
# The type of container node. Possible values are HOSTVM, BAREMETAL.
node_type = BAREMETAL
[ha]
#
# NCP High Availability configuration options
#
# Time duration in seconds of mastership timeout. NCP instance will
# remain master for this duration after elected. Note that the heartbeat
# period plus the update timeout must be less than this period. This
# is done to ensure that the master instance will either confirm
# liveness or fail before the timeout.
#master_timeout = 9
# Time in seconds between heartbeats for elected leader. Once an NCP
# instance is elected master, it will periodically confirm liveness based
# on this value.
#heartbeat_period = 3
# Timeout duration in seconds for update to election resource. If the
# update request does not complete before the timeout it will be
# aborted. Used for master heartbeats to ensure that the update finishes
# or is aborted before the master timeout occurs.
#update_timeout = 3
[k8s]
#
# From kubernetes
#
# IP address of the Kubernetes API Server. If not set, will try to
# read and use the Kubernetes Service IP from environment variable
# KUBERNETES_SERVICE_HOST.
#apiserver_host_ip = <ip_address>
# Port of the Kubernetes API Server.
# Set to 6443 for https. If not set, will try to
# read and use the Kubernetes Service port from environment
# variable KUBERNETES_SERVICE_PORT.
#apiserver_host_port = <port>
# Specify a CA bundle file to use in verifying the Kubernetes API server
# certificate. (string value)
#ca_file = <None>
ca_file = /var/run/secrets/kubernetes.io/serviceaccount/ca.crt
NSX Container Plug-in for OpenShift - Installation and Administration Guide
VMware, Inc. 27

# Full path of the Token file to use for authenticating with the k8s API server.
#client_token_file = <None>
client_token_file = /var/run/secrets/kubernetes.io/serviceaccount/token
# Full path of the client certificate file to use for authenticating
# with the k8s API server. It must be specified together with
# "client_private_key_file"
#client_cert_file = <None>
# Full path of the client certificate file to use for authenticating
# with the k8s API server. It must be specified together with
# "client_cert_file"
#client_private_key_file = <None>
# Log level for the kubernetes adaptor. If set, overrides the level specified
# for the root logger. Possible values are NOTSET, DEBUG, INFO, WARNING,
# ERROR, CRITICAL
#loglevel=None
[nsx_node_agent]
#
# Configuration for nsx_node_agent
#
# Needs to mount node /proc to container if nsx_node_agent runs in a container.
# By default node /proc will be mounted to /host/proc, the prefix is /host.
# It should be the same setting with mounted path in the daemonset yaml file.
# Set the path to '' if nsx_node_agent is running as a process in minion node.
#proc_mount_path_prefix = /host
# The OVS bridge to configure container interface.
#ovs_bridge = br-int
[nsx_kube_proxy]
#
# Configuration for nsx_kube_proxy
#
# The OVS uplink OpenFlow port where to apply the NAT rules to.
# If not specified, the port that gets assigned ofport=1 is used.
#ovs_uplink_port = <None>
Install NSX-T Container Plug-inNSX-T Container Plug-in (NCP) is delivered as a Docker image. NCP should run on a node forinfrastructure services. Running NCP on the master node is not recommended.
Procedure
1 Download the NCP Docker image.
The filename is nsx-ncp-xxxxxxx.tar, where xxxxxxx is the build number.
NSX Container Plug-in for OpenShift - Installation and Administration Guide
VMware, Inc. 28

2 Download the NCP ReplicationController yaml template.
The filename is ncp-rc.yml. You can edit this file or use it as an example for your own template file.
3 Load the NCP Docker image to your image registry.
docker load -i <tar file>
4 Edit ncp-rc.yml.
Set the node type to bare metal.
[coe]
node_type = ‘BAREMETAL’
Change the image name to the one that was loaded.
Specify the nsx_api_managers parameter. This release supports a single Kubernetes node clusterand a single NSX Manager instance. For example:
nsx_api_managers = 192.168.1.180
(Optional) Specify the parameter ca_file in the [nsx_v3] section. The value should be a CA bundlefile to use in verifying the NSX Manager server certificate. If not set, the system root CAs will be used.
Specify the parameters nsx_api_cert_file and nsx_api_private_key_file for authenticationwith NSX-T Data Center.
nsx_api_cert_file is the full path to a client certificate file in PEM format. The contents of this fileshould look like the following:
-----BEGIN CERTIFICATE-----
<certificate_data_base64_encoded>
-----END CERTIFICATE-----
nsx_api_private_key_file is the full path to a client private key file in PEM format. The contents of thisfile should look like the following:
-----BEGIN PRIVATE KEY-----
<private_key_data_base64_encoded>
-----END PRIVATE KEY-----
Specify the parameter ingress_mode = nat if the Ingress controller is configured to run in NATmode.
By default, subnet prefix 24 is used for all subnets allocated from the IP blocks for the pod logicalswitches. To use a different subnet size, update the subnet_prefix option in the [nsx_v3] section.
Note In the yaml file, you must specify that the ConfigMap generated for ncp.ini be mounted as aReadOnly volume. The downloaded yaml file already has this specification, which should not bechanged.
NSX Container Plug-in for OpenShift - Installation and Administration Guide
VMware, Inc. 29

5 Create NCP ReplicationController.
kubectl create -f ncp-rc.yml
Note NCP opens persistent HTTP connections to the Kubernetes API server to watch for life cycleevents of Kubernetes resources. If an API server failure or a network failure causes NCP's TCPconnections to become stale, you must restart NCP so that it can re-establish connections to the APIserver. Otherwise, NCP will miss the new events.
During a rolling update of the NCP ReplicationController, do not reboot the container host. If the host isrebooted for any reason, you might see two NCP pods running after the reboot. In that case, do thefollowing:n Delete one of the NCP pods. It does not matter which one. For example,
oc delete pods <NCP pod name> -n nsx-system
n Delete the namespace nsx-system. For example,
oc delete -f ncp-rc.yml -n nsx-system
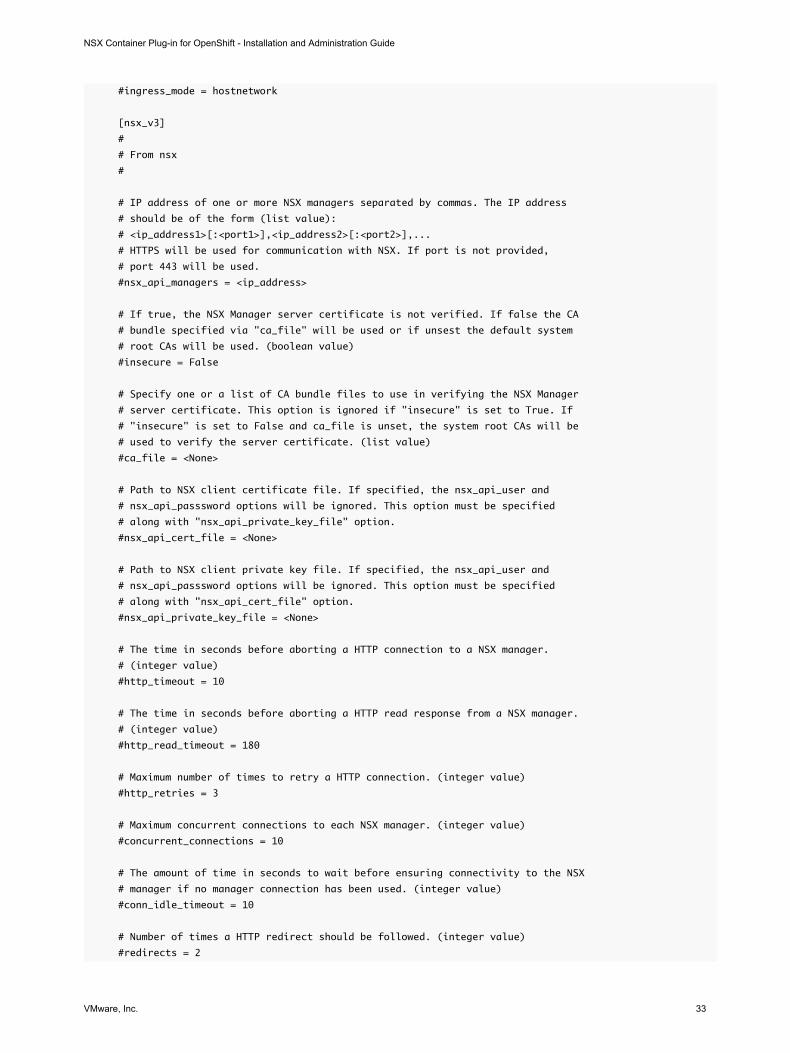
Configmap for ncp.ini in ncp-rc.ymlThe sample YAML file ncp-rc.yml contains a ConfigMap for the configuration file ncp.ini. ThisConfigMap section contains parameters that you must specify before you install NCP, as described in theprevious section.
The sample ncp-rc.yml that you download has the following ncp.ini information:
# ConfigMap for ncp.ini
apiVersion: v1
kind: ConfigMap
metadata:
name: nsx-ncp-config
labels:
version: v1
data:
ncp.ini: |
[DEFAULT]
# Set to True to enable logging to stderr
#use_stderr = True
# Set to True to send logs to the syslog daemon
#use_syslog = False
# Enabler debug-level logging for the root logger. If set to True, the
# root logger debug level will be DEBUG, otherwise it will be INFO.
#debug = True
# The log file path must be set to something like '/var/log/nsx-ujo/'. By
NSX Container Plug-in for OpenShift - Installation and Administration Guide
VMware, Inc. 30

# default, logging to file is disabled.
#log_dir = None
# Name of log file to send logging output to. If log_dir is set but log_file is
# not, the binary name will be used, i.e., ncp.log, nsx_node_agent.log and
# nsx_kube_proxy.log.
#log_file = None
# max MB for each compressed file. Defaults to 100 MB
#log_rotation_file_max_mb = 100
# Total number of compressed backup files to store. Defaults to 5.
#log_rotation_backup_count = 5
[coe]
#
# Common options for Container Orchestrators
#
# Container orchestrator adaptor to plug in
# Options: kubernetes (default), openshift, pcf.
#adaptor = kubernetes
# Specify cluster for adaptor. It is a prefix of NSX resources name to
# distinguish multiple clusters who are using the same NSX.
# This is also used as the tag of IP blocks for cluster to allocate
# IP addresses. Different clusters should have different IP blocks.
#cluster = k8scluster
# Log level for the NCP operations. If set, overrides the level specified
# for the root logger. Possible values are NOTSET, DEBUG, INFO, WARNING,
# ERROR, CRITICAL
#loglevel=None
# Log level for the NSX API client operations. If set, overrides the level
# specified for the root logger. Possible values are NOTSET, DEBUG, INFO,
# WARNING, ERROR, CRITICAL
nsxlib_loglevel=INFO
# Once enabled, all projects in this cluster will be mapped to a NAT
# topology in NSX backend
#enable_snat = True
# The type of container node. Possible values are HOSTVM, BAREMETAL.
node_type = BAREMETAL
[ha]
#
# NCP High Availability configuration options
#
# Time duration in seconds of mastership timeout. NCP instance will
# remain master for this duration after elected. Note that the heartbeat
# period plus the update timeout must be less than this period. This
# is done to ensure that the master instance will either confirm
# liveness or fail before the timeout.
NSX Container Plug-in for OpenShift - Installation and Administration Guide
VMware, Inc. 31

#master_timeout = 9
# Time in seconds between heartbeats for elected leader. Once an NCP
# instance is elected master, it will periodically confirm liveness based
# on this value.
#heartbeat_period = 3
# Timeout duration in seconds for update to election resource. If the
# update request does not complete before the timeout it will be
# aborted. Used for master heartbeats to ensure that the update finishes
# or is aborted before the master timeout occurs.
#update_timeout = 3
[k8s]
#
# From kubernetes
#
# IP address of the Kubernetes API Server. If not set, will try to
# read and use the Kubernetes Service IP from environment variable
# KUBERNETES_SERVICE_HOST.
#apiserver_host_ip = <ip_address>
# Port of the Kubernetes API Server.
# Set to 6443 for https. If not set, will try to
# read and use the Kubernetes Service port from environment
# variable KUBERNETES_SERVICE_PORT.
#apiserver_host_port = <port>
# Specify a CA bundle file to use in verifying the Kubernetes API server
# certificate. (string value)
#ca_file = <None>
ca_file = /var/run/secrets/kubernetes.io/serviceaccount/ca.crt
# Full path of the Token file to use for authenticating with the k8s API server.
#client_token_file = <None>
client_token_file = /var/run/secrets/kubernetes.io/serviceaccount/token
# Full path of the client certificate file to use for authenticating
# with the k8s API server. It must be specified together with
# "client_private_key_file"
#client_cert_file = <None>
# Full path of the client certificate file to use for authenticating
# with the k8s API server. It must be specified together with
# "client_cert_file"
#client_private_key_file = <None>
# Log level for the kubernetes adaptor. If set, overrides the level specified
# for the root logger. Possible values are NOTSET, DEBUG, INFO, WARNING,
# ERROR, CRITICAL
#loglevel=None
# Specify how ingress controllers are expected to be deployed. Possible values:
# hostnetwork or nat. NSX will create NAT rules only in the second case.
NSX Container Plug-in for OpenShift - Installation and Administration Guide
VMware, Inc. 32
#ingress_mode = hostnetwork
[nsx_v3]
#
# From nsx
#
# IP address of one or more NSX managers separated by commas. The IP address
# should be of the form (list value):
# <ip_address1>[:<port1>],<ip_address2>[:<port2>],...
# HTTPS will be used for communication with NSX. If port is not provided,
# port 443 will be used.
#nsx_api_managers = <ip_address>
# If true, the NSX Manager server certificate is not verified. If false the CA
# bundle specified via "ca_file" will be used or if unsest the default system
# root CAs will be used. (boolean value)
#insecure = False
# Specify one or a list of CA bundle files to use in verifying the NSX Manager
# server certificate. This option is ignored if "insecure" is set to True. If
# "insecure" is set to False and ca_file is unset, the system root CAs will be
# used to verify the server certificate. (list value)
#ca_file = <None>
# Path to NSX client certificate file. If specified, the nsx_api_user and
# nsx_api_passsword options will be ignored. This option must be specified
# along with "nsx_api_private_key_file" option.
#nsx_api_cert_file = <None>
# Path to NSX client private key file. If specified, the nsx_api_user and
# nsx_api_passsword options will be ignored. This option must be specified
# along with "nsx_api_cert_file" option.
#nsx_api_private_key_file = <None>
# The time in seconds before aborting a HTTP connection to a NSX manager.
# (integer value)
#http_timeout = 10
# The time in seconds before aborting a HTTP read response from a NSX manager.
# (integer value)
#http_read_timeout = 180
# Maximum number of times to retry a HTTP connection. (integer value)
#http_retries = 3
# Maximum concurrent connections to each NSX manager. (integer value)
#concurrent_connections = 10
# The amount of time in seconds to wait before ensuring connectivity to the NSX
# manager if no manager connection has been used. (integer value)
#conn_idle_timeout = 10
# Number of times a HTTP redirect should be followed. (integer value)
#redirects = 2
NSX Container Plug-in for OpenShift - Installation and Administration Guide
VMware, Inc. 33

# Maximum number of times to retry API requests upon stale revision errors.
# (integer value)
#retries = 10
# Subnet prefix of IP block. IP block will be retrieved from NSX API and
# recognised by tag 'cluster'.
# Prefix should be less than 31, as two addresses(the first and last addresses)
# need to be network address and broadcast address.
# The prefix is fixed after the first subnet is created. It can be changed only
# if there is no subnets in IP block.
#subnet_prefix = 24
# Indicates whether distributed firewall DENY rules are logged.
#log_dropped_traffic = False
# Option to use native loadbalancer support.
#use_native_loadbalancer = False
# Used when ingress class annotation is missing
# if set to true, the ingress will be handled by nsx lbs
# otherwise will be handled by 3rd party ingress controller (e.g. nginx)
#default_ingress_class_nsx = True
# Path to the default certificate file for HTTPS load balancing
#lb_default_cert_path = <None>
# Path to the private key file for default certificate for HTTPS load balancing
#lb_priv_key_path = <None>
# Option to set load balancing algorithm in load balancer pool object.
# Available choices are
# ROUND_ROBIN/LEAST_CONNECTION/IP_HASH/WEIGHTED_ROUND_ROBIN
#pool_algorithm = 'ROUND_ROBIN'
# Option to set load balancer service size. Available choices are
# SMALL/MEDIUM/LARGE.
# MEDIUM Edge VM (4 vCPU, 8GB) only supports SMALL LB.
# LARGE Edge VM (8 vCPU, 16GB) only supports MEDIUM and SMALL LB.
# Bare Metal Edge (IvyBridge, 2 socket, 128GB) supports LARGE, MEDIUM and
# SMALL LB
#service_size = 'SMALL'
# Choice of persistence type for ingress traffic through L7 Loadbalancer.
# Accepted values:
# 'cookie'
# 'source_ip'
#l7_persistence = <None>
# Choice of persistence type for ingress traffic through L4 Loadbalancer.
# Accepted values:
# 'source_ip'
#l4_persistence = <None>
# Name or UUID of the tier0 router that project tier1 routers connect to
NSX Container Plug-in for OpenShift - Installation and Administration Guide
VMware, Inc. 34

#tier0_router = <None>
# Name or UUID of the NSX overlay transport zone that will be used for creating
# logical switches for container networking. It must refer to an existing
# transport zone on NSX and every hypervisor that hosts the Kubernetes
# node VMs must join this transport zone
#overlay_tz = <None>
# Name or UUID of the NSX lb service that can be attached by virtual servers
#lb_service = <None>
# Name or UUID of the container ip blocks that will be used for creating
# subnets. If name, it must be unique
#container_ip_blocks = <None>
# Name or UUID of the container ip blocks that will be used for creating
# subnets for no-SNAT projects. If specified, no-SNAT projects will use these
# ip blocks ONLY. Otherwise they will use container_ip_blocks
#no_snat_ip_blocks = <None>
# Name or UUID of the external ip pools that will be used for allocating IP
# addresses which will be used for translating container IPs via SNAT rules
#external_ip_pools = <None>
# Firewall sections for this cluster will be created below this mark section
#top_firewall_section_marker = <None>
# Firewall sections for this cluster will be created above this mark section
#bottom_firewall_section_marker = <None>
NSX Container Plug-in for OpenShift - Installation and Administration Guide
VMware, Inc. 35

Load Balancing 5The NSX-T Data Center load balancer is integrated with OpenShift and acts as the OpenShift Router..
NCP watches OpenShift route and endpoint events and configures load balancing rules on the loadbalancer based on the route specification. As a result, the NSX-T Data Center load balancer will forwardincoming layer 7 traffic to the appropriate backend pods based on the rules.
Configuring Load BalancingConfiguring load balancing involves configuring a Kubernetes LoadBalancer service or an OpenShiftroute. You also need to configure the NCP replication controller. The LoadBalancer service is for layer 4traffic and the OpenShift route is for layer 7 traffic.
When you configure a Kubernetes LoadBalancer service, it is allocated an IP address from the externalIP block that you configure. The load balancer is exposed on this IP address and the service port. Youcan specify the name or ID of an IP pool using the loadBalancerIP spec in the LoadBalancer definition.The Loadbalancer service's IP will be allocated from this IP pool. If the loadBalancerIP spec is empty,the IP will be allocated from the external IP block that you configure.
Starting with NCP 2.3.1, the IP pool specified by loadBalancerIP must have the tag{"ncp/owner": cluster:<cluster>}.
To use the NSX-T Data Center load balancer, you must configure load balancing in NCP. In thencp_rc.yml file, do the following:
1 Set use_native_loadbalancer = True.
2 Set pool_algorithm to WEIGHTED_ROUND_ROBIN.
3 Set lb_default_cert_path and lb_priv_key_path to be the full path names of the CA-signed certificatefile and the private key file, respectively. See below for a sample script to generate a CA-signedcertificate. In addition, mount the default certificate and key into the NCP pod. See below forinstructions.
VMware, Inc. 36

4 (Optional) Specify a persistence setting with the parameters l4_persistence and l7_persistence.The available option for layer 4 persistence is source IP. The available options for layer 7 persistenceare cookie and source IP. The default is <None>. For example,
# Choice of persistence type for ingress traffic through L7 Loadbalancer.
# Accepted values:
# 'cookie'
# 'source_ip'
l7_persistence = cookie
# Choice of persistence type for ingress traffic through L4 Loadbalancer.
# Accepted values:
# 'source_ip'
l4_persistence = source_ip
5 (Optional) Set service_size = SMALL, MEDIUM, or LARGE. The default is SMALL.
6 If you are running OpenShift 3.11, you must perform the following configuration so that OpenShift willnot assign an IP to the LoadBalancer service.n Set ingressIPNetworkCIDR to 0.0.0.0/32 under networkConfig in
the /etc/origin/master/master-config.yaml file.
n Restart the API server and controllers with the following commands:
master-restart api
master-restart controllers
Note If you configure both a layer 4 and a layer 7 load balancer, you can set either l4_persistence orl7_persistence, or both to source_ip, but you cannot set l4_persistence to source_ip andl7_persistence to cookie. If by mistake you set l4_persistence to source_ip and l7_persistenceto cookie, the LoadBalancer service will not work. To resolve the issue, you must delete the Ingressresource and the LoadBalancer service, change the persistence settings, restart NCP, and recreate theIngress resource and the LoadBalancer service.
Layer 7 Load Balancer ExampleThe following YAML file configures two replication controllers (tea-rc and coffee-rc), two services (tea-svcand coffee-svc), and two routes (cafe-route-multi and cafe-route) to provide layer 7 load balancing.
# RC
apiVersion: v1
kind: ReplicationController
metadata:
name: tea-rc
spec:
replicas: 2
template:
metadata:
labels:
app: tea
NSX Container Plug-in for OpenShift - Installation and Administration Guide
VMware, Inc. 37

spec:
containers:
- name: tea
image: nginxdemos/hello
imagePullPolicy: IfNotPresent
ports:
- containerPort: 80
---
apiVersion: v1
kind: ReplicationController
metadata:
name: coffee-rc
spec:
replicas: 2
template:
metadata:
labels:
app: coffee
spec:
containers:
- name: coffee
image: nginxdemos/hello
imagePullPolicy: IfNotPresent
ports:
- containerPort: 80
---
# Services
apiVersion: v1
kind: Service
metadata:
name: tea-svc
labels:
app: tea
spec:
ports:
- port: 80
targetPort: 80
protocol: TCP
name: http
selector:
app: tea
---
apiVersion: v1
kind: Service
metadata:
name: coffee-svc
labels:
app: coffee
spec:
ports:
- port: 80
targetPort: 80
protocol: TCP
name: http
selector:
NSX Container Plug-in for OpenShift - Installation and Administration Guide
VMware, Inc. 38

app: coffee
---
# Routes
apiVersion: v1
kind: Route
metadata:
name: cafe-route-multi
spec:
host: www.cafe.com
path: /drinks
to:
kind: Service
name: tea-svc
weight: 1
alternateBackends:
- kind: Service
name: coffee-svc
weight: 2
---
apiVersion: v1
kind: Route
metadata:
name: cafe-route
spec:
host: www.cafe.com
path: /tea-svc
to:
kind: Service
name: tea-svc
weight: 1
Additional Notesn Only Edge termination is supported for HTTPS traffic.
n Wildcard subdomain is supported. For example, if wildcardPolicy is set to Subdomain, and thehost name is set to wildcard.example.com, any request to *.example.com will be serviced.
n If NCP throws an error during the processing of a Route event due to misconfiguration, you need tocorrect the Route YAML file, delete and recreate the Route resource.
n NCP does not enforce hostname ownership by namespaces.
n One Loadbalancer service is supported per Kubernetes cluster.
n NSX-T Data Center will create a layer 4 load balancer virtual server and pool for each LoadBalancerservice port. Both TCP and UDP are supported.
n The NSX-T Data Center load balancer comes in different sizes. For information about configuring anNSX-T Data Center load balancer, see the NSX-T Administration Guide.
The small NSX-T Data Center load balancer supports the following:
n 10 NSX-T virtual servers.
NSX Container Plug-in for OpenShift - Installation and Administration Guide
VMware, Inc. 39

n 10 NSX-T pools.
n 30 NSX-T pool members.
n 8 ports for LoadBalancer services.
n A total of 10 ports defined by the LoadBalancer services and Route resources.
n A total of 30 endpoints referenced by the LoadBalancer services and Route resources.
The medium NSX-T Data Center load balancer supports the following:
n 100 NSX-T virtual servers.
n 100 NSX-T pools.
n 300 NSX-T pool members.
n 98 ports for LoadBalancer services.
n A total of 100 ports defined by the LoadBalancer services and Route resources.
n A total of 300 endpoints referenced by the LoadBalancer services and Route resources.
The large NSX-T Data Center load balancer supports the following:
n 1000 NSX-T virtual servers.
n 1000 NSX-T pools.
n 3000 NSX-T pool members.
n 998 ports for LoadBalancer services.
n A total of 1000 ports defined by the LoadBalancer services and Route resources.
n A total of 3000 endpoints referenced by the LoadBalancer services and Route resources.
After the load balancer is created, the load balancer size cannot be changed by updating theconfiguration file. It can be changed through the UI or API.
n Starting with NCP 2.3.1, automatic scaling of the layer 4 load balancer is supported. If a KubernetesLoadBalancer service is created or modified so that it requires additional virtual servers and theexisting layer 4 load balancer does not have the capacity, a new layer 4 load balancer will be created.NCP will also delete a layer 4 load balancer that no longer has virtual servers attached. This featureis enabled by default. You can disable it by setting l4_lb_auto_scaling to false in the NCPConfigMap. This feature requires NSX-T Data Center 2.3 or later releases.
NSX Container Plug-in for OpenShift - Installation and Administration Guide
VMware, Inc. 40

Sample Script to Generate a CA-Signed CertificateThe script below generates a CA-signed certificate and a private key stored in the files <filename>.crt and<finename>.key, respectively. The genrsa command generates a CA key. The CA key should beencrypted. You can specify an encryption method with the command such as aes256.
#!/bin/bash
host="www.example.com"
filename=server
openssl genrsa -out ca.key 4096
openssl req -key ca.key -new -x509 -days 365 -sha256 -extensions v3_ca -out ca.crt -subj
"/C=US/ST=CA/L=Palo Alto/O=OS3/OU=Eng/CN=${host}"
openssl req -out ${filename}.csr -new -newkey rsa:2048 -nodes -keyout ${filename}.key -subj
"/C=US/ST=CA/L=Palo Alto/O=OS3/OU=Eng/CN=${host}"
openssl x509 -req -days 360 -in ${filename}.csr -CA ca.crt -CAkey ca.key -CAcreateserial -out $
{filename}.crt -sha256
Mount the Default Certificate and Key into the NCP PodAfter the certificate and private key have been generated, place them in the directory /etc/nsx-ujo onthe host VM. Assuming the certificate and key files are named lb-default.crt and lb-default.key,respectively, edit ncp-rc.yaml so that these files on the host are mounted into the pod. For example,
spec:
...
containers:
- name: nsx-ncp
...
volumeMounts:
...
- name: lb-default-cert
# Mount path must match nsx_v3 option "lb_default_cert_path"
mountPath: /etc/nsx-ujo/lb-default.crt
- name: lb-priv-key
# Mount path must match nsx_v3 option "lb_priv_key_path"
mountPath: /etc/nsx-ujo/lb-default.key
volumes:
...
- name: lb-default-cert
hostPath:
path: /etc/nsx-ujo/lb-default.crt
- name: lb-priv-key
hostPath:
path: /etc/nsx-ujo/lb-default.key
NSX Container Plug-in for OpenShift - Installation and Administration Guide
VMware, Inc. 41

AdministeringNSX-T Container Plug-in 6You can administer NSX-T Container Plug-in from the NSX Manager GUI or from the command-lineinterface (CLI).
Note If a container host VM is running on ESXi 6.5 and the VM is migrated through vMotion to anotherESXi 6.5 host, containers running on the container host will lose connectivity to containers running onother container hosts. You can resolve the problem by disconnecting and connecting the vNIC of thecontainer host. This issue does not occur with ESXi 6.5 Update 1 or later.
Hyperbus reserves VLAN ID 4094 on the hypervisor for PVLAN configuration and this ID cannot bechanged. To avoid any VLAN conflict, do not configure VLAN logical switches or VTEP vmknics with thesame VLAN ID.
This chapter includes the following topics:n Manage IP Blocks from the NSX Manager GUI
n View IP Block Subnets from the NSX Manager GUI
n CIF-Attached Logical Ports
n CLI Commands
n Error Codes
Manage IP Blocks from the NSX Manager GUIYou can add, delete, edit, view details of, and manage the tags for an IP block from the NSX ManagerGUI.
Procedure
1 From a browser, log in to the NSX Manager at https://<nsx-manager-IP-address-or-domain-name>.
2 Navigate to Networking > IPAM.
A list of the existing IP blocks is displayed.
VMware, Inc. 42

3 Perform any of the following actions.
Option Action
Add an IP block Click ADD.
Delete one or more IP blocks Select one or more IP blocks and click DELETE.
Edit an IP block Select an IP block and click EDIT.
View details about an IP block Click the IP block name. Click the Overview tab to see general information. Clickthe Subnets tab to see this IP block's subnets.
Manage tags for an IP block Select an IP block and click ACTIONS > Manage Tags. You cannot delete an IP block that has subnets allocated.
View IP Block Subnets from the NSX Manager GUIYou can view the subnets for an IP block from the NSX Manager GUI. Adding or deleting IP block subnetsafter NCP is installed and running is not recommended.
Procedure
1 From a browser, log in to the NSX Manager at https://<nsx-manager-IP-address-or-domain-name>.
2 Navigate to Networking > IPAM.
A list of the existing IP blocks is displayed.
3 Click an IP block name
4 Click the Subnets tab.
CIF-Attached Logical PortsCIFs (container interfaces) are network interfaces on containers that are connected to logical ports on aswitch. These ports are called CIF-attached logical ports.
You can manage CIF-attached logical ports from the NSX Manager GUI.
Managing CIF-Attached Logical PortsNavigate to Networking > Switching > Ports to see all logical ports, including CIF-attached logical ports.Click the attachment link of a CIF-attached logical port to see the attachment information. Click the logicalport link to open a window pane with four tabs: Overview, Monitor, Manage, and Related. ClickingRelated > Logical Ports shows the related logical port on an uplink switch. For more information aboutswitch ports, see the NSX-T Administration Guide.
NSX Container Plug-in for OpenShift - Installation and Administration Guide
VMware, Inc. 43

Network Monitoring ToolsThe following tools support CIF-attached logical ports. For more information about these tools, see theNSX-T Administration Guide.
n Traceflow
n Port Connection
n IPFIX
n Remote port mirroring using GRE encapsulation of a logical switch port that connects to a container issupported. For more information, see "Understanding Port Mirroring Switching Profile" in the NSX-TAdministration Guide. However, port mirroring of the CIF to VIF port is not supported via the managerUI.
CLI CommandsTo run CLI commands, log in to the NSX-T Container Plug-in container, open a terminal and run thensxcli command.
You can also get the CLI prompt by running the following command on a node:
kubectl exec -it <pod name> nsxcli
Table 6‑1. CLI Commands for the NCP Container
Type Command
Status get ncp-master status
Status get ncp-nsx status
Status get ncp-watcher <watcher-name>
Status get ncp-watchers
Status get ncp-k8s-api-server status
Status check projects
Status check project <project-name>
Cache get project-cache <project-name>
Cache get project-caches
Cache get namespace-cache <namespace-name>
Cache get namespace-caches
Cache get pod-cache <pod-name>
Cache get pod-caches
Cache get ingress-caches
Cache get ingress-cache <ingress-name>
Cache get ingress-controllers
NSX Container Plug-in for OpenShift - Installation and Administration Guide
VMware, Inc. 44

Table 6‑1. CLI Commands for the NCP Container (Continued)
Type Command
Cache get ingress-controller <ingress-controller-name>
Cache get network-policy-caches
Cache get network-policy-cache <pod-name>
Support get ncp-log file <filename>
Support get ncp-log-level
Support set ncp-log-level <log-level>
Support get support-bundle file <filename>
Support get node-agent-log file <filename>
Support get node-agent-log file <filename> <node-name>
Table 6‑2. CLI Commands for the NSX Node Agent Container
Type Command
Status get node-agent-hyperbus status
Cache get container-cache <container-name>
Cache get container-caches
Table 6‑3. CLI Commands for the NSX Kube Proxy Container
Type Command
Status get ncp-k8s-api-server status
Status get kube-proxy-watcher <watcher-name>
Status get kube-proxy-watchers
Status dump ovs-flows
Status Commands for the NCP Containern Show the status of the NCP master
get ncp-master status
Example:
kubenode> get ncp-master status
This instance is not the NCP master
Current NCP Master id is a4h83eh1-b8dd-4e74-c71c-cbb7cc9c4c1c
Last master update at Wed Oct 25 22:46:40 2017
n Show the connection status between NCP and NSX Manager
get ncp-nsx status
NSX Container Plug-in for OpenShift - Installation and Administration Guide
VMware, Inc. 45

Example:
kubenode> get ncp-nsx status
NSX Manager status: Healthy
n Show the watcher status for ingress, namespace, pod, and service
get ncp-watcher <watcher-name>
get ncp-watchers
Example 1:
kubenode> get ncp-watcher pod
Average event processing time: 1174 msec (in past 3600-sec window)
Current watcher started time: Mar 02 2017 10:47:35 PST
Number of events processed: 1 (in past 3600-sec window)
Total events processed by current watcher: 1
Total events processed since watcher thread created: 1
Total watcher recycle count: 0
Watcher thread created time: Mar 02 2017 10:47:35 PST
Watcher thread status: Up
Example 2:
kubenode> get ncp-watchers
pod:
Average event processing time: 1145 msec (in past 3600-sec window)
Current watcher started time: Mar 02 2017 10:51:37 PST
Number of events processed: 1 (in past 3600-sec window)
Total events processed by current watcher: 1
Total events processed since watcher thread created: 1
Total watcher recycle count: 0
Watcher thread created time: Mar 02 2017 10:51:37 PST
Watcher thread status: Up
namespace:
Average event processing time: 68 msec (in past 3600-sec window)
Current watcher started time: Mar 02 2017 10:51:37 PST
Number of events processed: 2 (in past 3600-sec window)
Total events processed by current watcher: 2
Total events processed since watcher thread created: 2
Total watcher recycle count: 0
Watcher thread created time: Mar 02 2017 10:51:37 PST
Watcher thread status: Up
ingress:
Average event processing time: 0 msec (in past 3600-sec window)
Current watcher started time: Mar 02 2017 10:51:37 PST
Number of events processed: 0 (in past 3600-sec window)
Total events processed by current watcher: 0
Total events processed since watcher thread created: 0
Total watcher recycle count: 0
Watcher thread created time: Mar 02 2017 10:51:37 PST
NSX Container Plug-in for OpenShift - Installation and Administration Guide
VMware, Inc. 46

Watcher thread status: Up
service:
Average event processing time: 3 msec (in past 3600-sec window)
Current watcher started time: Mar 02 2017 10:51:37 PST
Number of events processed: 1 (in past 3600-sec window)
Total events processed by current watcher: 1
Total events processed since watcher thread created: 1
Total watcher recycle count: 0
Watcher thread created time: Mar 02 2017 10:51:37 PST
Watcher thread status: Up
n Show the connection status between NCP and Kubernetes API server
get ncp-k8s-api-server status
Example:
kubenode> get ncp-k8s-api-server status
Kubernetes ApiServer status: Healthy
n Check all projects or a specific one
check projects
check project <project-name>
Example:
kubenode> check projects
default:
Tier-1 link port for router 1b90a61f-0f2c-4768-9eb6-ea8954b4f327 is missing
Switch 40a6829d-c3aa-4e17-ae8a-7f7910fdf2c6 is missing
ns1:
Router 8accc9cd-9883-45f6-81b3-0d1fb2583180 is missing
kubenode> check project default
Tier-1 link port for router 1b90a61f-0f2c-4768-9eb6-ea8954b4f327 is missing
Switch 40a6829d-c3aa-4e17-ae8a-7f7910fdf2c6 is missing
Cache Commands for the NCP Containern Get the internal cache for projects or namespaces
get project-cache <project-name>
get project-caches
get namespace-cache <namespace-name>
get namespace-caches
NSX Container Plug-in for OpenShift - Installation and Administration Guide
VMware, Inc. 47

Example:
kubenode> get project-caches
default:
logical-router: 8accc9cd-9883-45f6-81b3-0d1fb2583180
logical-switch:
id: 9d7da647-27b6-47cf-9cdb-6e4f4d5a356d
ip_pool_id: 519ff57f-061f-4009-8d92-3e6526e7c17e
subnet: 10.0.0.0/24
subnet_id: f75fd64c-c7b0-4b42-9681-fc656ae5e435
kube-system:
logical-router: 5032b299-acad-448e-a521-19d272a08c46
logical-switch:
id: 85233651-602d-445d-ab10-1c84096cc22a
ip_pool_id: ab1c5b09-7004-4206-ac56-85d9d94bffa2
subnet: 10.0.1.0/24
subnet_id: 73e450af-b4b8-4a61-a6e3-c7ddd15ce751
testns:
ext_pool_id: 346a0f36-7b5a-4ecc-ad32-338dcb92316f
labels:
ns: myns
project: myproject
logical-router: 4dc8f8a9-69b4-4ff7-8fb7-d2625dc77efa
logical-switch:
id: 6111a99a-6e06-4faa-a131-649f10f7c815
ip_pool_id: 51ca058d-c3dc-41fd-8f2d-e69006ab1b3d
subnet: 50.0.2.0/24
subnet_id: 34f79811-bd29-4048-a67d-67ceac97eb98
project_nsgroup: 9606afee-6348-4780-9dbe-91abfd23e475
snat_ip: 4.4.0.3
kubenode> get project-cache default
logical-router: 8accc9cd-9883-45f6-81b3-0d1fb2583180
logical-switch:
id: 9d7da647-27b6-47cf-9cdb-6e4f4d5a356d
ip_pool_id: 519ff57f-061f-4009-8d92-3e6526e7c17e
subnet: 10.0.0.0/24
subnet_id: f75fd64c-c7b0-4b42-9681-fc656ae5e435
kubenode> get namespace-caches
default:
logical-router: 8accc9cd-9883-45f6-81b3-0d1fb2583180
logical-switch:
id: 9d7da647-27b6-47cf-9cdb-6e4f4d5a356d
ip_pool_id: 519ff57f-061f-4009-8d92-3e6526e7c17e
subnet: 10.0.0.0/24
subnet_id: f75fd64c-c7b0-4b42-9681-fc656ae5e435
kube-system:
logical-router: 5032b299-acad-448e-a521-19d272a08c46
logical-switch:
id: 85233651-602d-445d-ab10-1c84096cc22a
ip_pool_id: ab1c5b09-7004-4206-ac56-85d9d94bffa2
NSX Container Plug-in for OpenShift - Installation and Administration Guide
VMware, Inc. 48

subnet: 10.0.1.0/24
subnet_id: 73e450af-b4b8-4a61-a6e3-c7ddd15ce751
testns:
ext_pool_id: 346a0f36-7b5a-4ecc-ad32-338dcb92316f
labels:
ns: myns
project: myproject
logical-router: 4dc8f8a9-69b4-4ff7-8fb7-d2625dc77efa
logical-switch:
id: 6111a99a-6e06-4faa-a131-649f10f7c815
ip_pool_id: 51ca058d-c3dc-41fd-8f2d-e69006ab1b3d
subnet: 50.0.2.0/24
subnet_id: 34f79811-bd29-4048-a67d-67ceac97eb98
project_nsgroup: 9606afee-6348-4780-9dbe-91abfd23e475
snat_ip: 4.4.0.3
kubenode> get namespace-cache default
logical-router: 8accc9cd-9883-45f6-81b3-0d1fb2583180
logical-switch:
id: 9d7da647-27b6-47cf-9cdb-6e4f4d5a356d
ip_pool_id: 519ff57f-061f-4009-8d92-3e6526e7c17e
subnet: 10.0.0.0/24
subnet_id: f75fd64c-c7b0-4b42-9681-fc656ae5e435
n Get the internal cache for pods
get pod-cache <pod-name>
get pod-caches
Example:
kubenode> get pod-caches
nsx.default.nginx-rc-uq2lv:
cif_id: 2af9f734-37b1-4072-ba88-abbf935bf3d4
gateway_ip: 10.0.0.1
host_vif: d6210773-5c07-4817-98db-451bd1f01937
id: 1c8b5c52-3795-11e8-ab42-005056b198fb
ingress_controller: False
ip: 10.0.0.2/24
labels:
app: nginx
mac: 02:50:56:00:08:00
port_id: d52c833a-f531-4bdf-bfa2-e8a084a8d41b
vlan: 1
nsx.testns.web-pod-1:
cif_id: ce134f21-6be5-43fe-afbf-aaca8c06b5cf
gateway_ip: 50.0.2.1
host_vif: d6210773-5c07-4817-98db-451bd1f01937
id: 3180b521-270e-11e8-ab42-005056b198fb
ingress_controller: False
ip: 50.0.2.3/24
labels:
NSX Container Plug-in for OpenShift - Installation and Administration Guide
VMware, Inc. 49

app: nginx-new
role: db
tier: cache
mac: 02:50:56:00:20:02
port_id: 81bc2b8e-d902-4cad-9fc1-aabdc32ecaf8
vlan: 3
kubenode> get pod-cache nsx.default.nginx-rc-uq2lv
cif_id: 2af9f734-37b1-4072-ba88-abbf935bf3d4
gateway_ip: 10.0.0.1
host_vif: d6210773-5c07-4817-98db-451bd1f01937
id: 1c8b5c52-3795-11e8-ab42-005056b198fb
ingress_controller: False
ip: 10.0.0.2/24
labels:
app: nginx
mac: 02:50:56:00:08:00
port_id: d52c833a-f531-4bdf-bfa2-e8a084a8d41b
vlan: 1
n Get network policy caches or a specific one
get network-policy caches
get network-policy-cache <network-policy-name>
Example:
kubenode> get network-policy-caches
nsx.testns.allow-tcp-80:
dest_labels: None
dest_pods:
50.0.2.3
match_expressions:
key: tier
operator: In
values:
cache
name: allow-tcp-80
np_dest_ip_set_ids:
22f82d76-004f-4d12-9504-ce1cb9c8aa00
np_except_ip_set_ids:
np_ip_set_ids:
14f7f825-f1a0-408f-bbd9-bb2f75d44666
np_isol_section_id: c8d93597-9066-42e3-991c-c550c46b2270
np_section_id: 04693136-7925-44f2-8616-d809d02cd2a9
ns_name: testns
src_egress_rules: None
src_egress_rules_hash: 97d170e1550eee4afc0af065b78cda302a97674c
src_pods:
50.0.2.0/24
src_rules:
from:
namespaceSelector:
matchExpressions:
NSX Container Plug-in for OpenShift - Installation and Administration Guide
VMware, Inc. 50

key: tier
operator: DoesNotExist
matchLabels:
ns: myns
ports:
port: 80
protocol: TCP
src_rules_hash: e4ea7b8d91c1e722670a59f971f8fcc1a5ac51f1
kubenode> get network-policy-cache nsx.testns.allow-tcp-80
dest_labels: None
dest_pods:
50.0.2.3
match_expressions:
key: tier
operator: In
values:
cache
name: allow-tcp-80
np_dest_ip_set_ids:
22f82d76-004f-4d12-9504-ce1cb9c8aa00
np_except_ip_set_ids:
np_ip_set_ids:
14f7f825-f1a0-408f-bbd9-bb2f75d44666
np_isol_section_id: c8d93597-9066-42e3-991c-c550c46b2270
np_section_id: 04693136-7925-44f2-8616-d809d02cd2a9
ns_name: testns
src_egress_rules: None
src_egress_rules_hash: 97d170e1550eee4afc0af065b78cda302a97674c
src_pods:
50.0.2.0/24
src_rules:
from:
namespaceSelector:
matchExpressions:
key: tier
operator: DoesNotExist
matchLabels:
ns: myns
ports:
port: 80
protocol: TCP
src_rules_hash: e4ea7b8d91c1e722670a59f971f8fcc1a5ac51f1
Support Commands for the NCP Containern Save the NCP support bundle in the filestore
NSX Container Plug-in for OpenShift - Installation and Administration Guide
VMware, Inc. 51

The support bundle consists of the log files for all the containers in pods with the labeltier:nsx-networking. The bundle file is in the tgz format and saved in the CLI default filestoredirectory /var/vmware/nsx/file-store. You can use the CLI file-store command to copy thebundle file to a remote site.
get support-bundle file <filename>
Example:
kubenode>get support-bundle file foo
Bundle file foo created in tgz format
kubenode>copy file foo url scp://[email protected]:/tmp
n Save the NCP logs in the filestore
The log file is saved in the tgz format in the CLI default filestore directory /var/vmware/nsx/file-store. You can use the CLI file-store command to copy the bundle file to a remote site.
get ncp-log file <filename>
Example:
kubenode>get ncp-log file foo
Log file foo created in tgz format
n Save the node agent logs in the filestore
Save the node agent logs from one node or all the nodes. The logs are saved in the tgz format in theCLI default filestore directory /var/vmware/nsx/file-store. You can use the CLI file-storecommand to copy the bundle file to a remote site.
get node-agent-log file <filename>
get node-agent-log file <filename> <node-name>
Example:
kubenode>get node-agent-log file foo
Log file foo created in tgz format
n Get and set the log level
The available log levels are NOTSET, DEBUG, INFO, WARNING, ERROR, and CRITICAL.
get ncp-log-level
set ncp-log-level <log level>
NSX Container Plug-in for OpenShift - Installation and Administration Guide
VMware, Inc. 52
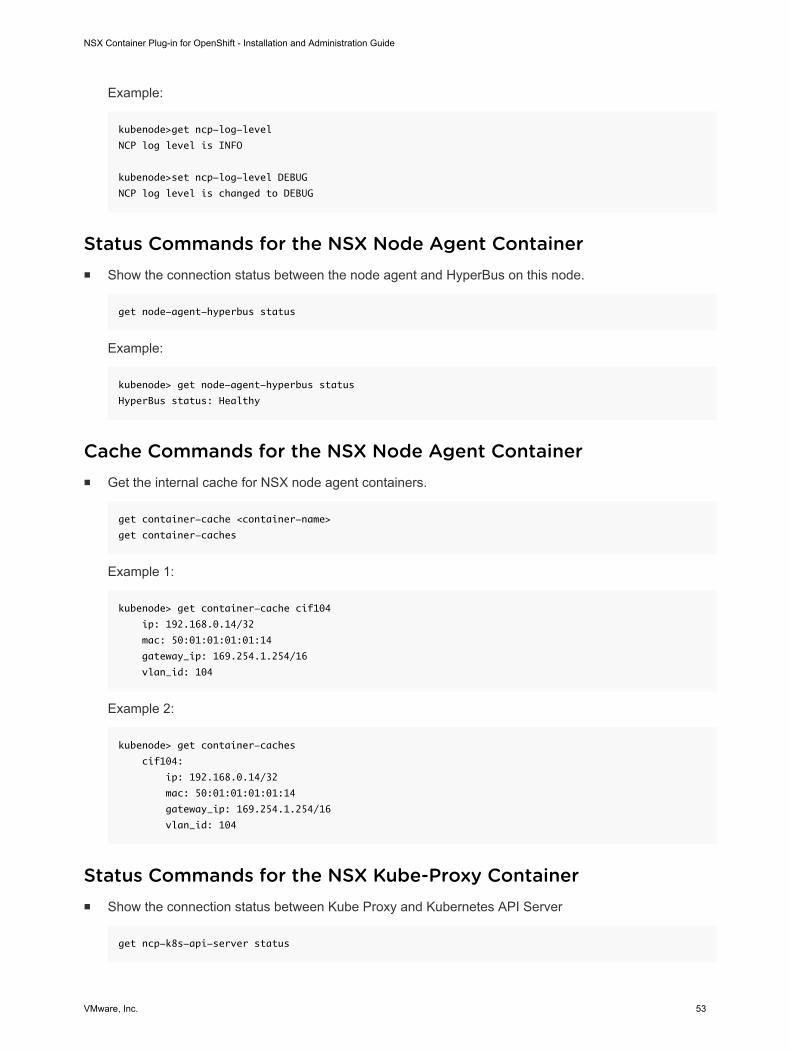
Example:
kubenode>get ncp-log-level
NCP log level is INFO
kubenode>set ncp-log-level DEBUG
NCP log level is changed to DEBUG
Status Commands for the NSX Node Agent Containern Show the connection status between the node agent and HyperBus on this node.
get node-agent-hyperbus status
Example:
kubenode> get node-agent-hyperbus status
HyperBus status: Healthy
Cache Commands for the NSX Node Agent Containern Get the internal cache for NSX node agent containers.
get container-cache <container-name>
get container-caches
Example 1:
kubenode> get container-cache cif104
ip: 192.168.0.14/32
mac: 50:01:01:01:01:14
gateway_ip: 169.254.1.254/16
vlan_id: 104
Example 2:
kubenode> get container-caches
cif104:
ip: 192.168.0.14/32
mac: 50:01:01:01:01:14
gateway_ip: 169.254.1.254/16
vlan_id: 104
Status Commands for the NSX Kube-Proxy Containern Show the connection status between Kube Proxy and Kubernetes API Server
get ncp-k8s-api-server status
NSX Container Plug-in for OpenShift - Installation and Administration Guide
VMware, Inc. 53

Example:
kubenode> get kube-proxy-k8s-api-server status
Kubernetes ApiServer status: Healthy
n Show the Kube Proxy watcher status
get kube-proxy-watcher <watcher-name>
get kube-proxy-watchers
Example 1:
kubenode> get kube-proxy-watcher endpoint
Average event processing time: 15 msec (in past 3600-sec window)
Current watcher started time: May 01 2017 15:06:24 PDT
Number of events processed: 90 (in past 3600-sec window)
Total events processed by current watcher: 90
Total events processed since watcher thread created: 90
Total watcher recycle count: 0
Watcher thread created time: May 01 2017 15:06:24 PDT
Watcher thread status: Up
Example 2:
kubenode> get kube-proxy-watchers
endpoint:
Average event processing time: 15 msec (in past 3600-sec window)
Current watcher started time: May 01 2017 15:06:24 PDT
Number of events processed: 90 (in past 3600-sec window)
Total events processed by current watcher: 90
Total events processed since watcher thread created: 90
Total watcher recycle count: 0
Watcher thread created time: May 01 2017 15:06:24 PDT
Watcher thread status: Up
service:
Average event processing time: 8 msec (in past 3600-sec window)
Current watcher started time: May 01 2017 15:06:24 PDT
Number of events processed: 2 (in past 3600-sec window)
Total events processed by current watcher: 2
Total events processed since watcher thread created: 2
Total watcher recycle count: 0
Watcher thread created time: May 01 2017 15:06:24 PDT
Watcher thread status: Up
n Dump OVS flows on a node
dump ovs-flows
NSX Container Plug-in for OpenShift - Installation and Administration Guide
VMware, Inc. 54

Example:
kubenode> dump ovs-flows
NXST_FLOW reply (xid=0x4):
cookie=0x0, duration=8.876s, table=0, n_packets=0, n_bytes=0, idle_age=8, priority=100,ip
actions=ct(table=1)
cookie=0x0, duration=8.898s, table=0, n_packets=0, n_bytes=0, idle_age=8, priority=0
actions=NORMAL
cookie=0x0, duration=8.759s, table=1, n_packets=0, n_bytes=0, idle_age=8,
priority=100,tcp,nw_dst=10.96.0.1,tp_dst=443 actions=mod_tp_dst:443
cookie=0x0, duration=8.719s, table=1, n_packets=0, n_bytes=0, idle_age=8,
priority=100,ip,nw_dst=10.96.0.10 actions=drop
cookie=0x0, duration=8.819s, table=1, n_packets=0, n_bytes=0, idle_age=8,
priority=90,ip,in_port=1 actions=ct(table=2,nat)
cookie=0x0, duration=8.799s, table=1, n_packets=0, n_bytes=0, idle_age=8, priority=80,ip
actions=NORMAL
cookie=0x0, duration=8.856s, table=2, n_packets=0, n_bytes=0, idle_age=8, actions=NORMAL
Error CodesThis section lists error codes produced by the various components.
NCP Error Codes
Error Code Description
NCP00001 Invalid configuration
NCP00002 Initialization failed
NCP00003 Invalid state
NCP00004 Invalid adapter
NCP00005 Certificate not found
NCP00006 Token not found
NCP00007 Invalid NSX configuration
NCP00008 Invalid NSX tag
NCP00009 NSX connection failed
NCP00010 Node tag not found
NCP00011 Invalid node logical switch port
NCP00012 Parent VIF update failed
NCP00013 VLAN exhausted
NCP00014 VLAN release failed
NCP00015 IP pool exhausted
NCP00016 IP release failed
NCP00017 IP block exhausted
NCP00018 IP subnet creation failed
NSX Container Plug-in for OpenShift - Installation and Administration Guide
VMware, Inc. 55

Error Code Description
NCP00019 IP subnet deletion failed
NCP00020 IP pool creation failed
NCP00021 IP pool deletion failed
NCP00022 Logical router creation failed
NCP00023 Logical router update failed
NCP00024 Logical router deletion failed
NCP00025 Logical switch creation failed
Error Code Description
NCP00026 Logical switch update failed
NCP00027 Logical switch deletion failed
NCP00028 Logical router port creation failed
NCP00029 Logical router port deletion failed
NCP00030 Logical switch port creation failed
NCP00031 Logical switch port update failed
NCP00032 Logical switch port deletion failed
NCP00033 Network policy not found
NCP00034 Firewall creation failed
NCP00035 Firewall read failed
NCP00036 Firewall update failed
NCP00037 Firewall deletion failed
NCP00038 Multiple firewall found
NCP00039 NSGroup creation failed
NCP00040 NSGroup deletion failed
NCP00041 IP set creation failed
NCP00042 IP set update failed
NCP00043 IP set deletion failed
NCP00044 SNAT rule creation failed
NCP00045 SNAT rule deletion failed
NCP00046 Adapter API connection failed
NCP00047 Adapter watcher exception
NCP00048 Load balancer service deletion failed
NCP00049 Load balancer virtual server creation failed
NCP00050 Load balancer virtual server update failed
NSX Container Plug-in for OpenShift - Installation and Administration Guide
VMware, Inc. 56

Error Code Description
NCP00051 Load balancer virtual server deletion failed
NCP00052 Load balancer pool creation failed
NCP00053 Load balancer pool update failed
NCP00054 Load balancer pool deletion failed
NCP00055 Load balancer rule creation failed
NCP00056 Load balancer rule update failed
NCP00057 Load balancer rule deletion failed
NCP00058 Load balancer pool IP release failed
NCP00059 Load balancer virtual server and service association not found
NCP00060 NSGroup update failed
NCP00061 Firewall rules get failed
NCP00062 NSGroup no criteria
NCP00063 Node VM not found
NCP00064 Node VIF not found
NCP00065 Certificate import failed
NCP00066 Certificate un-import failed
NCP00067 SSL binding update failed
NCP00068 SSL profile not found
NCP00069 IP pool not found
NCP00070 T0 edge cluster not found
NCP00071 IP pool update failed
NCP00072 Dispatcher failed
NCP00073 NAT rule deletion failed
NCP00074 Logical router port get failed
NCP00075 NSX configuration validation failed
Error Code Description
NCP00076 SNAT rule update failed
NCP00077 SNAT rule overlapped
NCP00078 Load balancer endpoints add failed
NCP00079 Load balancer endpoints update failed
NCP00080 Load balancer rule pool creation failed
NCP00081 Load balancer virtual server not found
NCP00082 IP set read failed
NCP00083 SNAT pool get failed
NSX Container Plug-in for OpenShift - Installation and Administration Guide
VMware, Inc. 57

Error Code Description
NCP00084 Load balancer service creation failed
NCP00085 Load balancer service update failed
NCP00086 Logical router port update failed
NCP00087 Load balancer init failed
NCP00088 IP pool not unique
NCP00089 Layer 7 load balancer cache sync error
NCP00090 Load balancer pool not exist error
NCP00091 Load balancer rule cache init error
NCP00092 SNAT process failed
NCP00093 Load balancer default certificate error
NCP00094 Load balancer endpoint deletion failed
NCP00095 Project not found
NCP00096 Pool access denied
NCP00097 Failed to get a load balancer service
NCP00098 Failed to create a load balancer service
NCP00099 Load balancer pool cache synchronization error
NSX Node Agent Error Codes
Error Code Description
NCP01001 OVS uplink not found
NCP01002 Host MAC not found
NCP01003 OVS port creation failed
NCP01004 No pod configuration
NCP01005 Pod configuration failed
NCP01006 Pod un-configuration failed
NCP01007 CNI socket not found
NCP01008 CNI connection failed
NCP01009 CNI version mismatch
NCP01010 CNI message receive failed
NCP01011 CNI message transmit failed
NCP01012 Hyperbus connection failed
NCP01013 Hyperbus version mismatch
NCP01014 Hyperbus message receive failed
NCP01015 Hyperbus message transmit failed
NSX Container Plug-in for OpenShift - Installation and Administration Guide
VMware, Inc. 58

Error Code Description
NCP01016 GARP send failed
NCP01017 Interface configuration failed
nsx-kube-proxy Error Codes
Error Code Description
NCP02001 Proxy invalid gateway port
NCP02002 Proxy command failed
NCP02003 Proxy validate failed
CLI Error Codes
Error Code Description
NCP03001 CLI start failed
NCP03002 CLI socket create failed
NCP03003 CLI socket exception
NCP03004 CLI client invalid request
NCP03005 CLI server transmit failed
NCP03006 CLI server receive failed
NCP03007 CLI command execute failed
Kubernetes Error Codes
Error Code Description
NCP05001 Kubernetes connection failed
NCP05002 Kubernetes invalid configuration
NCP05003 Kubernetes request failed
NCP05004 Kubernetes key not found
NCP05005 Kubernetes type not found
NCP05006 Kubernetes watcher exception
NCP05007 Kubernetes resource invalid length
NCP05008 Kubernetes resource invalid type
NCP05009 Kubernetes resource handle failed
NCP05010 Kubernetes service handle failed
NCP05011 Kubernetes endpoint handle failed
NCP05012 Kubernetes Ingress handle failed
NSX Container Plug-in for OpenShift - Installation and Administration Guide
VMware, Inc. 59

Error Code Description
NCP05013 Kubernetes network policy handle failed
NCP05014 Kubernetes node handle failed
NCP05015 Kubernetes namespace handle failed
NCP05016 Kubernetes pod handle failed
NCP05017 Kubernetes secret handle failed
NCP05018 Kubernetes default backend failed
NCP05019 Kubernetes unsupported match expression
NCP05020 Kubernetes status update failed
NCP05021 Kubernetes annotation update failed
NCP05022 Kubernetes namespace cache not found
NCP05023 Kubernetes secret not found
NCP05024 Kubernetes default backend is in use
NCP05025 Kubernetes LoadBalancer service handle failed
OpenShift Error Codes
Error Code Description
NCP07001 OC route handle failed
NCP07002 OC route status update failed
NSX Container Plug-in for OpenShift - Installation and Administration Guide
VMware, Inc. 60


![시스코코리아 최우형이사 · 2018. 6. 21. · [ DC Summit 2018 ] Cisco Container Platform 기술아키텍쳐 K8s Master K8s Master n K8s Node K8s Node K8s Node Persistent](https://img.dokumen.tips/doc/110x75/6120efdbf97d26532662f038/oee-oe-2018-6-21-dc-summit-2018-cisco-container.jpg)