Embed Size (px)
Citation preview
Getting Started Guide - English
Your Gateway to Electronic Payments & Financial Services

• Introduction
• Register online for noqodi
• How to fund?
• How to execute Transactions and Payments?
• Conclusion
Contents

noqodi is a Payment Gateway hosted and managed by emaratech software & solutions. noqodi is a safer way to pay
for Government services and other Service Providers on-line.
noqodi provides a unique Wallet to its channel partners and consumers where-in an individual or an establishment
registers and gets a Wallet account, fund the wallet account and can use the same wallet account to pay for listed
Service Providers at the noqodi Payment Gateway. On-line statements can be viewed anytime on noqodi portal for
funding and payment transactions.
e-cash is a pre-paid wallet account which can be funded through any of the partner banks through the listed
channels. Paying for the noqodi listed Service Providers through e-cash is quick, convenient and error free.
noqodi pillars:
Safety, Convenience and Speed
• If you pay via noqodi, the service provider never sees your payment information. This keeps your financial safe
and protected against fraud.
• There's no need to re-enter your payment details with each transaction. Simply pay with your noqodi Wallet ID.
• Payments are processed in real-time and no need to browse through complex web screen and re-enter
payment information again and again.
Introduction

• Visit www.noqodi.com to register online for noqodi wallet.
• Click on link “New User? Register here” as shown in the below image.
A
Registering for noqodi….Step 1

• Select Customer Type as establishment if you are a typing center or a corporate else as individual.
• Click on ‘Create An Account’ button.
A
Registering for noqodi….Step 2

• Enter application details, accept terms & conditions and click “Save & Continue” button to proceed.
Note: Please note all fields
are mandatory except Fax.
Registering for noqodi….Step 3
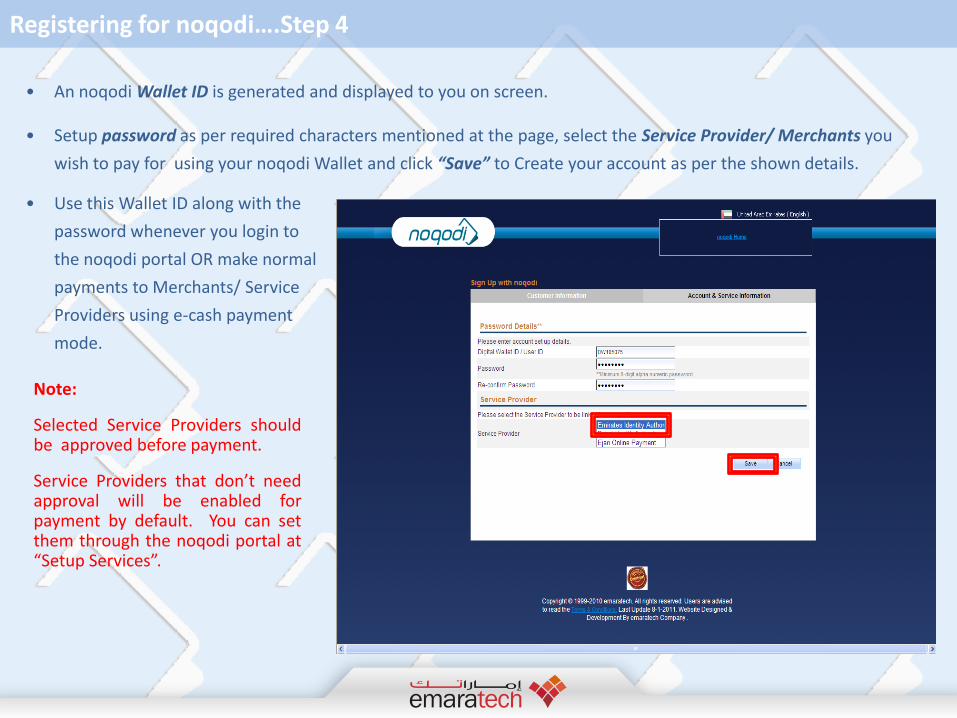
• Use this Wallet ID along with the
password whenever you login to
the noqodi portal OR make normal
payments to Merchants/ Service
Providers using e-cash payment
mode.
Note:
Selected Service Providers should be approved before payment.
Service Providers that don’t need approval will be enabled for payment by default. You can set them through the noqodi portal at “Setup Services”.
• An noqodi Wallet ID is generated and displayed to you on screen.
• Setup password as per required characters mentioned at the page, select the Service Provider/ Merchants you
wish to pay for using your noqodi Wallet and click “Save” to Create your account as per the shown details.
Registering for noqodi….Step 4
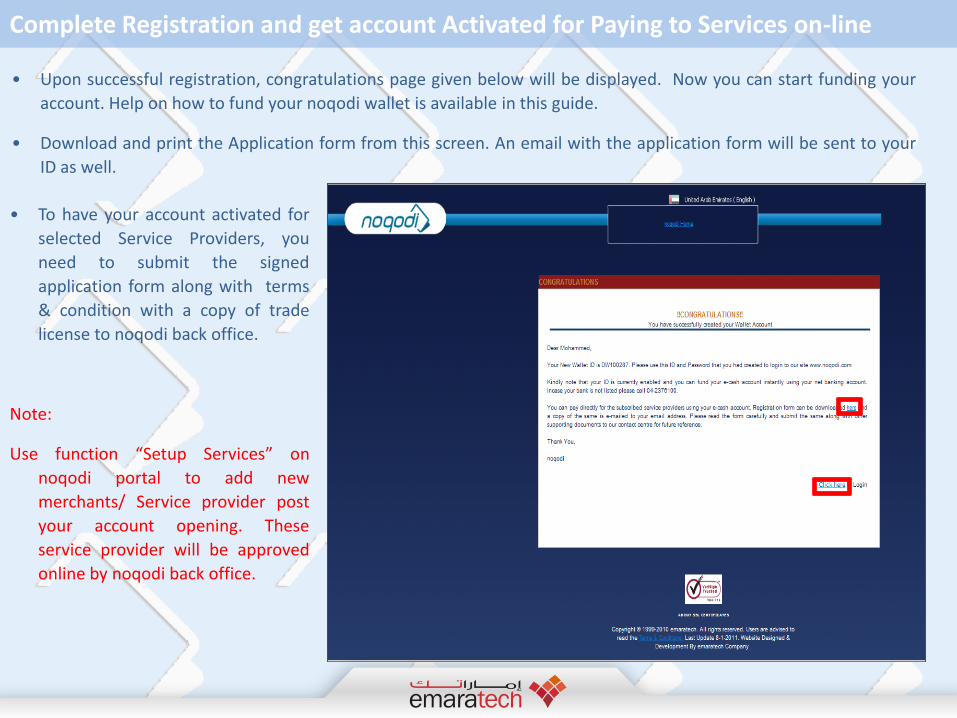
• Upon successful registration, congratulations page given below will be displayed. Now you can start funding your
account. Help on how to fund your noqodi wallet is available in this guide.
• Download and print the Application form from this screen. An email with the application form will be sent to your
ID as well.
• To have your account activated for
selected Service Providers, you
need to submit the signed
application form along with terms
& condition with a copy of trade
license to noqodi back office.
Note:
Use function “Setup Services” on
noqodi portal to add new
merchants/ Service provider post
your account opening. These
service provider will be approved
online by noqodi back office.
Complete Registration and get account Activated for Paying to Services on-line

• Wallet account can be funded online through Abu Dhabi Islamic Bank (ADIB).
• You need to open an account with Abu Dhabi Islamic Bank to use this feature, for help on opening the ADIB
account please call our help desk at +971 42376100).
• Once the account is opened with ADIB you need to get access to the eDD service of ADIB (User ID, Password and
RSA Token Device).
• To fund the account, login to
www.noqodi.com and choose
option purchase credit as
shown in the picture, enter
amount, select payment
mode as e-cash and bank as
Abu Dhabi Islamic Bank and
Click “Pay”. noqodi will re-
direct to the ADIB eDD service
web site in a new window as
shown in the next slide.
(Ensure the popup blocker is
disabled in your browser
settings).
Funding e-cash on your noqodi Wallet… Step 1
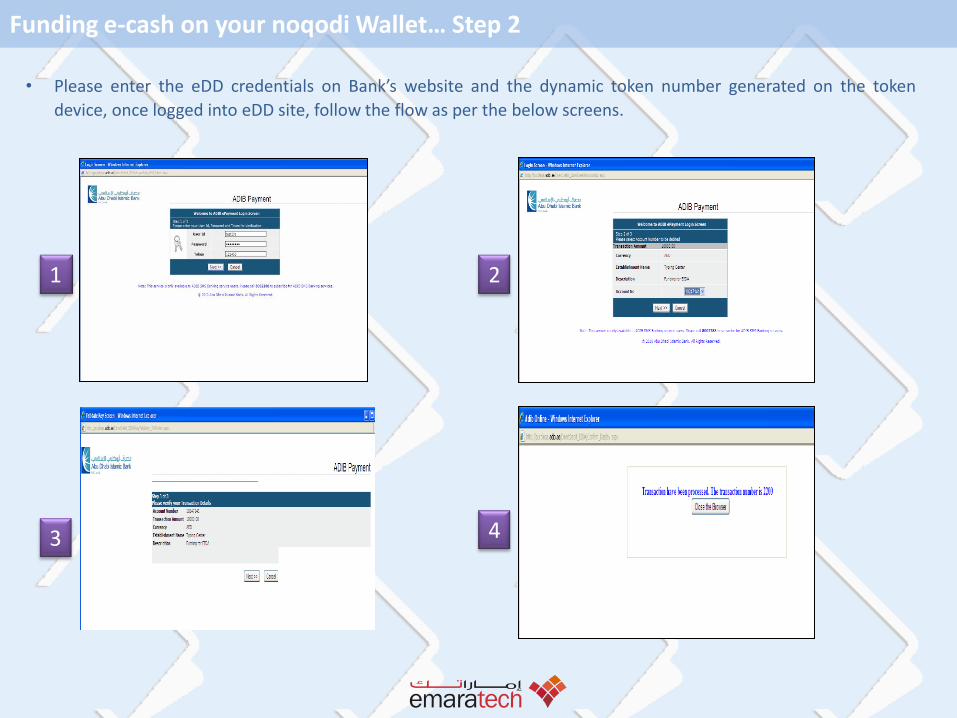
• Please enter the eDD credentials on Bank’s website and the dynamic token number generated on the token
device, once logged into eDD site, follow the flow as per the below screens.
1 2
3 4
Funding e-cash on your noqodi Wallet… Step 2

• Follow the eDD web site payment interface of ADIB until the payment is successful and a transaction reference is
displayed and you close the browser.
• Once you are back into the noqodi portal, you should see the “e-Cash balance” with the new credit amount as
shown below.
• As your e-cash is Successfully
Funded, you can now proceed with
making error free and real time
payments to the listed Service
Providers with noqodi.
Funding e-cash on your noqodi Wallet… Step 3
• Payment transactions are initiated through a Merchant website like EIDA.
There are two types of payment:
• noqodi Standard
• noqodi xPresspay.
• In a Standard payment scenario, the EIDA will re-direct to the noqodi payment
gateway interface. The user will enter the noqodi wallet ID and password to
complete the payment.
• In a xPresspay payment scenario, the Wallet owner needs to register the
merchant users into his Wallet. Once registered these users can pay from the
respective merchant interfaces instantaneously. The Wallet owner can also
restrict these users by putting a daily limit and pay modes etc. As the name
suggests, xPresspay payment is done without being needed to re-authenticate
the user.
• A Complete pay feature is introduced, where in the merchant site can verify a
payment incase of any technical failures, and if not done this can be re-
executed.
• A step by step guide on how to make use of the above features are listed in
the coming slides.
Making Payment for EIDA through the noqodi Wallet using e-Cash

• Fill in the application form, attach the required documents and proceed to payment page as shown in the picture
• Select Payment type as “noqodi Standard” on payment screen and click on Pay button.
• The EIDA application will re-direct to the noqodi payment gateway in a new window as shown in the next slide.
(Ensure the popup blocker is disabled in your browser settings).
Making Standard Payment…Step 1

• EIDA application will re-direct to the below page where the transaction details and payment details will be shown here. Verify the transaction details and payment amount.
• Enter your noqodi wallet ID and password and click login to make payment for your transaction.
NOTE : IF YOU CLOSE THE BROWSER BY CLICKING “X” IN THIS WINDOW. YOUR PAYMENT WILL NOT BE COMPLETE.
Making Standard Payment…Step 2

• On Successful Login, you will see the below page with the transaction amount details and the wallet account
number.
• Enter payment details for your statement and confirm the payment.
• The noqodi will debit your
wallet account and complete
your payment and you will get
a acknowledgement page as
shown in next slide.
• NOTE : IF YOU CLOSE THE
BROWSER BY CLICKING “X” IN
THIS WINDOW. YOUR
PAYMENT WILL NOT BE
COMPLETE.
Making Standard Payment…Step 3

• A payment acknowledgement will appear as shown below once the payment is successful.
• The payment details will be reflected in your e-cash account statement.
• An payment receipt will be sent to your e-mail address defined in the Wallet account information.
• Click “Click Here” URL to go back to the EIDA application. The below screen will be closed within 10 seconds and go
back to the application if you don’t click.
• You will be redirected back to the EIDA application where you can see the successful payment reference as shown in
next slide.
Making Standard Payment…Step 4
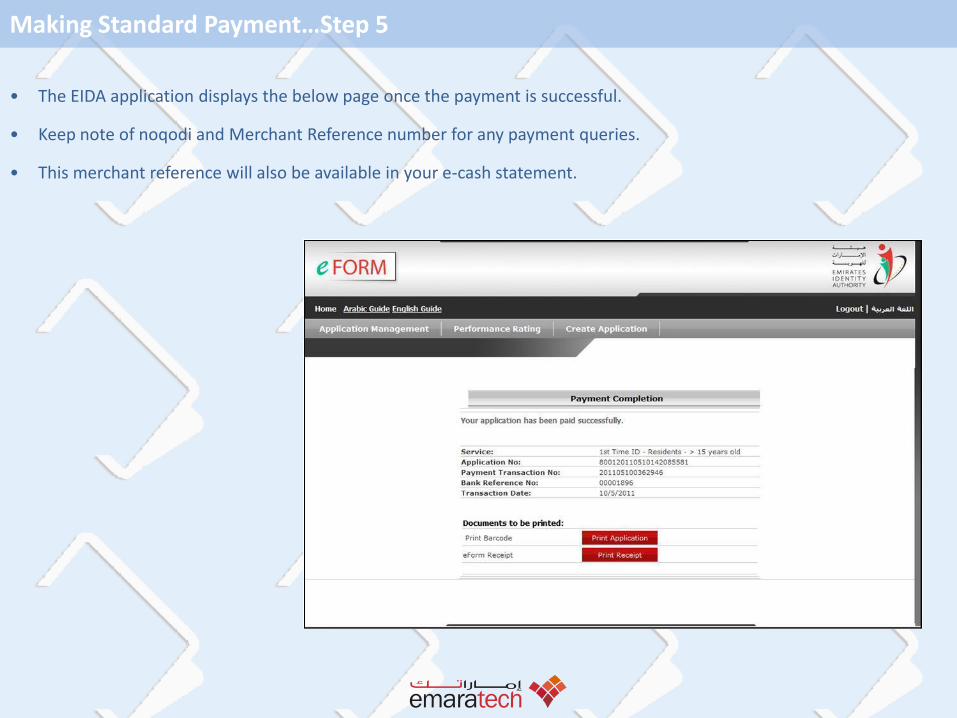
• The EIDA application displays the below page once the payment is successful.
• Keep note of noqodi and Merchant Reference number for any payment queries.
• This merchant reference will also be available in your e-cash statement.
Making Standard Payment…Step 5

• An noqodi wallet account owner can register users of the listed merchants so that they can pay instantly through his
e-cash. Registration can be done through the noqodi portal.
• Select “Manage xPressPay” menu at the portal and select the merchant you wish to add member or user.
• Enter the Member id and click “Validate ID”. noqodi will connect to the merchant system and check whether the
user is available.
• Enter a daily limit that the user can pay
through e-cash on your wallet.
• Select e-cash as pay mode and click
“Save”.
Note: Once a member for a selected service
is added by you on your wallet, the
respective user can pay from your wallet
for those merchant service up to the
specified limit without any re-
authentication.
Registering a member for xPresspay Payment

• Fill in the application form, attach the required documents and proceed to payment page as shown in the picture
• Select Payment type as “xPresspay Payment” on payment screen and click on Pay button.
• The EIDA application will execute the payment internally by debiting the Wallet account of the account holder with
whom the respective EIDA user is registered.
Making xPresspay Payment…Step 1

• The EIDA application displays the below page once the xPresspay payment is successful.
• Keep note of noqodi and Merchant Reference number for any payment queries.
• This merchant reference will also be available in your e-cash statement.
Making xPresspay Payment…Step 2

• At times due to any network issues or computer crashes, there would be a payment break and your transactions will not be complete.
• noqodi provides a new feature of verifying payment with the payment gateway . EIDA list those transactions where payments are not complete or not done
• Click on the “Complete Payment” for each transaction, and complete the payment as shown earlier either through standard or xPresspay, in this case the payment type will be what was selected earlier and cannot be changed.
Verifying payment done incase of no response from noqodi

By putting together this Getting Started Guide, we hope to reduce some of the uncertainty that may emerge when a customer is registering, obtaining approval, funding e-cash or making payments through our gateway. As we move forward together, we will enhance the gateway with new functionalities and features, on which, you may continue to have questions and clarifications that you want to sought. We will constantly update our guide to help you understand the added functionalities. Fortunately, our call centre (+971 42376100) will offer advice and solution for all your queries regardless of how important the query is. You can also reach us anytime through our Web site at www.noqodi.com or email us at [email protected] Thanks
Conclusion

Thank You
The noqodi team

![Skaffold - storage.googleapis.com · [getting-started getting-started] Hello world! [getting-started getting-started] Hello world! [getting-started getting-started] Hello world! 5](https://img.dokumen.tips/doc/110x75/5ec939f2a76a033f091c5ac7/skaffold-getting-started-getting-started-hello-world-getting-started-getting-started.jpg)


