Embed Size (px)
Citation preview

Nokia 930with Black
0 DeviceBerry Connect

2
ts reserved.on or storage of part or all of the contents in this e prior written permission of Nokia is prohibited.ple are registered trademarks of Nokia
company names mentioned herein may be eir respective owners. g development. Nokia reserves the right to make y of the products described in this document
Under no circumstances shall Nokia be responsible for any loss of data or income or any special, incidental, consequential or indirect damages howsoever caused.The contents of this document are provided "as is". Except as required by applicable law, no warranties of any kind, either express or implied, including, but not limited to, the implied warranties of merchantability and fitness for a particular purpose, are made in relation to the accuracy, reliability or contents of this document. Nokia reserves the right to revise this document or withdraw it at any time without prior notice.
Legal NoticeCopyright © 2005 Nokia. All righReproduction, transfer, distributidocument in any form without thNokia and Nokia Connecting PeoCorporation. Other product and trademarks or trade names of thNokia operates a policy of ongoinchanges and improvements to anwithout prior notice.

Cont
ents
3
ding email ............. 18resses .......................................18sage font................................19
o, and forwarding ................................. 20ge: .............................................20...................................................20ssage ........................................21ssage:.......................................21
il messages ............. 22...................................................22..................................................22s.................................................23
................................. 24
ContentsIntroduction ...............................................4
Setting up BlackBerry Internet Service...5
Setting up BlackBerry Connect to BlackBerry Enterprise Server ....................7
Using the BlackBerry Configuration for Nokia........................................................ 11Creating a signature ...........................................................11Creating filters .....................................................................11Creating encryption keys...................................................12Specifying advanced options ...........................................12
Email address in use ...................................................12Profile settings..............................................................13Folder redirection.........................................................13Saved messages............................................................13
Specifying BlackBerry Connect settings14
Calendar synchronization....................... 15Synchronizing with BlackBerry Internet Service ........15Synchronizing with BlackBerry Enterprise Server ......15Meeting Requests................................................................16
Composing and senSearching for email addChanging the email mes
Reading, replying temail ......................To read an email messaViewing attachments ....To reply to an email meTo forward an email me
Working with emaSaving email messages .Printing email messagesDeleting email message
Notes .....................

4
up and use BlackBerry Internet terprise Server, or you may choose t the same time. Note that to use ave BlackBerry Connect service ard.
ervice provider for information on Berry Connect service.
r detailed information is given in 00 user guide. Do not use this
Device with BlackBerry Connect place of the complete user guide, es important safety and information.
NOT connect the data cable to a ntil you have been instructed to do alling Nokia PC Suite. Connecting
ble at the wrong time may prevent er properly synchronizing your e.
Intr
oduc
tion Introduction
BlackBerry Connect allows you to access your compatible email accounts with your Nokia 9300 device. As messages arrive at the email server, they are automatically delivered to your device. You can send, receive, and reply to emails at your convenience.
The following BlackBerry Connect services are available:
• BlackBerry Internet Service — Allows you to receive email from an Internet service provider (ISP) or other email accounts (POP3, IMAP4) for up to ten existing compatible email accounts.
• BlackBerry Enterprise Server — Allows you to receive email from your company’s corporate email server. This option is compatible with Microsoft Exchange or Lotus Notes and requires your company to have a BlackBerry Enterprise Server installed and working with your company's email system. Check with your company's IT department to verify compatibility with your corporate email.
You may choose to set Service or BlackBerry Ento set up and use both athe services, you must hactivated on your SIM c
Contact your wireless sthe availability of Black
Note: Furthethe Nokia 93Nokia 9300 document inwhich providmaintenance
Caution: DOcomputer uso after instthe data cayou from evNokia devic

Sett
ing
up B
lack
Berr
y In
tern
et S
ervi
ce
5
essaging→ BlackBerry. Enable Service to Yes.and key. The device is ready to he GPRS icon and the icon are visible on the displays.
N, IMEI and IMSI numbers:e.
fo tab., IMEI and IMSI numbers
nt from a PC:
om a PC browser, go to the Web wireless service provider to set the instructions provided.
our IMEI numbers, and possibly plete the process.
nt from the device (if ess service provider): screen) on your device, click on nt setup” icon.
ccount" from the web page that
Setting up BlackBerry Internet ServiceUsing BlackBerry Internet Service you can receive email messages from an ISP (POP3 or IMAP4). BlackBerry Internet Service can be integrated with up to ten compatible ISP email accounts which provide you with the ability to send and receive email from those accounts with one solution.
To use BlackBerry Internet Service, you must enable BlackBerry Connect on your device. You will need the personal identification number (PIN), International Mobile Equipment Identity (IMEI) code, and International Mobile Subscriber Identity (IMSI) number assigned to your Nokia 9300 device. Reference the instructions provided by your wireless service provider for more information.
Use the following steps to find this information and enable your device to receive BlackBerry Connect settings:
To enable your device to receive BlackBerry Connect email settings:Be sure that you have set up your device as instructed in the Set Up Instructions Guide found in the sales package.
1 From the Desk (Home Screen), scroll to and select Tools.2 Select Control panel.
3 Scroll to and select M4 Scroll right to change5 Press the Done comm
continue when both tBlackBerry connectedinternal and external
To locate your device PI1 Follow steps 1-3 abov
2 Scroll to the Device in3 Make note of the PIN
displayed.
To configure your accou
To create your account fraddress supplied by your up your device, and follow
You will need your PIN, yyour IMSI numbers to com
To configure your accousupported by your wirel1 From the Desk (Home
the “BlackBerry accou
2 Select "Create Your Adisplays.

6
can be downloaded from a evice using Nokia PC Suite (refer ation” on page 15); however,
synchronized wirelessly with ng the BlackBerry Internet Service ontacts can be synchronized using luetooth wireless technology.
ed CD-ROM into your PC, click the n, choose the option Install Nokia w the installation wizard
o not need to install BlackBerry n for Nokia if you are only using ry Internet Service.
Sett
ing
up B
lack
Berr
y In
tern
et S
ervi
ce Note: The PIN and IMEI of your device have been automatically sent to this site.
3 Follow the on-screen instructions to create your username, password and integrate ISP email accounts if desired.
Note: To integrate your ISP email account with BlackBerry Internet Service, you will need your ISP email account name and password.
Calendar and contacts compatible PC to your dto “Calendar synchronizinformation will not beBlackBerry Connect usisolution. Calendar and cdata cable, Infrared or BInsert the Getting StartInstall Software sectioPC Suite Only and folloinstructions.
Note: You dConfiguratiothe BlackBer

Sett
ing
up B
lack
Berr
y Co
nnec
t to
Bla
ckBe
rry
Ente
rpris
e
7
mpany's BlackBerry Enterprise orporate email account.
rry Connect to synchronize your ing BlackBerry Enterprise Server. orate calendar events are o your device using BlackBerry s you make to your calendar e are synchronized with the as well.
BlackBerry Enterprise Server, Suite to synchronize your il contacts ONLY. Upon set up of e uncheck the boxes for email synchronization.
use with BlackBerry
up your device as instructed in uide found in the sales package.
receive BlackBerry Connect
e screen), scroll to and select
l. Messaging→ BlackBerry.ge Enable Service to Yes.
Setting up BlackBerry Connect to BlackBerry Enterprise ServerThis section will explain how to set up BlackBerry Connect to access corporate email. (NOTE: access to your company's BlackBerry Enterprise Server is required). Before corporate email messages can be delivered to your device, you have to set up BlackBerry Connect to work with the BlackBerry Enterprise Server installed in your corporate network. From the Getting Started CD-ROM, refer to the Install Software tab and choose the Install Nokia PC Suite and BlackBerry Configuration for Nokia option. The software applications will automatically install one after the other.From the Getting Started CD-ROM, install the following software onto your PC:• Nokia PC Suite — This software is used to connect your
device to the computer and to synchronize your contacts with your device.
• BlackBerry Configuration for Nokia — This software is used to configure your device to use BlackBerry
Connect with your coServer for a specific c
You can also use BlackBecalendar when you are usWhen enabled, your corpautomatically delivered tConnect, and any changeapplication on your deviccorporate network server
Note: If usinguse Nokia PC corporate emaNokia PC Suitand calendar
To set-up your device toEnterprise Server:Be sure that you have setthe Set Up Instructions G
1 Enable your device toemail settings:• From the Desk (Hom
the Tools folder.• Select Control pane• Scroll to and select• Scroll right to chan

8
kBerry, click Yes to accept the new 300 device.cept the PIN configuration, and tion key by moving your mouse s instructed.ect whether you want to bulk load ntments to your device want to place existing ts in your device, you must bulk our calendar. (This may take a ding upon the number of calendar ou decide to skip the bulk he wireless calendar tion of BlackBerry Connect will be til you run BlackBerry n for Nokia again and choose to ad your calendar items. For more , see “Synchronizing with e Server” on page 15.
if needed. For more information, ” on page 11.nfiguration wizard notifies you ick Exit.
ivates automatically. See “Using ration for Nokia” on page 11 for
Settin
g up
Bla
ckBe
rry
Conn
ect
to B
lack
Berr
y En
terp
rise • Press the Done command key. The device is ready to
continue when both the GPRS icon and the BlackBerry connected icon are visible on the display.
2 Make sure that your computer is connected to your corporate network.
3 Insert the Getting Started CD-ROM.4 Select Install Software from the CD's menu on the left,
then click Install Nokia PC Suite and BlackBerry Configuration for Nokia. The installation wizard will guide you through the important next steps.
5 After installing Nokia PC Suite and BlackBerry Configuration for Nokia, it is safe to connect your device to your computer using the data cable (the recommended connection method) provided in the sales package. Follow the Nokia PC Suite wizard instructions when connecting your device to a PC.
Note: Refer to the Nokia 9300 User Guide for additional details on connecting your device to a compatible computer.
6 If prompted, select the profile that you want to use, and press OK.
7 After installation minimize the CD window to access the BlackBerry Configuration window. To establish connectivity between your device and the BlackBerry Configuration for Nokia, click Connect. If you
previously used BlacPIN on your Nokia 9
8 When prompted, acgenerate the encryparound the screen a
9 When prompted, selyour calendar appoi
Note: If youappointmendownload ywhile, depenentries.) If ydownload, tsynchronizadisabled unConfiguratiobulk downloinformation
BlackBerry Enterpris
10 Create email filters see “Creating filters
11 When BlackBerry Cothat it is finished, cl
BlackBerry Connect actthe BlackBerry Configuadditional information.
Sett
ing
up B
lack
Berr
y Co
nnec
t to
Bla
ckBe
rry
Ente
rpris
e
9
n message icons
y service configuration message
vice configuration message has opened.
s
message
ry message
ror
error
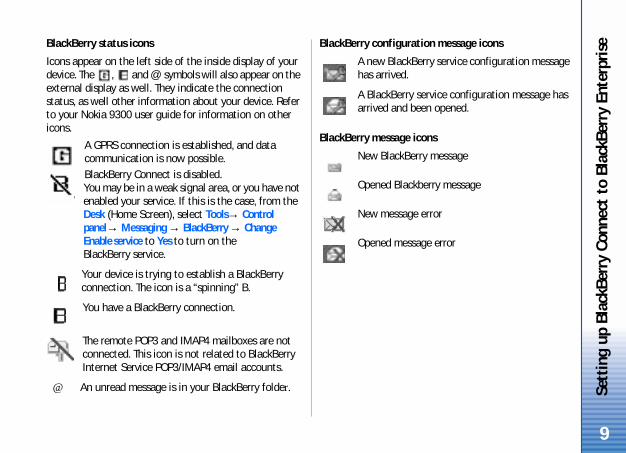
BlackBerry status icons
Icons appear on the left side of the inside display of your device. The , and @ symbols will also appear on the external display as well. They indicate the connection status, as well other information about your device. Refer to your Nokia 9300 user guide for information on other icons.
A GPRS connection is established, and data communication is now possible.BlackBerry Connect is disabled. You may be in a weak signal area, or you have not enabled your service. If this is the case, from the Desk (Home Screen), select Tools→ Control panel→ Messaging → BlackBerry → Change Enable service to Yes to turn on the BlackBerry service.
Your device is trying to establish a BlackBerry connection. The icon is a “spinning” B.
You have a BlackBerry connection.
The remote POP3 and IMAP4 mailboxes are not connected. This icon is not related to BlackBerry Internet Service POP3/IMAP4 email accounts.
@ An unread message is in your BlackBerry folder.
BlackBerry configuratio
A new BlackBerrhas arrived.
A BlackBerry serarrived and been
BlackBerry message icon
New BlackBerry
Opened Blackber
New message er
Opened message

10
est iconsest
equest
est response
Opened meeting request response
New meeting request cancellation
Opened meeting request cancellation
Sett
ing
up B
lack
Berr
y Co
nnec
t to
Bla
ckBe
rry
Ente
rpris
e BlackBerry meeting requNew meeting requ
Opened meeting r
New meeting requ

Usin
g th
e Bl
ackB
erry
Con
figur
atio
n fo
r N
okia
11
x next to Redirect incoming is selected so that you will device.
aturee that is automatically added to sent using BlackBerry Connect.
.e Automatically include your
messages field. click Apply.
a signature, clear the r signature on outgoing messages
st determine which email to your device.
ld, enter a descriptive name for
Using the BlackBerry Configuration for NokiaUse the BlackBerry Configuration for Nokia to access your corporate email from a BlackBerry Enterprise Server. BlackBerry Configuration for Nokia enables you to create filters, a signature for your messages, and encryption keys. If you are using BlackBerry Internet Service, you do not need to use the BlackBerry Configuration for Nokia.
Note: To use the BlackBerry Configuration for Nokia, your computer must be connected to the corporate network. If you want to set up your device, you must also connect your device to your computer using a data cable, infrared, or Bluetooth wireless technology. If you just want to create filters or change the signature, you do not need to connect your device to the computer.
Once installed, you can open the BlackBerry Configuration for Nokia on your PC from the Start menu or from the desktop icon. Security settings made within the BlackBerry Configuration for Nokia require your device to be connected to your computer in order for the settings to take effect.
Be sure that the check bomessages to your handsetreceive messages on your
Creating a signYou can create a signaturoutgoing email messages
To create a signature:
1 Select the General tab2 Enter a signature in th
signature on outgoing3 To save the signature,
If you do not want to useAutomatically include youfield, and click Apply.
Creating filterYou can create filters thamessages are forwarded
To create a new filter:1 Select the Filters tab.2 Click New.3 In the Filter Name fie
the filter.

12
tab.s automatically.
eys manually:tab. manually, click Generate.n the screen, and click Apply.
vanced optionse the Advanced tab to specify lackBerry Connect.
in use are using a Lotus Notes Domino nt, you cannot change the email d by BlackBerry. You can only email address if your device is a BlackBerry Enterprise Server for xchange.
ail address on the Advanced tab verify that it is correct.
ddress:
ess.dress, and click Apply.
Usin
g th
e Bl
ackB
erry
Con
figur
atio
n fo
r N
okia 4 In any of the From, Sent to, Subject, Body, Recipient
Types, Sensitivity, and Importance fields, enter the properties that you want the filter to use. Separate multiple entries with a semicolon (;).
5 To forward messages detected by the filter to your device, select Forward message to the handset. To leave the messages detected by the filter on the server, select Don't forward message to the handset.
6 Click OK.7 To save the filter, click Apply.
If you have several filters, they are used in the order that they are listed on the Filters tab. To move a filter, select the filter that you want to move, and use the arrows to the right of the filter to move the filter to a desired position.
To disable a filter:
Clear the check box next to it.
Creating encryption keysEncryption keys are used to create end-to-end encryption between a BlackBerry Enterprise Server and your device. You can generate encryption keys automatically or manually.
To create encryption keys automatically (recommended):
1 Select the Security 2 Select Generate key3 Click Apply.
To create encryption k1 Select the Security 2 Select Generate keys3 Move your mouse o
Specifying adIf necessary, you can usadvanced options for B
Email addressNote: If youemail accouaddress usechange the enabled on Microsoft E
Your device uses the emfor communication, so
To change the email a
1 Select Override Addr2 Enter the correct ad

Usin
g th
e Bl
ackB
erry
Con
figur
atio
n fo
r N
okia
13
ssend from your device are saved n the server. If necessary, you by selecting the Don’t save older check box, and
Profile settingsYou can specify which email profile is used when you open the BlackBerry Configuration for Nokia, by selecting Prompt for a profile to be used.
To change the profile settings:
1 Click Profile Settings in the Email profile settings section.
2 Change the setting.3 Click OK, then Apply.To use the same profile all the time:
1 Select Always use this profile.2 Select the desired profile.3 Click OK, then Apply.
Folder redirectionBy default, only email messages that arrive in your Inbox are forwarded to your device. However, you can specify that email messages are also forwarded to your device from other folders.
To specify folder redirection:
1 Click Selected folders in the Folder redirection section.2 Click Choose Folders, and select the applicable folders.
Make sure that you also select your Inbox.3 Click OK, then Apply.
Saved messageEmail messages that you in the Sent Items folder ocan change this behaviora copy to the Sent Items fclicking Apply.

14
g OK, and pressing the Set up nd button, specifies how messages tween your device and the erver or Web client.
ions may also be available under cile command button: — reconciles deletions and tatus.s On or Off — reconciles changes in
age, the following features may be
elects the location of searched
ly — only the addresses in the s on your device and memory .s only — only the addresses in the er address database are searched.e — (recommended) the addresses abases on your device and memory first and if no match is found, then he remote email server address ched., press Done.
Spec
ifyin
g Bl
ackB
erry
Con
nect
set
tings Specifying BlackBerry
Connect settingsYou can modify BlackBerry Connect settings on your device to suit your preferences.
Note: Not all BlackBerry Enterprise Servers support all of these features. For details on which features are supported by your server, contact your IT department.
To modify BlackBerry Connect settings:1 From the Desk (Home screen) scroll to and select Tools
folder.
2 Select Control Panel.3 Scroll to and select Messaging→BlackBerry.4 On the General page, the following features may be
modified:• Enable service — Selecting Yes turns on the
BlackBerry service.• Allow service when roaming — Selecting Yes allows
the use of the BlackBerry service when you are not in your local wireless service area. Selecting No disallows roaming service.
• Wireless reconcile — Pressing the Change command key, selecting the BlackBerry service that you want
to set up, pressinreconcile commaare reconciled becorporate email s
The following optthe Set up reconDeletions On or Offchanges in read sRead/Unread staturead status.
5 On the Composing pavailable:• Check names — S
addresses.• In local contacts on
contact databasecard are searched
• In remote addresseremote email serv
• In local, then remotin the contact datcard are searchedthe addresses in tdatabase are sear
6 To save the settings
Cale
ndar
syn
chro
niza
tion
15
t from the device removes that
ake edits to All occurrences of ies from the device, the entire synchronized with the server. u edit a single event within the
ent will not be synchronized er.
ompted to download your Connect in the BlackBerry
hen your device is connected. ep wireless synchronization
load, all calendar events in your with the new calendar data. ted from the current date and
t time you synchronize data Nokia 9300 device and your PC me time depending on the size ar, contacts, and to-do list.
ver synchronizes email and . Use Nokia PC Suite to te email server contacts ONLY. Suite uncheck the boxes for ronization.
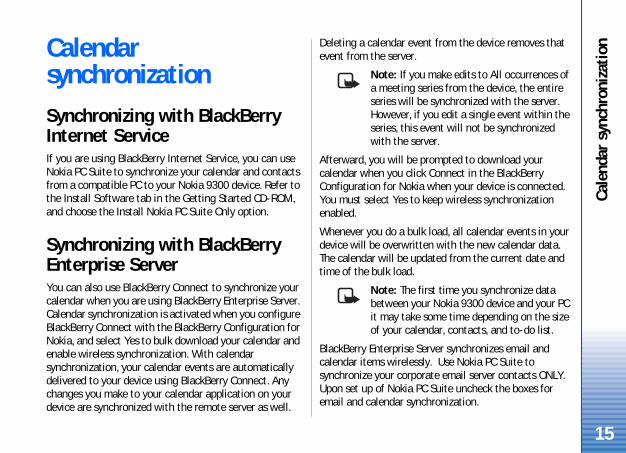
Calendar synchronizationSynchronizing with BlackBerry Internet ServiceIf you are using BlackBerry Internet Service, you can use Nokia PC Suite to synchronize your calendar and contacts from a compatible PC to your Nokia 9300 device. Refer to the Install Software tab in the Getting Started CD-ROM, and choose the Install Nokia PC Suite Only option.
Synchronizing with BlackBerry Enterprise ServerYou can also use BlackBerry Connect to synchronize your calendar when you are using BlackBerry Enterprise Server. Calendar synchronization is activated when you configure BlackBerry Connect with the BlackBerry Configuration for Nokia, and select Yes to bulk download your calendar and enable wireless synchronization. With calendar synchronization, your calendar events are automatically delivered to your device using BlackBerry Connect. Any changes you make to your calendar application on your device are synchronized with the remote server as well.
Deleting a calendar evenevent from the server.
Note: If you ma meeting serseries will be However, if yoseries, this evwith the serv
Afterward, you will be prcalendar when you click Configuration for Nokia wYou must select Yes to keenabled.
Whenever you do a bulk device will be overwrittenThe calendar will be updatime of the bulk load.
Note: The firsbetween yourit may take soof your calend
BlackBerry Enterprise Sercalendar items wirelesslysynchronize your corporaUpon set up of Nokia PC email and calendar synch

16
reply and add your own
Act upon the message request but ssage. meeting request without action.
quest:
ntry→ Meeting.
tab.om your local contacts list, select nd choose the contact you wish to
om remote server contacts, be sure ed the “in local, then remote”
eld.
the name of the person you wish
dee command button.
Cale
ndar
syn
chro
niza
tion Refer to the Install Software tab in the Getting Started
CD-ROM, and choose the Install Nokia PC Suite and BlackBerry Configuration for Nokia option.
Meeting Requests To accept, decline, or tentative a meeting request:1 A meeting request will appear showing an envelope
with a person’s head. Select the request and press the Open command button. The meeting request opens.
2 Press the Accept, Tentative, or Decline command button to act upon the request, or the Close command button to exit the request.• Accept —Accept the meeting request.• Tentative—Tentatively accept the meeting request.• Decline—Refuse the meeting request.• Close—Close the meeting request without action.
Acting on a meeting request opens the Meeting Request Reply window.
To add comments to a meeting response:1 In the Meeting Request Reply window complete the
action on the message request by pressing the Send now, Edit reply, Do not send reply, or Cancel command button.• Send now —Complete the action with the default
reply.
• Edit reply—Edit thecomments.
• Do not send reply—send no reply me
• Cancel—Close the
To create a meeting re1 Press Calendar.2 Press Menu key.3 Select File→ New E4 Fill in the Details. 5 Scroll to Attendees 6 To invite someone fr
Add from Contacts ainvite ORTo invite someone frthat you have selectsetting.• Scroll to search fi
• Type all or part ofto invite.
• Press Add as atten

Cale
ndar
syn
chro
niza
tion
17
Specify check names settings for sending meeting requests:1 Press Calendar.
2 Press Menu key.
3 Scroll to and select Tools.
4 Highlight and select General settings.
5 Scroll to and select Meeting requests.
6 Scroll down to Check names and choose Change.
7 Select preferred option (In local, then remote is recommended).
8 Press OK then Done.
If you chose the "in local, then remote" setting, the meeting editor will first try to make a match from your local contacts database. If you wish to ignore the local match and force a remote name look up, select Cancel and a list of remote address matches will appear.
You may choose different settings for checking names for meeting requests versus sending emails. See “Specifying BlackBerry Connect settings” on page 14.

18
age editor window, press Menu, ull screen mode.y or sending service of the message, ns. If you do not change the of the message is set to Normal ing service is used., press Send. The sent message is folder on the device until it has message has been sent, it is saved there is a sending error, the ved from the Sent folder to the
email addressesings, you can search for email ntact databases, the remote email cifying BlackBerry Connect
dresses:t of a name in the To, Cc, or Bcc the @ symbol.ect Tools→ Check names. You can ith the message during the search.the search are shown, scroll to the he list of matches, and press Select. search for addresses from the
Com
posi
ng a
nd s
endi
ng e
mai
l Composing and sending emailYou can send BlackBerry email messages to any recipient with an email account. The recipient of the message does not need to have BlackBerry Connect.
To send an email message:1 Press Messaging, then Write message, and
select BlackBerry.2 Press Recipient, and select the recipients, or enter
the email addresses of the recipients in the To, Cc, and Bcc fields.• To — The message is sent to the recipient.• Cc — A copy of the message is sent to the recipient.
• Bcc — A copy of the message is sent to the recipient but this is hidden from the other recipients. If the Bcc field is not shown, press the Menu button and select View→Show Bcc field.
If you enter more than one email address in a field, separate the addresses with a semicolon (;), or press Enter between the addresses.
3 In the Subject field, enter a subject for the message.4 Write your message. To enlarge the text while writing,
press Menu, and select View→ Zoom→ Zoom out.
To enlarge the messand select View→ F
5 To specify the prioritpress Sending optiosettings, the priorityand the default send
6 To send the messagesaved in the Outboxbeen sent. Once thein the Sent folder. Ifmessage will be moOutbox folder.
Searching forDepending on your settaddresses from your coserver or both. See “Spesettings” on page 14.
To search for email ad1 Enter a name or par
field. Do not include2 Press Menu, and sel
continue working w3 When the results of
correct recipient on tNote that when you

Com
posi
ng a
nd s
endi
ng e
mai
l
19
corporate server address database, the list shows the first 20 matches. To get more matches, press Get more results.If no matches are found, or none of the matches is correct, you need to enter the email address manually.
Changing the email message fontWhen composing an email message, you can change the font and font size. Note that changing the font has no effect on the sent message, which is always plain text. The font settings only affect how the message is presented in the message editor.
To change the font:1 To specify the font used in the messages, when
composing an email, press Menu, and select Tools→ Preferences→ Font.
2 To specify the size, press Menu, and select Tools→ Preferences→ Font size.
3 To save the changes, press Done.

20
mail that includes an attachment, ect View → Attachments. A list of You can see the number of eir names in the left frame, and t of the attachment in the right
move to the right frame. contents, select Table of contents, elect a section, and press View. To chment, select Full content, and
t. To view more, press Get more. To attachments, press Back.ttachments and return to the
BlackBerry Connect you may view s of attachments. This list may time as service upgrades are orted file types include documents dsheets (.xls) and presentations d in Microsoft Office 97, 98, 2000, s Adobe PDF (.pdf), Corel t (.wpd), ASCII Text (.txt), HTML ZIP (.zip) files. BlackBerry Connect o view but not edit these types. Using the native email Nokia 9300 you may view as well
t of the attachment types above.
Read
ing,
rep
lyin
g to
, and
for
war
ding
em
ail Reading, replying to,
and forwarding emailAll BlackBerry email messages are wirelessly delivered to the BlackBerry folder in the Messaging application. The folder is created automatically when you enable BlackBerry Connect on your device. The @ symbol appears on the outside display of your device when you have an unread message in your BlackBerry folder.
To read an email message:1 When the icon indicates that a new BlackBerry email
message has arrived, press Messaging, select the BlackBerry folder. Select the unread message (indicated in bold text) and open it by pressing the Open command key to the right of the display.
2 Read the message. Only the first 2 Kb of the message is delivered to your device automatically. To read the rest of the message, press the Get more command key.
Viewing attachmentsMessages with attachments are indicated by an envelope with a paperclip. To view attachment:
1 While viewing an e-press Menu, and selattachments opens.attachments and thdetails of the contenframe.
2 Press the tab key to3 To view the table of
and press Expand. Sview the entire attapress View
4 Read the attachmenreturn to the list of
5 To close the list of aemail, press Close.
Note: With several typechange overmade. Supp(.doc), sprea(.ppt) createXP as well aWordPerfec(.html) and allows you tattachmentclient of theas edit mos
Read
ing,
rep
lyin
g to
, and
for
war
ding
em
ail
21
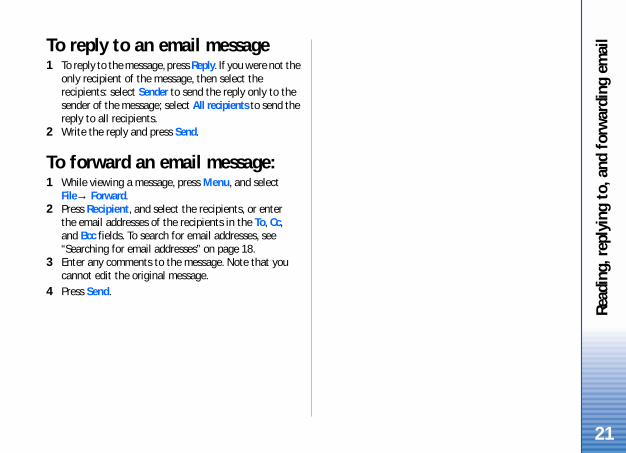
To reply to an email message1 To reply to the message, press Reply. If you were not the
only recipient of the message, then select the recipients: select Sender to send the reply only to the sender of the message; select All recipients to send the reply to all recipients.
2 Write the reply and press Send.
To forward an email message:1 While viewing a message, press Menu, and select
File→ Forward.2 Press Recipient, and select the recipients, or enter
the email addresses of the recipients in the To, Cc, and Bcc fields. To search for email addresses, see “Searching for email addresses” on page 18.
3 Enter any comments to the message. Note that you cannot edit the original message.
4 Press Send.

22
age: message, press Menu, and select you have already saved the ve it after changes, press Menu,
e:, open the message, and make
sage:
l messagesy email messages to compatible ble, infrared, or Bluetooth wireless e Nokia 9300 User Guide for more ing your device using one of these ding with the steps below.
age:hat you want to print.
setup, press Menu, select File→ p, and make any necessary
ect File→ Printing→ Print.
Wor
king
with
em
ail m
essa
ges Working with email
messagesThe maximum number of email messages that you can store in the BlackBerry folder is 2000, provided that you have enough free memory on your device. If the number of messages reaches the limit, the oldest messages are deleted from the folder. Note that messages deleted for this reason are deleted only from the device, not from the server.
Note: All received BlackBerry email messages are saved in the BlackBerry folder. You can move BlackBerry email messages to the Drafts folder or to your personal folders. Only messages in the BlackBerry folder can be reconciled; messages moved to other folders are not reconciled. You cannot create subfolders for the BlackBerry folder.
Saving email messagesYou can save email messages that have not been sent yet in the Drafts folder. If you exit the message editor without sending the message, the message will automatically be saved in the Drafts folder.
To save an email messWhile composing a newFile→ Save in Drafts. If message and want to saand select File→ Save.
To edit a saved messagGo to the Drafts folderthe changes.
To send the saved mes
Press Send.
Printing emaiYou can print BlackBerrprinters using a data catechnology. Refer to thinformation on connectmethods, before procee
To print an email mess1 Open the message t
To change the page Printing→ Page setuchanges.
2 Press Menu, and sel
Wor
king
with
em
ail m
essa
ges
23
Deleting email messagesBlackBerry Internet Service offers a wireless delete option which enables permanent deletion of email messages from the server when those email messages are deleted from your device.
BlackBerry Enterprise Server allows you to keep your corporate email mailbox in sync with your device. Depending upon your settings, messages deleted from the Nokia 9300 device are automatically deleted from the remote server. See “Specifying BlackBerry Connect settings” on page 14.
To delete an email message:Open the message that you want to delete, and press Delete.
To delete without opening:
Highlight the message, and press the backspace key.
To delete an email message that you are currently composing:
Press Menu, and select File→ Delete message.

24
Not
es Notes