Embed Size (px)
Citation preview
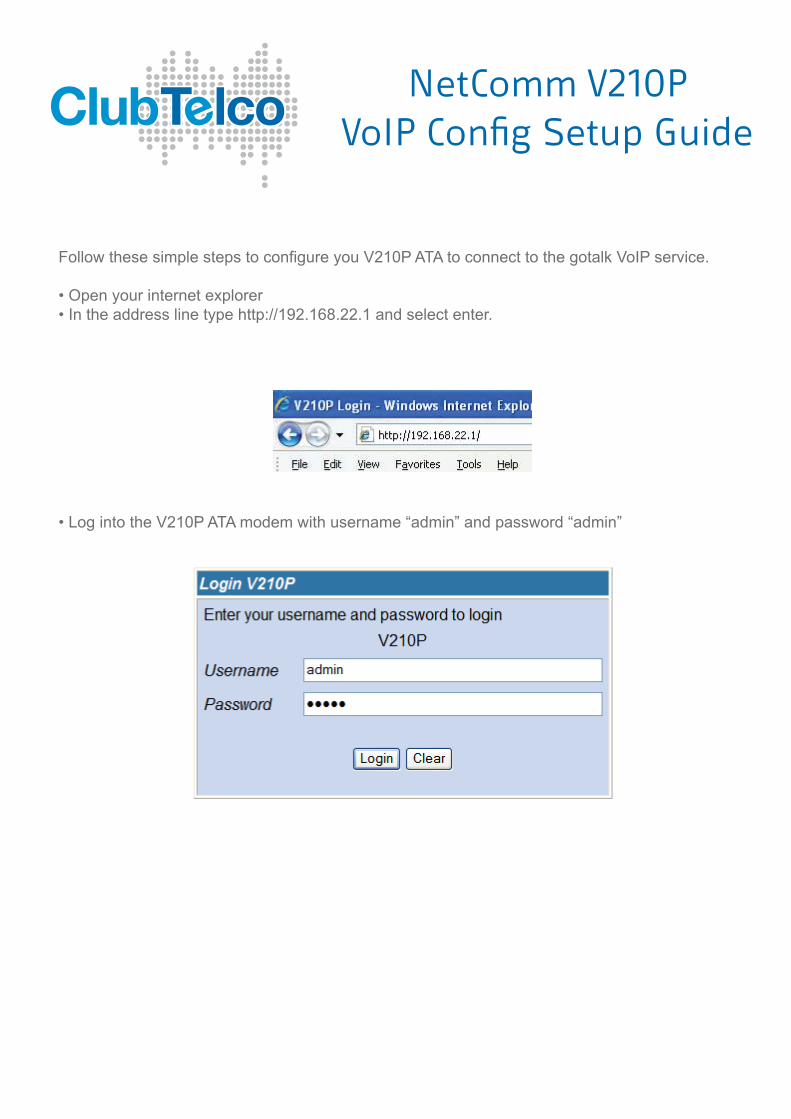
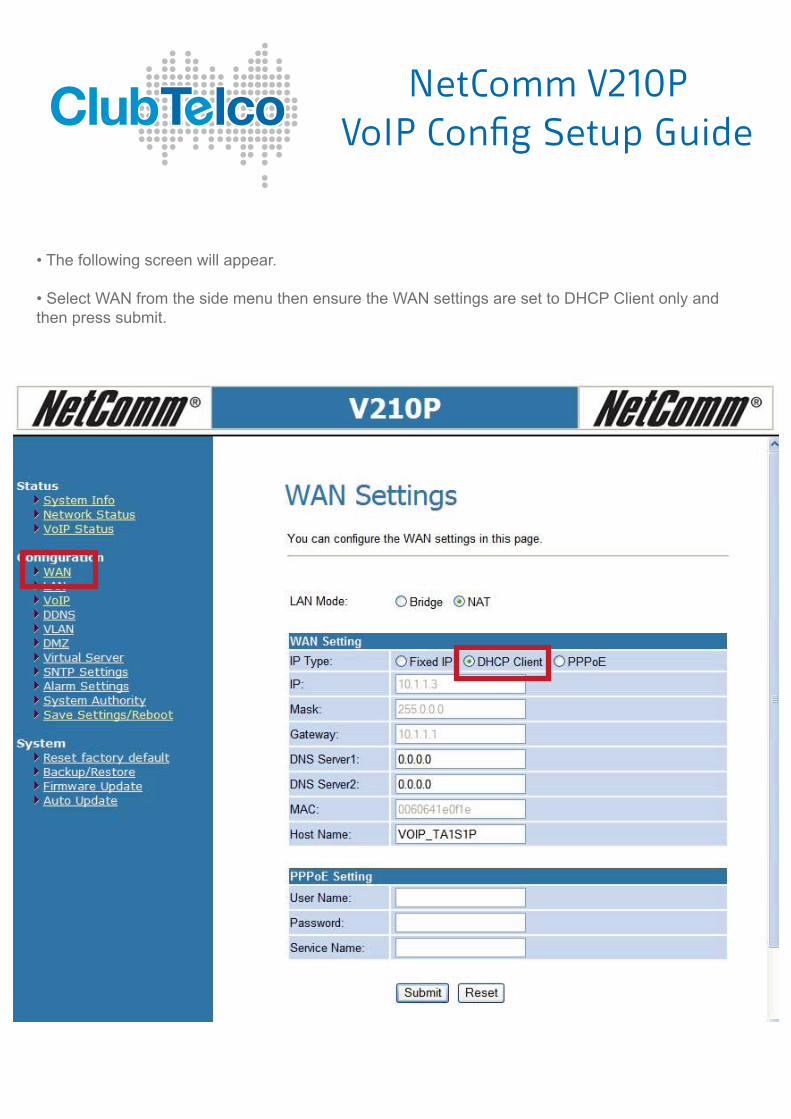
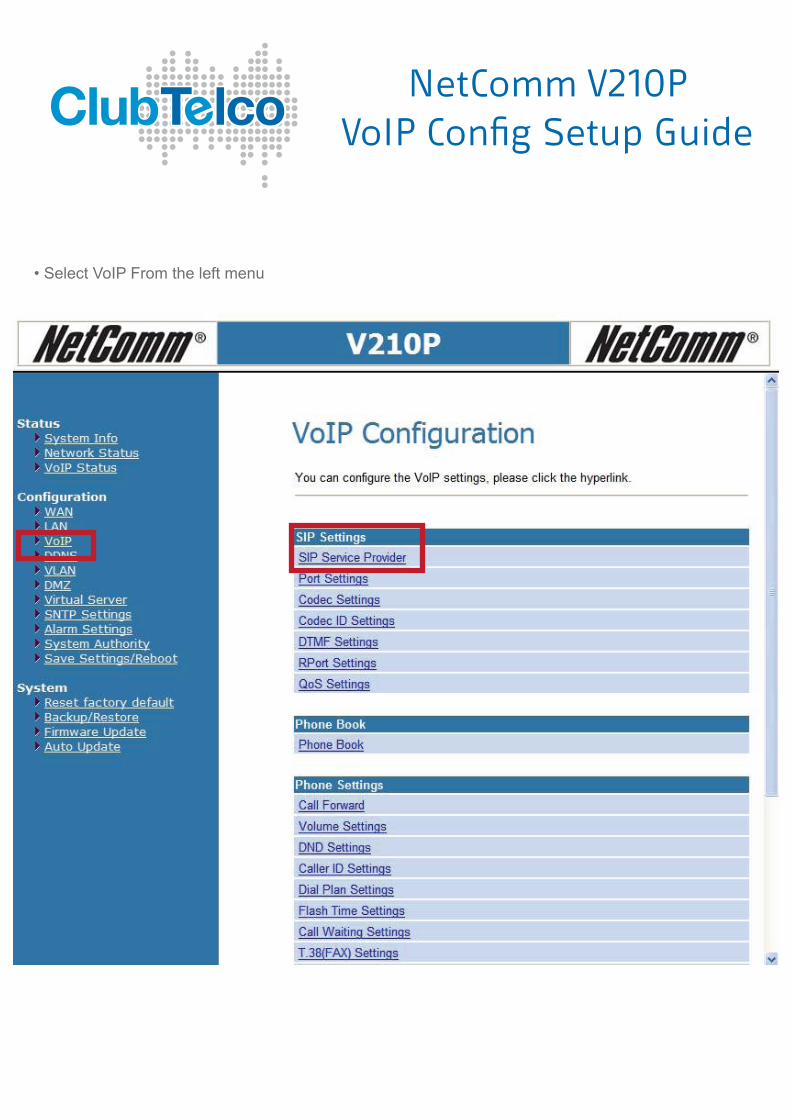
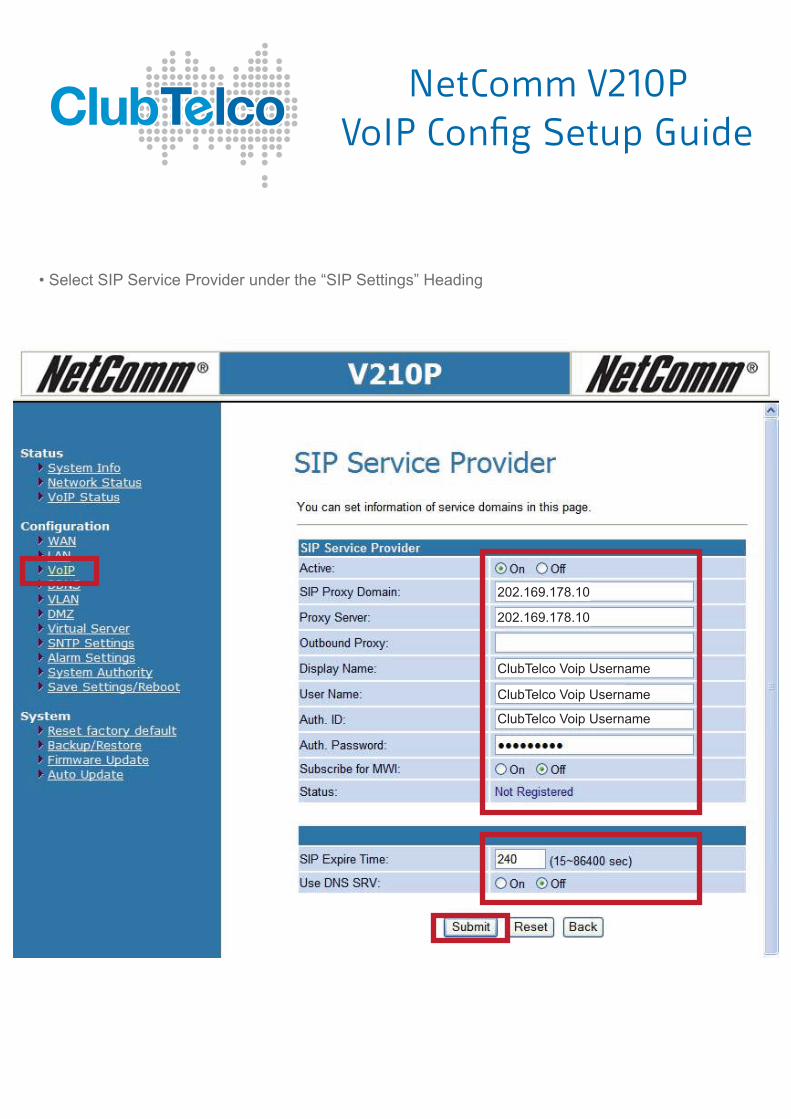
NETCOMM 210P VoIP ATA CONNECTION GUIDE
WElCOME TO ClUbTElCOWe have pre-configured your ATA (Analog Telephone Adaptor) for you - just follow these steps to start using your ClubTelco VoIP service.
STEP 1 - CONNECT ThE ATA TO yOUr PC
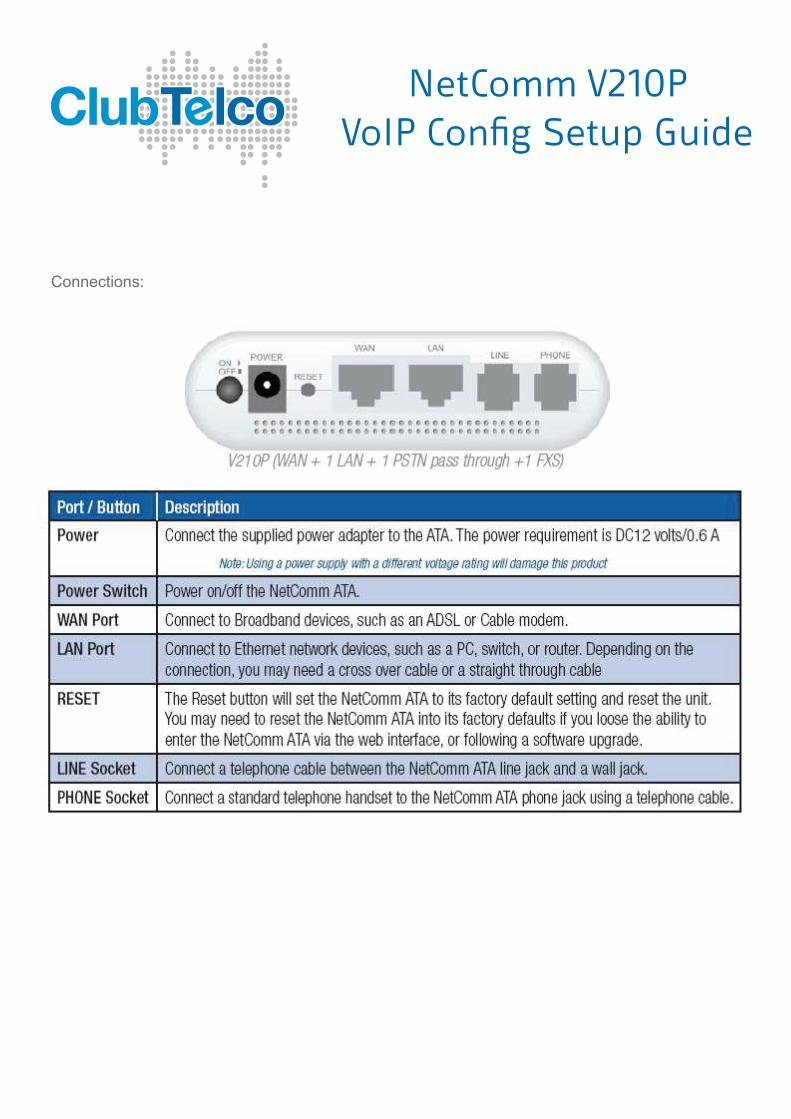
Connect an Ethernet Cable to the back of your computer and the other end of the cable to the port labelled LAN on the back of the ATA.
STEP 2 - CONNECT ThE ATA TO yOUr MODEM
Connect another Ethernet Cable to the LAN (Ethernet) port on your modem/router and then the other end of the cable to the WAN port on the back of the ATA.
STEP 3 - CONNECT ThE ATA TO yOUr PhONE
Once you have plugged the ATA into the computer and modem, connect a standard Telephone Cable from the port labelled Phone on the ATA and the other end of that cable to the phone you wish to use to make your calls.
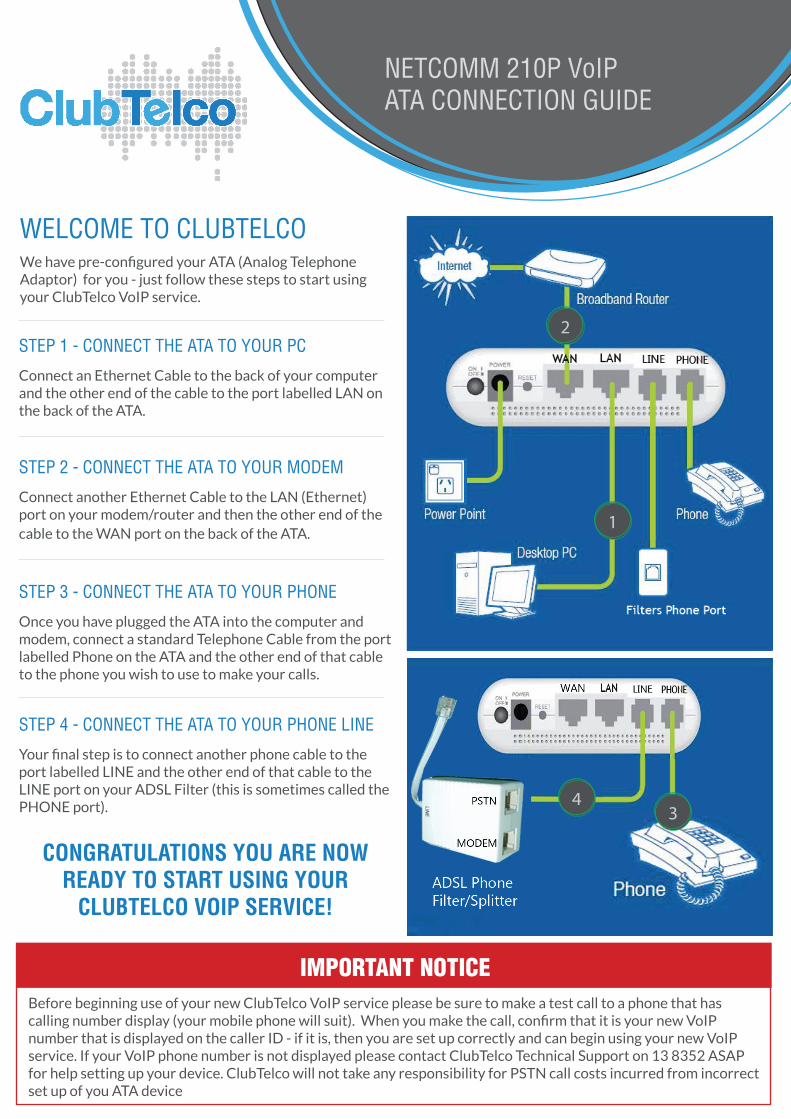
STEP 4 - CONNECT ThE ATA TO yOUr PhONE lINE
Your final step is to connect another phone cable to the port labelled LINE and the other end of that cable to the LINE port on your ADSL Filter (this is sometimes called the PHONE port).
IMPORTANT NOTICE
2
3
1
4
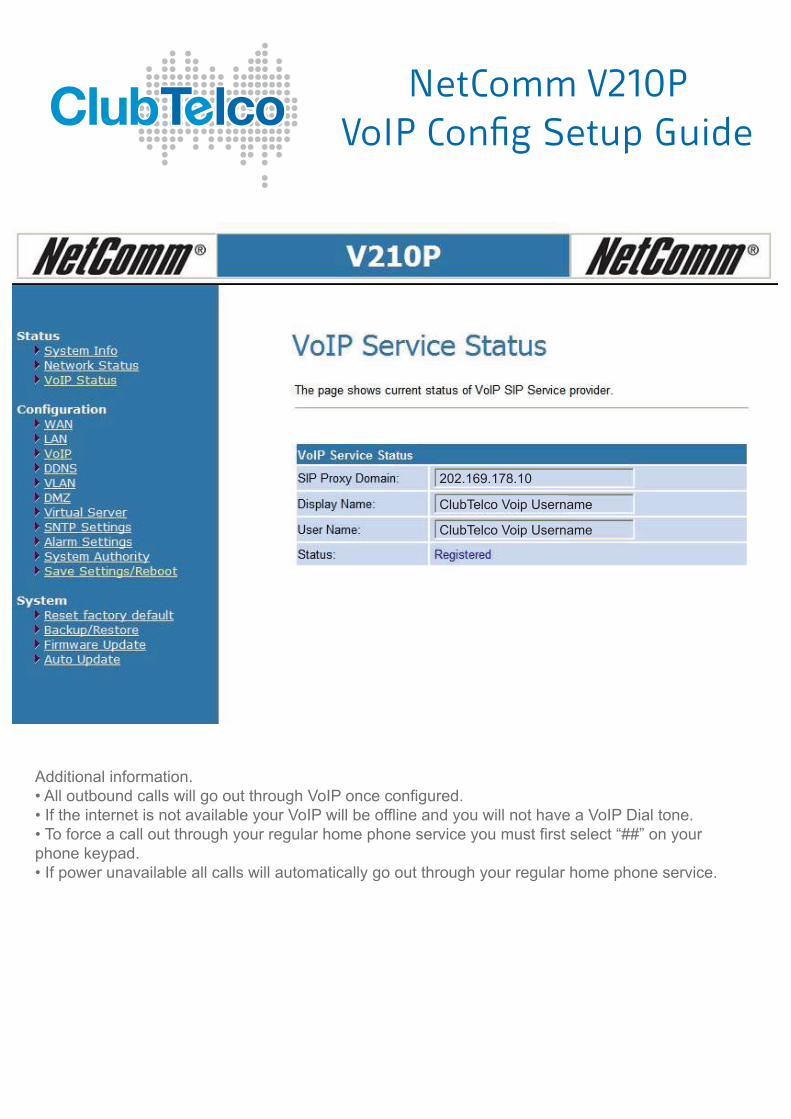
Before beginning use of your new ClubTelco VoIP service please be sure to make a test call to a phone that has calling number display (your mobile phone will suit). When you make the call, confirm that it is your new VoIP number that is displayed on the caller ID - if it is, then you are set up correctly and can begin using your new VoIP service. If your VoIP phone number is not displayed please contact ClubTelco Technical Support on 13 8352 ASAP for help setting up your device. ClubTelco will not take any responsibility for PSTN call costs incurred from incorrect set up of you ATA device
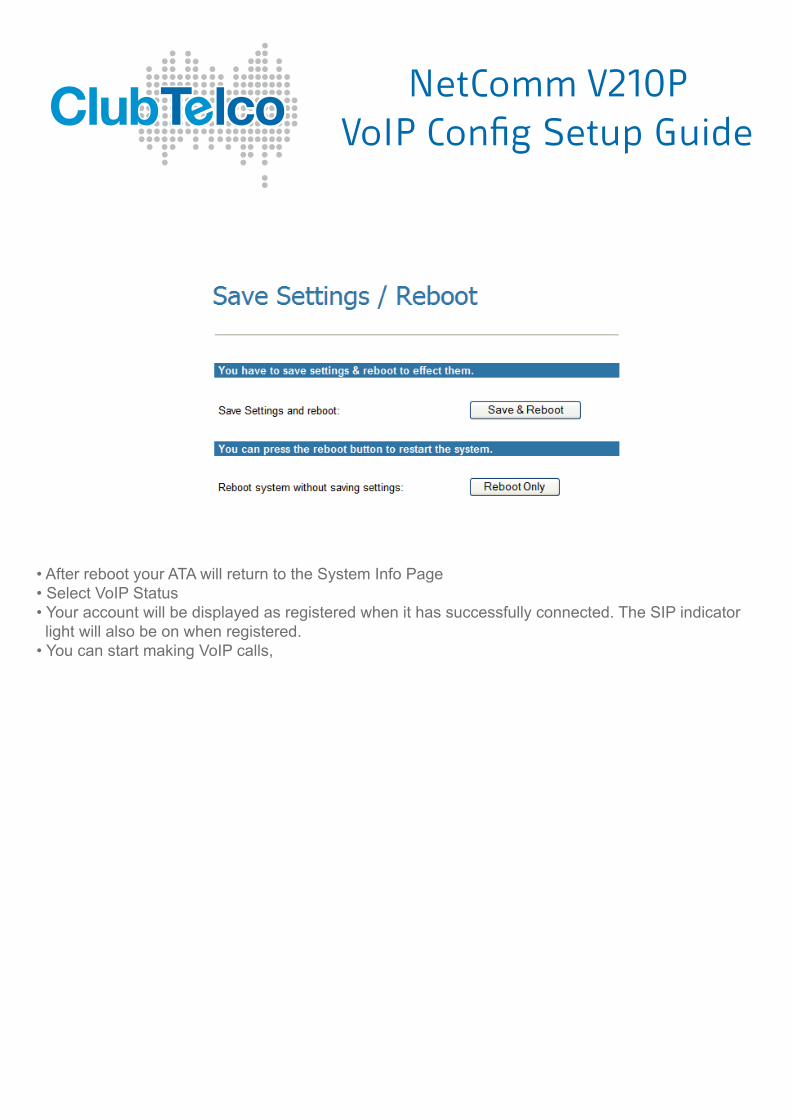
Congratulations you are now ready to start using your
ClubtelCo VoiP serViCe!