Embed Size (px)
Citation preview
2011
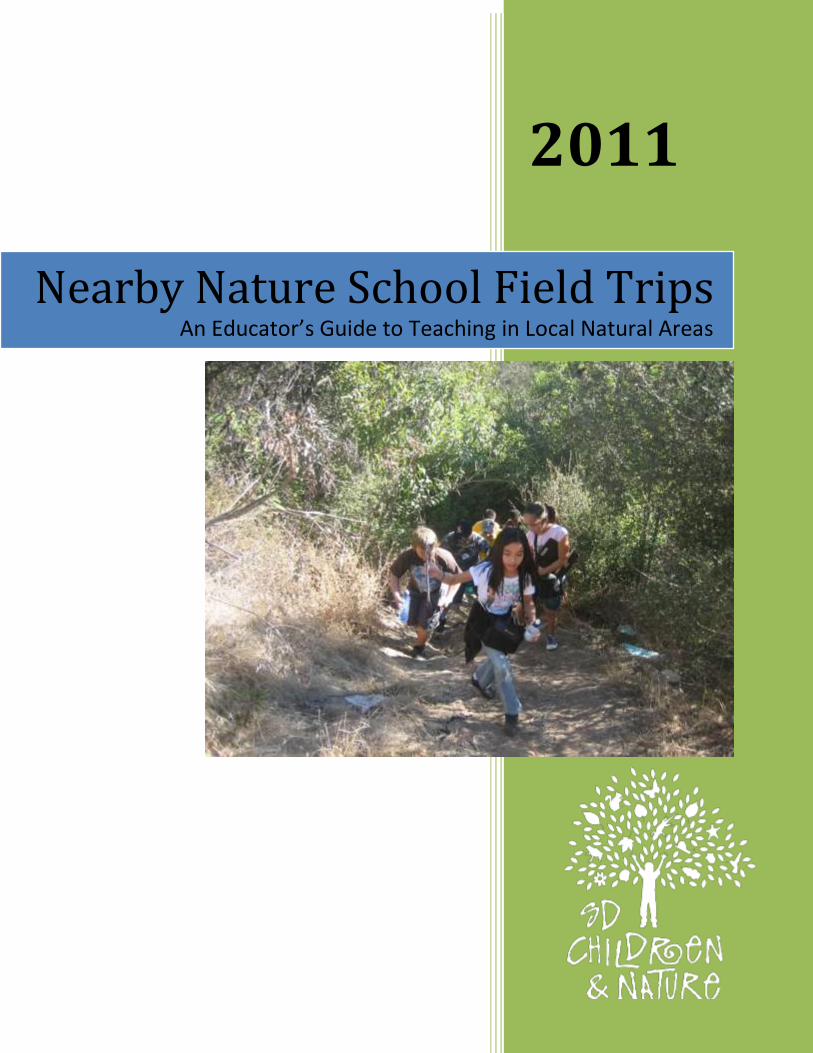
Nearby Nature School Field Trips An Educator’s Guide to Teaching in Local Natural Areas

6/16/2011 Page 1
Inspiring communities to nurture, empower, and engage youth in cultivating their relationship with nature.
Project Coordination Crystal De Soto
Local Point of View Tours Anne Fege
San Diego Children and Nature Collaborative
Contributing Partners
Deborah Knight Friends of Rose Canyon
Camille Armstrong San Diego Audubon Society
Leslie Reynolds Groundwork San Diego
Doretta Winkelman San Diego Natural History Museum
Connie Glenn and Lana Findlay I Love a Clean San Diego
Tara Fuad San Elijo Lagoon Conservancy
Editors Pam Long
Brian Moehl, San Diego Audubon Society
This guidebook was made possible by contributions from the Sempra Energy Foundation.
6/16/2011 Page 2
About the Guide This guidebook is designed to help you use local natural areas, referred to as Nearby Nature, to meet your curricular goals. Included in this guidebook are field trip procedures, sample lessons, and a list of potential nearby natural areas to enhance your ability to connect children to nearby nature.
San Diego Children and Nature (SDCaN) partnered with four nature providers to deliver standards‐based classroom field trips into nearby natural areas. Twenty classrooms, 646 students, were guided into their nearby natural areas for standards‐based lessons. Through this project, key practices for utilizing local natural areas to meet curricular goals were consolidated into this guide.
Do you have comments or suggestions regarding this guidebook? We’d love to hear about what works well and what you would change. Send comments to the San Diego Children and Nature Collaborative at [email protected].
How is education in nature relevant to my classroom requirements? Nature education improves academic performance. When the environment is used as an integrating context for learning the school curriculum, students have shown better performance on standardized measures of academic achievement in reading, writing, math, social studies, and science. Additionally, teachers have seen reduced discipline and classroom management problems and increased engagement and enthusiasm for learning. Nature experiences help children develop a sense of place in their community and increase awareness of San Diego County habitats. Nature education programs can also increase environmentally responsible behavior, including students’ perceived knowledge of issues and action, environmental sensitivity, and intention to act.
Benefits of Using Nearby Nature Free, no transportation costs. Available when you are. Real‐world context for learning, It is easier to visit nature than to try to recreate it in the classroom.
Ability for repeat visits to address multiple curricular areas: nature writing, ecological field investigations over time, mapping, community service, wildlife sketches, etc.
6/16/2011 Page 3
Organization of a Nearby Nature Field Trip This guide is organized by the following steps to consider when planning your nearby nature field trip.
Before the Nearby Nature Field Trip Locate a Nearby Nature Site (p. 4) Conduct a site assessment (p. 5) Logistical considerations (p. 6) Plan student activities (p. 7)
Planning tips (p. 7) Field trip activities (p. 8) Alignment with California Content Standards (p. 9) Pre‐nature field trip activities (p. 10) Post‐nature field trip activities (p. 11)
Conduct pre‐nature field trip activities
Nearby Nature Field Trip Day Materials checklist (p. 12) Chaperone meeting (p. 12) Trip orientation (p. 12) Site orientation (p. 13) Teaching on the trail (p. 14) Conduct field trip activities
After the Nearby Nature Field Trip Conduct post‐nature field trip activities (p. 15) Evaluate the success of the trip (p. 15)
Additional Resources Nature areas and naturalist guides (p. 16) Field trip curriculum and activities (p. 16) Local habitat‐related resources (p. 16) References (p. 16)

6/16/2011 Page 4
Locate a Nearby Nature Site San Diego offers a wealth of open space through local canyons and parks. Did you know that 45 percent of San Diego County is covered by green space (San Diego Foundation and the City Project, 2011)? There is a good chance that your school has a natural area within a 15 minute walk.
1. Map It. One of the quickest ways to locate the natural area closest to your school is to use an online map, such as Google in satellite view, to locate open (undeveloped) space. Some of the parks and open‐space areas will be labeled on the map. If the open‐space area is not identified, scan the map for potential entry points (trail heads) near your school. Trails and fire roads can easily be seen in satellite view.
2. Scout It. Become familiar with the nearby natural area you will visit prior to taking students.
If the site is labeled on the map, contact the managing agency directly to learn more. Arrange for a visit and ask if there is someone available to meet you at the site.
If the site is not identified on the map, visit the potential entry points that you found on the map. Walk the trail to identify the best entry point for your students. Typically, natural areas will have signs at the larger access points identifying who manages them so you can further research the area.
If there is no nature site within walking distance. Some parks offer access funds for transportation at little or no cost for school groups. Consult the resource section for more information. An alternative is to consider starting a native plant garden at your school. The San Diego Master Gardeners offer support to bring nature to your campus.
3. Investigate. Below are some things to consider while visiting your site. The Site Assessment Worksheet (p. 6) will help organize the information.
Distance and time for students to walk to the site. Determine the safest walking route. Identify if there are restrooms, water fountains, or informational materials available. Consider the accessibility and quality of the trail for the size and age of your group. Note places along the trail for the group to gather, rest, conduct activities. Inquire about the availability of a naturalist to guide your group. If naturalists are not available, prepare to lead the nature visit yourself or consider inviting a naturalist from the Naturalist Listing (p. 16).

6/16/2011 Page 5
Site Assessment Worksheet Sample Site Assessment Courtesy San Diego Audubon Society
Name of School Cubberly Elementary
Name of Open Space Ruffin Canyon
Ownership City of San Diego Park and Recreation Dept Open Space Division
Distance from school (miles, min.) 0.3 miles ( 4 blocks on city streets), 10 minutes Trail Head Ruffin Rd. and Gramercy ‐ parking east of Taft Middle School
Accessibility Excellent ‐ trail sign and info kiosk at Native Plant Garden
Trail Conditions Well maintained by Friends of Ruffin Canyon ‐ loop trail
Habitat Coastal Sage Scrub & Chaparral Safety & Concerns cactus, rattlesnakes
Services None
SITE ASSESSMENT (Fill in information)
Name of School
Name of Open Space
Open Space Ownership
Distance from school (miles, minutes)
Trail Head
Accessibility Trail Conditions Habitat
Safety & Concerns
Services
6/16/2011 Page 6
Logistical Considerations In order to plan and prepare a field trip that will result in successful learning, it is essential to gather information to meet administrative requirements and inform participants. There are a variety of logistics to consider when planning a nature field trip.
School field trip policies and procedures Paperwork. Many districts have a standard field trip permission form. Check with your administrator regarding the appropriate paperwork needed for a nearby nature field trip.
Emergency procedures. Refer to your school’s established procedures for field trips that address accidents, injuries, and major emergencies such as fire drills, earthquakes and lockdowns. When conducting your site visit, consider how these procedures will apply.
Rain and adverse weather days. If it is actively raining or extremely hot on your scheduled field trip day, refer to your administration’s policy about whether or not to continue with the trip. Visiting natural areas in these conditions can make for an amazing experience, provided activities are modified for student safety.
Parental Support Send a letter home to parents well in advance that includes the following information:
Date, length, location, and academic goals of the field trip. Permission forms. Clothing recommendations such as comfortable closed‐toe walking shoes, hat, long
pants, and layered clothing for unexpected changes in temperature. Any precautions for students with special needs.
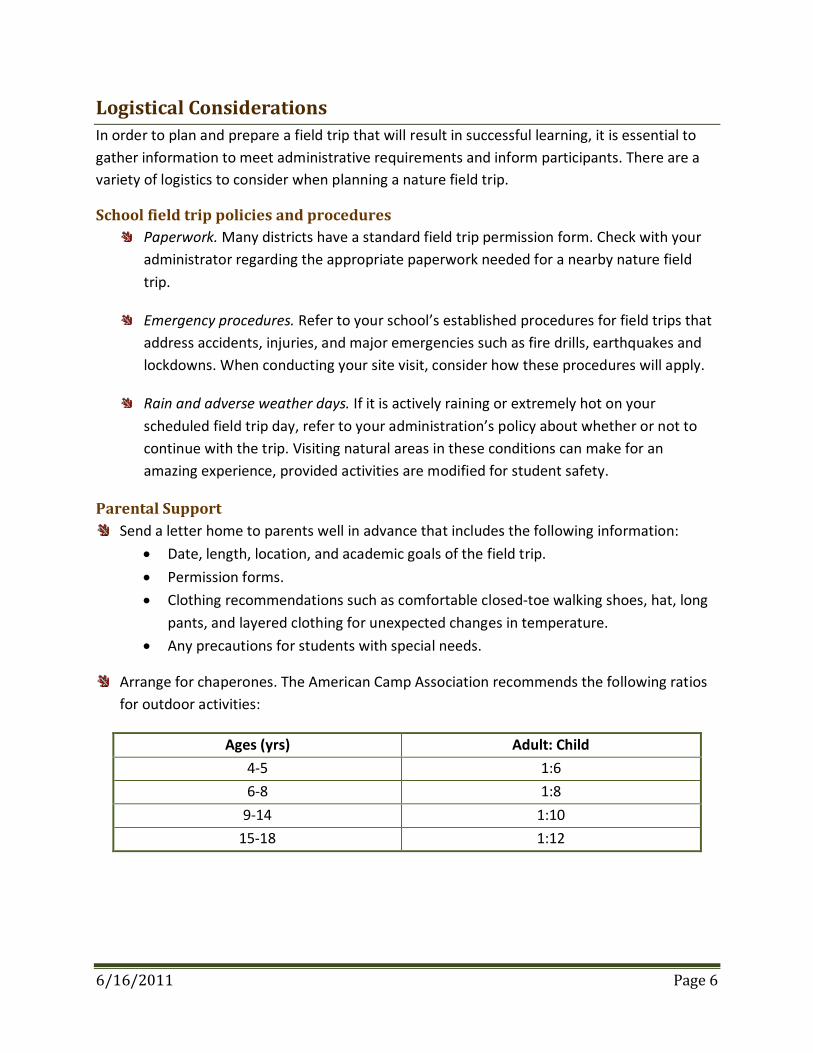
Arrange for chaperones. The American Camp Association recommends the following ratios for outdoor activities:
Ages (yrs) Adult: Child 4‐5 1:6 6‐8 1:8 9‐14 1:10 15‐18 1:12

6/16/2011 Page 7
Gather a list of materials needed for the field trip Create a nature educator backpack to manage supplies:
First aid kit. Cellular phone or radio. List of emergency contact information for all of the participating students and
chaperones. Make note of any relevant medical concerns such as bee allergies. Spray bottles to spray water into children’s mouths when they are thirsty and on
their faces if they are hot. If you divide into groups, have an adult in each group carry a spray bottle.
Any additional props identified in your activities such as hand lenses or journals. Light snacks if you will be outside for a long time.
Condense group materials such as journals, water, and snacks into one or two packs that chaperones or volunteer students can carry.
View Figure 2 (pg. 17) for a sample field trip day schedule.
Planning Student Activities Nearby nature can be a place for quiet contemplation, active play, intense observation, questioning, independent work, group projects, hard work, and relaxation. Before taking students outside, it is important to decide which type of experience you want to provide on a given day. In order to provide the maximum benefit for students, nature visits should reinforce the classroom curriculum.
Planning Tips Keep activities hands‐on and exploratory. Keep plans simple the first few times you teach outdoors. Don’t worry if you do not finish all that you have planned. Both you and your students need time to adjust to this new classroom environment.
Decide on a way of getting students’ attention outdoors. Have a clear signal for getting everyone’s attention and gathering together. Practice it!
Develop a list of fun strategies for moving your students from place to place. For Grade 3 and under, save written activities for afterwards in the classroom. If you want written notes, have a parent volunteer take them.
Consider whether or not to do written activities with older students such as documenting observations by drawing or writing. It may depend on the length of time you have outdoors and the frequency of your nature visits. If these are very limited, don’t shortchange their exploration time by requiring a lot of sitting.
6/16/2011 Page 8
Engage the senses. Have students close their eyes and draw what they hear around them; touch plants and trees; safely taste some of the fruits or seeds, but always under expert supervision.
Have a pocketful of leading questions in mind that will help students focus on the specific learning objectives of your trip. For a plant adaptation focus, questions could be: Why are cactus stems so thick? Why does pickleweed turn red at the tip? If you are focusing on how wildlife behaves in their habitat, you could ask: How can so many different species of birds live together in the wetlands? Do insects live in the ground, and what do they do down there?
Use tools such as hand lenses, binoculars, viewing boxes for a new perspective.
Field Trip Activities Identify an introductory activity to excite your students and introduce them to the outdoors. Reinforce the outdoor activity with pre and post classroom lessons.
Design lessons that flow, so that activities transition your students from idea to idea and from indoor to outdoor behavioral expectations.
Take a few quiet breaks along the trail. Encourage children to use all of their senses. The breaks can be as short as one or two minutes as they sit or stand without talking, to see how many different things they can see and hear. Ask questions such as: Why is hearing so important for animals? Which animals have the most acute sense of hearing, seeing, smell, taste, and touch? Why is it important to them?
Use a closing activity to review what students have learned and to prepare them for returning indoors.
Engage all students during all activities. Students that are actively engaged in a lesson are less likely to have behavior issues. Give each child a role or task for each activity. For example, if your students are observing pollinators, have them work in small groups and have students in each group take on the following roles: observer, writer, artist, and identifier (uses field guides).
Materials: Do you want to bring any materials to the field such as sketch pads, magnifying lenses, video or digital cameras, or bags to pick up trash? While none of these items are required, they can enhance the learning the experience if used properly. Pictures and videos can serve as excellent resources for follow‐up classroom activities.
Point out relationships in nature. Use questions such as: In what way do plants and insects help each other? How do insects help people? Can you name some pollinators? How do plants use signals to attract pollinators?

6/16/2011 Page 9
Alignment with California Content Standards Below is a list of California Content Standards that align well with nearby nature visits. This list is not meant to be exhaustive, rather it serves as a starting point for teachers. Other content areas you may want to consider include English language arts, visual and performing arts, and history‐social science.
Grade/ Content Standards Life Science
Investigation & Experimentation
Earth Science
Physical Education
Kindergarten 2.a,c 4.a,c,d,e 3.a
1.1, 1.7, 1.10, 3.1, 3.6
1st 2.a,b,c,d 2.1, 2.2, 3.1
2nd 2.b,f 4.b,c 3.a,b,c 3.1, 5.2
3rd 3.a,b,c,d 3.7, 5.3
4th 2.a, b, c, 3.a,b
4.a, 5.a,c 3.7
5th 6.a 3 3.7
6th 5.a, 5.b, 5.e 7.f 2.a, 2.b, 2.d 3.4, 5.1
7th 3.e, 4.c, 5.f 7.a, 7.d, 4.c 1.6, 3.5, 5.4
8th 9 3.4, 5.7
9th - 12th 6.a, 6.b, 6.d,6.e, 8.b 1.h, 1.i 9.a, 9.c
C1: 2.2, 2.6, 3.3, 3.9
C4A: 1.4
6/16/2011 Page 10
Pre‐Nature Field Trip Activities Preparing students in advance about what they can expect to see and learn may increase their focus during the subsequent trip without taking away the enjoyment and excitement of the nature experience (Melber, 2008). Issues to discuss with them may include field trip logistics as well as information about the natural area (adapted from EECC, 2005).
Logistical Information When students are familiar with the purpose of the field trip and what they are expected to get out of it, they enjoy and benefit more from their experiences.
Go over the objectives of the field trip including your expectations from the class. Set rules for positive outdoor behavior prior to your first outdoor venture with students. Students need to understand that “outside” is a classroom too. Involve the students in the rule–setting, just as you may already do when setting indoor rules (NWF, 2010).
Review the route and length of time it will take to get to the nature site. Show a map of the natural area and trace the route you will follow (Google Earth is a great visual aid). Point out significant landmarks and note distances and times.
Discuss field safety and possible scenarios. Review procedures for walking through residential areas, crossing the street, and what to do if students encounter a bee, snake, or any other aggressive animal. For aggressive animal encounters, it is important for the group to stay calm. Have
students freeze and point in the direction of the animal. Then the adult can give further group instructions (like back away slowly).
Address any student concerns about being out in the field.
Natural Area Information Connect what you are studying in the classroom with what you will see and experience during the field trip.
Share photos, videos, or brochures of the area. If you don’t have visual aids for the specific site, use resources from parks that have a similar habitat. They may also have relevant activities for your students.
Describe the habitat, such as the types of wildlife and plants that may be encountered. Practice identifying poison oak if it is found in your nature area.
Introduce the subjects that will be covered during the field trip like bird adaptations or ecology.
Check out local specimens from the Nature to You Loan Library. Discuss observation techniques and practice making observations. If students are going to use a field notebook, explain how they should use the notebook in the field and first do a class entry together on campus.

6/16/2011 Page 11
Post‐Nature Field Trip Activities Appropriate post‐nature field trip activities will help reinforce content and provide students with additional opportunities for exploring topics of interest. These activities do not need to be complex to be effective (Melber, 2008).
Lead a group discussion centered on students’ experiences and questions from the field trip. Guiding questions may include: What image do you remember most? What did you like the best? What new thing did we learn? Did you talk to your family or friends about the field trip (EECC, 2008)?
If the field trip will be repeated by another class, have students write a letter to the next group about what to expect on the trip.
Ask students to write a story or poem, make a drawing, or compose a song about their experience (Figure 1. Native Animal Poetry).
Figure 1. Native Animal Poetry, SDCaN 2010
Native Animal Poetry Using a field guide, students choose a native animal to write about. The diamante poem should be structured as follows: First line, write a noun that describes the animal you selected. Second line, write two adjectives that describe how your animal looks. Third line, write three adjectives describing how the animal moves or where it lives. Fourth line, write two nouns that describe how the animal contributes to the ecosystem or how it lives. On the last line, write the name of the animal. For example:
Bird Large, Strong
Soaring, Diving, Twisting Predator, Hunter
Hawk

6/16/2011 Page 12
Nature Field Trip Day
Materials Checklist Nature educator backpack. Bring along student and chaperone emergency cards and/or contacts. Make sure water bottles are packed. If you plan to eat at some point during the field trip, pack lunches or healthy snacks as well.
Chaperone Meeting Emphasize the importance of staying with students at all times. Cover emergency procedures and distribute contact information such as important cellular phone numbers of all the chaperones.
Review class rules, expectations, and consequences. Discuss any health considerations for individual students. Go over details of learning activities, highlighting important concepts or prompts. If breaking into groups, have chaperones bring a backpack to carry supplies. Specify how everyone should be arranged on the trail. Adults should always position themselves at the front and back of the group to protect children from any unsafe encounters. Other adults should spread out through the group.
Trip Orientation Introduce chaperones for the trip and identify their role during the trip. Remind students how long the walk will be and review how to walk safely through the neighborhood (when crossing the street, an adult should always be at the front and rear of the group).
Remind students to leave valuables behind. The field isn’t a good place for electronics and toys because they may be lost or damaged.
Last chance to use the restroom before departure. If appropriate, provide nametags for students and adults. This will help chaperones considerably when addressing children in the field.
Figure 2. Field Trip Day Sample Schedule On Campus (20 min): Bathroom & water break, trip orientation, depart and walk to site Trail Head (10 min): Site orientation, rules, describe activities, and divide into groups if possible. Trail (60 min): Spread groups out if possible, explore and conduct activities Trail Head (10 min): Regroup, short review of what children discovered and learned Return to campus (10 min)

6/16/2011 Page 13
Site Orientation At the trail head, welcome students to the natural area and give them a brief overview of the site. Make group announcements at this spot including Safety and Trail Etiquette before dividing students into groups (if applicable).
Safety An adult should always be at the lead and tail of the group. Depending on the trail, students may walk together as a group, in pairs or single file. Practice key words or signals for when the arrangements need to change.
Review what to do when you encounter a bee, snake, or even an aggressive dog. Freeze and point at the animal, then carefully walk backwards away from the animal.
Review plant safety. Be mindful of where you step, keeping an eye out for Cactus and Poison Oak. Never eat anything unless instructed by a naturalist that it is safe.
If the group is removing trash from natural areas, be aware of items such as broken glass or sharp metal.
Review expectations for student behavior.
Trail Etiquette Stay on the trail. Leave what you find for future visitors. Respect the plants and animals by treating them gently. The quieter you are, the more likely you are to see wildlife. If appropriate, pack out trash found on the trail.
6/16/2011 Page 14
Teaching on the Trail Keep the following suggestions in mind to ensure successful, worthwhile lessons and experiences with students in the outdoor site (NWF, 2010): Use keys points along the trail to conduct specific activities. Not only does this break up the trip, but it also helps students to focus on specific features of the natural area.
Positioning. Keep the sun in your eyes (out of students’ eyes), the wind at your back (so your voice carries to your students), and stand in the center of a circle or line of students when sharing (so all can see).
Be a positive role model. Show enthusiasm, excitement, and a positive attitude in all that you do. Make sure your students can hear this in your tone of voice and can see it in your body language. Create a sense of adventure or mystery. Enjoy what your students find; look at what they are showing you and share these discoveries with the whole group.
Allow students the opportunity to explore their surroundings. To be safe, comfortable, and excited about learning in the outdoors, students need time to explore the areas in which they will be learning. Many of today’s children do not have the opportunity to explore outdoor areas and need the opportunity to adjust. Emphasize observation. By using all of their senses,
students can learn more about the things they investigate.
Learn to use “teachable moments.” Nature’s lessons will often be more compelling than the task at hand. Be flexible and remember that in the natural world, everything is connected to everything else. Let students experience nature in the moment and then link that moment back to your lesson.
Become a “guide”, “explorer” and “learner.” You do not/should not/could not know everything about nature! Don’t let a lack of knowledge slow you down. Create an atmosphere of investigation and share your excitement about learning new things. If you are excited about learning, then your students will be excited as well! Telling a student “I don’t know, but let’s look it up!” is a great way to encourage students to guide their own learning.
Ask guiding questions. Avoid giving direct answers to student questions. Help students discover the answers on their own. If a student wants to know the name of something, ask him or her questions such as “How large is it?” “Where does it live?” or “How do you think it avoids predators?

6/16/2011 Page 15
After the Nature Visit
Conduct Post‐Nature Field Trip Activities
Student evaluation By reviewing the field‐trip topics, you will be able to evaluate to what extent the field trip facilitated learning, and if the experience‐based learning was successful in teaching the desired subject material.
A questionnaire asking your students for feedback on their field‐trip experience will also be useful to you.
The following questions could be helpful in creating a student evaluation:
What is the most important idea or lesson you learned during the field trip? What are the differences you noticed between the plants you observed in the field‐trip site, and the plants you see at school or at home?
Why is wildlife important to us? Draw a picture of the nature area you visited today. Do you think it is important to protect the native plants and animals living in the site? Why?
How can you help protect the site? Would you like to return to the site someday?
Educator Evaluation What was the educational value of the field trip? Were the planned objectives met? What activities engaged the students? Did you have enough time for all of the activities? Was there adequate supervision from the educator(s) and the chaperone(s)? What can be changed or adapted to make a future field trip better? What topics or aspects should you remember to emphasize on future field trips? What problems arose and how can you plan for or avoid them next time? What other general improvements can be made to make the field trip better?
6/16/2011 Page 16
Local ResourcesNature Areas
San Diego Children and Nature Collaborative Searchable database of youth centered organizations and nature areas. www.sdchildrenandnature.org
Naturalist Guides Local Point of View Tours Naturalists for hire to lead nature walks in your nature area. Contact: (619) 537‐9286 www.localpointofview.com
San Diego Canyonlands Canyon volunteer groups throughout the county that may be to lead a walk. Contact: (619) 284‐9399 www.sdcanyonlands.org
San Diego Natural History Museum, Canyoneers Volunteer naturalists offer one‐hour nature walks at select locations throughout San Diego County. Contact: (619) 255‐0210 www.sdnhm.org/education/teachers
Field Trip Curriculum and Activities Catalog of Ecologically and Educationally Significant Sites Environmental Education Council of the Californias http://eecc.net/binders/index.php
Informal Learning and Field Trips Melber, Leah. 2008. Thousand Oaks, CA: Corwin Press.
Opening the World through Journaling: Integrating art, science, and language arts California Native Plant Society www.cnps.org/cnps/education/curriculum
Sharing Nature with Children Cornell, Joseph. 1988. Nevada City, CA: DAWN Publications.
Local Habitat Related Resources Conserving San Diego's Habitats San Diego Zoo Reader for grades 6–12 about San Diego's diverse habitats. www.sandiegozoo.org/education/habitats_booklet_2010.pdf Nature Bytes Video Naturesway Productions Online video footage of local wildlife and habitats. naturebytesvideo.com Nature to You Loan Program San Diego Natural History Museum Thousands of biologic and geologic specimens for loan. www.sdnhm.org/education/naturetoyou REI Gear Bank Rent binoculars and other gear for free. 2015 Birch Road, Suite 150, Chula Vista, CA 91915 Tel: (619) 591‐4924 San Diego Master Gardeners Assistance in planning and maintaining native plant gardens and schoolyard habitats. www.mastergardenerssandiego.org
References
Schoolyard Habitats: A how‐to guide National Wildlife Federation http://www.nwf.org
Parks for Everyone: Green access for San Diego County San Diego Foundation and the City Project http://www.sdfoundation.org/Portals/0/Newsroom/PDF/Reports/parkforeveryone_finalsm.pdf

6/16/2011 Page 17
Project Funded by
Contributors