Embed Size (px)
Citation preview

NANONEX NX-B200 IMPRINTER SYSTEM OPERATING PROCEDURES
Version: 1.0 July 2013
UNIVERSITY OF TEXAS AT ARLINGTON
Nanotechnology Research and Education Center

This SOP is for reference only. Training from an authorized Nanofab staff member is required before using this equipment.
1. Description
The Nanonex NX-B200 is used to imprint/ transfer high resolution micron and nano-size patterns from up to 3” diameter mold to polymer coated 3” diameter wafers or sample pieces that are subsequently used in etching or lift-off processes. The recommended polymers are: NXR-2010 UV Resist, NXR-3020 Underlayer Resist, and NXR-1020 Resist from Nanonex Corporation.
2. Safety a) This machine is connected to HIGH VOLTAGE. Be very careful and aware of electrical hazards. DO NOT operate this machine with any component enclosures/panels open. If you encounter any electrical malfunctions contact NanoFab staff immediately. b) This machine uses UV light which can cause sunburn, skin and eye damage. DO NOT operate this machine
with any component enclosures/panels open. c) This machine uses high pressure nitrogen gas (N2) which in high concentrations can asphyxiate. The process gases are normally pumped out of system; if the process pressure is not being
maintained, the program does not start, or the system cannot reach base pressure, notify NanoFab staff immediately.
d) This machine can heat molds/substrates to high temperatures (200°C). Make sure you wait until the mold/substrate temperature is < 55°C before removing your sample from the process chamber.
e) Keep your fingers clear when opening or closing the process chamber drawer during loading/unloading wafers. DO NOT pull out the Chamber Drawer until the program is finished ! f) This machine has an EMO (Emergency Off) switch/button mounted on the right front panel. The EMO switch
should be pressed only in an emergency. An emergency would be fire, smoke, electrocution hazards, and an injury to anyone using this particular piece of equipment.
If the EMO is pressed notify NanoFab staff immediately. 3. Requirements/Restrictions
a) You must be a qualified user on Nanonex NX-B200. b) Nanonex resist, imprint, plasma etch, and cleaning processes are located in section: 8. NanoNex Film Casting, Imprinting , and Plasma Etch and Stripping Processes c) Use ONLY 1” X 1” sample pieces (approximately) to 3” diameter wafers coated with NXR-2010 UV Curable Resist, NXR-3020 Underlayer Resist or NXR-1020 Nanoimprint Resist ( Thermal Plastic) for imprinting . d) Maximum substrate and mold size is 3” diameter. e) Use up to 3” diameter mold (manufacturer supplied or user made) for all runs. A mold and coated
sample/wafer needs to be loaded for all runs. f) All mold dimensions need to be equal to or smaller than the dimensions of the coated samples or wafers.
OK to use USER MADE 3” diameter molds with 3” diameter wafers. All molds and samples/wafers should be very clean and have no edge chips, nicks, or cracks. The backside must be clean and flat (no warps, dimples, defects).
g) User Made Molds Allowed( UV process): Quartz crystal. h) User Made Molds Allowed( Non-UV process): Oxide hard masks ( Sputter,Thermal or PECVD), Nitride hard mask (Sputter or PECVD) and Metal Masks. i) User Made Molds NOT Allowed : All other materials.
Staff approval for other masking materials is required. j) Imprinter recipes other than Nanonex or NanoFab can be run with staff approval. Save these other recipes to your USB memory stick and not to the system hard drive

4. Nanonex Imprinter System Checks
a) Check to ensure all tower panels and side enclosures/panels are closed. b) Check to ensure the control key is set to the “OPEN” position. c) Check to ensure the computer in ON by pressing the keyboard space bar
or moving the mouse. The Microsoft Desktop screen should display. d) Check to ensure the two plastic imprinting films are inside the process chamber by gently opening the
process chamber drawer and inspecting. e) Check to ensure that the N2 cylinder located in the service chase has > 450 PSI remaining.
The following visual aide pictures are for the previously listed Nanonex Imprinter System Checks
(4a) (4b)
(4c) (4d) (4d)
(4e)
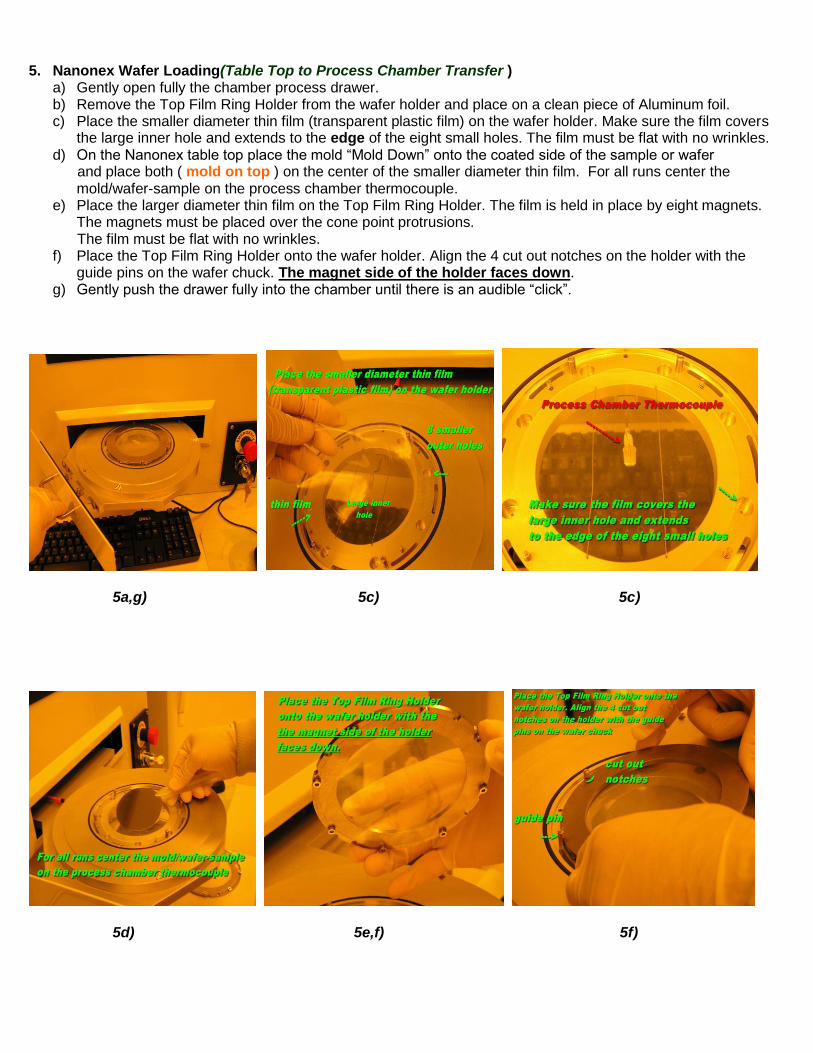
5. Nanonex Wafer Loading(Table Top to Process Chamber Transfer ) a) Gently open fully the chamber process drawer. b) Remove the Top Film Ring Holder from the wafer holder and place on a clean piece of Aluminum foil. c) Place the smaller diameter thin film (transparent plastic film) on the wafer holder. Make sure the film covers
the large inner hole and extends to the edge of the eight small holes. The film must be flat with no wrinkles. d) On the Nanonex table top place the mold “Mold Down” onto the coated side of the sample or wafer and place both ( mold on top ) on the center of the smaller diameter thin film. For all runs center the
mold/wafer-sample on the process chamber thermocouple. e) Place the larger diameter thin film on the Top Film Ring Holder. The film is held in place by eight magnets.
The magnets must be placed over the cone point protrusions. The film must be flat with no wrinkles. f) Place the Top Film Ring Holder onto the wafer holder. Align the 4 cut out notches on the holder with the
guide pins on the wafer chuck. The magnet side of the holder faces down. g) Gently push the drawer fully into the chamber until there is an audible “click”.
5a,g) 5c) 5c)
5d) 5e,f) 5f)

6. Imprinting Procedure
a) Open the Control Program screen by double clicking on the NX-B200 v3.65 icon on the Microsoft desktop screen.
b) In the Control Program screen click on the “User” box to Login or exit from this screen. Exit will terminate the program.
c) Enter User ID and Password then click “OK” to login the system. Use “users” for both User ID and Password.

d) Click “Recipe” to download the Nanonex default imprinting recipe. In the Load Recipe screen open NIL recipe file to download a default recipe and click OK.
e) To create a new recipe click on User Set.
f) In the User Set screen input workable/appropriate process parameters in the set point boxes.

g) Enter Pumping Time (chamber) minutes and seconds in the Pump box and press ENTER on the keyboard.
h) Enter Pre-temperature and Pre-pressure set points in the Pre-Imprint box and press ENTER on the keyboard.
Note: If both Pre-temperature and Temperature Settings are less than 25°C the thermal heater will not be turned ON during the imprint process.
i) Enter Temperature, Pressure, UV on/off by clicking on UV box , Processing Time and UV on time in the Imprint box and press ENTER on the keyboard. The process will keep the sample at the temperature and pressure set points for the duration of the processing time, and then turn on the UV lamp.
Note: For UV-on the green box light will go ON for UV-off the UV on time will automatically set to 0 by the software.
Note: If both Pre-temperature and Temperature Settings are less than 25°C the thermal heater will not be turned ON during the imprint process.

j) Enter Vent temperature set point in the Cooling and vent box. Do not use a Vent temperature > 55°C.
Note: If both Pre-temperature and Temperature Settings are less than 25°C the thermal heater will not be turned ON during the imprint process.
k) To save the recipe press Save then name and select a path. To save a current Run File click Profiles and
press Save then select a path. l) Once a recipe is selected and downloaded ( Nanonex default or User Set ) the indicators will show whether the
thermal heaters and UV lamp will be on during the current process. m) To start the imprint process click on the Begin button in the Process Run screen and then click OK.
Note :DO NOT pull out the Chamber Drawer until the program is finished !
n) During the process the only button active is the Abort button . The chamber temperature and pressure are monitored and displayed in real-time on the monitor.

o) When the imprinting is completed the chamber vents and opens automatically. The status indicator at the
bottom of the screen will display :
p) You can now open the chamber drawer and remove the sample.
Warning : Use Caution Before Removing Top Film Ring Holder After a high temperature and pressure imprint the Top Film Ring Holder may be HOT! Make sure you wait until the mold/substrate temperature is < 55°C before removing your sample from the process chamber.
q) After finishing all imprint runs click Login then Exit to exit the program.
7. Nanonex Wafer Unloading(Process Chamber to Table Top Transfer) a) Gently open fully the chamber process drawer. b) Remove the Top Film Ring Holder, mold/wafer-sample and the smaller diameter thin film from the wafer holder and place on the table top with a clean piece of Aluminum foil. c) Separate the Top Film Ring Holder, mold/wafer-sample and the smaller diameter thin film. d) Carefully separate the mold and wafer-sample with tweezers, small tools and pressurized N2 gas. e) Replace the smaller diameter thin film (transparent plastic film) on the wafer holder. Make sure the film
covers the large inner hole and extends to the edge of the eight small holes. The film must be flat with no wrinkles. f) Replace the larger diameter thin film on the Top Film Ring Holder. The film is held in place by eight magnets.
The magnets must be placed over the cone point protrusions. The film must be flat with no wrinkles. g) Replace the Top Film Ring Holder onto the wafer holder. Align the 4 cut out notches on the holder with the
guide pins on the wafer chuck. The magnet side of the holder faces down. h) Gently push the drawer fully into the chamber until there is an audible “click”. i) Enter the required information in the logbook.
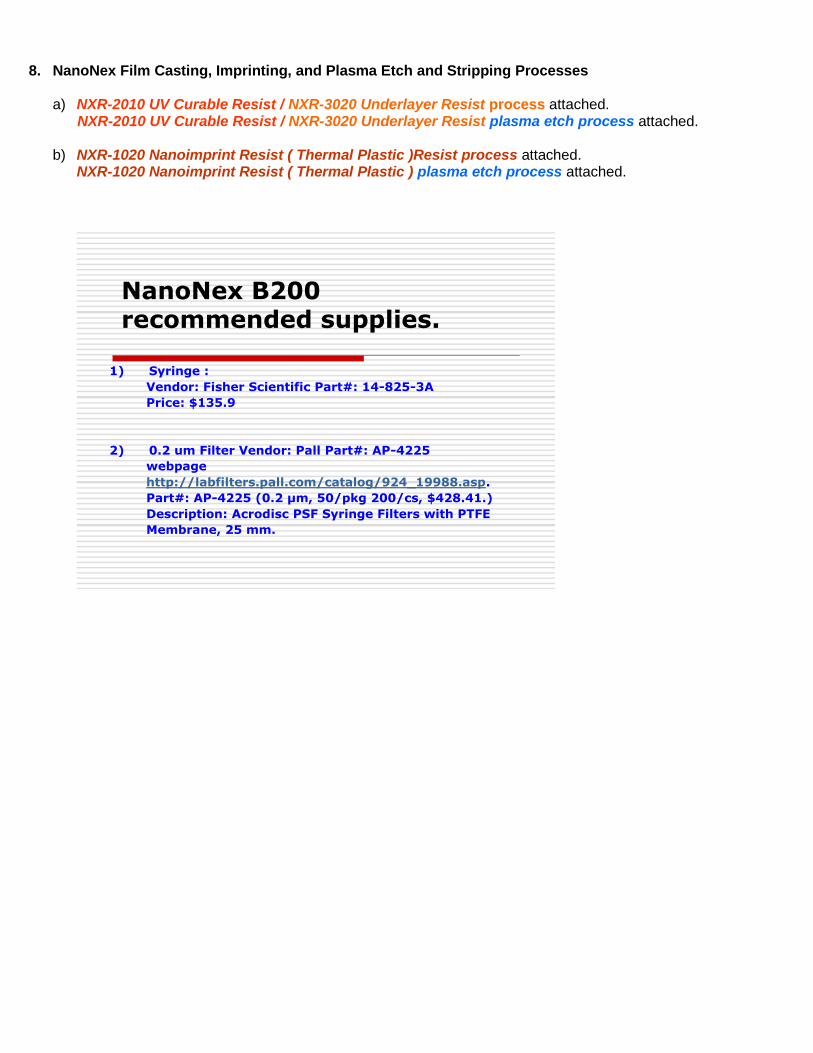
8. NanoNex Film Casting, Imprinting, and Plasma Etch and Stripping Processes
a) NXR-2010 UV Curable Resist / NXR-3020 Underlayer Resist process attached. NXR-2010 UV Curable Resist / NXR-3020 Underlayer Resist plasma etch process attached. b) NXR-1020 Nanoimprint Resist ( Thermal Plastic )Resist process attached.
NXR-1020 Nanoimprint Resist ( Thermal Plastic ) plasma etch process attached.
NanoNex B200 recommended supplies.
1) Syringe :
Vendor: Fisher Scientific Part#: 14-825-3A
Price: $135.9
2) 0.2 um Filter Vendor: Pall Part#: AP-4225
webpage
http://labfilters.pall.com/catalog/924_19988.asp.
Part#: AP-4225 (0.2 µm, 50/pkg 200/cs, $428.41.)
Description: Acrodisc PSF Syringe Filters with PTFE
Membrane, 25 mm.


![fi-434PR Imprinter User's Guide: Option - Fujitsu · This mode tests the printing performance of the imprinter. Turn the power on while pressing the [Exit] button on the scanner's](https://img.dokumen.tips/doc/110x75/60162e0ddf9cb31bec0a45eb/fi-434pr-imprinter-users-guide-option-fujitsu-this-mode-tests-the-printing-performance.jpg)