Embed Size (px)
Citation preview
English Hedgehog Pawn Structure -Tactical and Strategical Ideas
ExchangeSacrifice
Methods of Playingwith Semi-Hanging Pawns
Endgame Series - Part 8
Attackingthe King
GMThinking
MODERN CHESSMAGAZINE
ISSUE 8
Table of contents
Exchange Sacrifice (GM Vladimir Georgiev)
Shabalov - VitolinshHaskin,Zachary (2107) - Furfine,Jacob (2313)Kortschnoj, V (2600) - Hulak, Krunoslav (2515) Gleizerov,Evgeny (2557) - Georgiev,Vladimir (2564) Anand,V (2791) - Mamedyarov,S (2756)Ganguly,S (2633) - Sachdev,T (2414)TEST
23242527283031
121315161718192021
424852
368
10
3335373941
23
12
42
3
33
English Hedgehog Pawn Structure – Tactical and Strategical Ideas (GM PetarArnaudov)
Intro, & - move ordersEarly bishops exchange - h5! ideaBad position of White's queen - 1Bad position of White's queen - 2d6–d5 breakd6–d5 break,2b6–b5 breakb6–b5 + d6–d5TEST
Endgame Series – Part 8 (GM Davorin Kuljasevic)
Key squares 1 - 6Opposition 1 - 5Exercice 1 - 6
Razuvaev,Yuri S (2470) - Farago,Ivan (2510)Bolbochan,Julio - Pachman,LudekBobotsov,Milko G - Martinov,GeorgiTEST 1-5
Methods of Playing with Semi-Hanging Pawns (GM Grigor Grigorov)
Attacking the King (GM Valeri Lilov)
McDonnell - La BourdonnaisPetrosian,T - Estrin,YFischer,R - Sherwin,JKasparov - ShortAttacking The King - TEST 1 - 5

3
Methods of Playing with Semi-Hanging Pawns
GM Grigor Grigorov
Dear Reader, In the previous issue of Modern Chess magazine, we examined the basic ideas one should know when playing against semi-hanging pawns. Nevertheless, in order to draw objective conclusions about this structure, we should also be familiar with the attacking potential of these pawns. In the current article, I am going to discuss some of the most typical attacking ideas in such kind of positions. As I already pointed out in my first article concerning the semi-hanging pawns, since the central pawn is protected in this structure, the side playing with hanging pawns could more effectively use the attacking potential of his pieces (he need not be concerned about the defense of the pawn). Very often, however, we face considerable difficulties in building our kingside attack. Our opponent constantly tries to reduce our attacking chance by exchanging the minor pieces while it is not easy to bring our heavy pieces (queen and
rooks) into the attack. One of the most instructive ways to develop an attack in positions with semi-hanging pawns was demonstrated in the game Razuvaev - Farago (see the diagram). On the diagram, we see a typical position which arises from the Semi-Tarasch defense. Besides enjoying a considerable spatial advantage, White has comfortably developed his forces. On the other hand, Black has not even started his typical queenside play by means of , etc. Despite these considerations, it's difficult to point out a concrete way in which White could proceed with his attack. His biggest problem is how to transfer his queen to the kingside. The best way to solve it consists in removing the f3–knight followed by or . However, it's very difficult to find a suitable square for the white knight since Black controls the important e5–and g5–squares. The attempt to build a battery along the b1–h7 diagonal by means of followed by is not only rather slow but also closes the a1–rook. In my comments to the game Bolbochan - Pachman, I draw the conclusion that the move is also not an optimal solution since the queen is placed behind the bishop and could get bothered by Black's c8–rook. In the current game, Razuvaev introduces White's best continuation by far.
Razuvaev,Yuri S (2470) - Farago,Ivan (2510) Dubna Dubna, 1979
Spectacular idea. This pawn advance is designed to prepare the attacking thus

4
opening the way of the queen. Furthermore, after White attacks the h7–pawn and in some cases Black will be forced to weaken his kingside.
As we know from the previous article, this move is quite typical for positions with semi-hanging pawns. Nevertheless, here this idea seems to be too slow. While Black is trying to build some pressure against the c3–pawn, White develops an overwhelming attack on the kingside.
White obtains a pleasant initiative for the pawn after
This rook transfer is the key attacking resource you should be familiar with. Now White has a powerful pair of bishops while Black queen is rather vulnerable. Black should find a way to parry the threat of . The most obvious way to do so seems to be This move eliminates White's direct winning attempts but weakens the dark squares in Black's camp.
Another very precise move. By creating an opposition along the g-file, White creates the threat of . Black should spend one more tempo on retreating with his queen. For example: (dubious is since the queen will be forced into an extremely passive position after White's play is full of energy. With his last move, he not only transfers the queen to the kingside but also creates the threat of After this obvious move, there is no good defense against.
White enjoys complete domination over the board. The game is practically over. 1–0 Seeman,T (2428)-Nei,M (2300)/Tallinn 2000 (18)) White's last move is designed to provoke further weakening of Black's kingside. Now Black is forced to play f7–f6, thus increasing the potential of white bishops.
White has more than enough compensation for the missing pawn. He has active rooks and a
5
powerful pair of bishops. At the same time, Black is too late with his typical queenside counterplay. In the game Relange - Mulder, after Black went for the weak 1–0 Relange,E(2490)-Mulder,B (2210)/France 1998/(34) (The somewhat passive
allowed Black to prolong the resistance) and now was immediately decisive With to come. White is winning.
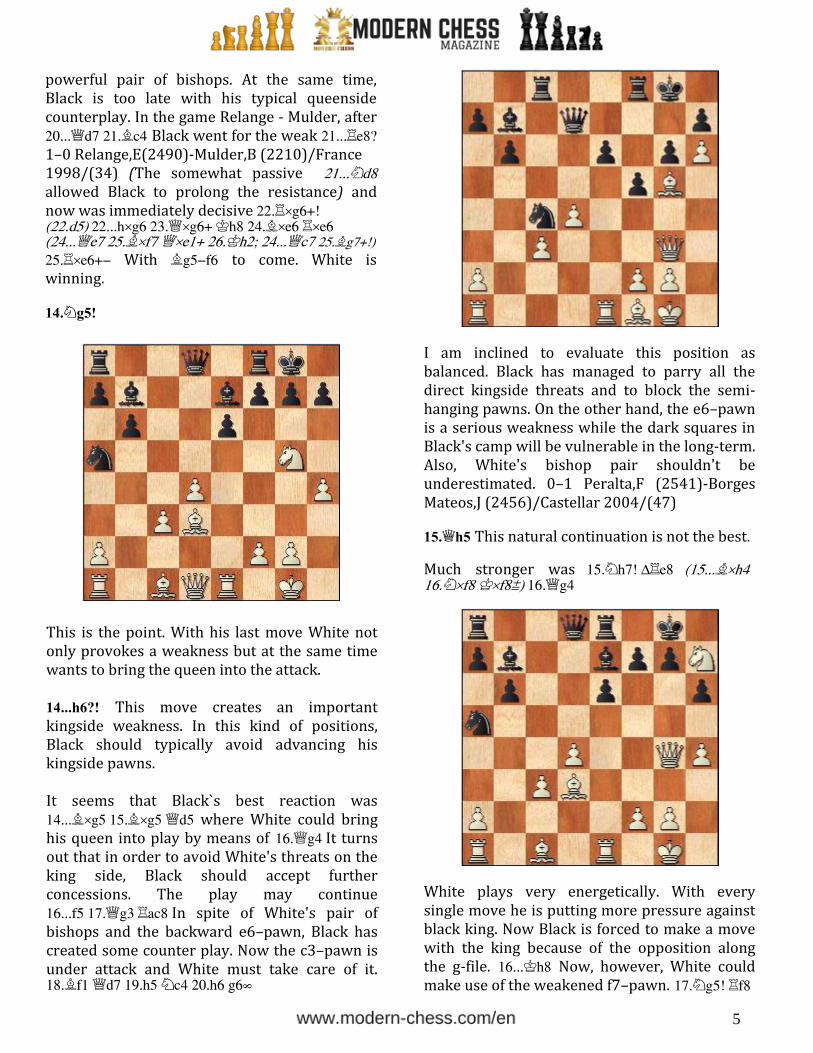
This is the point. With his last move White not only provokes a weakness but at the same time wants to bring the queen into the attack.
This move creates an important kingside weakness. In this kind of positions, Black should typically avoid advancing his kingside pawns.
It seems that Black`s best reaction was where White could bring his queen into play by means of It turns out that in order to avoid White's threats on the king side, Black should accept further concessions. The play may continue In spite of White's pair of bishops and the backward e6–pawn, Black has created some counter play. Now the c3–pawn is under attack and White must take care of it.
I am inclined to evaluate this position as balanced. Black has managed to parry all the direct kingside threats and to block the semi-hanging pawns. On the other hand, the e6–pawn is a serious weakness while the dark squares in Black's camp will be vulnerable in the long-term. Also, White's bishop pair shouldn't be underestimated. 0–1 Peralta,F (2541)-Borges Mateos,J (2456)/Castellar 2004/(47)
This natural continuation is not the best.
Much stronger was
White plays very energetically. With every single move he is putting more pressure against black king. Now Black is forced to make a move with the king because of the opposition along the g-file. Now, however, White could make use of the weakened f7–pawn.

6
This is the final blow after which White is winning by force.
Black fails to use his opponent's inaccuracy. From this point on, White's attack is unstoppable.
The move loses immediately after Black should have continued (The only reasonable way to avoid the repetition is After the forced sequence we reach a very unclear position in which White's play is a bit easier.)
After this move, White is winning by force.
threatening followed by
Not
1–0


![Ludek Pachman--Modern Chess Strategy 1963[1]](https://img.dokumen.tips/doc/110x75/5464a832b4af9f83098b45c0/ludek-pachman-modern-chess-strategy-19631.jpg)