Embed Size (px)
Citation preview
MMooddeell AAMM66OOwwnneerr''ss GGuuiiddee
ii© 2005 Directed Electronics—all rights reserved
LLiimmiitteedd LLiiffeettiimmee CCoonnssuummeerr WWaarrrraannttyy
Directed Electronics promises to the original purchaser to repair or replace with acomparable reconditioned model any Directed Electronics unit (hereafter the "unit"),excluding without limitation the siren, the remote transmitters, the associatedsensors and accessories, which proves to be defective in workmanship or materialunder reasonable use during the lifetime of the vehicle provided the following con-ditions are met: the unit was professionally installed and serviced by an authorizedDirected Electronics dealer; the unit will be professionally reinstalled in the vehiclein which it was originally installed by an authorized Directed Electronics dealer; andthe unit is returned to Directed Electronics, shipping prepaid with a legible copy ofthe bill of sale or other dated proof of purchase bearing the following information:consumer's name, telephone number and address; the authorized dealers name, tele-phone number and address; complete product description, including accessories; theyear, make and model of the vehicle; vehicle license number and vehicle identifica-tion number. All components other than the unit, including without limitation thesiren, the remote transmitters and the associated sensors and accessories, carry aone-year warranty from the date of purchase of the same. This warranty is non-trans-ferable and is automatically void if: the original purchaser has not completed thewarranty card and mailed it within ten (10) days of the date of purchase to theaddress listed on the card; the unit's date code or serial number is defaced, missingor altered; the unit has been modified or used in a manner contrary to its intendedpurpose; the unit has been damaged by accident, unreasonable use, neglect,improper service, installation or other causes not arising out of defects in materialsor construction. The warranty does not cover damage to the unit caused by installa-tion or removal of the unit. Directed Electronics, in its sole discretion, will determinewhat constitutes excessive damage and may refuse the return of any unit with exces-sive damage. TTOO TTHHEE MMAAXXIIMMUUMM EEXXTTEENNTT AALLLLOOWWEEDD BBYY LLAAWW,, AALLLL WWAARRRRAANNTTIIEESS,,IINNCCLLUUDDIINNGG BBUUTT NNOOTT LLIIMMIITTEEDD TTOO EEXXPPRREESSSS WWAARRRRAANNTTYY,, IIMMPPLLIIEEDD WWAARRRRAANNTTYY,, WWAARR--RRAANNTTYY OOFF MMEERRCCHHAANNTTAABBIILLIITTYY,, FFIITTNNEESSSS FFOORR PPAARRTTIICCUULLAARR PPUURRPPOOSSEE AANNDD WWAARRRRAANNTTYY OOFFNNOONN--IINNFFRRIINNGGEEMMEENNTT OOFF IINNTTEELLLLEECCTTUUAALL PPRROOPPEERRTTYY,, AARREE EEXXPPRREESSSSLLYY EEXXCCLLUUDDEEDD;; AANNDDDDIIRREECCTTEEDD EELLEECCTTRROONNIICCSS NNEEIITTHHEERR AASSSSUUMMEESS NNOORR AAUUTTHHOORRIIZZEESS AANNYY PPEERRSSOONN OORR EENNTTIITTYYTTOO AASSSSUUMMEE FFOORR IITT AANNYY DDUUTTYY,, OOBBLLIIGGAATTIIOONN OORR LLIIAABBIILLIITTYY IINN CCOONNNNEECCTTIIOONN WWIITTHH IITTSSPPRROODDUUCCTTSS.. DDIIRREECCTTEEDD EELLEECCTTRROONNIICCSS DDIISSCCLLAAIIMMSS AANNDD HHAASS AABBSSOOLLUUTTEELLYY NNOO LLIIAABBIILLIITTYYFFOORR AANNYY AANNDD AALLLL AACCTTSS OOFF TTHHIIRRDD PPAARRTTIIEESS IINNCCLLUUDDIINNGG IITTSS AAUUTTHHOORRIIZZEEDD DDEEAALLEERRSS OORRIINNSSTTAALLLLEERRSS.. DDIIRREECCTTEEDD EELLEECCTTRROONNIICCSS SSEECCUURRIITTYY SSYYSSTTEEMMSS,, IINNCCLLUUDDIINNGG TTHHIISS UUNNIITT,, AARREEDDEETTEERRRREENNTTSS AAGGAAIINNSSTT PPOOSSSSIIBBLLEE TTHHEEFFTT.. DDIIRREECCTTEEDD EELLEECCTTRROONNIICCSS IISS NNOOTT OOFFFFEERRIINNGG AAGGUUAARRAANNTTEEEE OORR IINNSSUURRAANNCCEE AAGGAAIINNSSTT VVAANNDDAALLIISSMM,, DDAAMMAAGGEE OORR TTHHEEFFTT OOFF TTHHEE AAUUTTOO--MMOOBBIILLEE,, IITTSS PPAARRTTSS OORR CCOONNTTEENNTTSS;; AANNDD HHEERREEBBYY EEXXPPRREESSSSLLYY DDIISSCCLLAAIIMMSS AANNYY LLIIAABBIILLIITTYY
iiii © 2005 Directed Electronics—all rights reserved
WWHHAATTSSOOEEVVEERR,, IINNCCLLUUDDIINNGG WWIITTHHOOUUTT LLIIMMIITTAATTIIOONN,, LLIIAABBIILLIITTYY FFOORR TTHHEEFFTT,, DDAAMMAAGGEEAANNDD//OORR VVAANNDDAALLIISSMM.. TTHHIISS WWAARRRRAANNTTYY DDOOEESS NNOOTT CCOOVVEERR LLAABBOORR CCOOSSTTSS FFOORR MMAAIINNTTEE--NNAANNCCEE,, RREEMMOOVVAALL OORR RREEIINNSSTTAALLLLAATTIIOONN OOFF TTHHEE UUNNIITT OORR AANNYY CCOONNSSEEQQUUEENNTTIIAALLDDAAMMAAGGEESS OOFF AANNYY KKIINNDD.. IINN TTHHEE EEVVEENNTT OOFF AA CCLLAAIIMM OORR AA DDIISSPPUUTTEE IINNVVOOLLVVIINNGGDDIIRREECCTTEEDD EELLEECCTTRROONNIICCSS OORR IITTSS SSUUBBSSIIDDIIAARRYY,, TTHHEE PPRROOPPEERR VVEENNUUEE SSHHAALLLL BBEE SSAANN DDIIEEGGOOCCOOUUNNTTYY IINN TTHHEE SSTTAATTEE OOFF CCAALLIIFFOORRNNIIAA.. CCAALLIIFFOORRNNIIAA SSTTAATTEE LLAAWWSS AANNDD AAPPPPLLIICCAABBLLEEFFEEDDEERRAALL LLAAWWSS SSHHAALLLL AAPPPPLLYY AANNDD GGOOVVEERRNN TTHHEE DDIISSPPUUTTEE.. TTHHEE MMAAXXIIMMUUMM RREECCOOVVEERRYYUUNNDDEERR AANNYY CCLLAAIIMM AAGGAAIINNSSTT DDIIRREECCTTEEDD EELLEECCTTRROONNIICCSS SSHHAALLLL BBEE SSTTRRIICCTTLLYY LLIIMMIITTEEDD TTOOTTHHEE AAUUTTHHOORRIIZZEEDD DDIIRREECCTTEEDD EELLEECCTTRROONNIICCSS DDEEAALLEERR''SS PPUURRCCHHAASSEE PPRRIICCEE OOFF TTHHEE UUNNIITT..DDIIRREECCTTEEDD EELLEECCTTRROONNIICCSS SSHHAALLLL NNOOTT BBEE RREESSPPOONNSSIIBBLLEE FFOORR AANNYY DDAAMMAAGGEESS WWHHAATTSSOOEEVVEERR,,IINNCCLLUUDDIINNGG BBUUTT NNOOTT LLIIMMIITTEEDD TTOO,, AANNYY CCOONNSSEEQQUUEENNTTIIAALL DDAAMMAAGGEESS,, IINNCCIIDDEENNTTAALLDDAAMMAAGGEESS,, DDAAMMAAGGEESS FFOORR TTHHEE LLOOSSSS OOFF TTIIMMEE,, LLOOSSSS OOFF EEAARRNNIINNGGSS,, CCOOMMMMEERRCCIIAALL LLOOSSSS,,LLOOSSSS OOFF EECCOONNOOMMIICC OOPPPPOORRTTUUNNIITTYY AANNDD TTHHEE LLIIKKEE.. NNOOTTWWIITTHHSSTTAANNDDIINNGG TTHHEE AABBOOVVEE,, TTHHEEMMAANNUUFFAACCTTUURREERR DDOOEESS OOFFFFEERR AA LLIIMMIITTEEDD WWAARRRRAANNTTYY TTOO RREEPPLLAACCEE OORR RREEPPAAIIRR TTHHEECCOONNTTRROOLL MMOODDUULLEE AASS DDEESSCCRRIIBBEEDD AABBOOVVEE.. Some states do not allow limitations on howlong an implied warranty will last or the exclusion or limitation of incidental or con-sequential damages. This warranty gives you specific legal rights and you may alsohave other rights that vary from State to State.
This product may be covered by a Guaranteed Protection Plan ("GPP"). See yourauthorized Directed Electronics dealer for details of the plan or call DirectedElectronics Customer Service at 1-800-876-0800. Directed Electronics security systems,including this unit, are deterrents against possible theft. Directed Electronics is notoffering a guarantee or insurance against vandalism, damage or theft of the automo-bile, its parts or contents; and hereby expressly disclaims any liability whatsoever,including without limitation, liability for theft, damage and/or vandalism. DirectedElectronics does not and has not authorized any person or entity to create for it anyother obligation, promise, duty or obligation in connection with this security system.
Make sure you have all of the following information from your dealer:
A clear copy of the sales receipt, showing the following:
■ Date of purchase■ Your full name and address■ Authorized dealer's company name and address■ Type of alarm installed■ Year, make, model and color of the automobile■ Automobile license number■ Vehicle identification number■ All security options installed on automobile■ Installation receipts
11© 2005 Directed Electronics—all rights reserved
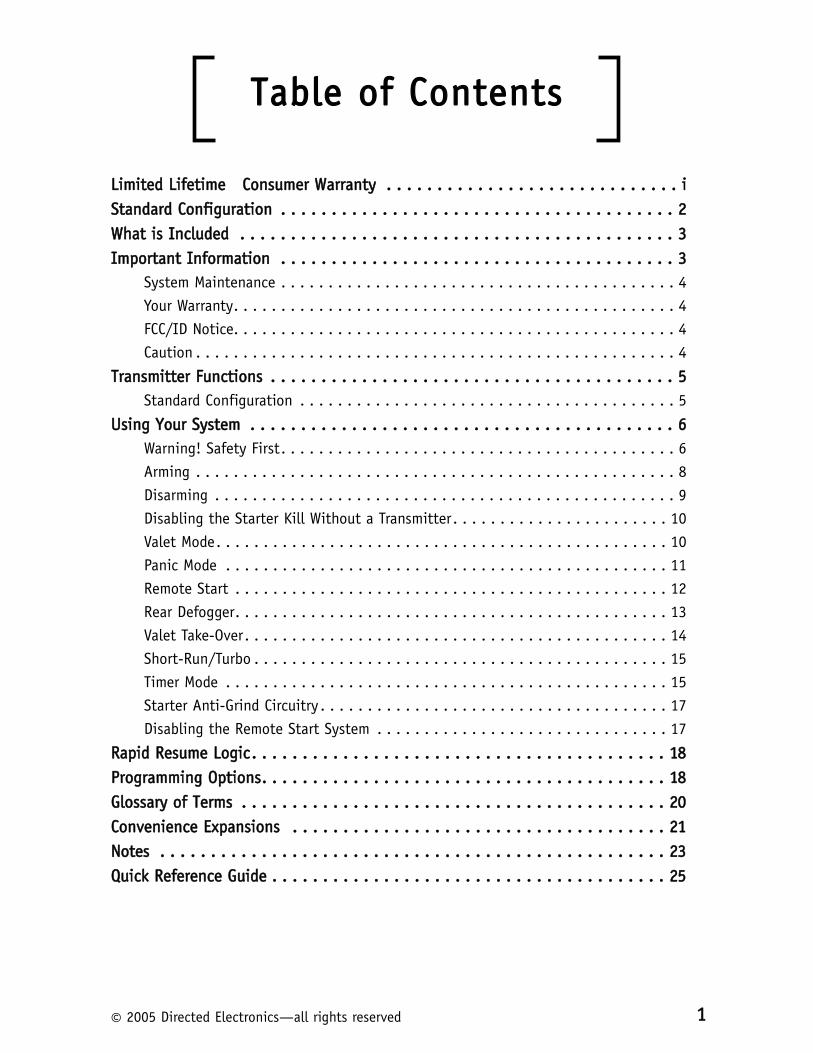
TTaabbllee ooff CCoonntteennttss
LLiimmiitteedd LLiiffeettiimmee CCoonnssuummeerr WWaarrrraannttyy .. .. .. .. .. .. .. .. .. .. .. .. .. .. .. .. .. .. .. .. .. .. .. .. .. .. .. .. .. iiSSttaannddaarrdd CCoonnffiigguurraattiioonn .. .. .. .. .. .. .. .. .. .. .. .. .. .. .. .. .. .. .. .. .. .. .. .. .. .. .. .. .. .. .. .. .. .. .. .. .. .. .. 22WWhhaatt iiss IInncclluuddeedd .. .. .. .. .. .. .. .. .. .. .. .. .. .. .. .. .. .. .. .. .. .. .. .. .. .. .. .. .. .. .. .. .. .. .. .. .. .. .. .. .. .. .. 33IImmppoorrttaanntt IInnffoorrmmaattiioonn .. .. .. .. .. .. .. .. .. .. .. .. .. .. .. .. .. .. .. .. .. .. .. .. .. .. .. .. .. .. .. .. .. .. .. .. .. .. .. 33
System Maintenance . . . . . . . . . . . . . . . . . . . . . . . . . . . . . . . . . . . . . . . . . . 4Your Warranty. . . . . . . . . . . . . . . . . . . . . . . . . . . . . . . . . . . . . . . . . . . . . . . 4FCC/ID Notice. . . . . . . . . . . . . . . . . . . . . . . . . . . . . . . . . . . . . . . . . . . . . . . 4Caution . . . . . . . . . . . . . . . . . . . . . . . . . . . . . . . . . . . . . . . . . . . . . . . . . . . 4
TTrraannssmmiitttteerr FFuunnccttiioonnss .. .. .. .. .. .. .. .. .. .. .. .. .. .. .. .. .. .. .. .. .. .. .. .. .. .. .. .. .. .. .. .. .. .. .. .. .. .. .. .. 55Standard Configuration . . . . . . . . . . . . . . . . . . . . . . . . . . . . . . . . . . . . . . . . 5
UUssiinngg YYoouurr SSyysstteemm .. .. .. .. .. .. .. .. .. .. .. .. .. .. .. .. .. .. .. .. .. .. .. .. .. .. .. .. .. .. .. .. .. .. .. .. .. .. .. .. .. .. 66Warning! Safety First. . . . . . . . . . . . . . . . . . . . . . . . . . . . . . . . . . . . . . . . . . 6Arming . . . . . . . . . . . . . . . . . . . . . . . . . . . . . . . . . . . . . . . . . . . . . . . . . . . 8Disarming . . . . . . . . . . . . . . . . . . . . . . . . . . . . . . . . . . . . . . . . . . . . . . . . . 9Disabling the Starter Kill Without a Transmitter. . . . . . . . . . . . . . . . . . . . . . . 10Valet Mode. . . . . . . . . . . . . . . . . . . . . . . . . . . . . . . . . . . . . . . . . . . . . . . . 10Panic Mode . . . . . . . . . . . . . . . . . . . . . . . . . . . . . . . . . . . . . . . . . . . . . . . 11Remote Start . . . . . . . . . . . . . . . . . . . . . . . . . . . . . . . . . . . . . . . . . . . . . . 12Rear Defogger. . . . . . . . . . . . . . . . . . . . . . . . . . . . . . . . . . . . . . . . . . . . . . 13Valet Take-Over. . . . . . . . . . . . . . . . . . . . . . . . . . . . . . . . . . . . . . . . . . . . . 14Short-Run/Turbo . . . . . . . . . . . . . . . . . . . . . . . . . . . . . . . . . . . . . . . . . . . . 15Timer Mode . . . . . . . . . . . . . . . . . . . . . . . . . . . . . . . . . . . . . . . . . . . . . . . 15Starter Anti-Grind Circuitry . . . . . . . . . . . . . . . . . . . . . . . . . . . . . . . . . . . . . 17Disabling the Remote Start System . . . . . . . . . . . . . . . . . . . . . . . . . . . . . . . 17
RRaappiidd RReessuummee LLooggiicc.. .. .. .. .. .. .. .. .. .. .. .. .. .. .. .. .. .. .. .. .. .. .. .. .. .. .. .. .. .. .. .. .. .. .. .. .. .. .. .. .. 1188PPrrooggrraammmmiinngg OOppttiioonnss.. .. .. .. .. .. .. .. .. .. .. .. .. .. .. .. .. .. .. .. .. .. .. .. .. .. .. .. .. .. .. .. .. .. .. .. .. .. .. .. 1188GGlloossssaarryy ooff TTeerrmmss .. .. .. .. .. .. .. .. .. .. .. .. .. .. .. .. .. .. .. .. .. .. .. .. .. .. .. .. .. .. .. .. .. .. .. .. .. .. .. .. .. .. 2200CCoonnvveenniieennccee EExxppaannssiioonnss .. .. .. .. .. .. .. .. .. .. .. .. .. .. .. .. .. .. .. .. .. .. .. .. .. .. .. .. .. .. .. .. .. .. .. .. .. 2211NNootteess .. .. .. .. .. .. .. .. .. .. .. .. .. .. .. .. .. .. .. .. .. .. .. .. .. .. .. .. .. .. .. .. .. .. .. .. .. .. .. .. .. .. .. .. .. .. .. .. .. .. 2233QQuuiicckk RReeffeerreennccee GGuuiiddee .. .. .. .. .. .. .. .. .. .. .. .. .. .. .. .. .. .. .. .. .. .. .. .. .. .. .. .. .. .. .. .. .. .. .. .. .. .. .. 2255
22 © 2005 Directed Electronics—all rights reserved
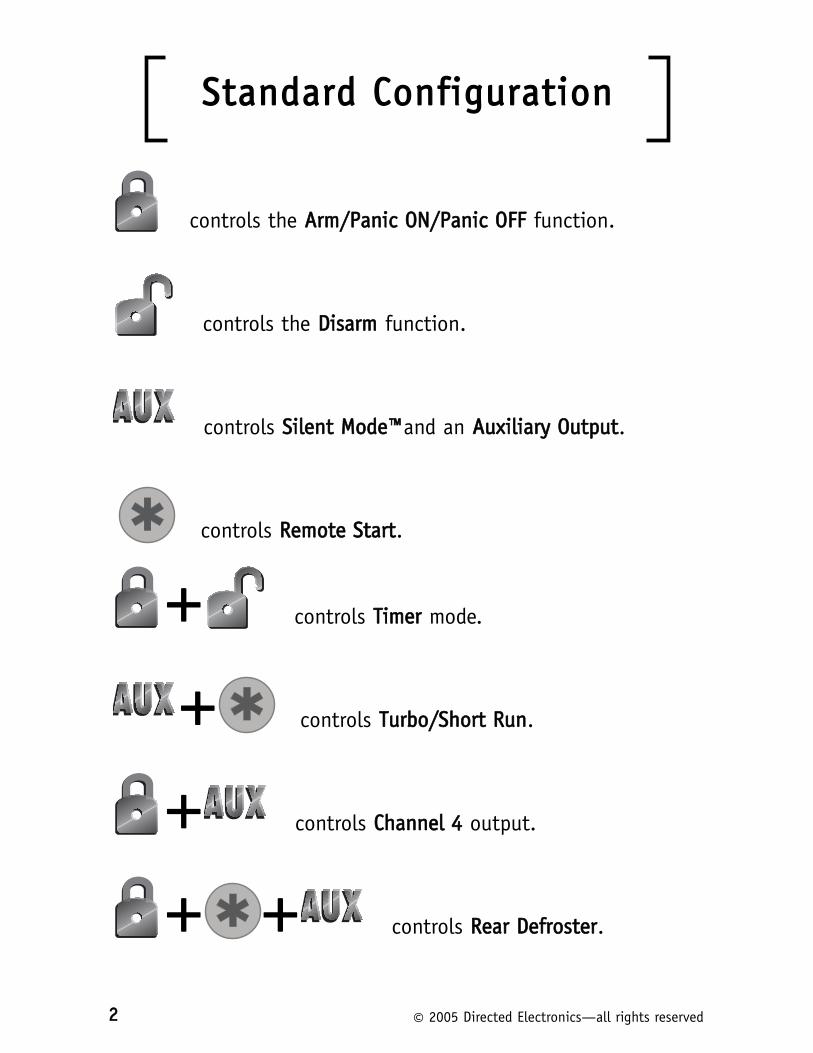
SSttaannddaarrdd CCoonnffiigguurraattiioonn
controls the AArrmm//PPaanniicc OONN//PPaanniicc OOFFFF function.
controls the DDiissaarrmm function.
controls SSiilleenntt MMooddee™™and an AAuuxxiilliiaarryy OOuuttppuutt.
controls RReemmoottee SSttaarrtt.
+ controls TTiimmeerr mode.
+ controls TTuurrbboo//SShhoorrtt RRuunn.
+ controls CChhaannnneell 44 output.
+ + controls RReeaarr DDeeffrroosstteerr.
33© 2005 Directed Electronics—all rights reserved
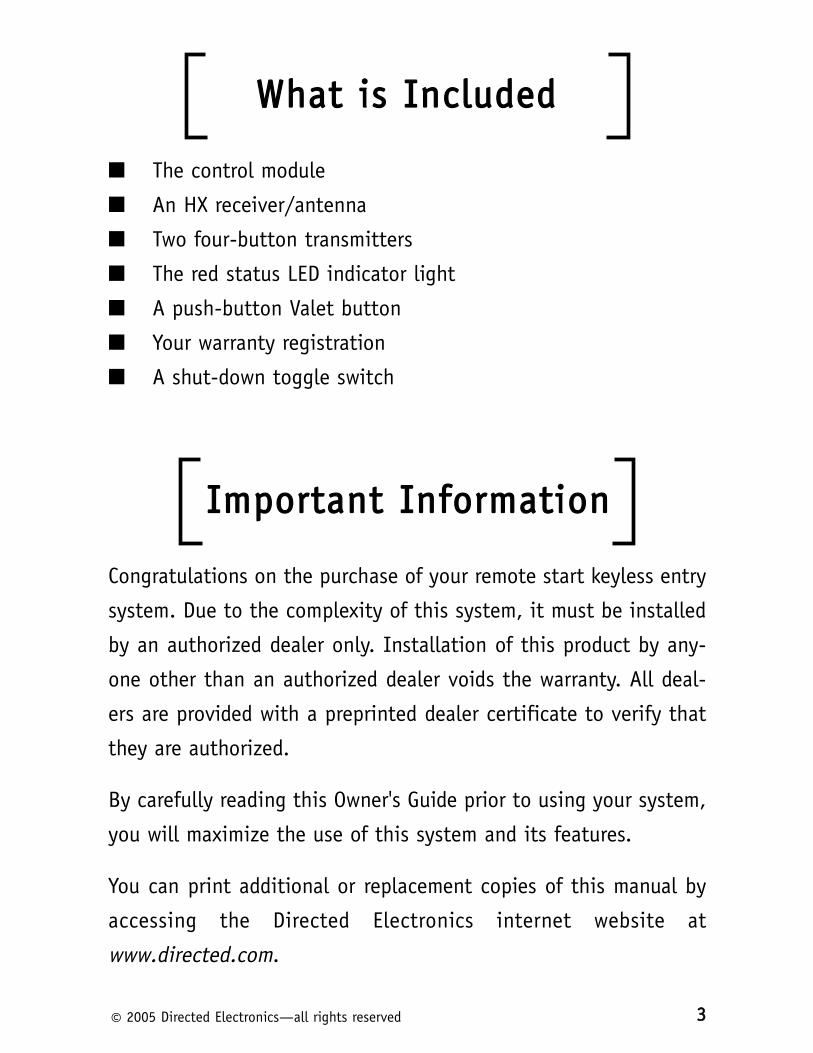
WWhhaatt iiss IInncclluuddeedd
■ The control module
■ An HX receiver/antenna
■ Two four-button transmitters
■ The red status LED indicator light
■ A push-button Valet button
■ Your warranty registration
■ A shut-down toggle switch
IImmppoorrttaanntt IInnffoorrmmaattiioonn
Congratulations on the purchase of your remote start keyless entry
system. Due to the complexity of this system, it must be installed
by an authorized dealer only. Installation of this product by any-
one other than an authorized dealer voids the warranty. All deal-
ers are provided with a preprinted dealer certificate to verify that
they are authorized.
By carefully reading this Owner's Guide prior to using your system,
you will maximize the use of this system and its features.
You can print additional or replacement copies of this manual by
accessing the Directed Electronics internet website at
www.directed.com.

44 © 2005 Directed Electronics—all rights reserved
The system requires no specific maintenance. Your remote is powered
by a small, lightweight 3-volt lithium battery that will last approx-
imately one year under normal use. When the battery begins to weaken,
operating range will be reduced and the LED on the remote will dim.
Your warranty registration must be completely filled out and
returned within 10 days of purchase. Your product warranty
will not be validated if your warranty registration is not returned.
Make sure you receive the warranty registration from your dealer.
It is also necessary to keep your proof of purchase, which reflects
that the product was installed by an authorized dealer.
This device complies with Part 15 of FCC rules. Operation is subject
to the following conditions: (1) This device may not cause harmful
interference, and (2) This device must accept any interference re-
ceived, including interference that may cause undesired operation.
Changes or modifications not expressly approved by the party responsible
for compliance could void the user's authority to operate this device.
This product is designed for fuel injected, automatic transmission
vehicles only. Use of this product in a standard transmission vehi-
cle is dangerous and contrary to the product's intended use.
CCaauuttiioonn
FFCCCC//IIDD NNoottiiccee
YYoouurr WWaarrrraannttyy
SSyysstteemm MMaaiinntteennaannccee
55© 2005 Directed Electronics—all rights reserved
TTrraannssmmiitttteerr FFuunnccttiioonnss
The receiver uses a computer-based learn routine to learn the
transmitter buttons. This makes it possible to assign any specific
transmitter button, or combination of buttons, to any receiver
function. The transmitter initially comes programmed with the
Standard Configuration, but may also be customized by an autho-
rized dealer. The transmitter buttons indicated in all of the
instructions in this manual correspond to a Standard Configuration
transmitter.
BBuuttttoonn
The arming and panic functions are controlled by pressing on
the transmitter for one second.
BBuuttttoonn
The disarm function is controlled by pressing on the trans-
mitter for one second.
BBuuttttoonn
Silent Mode™ and an optional auxiliary function are controlled
by pressing . Silent Mode works by pressing for less
than one second. An optional auxiliary function, such as
trunk release, is controlled by pressing and holding for
1.5 seconds.
SSttaannddaarrdd CCoonnffiigguurraattiioonn

66 © 2005 Directed Electronics—all rights reserved
BBuuttttoonn
The remote start function of your system is controlled by pressing
this button twice within 3 seconds.
and Buttons
An optional auxiliary convenience or expansion function that you
have added to your system can be activated by pressing these but-
tons simultaneously.
The auxiliary output controls __________________________.
BBuuttttoonnss + +
When simultaneously pressed these buttons control the rear win-
dow defogger during remote starting.
UUssiinngg YYoouurr SSyysstteemm
The following safety warnings must be observed at all times:
■ Due to the complexity of this system, installation of this
product must only be performed by an authorized Directed
Electronics dealer.
■ When properly installed, this system can start the vehicle via
a command signal from the remote control transmitter.
Therefore, never operate the system in an enclosed area or
WWaarrnniinngg!! SSaaffeettyy FFiirrsstt
77© 2005 Directed Electronics—all rights reserved
partially enclosed area without ventilation (such as a garage).
When parking in an enclosed or partially enclosed area or
when having the vehicle serviced, the remote start system
must be disabled using the installed toggle switch. It is the
user's sole responsibility to properly handle and keep out of
reach from children all remote control transmitters to assure that
the system does not unintentionally remote start the vehicle.
TTHHEE UUSSEERR MMUUSSTT IINNSSTTAALLLL AA CCAARRBBOONN MMOONNOOXXIIDDEE DDEETTEECCTTOORR IINN
OORR AABBOOUUTT TTHHEE LLIIVVIINNGG AARREEAA AADDJJAACCEENNTT TTOO TTHHEE VVEEHHIICCLLEE.. AALLLL
DDOOOORRSS LLEEAADDIINNGG FFRROOMM AADDJJAACCEENNTT LLIIVVIINNGG AARREEAASS TTOO TTHHEE
EENNCCLLOOSSEEDD OORR PPAARRTTIIAALLLLYY EENNCCLLOOSSEEDD VVEEHHIICCLLEE SSTTOORRAAGGEE AARREEAA
MMUUSSTT AATT AALLLL TTIIMMEESS RREEMMAAIINN CCLLOOSSEEDD.. These precautions are
the sole responsibility of the user.
■ Use of this product in a manner contrary to its intended mode
of operation may result in property damage, personal injury,
or death. (1) Never remotely start the vehicle with the vehi-
cle in gear, and (2) Never remotely start the vehicle with the
keys in the ignition. The user must also have the neutral safe-
ty feature of the vehicle periodically checked, wherein the
vehicle must not remotely start while the car is in gear. This
testing should be performed by an authorized Directed
Electronics dealer in accordance with the Safety Check out-
lined in the product installation guide. If the vehicle starts in
gear, cease remote start operation immediately and consult
with the authorized Directed Electronics dealer to fix the
problem.
88 © 2005 Directed Electronics—all rights reserved
■ After the remote start module has been installed, contact your
authorized dealer to have him or her test the remote start
module by performing the Safety Check outlined in the prod-
uct installation guide. If the vehicle starts when performing
the Neutral Safety Shutdown Circuit test, the remote start unit
has not been properly installed. The remote start module must
be removed or the installer must properly reinstall the remote
start system so that the vehicle does not start in gear. All
installations must be performed by an authorized Directed
Electronics dealer. OOPPEERRAATTIIOONN OOFF TTHHEE RREEMMOOTTEE SSTTAARRTT MMOODDUULLEE
IIFF TTHHEE VVEEHHIICCLLEE SSTTAARRTTSS IINN GGEEAARR IISS CCOONNTTRRAARRYY TTOO IITTSS IINNTTEENNDD--
EEDD MMOODDEE OOFF OOPPEERRAATTIIOONN.. OOPPEERRAATTIINNGG TTHHEE RREEMMOOTTEE SSTTAARRTT SSYYSS--
TTEEMM UUNNDDEERR TTHHEESSEE CCOONNDDIITTIIOONNSS MMAAYY RREESSUULLTT IINN PPRROOPPEERRTTYY
DDAAMMAAGGEE OORR PPEERRSSOONNAALL IINNJJUURRYY.. YYOOUU MMUUSSTT IIMMMMEEDDIIAATTEELLYY
CCEEAASSEE TTHHEE UUSSEE OOFF TTHHEE UUNNIITT AANNDD SSEEEEKK TTHHEE AASSSSIISSTTAANNCCEE OOFF AANN
AAUUTTHHOORRIIZZEEDD DDIIRREECCTTEEDD EELLEECCTTRROONNIICCSS DDEEAALLEERR TTOO RREEPPAAIIRR OORR
DDIISSCCOONNNNEECCTT TTHHEE IINNSSTTAALLLLEEDD RREEMMOOTTEE SSTTAARRTT MMOODDUULLEE.. DDIIRREECCTT--
EEDD EELLEECCTTRROONNIICCSS WWIILLLL NNOOTT BBEE HHEELLDD RREESSPPOONNSSIIBBLLEE OORR PPAAYY FFOORR
IINNSSTTAALLLLAATTIIOONN OORR RREEIINNSSTTAALLLLAATTIIOONN CCOOSSTTSS..
Pressing for one second arms the system by activating the
starter kill and locking the doors (if the door locks are connected).
The horn will honk (if connected) and the parking lights will flash
once to confirm arming of the system. While the system is armed,
the status LED will flash once per second. The Failsafe® Starter Kill
(if installed) will also prevent the vehicle’s starter from cranking.
AArrmmiinngg
99© 2005 Directed Electronics—all rights reserved
The system can also be programmed to arm the optional Failsafe®
Starter Kill automatically (called Passive Mode). If the system has
been programmed for Passive Mode, the Failsafe® Starter Kill will
automatically activate 30 seconds after the ignition has been
turned off. After the ignition has been turned off, the status LED
will flash rapidly to indicate that the system is in Passive Mode.
If Passive Mode has been programmed on, then it is also possible
to program the system for Passive Locking. With Passive Locking,
the vehicle doors lock automatically at the same time that the Failsafe®
Starter Kill is activated. If Passive Locking is programmed on, care
must be taken to prevent the keys from being locked in the vehicle.
NNOOTTEE:: For Passive Mode to be effective, the Failsafe® Starter Kill relaymust be installed.
Pressing for one second disarms the system and unlocks the
doors (if connected). The horn will honk twice (if connected) and
the parking lights will flash twice to confirm disarming of the sys-
tem. The optional Failsafe® Starter Kill will be deactivated. The sta-
tus LED will turn off, unless the system is programmed for Passive
Mode. In Passive Mode, the status LED will flash rapidly when the
system is disarmed. This indicates that the system will re-engage
the starter kill and re-lock the doors (if Passive Locking has been
programmed) in 30 seconds unless the ignition is turned on.
DDiissaarrmmiinngg
1100 © 2005 Directed Electronics—all rights reserved
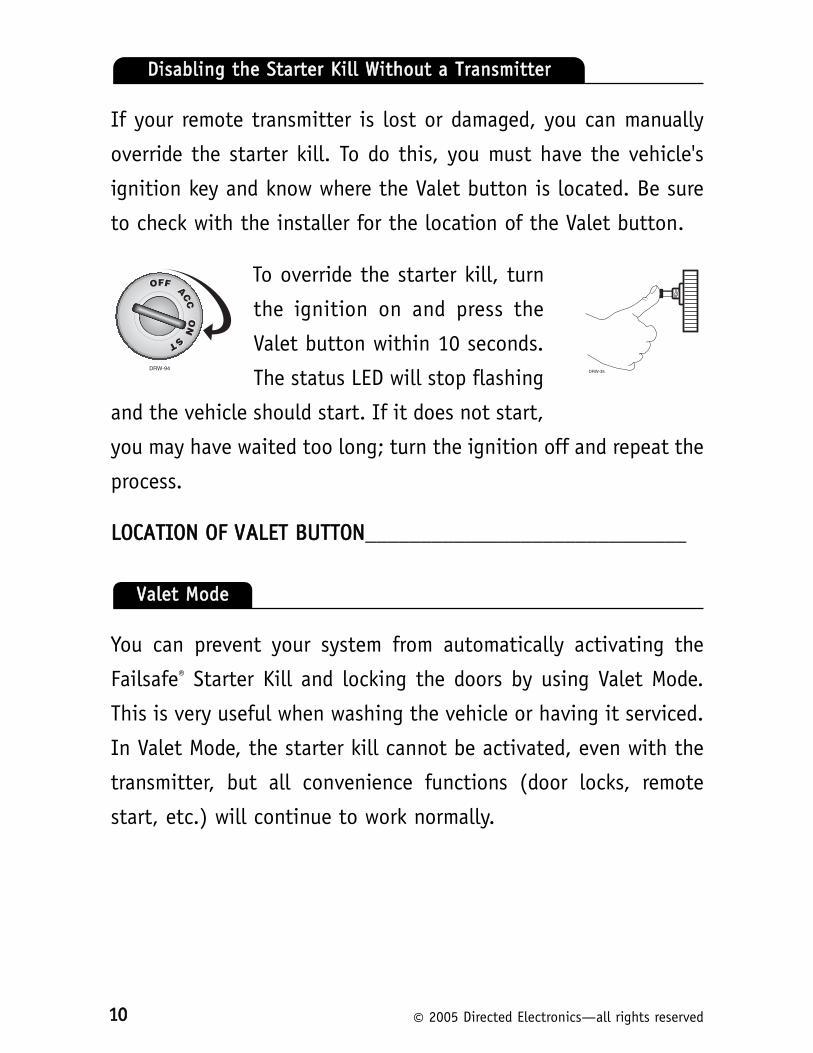
If your remote transmitter is lost or damaged, you can manually
override the starter kill. To do this, you must have the vehicle's
ignition key and know where the Valet button is located. Be sure
to check with the installer for the location of the Valet button.
To override the starter kill, turn
the ignition on and press the
Valet button within 10 seconds.
The status LED will stop flashing
and the vehicle should start. If it does not start,
you may have waited too long; turn the ignition off and repeat the
process.
LLOOCCAATTIIOONN OOFF VVAALLEETT BBUUTTTTOONN_____________________________
You can prevent your system from automatically activating the
Failsafe® Starter Kill and locking the doors by using Valet Mode.
This is very useful when washing the vehicle or having it serviced.
In Valet Mode, the starter kill cannot be activated, even with the
transmitter, but all convenience functions (door locks, remote
start, etc.) will continue to work normally.
VVaalleett MMooddee
DRW-35
DDiissaabblliinngg tthhee SSttaarrtteerr KKiillll WWiitthhoouutt aa TTrraannssmmiitttteerr

1111© 2005 Directed Electronics—all rights reserved
TToo eenntteerr oorr eexxiitt VVaalleett MMooddee::
1. Turn the ignition on.
2. Turn the ignition off.
3. Press and release the Valet
button within 10 seconds.
The status LED will light steadily if you are entering Valet Mode
and will turn off if you are exiting Valet Mode.
If you are threatened in or near your vehicle, you can attract
attention by triggering the system with your transmitter. Just
press for 1.5 seconds to enter Panic Mode. In Panic Mode, the
horn will honk and the parking lights will flash for 30 seconds. To
stop Panic Mode at any time, press , or on the
transmitter.
NNOOTTEE:: In order for Panic Mode to be effective, the vehicle’s horn (oroptional siren) as well as the vehicle's parking lights must be connected.
PPaanniicc MMooddee
DRW-35

1122 © 2005 Directed Electronics—all rights reserved
This feature allows you to remotely start and run your vehicle for
a programmable period of time. This makes it possible to warm up
the engine, as well as adjust the interior temperature of the vehi-
cle with the climate control system. If interior heating or cooling
is desired, the climate controls must be preset, and the fan blower
must be set to the desired level prior to remote starting the
vehicle.
IIMMPPOORRTTAANNTT!! (1) Never remotely start the vehicle with the vehicle in gear, and (2) Never remotely start the vehicle with the key in the ignition.
TToo rreemmoottee ssttaarrtt tthhee vveehhiiccllee::
1. Press the button twice within 3 seconds on the trans-
mitter.
2. The parking lights will flash to confirm that the vehicle will
attempt to start.
3. Release the button as soon as the parking lights flash.
(In gasoline vehicles, the engine will start 4 seconds after
the parking lights flash. In diesel vehicles, the engine will
start when the WAIT-TO-START indicator on the vehicle's dash
goes out or the timer has expired.)
4. Once the vehicle has started, it will run for the pre-program-
med period of time (12, 24, or 60 minutes) or until a shut-
down input is triggered.
RReemmoottee SSttaarrtt
1133© 2005 Directed Electronics—all rights reserved
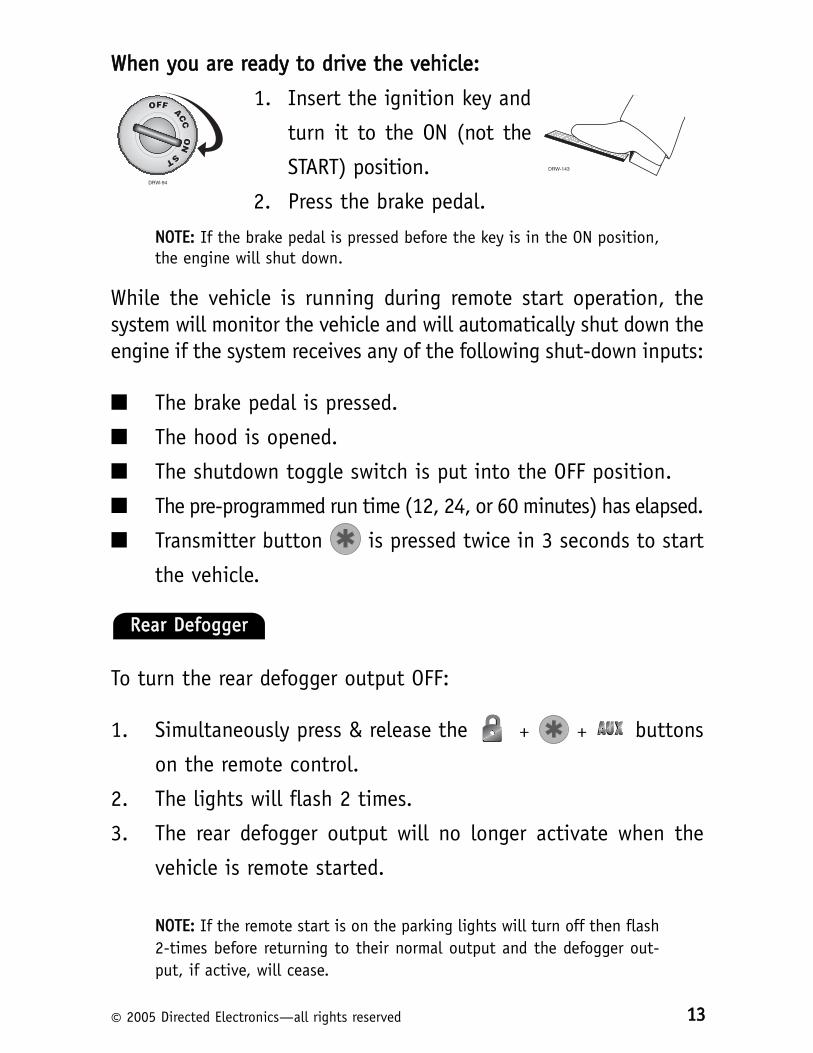
WWhheenn yyoouu aarree rreeaaddyy ttoo ddrriivvee tthhee vveehhiiccllee::
1. Insert the ignition key and
turn it to the ON (not the
START) position.
2. Press the brake pedal.
NNOOTTEE:: If the brake pedal is pressed before the key is in the ON position,the engine will shut down.
While the vehicle is running during remote start operation, thesystem will monitor the vehicle and will automatically shut down theengine if the system receives any of the following shut-down inputs:
■ The brake pedal is pressed.
■ The hood is opened.
■ The shutdown toggle switch is put into the OFF position.
■ The pre-programmed run time (12, 24, or 60 minutes) has elapsed.
■ Transmitter button is pressed twice in 3 seconds to start
the vehicle.
To turn the rear defogger output OFF:
1. Simultaneously press & release the + + buttons
on the remote control.
2. The lights will flash 2 times.
3. The rear defogger output will no longer activate when the
vehicle is remote started.
NNOOTTEE:: If the remote start is on the parking lights will turn off then flash2-times before returning to their normal output and the defogger out-put, if active, will cease.
RReeaarr DDeeffooggggeerr
1144 © 2005 Directed Electronics—all rights reserved
To turn the rear defogger output ON:
1. Simultaneously press & release the + + buttons
on the remote control.
2. The lights will flash 3 times.
3. The rear defogger output will once again activate when the
vehicle is remote started.
NNOOTTEE:: If the remote start is on the lights will turn off then flash 3-timesbefore returning to their normal output and the defogger output willactivate as programmed.
The Valet Take-Over feature allows the vehicle to remain running
after the key has been removed from the ignition. This feature is
useful for occasions when you wish to exit and lock the vehicle for
short periods of time, but would like to leave the motor running
and the climate controls on.
TToo ppeerrffoorrmm VVaalleett TTaakkee--OOvveerr::
1. Before turning off the engine, press and release on the
transmitter twice in 3 seconds (or press and release the
optional momentary switch).
2. Turn the ignition key to the OFF position. (The engine will
stay running.)
3. Once the vehicle has started, it will run for the pre-program-
med period of time (12, 24, or 60 minutes) or until a shut-
down input is triggered.
VVaalleett TTaakkee--OOvveerr
Short-run turbo mode keeps the engine running after arriving at
you destination for a programmable period of 1, 3 ,5 or 10 min-
utes. This allows the system’s timer to conveniently cool down the
turbo after you have left the vehicle.
To activate:1. Park the vehicle and set parking brake.
2. Remove your foot from the brake pedal and leave the engine
running.
3. Press and release the and buttons at the same time.
4. The lights will flash to indicate the remote start has entered
short run turbo mode.
5. Turn off the key, the engine will keep running.
6. Exit and secure the vehicle.
7. The engine will turn off after the programmed run time.
By pressing the remote and buttons the parking lights
will flash 4 times and then start the vehicle and run for the set
duration. The remote start can be shut off by the transmitter by
pressing the remote start button and remain in timer mode,
but if any other shut down zones or the ignition becomes active
the timer mode will cancel.
TTiimmeerr MMooddee
SShhoorrtt--RRuunn//TTuurrbboo
11551155© 2005 Directed Electronics—all rights reserved
1166 © 2005 Directed Electronics—all rights reserved
1. Press Timer mode buttons.
2. The vehicle will confirm with 4 parking light flashes.
3. A 1-second delay will start.
4. The system will start the car and will run for the specified
duration, unless shut down by the remote start button
. If shut down with the remote start button the system
will remain in timer mode.
5. The system will start every 3 hours until canceled by the
brake, hood, or neutral safety shut-down wires.
To exit timer mode, turn the ignition switch on any time the
engine is running. The parking lights will flash 4 times, indicating
timer mode has been exited.
5. The system will start every 3 hours until canceled by the
brake, hood, or neutral safety shut-down wires.
IIMMPPOORRTTAANNTT!! Timer Mode should be used onlyin open areas. Never start and run the vehiclein an enclosed space such as a garage orcarport.
important!! Timer Mode should be used only inopen areas. Never start and run the vehicle in anenclosed space such as a garage or carport.
Whenever the vehicle is remote started, advanced anti-grind cir-
cuitry prevents the starter from engaging, even if the key is
turned to the start position. This prevents damage to the starter
motor if the key is turned to the start position during remote start
operation.
NNOOTTEE:: Anti-grind circuitry only works when the remote start system isoperating the motor and the Failsafe® Starter Kill relay is installed.
This feature allows your system's remote start unit to be tem-
porarily disabled to prevent the vehicle from being remote start-
ed accidentally. This feature is useful if the vehicle is being ser-
viced or stored in an enclosed area. To disable the remote start,
move the shutdown toggle switch to the OFF position. The switch
can be installed in a location of your choice. Check with your
installer for recommended locations.
LLOOCCAATTIIOONN OOFF SSHHUUTTDDOOWWNN SSWWIITTCCHH_________________________
DDiissaabblliinngg tthhee RReemmoottee SSttaarrtt SSyysstteemm
SSttaarrtteerr AAnnttii--GGrriinndd CCiirrccuuiittrryy
1177© 2005 Directed Electronics—all rights reserved
1188 © 2005 Directed Electronics—all rights reserved
RRaappiidd RReessuummee LLooggiicc
This Directed Electronics system will store its current state to non-
volatile memory. If power is lost and then reconnected the system
will recall the stored state from memory. This means if the unit is
in Valet Mode and the battery is disconnected for any reason, such
as servicing the car, when the battery is reconnected the unit will
still be in Valet Mode. This applies to all states of the system
including arm, disarm, and Valet Mode.
PPrrooggrraammmmiinngg OOppttiioonnss
Programming options control your system's normal, operational
set-up. Most options do not require additional parts, but some may
require additional installation labor. This system's programming
options are listed below, with the factory default settings in bboolldd:
■ 1122,, 24, or 60 minute run time. your system can be pro-
grammed to allow the vehicle to run for 12, 24, or 60 min-
utes when remote started.
■ 3, 6, 9, or 1122 minute timer mode run time. Your system can
be programmed to allow the vehicle to run for 3, 6, 9, or 12
minutes when remote started in timer mode. Can be set up to
16 minutes by your installer.
1199© 2005 Directed Electronics—all rights reserved
■ Comfort closure is a programming option which closes the
vehicle’s windows after remote locking.
■ Parking lights ffllaasshhiinngg or constant. Your system can be pro-
grammed to either flash or to turn on the parking lights con-
stantly during the entire remote start operation.
■ Passive Mode or AAccttiivvee MMooddee. In Passive Mode the Failsafe®
Starter Kill will automatically activate 30 seconds after the
ignition has been turned off.
■ Ignition switch-controlled door-locking oonn or off. With this
feature on, the doors will lock 3 seconds after the ignition
key is turned on, and unlock when the ignition key is turned off.
■ Passive Locking or AAccttiivvee LLoocckkiinngg (doors lock only with the
transmitter). With Passive Locking, the vehicle doors lock
automatically 30 seconds after the ignition has been turned
off. Passive Locking can only be selected when the system
has been programmed for Passive Mode.
■ The horn honk confirmations for locking and unlocking can be
programmed oonn or off. In order for this feature to be pro-
grammed on, the horn must be connected to the system.

2200 © 2005 Directed Electronics—all rights reserved
GGlloossssaarryy ooff TTeerrmmss
CCoonnttrrooll UUnniitt: The “brain” of your system. Usually hidden under-
neath the dash area of the vehicle. It houses the microprocessor
which monitors your vehicle and controls all system functions.
FFaaiillssaaffee®® SSttaarrtteerr KKiillll:: An automatic switch controlled by your sys-
tem which prevents the vehicle’s starter from cranking whenever
the system is armed. The vehicle is never prevented from cranking
when the system is disarmed, in Valet Mode, or if the starter kill
switch itself fails. Your system has feature-ready circuitry for the
starter kill, however installation may require additional labor.
LLEEDD:: A red light mounted at a discretionary location inside the
vehicle. It is used to indicate the status of your system.
TTrraannssmmiitttteerr:: A hand-held, remote control which operates the vari-
ous functions of your system.
VVaalleett BBuuttttoonn:: A small push button mounted at a discretionary
location inside the vehicle. It is used to override the Failsafe®
Starter Kill when a transmitter is lost or damaged, or to enter or
exit Valet Mode.
2211© 2005 Directed Electronics—all rights reserved
CCoonnvveenniieennccee EExxppaannssiioonnss
Listed below are some of the many expansion options available for
use with your system. Some options may require additional parts
and/or labor. Please consult with your dealer for a complete list of
options available for use with this system.
DDoommeelliigghhtt SSuuppeerrvviissiioonn:: The domelight will illuminate for 30 sec-
onds each time the system is disarmed using the transmitter. This
is useful for seeing inside the vehicle at night prior to entering
it.
PPoowweerr DDoooorr LLoocckk CCoonnttrrooll:: Your system is capable of controlling
many types of power door lock systems; however, some door lock
systems may require extra parts. Consult with your dealer to deter-
mine which type of locks your vehicle uses. If power locks are
connected, the system can be programmed to lock the doors auto-
matically 30 seconds after the ignition has been turned off. The
system can also be programmed to lock the doors when the ignition
is turned on and to unlock them when the ignition is turned off.
PPoowweerr TTrruunnkk RReelleeaassee:: The system’s auxiliary output can be pro-
grammed to operate a factory power release for the vehicle's trunk
or hatch. If the factory release is not power-activated, Directed
Electronics 522T trunk-release solenoid can often be added.

PPoowweerr WWiinnddooww CCoonnttrrooll:: Power window control is provided with
Directed Electronics 529T or 530T systems. The 529T system will
roll up two windows automatically when the system is armed, or
roll two windows down by using the transmitter. The 530T will roll
two windows both up and down. The 530T also provides one touch
switch operation.
PPrrooggrreessssiivvee DDoooorr UUnnlloocckkiinngg:: For added security, your system can
be configured to unlock the driver’s door only, leaving the pas-
senger doors locked. Pressing the unlock button an additional time
will unlock the passenger doors. This option requires additional
parts and labor.
AAuuxxiilliiaarryy OOuuttppuuttss LLiinnkkeedd ttoo AArrmm//DDiissaarrmm//RReemmoottee SSttaarrtt:: For added
convenience the auxiliary outputs can be used to position the dri-
ver’s seat to a preset position on an Arm, Disarm, or Remote Start
command from the remote.

2233© 2005 Directed Electronics—all rights reserved
NNootteess

2244 © 2005 Directed Electronics—all rights reserved
2255© 2005 Directed Electronics—all rights reserved
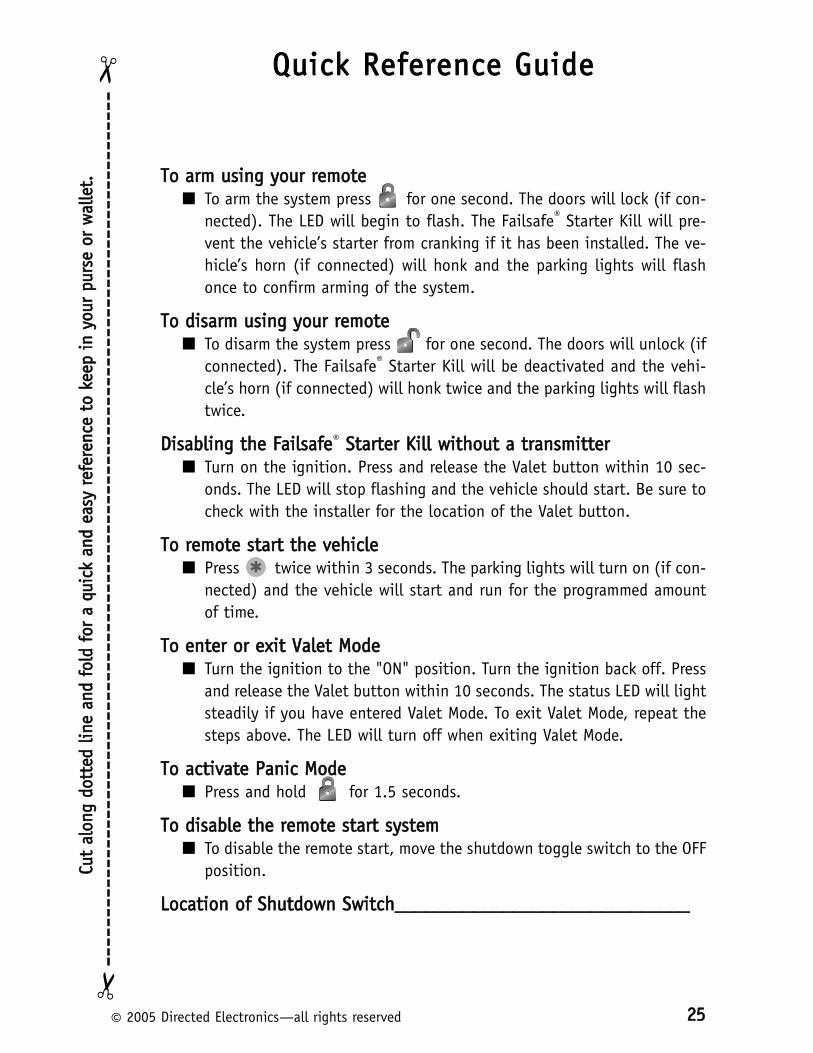
QQuuiicckk RReeffeerreennccee GGuuiiddee
TToo aarrmm uussiinngg yyoouurr rreemmoottee■ To arm the system press for one second. The doors will lock (if con-
nected). The LED will begin to flash. The Failsafe® Starter Kill will pre-vent the vehicle’s starter from cranking if it has been installed. The ve-hicle’s horn (if connected) will honk and the parking lights will flashonce to confirm arming of the system.
TToo ddiissaarrmm uussiinngg yyoouurr rreemmoottee■ To disarm the system press for one second. The doors will unlock (if
connected). The Failsafe® Starter Kill will be deactivated and the vehi-cle’s horn (if connected) will honk twice and the parking lights will flashtwice.
DDiissaabblliinngg tthhee FFaaiillssaaffee® SSttaarrtteerr KKiillll wwiitthhoouutt aa ttrraannssmmiitttteerr■ Turn on the ignition. Press and release the Valet button within 10 sec-
onds. The LED will stop flashing and the vehicle should start. Be sure tocheck with the installer for the location of the Valet button.
TToo rreemmoottee ssttaarrtt tthhee vveehhiiccllee■ Press twice within 3 seconds. The parking lights will turn on (if con-
nected) and the vehicle will start and run for the programmed amountof time.
TToo eenntteerr oorr eexxiitt VVaalleett MMooddee■ Turn the ignition to the "ON" position. Turn the ignition back off. Press
and release the Valet button within 10 seconds. The status LED will lightsteadily if you have entered Valet Mode. To exit Valet Mode, repeat thesteps above. The LED will turn off when exiting Valet Mode.
TToo aaccttiivvaattee PPaanniicc MMooddee■ Press and hold for 1.5 seconds.
TToo ddiissaabbllee tthhee rreemmoottee ssttaarrtt ssyysstteemm■ To disable the remote start, move the shutdown toggle switch to the OFF
position.
LLooccaattiioonn ooff SShhuuttddoowwnn SSwwiittcchh____________________________________________________________
CCuutt
aalloonn
gg ddoo
tttteedd
lliinnee
aanndd
ffooll
dd ffoo
rr aa
qquuiicc
kk aann
dd eeaa
ssyy rr
eeffeerr
eennccee
ttoo
kkeeeepp
iinn
yyoouurr
ppuurr
ssee oo
rr ww
aallllee
tt..✂
✂
CCuutt
aalloonn
gg ddoo
tttteedd
lliinnee
aanndd
ffooll
dd ffoo
rr aa
qquuiicc
kk aann
dd eeaa
ssyy rr
eeffeerr
eennccee
ttoo
kkeeeepp
iinn
yyoouurr
ppuurr
ssee oo
rr ww
aallllee
tt..✂
✂
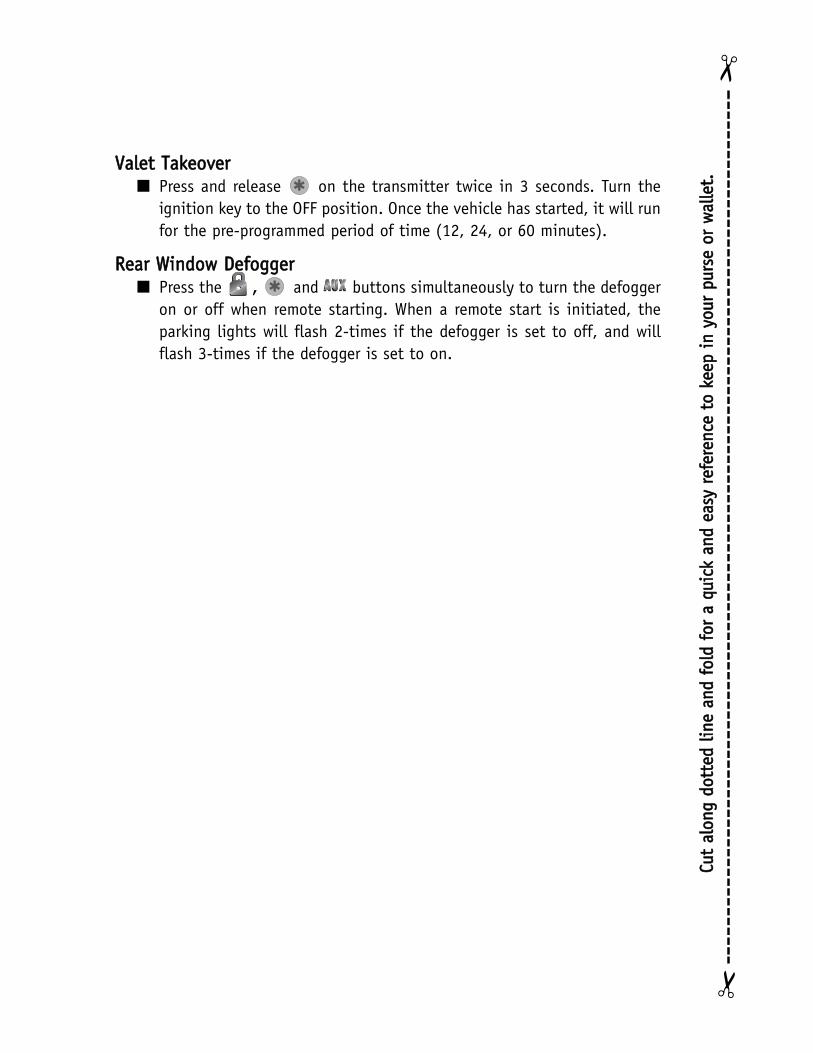
VVaalleett TTaakkeeoovveerr■ Press and release on the transmitter twice in 3 seconds. Turn the
ignition key to the OFF position. Once the vehicle has started, it will runfor the pre-programmed period of time (12, 24, or 60 minutes).
RReeaarr WWiinnddooww DDeeffooggggeerr■ Press the , and buttons simultaneously to turn the defogger
on or off when remote starting. When a remote start is initiated, theparking lights will flash 2-times if the defogger is set to off, and willflash 3-times if the defogger is set to on.

TThhee ccoommppaannyy bbeehhiinndd tthhiiss ssyysstteemm iiss DDiirreecctteedd EElleeccttrroonniiccss
Since its inception, Directed Electronics has had one purpose, to provide consumerswith the finest vehicle security and car stereo products and accessories available. Therecipient of nearly 100 patents and Innovations Awards in the field of advanced electronictechnology, Directed Electronics is ISO 9001 registered.
Quality Directed Electronics products are sold and serviced throughout North Americaand around the world.
Call ((880000)) 227744--00220000 for more information about our products and services.
Directed ElectronicsVista, CA 92081
www.directed.com© 2005 Directed Electronics—all rights reserved
G562A 07-05
Directed Electronics is committed to delivering world class quality productsand services that excite and delight our customers.
![Induction of Retinoid X Receptor Activity and Consequent ... · 11H-indeno[1,2-c]isoquinolinedihydrochloride(AM6-36)wasfoundtoinduceRXRE-luciferaseactivities. AM6-36inhibitedCOX-2expressionandanchorage-independentgrowthwith12-O-tetradecanoylphorbol](https://img.dokumen.tips/doc/110x75/5e76936612e3632afb38a148/induction-of-retinoid-x-receptor-activity-and-consequent-11h-indeno12-cisoquinolinedihydrochlorideam6-36wasfoundtoinducerxre-luciferaseactivities.jpg)