Embed Size (px)
Citation preview

Division of Community Health Services“Afya Yetu, Jukumu Letu”
MINISTRY OF HEALTH
Facilitators Guide
COMMUNITY HEALTH VOLUNTEERS (CHVs)
7MODULE
WATER, SANITATION AND HYGIENE
Module 7 - WASH ed.indd 01Module 7 - WASH ed.indd 01 12/4/13 5:01 PM12/4/13 5:01 PM

Module 7 - WASH ed.indd 02Module 7 - WASH ed.indd 02 12/4/13 5:01 PM12/4/13 5:01 PM

Facilitators Guide
COMMUNITY HEALTH VOLUNTEERS (CHVs)
Module No. 7 Water, Sanitation and Hygiene
This publication is made possible by the generous support of the Government of Kenya and United States Agency for International Development (USAID). The contents do not necessarily refl ect the views of USAID, the United States Government or the Japanese Government.
June 2013
Module 7 - WASH ed.indd 03Module 7 - WASH ed.indd 03 12/4/13 5:01 PM12/4/13 5:01 PM

AICAD The African Institute for Capacity Development
AMREF African Medical Research Foundation
CHEW Community Health Extension Worker
CHSFP Community Health Strategy Focal Person
CHV Community Health Volunteers
CLTS Community Led Total Sanitation
DCHS Division of Community Health Services
FHI 360 Family Health International
JICA CHS Japan International Corporation Agency- Community Health Strategy project
MDGs Millennium Development Goals
MOH Ministry of Health
NGO Non-Governmental Organization
NHSSP National Health Sector Strategic Plan
PET Polyethylene Terephthalate
PVC Polyvinyl chloride
SODIS Solar Water Disinfection
STI Sexually Transmitted Infections
TB Tuberculosis
UNICEF United Nations Childrens Fund
USAID United States Agency for International Development
UTI Urinary Tract Infection
WASH Water, Sanitation and Hygiene
List of Abbreviations
Module 7 - WASH ed.indd 04Module 7 - WASH ed.indd 04 12/4/13 5:01 PM12/4/13 5:01 PM

FACILITATORS GUIDE | COMMUNITY HEALTH VOLUNTEERS | MODULE NO. 7 | WATER, SANITATION AND HYGIENE i
Table of Contents
List of Abbreviations
Foreword ii
Preface iii
Acknowledgements iv
Contributors 1
Introduction and Purpose 2
Module 7:Water, Sanitation and Hygiene 2
Unit 1Water Safety 5
Importance of Water for Health 7
Improving Water quality in the Community 8
Causes of Water Contamination and Health Problems caused by Unsafe Water 9
Water Treatment at Household Level 17
Water Treatment Methods 19
Safe Water Storage 22
Unit 2Sanitation 25
Purpose and Objectives of this Unit 26
Defi nition of Sanitation 26
Components of Sanitation and the Sanitation Ladder 27
Health Problems Caused by Poor Sanitation 37
Environmental Sanitation 38
Unit 3 Hygiene 41
Purpose and Objectives of this Unit 42
Defi nition of Hygiene 42
Types of Hygiene 43
Handwashing 45
Home and Food Hygiene 61
Bibliography 65
Module 7 - WASH ed.indd iModule 7 - WASH ed.indd i 12/4/13 5:01 PM12/4/13 5:01 PM

ii FACILITATORS GUIDE | COMMUNITY HEALTH VOLUNTEERS | MODULE NO. 7 | WATER, SANITATION AND HYGIENE
Foreword
Health is a major component in the socio-economic development of any community. Indeed, it is not only a right but also a responsibility for all. Promotion of good health at diff erent levels of society is the responsibility of all individuals, families, households, and communities. Kenya has embraced the community strategy to enable communities to improve and maintain a level of health that will enable them to participate fully in national development towards the realisation of Vision 2030.
Extensive consultations among various departments, divisions and stakeholders marked the development process of the Community Health Volunteer (CHV) Curriculum and this Water, Sanitation and Hygiene (WASH) manual. The inputs from the diff erent groups was harmonised, and has informed the production of this manual.
This document will assist the Ministry of Health and the Division of Community Health Services in achieving its strategic objectives as outlined in the National Health Sector KHSSP3 and towards the attainment of Millennium Development Goals (MDG) targets. It will be used to administer WASH training through well-trained Community Health Extension Workers (CHEW).
In having a harmonised training manual, health managers will be able to guide CHVs to effi ciently off er services to communities, linking them to care and referral. This is expected to boost awareness of availability of preventive and promotive services to the communities, increased access and uptake of services.
On behalf of the Ministry of Health, I wish to thank USAID WASHPlus/FHI 360, UNICEF and JICA CHS project who provided fi nancial and technical support, and all other contributors, reviewers and editors who worked tirelessly to produce this manual. They made the preparation of this manual for the training of Community Health Volunteers possible. I thank IntraHealth for supporting and following up on this work which included the provision of the consultant who has facilitated the production of this manual.
I am confi dent that the implementation of this manual will help us address the issue of equitable access to primary health services and by so doing, bring about a much improved status for all Kenyans that will be refl ected in robust positive health indices.
Mark Bor, MBSPermanent SecretaryP.S, Ministry of Public Health and SanitationMinistry of Health
Module 7 - WASH ed.indd iiModule 7 - WASH ed.indd ii 12/4/13 5:01 PM12/4/13 5:01 PM

FACILITATORS GUIDE | COMMUNITY HEALTH VOLUNTEERS | MODULE NO. 7 | WATER, SANITATION AND HYGIENE iii
Preface
One of the dominant themes in health policy and planning today is the need for interventions based on sound evidence of eff ectiveness. The responsibility of ensuring programmes are consistent with the best available evidence must be shared between providers, policy makers and consumers of services.
CHVs have been major players in the implementation of primary healthcare since the 1980s, and still continue to play a critical role in mobilising communities in taking care of their health, and providing basic healthcare at community level. To enable CHVs be more eff ective and effi cient in Water, Sanitation and Hygiene – there is need for appropriate training, not only in community mobilisation but also in the assessment of health-related issues in the community, and identifi cation of appropriate actions at that level. Such training needs to be well planned and implemented using a standard training that takes into account the level of operation and capacity of CHVs. This also requires the support of well-trained and informed trainers and supervisors from the formal healthcare system.
This training is meant to assist the healthcare system at all the four tiers to operationalize the community strategy by providing appropriate training for CHVs to enable them take charge of appropriate interventions at tier 1. The Government of Kenya is committed to supporting community health initiatives this way, and accelerating the achievement of the current KHSSP III goals, MDGs and providing support to Vision 2030.
The CHV training is organised in Modules which should be applied incrementally to enable the CHVs develop adequate capacity for working with communities. Specifi cally, the training covers two sections:
l Section One: Basic Modules
l Section Two: Technical Modules
This module on WASH is the seventh module to be developed after the six basic modules.
It is my hope that all stakeholders in community health will utilise this manual to train CHVs in order to standardise provision of healthcare to our communities.
Dr. Kepha Ombacho, MBSHead, Department of Environmental HealthMinistry of Health
Module 7 - WASH ed.indd iiiModule 7 - WASH ed.indd iii 12/4/13 5:01 PM12/4/13 5:01 PM

iv FACILITATORS GUIDE | COMMUNITY HEALTH VOLUNTEERS | MODULE NO. 7 | WATER, SANITATION AND HYGIENE
Acknowledgements
The development of this Facilitators Manual for training Community Health Volunteers has been fi nanced and technically supported by USAID through WASHPlus/FHI 360 and IntraHealth/Capacity project. For this, the ministry records deep appreciation and gratitude.
The development of the Manual was preceded by extensive discussion by partners, stakeholders and staff from diff erent departments in the Ministry of Health (MOH) as well as the Ministry of Medical Services. This culminated in the Technical working Group’s retreat for the validation of this facilitators’ manual for training Community Health Volunteers. Sections of this document have been adapted from MOH/USAID/WASHPlus Training Manual for Community Health Workers on WASH-HIV Integration. The following departments and divisions participated in the development of this manual: Community Health Services, Malaria, Environmental Health, Nutrition, Oral Health, Child and Adolescents Health, NASCOP, Reproductive Health, TB and Lung Diseases, Departments of Health Promotion, Primary Health Care, Human Resource and Training, Divisions of Vaccines and Immunization, Disease Surveillance and Response and, Non-Communicable Diseases. Our appreciation goes to partners such as USAID WASHPlus/FHI 360, UNICEF, AMREF and JICA CHS project who gave fi nancial and technical support.
We also recognize those who may not have participated directly in the drafting of this manual but who rendered services in support of the teams that helped in its realization. Last but not least, we thank communities who shared their experiences that informed the development of this manual.
Special thanks are due to the participants at the development of the Community Health Volunteers training manual workshop held at the Nakuru Resort in March 2012 and many meetings at AICAD. Many Thanks to Ms. Akiko Chiba of JICA CHS project, the Capacity Unit members Mr. S.N. Njoroge, Ms. Jane Koech and Mr. Kenneth Ogendo as well as the division staff who sacrifi ced to develop this manual.
Dr James MwitariHead, Division of Community Health ServicesMinistry of Health
Module 7 - WASH ed.indd ivModule 7 - WASH ed.indd iv 12/4/13 5:01 PM12/4/13 5:01 PM

FACILITATORS GUIDE | COMMUNITY HEALTH VOLUNTEERS | MODULE NO. 7 | WATER, SANITATION AND HYGIENE 1
7MODULE
Contributors
David K. Njoroge MOH-HRD
Akiko Chiba JICA CHS Project
John O Osir MOH-CHEW
Ben Lodung’okiok MOH-CHEW
Jacob Kioko MOH-CHEW
Josephine M. Nduva MOH-CHEW
Nickson V. Ouma MOH-CHEW
Georgiadis G. Mwambia MOH-CHEW
Tarcisio Nakuo Samburu CHSFP
Rhoda M. Makato Makueni CHSFP
Sammy Kamwaro Kasarani CHSFP
Rachel Kiiru Nairobi CHSFP
Githinji Miginyo Nyeri CHSFP
Dr James Mwitari MOH-DCHS
Samuel G. Kiogora MOH-DCHS
Jane Koech MOH-DCHS
Various stakeholders and reviewers provided technical reviews and suggestions to improve this module.
Following all input, this module was fi nalized. We acknowledge these contributors.
Clare Mwangi MOH-DCHS
Kenneth Ogendo MOH-DCHS
Anne Thitu MOH-DCHS
Samuel N. Njoroge MOH-DCHS
Peter Wanjohi MOH Department ofEnvironmental Health
Dr John Kariuki MOH Department of Environmental Health
Dr Kepha Ombacho MOH Department of Environmental Health
Benjamin Murkomen MOHDepartment of Environmental Health
Josephat Mutua Division of Child and Adolescent Health
John Kagira USAID WASHPlus/FHI 360
Evelyn Makena USAID WASHPlus/FHI 360
Dennis C. Langat USAID WASHPlus/FHI 360
Module 7 - WASH ed.indd 1Module 7 - WASH ed.indd 1 12/4/13 5:01 PM12/4/13 5:01 PM

2 FACILITATORS GUIDE | COMMUNITY HEALTH VOLUNTEERS | MODULE NO. 7 | WATER, SANITATION AND HYGIENE
7MODULE
7Module 7Water, Sanitation and Hygiene
Key Community Practices addressed in this module
Roles and Responsibilities of CHVs in this module
Reference
Number of Units
Methodology
l Understanding the sources of water in the community
l Understanding sources of water contamination
l Protection of water sources
l Understanding the water treatment and practice methods
l Safe water storage
l Hand washing with soap, tippy taps, leaky tin practices
l Proper use of pit latrines and waste disposal
l Vector control for vector borne diseases
l To carry out health promotion activities including demonstration on all practices mentioned above in their communities e.g. Community Led Total Sanitation (CLTS)
l To identify water sanitation and hygiene related diseases and to negotiate improved practices
l To identify root causes of the water and sanitation concerns in the community and their solutions
Wash Manuals e.g. wash modules
Three
1. Water safety
2. Sanitation
3. Hygiene
Role-play, demonstrations, group discussions, stories, brainstorming and mini lectures
Purpose The purpose of this module is to equip Community Health Volunteers with knowledge and skills in water safety, sanitation and hygiene.
Introduction
2 FACILITATORS GUIDE | COMMUNITY HEALTH VOLUNTEERS | MODULE NO. 7 | WATER, SANITATION AND HYGIENE
Module 7 - WASH ed.indd 2Module 7 - WASH ed.indd 2 12/4/13 5:01 PM12/4/13 5:01 PM

FACILITATORS GUIDE | COMMUNITY HEALTH VOLUNTEERS | MODULE NO. 7 | WATER, SANITATION AND HYGIENE 3
7MODULE
UNIT 1WATER SAFETY
Module 7 - WASH ed.indd 3Module 7 - WASH ed.indd 3 12/4/13 5:01 PM12/4/13 5:01 PM

4 FACILITATORS GUIDE | COMMUNITY HEALTH VOLUNTEERS | MODULE NO. 7 | WATER, SANITATION AND HYGIENE
7MODULE
Module 7 - WASH ed.indd 4Module 7 - WASH ed.indd 4 12/4/13 5:01 PM12/4/13 5:01 PM

FACILITATORS GUIDE | COMMUNITY HEALTH VOLUNTEERS | MODULE NO. 7 | WATER, SANITATION AND HYGIENE 5
7MODULE
Unit 1
WATER SAFETY
Objectives: By the end of the unit, the participants will be able to:
l Identify water sources and the ways of improving water quality
l Identify water contaminants and contamination routes
l Explain how to prevent water contamination
l Explain and demonstrate how to use diff erent methods of making water safe according to the situation
l Explain the dangers of using contaminated water.
Duration: · 7 hours 40 minutes
Methodologies: Brainstorming, discussion, demonstration and role-play.
Materials: Newsprint, Felt/Marker pens, Masking tape, Newspaper cuttings, Pens, Notebooks, Training/Demonstration materials – Chlorine, Buckets, Sticks/Mwiko.
Unit Session Plan
Duration Topics Methodology
20 min Purpose of this unit Story and Objectives of this unit
10 min Importance of Water for Health Brainstorming
2 hrs Improving Water quality in the Community Discussion and Group Work (Village Mapping)
2 hrs Causes of Water Contaminations Group Work and and Protection of Water Sources and Discussion health problems caused by unsafe water
40 min Water Treatment at Household Level Discussion and Demonstrations
2 hrs Demonstration of Water Treatment Methods Demonstration
30 min Safe Water Storage Group Work
Module 7 - WASH ed.indd 5Module 7 - WASH ed.indd 5 12/4/13 5:01 PM12/4/13 5:01 PM

6 FACILITATORS GUIDE | COMMUNITY HEALTH VOLUNTEERS | MODULE NO. 7 | WATER, SANITATION AND HYGIENE
7MODULE
ACTIVITIES AND FACILITATION STEPS
R Activity 1:
PURPOSE OF THIS MODULE AND OBJECTIVES OF THIS UNIT (20 MIN)
Starter Story to Learn Purpose of This Module and Objectives of this Unit
Read the following story of Timothy.
Timothy’s story
Njoki lived in the village of Kamwaki in Central province, Kenya, with her young son Timothy. He was a happy and healthy child until recently.
In their village, water was pumped up from a deep borehole. A development group had built the well and pumps many years before. Once in a while a part of the pump would break, but one of the development workers always knew how to repair it or could buy a new part. But now the development workers are gone from the region. There is no one left who knows how to repair the pump, and there is no money for new parts.
When the pump broke again, Njoki’s village had to rely on a water hole far from the village. The water hole, also used by many animals, was contaminated with, germs, and parasites (worms). Timothy soon became very sick with severe, watery diarrhea. He became very weak and dehydrated. Njoki had no money to take her son to the health centre many hours away. Within a few days, Timothy died.
Ask participants, ”Why did Timothy die?” and discuss and identify the chain of causes of his death.
The following points should be answered during the discussion.
l What caused Timothy’s death?
l Why did he have diarrhea?
l Why didn’t Timothy’s family have enough safe water?
l Why didn’t Njoki make the water safer to drink?
l Ask participants whether there are similar situations in their community and what they want to learn to improve the situations.
UNIT 1 : WATER SAFETY
4
Module 7 - WASH ed.indd 6Module 7 - WASH ed.indd 6 12/4/13 5:01 PM12/4/13 5:01 PM

FACILITATORS GUIDE | COMMUNITY HEALTH VOLUNTEERS | MODULE NO. 7 | WATER, SANITATION AND HYGIENE 7
7MODULE
R Activity 2:
IMPORTANCE OF WATER FOR HEALTH (10 MIN)
Brainstorm on Importance of Water for Health
Ask participants, ”Is water important to health? Why?”
As you list down their responses, check whether the key points in the following box are mentioned by them or not and if not, add as you summarize their responses.
Key points: Water for Health
Water is essential for life. We need it, as do the animals and plants that we depend on for our survival. In communities that lack adequate water, many health problems arise.
l Without water, people cannot grow enough food to eat, leading to malnutrition and the many health problems that go along with it
l Infections of the eyes and skin arise when people cannot use water to bathe. Other illness also spreads more quickly when people cannot stay clean
Summarize the discussion and tell the participants. In this module we are going to learn to prevent water and hygiene related diseases by promoting safe water and personal and environmental hygiene practices in the community. So that, we can save the lives of children like Timothy and improve people’s quality of life.
Share the objectives of the unit with participants.
UNIT 1 : WATER SAFETY
Module 7 - WASH ed.indd 7Module 7 - WASH ed.indd 7 12/4/13 5:01 PM12/4/13 5:01 PM

8 FACILITATORS GUIDE | COMMUNITY HEALTH VOLUNTEERS | MODULE NO. 7 | WATER, SANITATION AND HYGIENE
7MODULE
Copy the table below on fl ipchart and complete the table with the responses from the participants. After completing the table, summarize.
Table to understand the amount of water a person needs/uses in a day
Drinking Food Personal Laundry Other Total preparation cleanliness & cleaning
Litres Litres Litres Litres Litres Litres
Summary on Amount of Water in Need for Life
A person needs 15 to 20 litres of water per day. But many people are forced to manage with much less. Other needs, such as sanitation, irrigation and watering livestock often require much more water than drinking, cooking and washing.
Community places such as schools and health centres may need more than the average amount of water used by one person in a household. Health centres, for example, should have at least 40 to 60 litres of water per day available for every person served.
l Group the participants according to their villages and tell them to draw their village map fi rst on the ground then transfer to the fl ipcharts
l The village map should include important landmarks such as roads, paths, houses and other buildings, farms, fi elds, toilets and sewer lines, dumping sites, water sources people usually use and unused water sources
l Allow two or three groups to present
l Discuss with participants whether there are any opportunities/ways to improve water supply in their communities using the maps and if there are, how?
R Activity 3:
IMPROVING WATER QUALITY IN THE COMMUNITY (2 HRS)
Discussion and Group Work of Village Mapping for Improving Water quality
Ask participants, “In which activities in your life do you need water? How many litres of water do you need for each activity per person?”
UNIT 1 : WATER SAFETY
Module 7 - WASH ed.indd 8Module 7 - WASH ed.indd 8 12/4/13 5:01 PM12/4/13 5:01 PM

FACILITATORS GUIDE | COMMUNITY HEALTH VOLUNTEERS | MODULE NO. 7 | WATER, SANITATION AND HYGIENE 9
7MODULE
R Activity 4:
CAUSES OF WATER CONTAMINATION AND HEALTH PROBLEMS CAUSED BY UNSAFE WATER (2 HRS)
Discussion on Causes of Water Contamination and the Ways of Protecting Water Sources (40 min)
l Group the participants in each village (use the same groups made in activity 1) and ask them to tell which water sources are safe and which are unsafe among the water sources indicated in the village map. Ask them to tell the reasons why they think the sources are safe or unsafe.
l Ask groups, “Are there any actions to protect water sources from contamination taken by the community and households? If yes, what are they?”
l If there are more possibilities to protect water sources from contamination other than the ones described by the groups, explore the possibilities with participants.
Key points: Improving Water Quality
The actions your community takes to improve water security depend on which problems are most urgent, or easiest to solve fi rst. What is important is to make a plan that addresses the root causes of the problems and satisfi es the needs of everyone in the community.
If water is scarce or diffi cult to get to, building rainwater catchment tanks, storage tanks or a piped water system may help bring water closer to the community. If this is not possible, can the work of collecting water be shared to make it fairer and easier for everyone? If there already is a water system, can the community improve it by improving collection methods, fi xing broken pipes and pumps, protecting water sources and conserving water? If it is a problem that should be resolved by the government, can the community solicit government support?
If the water is contaminated by germs, the source can be improved or the water can be treated to make it safe. The community can discuss which of these options will be easiest, most eff ective, and most sustainable over time.
If the water may be contaminated by chemicals the water should not be used until a water quality test can be done. If a test shows that the water is contaminated, more contamination should be prevented and another water source should be developed.
UNIT 1 : WATER SAFETY
Module 7 - WASH ed.indd 9Module 7 - WASH ed.indd 9 12/4/13 5:01 PM12/4/13 5:01 PM

10 FACILITATORS GUIDE | COMMUNITY HEALTH VOLUNTEERS | MODULE NO. 7 | WATER, SANITATION AND HYGIENE
7MODULE
Key points: Protecting Water Sources
1. Ground water - shallow well, borehole, springs
Fencing, tree planting, covering using slabs and cement lining, proper siting of toilets.
2. Rain water
Guttering system, cleaning the roofs and the gutters.
3. Surface water
Tree planting, fencing seating of toilets, avoid bathing in the rivers, avoid cultivating along the rivers, constriction of animals trough for drinking water, avoid car wash near the rivers.
4. Piped water
Avoid illegal connections and vandalism.
R Activity 5:
Brainstorming and Sharing on Health Problems caused by Unsafe Water (1 hr 20 min)
Ask participants the following questions for brainstorming;
l Which health problems caused by unsafe water have you experienced and observed in your community?
l When do these problems happen most?
l Why do you think these problems happen in the particular seasons?
l What do you do to manage the health problems caused by unsafe water?
l Divide the participants into groups and ask them to draw a chart to explain how diarrhea diseases can spread
l Allow 3 or 4 groups to present and the others to input on the presentation.
UNIT 1 : WATER SAFETY
Module 7 - WASH ed.indd 10Module 7 - WASH ed.indd 10 12/4/13 5:01 PM12/4/13 5:01 PM
FACILITATORS GUIDE | COMMUNITY HEALTH VOLUNTEERS | MODULE NO. 7 | WATER, SANITATION AND HYGIENE 11
7MODULE
UNIT 1 : WATER SAFETY
An example of the chart showing how diarrhea disease spread
Module 7 - WASH ed.indd 11Module 7 - WASH ed.indd 11 12/4/13 5:01 PM12/4/13 5:01 PM

12 FACILITATORS GUIDE | COMMUNITY HEALTH VOLUNTEERS | MODULE NO. 7 | WATER, SANITATION AND HYGIENE
7MODULE
Share information in the following Resource Notes with the participants. Try to make the session as interactive as possible rather than lecturing.
Resource Notes on Diarrhea Diseases
Diarrhea diseases
Diarrhea, dysentery, cholera, and typhoid are caused by many kinds of germs carried by human waste, unsafe water, fl ies and insects, and on food. Diarrhea can be a sign of some kinds of worm and parasite infections. These illnesses may also be caused by poor sanitation and a lack of enough water for personal cleanliness.
Signs of diarrhea diseases
The most common sign of a diarrhea disease is frequent, watery stools. It may be accompanied by fever, headache, trembling, chills, weakness, and vomiting. Because there are many causes of diarrhea and dysentery, knowing what treatment to give depends on the kind of diarrhea.
These signs can help you know which diarrhea disease a person has:
l Cholera: diarrhea like rice water, severe intestinal pain and cramping, vomiting
l Typhoid: fever, severe intestinal pain and cramping, headache, constipation or diarrhea
l Giardia: diarrhea that appears greasy, fl oats and smells bad, gas and burps that smell like rotten eggs
l Dysentery: bloody diarrhea, fever, severe intestinal pain and cramping.
Management for diarrhea at tier 1
l Diarrhea is best treated by giving plenty of liquids and food. In most cases, no medicine is needed. These diarrhea diseases need special treatment
l Diarrhea is best treated with a rehydration drink/ORS, zinc sulphate, lots of fluids and easy-to-digest foods to replace nutrients lost through diarrhea. The CHV should refer all diarrhea cases to the health facility.
Prevention of diarrhea diseases
Because most diarrhea diseases are related to poor sanitation and hygiene, contaminated water and food, they are best prevented by protecting water sources and improving sanitation.
Ü
UNIT 1 : WATER SAFETY
Module 7 - WASH ed.indd 12Module 7 - WASH ed.indd 12 12/4/13 5:01 PM12/4/13 5:01 PM

FACILITATORS GUIDE | COMMUNITY HEALTH VOLUNTEERS | MODULE NO. 7 | WATER, SANITATION AND HYGIENE 13
7MODULE
Key points: Prevention of diarrhea diseases
l Do not drink water from unprotected sources
l Make water safe to drink by treating it
l Use toilets and wash hands with soap and running water after use
l Wash hands with soap and water before handling food
l Cook food well and cover to protect it from germs
l Clean baby feeding utensils and eating utensils with soap and clean running water after use and dry on a dish rack
Resource Notes on health problems caused by unsafe water
WORM INFESTATIONSome worms and other parasites that live in surface water can get into people’s intestines and cause diseases. The larger ones can be seen, but most cannot.
Stepping into or washing with contaminated water, drinking this water, or eating uncooked shellfi sh or plants can pass these worms and parasites to people.
HOOKWORMSThe hookworm is a parasite that lives in the small intestine of its host, which may be a mammal such as a dog, cat, or human.
Hookworms are much smaller than the giant roundworm The most signifi cant risk of hookworm infection is anemia, secondary to loss of iron (and protein) in the gut. The worms suck blood voraciously and damage the wall of the stomach.
Ü
UNIT 1 : WATER SAFETY
R Activity 6:Ask participants to share their experiences of worm infestation in their community and ask the following questions for brainstorming.
l Who are aff ected?
l What are the signs of worm infestation?
l What steps do the community take to address the worm problems?
l How can worm infestation be prevented in their community?
As you list down their responses, share information in the following resource notes with the participants.
Module 7 - WASH ed.indd 13Module 7 - WASH ed.indd 13 12/4/13 5:01 PM12/4/13 5:01 PM

14 FACILITATORS GUIDE | COMMUNITY HEALTH VOLUNTEERS | MODULE NO. 7 | WATER, SANITATION AND HYGIENE
7MODULE
Hookworm is a leading cause of maternal and child morbidity in the developing countries. In susceptible children, hookworms cause intellectual, cognitive and growth retardation, intrauterine growth retardation, prematurity, and low birth weight among newborns born to infected mothers.
Signs and SymptomsThere are no specifi c symptoms or signs of hookworm infection. However, they give rise to a combination of intestinal infl ammation and anaemia. Larval invasion of the skin might give rise to intense, local itching, usually on the foot or lower leg, which can be followed by lesions that look like insect bites, can blister (“ground itch”), and last for a week or more.
PreventionThe infective larvae develop and survive in an environment of damp dirt, particularly sandy and loamy soil. They cannot survive in clay or muck.
The main lines of precaution are those dictated by sanitary science:
l Do not defecate in places other than latrines, toilets etc.
l Do not use human excrement or raw sewage or untreated ‘night soil’ as manure/fertilizer in agriculture
l Do not walk barefoot in the toilet or in areas with human or animal feaces
l Deworm pet dogs.
ROUNDWORMSRoundworms are parasites that can infect people. They usually live in the intestines. There are diff erent kinds of worms that can cause infection, and they can range in length from 1 millimeter to 1 meter.
Most often, eggs or larvae live in the soil and get into the body when you get them on your hands and then touch your mouth. Some can also get into the body through the skin.
Like other parasitic diseases, roundworm infections happen more often in warm, tropical climates. Ascariasis is the most common roundworm infection, and aff ects as many as 1 billion people worldwide.
Signs and SymptomsThe signs and symptoms of roundworm infection include:
Ascariasis
l Cough
l Shortness of breath
l Abdominal pain
l Nausea and diarrhea
l Blood in the stool
UNIT 1 : WATER SAFETY
Module 7 - WASH ed.indd 14Module 7 - WASH ed.indd 14 12/4/13 5:01 PM12/4/13 5:01 PM

FACILITATORS GUIDE | COMMUNITY HEALTH VOLUNTEERS | MODULE NO. 7 | WATER, SANITATION AND HYGIENE 15
7MODULE
l Weight loss
l Fatigue
l Presence of the worm in vomit or stool.
Risk FactorsThe risk factors for roundworm infection include:
l Living in or visiting a warm, tropical climate
l Poor sanitation
l Poor personal hygiene
l Crowded conditions, such as day care or institutional settings
l Weakened immune system
l Malnutrition
l Eating undercooked meat
l Eating dirt or clay -- children tend to become infected this way
l Contact with animal faeces
l Multiple insect bites.
DiagnosisDiagnosing roundworm infection involves fi nding out which worm is causing the infection. If you have lived in or visited an area where these parasites are common, your doctor may suspect an infection. If a worm passes through the mouth or rectum, take it to your doctor so it can be identifi ed.
Preventive CareIt is easier to prevent roundworms than to cure them. The steps to preventing roundworm infection include:
l Practice good personal hygiene. Wash hands and avoid contact with faecal matter
l Don’t eat uncooked or unwashed fruits and vegetables
l Stay away from mosquito or fl y-infested areas; don’t drink unfi ltered water, and don’t touch the soil in areas where roundworm infections are common
l Wear protective clothing, and use insect repellant
l Cook or freeze meat thoroughly
l Keep children away from pet faeces
l Ask a veterinarian about deworming pets
l Public health measures include improving general sanitation, especially sewage disposal, and reducing mosquito and fl y populations.
TreatmentThe main treatment for roundworm infections are medications that kill parasites (deworming).
UNIT 1 : WATER SAFETY
Module 7 - WASH ed.indd 15Module 7 - WASH ed.indd 15 12/4/13 5:01 PM12/4/13 5:01 PM

16 FACILITATORS GUIDE | COMMUNITY HEALTH VOLUNTEERS | MODULE NO. 7 | WATER, SANITATION AND HYGIENE
7MODULE
GUINEA WORMGuinea worm is a long, thin worm that lives under the skin and makes a painful sore on the body. The worm, which looks like a white thread, can be over a meter long. Guinea worm is found in parts of Africa, India, and the Middle East.
Signs of Guinea Worml A painful swelling develops on the ankle, leg, or
elsewhere on the body
l After a few days to a week a blister forms which soon bursts open and forms a sore. This often happens when standing in water or bathing. The end of a white thread-like guinea worm can be seen poking out of the sore. The worm works its way out of the body over the next week
l If the sore gets dirty and infected or if the worm is broken by trying to pull it out, the pain and swelling spread and walking becomes impossible
l To treat guinea worms refer to a health facility.
BLOOD FLUKES (Schistosomiasis, Bilharzia)
This infection is caused by a kind of worm that gets into the bloodstream after washing or swimming in contaminated water. The illness can cause serious damage to the liver and kidneys, and may lead to death after months or years.
Sometimes there are no early signs. A common sign in some areas is blood in the urine or bloody stools. In areas where this illness is very common, people with only mild signs or belly pain should be tested.
To prevent Blood FlukesBlood Flukes do not spread directly from person to person. Part of their life, they must live inside a certain kind of small water snail. Blood Flukes are preventable if people follow the most basic preventive step: never urinate or defecate in or near water.
Bilharzia is best treated with medicines; refer to a health facility.
TO PREVENT WORM INFESTATIONl Reduce contact with contaminated water
l Keep animal waste out of water
l Use toilets and wash hands with soap or ash and running water after using the toilet
l Cook food well and cover it to protect it from germs
l Trim fi ngernails and wash hands at critical times
l Wear shoes to prevent worms from entering through the feet
l Settle, fi lter, and treat drinking water
UNIT 1 : WATER SAFETY
Module 7 - WASH ed.indd 16Module 7 - WASH ed.indd 16 12/4/13 5:01 PM12/4/13 5:01 PM

FACILITATORS GUIDE | COMMUNITY HEALTH VOLUNTEERS | MODULE NO. 7 | WATER, SANITATION AND HYGIENE 17
7MODULE
R Activity 7:
WATER TREATMENT AT HOUSEHOLD LEVEL (40 MIN)
Discussion on Water Treatment at Household
l Ask the participants to raise their hands if they don’t treat water in their household, fi nd out reasons why they do not treat water in their household.
l Ask the participants to raise their hands if they treat water in their household, and ask them why they treat water in their household.
l Emphasize on the importance of water treatment at the household level as explained in the following key points.
Ask the participants, “How do you treat water at your home? Why do you use the method to treat water?” Copy the table below on a fl ipchart and complete the table with the responses from the participants.
Key points: Importance of Water Treatment at Household Level
Some sources are not as safe as they seem. Just because clear water fl ows from pipes, tanks, or wells does not mean it is not contaminated or does not need treatment
l Rainwater can be contaminated due to dirty roofs or tanks
l Water by vendors can never be trusted as safe
l Piped water may be unsafe due to breakages and illegal tapping
l The safest policy is to treat all drinking water at household level
How do you treat water at your home? Why do you use the method to treat water?
UNIT 1 : WATER SAFETY
As you list down their responses, check whether the points in the following table are mentioned. if not, add as you summarize their responses.
Module 7 - WASH ed.indd 17Module 7 - WASH ed.indd 17 12/4/13 5:01 PM12/4/13 5:01 PM

18 FACILITATORS GUIDE | COMMUNITY HEALTH VOLUNTEERS | MODULE NO. 7 | WATER, SANITATION AND HYGIENE
7MODULE
Considerations for Choosing Appropriate Water Treatment Methods in Particular Settings
Water TreatmentMethods
Boiling water
Chlorination
Filtration
SODIS
Advantages
l Some or many families are already boiling water.
l Fuel is easily available and free or aff ordable.
l Fuel burns relatively cleanly &/or young children are not greatly exposed to smoke from fi re (because well-ventilated, children kept at distance, etc.).
l Mothers have time to boil.
l Commercial product available, accessible, and aff ordable.
l Instructions for use are clear and understood.
l People can understand and are motivated to follow simple instructions.
l Residual chlorine protects water up to 7 days if covered and up to 24 hours if uncovered.
l Eff ective fi lters are available, accessible, and aff ordable.
l Instructions for use are clear and understood.
l The family has time to use and maintain the fi lter properly.
l Climate is mostly sunny.
l Families either can fi nd or purchase safe (PET) plastic bottles or program can provide bottles.
l People can understand and are motivated to follow simple instructions.
l A cadre of community-based workers can monitor solar disinfection.
Disadvantages
l Few families already boil drinking water.
l The fuel used is not easily available unless purchased.
l Taking fuel is causing deforestation and fl ooding.
l Burning fuel creates lots of smoke that babies are exposed to (indoor burning, babies near fi re, poor ventilation).
l Mothers are already too busy to boil.
l Families don’t take suffi cient care in storing and retrieving their water.
l No commercial product is available, accessible, and aff ordable.
l Instructions are not clear and understood.
l Bleach or other chlorine products are sometimes or often sold diluted or concentration is not consistent.
l People have trouble following simple instructions.
l Families dislike taste of properly chlorinated water.
l The water is turbid.
l Eff ective fi lters are not available, accessible, and aff ordable.
l Instructions for use are not clear and understood.
l Mothers are already too busy to use and maintain fi lter.
l Climate is usually cloudy and rainy.
l Many families cannot purchase safe (PET) plastic bottles, nor can they get them for free.
l People have trouble following simple instructions.
l Families need to treat large volumes of water.
l No cadre of community-based workers can monitor correct solar disinfection.
UNIT 1 : WATER SAFETY
Module 7 - WASH ed.indd 18Module 7 - WASH ed.indd 18 12/4/13 5:01 PM12/4/13 5:01 PM

FACILITATORS GUIDE | COMMUNITY HEALTH VOLUNTEERS | MODULE NO. 7 | WATER, SANITATION AND HYGIENE 19
7MODULE
l Discuss with the participants which water treatment methods are most appropriate in their community according to how much water they need, what it is contaminated with, and what resources are available
l Discuss with the participants how to promote water treatment at household in their community refer to module 3 of the guide for training.
R Activity 8:
WATER TREATMENT METHODS (2 HRS)
Demonstration of Water Treatment Methods
To demonstrate using chlorine commercial products we need to do the following:
1. Skip any treatment methods that are not feasible in CHV communities. For example, if no chlorine products or fi lters are available, do not teach those methods, unless your program will make those products available.
2. If a shortage of wood or other fuel for boiling water exists, skip the session on boiling (as long as other feasible alternatives exist). Consider and discuss the sources of safe and unsafe water in that community. Talk about issues of smell and purity/ quality of the water.
3. In addition to the products listed above, PUR® may be available. PUR is a complete water treatment product—it chlorinates as well as acts as a fl occulent to clarify turbid water and remove heavy metals. It requires some investment of time on the part of the user, and the waste collected from the process must be properly disposed of (in a latrine or other dedicated area), but it is a very eff ective method to use, especially in places where turbidity is a signifi cant problem. PUR is quite expensive relative to a chlorine only product. Some products come in both tablet and liquid form. The dosing recommendations and instructions are unique to each product. Make note of what is commonly available and used and be prepared to discuss/demonstrate both types if necessary.
4. Compare how water is currently being treated in the community and the ideal way of doing it. Generate a discussion around it and understand why this practice is happening and not the ideal and how best you can address the issues raised around treating the water.
To demonstrate using SODIS (Solar Water Disinfection) products we need the following items
1. SODIS should be off ered as an alternative only if PET plastic bottles are widely available. You can identify PET bottles because, unlike PVC-type plastic bottles, they burn easily (with a sweet smell). If PVC bottles are also available, the participants need to understand that they should not be used
UNIT 1 : WATER SAFETY
Module 7 - WASH ed.indd 19Module 7 - WASH ed.indd 19 12/4/13 5:01 PM12/4/13 5:01 PM

20 FACILITATORS GUIDE | COMMUNITY HEALTH VOLUNTEERS | MODULE NO. 7 | WATER, SANITATION AND HYGIENE
7MODULE
for SODIS. Glass bottles can be used for SODIS, as long as they have a reusable lid. SODIS bags are available in some communities. Find out whether participants come from communities that have them. If not, do not discuss, but tell participants that they exist.
2. Using the word “germ” will depend on the audience’s acceptance of the concept. Some CHV audiences will not understand “germs,” so adjust your vocabulary. Some cultures use the term “small bugs,” for example.
3. If the sun is not shining, ask participants to tell you what it feels like when they are out in the bright sun, or what happens when they touch metal that has been in the sun, etc. Reinforce that the sun’s heat and rays are strong enough to make water safe to drink if the process is done correctly. Do not use scratched bottles because scratches will block sun rays from penetrating the water.
l For Accidental Chlorine/Water Guard contact with eye/skin, wash with clean water and soap
l Always Check validity period of Water Guard before use
Water Treatment
Filtering through cloth
Chlorinate
Boil
Settling/Decanting
Do not drink water from unprotected sources
UNIT 1 : WATER SAFETY
How do you treat water?
SODIS
Module 7 - WASH ed.indd 20Module 7 - WASH ed.indd 20 12/4/13 5:01 PM12/4/13 5:01 PM

FACILITATORS GUIDE | COMMUNITY HEALTH VOLUNTEERS | MODULE NO. 7 | WATER, SANITATION AND HYGIENE 21
7MODULE
Treatment, Safe Storage and Handling of Drinking WaterAsk the participants to state how they currently handle and treat drinking water in their community and what actions have been put in place by the community for the safe treatment and handling of drinking water. Compare their answers with the points in the table below.
Current Practice
Some parts of the country have limited access to water, so they get water from water kiosks/vendors who get from commercial boreholes.
Water is not treated before consumption because:
– Rain and spring water is blessed
– Water is clean early in the morning
– Smell and taste of treated water is not desirable
– Expensive (boiling)
– Can’t access treatment products
– No knowledge of treatment options
– Borehole considered safe
– Piped water considered safe
– Bought water supposed to be safe.
l People store water in jerrycans or clay pots (agulu or da‐pii) that are usually covered.
l People use 100 gallon drums to store water then they dip containers into the drum for diff erent uses
l People consider treating drinking water a burden when they have to fi ll a 20 litre jerrycan and then treat it
l Cups are often used to dip into water when it is served
l People clean water containers with soap in the urban areas or with leaves and sand/ash in the rural areas
l People drink unsafe water outside the home e.g. in school, market places, church
Actions
l Drinking water source: use water from protected sources e.g. springs, water pans
l Treat water before drinking with one of the following methods:
– Water Guard – Chlorine Tablets (aqua tabs)
– Boiling – PUR (more expensive)
– SODIS
– Use chlorine pots for hand dug wells
l Use narrow necked containers or pots for storing drinking water
l Keep water container always covered
l Use one cup to draw/collect water to serve and use a separate clean cup for drinking
l Use jerrycan with tap or improvise by purchasing a tap and fi t it on it
l Pour water from jerrycan or clay pot directly to clean cup or jug
l Store water in covered jug or 5 litre jerrycan for children to use
l Construct a ladle with a long handle for drawing/retrieving water. Hang the ladle on the wall or place on top of water container OR
l Tie cup with string to container or put on reed (fi to) hanging in house
l Teach children to use the cup/ladle (kata)/fi to system
l Keep water container away from animals.
Dedicate smaller (10 or 20 litre) covered, narrow‐neck container to drinking water to allow treatment of only drinking water.
If water is turbid:
l Add ash/alum to water to help clear turbid water
l Use 3 pot system to clear water or let water stand overnight and pour in another container (straining system)
l Then treat water as above. Have separate water pans for animal and human consumption
l Carry treated drinking water from your home to wherever you go.
UNIT 1 : WATER SAFETY
Module 7 - WASH ed.indd 21Module 7 - WASH ed.indd 21 12/4/13 5:01 PM12/4/13 5:01 PM

22 FACILITATORS GUIDE | COMMUNITY HEALTH VOLUNTEERS | MODULE NO. 7 | WATER, SANITATION AND HYGIENE
7MODULE
R Activity 9:
SAFE WATER STORAGE (30 MIN)
Group Work on Important Tips on Safe Water Storage
l Ask participants, “What do we have to do with the treated water?
l Divide the participants in groups and ask them to write down important tips to prevent treated water from becoming contaminated during storage on fl ip chart. Give them 10 minutes for the activity
l Allow 2 or 3 groups to present or use gallery notes and the others to make inputs
l Compare with the key points below and let the participants discuss how to improve the water storage at household in their community.
Key Points: Water Storage
To prevent water from becoming contaminated during storage:
l Pour water out without touching the mouth of the container, or use a clean, long-handled dipper to take water out of the container. Do not let the dipper touch anything else, or it will contaminate the clean water when it is used again
l Empty and clean the container with hot water every 2 or 3 weeks
l Keep containers covered
l Keep drinking cups clean
l Never store water in containers that have been used for pesticides or toxic chemicals
l Do not treat more water than you need for short-term use, if possible. For drinking and preparing food, that is usually about 5 litres for each person each day
l Wash hand with soap before treating and pouring water
UNIT 1 : WATER SAFETY
Module 7 - WASH ed.indd 22Module 7 - WASH ed.indd 22 12/4/13 5:01 PM12/4/13 5:01 PM

FACILITATORS GUIDE | COMMUNITY HEALTH VOLUNTEERS | MODULE NO. 7 | WATER, SANITATION AND HYGIENE 23
7MODULE
UNIT 2SANITATION
Module 7 - WASH ed.indd 23Module 7 - WASH ed.indd 23 12/4/13 5:01 PM12/4/13 5:01 PM

24 FACILITATORS GUIDE | COMMUNITY HEALTH VOLUNTEERS | MODULE NO. 7 | WATER, SANITATION AND HYGIENE
7MODULE
Module 7 - WASH ed.indd 24Module 7 - WASH ed.indd 24 12/4/13 5:01 PM12/4/13 5:01 PM
FACILITATORS GUIDE | COMMUNITY HEALTH VOLUNTEERS | MODULE NO. 7 | WATER, SANITATION AND HYGIENE 25
7MODULE
Unit 2
SANITATION
Objectives: By the end of the unit, the participants will be able to:
l Understand what sanitation is
l Understand various components of sanitation
l Understand health problems caused by poor sanitation
l Understand factors hindering personal and environmental sanitation.
Duration: · 8 hours 15 minutes
Methodologies: Brainstorming, discussion, community-mapping, fi eld trips, demonstration and role-play.
Materials: Newsprint, Felt/Marker pens, Masking tape, Newspaper cuttings, Pens, Note books.
Unit Session Plan
Duration Topics Methodology
20 min Purpose of this unit Role play and Objectives of this unit
20 min Defi nition of Sanitation Brainstorming/ Discussion
4hr 5min Components of Sanitation Discussion and and Sanitation Ladders Demonstration
2 hrs Health Problems caused by Poor Sanitation Discussion, Group Work
1hr 30min Factors Hindering Environmental Sanitation Group Work, Discussion and Lecture
Module 7 - WASH ed.indd 25Module 7 - WASH ed.indd 25 12/4/13 5:01 PM12/4/13 5:01 PM

26 FACILITATORS GUIDE | COMMUNITY HEALTH VOLUNTEERS | MODULE NO. 7 | WATER, SANITATION AND HYGIENE
7MODULE
ACTIVITIES AND FACILITATION STEPS
R Activity 1:
PURPOSE AND OBJECTIVES OF THIS UNIT (20 MIN)
Story to Learn the Purpose and Objectives of this Unit
Ask two volunteers to role play the following story.
Two people walking
Two people were seen walking from a nearby market going to their homes. Along the way one person says that he/she would like to relieve him/herself and walks to a nearby bush, which is just above the community water spring.
Ask the participants the following questions:
l What did you see?
l What did you hear?
l Does it happen in our communities?
l Why does it happen in our community?
l When does it happen?
l What can we do about it?
R Activity 2:
DEFINITION OF SANITATION (20 MIN)
Ask participants what they understand by environmental sanitation.
As you list down their responses, check whether the key points in the following box are mentioned by them or not and if not, add as summarizing their responses.
UNIT 2 : SANITATION
4
Module 7 - WASH ed.indd 26Module 7 - WASH ed.indd 26 12/4/13 5:01 PM12/4/13 5:01 PM

FACILITATORS GUIDE | COMMUNITY HEALTH VOLUNTEERS | MODULE NO. 7 | WATER, SANITATION AND HYGIENE 27
7MODULE
Key points: Defi nition of Sanitation
It is a practice or behavior of keeping our surrounding clean and free from disease causing germs. It includes:
l Solid waste management
l Waste water management
l Insect vector control e.g. jiggers, mosquitoes cockroaches
l Human waste management
COMPONENTS OF SANITATION AND THE SANITATION LADDER (4 HRS 5 MIN)
Components of Sanitation
R Activity 3:Place the participants into three groups;
Group 1:
To list and explain the waste disposal methods at household level.
Group 2:
To list and explain waste water disposal methods at household level.
Group 3:
To list and explain insect vectors control methods at household level.
Ask each group to present their fi ndings after which you summarize with the following key points.
UNIT 2 : SANITATION
Module 7 - WASH ed.indd 27Module 7 - WASH ed.indd 27 12/4/13 5:01 PM12/4/13 5:01 PM
28 FACILITATORS GUIDE | COMMUNITY HEALTH VOLUNTEERS | MODULE NO. 7 | WATER, SANITATION AND HYGIENE
7MODULE
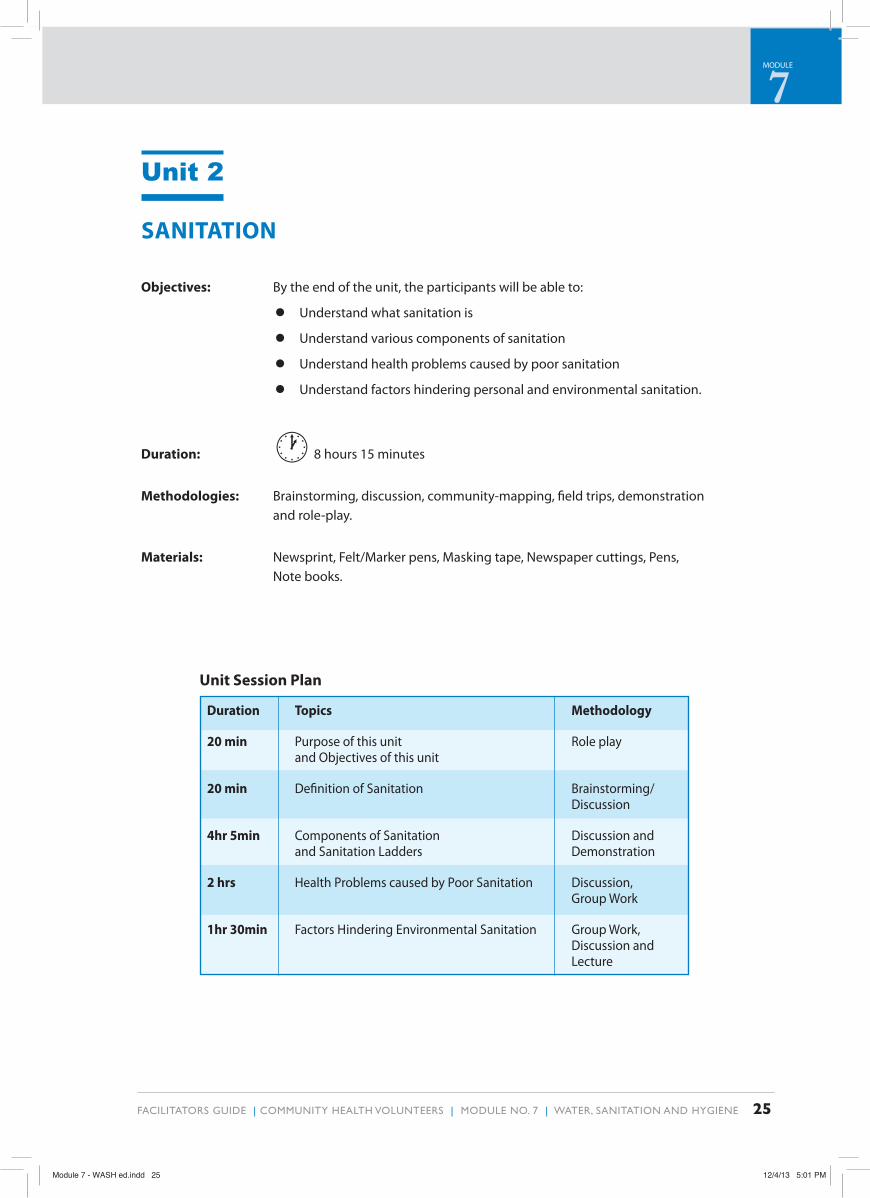
Key points: Components of Sanitation
The components of sanitation are grouped into four categories as follows:
1. Solid waste management under which we have:
a) Household wastes which can be managed by;
– Burning wastes such as papers and litter
– Burying the wastes that cannot burn
– Composting the waste that are easy to rot and be used as manure.
– Reuse of some wastes e.g. plastic bags, papers, metals etc.
2. Waste water management which is achieved through:
a) Discharging into kitchen garden
b) Discharging into a soak pit
c) Discharging into communal drains incase of towns
3. Insect vector control (cockroaches, bedbugs, jiggers, mosquitoes) this can be controlled by good housing and clean environment.
4. Human waste is disposed by use of a pit latrine and other ways:
a. Pit latrine
b. VIP latrine
c. Water closet
R Activity 4:
Ask participants what they understand by faeces disposal.
As you list down their responses, check whether the key points in the following box are mentioned by them or not and if not, add as summarizing their responses.
UNIT 2 : SANITATION
Module 7 - WASH ed.indd 28Module 7 - WASH ed.indd 28 12/4/13 5:01 PM12/4/13 5:01 PM

FACILITATORS GUIDE | COMMUNITY HEALTH VOLUNTEERS | MODULE NO. 7 | WATER, SANITATION AND HYGIENE 29
7MODULE
Two faeces disposal methods create a large risk of spreading diarrhoeal disease. These are never acceptable practices:
l Defecation in the compound by young children
l Defecation in the open—indiscriminately.
R Activity 5:How faeces can be spread (30 min)
Introduction (5 min)
Tell participants that during this session they are going to learn about how faeces can be spread, how they can be dangerous, and something about how people in the community dispose of their faeces. They will also learn about the sanitation ladder concept.
Climate Setter (5 min)
1. Ask participants to name some common defecation practices in the community (use the culturally appropriate word) and how people presently dispose of their faeces.
2. Record answers on a piece of fl ipchart paper. Ask their opinions about each answer. Do not belabor this discussion:
l What do you think about this practice?
l What are positive and negative aspects to the current practices?
Key points : Faeces Disposal
Faeces disposal practices include:
l Defecate in a small hole, then cover with earth (Cat’s method)
l A traditional pit latrine or basic ecosan solution
l An improved pit latrine with an improved slab or ecosan solution
l An improved pit latrine with ventilation
l Flush toilet with on-site disposal
l Flush toilet with sewage and waste water treatment
UNIT 2 : SANITATION
Module 7 - WASH ed.indd 29Module 7 - WASH ed.indd 29 12/4/13 5:01 PM12/4/13 5:01 PM

30 FACILITATORS GUIDE | COMMUNITY HEALTH VOLUNTEERS | MODULE NO. 7 | WATER, SANITATION AND HYGIENE
7MODULE
Large Group Discussion and Task (20 min)
1. Hold up the picture of the person openly defecating and ask participants:
l What happens when someone defecates in the open?
2. Take a few answers. Then ask:
l Where do the faeces go?
l What happens to them when it rains?
l How do people feel about stepping in faeces?
l Does the smell of faeces in the community bother people?
l What do people think about someone who defecates in open areas?
Complement the discussion by emphasizing that all faeces is potentially dangerous and needs to be “treated with care” because all faeces contain germs that can cause illnesses in people. This is why faeces should be deposited in a latrine or toilet where they cannot be transported by one of several possible routes—water, dirt, food, fl ies, or hands—into the mouths of other people. When someone sick defecates in the open, s/he is putting everyone at risk of catching the same illness.
3. Ask each table to write three or four actions that the community could take to help stop the spread of faeces.
4. When the tables are done, collect suggestions from around the room. Record answers on a fl ipchart. Open the discussion and let people add suggestions.
R Activity 6:The Sanitation Ladder (1hr 50 min)
Introduction (5 min)
Tell participants that during this session they are going to learn more about the sanitation ladder, look at actual community practices, and talk about ways to get the community members to properly dispose of (isolate) their faeces. In addition, they will review hand washing and cleaning practices with special attention to its importance after defecation.
Climate Setter (10 min)
1. Quickly review the diff erent steps on the sanitation ladder and ask where the participants think most community members are at the present time regarding faeces disposal.
Extend the conversation to talk about the faeces of babies, sick people, and animals and why it’s important to think about the correct disposal of these kinds of waste. Record answers on fl ipchart.
2. Ask participants what they think about these practices. Do not belabour this discussion or record the opinions.
UNIT 2 : SANITATION
Module 7 - WASH ed.indd 30Module 7 - WASH ed.indd 30 12/4/13 5:01 PM12/4/13 5:01 PM

FACILITATORS GUIDE | COMMUNITY HEALTH VOLUNTEERS | MODULE NO. 7 | WATER, SANITATION AND HYGIENE 31
7MODULE
Table Discussion (30 min)
1. Referring to the sanitation ladder list on the wall or the copies on the desk, ask the participants at each table to talk about the pros and the cons of a few methods of disposing of excreta and to record those on fl ipchart paper. (The number of methods per table will vary depending on the number of tables.)
2. When the tables have completed and posted their work, ask participants what they’ve begun to conclude about the steps on the ladder. Briefl y discuss the pros and cons of the diff erent methods.
3. Open the discussion by asking the participants how they might get community members to “move up the ladder”.
Encourage creative ideas.
Role Play and Discussion (30 min)
1. Pass around Assessment Cards and have two participants assume the roles of CHV and household member. Have the CHV assess where on the ladder the family is and practice negotiating how they could move up the ladder.
2. Ask participants to recall the most important things to remember when it comes to handling faeces (proper disposal of faeces and hand washing). Record answers.
3. Remind participants about how to wash their hands (based on what they remember from the hand washing sessions). Talk about “washing” with soap or ash, air drying, how long to wash, etc.
UNIT 2 : SANITATION
The steps on the sanitation ladder
1. Defecation in the open—indiscriminately (includes children defecating in compound).
2. A designated place in the open for defecation (not an acceptable option unless in an emergency setting).
3. Cat’s method (in a small hole and covered with earth).
4. A traditional pit latrine or basic ecosan solution (this option meets the Millennium Development Goal criteria for faeces disposal).
5. An improved pit latrine (generally means improved slab) or ecosan solution.
6. An improved pit latrine with ventilation.
7. Flush toilet with onsite disposal.
8. Flush toilet with sewage and waste water treatment.
On the ladder (in order from least acceptable [#1] to “best” practice [#8]):
Module 7 - WASH ed.indd 31Module 7 - WASH ed.indd 31 12/4/13 5:01 PM12/4/13 5:01 PM

32 FACILITATORS GUIDE | COMMUNITY HEALTH VOLUNTEERS | MODULE NO. 7 | WATER, SANITATION AND HYGIENE
7MODULE
The sanitation ladder idea is useful to help CHVs assess current faeces disposal practices and give them options for working with families to promote improved practices. The ladder indicates, from most dangerous to safest, the options for how people dispose of faeces. Using the ladder concept can help a family take small, incremental steps up the ladder. Adapt the ladder to use the diff erent steps from your community.
Contest: Creating Sanitation Ladders (30 min)
1. Provide pre-written pieces of paper with diff erent forms of faeces disposal methods to the participants, each getting a piece of paper. Pin one of the prepared cards on the back of each participant.
2. Let the participants move around the room to fi nd out what other members have as a method of faeces disposal.
3. In the process encourage participants to form a sanitation ladder according to the available members in the room, having the lowest level of the ladder as the head of the queue that the participants have formed.
4. The trainer will facilitate the discussion of the sanitation ladder as the participants stand in a queue, for them to explain how they made up their ladder and why.
5. Depending on the number of participants, there will be 3-6 sanitation ladders. Once people have formed a line, have the groups decide which is the most complete.
Review and Draw Conclusions (5 min)
1. Ask participants talk to another person about how they could use this information in their work as a CHV:
l What did you learn during this session?
l Are you comfortable enough with the subject matter to facilitate a session with an individual, family, or group?
l What will you remember about faecal-oral transmission when you are working with community members?
l What else do you need to know/to do to be ready?
2. Summary points:
l Review current practices in the community
l List some serious diseases spread by not isolating faeces
l What are the potential perceptions of open defecation in the community?
l What are some potential dangers of open defecation?
l Review the steps on the sanitation ladder.
UNIT 2 : SANITATION
Module 7 - WASH ed.indd 32Module 7 - WASH ed.indd 32 12/4/13 5:01 PM12/4/13 5:01 PM

FACILITATORS GUIDE | COMMUNITY HEALTH VOLUNTEERS | MODULE NO. 7 | WATER, SANITATION AND HYGIENE 33
7MODULE
R Activity 7:
Latrine Basics (1 hr 45 min)
Introduction (5 min)
Tell participants they will talk about some latrine basics, some maintenance guidelines, and suggestions for correctly using latrines.
Climate Setter (5 min)
1. Ask participants what they know about the current situation in the community regarding presence and use of latrines.
2. Find out why latrines are built and not used, for example. Or why people are reluctant culturally to build latrines, etc. What do participants think motivates families to build latrines?
Discussion Task (two discussion groups) (20 min)
1. Ask participants on one side of the room to think about what would be a good set of guiding principles for building a latrine.
2. Ask the participants on the other side of the room to discuss at least fi ve ways to keep latrines clean.
3. Give them time to talk and then take some answers. For the guiding principles, make sure they include:
l Adequate pit depth to last a family at least two years—ask about local practice
l Placement at the back of the house within 30 meters and at least 30 meters (downhill) from a water source
l Pit should not go into ground water—especially if people in the village get water from wells
l Hole must have a cover to discourage fl ies
l Privacy and comfort.
For keeping latrines clean, make sure they include:
l Check the structure daily to make sure it’s fi rm and verify the platform is fi rm
l Keep latrine covered
l Wash down or sweep into the hole any faecal material that’s on the slab
l Verify that the platform is solid
UNIT 2 : SANITATION
Module 7 - WASH ed.indd 33Module 7 - WASH ed.indd 33 12/4/13 5:01 PM12/4/13 5:01 PM

34 FACILITATORS GUIDE | COMMUNITY HEALTH VOLUNTEERS | MODULE NO. 7 | WATER, SANITATION AND HYGIENE
7MODULE
l Keep animals out of the latrine and don’t allow insects to live in the latrine
l Clean the slab daily with quicklime or ashes by sprinkling a handful or two on the slab to soak up moisture around the hole and then sweep into the pit
l Clean concrete slabs with water and bleach or soap.
Trios: Discussion in Groups (30 min)
1. Count off by threes. Ask each group to come up with some reasons why latrines are not used, or used improperly.
2. When each group has worked for a few minutes, write some responses on cards or a fl ipchart.
3. In the large group, for each reason that a latrine is not used, have participants come up with a solution. (For example, for the reason “It’s too smelly,” a counter argument might be that “It’s easy to install proper ventilation, keep the latrine clean, or cover the hole.”)
4. Discuss some points about the protocol of latrine use. This might include: putting a tippy tap near so people can wash their hands immediately upon exiting the latrine, keeping a supply of wiping material handy inside the latrine, respecting people’s privacy, etc.
Synthesis on Faeces Management and Latrines (45 min)
1. Ask participants to think about the following questions and to construct a chart to help them start work in the community. Use the table found at the end of this session to facilitate this conversation.
2. What are the most pressing problems in the community regarding the eff ective disposal/ isolation of faeces?
l Who are the potential audiences for targeting your activities?
l What are the most prevalent behaviors related to faeces disposal?
l What are things that make it diffi cult to improve practices?
l What are things that make it easier to improve practices?
l What are some motivational activities from the water, hand washing, and faeces sessions that might be done in the community?
UNIT 2 : SANITATION
Module 7 - WASH ed.indd 34Module 7 - WASH ed.indd 34 12/4/13 5:01 PM12/4/13 5:01 PM

FACILITATORS GUIDE | COMMUNITY HEALTH VOLUNTEERS | MODULE NO. 7 | WATER, SANITATION AND HYGIENE 35
7MODULE
Major issues in the Community One Community Two Community Threecommunityabout disposal (isolation) of faeces
Possible audiences for mutual
Planning or group activities
Behaviors now prevalent
Alternatives to current behaviors
Barriers to adopting new practices
Enablers to adopting new practices
Potential activities for CHVs
Discuss as needed. Post the charts on the wall for a gallery walk, if time permits.
UNIT 2 : SANITATION
Ask the participants:
l What are the main barriers to safe disposal of faeces in the community?
l What can a CHV do to address the problems?
List down their responses and share information that appears in the following table on ‘Barriers to Safe Disposal of Faeces’ with the participants.
Module 7 - WASH ed.indd 35Module 7 - WASH ed.indd 35 12/4/13 5:01 PM12/4/13 5:01 PM

36 FACILITATORS GUIDE | COMMUNITY HEALTH VOLUNTEERS | MODULE NO. 7 | WATER, SANITATION AND HYGIENE
7MODULE
Barriers to Safe Disposal of Faeces
Common reasons why people don’t dispose of faeces safely (barriers)
People don’t know how important the disposing of faeces properly is. They don’t connect where they defecate with their children getting sick, and/or they consider diarrhea a “normal” and not dangerous condition.
People accept open defecation as normal or traditional.
Families don’t have latrines. Some, especially in urban slums, may not have space far enough from the house. Some may live on land where only a hole lined with rock or cement would work. Some don’t understand the importance or otherwise are not suffi ciently motivated. Some don’t know how to build one. They may lack tools and basic materials. Some cannot aff ord the materials and/or labour necessary to construct a latrine.
Latrine is not situated within 10m from the home and at least 15m downhill from a water source.
People don’t use the latrine at night because it’s too dark, there are too many bugs and vermin, and especially for women it’s dangerous to walk alone at night.
Latrine is not well-cleaned, so faeces or urine stains are on the fl oor and seat.
Latrine is used for storage or other purposes.
Latrine is not well-used because it stinks.
Latrine is not well-used because it is infested with worms or bugs.
Latrine hole is fi lling up with water.
Latrine is not well-used because there is no wiping material.
Family cannot/will not build latrine because it has no tools to dig hole.
In some cultures, it is not acceptable for men and women or for women and in-laws to share the same latrine.
Children up to age 6 or 8 do not use the latrine because they are afraid of falling in the hole, and they are allowed to defecate anywhere.
What an outreach worker can do to address this barrier
Explain and show the community the most likely ways that germs can go from faeces into people to make them sick. To explain the eff ects of diarrhea, mention what happens to crops when they don’t get enough water. Acknowledge that it should not be common for children to get diarrhea and that one of the key ways to reduce it is for everyone to dispose of their faeces safely.
CHVs can work with the families using some of these training exercises, sharing about how faeces on the ground eventually cause illness. In some settings, creating a sense of disgust or even shame (using CLTS) has worked.
CHVs cannot address all these problems alone. They must have strong support from the government or an organization. NGOs should do a technical assessment to decide the best latrine options for the conditions and should link program participants with loans, materials, or skilled labor.
Advise a new location if a better one is available; explore access to a public or neighbor’s latrine if building one is not possible.
Suggest using candles or fl ashlights, but also explore using a potty, with ash in the bottom (and put additional ash on top of faeces), that can be emptied in the latrine or hole in the morning.
Try to problem-solve with the family how it can be kept clean and advocate that family members share responsibilities; it shouldn’t just be added to the mother’s burdens. If multiple families share the latrine, discuss how to improve maintenance.
Motivate owners to use the latrine as intended; suggest other possibilities for storage.
Consult with the local environmental health offi cer. Use quicklime or ash to clean the slab daily. Sprinkle a handful or two of ash on the slab to soak up any moisture around the hole and then sweep it into the pit. Add small, high windows for ventilation in the structure. Covering the hole helps to reduce smell.
Consult with the local environmental health offi cer.
Move the latrine location if possible. This will solve the problem. Or build a rock-lined or cement-walled hole, if feasible.
Buy toilet paper or have children collect paper trash or leaves for wiping. Once used, it can be burned or put in the pit. In places where people use water to clean, problem-solve to make enough water available.
Encourage community to facilitate the shared use of appropriate digging tools.
A family could either build a second latrine, or could negotiate with a neighbor so that one family’s latrine could be designated for women and one for men.
Explain that children’s faeces have even more germs than adult faeces, so they must defecate either in a potty (with ash if possible) or a latrine. Keep a sanded board in the latrine to cover part of the hole when a child uses it.
UNIT 2 : SANITATION
Module 7 - WASH ed.indd 36Module 7 - WASH ed.indd 36 12/4/13 5:01 PM12/4/13 5:01 PM

FACILITATORS GUIDE | COMMUNITY HEALTH VOLUNTEERS | MODULE NO. 7 | WATER, SANITATION AND HYGIENE 37
7MODULE
Review and Summary
Discuss why it is important not to dispose other waste in the pit latrine. Make the link to the next session on disposing of faeces for people who are bedridden.
R Activity 8:
HEALTH PROBLEMS CAUSED BY POOR SANITATION (2 HRS)
Discuss health problems caused by poor sanitation
l Put the participants in groups and ask them to discuss and list down health problems caused by poor sanitation.
l Let three groups present their fi ndings. As you list down their responses, check whether the key points in the following box are mentioned by them or not and if not, add as summarizing their responses.
Key points : Poor Sanitation
Health problems caused by poor sanitation include:
l Diarrhea diseases e.g. cholera,typhoid,dysentery
l Water and land contamination
l Breeding of insect and other vectors
l Worm infestations
l Dirty environment
l Risk of fi re outbreak
l Foul smells
l Accidents
UNIT 2 : SANITATION
Module 7 - WASH ed.indd 37Module 7 - WASH ed.indd 37 12/4/13 5:01 PM12/4/13 5:01 PM
38 FACILITATORS GUIDE | COMMUNITY HEALTH VOLUNTEERS | MODULE NO. 7 | WATER, SANITATION AND HYGIENE
7MODULE
R Activity 9:
ENVIRONMENTAL SANITATION (1 HR 30 MIN)
Factors Hindering Environmental Sanitation
1. Place the participants in groups of four and then let them discuss factors hindering environmental sanitation and put their fi ndings on the fl ipchart for presentation.
2. Let three groups present their fi ndings. As you list down their responses, check whether the key points in the following box are mentioned by them or not and if not, add as summarizing their responses.
Key points : Environmental Sanitation
Factors Hindering Improvements in Environmental Sanitation
l Lack of adequate and safe water
l Lack of awareness
l Negative cultural beliefs e.g. inability to share toilet
l Negative attitudes
l Poverty
l Illiteracy
UNIT 2 : SANITATION
Module 7 - WASH ed.indd 38Module 7 - WASH ed.indd 38 12/4/13 5:01 PM12/4/13 5:01 PM

FACILITATORS GUIDE | COMMUNITY HEALTH VOLUNTEERS | MODULE NO. 7 | WATER, SANITATION AND HYGIENE 39
7MODULE
UNIT 3HYGIENE
Module 7 - WASH ed.indd 39Module 7 - WASH ed.indd 39 12/4/13 5:01 PM12/4/13 5:01 PM

40 FACILITATORS GUIDE | COMMUNITY HEALTH VOLUNTEERS | MODULE NO. 7 | WATER, SANITATION AND HYGIENE
7MODULE
Module 7 - WASH ed.indd 40Module 7 - WASH ed.indd 40 12/4/13 5:01 PM12/4/13 5:01 PM

FACILITATORS GUIDE | COMMUNITY HEALTH VOLUNTEERS | MODULE NO. 7 | WATER, SANITATION AND HYGIENE 41
7MODULE
Unit 3
HYGIENE
Objectives: By the end of the unit, the participants will be able to:
l Defi ne hygiene
l Describe the types of hygiene
l Understand factors that promote personal and environmental hygiene
l Demonstrate and understand good hygiene practices.
Duration: · 6 hours 40 minutes
Methodologies: Brainstorming, discussion and demonstration.
Materials: Newsprint, Felt/Marker pens, Pens, Notebooks, Training/Demonstration materials: Soap and water.
Unit Session Plan
Duration Topics Methodology
20 min Purpose of this unit Story and and Objectives of this unit Discussion
10 min Defi nition of Hygiene Brainstorming
1 hr Types of Hygiene Discussion and Group Work
3hrs 10 min Hand Washing Demonstration, Lecture, Group Work and Discussion
2 hrs Personal, Home and Food Hygiene Discussion and their determinants and Mini Lecture
Module 7 - WASH ed.indd 41Module 7 - WASH ed.indd 41 12/4/13 5:01 PM12/4/13 5:01 PM

42 FACILITATORS GUIDE | COMMUNITY HEALTH VOLUNTEERS | MODULE NO. 7 | WATER, SANITATION AND HYGIENE
7MODULE
ACTIVITIES AND FACILITATION STEPS
R Activity 1:
PURPOSE AND OBJECTIVES OF THIS UNIT (20 MIN)
Story to Learn the Purpose and Objectives of this Unit
Read the following story of Mr. Aseka.
Khwisero village story
In Khwisero village community members are gathered for a party to celebrate good performance of their school. After the speeches, they move to the dining hall to be served food. One of them, a Mr. Aseka excuses himself to visit the toilet. On coming back, he goes straight to the table and starts eating. After eating, Mr. Aseka goes to wash his hands.
l Ask participants what hygiene practices were seen in Aseka’s act
l Ask the participants whether similar practices are seen in the community
l Summarize the discussion and tell the participants – “we are going to learn more about good hygiene practices”
l Share the objectives for the unit.
R Activity 2:
DEFINITION OF HYGIENE (10 MIN)
l Ask the participants what they understand by the word hygiene?
l Let them brainstorm as you list down their answers
l Summarize to fi t the below defi nition.
Key points : Defi nition of Hygiene
Hygiene is the practice of keeping oneself and the surrounding environment clean.
UNIT 3 : HYGIENE
4
Module 7 - WASH ed.indd 42Module 7 - WASH ed.indd 42 12/4/13 5:01 PM12/4/13 5:01 PM

FACILITATORS GUIDE | COMMUNITY HEALTH VOLUNTEERS | MODULE NO. 7 | WATER, SANITATION AND HYGIENE 43
7MODULE
R Activity 3:
TYPES OF HYGIENE (1 HR)
Discuss the Types of Hygiene (15 min)
Place the participants into groups and ask them to brainstorm and come up with hygiene practices.
l Place the participants in groups and ask them to discuss and come up with various types of hygiene.
l Randomly let them present their fi ndings.
The facilitator to summarize their fi ndings in relation to the following key points:
Key points : Hygiene Practices
Hygiene Practices involve the following types of food and personal hygiene.
Personal hygiene involves the following:
Bathe regularly, brush your teeth twice a day–especially before going to sleep and after breakfast, wash hair and keep it clean to avoid lice, wash eyes and face daily to avoid trachoma.
Put on clean shoes, wash your feet before going to bed to avoid jiggers, hookworms and bilharzia, wear clean clothes, keep nails clean and short (refer to school health hygiene).
Examples of Unhygienic Practices to Avoid
l Spitting in the open
l Open coughing
l Blowing of the nose with bear hands
l Sneezing without covering both nose and mouth.
UNIT 3 : HYGIENE
Module 7 - WASH ed.indd 43Module 7 - WASH ed.indd 43 12/4/13 5:01 PM12/4/13 5:01 PM

44 FACILITATORS GUIDE | COMMUNITY HEALTH VOLUNTEERS | MODULE NO. 7 | WATER, SANITATION AND HYGIENE
7MODULE
The facilitator to summarize their fi ndings in relation to the following points:
Current Practice
l Women and girls do not have access to appropriate materials to absorb the blood.
l Some women use linen/cotton to make pads, but do not properly wash them for re‐use.
l Some households use jik or salt to clean materials.
l The recycled sanitary towels are not put in sun but hidden under bed.
l Women/girls do not wash their hands after changing their soiled menstrual materials.
l Women and girls do not dispose of used menstrual materials safely.
l Caregivers touch menstrual blood without any kind of protection on their hands.
Small Doable Actions
l Make sanitary pads from locally available materials such as sanitary pads with a plastic sheet underneath to prevent leakage.
l Install hand washing station in changing areas/latrines.
l Wash hands with soap and running water after handling blood-stained materials or caring for patients.
l Wear gloves or plastic bags when caring for sick person with menses.
l For reusable materials soak in soap and water for 20 minutes then wash with soap and water and dry in sun.
l Dispose of pads in pit latrines.
l Dispose off the sanitary bin in the set up
– Put in waste pit for burning (but dispel cultural taboos about burning blood)
– Dig a deep pit and bury bloody materials every day.
Menstrual Management
R Activity 4:
Menstrual Management (45 min)
What to do:
1. Divide participants into focus groups.
2. Ask them to brainstorm and come up with a list of how women take care of themselves during menstruation.
3. Let them present their group works in plenary.
4. Facilitate a discussion on the issues raised above.
UNIT 3 : HYGIENE
Module 7 - WASH ed.indd 44Module 7 - WASH ed.indd 44 12/4/13 5:01 PM12/4/13 5:01 PM

FACILITATORS GUIDE | COMMUNITY HEALTH VOLUNTEERS | MODULE NO. 7 | WATER, SANITATION AND HYGIENE 45
7MODULE
Key points : Menstruation
Menstruation is a natural process. However, if not properly managed it can result in health problems.
Reports have suggested links between poor menstrual hygiene and UTIs, STIs and other illnesses. The impact of poor menstrual hygiene on the psychosocial wellbeing of women and girls (e.g. stress levels, fear, embarrassment, and social exclusion during menstruation) should also be considered.
UNIT 3 : HYGIENE
HANDWASHING (3 HRS 10 MIN)
How to wash hands properly
R Activity 5:
Introduction (5 min)
Tell participants that during this session they are going to learn about how dirty hands can transmit germs and how to wash their hands properly.
Climate Setter (5 min)
1. Walk around the room with the two drawings (dirty/“clean” hands).
2. Ask for some volunteers to answer questions (examples below) by pointing.
l Which person would you like to prepare your meals?
l Which person would you like to weed your garden?
l Which person would you like to hand you the medicines or tablets when you’re sick?
l Which person would you like to change your bicycle tire?
3. Say that for many activities, we like people with clean hands. For some activities, it doesn’t matter. Stress that hands can look “clean” and still be dirty. Recall the session on “clear” but “not safe drinking” water when the water was clear, but in fact was contaminated by faeces. Hands can also look clean but may not be, so it is important to wash them properly. This session discusses how to wash hands correctly.
Module 7 - WASH ed.indd 45Module 7 - WASH ed.indd 45 12/4/13 5:01 PM12/4/13 5:01 PM

46 FACILITATORS GUIDE | COMMUNITY HEALTH VOLUNTEERS | MODULE NO. 7 | WATER, SANITATION AND HYGIENE
7MODULE
UNIT 3 : HYGIENE
Demonstrate a Perfect Hand Wash (10 min)
1. Invite one volunteer to participate in an exercise without saying what that exercise will be.
2. Ask the volunteer wash his/her hands as s/he would normally. Ask the participants to be sure to watch everything that the volunteer does.
3. Ask participants to critique the hand washing eff ort.
4. Have a discussion about what a person could do diff erently from what the volunteer did while washing: “Which steps might be missing?” “What would you do diff erently?”
5. Generate a list of steps for hand washing. Make sure that these are the same as on the job aid.
6. Are there any risks of washing hands in the same container? No. Discuss. What precautionary measures need to be considered?
Show the “How Do We Wash Our Hands?” poster. Review the steps on the poster. Compare the poster with the list of steps generated by the volunteer and the participants.
7. Explain that treated (chlorinated, boiled, SODIS, fi ltered) water isn’t necessary to wash hands. However, they MUST use soap or an abrasive such as sand or ash. Say it’s best to rinse under fl owing water and let the hands air dry. Some recommendations include drying hands on a clean cloth or towel, although a clean cloth or towel is unlikely to be available in many settings. Air drying is the best alternative in most situations. Remind participants that sometimes in schools they use treated water for washing hands so students are not exposed to untreated water that could be used for drinking.
8. If soap is not available or aff ordable, people can use ash on the job and sand, or even mud as an alternative to soap, as long as they wash and rinse (with running water) thoroughly. The sand or ash act as an abrasive and “rub off ” the dirt and germs. The fl owing water takes the dirt and germs away. You can have fl owing water by using a tap, a jug, or a tippy tap. Using a basin fi lled with water to rinse hands will not make the hands clean because the dirt and germs may not fl ow off the hands.
Demonstration Two (5 min)
1. Invite another volunteer to the front of the room without explaining what you’re going to do. Stand next to the volunteer so that everyone can see you and the volunteer.
Simulate a violent coughing fi t, covering your mouth with your hand. Then off er that same hand to the person for a handshake.
2. Ask the participants what they just saw. Ask what did they think might happen when you shake the volunteer’s hand. Listen carefully to the answers. List key points.
3. Lead a discussion with the large group about how our hands are always dirty with germs even if we can’t see the germs. Make the connection about how we transmit germs from one person to another with our hands.
Ask the participants to tell you what other tasks they do that can get their hands dirty.
Module 7 - WASH ed.indd 46Module 7 - WASH ed.indd 46 12/4/13 5:01 PM12/4/13 5:01 PM

FACILITATORS GUIDE | COMMUNITY HEALTH VOLUNTEERS | MODULE NO. 7 | WATER, SANITATION AND HYGIENE 47
7MODULE
How to thoroughly wash your hands using soap and water
Wet hands with water Apply soap to cover all surface of the hands
Rub hands palm to palm
Rub each palm over the back of the other hand
Rub palm to palm with fi ngers interfaced
Rub backs of fi ngers to opposing palms with fi ngers interlocked
Rub each thumb clasped in opposing palm
Clasp fi ngers and circular rub opposing palm
Rub each wrist with opposite hand
Rinse hands with clean running water and air dry
UNIT 3 : HYGIENE
Ü
Resource Notes on Hand WashingHand washing is the single most important thing that you can do to help prevent the spread of infections and to stay healthy and well. Washing hands with soap and water is a very eff ective way of reducing germs on our hands.
l Use running water to wash your hands
l Use soap: bar or liquid, plain or antiseptic (bar soap must be allowed to drain between uses; use soap racks)
l Use friction, remove dirt from under fi ngernails
l Timing (10 -15 seconds) is the standard acceptable length of time for hand washing
l Use clean towels (disposable or individual) for drying, or allow to air dry.
Review and Summary (10 min)
1. Ask participants the following questions.
Who should wash their hands?
Everyone should wash their hands: adults, the elderly, young people, children, and babies. If children are unable to wash hands by themselves, an adult should help them.
Share information in the following resource notes with the participants.
Module 7 - WASH ed.indd 47Module 7 - WASH ed.indd 47 12/4/13 5:01 PM12/4/13 5:01 PM

48 FACILITATORS GUIDE | COMMUNITY HEALTH VOLUNTEERS | MODULE NO. 7 | WATER, SANITATION AND HYGIENE
7MODULE
How should we wash our hands?
We should wash our hands with water and soap. To wash our hands correctly, we wet them, soap them, rub them together at least three times, clean under our nails, between fi ngers, and up to our wrists, and rinse them with running water. We air dry them by shaking them or we use a clean towel (only if a clean one is available).
If I don’t have soap, what can I use as a substitute?
Soap is the best cleanser to use, but if no soap is available or aff ordable, you can use ash or sand as an alternative to soap because all of these are abrasive so they help loosen (or “rub off ”) the germs or dirt. You should then rinse under.
Is “clean” water, i.e., pure or treated water, necessary for washing my hands?
No, washing your hands with any running water even if it has colour makes them cleaner if you also use a cleaning agent such as soap, sand, or ash. It is better to rinse your hands with running water.
2. Ask participants to talk to the person next to him or her. Have participants call out some answers and record them on a fl ipchart:
l What did they learn?
l Do they think the demonstrations will work with their households? Why or why not?
3. Review summary points:
l Sometimes hands get dirty
l Sometimes hands don’t look dirty but can still transmit germs
l The steps for proper hand washing are _________________________________________ a stream of water (fi ll in from the two lists)
l Ash, sand, and mud are possible substitutes for soap
l Washing hand in a basin fi lled with water is not acceptable. Flowing water must be poured over hands to wash off the dirt and germs
l When water is scarce, we ____________________________________________________ (fi ll in from the discussion).
Make the link to the next session. Now that they know how to wash their hands, it’s important to know when to wash their hands (at what moments).
UNIT 3 : HYGIENE
Module 7 - WASH ed.indd 48Module 7 - WASH ed.indd 48 12/4/13 5:01 PM12/4/13 5:01 PM
FACILITATORS GUIDE | COMMUNITY HEALTH VOLUNTEERS | MODULE NO. 7 | WATER, SANITATION AND HYGIENE 49
7MODULE
UNIT 3 : HYGIENE
R Activity 6:
Critical times for hand washing
Introduction (5 min)
1. Tell participants they are going to learn about critical times for washing their hands. They should be able to identify at least fi ve times when they should wash their hands.
Conclude that there are “before” times (washing hands before something) and “after” times (washing hands after something). Do not reveal the fi ve times, which are: before preparing food, before eating food or feeding someone, after using the toilet, after cleaning someone’s bottom and before and after caring for someone who is sick.
2. Continue by saying that at the end of the session, they will have a chance to examine some conditions and practices regarding hand washing in their own communities and how they might help people improve their hand washing practices.
Climate Setter (5 min)
1. Ask the participants when they presently wash their hands with soap or another cleansing agent such as ash.
2. Then ask what they’ve noticed about hand washing in their community to get some more details e.g. How many times a day do they wash their own hands? Do they help their children wash? Do many people wash with water only? What products do they use? How much does soap cost? Etc.
3. Record their answers as they call them out on a piece of fl ipchart paper.
Table Task (10 min)
1. Distribute the sets of pictures (or words) as appears in the following page—one set per table. Add extra images of human activity as needed.
2. Tell participants to sort all the images/pictures into two groups: in one group put pictures of people doing things that require them to wash hands before they do them (like preparing meals); in the other group put pictures of people doing things that require them to wash their hands after they do them (like changing the baby).
3. Give them a couple of minutes to sort the pictures. Walk around as they work. If the participants say “it doesn’t matter,” tell them to establish a third category of pictures.
Module 7 - WASH ed.indd 49Module 7 - WASH ed.indd 49 12/4/13 5:01 PM12/4/13 5:01 PM

50 FACILITATORS GUIDE | COMMUNITY HEALTH VOLUNTEERS | MODULE NO. 7 | WATER, SANITATION AND HYGIENE
7MODULE
Examples of ‘Before’ and ‘After’ Pictures for Activity 6
After visiting the latrine
Before eating
After changing diapers and napkins
Before feeding children
Module 7 - WASH ed.indd 50Module 7 - WASH ed.indd 50 12/4/13 5:01 PM12/4/13 5:01 PM

FACILITATORS GUIDE | COMMUNITY HEALTH VOLUNTEERS | MODULE NO. 7 | WATER, SANITATION AND HYGIENE 51
7MODULE
Large Group Discussion (10 min)
Have groups report the results of their sorting exercise. Let the reports be the basis for some discussion. Some possible questions to get started:
l How many “before” pictures do you have?
l How many “after” pictures do you have?
l How many pictures did your group put into the “didn’t matter” group?
l What did your group notice about the pictures?
l Can your group estimate how many times someone would wash his or her hands if that person washed when recommended?
l What do you think are the most critical times for washing hands?
Table task (10 min)
After each table has reported, have the participants go back and add anything they feel should be part of the two lists (e.g. before praying). They can write these on paper.
Review and Summary (5 min)
1. Ask the participants to review the poster about the times when hands should be washed.
2. Have participants discuss with their neighbors how they might talk about this topic with families in their communities:
l What did they learn about when to wash their hands?
l Do they think they can use the pictures to illustrate when the best times are to wash hands?
l Would the sorting exercise work in their community?
3. Review summary points from this session:
l Wash your hands before ________________________________________________ (fi ll in).
l Wash your hands after _________________________________________________ (fi ll in).
l Always wash your hands with soap or ashes or sand, because water alone will not get them clean enough, and rinse them using running/pouring water.
Tell participants the next session takes a look at how much water is necessary for proper hand washing.
UNIT 3 : HYGIENE
Module 7 - WASH ed.indd 51Module 7 - WASH ed.indd 51 12/4/13 5:01 PM12/4/13 5:01 PM

52 FACILITATORS GUIDE | COMMUNITY HEALTH VOLUNTEERS | MODULE NO. 7 | WATER, SANITATION AND HYGIENE
7MODULE
R Activity 7:
Overcoming barriers to proper hand washing
Introduction (5 min)
1. Explain that participants will learn about overcoming barriers to proper hand washing. Hand washing should be made as easy as possible by keeping water and the cleansing agent in several places: beside the latrine, outside the kitchen or eating area, and next to a bedridden person’s bed. When hand washing stations with water and soap are not convenient, it is much less likely that people will wash their hands well and when needed. Another reason that people do not wash their hands is that it requires a quite a lot of water, which can be diffi cult for households that have limited access to water or have to pay for water.
2. Say that we will start by talking about how much water is needed to wash hands properly.
Climate Setter (5 min)
1. Ask participants to guess how much water it takes to eff ectively wash hands that:
l Are very dirty from working in the fi elds
l Look clean but just changed the baby’s dirty diaper.
2. Record participant answers on the fl ipchart.
Large Group Demonstration and Table Task (30 min)
1. Ask for one volunteer to demonstrate correct hand washing for all the participants. Ensure someone assists him or her so the water can fl ow to rinse hands. Ask observers to remember the steps learned in the last session on the proper ways to wash your hands and have them coach the hand washing volunteer on correct technique.
Catch all the waste water in a basin/bucket.
2. Fill a cup with wastewater from the basin and pour it into an empty bottle/basin. Continue until the waste water is gone, having the participants count the number of cups that it took. Have the group take notice of how full the bottle/basin is (mostly full, overfl owing, half full, etc.) and display it somewhere in view. Explain that they are going to use this measurement in the next exercise.
3. Next, explain that participants will look at how many times a day a typical family needs to wash their hands and how much water that household would need. Ask participants to think about a family of six and fi gure roughly how many times a day this means they will wash their hands. Let’s assume that this family of six has an infant, one toddler less than two years of age, two older children, one man who is ill and bed ridden and takes medication three times per day, and one woman who currently has her menstrual period.
4. Walk the participants through the following table (posted on the wall or a fl ipchart), briefl y explain the numbers and the math, but do not dwell on it.
UNIT 3 : HYGIENE
Module 7 - WASH ed.indd 52Module 7 - WASH ed.indd 52 12/4/13 5:01 PM12/4/13 5:01 PM

FACILITATORS GUIDE | COMMUNITY HEALTH VOLUNTEERS | MODULE NO. 7 | WATER, SANITATION AND HYGIENE 53
7MODULE
5. Explain that now they have an estimate that this family of six needs to be washing their hands 54 times per day.
6. Tell participants that they will now multiply the number of washes a family must do per day (e.g. 54 hand washings per day in the example above) by the amount of water it takes to wash your hands. Locate this bottle/basin fi lled with water used in just ONE hand washing and ask the participants to imagine 54 of those bottles/basins. THIS is the amount of water it would take our example family to wash their hands each day in an ideal fashion.
7. Acknowledge to participants that it takes a lot of water for a family of six to wash their hands properly! Lead a discussion with the group, asking participants about the following key points:
l What kind of container is used in the communities to transport water?
l How far do people in the community have to go to get their water?
l How many extra trips to the water source (e.g. well, tap, etc.) would be required each day to follow the ideal recommendation of hand washing at the critical times?
l Who actually transports the water (young girls, the woman of the household?) What would this extra burden mean for them?
8. Now ask participants if these kinds of issues will aff ect whether someone will or will not wash their hands at critical times. Spend two minutes gathering responses.
UNIT 3 : HYGIENE
Water Calculation TableExample for family of six (including one infant, one toddler, two older children, one man who takes medication three times per day and is bedridden, and one woman who currently has her menses).
Example Column “A” Number Column “B” Number Total number of of times a day/ each of family members times a day (Multiply person doing this Column A x Column B)
After defecation 2 4 (woman, man, 2 older 8 children) (2 babies don’t wash THEIR hands)
After changing a nappy/diaper and cleaning ababy’s bottom 6 2 12
After changing material 4 1 4used to absorb (menstrual period)menstrual blood
Before preparing 3 2 food/Cooking (mother and daughter) 6
Before taking/giving 3 1Medication (father) 3
Before eating 3 4 12
Before feeding 3 1 3 (toddler that is eating solids)
Before breastfeeding 6 1 6 (baby that is still breastfeeding)
TOTAL 54 TIMES A DAY
Module 7 - WASH ed.indd 53Module 7 - WASH ed.indd 53 12/4/13 5:01 PM12/4/13 5:01 PM

54 FACILITATORS GUIDE | COMMUNITY HEALTH VOLUNTEERS | MODULE NO. 7 | WATER, SANITATION AND HYGIENE
7MODULE
9. Acknowledge to participants the amount of water required to wash hands at each critical moment can be a major barrier to families actually practicing hand washing. Tell them that it is the job of the outreach worker to help families fi gure out how.
10. Spend another two minutes and facilitate a discussion with the participants about what they might say to a family that feels that it doesn’t have enough water to wash hands.
Record the key messages on the fl ipchart. Make sure you get their ideas in their own words.
If the discussion is stuck, guide it by asking:
l How could a CHV work with a family to prioritize certain times for hand washing over others from the list?
l Has anyone seen or heard of any devices that let you wash your hands using a small amount of water?
l Tell participants that you will later review how to make and use a device that is called a tippy tap or “leaky tin”, which helps save water when hand washing. Do not spend much time discussing tippy taps now since they will be covered in the next session.
Review and Summary (5 min)
1. Ask participants to discuss their thoughts about talking with families:
l What did they learn about the amount of water necessary for hand washing?
l Do they think they can help a family fi nd ways to address a lack of water availability? (Note that they will be learning much more about tippy taps in the next session.)
2. Review summary points:
The amount of water necessary for “ideal” hand washing is substantial and can present a major barrier to hand washing.
Even when people know that they should wash, they frequently don’t because there is simply not enough water. Remind them that CHVs working with families can do as much as possible to help families fi nd ways to practice hand washing, even when water is scarce. These strategies include helping families prioritize times for hand washing and using a tippy tap to conserve water.
3. Link to the next section by saying they are going to look at how to build a tippy tap or leaky tin.
R Activity 8:
Tippy Tap
Introduction (10 min)
Tell participants that during this session they are going to learn how to build a tippy tap. They will have the chance to see how a tippy tap is made and will work on building a tippy tap at their tables (if materials are available).
UNIT 3 : HYGIENE
Module 7 - WASH ed.indd 54Module 7 - WASH ed.indd 54 12/4/13 5:01 PM12/4/13 5:01 PM

FACILITATORS GUIDE | COMMUNITY HEALTH VOLUNTEERS | MODULE NO. 7 | WATER, SANITATION AND HYGIENE 55
7MODULE
1. Ask participants if people in their community have enough water for their needs. If not, ask the participants what people do to conserve or minimize the use of water.
2. If water is scarce or has to be carried to the house from an outside water source, mention that one way to help economize water for hand washing is to use a tippy tap.
3. Explain that in previous sessions they focused on when and how to wash hands. In the last module, they saw how much water it takes to wash hands well. Say that often water is scarce in the community or has to be hauled long distances to the household and that by building tippy taps, families can do eff ective hand washing with just a little bit of water.
4. Having a tippy tap in one or more key places near the house is a good reminder that hands should be washed and enables people to do so more easily. Ask where people should place tippy taps. (The best places would be just outside the latrine and in the kitchen area.)
R Activity 9:
Demonstration of building a Tippy Tap and Leaky Tins
A tippy tap is a simple handwashing device made of locally available material and is very easy to build. Materials consist of:
l 3-4 sticks
l Wire/string
l 3-5 litre jerrycan
l Panga for digging holes
l Soap dish.
Large Group Demonstration (20 min)
1. Invite everyone to stand around the table/fi eld
2. With the poster in view, build a tippy tap, following the steps on the poster.
3. Once the tippy tap is built, have a volunteer wash his or her hands using the tippy tap. Catch the waste water.
Compare this to the amount of water used when pouring from a jug.
4. Calculate as a group how much water it would take for the whole family to wash their hands now. Compare to the other amount calculated.
Group Task (30 min)
Divide the participants into 3-4 groups.
1. Have each group build a tippy tap.
2. Once each group has a tippy tap, hang them up and use them if time permits.
UNIT 3 : HYGIENE
Module 7 - WASH ed.indd 55Module 7 - WASH ed.indd 55 12/4/13 5:01 PM12/4/13 5:01 PM

56 FACILITATORS GUIDE | COMMUNITY HEALTH VOLUNTEERS | MODULE NO. 7 | WATER, SANITATION AND HYGIENE
7MODULE
Steps for building a tippy tap
1. Start out by digging 15 centimeter holes for the posts to sit in. Space them about half a meter apart from one another.
2. Cut the wood to the post’s desired length, wrap the bottom parts with the plastic bags (this prevents the wood from rotting) and then put them in the ground. Fortify the stability of the posts by fi lling in the remaining empty space in the holes with a mixture of rocks and dirt.
3. Next, unscrew the lid of the jerrycan and poke a hole in the top large enough for the string to pass through. Tie one end of the string to the wire. Thread the string through the hole so that the wire sits snugly in the underside of the lid.
Poke a hole about 3/4 up the side of the jerrycan opposite of the handle. This is the spout where the water will come out.
4. Slide one of the slender pieces of wood through the handle of the jerrycan. Make sure that it can rock back and forth in the middle of the beam. If the stick is too big, whittle it down. Nail one side of the beam into the top.
5. Extend the string to the ground and tie a piece of wood to the end of it. The tippy-tap can then be tipped using your foot on the piece of wood like a foot pedal.
UNIT 3 : HYGIENE
3. Initiate a discussion of how they might introduce this concept into their communities.
4. If feasible, allow some participants to use the tippy taps to wash their hands. Ask for their reactions; e.g. “How did you fi nd it washing your hands using the tippy tap?”
Review and Summary (5 min)
1. Discuss as a group how participants could us this in discussions with the households they visit:
l What did they learn about building tippy taps?
l What materials are available in the community for building a tippy tap?
l Do they think they can demonstrate this in the community?
l What other materials could be used to make hand washing stations? (e.g. pots, buckets with taps, etc.)
2. Review summary points:
l Tippy taps are easy to build.
l Tippy taps allow people to wash their hands using very little water.
l Tippy taps may be made out of locally available materials.
l Tippy taps remind us to wash our hands and help us to do it better.
l Good places to place a tippy tap are in the food preparation area and near a latrine.
3. Link to the next section by saying the next session will be a hand washing synthesis
Module 7 - WASH ed.indd 56Module 7 - WASH ed.indd 56 12/4/13 5:01 PM12/4/13 5:01 PM

FACILITATORS GUIDE | COMMUNITY HEALTH VOLUNTEERS | MODULE NO. 7 | WATER, SANITATION AND HYGIENE 57
7MODULE
UNIT 3 : HYGIENE
l Make a hole on side of tin can near bottom
l Hang can
l To start water fl ow: pour cup of water in can
l To stop water fl ow: let water run out
Tin Can
Tippy tap
Types of leaky tins
Module 7 - WASH ed.indd 57Module 7 - WASH ed.indd 57 12/4/13 5:01 PM12/4/13 5:01 PM
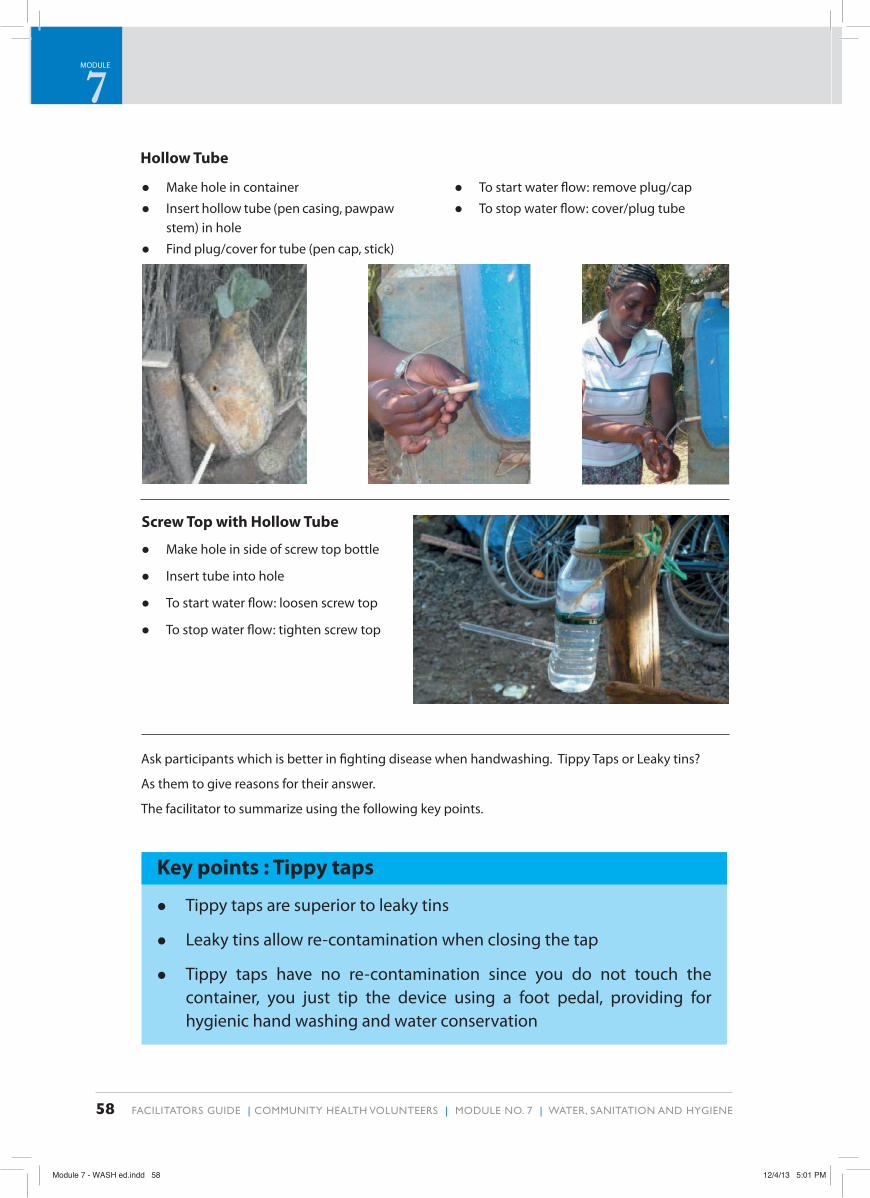
58 FACILITATORS GUIDE | COMMUNITY HEALTH VOLUNTEERS | MODULE NO. 7 | WATER, SANITATION AND HYGIENE
7MODULE
l Make hole in container
l Insert hollow tube (pen casing, pawpaw stem) in hole
l Find plug/cover for tube (pen cap, stick)
Hollow Tube
l To start water fl ow: remove plug/cap
l To stop water fl ow: cover/plug tube
Screw Top with Hollow Tube
l Make hole in side of screw top bottle
l Insert tube into hole
l To start water fl ow: loosen screw top
l To stop water fl ow: tighten screw top
Key points : Tippy taps
l Tippy taps are superior to leaky tins
l Leaky tins allow re-contamination when closing the tap
l Tippy taps have no re-contamination since you do not touch the container, you just tip the device using a foot pedal, providing for hygienic hand washing and water conservation
Ask participants which is better in fi ghting disease when handwashing. Tippy Taps or Leaky tins?
As them to give reasons for their answer.
The facilitator to summarize using the following key points.
Module 7 - WASH ed.indd 58Module 7 - WASH ed.indd 58 12/4/13 5:01 PM12/4/13 5:01 PM

FACILITATORS GUIDE | COMMUNITY HEALTH VOLUNTEERS | MODULE NO. 7 | WATER, SANITATION AND HYGIENE 59
7MODULE
R Activity 10:
Strategies for proper hand washing
Introduction (5 min)
1. Ask participants what key points they remember regarding when and how to wash hands, how to dry hands, how much water and time it takes, and how to build a tippy tap (if that session was done). Make sure you have the fl ipcharts from the previous hand washing sessions hanging where participants can see them.
2. Tell participants that during this session they can consolidate their thoughts about hand washing. At the end, they will have a clearer idea of the strategies they can promote for proper hand washing with soap.
3. Discuss further about the techniques on hand washing with soap.
Small Group Activity (40 min)
1. Move the participants so that they are sitting with others from their village or area, if appropriate. Post or distribute copies of the Hand Washing Matrix (not necessary if not available).
2. Ask each group (or individual participants) to think about the following:
l Based on what they’ve learned about the importance of hand washing with soap, why is this an important practice to promote?
l Who are some of the potential audiences they should be working with (individuals, families, groups, schools, and children)? Be specifi c.
l What are some of the prevalent current practices regarding hand washing with soap?
l What could the community members be doing instead of some of the current (not so ideal) behaviors?
l What is the current practice with soap in the household? Where is it kept, who keeps it and how is it used?
l What are some things that make it hard to change people’s behaviors?
l What are some things that make it easier for people to change their behavior?
l Which, of the activities they saw demonstrated, might they do in their community?
3. Have participants practice negotiating with family members in their community to improve their hand washing practices. Do a simulation with someone else. Then change roles. Have participants talk about the potential problems and solutions they discussed.
Share information in the following table with the participants.
UNIT 3 : HYGIENE
Module 7 - WASH ed.indd 59Module 7 - WASH ed.indd 59 12/4/13 5:01 PM12/4/13 5:01 PM

60 FACILITATORS GUIDE | COMMUNITY HEALTH VOLUNTEERS | MODULE NO. 7 | WATER, SANITATION AND HYGIENE
7MODULE
UNIT 3 : HYGIENE
Barriers to Handwashing
People don’t know how important the practice is. They don’t connect dirty hands with diarrhea, and/or they consider diarrhea a “normal” and not dangerous condition.
Hands don’t look dirty.
Soap is not easily available to purchase or aff ordable.
People have poor access to water, so they don’t want to use too much for things like hand washing.
People are too busy.
People don’t have a good place to wash where all the supplies (soap, water, etc.) are located together.
People don’t wash at critical times.
People don’t wash thoroughly enough.
People dry hands on whatever soft material is available (often dirty).
HIV stigma.
Location of hand washing facility.
What CHVs can do to address this barrier
Explain/teach/demonstrate the concept of dehydration—that diarrhea leads to children losing so much water that they get sick and can die. Mention what happens to crops when they don’t get enough water. Acknowledge that children with diarrhea are too common now, but that it doesn’t have to be that way—one key way to reduce diarrhea is good hand washing.
Use coughing and sneezing in hand exercise.
First try to motivate people to purchase hand soap, even if it is diffi cult. Note that the bar of soap can be cut into smaller pieces, so one bar can be “spread” across multiple hand washing stations. If people feel that they cannot buy soap, then ask them to wash with ashes, sand, or mud…whichever is most acceptable and available.
Consider three basic ideas together with the mothers or families: (1) use a tippy tap or some other watersaving device; (2) fi gure out a way to get more water for the family; (3) when water is most scarce, wash only at the most critical times (in most places, after defecating, cleaning a baby’s bottom or diaper, or otherwise coming into contact with faeces).
Try to motivate hand washing with soap as often as possible, but emphasize the most critical times.
Encourage every family to prepare at least one hand washing station, ideally one at the latrine and one where food is prepared; engage respected community members to do the same.
Teach what the most critical times are; prioritize critical times if washing at all recommended times is not acceptable or feasible.
Organize public demonstrations, using children and adults, to model good hand washing techniques.
Encourage people to air dry.
Not a danger as long as precautions are taken.
Must be conveniently located to promote hand washing with soap practice.
Module 7 - WASH ed.indd 60Module 7 - WASH ed.indd 60 12/4/13 5:01 PM12/4/13 5:01 PM

FACILITATORS GUIDE | COMMUNITY HEALTH VOLUNTEERS | MODULE NO. 7 | WATER, SANITATION AND HYGIENE 61
7MODULE
HOME AND FOOD HYGIENE (2 HRS)
R Activity 11:
Determinants of Hygiene
Place the participants into groups and ask them to discuss and come up with factors that enhance good hygiene practices. Let them present their fi ndings and then compare with the listed points below:
Key points: Hygiene Practices
l Literacy level – health education and health promotion level
l Economic empowerment – availability of adequate clean and safe water, creation of income generating activities
l Infrastructure (provision of good roads for health works to reach the community)
l Environment
l Security (e.g. access of toilets in slums at night)
l Culture
l Government policies
l Availability of adequate clean and safe water
Personal Hygiene
Ask the participants to brainstorm on the role of the CHV and household member in maintaining hygienic practices.
As you list down their responses, check whether the following points are mentioned by them, and if not, add as you summarize their responses.
l Hand washing with soap before eating and after use of toilet should be reinforced
l Households should provide hand cleaning materials
UNIT 3 : HYGIENE
Module 7 - WASH ed.indd 61Module 7 - WASH ed.indd 61 12/4/13 5:01 PM12/4/13 5:01 PM

62 FACILITATORS GUIDE | COMMUNITY HEALTH VOLUNTEERS | MODULE NO. 7 | WATER, SANITATION AND HYGIENE
7MODULE
Notes on Home and Hygiene
The community health worker should promote home hygiene which involves the following:
l Site pit latrines properly (30 metres away and downstream/downhill from water sources)
l Ensure houses are well constructed, thoroughly smeared with clay/cow dung/plaster and properly ventilated
l Provide and use rubbish pits
l Provide cattle troughs and keep cows in a fenced enclosure
l Protect the environment – dispose of rubbish properly, burn plastic bags, keep water sources clean, etc.
l Construct drainage channels around the house, so that water does not collect near it and produce breeding grounds for mosquitoes
l Cut vegetation and bushes around houses to deter mosquitoes and other vermin (rats etc.)
l If chickens and domestic animals are kept in the same house with human beings they should be kept away from the kitchen and eating and sleeping places
l Protect both public and private water points, e.g., wells, springs
l Plant trees.
UNIT 3 : HYGIENE
Let the participants buzz in two’s on examples of hygienic practices for the home.
Compare their examples with the notes below:
l CHV and household head should undertake routine personal hygiene for the households they are in charge of
l CHV and household head should screen for ringworms, jiggers, lice and scabies.
Ringworms Jiggers Lice Scabies
Module 7 - WASH ed.indd 62Module 7 - WASH ed.indd 62 12/4/13 5:01 PM12/4/13 5:01 PM

FACILITATORS GUIDE | COMMUNITY HEALTH VOLUNTEERS | MODULE NO. 7 | WATER, SANITATION AND HYGIENE 63
7MODULE
Distribution of Household Vector in Kenya
R Activity 12: Share the following table with the participants. Divide them into several groups and give them fl ipcharts. Allow 1 or 2 to present and compare their responses with the table.
UNIT 3 : HYGIENE
Disease/Conditions
Painful bites, allergic reactions
Diarrhea, Trachoma
Wounds, secondary infections, disability
Diarrhoel, Hepatitis A, Asthma
Location
Pastoralists, slums, boarding institutions
Countrywide
Jigger endemic counties
Countrywide
Hygienic practices
Washing clothing and beddings using hot water and detergents.
Airing of beddings in the sun.
Regular face washing, proper disposal of waste, keeping away livestock from dwelling unit, improving and maintaining of VIP latrines.
Daily washing of feet, wearing shoes, domestic hygiene, regular cleaning and wetting fl oors, smearing of fl oors and walls with cow dung or cement.
Covering of food well, keep cooked food covered, cleaning of utensils and cupboards, improvement of latrines.
Vector(s)
Bedbugs
House fl ies
Jiggers
Cockroaches
Module 7 - WASH ed.indd 63Module 7 - WASH ed.indd 63 12/4/13 5:01 PM12/4/13 5:01 PM

64 FACILITATORS GUIDE | COMMUNITY HEALTH VOLUNTEERS | MODULE NO. 7 | WATER, SANITATION AND HYGIENE
7MODULE
UNIT 3 : HYGIENE
R Activity 13: Have a plenary session to interrogate the common food hygiene safety practices in the community.
Let the participants participate openly. Try to make the session as interactive as possible.
Let them present their fi ndings and then compare with the listed points below.
Food Hygiene safety
l Always cover your hair during preparation of food
l Keep your nails short
l Wash hands with soap and water
l Prepare food on a clean surface and use clean utensils
l All food that is eaten raw should be cleaned with safe water
l Wash vegetables well before cutting
Appropriate hygiene practices during cooking
l Keep the food covered during cooking
l Cook in a clean environment
l Used utensils should be washed in hot water using detergent. Always dry utensils using a dish rack.
l Always cover prepared or cooked foods intended for later use to avoid insect and dust contamination. Always reheat food before eating it.
l Left over food should be properly disposed of and not recycled for use the next day
Module 7 - WASH ed.indd 64Module 7 - WASH ed.indd 64 12/4/13 5:01 PM12/4/13 5:01 PM

FACILITATORS GUIDE | COMMUNITY HEALTH VOLUNTEERS | MODULE NO. 7 | WATER, SANITATION AND HYGIENE 65
7MODULE
Bibliography
Ministry of Health (2007). Linking Communities with Health System: The Kenya Essential Package for Health at Level 1. A Manual for Training Community Health Workers – (Pg 6- 10)
P Ngatia., N. Mwita,. S. Kangethe,. H. Waweru,. T Nyakwana,. S. Nzyuko (2010). Comprehensive Curriculum and Implementation Guide for Training Community Health Workers in Africa, AMREF.
G. Rakungu (2011). Environmental Health for East Africa.
Mara,. Feacher,. Cainecross,. (1996). Environmental Health Engineering in Tropical Countries.
MOH (2011), MOH/USAID WASHPlus Training Guide for Community Health Workers in WASH-HIV Integration.
Module 7 - WASH ed.indd 65Module 7 - WASH ed.indd 65 12/4/13 5:01 PM12/4/13 5:01 PM

66 FACILITATORS GUIDE | COMMUNITY HEALTH VOLUNTEERS | MODULE NO. 7 | WATER, SANITATION AND HYGIENE
7MODULE
Module 7 - WASH ed.indd 66Module 7 - WASH ed.indd 66 12/4/13 5:01 PM12/4/13 5:01 PM

FACILITATORS GUIDE | COMMUNITY HEALTH VOLUNTEERS | MODULE NO. 7 | WATER, SANITATION AND HYGIENE 67
7MODULE
Module 7 - WASH ed.indd 67Module 7 - WASH ed.indd 67 12/4/13 5:01 PM12/4/13 5:01 PM

68 FACILITATORS GUIDE | COMMUNITY HEALTH VOLUNTEERS | MODULE NO. 7 | WATER, SANITATION AND HYGIENE
7MODULE
© June 2013
MINISTRY OF HEALTH
Design and production funded by
Module 7 - WASH ed.indd 68Module 7 - WASH ed.indd 68 12/4/13 5:01 PM12/4/13 5:01 PM