Embed Size (px)
Citation preview
U.S. DEPARTMENT OF THE INTERIOR
U.S. GEOLOGICAL SURVEY
Mineral Resources Data System using 4th DIMENSION
by
Hal Sindler, Paul Schruben, and Carl A. Carlson
Open-File Report OF 95-616
This report is preliminary and has not been reviewed for conformity with the U.S. Geological Survey editorial standards. An\ use of trade names is for descriptive purposes only and does not imply endorsement by the U.S. Geological Survey.
Although this program has been used b\ the U.S. Geological Survey, no warranty, expressed or implied, is made b\ the USGS as to the accuracy and functioning of the program and related program material, nor shall the fact of distribution constitute any such warranty, and no responsibility is assumed by the USGS in connection therewith.
Menlo Park, California June 30, 1995

Table of Contents
Introduction..................................................................................................................!Software Configuration..............................................................................................!MRDS -4D Application..............................................................................................2Hardware Configuration............................................................................................5Launching MRDS - 4D................................................................................................6Typical Session.............................................................................................................8The Mineral Site File ..................................................................................................12Searching and Selecting Records..............................................................................14
Search by Example...........................................................................................14Search by Example field descriptions...........................................................15Selecting Records with the mouse in the column listing.......................19The Search Editor.............................................................................................22Field Structure and Searching.......................................................................24Sorting Records................................................................................................25Set Operations...................................................................................................25
Save Set..................................................................................................25Load Set..................................................................................................26Permanent Sets.....................................................................................27
Plotting......................................................................................^^Selecting a Plot Window................................................................................29
Window Name(s)................................................................................30Latitude/Longitude .............................................................................30Create window from Search by Example screen entries..............30Window on maximum extent of Mineral Site points ................30Use world window ..............................................................................30Revert to original window ................................................................31Load and Save buttons........................................................................31
Layers, Devices, Projections...........................................................................31Graphic Files Selections......................................................................32
World.........................................................................................32USA States.................................................................................32Counties.....................................................................................321:250,000 - Scale Quadrangle Outlines .................................33USA Geology.............................................................................33USA National Forests.............................................................33USA Wilderness......................................................................33Mineral Districts.......................................................................33USA Drainage Basins..............................................................34Mineral Sites: Points and Labels...........................................34Renumber..................................................................................34
Output Device Selection.....................................................................35Screen.........................................................................................35Color Pict....................................................................................35LaserWriter.................................................................................36

Flash Screen..............................................................................36New Flash File..........................................................................36Pen Plotter.................................................................................37
Projections.............................................................................................37Fast Mercator.............................................................................37Transverse Mercator ...............................................................37Albers Equal-Area Conic ........................................................37Lambert Conformal Conic .....................................................38
Pen Plotter Symbols Dialog............................................................................39Pen Plotter Symbol SizesPlot title..................................................................................................41Pen Assignments.................................................................................41Commodities Present, Major Commodities, USGS Model Name, Change......................................................................................42First Commodity Only or Nested Symbols....................................43Show last inventory list, or Create new inventory list...............43Executing the pen plot ........................................................................43Pen Types...............................................................................................44Plotter Settings......................................................................................46Operating the Plotter...........................................................................46Cable Connection.................................................................................47
Assessments AK and Assessments US.......................................................48Entering Data ................................................................................................................49
New Record menu item.................................................................................50Cancel button....................................................................................................50Enter button......................................................................................................51Delete Records menu item ...........................................................................51First Record, Previous Record, Next Record, Last Record buttons .......51Page buttons and menu items.......................................................................51Apply Formula menu item...........................................................................51Repair Sets menu item...................................................................................51
Transferring Data.........................................................................................................53Send Records.....................................................................................................53Receive Records...............................................................................................56IBM-PC's and other computers.....................................................................57
Reports...........................................................................................................................58Standard Listings..............................................................................................58Graphs................................................................................................................58Quick Report.....................................................................................................58
Other File Menu Items ...............................................................................................60Preferences.........................................................................................................60Quit.....................................................................................................................61
Bibliography ..................................................................................................................62

Introduction
The Mineral Resources Data System using 4th DIMENSION (MRDS - 4D) is an Apple Macintosh application for displaying mineral-resource and related earth-science data. The MRDS - 4D graphical interface is a vector- based plotting system developed at the U.S. Geological Survey (USGS). It operates in conjunction with the commercial database manager 4th DIMENSION. The user can display and explore data in a mouse-driven map environment, as opposed to the traditional text-based, command-driven environment. Point localities and polygon features are clickable objects, allowing access to further information on individual map items. The MRDS - 4D data base is capable of containing mineral-site locations, mineral-district outlines, bedrock geology, Wilderness Area, National Forest, political and coastline boundaries, and several other types of files.
MRDS - 4D was formerly called "ROCS" (Resource Oriented Computer System), a database application written by Paul Schruben and Carl Carlson in several versions from 1987 to 1994.
This report is a manual for MRDS - 4D users and describes its capabilities and procedures.
Software Configuration
MRDS - 4D has several major software components:
4th DIMENSION - a commercially available database manager by Acius, Inc.
Database Structure -file dictionaries, dialog layouts, and procedures written in 4th DIMENSION database language.
Graphics drivers - Pascal graphics driver programs controlling screen, laserwriter, PICT, and pen plotter map plots.
Data - graphics and text files derived from many sources.
Ancillary Macintosh software -MacDraw or similar graphics editor for manipulating PICT files.Macintosh System 6.x or greater.SendPS for sending Postscript files to the laserwriter.

MRDS - 4D Application
Because of how 4th DIMENSION is marketed, there are several versions of MRDS - 4D. An important concept in understanding the differences between the versions of MRDS - 4D is to keep in mind the three environments that are available in 4th DIMENSION:
Design EnvironmentThe design environment is used to actually create a database. A
custom application, such as MRDS - 4D, is created in the design environment. Versions of 4th DIMENSION that have this capability are the most expensive; consequently, modifications to the data base are made at the USGS in Denver, Colo., which maintains the 4th DIMENSION compiler (The 4th DIMENSION compiler provides full design and structure modification capability.)
User EnvironmentThe user environment is where data is entered and manipulated and where reports and graphs are created.
Runtime EnvironmentThis is a special environment that is used to run a custom application. It is termed "runtime" because it can use a low-cost version of 4th DIMENSION called 4D Runtime that can run, but not create, 4th DIMENSION databases. A runtime application is created in the design environment. Note that once the runtime application is created on the full version of 4th DIMENSION, it can be run at locations that do not have the full capability 4th DIMENSION product.
The user can select the environment from the USE menu, which is accessed from the menu bar displayed after pressing Command-Q while in the Grand Canyon scene. Of course, if that environment is not available in the version of MRDS - 4D being used, it will not appear in bold face in the USE menu.
Design 3SY </User
Runtime
There are three versions of MRDS - 4D:
MRDS Design, User, and Runtimeenvironments
MRDS. comp User and Runtime environments MRDS.runtime Runtime environment only
MRDS is a version that contains the full capability of 4th DIMENSION. It executes interpretively and is therefore slower than MRDS.comp.
MRDS.comp is the compiled version and lacks the Design environment. It can create or modify reports and records but cannot modify programs, files, or layouts. The advantage of MRDS.comp is execution speed.
MRDS.runtime lacks both the Design and User environments. This is bundled with the low-cost version of 4th DIMENSION. Data can be entered and modified even though it does not provide the "user" environment. 4th DIMENSION runtime is provided by the user and not distributed by the USGS.
MRDS, MRDS.comp and MRDS.runtime are examples of 4th DIMENSION structure files. They point to a data file called MRDS.data or MRDS.data.clone. MRDS.data contains the entire Mineral Site database. MRDS.data.clone, is used to create customized user subsets of the Mineral Site database.
A folder containing a clone of MRDS - 4D is provided with each release. If the user wishes to work only with a copy of MRDS - 4D and a subset of the mineral site database, he or she can create a copy of the clone (It is best to keep one pristine clone folder). The clone folder consists of the following:
MRDSMRDS.compMRDS.data.cloneSendPS substituteSendPS»1.21Proc.ExtSets
To create a clone, begin by duplicating the clone folder. For reasons described below, it is best to place a copy of 4th DIMENSION in this folder. MRDS.data.clone is a skeleton dataset that can be filled with user records that have been transferred from the main Mineral Site database. The records can be transferred from the main database using Send Records under the File menu. These records can, in turn, be read into MRDS.data.clone by using Receive Records also under the File menu. Sending and receiving records is discussed in the section titled Transferring Data. Once the records have been read into MRDS.data.clone, they can be accessed by launching the clone of MRDS.comp or MRDS that resides in the same folder as MRDS.data.clone.

4th DIMENSION has some peculiarities about locating a data file on launch. Double clicking on MRDS or MRDS.comp structure files normally launches the 4th D 2.2.3 application located in the same folder. If it fails to find a copy of 4th D 2.2.3 in the local folder, it searches the default disk drive starting with the root folder and proceeding alphabetically through the folders until it finds the 4th D 2.2.3 application. Unfortunately, it also looks for a data file in the same foreign folder. This can result in data-entry records seeming to go into the "wrong" data file or disappearing from the "correct" data file.
The same phenomenon occurs if you launch by double clicking on the data file. 4th DIMENSION looks for the structure file in the folder where it finds 4th D 2.2.3. The only exception is MRDS.runtime which has 4th D 2.2.3 bundled within it, so it never looks in other folders.
There are two solutions to the problem:
Copy 4th D 2.2.3 to all MRDS folders as noted above.
Hold down the option key on every launch, then switch folders to the desired data clone. Note that using the option key allows you to "point" to any desired data clone, even one with a different name than MRDS.data.clone. The option key be held down until the Open datafile..... dialog box appears.
Hardware Configuration
MRDS - 4D operates in stand-alone mode to take advantage of the Macintosh programming tools and avoid the complications and expense of telephone communications and mainframe computer operations.
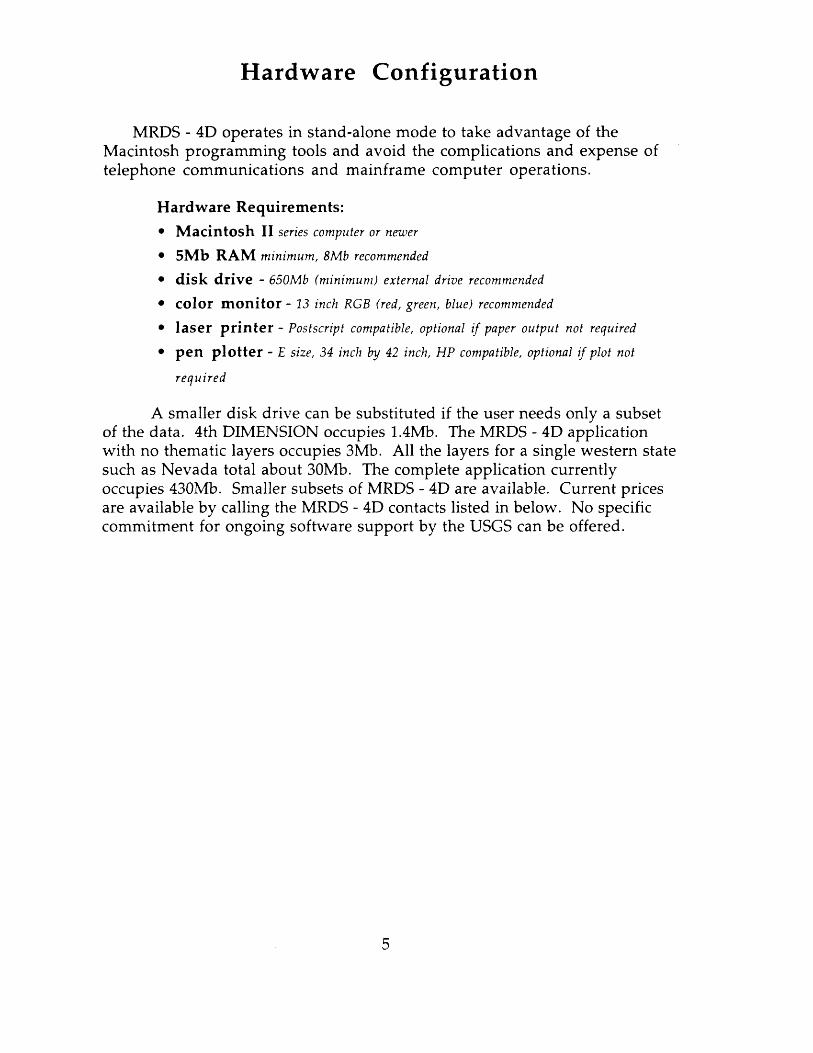
Hardware Requirements:
Macintosh II series computer or newer
5Mb RAM minimum, 8Mb recommended
disk drive - 650Mb (minimum) external drive recommended
color monitor - 13 inch RGB (red, green, blue) recommended
laser printer - Postscript compatible, optional if paper output not required
pen plotter - E size, 34 inch by 42 inch, HP compatible, optional if plot not
required
A smaller disk drive can be substituted if the user needs only a subset of the data. 4th DIMENSION occupies 1.4Mb. The MRDS - 4D application with no thematic layers occupies 3Mb. All the layers for a single western state such as Nevada total about 30Mb. The complete application currently occupies 430Mb. Smaller subsets of MRDS - 4D are available. Current prices are available by calling the MRDS - 4D contacts listed in below. No specific commitment for ongoing software support by the USGS can be offered.

Launching MRDS - 4D
The following procedure is used to launch MRDS - 4D on most Macintosh II computers:
Turn on the external disk drive, if any.
Most MRDS - 4D systems use an external disk drive. The ON button is usually a rocker switch located on the drive's back panel. Some drives must be allowed to spin up for a few seconds before the Macintosh itself is turned on.
Turn on the Macintosh.
The Mac is turned on via the keyboard. The ON key is marked with a triangle in the upper right-hand corner of the keyboard.
Open the folder containing MRDS - 4D.
As the installation of MRDS - 4D is dependent upon choices made by the installer, the name of the MRDS - 4D folder and the name of the MRDS - 4D application will vary from computer to computer. Also, MRDS - 4D can be installed in its own folder or it can be installed in the 4th DIMENSION folder. Once the correct folder is found, the MRDS - 4D application will typically have the name MRDS.runtime. To begin MRDS - 4D, double-click on MRDS .runtime.
If you are launching MRDS - 4D.runtime for the first time, you will be asked to provide the following information. This is the registration information that goes along with a legal purchase of 4th DIMENSION.
Welcome to 4th DIMENSION®
Name:
Organization:
ID (from the card in the disk pack):
[ Cancel ~~] [ OK

Enter MRDS - 4D.
After MRDS - 4D loads its variables, the Grand Canyon scene appears signifying that 4th DIMENSION has entered the Runtime environment. Choose menu item Enter MRDS - 4D.
Using Help.
After MRDS - 4D is launched, the help facility can be accessed by selecting the menu item About MRDS - 4D in the File menu.
Selecting Quit from the Grand Canyon scene will take the user back to the 4th DIMENSION user environment. To return from the user environment to the runtime environment (the MRDS - 4D application), select Runtime under the Use menu.
Selecting Run Startup will reinitalize MRDS - 4D and display the Grand Canyon scene.

Typical Session
Enter MRDS-4D
From the Grand Canyon screen in MRDS - 4D, choose menu item Enter MRDS - 4D. This evokes the Search by Example layout.
While in MRDS - 4D, the following menu bar is displayed at the top of the window. While progressing through a session from record selection to final plot, choices will made from the menus selected from this bar:
w File Edit Enter Select Plot Report
The following is a simple example of using MRDS from the Search by Example screen .
Suppose we want to find all sites in Santa Clara County, Calif, that contain the commodity mercury and produce a screen plot of the site locations, geologic formations and certain boundaries. Once the screen plot is available, we can look at record summaries of each site and also at a brief description of the geologic formations.
Enter the search criteria as shown on the following Search by Example screen.
Record No.
Latitude
Longitude
Quadrangle
Search by*x»mp)»: Ml 23456,
1 xwnpto: 48-3ON
1
1
1 Mineral Site File
txample Hagel *>\ IV07»
-to- |
-to- |
CumuUtivo hFfl*
, | | |
1 250,000 Set\» Qu»ds only »x«mf)» : MoOtrmtH, Vmwfm*
[ Country ] | [ | | |
[ State ]
County
[Commodity
(California
jSanta Clara xwnpU : Pb Zn and Cu|Hg
Commod Type DM»UIHO O*
Site Name I
Mev* cursor to tno
Records to Searcl
lo»-MoUHio D « >
thtr fWU 1e roqlslor dunft
( 90368]
' [ 95861]
[ Load 1 [ Saue ]
| 41 | | 14845|
1 4H 1 isTl
n Major C»B-»i«m»t | 41 | [ 2194|
M»«aIKo & HM D Bl»o* | "| [ "|
® VWW Vorrf (f«rt) ______ ______
O Sltrts VMfc (fast) 1 1 1. 1
O fe*ctrlM (stov)
|Currrent SelectionIMRDS Default Set(Entlrt Mineral Site File
[ Page 2 Enecute Plot XEJ
Next, click on the button associated with MRDS Default Set or Entire Mineral Site File. The data base is searched until all records meeting the criteria are
8

found. Now you can look at a columnar listing for the current set by pulling down the Select menu and selecting Show Subset.
The columnar listing will appear as follows. The full data entry records for any of these sites can be selected by double-clicking on the desired record, displayed, and modified if desired.
Record No.
M055599
M055600
M055601
M055602
M055603
M055604
M055605
M055606
M055607
M055608
M055609
M055610
M055611
M055612
M055613
MO55614
M055615
M055616
M055617
M055618
M055619
M055620
M055621
M055622
Sit* Name
NEV ALMADENDISTRI
BERNAL
BRAINARD
BO VIE
CHABOYA-HH.LSDAL
GUADALUPE
rCV ALMADEN
rCV ALMADEN - COR/
NEV ALMADEN - HARF
NEV ALMADEN-VELi»
NEV ALMADEN - CENT
NEV ALMADEN - VICT
NEV ALMADEN - NOR!
NEV ALMADEN - SOUT
NEV ALMADEN - SAN
NEV ALMADEN - S AN
NE V ALMADEN - SAN
AMERICAN
PROVDENCIA
ENRIQUITA
SAN ANTONIO
SAN MATED
SENATOR
DEEP GULCH PLACER
District
NEV ALMADEN
NEV ALMADEN
NEV ALMADEN
NEV ALMADEN
NEV ALMADEN
NEV ALMADEN
NEV ALMADEN
NEV ALMADEN
NEV ALMADEN
NEV ALMADEN
NEV ALMADEN
NEV ALMADEN
NEV ALMADEN
NEV ALMADEN
NEV ALMADEN
NEV ALMADEN
NEV ALMADEN
NEV ALMADEN
NEV ALMADEN
NEV ALMADEN
NEV ALMADEN
Latitude
37-13-12N
37-1 0-41 N
37-08-34N
37-17-19N
37-12-38N
37-10-46N
37-10-27N
37-10-38N
37-10-45N
37-1 0-31 N
37-10-46N
37-11-06N
37-10-45N
37-10-24N
37-10-27N
37-10-36N
37-10-52N
37-1 1-2 IN
37-11-35N
37-12-02N
37-11-59N
37-12-34N
37-10-25N
Longitude
121 -47-32 V
121-53-08V
121 -51 -30V
121 -51 -20V
121-53-59V
121 -50-30 V
121-50-07V
121-50-22V
121-50-24V
121 -50-1 8V
121 -50-30 V
121-50-32V
121 -50-48 V
121-50-40V
121-50-46V
121 -50-48 V
121-51-10V
121 -51 -57V
121-52-01V
121 -52-46 V
121-52-33V
121-53-33V
121-49-25V
:try
US
US
US
US
US
US
US
US
US
US
usususususususususususususus
st
CA
CA
CA
CA
CA
CA
CA
CA
CA
CA
CA
CA
CA
CA
CA
CA
CA
CA
CA
CA
CA
CA
CA
CA
Cty /Prov
SANTA CL
SANTA CL
SANTA CL
SANTA CL
SANTA CL
SANTA CL
SANTA CL
SANTACL
SANTA CL
SANTA CL
SANTA CL
SANTA CL
SANTACL
SANTA CL
SANTACL
SANTA CL
SANTA CL
SANTA CL
SANTA CL
SANTACL
SANTA CL
SANTA CL
SANTACL
SANTA CL
Commodities Present
HG CR MN cu STN;HC
HG
HG
HG
HG
HG
HG
HG
HG
HG
HG
HG
HG
HG
HG
HG
HG
HG
HG
HG
HG
HG
HG
Maj<
HG
HG
HG
HG
HG
HG
HG
HG
HG
HG
HG
HG
HG
HG
HG
HG
HG
HG
HG
HG
HG
HG
HG
Establish the plot parameters.
To establish the plot parameters, pull down the Plot menu and select Plot Window. In this example, the latitude and longitude have been calculated by selecting the Window on maximum extent of mineral site points box. Although the Execute Plot button appears in many dialog boxes, a plot window must be established before plotting.

Mineral Site File: 41 of 95881
Plot Window Settings
Window Name(s)for example: Oregon, Washington
Press "Return" or mouse another field to register otttnge.
example: 42-30N
Latitude: |36-11-25N -to- |37-26-26N
LonflUde: |l21~56-5W -to- J121-9-54W
Q Create vindov from Search by Example screen entries
fT) Windov OR maximum extent of mineral site points
Q} Use world vindov
Revert to original vindov
[toad Saue Execute Plot XE
Now pull down the Plot menu again and select Layers, Devices, Projections.
Layers, Devices, Projectio-Graphic Files: Coastlines & Political Boundaries
O World CHcu1 Fle*olu(ion O IWorid States O Meil liescilul kori OUSfl States ® High Resolution <g>USfl Counties QNone
Quadrangle Outlines O 1:250,000 scale ® None
-Output Devices:
<S> Screen O FlashScreen
O Color PICT I
O LaserWriter
O Pen Plotter O New Flash File
Plot Title |
nq cl
HUSH Geology DUSfl National Forests D USfl Wilderness D Mineral Districts DUSfl Drainage Basins G flssessment Quads
Mineral SitesH Points [Renumber]H Labels(site Name [ Change ]
-Projections:
® Fast Mercator OTransuerse Mercator O fllbers Equal flrea [F'aiarm] O Lambert ConTormol [F'<n<irr^]
[ Load ] [ Saue 1 (Execute Plot XE
To display the boundaries of counties adjoining Santa Clara county, select USA Counties. Select 1:250,000 scale quadrangle outlines if you want these displayed. Select USA Geology for the geologic formations, Points to plot the
10

mineral sites as circles, and Labels for site names. The output device will be Screen, and the projection will be Fast Mercator.
Execute the plot.
Click on the Execute Plot button. Shown below is part of the screen plot for this example. As explained later in this manual, site and formation names can be determined by passing the mouse over the circular points and geologic formations. Also site records and geologic information can be displayed by mouse selection.
Above: Partial screen plot of Santa Clara county mercury sites
A mouse click outside of the map area allows you to quite the map.
11

The Mineral Site File
Text files available in MRDS - 4D are listed under the File menu, Choose File item. The Mineral Site File is the one most frequently accessed and is the default file when MRDS - 4D is entered.
flbout ROCS... Preferences...
Choose File
Send Records... Receiue Records...
Print...
Quit § Q
The following files are available from Choose File:
file useAssessmentsCommodity SpecialistsDistrictsInventoryMineral Site File
Plot ParametersPostal AddressProjectsReferencesRequestsSpecialistsUpgradesWilderness Explanation
AMRAP and CUSMAP projects and referencesUSGS commodity personnel and referencesmineral districts outlines and descriptionsa tabulation of entries in the requests fileMRDS records, Major mines and other mineral site dataand other mineral site datacontains all the information required to perform a plotapplies to Commodity Specialists fileUSGS Geologic Division projectsapplies to Districts file onlylogs official inquiries to MRDS - 4D usersused by the Commodity Specialist filedescribes edits and changes to Mineral Site fileWilderness area descriptions
Only the Mineral Site file is discussed in this manual.
Choosing the Mineral Site File causes MRDS - 4D to display the column listing. The column listing can not be directly edited and may not display all the fields. A full screen layout is needed to edit the records. The edit layout is evoked by double-clicking on an individual record in the
12

column listing or by single-clicking on a record, then selecting , Modify Record from the File menu. If an empty file screen is displayed instead of the column listing, go to the Select Menu and select Show All.
The Mineral Site File is identical in content to the USGS Mineral Resource Data System (MRDS) file on Data General using uniVerse in Reston, Va. The following fields in the Mineral Site File are indexed for rapid searches and sorts. They appear in bold print in the 4th DIMENSION Design environment. Knowledge of the MRDS data base structure is required to effectively use field names in the sort and search editors. Its easier to use the Search by Example screen for most applications. The fields that are indexed vary from version to version and can be changed by users with Design capability. Also, the database field names are not necessarily identical to the names used in the columnar or long form reports.
field useCommodPreSort Country Name Country Code County Deposit Size Desc Workings Latitude DecDeg Longitude DecDeg CommodMaj Search Quad250 Record Number Site for Sort State Code State Name Status Activity USGSModel first Dep. Type first AgeMineralizatn Host Rock Type Host Rock Age Commod Type Production
stores commodities as a single string30 diameters maximum2 charactersfirst 20 characters1 character, Large, Medium, Small (L, M, or S)1 character, Surface, Underground, Both (S, U,or B)calculated by MRDS - 4Dcalculated by MRDS - 4Dindividual commodities, 4 characters maximum each1 by 2 degree 1:250,000 scale quadrangle name7 charactersfirst 20 characters, total field stored in Site Name Long2 characters maximum20 characters maximumcodes 1 through 840 characters maximumfirst 20 clwracters, total field stored in Dep Typ Longfirst 10 characters, total field stored in Age Min Longfirst 20 characters, total field stored in Host RkTyp Longfirst 10 characters, total field stored in Host RkAge Longcode indicating metallic or non metallic or both (M,N, or B)code indicating small, medium, large, or undetermined (S,M,L,or U).
13

Searching and Selecting Records
Search by Example
If MRDS - 4D is entered from the Grand Canyon scene, the Search by Example layout is evoked. The Search by Example layout can also be evoked from the Select menu. This is useful for returning to the Search by Example layout from other menu-selected layouts.
The Search by Example menu item automatically sets Choose File to the Mineral Site File (Refer to the previous section, The Mineral Site File).
Show Rll Show Subset Omit Subset
Search by Example... :*:$Search Rll... Search Subset... Sort...
Saue Set Load Set... Permanent Sets.
Record No.
Latitude Longitude
Quadrangle
Search by hxample Pagel ">i .... i*xampU: Ml 23456 , V07<» CumuUtiv* In Fifc
txampl*: 48-30N
1 -to- | ' '1 250,000 Soak Quads only txampU : McDmnitt, VinnwrxX*
[ Country ] | | 1 | |
[ State ]
County
[Commodity]Commod Type
Site Name
|Cal1forn1a | ___ 4iJ r"i4845l
[Santa Clara | 41] | TTTI xampl* : Pb Zn and Cu |Hg D M« J*r CMMMdlttos | 41 | | 2194|
D Metallic D «»i»-M«tanic Q B.tk Metallic & MM Q Bl*-* | ] | ]
® Vk*l« V»r_ (fast) ______ _______
| - O Starts Vitk (fast) 1 J I J
Mov* cursor to aooth*r fi«M to r*qist*r chang* _ (J S«fcstri_f (stow)
Records to Search
( 4 l]|Currrent Selection
( 90368] |MRDS Default Set [ 9588 HlEntire Mineral Site File
[ Load 1 [ Saue 1 1 Page 2 Execute Plot XEJ
14

Search by Example field descriptions
There are two Search by Example screens in MRDS - 4D. A search is conducted on all the criteria in both pages every time a search button is selected. Only the AND logic is employed between fields except for the Deposit Size and Production Size fields on Search by Example Page 2. To conduct a search with OR logic between fields use the Search Editor as described later in this section under the topic The Search Editor. Search text strings are not case sensitive.
Record Number W@, 1234567,W12345@
Any leading part of a MRDS seven-digit number is acceptable. Separate individual record numbers with commas. To select a large number of records, the ID's can be prepared in a text editor such as Microsoft Word and pasted into the Search by Example field which can hold 32k bytes or approximately 4,000 MRDS record numbers. Lists of ID's from PC's and other computers can be imported using the clipboard.
Latitude, Longitude 108-15-30W or 108-15W or 108W
All four fields must be filled in for a valid search. Coordinate order isunimportant. Range is interpreted so as to not cross the poles or the 180° meridian. The values are converted to decimal degrees and used to search the LatitudeDecDeg and LongitudeDecDeg fields. If chosen in the Preferences dialog of the File menu, these items automatically set the plot window as well as the search area.
Quadrangle Ely, Elko
Most of the MRDS records in the U.S. have 1:250,000 scale quadrangle names in the Quad250 field. Separate individual names with commas. This item automatically sets (if chosen in the Preferences dialog of the File menu) the plot window as well as the search area.
Country United States, Canada
Select the Country button for help with country names. Not all names appear on the help maps. If the name is present, clicking on it automatically sets the plot window as well as the search area. If the necessary name is missing, Cancel from the help maps and type the name as listed in the MRDS Applications Guide. Separate individual names with commas.
State Nevada
15

Select the State button for help with state names. All states for the U.S. are present. This item automatically sets the plot window as well as the search area. If names are typed in, separate them with commas.
County Elko, Eureka
Separate individual counties with commas.
Commodity Au GRF Ni
A help screen is available by selecting the Commodity button. An OR is implied between commodities. AND connectors must be typed in. Multi- criteria search logic is strictly left-to-right, no grouping of criteria is supported. AND and OR have equal precedence. The retrieval set from the first criterion is AND'ed or OR'ed with the retrieval set from the next criterion, and so on until the list is exhausted.
Site Name Carlin, Bingham
Single Word option. Enter a single entire word such as Bingham or a wildcard such as Bing@. Do not enter more than one word such as Bingham Mine.
First 20 Characters option. Enter the first 20 characters of the entire site name, or a wildcard such as Bingham Mi@. Characters typed beyond 20 will be ignored.
Substring option. Enter any portion or all of the Site Name, forinstance gham mi. Substring option searches slowly, about 400 records per minute. First narrow your search using other fields on the layout. Then use Current Selection (top button of Records to Search), as opposed to MRDS Default Set or All MRDS Set (middle and bottom buttons of Records To Search). Note that the exact name of the data set that appears opposite the buttons depends upon the set or sets selected for search.
Cumulative, In File
The two columns on the right hand side of the screen display search tallies. The left column titled Cumulative shows cumulative matches; that is, the number of records meeting the criteria on the current line and all preceding criteria to the top of Page 1. Thus, the number of records selected never increases down the page.
The right column titled In File shows the total number of matches in the entire database for that criteria alone.
Both columns are recalculated after performing a search or Load set.
16

Records to Search
The Current Selection button is used to specify a search of the current subset. You can enter the name of a previously saved subset by typing the name on the line adjacent to the button or you can further refine the results of a preceding search. Current Selection looks at only the current set, equivalent to a logical AND with the previous search. It always results in a lesser or equal number of records, never more records, than the previous selection.
The number of records in the current selection is listed in the document title just below the menu bar. For example, Mineral Site File: 38 of 95881 indicates 38 records in the current selection. These will be the only records considered during a Current Selection search.
The middle button is the current MRDS set (selected from the Permanent Sets dialog of the Select menu). If a permanent set is not specified in the Permanent Sets dialog, the middle button defaults to All MRDS Set, which is equivalent to the entire mineral site file. Whatever selections are made in the Permanent Sets dialog will be saved upon exit from MRDS - 4D and reset at the next startup.
The bottom button is always set to select the entire mineral site file.
Page 2 of Search by Example:
Mineral Site File: 41 of 95881
17
The numbers listed to the left of each field on page 2 of Search by Example are the maximum number of characters necessary to fully define the data in that field. When typing less than the maximum, append with an "@" symbol, as in Stratab®. Characters exceeding the maximum will be ignored.
Deposit Size and Production Size searches can be connected by a logical OR, which is the default setting. When this option is unselected, AND logic is employed.
The results of a search using the Search by Example layout can be displayed by selecting Show Subset in the Select Menu. This displays the columnar listing for the Current Selection. If a Show All is selected at this point, the columnar listing for the set or sets identified by the middle button (current MRDS set, as selected in the Permanent Sets dialog) is displayed. However, you can't display the subset unless you execute the search again.
To show a columnar listing of the entire mineral site file, go to the Search by Example layout and click on the bottom button of Records To Search in the Search by Example layout. This establishes the entire mineral site file as the Current Selection. Then choose Show Subset for the columnar listing.
At this point attempting to change search criteria and search a larger set of records (that is, All MRDS Set) is not possible without reinitializing the search. This is most easily done by saving a "null" copy of the Search by Example layout as it appears when first entering MRDS - 4D. This copy can then be used to reset the layout for a new search. The procedure is as follows:
Enter MRDS - 4D from the Grand Canyon scene. You will now be in the Search by Example layout.
Press the Save button and follow the dialog box instructions to save the null criteria. Whenever you want to begin a new search,
Press the Load button and specify the null layout as the file to be loaded,
18

Record ID
blank-it Hash Rl
onnw geol pts activenw geol pts inactivenw ID east centnw ID south central
nw ID ssouth central
nw mt swnw st pts activenw st pts inactivenw ti zr rae areaRI screensanta clara mercuryse gase geol pts active
se geol pts inactivese nc wse pts active
Window Name
Virginia
rhode island
rhode island
georgiageorgia, Virginia
georgia, Virginia
georgia, Virginia south Carolina
Plot Title Set Name
se200 ti rae z
Currrent SeleCurrrent Sele HMHMPHHIUUlUjyQUflEaQ
nw 929 ti zr t nw1049 ti zr nw ti zr rae h nw32 ID soutt
nw ti zr rae h
nw224 mt sw nw 929 ti zr t nw 929 ti zr t nw1049 ti zr Currrent Sele Currrent Sele se ga 5 se238 ti zr hf
se238 ti zr hf se nc 182 w se238 ti zr hf se sc 86
South
42n 42n
42n
44n 42n 42n 42n
33-45n
Single-click to a select a record.
OK Cancel
Press the middle button to make the current MRDS set (e.g. All MRDS Set) the Current Selection,
Type the new search criteria and proceed with the search.
Selecting Records with the mouse in the column listing
Using the mouse to select records from a columnar listing is useful for several operations including using the search editor and displaying the full content of individual records.
Show All displays a columnar listing of the currently chosen Permanent set (as displayed in the middle button of Records To Search in the Search by Example layout). Show Subset displays the columnar listing for records in the Current Selection, or to establish, as the Current Selection, those records selected with the mouse.
A Sort (discussed later in this section) can increase the effectiveness of selecting records with the mouse.
For example, choose Show All to produce a columnar listing of the current MRDS set:
19

Select Shoin fillShow Subset Omit Subset
Search fill... Search Subset... Sort...
Saue Set Load Set... Permanent Sets.
The columnar listing will appear on the screen:
No. S«t Record No.
M055599
M055600
M055601
M055602
M055603
M055604
M055605
M055606
M055607
M035608
M055609
M055610
M0556J1
M0556I2
M055613
M055614
M055615
M055616
M055617
M055618
MO55619
MO5562Q
M053621
M055622
Sit* Name
NEW ALMADEN DISTRI
BERNAL
BRAINARD
BOVE
CHABOYA- HLLSDAL
GUADALUPE
NEV ALMADEN
NEV ALMADEN -
NEV ALMADEN -
NEV ALMADEN -
NEV ALMADEN -
NEV ALMADEN -
NEV ALMADEN -
NEV ALMADEN -
NEV ALMADEN -
NEV ALMADEN -
NEV ALMADEN -
AMERICAN
PROVOENCIA
ENRIQUITA
SAN ANTONIO
SAN MATED
SENATOR
COR;
HARI
VELJ
CENT
VICT
NOR1
SOU!
SANSAN"
SAN
DEEP GULCH PLACER
Renumber this Set 1
District
NEV ALMADEN
NEV ALMADEN
NEV ALMADEN
NEV ALMADEN
NEV ALMADEN
NEV ALMADEN
NEV ALMADEN
NEV ALMADEN
NEV ALMADEN
NEV ALMADEN
NEV ALMADEN
NEV ALMADEN
NEV ALMADEN
NEV ALMADEN
NEV ALMADEN
NEV ALMADEN
NEV ALMADEN
NEV ALMADEN
NEV ALMADEN
NEV ALMADEN
NEV ALMADEN
L»titud«
37-13-12N
37-1 0-41 N
37-08-34N
37-17-19N
37-12-38N
37-10-46N
37-10-27N
37-10-38N
37-10-45N
37-1 0-31 N
37-10-46N
37-11-06N
37-1 (MSN
37-10-24N
37-10-27N
37-10-36N
37-10-52N
37-11 -21 N
37-11-35N
37-12-02N
37-11-59N
37-12-34N
37-10-25N
Longrtud*
121-47-32V
121 -53-08 V
121 -51 -30V
121 -51 -20V
121-53-59V
121-50-30V
121 -50-07 V
121-5O-22V
121-50-24V
121-50-18V
121-5O-30V
121-5O-32V
121-50-48V
121-50-40V
121-5O-46V
121-5O-48V
121-51-10V
121-51-57V
121 -52-01 V
121 -52-46 V
121-52-33V
121-53-33V
121-49-25V
:try
US
US
US
US
US
US
usususususususususususususususususus
st
CACA
CA
CA
CA
CA
CA
CA
CA
CA
CA
CA
CA
CA
CA
CA
CA
CA
CA
CA
CA
CA
CA
CA
Cty /Prov
SANTA CL
SANTA a
SANTA CL
SANTA CL
SANTA a
SANTA CL
SANTA CL
SANTA CL
SANTA CL
SANTA CL
SANTA CL
SANTA CL
SANTA CL
SANTA CL
SANTA a
SANTA a
SANTA CL
SANTA CL
SANTA a
SANTA a
SANTA CL
SANTA CL
SANTA CL
SANTA CL
Commodities Pr*s*tv
HG CR MN CU S
HG
HG
HG
HG
HG
HG
HG
HG
HG
HG
HG
HG
HG
HG
HG
HG
HG
HG
HG
HG
HG
HG
HG
Form Reference List
Select records with:
clickshift-click98-click
at the beginning of a groupat the end of a groupany number of isolated records
Only one shift-click group is allowed. However, an unlimited number of individual 9§- click records can be selected. You may remove a chosen recordfrom your selection by pressing IE-click. However, this can be done only one record at a time.
20

Selected records will be highlighted. Choose Show Subset from the Select menu to establish the selected records as the Current Selection.
SelectShow RllShorn SubsetOmit Subset
Search by Example... d£S Search fill... Search Subset... Sort ...
Saue Set Load Set... Permanent Sets...
Note: Omit Subset displays those records not selected.
The Renumber this set button is used to renumber the current set of the Mineral Site file as displayed in the No. Set column (if Columns Numbered Set is selected in the Preferences dialog). The numbers will appear on plots and printouts. See the section titled Layers, Devices, Projections for more information on the use of these numbers.
Initially the No. Set entries are blank, but individual numbers can be typed into the data entry layouts for the Mineral Site file. However, if a current set is renumbered, all records in that set will be renumbered beginning with the number one at the top of the columnar listing. Also, if the current set has no numbers displayed in No. Set, renumbering will begin with one. Whatever records are numbered, the numbers will remain so until erased, overwritten manually or renumbered in a subsequent list.
21

The Form Reference List feature at the bottom of the columnar listing display is not yet implemented.
The Search Editor
Show fill Show Subset Omit Subset
Search by EHample. Search fill... Search Subset... Sort...
Saue Set Load Set... Permanent Sets...
The 4th DIMENSION Search Editor is evoked from the Search All or Search Subset menu items. Search Subset searches only the records in the Current Selection and always results in a selection of records that is less than or equal to the Current Selection. The Search Editor is also available in the User environment. After searching, Show Subset displays the results of the search in column mode.
Search EditorState Name is equal to
Or State Name is equal to And CommodPreSearch'Commoditis equal to
NEVADA
UTAHCU
«- -»
CommodPreSearch CommodPresSortOre Minerals Commod Major CommodMajSearch Commod Minor
£
<v
is equal tois not equal tois greater thanis greater than or equal tois less thanis less than or equal tocontains
Oflnd
OOrO EKcept
|V*lue
[ Saue... ) [ Load... ] [ Cancel ] [ OK
22

Establish search criteria in the Search Editor by first selecting the field name (left box) and operator (middle box). Finally enter the matching text (not case sensitive) or number. Then select the connector. For instance:
_______field name_______operator_____match text connectorState Name is equal to NEVADA
ORState Name is equal to UTAH
ANDCommodPreSearch is equal to CU
Multiple criteria may be connected in a single search with AND, OR, or EXCEPT ("not") logic. The AND connector is equivalent to performing consecutive single criterion searches. Multi-criteria searches with OR connectors must be accomplished in a single search.
Multi-criteria search logic is strictly top to bottom; no grouping of criteria is supported. AND and OR have equal precedence. The retrieval set from the first criteria is AND'ed or OR'ed with the retrieval set from the next criteria, and so on until the list is exhausted except for indexed fields which always search the entire file. This can lead to unexpected results. For instance, the intention in the following search is to find all the copper records in Utah and Nevada:
CommodPreSearch is equal to CuAND
State Name is equal to UtahOR
State Name is equal to Nevada
First, 4th DIMENSION searches the entire file for copper records. Then it finds all the Utah records and performs a logical AND with the previous set to form a copper-Utah set. Finally, because State Name is indexed, 4th DIMENSION searches the entire file for Nevada records and OR's the Nevada set with the copper-Utah set. Unfortunately, all the Nevada records meet the criteria, not just the Nevada-copper records. This is obviously not what was intended.
The correct results can be obtained by placing the OR clause first as in the following example:
State Name is equal to NevadaOR
State Name is equal to UtahAND
CommodPreSearch is equal to Cu.
23

Indexed fields are usually searched more rapidly than non-indexed fields. For a list of indexed fields, see the section titled The Mineral Site File. The contains operator forces 4th DIMENSION not to use the indexes if any exist. For instance:
Site for Search contains Bingham
searches the current subset and is usually much slower than:
Site for Search is equal to Bingh®
which searches the entire file using the indexes. For this reason, it is advisable to narrow the selection as much as possible with indexed fields before a contains search.
The use of the 4th DIMENSION @ wildcard character for matching trailing characters is valid for alpha-numeric fields, but not for numeric fields such as LatitudeDecDeg.
Search criteria can be saved and reloaded at a later time. Select the SAVE button and enter a file name at the prompt. Alternatively, search results can be saved with the Save Set menu item.
Field Structure and Searching
Be careful when searching certain fields such as Commod Pres with the search editor, because database field names are not necessarily identical to the names used in the column listings. Commod Pres is represented by the name Commodities Present in the column listing. The structure of Commd Pres is not obvious from the columnar listing. It is not an 80-character field as is Commod Major, but rather a series of 4-character codes (maximum) separated by a blank. Each of the 4-character "subfields" must meet the criteria of the search. Also, if more than four characters were originally entered in the record, the fifth character will be accepted and placed where the blank should be. However, this fifth character is not considered during a search.
Thus, if the code COA1 (anthracite) is entered with a question mark as "COA1?", the question mark will appear in the listing, but a search for equality on COA1? will fail. A search for equality on COA1 will find all entries with COA1 and COA1?.
It is also possible that the data were entered as "COA1 ?". In this case the question mark becomes the next code in the series as if a question mark were a commodity code. This is because upon data entry, a blank terminates a commodity code and the next character typed is assumed to begin another commodity code.
These problems do not exist when searching the Commod Major field because the field is structured as an 80-character string. An equality search will only be logically true if the character string in the field exactly matches
24

the string specified in the search command. Of course a "contains" search can be used to find substrings within the 80-character field.
Sorting Records
Sort evokes the 4th DIMENSION sort editor. Click the arrow icon on the right hand side of the screen to change from ascending to descending sorts. Sorts on indexed fields are much faster than sorts of non-indexed fields. For a list of indexed fields see the section titled The Mineral Site File
Sort Main MRDS...
Record NumberRecord TypeFile Link IdentReporterUpdaterSite Name LongSite for SearchSite for SortDistrictforSortCountry NameCountry CodeState NameState CodeCountyLatitude DecDeg
State Name
Record Number
fldd Formula ] f~ J [ Cancel J [ Sort ]
Set Operations
Sets allow rapid access to a group of records in a file. Sets store pointers to records, not the data themselves. Each pointer occupies only one bit. Consequently, sets are very compact and load rapidly, making them very useful for speeding up demonstrations or for executing several different searches from a common subset.
However, there are some disadvantages to sets. Because they are merely pointers to the first field in each record in the file and do not contain the record id, sets are not generally valid in databases other than the one in which they were created. Thus, sets are not necessarily transferable to other databases. Also, pointers may become invalid if some records are deleted and others are added that occupy the previous "holes" in the file.
Save Set
This operation saves pointers to records in the current selection of the current file to disk. The user must remember to which file a given set
25

applies. Choose a very descriptive set name, such as Set Sites Reno Quad Au and remember the folder you place the set in. If you have just placed a file in a folder other than the Sets folder, the next Save Set will default to that folder.
Load Set
1Records in Set
Load Set
Union
Saue Set
OK
0
Clear Set
Intersection
R minus B
Cancel
The Load Set menu item under the search heading starts with the current record selection, which for this discussion will be called set A. Set A can be removed as the current set with the Clear Set button. The Load Set button replaces the current set with any selected set previously stored on disk, for example, Set B.
Save Set writes the set pointers to a disk file which you are asked to name. OK exits the dialog and makes set A the current set. Cancel also exits the dialog but reverts to the set in use before the Load Set menu item was evoked. The original set remains accessible with a Cancel regardless of how many operations have been conducted in the dialog.
Union adds records in set B to those in set A. More sets can be added by selecting Union again. The resulting set needs to be saved (click Save Set), to the name Set A or any other name, if it is to be loaded again. Otherwise click OK to exit the dialog and make it the current set.
Intersection forms a set of only those records common to sets A and B. More sets can be intersected by selecting Intersection again. The resulting set needs to be saved (click Save Set), to the name Set A or any other name, if it is to be loaded again. Otherwise click OK to exit the dialog and make it the current set.
A minus B performs a difference operation, finding records unique to A. It creates a set composed of those records in Set A which are not also in set B. More sets can be subtracted by selecting A minus B again. The resulting set needs to be saved (click Save Set), to the name Set A or any other name, if is to be loaded again. Otherwise click OK to exit the dialog and make it the current set.
26

Permanent Sets
-Choose any
D 95,881
D 595
D 103
D o
D 713
D 4,842
D 732
^ 90,368
OK
f number of sets* iI IUII 1 1 fc^ X* 1 \J 1 O \* \v+J .
Mineral Resources Data System (all records)
Major Mines (MMF, MSF)
Major Deposits (MDF)
Regionally Important Sites (RMF)
Prospective Major Mines (PMM)
Prospective MRDS Records (PMR)
International Strategic Minerals Inventory (ISMI)
MRDS Default Set (All minus PMM&PMR)
Cancel
The Mineral Site file contains eight permanent subsets:
MRDS - The entire Mineral Site file.
Major Mines - Includes only mines with large current or past production.
Major Deposits - Large reserves or resources but no current or past production, code MDF.
Regionally Important Sites - Important production or reserves with respect to a specific country, state or region but not necessarily world-class sites, code RMF.
Prospective Major Mines - Mines thought to be large but containing incomplete information, code PMM.
Prospective MRDS Records - Records containing incomplete information, code PMR.
International Strategic Minerals Inventory - Major mines and deposits of selected mineral commodities compiled as part of a six-nation cooperative program, code ISMI
MRDS Default Set - The MRDS set minus the Prospective sets PMM and PMR.
27

If multiple boxes are selected, the sets will be combined and called the User Set in the middle Records to Search button of the Search by Example layout.
Changing Permanent Sets selections sets the Current Selection equal to the set shown in the middle button of the Search by Example layout.
Certain operations can change the record count in permanent sets; therefore, a Repair Sets operation (under the Enter menu) should be performed after:
Adding records via the New Record menu item. Changing entries in the File Link ID field. Deleting records in the User environment. Receiving records to a previously empty clone.
MRDS - 4D automatically Repairs Sets after:
Receive Records under the File menu Delete Subset under the Enter menu
28

Plotting
The process of plotting requires that certain plot parameters be specified before executing the plot. These can be established by progressing through the Plot menu from Plot Window to Execute Plot (or the Execute Plot button). In actual practice, you will probably jump back and forth through the various menus as you produce a number of searches and plots. The key thing to remember is that you cannot execute a plot until a plot window is defined.
Selecting a Plot Window
From the PLOT menu in the menu bar, select Plot Window.
Layers, Deuices, Projections.. Pen Plotter... 930 EKecute Plot... 9§E
flssessments flK... assessments US...
Plot Window Settings Plscmta clara mercury
Window Name(s)for example: Oregon, Washington
Press "Return" or mouse another field ft> register change.
example: 42-30N
Latitude: 137-2- 15N -to- I37-24N
Longitude: J12I-55-20W -to- J121-25-38W
f~) Create vindov from Search bg Example screen entries
Q Windov on maximum extent of mineral site points
Q} Use vorid vindov
Revert to original vindov
Load Saue Enecute Plot XE
29

This will display the Plot Windows Dialog (above).
The plot window represents the actual geographic area to be plotted, expressed in degrees, minutes, seconds. The plot window can differ from the search area specified in the Search by Example screen. MRDS - 4D plots the area specified in Search by Example or the Plot Window, whichever was most recently visited. The plot window must be specified before trying to execute the plot from any dialog under the Plot menu.
Window Name(s)
The Window Name(s) button allows users to select areas by name with the mouse. Alternatively, one or more names, separated by commas, can be typed in. The user must press tab, return, or click on another field or button to register the entry. MRDS - 4D attempts to compute the latitude and longitude limits from a table of names. If MRDS - 4D is unsuccessful, either due to the name not being in the table or to a misspelling, an error message is displayed.
Latitude/Longitude
A third alternative for window selection is to type in the latitudes and longitudes. All four fields must be filled in for a valid window. Coordinate order is unimportant. Range is interpreted so as to not cross the poles or the180° meridian. The user must tab, return, or click on another field or button to register the coordinates. The EKBCUte Plot §§ E menu item will not register the last coordinate typed if the cursor is left in the coordinate field.
Create window from Search by Example screen entries
MRDS - 4D derives an initial plot window from information in the Search by Example screen fields: latitude/longitude, quadrangle, country, or state. This computation takes place automatically every time Search by Example is visited, if so specified in the Preferences dialog. The Create window... button forces the calculation, and can be used if the preference item is turned off or if you have changed the Plot Window settings and wish to revert to the Search by Example settings.
Window on maximum extent of Mineral Site points
MRDS - 4D searches the current selection of Mineral Site points for their maximum latitude/longitude extent and adds 5 percent at each edge.
Use world window
30

This choice sets latitude/longitude to the MRDS - 4D default world window, which is currently set for latitudes 75N to 60S and longitudes 180W to 180E.
Revert to original window
Resets the window parameters to those that existed when the Plot Window dialog was evoked.
Load and Save buttons
The Save button is used to save the contents of the Plot Window dialog to a file. Conversely, the Load button is used to load a previously saved Plot Window Settings dialog from the file identified in the ID box.
Layers, Devices, Projections
From the Plot menu of the menu bar, select Layers, Devices, Projections.
PlotPlot Window...Layers, Deuices, Projections.. &LPen Plotter... Execute Plot...
assessments RK... Rssessments US...
§§0
This displays the Layers, Devices, Projections dialog.
31

Layers, Devices, Projections t BHEEEZE333M-Graphic Files:
Coastlines & Political Boundaries O World O 1-fl" 1 He*olulii>n O UJorld States O Mpd Resolution QUSR States (i> High Resolution (g) USR Counties ONone
Quadrangle Outlines O 1:250,000 scale <i> None
-Output Devices:
<S> Screen O FlashScreen
O Color PICT 1
O LaserWriter
O Pen Plotter O New Flash File
Plot Title]
EJ USR Geology DUSR National Forests DUSR Wilderness D Mineral Districts D USR Drainage Dasins n Rssessment Quads
Mineral SitesM Points [Renumber]El Labels
|Site Name [ Change ]
-Projections:
® Fast Mercator
OTransuerse Mercator
O Rlbers Equal Rrea [Panirrn]
O Lambert Conformal [F<tr<irnt]
Load Saue EHecute Plot §6E
Graphic Files Selections
World
The world file is available in three resolutions. Originally from the CIA World Data Bank I file, it was generalized in ARC/INFO and exported to MRDS - 4D. The low-resolution version plots the fastest, but is too generalized for plots of areas covering less than 80 degrees. Medium resolution is useful down to approximately 5 degrees.
USA States
The USA States file is also available in three resolutions. It is based on U.S. Geological Survey National Mapping Division 1:2,000,000 scale DLG maps, generalized in ARC/INFO and exported to MRDS - 4D. Low resolution is suited mainly for large areas. Medium resolution remains useable down to state-size plots.
Counties
County boundaries originated as a U.S. Geological Survey National Mapping Division 1:2,000,000 scale DLG file which was generalized in
32

ARC/INFO. On MRDS - 4D, it is available in high resolution only and plots as black lines (white on screen plots) with the state outlines in red.
'1:250,000 - Scale Quadrangle Outlines'
1 by 2 degree quadrangle outlines can be selected. They plot as gray lines on screen plots. There is no text file associated with the quadrangles. The quadrangle name appears in the inset box as the cursor passes over a quadrangle boundary.
USA Geology
The geology file is a digitized version of the USGS Geologic Map of the United States (King and Beikman, 1974). It was created by both hand- digitizing and scanning, then converted to ARC/INFO for editing and exported to MRDS - 4D. The unit designations for the formations are shown in the inset box as the cursor is moved across the map. The formations are accompanied by a brief description of the unit excerpted from the King and Beikman explanation. This description is obtained by single clicking in the formation pattern.
The 160 geologic units are distinguished on the screen by a combination of pattern and color. The PICT and laserwriter patterns differ from the screen patterns so they can be distinguishedin black and white and take advantage of the higher resolution on the laserwriter.
USA National Forests
The USA National Forest file in MRDS - 4D is currently available only for Oregon. The screen plot shows forest boundaries in green unless the geology is also plotted, in which case the forest boundaries are white outlines. The areas are accompanied by a text description of the forest, which is obtained by single clicking when the forest name appears in the inset box. The forest names appear as the cursor crosses the forest boundary.
USA Wilderness
The current USA Wilderness file covers Nevada, Idaho and Oregon. Boundaries plot on the screen in yellow unless the USA Geology is also plotted, in which case boundaries are white. The wilderness areas are accompanied by a text description of the area with selected references, which is obtained by single clicking within the wilderness boundary. The wilderness name appears in the inset box when the cursor is within a wilderness boundary.
Mineral Districts
33
The Districts and References files refer to groups of mineral sites with common features. For Arizona, the only state entered, the districts refer to mineralized areas with common metallogeny. Some districts overlap. A screen plot of a particular district is available in its data-entry layout in the district file. The data entry layout is evoked by double clicking a record in the column listings. District outlines can also be plotted by selecting the Mineral Districts check box in the Layers.... dialog.
The district outlines were digitized at a scale of 1:1 million and are somewhat inaccurate at larger scales such as 1:250,000.
USA Drainage Basins
The USA drainage basins plot as blue outlines. They originated as USGS National Mapping 1:2,000,000 scale DLG data and constitute the 20 major basins of the conterminous U.S.
'Mineral Sites: Points and Labels'
MRDS - 4D displays the deposit points as small white circles with black outlines on the screen. The first 27 characters of the site name are displayed in the inset box as the cursor passes over the circle. Selecting a round button with a single click evokes an abbreviated text record describing the deposit. To display the entire record, click on the Long Form button of the text record screen.
On LaserWriter and Color Pict plots the deposits appear as "+" symbols with an optional label if the Labels box is clicked in the Layers.... dialog. Hewlett Packard pen plots can display as many as seven symbols for data values or nested symbols for multiple commodities.
For all output devices, the optional label can be changed to any of the Mineral Site file fields, such as Major Commodity or Host Rock Type, displayed in the list that appears when you click the Change button.
Renumber
Clicking this button performs the same numbering function as clicking on Renumber This Set on the column listing screen. The numbers remain stored in the record until erased or overwritten by new numbers or a new version of MRDS - 4D. Once numbered, records can be sorted by any other field in the record yet still plot with the correct number. They can be sent using Send Records with the Tab text format.
To plot the numbers, select the Change button and then select the Number in Set field. The Number in Set field is actually composed of two fields in the data structure:
(1) As a right justified numeric field called No in Set Numer that displaysand sorts correctly in the column listings
34
(2) As a left justified character field called No in Set Alpha that plots quickly because it does not have to be converted to a string.
Output Device Selection
Screen
The default output device is the monitor. Active screen objects are round buttons or polygon buttons. The round buttons are discussed in the previous section under Mineral Sites: Points and Labels.
Screen plots of polygonal features such as National Forests, Wilderness Areas, USA Geology, or Mineral Districts are overlaid with buttons that follow the polygon outlines. The polygon name appears in the inset box when the cursor passes over the active area. Clicking once within the polygon displays a text description of the area. For example, if USA Geology is selected as a layer, clicking once in the polygon will display text from the King and Beikman explanation. The 1 by 2 degree quadrangle names also appear but have no accompanying text file. Mouse-click outside the map area to exit the map.
Color Pict
Color PICT plot files can be edited and printed in separate graphics programs such as MacDraw, Canvas, or LaserPaint. When printing wide plots, it is sometimes desirable to rotate the plot to better fit the page. However, rotating a plot to landscape mode in Page Setup can cause lengthy print times. Use the following procedure in MacDraw to rotate documents before printing:
Select Layout menu, Turn Autogrid Off item.
Select the zoom-in box, which is the larger of the two mountain icons in the lower left.
Pull apart labels. Optional step to separate the overlapping MRDS point labels, if any. The practical upper limit is about 50 labels. To make it easier, #A to select all the labels, then change text size to 9.
Select the zoom-out box, which is the smaller of the two mountain icons in the lower left. Zoom-out until the document is about 1/4 of the screen size.
Select Layout menu, Drawing Size item. Change width from 8 to 16 inches.
35

Select Edit menu, Select All item. Then select anywhere inside the document and drag it away from the upper and left hand page limits a small distance.
Select Arrange menu, Group item.
Select Arrange menu, Rotate item. Then hold down the shift key and drag the lower left corner to the right. It will pause at 45°, then as you continue to drag, it will stop at 90°. Press 9§T to turn off Rotate. Drag the entire document back near the left hand edge of the window.
Select menu File, item Page Setup. Change Reduce or Enlarge to 120%. Do not switch to landscape mode!! Select OK, then re-center the document in the page by dragging.
Select menu File, item Print. In Pages From to , type 1 tab 1, then select OK. It should print in about five minutes.
LaserWriter
A laserwriter file is a PostScript plot file that can be sent to the laser printer as a background task with a separate program such as SendPS»1.21 or the desk accessory TOPS Spool.
Flash Screen
The FlashScreen option offers a rapid method of creating a screen plot using a previously saved Flash File. All layers and projections are stored in the flash file except Points and Labels, which must be redrawn on top of the FlashScreen. They must be respecified in the Plot Parameters dialog. Also, the correct plot window and projection must be selected for the points to correctly overlay an existing FlashScreen. You must remember the correct parameters for each FlashScreen.
New Flash File
New Flash File creates FlashScreen files for storage and later use with the Flash Screen option. Use careful file naming conventions. For example, the name "Flash Reno Wild" could be used to represent a flash file of wilderness areas in the Reno 2-degree quadrangle. At present, flash files should be saved in the local MRDS - 4D folder rather than the Flashfile folder. This may be corrected at a later date.
36

Pen Plotter
A pen plotter file contains Hewlett Packard Graphics Language (HPGL) commands for HP 7550A or later pen plotters capable of producing E size plots. The plotter file can be sent to an HP compatible plotter using a communications program (via the modem port) such as Red Ryder or by using the Send to Plotter button in the Pen Plotter Symbols dialog box. Red Ryder can be run as a background task; however, multitasking is not available with the Send to Plotter feature.
Projections
Fast Mercator
The Fast Mercator projection is executed quickly and can be used to display large areas such as a hemisphere or the world. The meridians are parallel, latitude lines are parallel but not equidistant. Scale is true at the equator. Distortion becomes great near the poles.
Transverse Mercator
Transverse Mercator has less distortion near the poles and can be used for maps of greater north-south extent. Scale is correct along a central meridian. Transverse Mercator projections overlie USGS quadrangle topographic maps at scales of 1:2,500,000 to 1:24,000. They also overlie polyconic projection maps. Use the Pen Plotter output device to generate overlays for USGS quadrangle maps.
Albers Equal-Area Conic
The following dialog is available with the Params button:
37
Albers Projection Parameters:decimal degrees
Central Meridian |-96_____
Latitude of Origin |_______
1st Standard Parallel |__________
2nd Standard Parallel I 45.5
23
29.5
O Use typed changes in entries aboue, if any
<i) Conterminous U.S.
O Alaska
O Calculate from current plot window
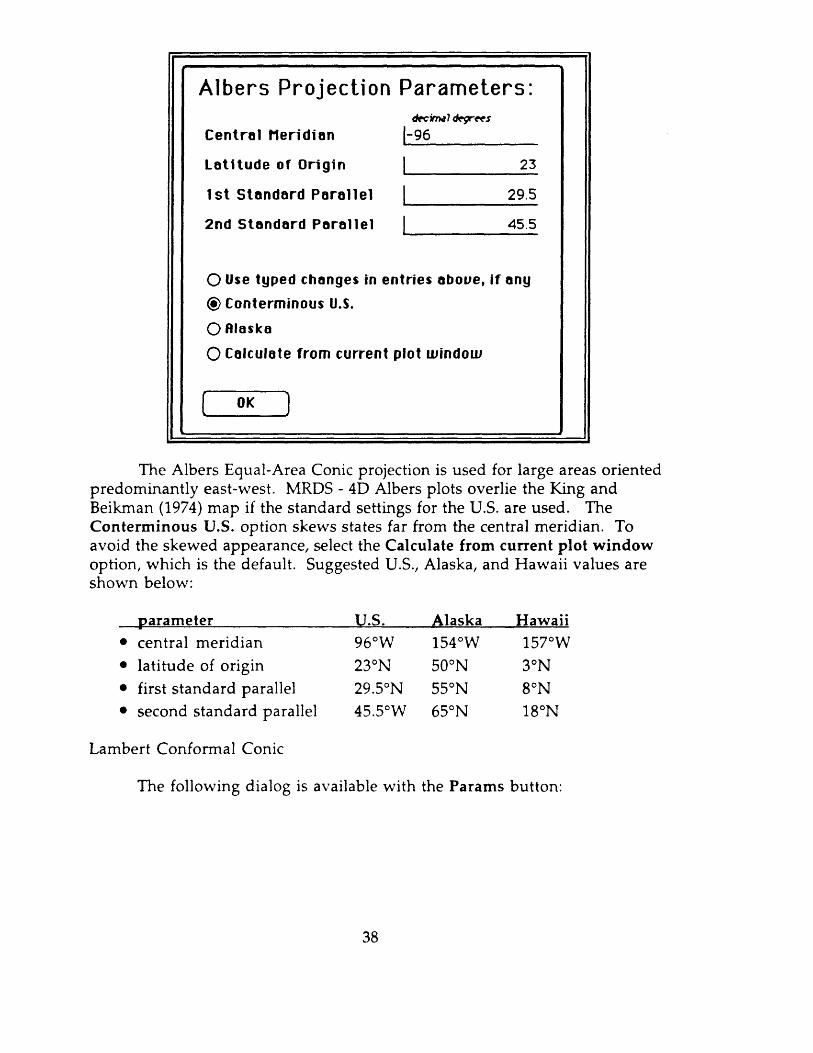
The Albers Equal-Area Conic projection is used for large areas oriented predominantly east-west. MRDS - 4D Albers plots overlie the King and Beikman (1974) map if the standard settings for the U.S. are used. The Conterminous U.S. option skews states far from the central meridian. To avoid the skewed appearance, select the Calculate from current plot window option, which is the default. Suggested U.S., Alaska, and Hawaii values are shown below:
parameter central meridian latitude of origin first standard parallel second standard parallel
U.S.96°W23°N
29.5°N45.5°W
Alaska154°W50°N55°N65°N
Hawaii157°W3°N8°N18°N
Lambert Conformal Conic
The following dialog is available with the Params button:
38
Lambert Projection Parameters
Central Meridian
Latitude of Origin
1st Standard Parallel
2nd Standard Parallel
decimal degrees-96
24
33
45
O Use typed changes in entries aboue, if any
(5) Conterminous U.S.
O Alaska
O Calculate from current plot window
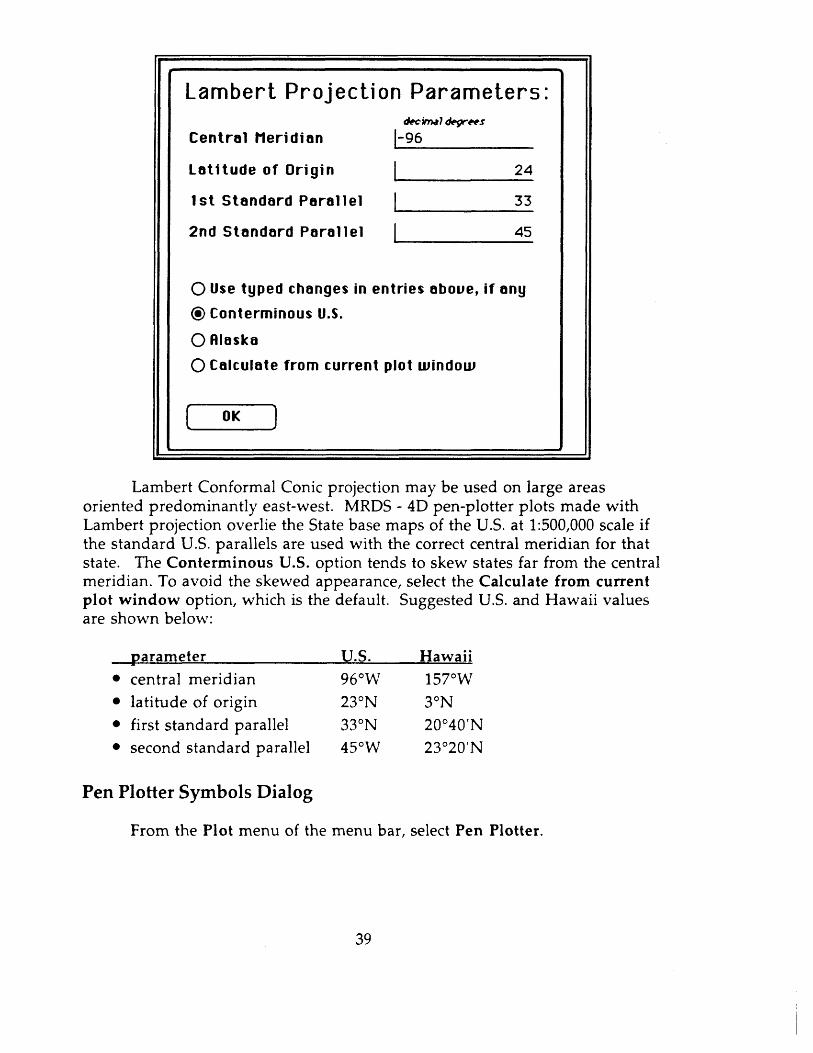
Lambert Conformal Conic projection may be used on large areas oriented predominantly east-west. MRDS - 4D pen-plotter plots made with Lambert projection overlie the State base maps of the U.S. at 1:500,000 scale if the standard U.S. parallels are used with the correct central meridian for that state. The Conterminous U.S. option tends to skew states far from the central meridian. To avoid the skewed appearance, select the Calculate from current plot window option, which is the default. Suggested U.S. and Hawaii values are shown below:
parameter
central meridian latitude of origin first standard parallel second standard parallel
U.S.96°W23°N33°N45°W
Hawaii157°W3°N20°40'N23°20'N
Pen Plotter Symbols Dialog
From the Plot menu of the menu bar, select Pen Plotter.
39

Plot Window... *6B Layers, Deuices, Projections..
Enecute Plot...
Assessments RK... Assessments US...
This displays the Pen Plotter Symbols dialog.
Pen Plotter Symbols Dl 1
<>y riH/v i» r n we i w 1 1 ivi i 1 1* HJ . t* to \ now iTV«ny COt
<i) Commodities Present (§) First Com O Major Commodities
r^i > O Nested Sy O USDS Model Name [Change] w a
Q Show last inventory list. Q Create new inventory list from current mineralSelect a value... Then select Size ~9" * «H unassigned values a symbol... [ Set )
2¥
0
X 1 60
D 1 60O L 6° O L^oA 1 60
V 1 60
Plot Title |
Load Saue Pens
modity Only
mbols )^^
site selection.Or type the record value such as "Au" or "Porph<»"
Scale] 250,ooo|
Tics Send to Plotter Execute Plot XE
Pen Plotter Symbol Sizes:
The pen plotter symbol sizes are user definable in the Pen Plotter Symbols dialog. MRDS-4D alternates between two arrays of symbol sizes depending on whether Nested Symbols is selected. The Set button stores the currently displayed values in non-volatile memory as defaults. The two sets of default values, one for nested and one for single symbols can be set independently. The numbers represent hundreths of an inch.
40

Or type the values such as "Au" or "PhoryphO"
cuxa oA V
PB
Plot title
Enter the plot title. The length is limited only by the paper size. This is the same title on the Layers, Devices Projections dialog.
Pen Assignments
The Pens button at the bottom of the Pen Plotter symbols dialog, allows changing pen number assignments. The settings revert to the following default settings (for an 8 pen carousel) when MRDS - 4D is launched. The MRDS - 4D standard for associating pen number, color and feature represented is discussed under the topic PenTypes, later in this section .
8
Pen Number
4~| Mineral Site points
"T| World Country Boundaries
World State BoundariesUSA State Boundaries
USA Counties
National Forests
Wildernesses
Drainage BasinsAssessment QuadsMineral Districts
Quadrangles
Tics, Scalebar
Title
Defaults
41

The Tics button at the bottom of the Pen Plotter Symbols dialog is used to select the placement of latitude and longitude tic marks on the plot.
E3 Place tics euery:
Degrees Minutes
0
OK
15
Cancel
Commodities Present, Major Commodities, USGS Model Name, Change
This feature associates values based on the contents of a field to a symbol type. For example, an inventory list for the field Commodities Present might contain the values AU, AG, and CU. Any of the symbol types displayed in the dialog box may be associated with any value. Note that symbol type is distinct from symbol label, which is a text item as defined in the Layers... dialog box and is plotted next to the symbol. The third button defaults to USGS Model Name but can be changed with the Change button. This evokes a list of Mineral Site fields, any one of which can be associated writh a symbol type.
The association between field value and symbol type is made as follows:
1. Display the desired inventory list (that is, values).
2. Click on a field value.
3. Click on the symbol to associate with the field value.
4. The field value will appear opposite the symbol at the right of the dialog box.
Do not use the Change button to choose a commodity field. Full implementation of the commodity fields for plotting is achieved only by using the Commodities Present or Major Commodities buttons in the dialog box. For example, individual commodities can be chosen and associated with the desired symbols only by using the Commodities Present button. If Commodities present is chosen from the Change list, the entire field is plotted as a unit, not as separate commodities.
42

First Commodity Only or Nested Symbols
The First Commodity Only option plots a single symbol based on the first commodity listed in the field. The Nested Symbols option plots up to seven symbols at each site.
Show last inventory list, or Create new inventory list
The current selection of Mineral Site file records can be inventoried to list the entries for the chosen field. The current limit on the number of records inventoried is about 500. An inventory list appears in the scrollable area. The list is blank on evoking the dialog. Show last inventory list displays the most recent inventory conducted; this list may or may not apply to the current Mineral Site file selection.
Enter the commodities as you wish them to appear in the explanation. Alternatively, select a commodity from the list in the scrollable area. Then select a symbol with the small boxes to the left of the symbols. Keep in mind the commodities will appear in the explanation exactly as typed in the boxes next to the symbols. They may be retyped in lower or upper case to improve the appearance of the legend without affecting the retrieval.
Executing the pen plot
Preparing a screen plot before making a pen plot file can sometimes be useful to verify that the correct deposits have been chosen. After the plot has been checked on the screen, change output devices to Pen Plotter. To execute the plot, click on Execute Plot or press#E. MRDS - 4D prompts for an output file name. Be sure to select the correct folder in the pop-down menu above the scrollable area. Then type a new file name or reuse the old name. MRDS - 4D displays the scale (defaults to 250,000 but can be changed by the user in the Pen Plotter dialog) and suggested paper size
When the plot file is complete, load the plotter with paper as shown under Operating the Plotter. Then prepare the pen carousel as described under Pens.
The send pop-up menu shown below appears after creating a plot file. Also, a send button is located in the Pen Plotter dialog. The baud rate is adjustable. Click on Send to Plotter to select plot file and intiate plot.
43

1200 baud
Send to Plotter
Cancel
If you wish to avoid tying up MRDS - 4D during long plots, launch Red Ryder and check its settings as follows:
Click in the upper-center box of the main screen until it says 2400-N-8- 1-FULL.
File menu, TEXT File Transfer Preferences... item. Turn off all the items in the dialog by deselecting the four check boxes on the left. Click OK.
Send the plot file to the plotter with File menu, Send TEXT File item.
Pen Types
Ceramic-tip pens
Ceramic-tip pens are a good compromise between the line quality of rapidograph and the ease of use of fiber-tip.
Fiber-tip pens
Fine-point fiber-tip pens are the best all-around choice for most paper plots. They produce reasonable line quality and color. Their disadvantages are:
(1) Drying out in the carousel. For overnight storage unload the pens from the carousel and replace the small black cap. The seal in the carousel can be improved by cleaning the receptacle as recommended in the manual.
(2) Drying out while plotting. Test the pens by hand, particularly before long plots to see if they are low on ink. The ink reservoir is small, geared to the expected tip life. Replace pens frequently to avoid having them dry out in the middle of a plot. The manual test is sometimes less than definitive, because a pen may lack sufficient flow during rapid plotting.
44

If a pen runs out of ink during a plot, it may be possible to save the plot by leaving the paper exactly where the plot finished, removing all the pens, replacing the expired pen and re-sending the plot file.
(3) Fuzzy line quality. Fiber-tip pens are fragile. On HP DraftMaster models, the pen force is set with the carousel column setting. Turn the center column until the white line points to the fiber-tip pen icon on the top, otherwise premature wear can occur. On the HP 7585B model, each carousel has a fixed pen type and is so marked in the center of the carousel stem.
Roller-ball pens
Roller-ball pens are very rugged and have a large ink capacity but give lesser line quality and color. They tend to skip in later life. However, for a production-oriented shop, they are the pen of choice.
Rapidograph
Both the disposable and refillable rapidograph pens tend to clog, even when stored capped with the tip down. The only solution is to place the tip in an ultrasonic cleaner for a few minutes. Generally, the inconvenience of rapidograph pens is only justified for plots on mylar base.
The carousel
The carousel must be matched with the correct pen type. On HP DraftMaster models, the carousel with the short pen holders accommodates fiber-tip and roller-ball pens. The carousel with rubber extensions on the holders is for rapidograph pens. The carousel stem must be set for the correct pen type. Turn the center column until the white line points to the correct pen icon on the top. This sets the correct pen speed and force. On the HP 7585B model, each carousel has a fixed pen type and is so marked in the center of the stem.
The pens can be loaded in any order; however, the MRDS - 4D default is the following:
Holder/Color Plotted Feature
1 = black coastlines, countries, plot title2 = red scale bar, lat/long tics3 = green national forests4 = blue Mineral Site file symbols, legend5 = purple mineral districts6 = yellow counties7 = orange wilderness
45
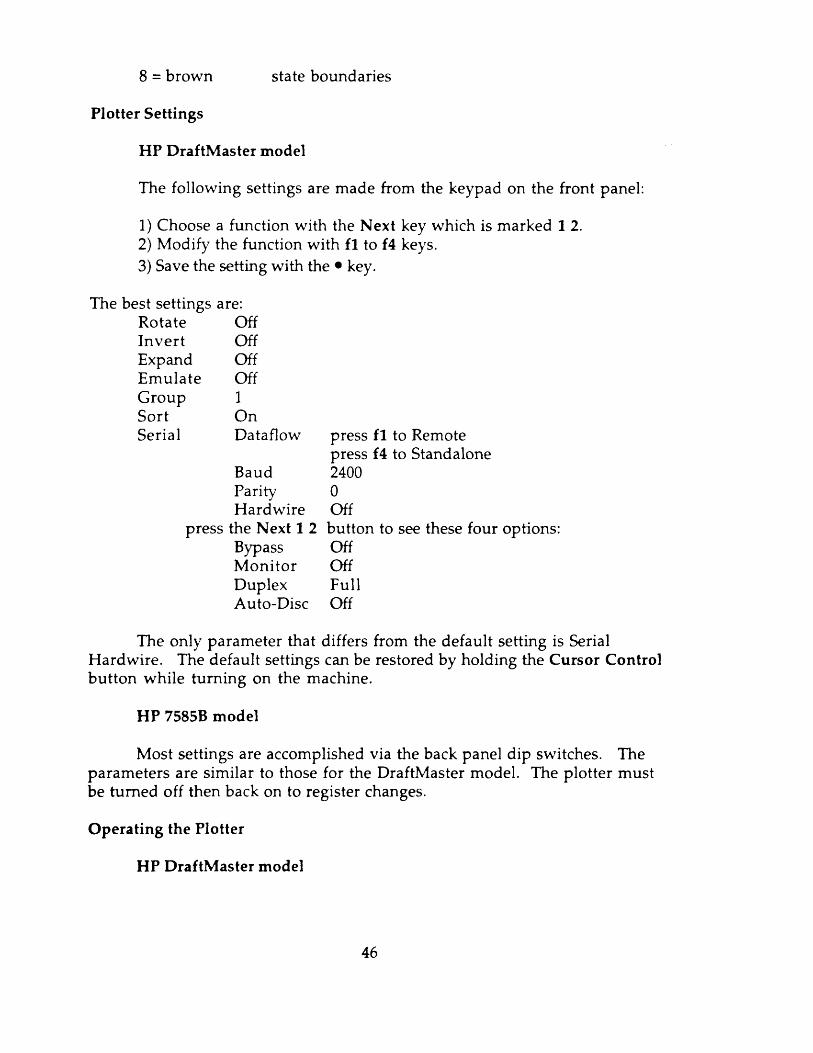
8 = brown state boundaries
Plotter Settings
HP DraftMaster model
The following settings are made from the keypad on the front panel:
1) Choose a function with the Next key which is marked 1 2.2) Modify the function with fl to £4 keys.3) Save the setting with the key.
The best settings are: Rotate Off Invert Off Expand Off Emulate Off Group 1 Sort On Serial Dataflow press fl to Remote
press f4 to StandaloneBaud 2400Parity 0Hardwire Off
press the Next 1 2 button to see these four options:Bypass OffMonitor OffDuplex FullAuto-Disc Off
The only parameter that differs from the default setting is Serial Hardwire. The default settings can be restored by holding the Cursor Control button while turning on the machine.
HP 7585B model
Most settings are accomplished via the back panel dip switches. The parameters are similar to those for the DraftMaster model. The plotter must be turned off then back on to register changes.
Operating the Plotter
HP DraftMaster model
46

Turn the plotter on and lift the tinted carriage cover by its handle in the center. Disengage the pinch wheels by pulling the lever on the right towards you. Insert the paper under the pinch wheels.
Smooth the paper against the stops on the right. Paper should be just touching both front and back guides. If the paper is not perfectly square with the machine, the pinch rollers will run off the edge and destroy it.
Engage the pinch wheels by pushing the lever on the right away from you. Lower the tinted carriage cover. The plotter automatically finds the paper size.
Connect the plotter to the Mac with the appropriate cable (see Cable) or switch box and send the plot file with MRDS - 4D, Red Ryder, or some other communications program.
When the plotter is finished drawing, disengage the pinch rollers with the lever on the right. The pinch rollers deteriorate if left engaged for long periods of time.
HP 7585B model
Turn the plotter on and lift the tinted carriage cover by it's handle on the left. Insert the paper under the pinch wheels.
Smooth the paper against the stops on the left. Paper should be just touching both front and back guides. If the paper is not perfectly square with the machine, the pinch rollers will run off the edge and destroy it.
Lower the tinted carriage cover and press HOLD then REMOTE. The plotter automatically finds the paper size.
Connect the plotter to the Mac with the appropriate cable and send the plot file with MRDS - 4D, Red Ryder or some other communications program.
When the plot is done, press VIEW and UNLOAD to disengage the pinch rollers. The pinch rollers deteriorate if left engaged for long periods of time.
Cable Connection
The standard Mac-modem cable, also called the System Peripheral cable can be connected to the HP-PC cable which is then connected to the plotter. For longer distances, a serial cable can be fabricated with 4 conductor round telephone wire. The pin assignments are as follows:
Mac System Peripheral 8 cable 25 pin male.2378
I I I I3 2 7 20
HP Plotter 25 pin RS232 female.
47

The cable is not symmetrical and cannot be switched end for end.
Assessments AK and Assessments US
These features are not fully implemented, therefore the menu items will not be discussed in this manual.
48

Entering Data
The items available under the Enter menu when displaying a columnar layout are different from those in the Enter menu when displaying the data entry layouts (title bar displays: Modifying Record.) When working from the columnar layout, it is recommended that you use only New Record, Delete Record, and Repair Sets. The other operations are more easily performed by using the buttons at the top of the data entry layouts. Even the Enter menu items available in the data entry layouts have limited usefulness.
Enter Menu Items Available from Columnar Layout
New Record
flccept Record Return to Splash
Delete Records
Next Record Previous Record First Record Last Record
Repair Sets
The menu item Return to Splash returns the user to a full screen display of the USGS buffalo logo. The usefulness of this is questionable; however, you can proceed by selecting from the Menu bar. The term "splash" is from the 4th Dimension language and simply means a display or announcement created by the data base designer.
Enter Menu Items Available from data entry Layout:
49

New Record
Rccept RecordCancel Record
Delete Records
Next RecordPreuious RecordFirst RecordLast RecordNext PagePreuious PageFirst PageLast Page
Repair Sets
XN
XI9 2X3X4XI9 8X9XO
New Record menu item
New Record (used from either the columnar layout or data entry layout) opens an input layout for data entry. After opening a record, direct access to any of the 14 pages of the layout is provided by the buttons that appear at the top of the input layout.
Identification (cancel]rTHt¥T|[N]|T|[E|[H]l |2|3|4|s|6|7|8|9|o|i j2|5|4| |
For the Mineral Site file, latitude and longitude must be entered as formatted items with leading zeros:
dd-mm-ssN or S ddd-mm-ssW or W
latitude longitude
MRDS - 4D converts these items to decimal degrees as they are entered. If the decimal degrees readings disagree with the degree-minutes-seconds fields, check the format of the latter.
Cancel button
Clicking the Cancel button avoids saving any changes made to the current (new or modified) record, then exits the record. The Cancel Record menu item under the Enter menu performs the same operation.
50

Enter button
Clicking the Enter button saves the current (new or modified) record and then exits the record. The Accept Record menu item under the Enter menu performs the same operation.
Delete Records menu item
Deletes the current record or the current selection.
WARNING
The Delete Records operation cannot be undone! Delete Recordspermanently alters the disk file. Deleted records can only be recovered from backups or from another copy of MRDS - 4D.
First Record, Previous Record, Next Record, Last Record buttons
The First Record, Previous Record, Next Record, and Last Recordbuttons (left to right as shown above) allow navigating between records without going to the columnar listing. This can save time. If changes were made to a record, clicking these buttons is the same as clicking the ENTER button, which will save all changes. These buttons are not active during initial data entry, but only for records already present in the database. Again, it is preferable to use these buttons rather than the equivalent items under the Enter menu.
Page buttons and menu items
These buttons are for navigating to pages (screens) within a record. Each record is composed of 14 pages. Navigating can also be done from the Next Page, Previous Page, First Page, and Last Page selections under the Enter menu. Again, it is preferable to use these buttons rather than the Enter menu items.
Apply Formula menu item
This feature is not implemented yet. Use the Apply Formula under the Enter menu in the User environment. It allows making global changes to a field in every record in a selection.
Repair Sets menu item
51

Adds or deletes records in the eight Permanent Sets, which are under the Select menu. Repair Sets should be done after:
Adding records via the New Record menu item. Changing entries in the File Link ID field. Deleting records in the User environment. Receiving records to a previously empty clone.
MRDS - 4D automatically Repairs Sets after:
Receive Records under the File menu Delete Subset under the Enter menu
52

Transferring Data
Send Records
Send Records item under File menu uses the current set regardless of how it is established. The current set can be established from the Search by Example screen, by selecting records from the columnar listing with the mouse, or by loading previously saved sets.
The send records dialog box is accessed from the File menu.
18 records selected for sending.
pFormat options:
4th Dimension
O External References
O dBase "," delimited
MRDS Uniuersal |_@
<§) Enternal References O Internal References
O Tab Text Fields
Applications ROCS 8.x ROCS 7.x Revelation Formats 4th Dimension External Refs R/W
R/W R/W
4th Dimension Internal Refs MRDS Universal External RefsMRDS Universal Internal Refs R/W R/WdBase "/delimited W WTab Text W W
R/W
Send Cancel Help
Send Records has four output file options. The 4th Dimension and MRDS Universal formats require the user to chose between external or internal reference format. The distinction between the two reference formats is how these reference fields were structured in the various versions of MRDS - 4D and the use of a references file external to the MRDS records.
The simplest way to proceed is to follow the chart in the dialog box. The Help button also provides more information on the various formats.
The four output file options are summarized as follows:
53

1) 4th Dimension format - Creates a file that can be loaded into another MRDS - 4D database with Receive Records, provided the file structures are identical. Select 4th Dimension format only when transferring between MRDS - 4D databases that are 8.0 or later. Also, if the databases do not have identical structures, the transfer can crash the database. In this case, the safe alternative is the MRDS Universal, External References format, which is slower but less likely to ruin a database.
The 4th Dimension format transfer file is binary so there is little point in reading it into a word processor or spreadsheet program. The Tab/Text format discussed below is available for exporting information to word processors and spreadsheets. The 4th Dimension format is also incompatible with the Revelation and uniVerse versions of MRDS - 4D, so MRDS Universal format must be used according to the guide in the dialog box.
For non-Mineral Site files, the 4th Dimension format is the only option available in the Runtime environment. If the structure of the destination database has been modified, use the Export/Import option in the User environment.
2) MRDS Universal format - Features a text file readable in all three MRDS environments, Data General uniVerse, Advanced Revelation, and 4th DIMENSION. This option is only available for the Mineral Site file. The structure is as follows:
Variable length fields and records. The fields are in Data General uniVerse and Advanced Revelation
dictionary order. "@" = record separator. "_" = field separator. " I" = subfield separator. Each logical record is split into physical records of 80 characters.
3) Tab Text format - The Tab Text format is used for converting to tab -delimited compatible spreadsheets and word-processor applications. Currently this option is available only for the Mineral Site file. The desired fields are selected in the dialog box accessed by clicking on the Select Fields button in the Send Records dialog box. The fields are truncated at the lengths set in the data base structure file and indicated in the Choose Fields list. They can be set to 32,754 bytes maximum by modifying the structure file in the User environment. Alternatively use the 4th Dimension Export option in the User environment. This option displays all the fields and offers other output formats.
54

Fields Selected for Sending:
[ Delete ] [ Clear ] TtU1 1 1
<>
O
«
[ Load ] [ Saue 1
[ OK ]
Choose Fields:Ag* of Rincral i ration 30 associated Rock Ag* 15 Rssociatad Rock Tgp« 50 Co<M»oditi*f Major 15 Co*»oditi*s flinor 15 Cowkod i t i «s Pr*s*n t 45 CoModitics Tract 15 CoMiod i ty Tgp« 1 Count of 1 1 Country Cod* 2 Country NCM* 35 County 35 D*poci t Siz« 1 0*pos i t Typ« 40
£i
§
[ Cancel ]
4) dBase - A comma-delimited text file containing a subset of 59 MRDS fields convertible to dBase. The MRDS fields in dBase format are as shown below. All fields are type character with the indicated dBase field length shown.
FIELD LABEL LENGTH FIELD LABEL LENGTH
1) RECORD_NO 72) REPORTER 503) REP_DATE 54) REP_AFFIL 255) UPDATER 506) UPD_DATE 57) UPD_AFFIL 258) SITE 509) SYNONYM 5010) DISTRICT 5011) REC_TYPE 112) COUNTY 3513) STATE_CODE 214) COUNTRY_CD 215) QUAD 2516) QUAD1 2517) LATITUDE 918) LONGITUDE 1019) COMMODS 4920) PROD 1
31) IG_RK_TYPE32) IG_RK_AGE33) ORE_CTRL34) TECTONICS35) ALTERATION36) CONCENTRAT37) ORE_MINS38) NONORE_MIN39) COMMENTS40) PROD141) PROD242) PRODS43) CUM_PROD144) CUM_PROD245) CUM_PROD346) PR_COMMENT47) RESERVES148) RESERVES249) RESERVES350) RESV_COM
501550505050
254203254
8080808080808080808080
55

21) STATUS22) OWNER23) OPERATOR24) DEP_TYPE25) DEP_FORM26) DEP_SIZE27) SURFJJNDG28) HR_TYPE29) HR_AGE30) AGE_OF_MIN
150505050
11
501515
51) REF152) REF253) REF354) REF455) REF556) STATE_NAME57) COUNTRY_NM58) MODEL_NAME59) MODELJSIUM
total characters =
2542542542542543535405
4001
Convert to dBase using the following procedure:
Send the text file to an IBM/PC compatible computer by either of the following methods: 1) Via Modem, serial port link, Ethernet, or Appletalk/TOPS:
Make sure the communications program is set to append line feeds to the carriage returns at the end of each line.
(2) Via Macs equipped with external 5.25 inch floppy drives or Mac Ex, ex, ci, fx, si, and so on equipped with 3.5-inch 1.4Mb Superdrives.
Launch Apple File Exchange:Select the Mac to MSDOS menu, Text Translation item In the Text Translation dialog:
Carriage Return/Line Feed:Check Replace CR with CRLF.
Special Characters:Select Change to closest single character.
Tab Character:Select Neither.
Insert the destination floppy disk, select the source file, Select the »Translate» button.
Mac II's only translate about 20 records per minute!
On the IBM/PC compatible, name the text file MRDS.TXT. Obtain the MRDS.DBF structure file from the MRDS - 4D authors and
copy it to the dBase directory. Launch dBase. Then type USE MRDS. Type APPEND FROM MRDS DELIMITED.
For the Commodity Specialists file it is necessary to send three files: Commodity Specialists, Specialists, Postal Address.
Receive Records
56

Receive Records operates only on files created by Send Records in 4th Dimension or MRDS Universal format. It cannot read dBase or Tab Text files. The file structure in source and destination files must be identical, otherwise defective records will be created in the destination file. Receiving records from a different numbered version of MRDS - 4D can cause corrupted files.
IBM-PC's and other computers
MRDS Universal format is compatible with Kermit file transfer protocol for transmitting over phone lines to PC's running MRDS-AREV or to the Data General uniVerse. Tab Text is Kermit compatible if the line length is less than 250 characters. If lines are longer, use XMODEM or some other type of transmission protocol.
To write these files directly to IBM-PC compatible floppy disk, Mac Us require an external 3.5-inch or 5.25-inch drive or a high density internal drive. Later model Mac Hex, x, ci, si, fx, and so on are equipped with IBM-PC compatible 3.5-inch floppy drives.
57

Reports
Standard Listings
The Print command under the File menu prints the default output layout for each file. In the case of the Mineral Site file, the long or columnar layouts are selectable in the Preferences dialog. Other layouts are available only in the User environment at this time.
For all files, the entire selection can be printed or a subset of the current selection can be printed using techniques described in "Selecting records with the mouse".
The only disadvantage to selecting records with the mouse before printing, is that they will not be printed in sorted order. To print mouse- selected records in sorted order the user must:
Select menu, Sort item (use desired sort). File menu, Print item.
The selection but not the sort order can be saved in advance with Select menu, Save Set item.
If a sorted printout of a loaded set is desired, a sort must be done each time a set is loaded.
Graphs
The Graphs selection under the Report menu is used to create bar charts, scatter plots and pie charts of certain fields for records in the current file. The creation of graphs is best learned from the 4th Dimension tutorial and user reference documentation.
Quick Report
Custom reports can be prepared with Quick Report under the Report menu. Quick reports allow flexibility in field choice, column widths and order as well as break items.
Selecting Quick Report displays a new layout - you can begin creating a report immediately. Use Open under the File menu to modify an existing report.
In the Quick Report dialog, drag the fields from left to right. With the Auto column width selected, the maximum width of each field is controlled by the actual width of the data in the current selection or the column title,
58

whichever is longer. To insert and delete entire columns, use the Insert Column and Delete Column menu items under the Edit menu. Columns can be designated for sorting by dragging the «Add Sort» phrase from the sort list onto the desired column. Multi-level sorting is possible.
59

Other File Menu Items
Preferences
Preferences:
Mineral Site File -Display Format:
< ) ColumnsO Columns Numbered Set O Record Profiles
Format: ______
O Columns
O Columns Numbered Set < ) Long Form
Data Entry Format: O Columns
( ) Long Form
Create plot window from Search by Example entries
(1) Display Format:
This option controls the appearance of the screen listings of the Mineral Site file after Show All or Show Subset menu items are invoked. The numbering system (discussed under the topic Renumber in the section titled Layers, Devices, Projections) allows users to add temporary numbers for plotting. The Record Profiles selection provides a statistical summary for management use.
2) Print format
The print options control the laserwriter output format. The column listings can be either numbered or unnumbered. The long form prints all nonblank fields for each selected record. Normally, the printout consists of about two pages.
3) Data Entry Format:
Long Form - Double-clicking on a record in a column listing displays the first page of the full 14 page data entry layout.
60

Columns - Double-clicking on a record in a column listing allows editing of the following fields: No. Set, Record No. Site Name, District, Latitude, Longitude, Country, State, Provence, and Commodity. Scrolling or flipping pages to other fields is not currently available.
4) Create plot window from Search by Example screen entries:
MRDS - 4D attempts to determine the actual area to be plotted from information in the Search by Example screen. Specifying four coordinates, or a country, state, or quadrangle name usually allows MRDS - 4D to create a plot window.
If MRDS - 4D is successful in determining a plot window, the parameters in the Plot Window screen are updated.
Unselecting this option tells MRDS - 4D not to update the Plot window screen regardless of what is specified in the Search by Example screen. The settings in the Plot Window screen remain unchanged until directly modified by the user.
Quit
The Quit menu item returns to the Grand Canyon display screen. Another Quit exits to the User environment (if available). A third Quit exits 4th DIMENSION.
Shortcut: %Q %Q%Q, exits 4th DIMENSION quickly.
61

Bibliography
Arndt, Raymond, 1993, Mineral Resources Data System (MRDS) Application Guide: draft.
Carlson, C.A. and Schruben P.G., 1991, Resource Oriented Computer System (ROCS), U.S. Geological Survey Open-File Report: draft.
Domaratz, M.A., Hallam, C.A., Schmidt, W.E., Calkins, H.W., 1983, DIGITAL LINE GRAPHS FROM 1:2,000,000-SCALE MAPS: U.S. Geological Survey Circular 895-D.
King, P.B. and Beikman, H.M., 1974, Geologic Map of the United States: U.S. Geological Survey map and accompanying Professional Paper 901.
Marsh, S.P., Kropschot, S.J. and Dickinson, R..G., 1984, Wilderness Mineral Potential, Assessment of Mineral-Resource Potential in U.S. Forest Service Lands Studied 1964-1984: U.S. Geological Survey Professional Paper 1300.
62


![Data-Driven and Keyword-Driven Test[1]](https://img.dokumen.tips/doc/110x75/577ce76d1a28abf103951d8d/data-driven-and-keyword-driven-test1.jpg)