Embed Size (px)
Citation preview

West Virginia Links- 6th Grade
West Virginia Links- 6th Grade
Developmental Guidance6th Grade
!

1 1Orientation/Transition
H1, TR1,TR2, TR3
2Developing/Reviewing Ground Rules
TR1
3Getting to Know You
4
Getting to Know MeTR1
5Time Management
H1, TR1
6Study Skills
H1, H2,H3, H4
7Friendly vs. Mean Teasing
H1 H2
8Conflict Resolution
H1, H2,H3, TR1
9Introduction to Portfolio
H1, TR1
Links-6th grade, Lessons 1-9

NETWORTH PERSONAL FINANCE EDUCATION
Do I Really Need This?
GRADE 6 LESSON 1
Time Required: 30 minutes
Content Standards: (7.3.1 Standard 7): Students will acquire the attitudes, knowl-edge and interpersonal skills to help them understand and respect self and others.
Indicators:a. Students will identify personal values, attitudes and beliefs. b. Students will understand the need for self-control and how to practice it.
Activity Statements: Students will review the attached list and determine which items or services are things they need and which items or services are things they want.Materials: 1. Handout #1 – Need It or Want It?2. Pencils or pens
Procedures:• Pass out the Handout #1 (Need it or Want it?) and ask students to compete
the survey.
• Break students into small groups for approximately seven to ten minutes to discuss their choices.
• Ask students to make a decision as a group whether something is a Need or Want and why.
• Mark their answers on the Handout #1 – Need it or Want it?
Discussion:
After students have had time to discuss their Need or Want responses, go down the list and ask groups to share their responses. Discuss each item with students as fol-lows, explaining why things may sometimes either be a need or a want:
• Three meals a day – Need• Sports Uniform – Need if you are on the team, but do you need to be on the
team if you can’t afford the uniform?• Gym shoes – Need if you take gym• New Shoes – Want unless you have no shoes, shoes don’t always have to be
new• Ice Cream – Want• Pizza – Want, unless it is part of your three meals a day and then you need it• Milk – Need, but some people can’t drink milk. They still need the vitamins but
they will have to get those from another food source or vitamin supplement• Telephone at home – Want, although if someone has medical problems, they
may need a phone in case of an emergency
• Cable TV – Want, no one needs a TV. Remember, many years ago, TV’s didn’t even exist!
• Eyeglasses (or Contact Lens) – Need, you have to be able to see!• New Outfit – Want, new outfits are nice but not necessary unless it is for a spe-
cific purpose• Dance Lessons – Want, although if you are going to be a Dancer, you made
need lessons first!• A Pet – Want, unless it is a service animal such as a seeing eye dog, then you
may need it• A Credit Card – Want, unless you are buying from a place that only takes
credit cards, you don’t need one. Credit Cards can get you in trouble if you aren’t careful with them
• A cell phone – Want, unless it is needed for your job• Pencils and Paper – Need, if you are a student• A House – Want, we need a place to live but it doesn’t have to be a house. It
can be an apartment or we might live with other family or friends.• A Car – Want, we may wish we had a car but we don’t need it if we have
buses and taxis available, and there is always walking or riding a bike!
For further discussion:
1.! What are some other Needs? Wants?
2
GOAL: Students will understand and identify their personal needs and wants.

2.! How do we know if something is a Need or a Want? Why do some people ! have different answers?3.! Can some things be a Need for one person but only a Want for someone ! else? 4.! What are some things you Need?
Additional Resources:
1.! PBS Kids Go – It’s My Life – Managing Money: Needs vs. Wants athttp://pbskids.org/itsmylife/money/managing/article2.html
2.! Social Studies for Kids – “Want vs. Need: Basic Economics” athttp://www.socialstudiesforkids.com/articles/economics/wantsandneeds1.htm
3.! Money Doesn't Grow On Trees: A Parent's Guide to Raising Financially Re-sponsible Children by Neale S. Godfrey, Carolina Edwards, and Tad Richards (Paperback - Aug 1, 2006)
Extension Activities:
Have students take home Handout #1 – Need it or Want it? and share with their par-ents. Ask parents how Needs and Wants change as a person gets older. Are there things your family needs that other families might not need? What are some things your family may want, but don’t necessarily need, but others might really need?
T.E.A.M.
GRADE 6 LESSON 2
Time Required: 30-45 minutesContent Standards: AA.S.7! ! Students will acquire the knowledge, attitudes and interpersonal skills to help them understand and respect self and others.
Indicators: AA.PSD.6.7.05 Distinguish cooperative behavior in groups.
GOAL: Students will learn to interact and work cooperatively in groups.
Activity Statements: Students will learn the value of cooperation and teamwork by first doing an assigned task by his/herself and then working with others to complete the same task.
Materials: Teacher Resource 1 - Teamwork Activity One large copy of Activity Chart # 1 (page 2 from Teacher Resource 1 on chart pa-per, overhead, or projector)One large copy of Activity Chart # 2 (page 3 from Teacher Resource 1 on chart pa-per, overhead, or projector)Pencil and paper
Procedures:1. Start the lesson by describing the purpose of today’s lesson. Ask students to ex-
plain what T.E.A.M. (Together Everyone Achieves More) might mean. 2. Follow procedures described on Teacher Resource 1 - Teamwork Activity.
Discussion: • Why is it important to be able to cooperate and work on a team?• How are teamwork and cooperation important in careers?• Can teamwork be difficult? How or why?• Do some careers require more teamwork than others?• Give examples of cooperation and teamwork.• What traits are important for effective teamwork?
3

• How would the lack of one or more of these traits affect a team?• What strengths do you have that you can offer on a team?• Can you think of an example when someone’s strength benefitted a group
or team?• How are teamwork on a sports team and teamwork on a job similar?
!Additional Resources: http://middle-school-curriculum.suite101.com/article.cfm/team_building_ideas_for_middle_school - team building group activitieshttp://www.teach-nology.com/worksheets/time_savers/grouping/
Extension Activities:Students may develop a list of examples of teamwork outside of school. They may present their examples through a 21st Century presentation to the class.
Students may interview adults in various careers and document examples of team-work and why teamwork is important for particular careers.
Other activities as assigned by advisor.
Developed by: Dr. Penny Fisher, Director, Putnam County Schools (2009)
Getting to Know You
GRADE 6 LESSON 3
Time Required: 30-45 minutes
Content Standards: AA.S.7 ! ! Student will acquire the knowledge, attitudes, and interpersonal skills to help them understand and respect self and others.
Indicators: AA. PSD.6.7.10 Develop a sense of belonging to a group to establish group cohesive-ness.
GOAL: Students will establish new relationships as they develop positive interactions with others.
Activity Statements: 1. Students will complete the “We’re Alike Bingo” handout. This activity is de-
signed to help students learn about the likes of other students compared to their own. This awareness of similarities will help the students feel more con-nected with their peers.
2. The instructor will lead the class in a discussion about similarities and differ-ences between students. Even though each student is unique, many have common traits giving them a sense of cohesiveness.
Materials: ! Handout #1 “We’re Alike Bingo”! Pencils
Procedures:1. The instructor should introduce the lesson by pointing out that students some-
times feel alone even in a large group. Some students may also feel very dif-ferent from others without realizing how much they have in common with their fellow classmates.
2. Distribute the “We’re Alike Bingo” Handout and review the directions at the top. The goal is for students to complete typical bingos such as vertical, hori-zontal, sideways, or four corners. Asking students to complete at least two bin-
4

gos encourages them to meet more students and potentially learn more about their classmates.
3. Allow the students adequate time to do the activity.
Discussion: 1. After students complete the activity, follow-up questions may include:
a. Were you surprised to find so many students with similar likes?b. What are some ways that you discovered similarities of which you
were not aware?c. Why is it good to know how you are similar to other students?d. Is it OK to be unique in some ways also?e. Why is it interesting to know how other students are unique from
us?f. How does this activity help you?
Additional Resources: Websites for additional activities:! www.icebreakers.ws/get-to-know-you! www.education-world.com/e_lesson/lesson/lesson196.shtml! www.ehow.com/how_2148567_plan-classroom-icebreakers-kids.html
Extension Activities: This activity may be extended to the home. Challenge students to take a copy of
“Alike Bingo” home to discover family members who are alike or different in some ways. Students may want to talk with their parents about qualities that may be similar to other family members, and qualities that are very unique to them as individuals.
Developed by Cathy Grewe, School CounselorJackson Middle School (2009)
GETTING TO KNOW ME
GRADE 6 LESSON 4
Time Required: 30-45 minutes
Content Standards: AA.S.7 ! Students will learn how to set goals.
Indicators: AA.PSD.6.7.11 Identify personal strengths and weaknesses.
GOAL: Students will identify personal strengths and weaknesses.
Activity Statements:• Students will participate in a game to identify individual strengths and weak-
nesses. They will use negotiation and interpersonal skills to collect strengths and weaknesses statements that apply to themselves.
• Students will discuss and share their identified strengths and weaknesses and how to improve their self concept by receiving feedback from each other.
Materials:1. Teacher Resource 1: Strengths and Weaknesses Cards (there are blank
cards available for students to write in their own strength or weakness).
Procedures:
• Divide students into groups (approximately 4 to 5 in a group)• Give each group a set of cards.• Have each group appoint a dealer who shuffles, deals one card to each student
and then puts the remaining cards in a pile face down on the table.• Read the following instructions for the game:You are to think about the card you have been given and how it possibly describes your personality. Is it a strength or weakness of yours? If you are able to identify it as one of you strengths or weaknesses then KEEP the card, if not, then place the card underneath the pile and draw a new card. Starting to the left of the dealer each member of the group, in turn, has the chance to keep their first card or put it face
5

down underneath the pile, and replace it with another from the top of the pile. If you draw a blank card, you can write in strengths or weaknesses of your choice. Then, in turn, each one of you has to pick up another card, which you can either keep or put back under the pile and replace it with another from the top until all the cards are picked up. You can only reject one card in each turn. The game is complete when all the cards have been used, although it is likely that some cards may not be accept-able to anyone.
Give these instructions after all the cards have been drawn:
Each person needs to sort their hand by strengths and weaknesses. Then take turns and each person reveals their strengths cards. If someone else has the same strength as you (by show of raising their hand) then give yourself zero points but if no one has that same strength in the group then you give yourself 5 points. Take turns and allow each person to share each of their strengths and calculate their scores. Then take turns and each person reveals their weaknesses. If someone else has that same weakness as you (by show of raising their hand) then give yourself zero points but if no one has that same weakness in the group then you give yourself 5 points. Take turns and allow each person to share each of their weakness and calcu-late their scores. The person with the highest score in the end is the student with the most unique strengths and most unique weaknesses in that group.
Members of the group may ask each other to give personal examples (of their strengths or weaknesses e.g.):
• Honest – found $5.00 and handed it in to the school office• Ambitious – want to compete in the Olympics• Indecisive – took an hour to decide what to wear last Saturday
Use the discussion questions below to summarize this lesson.
Discussion: 1. What you have learned by playing this game, about your personal
strengths and weaknesses.2. Are there any changes you would like to make to your selections? Do
you see any errors?3. Do others have similar or different strengths and weaknesses?4. What strengths or weaknesses seem to be more unique to you?5. Why is it important to know this information? How can it be helpful to
you in the future?
Additional Resources: Improving self concept: http://www.educationworld.com/a_lesson/lesson/lesson085.shtml
Knowing strengths: http://www.cccoe.net/social/ESTstrengths.htm Personal qualities: http://www.docstoc.com/docs/7686250/PERSONAL-QUALITIES-CHECK-LIST
Extension Activity: Create a "Me" CommercialHave each student write a two- to three-minute television commercial. The topic is why someone should hire him. The commercial depicts the student's special qualities and strengths. After they work on these, the students present their commercials in front of the class. Another variation is for a group of five to create a commercial for each one and then present this in front of the class.
Adapted from:Western Quebec School Board
www.wqsb.qc.ca/.../LessonPlans/lessonplans/LessonPlan14-StrengthsAndWeaknesses.doc
6

Time Management
GRADE 6 LESSON 5
Time Required: 30-45 minutes
Content Standards: AA.S.1 ! Students will acquire attitudes, knowledge, and skills that contribute to effective learning in school and across the lifespan.!
Indicators: AA.A.6.1.04 !Review and revise time management plan.
GOAL: Students will develop and revise a time management plan.
Activity Statements: Students will develop a time management plan by creating a daily schedule and evaluating what they have to do and what they want to do. Students will investigate the value of having a time management plan. They will learn that effective time man-agement will help them achieve their goals.!Materials:
1. Handout 1: Daily Schedule – one copy per student (teacher may also dis-play electronically to assist with instructions by using personal examples)
2. Handout Have to, Want to, Goals - http://pbskids.org/itsmylife/school/time/article2.html
3. Teacher Resource 1: Big Rocks First (requires some advance preparation and simple materials)
4. Optional flip chart or white board5. Pencils or pens
Procedures:1. The teacher distributes Handout 1: Daily Schedule. (If an electronic copy
is available, the teacher may use it to explain how to complete it. The teacher may sketch a section on a flip chart of the white board and fill in personal examples as a visual aid.) After a brief explanation, tell students
they have five minutes to complete their personal daily schedules. While students are working, the teacher walks around the room looking at stu-dent work to check for understanding.
2. After five minutes the teacher calls the students back to attention to con-tinue the lesson. Ask students if they can see where they use most of their time and if there are any surprises. (If students didn’t finish, they may con-tinue working on their schedules later during class or take them home to finish.)
3. The teacher organizes students into three groups. After assigning groups, the teacher explains that each group will be assigned to a section of Hand-out 2. The teacher then distributes copies of Handout 2: Have to, Want to, Goals. Each group reads the section as assigned and selects one speaker who will be responsible for explaining key points determined by the group to the rest of the class.
4. The teacher explains that students have five minutes to read their section of Handout 2 and be prepared to present key points to the class. The teacher checks the starting time and monitors the class for productive con-versations while groups are working independently.
5. After five minutes, group speakers take turns sharing key points. After each presentation, the teacher adds comments as needed and allows time for questions from others in the class. Follow with discussion questions.
6. The teacher may wrap up the lesson using the illustration provided on Teacher Resource 1: Big Rocks First.
Discussion: • Give examples of have to, want to, need to and explain. Could these
change for you in the future? Explain.• Why do we put off the “have to” list sometimes? Can this cause a prob-
lem? Is there a way to do a better job with our “have to” list?• What do have to and want to have to do with reaching your goals? Can you
think of an example? Explain.• Is it possible to spend too much time on have to or want to? Explain.
Additional Resources: • http://pbskids.org/itsmylife/school/time/ - Time Management: It’s You Against the
Clock
7

• http://www.pbs.org/parents/itsmylife/resources/time.html - Time Management Re-sources
• http://www.teachingmoments.com/Teaching-Moments-10-Steps-to-Positive-Results.html - 10 Steps to Positive Results
• http://www.how-to-study.com/study-skills/en/studying/34/managing-your-study-time/ - Managing Your Study Time
• http://www.how-to-study.com/study-skills/en/studying/36/procrastination/ - Procras-tination
Extension Activities: • Students may take completed calendars home and post in their rooms. Encour-
age students to find ways to better use their time to achieve their goals.• Students may complete a journal writing activity describing how use of time will
help them achieve their goals.• Students may share their daily schedules with parents and discuss the lesson at
home.• Students may create a daily schedule to keep in their student planners or school
notebooks.• Other activities as assigned by advisor.
Developed by: Dr. Penny Fisher, Director, Putnam County Schools (2010)
Effective Study Skills
GRADE 6 LESSON 6
Time Required: 30-45 minutes
Content Standards:
AA.S.1 ! Students will acquire attitudes, knowledge, and skills that contribute to effective learning in school and across the lifespan.
Indicators: AA.A.6.1.05 !Review effective study skills.
GOAL: Students will identify and use effective study techniques.
Activity Statements: Students will identify effective study/learning techniques and will practice applying study/learning techniques. They will make presentations based on the discussion.!Materials:
7. Handout # 1 – Study Technique 18. Handout # 2 – Study Technique 29. Handout # 3 – Study Technique 310.Handout # 4 – Study Technique 4
Procedures:6. The teacher begins by explaining that some study (or learning) techniques
are simple. For example, explain that one technique might be taking notes for review after class. Discuss the idea that they may be using techniques without knowing it. Provide a brief discussion period if students have ex-amples of effective study techniques. (If the class started a Study skills Strategies poster in Grade 5, the teacher may still have it posted. If so, use the information for the discussion.)
7. The teacher explains to students that they have 1 minute to line up by birth-day (month/day, not year). After one minute, the teacher checks the order and students rearrange if necessary.
8

8. Once students are in order, the teacher asks students to number off by 4. Once students are numbered, the teacher instructs students to form three groups (“1”s together, etc.).
9. The teacher distributes Handout # 1 – Study Techniques; Each group will review the corresponding study technique (group #1 will read Study Tech-nique # 1, etc.). The teacher explains the instructions on the Handout, then tells students they are “on the clock” for five minutes. After five min-utes, each group will explain its assigned study technique and demon-strate an example of using the technique.
10.After group presentations, permit students to ask questions and discuss their ideas.
Discussion: • What are effective study techniques? Give examples of effective study tech-
niques.• Are all study techniques equally effective for every person? Explain.• Did you learn a new strategy today that might work for you? How will you
know it’s effective?• Could you add motions (clapping, jumping) to one of the strategies to help
you remember information?• Are there some strategies that work better in some subjects than others?• Did you learn a new way to adapt an existing strategy to make it work better
for you? Explain.!Additional Resources: • http://www.adprima.com/studyout.htm - Effective Study Skills• http://www.studygs.net/attmot4.htm - Effective Habits for Effective Study• http://psychcentral.com/lib/2006/top-10-most-effective-study-habits/ - 10 Highly
Effective Study Habits• http://www.studygs.net/memory/memchaining.htm - Memorizing Using Chaining• http://www.greatschools.org/LD/school-learning/study-and-test-taking-strategies-f
or-kids-with-learning-difficulties.gs?content=627 – Strategies for Kids With Learn-ing Difficulties
• http://www.articleswave.com/educational/effective-learning-techniques-methods.html - Effective Learning Techniques and Methods
• http://www.mindtools.com/mnemlsty.html - Understanding Your Learning Prefer-ences
• http://www.psychologicalselfhelp.org/Chapter4/chap4_42.html - Becoming Moti-vated to Study
• http://passged.websitetoolbox.com/post?id=140164 – How to Get Motivated to Study
• http://www.accd.edu/sac/history/keller/accditg/ssmt.htm - Memorization Tech-niques
• http://www.pesdirect.com/lsitactile.html - Learning Styles• http://middle-school-life.suite101.com/article.cfm/middle_school_orientation -
Time Management, Organization and Study Skills for Teens • http://www.how-to-study.com/study-skills/en/studying/98/improving-concentration/
- Improving Concentration• http://www.howtodothings.com/education/a2964-how-to-improve-study-skills-in-mi
ddle-school.html • http://www.readwritethink.org/classroom-resources/lesson-plans/spelling-cheerlea
ding-integrating-movement-233.html - • http://www.k8accesscenter.org/training_resources/Mnemonics.asp - Spelling
Cheerleading• http://esl.about.com/od/esleflteachingtechnique/a/brainmusic.htm - Music in the
Classroom• http://www.forvo.com/word/loci/ - loci pronunciation
Extension Activities: • Students may discuss study techniques with other students as well as adults.
They should collect study techniques and share them with the class. If the Study Skills Strategies poster is still available from Grade 5, continue to add strategies during the school year.
• Students should try at least one new strategy and report back to the teacher about how it worked.
• Other activities as assigned by advisor.
Resource:Lesson Plan – Successful Study Techniques
Developed by: Dr. Penny Fisher, Director, Putnam County Schools (2010)
9

FRIENDLY VS. MEAN TEASING
GRADE 6 LESSON 7
Time Required: 30-45 minutes
Content Standards: AA.S.7 ! Students will acquire the knowledge, attitudes and interpersonal skills to help them understand and respect self and others.AA.S.9 ! Students will understand safety and survival skills and apply coping strategies.
Indicators: AA.PSD.6.7.12 ! Understand appropriate good-natured communication with peers and others.AA.PSD.6.9.07! Evaluate healthy relationships.
GOAL: Students will recognize appropriate teasing in various situations.
Activity Statements: Students will work cooperatively to demonstrate understand-ing ofmean versus friendly teasing.
Materials: • Handout 1 Friendly vs. Mean Teasing Cue Cards (one for each student, pref-
erably on card stock) NOTE: this is Handout 5.7 from 5th grade lessons• Handout 2 Friendly vs. Mean Teasing Activity Sheet (practice)
Procedures: 1. Hand each student a Friendly vs. Mean Teasing Cue Card; if anyone comments that they were given these cards last year, state that discussing this is THAT impor-tant and you want to insure everyone still has a card they can refer to.
2. Using Handout 2 Friendly vs. Mean Teasing, have students decide which of the four steps of handling teasing is demonstrated correctly. Students may pair up to work on this activity, then come together as a class for discussion. 3. If time permits, have students act out the situations.
Discussion: 1. How can friendly teasing create a bond between people? How can mean teasing drive a wedge between people?2. What are some cues that our teasing may be going too far? What is the ap-propriate, mature response when someone tells us that they don’t like our teas-ing? What should we choose to do?3. Even if we are not actively teasing someone in a mean way, being a by-stander (just watching it happen) can hurt the person just as much. What are our choices when we see someone being teased in a mean way?
Additional Resources: • Goldstein, A. The PREPARE Curriculum: Teaching Prosocial Competencies.
Champaign, IL: Research Press, 1999• Article on teasing:
http://www.cyh.com/HealthTopics/HealthTopicDetailsKids.aspx?p=335&np=287&id=1683
• Article discussing mean versus friendly teasing:http://www.blurtit.com/q757112.html
Extension Activities: • Have students write down an observation at home/after school where people
are teasing appropriately and inappropriately.• Play the song, “Don’t Laugh at Me” by Mark Wills• Other activities as assigned by advisor.
Adapted with permission from:Goldstein, A. The PREPARE Curriculum: Teaching Prosocial Competencies. Cham-
paign, IL: Research Press, 1999
10

Conflict Mediation
GRADE 6 LESSON 8
Time Required: 30-45 minutes
Content Standards: AA.S.9 ! Students will understand safety and survival skills and apply coping strategies.
Indicators: AA.PSD.6.9.05 ! Define techniques for managing stress and conflict.
GOAL: Students will learn and apply techniques to manage conflicts.
Activity Statements: Students will learn one’s personal style of dealing with conflict by hearing the different styles of handling conflict, determining how they handle con-flict, talking with others who handle conflicts the same way and discussing the pros and cons of each way. Materials: Handout 1- Steps to resolve a conflictHandout 2- How to Construct an I-messageHandout 3 – Conflict SituationsTeacher Resource 1- Styles of Handling Conflict
Procedures: 1. Hand out and review copies of handout 1, “Conflict Mediation- steps to resolve a Conflict” and handout 2, “How to Construct an I-message”. 2. Ask the students to share what they think the definition of conflict is? 3. Have the students give some examples of the types of conflicts that are common in the sixth grade.4. Say, “Each one of us handles conflicts differently. There are different “styles” of handling conflicts. I will read to you a description of each style. After I am done read-ing about all four types, you may go to the corner of the room which best describes your “style”.5. Read about each of the four styles of handling conflict aloud from TR 1, “Styles of Handling Conflicts”.6 Allow each group of students to take a few minutes to discuss why they think that they belong in their particular group.
7. Next, ask the students to figure out which “style” that they would like to be and go to that corner. Allow a few moments for the students to discuss with each other what they like about this particular style. Discussion:What do you think are the pros and cons of each “style”?Which “style” do you think is the most successful in resolving conflict?
Additional Activity:1. Use handout 6.3, “Conflict Situations”.2 Read aloud each example of a conflict and ask the students how they think each “type” would handle this particular conflict.3. Allow the students to role-play the various conflicts using the different types of resolution strategies. 4. Students may also role play a conflict that they have experienced in or out of school. Have them decide which “type” would be better for this particular conflict.
Additional Resources: Guide to help solve conflict: click on “Your life” and then “BAM! Guide to Getting Along”www.bam.gov/Article on using conflict mediation effectively:http://www.studygs.net/conflres.htm Article on managing parent-teen conflict constructively:www.mediate.com
Extension Activities: Practice using “I” messages with peers and family members. Apply conflict resolution practices with peers and families.
ResourceWittmer, Joe, (2000) “Large Group Guidance Activities, a k-12 Sourcebook”, Edu-
cational Media Corp. Minneapolis, MN
Developed by: Julie Fulks, Johnson Elementary School Counselor (2009)
11

Introduction to Portfolio
GRADE 6 LESSON 9
Time Required: 30-45 minutes
Content Standards: AA.S.2 ! ! Students will complete school with the academic rigor and prepa-ration essential to choose from a wide range of substantial postsecondary options, including college.AA.S.5 ! ! Students will employ strategies to achieve future career goals and know where and how to obtain information about the world of work and postsec-ondary training/education.
Indicators: AA.A.6.2.12 ! Recognize the importance of the portfolio and begin updating current information.AA.C.6.5.05 ! Maintain a portfolio reflecting academic, career, and personal/social accomplishments.
Activity Statements: Students will learn what a portfolio is and the purpose of beginning one now. Stu-dent will start creating their own portfolios and share them with partners. They will then share with the class what they have learned about their partner by reading that person’s portfolio.
Materials: LCD data projectorTeacher Resource #1 Middle School Portfolio (4 pages)Handout #1 Middle School Portfolio
Procedures:1. Say: Today we are going to learn about portfolios. What they are and why
they are important to us. Has anyone ever heard of a portfolio? (if so, let them explain what it is).
2. Say: Portfolios serve as a tool that will allow you to create a professional package about yourself. A portfolio will show off your work throughout middle school. It is like creating a picture of yourself, for others to see. When others look at your portfolio they will know
what you like and dislike and what you are good at and what you are not so good at as well. They will know what your goals are for your future and what your plans are for reaching those goals. Just like your picture you take each year at school, your portfolio will change a little each year. You might change your likes and dislikes from 6th to 8th grade. Or you might change your plans for after high school from 6th to 8th grade. That is why it is so important to per-form certain task each other that are added to your portfolio. Today we are going to start our portfolios and throughout this year we will be adding informa-tion to our portfolio as we go.
3. Show Instructor Resource #1 Middle School Portfolio
4. Pass out Handout #1 Middle School Portfolio5. Have students complete the top identifying information.
6. Instruct students that you are going to work on the next section together. Go through each of the categories and discuss possible answers for each. Then have students fill in their own answers on their handout. Complete sections: Developing My Interest, My Career Plan, Extracurricular Activities and Awards. Then have students write in the date for “created a portfolio” and any other dates of completion so far.
7. Divide students into pairs. Have them trade portfolios. After reviewing and studying their partner’s portfolio ask them to pass them back to their owner. Then ask for a couple of volunteers to share the “picture of their partner” that they saw on the portfolio. In other words, describe their partner to the class using what they learned from that person’s portfolio. Let as many students share the picture of their partner as time allows.
Discussion: 1. What have you learned today about portfolios?2. How can a portfolio be helpful to you in the future?3. What are some things you can learn about a person by reading their port-
folio?
12
GOAL: Students will understand what a portfolio is and initiate development.

4. What did you learn about yourself today by starting your portfolio?
Additional Resources: http://www.marion.k12.fl.us/dept/cte/docs/CareerDevPlan.pdfhttp://www.prenhall.com/divisions/ECT/app/literacy_portfolios/pdf/chapter3.pdfhttp://www.dodea.edu/HSi/portfolio.htm http://www.dcn-cde.ca.gov/portfolios.htm
Extension Activities: Students will take the work done in class today home and review with parent and ob-tain parent signature.
Activity:Have students explore their Portfolio in CFWV.com. You may wish to concentrate on one area within the Portfolio and have the students fill out their relevant informa-tion.
Resources:Lesson Plan – Creating Your Own Overall Personal Portfolio and Career PortfolioLesson Plan – Introduction to Lifelong PortfoliosLesson Plan – Storing Your Portfolio Plus More
Reporting:Advisors, teachers and counselors with professional accounts for Professional Tools may add reviews to students’ Portfolio work.
Developed by: Shelly DeBerry, Counselor, Martinsburg High School (2009)[email protected]
Resource or Adapted from:http://missouricareereducation.org/curr/cmd/guidanceplacementG/elearning
Grade 9 Unit 1 Lesson 1
13

2 10Academic Progress Review
H1
11Big Hairy Audicious Goal - BHAG
H1
12Problem-Solving
H1, H2
13Anger Management
H1, H2
14Respect for Property and Belongings
H1, H2, H3
15Coping SkillsH1, H2, H3
16Learning to Learn - Learning Styles
H1, H2,H3, TR1
17Multiple Intelligences
H1, H2, H3
18Skills for Global 21
Links-6th grade, Lessons 10-18

Academic Progress Review
GRADE 6 LESSON 10
Time Required: 30-45 minutes
Content Standards: AA.S.3 ! Students will understand the relationship of academics to the world of work and to life at home and in the community.
Indicators: AA.A.6.3.04 !Review and progress and modify academic goals where indicated.
GOAL: To review first quarter progress and set academic goals.
Activity Statement: Students will discuss their academic performance so far this year. Students will develop an academic goal. Students will learn about any electronic grading system the school system may use and how to access it.
Materials:! Copy of each student’s progress report! Copy of each student’s WESTEST 2 scores from previous year! Handout 1 – Academic Goal Activity Sheet
Procedures: 1. Give each student a copy of their most recent progress report/report card
and a copy of last year’s WESTEST 2 scores (these will need to be col-lected at the end of the session and kept in the student’s portfolio/file).
2. Let students review and compare progress reports and WESTEST 2 scores (see discussion questions below).
3. Have students develop an Academic Goal. Distribute a copy of the Aca-demic Goal Worksheet to each student. Ask each student to complete the goal statement by indicating at least one academic achievement they would like to accomplish during 6th grade. Let them know that these goals
should be based on how they are doing so far this year. These goals are meant to help them transition into middle school and succeed (these will need to be collected and kept in the student’s portfolio or file).
4. If your school uses an electronic grading system students and parents can access make certain the student’s know about the system, how to access it, who they need to see about getting a password, etc.
Discussion Questions:• What have you learned from reviewing your progress reports? • What do the WESTEST II scores from last year tell you and how do
they compare with your current grades?• What do you think of middle school classes?• How are you doing and why?• Do you study more or are you doing more homework to succeed?• What do you think would help you to do better in your classes and
on assessments this year?• In which classes do you have grades that you are pleased with?• What can you do to improve your performance in any class in
which you did not get an “A”?• In what classes are you not happy with your grade?• What do you plan to do to improve your grade?• How will you use what you are learning in each of your classes in
real life?
Additional Resources:
http://cfwv.com – College Foundation of West Virginia is a high school, career, college and financial aid planning tool for middle school students and their par-ents.
Extension Activities (Optional): ! Have students take a copy of their completed Academic Goal Activity Sheet home to share with their parents. They can incorporate any suggestions their family may have in their goal and bring it back to file in their portfolio.
Activity:
15

Have students outline their support plans for any required tutoring or study assis-tance through Support for Academic Goals.
Resource:Lesson Plan – Time for a Check Up!
Developed by: Iestyn J. Bright, Counselor, WVDE (2010)
Big Hairy Audacious Goal (BHAG)
GRADE 6 LESSON 11
Time required: 30-45 minutes
Content Standards: AA.S.3! Students will understand the relationship of academics to the world of work and to life at home and in the community.
AA.S.6 ! Students will make decisions, set goals, and take necessary action to achieve goals.
Indicators: AA.A.6.3.05! ! Revise organizational plan to achieve academic goals.AA.PSD.6.8.07! Establish short and long-term goals for the academic year.
GOAL: Students will set short and long-term goals for the remainder of the academic year.
Activity Statements: To encourage goal setting as a way of accomplishing a task related to school and beyond, the students will complete an activity to set both short and long-term goals. They will develop an understanding of how to develop achievable goals.
Materials: 1. Handout 1: “Goal Sheet” 2. Pen/Pencil
Procedures: 1. Begin by discussing the meaning and importance of goal setting. Say “What is a goal?”
• A limit
16

• A boundary • A set place or direction • A point of success! ! ! ! ! ! ! !
2. Say “Why is it important to set goals?” • To direct our energies• To motivate achievement• To determine values• To provide direction• To have something to work for • To stay on track • To determine what is really important
3. Ask “What are some obstacles that get in the way of achieving our goals?”• Bad habits• Misperceptions• Fears• Assumptions• Impatience• Resistance to change
4. Ask “What is the criteria for a good goal?”• It is conceivable – can be put into works• It is possible • It is controllable – includes others with permission• It is measurable – able to know when it was (wasn’t) accomplished• It is definite – no “either-or”
5. Indicate that in this session you are going to work on short- and long-range goals or what we like to call “Big Hairy Audacious Goals – BHAG”.
6. Give out Handout 1: “Goal Sheet” and ask students to complete. Have students discuss their goals with the class when completed. Discuss if the goals are controlla-ble, possible, measurable, conceivable, and definite. If not, have students revise as necessary.
7. After students have had ample time to independently develop some goals, ask stu-dents to share short-term and long-term goals, discuss barriers and plans to over-come and reach goals. This activity may be done in small groups or as a classroom activity.
Discussion: 1. Why is it important to set goals?
2. Are there some famous people you know that might use goal setting to help them? Who are they? Why would they have goals? 3. How does setting goals help you in school? At home? 4. Describe how it feels when you achieve or accomplish a goal? 5. If there are obstacles in your way that interfere with achieving your goal, what can you do? 6. What resources can you use to help achieve your goal?
Additional Resources: • Setting and Keeping Goals www.kidshealth.org • Goal Setting for Students http://www.goalsetting4students.com/• Goal Setting http://www.ctqel.org/halifax/goalsetting.html
Extension Activities: Students: Ask each student to take their completed “Goal Sheet” home and share it with their parents or guardians. Suggest they keep track of their improvements, ana-lyze the plan frequently, and make changes if the plan is not going well.
Advisors: Set a definite time for the report-in on goal achievement. The review will include progress on the goal and resetting goals which were not accomplished. Re-view the criteria for a good goal. Be sure new goals meet those criteria.
Activity:
Have students record their intermediate-term goals in the Looking Ahead section of their Portfolio.
Resource Adapted from: 102 Tools for Teachers & Counselors Too by Hannaford, Mary.
Developed by: Dr. Lisa Burton, Assistant Professor, Marshall University
17

Problem-Solving
GRADE 6 LESSON 12
Time Required: 30-45 minutes
Content Standards: AA.S.3 students will understand the relationship of academics to the world and to life at home and in the community.
AA.S.8 students will make decisions, set goals, and take necessary action to achieve goals.
Indicators: AA.A.9.3.06 !apply effective decision-making strategiesAA.PSD.6.8.01 use a decision-making and a problem-solving model
GOAL: Students will review and apply an effective decision-making model.
Activity Statements: Students will learn to use the “decision-making model” by reviewing the “decision making model”, working in groups to list decision they make on a daily basis and seeing how those decisions work in the model. Students will then list good and bad decisions they have made and discuss them.
Materials: Handout 1- Decision-Making Model Overhead ProjectorTransparency of handout 1- Decision-Making ModelHandout 2- My Choices
Procedures:1. Pass out copies of handout 1, “Decision-Making Model” and begin by saying,
“We all have to make decisions every day. What are some of the decisions
you have already made today?” (Allow students to answer out loud.). “Today, we are going to learn a process to make a decision.” Go over handout 1, “Decision-Making Model” with the students, step by step.
2. Distribute a copy of handout 2, “My Choices” to each student. Divide the stu-dents into small groups of 3-4 students and ask each group to choose what they think are the five
most important decisions. Discuss with the class as a whole what the most common answers were and why they were chosen.
3. Using the transparency of handout 1, “Decision-Making Model”, guide the stu-dents step by step through the process using the top five most important deci-sions chosen from handout 2, “My Choices”.
Discussion:
“Do you realize that you are constantly making decisions?” “What are some decisions that you have made today?”“What did you think is the single most important decision that you have make today so far?”“Do you think that personal values enter into our decision-making process some-times?”
Good or Poor Decisions
1. Ask students to come up with some examples of decisions that are com-mon in the sixth grade.
2. Give each student a piece of paper and ask them to fold it in half. 3. Ask students to write “Good Decisions” on the top half and “Poor Deci-
sions” on the bottom half. 4. Direct the students to think of some decisions that they have made in the
past week and write them on the paper in the appropriate section. 5. Ask the students to look at the “Good Decisions” section and ask them-
selves the following questions:“How did I happen to make this decision?”“Who influenced me in making this decision?”“How many of these decisions were the result of my having received ad-vice from others?”“What was the consequence of this decision?”
18

6. Students may ask themselves the same questions as they look at the “Poor Decisions” section.
Discussion:
“How responsible are we for determining our futures?” “What can we learn from a poor decision?” “What did you learn today?”
Additional Resources:
Study guides and strategies for problem-solving and decision-making.!http://www.studygs.net/problem/index.htm Decision-making quiz for children and teenswww.rnli.org.uk/shorething/Youth/Games/ Five steps to Good Decision-Making Skills for Teenshttp://parentingteens.about.com/od/behavioranddiscipline/a/decisionmaking.htm
Extension Activities:
Students may interview a parent or other adult on the choices that they have made in life and the consequences of those choices. Students may use hand-out 1, “Decision-Making Model” to practice working through some of these problems.
Activity:a. To “try out” real-life decision making in jobs (and to show the importance of
good decision making), have the students go to the Explore Careers section in CFWV.com.
b. Then ask them to select a career cluster that appeals to them. c. From the list of careers in that cluster, choose one that has “Insider Info Only”d. From the tabs on the left side of the page, choose “Real Life Activity”e. Have the student try out the “Real-Life Decision Making” question for that ca-
reer
Resources:The Roads to Success lessons have been correlated to the inventories and as-
sessments found in CFWV.com
Road to Success Lesson Plan – Decision Making
Resource or Adapted from:
Wittmer, Joe, (2000) “Large Group Guidance Activities, a k-12 Sourcebook”, Edu-cational Media Corp. Minneapolis, MN
Developed by: Julie Fulks, School Counselor, Johnson Elementary (2009)
19

Anger Management
GRADE 6 LESSON 13Time Required: 30-45 minutes
Content Standards: AA.S.9 ! Students will understand safety and survival skills and apply coping strategies.
Indicators: AA.PSD.6.9.08 ! Learn and apply appropriate anger management skills.
GOAL: Students will learn and understand proper application of anger management skills.
Activity Statements: Students will explore their personal reactions to anger, as well as learn ways to control their anger.
Materials: Handout 1: “My Anger”Handout 6.2 “False beliefs about anger”
Procedures:1. Distribute handout 6.1, “My Anger” and give the students several minutes to fill
it out independently. 2. Upon completion, ask the group, “what do you do when you’re angry?’ List all
of the answers on the board. Encourage students to think of as many expres-sions of anger as possible. Common responses are:
Get even! ! ! ! ! ! ! Talk to an adultTalk to a friend! ! ! ! ! ! Hide or run awayIgnore it! ! ! ! ! ! ! YellHit something! ! ! ! ! ! Go workout
Throw things! ! ! ! ! ! Be quiet
Do nothing! ! ! ! ! ! Run or exercise!Scream! ! ! ! ! ! ! Hit someone (fight)
3. Discuss each response with the group and decide whether the response is healthy or unhealthy. Ignoring or doing nothing is not healthy; neither is hurt-ing yourself or others.
4. With this exchange of ideas as a foundation, process the worksheets by dis-cussing each question. Reinforce the idea that all emotions just are; they are not good or bad. How they are expressed can be good or bad. Challenge the group to try something new the next time they feel angry.
Here are some tips to keep your anger from boiling over:1. Take some deep breaths and concentrate on relaxing your body with each
breath.2. Count to 10 slowly.3. Think before you react- what are the consequences of your actions?4. Keep your voice “low and slow”.5. Split the scene. Remove yourself from the situation- leave the room for a min-
ute or take a short walk.
Discussion: • What do you do when you’re angry?• Do you see a correlation between how you deal with anger and how your
parents deal with anger?• What makes a response “unhealthy”?
Additional Resources:
http://www.nationalsave.org/ - the National Association of Students Against Violence Everywhere. Students can learn about alternatives to violence and practice what they learn through school and community projects. www.bam.gov/ - Body and Mind website sponsored by DHHS center for disease con-trol. Resources for managing stress, conflicts and other pressures.
Additional Activities: Students will identify false beliefs about anger.
20

Procedures: !
Distribute handout 6.2, “False beliefs about anger”. Read through each statement slowly and ask the students if they believe that this statement is true or false. If the students feel that the statement is false ask them to explain why they think that the statement is false and substitute it with a true statements.
Resource or Adapted from:Carrell, Susan (1993), “Group Exercises for Adolescents, A Manual for Therapists”, Sage Publications, Inc.www.bam.gov/
Respect of Property & Belongings
Grade 6 Lesson 14Time Required: 30-45 minutes
Content Standards: AA.S.7! ! Students will acquire knowledge, attitudes and interpersonal skills to help them understand and respect self and others.
Indicators: AA.PSD.6.7.13! Demonstrate respect for others and their property.
GOAL: To understand the concept of respect towards others, their property, and belongings.
Activity Statement: Students will review what respect for others and their property looks like and will par-ticipate in small group discussions on how not respecting others property affects eve-ryone involved.
Materials: 1. Handout 1 - Definition of Respect 2. Handout 2 - Discussion Scenario’s3. Handout 3 – Identifying Infractions to the Law
Procedures:1. Lead the group in a discussion on what it means to respect others and their prop-
erty. Help them define respect. (Formal definition included for your convenience)2. Divide the group into small groups of three or four. 3. Read aloud one at a time the paragraphs from the Discussion Scenario’s and ask
student to discuss each in their small groups and come to a consensus on how to respond.
21

4. After each scenario has been discussed in the small groups and they have made a decision, bring it to the class and have each of the small groups report what they decided and why. Facilitate a class debate. Continue through all the sce-nario’s.
Discussion Points for the Scenarios: 1. What are some possible courses of action? What are some of the costs of
shoplifting? Are there drawbacks to your course of action? List some ways he the owner is affected. List some ways the customers are affected. What would happen to the shoplifters if they were caught?
2. What kind of a friend are you if you tell? (you may have to really work to get an appro-priate response here) What happens if you don’t report what you saw? What hap-pens if you do? What is the right thing to do? Why?
3. What factors do you believe contribute to teenagers committing property crimes? What do you think would reduce the number of property crimes committed by teenag-ers in your community? If you were a city official, how would you go about implement-ing crime reduction in your community.
4. What are the programs in your community that help people protect their property from vandalism and prevent burglaries? How do these programs help?
Additional Resources: the following are websites that offer information or teens and crime.http://www.ncpc.org/programs/teens-crime-and-the-communityhttp://www.ci.mpls.mn.us/police/outreach/http://www.sacsheriff.com/crime_prevention/index.cfm
Extension Activities: 1. Ask your students to share situation they were in where they had to decide
what is right and what is wrong. 2. Ask them to share situations of being a victim or knowing a victim of a crime. 3. Instruct students to read the newspaper everyday for one week and keep a
running count how many crimes are reported during that week. Discuss as a group.
4. Have students complete worksheet 1 on their own and then discuss as a group.
Resource:Teens, Crime, and the Community
National Crime Prev West Education Publishing, Developed by: Pam Bauman, Counselor, WVDE (2009)
Coping Skills
GRADE 6 LESSON 15
Time Required: 30-45 minutes
Content Standards:AA.S.9 Students will understand safety and survival skills and apply coping strategies.
Indicators : AA.PSD.6.9.04 Identify techniques to cope with peer pressure.AA.PSD.6.9.06 Recognize coping skills for managing life events.
GOAL: To learn and apply coping techniques.
Activity Statements: Students will learn what coping skills are. Students will use small group and whole group discussion to process how to use coping skills, produc-tive vs. ineffective coping skills and ways of dealing with stressors.
Materials:• Handout 1 – Introduction to Coping Skills• Handout 2- Coping Skills 1• Handout 3 – Coping Skills 2
Procedures: 1. Let the students know they will be learning about coping skills today. Ask the
students what they think coping skills are? 2. Pass out Handout 1 Introduction to Coping Skills to each student. Have stu-
dents take turns reading bullet points out loud and discuss each point as a group. (See discussion questions below). Students can highlight or underline important information as they follow along if they would like to.
22

3. Have students get into groups of 3 or 4. Pass out Handout 2 to each group instruct the groups to read over the statement at the top and complete the handout as instructed. Review completed handouts with entire group.
4. Pass out Handout 3 and have small groups work on this activity together. Have each group tell the class one of the stressors they came up with and ways they would deal with it.
Discussion: • Does everyone understand there are three different parts to your brain?
What are they? • Which part should use to make decisions about coping with stress?
Why? • What if we use our survival part? • What happens if we use our emotional part? • Describe one new technique you can use to cope with difficult issues.• What are some coping strategies you have used before that worked for
you?
Additional Resources: !
http://www.copingskills4kids.net – Coping skills for kids, The Brain Works project. http://www.kidshealth.org – How the body works and more.
Extension Activities: www.teenadvice.about.com - On this site search peer pressure and click on the article “How to Combat Peer Pressure”. After reading the article, scroll down until you see Related Quizzes on the left side of the screen. Click on “Does Peer Pressure Control You?”
Have students work in groups to share stories of when they have felt peer pressure. Allow groups to brainstorm methods of coping with peer pressure. The last list on Handout 3 can be used for homework if desired.
Developed By: Iestyn J. Bright, Counselor, WVDE (2010)
Learning Styles
GRADE 6 LESSON 16Time Required: 30-45 minutes
Content Standards:AA.S.1 ! Students will acquire attitudes, knowledge, and skills that contribute to effective learning in school and across the lifespan.
Indicators: AA.A.6.1.06 Explore and differentiate learning styles and intelligences.
GOAL: Students will discover personal learning styles.
Activity Statements: Students will identify learning styles and determine their personal learning styles. Students will develop lists of strategies to improve achievement based on their learn-ing styles.!Materials:
1. Handout 1: Learning Styles (copies for students to share or display elec-tronically)
2. Handout 2: Identifying Learning Styles (one copy per student)3. (Optional) Teacher Resource 1: Style Stations (at least three learning sta-
tions needed with electronic access for student groups)4. (Optional) Handout 3: Style Station Links (a few copies for electronic learn-
ing stations)5. Paper, pencils or pens for students
Procedures:1. The teacher distributes Handout 1: Learning Styles (or displays the mate-
rial electronically) to pairs of students. Students are asked to read through the description of learning styles silently.
23

2. After a few moments, the teacher announces it’s time to stop and “Say Something”. (The teacher explains that whenever they hear “Say Some-thing” from the teacher,
students should stop and take turns so that each person tells his/her part-ner one important point from the assignment.)
3. The teacher distributes Handout 2: Identifying Learning Styles and ex-plains the instructions for completing the assignment (page 1 of Handout 2). After completing the self-assessment (pages 2 and 3 of Handout 2), students will circle the learning style on page 4 of Handout 2 for which they scored the highest and read that section silently.
4. The teacher may use the instructions from Teacher Resource 1: Style Sta-tions to provide learning stations for students based on their choice of learning style. If electronic learning stations are not available, the teacher may use other materials for student research.
Discussion: • According to the self-assessment on Handout 2, what is your main learning
style?• Were you surprised by the results of the self-assessment? Explain.• What are the three learning styles?• Give an example of a learning tip for each of the learning styles.• Learning styles are related to how we prefer to learn, not what we learn. Ex-
plain this statement in your own words.• How can this information help you do better in school?• How can you develop a learning style that may not be your preferred learn-
ing style? How might this be useful?
Additional Resources: • http://www.educationworld.com/a_lesson/03/lp319-01.shtml - student learning-strengths• http://www.ldpride.net/learningstyles.MI.htm - learning styles for multiple intelligences• http://www.edutopia.org/multiple-intelligences-learning-styles-quiz - learning styles and
multiple intelligences• http://www.studytechniques.org/learning-styles.html - study techniques• http://www.pacareerzone.org/assessment/home.jsf?conversationId=1628396 – career
zone• http://www.berghuis.co.nz/abiator/lsi/lsiframe.html - learning styles
• http://www.learning-styles-online.com/inventory/ - learning styles inventories• http://www4.ncsu.edu/unity/lockers/users/f/felder/public/ILSpage.html - Index of Learning
Styles• http://people.usd.edu/~bwjames/tut/learning-style/stylest.html - Learning Styles Inventory• http://www.nwlink.com/~donclark/hrd/styles.html - Learning Styles and Preferences
(teacher resource)• http://www.mindtools.com/mnemlsty.html - finding balance in your learning styles• http://www.teachervision.fen.com/group-work/cooperative-learning/48547.html - Think,
Pair, Share Strategy (teacher resource)• http://clte.asu.edu/active/usingtps.pdf - Think, Pair, Share Strategy (teacher resource)
Extension Activities: • Students may study learning styles independently by searching for additional re-
sources, inventories, and study techniques for their own individual styles.• Students may discuss learning styles with other students and/or adults. • Students may work on developing the learning styles that are not their first prefer-
ence.• Other activities as assigned by advisor.
Activity:Have the student take the Learning Style Inventory in the Learn About Yourself Sec-tionHave students record their Learn Style Inventory Results in their PortfolioHave students record their thoughts and plans for incorporating their learning style knowledge in their Journal
Developed by: Dr. Penny Fisher, Director, Putnam County Schools (2010)
24

Multiple Intelligences
GRADE 6 LESSON 17
Time Required: 30-45 minutes
Content Standards: AA.S.1 ! Students will acquire attitudes, knowledge, and skills that contribute to effective learning in school and across the lifespan. !
Indicators: AA.A.6.1.06 !Explore and differentiate learning styles and multiple intelligences.
GOAL: Students will discover and differentiate multiple intelligences
Activity Statements: Students will identify multiple forms of intelligence and identify their personal strengths as related to forms of intelligence. They will work with partners to explore different ways that they demonstrate intelligence.!Materials:
6. Handout 1: Multiple Intelligences (copy one handout per two students)7. Handout 2: Introduction to Multiple Intelligences (copy one handout per
two students and cut each copy in half using random shapes so that differ-ent pairs will not match)
8. Handout 3: Identifying Multiple Intelligences (one copy per student)
Procedures:5. As students enter the classroom, the teacher distributes sections of Hand-
out 2: Introduction to Multiple Intelligences randomly. After all students are
in the room, instruct them to find their partner by matching pieces of their handout. This activity forms pairs of students for the lesson.
6. The teacher asks students “In what ways are you smart?” After students respond, the teacher may ask “Are there different ways you can be smart?”
7. The teacher explains that students will investigate “multiple intelligences”. The teacher distributes copies of Handout 1: Multiple Intelligences to pairs of students.
8. Students read the handout silently, and then the teacher instructs students to share their thoughts about the article with their partners.
9. The teacher follows up with a brief discussion of key points from Handout 1 by asking students to share their thoughts. The teacher asks students if they recognize their own strengths in one of these descriptions.
10.The teacher explains that students will complete a simple assessment of their own multiple intelligences. The teacher distributes copies of Handout 3: Identifying Multiple Intelligences. The teacher refers to page 1 and clari-fies instructions before students begin completing the handout. Students may work independently to complete the task.
11.Students may refer back to the section(s) of Handout 2: Introduction to Multiple Intelligences for review and discussion based upon their own scores.
Discussion: • How is intelligence usually measured? Are all intelligences usually measured?• Can we mostly recognize our intelligences without formal assessments? How do
we recognize our own intelligences?• “Everyone is smart in some way.” Explain this statement and give an example.• Compare special talents and intelligences. Does it matter which name we call
them?• Are you familiar with your own special talents and multiple intelligences?• Is it possible to be strong in more than one area of the multiple intelligences? Do
most of us have varying degrees in each one?• How does an understanding of multiple intelligences change how you view your
own abilities? The abilities of others?
Additional Resources: • http://careerservices.rutgers.edu/careerassessments.shtml - Career Assessments• http://www.businessballs.com/howardgardnermultipleintelligences.htm - Howard Gard-
ner’s Multiple Intelligences
25
• http://kids.lovetoknow.com/wiki/Multiple_Intelligence_Test_for_Children - Online MI Tests• http://www.classroomtech.com/SCOE/index.html (teacher resource)• http://lth3.k12.il.us/rhampton/mi/mi.html - Multiple Intelligences• http://lth3.k12.il.us/rhampton/mi/LessonPlanIdeas.htm - Lesson Plan Ideas• http://www.edutopia.org/multiple-intelligences-introduction (teacher resource)
• http://www.thomasarmstrong.com/multiple_intelligences.htm - Multiple Intelligences• http://www.newhorizons.org/strategies/mi/weber1.htm (teacher resource)• http://www.doe.state.la.us/lde/uploads/4879.pdf “How Am I Smart” section• http://www.businessballs.com/howardgardnermultipleintelligences.htm - Multiple Intelli-
gences• http://eduscapes.com/tap/topic68.htm - Multiple Intelligences (teacher resource)• http://lth3.k12.il.us/rhampton/mi/lessonplanideas.htm - Multiple Intelligences lesson plan-
ning support• http://www.todaysteacher.com/MILearningActivities.htm - MI Activities• http://www.edwebproject.org/edref.mi.th.html - MI - The Theory• http://www.newhorizons.org/strategies/mi/front_mi.htm - Multiple Intelligences• http://www.spannj.org/BasicRights/appendix_b.htm - Multiple Intelligence Worksheets
Extension Activities: • Students may independently study multiple intelligence theory and how it has de-
veloped over time.• Students may design a new school utilizing multiple intelligences. They should
sketch out a drawing and write a paragraph to describe components of the school.
• Students may interview others about their own multiple intelligences.• Other activities as assigned by advisor.
Developed by: Dr. Penny Fisher, Director, Putnam County Schools (2010)
26

Skills for Global 21
GRADE 6 LESSON 18
Time Required: 30 – 45 minutes
Content Standards: AA.S.3 ! Students will understand the relationship of academics to the world of work and to life at home and in the community.
AA.S.9 Students will understand safety and survival skills and apply coping strategies
Indicators:AA.A.6.3.07 ! ! Understand and apply skills for Global 21 learning.
AA.PSD.6.9.11 ! Apply Global 21 skills to academic, career and personal/social behaviors.
GOAL: To understand and apply skills for Global21 learning.
Activity Statement:In this activity students will learn to “think outside of the box”. They will use the example given to discuss possible careers and college majors.
Materials:• Pencils• Handout 1 - “21st Century Learning Skills”
Procedures: 1. Give each student a copy of handout 1 and review the handout as a class.
2. Explain this activity is developed to encourage the students to use creative 21st Century thinking skills to solve challenges.
3. Students will work individually on this activity.
On a whiteboard, chalkboard or flipchart easel, draw a 9 dot square large enough for all of
4. Give each student a copy of handout 1 and review the handout as a class. 5. Explain this activity is developed to encourage the students to use creative
21st Century thinking skills to solve challenges. 6. Students will work individually on this activity. 7. On a whiteboard, chalkboard or flipchart easel, draw a 9 dot square large
enough for all of the students to see. (see diagram 1)8. Ask the students to replicate your drawing on the back of the handout you just
gave them. Then, ask the students to connect all of the dots using four straight lines, without lifting their pens off the paper. All of the dots must be connected within one of the lines.
9. Allow students five minutes to work on activity independently.10.After five minutes are complete, ask everyone to put down their pens. Ask if
anyone believes they have found the correct way to complete the challenge. Offer them the opportunity to come up front and show everyone how they com-pleted the challenge.
11.Once everyone who would like to show how they completed the challenge has had a chance to do so, show the students the correct way to complete the challenge. (see diagram 2)
27
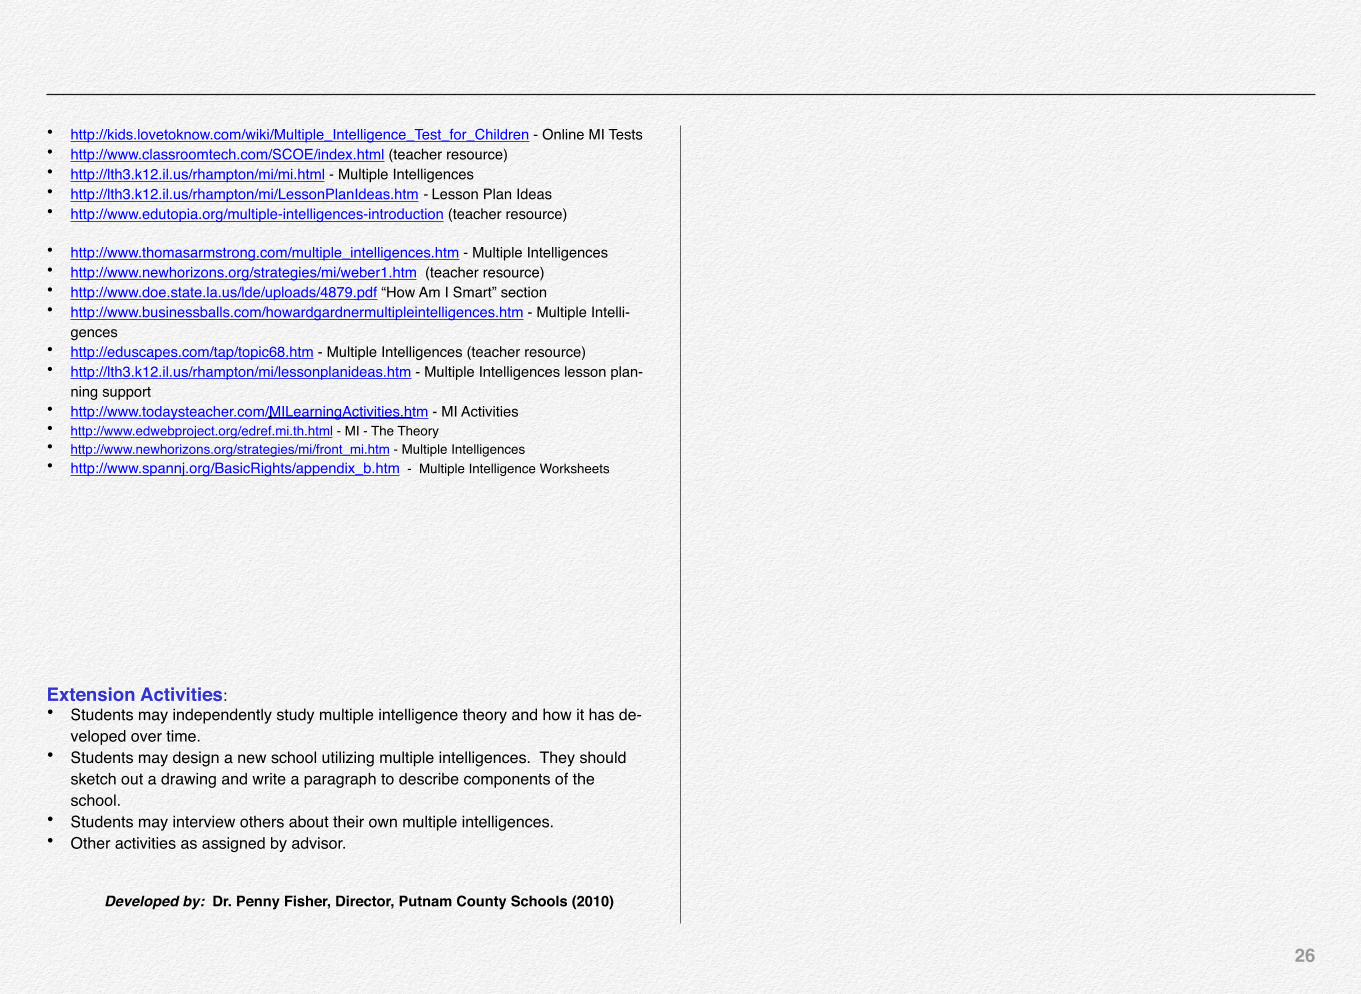
Diagram 1:! .! .! .! ! ! .! .! .! ! ! .! .! .!
! 1.
Diagram 2:! ! .! .! .! ! ! .! .! .! ! ! .! .! .! !
!
Discussion Questions:1. How does this activity relate to planning your future? 2. When you are asked “what you want to be when you grow up”,
what are the usual answers? (teacher, doctor, lawyer, nurse, truck driver, etc.)
3. Should you only think of common careers when planning for the future?
4. How can you learn about careers and college majors that are not usually talked about?
5. Is it important to have a job that you are interested in doing for the rest of your life?
Additional Resources: Policy 2520.14 -- 21st Century Learning Skills and Technology Tools Content Stan-dards and Objectives for West Virginia Schools (PDF) (Word) (http://wvde.state.wv.us/policies/)Skills Pay Off Later - http://www.sciencedaily.com/releases/2009/03/090325132536.htmCrossword Puzzles - http://www.readwritethink.org/materials/crossword/Crossword_k-8.pdfPay Differential - http://www.econedlink.org/lessons/docs_lessons/203_pay1.html
Extension Activities (Optional): Have students take handout home and discuss 21st Century Learning Skills with their parents or other adults. They can ask questions about how 21st Century Learning Skills are used on a daily basis at home, at work, etc.
28
3 19Progress Review - Organizing for Success
H1
20Career Exploration
H1, H2
21Online Writing Assessment - Becoming a Bet-
ter WriterH1, H2,TR1, TR2
22Public Speaking - Part I - Careers
H1
23Public Speaking - Part II - Careers
H1
24Hold 'em or Fold 'em - Friendships
H1, TR1
25Leadership and School Involvement
H1
26aChoose your 'Tude Dude
H1, H2
26b
Links-6th grade, Lessons 19-27

Reflect and Revise
GRADE 6 LESSON 19
Time Required: 30-45 minutes
Content Standards: AA.S.3 Students will understand the relationship of academics to the world of work and to life at home and in the community.
Indicators: AA.A.6.3.08 Revise organizational plan to achieve academic goals.
GOAL: To reflect on first semester and revise organizational plan.
Activity Statements: Students will create an action oriented goal dealing with their academics they would like to achieve. They will work in groups through a four step process outlining what actions they will need to do in order to achieve their goal.
Materials: • Copies of Handout 1
Procedures:1. Prior to the class write on chalkboard, whiteboard, or display on overhead:
Action Oriented Goals rather than Outcome Oriented Goals• Action oriented goal: I want to improve my current grade in math. • Outcome based goal: I want an A in math.
2. Tell the students “you can achieve the goals you set and today we are going to learn how.”
3. Divide class into small groups and give everyone a copy of handout 1. They will complete the handout as you discuss each step with them.
4. Tell the students “Action oriented goals are completely dependent on the effort of the person trying to achieve the goal. Outcome based goals are often de-
pendent on a host of variables, which the goal seeker has no control over. In the case of the outcome based goal on the board / projector the math teacher ultimately decides what questions appear on tests, the value of nightly home-work or class assignments, and project requirements, all of which determine a student’s final grade.”
5. Instruct students to work in their groups to develop an action oriented goal they would each like to achieve relating to their academics and write it down on handout 1. Give them 5 minutes to do this.
6. Now tell the students “Let’s look at step 2 and think about what we can do to-day to start working toward this goal. If you can do one thing today you will be one step closer to achieving your goal. In order to walk you have to put one foot in front of the other the same with achieving goals you have to start some-where and one step, even one small step, will be the start of achieving your goal.” Allow students to work in their groups to complete step 2 (5 minutes)
7. Ask the students “What can you do tomorrow that would help you to achieve your goal? Thinking about what’s next will give you a focal point and a plan of action.” Although tomorrow doesn’t seem faraway to adults, many adoles-cents and teens don’t have a clue about what is going to happen in the next 24 hours. Have students complete step 3 in their groups (5 minutes)
8. Tell the students “Now let’s look at Step 4. This step asks you to outline what you will do over the next week to achieve your goal. It’s pretty easy to think of things to do today and tomorrow to work toward a goal but to really make a change you will need to work on it every day for at least a week. Once you get in a habit of working toward your goal every day it will become easier for you to do without even thinking about it.” Allow students to work in their groups to complete Step 4 (10 minutes).
9. Tell students to keep the handout 1 they completed and check off every day when they have completed the action step they wrote down toward completing their goal. They will need to turn this in to you after the 7th day.
10.Have the students turn their handout over and write on the back what they will do over the next month and for the rest of this semester to work toward achiev-ing the goal.
Discussion: Ask students these questions:1. What types of goals do you have? 2. What is the difference in action oriented and outcome based goals?3. Is it a good idea to set goals? Why, what do goals do for you?
30
4. How do you decide what your goals are? 5. What did you learn today about achieving your goals?
Additional Resources: ! www.goalsetting-worksheet.com – Website to assist with goal setting, includes les-son plans, goal setting worksheets and forms.
www.lessonplanet.com – Teacher approved lesson plans resource for educators.
Extension Activities: • Ask students to take their Handout home and discuss it with their parents
have parents sign off on handout.• Write about a time when you succeeded at something because you made it a
goal and committed to it: Describe what happened / How did it make you feel / What did you learn from the experience?
Activity:Have students complete Short Term Goals section within their Portfolio Have students complete Goals into Action section within their Portfolio
Adapted from http://middle-school-life.suite101.com/article.cfm/adolescent_goal_setting_strategies
Developed by: Iestyn J. Bright, Counselor, WVDE (2010)
Career Exploration
GRADE 6 LESSON 20
Time Required: 30-45 minutes
Content Standards:AA.S.4 Students will acquire the skills to investigate the world of work in relation to knowledge of self and to make informed career decisions.
Indicators: AA.C.6.4.11 Compare and contrast different career options.
GOAL: Students will compare and contrast different career options.
Activity Statements: Students will learn about available careers by exploring various career options. They will determine the benefits and the difference between career options.!Materials:
1. Handout 1: Career Zones (copies for students to share or display electroni-cally)
2. Handout 2: Career Quiz (one copy for each student or display electroni-cally)
3. Teacher Resource 1: Career Quiz Answers4. Paper, pencils or pens5. Optional Activity: Display career planner electronically and search a few careers
together (http://www.educationplanner.org/careerkey/code/careersearch.asp?sponsor=2859&path=ug.gs.discover&islogin=true - optional career planner link)
31

Procedures:1. Students are instructed to read Handout 1: Career Zones silently. After
few minutes of silent reading, the teacher asks students to briefly describe job interest areas.
2. The teacher displays Handout 2: Career Quiz electronically or distributes copies of the handout. (If an electronic display is used, students will write answers on their own paper.) Students complete the Career Quiz inde-pendently. The teacher should announce the amount of time they will have to complete the Quiz, and then announce they are “on the clock”.
3. After the allotted time, the teacher checks to make sure all students are ready to proceed. The teacher displays the answers on Teacher Resource 1: Career Quiz Answers or read answers. Students check their own an-swers. The teacher leads a discussion of any surprises, how well they did on the quiz, etc.
4. If possible, continue with the Optional Activity. Access the link electroni-cally and click through a couple of examples.
5. Point out the additional resource (listed below), Occupational Outlook Handbook and explain that this book tells training and education needed, earnings, expected job prospects in the future, what workers do on the job, and working conditions.
Discussion: • Did you identify a particular area of interest when you read Handout 1: Career
Zones? Explain.• What is most important when considering a future career?• Is it important to consider personal strengths and weaknesses, likes and dislikes
when selecting a career? Why?• Do most people have only one job or career in their lifetimes? Explain.• Is it important to develop skills that are flexible? Why?• Experts say that many of the jobs that will be available in the near future have not
yet been created. What does this mean and why?
Additional Resources: • http://www.khake.com/page94.html - Career Development and Lesson Plans• http://www.breitlinks.com/careers/career_activities.htm - Career Exploration• http://alex.state.al.us/lesson_view.php?id=6673 – Career Exploration Lesson Plan• http://www.bls.gov/OCO/ - Occupational Outlook Handbook
• http://www.associatedcontent.com/article/342425/a_lesson_plan_for_career_exploration.html -writing activity
• http://teachers.net/projects/traveling_buddies/ - Flat Stanley resource• http://www.mnsu.edu/cdc/students/undeclared/handbook/worksheet.pdf - Career Explora-
tion Worksheet• http://www.pacareerzone.org/assessment/quick/home.jsf?conversationId=1628472 – Ca-
reer Zone• http://cfwv.com – Career planning tool
Extension Activities: • Students may access electronic links to do independent study on careers.• Students may extend the Flat Stanley concept into the workplace. Students will
complete a journal activity or some form of documentation of Flat Stanley’s experi-ence.
• Students may share career information and resources with other students or adults.
• Other activities as assigned by advisor.
Activity:
Students can have fun playing the Career-O-Matic where they get see what careers they might have if they leave their career up to chance. Then, students can browse careers by the WV Career Clusters. Any careers students find interesting they can add to their Portfolio.
Developed by: Dr. Penny Fisher, Director, Putnam County Schools (2010)
32

Career Journal 2
GRADE 6 LESSON 6.21
Time Required: 30-45 minutes
Content Standards: AA.S.3 Students will understand the relationship of academics to the world of work and to life at home and in the community.
AA.S.5 Students will employ strategies to achieve future career goals and know where to obtain information about the world of work and postsecondary training edu-cation.!
Indicators: AA. A.6.3.09 Explore the various skills applied to the annual assessment.A. A..6.3.10! Improve written communication strategies.AA.C.6.5.06! Review the previous writing assessment and apply new strate-gies to improve skills
GOAL: Students will review previous writing assessments and strengthen writing strategies using a career prompt.
Activity Statements: Students will discuss the state writing assessment, review the scoring rubric and iden-tify their personal strengths and weaknesses. Students will identify and practice strategies to improve writing skills.!Materials:
6. Handout 1: Writing Assessment Rubric7. Handout 2: BINGO Cards (one set to be distributed one page per stu-
dent)8. Teacher Resource 1: Sample Writing Prompts9. Teacher Resource 2: BINGO Call Card10.Optional small prizes or awards for BINGO games
11.Pencils, paper12.White board, or flip chart13.Optional closed circuit presentation, video, or guest speaker to explain the Online
Writing Assessment
Procedures:6. The teacher begins class by displaying one writing prompt from Teacher
Resource 1: Sample Writing Prompts or another prompt of choice. The teacher should take a moment to remind students about how the online writing assessment is done and what to expect. (A school administrator or counselor could provide a brief explanation by closed circuit television for sixth grade advisories on a day before this lesson is to be presented.)
7. The teacher instructs students to brainstorm ideas about the topic. These ideas are posted as students say them. After ideas are listed, the class works in small groups to develop complete sentences for at least one or two of the ideas posted.
8. The teacher distributes Handout 1: Writing Assessment Rubric and the class discusses the items listed for a score of 6, exemplary rating.
9. The teacher distributes Handout 2: BINGO Cards and follows the instruc-tions on Teacher Resource 2: BINGO Call Card. (Students will need to use pieces of paper to cover, or a pencil to mark, items on their cards dur-ing this game.)
Discussion: • What did you learn about writing complete sentences?• Is writing important? Will it be important to you as adults? How?• Are there times you don’t have to use a complete sentence? How do you
know?• What is the most difficult part of writing? Is it harder to come up with the
ideas or harder to remember rules for grammar, spelling, etc.?• How can we improve the area that’s harder for us to do? Who can help us
with this?• Are there sections of the Writing Rubric that you don’t understand? Ex-
plain.• If there is something on the Writing Rubric that is a weakness in your writ-
ing skills, what can you do to improve?
Additional Resources:
33

• http://wvde.state.wv.us/oaa/westest_index.html - WESTEST 2 Overview• http://wvde.state.wv.us/oaa/writing/wa_index.html - Online Writing Overview• http://boe.mono.k12.wv.us/resources/writing_files/PARENT_GUIDE_2008.pdf - Parent
Guide• http://www.acuityforschool.com/why-choose-acuity/acuity_casestudy_ohiocounty.pdf
(teacher?)• http://wvde.state.wv.us/oaa/results_state.html - state results• http://wvde.state.wv.us/oaa/filecabinet.html - WVDE File Cabinet• http://wvde.state.wv.us/oaa/pdf/WRITING%20ROADMAP%202%20-%20RUBRIC.pdf –
writing rubric• Writing Roadmap 2.0 Description - Roadmap Description• http://wvde.state.wv.us/oaa/pdf/WESTEST%20Online%20Writing%20ParentBrochure.8.1
2indd.pdf – parent brochure
Extension Activities: • The class may begin a Word Wall in the classroom and build it during the school year.
Encourage students to find new words to add to the Wall for test preparation. Remind students of the importance of vocabulary and being able to use and recognize a variety of words.
• Students may work on improving their own writing strategies through independent study. They may talk with their language arts teachers or other resources to as-sist them.
• Students may practice brainstorming ideas about various topics. • Other activities as assigned by advisor.
Developed by: Dr. Penny Fisher, Director, Putnam County Schools (2010)
PUBLIC SPEAKING PART 1 – Speak Up!
GRADE 6 LESSON 22
Time Required: 30-45 minutes
! Content Standards: ! AA.S.1 ! Students will acquire attitudes, knowledge, and skills that contrib-ute to effective learning in school and across the lifespan. ! AA.S.5 ! Students will employ strategies to achieve future career goals and know where and how to obtain information about the world of work and postsec-ondary training/education. ! AA.S.7 ! Students will acquire the knowledge, attitudes and interpersonal skills to help them understand and respect self and others.
Indicators: AA.A.6.1.07! ! Reinforce effective communication skills including public speak-ing and presentation skills.AA.C.6.5.07! ! Demonstrate effective communication skills with presentations and public speaking activities.AA.PSD.6.7.08! Demonstrate understanding of effective communication skills.! ! !
GOAL: Students will reinforce effective public speaking/presentation skills.
Activity Statements: Students will learn about successful public speaking strategies. They will have the opportunity to speak in front of the class by presenting one of the strategies for dis-cussion. They will then discuss the various forms of communication as well as reflect-ing on the experience.
Materials: Handout 1 - Effective Public Speaking
Procedures:
34
1. Begin the lesson by asking students what makes a good speech. Give students time to think before answering. Point out that it might be easier to answer what makes a speech NOT good.
2. Assign student partners to set up for a “jigsaw” activity. Students line up (either by birthday or by alphabetical order of first name as the teacher chooses). The students then count off as 1-2
until all students are either 1 or 2. Distribute copies of Handout 1 – Effective Pub-lic Speaking. Partners are then assigned a section of Handout 1 to read and discuss. Instruct students that after ten minutes, they will present their section to the rest of the class and will be considered the experts on that section. Tell the students they are “on the clock” to be prepared to share their section after ten min-utes to prepare. Instruct them to make sure each member of the team is involved in the preparation and presentation in some way.
3. After ten minutes, each pair will present the assigned section of Handout 1 to the class. Continue with each pair in order of the sections of the handout.
4. Ask students to formulate one or two questions (with the correct answers) about their section of the handout and submit to the teacher. The teacher uses stu-dents’ questions to have a verbal discussion. (The teacher may also use stu-dents’ questions as a follow up for a future lesson.)
Discussion: • How can you overcome fear of speaking in front of others? • Can you describe strategies that have worked for you in the past?• What presentations or public speaking will you need to be able to do in the
future?• What types of presentations or public speaking might be necessary in
some careers?• What types of communication are important when speaking to a group?• What have we learned about effective speaking from today’s presentations?• Is there anything we will change about our own presentations based upon
what we learned today?• Are there key points for which there should be further study or discussion?
Additional Resources: http://www.school-for-champions.com/speaking/boyd_short_guide.htm - Effective
Public Speakinghttp://www.cccoe.net/social/skillslist.htm - Relaxation Strategieshttp://www.school-for-champions.com/speaking.htm - Succeed in Public Speakingwww.teach-nology.com/teachers/lesson_plans/language_arts/speaking
Extension Activities: • Discuss introductions and business etiquette. Have students learn appropriate
ways to introduce other and practice introductions. Role play business greetings for various career settings. Discuss how first impressions can ruin chances for employment.
• Investigate high school requirements for presentations, speeches, etc. Will stu-dents need to be prepared to present senior portfolios? Are there courses in which they will have to present oral reports? If so, what can students do now to be more prepared for those activities?
• Other activities as assigned by advisor.
Developed by: Dr. Penny Fisher, Director, Putnam County Schools (2009)
35

PUBLIC SPEAKING PART II - Glad to Meet You!
GRADE 6 LESSON 23Time Required: 30-45 minutes
Content Standards:AA.S.7! ! Students will acquire the knowledge, attitudes and interpersonal skills to help them understand and respect self and others.
Indicators: AA.PSD.6.7.8 ! Demonstrate understanding of effective communication skills.AA.PSD.6.7.9 Distinguish between all levels of communication including speak-ing, listening, and non-verbal behavior.!
GOAL: Students will practice public speaking and communication skills.
Activity Statements: The students will participate in a round-robin group activity in which each student has the opportunity to speak to the group members. The students will discuss the differ-ent levels of communication and how they can be used effectively.
Materials: Handout 1 – Team Talk Questions
Procedures:1. Instruct students to form a circle in the classroom. 2. Explain that they will learn about introductions and effective communication. 3. Demonstrate a simple introduction in the center of the circle with one student vol-
unteer. The teacher introduces himself first to the student volunteer, then the stu-dent follows suit by doing the same.
4. Discuss nonverbal communication involved in meeting people and talking with them. Ask them why being able to introduce themselves and make “small talk” are important. Discuss how these skills may be important in their future.
5. Have students to count off as 1 – 2 around the circle. Instruct the “1”s to take a step into the circle, form the Inner Circle, and turn facing the “2”s. Students who are “2”s will remain in the Outer Circle. (If there is an odd number, the teacher may participate, too, or 3 people may form one group.)
6. Distribute copies of Handout 1 – Team Talk Questions. Explain that students will briefly introduce themselves to each other like the teacher demonstrated and ask each other any one of the questions from Handout 1 during the Inner/Outer Circle activity. Explain the process before beginning the activity.
7. The teacher will time the rounds of questions allowing one minute for the Inner Circle to introduce and ask a question, then one minute for Outer Circle to intro-duce and ask a question.
8. After a minute for each, the Inner Circle students move one person to their left and then repeat the process.
9. Continue the activity in the same manner until students are all the way back to their original spot in the circle.
Discussion:• What questions could you ask if you are sitting at a dinner meeting with
people you don’t know very well?• How might communication skills be helpful on a job or in a business set-
ting?• What does “first impression” mean? How might we improve others’ first
impression of us?• What strategies did you use during the Inner/Outer Circle activity to interact
in a positive manner with each person?• What is “social networking” and how is it important in 21st Century careers?• Did introductions and talking become easier as you went around the circle?
Additional Resources:How to Introduce Yourself - http://www.readwritethink.org/lessons/lesson_view.asp?id=17Introducing Yourself, Introducing Others - http://www.cccoe.net/social/skillslist.htm
Extension Activities: • Ask students to practice introductions with family or friends outside of class and
report back to the class.• Other activities as assigned by advisor.
Developed by: Dr. Penny Fisher, Director, Putnam County Schools (2009
36

Leadership and Involvement
GRADE 6 LESSON 25
Time Required: 30-45 minutes
Content Standards: AA.S.1 ! Students will acquire attitudes, knowledge, and skills that contribute to effective learning in school and across the lifespan.
AA.S.7 ! Students will acquire the knowledge, attitudes and interpersonal skills to help them understand and respect self and others.
Indicators: AA.A.6.1.08 ! ! Explore opportunities to develop leadership.AA.PSD.6.7.15 ! Understand the role of participation and engagement in the de-velopment ! of leadership skills.
GOAL: Students will recognize how involvement develops leadership skills.
Activity Statements: Students will discuss the qualities of a leader and how to become more involved in their school and community. Students will brainstorm activi-ties in their area that are available to them.
Materials: Handout 1- “Blank Application”Sticky notes in four different colorsLarge poster board divided into four sections.
Procedures:1. Say, “Today we are going to discuss the importance of being involved in your school and community. I am going to hand out a blank application for a leadership position and ask you to complete it as best as you can.”
37

2. Distribute handout 1, Blank Application and give the students a few minutes to fill it out.3. Ask, “Was it hard to think of activities to write on your application? Did you notice that you are more involved in some areas than others? Would you choose yourself for a leadership position?”
4. Divide a large poster board into four sections. Write one area from the blank appli-cation on each section:
a. Clubs/Organizations/Sports Teamsb. Leadership Positions/Team Captainc. Volunteer/Community Serviced. Awards/Recognitions
5. Divide the students into four groups and give each group several sticky notes in one of the four colors. 6. Ask each group to designate a recorder and a runner for their group.7. Allow groups 10-15 minutes to brainstorm as many ways as they can to become involved in their school and community. 8. Recorders will write down the group’s ideas on the sticky notes (one idea per sticky-note).9. Runners will place the sticky notes on the appropriate area on the poster board at the front of the classroom (ideas may not be duplicated).10. After the allotted time period, the teacher can look at the poster board to see which group has the most colored sticky notes on the board.
Discussion: 1. “Was it hard to come up with ideas for the poster board?”2. “Were some areas harder to fill in than others?”3. “Are there a lot of ways to become involved in your school and community?”4. “Are you as involved as would like to be?”5. “If not, how could you become more involved?”6. “How does being involved help a person develop leadership skills?”
Additional Resources: Article on the importance of extracurricular activities:www.prepme.com/resources/article/t/extracurricular_activitiesTeam Building Activities for Kids; games to promote leadership, teamwork and coop-eration:http://after-school-youth-programming.suite101.com/article.cfm/team_building_activities_for_kidsClassroom activities involving leadership:
Extension Activities: 1. Distribute another copy of handout 1, Blank Application for students to take
home.2. Students may use this copy as a goal sheet for what they would like to be-
come involved or learn more about in the future.3. Students may want to discuss with their families these ideas and ways to ob-
tain information on the activities.
Resource or Adapted from:http://missouricareereducation.org/curr/cmd/guidanceplacementG/elearning
38

Choose a Winning ‘Tude, Dude!
GRADE 6 LESSON 26a
Time Required: 30-45 minutes
Content Standards: AA.S.1! ! Students will acquire attitudes, knowledge, and skills that contrib-ute to effective learning in school and across the lifespan. AA.S.7! ! Students will acquire the knowledge, attitudes and interpersonal skills to help them understand and respect self and others.
Indicators: AA.A.6.1.01 !Identify attitudes and behaviors that lead to successful learning.AA.PSD6.7.16 Understand how esteem impacts social success.
Goal: To understand how attitude impacts academic and social success.
Activity Statements: Students will determine their “attitude quotient” and share their scores.Students will portray their attitude through completion of the Wear an Attitude project and demonstrate an appreciation for the similarities and differences among people.Materials:
• Handout 1- Attitude Quotient Survey • Handout 2 – Wear an Attitude activity sheet
Procedures:
1. Give each student a copy of handout 1 – Attitude Quotient Survey. Read the directions as a group and talk about what is the difference in a good attitude and bad attitude. Have the students complete the activity sheet.
2. Have students share their scores.3. Lead a discussion on the importance of positive attitudes toward work and
learning.
4. Define and discuss the meaning of attitude (personal view of something, an opinion or general feeling about something; bodily posture, a physical posture, especially while interacting with others; challenging manner, an arrogant or assertive manner or stance) and the statement “attitude is everything.”
5. Hand out the Wear an Attitude activity sheet and explain the project require-ments. Students are to work independently and keep their project a secret, have them write their name on the back.
6. The next time advisory meets, post the results and see if the students can guess who did each project.
Discussion: • What is an attitude?• How do people with a bad attitude act? • How do people with a good attitude act? • Is it hard to keep a positive attitude in 6th grade? Why? • What can you do to have a good or positive attitude? • How does your attitude affect your relationship with others (family,
friends, teachers, etc.)?• How does your attitude affect your academics or grades?
Additional Resources:
http://kidshealth.org/teen/your_mind/mental_health/self_esteem.html - ways to im-prove self-esteem.http://discoveryhealth.queendom.com/self_esteem_abridged_access.html - self es-teem test tells you whether you have a high or low self-esteem and ways to increase it. www.selfesteemawareness.com – defines and gives examples of self-esteem.
Extension Activities: 1. Ask students write a paragraph or journal article identifying their own sources
of good attitude.2. Ask students to make a list of behaviors that lead to success in academics,
relationships, sports, and physical appearance.
Adapted from: Florida Dept. of Education Guidance and Counseling Lesson Plans
39

What’s in a Label?
GRADE 6 LESSON 26b
Time Required: 30-45 minutes
Content Standards: AA.S.1! ! Students will acquire attitudes, knowledge, and skills that contrib-ute to effective learning in school and across the lifespan. AA.S.7! ! Students will acquire the knowledge, attitudes and interpersonal skills to help them understand and respect self and others.
Indicators: AA.A.6.1.01 !Identify attitudes and behaviors that lead to successful learning.AA.PSD6.7.16 Understand how esteem impacts social success.
Goal: To understand how self-esteem impacts academic and social success.
Activity Statements: Students will participate in the “Label Game” activity to cre-ate awareness of how labels affect people, to understand self-fulfilling prophecy, and to grasp how self esteem is built and destroyed. Materials:
• 1 strip of cardboard or construction paper (10” long by 2” wide) for each stu-dent
• Tape• Pre-made labels (on index cards or paper cut to fit on cardboard strips)• Dark colored marker• Teacher Resource 1
Procedures:
7. Before class, make one label per participant on paper or index cards (sized to fit on the cardboard strips). Use a dark colored marker. Lay all the labels out
upside down and put tape on the backside of each one. Put a few positive labels in a certain place so you can grab one for any participants with low self esteem. Suggested labels are listed below, you can use these or make up your own:
Natural Leader BrainiacExtremely Creative WealthyFrom the “Wrong Side of the Tracks” BossyHyperactive Very Hostile or AngryBeauty Queen InvisibleEverything I Say is Funny PushoverVery Shy TroublemakerAirhead Computer GeekJock LoserNerd Drama Queen
8. Give each student a strip of cardboard and a piece of tape. Have students wrap cardboard strip around their heads (going across the forehead) and hold the spot where it fits comfortably. Next, tell them to pull it off and secure the spot with the tape. Now they should place the cardboard strips back on their heads (they should look like they are wearing funny headbands).
9. Have students arrange their chairs in a tight circle. They need to be able close enough to read the labels on other participants “headbands”.
10.Read the story in the teacher resource you feel fits best with your students (or summarize it in your own words) or make up a scenario of your own.
11.Place labels on students’ headbands and give the group 10 minutes to dis-cuss the situation you presented. At first, observe. If the group is moving slowly, join in to get things going. Start by looking directly at the person la-beled “Natural Leader” and say something like, “We are looking to you to see what you think we should do.” Whatever idea he or she presents, support it and tell the group they should too. If the person with the “Invisible” label says something, you must persuade the group to ignore it. You may want to say something like “Did you hear something? I thought I did but I guess not.” Sometimes the teacher’s participation in the activity is vital to make it work, other times groups will run with it and it’s better to observe.
40

12.After the group has had several minutes of discussion, break in and ask them to each state one idea on how to spend the money. Be sure that you and the rest of the group respond to each person based on his or her “label”. After each person contributes have them guess what their label is.
13. If time permits you can repeat the entire process using a different scenario and re-labeling the students.
Discussion: Many participants report being deeply affected by this activity. This exercise can be a wonderful example of a self-fulfilling prophecy and how it can destroy a relation-ship. For example, if someone is constantly ignored or feel invisible they will start acting as if they are not important and quit trying to interact with others. The student who was labeled “invisible” may even say “I just quit talking because everyone was ignoring me”. This can lead to the discussion about the importance of self esteem and how damaging labels can be on your self esteem. It can also be used to talk about why we label each other and what effect it has on others.
• What do you think this exercise was about and how does it relate to sixth graders?
• How did it feel to be labeled? If you had a positive label, how did you feel about the exercise? (Surprisingly, the “good” labels often come with a lot of pressure, so they are not always a positive experience)
• Did the way others were treating you change your behaviors? (for exam-ple, some people stop talking, some people talk more, etc.)
• How hard was it to find proof of each person’s label? (look for the label instead of how the person truly is)
• What other labels can people receive when growing up or as an adult? • How do labels affect your self esteem? • How do labels affect your relationship with others (family, friends, teach-
ers, etc.)?• How does your self esteem affect your academics or grades?
Additional Resources:
http://kidshealth.org/teen/your_mind/mental_health/self_esteem.html - ways to im-prove self-esteem.http://discoveryhealth.queendom.com/self_esteem_abridged_access.html - self es-teem test tells you whether you have a high or low self-esteem and ways to increase it.
www.selfesteemawareness.com – defines and gives examples of self-esteem.
Extension Activities: 3. Ask students write a paragraph or journal article identifying their own sources
of good self esteem.4. Ask students to make a list of behaviors that lead to success in academics,
relationships, sports, and physical appearance.
Adapted from: http://www.healthymarriageinfo.org/docs/facilitator_toolkit/LabelGame.pdf
By: Iestyn Bright, Counselor, WVDE (2010)
41

Test Taking Skills
GRADE 6 LESSON 27
Time Required: 30-45 minutes
Content Standards: AA.S.1 ! ! Students will acquire attitudes, knowledge, and skills that contrib-ute to effective learning in school and across the lifespan.!
Indicators: AA.A.6.1.09 !Acquire and practice effective test-taking skills.
GOAL: Students will acquire and practice effective test-taking skills.
Activity Statements: Students will discuss test-taking skills and will recognize the benefit of test-taking strategies.
Students will compare types of test-taking skills based on type of test.!Materials:
14.Handout 1: Test Taking Strategies (one copy per student or display hand-out electronically)
15.Handout 2: Test Taking Tips (one copy per student or display handout elec-tronically)
16.Projector, white board, or flip chart
Procedures:10.The teacher begins the lesson by asking students to name the different
types of test they take. As students provide examples, the ideas are
posted electronically, or on a board or chart. The teacher asks students if there are ways to study for each of these types of tests. Their suggestions should be added to the display next to the type of test.
11.Copies of Handout 1: Test Taking Strategies are distributed to students (or displayed electronically). The teacher explains that Handout 1 provides an explanation of test taking strategies. Students read the DETER strategy silently. After a few minutes for silent reading, the teacher asks students if they can describe what each letter in DETER represents.
12.Assign students to five groups identified by each of the letters “DETER”. Each group will work as a team to develop an action to help remember what the letter assigned to the group represents. After a few minutes of teamwork, each group will give their demonstration.
13.After all groups have demonstrated, the entire class will discuss how these demonstrations can help them remember the steps. Act out DETER as a group, and then ask students to give a quick explanation of each letter tak-ing note that the activity will make it easier to remember what they repre-sent the next time there is a test.
14. If time, distribute and read Handout 2: Test Taking Tips. Discuss addi-tional test taking strategies.
Discussion: • What strategies might be needed for WESTEST?• Are the strategies for WESTEST different than for a regular classroom
exam? Explain.• Have you developed your own strategies that work for you? Do you have
strategies you can share with others? • What is the DETER method for test taking strategies?• What additional test taking tips have you learned? Do you have additional
strategies you can share with us?• Which strategies have we learned that will work for almost any type of test?
Additional Resources: • http://www.testtakingtips.com/• http://www.studygs.net/tsttak1.htm - [email protected]
42

• http://www.amby.com/worksite/taketest.html (maybe 8th grade & tied to future employ-ment?)
• http://www.state.tn.us/education/assessment/doc/tsteststrategies.pdf• http://www.bucks.edu/~specpop/tests.htm• http://www.how-to-study.com/study-skills/en/taking-tests/47/test-anxiety/• http://www.stressmanagementtips.com/ - Stress Management Tips• http://www.testtakingtips.com/parents/index.htm - Tips for Parents• http://testtakingtips.com• http://www.songsforteaching.com/studytesttakingskills/index.htm• http://wvde.state.wv.us/strategybank/ - WVDE Strategy Bank
Extension Activities: • Students may investigate additional test taking tips using electronic resources.• Students may use Acuity test sample questions to practice for the WESTEST.• Students may develop a 21st Century presentation on DETER or another test tak-
ing strategy.• Other activities as assigned by advisor.
Developed by: Dr. Penny Fisher, Director, Putnam County Schools (2010)
43

4 28Winning Attitude
29Why School?H1,H2, PP
30WESTESTH1, TR1
31Tech Sense II - Netiquette
H1
32Tech Sense III
H1, TR1
33Your Community Role
H1
34High School Credits
H1, H2, H3
35Halfway ThroughH1, TR1,TR2, TR3
36Celebration/Evaluation
Links-6th grade, Lessons 28-36

Choose a Winning ‘Tude, Dude!
GRADE 6 LESSON 28
Time Required: 30-45 minutes
Content Standards: AA.S.7 ! Students will acquire the knowledge, attitudes and interpersonal skills to help them understand and respect self and others.
Indicators : AA.PSD.6.7.01 Develop a positive attitude toward self as a unique and worthy per-son.AA.PSD.6.7.16 Understand how self-esteem impacts social success.! !! ! AA.PSD.6.7.17 Recognize an individual’s role and contribution within the commu-nity.!
GOAL: Students will recognize and change stinkin’ thinking to a more winning attitude.
Activity Statements: Students will participate in a sensory experiment and dis-cussion of how attitudes impact self and others.
Materials: !Deer lure (or something equally pungent)Cookie-scented candle (or something equally pleasant-smelling)NOTE: no handouts for this lesson
Procedures: 1. Begin class by sharing favorite pleasant scents, then switch to brainstorming bad odors.2. Explain that our sense of smell is one of our deepest memory triggers, and that since you want them to remember today’s lesson, you want to help set a memory with scent.3. Walk around the room with the deer lure (or whatever pungent-smelling item you have) and have students take a small sniff (this is important especially in the case of the deer lure, as it really could induce nausea if inhaled deeply).
4. Immediately follow the pungent scent by having them smell the candle (or what-ever pleasant-smelling item you have; this should be able to be ! inhaled without the precaution placed on the other scent).5. Explain that our attitudes give of an “aroma” to others as well. Negative attitudes are like the pungent odor; people don’t want to be around it for very long. Con-versely, positive attitudes draw people in and help generate a more pleasant environ-ment. Remind them that our attitudes come from our thoughts, so we can choose to change our “stinkin’ thinking” into more pleasant, winning thinking. Remind them that it sometimes takes many attempts before this comes more naturally, but that like any !skill, the more we practice it, the easier it usually becomes.6. Have students “pair and share” examples of “stinkin’ thinking” in the following life areas: chores, homework, studying, friendship conflict, sports or hobbies. Allow 2 minutes for each pair and share segment (or whatever amount of time you find rea-sonable).
IF TIME PERMITS HAVE STUDENTS DO ROLE PLAY LISTED AS AN EXTEN-SION ACTIVITY.
Discussion: 1. What is the best way to change your attitude?2. Have you ever awaken in a bad mood? What can you do to change a bad
mood in the morning before you get to school? 3. What are you going to remember most from this lesson and why?
Additional Resources: • Free mini-book on stinking thinking:
http://changeyourstinkingthinking.com/• Article on stinking thinking:
http://www.bullseye-living.com/427/how-to-end-addiction-to-stinkin-thinkin/• Article on helping kids avoid the stinking thinking trap:
http://micheleborba.ivillage.com/parenting/archives/2009/09/solutions-to-turn-pessimistic.html
Extension Activities: • Students could role play one or more of the following situations, first demon-
strating a negative attitude, then changing it to a positive attitude:! * mom says you can’t play your video game until you clean your room! * teacher assigns homework over the weekend! * best friend is acting distance
*didn’t make the sports tea
Developed by: Shauna Jones, WV Children’s Home School (2009)
45

Why School?
GRADE 6 LESSON 29
Time Required: 30-45 minutes
Content Standards: AA.S.2 ! Students will complete school with the academic rigor and preparation essential to choose from a wide range of substantial postsecondary options, includ-ing college
Indicators: AA.A.6.2.13 !Identify the components of a successful academic career.
GOAL: Students will recognize and evaluate benefits of a successful academic career.
Activity Statements: Students will review a power-point presentation about the top ten skills that employ-ers are looking for and question discussion questions throughout. Then students, in small groups will identify necessary skills for a variety of jobs. Finally, students will complete a self-assessment to identify what skills they currently possess and what skills they still need to gain.
Materials: LCD or data projectorPower-Point Presentation Top Ten SkillsHandout #1 Career Skills NeededHandout #2 My Employable Skills
Procedures:
1. Say: Today we are going to learn why school is important to our future. Spe-cifically, we are going to learn why school is important for my future career.
2. Show PowerPoint Presentation Top Ten Skills.3. Slide #5 – Ask students to respond before going to the next slide.
4. Slide #8 – Ask students where do these skills come from and have them re-spond before showing Slide #8.
5. Slide #12 - STOP PowerPoint
6. Divide students into pairs or groups of three
7. Pass Out Handout #1 Career Skills Needed
8. Give students about ten minutes to complete the handout together.
9. Resume PowerPoint presentation at Slide #13. (have students compare their answers with the ones on the slides)
10.Slide #26 - STOP PowerPoint
11.Pass Out Handout #2 My Employable Skills
12.Give students about 5 or 10 minutes to complete the handout on their own.
13.Resume PowerPoint at Slide #27 and allow students to respond to the ques-tions using their answers to handout #2 that they just completed.
Discussion: Use questions from Slide # 27
1. Which of the Ten do you show the most?2. How does your work at school show that you have the Top Ten Skills?3. How does your life at home show that you have the Top Ten Skills?4. Why do you think employers chose these skills?5. Which of these skills best describe you?6. Which of these skills do you need to develop?7. How can you develop these skills?
Additional Resources:
46

Southern Indiana Chamber of Commerce (www.sicc.org)www.kentuckianaworks.org Southern7 Workforce Investment Board (944-7793)Work One Center (Karen Bertrand 948-6102 ext. 111)ICPAC (icpac.indiana.edu)Occupational Outlook Handbook (www.bls.gov/oco)Department of Education (www.ed.gov/index.jhtml)
Extension Activities:
Have students take home Handout #2 and share it with their parents the skills that they still need help developing.
Activity:
Have students record their Early Skills in their Portfolio.
Developed by: Shelly DeBerry, Counselor, Martinsburg High School (2009)[email protected]
Resource or Adapted from:http://missouricareereducation.org/curr/cmd/guidanceplacementG/elearning
Grade 9 Unit 1 Lesson 1
WESTEST Success
GRADE 6 LESSON 30
Time Required: 30-45 minutes
Content Standards: AA.S.3 ! Students will understand the relationship of academics to the world of work and to life at home and in the community.AA.S.1! Students will acquire attitudes, knowledge, and skills that contribute to effective learning in school and across the lifespan.
Indicators: AA.A.6.3.09 Explore the various skills applied to the annual assessment.AA.A.6.1.09 Acquire and practice effective test-taking skills.
GOAL: Students will review the components of the WESTEST and defuse stress.
Activity Statements: Students will review methods for managing stress. They will participate in a team activity to identify strategies for reducing stress. Students will discuss effective test preparation and strategies.
Materials: 1. Handout 1: Stress Management (copies for groups of students to share or
display handout electronically)2. Teacher Resource 1: Class Feud 3. White board or chart paper
Procedures:1. The teacher begins class by having students count off in groups of five.
Students sit in teams and follow instructions to practice a relaxation tech-nique as follows: Ask students to close their eyes and sit quietly for a mo-ment. While their eyes remain closed, they are to think about someplace
47

nice and visualize that scenario in front of their closed eyes as if they are actually there. Explain to students that thoughts of a
positive scenario can help us feel relaxed. Discuss how this technique might be used to relieve stress.
2. The teacher distributes copies of Handout 1: Stress Management or dis-play the material electronically. Ask one student to read each section aloud, and then ask students to restate the section briefly. Work through the nine sections of Handout 1: Stress Management in the manner. Ask students which of these strategies may be helpful before a test. Discuss which items may be helpful for the WESTEST or other annual assess-ments.
3. The teacher uses Teacher Resource 1: Class Feud to continue the lesson.
Discussion: • What strategies did we learn today? What key points caught your atten-
tion?• Did today’s discussion help you remember strategies or come up with new
strategies?• Does preparation for tests help us to manage our stress? How or why?• Can stress management help you perform better on a test? Explain.• What test taking strategies or tips may be helpful on WESTEST? On other
tests?• How did we do last year on WESTEST? Do we know where we did best?
How about the areas that need improvement? • Is there something we learned today that we can help us do better this
year? • How do we get better in areas that need improvement?
Additional Resources: • http://www.learnatest.com/generalinfo/testpreptips/ninetips.cfm - Test Prep Tips: Nine
Tips for Stress Management• http://education.ti.com/educationportal/activityexchange/activity_detail.do?activityid=7057
&cid=us – TI Calculator Activities Exchange• http://www.studygs.net/ - Study Guides and Strategies
• http://74.125.113.132/search?q=cache:GitaLyaoKqoJ:jc-schools.net/tutorials/test-strategies.ppt+test+taking+skills+activities&cd=1&hl=en&ct=clnk&gl=us (saved as powerpoint under resources, too)
• http://www.knowledgeessentials.com/index.php?id=631 (& family involvement)• http://www.teachingmoments.com/Teaching-Moments-Basketball-Shuffle.html (parent
involvement?)• http://wvde.state.wv.us/oaa/westest_index.html - WESTEST overview• https://www.studyisland.com/stateprofdemo.cfm?myState=WV – Study Island• http://wvde.state.wv.us/news/1945/ - News article on WESTEST results• http://www.budwins.com/product/WESTEST/Bud-n-Dud---Do-Your-Best-On-The-WESTE
ST-(set-of-2-DVDs)/ - Do Your Best resources• http://jackson.wv.schoolwebpages.com/education/components/scrapbook/default.php?se
ctiondetailid=578&PHPSESSID=37507cddd388275f2cee330d106b101f – sample calen-dar
• http://www.businessballs.com/stressmanagement.htm - stress management• http://www.buzzle.com/articles/top-ten-relaxation-techniques-for-children.html - Top Ten
Relaxation Techniques for Children• http://www.educationworld.com/a_lesson/03/lp321-01.shtml - Game Ideas
Extension Activities: • Students may develop skit, video, or another type of presentation on test prepara-
tion, importance of doing your best, etc. Upon approval by teacher and adminis-trator, resources may be offered to other classes.
• Students may use electronic resources to further research effective strategies and tips and collected in a notebook, flash drive, or disk. Materials may be shared as part of a presentation.
• Other activities as assigned by advisor.
Developed by: Dr. Penny Fisher, Director, Putnam County Schools (2010)
48

Netiquette
GRADE 6 LESSON 31
Time Required: 30-45 minutes
Content Standards: AA.S.1! Students will acquire attitudes, knowledge, and skills that contrib-ute to effective learning in school and across the lifespan. AA.S.9! Students will understand safety and survival skills and apply cop-ing strategies.
Indicators: AA.A.6.1.10! Demonstrate effective use of the internet as a research and learning tool.AA.PSD.6.9.09! Utilize proper internet etiquette.
GOAL: Students will learn and utilize proper Internet etiquette.
Activity Statements: Students will identify appropriate netiquette. Students will recognize appropriate neti-quette may be different in various situations. Students will discuss reasons for use of appropriate netiquette in school, business, etc.
Materials: Handout 1 – Netiquette
Procedures:1. Ask students to explain “etiquette” and give examples of good manners.
Have students explain why good manners are important. 2. Discuss how good manners, or etiquette, are important in different settings.
For example, good manners might be especially important in a business meet-ing or a formal setting. Ask students to think about how good manners may depend on where and with whom they are.
3. Introduce the term “netiquette” and ask students to explain what it probably means.
4. Ask students to share stories about improper use of email, giving specific ex-amples of what has happened to them, their friends, or even someone they read heard a news story about that was embarrassing or hurtful.
5. Divide students into teams. Have students brainstorm and create a list of do’s and don’ts for emailing, instant messaging, and using electronic communica-tion tools.
6. Provide copies of Handout 1 – Netiquette or display electronically for discus-sion. Use the list of “dos and don’ts” on the handout to see which group got the most correct regarding use of good manners online. Have each group iden-tify additional ‘netiquette’ ideas they came up with that were not on Handout 1. Give team with most points prizes, if available.
Discussion: • What rules or guidelines are in place concerning netiquette?• Are there different rules for communicating with peers? Parents or other
adults?• Are there other netiquette rules that should be on the list of good online
manners?• Are there different rules when at school and home?• How important Is netiquette on the job? Will it be important to an em-
ployer? Why?• Are there times when different rules apply? Why and can you give exam-
ples? • Why is it important to use appropriate netiquette?
!Additional Resources: Netiquette - http://www.cccoe.net/social/skillslist.htmRoads to Success Lesson: http://www.roadstosuccess.org/pdfs/G8_CommNetwork1.pdfNetSmartz - http://www.netsmartz.org/resources/resources.htmProLiteracy America – www.proliteracy.org
Extension Activities: • Students may investigate how Internet is used in careers. What rules and guide-
lines are in place governing netiquette?• The teacher may reserve a computer lab to do additional work on this topic.
49

• Other activities as assigned by advisor. Developed by: Dr. Penny Fisher, Director, Putnam County Schools (2009)
Not Always What it Seems
GRADE 6 LESSON 32
Time Required: 30-45 minutes
Content Standards: AA.S.1! Students will acquire attitudes, knowledge, and skills that contribute to effective learning in school and across the lifespan. AA.S.9! Students will understand safety and survival skills and apply coping strategies.
Indicators: AA.A.6.1.10! Demonstrate effective use of the internet as a research and learning tool. AA.PSD.6.9.10 Discern between valid and invalid internet resources.
GOAL: Students will discern between valid and invalid Internet resources.
Activity Statements: Students will investigate and identify unreliable Internet material through discussion of terminology and sources for “fake” or inaccurate information. They will analyze suspicious email messages and look for clue to their reliability.
Materials: Handout 1 – Unreliable E-Mail Samples (or display electronically)Teacher Resource 1 – DefinitionsChart paper, white board, or overhead and markers
!Procedures:1. The teacher will begin by asking students to define “unreliable”. After students
provide their ideas, the teacher may ask a student to read the definition from Teacher Resource 1 - Definitions or from a classroom dictionary.
2. Ask students to discuss how “unreliable” applies to internet and technology. !
50

3. Ask students to give examples of how unreliable or fake sources might be used through the Internet and electronic sources. List their ideas on chart paper, white board, or overhead.
4. (The teacher may assist them by giving a suggestion or two to get them started. For example, a student may receive an Instant Message from someone who pre-tends to be someone he/she is not.)
5. Provide copies of Handout 1 – Unreliable E-Mail Samples for students to review or display it by data projector so that all students may read them. Beginning with Handout 1 - Unreliable E-Mail Sample 1, have students read silently and look for things that give it away as unreliable.
6. After a few minutes of silent reading, ask students to point out things they have noticed. (Note in particular that the e-mails use the addressee’s name even though it is a fake.)
7. Allow a few minutes for students to read Unreliable E-Mail Sample 2 and continue the discussion about how they can tell it must be a fake. Note again that, even though it appears obvious, fakes must work in many cases, possibly by catching people off guard.
8. Next, the teacher explains that unreliable sources are also evident when doing
Internet searches. Ask students if they know of any resources they have “gog-gled” only to find it is not valid information.
9. Discuss the use of Wikipedia. Ask students if they know the source for Wikipedia “facts”. Point out that Wikipedia changes as people add or change its content. Remind students that many Internet sources are merely someone else’s opinion and not necessarily facts.
Discussion: • Why do we need to be aware of unreliable Internet sources?• Why do you believe unreliable Internet material exists?• What should you do if you believe you have been tricked by an unreliable
source?• Will all unreliable Internet sources look the same?• Are some Internet sources reliable while others are not? How can you tell?
• Have you found websites that are not what they seemed they would be?• Have you seen offers for free stuff that appear to be too good to be true?
Are the offers too good to be true?• How should you handle it when you accidently come across an inappropri-
ate source?• Why do people believe unreliable sources?• How can you protect yourself from unreliable sources?
Additional Resources: ! http://www.scambusters.org/! http://www.nationalgeographic.com/xpeditions/lessons/03/g68/hoaxphoto.html! http://www.kn.att.com/wired/21stcent/sitemap.html! http://lookstoogoodtobetrue.com
Extension Activities: • Ask students to remember the lesson through the semester and gather ap-
propriate materials, such as false Internet sources, newspaper articles about scams, and other unreliable sources they can share with the class.
• Other activities as assigned by advisor.
Developed by: Dr. Penny Fisher, Director, Putnam County Schools (2009)
51

CONTRIBUTING TO OUR COMMUNITY
GRADE 6 LESSON 33
Time Required: 30-45 minutes
Content Standards: AA.S.7! Students will acquire the knowledge, attitudes and interpersonal skills to help them understand and respect self and others.
Indicators: AA.PSD.6.7.17! Recognize an individual’s role and contribution within their com-munity.
GOAL: Students will recognize their role and contribution within their community.
Activity Statements: Students will brainstorm to identify local organizations that provide opportunity for community service and volunteerism. They will discuss the value of community serv-ice and how they might contribute.
Materials: Handout 1 – Community ServiceWhite board or poster board, dry erase markers or crayonsLocal phone directories, newspapers, magazines, guest speaker (optional resource)
Procedures:1. Begin the lesson with several of the “Discussion Questions” below. Ask students
to name organizations of which they are aware that provide service to members of the community. Assign one or two student volunteers to write the list as stu-dents provide ideas. As they brainstorm, the teacher may add suggestions such as local churches, Lion’s Club, local food bank, community action groups, etc.
2. Ask students to think about what how these organizations and activities help the community. Encourage students to think about activities and organizations that
include students. Use Handout 1 – Community Service to facilitate the discus-sion about community service opportunities. Have students list additional organi-zations where they have volunteered or might volunteer in the future.
Discussion: • What is a community?• What is your role in our community?• Are there activities in which teenagers may participate in this community to
make it better?• Can you share examples of other kids who have contributed to their commu-
nity?• How can you improve our community?• Does teamwork play a role in any of the service opportunities discussed?• Are there community service projects in progress in our school?• What can we do to improve our school?• Why is it important to recognize our role in our community?• What are some ways that doing community service now might benefit you
later? (Discuss benefits such as scholarships, job opportunities, beefing up the resume, hiring advantages over someone who does not volunteer, personal gratifi-cation, someone returning the favor, etc.)
Additional Resources: • Leadership through Service -
http://www.doe.virginia.gov/VDOE/Instruction/leadership/main/expectations/expectations6-8.html
• Roads to Success Lesson: http://www.roadstosuccess.org/pdfs/G8_CommunityMakeover1.pdf (Commu-nity Makeover )
• Family Guide to Getting Involved - http://kidshealth.org/parent/positive/family/volunteer.html
• Community Service for Kids - http://life.familyeducation.com/volunteer-work/community-life/29595.html
• Government portal for resources and ideas - http://www.afterschool.gov/
Extension Activities: • Invite high school students, student council officers, etc. to visit the classroom to
share their experiences in community involvement.
52

• Bring in adults from various service organizations (Lion’s Club, church service groups, Animal Shelter, etc.) to share their experiences in community support and involvement.
• The class could select and carry out a school or community project. Set goals and a timeline for participation, and then monitor progress throughout the project.
• Students may interview a friend, relative, or neighbor about his/her community involvement.
• Students may investigate other local and regional service opportunities and report findings to the class.
• Other activities as assigned by advisor.
Activity:Have students record their community service in their Portfolio
Developed by: Dr. Penny Fisher, Director, Putnam County Schools (2009)
THINK AHEAD, PLAN AHEAD
GRADE 6 LESSON 34
Time Required: 30-45 minutes
Content Standards: AA.S.2! Students will complete school with the academic rigor and preparation essential to choose from a wide range of substantial postsecondary options, includ-ing college.
Indicators: AA.A.6.2.14! Understand the options and opportunities for secondary education.
GOAL: Students will understand personal high school credits and options.
Activity Statements: Students will identify useful skills by completing the self-assessment. They will ex-plore the high school career clusters and the available options for high school credit. They will explore the options and discuss the importance of planning ahead.
Materials: Handout 1 – Useful Skills (“How Are My Skills Useful”) , pages 2-4Handout 2 – Career Clusters (May use with projector rather than copying.)Handout 3 – High School Options (May use with projector rather than copying.)
Procedures:1. Follow instructions for the lesson plan on Handout 1 – Useful Skills, page 1. Pro-
vide copies of pages 2-4 for students to complete.2. Use Handout 2 – Career Clusters to review Career Clusters available in West Vir-
ginia schools. Explain that these are broad areas students should begin to con-sider as they get closer to high school. Students will be asked by the end of 8th
53
grade to select a Career Cluster. They should begin thinking about their useful skills as well as their interests.
3. Discuss how high school is supposed to prepare students for their futures. Ex-plain that, in high school, students should take courses that will help them pre-pare for their postsecondary goals. Ask students to come up with examples of courses that might help them. (For example, if a student has a weakness in math and that is something he needs for a particular career or college, he should take additional classes to get better rather than avoid math.)
4. Share the information on Handout 3 – High School Options. (The teacher may use this Handout to access sites electronically as well.) Discuss how students will have regular high school courses, but will have other options available to them. Explain that many options are available to try to help students find the right courses to prepare for their futures.
Discussion: • What are my useful skills? • What skills do I have that are useful at school? • What skills do I have that will be useful for a job?• What do I like to do? • Did I recognize any new useful skills?• What might I like to do as a career?• What are the Career Cluster for West Virginia schools?• Why is it important to “think ahead, plan ahead”?• Are there options available in high school I hadn’t thought to consider?
Additional Resources: • WV EDGE - http://www.wvtechprep.wvnet.edu/edge.htm• WV Clearinghouse - http://wvclear.wvstateu.edu/• Career & Technical Education -
http://careertech.k12.wv.us/ProgramsofStudy.htm• Advanced Placement -
http://www.collegeboard.com/student/testing/ap/subjects.html• WV Virtual School - http://virtualschool.k12.wv.us/vschool/index.html• West Virginia Policy 2510 - http://wvde.state.wv.us/policies/ (graduation re-
quirements)• Marshall University Online - http://www.marshall.edu/muonline/• Other examples of graduation requirements:
http://missouricareereducation.org/curr/cmd/guidanceplacementG/elearninghttp://www.teachersnetwork.org/dcs/math/BasicMath/Earn/index.htm
• Alternate Lesson: Roads to Success lesson: Why is education after high school so important, and what are some of my options? - http://www.roadstosuccess.org/pdfs/G8_EdAfterHS1.pdf
Extension Activities: • Interview a high school student about high school options and accumulating cred-
its. Ask the student to compare middle school and high school credits.• Students may continue exploring careers using Handout 1 – Useful Skills, pages
5-7.• Students may further investigate graduation requirements using local catalogs,
county programs of study, or a high school handbook.• Each county has its own policies concerning various course options. Students may inves-
tigate programs and options available in their county.• Students may study Career Clusters independently using WVDE website links.• Other activities as assigned by advisor.
Activity:
Students can browse careers by the WV Career Clusters. Any careers students find interesting they can add to their Portfolio. Have students record in their Journal what Cluster they liked the most.
Developed by: Dr. Penny Fisher, Director, Putnam County Schools (2009)
54

Halfway Through: Don’t Close the D00r
GRADE 6 LESSON 35
Time Required: 30-45 minutes
Content Standards: AA.S.2! Students will complete school with the academic rigor and preparation essential to choose from a wide range of substantial postsecondary options, includ-ing college.
Indicators:AA.A.6.2.07 !Understand how to use assessment results in educational planning.
GOAL: Students will assess past progress and future plans.
Activity Statements: Students will engage in a partnering activity to begin thinking about what they want to do in the future. The next activity will allow students to match things about themselves and possible career options. They will begin to develop an ac-tion plan.
Materials: Teacher Resource 1 – Inner/Outer CircleHandout 1 – Who AM I?(Optional) Teacher Resource 2 – Colleges and Universities (Should be displayed
electronically to access Internet links.)(Optional) Teacher Resource 3 - Multiple Jobs (May also be used as the warm up
in place of Teacher Resource 1)! !
Procedures:1. Begin the lesson with Teacher Resource 1 - Inner/Outer Circle activity. The
teacher organizes the circle and provides questions for students to use in the discussion circles. The teacher may wish to review respectful communication
before beginning the circle activity. The teacher should monitor conversations and keep the circles moving quickly to keep students on task.
2. After the activity, provide students with Handout 1 – Who Am I; Instruct stu-dents to complete the handout following the instructions for Step 1 and Step 2 on the handout.
3. Upon completing Handout 1 – Who Am I Steps 1 and 2, discuss the final set of instructions in Step 3. (Students compare Xs and Os to determine if their career choice matches their personal interests.) Ask students to give a few examples of both how Xs and Os match and do not match. Discuss the impli-cations for each of these situations.
4. Instruct students to write a “Letter to Self” about the results of the “Who Am I” activity. Ask students to include steps for a personal plan to achieve their choice of careers. (The teacher should point out specific requirements that will help students begin to think ahead. For example, Algebra II is required for ad-mittance to some university programs.)
5. If time, the teacher may utilize Teacher Resource 2 – Colleges and Universi-ties to investigate available programs and possible education options.
Discussion: • What is the connection between school and post-secondary opportunities?• Will choices made in high school limit choices after graduation? How?• Do the classes you take in high school make a difference in what opportuni-
ties you will have after school?• How can I improve on my weaknesses if I want a particular career?• What is the connection between my strengths and weaknesses and postsec-
ondary options?• What things do I like to do that involve my strengths? • What other things can make a difference in the post-secondary opportuni-
ties you will have?• What are my dreams and future plans? Have you set goals toward achiev-
ing those dreams?• If most people are expected to hold multiple jobs over their lifetimes, what
does that mean to students?• What does the saying “Don’t Close the Door” mean related to preparing for
high school and post-secondary opportunities?
55

Alternate Assignment:Roads to Success - http://www.roadstosuccess.org/joomla/documents/G7_GYI3.pdf
Roads to Success correlated to CFWV.com https://secure.cfwv.com/images/wv/PDFs/RTS/Facilitators_Guides/Grade_7/G7_GYI2.pdf
Use Optional Teacher Resource 1 – Multiple Jobs to introduce planning for multiple future jobs in the future
Additional Resources:
What Might Happen If - http://antiochne.edu/acsr/teachertools/ The Fun Works (for Careers You Never Knew Existed) - http://caren.edc.org/index.phpCareer Games - http://www.careergames.com/College Summit Guest Speaker - www.collegesummit.org (Speakers are available from the local College Summit office. Call 304.204.4061 or e-mail [email protected])Bottom Line Activity - http://www.lauracandler.com/filecabinet/misc/bottomline.pdfMultiple Intelligence Survey -
http://www.lauracandler.com/filecabinet/misc/smartsurvey.pdf Pieces of the Puzzle (page 376) -
http://missouricareereducation.org/CDs/GuidanceLessons/AllGr6-8.pdf
Extension Activities:
• Students may read about the Dreamcatcher Legend - http://www.dreamcatchers.org/dcat16.html
• Students may make Dreamcatcher art and share the story with the class in relation to today’s lesson.
• Students may interview adults about jobs the adults have held and they liked or didn’t like about those jobs.
• Teacher may want to post Activity Sheets on bulletin board so students can visually un-derstand many examples of how various careers are dependent on one another.
• Borrow a college guide or search online for admissions requirements at a state college or university. Help students identify admissions requirements and discuss why they need to plan ahead.
• Students may complete the writing assignment from today’s lesson and add it to their personal career portfolios.
• The teacher may collect the “Letter to Self” students completed in today’s lesson and re-turn them for reflection at a later date. The teacher may also assist the students in fur-ther research of their careers of choice.
• Students may complete a self-addressed stamped envelope during class. The teacher uses the envelopes to mail the letters to the students when they are in 7th grade along with words of encouragement for their future career plans.
• Other activities as assigned by advisor.
Activity:
Students can fill out A Picture of Me in the Future.
Developed by: Dr. Penny Fisher, Director, Putnam County Schools (2009)
56

Celebration/Evaluation
GRADE 6 LESSON 36
Time Required: 30-45 minutes
Content Standards: AA.S.3! Students will understand the relationship of academics to the world of work and to life at home and in the community. AA.S.8! Students will make decisions, set goals, and take necessary action to achieve goals.
Indicators: AA.A.6.3.04! ! Review progress and modify academic goals where indicatedAA.PSD.6.8.08! Review and update portfolio. ! ! !
GOAL: To reflect on the portfolio and celebrate the year’s accomplishments.
Activity Statement: Students will identify their accomplishments and challenges for the past year and set goals for the summer. Students will articulate their biggest accomplishment and classmates and advisor will celebrate them through cheers and prizes. Students will complete the WVDE online survey at http://wvde.state.wv.us/forms/links-assessment sometime during the week prior to the last LINKS session. Advisors will also com-plete the WVDE Advisor online survey at http://wvde.state.wv.us/forms/links-assessment.
Materials: Goals from Lesson 10Handout 1: Goals ReflectionHandout 2: My Summer GoalsPrizes to celebrate each student and advisor
Procedures:1. Gather enough prizes for each student to have one before this last class be-
gins. School coordinators may do this. If you do not have a school LINKS co-ordinator, advisors may be able to collect prizes from local restaurants, busi-nesses, and churches. The principal and counselor(s) may be invited to assist with prize collections.
2. Counselor or principal should meet with each grade level class prior to this lesson to encourage students to think of ways they can celebrate their advisor, as they are celebrated during this last lesson.
3. Start the session with a celebratory mode. Say “Today we are going to cele-brate our successes for the year and set new goals to achieve over the sum-mer that sets you up for success in your 7th grade year. You are going to re-view the goals you set earlier this year and evaluate your own success, then as a class each of you will be celebrated.”
4. Ask each student to take their goals out from their portfolios from Lesson 10 and read.
5. Instruct students to complete the questions on Handout 1.6. Divide students into small groups of 4 or 5 and ask them to discuss their suc-
cesses, challenges and goals over the past year, finding similarities and differ-ences.
7. Bring them back to the large group and ask each student to verbally share a success either they or a peer had that they liked, a challenge they had or can empathize with and a solution they think will work either theirs or a peers. When the student shares their success, lead the class in a quiet applause and give congratulating statements. (See discussion section below) When the stu-dent shares a challenge, lead the group in encouraging statements. (See dis-cussion section below) When the student shares their new goal, lead the group in the applause, congratulations and encouraging statements. You may want to provide party favors and noise makers. Continue celebration until every student has had a turn.
8. Ask the students complete Handout 2 quietly to themselves. When they are finished, have them fold the paper in thirds with the writing enclosed as if it were going to be put into an envelope. Next, have the students write their name and address in the middle of the page as if they were addressing an en-velope. After you read them, tape or staple them closed and have it mailed
57

from the school to the students home halfway through the summer to remind them of their new goals. Feel free to include stickers, positive affirmations or just a friendly note of encouragement.
Discussion: As the advisor will set the tone for the group activity. Gear students to respect each other and take the activity seriously. For your first volunteer, choose a student who will provide a nice example for the rest to follow. This is a time for them to reflect and celebrate their accomplishments as well as recognize their potential.
• Ideas for statements of congratulations: Way to go!, That’s Awesome!, Ex-cellent!, Super!, Superb!, Fantastic!, How wonderful!, Right on!, Fantastic!, Good for you!, Good job!, WOO HOO!, Hooray!, Nice work!, incredible!, Right-eous!, Cool!, Cool bean!, Keep it up!, you’re on your way!, I’ll bet that feels really good!, You must be so proud of yourself! I’m so proud of you!
• Ideas for encouraging statements: Hang in there!, You can do it!, Don’t give up!, If you need help, I’m here!, you’ll get it!, With a little more work it’s yours!, You’ll get it next time!, It will come!, Keep on trucking!, You know what to do!, you got this!, It’s o.k., we love you anyway!, I have faith in you!, Your turn is coming!, You can make it happen!, Just a little more time!, Don’t give in!, Just a little more work!
Additional Resources:
Students and Advisors should go to http://wvde.state.wv.us/forms/links-assessment and take the online LINKS survey. Data from this survey will be used to educate oth-ers about student advisement program impact and help schools make program im-provements. The following are websites with resources for teaching adolescents/Middle school students how to set and evaluate goals. http://www.goodcharacter.com/BCBC/Goals.html http://middle-school-life.suite101.com/article.cfm/adolescent_goal_setting_strategieshttp://findarticles.com/p/articles/mi_m0FCG/is_3_32/ai_n15763427/
Extension Activities: 1. Send Handout 2 home with students to complete with and/or discuss with their
parents.2. Have students pair up with a peer they will see or be in contact with over the sum-
mer. Have them complete and exchange handout 2. Ask them to return it to its owner halfway through the summer.
Activity:Have students complete their Annual Reflection in their Portfolio.
Adapted from:Chicago Public Schools (9-12) 30 Advisor/Advisee Lessons
http://intranet.cps.k12.il.us/Lessons/Advisory/
Grade 10 Lesson 2
Developed By: Pam Bauman, Counselor, WVDE (2009)
58


![Module Topics[1Hr Each] PPT Video Links E-Materials 17EE61 Online Resource 6th Sem... · 26/3/2020 to 04/04/2020 Module Topics[1Hr Each] PPT Video Links E-Materials 17EE61.3 Lecture](https://img.dokumen.tips/doc/110x75/5f55d569204495609d5eba20/module-topics1hr-each-ppt-video-links-e-materials-17ee61-online-resource-6th-sem.jpg)