Embed Size (px)
Citation preview

Limbert Chair
9
I love the outdoors. And I’m impressed with whatever forces in the universe have made it possible for me to purchase a collapsible canvas-and-metal camp chair for under $20. But when you’re looking for furniture for a more permanent outdoor setting, then you need something special. This chair design caught my eye in a book called Arts & Crafts Furniture, by Kevin Rodel and Jonathan Binzen.
Actually there were two chairs similar in design. A nearly-black painted version by Scottish designer Charles Rennie Mackintosh that, it appears, influ-enced American designer Charles Limbert who cre-ated a wood-finished cafe chair. I liked the look of both chairs, and quickly recognized that they would easily adapt to our “minimal” approach to construc-tion. My version here is an amalgam of the two, but because of my use of corbels under the arms, I’m going to give Charles Limbert the stronger claim.
74 75
1⁄2"
211⁄2"
21⁄2"
71⁄8"
31⁄2"
20"141⁄2"
20"
41⁄2"
41⁄2" 41⁄2"111⁄2"
7"
53⁄4"231⁄2"
215⁄8"
6"
1"
31⁄2"
27"
31⁄2"1⁄2"
1"
11⁄2"301⁄8"
211⁄2"
11⁄2" R
Refe
Ren
ce
Qu
an
tity
paRt
sto
ck
len
gth
wid
th
thic
kn
ess
(mm) (mm) (mm)
a 2 frontlegs* poplar 3 ⁄4 19 41⁄2 115 22 559
B 2 backlegs* poplar 3 ⁄4 19 41⁄2 115 24 610
c 6 sidestretchers poplar 3 ⁄4 19 31⁄2 89 111⁄2 292
d 2 f&bstretchers poplar 3 ⁄4 19 31⁄2 89 20 508
e 2 f&bstretchers poplar 3 ⁄4 19 21⁄2 64 20 508
f 2 arms poplar 3 ⁄4 19 31⁄2 89 211⁄2 546
g 4 seatslats poplar 3 ⁄4 19 41⁄2 115 18 457
h 2 corbels poplar 3 ⁄4 19 11⁄2 38 6 152
J 1 back plywd 5 ⁄8 16 20 508 18 457
k 4 cleats** poplar 3 ⁄4 19 3 ⁄4 19 9 229
*allowslengthformitercutononeend.
**cuttofit.
limbert chair • inches (millimeters)
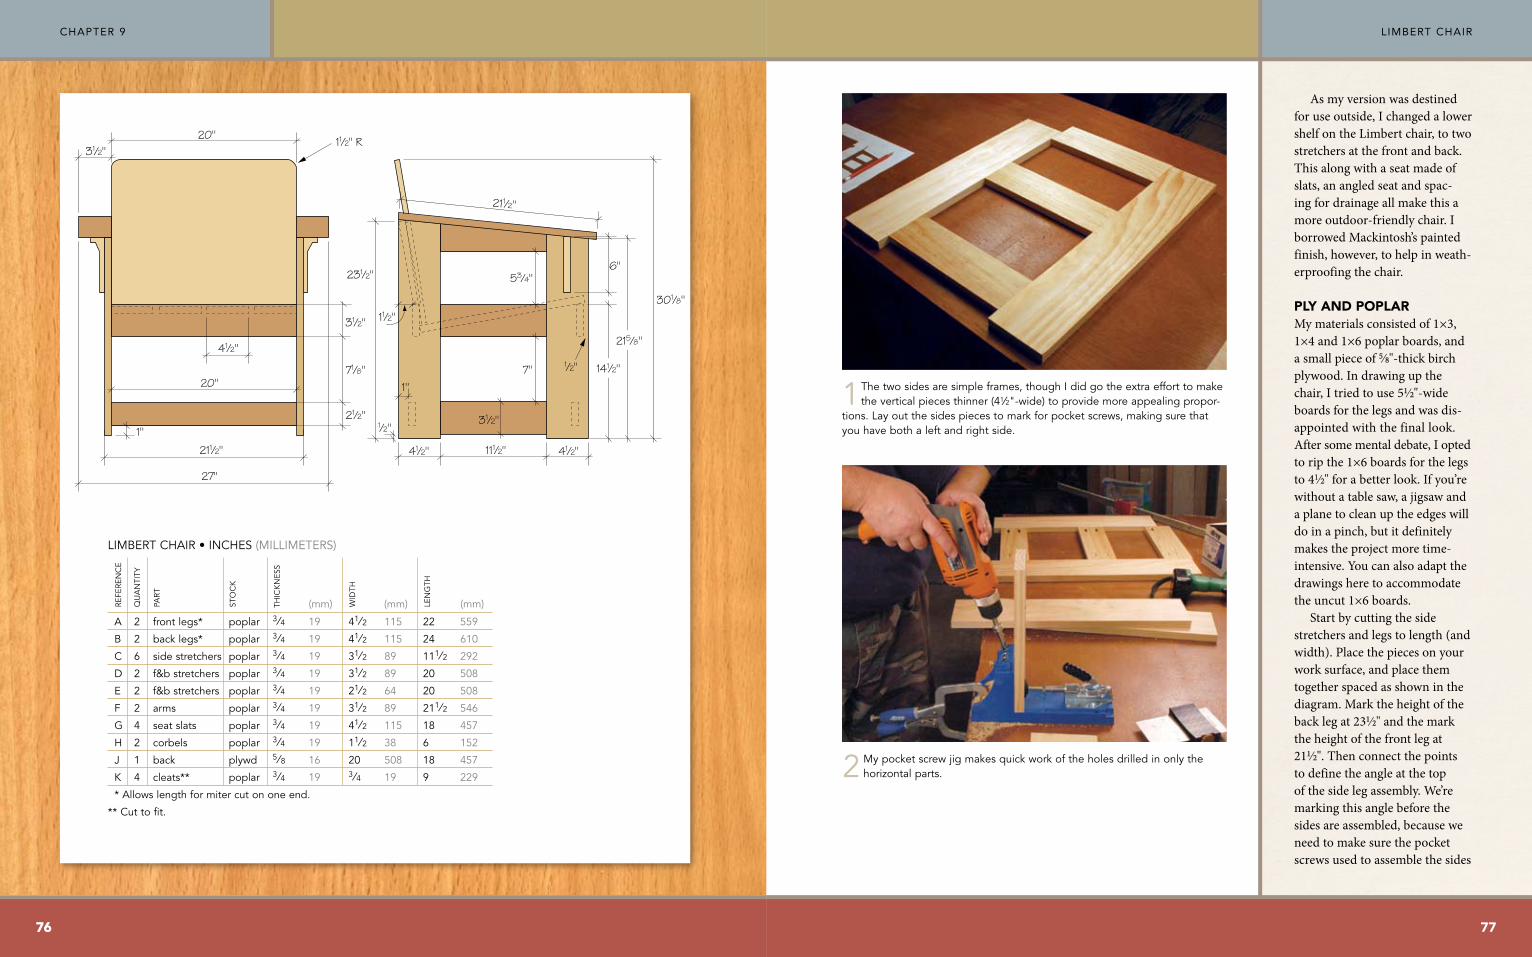
2 Mypocketscrewjigmakesquickworkoftheholesdrilledinonlythehorizontalparts.
1thetwosidesaresimpleframes,thoughididgotheextraefforttomaketheverticalpiecesthinner(41⁄2"-wide)toprovidemoreappealingpropor-
tions.layoutthesidespiecestomarkforpocketscrews,makingsurethatyouhavebothaleftandrightside.
As my version was destined for use outside, I changed a lower shelf on the Limbert chair, to two stretchers at the front and back. This along with a seat made of slats, an angled seat and spac-ing for drainage all make this a more outdoor-friendly chair. I borrowed Mackintosh’s painted finish, however, to help in weath-erproofing the chair.
Ply and PoPlarMy materials consisted of 1×3, 1×4 and 1×6 poplar boards, and a small piece of 5∕8"-thick birch plywood. In drawing up the chair, I tried to use 51∕2"-wide boards for the legs and was dis-appointed with the final look. After some mental debate, I opted to rip the 1×6 boards for the legs to 41∕2" for a better look. If you’re without a table saw, a jigsaw and a plane to clean up the edges will do in a pinch, but it definitely makes the project more time-intensive. You can also adapt the drawings here to accommodate the uncut 1×6 boards.
Start by cutting the side stretchers and legs to length (and width). Place the pieces on your work surface, and place them together spaced as shown in the diagram. Mark the height of the back leg at 231∕2" and the mark the height of the front leg at 211∕2". Then connect the points to define the angle at the top of the side leg assembly. We’re marking this angle before the sides are assembled, because we need to make sure the pocket screws used to assemble the sides
7676
Chapter 9
77
Limbert Chair
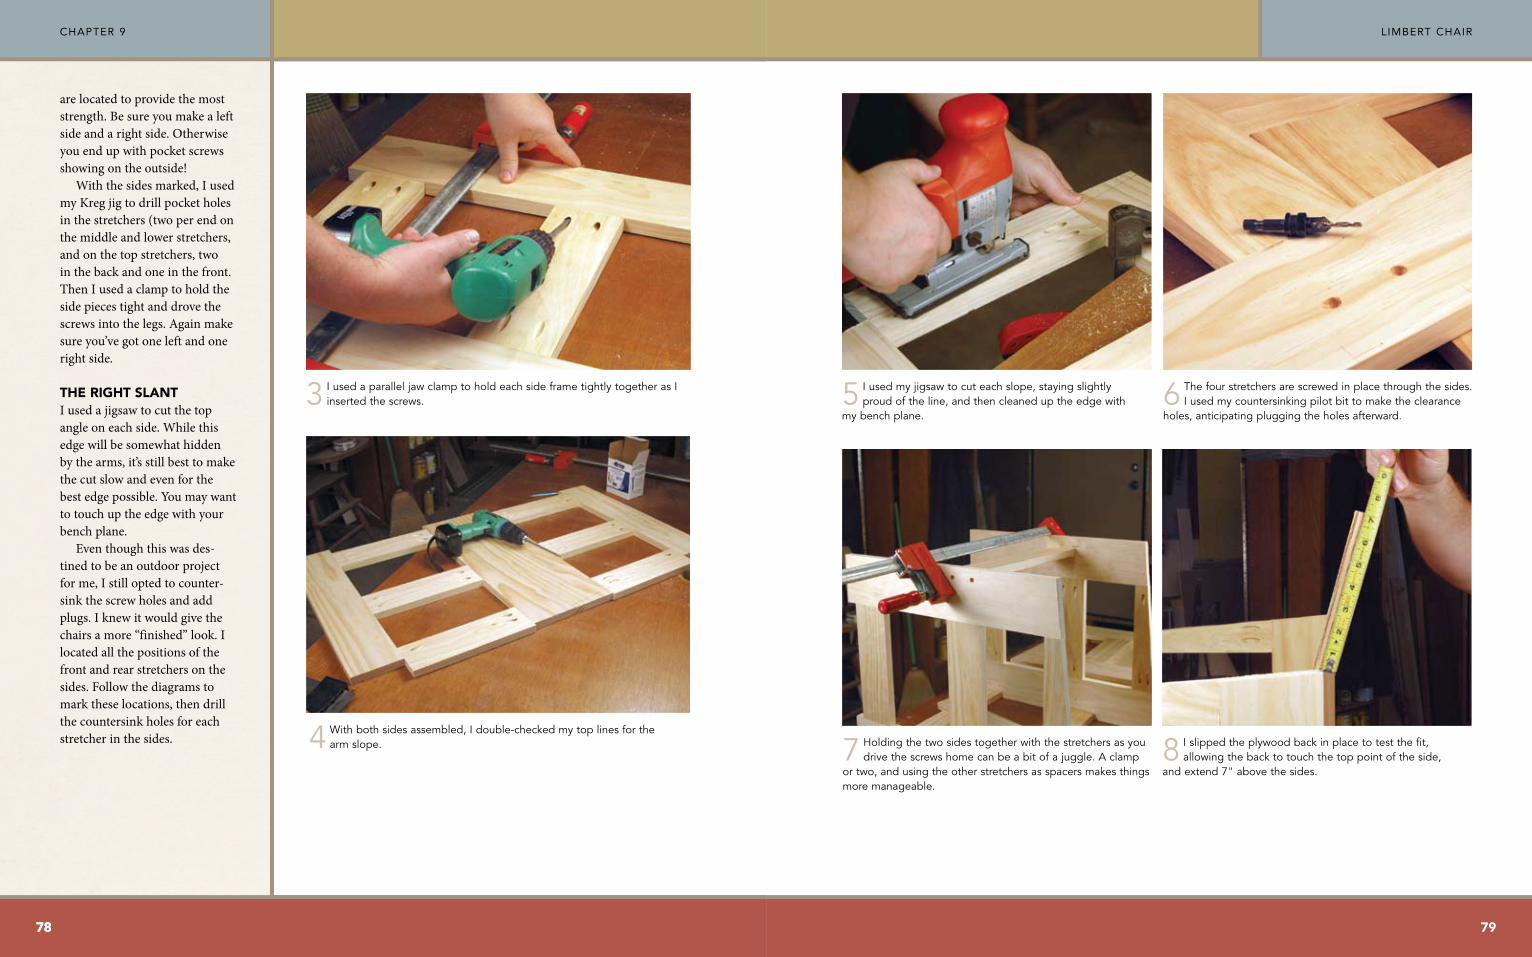
6 thefourstretchersarescrewedinplacethroughthesides.iusedmycountersinkingpilotbittomaketheclearance
holes,anticipatingpluggingtheholesafterward.5 iusedmyjigsawtocuteachslope,stayingslightly
proudoftheline,andthencleaneduptheedgewithmybenchplane.
7 holdingthetwosidestogetherwiththestretchersasyoudrivethescrewshomecanbeabitofajuggle.aclamp
ortwo,andusingtheotherstretchersasspacersmakesthingsmoremanageable.
8 islippedtheplywoodbackinplacetotestthefit,allowingthebacktotouchthetoppointoftheside,
andextend7"abovethesides.
are located to provide the most strength. Be sure you make a left side and a right side. Otherwise you end up with pocket screws showing on the outside!
With the sides marked, I used my Kreg jig to drill pocket holes in the stretchers (two per end on the middle and lower stretchers, and on the top stretchers, two in the back and one in the front. Then I used a clamp to hold the side pieces tight and drove the screws into the legs. Again make sure you’ve got one left and one right side.
The righT slanTI used a jigsaw to cut the top angle on each side. While this edge will be somewhat hidden by the arms, it’s still best to make the cut slow and even for the best edge possible. You may want to touch up the edge with your bench plane.
Even though this was des-tined to be an outdoor project for me, I still opted to counter-sink the screw holes and add plugs. I knew it would give the chairs a more “finished” look. I located all the positions of the front and rear stretchers on the sides. Follow the diagrams to mark these locations, then drill the countersink holes for each stretcher in the sides. 4 withbothsidesassembled,idouble-checkedmytoplinesforthe
armslope.
3 iusedaparalleljawclamptoholdeachsideframetightlytogetherasiinsertedthescrews.
7878
Chapter 9
79
Limbert Chair
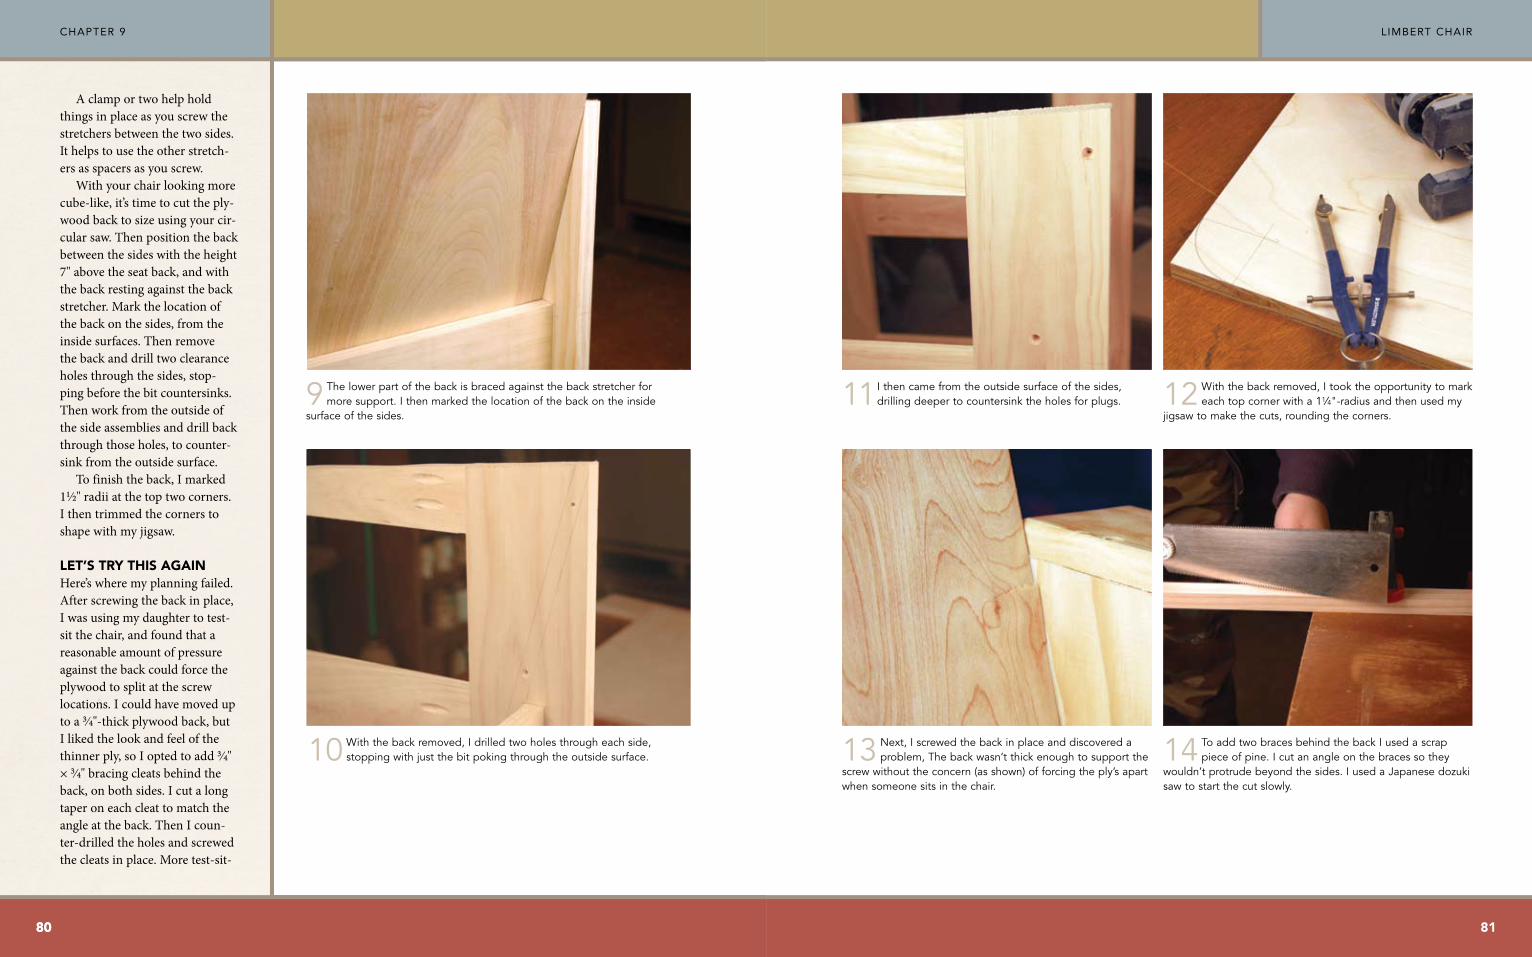
12 withthebackremoved,itooktheopportunitytomarkeachtopcornerwitha11⁄4"-radiusandthenusedmy
jigsawtomakethecuts,roundingthecorners.11ithencamefromtheoutsidesurfaceofthesides,
drillingdeepertocountersinktheholesforplugs.
13 next,iscrewedthebackinplaceanddiscoveredaproblem,thebackwasn’tthickenoughtosupportthe
screwwithouttheconcern(asshown)offorcingtheply’sapartwhensomeonesitsinthechair.
14 toaddtwobracesbehindthebackiusedascrappieceofpine.icutanangleonthebracessothey
wouldn’tprotrudebeyondthesides.iusedaJapanesedozukisawtostartthecutslowly.
9 thelowerpartofthebackisbracedagainstthebackstretcherformoresupport.ithenmarkedthelocationofthebackontheinside
surfaceofthesides.
10 withthebackremoved,idrilledtwoholesthrougheachside,stoppingwithjustthebitpokingthroughtheoutsidesurface.
A clamp or two help hold things in place as you screw the stretchers between the two sides. It helps to use the other stretch-ers as spacers as you screw.
With your chair looking more cube-like, it’s time to cut the ply-wood back to size using your cir-cular saw. Then position the back between the sides with the height 7" above the seat back, and with the back resting against the back stretcher. Mark the location of the back on the sides, from the inside surfaces. Then remove the back and drill two clearance holes through the sides, stop-ping before the bit countersinks. Then work from the outside of the side assemblies and drill back through those holes, to counter-sink from the outside surface.
To finish the back, I marked 11∕2" radii at the top two corners. I then trimmed the corners to shape with my jigsaw.
leT’s Try This againHere’s where my planning failed. After screwing the back in place, I was using my daughter to test-sit the chair, and found that a reasonable amount of pressure against the back could force the plywood to split at the screw locations. I could have moved up to a 3∕4"-thick plywood back, but I liked the look and feel of the thinner ply, so I opted to add 3∕4" × 3∕4" bracing cleats behind the back, on both sides. I cut a long taper on each cleat to match the angle at the back. Then I coun-ter-drilled the holes and screwed the cleats in place. More test-sit-
8080
Chapter 9
81
Limbert Chair
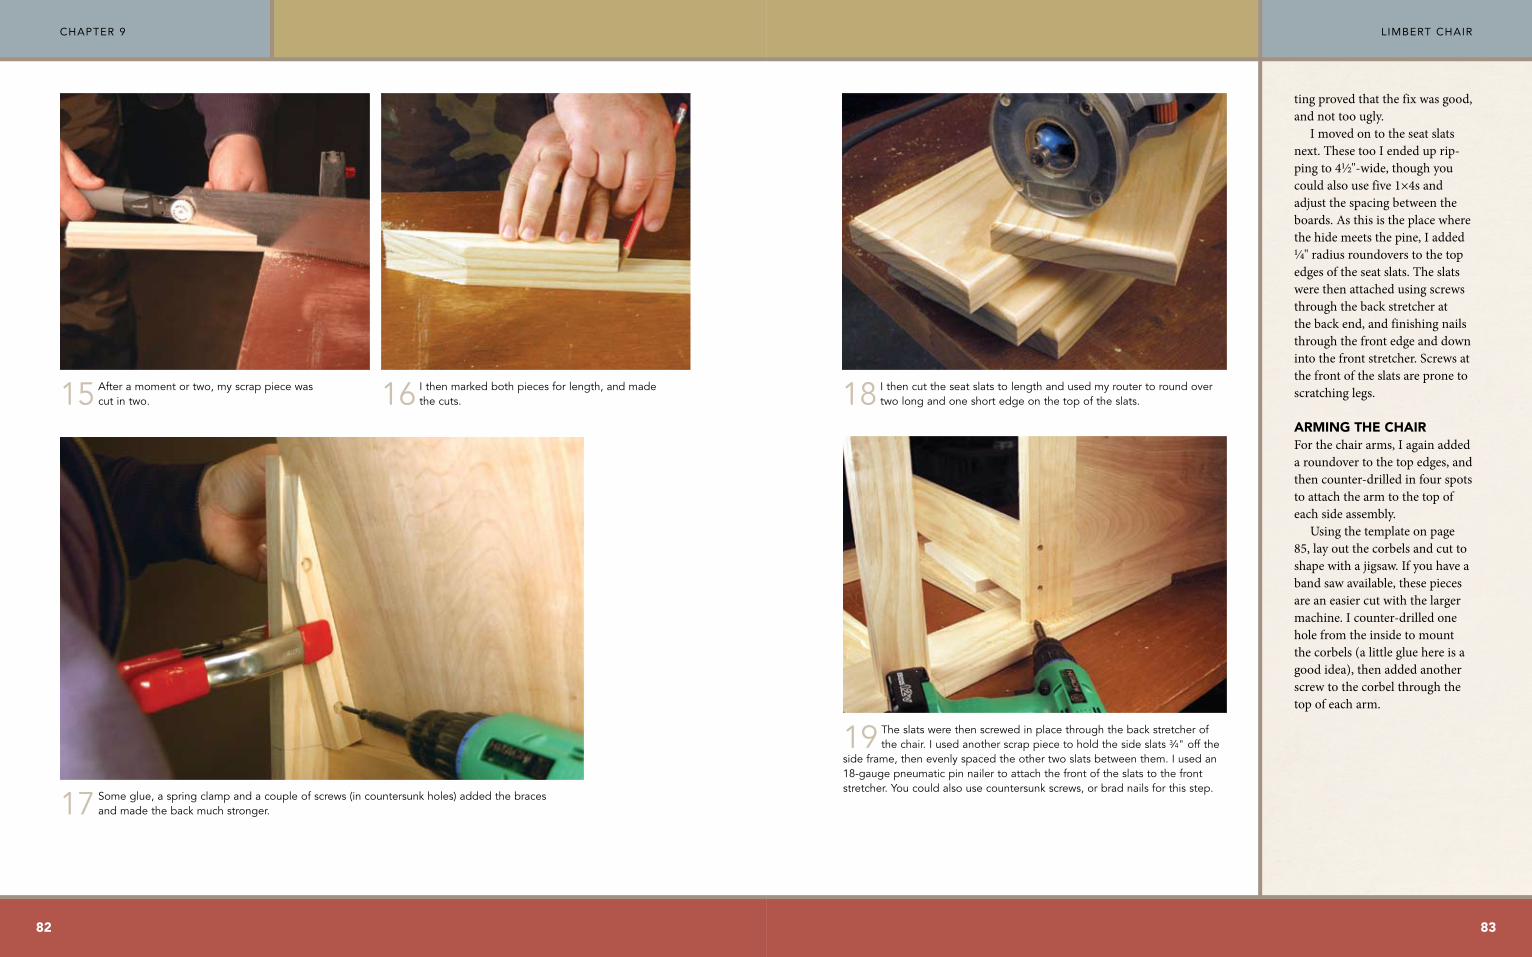
18 ithencuttheseatslatstolengthandusedmyroutertoroundovertwolongandoneshortedgeonthetopoftheslats.
17 someglue,aspringclampandacoupleofscrews(incountersunkholes)addedthebracesandmadethebackmuchstronger.
19 theslatswerethenscrewedinplacethroughthebackstretcherofthechair.iusedanotherscrappiecetoholdthesideslats3⁄4"offthe
sideframe,thenevenlyspacedtheothertwoslatsbetweenthem.iusedan18-gaugepneumaticpinnailertoattachthefrontoftheslatstothefrontstretcher.youcouldalsousecountersunkscrews,orbradnailsforthisstep.
16 ithenmarkedbothpiecesforlength,andmadethecuts.15 afteramomentortwo,myscrappiecewas
cutintwo.
ting proved that the fix was good, and not too ugly.
I moved on to the seat slats next. These too I ended up rip-ping to 41∕2"-wide, though you could also use five 1×4s and adjust the spacing between the boards. As this is the place where the hide meets the pine, I added 1∕4" radius roundovers to the top edges of the seat slats. The slats were then attached using screws through the back stretcher at the back end, and finishing nails through the front edge and down into the front stretcher. Screws at the front of the slats are prone to scratching legs.
arming The chairFor the chair arms, I again added a roundover to the top edges, and then counter-drilled in four spots to attach the arm to the top of each side assembly.
Using the template on page 85, lay out the corbels and cut to shape with a jigsaw. If you have a band saw available, these pieces are an easier cut with the larger machine. I counter-drilled one hole from the inside to mount the corbels (a little glue here is a good idea), then added another screw to the corbel through the top of each arm.
82 83
Limbert ChairChapter 9
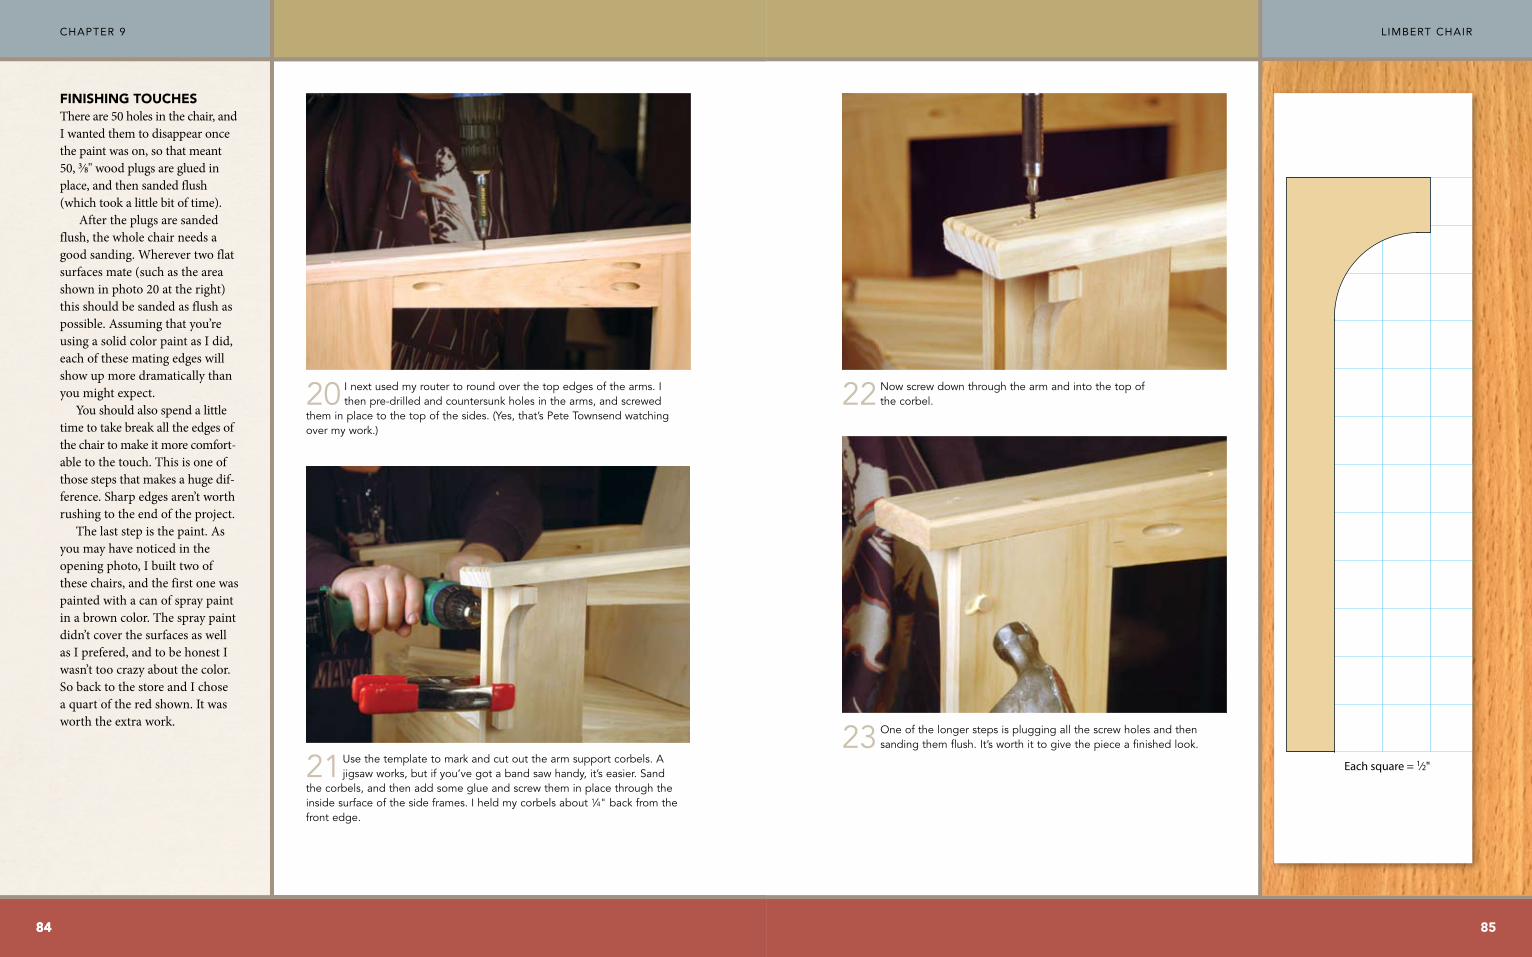
Each square = 1⁄2"
22 nowscrewdownthroughthearmandintothetopofthecorbel.20 inextusedmyroutertoroundoverthetopedgesofthearms.i
thenpre-drilledandcountersunkholesinthearms,andscrewedtheminplacetothetopofthesides.(yes,that’spetetownsendwatchingovermywork.)
21usethetemplatetomarkandcutoutthearmsupportcorbels.ajigsawworks,butifyou’vegotabandsawhandy,it’seasier.sand
thecorbels,andthenaddsomeglueandscrewtheminplacethroughtheinsidesurfaceofthesideframes.iheldmycorbelsabout1⁄4"backfromthefrontedge.
23 oneofthelongerstepsispluggingallthescrewholesandthensandingthemflush.it’sworthittogivethepieceafinishedlook.
finishing TouchesThere are 50 holes in the chair, and I wanted them to disappear once the paint was on, so that meant 50, 3∕8" wood plugs are glued in place, and then sanded flush (which took a little bit of time).
After the plugs are sanded flush, the whole chair needs a good sanding. Wherever two flat surfaces mate (such as the area shown in photo 20 at the right) this should be sanded as flush as possible. Assuming that you’re using a solid color paint as I did, each of these mating edges will show up more dramatically than you might expect.
You should also spend a little time to take break all the edges of the chair to make it more comfort-able to the touch. This is one of those steps that makes a huge dif-ference. Sharp edges aren’t worth rushing to the end of the project.
The last step is the paint. As you may have noticed in the opening photo, I built two of these chairs, and the first one was painted with a can of spray paint in a brown color. The spray paint didn’t cover the surfaces as well as I prefered, and to be honest I wasn’t too crazy about the color. So back to the store and I chose a quart of the red shown. It was worth the extra work.
8484
Chapter 9
85
Limbert Chair


![[XLS] · Web viewLOPEZ ESTRADA KATHERINE ESTELA 10102875902 VALVERDE INGA ALBERTO LIMBERT 10102879398 FARACH RAMIREZ AURORA MAYRA 10102888702 MIYASATO TAIRA BEATRIZ NELLY 10102905381](https://img.dokumen.tips/doc/110x75/5af7a52b7f8b9ae948906b91/xls-viewlopez-estrada-katherine-estela-10102875902-valverde-inga-alberto-limbert.jpg)