Embed Size (px)
Citation preview

Unit 2
The U.S. Space Program called Apollo achieved monumental goals including thecollection and return of rock and sediment samples from the Moon. Analyses of thesamples by scientists worldwide continue to give us new insight to the forces thatshaped the early solar system, the Moon, and maybe most importantly, Earth. Thisexcitement of discovery, a legacy of the Apollo program, is the theme of Unit 2.
The highlight of this unit is the Lunar Sample Disk. Classroom activities focus on theMoon's rocks, surface features, and the geologic processes that formed them. Studentsare then given the opportunity to plan their own lunar missions in the “Lunar LandingSites” and “Lunar Roving Vehicle” activities. The last activity of the unit presents fouranomalies of the Moon for investigation and interpretation.
A Resource Section for Unit 2 is on Page 38.
Learning from Apollo
The Lunar DiskApollo Landing SitesRegolith FormationLunar SurfaceDifferentiationImpact CratersClay Lava FlowsLava LayeringLunar Landing SitesLunar Roving VehicleMoon Anomalies
37Exploring the Moon -- A Teacher's Guide with Activities, NASA EG-1997-10-116-HQ

Unit 2Resource Section
This list presents possible independent and commercial sources of items to complement the activities in Unit2. The sources are offered without recommendation or endorsement by NASA. Materials from the U.S.Government Printing Office also are included. Inquiries should be made directly to the appropriate sourceto determine availability, cost, and ordering information before sending money. Contact your NASAEducator Resource Center (see Page 146) for more resources available directly from NASA.
38 Exploring the Moon -- A Teacher's Guide with Activities, NASA EG-1997-10-116-HQ
Apollo and the Moon Landing, by Gregory Vogt,1991, Millbrook Press, 112 p. An illustrated textin the Missions in Space Series for grades 4-6.
SlidesThe Apollo Landing Sites, set of 40 slidesLunar and Planetary Institute3600 Bay Area BoulevardHouston, TX 77058-1113phone 1-281-486-2172 or fax 1-281-486-2186
VideosOut of This World: The Apollo Moon Landings,Finley-Holiday Film Corp./Steve Skootsky, 1993,60 minutes. Historically accurate video using newlyrestored NASA footage. Finley-Holiday Film Corp.P.O. Box 619Whittier, CA 90608phone 1-800-345-6707
Rockets and ModelsEstes IndustriesP.O. Box 227Penrose, CO 81240
Other Teacher's GuidesExploring Meteorite Mysteries: Teacher's Guidewith Activities, NASA EG-1997-08-104-HQ.Marilyn Lindstrom et. al., 1997.
Rockets: Physical Science Teacher's Guide withActivities, NASA EP-291.Gregory L. Vogt, 1993.
BooksApollo Over the Moon: A View From Orbit,NASA SP-362, 1978, 255 p. Annotated picturebook of lunar geologic features. U.S. GovernmentPrinting Office, Superintendent of DocumentsP.O. Box 371954Pittsburgh, PA 15250-7054phone 1-202-783-3238
Apollo Expeditions to the Moon, NASA SP-250,1975, 313 p. Illustrated chronicle of the Apollomissions with a focus on the engineering and team-work that made the missions possible.U.S. Government Printing Office, same as above.
The Moon, by Patrick Moore, 1981, Rand McNallyand Co., 96 p. Illustrated with maps, drawings, andApollo mission photographs. Also gives descriptionsof unmanned missions including Russian Luna probes.
To Rise From Earth: An Easy to UnderstandGuide to Space Flight, by Wayne Lee, 1993, TexasSpace Grant Consortium (ISBN 0-9637400-3-2),279 p. Detailed, non-mathematical discussions oforbital mechanics, Apollo missions, and the Shuttle.
To A Rocky Moon: A Geologist's History ofLunar Exploration, by Don E. Wilhelms, 1993,Univ. of Arizona Press, 477 p.
Carrying the Fire: An Astronaut's Journeys, byMichael Collins, 1974, Ballantine Books, 488p. p.

The Lunar DiskTeacher Page
39Exploring the Moon -- A Teacher's Guide with Activities, NASA EG-1997-10-116-HQ
Purpose
Background [also see "Teacher's Guide" Pages 1, 4-9, photo on
15, 16 and "About the Lunar Sample Disk" on Page iv]
The six Apollo missions that landed astronauts on the Moon returned a collection ofrocks and sediment samples weighing 382 kilograms and consisting of more than2,000 separate samples.
Each lunar disk contains six small samples of lunar material. Descriptions of the samplesaccompany every disk; included are annotated color photographs, discussion of origins,and Apollo missions and collection sites.
PreparationFirst, do the “Reaping Rocks” activity on Page 33 or spend time on a basic unit on rockand mineral identification.Read the rock descriptions provided with the Lunar Sample Disk.Review and prepare materials listed on the student sheet.Each student will need two copies of the “Lunar Disk Sample Chart,” there is room forthree samples per page. Use of magnifying lenses or a stereo microscope would greatlyenhance observations.
Have on hand the students' “My Own Rock Charts” for comparisons to the lunar samples.You may also want to collect some sediment from the school yard to display on a glassslide. Students could then compare this sediment to the lunar samples. Most likely,evidence of life will be seen in the school yard sediment under magnification, includingplant matter, bits of plastic, fibers, etc.
In ClassThe Lunar Sample Disk is a national treasure and students need to be reminded about theproper way to handle it. The disk must be in your sight during use.
Encourage students to describe the samples with as many adjectives or descriptivephrases as possible. The “Lunar Disk Sample Chart” will help students organize theirobservations and interpretations.
To carefully look at, describe, and learn about theorigins of the six lunar samples contained in the disk.

The Lunar DiskTeacher Page
40 Exploring the Moon -- A Teacher's Guide with Activities, NASA EG-1997-10-116-HQ
Note: The name of each sample is labeled on the disk and may be entered on the chartunder classification. The sediment samples, instead of being labeled regolith, are la-beled "soil." Remined the students this is a misnomer because there are no organicmaterials in lunar regolith.
Ask the students if their predictions of the Moon rocks were accurate.
Wrap-UpBy comparing the lunar samples with their own rock collections, students can discussthe similarities and differences between Earth and Moon rocks. Discuss the variousways that rocks are formed on Earth and the Moon.

The Lunar Disk
41Exploring the Moon -- A Teacher's Guide with Activities, NASA EG-1997-10-116-HQ
Lunar Disk
magnifying lens or stereomicroscope
“Lunar Disk Sample Chart”
“My Own Rock Chart”
“Moon ABCs Fact Sheet”
ProcedureKey Wordsanorthosite
mare basalt
orange “soil”
breccia
mare “soil”
highland “soil”
Materials
Purpose
1. Look at each lunar sample with and without amagnifying lens or stereo microscope.What details can you see under magnification?
2. Describe what you see by filling out “LunarDisk Sample Chart.” Use as many adjectivesor descriptive phrases as you can.
3. Do the Moon rocks look like what you expected?
4. Which lunar samples closely resemble rocks from your collection?
5. Based on your comparisons of Earth and Moon rocks, what can you now say about the origins of the lunar samples contained in the disk? Add this information to your chart.
6. Which rock types on Earth are not found in the lunar samples? Why?
To carefully look at, describe, and learn about theorigins of the six lunar samples contained in the disk.
Caution
The only way to handlethe Lunar Sample Disk iswith care.
Always place it on thesoft cloth to preventscratchs to the surface.The disk must always bein the teacher's sight.
Care for and enjoy thisnational treasure.

Lu
na
r Dis
k S
am
ple
Ch
art
Interpretations Observations
Origin
Classification
Apollo M
ission/C
ollection Site
Texture
Colors
Size
Shape
Sketch of S
ample
42 Exploring the Moon -- A Teacher's Guide with Activities, NASA EG-1997-10-116-HQ

Apollo Landing SitesTeacher Page
43Exploring the Moon -- A Teacher's Guide with Activities, NASA EG-1997-10-116-HQ
Purpose
BackgroundLatitude and longitude coordinates for the Moon start at a point near the craterBruce. From this starting point (0o latitude, 0o longitude) locations towards the east sideof the Moon (the direction in which the sun rises) are indicated with east longitudevalues. Locations towards the west side (the direction in which the sun sets) have westlongitude values. North latitude is measured towards the Moon's north pole. Southlatitude is measured towards the Moon's south pole.
Twelve astronauts in six Apollo missions landed on and explored the nearside(Earth-facing side) of the Moon between 1969 and 1972. The six landing sites werechosen to explore different geologic terrains.
Refer to the rock descriptions included with the Lunar Sample Disk for details on wherethe samples came from and who collected them. An answer chart is provided.
PreparationReview and prepare materials listed on the student sheet.See the Resource Section on Page 24 for sources of maps and globes.
In ClassRefer back to the Lunar Sample Disk to review the collection sites of each sample.Ask students to consider the geologic differences of the six sites.
Wrap-upWere the Apollo landing sites in similar terrains? Which crew was the first to work inhilly terrain?
Extensions1. Form cooperative teams to research each Apollo landing site (the who, what,
when, where, and why) and to report to the class.2. Why were all six Apollo landing sites on the nearside of the Moon?3. Why were there no further Apollo Moon landings?4. Was Apollo the only program to land on the Moon? Discuss the unpiloted
American and Soviet missions and landings.
To learn about the locations and geology of the sixApollo landing sites.

Apollo Landing Sites Chart
12 Nov. 19, 1969 23 oW 3 oS
Mare (Ocean of Storms), rocks are basaltic lava;ray from Copernicus Crater crosses the site.
14 Jan. 31, 1971 17 oW 3 oS
11 July 20, 1969 23 oE 1 oN Mare (Sea of Tranquillity), basaltic lava.
Highlands (Fra Mauro formation) - thought to be ejectafrom the Imbrium Basin.
15 July 30, 1971 4 oE 26 oN
Mare (Hadley Rille in a mare area near the margin ofMare Imbrium) and highlands (Apennine Mountains, aring of the Imbrium basin); rocks are breccia and basalt.
Highlands (Descartes formation and Cayley Plains);rocks are anorthosite and highlands soil. 16 April 21, 1972 16 oE 9 oS
17 Dec. 11, 1972 31 oE 20 oN
Mare (Sea of Serenity) and Highlands; rocks are mare soil, orange soil, basaltic lava, anorthosite.
Apollo Mission Landing Date Longitude Latitude Major Geologic Features and Rock Types (rock types underlined are found in the Lunar Sample Disk)
44
Te
ach
er P
ag
e
Exploring the M
oon -- A T
eacher's Guide w
ith Activities, N
AS
A E
G-1997-10-116-H
Q

Apollo Landing Sites
45Exploring the Moon -- A Teacher's Guide with Activities, NASA EG-1997-10-116-HQ
ProcedureKey Wordslatitude
longitude
mare
highlands
Sea of Tranquillity
Ocean of Storms
Fra Mauro
Hadley-Appenine
Descartes
Sea of Serenity
Taurus-Littrow
Materials
Purpose
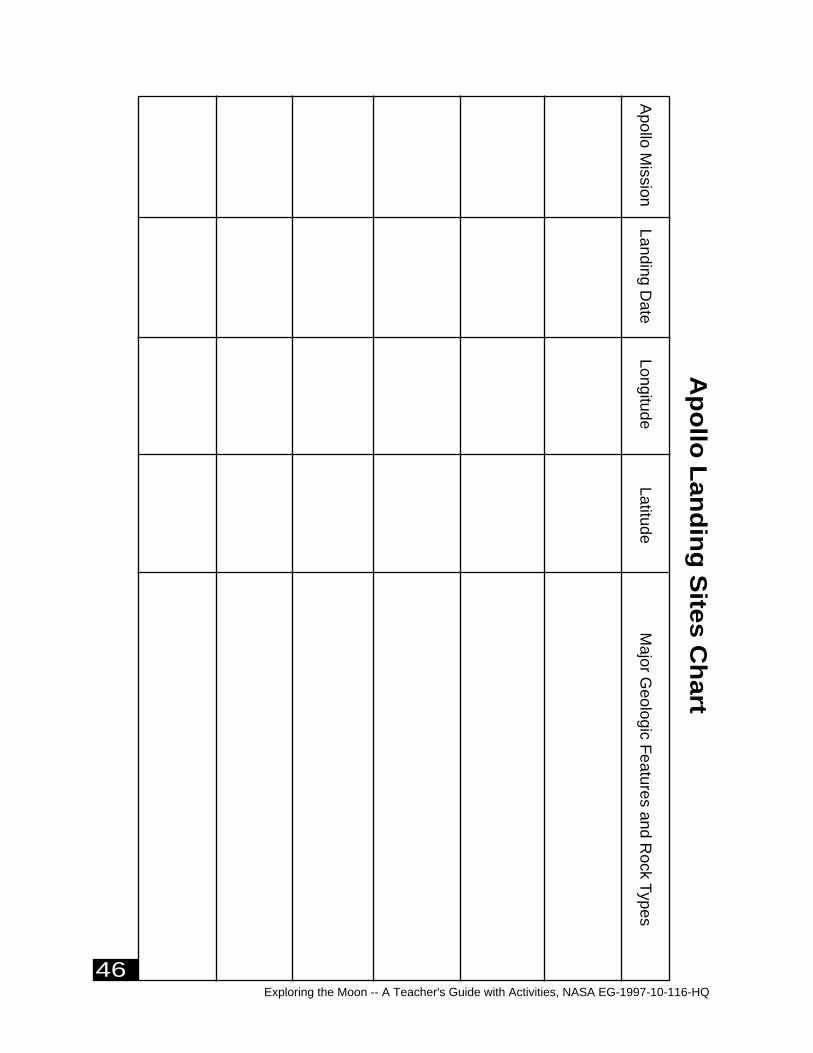
1. Look at a map of the Moon showing the Apollolanding sites. Fill in the “Apollo LandingSites Chart.”
2. Find the landing sites on a globe of the Moon.
3. How do latitude and longitude compare on Earth and on the Moon?
4. Compare and contrast the six Apollo landing sites.
(Think about who, when, where, and geology foryour answer.)
5. Which site would you most like to visit? Why?
To learn about the locations and geology of the sixApollo landing sites.
lunar maps with latitudeand longitude grid
“Apollo Landing SitesChart”
Moon globe
Apollo M
ission Landing Date Longitude Latitude M
ajor Geologic F
eatures and Rock T
ypes
Ap
ollo
La
nd
ing
Site
s Ch
art
5
0
46Exploring the Moon -- A Teacher's Guide with Activities, NASA EG-1997-10-116-HQ

Regolith Formation
47
Teacher Page
Exploring the Moon -- A Teacher's Guide with Activities, NASA EG-1997-10-116-HQ
PurposeTo compare the process of regolith formation on Earthand on the Moon.
Background [also see “Teacher's Guide” Pages 4, 5]
The loose, fragmental material on the Moon’s surface is called regolith. This regolith, aproduct of meteoritic bombardment, is the debris thrown out of the impact craters.The composition and texture of the lunar regolith varies from place to place depending onthe rock types impacted.
Generally, the older the surface, the thicker the regolith. The regolith on young mariamay be only 2 meters thick; whereas, it is perhaps 20 meters thick in the older lunarhighlands.
By contrast, regolith on Earth is a product of weathering. Weathering encompasses allthe processes that cause rocks to fragment, crack, crumble, or decay. These processes canbe physical (such as freezing water causing rocks to crack), chemical (such as decayingof minerals in water or acids), and biological (such as plant roots widening cracks inrocks).
The rock debris caused by weathering can then be loosened and carried away by ero-sional agents -- running water (fast-flowing rivers, rain, ocean waves), high-speed wind(by itself or sandblasting), and ice (glaciers).
In this activity, procedures A and B challenge the students to determine the effects ofwind, sandblasting, and water on regolith formation and deposition on Earth. This isfollowed by prodedure C in which the students simulate regolith formation on the Moonby meteoritic bombardment.
PreparationReview and prepare materials listed on the student sheet.Toast, crackers, or brittle cookies can be used in this activity. Toast is the least expensivebut most time consuming choice. In any case, students will need two different colors ofmaterials for procedure C; for example, vanilla and chocolate graham crackers. Invari-ably, students get hungry at the sight of food, so you may want to reserve some cleanmaterials for consumption or use something other than a rock for the projectile.To prepare bread: use a conventional oven, toaster, or sun-dry method to produce themost crisp and brittle toast. Toast one loaf of white bread and one loaf of golden wheat orrye bread. Note that whole wheat bread does not get brittle enough.

Regolith Formation
48
Teacher Page
Exploring the Moon -- A Teacher's Guide with Activities, NASA EG-1997-10-116-HQ
For procedure B, fill margarine containers (one for each group) with water and sand,then freeze. The more sand, the better the illusion to a real rock.
For procedure C, do not use glass pans. Large plastic tubs are preferred for this proce-dure, but recyclable aluminum roasting pans or shallow cardboard boxes work as well.
In ClassDivide the students into cooperative groups and distribute materials.
Discuss the definition of regolith. Have students guess how regolith is formed on Earthand on the Moon. Ask students for justification.
If sand paper or nail files are not available, then students can use the edge of a ruler toillustrate the effects of sandblasting in procedure A. Caution students to use a collectiontray in the sink in procedure B to avoid sand-clogged drains. An alternative to using afaucet is to have the students pour a steady stream of water from beakers onto their ice-cube rocks to illustrate the effects of falling water.
Have students guess individually, then discuss in groups, what the surface of the Moonis like (hard rocks, fine dust, large boulders). Ask students for justification of theiranswers.
Refer to a photograph of an astronaut’s bootprint on the surface of the Moon. Givestudents the opportunity to change or confirm their guesses.
Procedure C is best done outside. Drop the rock from waist high. Sometimes the im-pacting rock causes the pan to bounce so you may want to secure the pan to the groundwith tape. Students should stand back as a safety precaution.
Wrap-upAfter participating in the activity, have the whole class compare and contrast regolithformation and ask each small group to verify their original guesses.

Regolith Formation
49Exploring the Moon -- A Teacher's Guide with Activities, NASA EG-1997-10-116-HQ
PurposeTo compare and contrast the process of regolithformation on Earth and on the Moon.
Key Wordsregolith
meteoritic bombardment
weathering
erosion
Materialstoasted white bread
toasted golden wheatbread
small pan
sand paper, nail file, oredge of ruler
ice cube with sand inside
tray
fist-size rock
Regolith formation on EarthProcedure AWhat effect does wind have onregolith formation?1. Imagine that the piece of toasted bread is a rock on Earth. Your hand is the wind. The sand paper is wind carrying particles of sand.
2. Predict the effects of rubbing just your hand and then the sand paper across the toasted bread.
3. Now try it. Rub your hand across the toasted bread and observe the bread and the pieces which fall from it onto the pan. Observations:
4. This time rub the sand paper across the toasted bread and observe the bread and the pieces which fall from it onto the pan. Observations:

Regolith Formation
50 Exploring the Moon -- A Teacher's Guide with Activities, NASA EG-1997-10-116-HQ
Procedure BWhat effect does falling or fast flowingwater have on regolith formation?
5. How was the effect different?
6. How is this activity related to processes on Earth?
1. Imagine that the ice cube with sand is a rock.
2. Place this ice cube on a collection tray beneath the water faucet.
3. Adjust the water flow from the faucet so a medium stream hits the ice cube.
4. Observe what happens to the ice cube and the remaining particles.
5. What happened to the rock (ice cube)?
6. Describe the particles which remain.

Regolith Formation
51Exploring the Moon -- A Teacher's Guide with Activities, NASA EG-1997-10-116-HQ
Regolith formation on the MoonProcedure C
1. Do you think regolith on the Moon is formed in the same manner as on Earth? Why or why not?
Now we will investigate the effects of meteoritic bombardment on regolith formation.
2. In a small pan, place 2 slices of toasted white bread onto 3 slices of toasted golden wheat bread. This represents the Moon’s crust.
3. Drop a rock onto the layers of toasted bread twice. Describe the bread slices and the crumbs.
7. How does water contribute to regolith formation on Earth?

Regolith Formation
52 Exploring the Moon -- A Teacher's Guide with Activities, NASA EG-1997-10-116-HQ
4. Drop the rock 20 times onto the layers of toasted bread. Describe the bread slices and the crumbs.
5. Which crumbs can be seen at the surface? Why?
6. How does the thickness of the crumb layers compare after 2 hits and after 20 more hits?
7. How does meteoritic bombardment make regolith on the Moon?

Lunar SurfaceTeacher Page
53Exploring the Moon -- A Teacher's Guide with Activities, NASA EG-1997-10-116-HQ
Purpose
Background [also see “Teacher's Guide” Pages 2, 3, 4, 12, 13]
A variety of features are evident on the lunar surface. These features include craterswith and without rays (also see the “Impact Craters” activity on Page 61), craterchains, maria, rilles, and mountains.
crater chains - in curved paths are probably incompletely formed rilles,
- in straight paths are probably from rocks thrown out during an impact event and landing in a row.
rilles - are long valleys crossing maria that formed as underground lava channels which collapsed after the hot lava flowed away.
mountains - almost all in the highlands are the rims of large craters,
- also occur in the centers of craters that are larger than 40 km diameter; these mountains are called central uplifts,
- also occur as low, circular, rounded hills called domes.
In this activity students will use clay, plaster of Paris, or playdough to construct modelsurfaces to match what they see on maps and photographs of the Moon. They “flag”Apollo landing sites and consider the collection site of each Lunar Disk sample.
PreparationReview and prepare materials listed on the student sheet.Obtain one or more lunar maps. Students can either be assigned to or given a choice ofspecific areas to model. Using maps of both the nearside (Earth-facing side) and farsideof the Moon will give more variety of surface features.
Collect trays or shallow cardboard boxes and modeling material (recipes for playdoughappear on Page 78). Assemble sculpturing tools such as wooden sticks, plastic knives,rolling pins, etc.
To make a model of the Moon's surface and to con-sider the geologic processes and rocks of each area.

Lunar SurfaceTeacher Page
54 Exploring the Moon -- A Teacher's Guide with Activities, NASA EG-1997-10-116-HQ
It is beneficial to do “The Lunar Disk” activity (on Page 39) first so students can relatethe samples to their model surfaces.
In ClassConsider having cooperative teams build one model surface. Each team is responsible fordescribing the surface features, explaining the geology, and listing the typical rock types ofthe area. Either draw an outline around each area on a Moon map or if you have an extramap, cut the map into sections. The whole map is finally recreated by putting the modelsurfaces back together.
Have the students use toothpick flags to label Apollo landing sites.
Wrap-up
Review the variety of surface features found on the Moon. Are some features more com-mon than others?
What are the most common terrains on the Moon? Do these terrains exist on the nearside,farside, or globally?
Review the processes that made the various surface features. Also see the “Impact Cra-ters” activity on Page 61 and the “Clay Lava Flows” activity on page 71.
What kinds of rocks are found in the areas modeled by the students? Also see the“Apollo Landing Sites” activity on page 43 and the literature which accompanies theLunar Sample Disk.
If the student teams made models of different sections of a large map, then did themodeled surface features match from tray to adjacent tray? Have the students discusswhy or why not.
Lunar Surface
55Exploring the Moon -- A Teacher's Guide with Activities, NASA EG-1997-10-116-HQ
ProcedureKey Wordscrater
mountain
rille
mare
crater chain
ray
terrain
Materialsbinoculars or telescope
lunar map
photographs of the Moon
clay, plaster of Paris, orplaydough
tray
sculpturing tools
toothpick flags
Lunar Sample Disk
1. Observe the Moon using binoculars or a telescope. What surface features can you see?
2. Look at a map and photographs of the Moon. List the many different features you see.
3. Prepare a model lunar surface by placing a thin, even layer of modeling material on a tray.
4. Use sculpturing tools to form the features that you see on the Moon's surface.
PurposeTo make a model of the Moon's surface and to con-sider the geologic processes and rocks of each area.

Lunar Surface
56 Exploring the Moon -- A Teacher's Guide with Activities, NASA EG-1997-10-116-HQ
5. How do you think these surface features were created on the Moon? List at least one idea for each kind of feature.
6. If your model surface has an Apollo landing site, then label it with a toothpick flag.
7. What kinds of rocks occur in your area? If your area has an Apollo landing site, then include the names of samples from the Lunar Sample Disk in your answer.
8. Compare your model surface with your classmates' surfaces. Can you match features from one area to another? Why or why not?
11
57
Teacher Page
Differentiation
Exploring the Moon -- A Teacher's Guide with Activities, NASA EG-1997-10-116-HQ
PurposeTo see how minerals separate from each other in amagma ocean.
Background [also see “Teacher’s Guide” Page 12]
When planets begin to melt, the materials in them begin to separate from one another.The heaviest materials, such as metallic iron, sink to form cores. Low density mag-mas rise forming crusts. This process is called differentiation.
Soon after formation, the Moon melted substantially forming a large body of magmathat completely surrounded it. This is called the lunar magma ocean. The mainevidence that this actually happened on the Moon is the presence of large amounts ofthe mineral plagioclase feldspar in the ancient, lunar highlands crust. Scientistssurmise feldspar floated in the magma ocean and accumulated at the top, while denserminerals such as olivine and pyroxene sank and accumulated at the base of the magmaocean.
This same process happens in lava lakes and in magma chambers beneath volcanoeson Earth. Minerals denser than the melt sink; those less dense float. It is an importantgeological process that leads to the production of a wide variety of igneous rocks .
PreparationReview and prepare materials listed on the student sheet. Students will simulate theprocess of differentiation using readily-available materials: water, a transparent con-tainer (1000-milliliter beakers are good because they look scientific, but any wide-mouthed glass will work), pennies or metal shot, sand, and toothpicks.
In ClassTake a handful of pennies, sand, and toothpicks and dump them into the water. Thepennies (or metal shot) sink faster than the sand. The toothpicks float. The floatingtoothpicks lie at a variety of angles and are analogous to the feldspar that formed theinitial lunar crust. There ought to be more pennies than sand on the very bottom, withsand on top of that pile. (The pennies are much denser, 8.9 grams per cubic centimeter,than the sand, about 2.6 grams per cubic centimeter, so the pennies sink faster.) Theclear water in between represents still-molten magma.

58
DifferentiationTeacher Page
Exploring the Moon -- A Teacher's Guide with Activities, NASA EG-1997-10-116-HQ
This activity can be done as a demonstration if you prefer.
Wrap-upRelate the sinking and floating objects to the differentiation of the Moon'smagma ocean.

Differentiation
59Exploring the Moon -- A Teacher's Guide with Activities, NASA EG-1997-10-116-HQ
Purpose
Key Wordsdifferentiation
density
magma ocean
Materials
Procedure1. Mix the pennies, sand, and toothpicks in the bowl.
2. Fill the container with water to about 2 cm from the top.
3. Predict what will happen when you drop a hand- ful of the pennies-sand-toothpicks mixture into the water. Will they all sink to the bottom? Will some sink faster than others?
4. Now drop the mixture into the water. Wait until the objects stop moving and look at the deposits. What do you see?
pennies
sand
toothpicks
bowl
transparent container
water
To see how minerals separate from each other in amagma ocean.

Differentiation
60 Exploring the Moon -- A Teacher's Guide with Activities, NASA EG-1997-10-116-HQ
5. Can you explain what causes the differences in the way the objects sink or float?
6. Suppose the mineral feldspar in the lunar magma oceanresponded like the toothpicks in the water. What does this tellyou about the formation of the original crust on the Moon?
7. What makes up the highlands of the Moon? Based on this experiment, does this make sense?

61
Impact CratersTeacher Page
Exploring the Moon -- A Teacher's Guide with Activities, NASA EG-1997-10-116-HQ
To determine the factors affecting the appearance ofimpact craters and ejecta.
Background [also see “Teacher's Guide” Pages 1, 2, photo on 8, 12, and photo on 13]
The circular features so obvious on the Moon’s surface are impact craters formedwhen impactors smashed into the surface. The explosion and excavation of materials atthe impacted site created piles of rock (called ejecta) around the circular hole as well asbright streaks of target material (called rays) thrown for great distances.
Two basic methods forming craters in nature are:1) impact of a projectile on the surface and 2) collapse of the top of a volcano creatinga crater termed caldera. By studying all types of craters on Earth and by creating impactcraters in experimental laboratories geologists concluded that the Moon's craters areimpact in origin.
The factors affecting the appearance of impact craters and ejecta are the size and velocityof the impactor, and the geology of the target surface.
By recording the number, size, and extent of erosion of craters, lunar geologists candetermine the ages of different surface units on the Moon and can piece together thegeologic history. This technique works because older surfaces are exposed to impactingmeteorites for a longer period of time than are younger surfaces.
Impact craters are not unique to the Moon. They are found on all the terrestrial planetsand on many moons of the outer planets.
On Earth, impact craters are not as easily recognized because of weathering and erosion.Famous impact craters on Earth are Meteor Crater in Arizona, U.S.A.; Manicouagan inQuebec, Canada; Sudbury in Ontario, Canada; Ries Crater in Germany, and Chicxulub onthe Yucatan coast in Mexico. Chicxulub is considered by most scientists as the sourcecrater of the catastrophe that led to the extinction of the dinosaurs at the end of the Creta-ceous period. An interesting fact about the Chicxulub crater is that you cannot see it. Itscircular structure is nearly a kilometer below the surface and was originally identifiedfrom magnetic and gravity data.
Purpose

Impact Craters
62
Teacher Page
Exploring the Moon -- A Teacher's Guide with Activities, NASA EG-1997-10-116-HQ
floor
raised rim
AristarchusTypical characteristics of a lunar impact crater are labeled on this photograph ofAristarchus, 42 km in diameter, located West of Mare Imbrium.
raised rim - rock thrown out of the crater and deposited as a ring-shaped pile of debris at the crater’sedge during the explosion and excavcation of an impact event.
floor - bowl shaped or flat, characteristically below surrounding ground level unless filled in with lava.
central - mountains formed because of the huge increase and rapid decrease in pressure during theuplifts impact event. They occur only in the center of craters that are larger than 40 km diameter.
See Tycho crater for another example.
walls - characteristically steep and may have giant stairs called terraces.
ejecta - blanket of material surrounding the crater that was excavated during the impact event. Ejectabecomes thinner away from the crater.
rays - bright streaks starting from a crater and extending away for great distances. See Copernicuscrater for another example.
ejecta centraluplifts
rays
wall

63
Impact CratersTeacher Page
Exploring the Moon -- A Teacher's Guide with Activities, NASA EG-1997-10-116-HQ
PreparationReview and prepare materials listed on the student sheet.In this activity, marbles or other spheres such as steel shot, ball bearings, golf, or woodenballs are used as impactors dropped from a series of heights onto a prepared “lunar sur-face.” Using impactors of different mass dropped from the same height will allow stu-dents to study the relationship of mass of the impactor to crater size. Dropping impactorsfrom different heights will allow students to study the realtionship of velocity of theimpactor to crater size.
The following materials work well as a base for the “lunar surface” topped with a dust-ing of dry tempera paint or other material in a contrasting color:
all purpose flour - Reusable in this activity and keeps well in a covered container.
baking soda - It can be recycled for use in the lava layer activity or for manyother science activities. Reusable in this activity, even if col-ored, by adding a clean layer of new white baking soda ontop. Keeps indefinitely in a covered container. Baking sodamixed (1:1) with table salt also works.
corn meal - Reusable in this activity but probably not recyclable. Keepsonly in freezer in airtight container.
sand and - Mixed (1:1), sand must be very dry. Keeps only in freezer incorn starch airtight container.
dry tempera paint - Sift on top; use a sieve, screen, or flour sifter. A contrastingor powdered drink color to the base materials gives striking results.mixes or glitter
Pans should be plastic, aluminum, or cardboard. Do not use glass. They should be atleast 7.5 cm deep. Basic 10"x12" aluminum pans or plastic tubs work fine, but thelarger the better to avoid misses. Also, a larger pan may allow students to drop moremarbles before having to resurface the target materials.
A reproducible student “Data Chart” is included; students will need a separate chart foreach impactor used in the activity.

Impact Craters
64
Teacher Page
Exploring the Moon -- A Teacher's Guide with Activities, NASA EG-1997-10-116-HQ
In Class1. Begin by looking at craters in photographs of the Moon and asking students their
ideas of how craters formed.
2. During this activity, the flour, baking soda, or dry paint may fall onto the floor andthe baking soda may even be disbursed into the air. Spread newspapers under thepan(s) to catch spills or consider doing the activity outside. Under supervision,students have successfully dropped marbles from second-story balconies. Resurfacethe pan before a high drop.
3. Have the students agree beforehand on the method they will use to “smooth” andresurface the material in the pan between impacts. The material need not be packeddown. Shaking or tilting the pan back and forth produces a smooth surface. Thenbe sure to reapply a fresh dusting of dry tempera paint or other material. Remindstudents that better experimental control is achieved with consistent handling of thematerials. For instance, cratering results may vary if the material is packed down forsome trials and not for others.
4. Allow some practice time for dropping marbles and resurfacing the materials in thepan before actually recording data.
5. Because of the low velocity of the marbles compared with the velocity of realimpactors, the experimental impact craters may not have raised rims. Central upliftsand terraced walls will be absent.
6. The higher the drop height, the greater the velocity of the marble, so a larger craterwill be made and the ejecta will spread out farther.
7. If the impactor were dropped from 6 meters, then the crater would be larger. The students need to extrapolate the graph out far enough to read the predicted crater diameter.
Wrap-UpHave the class compare and contrast their hypotheses on what things affect the appear-ance of craters and ejecta.

65
Impact CratersTeacher Page
Exploring the Moon -- A Teacher's Guide with Activities, NASA EG-1997-10-116-HQ
Extensions1. As a grand finale for your students, demonstrate a more forceful impact using a
slingshot.
2. What would happen if you change the angle of impact? How could this be tested?Try it! Do the results support your hypothesis?
If the angle of impact is changed, then the rays will be concentrated and longer inthe direction of impact. A more horizontal impact angle produces a more skewedcrater shape.
3. To focus attention on the rays produced during an impact, place a paper bulls-eyetarget with a central hole on top of a large, flour-filled pan. Students drop a marblethrough the hole to measure ray lengths and orientations.
4. Use plaster of Paris or wet sand instead of dry materials.
5. Videotape the activity.
6. Some people think the extinction of the dinosaurs was caused by massive globalclimate changes because of a meteorite impact on Earth. Summarize the excitingwork that has been done at Chicxulub on the Yucatan coast of Mexico.
7. Some people think Earth was hit by an object the size of Mars that caused a largepart of Earth to “splash” into space, forming the Moon. Do you agree or disagree?Explain your answer.
8. Physics students could calculate the velocities of the impactors from various heights.(Answers from heights of 30 cm, 60 cm, 90 cm, and 2 m should, of course, agree withthe velocity values shown on the “Impact Craters - Data Chart”.

Name:
Date:
trial 1 trial 2 trial 3 total average
impactor #
gm Impact Craters - Data Chart
craterdiameter
craterdepth
averagelength ofall rays
craterdiameter
craterdepth
averagelength ofall rays
averagelength ofall rays
craterdepth
craterdiameter
craterdiameter
craterdepth
averagelength ofall rays
66 Exploring the Moon -- A Teacher's Guide with Activities, NASA EG-1997-10-116-HQ

Impact Craters
67Exploring the Moon -- A Teacher's Guide with Activities, NASA EG-1997-10-116-HQ
ProcedureKey Wordsimpact
impactor
ejecta
Materials
Purpose
Making an hypothesis
1. After looking at photographs of the Moon, how do you think the craters were formed?
2. What do you think are factors that affect the appearance and size of craters and ejecta?
Preparing a “lunar” test sur-face1. Fill a pan with surface material to a depth of about 2.5 cm. Smooth the surface, then tap the pan to make the materials settle evenly.
2. Sprinkle a fine layer of dry tempera paint evenly and completely over the surface. Use a sieve or sifter for more uniform layering.
To determine the factors affecting the appearance ofimpact craters and ejecta.
1 pan
“lunar” surface material
tempera paint, dry
sieve or sifter
balance
3 impactors (marbles orother spheres)
meter stick
ruler, plastic with middledepression
protractor
“Data Chart” for eachimpactor
graph paper

Impact Craters
68 Exploring the Moon -- A Teacher's Guide with Activities, NASA EG-1997-10-116-HQ
3. What does this “lunar” surface look like before testing?
Cratering Process1. Use the balance to measure the mass of each impactor. Record
the mass on the “Data Chart” for this impactor.
2. Drop impactor #1 from a height of 30 cm onto the prepared sur-face.
3. Measure the diameter and depth of the resulting crater.
4. Note the presence of ejecta (rays). Count the rays, measure, anddetermine the average length of all the rays.
5. Record measurements and any other observations you have aboutthe appearance of the crater on the Data Chart.
Make three trials and compute the average values.
6. Repeat steps 2 through 5 for impactor #1, increasing the dropheights to 60 cm, 90 cm, and 2 meters. Complete the Data Chartfor this impactor. Note that the higher the drop height, the fasterthe impactor hits the surface.
7. Now repeat steps 1 through 6 for two more impactors. Use aseparate Data Chart for each impactor.
8. Graph your results. Graph #1: Average crater diameter vs. impactor height or veloc-
ity. Graph #2: Average ejecta (ray) length vs. impactor height or
velocity. Note: on the graphs, use different symbols (e.g., dot, triangle,
plus, etc.) for different impactors.

Impact Craters
69Exploring the Moon -- A Teacher's Guide with Activities, NASA EG-1997-10-116-HQ
Results1. Is your hypothesis about what affects the appearance and size of craters supported by test data? Explain why or why not.
2. What do the data reveal about the relationship between crater size and velocity of impactor?
3. What do the data reveal about the relationship between ejecta (ray) length and velocity of impactor?
4. If the impactor were dropped from 6 meters, would the crater be larger or smaller? How much larger or smaller? (Note: the velocity of the impactor would be 1,084 cm/s.) Explain your answer.
5. Based on the experimental data, describe the appearance of an impact crater.

Impact Craters
70 Exploring the Moon -- A Teacher's Guide with Activities, NASA EG-1997-10-116-HQ
6. The size of a crater made during an impact depends not only onthe mass and velocity of the impactor, but also on the amountof kinetic energy possessed by the impacting object. Kineticenergy, energy in motion, is described as:
KE = 1/2(mv2)
where, m = mass and v = velocity.During impact, the kinetic energy of an asteroid is transferredto the target surface, breaking up rock and moving the particlesaround.
7. How does the kinetic energy of an impacting object relate tocrater diameter?
8. Looking at the results in your Data Tables, which is the mostimporant factor controlling the kinetic energy of a projectile, itsdiameter, its mass, or its velocity?
9. Does this make sense? How do your results compare to thekinetic energy equation?
10. Try plotting crater diameter vs. kinetic energy as Graph #3.The product of mass (in gm) and velocity (in cm/s) squared is anew unit called “erg.”

Clay Lava FlowsTeacher Page
71Exploring the Moon -- A Teacher's Guide with Activities, NASA EG-1997-10-116-HQ
To understand some of the geological processes andthe structures that form as lava flows across planetarylandscapes by using mud as an analog for lava.
Purpose
Background [also see “Teacher's Guide” Pages 3, 4, 12, 13]
In this activity students will use mud to simulate surface lava flows. The experimentdemonstrates many of the key features of a’a flows, though not of whole pahoehoeflow fields, which are fed by lava tubes.
Real a’a lava flows are complicated. They are characterized by a prominent lava chan-nel confined between levees. Shear zones, places where one portion of the flow ismoving faster than an adjacent portion, usually occur. Small flows of pahoehoe lavaalso become channelized, but on a much smaller scale than a’a flows.
As mud is poured onto an inclined surface, the first and foremost thing to do is to ob-serve the formation of distinct features in the flow. Levees form on the outer part of theflow. These are not quite the same as levees on lava flows because the latter build uplevees by overflowing the banks, but nevertheless, mud flows do form levees. Insidethe levees the mud moves downhill. Ridges might develop in the flowing portions,analogous to large ridges in lava flows. The thickness of the flow varies with slope,time, position in the flow, and amount of mud poured. These variables can be tested bymeasuring width and thickness as functions of time, as described in the procedure.
PreparationReview and prepare materials listed on the student sheet.Mix clay and water in a bucket: 5 pounds of wet clay with 4 cups of water. To mix easily,break clay into half-inch pieces and allow to dry. The mixing process should be startedat least 2 days before you intend to use the clay. Cover the bucket to keep the claymixture from hardening.
The final clay-water mixture should be fairly uniform, with only a few lumps. Smooth themixture with a wire whisk to the consistency of thick cream. If the mixture is toorunny, then it will pour like water. If it is too thick, then it will mound up (though thatis interesting and somewhat resembles some very viscous lava flows).
Plexiglas is an excellent surface to use for the experiment, though any nonporous sur-face will do fine, such as a wooden drawing board covered with plastic wrap. If thesurface is too porous, then the mud loses moisture to it, changing flow characteristics.

Clay Lava FlowsTeacher Page
72 Exploring the Moon -- A Teacher's Guide with Activities, NASA EG-1997-10-116-HQ
Draw a grid with 10 cm spacing onto the Plexiglas using a permanent marker pen. Ordraw a grid onto paper taped to the wooden board, then cover with plastic wrap.
In ClassUsing a protractor and plumb line, the Plexiglas is propped up to an angle of 15o forthe procedure, then to an angle of 25o for a repeat of the procedure.
Students should pour the clay slowly and at a constant rate down the inclined Plexiglas.The bucket should be held about 10 cm from the high end of the Plexiglas.
At each 10 cm mark, the students will:
1. record the time the flow front passes the mark,
2. measure the length of the flow,
3. measure the width of the flow,
4. measure the center depth of the flow.
“Data Tables” are provided for recording these values. Space is provided for sketchesof the flow outline.
When the clay is flowing down the Plexiglas, look for areas near the edges where the flowrate is low or zero; these are the levees of the channel. The part in the middle that ismoving faster is called the channel interior.
Wrap-upHow do the two flows compare?Is the ratio of channel width to flow width the same?Presumably the clay volumes were the same for both slopes, but the flow areas could bedetermined and multiplied by the average depths as an exercise just to check.
Extensions1. Use a ruler with a grid to slice into the flow at each 10 cm mark to get cross sections.2. Can you see the levee margins in the cross sections?3. How do the cross sections change down the length of the flow?4. Videotape the activity.5. Use this clay in the “Impact Craters” activity on Page 61.
Clay Lava Flows
73Exploring the Moon -- A Teacher's Guide with Activities, NASA EG-1997-10-116-HQ
Procedure1. Stir your mixture of clay and water in the bucket. A few lumps are acceptable.
2. Prop up one end of the Plexiglas at an angle ofabout 15° (use the protractor and plumb lineto determine the angle). A board under the Plexiglashelps prevent sagging.
3. Hold the bucket of clay mixture about 10 cmdownslope from the high end of the Plexiglas.Keep the bucket about 10 cm above the Plexiglassurface. Pour the clay slowly. It is important tokeep the pour rate as constant as possible. Startthe stopwatch when the flow front passes thezero line.
4. Watch the flow as it goes downhill and spreadsout, and record the time it reaches each 10 cmmark. How far behind the flow front does thedistinct channel become apparent?
5. Record the time when you stopped pouring (theflow will continue to move). Fill in the “DataTables .”
6. Note the channel and levees as well as shear zoneswithin the levees. Does the channel extend theentire length of the flow?
Key Wordslava flows
channels and levees
pressure ridges
Materialsclay mixture
bucket, preferably withpouring spout
wire whisk
large spatula
Plexiglas or other nonpo-rous surface (~1/2 by 1meter, and preferably witha grid)
protractor with plumb line
stopwatch
“DataTables”
tape measure or ruler
PurposeTo understand some of the geological processes andthe structures that form as lava flows across planetarylandscapes by using mud as an analog for lava.

Clay Lava FlowsClay Lava Flows
74 Exploring the Moon -- A Teacher's Guide with Activities, NASA EG-1997-10-116-HQ
7. Using the tape measure, measure the length, width, andcenter depth of the flow and the channel width at each 10 cmmark. Fill in the “Data Tables.”
8. Draw the outline of the flow using the grid as a guide.
9. Now prop the Plexiglas up higher to an angle of about 25° andrepeat the procedure. The clay may flow off the end of the ramponto the flat underlying surface. How do the structures in thisflat part compare to those on the slope?
10. Repeat all the measurements and fill in the “Data Tables.”
11. How do the two experimental flows compare? Is the ratio of channel width to flow width the same?

Clay Lava Flows
75Exploring the Moon -- A Teacher's Guide with Activities, NASA EG-1997-10-116-HQ
Angle Time 10 20 30 40 50 60 70 80 90 Time at 0 stopped
pouring
15o
25o
Angle Width 10 20 30 40 50 60 70 80 90 Total at 0 length
15o
25o
Angle Center- 10 20 30 40 50 60 70 80 90 line depth at 0
25o
15o
Angle Channel 10 20 30 40 50 60 70 80 90 width
at 0
15o
25o
Data Tables

Clay Lava FlowsClay Lava Flows
76 Exploring the Moon -- A Teacher's Guide with Activities, NASA EG-1997-10-116-HQ
Sketch offlow at 15°
Sketch offlow at 25°

Lava Layering
77
Teacher Page
Exploring the Moon -- A Teacher's Guide with Activities, NASA EG-1997-10-116-HQ
PurposeTo learn about the stratigraphy of lava flows producedby multiple eruptions.
Background [also see “Teacher's Guide” Pages 3, 4, 12, 13]
Dark, flat maria (layers of basaltic lava flows) cover about 16 percent of the Moon’stotal surface. They are easily seen on a full Moon with the naked eye on clear nights frommost backyards. The maria, quite similar to Earth’s basalts, generally flowed long dis-tances utlimately flooding low-lying areas such as impact basins. Yet, the eruptionsources for most of the lunar lava flows are difficult to identify. The difficulty infinding source areas results from burial by younger flows and/or erosion from meteor-itic bombardment.
Generally, the overall slope of the surface, local topographic relief (small cliffs anddepressions), and eruption direction influence the path of lava flows. Detailed maps ofthe geology of the Moon from photographs reveal areas of complicated lava layering.The study of rock layering is called stratigraphy.
On the Moon, older flows become covered by younger flows and/or become morepocked with impact craters.
On Earth, older lava flows tend to be more weathered (broken) and may have morevegetation than younger flows. Field geologists use differences in roughness, color, andchemistry to further differentiate between lava flows. They also follow the flow mar-gins, channels, and levees to try to trace lava flows back to the source area.
The focus of this activity is on the patterns of lava flows produced by multiple erup-tions. We use a short cup to hold the baking soda because we are looking at the flowsand not at constructing a volcano model. Volcanoes, like those so familiar to us onEarth and Mars, are not present on the Moon. Three well-known areas on the Mooninterpreted as important volcanic complexes are: Aristarchus plateau, and the MariusHills and Rumker Hills (both located in Oceanus Procellarum). These areas are charac-terized by sinuous rilles (interpreted as former lava channels and/or collapsed lava tubes)and numerous domes.

Lava Layering
78
Teacher Page
Exploring the Moon -- A Teacher's Guide with Activities, NASA EG-1997-10-116-HQ
PreparationBaking soda-vinegar solutions and playdough are used to model the basaltic lavas.Different colors identify different eruption events; this activity calls for 4 colors.Students will be asked to observe where the flows traveled and to interpret the stratigra-phy. Cover the work area and be prepared for spills.
Play Dough (stove-top recipe)-best texture and lasts for months when refrigerated in an air tight container.2 cups flour 1/3 cup oil, scant1 cup salt 2 cups cold water4 teaspoons cream of tarter food colorings (20 drops more or less)
Make this large batch one color or divide ingredients in half to make 2 colors. You will need 4 colorstotal. Combine ingredients and cook mixture in a large sauce pan, stirring constantly, until the doughforms a ball. Turn dough out onto a floured surface to cool. Then kneed until smooth and elastic. Coolcompletely; refrigerate in air tight containers.
Play Dough (no-cooking recipe)2 cups flour 2 Tablespoons oil1 cup salt 1 cup cold water6 teaspoons alum or cream of tartar food colorings (as above)
Make this large batch one color or divide ingredients in half to make 2 colors. You will need 4 colorstotal. Mix ingredients and kneed until smooth and elastic. Store in air tight containers.
In ClassThis activity can be done individually or in cooperative teams.Making a vertical cut through the flows reveals, quite dramatically, the stratigraphy of thesection.
Wrap-upHave students compare their layered lava patterns with their classmates' patterns. Didthey recognize individual flows by color and outline? Point out how the oldest flow ison the bottom of the stack and the youngest flow is on top.
ExtensionsGroups can trade landscapes before answering the questions. Clear, plastic drinkingstraws can be pushed down into the landscapes to extract “drill” samples of the layers.

Lava Layering
79Exploring the Moon -- A Teacher's Guide with Activities, NASA EG-1997-10-116-HQ
Procedure1. Take one paper cup that has been cut to a height
of 2.5 cm and secure it onto the tray. (You mayuse a small loop of tape on the outside bottom ofthe cup.) This short cup is your eruption sourceand the tray is the original land surface.
2. Place one Tablespoon of baking soda in this cup.
3. Fill 4 tall paper cups each with 1/8 cup of vinegar.
4. To each paper cup of vinegar add 3 drops of food coloring; make each cup a different color. Set them aside.
5. Set aside small balls of playdough, one of each color.
6. You are now ready to create an eruption.Pour red-colored vinegar into your source cup andwatch the eruption of “lava.”
7. As best you can, use red playdough to cover theareas where red “lava” flowed.
8. Repeat steps 6 and 7 for each color of vinegar and playdough. You may add fresh baking soda to the source cup or spoon out excess vinegar from the source cup as needed.
Key Wordseruption
source
stratigraphy
Materialspaper cups, 4 oz. size,some cut down to aheight of 2.5 cm
cafeteria tray or cookiesheet, 1 for each eruptionsource
tape
tablespoon
baking soda
measuring cup
vinegar
food coloring, 4 colors;for example, red, yellow,blue, green
playdough or clay in thesame 4 colors as thefood coloring
plastic knife, string, ordental floss: to slicethrough the layers ofplaydough
PurposeTo learn about the stratigraphy of lava flows producedby multiple eruptions.

Lava Layering
80 Exploring the Moon -- A Teacher's Guide with Activities, NASA EG-1997-10-116-HQ
Results1. After your four eruptions, can you still see the original land surface (tray)? Where?
2. Describe what you see and include observations of flows cover-ing or overlapping other flows. Use the left page margin tomake a sketch.
3. Where is the oldest flow?
4. Where is the youngest flow?
5. Did the flows always follow the same path? (be specific)
6. What do you think influences the path direction of lava flows?
7. If you had not watched the eruptions, how would you know that there are many different layers of lava? Give at least 2 reasons:

Lava Layering
81Exploring the Moon -- A Teacher's Guide with Activities, NASA EG-1997-10-116-HQ
Verticalsectionthroughthe flows
8. Which of the reasons listed in answer 7 could be used to identify real lava layers on Earth?
9. What are other ways to distinguish between older and younger layered lava flows on Earth?
10. Which of the reasons listed in answer 9 could be used to identify lava layers on the Moon?
11. What are other ways to distinguish between older and younger layered lava flows on the Moon?
12. Make a vertical cut through an area of overlapping playdough “lava” layers. Draw what you see in the vertical section. Color your sketch and add these labels: oldest flow, youngest flow.

Lava Layering
82 Exploring the Moon -- A Teacher's Guide with Activities, NASA EG-1997-10-116-HQ

Lunar Landing SitesTeacher Page
83Exploring the Moon -- A Teacher's Guide with Activities, NASA EG-1997-10-116-HQ
Purpose
To design a spacecraft for travel to and from the Moonand choose an interesting lunar landing site.
Background [also see “Teacher's Guide” Pages 2-5]
The previous Unit 2 activities introduce the Moon's rocks, surface features, and thegeologic processes that formed them. With this background, students are given thechallenge to plan a mission to the Moon. In this activity, teams of students design aspacecraft, choose a suitable lunar landing site, and present their ideas before the entireclass. Final presentations should include speeches and visual aides such as maps, dia-grams, and 3-dimensional models.
PreparationReview and prepare materials listed on the student sheet. Schedule library time asneeded.
In ClassLead a discussion on what the students need to know about the Moon in general andabout potential landing sites before landing. A review of the Apollo sites may helpinitiate a discussion.
After presenting the scenario and tasks to the class, form cooperative teams of 3-4students. Each student will have assigned duties, as described on the reproducible“Team Duty Sheet.”
For the presentations, either 3-D models or poster-size diagrams can be made,depending on resources and time. Any one or all team members may participate inthe presentations.
Scenario: NASA has given you the assignment to develop a spacecraft that canfly people safely to the Moon, land, and return to Earth. You must select asafe yet interesting lunar landing site for the spacecraft.
Size, mass, propulsion, number of crew, life support systems, and meth-ods of takeoff and landing should be considered for the spacecraft.Geology, terrain, safety, and length of stay should be considered for thelunar landing site.

Lunar Landing SitesTeacher Page
84 Exploring the Moon -- A Teacher's Guide with Activities, NASA EG-1997-10-116-HQ
Wrap-up1. How do the sites chosen by the class compare in location and geologic diversity with the Apollo sites?
2. What made some spacecraft designs and landing sites, in this activity, more risky than others?
3. Are these lunar landing sites good for short-term visits only, or could the sites be appropriate for lunar base development? See the “Lunar Land Use” activity on Page 101.
ExtensionsSpacecraft design could be conducted as a spin-off of the "egg drop" contest. Eachspacecraft is constructed to hold and protect one raw egg. The egg must remainunbroken after landing from a high drop (perhaps a second-story balcony).
Some students may enjoy learning more details of Apollo site selections.A detailed discussion of how the sites were chosen is given in To A Rocky Moon byDon E. Wilhelms, Univ. of Arizona Press, 1993.
Use these lunar landing sites in the “Lunar Roving Vehicle” activity on Page 87,stipulating that the vehicle must be able to work on the terrains.
Use these lunar sites in the “Lunar Land Use” activity on Page 101.
Lunar Landing Sites
85Exploring the Moon -- A Teacher's Guide with Activities, NASA EG-1997-10-116-HQ
PurposeTo design a spacecraft for travel to and from theMoon and chose an interesting lunar landing site.
ScenarioMaterialsMoon maps
Apollo landing sites map
“Moon ABCs Fact Sheet”
Moon slides
background literature,such as the “Teacher’sGuide”
“Team Duty Sheet”
art and constructionsupplies
NASA has given you the assignment to develop aspacecraft that can fly people safely to the Moon,land, and return to Earth. You must also select a safeyet interesting lunar landing site for the spacecraft.
Size, weight, propulsion, number of crew, life sup-port systems, and methods of takeoff and landingshould be considered for the spacecraft. Geology,terrain, safety, and length of stay should be consid-ered for the lunar landing site.
Procedure1. Read the “Team Duty Sheet” given to your team.
2. Design a spacecraft with all necessary sytems thatcan go to the Moon, land, and return to Earth.Build a model or draw a detailed diagram of thedesign.
3. Study maps of the lunar sufrace and use yourknowledge of the Moon to determine a safeyet interesting lunar landing site.
4. Make a presentation to the class:(a) about your spacecraft and its special features using diagrams and/or a model,(b) describing, locating, and justifing the landing site.

Date:
Names:
T E A M D U T Y S H E E T
Your team must design a spacecraft and determine a safe yet interestingplace to land on the Moon.
Everyone on your team should be assigned one or more of the following duties:
Lunar Landing Sites
Chief Engineer : oversees the entire project, helps to design spacecraft, makescritical decisions for the team.
Scientist : designs spacecraft, oversees the construction of the model ordiagrams of the spacecraft.
Lunar Geologist : studies maps of the Moon and oversees the selection of asafe yet interesting place to land the spacecraft.
Public Relations helps scientist and geologist, oversees the presentation of the Manager : spacecraft and landing site before the class.
86 Exploring the Moon -- A Teacher's Guide with Activities, NASA EG-1997-10-116-HQ

Teacher Page
87
Lunar Roving Vehicle
Exploring the Moon -- A Teacher's Guide with Activities, NASA EG-1997-10-116-HQ
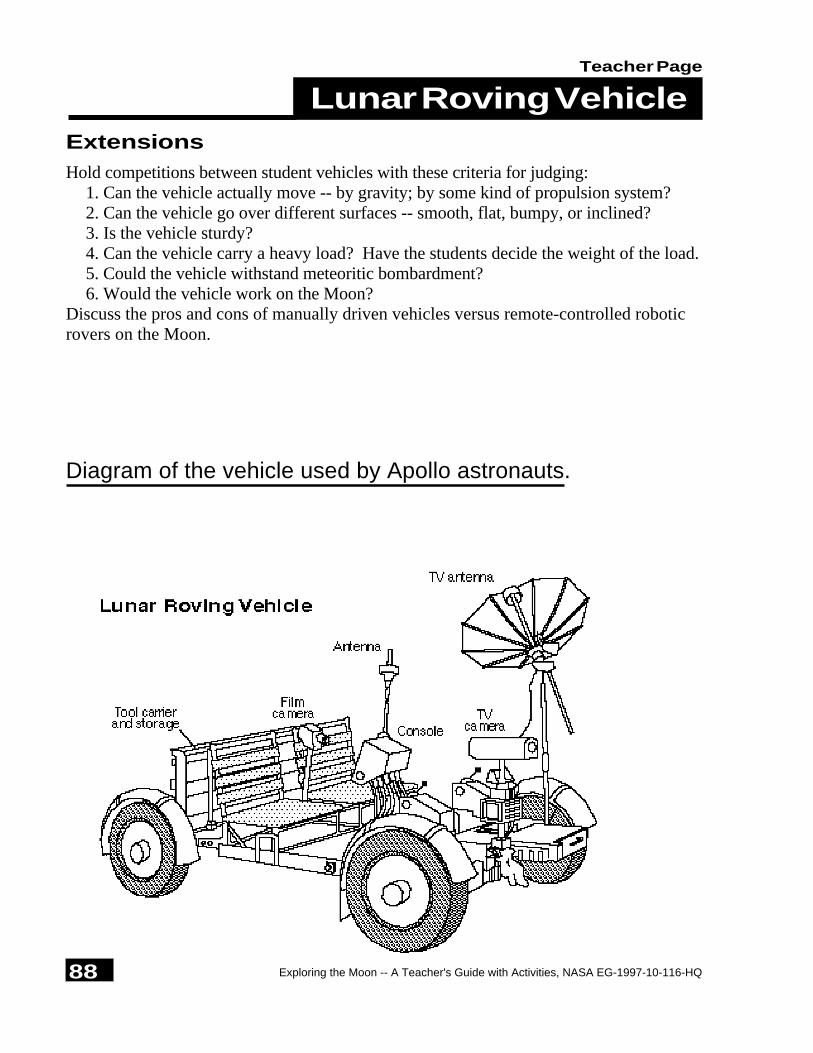
PurposeTo construct a model of a lunar roving vehicle.
BackgroundThe Apollo lunar roving vehicle was a battery-powered space buggy. The astro-nauts on Apollo 15, 16, and 17 used it to explore their landing sites and to travel greaterdistances than astronauts on earlier missions. The lunar rover neatly folded up inside thelunar lander during trips to the Moon. Once on the Moon's surface, it unfolded with thehelp of springs. The lunar rover carried two astronauts and was manually driven. It wasdesigned to climb steep slopes, to go over rocks, and to move easily over the Moon'sregolith. It was able to carry more than twice its own weight in passengers, scientificinstruments, rocks, and regolith samples. The wheels on the rover were made of wiremesh (piano wire) with titanium cleats for treads. Engineers did not use solid or air-filledrubber tires because they would have been much heavier than were the wire mesh wheels.The Apollo spacecraft had a fixed amount of mass (payload) it could deliver to thesurface, including the rover, rover batteries, scientific instruments, sample collection de-vices, etc. Hence, the wire-mesh wheels were important to the overall payload mass. Thisrover was not designed for prolonged use, and it is uncertain if future lunar explorerswould use similar designs and materials for their vehicles, use new, more durable compo-nents, or turn to robotic rovers.
If students are interested in constructing models that actually move, then refer to Page 38for more information on rocket and model building.
PreparationReview and prepare materials listed on the student sheet. While commercial building setsare very popular, models can be built with more simple and recyclable materials such ascardboard boxes, tubes, cans, straws, construction paper, string, tape, pins, styrofoamtrays, thread spools, balloons, rubber bands, and mouse traps (for propulsion).
In Class / Wrap UpAfter construction, students should name their vehicles and write a description of thecapabilities and special features.
Teacher Page
88
Lunar Roving Vehicle
Exploring the Moon -- A Teacher's Guide with Activities, NASA EG-1997-10-116-HQ
Diagram of the vehicle used by Apollo astronauts.
ExtensionsHold competitions between student vehicles with these criteria for judging:
1. Can the vehicle actually move -- by gravity; by some kind of propulsion system?2. Can the vehicle go over different surfaces -- smooth, flat, bumpy, or inclined?3. Is the vehicle sturdy?4. Can the vehicle carry a heavy load? Have the students decide the weight of the load.5. Could the vehicle withstand meteoritic bombardment?6. Would the vehicle work on the Moon?
Discuss the pros and cons of manually driven vehicles versus remote-controlled roboticrovers on the Moon.

89
Lunar Roving Vehicle
Exploring the Moon -- A Teacher's Guide with Activities, NASA EG-1997-10-116-HQ
Procedure1. Describe the similarities and differences between
the Apollo lunar roving vehicle and a typicalfamily vehicle.
2. What was special about the rover's wheels? Why weren't they made of rubber and filled with air?
3. Review the “Moon ABCs Fact Sheet.” Designa new lunar roving vehicle. Important designissues include size, weight, power supply, numberof passengers, controls, scientific instruments,tools, and storage compartments. Use the spaceprovided on the next page to draw a picture ofyour design. Label the parts.
4. Construct a model of the lunar rover based onyour design.
5. Give a name to the vehicle.
6. Write a descriptive essay about the special featuresand capabilitites of the vehicle and how yousolved the design issues raised in Question 3.
Key Wordsantenna
console
tool carrier and storage
robot
Materialsdiagram of Apollo lunarroving vehicle
“Moon ABCs Fact Sheet”
construction materialssuch as cardboardboxes, tubes, cans,straws, constructionpaper, string, tape, pins,styrofoam trays, threadspools, balloons, rubberbands, mouse traps, etc.
tape measures
stop watches
PurposeTo construct a model of a lunar roving vehicle.

90
Lunar Roving Vehicle
Exploring the Moon -- A Teacher's Guide with Activities, NASA EG-1997-10-116-HQ
Sketch ofmy model

Moon AnomaliesTeacher Page
91Exploring the Moon -- A Teacher's Guide with Activities, NASA EG-1997-10-116-HQ
PurposeTo investigate and try to explain various lunaranomalies.
Background [also see “Teacher’s Guide” Pages 4, 10]
In this activity teams of students present hypotheses that attempt to resolve four anoma-lies of the Moon. They will be expected to prepare written and oral presentations forthe entire class. Using a forum format, students will debate the merits of eachhypothesis, with no right or wrong answers.
The four anomalies are:“Quakes or No Quakes, that is the Question”“Where Have All the Volcanoes Gone?”“Maria, Maria, Where For Art Thou?”“Magnetic Field Forever?”
Some of these anomalies are more complicated than others. The class need not discussall the anomalies; the most straightforward are Quakes and Missing Volcanoes.
PreparationReview and prepare materials listed on the student sheets.Schedule library time, if needed.
Some possible solutions to the anomalies
Quakes or No Quakes, that is the Question
The number and strength (magnitude) of moonquakes is much less than the numberand magnitude of earthquakes. The probable cause of this difference is the Moon'ssmaller size and cooler interior. Earth is hot and active, manifested most dramatically inplate tectonics. Tectonic plate motions in Earth are driven by convection in themantle—the solid mantle actually moves at rates of a few centimeters a year. TheMoon’s mantle, too cool to move easily, has no convection and no active tectonic platemotions. Fewer movements inside the Moon mean fewer quakes. The few moon-quakes that do occur are driven primarily by gravitational tugs by Earth and Sun (tidesin the solid Moon).

Moon AnomaliesTeacher Page
92 Exploring the Moon -- A Teacher's Guide with Activities, NASA EG-1997-10-116-HQ
Where Have All the Volcanoes Gone?
The Moon has lots of lava flows, but no (or at least few) volcanoes. The clue tosolving this dilemma lies in understanding why volcanoes form on Earth, Mars, andVenus. In fact, those bodies also have large expanses of lava flows that are not associ-ated with volcanoes. For example, vast deposits of lavas occur in Oregon, Washington,and Idaho. These are called the Columbia River Basalts. They erupted from longcracks called fissures and flowed across the surface. The path the magma took wasfar different from that in other places. The magma never concentrated to narrow con-duits that were fed periodically over a long time to form a high mountain over the site.
The transport of magma for the Columbia River basalts was controlled by the stressenvironment of the region. Long fissures developed which provided the magma withpathways to the surface. On the Moon, plenty of fractures occur around the rings of themulti-ringed basins. These fractures undoubtedly extend far into the Moon, and mayhave provided easy access to the surface for magma, and at the same time did not allowthe magma paths to concentrate in one small area. Result: no large volcanoes formed.The idea that some did form but were destroyed by impacts is always a possibility on theMoon, but lots of volcano-sized mountains on basin rings survived, so one would expectvolcanoes to do so, too.
Maria, Maria, Where For Art Thou?
Almost all of the lunar maria decorate the Earth-facing side of the Moon. Only a fewadd contrast to the farside. See the first two photographs in the “Teacher’s Guide” onPage 1. The most likely cause of this asymmetry is the variation in thickness of theMoon’s crust. The crust is lower in density than the mare-basalt magmas that mustpass through it to erupt onto the surface. This, in turn, requires that the magmas have asufficient driving pressure to migrate through the crust. Scientists think that magmas onthe Moon tend to stall and collect at the base of the crust. They stay there until thepressure is enough to begin to form fissures for the magmas to travel through. On thenearside, the crust is about 70 kilometers thick. Many of the mare-basalt magmas wereable to reach the surface once the pressure was large enough to form cracks. However,on the farside, the crust is twice as thick, so very few magmas could reach the surface.Most stalled on their way through it.
Magnetic Field Forever?
The lunar magnetic field is one of the least understood properties about the Moon. Itis about 10,000 times weaker than Earth’s magnetic field. The Moon had a weak field inthe past, but none is being generated at the present time.

Moon AnomaliesTeacher Page
93Exploring the Moon -- A Teacher's Guide with Activities, NASA EG-1997-10-116-HQ
The most likely reason for the decline in field strength is that the Moon’s tiny metalliccore (no larger than 400 kilometers in radius) did generate a field the way Earth’s coredoes, but the field-generating engine kept losing power. Earth’s field is generated byconvective motions inside the liquid portion of the core: hotter iron rises, cooler ironsinks, and the differential motions create a magnetic field. On the Moon, the wholebody cooled much faster than Earth (because the Moon is smaller), so the core alsocooled, and probably solidified. Motions fast enough to generate a magnetic field donot occur today inside the Moon's core.
In ClassDivide the class into cooperative teams of 4-5 students. Encourage each team to generatea team name and logo. Give each team a “Task Sheet” describing their duties. Eachteam then develops a hypothesis that reconciles the dilemma given them. They mustwork together to produce a written report describing their anomaly, hypothesis, andsupporting evidence. You may want to copy and distribute all the final reports so eachteam has a complete set.
When the teams make their oral presentations to the class they must use visual aid mate-rials, such as maps, posters, charts, slides, laserdiscs, etc. After each presentation, otherteams may challenge the presenters with questions or arguments.
Wrap-upAfter all teams have presented, lead a discussion to summarize what has been learned.
ExtensionYou may wish to discuss another mysterious aspect of the Moon’s magnetic field: thepresence of several small areas (30-60 kilometers across) that have exceptionally largesurface magnetism, about 10 times the normal Moon magnetic field. These are associatedwith bright swirly deposits. Possible origins include impact of a comet that is highlymagnetized or magnetization of a comet during impact. In either case, the magnetism istransferred to the ejecta deposits at the site of impact. Another suggestion is that thefield results from giant, basin-forming impacts. It turns out that most, but not all, mag-netic swirl deposits are on the exact opposite side of the Moon from a large basin (i.e.,antipodal to the site of impact). The idea is that seismic waves generated by the largeimpact interact vigorously when they meet half way around the Moon. Somehow theseinteractions reinforce existing magnetic fields to create the anomaly. The whitish swirls,by the way, may form because the solar wind (mostly hydrogen nuclei) is deflected bythe strong magnetic field. Thus, no hydrogen gets implanted into the regolith, andsubsequent micrometeorite bombardment does not cause formation of dark aggluti-nates. Instead of being dark glass, the agglutinates are colorless or nearly so.

Date:
Names:
94 Exploring the Moon -- A Teacher's Guide with Activities, NASA EG-1997-10-116-HQ
Task Sheet
Everyone on your team should be assigned one or more of the following tasks:
Moon Anomalies
Chief Stratigist : oversees the entire project, works closely with all members,makes critical decisions.
Material Person : collects, cares for, and returns all materials needed forthe activity.
Media oversees development of all the visual aid materials thatConsultant : your team will use during the presentation, such as maps,
posters, models, etc. Also coordinates the use of slides,photographs, laserdisc, computer, etc.
Administrator : keeps notes, assists media consultant, and prepares finalwritten report.
The oral presentation may be made by any one or all team members.

Quakes or No Quakes,that is the Question
95Exploring the Moon -- A Teacher's Guide with Activities, NASA EG-1997-10-116-HQ
Key Wordsearthquake
moonquake
Materials
Purpose
Background
To investigate and try to explain why the Moon hasfewer moonquakes than Earth has earthquakes.
maps of the Moon
background information onthe Moon
“Moon ABCs Fact Sheet”
“Task Sheet”
art supplies
The Moon is safer than San Francisco—at least fromearthquake damage. Each year Earth has more than10,000 earthquakes of magnitude 4 or greater. Incontrast, the Moon has less than 500, and most ofthese are smaller than magnitude 2.5. The largestmoonquake recorded during the eight years that theApollo seismic instrument operated on the Moon wasslightly less than magnitude 5. On Earth, the largestquakes reach magnitude 8, or even 9. Finally, the totalamount of energy released by moonquakes is the sameas released by three 100-watt light bulbs. Earthquakesrelease the equivalent of 300,000,000 100-watt lightbulbs.
DilemmaWhy does the Moon have fewer quakes than Earth?Is it because people live on Earth? Because theMoon is smaller? Because Earth has moving tectonicplates? Because the Moon has craters?
TaskDevelop an hypothesis that explains why the Moonhas fewer quakes than Earth.
Where Have All the Volcanoes Gone?
96 Exploring the Moon -- A Teacher's Guide with Activities, NASA EG-1997-10-116-HQ
PurposeTo investigate and try to explain the absence ofvolcanoes on the Moon.
Key Wordsvolcano
lava flows
maria
Materials
maps of the Moon
background informationon the Moon
“Moon ABCs Fact Sheet”
“Task Sheet”
art supplies
BackgroundThe dark areas of the Moon’s surface, called the lunarmaria, are composed of solidified lava flows. Scien-tists know this from photographs that show themargins of individual lava flows and from examina-tion of rocks returned from the maria. The lavaplains cover 16% of the lunar surface and are up toabout 2 kilometers thick. This is a substantialamount of lava. Scientists estimate that a total of 10million cubic kilometers of lava erupted during aperiod of about a billion years to fill the mare basins.This is a lot of lava! -- enough to fill 10 billion foot-ball stadiums! Most of the maria occur inside thehuge circular impact craters called multi-ringed ba-sins. The formation of these immense craters did notcause the formation of the lava that made the maria,but the basins did provide low areas into which theliquid lava flowed.
DilemmaTen million cubic kilometers of lava flowed acrossthe Moon’s surface, yet there are no obvious sourcevolcanoes. There are no mountains that rise dramati-cally as they do in Hawai'i or the Cascades of thePacific Northwest. If there are no volcanoes on theMoon, then what is the source of the lava? Were thevolcanoes destroyed? Did the lava erupt in someother way? What other ways could lava erupt?
TaskDevelop an hypothesis that resolves the missingvolcanoes dilemma, without rejecting the idea thatthe maria are composed of solidified lava flows.

Maria, Maria, Where For Art Thou?
97Exploring the Moon -- A Teacher's Guide with Activities, NASA EG-1997-10-116-HQ
Key Wordsmaria
crust
lava flows
Materials
Purpose
Background
To investigate and try to explain why the farside hasfewer maria than the nearside of the Moon.
maps of the Moon
background information onthe Moon
“Moon ABCs Fact Sheet”
“Task Sheet”
art supplies
About 16% of the Earth-facing side of the Moon iscovered with dark maria. But less than 1% of thefarside is covered with maria. Scientists think thatthe magmas were formed inside the Moon by melt-ing of the Moon’s mantle, and that these magmasthen moved to the surface. They probably moved inlong cracks. Good evidence suggests that the cruston the farside is about two times thicker than on thenearside.
DilemmaAssuming magma was generated throughout theMoon’s mantle, why are almost all the maria on thenearside of the Moon? Did they get covered up byother rocks on the farside? Did Earth’s gravity helpthem get out onto the nearside? Was it too hard totravel through the thick, farside crust?
TaskDevelop an hypothesis that resolves the maria-are-more-abundant-on-the-nearside dilemma.
Magnetic Field Forever?
98 Exploring the Moon -- A Teacher's Guide with Activities, NASA EG-1997-10-116-HQ
PurposeTo investigate and try to explain why the Moon has aweaker magnetic field than does Earth.
Key Wordsmagnetic field
core
Materials
background informationon the Moon
“Moon ABCs Fact Sheet”
“Task Sheet”
art supplies
Background
The Moon has a much weaker magnetic field thandoes Earth. However, the field was stronger in thepast, as shown by study of the magnetic propertiesof lunar rocks. Earth's magnetic field is formed bymotions inside its iron core. The Moon also has acore, but it is much smaller than Earth’s core. TheMoon’s core is no larger than 400 kilometers inradius, and may be as small as 100 kilometers. Incontrast, Earth’s core is 2900 kilometers in radius.
DilemmaThe Moon had a stronger magnetic field in the past(billions of years ago), but it is weak now, muchweaker than Earth’s magnetic field. Why is it somuch weaker than Earth’s? Why was it stronger inthe past?
TaskDevelop an hypothesis that explains why the Moonhas a weaker magnetic field than does Earth, andwhy the Moon’s field was stronger in the past.