Embed Size (px)
Citation preview

Laser EngraverUser Manual
1
2
Focusing adjustment before using:turning the focus cap until the laser light converged into one point very small.
When it in unworking state you can control the laser head movement by press the direction button,additon to, the middle button can be used to control its suspended or start carving.
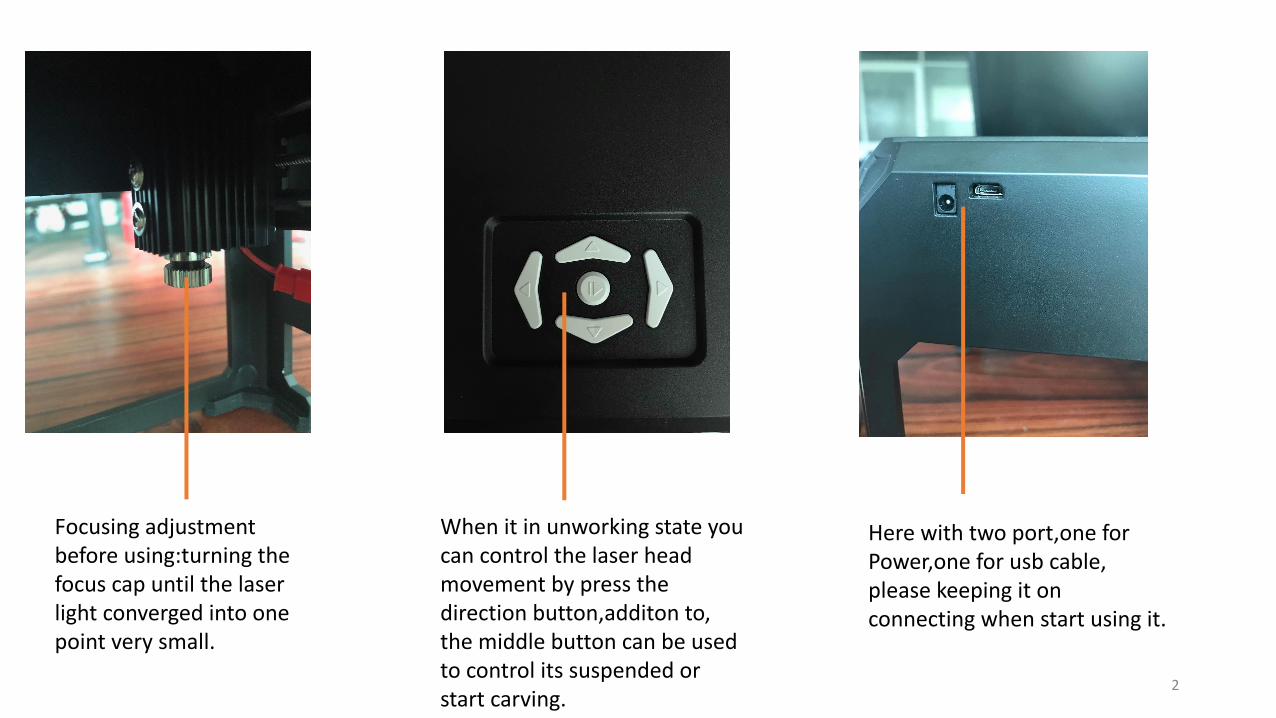
Here with two port,one for Power,one for usb cable, please keeping it on connecting when start using it.

Laser Engraver Guidence
• How to open the software 3• Software description 4-7• Simply image editing 8-25 • Engraving control 26-34• Setting 35• Precautions for Use 36
3

Green Version
Unzip the software as shown on the left, click Scarve.exe twice to open the software, you can also send Scarve.exe to the desktop.
How to open the software
4

Writting pen
Rubber
Zoom
Place the text
Cutting
Picture size
Image rotation
Left and right
Up and down
Negative film
Status
Edit image statusGray
Black and white
Discrete
Picture filter adjustment
Save
Clear
Completed and turn to the print interface
Software description
Edit image
5

Laser power adjustment
Carving depth adjustment
Fan control
Status
Connect the machineControl
Positioning
Start
Scale
Laser coordinate setting
Software descriptionControl
Time
6

Machine SettingControl setting
Software descriptionSetting
7

About
Software descriptionAbout
8
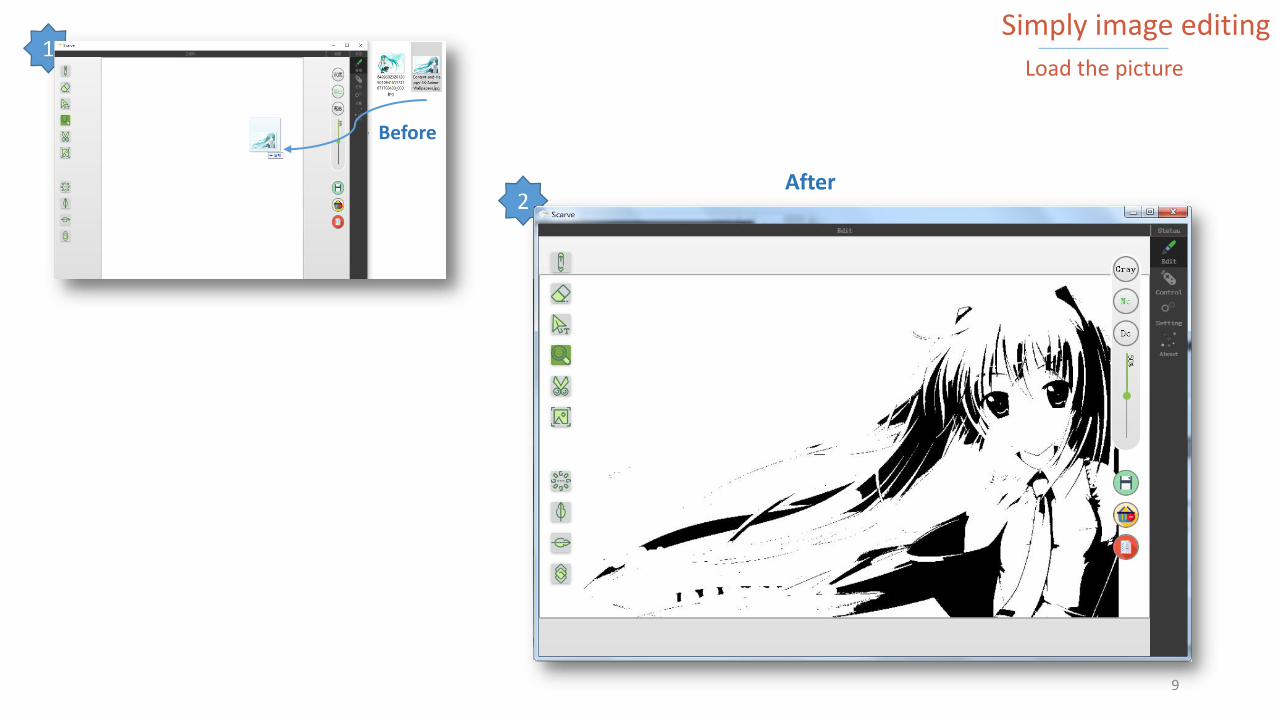
2After
1
Before
Simply image editingLoad the picture
9

Simply image editing
Black and white effect
Discrete effect
Image effectGrayscale effect
10
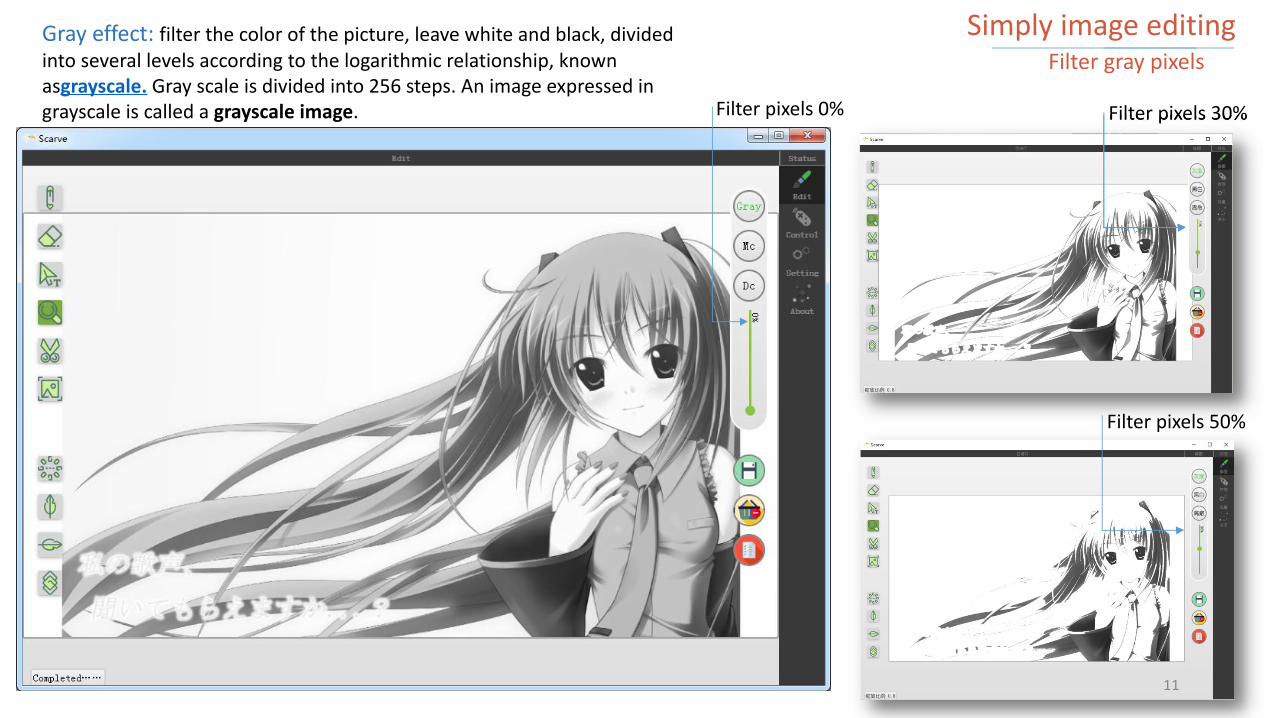
Filter gray pixels
Filter pixels 30%
Filter pixels 50%
Gray effect: filter the color of the picture, leave white and black, divided into several levels according to the logarithmic relationship, known asgrayscale. Gray scale is divided into 256 steps. An image expressed in grayscale is called a grayscale image.
Simply image editing
Filter pixels 0%
11
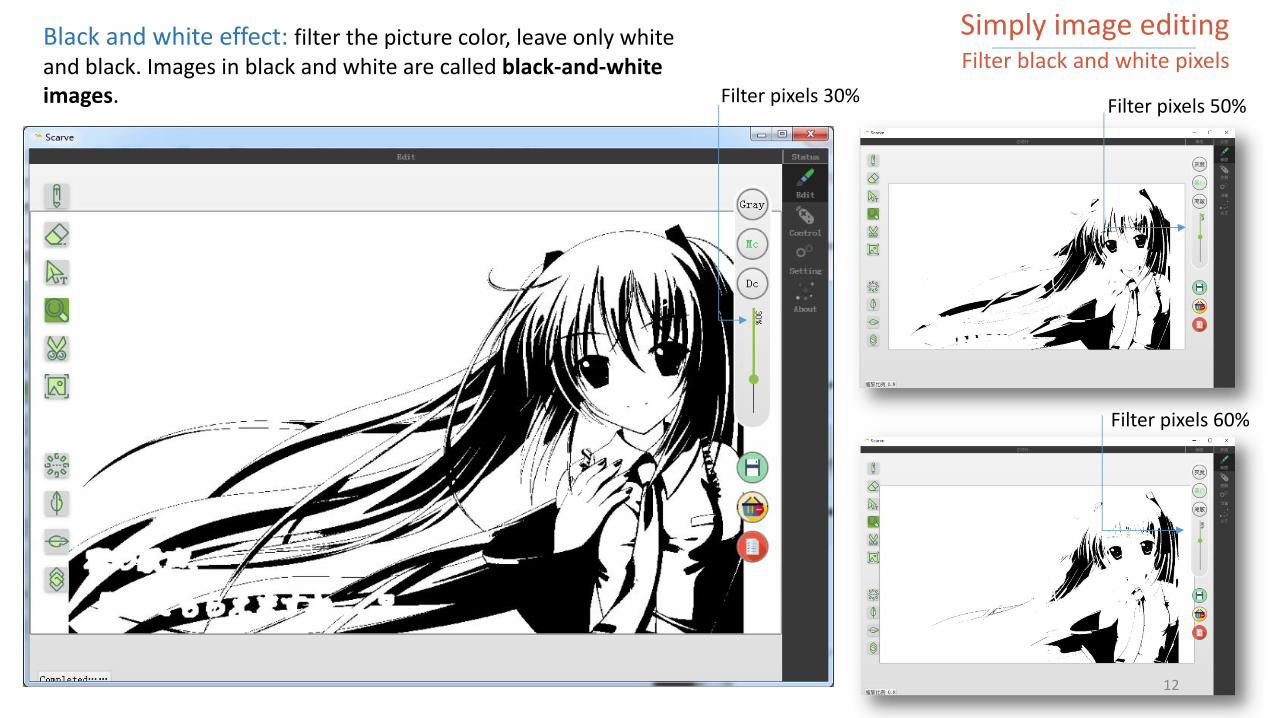
Simply image editingFilter black and white pixels
Filter pixels 30% Filter pixels 50%
Filter pixels 60%
Black and white effect: filter the picture color, leave only white and black. Images in black and white are called black-and-white images.
12

After rooming in
Filter discrete pixels
Filter pixels 66% Filter pixels 40%
Filter pixels 80%
Discrete effect: filter the picture color, leave only white and black. And calculate the distribution density of black spots in the image according to the original image color value, so the discrete image looks a lot of discrete points.
Simply image editing
13

The use of brushType of brush Brush size
The drawing by the brush
Submenu:Click the button, the submenu will be appeared when the mouse is suspended in the Brush icon
Simply image editing
14

The use of eraser
Erasing range
Eraser size
Submenu:Click the button, the submenu will be appeared when the mouse is suspended in the Eraser icon
Simply image editing
15

Place the text
Text sizeSubmenu:Click the button, the submenu will be appeared when the mouse is suspended in the Text icon
draging bar
Placed
To be placed; use the mouse to drag the green box to choose the position, double-click the picture to complete the placement
Font
Prompt
Simply image editing
16

Zoom in/out
prompt
Zooming in/out can not change the image size,just to facilitate the operation of the image, in the zoom mode can move the image
Simply image editing
17
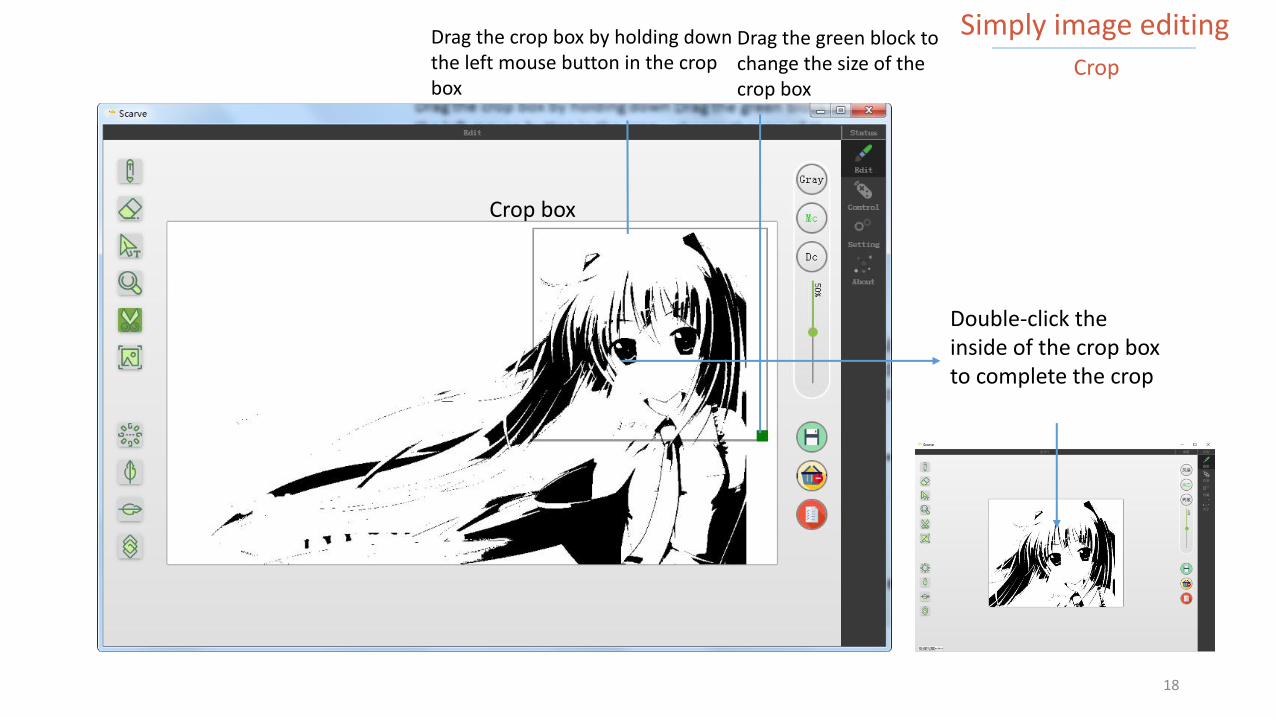
Crop
Crop box
Drag the crop box by holding down the left mouse button in the crop box
Drag the green block to change the size of the crop box
Double-click the inside of the crop box to complete the crop
Simply image editing
18

Simply image editingrotate image
Click once to rotate 90°
19

Simply image editingMirror left-
right
Click to finish mirror left-right
20

Simply image editingMirror up-
down
Click to finish mirror Up-down
21
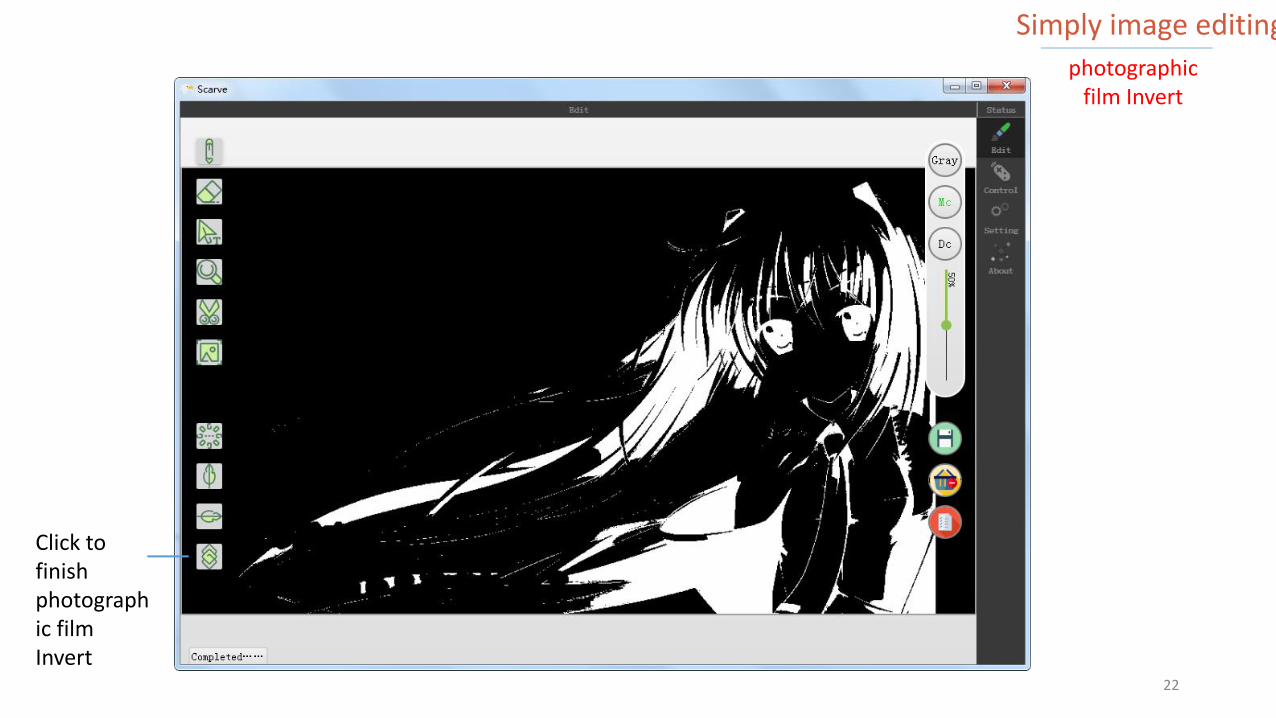
Simply image editingphotographic
film Invert
Click to finish photographic film Invert
22
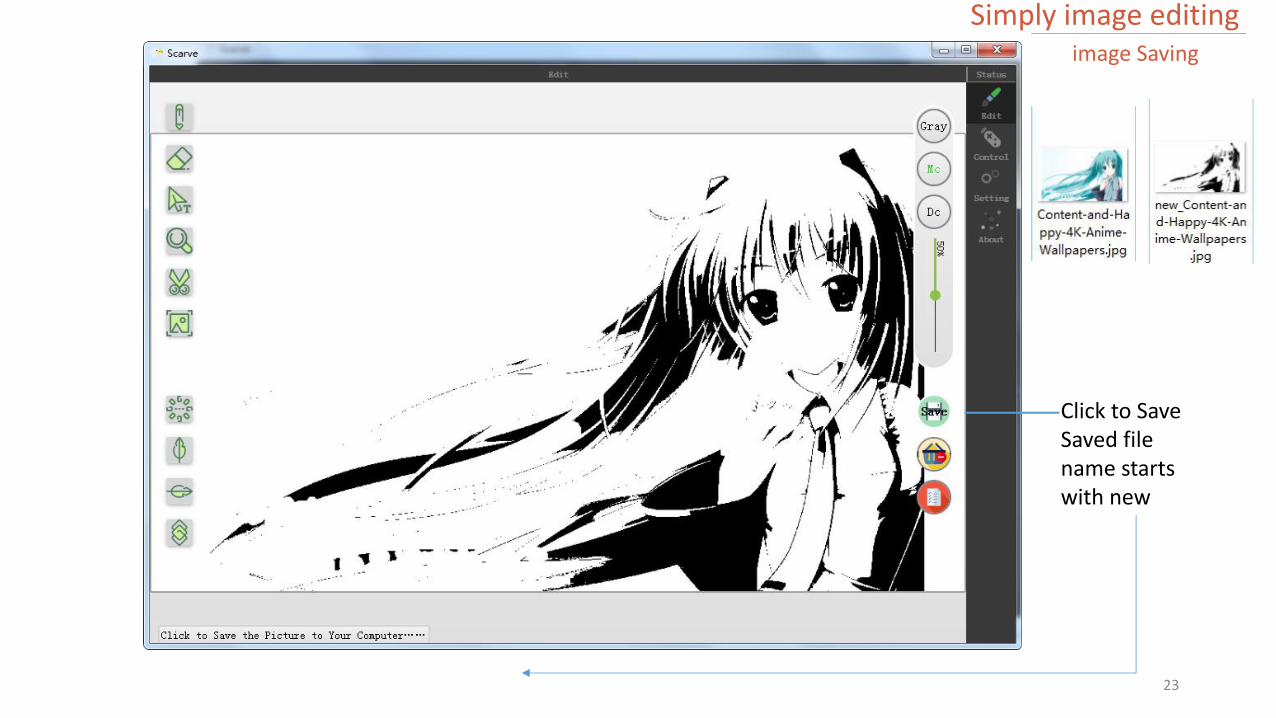
Simply image editingimage Saving
Click to SaveSaved file name starts with new
23

Simply image editing
Clear operation
click to clear opreation
24
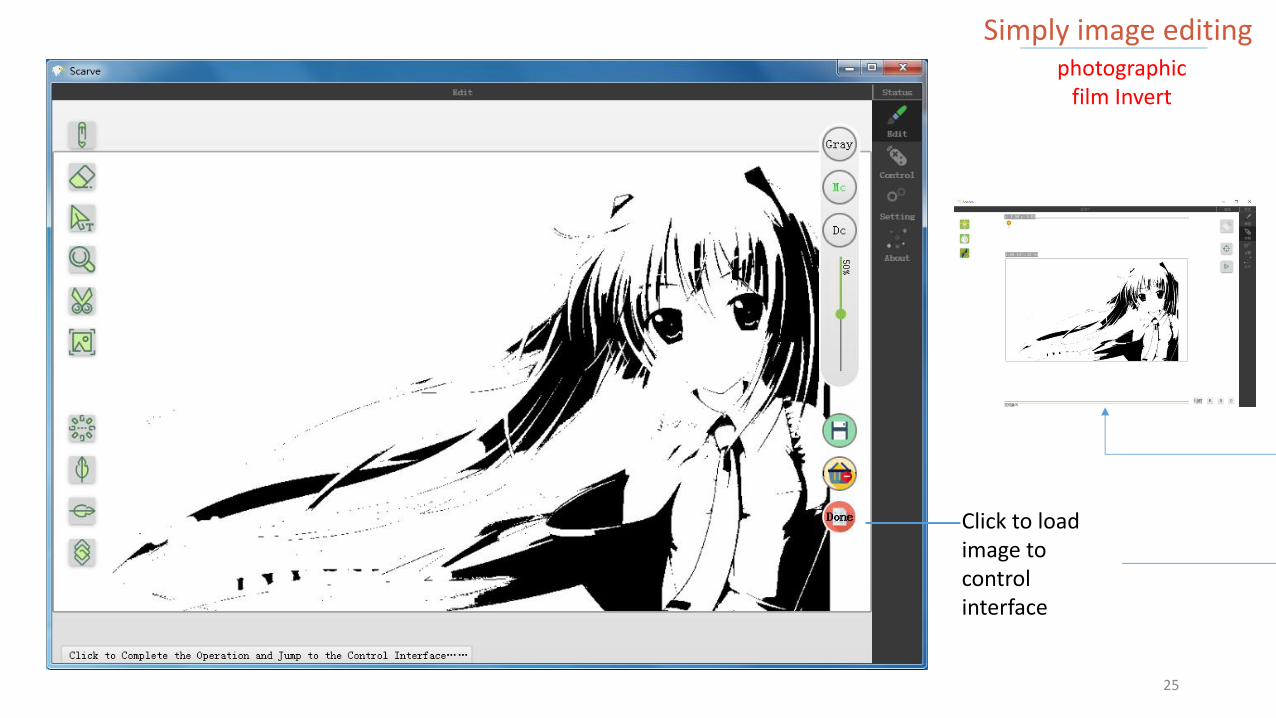
Simply image editingphotographic
film Invert
Click to load image to control interface
25

Engraving Control
Connect engraverAfter Successful Connect the USB Data Cable and Power Cable on Computer and Engraving Machine, click connection
After Connect successful , both the button and engraving machine laser head becomes bright
26

Engraving Control
Laser Positioning
You can drag the icon in an unprinted state, and the laser will be positioned to the coordinates after release
27

Engraving Control
Box Positioning
Click to Box Positioning
Picture Width and Height in mm
Brightening indicates Box Positioning
28
Engraving Control
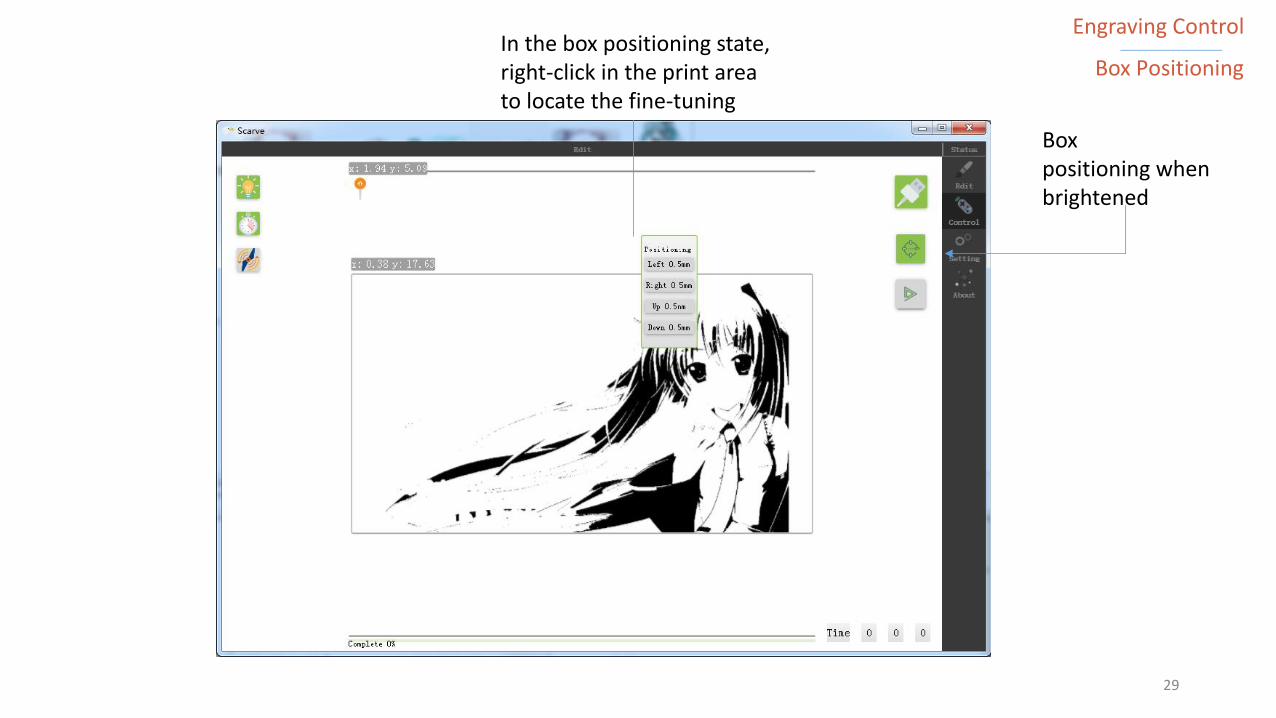
Box Positioning
Box positioning when brightened
In the box positioning state, right-click in the print area to locate the fine-tuning
29
Engraving Control
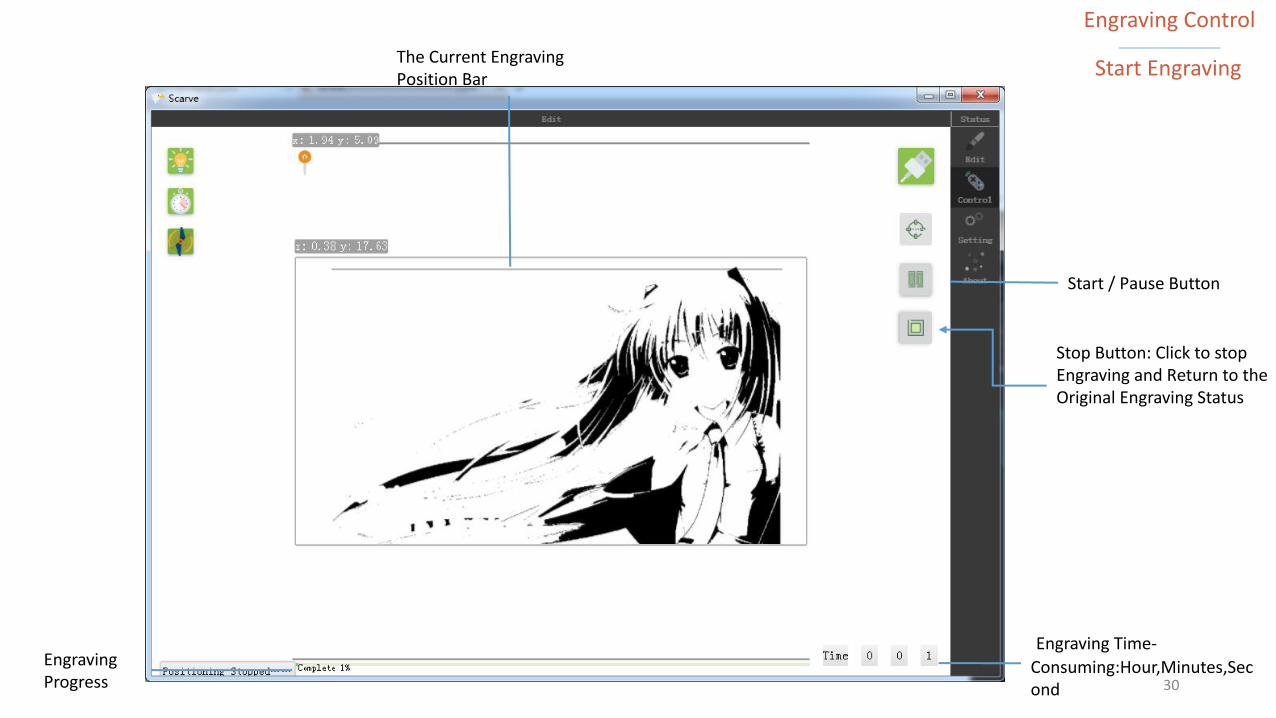
Start Engraving
Start / Pause Button
Stop Button: Click to stop Engraving and Return to the Original Engraving Status
Engraving Time-Consuming:Hour,Minutes,Second
Engraving Progress
The Current Engraving Position Bar
30

Engraving Control
Laser Power Adjustment
Laser power adjustment, 100% means full power output, adjust to 100% for normal use, if the material is very sensitive from light, you can properly reduce the laser power
31

Engraving Control
Engraving Depth Adjustment
Engraving Depth Adjustment:The Larger Depth Value will Engraving the Darker Image, and will take Longer Engraving Time
32
Engraving Control
Engraving Depth Adjustment
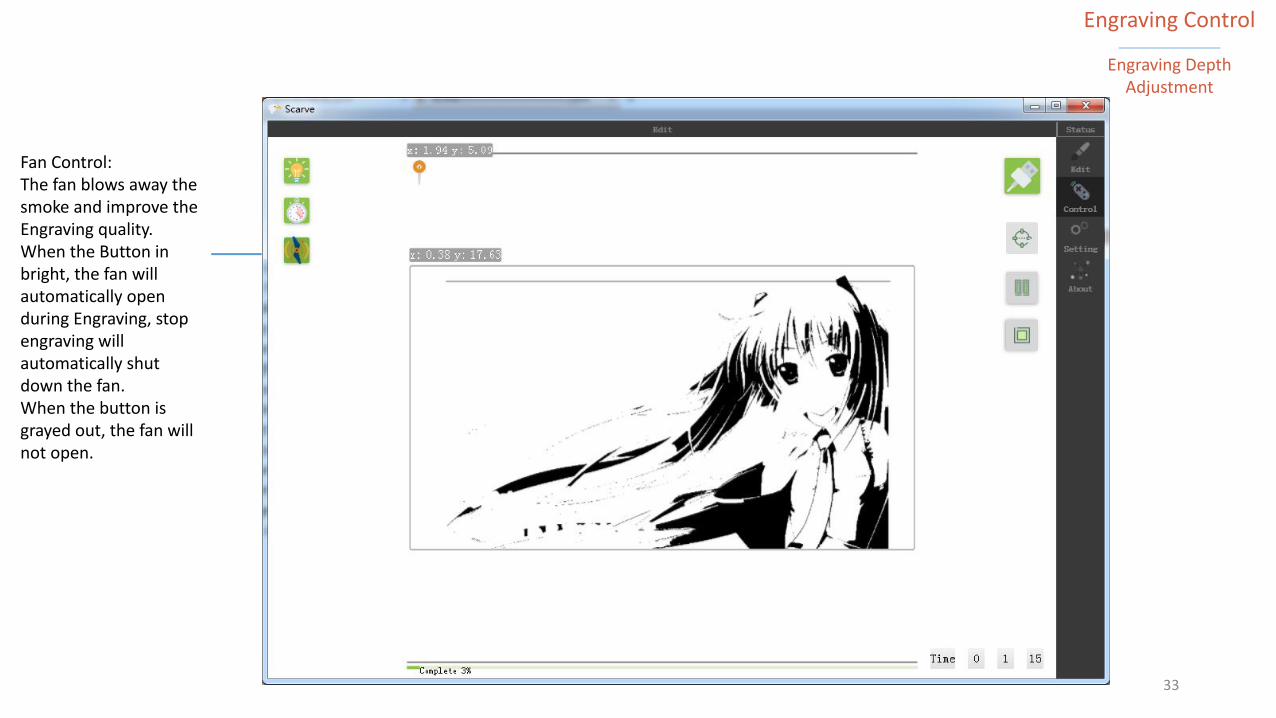
Fan Control:The fan blows away the smoke and improve the Engraving quality.When the Button in bright, the fan will automatically open during Engraving, stop engraving will automatically shut down the fan.When the button is grayed out, the fan will not open.
33

Engraving Control
Engraving effect
Gray Mode Effect:Engraving Depth of 20%
Engraving Power 80%
Black and White Mode Effect:Engraving Depth 25%
Engraving Power 100%
Discrete Mode Effect:Engraving Depth 25%
Engraving Power 100%
34

Setting
Click the Laser to Return to the Origin Position
Click the Button,The Laser will be positioned in the Middle
Set the Engraver into the Low Power Mode, Click the Below Save Button to indicate that the setting was Successful
Indicate the Relevant Coordinates of the Engraving
Display the progress
35

Precautions for Use
If the picture needs to be filtered, it is prefer to use the filter pixel function, the filter function is to use the original image for pixel filtering, If you make other changes after the image is filtered (such as adding text) , all other operations will be filtered out
Pixel Filtering:
Setting the Status Bar while Engraving will hHide Some other Settings, as shown on the Right Picture
Setting:
36
Software download address:www.bainuoxing.com
![CNC nc studio control intruction - Siam2Web.comfile.siam2web.com/cnctak/files[document]/NCStudio/201396_72632.pdf · (ARTCUT software, graphic and text design software for engraver,](https://img.dokumen.tips/doc/110x75/5b3428d97f8b9a7e4b8bc5f8/cnc-nc-studio-control-intruction-documentncstudio20139672632pdf-artcut.jpg)