Embed Size (px)
DESCRIPTION
Wheeler High School The Center for Advanced Studies in Science, Math & Technology. Laboratory #2: ELISA Immuno Explorer. Lab Timeline : Intro to ELISA H1N1 Genetics ELISA Lab Overview ELISA Assay. Post-AP DNA/Genetics – Ms. Kelavkar. Day #1: Introduction to ELISA. - PowerPoint PPT Presentation
Citation preview

Laboratory #2: ELISA Immuno Explorer
Lab Timeline:1) Intro to ELISA2) H1N1 Genetics ELISA Lab Overview3) ELISA Assay
Wheeler High SchoolThe Center for Advanced Studies in Science, Math & Technology
Post-AP DNA/Genetics – Ms. Kelavkar
Day #1: Introduction to ELISA
ELISA stands for enzyme-linked immunosorbent assay
Post-AP DNA/Genetics – Ms. Kelavkar
•Antibody based test to diagnose disease such as HIV, SARS, H1N1, STD’s, anthrax
•Also used to test for pregnancy, drugs and genetically modified organisms (GMO’s)
Introduction to ELISA
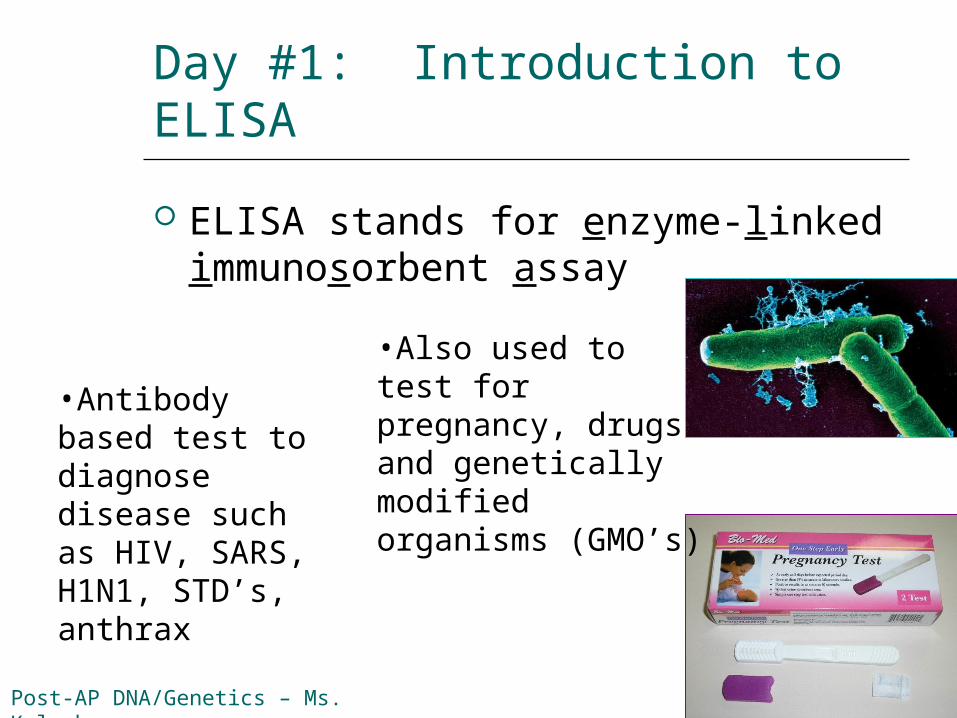
In this lab you will share simulated ‘body fluids’ with your classmates to see how easily it is to pass on H1N1.
Then you will perform an ELISA test to determine if you have been exposed to this contagious disease.
Post-AP DNA/Genetics – Ms. Kelavkar
Introduction to ELISA
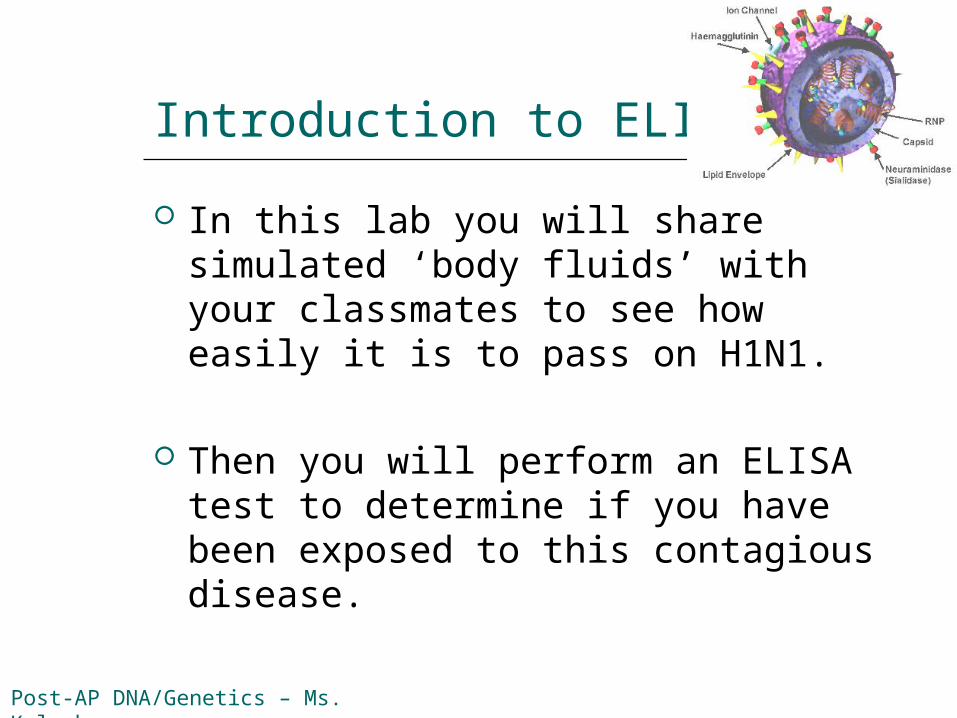
ELISA tests use antibodies to detect the presence of a disease.
Molecules that cause your body to start the immune response are called antigens.
Light chain
Heavy chain
Disulfide bonds
Antigens
Antibody Structure
Introduction to ELISA
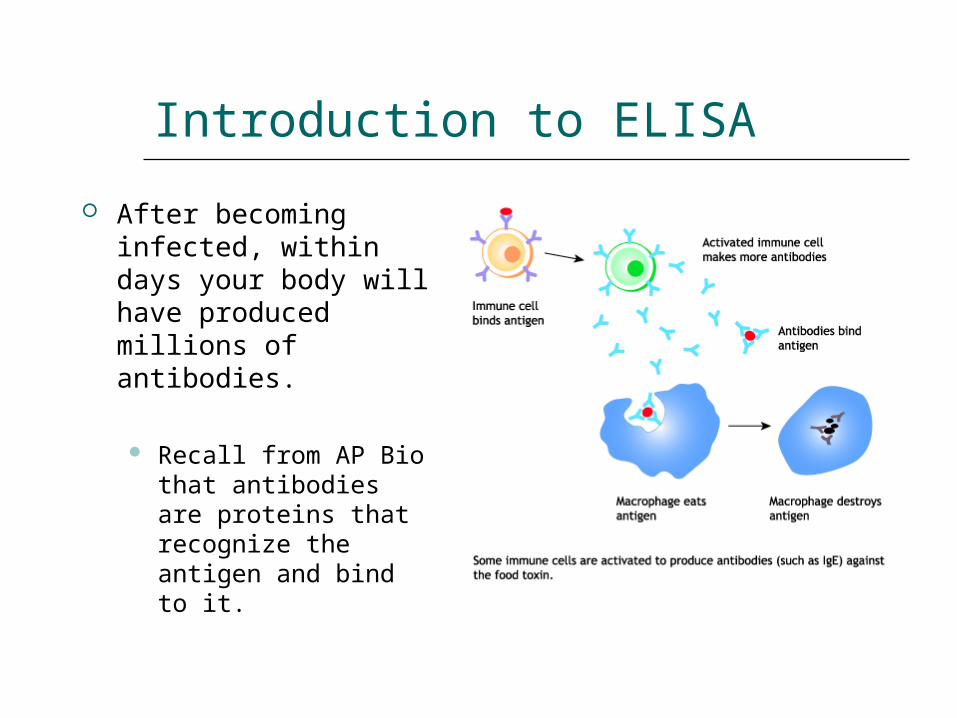
After becoming infected, within days your body will have produced millions of antibodies.
Recall from AP Bio that antibodies are proteins that recognize the antigen and bind to it.
Introduction to ELISA
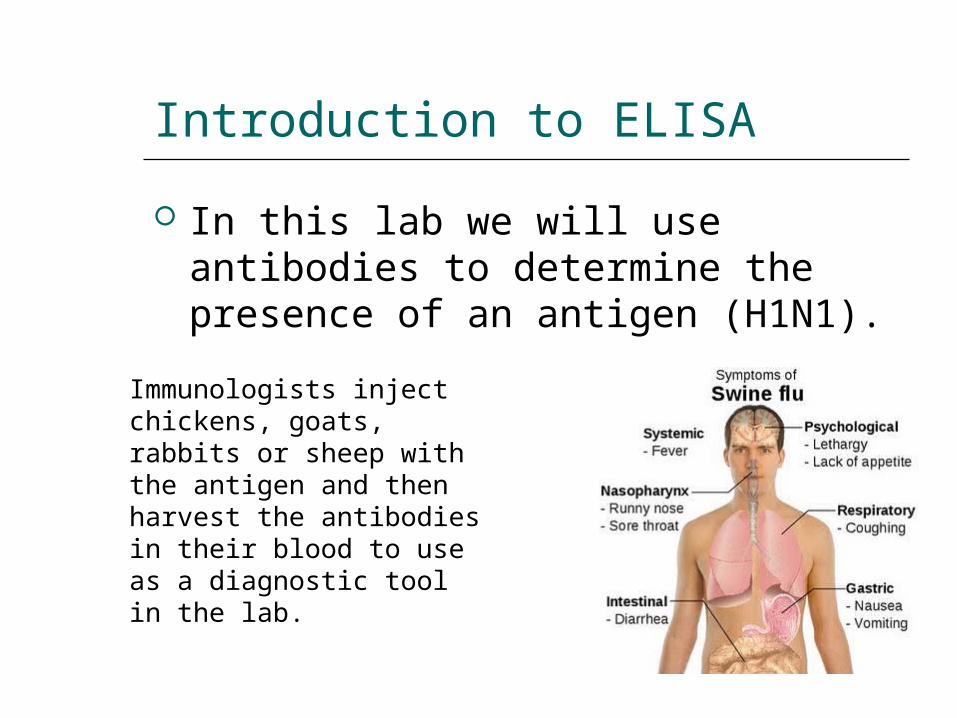
In this lab we will use antibodies to determine the presence of an antigen (H1N1).
Immunologists inject chickens, goats, rabbits or sheep with the antigen and then harvest the antibodies in their blood to use as a diagnostic tool in the lab.
Introduction to ELISA
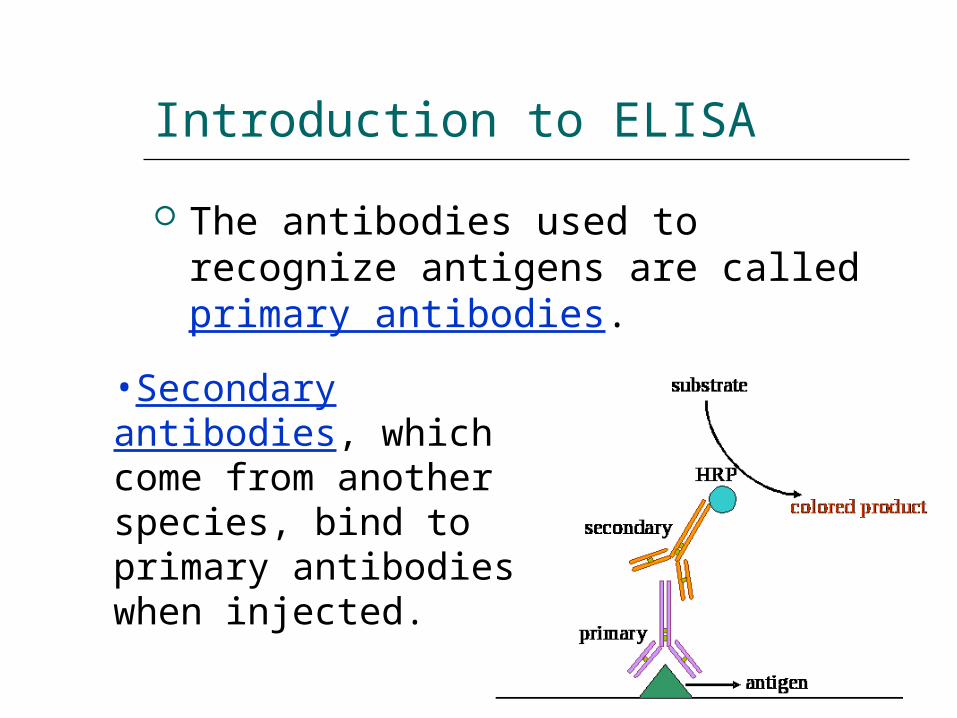
The antibodies used to recognize antigens are called primary antibodies.
•Secondary antibodies, which come from another species, bind to primary antibodies when injected.

Let’s See How ELISA is used in determining Pregnancy…
http://www.sumanasinc.com/webcontent/animations/content/pregtest.html
Day #2: H1N1 Genetics & Fluid Transfer
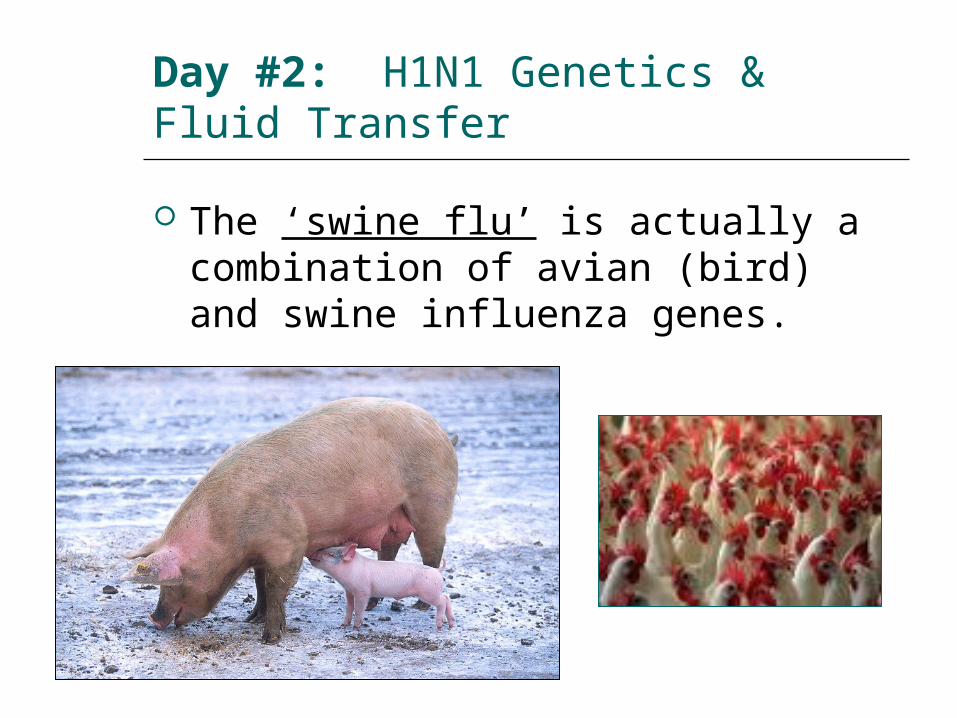
The ‘swine flu’ is actually a combination of avian (bird) and swine influenza genes.
Why H1N1?
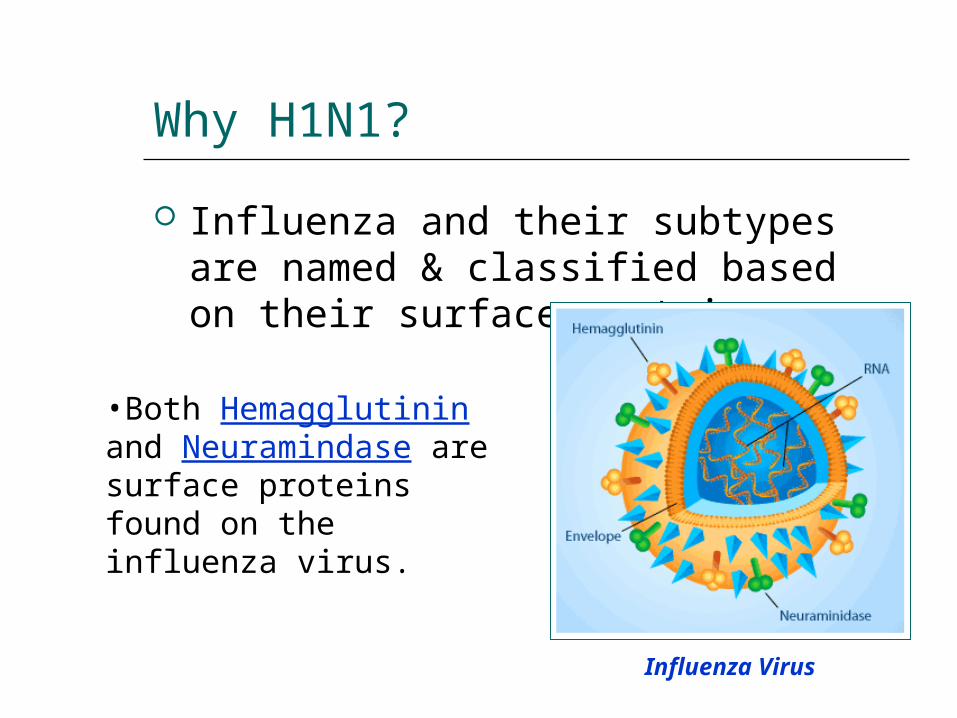
Influenza and their subtypes are named & classified based on their surface proteins.
Influenza Virus
•Both Hemagglutinin and Neuramindase are surface proteins found on the influenza virus.

Surface Proteins
Hemagglutinin – an antigenic glycoprotein Binds the virus to the
cell it’s trying to infect
Neuramindase – allows the virus to inject it’s viral genome into the host and replicate
Did You Know…
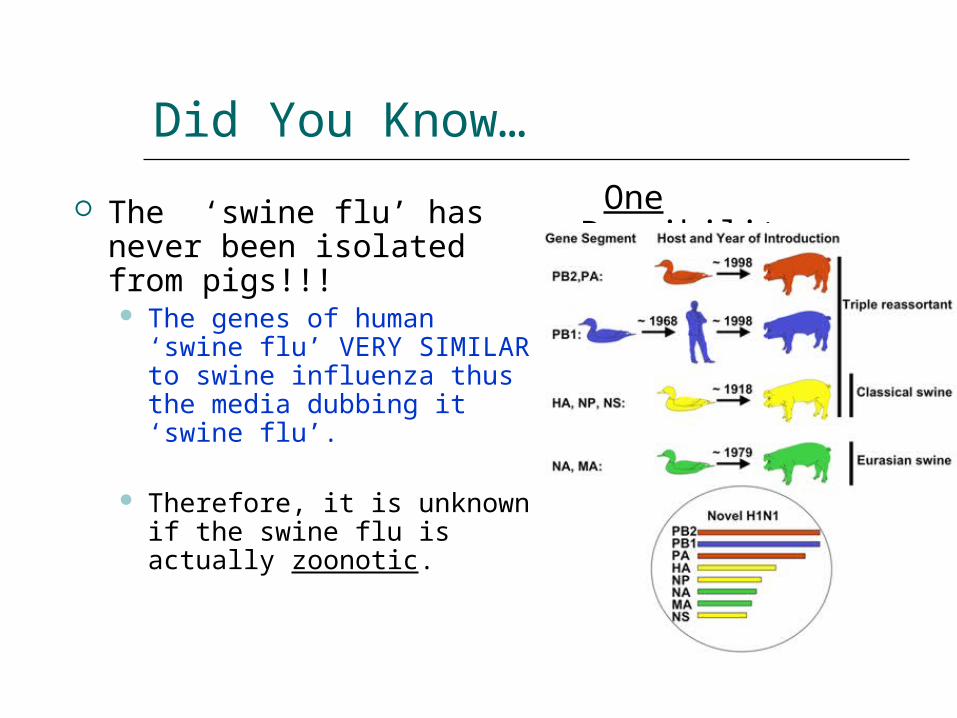
The ‘swine flu’ has never been isolated from pigs!!! The genes of human
‘swine flu’ VERY SIMILAR to swine influenza thus the media dubbing it ‘swine flu’.
Therefore, it is unknown if the swine flu is actually zoonotic.
One Possibility
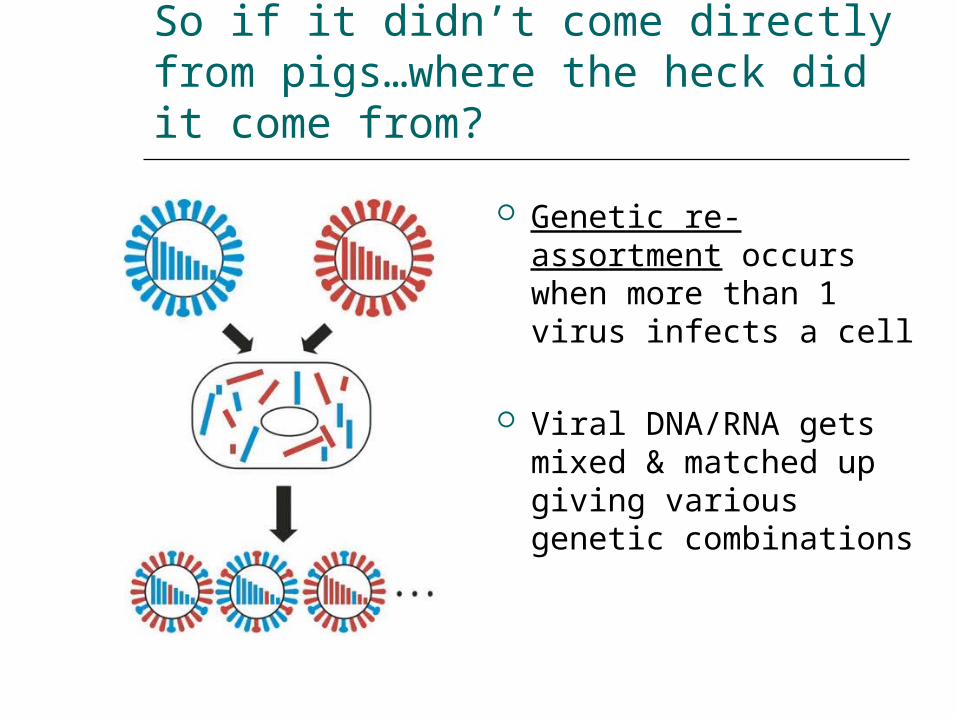
So if it didn’t come directly from pigs…where the heck did it come from?
Genetic re-assortment occurs when more than 1 virus infects a cell
Viral DNA/RNA gets mixed & matched up giving various genetic combinations

ELISA Assay Overview: Step #11. Obtain a test-sample
2. Label the 12-well strip:First 3 wells: positive controls “+”Next 3 wells: negative controls “-”Remaining wells to identify test-
samples
Proteins in the samples will bind to the wells via
hydrophobic interaction.
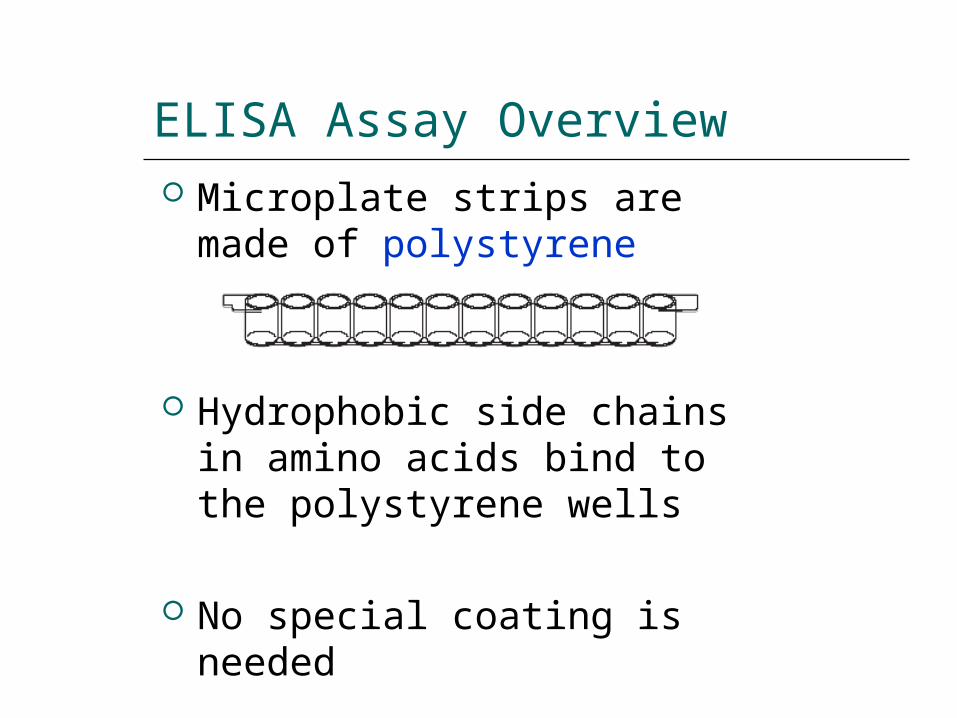
ELISA Assay Overview Microplate strips are made
of polystyrene
Hydrophobic side chains in amino acids bind to the polystyrene wells
No special coating is needed
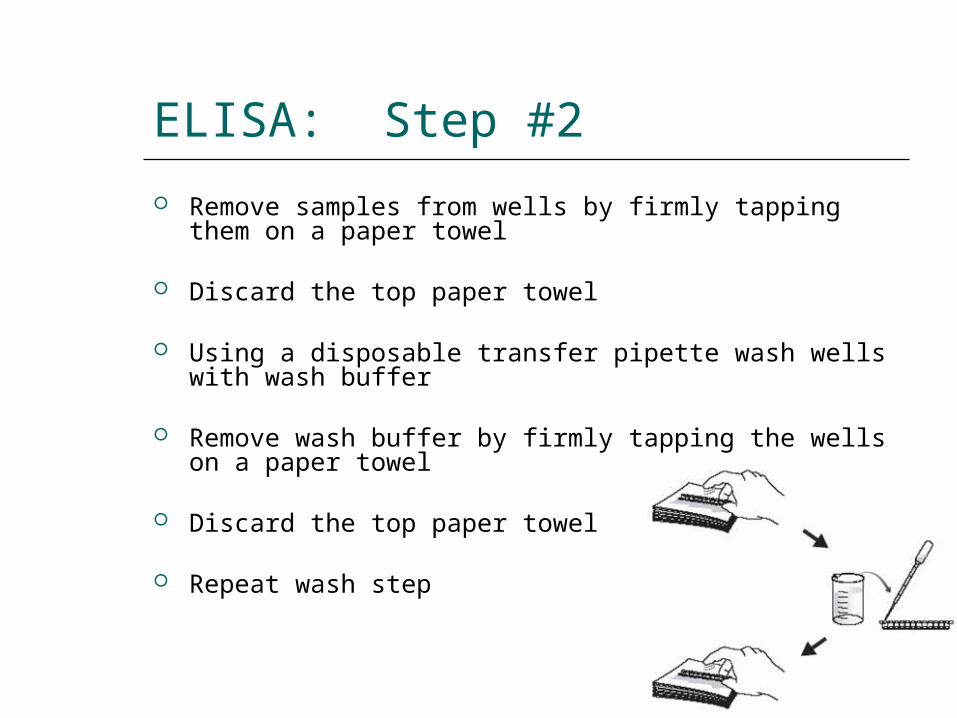
ELISA: Step #2
Remove samples from wells by firmly tapping them on a paper towel
Discard the top paper towel
Using a disposable transfer pipette wash wells with wash buffer
Remove wash buffer by firmly tapping the wells on a paper towel
Discard the top paper towel
Repeat wash step
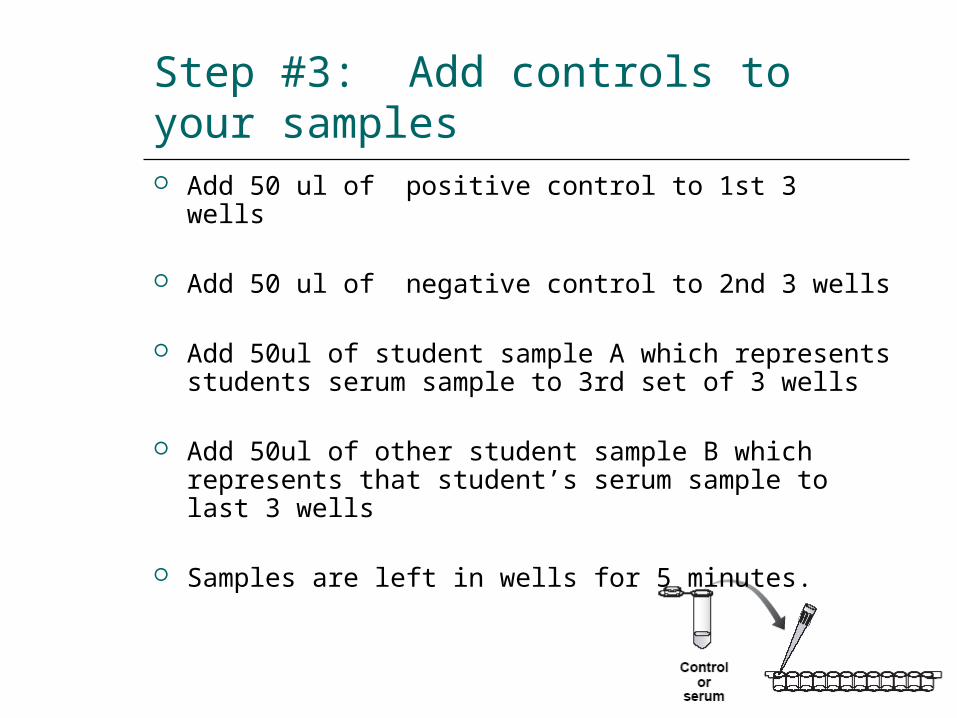
Step #3: Add controls to your samples Add 50 ul of positive control to 1st 3 wells
Add 50 ul of negative control to 2nd 3 wells
Add 50ul of student sample A which represents students serum sample to 3rd set of 3 wells
Add 50ul of other student sample B which represents that student’s serum sample to last 3 wells
Samples are left in wells for 5 minutes.

Step #4: Wash antibody & add enzyme-linked antibody
Wash the primary antibody from polystyrene wells as before
WASH 2X
Add 50ul of the enzyme-linked secondary antibody to each well
Wait 5 minutes

Step #4: Add enzyme substrate
Wash the enzyme-linked secondary antibody from polystyrene wells as before
Using a disposable transfer pipette wash wells with wash buffer
WASH 3X
Add 50ul of the enzyme substrate to each well
Wait 5 minutes
positive samples will begin to turn blue
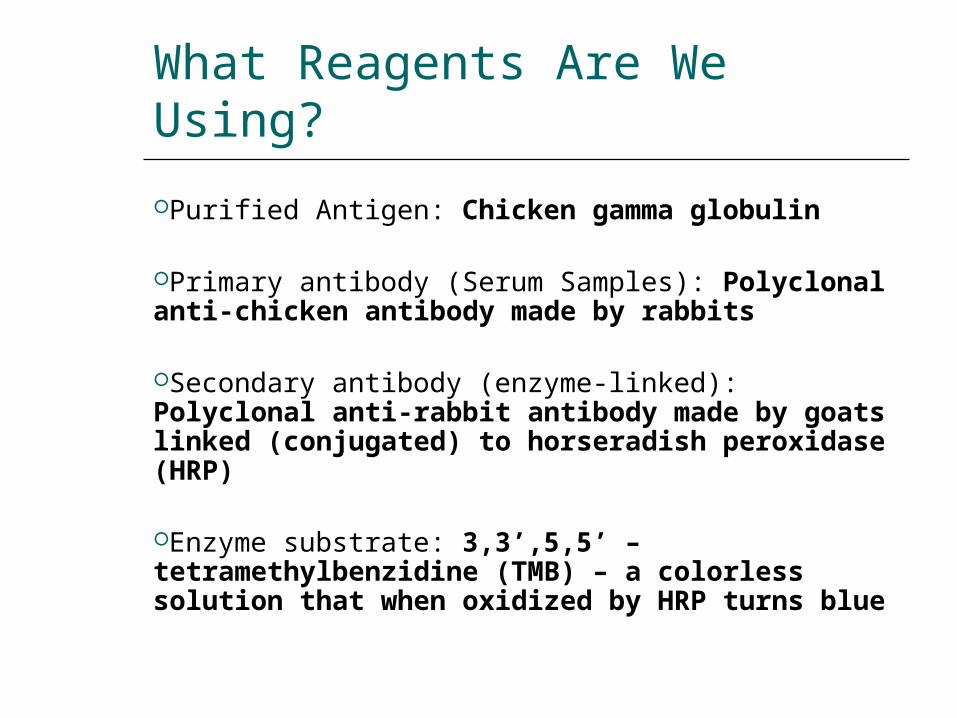
What Reagents Are We Using?
Purified Antigen: Chicken gamma globulin
Primary antibody (Serum Samples): Polyclonal anti-chicken antibody made by rabbits
Secondary antibody (enzyme-linked): Polyclonal anti-rabbit antibody made by goats linked (conjugated) to horseradish peroxidase (HRP)
Enzyme substrate: 3,3’,5,5’ – tetramethylbenzidine (TMB) – a colorless solution that when oxidized by HRP turns blue
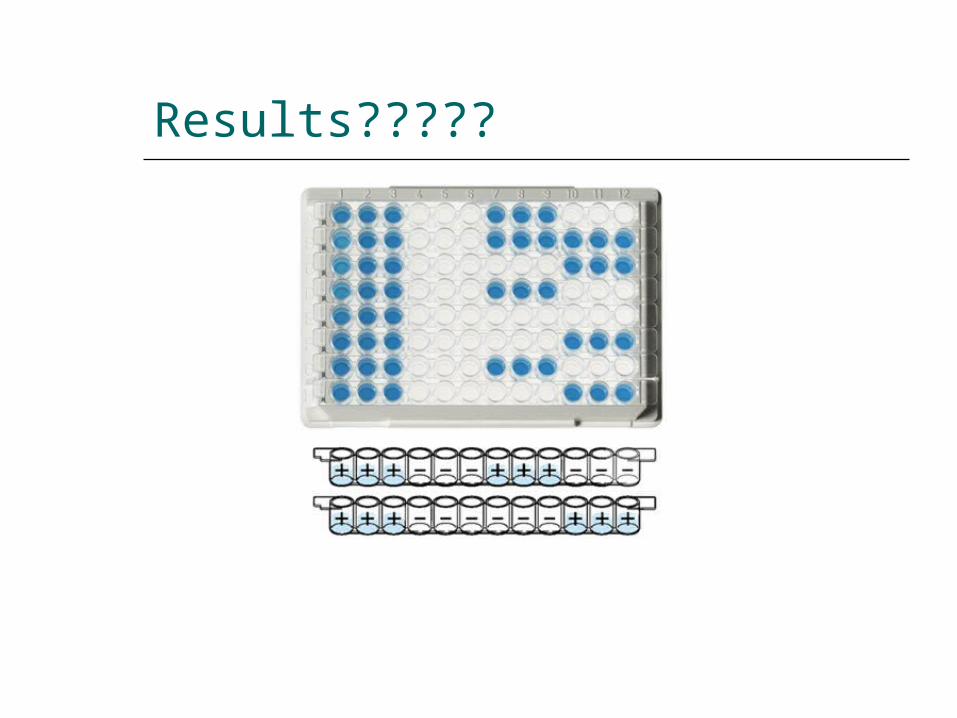
Results?????
Any Questions?